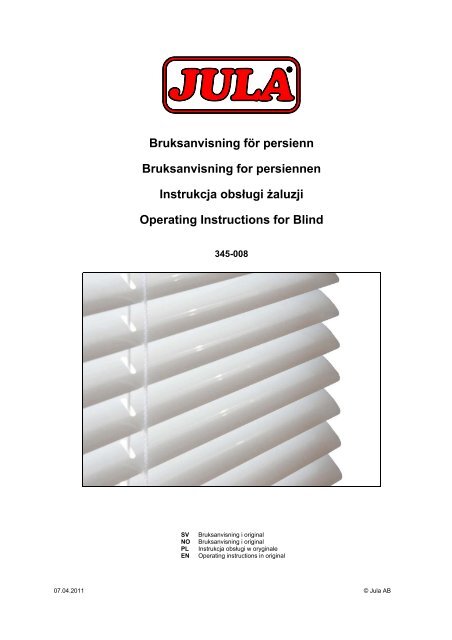
Bruksanvisning för persienn Bruksanvisning for persiennen ... - Jula
Bruksanvisning för persienn Bruksanvisning for persiennen ... - Jula
Bruksanvisning för persienn Bruksanvisning for persiennen ... - Jula
- No tags were found...

Create successful ePaper yourself
Turn your PDF publications into a flip-book with our unique Google optimized e-Paper software.
NORSKNORSKLes bruksanvisningen nøye før bruk!Emballasjens innhold 1 stang 3-4 braketter 12-14 skruerVendestangMONTERINGØverste skinneSnorlåsLøftesnorHold nedebraketterNederste skinneInstallere <strong>persienn</strong>en1. Mål til hvordan <strong>persienn</strong>en skal henge. Persiennen kanmonteres innen<strong>for</strong> (A) eller uten<strong>for</strong> (B) utsparingen.2. Plasser endebrakettene <strong>for</strong> festing enten (nede eller oppe).Sørg <strong>for</strong> at brakettene festes omtrent 5 cm fra enden av<strong>persienn</strong>en. Midtbraketten (kreves <strong>for</strong> <strong>persienn</strong>er som erbredere enn 120 cm) kan plasseres etter behov.PersiennePersienneOBS! Pass på at du ikke plasserer brakettene slik at de <strong>for</strong>styrrermekanismene i <strong>persienn</strong>en3. Før <strong>persienn</strong>en inn i braketten. Sørg <strong>for</strong> at tappene passerakkurat under den fremre kanten på den øvre skinnen. Draderetter i låsearmen til den trykkes mot den øvre skinnen.Øvre festeUtvendig festeDreiearm4
NORSKSlik begrenser du høyden1. Fjern knappene på den nederste skinnen.2. Løsne knuten i løftesnoren.3. Fjern den nederste skinnen og ekstra lameller.4. Skift ut den nedre skinnen, og lag en ny knute.5. Skjær av snorlengden som blir til overs. La det være igjen 1" på endene. Sett disse endene inn i hullene i den nedersteskinnen, og erstatt bunnene.6. Det leveres midtre støtte(r) bare <strong>for</strong> brede <strong>persienn</strong>er (dvs.120 cm og oppover)Slik begrenser du breddenSom vist på figuren, kan lamellene enkelt <strong>for</strong>kortes med saks.VEDLIKEHOLDRengjøre <strong>persienn</strong>enDet er enkelt å rengjøre <strong>persienn</strong>er med en <strong>persienn</strong>erenser (følger ikke med).Med <strong>for</strong>behold om trykkfeil og konstruksjonsendringer uten<strong>for</strong> vår kontroll. Ved eventuelle problemer,kontakt vår serviceavdeling på telefon: 67 90 01 34.<strong>Jula</strong> Norge AS, Solheimsveien 6-8, 1471 LØRENSKOGwww.jula.no5
POLSKIPOLSKIPrzed użyciem uważnie przeczytaj instrukcję obsługi!MONTAŻZawartość opakowania 1 żaluzja 3-4 uchwyty montażowe 12-14 wkrętów Uchwyty montażoweListwa górnaBlokada sznurkaListwa dolnaUchwyty montażoweMontaż żaluzji1. Zmierz miejsce zawieszenia żaluzji. Żaluzję możnazamontować we wnęce okiennej (A) lub na ościeżnicy okna(B).2. Ustal położenie uchwytów bocznych (w suficie lub naścianie), pamiętając, że muszą być zamocowanew odległości ok. 5 cm od końców żaluzji. W razie potrzebymożna zamontować uchwyt środkowy (wymagany dlażaluzji szerszych niż 120 cm).ŻaluzjaŻaluzjaUWAGA! Umieść uchwyty montażowe tak, aby nie zakłócałydziałania żaluzji.3. Zamocuj żaluzję w uchwytach i dopilnuj, aby skrzydełkaznalazły się dokładnie pod przednią krawędzią górnejlistwy. Następnie dociśnij blokadę w taki sposób, byprzylegała do górnej listwy.Montaż sufitowyMontaż ściennyBlokada6
POLSKISkracanie długości1. Zdejmij zapięcia z dolnej listwy.2. Rozwiąż węzeł na lince regulacyjnej.3. Zdejmij listwę dolną i żądaną liczbę lamelek.4. Załóż listwę z powrotem i zwiąż nowy węzeł.5. Obetnij taśmy żaluzji, zostawiając po 2,5 cm na końcach.Wprowadź te końce do otworów w dolnej listwie i załóżzapięcia.6. Uchwyt środkowy dołączany jest tylko do szerokich żaluzji(tzn. powyżej 120 cm).Zmniejszanie szerokościZgodnie z tym, co przedstawiono na rysunku, lamele można łatwoprzyciąć na żądaną szerokość.Czyszczenie żaluzjiKONSERWACJAŻaluzje najłatwiej czyści się szczotką do żaluzji (nie wchodzi w skład zestawu).Z zastrzeżeniem prawa do błędów w druku i zmian konstrukcyjnych, które są od nas niezależne. W razieproblemów skontaktuj się telefonicznie z działem obsługi klienta pod numerem 801 600 500.<strong>Jula</strong> Poland Sp. z o.o., ul. Malborska 49, 03-286 Warszawa, Polskawww.jula.pl7
ENGLISHENGLISHRead these instructions carefully be<strong>for</strong>e use!Package contents 1 blind 3-4 brackets 12-14 screwsBracketsINSTALLATIONHead railCord lockBottom railBracketInstallation of blind1. Measure where you want the blind. It can be fitted inside (A)or outside (B) the window recess.2. Position the end brackets (on the ceiling or wall) and makesure that they are approx. 5 cm inside the ends of the blind.The centre bracket (required <strong>for</strong> blinds wider than 120 cm)can be positioned as required.BlindBlindNOTE! Position the brackets so that they do not interfere with themechanism of the blind.3. Now fit the blind in the brackets. Make sure that the lugs arepositioned exactly under the front rim of the head rail. Thenpush the locking arm in until it is flush with the head rail.Ceiling installationWall installationLocking8
ENGLISHShortening the length1. Remove the bottom rail buttons.2. Untie the knot in the cord3. Remove the bottom rail and extra slats.4. Refit the bottom rail and tie a new knot.5. Cut off excess tape, leaving 2.5 cm on the ends. Insert theends into the holes in the bottom rail. Refit the buttons.6. Centre supports are provided <strong>for</strong> wide blinds only (i.e. 120cm or more).Shortening the widthAs illustrated, the slats can easily be shortened using scissors.Cleaning the blindMAINTENANCEThe blind is easily cleaned using a blind cleaner (not included).Subject to printing errors and design changes over which we have no control. In the event of problems,please contact our service department.www.jula.com9