Liftmaster model 600/800/1000A - Jyde Port
Liftmaster model 600/800/1000A - Jyde Port
Liftmaster model 600/800/1000A - Jyde Port

Create successful ePaper yourself
Turn your PDF publications into a flip-book with our unique Google optimized e-Paper software.
INHOLD SIDE<br />
SIKKERHEDSANVISNINGER . . . . . . . . . . . . . . . .1<br />
PORTTYPER . . . . . . . . . . . . . . . . . . . . . . . . . . . . .2<br />
NØDVENDIGT VÆRKTØJ . . . . . . . . . . . . . . . . . . .2<br />
MEDFØLGENDE MONTERINGSDELE . . . . . . . . .3<br />
INDEN DU BEGYNDER . . . . . . . . . . . . . . . . . . . . .3<br />
DEN FÆRDIGE INSTALLATION . . . . . . . . . . . . . .3<br />
MONTAGE . . . . . . . . . . . . . . . . . . . . . . . . . . . . .4-5<br />
INSTALLATION . . . . . . . . . . . . . . . . . . . . . . . . . .5-6<br />
TILSLUTNING TIL<br />
STRØMFORSYNINGSNETTET 7-8<br />
PROGRAMMERING AF KODEN . . . . . . . . . . . .9-10<br />
JUSTERINGER . . . . . . . . . . . . . . . . . . . . . . . . . .11<br />
1<br />
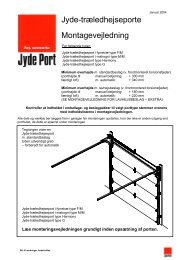
A. Vippeport med vandret køreskinne<br />
B. Vippeport med lodret og vandret køreskinne –<br />
speciel portarm (E, The Chamberlain Arm)<br />
og Protector-systemet (29 (9)) kræves.<br />
Henvend dig til forhandleren.<br />
C. Sektionsport med buet køreskinne – Se 20B –<br />
armen forbindes. Protector-systemet (29 (9)<br />
kræves til porte, mere end 2,5 m høj.<br />
D. Foldeport – speciel portarm (E, The<br />
Chamberlain Arm) og Protector-systemet<br />
(29 (9)) kræves. Henvend dig til forhandleren.<br />
E. The Chamberlain Arm for anvendelse på<br />
porttyper B og D.<br />
2<br />
PORTTYPER<br />
NØDVENDIGT VÆRKTØJ<br />
114A2910B-DK<br />
10mm, 8mm,<br />
4,5mm, 4mm<br />
11/13mm<br />
1<br />
2<br />
2-DK<br />
INHOLD SIDE<br />
INSTALLATION AF PROTECTOR SYSTEM<br />
(EKSTRAUDSTYR) . . . . . . . . . . . . . . . . . . . . . . .12<br />
SÆRLIGE EGENSKABER VED . . . . . . . . . . . . . .12<br />
TILBEHØR . . . . . . . . . . . . . . . . . . . . . . . . . . . . . .12<br />
RESERVEDELE . . . . . . . . . . . . . . . . . . . . . . .13-14<br />
PLEJE AF PORTÅBNEREN . . . . . . . . . . . . . . . . .14<br />
VEDLIGEHOLDELSE AF PORTÅBNEREN . . . . .14<br />
HVIS DER ER PROBLEMER? . . . . . . . . . . . . . . 15<br />
BETJENING AF PORTÅBNEREN . . . . . . . . . . . .16<br />
TEKNISKE DATA . . . . . . . . . . . . . . . . . . . . . . . . .16<br />
A B<br />
D<br />
E<br />
11mm, 13mm<br />
C<br />
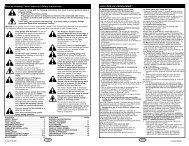
HAVING A PROBLEM?<br />
1. Opener doesn't operate from either door control<br />
or remote:<br />
• Does the opener have electric power? Plug lamp into<br />
outlet. If it doesn't light, check the fuse box or the<br />
circuit breaker. (Some outlets are controlled by a wall<br />
switch.)<br />
• Have you disengaged all door locks? Review<br />
installation instruction warnings on page 1.<br />
• Is there a build-up of ice or snow under door? The<br />
door may be frozen to ground. Remove any<br />
obstruction.<br />
• The garage door spring may be broken. Have it<br />
replaced.<br />
2. Opener operates from remote but not from door<br />
control:<br />
• Is door control button lit? If not, remove the bell wire<br />
from the opener terminals. Short the red and white<br />
terminals by touching both terminals at the same time<br />
with a piece of wire. If the opener runs, check for a<br />
faulty wire connection at the door control, a short<br />
under the staples, or a broken wire.<br />
• Are wiring connections correct? Review page 7.<br />
3. Door operates from door control but not from<br />
remote:<br />
• Replace battery if necessary.<br />
• If you have two or more remotes and only one<br />
operates, review Program Your Opener, Remote and<br />
Keyless Entry steps 22 and 24.<br />
• Is the door control button flashing? The opener is in<br />
lock mode. If you have a Multi-Function Door Control,<br />
push and hold the Lock button for 2 seconds. The<br />
door control button will stop flashing.<br />
4. Remote has short range:<br />
• Is battery installed?<br />
• Change the location of the remote control on the car.<br />
• A metal garage door, foil-backed insulation or metal<br />
siding will reduce the transmission range.<br />
5. Door reverses for no apparent reason and<br />
opener light doesn't blink:<br />
• Is something obstructing the door? Pull manual<br />
release handle. Operate door manually. If it is<br />
unbalanced or binding, call for professional garage<br />
door service.<br />
• Clear any ice or snow from garage floor area where<br />
garage door closes.<br />
• Repeat Setting Limits and Force, see adjustment<br />
steps 26 and 27.<br />
Repeat safety reverse test after adjustment is<br />
complete.<br />
6. Door reverses for no apparent reason and<br />
opener light blinks for 5 seconds after reversing:<br />
Check The Protector System (if you have installed<br />
this accessory). If the light is blinking, correct<br />
alignment.<br />
7. Opener noise is disturbing in living quarters<br />
of home:<br />
If operational noise is a problem because of proximity<br />
of the opener to the living quarters, Vibration Isolator<br />
Kit 41A3263 can be installed. This kit was designed to<br />
reduce the "sounding board effect" and is easy to<br />
install.<br />
8. The garage door opens and closes by itself:<br />
Make sure remote push button is not stuck "on".<br />
9. Door stops but doesn't close completely:<br />
Repeat Setting the Limits, see adjustment step 26.<br />
Repeat safety reverse test after any adjustment of door<br />
arm length, close force or down limit.<br />
14-GB<br />
10. Door opens but won't close:<br />
• Check The Protector System (if you have installed<br />
this accessory). If the light is blinking, correct<br />
alignment.<br />
• If opener light does not blink and it is a new<br />
installation, repeat Setting the Limit and Force steps<br />
26 and 27.<br />
Repeat the safety reverse test after the adjustment is<br />
complete.<br />
11. Opener light does not turn on:<br />
Replace light bulb (230V/40W maximum). Replace<br />
burned out bulbs with rough service light bulbs.<br />
12. Opener strains:<br />
Door may be unbalanced or springs are broken. Close<br />
door and use manual release rope and handle to<br />
disconnect trolley. Open and close door manually. A<br />
properly balanced door will stay in any point of travel<br />
while being supported entirely by its springs. If it does<br />
not, call for professional garage door service to correct<br />
the problem.<br />
13. Opener motor hums briefly, then won't work:<br />
• Garage door springs are broken. SEE ABOVE.<br />
• If problem occurs on first operation of opener, door is<br />
locked. Disable door lock.<br />
Repeat safety reverse test after adjustment is<br />
complete.<br />
14. Opener won't activate due to power failure:<br />
• Pull manual release rope and handle down to<br />
disconnect trolley. Door can be opened and closed<br />
manually. When the power is restored, pull the<br />
manual release handle down and toward opener. The<br />
next time the opener is activated, the trolley will<br />
reconnect.<br />
• The Outside Quick Release accessory (if fitted)<br />
disconnects the trolley from outside the garage in<br />
case of power failure.<br />
15. Setting the limits manually:<br />
1. Press and hold the black button until the yellow<br />
indicator light starts flashing slowly then release.<br />
2. Adjust the position of the door by using the black<br />
and orange buttons. Black moves the door UP<br />
(open) and orange moves the door DOWN (close).<br />
Check to be sure the door opens high enough for your<br />
vehicle.<br />
3. Push the remote control or door control. This sets<br />
the UP (open) limit and begins closing the door.<br />
Immediately press either the orange or the black<br />
button. The door will stop.<br />
Adjust the desired DOWN (close) limit position<br />
using the black and orange buttons. Check to be<br />
sure the door is fully closed without applying<br />
excessive pressure on the rail (rail should not bow<br />
upwards and the chain/belt should not sag or droop<br />
below the rail). Push the remote control or door<br />
control. This sets the DOWN (close) limit and<br />
begins opening the door.<br />
NOTE: If neither the black or the orange button is<br />
pressed, the door will reverse off the floor and the<br />
DOWN travel limit will be set automatically.<br />
4. Open and close the door with the remote control or<br />
door control 2 or 3 times.<br />
• If the door does not stop in the desired UP (open)<br />
position or reverses before the door stops at the<br />
DOWN (close) position, repeat Setting the Limits<br />
and Force, see adjustment steps 26 and 27.<br />
• If the door stops in both the desired UP (open) and<br />
DOWN (close) positions, proceed to Test the Safety<br />
Reversal System.<br />
114A2910B-GB