

Ladda ner manualen till den TV i PDF-format här ... - Siba
Ladda ner manualen till den TV i PDF-format här ... - Siba
Ladda ner manualen till den TV i PDF-format här ... - Siba

Create successful ePaper yourself
Turn your PDF publications into a flip-book with our unique Google optimized e-Paper software.
Noise Reduction: If the broadcast signal is weak and<br />
the picture is noisy, use Noise Reduction setting to<br />
reduce the noise amount. Noise Reduction can be set<br />
to one of these options: Low, Medium, High or Off.<br />
Advanced Settings<br />
• Colour Temp:<br />
Sets the desired colour tone.<br />
Setting Cool option gives white colours a slight blue<br />
stress.<br />
For normal colours, select Normal option.<br />
Setting Warm option gives white colours a slight red<br />
stress.<br />
• Picture Zoom:Sets<br />
the picture size to Auto,16:9,<br />
Subtitle,14:9, 14:9 Zoom, 4:3, Panoramic or<br />
Cinema.<br />
• HDMI True Black (optional): While watching from<br />
HDMI source, this feature will be visible in the Picture<br />
Settings menu. You can use this feature to enhance<br />
blackness in the picture. You can set this feature as<br />
“On” for activating HDMI True Black mode.<br />
• Film Mode (optional) : Films are recorded<br />
at a different number of frames per second<br />
to normal television programmes.<br />
Press “ ” or “ ” buttons to select Film mode. Press<br />
“ ” or “ ” buttons to set this feature Auto or Off. Turn<br />
this feature to Auto when you are watching films to<br />
see the fast motion scenes clearly.<br />
• Colour Shift: Adjust the desired colour tone.<br />
Reset: Resets the picture settings to factory default<br />
settings.<br />
While in VGA (PC) mode, some items in Picture menu<br />
will be unavailable. Instead, VGA mode settings will be<br />
added to the Picture Settings while in PC mode.<br />
PC Picture Settings<br />
For adjusting PC picture items, do the following:<br />
Press “ ” or “ ” button to select Picture icon. Picture<br />
menu appears on the screen.<br />
Contrast, Brightness, Colour, Colour Temp and<br />
Picture Zoom settings in this menu are i<strong>den</strong>tical<br />
to settings defined in <strong>TV</strong> picture menu under “Main<br />
Menu System”.<br />
Sound,Settings and Source settings are i<strong>den</strong>tical to<br />
the settings explained in main menu system.<br />
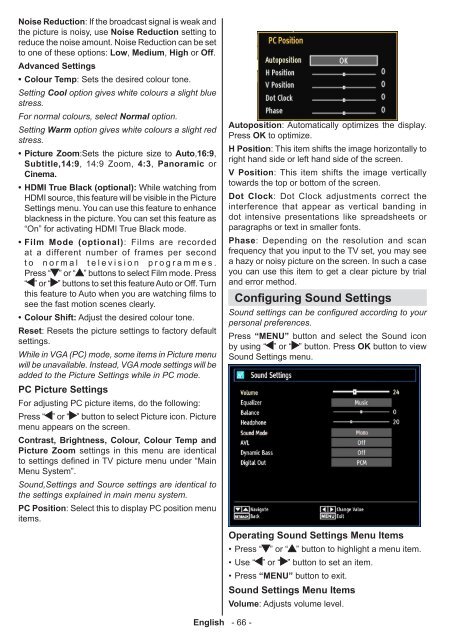
PC Position: Select this to display PC position menu<br />
items.<br />
English - 66 -<br />
Autoposition: Automatically optimizes the display.<br />
Press OK to optimize.<br />
H Position: This item shifts the image horizontally to<br />
right hand side or left hand side of the screen.<br />
V Position: This item shifts the image vertically<br />
towards the top or bottom of the screen.<br />
Dot Clock: Dot Clock adjustments correct the<br />
interference that appear as vertical banding in<br />
dot intensive presentations like spreadsheets or<br />
paragraphs or text in smaller fonts.<br />
Phase: Depending on the resolution and scan<br />
frequency that you input to the <strong>TV</strong> set, you may see<br />
a hazy or noisy picture on the screen. In such a case<br />
you can use this item to get a clear picture by trial<br />
and error method.<br />
Configuring Sound Settings<br />
Sound settings can be configured according to your<br />
personal preferences.<br />
Press “MENU” button and select the Sound icon<br />
by using “ ” or “ ” button. Press OK button to view<br />
Sound Settings menu.<br />
Operating Sound Settings Menu Items<br />
• Press “ ” or “ ” button to highlight a menu item.<br />
• Use “ ” or “ ” button to set an item.<br />
• Press “MENU” button to exit.<br />
Sound Settings Menu Items<br />
Volume: Adjusts volume level.


