STEREO iO Quickstart Guide - v1.2 - Numark
STEREO iO Quickstart Guide - v1.2 - Numark
STEREO iO Quickstart Guide - v1.2 - Numark

Create successful ePaper yourself
Turn your PDF publications into a flip-book with our unique Google optimized e-Paper software.
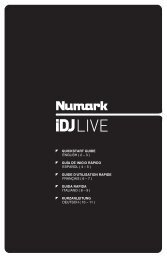
<strong>STEREO</strong> | <strong>iO</strong><br />
QUICKSTART GUIDE<br />
ENGLISH ( 1 – 3 )<br />
GUÍA DE INICIO RÁPIDO<br />
ESPAÑOL ( 4 – 6 )<br />
GUIDE D'UTILISATION SIMPLIFIÉ<br />
FRANÇAIS ( 7 – 9 )<br />
GUIDA RAPIDA<br />
ITALIANO ( 10 – 12 )<br />
KURZANLEITUNG<br />
DEUTSCH ( 13 – 15 )
BOX CONTENTS<br />
• <strong>STEREO</strong>|<strong>iO</strong><br />
• USB Cable<br />
• Software CD<br />
• <strong>Quickstart</strong> <strong>Guide</strong><br />
• Safety Instructions & Warranty Information booklet<br />
FEATURES<br />
1. PHONO INPUTS (RCA) – Connect phono-level devices,<br />
such as turntables, to these inputs.<br />
2. GROUNDING TERMINAL – If using phono-level<br />
turntables with a grounding wire, connect the grounding<br />
wire to these terminals. If you experience a low "hum" or<br />
"buzz", this could mean that your turntables are not<br />
grounded.<br />
Note: Some turntables have a grounding wire built into<br />
the RCA connection and, therefore, nothing needs to be<br />
connected to the grounding terminal.<br />
3. LINE INPUTS (RCA) – Connect line-level devices, such<br />
as CD players, samplers or audio interfaces, to these<br />
inputs.<br />
4. LINE | PHONO SWITCH – Flip this switch to the<br />
appropriate position, depending on the device connected<br />
to the LINE and PHONO INPUTS. If you are using<br />
phono-level turntables, set this switch to "PHONO" to<br />
provide the additional amplification needed for phonolevel<br />
signals. If using a line-level device, such as a CD<br />
player or sampler, set this switch to "LINE."<br />
5. LINE OUTPUTS (RCA) – Use standard RCA cables to<br />
connect this output to a speaker or amplifier system.<br />
The level of this output is controlled by the VOLUME dial.<br />
6. USB – Please use the supplied USB cable to connect<br />
this port to an available USB port on your computer.<br />
When plugged into your computer, the unit will draw<br />
power from the USB connection.<br />
7. USB LED – Illuminates when connected to your computer.<br />
8. VOLUME – Adjusts the audio level of the LINE OUTPUTS.<br />
1<br />
2<br />
3<br />
4 5<br />
6 7<br />
8<br />
1
CONNECTION DIAGRAM<br />
COMPUTER<br />
MIXER<br />
CD PLAYER<br />
or<br />
INCLUDED SOFTWARE<br />
We have included two software applications to aid you in converting your recordings to digital music:<br />
EZ Vinyl/Tape Converter (PC only) is the quickest and easiest way to turn your recordings into digital media. EZ<br />
Vinyl/Tape Converter conveniently saves your recordings in your iTunes* library. Novice users may find this<br />
application preferable. On the CD, we have included a handy <strong>Quickstart</strong> <strong>Guide</strong> with step-by-step instructions on<br />
software installation and operation.<br />
EZ Audio Converter (Mac only) is a basic converter application for Mac OS X and is ideal for novice users.<br />
Please refer to the included Software <strong>Quickstart</strong> <strong>Guide</strong> for step-by-step instructions on software installation and<br />
operation.<br />
* iTunes and iPod are trademarks of Apple, Inc., registered in the U.S.A. and other countries.<br />
or<br />
SPEAKERS<br />
2<br />
TURNTABLE<br />
Be sure your audio software<br />
program is set up to receive audio<br />
via the <strong>STEREO</strong>|<strong>iO</strong>. This can<br />
usually be done in your software's<br />
"Preferences" or "Device Setup."<br />
Please consult your software<br />
manual for more information.
AUDIO SETUP<br />
WINDOWS 7:<br />
1. Use the included cable to connect the <strong>STEREO</strong>|<strong>iO</strong> to<br />
your computer.<br />
2. Go to Start Menu � Control Panel � Hardware and<br />
Sound � Sound.<br />
3. Click the Playback tab and select USB Audio Codec* as<br />
the default device.<br />
4. Click the Recording tab and select USB Audio Codec*<br />
as the default device.<br />
5. Click Properties in the lower right-hand corner.<br />
6. In the new window, click the Advanced tab and select 2channel,<br />
16-bit, 44100 Hz (CD Quality) as the default<br />
format.<br />
7. Uncheck both boxes under Exclusive Mode.<br />
8. Click the Levels tab and set the slider to "4."<br />
9. Click OK to close the Properties window.<br />
10. Click OK to close the Sound control panel.<br />
WINDOWS VISTA:<br />
1. Use the included cable to connect the <strong>STEREO</strong>|<strong>iO</strong> to your computer.<br />
2. Go to Start Menu � Control Panel � Sound. (If you don't see Sound, select Switch to Classic View, and the<br />
Sound Control Panel should become available.)<br />
3. Click the Playback tab and select USB Audio Codec* as the default device.<br />
4. Click the Recording tab and select USB Audio Codec* as the default device.<br />
5. Click Properties in the lower right-hand corner.<br />
6. In the new window, click the Advanced tab and select 2-channel, 16-bit, 44100 Hz (CD Quality) as the default<br />
format.<br />
7. Uncheck both boxes under Exclusive Mode.<br />
8. Click OK to close the Properties window.<br />
9. Click OK to close the Sound control panel.<br />
WINDOWS XP:<br />
1. Use the included cable to connect the <strong>STEREO</strong>|<strong>iO</strong> to your computer.<br />
2. Go to Start Menu � Control Panel � Sounds and Audio Devices.<br />
3. Click the Audio tab.<br />
4. Under Sound Playback and Sound Recording, select USB Audio Codec* as the default device.<br />
5. Click OK.<br />
MAC:<br />
1. Use the included cable to connect the <strong>STEREO</strong>|<strong>iO</strong> to your computer.<br />
2. Go to Applications � Utilities � Audio MIDI Setup.<br />
3. In the Audio Devices tab under System Settings, select USB Audio Codec* as your Default Input and Default<br />
Output.<br />
4. Close the window.<br />
3<br />
* If you have other USB audio devices connected<br />
to your computer, which may have identical<br />
names, you may need to try selecting each one<br />
until the <strong>STEREO</strong>|<strong>iO</strong> is recognized.<br />
If you experience too much latency after adjusting<br />
your software latency settings, we recommend the<br />
free ASIO4ALL (Audio Stream Input/Output) driver<br />
for PC at www.asio4all.com. ASIO drivers<br />
generally perform better and with lower latency<br />
since they create a more efficient communication<br />
between audio devices and software.
CONTENIDO DE LA CAJA<br />
• <strong>STEREO</strong>|<strong>iO</strong><br />
• Cable USB<br />
• CD software<br />
• Guía de inicio rápido<br />
• Folleto de información sobre la seguridad y la garantía<br />
CARACTERÍSTICAS<br />
1. ENTRADAS FONOGRÁFICAS (RCA) – Estas entradas se<br />
usan para conectar dispositivos de nivel fonográfico, como<br />
giradiscos.<br />
3 1<br />
2. TERMINAL DE TIERRA – Si usa giradiscos de nivel<br />
fonográfico con cable de conexión a tierra, asegúrese de<br />
conectar dicho cable a estos terminales. Si se experimenta<br />
un zumbido grave, puede significar que sus giradiscos no<br />
están conectados a tierra.<br />
Nota: Algunos giradiscos tienen el cable de conexión a<br />
tierra incorporado a la conexión RCA y, por lo tanto, no es<br />
necesario conectar nada al terminal de tierra.<br />
4 5<br />
3. ENTRADAS DE LÍNEA (RCA) – Estas entradas se usan<br />
para conectar dispositivos de nivel de línea, tales como<br />
4.<br />
reproductores de CD, muestreadores o interfaces de audio.<br />
INTERRUPTOR DE ENTRADA DE LÍNEA |<br />
FONOGRÁFICA – Coloque este conmutador en la posición<br />
apropiada, en función del dispositivo conectado a las<br />
entradas Line o Phono. Si usa giradiscos de nivel<br />
fonográfico, coloque este conmutador en “Phono” para<br />
proporcionar la amplificación adicional necesaria para las<br />
6<br />
señales de este nivel. Si usa un dispositivo de nivel de<br />
línea, tal como un reproductor de CD o muestreador,<br />
coloque este conmutador en “Line”.<br />
5. SALIDAS DE LÍNEA (RCA) – Use cables RCA estándar<br />
para conectar esta salida maestra a un sistema de<br />
6.<br />
altavoces o amplificador. El nivel de esta salida se controla con el cuadrante VOLUME.<br />
USB – Use el cable USB2.0 provisto para conectar este puerto a un puerto USB2.0 disponible de su<br />
computadora. Cuando esté enchufada a su computadora, la unidad extrae energía por la conexión USB.<br />
7. USB LED – Se ilumina cuando el <strong>STEREO</strong>|<strong>iO</strong> está conectado al computadora.<br />
8. VOLUMEN – Ajusta el nivel de audio de las SALIDAS DE LÍNEA.<br />
7<br />
2<br />
8<br />
4
DIAGRAMA DE CONEXIÓN<br />
MEZCLADOR<br />
COMPUTADORA<br />
REPRODUCTEUR DE CD<br />
SOFTWARE<br />
Hemos incluido varios paquetes de software para ayudarle a convertir sus grabaciones de vinilo:<br />
• EZ Vinyl/Tape Converter (PC únicamente) es la forma más rápida y fácil de convertir las grabaciones en<br />
medios digitales. Este software guarda convenientemente sus grabaciones en la biblioteca de iTunes*. Es<br />
posible que los usuarios novicios prefieran esta aplicación. En el CD, incluidos una práctica Guía de inicio<br />
rápido con instrucciones paso a paso sobre la instalación y la operación del software.<br />
• EZ Audio Converter (Mac únicamente) es una aplicación de convertidor básica para Mac OS X, ideal<br />
para usuarios novicios. Consulte en la Guía de inicio rápido del software incluida las instrucciones<br />
detalladas sobre la instalación y la operación del software.<br />
* iTunes e iPod son marcas registradas de Apple, Inc., registradas en EE.UU. y otros países.<br />
o<br />
o<br />
PARLANTES<br />
GIRADISCOS<br />
5<br />
Asegúrese de que su programa<br />
de software de audio esté<br />
configurado para recibir audio<br />
por <strong>STEREO</strong>|<strong>iO</strong>. Esto se puede<br />
hacer habitualmente en<br />
"Preferences" o "Device Setup"<br />
(Configuración de dispositivos)<br />
de su software. Para más<br />
información, consulte el manual<br />
de su software.
CONFIGURACIÓN DE AUDIO<br />
WINDOWS 7:<br />
1. Use el cable incluido para conectar el <strong>STEREO</strong>|<strong>iO</strong> a su computadora.<br />
2. Vaya al menú Start � Control Panel � Hardware and Sound � Sound.<br />
3. Haga clic en la pestaña Playback y seleccione USB Audio Codec* como<br />
dispositivo predeterminado.<br />
4. Haga clic en la pestaña Recording y seleccione USB Audio Codec* como<br />
dispositivo predeterminado.<br />
5. Haga clic en Properties en la esquina inferior derecha.<br />
6. En la nueva ventana, haga clic en la pestaña Advanced y seleccione 2channel,<br />
16-bit, 44100 Hz (CD Quality) como formato predeterminado.<br />
7. Deseleccione ambas casillas debajo de Exclusive Mode.<br />
8. Haga clic en la pestaña Levels y ajuste el deslizador a "4".<br />
9. Haga clic en OK para cerrar las ventana Properties.<br />
10. Haga clic en OK para cerrar el panel de control Sound.<br />
WINDOWS VISTA:<br />
1. Use el cable incluido para conectar el <strong>STEREO</strong>|<strong>iO</strong> a su computadora.<br />
2. Vaya al menú Start � Control Panel � Sound. (Si no ve Sound,<br />
seleccione Switch to Classic View — el panel de control Sound debe<br />
aparecer.)<br />
3. Haga clic en la pestaña Playback y seleccione USB Audio Codec* como<br />
dispositivo predeterminado.<br />
4. Haga clic en la pestaña Recording y seleccione USB Audio Codec* como<br />
dispositivo predeterminado.<br />
5. Haga clic en Properties en la esquina inferior derecha.<br />
6. En la nueva ventana, haga clic en la pestaña Advanced y seleccione 2-channel, 16-bit, 44100 Hz (CD Quality) como<br />
formato predeterminado.<br />
7. Deseleccione ambas casillas debajo de Exclusive Mode.<br />
8. Haga clic en OK para cerrar las ventana Properties.<br />
9. Haga clic en OK para cerrar el panel de control Sound.<br />
WINDOWS XP:<br />
1. Use el cable incluido para conectar el <strong>STEREO</strong>|<strong>iO</strong> a su computadora.<br />
2. Vaya al menú Start � Control Panel � Sounds and Audio Devices.<br />
3. Haga clic en la pestaña Audio.<br />
4. En Sound Playback y Sound Recording seleccione USB Audio Codec* como dispositivo predeterminado.<br />
5. Haga clic en OK.<br />
MAC:<br />
1. Use el cable incluido para conectar el <strong>STEREO</strong>|<strong>iO</strong> a su computadora.<br />
2. Vaya a Applications � Utilities � Audio MIDI Setup.<br />
3. En la pestaña Audio Devices, bajo System Settings, seleccione USB Audio Codec* como Default Input y Default<br />
Output.<br />
4. Cierre la ventana.<br />
6<br />
* Si tiene conectados a su<br />
computadora otros dispositivos de<br />
audio USB que puedan tener<br />
nombres idénticos, puede ser<br />
necesario que pruebe a<br />
seleccionar cada uno hasta que<br />
se reconozca el <strong>STEREO</strong>|<strong>iO</strong>.<br />
Si sigue experimentando latencia<br />
después de ajustar los parámetros<br />
de latencia de su computadora,<br />
recomendamos gratuitamente el<br />
driver ASIO4ALL (Entrada/salida<br />
de corriente de audio) para PC de<br />
www.asio4all.com. En general,<br />
los drivers ASIO funcionan mejor<br />
y con menor latencia, dado que<br />
crean una comunicación más<br />
eficiente entre los dispositivos de<br />
audio y el software.
CONTENU DE LA BOÎTE<br />
• <strong>STEREO</strong>|<strong>iO</strong><br />
• Câble USB<br />
• CD logiciel<br />
• <strong>Guide</strong> d'utilisation simplifié<br />
• Le livret des consignes de sécurité et des informations concernant la garantie<br />
CARACTÉRISTIQUES<br />
1. ENTRÉES PHONO (RCA) – Ces entrées permettent de<br />
brancher des appareils à niveau phono, tels que les tables<br />
tournantes.<br />
3 1<br />
2. BORNE DE MISE À LA TERRE – Si vous utilisez des tables<br />
tournantes avec fils de mise à la terre, assurez-vous de<br />
brancher le fils à cette borne. S’il y a un ronflement ou du bruit,<br />
il se pourrait que vos tables tournantes ne soient pas mises à<br />
la terre.<br />
Remarque: Certaines tables tournantes fabriquées récemment<br />
sont dotées d'un fil de mise à la terre intégré à la connexion<br />
RCA, et donc, n'ont pas besoin d’être reliées à la borne de<br />
mise à la terre.<br />
4 5<br />
3. ENTRÉES LINE (RCA) – Ces entrées permettent de brancher<br />
des appareils à niveau ligne tels que lecteurs de disques<br />
compacts, échantillonneurs ou autres interfaces audio.<br />
6<br />
4. LINE | PHONO SÉLÉCTEUR – Mettre ce sélecteur à la<br />
position appropriée, selon l’appareil branché aux entrées Line<br />
ou Phono. Si vous utilisez des tables tournantes phono à<br />
niveau ligne, réglez ce sélecteur à « Phono » afin d’ajouter plus<br />
d’amplification pour les signaux phono à niveau ligne. Pour<br />
brancher un appareil à niveau de ligne, tel qu’un lecteur CD ou<br />
un échantillonneur, réglez le sélecteur LINE/PHONO à la<br />
position LINE.<br />
5. SORTIES LINE (RCA) – Utilisez des câbles RCA standards afin de brancher cette sortie à un haut-parleur<br />
ou à un système de sonorisation. Le niveau du signal de cette sortie est commandé par le cadran<br />
VOLUME.<br />
6. USB – Branchez le câble USB 2.0 depuis ce port USB au port USB 2.0 disponible de votre ordinateur.<br />
Lorsque branché à l’ordinateur, l’appareil tire son énergie de la connexion USB.<br />
7. USB LED – S'allume lorsque le <strong>STEREO</strong>|<strong>iO</strong> est connecté.<br />
8. VOLUME – Permet de régler le niveau des SORTIES LINE.<br />
7<br />
2<br />
8<br />
7
SCHÉMA DE CONNEXION<br />
ORDINATEUR<br />
CONSOLE<br />
DE MIXAGE<br />
LECTEUR CD<br />
LOGICIELS INCLUS<br />
ou<br />
ou<br />
HAUT-PARLEURS<br />
Plusieurs logiciels sont inclus afin de vous aider à faire la conversion des enregistrements de vos disques de<br />
vinyle :<br />
• Le EZ Vinyl/Tape Converter (PC seulement) est la façon la plus rapide et la plus simple de convertir vos<br />
enregistrements au média numérique. Le logiciel permet également de sauvegarder vos enregistrements<br />
dans votre bibliothèque iTunes*. L'utilisateur débutant préférera peut-être cette application pour sa<br />
simplicité d'utilisation. Sur le CD, nous avons inclus un guide d'utilisation simplifié avec des instructions<br />
détaillées sur l'installation et le fonctionnement du logiciel.<br />
• Le EZ Audio Converter (Mac seulement) est un logiciel de conversion pour Mac OS X idéal pour<br />
l’utilisateur débutant. Veuillez consulter le guide de démarrage rapide du logiciel pour les instructions étape<br />
par étape sur l’installation et l’utilisation.<br />
* iTunes et iPod sont des maques de commerce enregistrées de Apple, Inc., enregistrées aux États-Unis et dans d’autres pays.<br />
8<br />
TABLE TOURNANTE<br />
Assurez-vous que le logiciel<br />
est configuré de manière à<br />
recevoir de l'audio via le<br />
<strong>STEREO</strong>|<strong>iO</strong>. Vérifiez dans les<br />
paramètres « Préférences » ou<br />
« Installation du périphérique ».<br />
Pour de plus amples<br />
informations, veuillez consulter<br />
le guide d'utilisation du logiciel.
CONFIGURATION AUDIO<br />
WINDOWS 7 :<br />
1. Utilisez le câble inclus pour brancher le <strong>STEREO</strong>|<strong>iO</strong> à votre ordinateur.<br />
2. Cliquez sur Démarrer � Panneau de configuration � Hardware et<br />
Son � Son.<br />
3. Cliquez sur l'onglet Lecture et sélectionnez USB audio codec* comme<br />
l'appareil par défaut.<br />
4. Cliquez sur l'onglet Enregistrement et sélectionnez USB audio codec*<br />
comme l'appareil par défaut.<br />
5. Cliquez sur Propriétés dans le coin inférieur droit.<br />
6. À partir de la nouvelle fenêtre, cliquez sur l'onglet Advancé et<br />
sélectionnez l'option 2 canaux, 16 bits, 44 100 Hz (Qualité CD) comme<br />
le format par défaut.<br />
7. Décochez les deux options sous Mode exclusif.<br />
8. Cliquez sur l'onglet Niveaux et positionnez le curseur à 4.<br />
9. Cliquez OK pour fermer la fenêtre Propriétés.<br />
10. Cliquez OK pour fermer le panneau de configuration Son.<br />
WINDOWS VISTA :<br />
1. Utilisez le câble inclus pour brancher le <strong>STEREO</strong>|<strong>iO</strong> à votre ordinateur.<br />
2. Cliquez sur Démarrer � Panneau de configuration � Son. (Si vous ne<br />
voyez pas Son, sélectionnez « Basculer vers l'affichage classique » et<br />
le panneau de configuration Son devrait s'afficher.)<br />
3. Cliquez sur l'onglet Lecture et sélectionnez USB audio codec* comme<br />
l'appareil par défaut.<br />
4. Cliquez sur l'onglet Enregistrement et sélectionnez USB audio codec* comme l'appareil par défaut.<br />
5. Cliquez sur Propriétés dans le coin inférieur droit.<br />
6. À partir de la nouvelle fenêtre, cliquez sur l'onglet Advancé et sélectionnez l'option 2 canaux, 16 bits, 44 100 Hz<br />
(Qualité CD) comme le format par défaut.<br />
7. Décochez les deux options sous Mode exclusif.<br />
8. Cliquez OK pour fermer la fenêtre Propriétés.<br />
9. Cliquez OK pour fermer le panneau de configuration Son.<br />
WINDOWS XP :<br />
1. Utilisez le câble inclus pour brancher le <strong>STEREO</strong>|<strong>iO</strong> à votre ordinateur.<br />
2. Cliquez sur Démarrer � Panneau de configuration � Sons et périphériques audio.<br />
3. Cliquez sur l'onglet Audio.<br />
4. Sous Lecture audio et Enregistrement audio, sélectionnez USB audio codec* comme l'appareil par défaut.<br />
5. Cliquez sur OK.<br />
MAC :<br />
1. Utilisez le câble inclus pour brancher le <strong>STEREO</strong>|<strong>iO</strong> à votre ordinateur.<br />
2. Allez à Applications � Utilitaires � Configuration audio et MIDI.<br />
3. Dans l'onglet Sons et périphériques audio sous Réglages du système, sélectionnez USB audio codec* comme<br />
Entrée par défaut et Sortie par défaut.<br />
4. Fermez la fenêtre.<br />
9<br />
* Si vous avez d'autres<br />
périphériques audio USB branchés<br />
à votre ordinateur, qui pourraient<br />
avoir des noms identiques, il se<br />
peut que vous ayez à les<br />
sélectionner un à la suite de l'autre<br />
jusqu'à ce que le <strong>STEREO</strong>|<strong>iO</strong> soit<br />
reconnu.<br />
S'il y a de la latence après avoir<br />
modifié les paramètres de latence<br />
du logiciel, nous vous<br />
recommandons gratuitement le<br />
pilote ASIO4ALL (Audio Stream<br />
Input/Output) pour PC de<br />
www.asio4all.com. Les pilotes<br />
ASIO permettent de meilleures<br />
performances avec moins de<br />
latence puisqu’ils créent une<br />
communication plus efficace entre<br />
les appareils audio et les logiciels.
CONTENUTI DELLA CONFEZIONE<br />
• <strong>STEREO</strong>|<strong>iO</strong><br />
• Cavo USB<br />
• CD software<br />
• Guida rapida<br />
• Libretto di istruzioni di sicurezza e garanzia<br />
CARATTERISTICHE<br />
1.<br />
2.<br />
INGRESSI PHONO (RCA) – Collegare dispositivi a livello<br />
phono, ad esempio giradischi, a questi ingressi.<br />
TERMINALE DI MESSA A TERRA – Se si utilizzano<br />
giradischi a livello phono dotati di cavo di messa a terra,<br />
questo va collegato a questi terminali. Se si verifica un<br />
“ronzio” o un “brusio” basso, ciò può significare che i<br />
giradischi non sono messi a terra.<br />
3 1<br />
Nota bene: alcuni giradischi hanno il cavo di messa a terra<br />
incorporato nel collegamento RCA e, di conseguenza, non è<br />
necessario collegare nulla al terminale di messa a terra.<br />
4 5<br />
3. INGRESSI DI LINEA (RCA) – Collegare dispositivi a livello<br />
di linea quali lettori CD, campionatori o interfacce audio a<br />
questi ingressi.<br />
4. INTERRUTTORE LINEA | PHONO – Posizionare<br />
correttamente questo interruttore, a seconda del dispositivo<br />
collegato agli ingressi Linea o Phono. Se si utilizzano<br />
giradischi a livello phono, impostare l’interruttore su “Phono”<br />
per garantire l’amplificazione aggiuntiva necessaria per i<br />
segnali a livello phono. Se si utilizza un dispositivo a livello<br />
di linea quale un lettore CD o un campionatore, impostare<br />
6<br />
5.<br />
l’interruttore su “Line” (linea).<br />
USCITE LINEA (RCA) – Servirsi di cavi standard RCA per<br />
collegare questa uscita Master ad una cassa o ad un<br />
sistema di amplificatori. Il livello di questa uscita è<br />
controllato tramite il quadrante VOLUME.<br />
6. USB – Servirsi del cavo USB2.0 in dotazione per collegare questa porta ad una porta USB2.0 disponibile<br />
sul computer. Una volta collegato al computer, l’apparecchio trarrà l’alimentazione dal collegamento USB.<br />
7. USB LED – Si illumina quando il <strong>STEREO</strong>|<strong>iO</strong> è collegato il computer.<br />
8. VOLUME – Regola il livello audio di USCITE LINEA.<br />
7<br />
2<br />
8<br />
10
SCHEMA DEI COLLEGAMENTI<br />
COMPUTER<br />
MIXER<br />
SOFTWARE<br />
Per aiutarvi nella conversione dei dischi in vinile, abbiamo incluso diversi pacchetti software:<br />
• EZ Vinyl/Tape Converter (PC soltanto) è il modo più facile e veloce di trasformare i tuoi dischi in media<br />
digitali. EZ Vinyl/Tape Converter salva comodamente le tue registrazioni nella libreria iTunes*. Questa è<br />
probabilmente l’applicazione preferibile per gli utenti alle prime armi. Sul CD, abbiamo allegato una<br />
comoda Guida Rapida con istruzioni passo passo circa l’installazione e l’uso del software.<br />
• EZ Audio Converter (Mac soltanto) è un applicativo base di conversione per Mac OS X ed è l’ideale per<br />
utenti principianti. Fate riferimento alla comoda Guida Rapida allegata, recante le istruzioni passo passo<br />
circa l’installazione e l’uso del software.<br />
* iTunes e iPod sono marchi di fabbrica di Apple, Inc., registrati negli Stati Uniti e in altri paesi.<br />
o<br />
ALTOPARLANTE<br />
LETTORE CD GIRADISCHI<br />
o<br />
11<br />
Assicuratevi che il vostro programma<br />
audio sia configurato per ricevere<br />
audio da <strong>STEREO</strong>|<strong>iO</strong>. Questo può<br />
essere fatto solitamente a livello<br />
delle "Preferenze" o della<br />
"Configurazione periferica". Per<br />
maggiori informazioni, consultate il<br />
manuale del vostro software.
CONFIGURAZIONE AUDIO<br />
WINDOWS 7:<br />
1. Servirsi del cavo in dotazione per collegare il <strong>STEREO</strong>|<strong>iO</strong> ad un<br />
computer.<br />
2. Recarsi su Start � Pannello di controllo � Hardware e Audio �<br />
Audio.<br />
3. Cliccare sulla linguetta Riproduzione e selezionare USB Audio<br />
CODEC* come periferica predefinita.<br />
4. Cliccare sulla linguetta Registrazione e selezionare USB Audio<br />
CODEC* come periferica predefinita.<br />
5. Cliccare su Proprietà nell'angolo inferiore destro.<br />
6. Nella nuova finestra, cliccare sulla linguetta Avanzate e<br />
selezionare 2 canali, 16-bit, 44100 Hz (qualità da CD) come<br />
formato predefinito.<br />
7. Togliere il segno di spunta da entrambe le caselle in Modalità<br />
esclusiva.<br />
8. Cliccare sulla linguetta Livelli e impostare il cursore su 4.<br />
9. Cliccare su OK per chiudere la finestra Proprietà.<br />
10. Cliccare su OK per chiudere il pannello di controllo Audio.<br />
WINDOWS VISTA:<br />
1. Servirsi del cavo in dotazione per collegare il <strong>STEREO</strong>|<strong>iO</strong> ad un computer.<br />
2. Recarsi su Start � Pannello di controllo � Audio. (Se non viene visualizzato Audio, selezionare<br />
"Visualizzazione classica" ed il Pannello di controllo Audio dovrebbe diventare disponibile.)<br />
3. Cliccare sulla linguetta Riproduzione e selezionare USB Audio CODEC* come periferica predefinita.<br />
4. Cliccare sulla linguetta Registrazione e selezionare USB Audio CODEC* come periferica predefinita.<br />
5. Cliccare su Proprietà nell'angolo inferiore destro.<br />
6. Nella nuova finestra, cliccare sulla linguetta Avanzate e selezionare 2 canali, 16-bit, 44100 Hz (qualità da CD)<br />
come formato predefinito.<br />
7. Togliere il segno di spunta da entrambe le caselle in Modalità esclusiva.<br />
8. Cliccare su OK per chiudere la finestra Proprietà.<br />
9. Cliccare su OK per chiudere il pannello di controllo Audio.<br />
WINDOWS XP:<br />
1. Servirsi del cavo in dotazione per collegare il <strong>STEREO</strong>|<strong>iO</strong> ad un computer.<br />
2. Recarsi su Start � Pannello di controllo � Suoni e periferiche audio.<br />
3. Fare clic sulla linguetta "Audio".<br />
4. Sotto Riproduzione suoni e Registrazione suoni selezionare USB Audio CODEC* come periferica predefinita.<br />
5. Cliccare su "OK".<br />
MAC:<br />
1. Servirsi del cavo in dotazione per collegare il <strong>STEREO</strong>|<strong>iO</strong> ad un computer.<br />
2. Recarsi su Applicazioni � Utilità � Audio MIDI Setup.<br />
3. Nella linguetta Dispositivi Audio sotto Impostazioni di sistema, selezionare USB Audio Codec* come Ingresso<br />
predefinito e come Uscita predefinita.<br />
4. Chiudere la finestra.<br />
12<br />
* Qualora fossero presenti altri dispositivi<br />
audio USB collegati al computer, che<br />
potrebbero avere nomi identici, provare<br />
a selezionarli a uno a uno fino a quando<br />
il <strong>STEREO</strong>|<strong>iO</strong> non viene riconosciuto.<br />
Qualora si dovesse verificare<br />
un’eccessiva latenza dopo averne<br />
sistemato la configurazione a livello del<br />
vostro software, si consiglia il driver<br />
gratuito ASIO4ALL (Audio Stream<br />
Input/Output) per PC alla pagina<br />
www.asio4all.com. Solitamente, i driver<br />
ASIO hanno prestazioni migliori e con<br />
una minore latenza, in quanto creano<br />
una comunicazione più efficiente tra<br />
dispositivi audio e software.
INHALT DER VERPACKUNG<br />
• <strong>STEREO</strong>|<strong>iO</strong><br />
• USB Kabel<br />
• Software-CD<br />
• Kurzanleitung<br />
• Broschüre mit den Sicherheits- und Garantierichtlinien<br />
ÜBERSICHT<br />
1.<br />
2.<br />
PHONO-EINGÄNGE (RCA) – Zum Anschluss von Phono-<br />
Geräten, wie Plattenspieler.<br />
GROUNDING TERMINAL – Bei der Verwendung von Phono<br />
Pegel Turntables mit einem Massekabel müssen Sie dieses<br />
an diese Erdungspins anschließen. Sollten Sie ein tiefes<br />
Brummen oder andere Klangstörungen hören, sind Ihre<br />
3 1<br />
Turntables möglicherweise nicht geerdet.<br />
Hinweis: Bei einigen Turntables ist die Masseverbindung in<br />
die Chinch (RCA) Verbindung integriert – bei diesen Geräten<br />
benötigen Sie dann keine zusätzliche Masseverbindung.<br />
4 5<br />
3. LINE EINGÄNGE (RCA) – Schließen Sie hier Geräte mit<br />
Linepegelsignalen, wie CD Player, Sampler oder Audio<br />
Interfaces, an.<br />
4. LINE | PHONO SCHALTER – Abhängig davon, welches<br />
Gerät Sie an die Line oder Phono Eingänge angeschlossen<br />
haben, müssen Sie diesen Schalter in die richtige Position<br />
setzen. Falls Sie Turntables mit Phonopegel anschließen,<br />
bringen Sie diesen Schalter in die „PHONO” Position, um<br />
das Phono Signal zusätzlich zu verstärken, Bei der<br />
Verwendung eines Gerätes mit Linepegel, wie einem CD<br />
6<br />
5.<br />
Player, wählen Sie die „LINE” Position.<br />
LINE AUSGÄNGE (RCA) – Verbinden Sie diesen Ausgang<br />
mit einem PA System, Aktivmonitoren oder einer HiFi<br />
Anlage. Die Lautstärke dieses Ausgangs wird mit dem<br />
VOLUME Wählscheibe auf der Mixer Vorderseite geregelt..<br />
6. USB – Verwenden Sie bitte das beiliegende USB2.0 Kabel, um diesen Anschluss mit einem freien USB2.0<br />
Port des Computers zu verbinden. Beim Anschluss an den Computer wird das Gerät über USB mit Strom<br />
versorgt.<br />
7. USB LED – Leuchtet, wenn das <strong>STEREO</strong>|<strong>iO</strong> mit dem Computer verbunden ist.<br />
8. VOLUME – Steuert die Ausgangslautstärke des LINE AUSGÄNGE.<br />
7<br />
2<br />
8<br />
13
ANSCHLUSSÜBERSICHT<br />
COMPUTER<br />
MIXER<br />
CD SPIELER<br />
SOFTWARE<br />
oder<br />
oder<br />
LAUTSPRECHERN<br />
Wir haben mehrere Softwarepakete beigefügt, die Sie beim Konvertieren Ihrer Vinylaufnahmen unterstützen<br />
sollen:<br />
• EZ Vinyl/Tape Converter (nur PC) ist der schnellste und einfachste Weg zur Digitalisierung Ihrer<br />
Schallplatten. EZ Vinyl/Tape Converter speichert Ihre Aufnahmen direkt in Ihrer iTunes* Bibliothek.<br />
Anwender, die zum ersten Mal Musik auf dem Computer aufnehmen, werden dieses Programm als völlig<br />
ausreichend für ihre Zwecke empfinden. Auf der CD, in einer übersichtlichen Schritt-für-Schritt<br />
Kurzanleitung erfahren Sie alles über die Installation und die Verwendung des Programms.<br />
• EZ Audio Converter (nur Mac) ist ein grundlegendes Converter-Programm für Mac OS X und ideal für<br />
Neueinsteiger. Softwareinstallation und Betrieb sind Schritt für Schritt in der beigefügten Software-<br />
Kurzanleitung erklärt.<br />
* iTunes und iPod sind geschützte Warenzeichen von Apple, Inc., registriert in den U.S.A. und anderen Ländern.<br />
14<br />
Achten Sie darauf, dass Ihre<br />
Audiosoftware auf den Empfang von<br />
Audio über <strong>STEREO</strong>|<strong>iO</strong> konfiguriert ist.<br />
Dazu öffnen Sie normalerweise die<br />
"Voreinstellungen" oder die<br />
"Gerätekonfiguration" der Software.<br />
Beachten Sie bitte auch die Hinweise<br />
in der Bedienungsanleitung der<br />
Software für weitere Informationen.<br />
PLATTENSPIELER
AUDIO SETUP<br />
WINDOWS 7:<br />
1. Verwenden Sie das beiliegende Kabel, um den <strong>STEREO</strong>|<strong>iO</strong> an<br />
einen Computer.<br />
2. Gehen Sie auf Start Menü � Systemsteuerung � Hardware und<br />
Sound � Sound<br />
3. Klicken Sie auf den Reiter Wiedergabe und wählen Sie USB<br />
Audio Codec* als Standardgerät.<br />
4. Klicken Sie auf den Reiter Aufnahme und wählen Sie USB Audio<br />
Codec* als Standardgerät.<br />
5. Kicken Sie Eigenschaften in der rechten unteren Ecke.<br />
6. Im neuen Fenster klicken Sie den Reiter Erweitert und wählen 2-<br />
Kanal, 16-bit, 44100 Hz (CD Qualität) als Standardformat.<br />
7. Entfernen Sie das Häkchen in beiden Kästen unter<br />
Exklusivmodus.<br />
8. Klicken Sie auf den Reiter Pegels und setzen Sie den<br />
Schieberegler bis 4.<br />
9. Klicken Sie OK, um das Eigenschaftenfenster zu schließen.<br />
10. Klicken Sie OK, um das Sound Bedienfeld zu schließen.<br />
WINDOWS VISTA:<br />
1. Verwenden Sie das beiliegende Kabel, um den <strong>STEREO</strong>|<strong>iO</strong> an einen Computer.<br />
2. Gehen Sie auf Start Menü � Systemsteuerung � Sound (Falls Sie Sound nicht sehen, wählen Sie Auf<br />
klassische Ansicht wechseln und das Sound Bedienfeld sollte verfügbar sein.)<br />
3. Klicken Sie auf den Reiter Wiedergabe und wählen Sie USB Audio Codec* als Standardgerät.<br />
4. Klicken Sie auf den Reiter Aufnahme und wählen Sie USB Audio Codec* als Standardgerät.<br />
5. Kicken Sie Eigenschaften in der rechten unteren Ecke.<br />
6. Im neuen Fenster klicken Sie den Reiter Erweitert und wählen 2-Kanal, 16-bit, 44100 Hz (CD Qualität) als<br />
Standardformat.<br />
7. Entfernen Sie das Häkchen in beiden Kästen unter Exklusivmodus.<br />
8. Klicken Sie OK, um das Eigenschaftenfenster zu schließen.<br />
9. Klicken Sie OK, um das Sound Bedienfeld zu schließen.<br />
WINDOWS XP:<br />
1. Verwenden Sie das beiliegende Kabel, um den <strong>STEREO</strong>|<strong>iO</strong> an einen Computer.<br />
2. Gehen Sie zu Start Menü � Systemsteuerung � Sounds und Audiogeräte.<br />
3. Klicken Sie den Reiter Audio.<br />
4. Unter Soundwiedergabe und Soundaufnahme wählen Sie USB Audio Codec* als Standardgerät.<br />
5. Klicken Sie OK.<br />
MAC:<br />
1. Verwenden Sie das beiliegende Kabel, um den <strong>STEREO</strong>|<strong>iO</strong> an einen Computer.<br />
2. Gehen Sie zu Anwendungen � Dienstprogramme � Audio MIDI Konfiguration.<br />
3. Im Reiter Audiogeräte unter Systemeinstellungen, wählen Sie USB Audio Codec* als Ihren Standard-Input und<br />
Standard-Output.<br />
4. Schließen Sie das Fenster.<br />
15<br />
* Falls Sie andere USB Audiogeräte an<br />
Ihren Computer angeschlossen haben,<br />
die möglicherweise identische Namen<br />
haben, versuchen Sie jedes einzelne zu<br />
selektieren, bis der <strong>STEREO</strong>|<strong>iO</strong> erkannt<br />
wird.<br />
Wenn es zu viel Verzögerung nach<br />
Anpassung der Software<br />
Latenzeinstellungen, laden Sie sich den<br />
kostenlosen ASIO4ALL (Audio Stream<br />
Input/Output) Treiber für von der<br />
Webseite www.asio4all.com herunter.<br />
ASIO Treiber besitzen im Allgemeinen<br />
eine bessere Performance und eine<br />
niedrigere Latenz, da sie auf effizientere<br />
Kommunikation zwischen Audiogeräten<br />
und Software ermöglichen.
MANUAL VERSION 1.2<br />
16
www.numark.com<br />
18