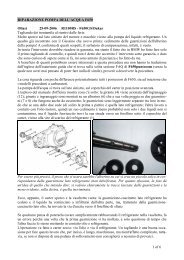
sostituzione ed equilibratura degli pneumatici fai-da-te - VAQ
sostituzione ed equilibratura degli pneumatici fai-da-te - VAQ
sostituzione ed equilibratura degli pneumatici fai-da-te - VAQ

Create successful ePaper yourself
Turn your PDF publications into a flip-book with our unique Google optimized e-Paper software.
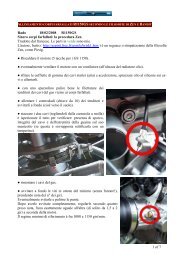
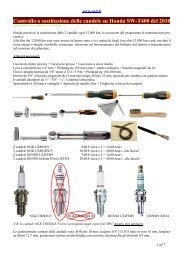
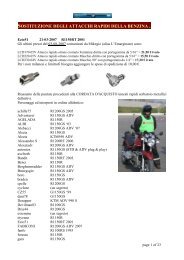
Next loosen the pinch bolt, but don’t remove it,<br />
just so it has no torque on it at all, a couple<br />
threads out from finger tight.<br />
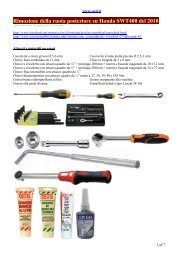
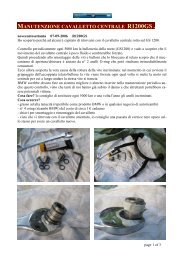
I made a tool for the 22mm axle shaft out of a<br />
13/16” Taiwan spark plug socket.<br />
I just cut the end off.<br />
This makes it easier to carry and use, but you<br />
could use the socket on the ex<strong>te</strong>nsion backwards<br />
to do the same thing.<br />
Loosen the axle shaft and remove it.<br />
Be ready to catch the tire as it will drop partially<br />
when you pull the axle shaft out.<br />
Also catch the spacer on the left, opposi<strong>te</strong>,<br />
side.<br />
Pull the axle shaft out and remove the wheel.<br />
See the above for dismounting and mounting<br />
the tire, as well as balancing it.<br />
Install the front wheel in reverse order of removal,<br />
and tigh<strong>te</strong>n the bolts to the following<br />
torques: Front axle 50 Nm<br />
Pinch Bolt 19 Nm<br />
Caliper Bolts 30 Nm<br />
When you are done, and the bike is ready to<br />
ride, make sure you give the brakes a couple<br />
pumps to get full power back. (Servo brakes do<br />
not ne<strong>ed</strong> this, but you should <strong>te</strong>st them before<br />
riding off.)<br />
Other advice, make sure you take it pretty easy<br />
until the tires are scrubb<strong>ed</strong> in. Depending on<br />
how you ride, this could be up to 200 miles.<br />
23 of 23