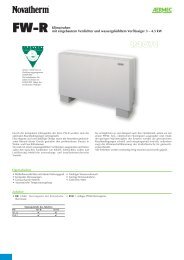
ventilconvettori canalizzati ductable fan coils ventilo-convecteurs ...
ventilconvettori canalizzati ductable fan coils ventilo-convecteurs ...
ventilconvettori canalizzati ductable fan coils ventilo-convecteurs ...

Create successful ePaper yourself
Turn your PDF publications into a flip-book with our unique Google optimized e-Paper software.
PACKING<br />
The <strong>fan</strong> <strong>coils</strong> are shipped in standard packaging and are<br />
protected by expanded polystyrene and cardboard.<br />
UNIT INSTALLATION<br />
Free access to the base unit must be avoided by using the<br />
appropriate means, which is netting or protective grilles,<br />
conforming to UNI EN 294.<br />
The <strong>fan</strong> coil must be installed in a position that will allow<br />
easy access for routine (cleaning of the filter) and extraordinary<br />
maintenance, as well as access to the air release<br />
valves and the input and output tubes for emptying the<br />
water in the exchange coil on the unit.<br />
The installation point must be chosen so that the minimum<br />
and maximum ambient temperatures of 0 - 45 °C are<br />
respected (< 85 % R.H.).<br />
Before performing any maintenance intervention protect<br />
yourself with the proper safety equipment.<br />
To install the unit proceed as follows:<br />
a) For ceiling mounting use the expansion bolts (not supplied)<br />
as indicated in Fig. 5.<br />
b)Perform the hydraulic connections. The position and the<br />
diameter of the hydraulic connections are reported with<br />
the dimensional data.<br />
It is recommended that the water piping be properly insulated<br />
to avoid dripping during the cooling operation.<br />
c) Apply the integral condensate drip tray BCL 10.<br />
The condensate discharge system must be correctly measured<br />
and the piping positioned in a way that will maintain<br />
an adequate inclination for the entire distance (min.<br />
1%). If draining into the sewer system, the implementation<br />
of a siphon is recommended which prohibits the<br />
return of unpleasant odors into the rooms.<br />
d)Perform the electrical connections according to that<br />
reported in the wiring diagrams and in the dedicated<br />
chapter. For access to the unit terminal strip remove the<br />
closing panel of the electrical box.<br />
e) Remount the closing panel of the electrical box.<br />
f) Apply the accessories.<br />
g) Connect the <strong>fan</strong> coil to the air intake and delivery ducts.<br />
ELECTRICAL CONNECTIONS<br />
Warning: before performing any maintenance intervention<br />
protect yourself with the proper safety equipment.<br />
Warning: before performing any maintenance intervention,<br />
make sure that the power supply is disconnected.<br />
WARNING: the electrical connections, the installation of<br />
the <strong>fan</strong> <strong>coils</strong> and their accessories must only be done by<br />
qualified individuals possessing the technical-professional<br />
requirements for the installation, trasformation, expansion<br />
and maintenance of the plants and able to verify the function<br />
and safety of these.<br />
In the specific case of electrical connections, the following<br />
must be checked:<br />
- Measurement of the isolation resistance of the electrical<br />
system.<br />
- Testing of the continuity of protection conductors.<br />
CONNECTION CABLE CHARACTERISTICS<br />
Use type H05V-K or N07V-K cables with 300/500 V insulation<br />
routed in either a tube or cable duct.<br />
All the cables must be routed in either a tube or cable duct<br />
so that they are not inside the <strong>fan</strong> coil.<br />
The cables exiting the tube or cable duct must be positioned<br />
in such a way as not to undergo traction or twisting stresses<br />
and at any rate protected from external agents.<br />
Stranded wires can only be used if fitted with end terminals.<br />
Make sure that all strands are securely inserted in the<br />
terminals.<br />
Stranded wires can only be used if fitted with end terminals.<br />
Make sure that all strands are securely inserted in the terminals.<br />
For all the connections follow the wiring diagrams accompanying<br />
the device and shown in this documentation.<br />
In order to protect the unit from short-circuits, mount an<br />
omnipolar thermal-magnetic switch 2A 250V (IG) to the<br />
power supply line with a minimum opening distance of 3 mm<br />
between the contacts.<br />
Each control panel can only control one <strong>fan</strong> coil.<br />
Never mount the control panel on a metal wall unless it is permanently<br />
grounded.<br />
The control panels are composed only of electric circuits connected<br />
to the 230V mains; all the probes and commands must<br />
therefore be insulated in correspondence to this voltage.<br />
By choosing the proper connections on the unit terminal strip,<br />
three selectable speeds of operation of the five available are<br />
enabled.<br />
The control panel with PX2 selector switch allows the <strong>fan</strong> coil<br />
to be connected either to the terminal strip of the panel or to<br />
the terminal strip of the unit.<br />
The panels equipped with electronic thermostats are all supplied<br />
with minimum water temperature probes, with the<br />
exception of the PXB.<br />
The minimum water temperature probe, to be positioned on<br />
the delivery tube, can automatically stop the <strong>fan</strong> if the input<br />
water temperature to the coil goes below 39°C.<br />
If the three-way valve is installed, the minimum water temperature<br />
probe must be placed on the delivery tube upstream<br />
from the valve.<br />
WARNING: THE PROBE IS DOUBLE INSULATED BECAU-<br />
SE IT IS SUBJECT TO A VOLTAGE OF 230V AC.<br />
For the control panels with PXL2E and PXL4 electronic thermostats,<br />
it is possible to connect an external contact to the<br />
internal terminal strip (EX), which would allow remote control<br />
of the <strong>fan</strong> coil.<br />
The multifunctional electronic thermostats are supplied<br />
ready to operate in the standard configuration, but allow the<br />
installer to adapt to the specific needs of the plant by adjusting<br />
the internal Dip-Switch.<br />
The personalized functions can vary from model to model,<br />
for this we recommend that you consult the relative<br />
manuals.<br />
Warning: check that the installation has been performed<br />
correctly. For PXL2E and PXL4 it is necessary to run the<br />
Autotest to check that the <strong>fan</strong> unit, the valves and the heater<br />
are all operating correctly.<br />
COIL ROTATION<br />
If, for reasons of hydraulic installation, the coil should be<br />
rotated. Proceed as follows:<br />
- remove the zinc plated sheet upper closure that is fastened<br />
with 4 screws.<br />
- remove the screws that fasten the coil (4 screws per side);<br />
- unthread the coil upwards;<br />
- rotate the coil;<br />
- reposition the coil in the unit;<br />
- fasten the coil with the screws;<br />
- remount the upper closure and fasten it with the screws,<br />
respecting<br />
9<br />
GB