

BlackandDecker Sabbiatrice Orbitale- Ka274ek(L) - Type 1 - Instruction Manual (Inglese - Arabo)
BlackandDecker Sabbiatrice Orbitale- Ka274ek(L) - Type 1 - Instruction Manual (Inglese - Arabo)
BlackandDecker Sabbiatrice Orbitale- Ka274ek(L) - Type 1 - Instruction Manual (Inglese - Arabo)

Create successful ePaper yourself
Turn your PDF publications into a flip-book with our unique Google optimized e-Paper software.
www.blackanddecker.ae<br />
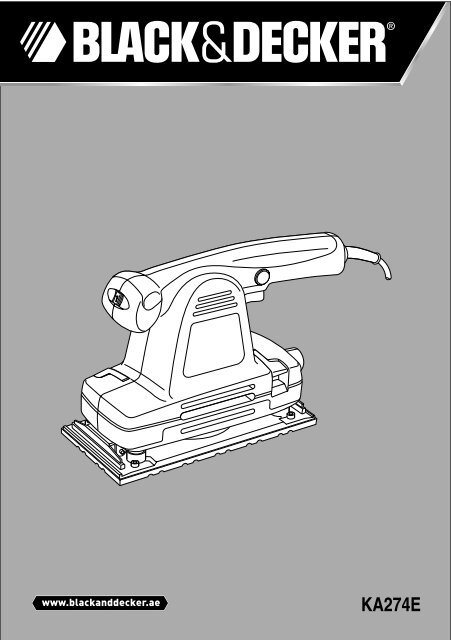
KA274E
ENGLISH<br />
1<br />
2<br />
6<br />
3<br />
5<br />
5<br />
4<br />
2
ENGLISH<br />
5<br />
5<br />
3<br />
4<br />
7<br />
B<br />
5<br />
3<br />
8 9<br />
A<br />
C<br />
D<br />
3
ENGLISH<br />
Intended use<br />
Your Black & Decker sander has been designed<br />
for sanding wood, metal, plastics and painted<br />
surfaces. This tool is intended for consumer use<br />
only.<br />
Safety instructions<br />
General power tool safety warnings<br />
Warning! Read all safety warnings and<br />
all instructions. Failure to follow the<br />
warnings and instructions listed below may<br />
result in electric shock, fire and/or serious injury.<br />
Save all warnings and instructions for future<br />
reference.<br />
The term "power tool" in all of the warnings<br />
listed below refers to your mains operated<br />
(corded) power tool or battery operated<br />
(cordless) power tool.<br />
1. Work area safety<br />
a. Keep work area clean and well lit. Cluttered<br />
or dark areas invite accidents.<br />
b. Do not operate power tools in explosive<br />
atmospheres, such as in the presence of<br />
flammable liquids, gases or dust. Power<br />
tools create sparks which may ignite the dust<br />
or fumes.<br />
c. Keep children and bystanders away while<br />
operating a power tool. Distractions can<br />
cause you to lose control.<br />
2. Electrical safety<br />
a. Power tool plugs must match the outlet.<br />
Never modify the plug in any way. Do not use<br />
any adapter plugs with earthed (grounded)<br />
power tools. Unmodified plugs and matching<br />
outlets will reduce risk of electric shock.<br />
b. Avoid body contact with earthed or grounded<br />
surfaces such as pipes, radiators, ranges<br />
and refrigerators. There is an increased risk<br />
of electric shock if your body is earthed or<br />
grounded.<br />
c. Do not expose power tools to rain or wet<br />
conditions. Water entering a power tool will<br />
increase the risk of electric shock.<br />
d. Do not abuse the cord. Never use the cord for<br />
carrying, pulling or unplugging the power tool.<br />
Keep cord away from heat, oil, sharp edges<br />
or moving parts. Damaged or entangled cords<br />
increase the risk of electric shock.<br />
e. When operating a power tool outdoors, use<br />
an extension cord suitable for outdoor use.<br />
Use of a cord suitable for outdoor use<br />
reduces the risk of electric shock.<br />
f. If operating a power tool in a damp location is<br />
unavoidable, use a residual current device<br />
(RCD) protected supply. Use of an RCD<br />
reduces the risk of electric shock.<br />
3. Personal safety<br />
a. Stay alert, watch what you are doing and use<br />
common sense when operating a power tool.<br />
Do not use a power tool while you are tired or<br />
under the influence of drugs, alcohol or<br />
medication. A moment of inattention while<br />
operating power tools may result in serious<br />
personal injury.<br />
b. Use personal protective equipment. Always<br />
wear eye protection. Protective equipment<br />
such as dust mask, non-skid safety shoes,<br />
hard hat, or hearing protection used for<br />
appropriate conditions will reduce personal<br />
injuries.<br />
c. Prevent unintentional starting. Ensure the<br />
switch is in the off-position before connecting<br />
to power source and/or battery pack, picking<br />
up or carrying the tool. Carrying power tools<br />
with your finger on the switch or energising<br />
power tools that have the switch on invites<br />
accidents.<br />
4
ENGLISH<br />
d. Remove any adjusting key or wrench before<br />
turning the power tool on. A wrench or a key<br />
left attached to a rotating part of the power<br />
tool may result in personal injury.<br />
e. Do not overreach. Keep proper footing and<br />
balance at all times. This enables better<br />
control of the power tool in unexpected<br />
situations.<br />
f. Dress properly. Do not wear loose clothing or<br />
jewellery. Keep your hair, clothing and gloves<br />
away from moving parts. Loose clothes,<br />
jewellery or long hair can be caught in<br />
moving parts.<br />
g. If devices are provided for the connection of<br />
dust extraction and collection facilities,<br />
ensure these are connected and properly<br />
used. Use of dust collection can reduce<br />
dust-related hazards.<br />
4. Power tool use and care<br />
a. Do not force the power tool. Use the correct<br />
power tool for your application. The correct<br />
power tool will do the job better and safer at<br />
the rate for which it was designed.<br />
b. Do not use the power tool if the switch does<br />
not turn it on and off. Any power tool that<br />
cannot be controlled with the switch is<br />
dangerous and must be repaired.<br />
c. Disconnect the plug from the power source<br />
and/or the battery pack from the power tool<br />
before making any adjustments, changing<br />
accessories, or storing power tools. Such<br />
preventive safety measures reduce the risk<br />
of starting the power tool accidentally.<br />
d. Store idle power tools out of the reach of<br />
children and do not allow persons unfamiliar<br />
with the power tool or these instructions to<br />
operate the power tool. Power tools are<br />
dangerous in the hands of untrained users.<br />
e. Maintain power tools. Check for misalignment<br />
or binding of moving parts, breakage of parts<br />
and any other condition that may affect the<br />
power tools operation. If damaged, have the<br />
power tool repaired before use. Many<br />
accidents are caused by poorly maintained<br />
power tools.<br />
f. Keep cutting tools sharp and clean. Properly<br />
maintained cutting tools with sharp cutting<br />
edges are less likely to bind and are easier to<br />
control.<br />
g. Use the power tool, accessories and tool bits<br />
etc., in accordance with these instructions,<br />
taking into account the working conditions<br />
and the work to be performed. Use of the<br />
power tool for operations different from those<br />
intended could result in a hazardous situation.<br />
5. Service<br />
a. Have your power tool serviced by a qualified<br />
repair person using only identical<br />
replacement parts. This will ensure that the<br />
safety of the power tool is maintained.<br />
Additional power tool safety<br />
warnings<br />
Warning! Additional safety warnings<br />
for sanders<br />
• Hold power tool by insulated gripping<br />
surfaces, because the belt may contact its<br />
own cord. Cutting a "live" wire may make<br />
exposed metal parts of the power tool "live"<br />
and shock the operator.<br />
• Use clamps or another practical way to<br />
secure and support the workpiece to a stable<br />
platform. Holding the work by hand or against<br />
your body leaves it unstable and may lead to<br />
loss of control.<br />
5
6<br />
ENGLISH<br />
• Warning! Contact with or inhalation of dusts<br />
arising from sanding applications may<br />
endanger the health of the operator and<br />
possible bystanders. Wear a dust mask<br />
specifically designed for protection against<br />
dust and fumes and ensure that persons<br />
within or entering the work area are also<br />
protected.<br />
• Thoroughly remove all dust after sanding.<br />
• Take special care when sanding paint which<br />
is possibly lead based or when sanding<br />
some woods and metal which may produce<br />
toxic dust:<br />
- Do not let children or pregnant women<br />
enter the work area.<br />
- Do not eat, drink or smoke in the work<br />
area.<br />
- Dispose of dust particles and any other<br />
debris safely.<br />
• This tool is not intended for use by persons<br />
(including children) with reduced physical,<br />
sensory or mental capabilities, or lack of<br />
experience and knowledge, unless they have<br />
been given supervision or instruction<br />
concerning use of the appliance by a person<br />
responsible for their safety. Children should<br />
be supervised to ensure that they do not play<br />
with the appliance.<br />
• The intended use is described in this<br />
instruction manual. The use of any<br />
accessory or attachment or performance of<br />
any operation with this tool other than those<br />
recommended in this instruction manual may<br />
present a risk of personal injury and/or<br />
damage to property.<br />
Safety of others<br />
• This appliance is not intended for use by<br />
persons (including children) with reduced<br />
physical, sensory or mental capabilities, or<br />
lack of experience and knowledge, unless<br />
they have been given supervision or<br />
instruction concerning use of the appliance by<br />
a person responsible for their safety.<br />
• Children should be supervised to ensure that<br />
they do not play with the appliance.<br />
Vibration<br />
The declared vibration emission values stated in<br />
the technical data and the declaration of<br />
conformity have been measured in accordance<br />
with a standard test method provided by EN<br />
60745 and may be used for comparing one tool<br />
with another. The declared vibration emission<br />
value may also be used in a preliminary<br />
assessment of exposure.<br />
Warning! The vibration emission value during<br />
actual use of the power tool can differ from the<br />
declared value depending on the ways in which<br />
the tool is used. The vibration level may increase<br />
above the level stated.<br />
When assessing vibration exposure to determine<br />
safety measures required by 2002/44/EC to<br />
protect persons regularly using power tools in<br />
employment, an estimation of vibration exposure<br />
should consider, the actual conditions of use and<br />
the way the tool is used, including taking account<br />
of all parts of the operating cycle such as the<br />
times when the tool is switched off and when it is<br />
running idle in addition to the trigger time.
ENGLISH<br />
Labels on tool<br />
The following pictograms are shown on the tool:<br />
Warning! To reduce the risk of injury,<br />
the user must read the instruction<br />
manual.<br />
Electrical safety<br />
This tool is double insulated; therefore<br />
no earth wire is required. Always<br />
check that the power supply<br />
corresponds to the voltage on the rating plate.<br />
• If the supply cord is damaged, it must be<br />
replaced by the manufacturer or an<br />
authorised Black & Decker Service Centre in<br />
order to avoid a hazard.<br />
Features<br />
This tool includes some or all of the following<br />
features.<br />
1. On/off switch<br />
2. Lock-on button<br />
3. Dust extraction outlet<br />
4. Sanding base<br />
5. Paper clamp lever<br />
6. Variable speed control knob<br />
Assembly<br />
Warning! Before assembly, make sure that the<br />
tool is switched off and unplugged.<br />
Fitting sanding sheets (fig. A)<br />
Warning! Never use the tool without a sanding<br />
sheet or accessory in place.<br />
• Soften the sanding sheet by rubbing its<br />
non-abrasive side over the edge of a<br />
worktop.<br />
• Release the sanding sheet clamp levers (5).<br />
• Place the sheet onto the sanding base (4),<br />
making sure that the holes in the sheet line<br />
up with the holes in the base.<br />
• Insert the edge of the sanding sheet into the<br />
front paper clamp as shown.<br />
• Press the front paper clamp lever (5)<br />
downwards.<br />
• While keeping a slight tension on the sheet,<br />
insert the rear edge of the sheet into the rear<br />
paper clamp.<br />
• Press the rear paper clamp lever (5)<br />
downwards.<br />
Fitting and removing the<br />
dustbag (fig. B)<br />
• Fit the dustbag (7) over the dust extraction<br />
outlet (3).<br />
• Rotate the dustbag to lock it into position.<br />
• To remove the dustbag, proceed in reverse<br />
order.<br />
Connecting a vacuum cleaner<br />
(fig. C)<br />
• Insert the adaptor (8) into the dust extraction<br />
outlet (3).<br />
• Connect the hose (9) of the vacuum cleaner<br />
to the adaptor.<br />
Residual risks<br />
Additional residual risks may arise when using<br />
the tool which may not be included in the<br />
enclosed safety warnings. These risks can arise<br />
from misuse, prolonged use etc.<br />
Even with the application of the relevant safety<br />
regulations and the implementation of safety<br />
devices, certain residual risks can not be<br />
avoided. These include:<br />
7
ENGLISH<br />
• Injuries caused by touching any<br />
rotating/moving parts.<br />
• Injuries caused when changing any parts,<br />
blades or accessories.<br />
• Injuries caused by prolonged use of a tool.<br />
When using any tool for prolonged periods<br />
ensure you take regular breaks.<br />
• Impairment of hearing.<br />
• Health hazards caused by breathing dust<br />
developed when using your tool (example:-<br />
working with wood, especially oak, beech<br />
and MDF.)<br />
Use<br />
Warning! Let the tool work at its own pace. Do<br />
not overload.<br />
Variable speed control<br />
The variable speed control allows you to adapt<br />
the speed of the tool to the workpiece material.<br />
• Set the control knob (6) to the desired<br />
setting. Use a high speed for wood, medium<br />
speed for veneer and synthetics and low<br />
speed for acrylic glass, non-ferrous metals<br />
and for removing paints.<br />
Switching on and off<br />
• To switch the tool on, press the on/off switch<br />
(1).<br />
• For continuous operation, press the lock-on<br />
button (2) and release the on/off switch.<br />
• To switch the tool off, release the on/off<br />
switch. To switch the tool off when in<br />
continuous operation, press the on/off switch<br />
once more and release it.<br />
Emptying the dustbag<br />
The dustbag should be emptied every 10<br />
minutes.<br />
• Shake the dustbag to empty the contents.<br />
Hints for optimum use (fig. D)<br />
• Always hold the tool with both hands.<br />
• Do not exert too much pressure on the tool.<br />
• Regularly check the condition of the sanding<br />
sheet. Replace when necessary.<br />
• Always sand with the grain of the wood.<br />
• When sanding new layers of paint before<br />
applying another layer, use extra fine grit.<br />
• On very uneven surfaces, or when removing<br />
layers of paint, start with a coarse grit. On<br />
other surfaces, start with a medium grit. In<br />
both cases, gradually change to a fine grit for<br />
a smooth finish.<br />
• Consult your retailer for more information on<br />
available accessories.<br />
Maintenance<br />
Your tool has been designed to operate over a<br />
long period of time with a minimum of<br />
maintenance. Continuous satisfactory operation<br />
depends upon proper tool care and regular<br />
cleaning.<br />
Warning! Before performing any maintenance,<br />
switch off and unplug the tool.<br />
• Regularly clean the ventilation slots in your<br />
tool using a soft brush or dry cloth.<br />
• Regularly clean the motor housing using a<br />
damp cloth. Do not use any abrasive or<br />
solvent-based cleaner.<br />
8
ENGLISH<br />
Mains Plug Replacement<br />
If a new mains plug needs to be fitted:<br />
• Safely dispose of the old plug.<br />
• Connect the brown lead to the live terminal of<br />
the new plug.<br />
• Connect the blue lead to the neutral terminal.<br />
• If the product is class l (earthed), connect the<br />
green / yellow lead to the earth terminal.<br />
Warning! If your product is class ll double<br />
insulated (only 2 wires in the cord set), no<br />
connection is to be made to the earth terminal.<br />
Follow the fitting instructions supplied with good<br />
quality plugs.<br />
Any replacement fuse must be of the same<br />
rating as the original fuse supplied with the<br />
product.<br />
Technical Data<br />
KA274E<br />
<strong>Type</strong>1<br />
Input voltage VAC 220-240<br />
Power input W 310<br />
Orbits (no load) min -1 6,000-11,000<br />
Sanding base surface mm 115 x 230<br />
Weight kg 2.5<br />
9
ENGLISH<br />
Protecting the environment<br />
Separate collection. This product must not<br />
be disposed of with normal household<br />
waste.<br />
Should you find one day that your Black &<br />
Decker product needs replacement, or if it is of<br />
no further use to you, do not dispose of it with<br />
other household waste. Make this product<br />
available for separate collection.<br />
• Black & Decker provides a facility for<br />
recycling Black & Decker products once they<br />
have reached the end of their working life.<br />
This service is provided free of charge. To<br />
take advantage of this service please return<br />
your product to any authorised repair agent<br />
who will collect them on our behalf.<br />
• You can check the location of your nearest<br />
authorised repair agent by contacting your<br />
local Black & Decker office at the address<br />
indicated in this manual. Alternatively, a list of<br />
authorized Black & Decker repair agents and<br />
full details of our after-sales service and<br />
contact are available on the Internet at:<br />
www.2helpU.com.<br />
Warranty<br />
If a Black & Decker product becomes defective<br />
due to a material or manufacturing defect , within<br />
12 months from the date of purchase, Black &<br />
Decker guarantees to replace defective parts or<br />
replace such products to ensure minimum<br />
inconvenience to the customer unless:<br />
• The product has been subjected to misuse or<br />
neglect.<br />
• The product has sustained damage through<br />
foreign objects, substances or accidents.<br />
• Repairs have been attempted by persons<br />
other than authorised repair agents or Black<br />
& Decker service staff.<br />
To claim on the warranty, you will need to submit<br />
proof of purchase to the seller or an authorised<br />
repair agent. You can check the location of your<br />
nearest authorised repair agent by contacting<br />
your local Black & Decker office at the address<br />
indicated in this manual. Alternatively, a list of<br />
authorised Black & Decker repair agents and full<br />
details of our after-sales service and contacts are<br />
available on the Internet at: www.2helpU.com.<br />
Please visit our website www.blackanddecker.ae<br />
to register your new Black & Decker product and<br />
to be kept up to date on new products and<br />
special offers. Further information on the Black &<br />
Decker brand and our range of products is<br />
available at www.blackanddecker.ae.<br />
10
ARABIC<br />
1<br />
2<br />
6<br />
3<br />
5<br />
5<br />
4<br />
11
ARABIC<br />
5<br />
5<br />
3<br />
4<br />
7<br />
B<br />
5<br />
3<br />
8 9<br />
A<br />
C<br />
D<br />
12
ARABIC<br />
غرض الاستخدام<br />
تم تصميم ماكينة الصنفرة بلاك آند ديكر لصنفرة الخشب<br />
والمعادن والبلاستيك والأسطه المطلية بالدهانات، علماً<br />
بأن هذا الجهاز مصمم لاستخدامه بواسطة المستهلك فقط.<br />
إرشادات السلامة<br />
تحذيرات السلامة العامة بخصوص الأجهزة الكهرباءية<br />
تحذير! ينبغي قراءة كافة تحذيرات وإرشادات<br />
السلامة. فقد يتسبب عدم إتباع كافة التهذيرات<br />
والإرشادات المذكورة أدناه في حدوش صدمة<br />
كهرباءية أو حريق أو إصابة خطيرة أو جميع هذه الأشياء<br />
معاً.<br />
يرجى الاحتفاظ بكافة التهذيرات والإرشادات للرجوع<br />
إليها مستقبلاً.<br />
يشير المصطله "جهاز كهرباءي" الوارد في كافة<br />
التهذيرات المذكورة أدناه إلى الجهاز الكهرباءي الذي<br />
يعمل بالتيار الكهرباءي (سلكيًا) أو الجهاز الكهرباءي<br />
الذي يعمل بالبطارية (لاسلكيًا).<br />
1. سلامة منطقة العمل<br />
أ. ينبغي الهفاظ على نظافة منطقة العمل وإضاءتها<br />
جيدًا، إذ تتسبب المناطق المظلمة والمكتظة بالركام<br />
في وقوع الهوادش.<br />
ب. لا تقم بتشغيل الأجهزة الكهرباءية في أجواء قابلة<br />
للانفجار؛ مشل تشغيلها في وجود سواءل أو غازات أو<br />
غبار قابل للاشتعال، نظراً لأن الأجهزة الكهرباءية<br />
ينتج عنها شرارات قد توءدي إلى اشتعال الغبار أو<br />
الأدخنة.<br />
ج. ينبغي إبعاد الأطفال والمارة أثناء تشغيل الجهاز<br />
الكهرباءي، فقد يتسبب الإلهاء في فقدانك للسيطرة<br />
على الجهاز.<br />
2. السلامة الكهرباءية<br />
أ. يجب أن تكون قوابس الجهاز الكهرباءي متوافقة مع<br />
مأخذ التيار الكهرباءي. تجنب مطلقًا تعديل القابس<br />
بأية طريقة، ولا تستخدم أية قوابس محولات مع<br />
الأجهزة الموءرضة، لأن استخدام القوابس غير المعدلة<br />
ومآخذ التيار الكهرباءي المتوافقة يوءدي إلى تقليل<br />
مخاطر التعرض لصدمة كه<br />
ب. تجنب ملامسة جسمك للأسطه الموءرضة مشل الأنابيب<br />
وأجهزة التدفئة والمواقد والشلاجات، حيش تزداد<br />
مخاطر إصابتك بصدمة كهرباءية إذا كان جسمك<br />
ً موءرضا.<br />
ج. لا تعرض الأجهزة الكهرباءية للمطر أو الأجواء الرطبة،<br />
فسوف يوءدي دخول الماء داخل الجهاز الكهرباءي إلى<br />
زيادة مخاطر الإصابة بصدمة كهرباءية.<br />
د. يجب عدم استخدام سلك التيار الكهرباءي بشكل خاطئ.<br />
لا تستخدم مطلقًا سلك التيار الكهرباءي لهمل الجهاز<br />
الكهرباءي أو سهبه أو فصله عن التيار الكهرباءي. كما<br />
يجب الاحتفاظ بسلك التيار الكهرباءي بعيدًا عن الهرارة<br />
أو الزيت أو الهواف الهادة أو الأجزاء المتهركة. علماً<br />
بأن الأسلاك التالفة أو المتشابكة تزيد من مخاطر<br />
الإصابة بصدمة كهرباءية.<br />
ه. عند تشغيل الجهاز الكهرباءي في الخارج، يجب<br />
استخدام سلك التوصيل المناسب للاستخدام الخارجي،<br />
نظراً لأن استخدام سلك التيار الكهرباءي المناسب<br />
للاستخدام الخارجي يقلل من مخاطر التعرض لصدمة<br />
كهرباءية.<br />
و. إذا تحتم تشغيل الجهاز الكهرباءي في مكان رطب، يجب<br />
استخدام جهاز وقاية من التيار المتبقي، نظراً لأن<br />
استخدام جهاز وقاية من التيار المتبقي يقلل من<br />
مخاطر الإصابة بصدمة كهرباءية.<br />
3. السلامة الشخصية<br />
أ. كن حذراً وانتبه لما تفعله واستخدم الهس السليم عند<br />
تشغيل الجهاز الكهرباءي. لا تستخدم الجهاز الكهرباءي<br />
إذا كنت منهكًا أو تحت تأثير العقاقير أو المشروبات<br />
الكهولية أو الأدوية، فقد تتسبب لهظة من الغفلة أثناء<br />
تشغيل الأجهزة الكهرباءية في حدوش إصابة شخصية<br />
بالغة.<br />
ب. استخدم معدات الوقاية الشخصية. ارتدي دومً ا واقٍ<br />
للعينين، لأن استخدام معدات الوقاية، مشل كمامات<br />
الأتربة والأحذية المانعة للانزلاق والخوذات الصلبة<br />
وأدوات وقاية السمع، يقلل من مخاطر حدوش إصابات<br />
شخصية.<br />
ج. يجب اتخاذ كافة الاحتياطات اللازمة للهول دون<br />
تشغيل الجهاز دون قصد. تأكد أن المفتاه في وضع عد<br />
التشغيل قبل التوصيل بمصدر التيار الكهرباءي و/أو<br />
تركيب البطاريات، أو رفع الجهاز أو حمله. إذ أن حمل<br />
الأجهزة الكهرباءية والأصابع ملامسة للمفتاه أو<br />
تزويد الأجهزة الكهرباءية بالطاقة والمفتاه في وضع<br />
التشغيل يوءدي إلى وقوع حوادش.<br />
13
ARABIC<br />
14<br />
د. قم بإزالة أي مفتاه تعديل أو مفتاه ربط قبل تشغيل<br />
الجهاز الكهرباءي، فقد يتسبب ترك المفتاه معلقاً<br />
بالجزء الدوار من الجهاز الكهرباءي في حدوش إصابة<br />
شخصية.<br />
ه. يجب عدم الاقتراب من الجهاز بشكل مفرط، كما يجب<br />
الهفاظ على ثبات القدمين والتوازن أثناء العمل، لأن<br />
ذلك يتيه لك السيطرة بشكل جيد على الجهاز<br />
الكهرباءي في المواقف غير المتوقعة.<br />
و. يجب ارتداء الملابس المناسبة، وعدم ارتداء الملابس<br />
الفضفاضة أو الهلي، كما يجب إبقاء شعرك وملابسك<br />
وقفازيك بعيدًا عن الأجزاء المتهركة، لأن الملابس<br />
الفضفاضة أو الهلي أو الشعر المتدلي قد يتشابك مع<br />
الأجزاء المتهركة.<br />
ز. إذا كان الجهاز مزوداً بأدوات لاستخراج الغبار أو<br />
تجميعه، تأكد من توصيل تلك الأدوات واستخدامها<br />
بشكل مناسب. كما أن استخدام أدوات تجميع الغبار<br />
يقلل من المخاطر المرتبطة بالغبار<br />
4. استخدام الجهاز الكهرباءي والعناية به<br />
أ. يجب عدم استخدام الجهاز الكهرباءي في غرض غير<br />
مخصص له، بل يجب استخدم الجهاز الكهرباءي<br />
الخاص بالغرض الذي تريده، لأن الجهاز الكهرباءي<br />
المناسب سوف يوءدي العمل بشكل أفضل وأكثر أمانًا<br />
وبالمعدل الذي تم تصميمه من أجله.<br />
ب. لا تستخدم الجهاز الكهرباءي إذاً لم تستطع التهكم في<br />
تشغيله وإيقاف تشغيله بواسطة المفتاه، لأن أي<br />
جهاز كهرباءي لا يمكن التهكم فيه باستخدام المفتاه<br />
يكون محفوفاً بالمخاطر ويجب إصلاحه.<br />
ج. يجب فصل قابس الجهاز الكهرباءي عن مصدر التيار<br />
الكهرباءي و/أو البطاريات قبل إجراء أية تعديلات أو<br />
تغييرات أو تركيب أية ملهقات في الأجهزة<br />
الكهرباءية أو تخزينها، لأن إجراءات السلامة الوقاءية<br />
هذه تقلل من مخاطر بدء تشغيل الجهاز الكهرباءي<br />
فجأة دون قصد.<br />
د. يجب تخزين الأجهزة الكهرباءية غير المستخدمة<br />
بعيدًا عن متناول الأطفال ولا تسمه للأشخاص غير<br />
المعتادين على استخدام الجهاز الكهرباءي أو غير<br />
المطلعين على هذه الإرشادات بتشغيل الجهاز<br />
الكهرباءي، فالأجهزة الكهرباءية تشكل خطراً عندما<br />
يستخدمها أشخاص غير مدربين.<br />
ه. يجب إجراء صيانة دورية للأجهزة الكهرباءية. افهص<br />
الجهاز للتعرف على الأجزاء المعيبة فيه أو التي تعوق<br />
حركة الأجزاء المتهركة والتأكد من خلوه من الأجزاء<br />
المكسورة ومن أي شيء آخر قد يوءثر على كفاءة<br />
تشغيله. وإذا تم اكتشاف أي تلف، يجب إصلاه الجهاز<br />
الكهرباءي قبل استخدامه، علماً بأن العديد من<br />
الهوادش تقع بسبب سوء صيانة الأجهزة الكهرباءية.<br />
و. ينبغي الهفاظ على أدوات القطع حادةً ونظيفة، لأن<br />
أدوات القطع التي يتم الهفاظ عليها بالشكل المناسب<br />
والمزودة بشفرات قاطعة حادة أقل عرضة للأعطال<br />
وأسهل في التهكم.<br />
ز. يجب استخدام الجهاز الكهرباءي وملهقاته وأجزاءه<br />
وما إلى ذلك وفقًا لهذه الإرشادات، مع أخذ ظروف<br />
العمل المهيطة والعمل المراد تنفيذه في الاعتبار، فقد<br />
يتسبب استخدام الجهاز الكهرباءي من أجل عمليات<br />
تشغيل سوى الأغراض المصمم من أجلها في حدوش<br />
مخاطر<br />
5. الصيانة<br />
أ. يجب صيانة وإصلاه الجهاز الكهرباءي بواسطة<br />
شخص موءهل باستخدام قطع غيار مطابقة، لأن ذلك<br />
يضمن سلامة الجهاز الكهرباءي.<br />
تحذيرات سلامة إضافية بخصوص الجهاز<br />
الكهرباءي<br />
تحذير! تحذيرات سلامة إضافية بخصوص<br />
ماكينات الصنفرة.<br />
• امسك الجهاز الكهرباءي بواسطة أدوات إمساك ذات<br />
أسطه معزولة، لأن الهزام قد يلامس سلك التيار<br />
الكهرباءي الخاص به، وقد يوءدي قطع سلك يسري فيه<br />
"تيار كهرباءي" إلى تعرية الأجزاء المعدنية في الجهاز<br />
وسريان التيار الكهربي فيه وتعرض المستخدم<br />
لصدمة كهرباءية.<br />
• استخدم المشابك أو أي أداة فعالة أخرى لتشبيت<br />
وتدعيم قطعة العمل على منصة ثابتة، لأن تشبيت<br />
قطعة العمل بواسطة اليد أو الجسم يجعل قطعة العمل<br />
غير ثابتة وقد يوءدي إلى فقدان السيطرة.
ARABIC<br />
øjôNB’G áeÓ°S قد يوءدي لمس أو استنشاق الغبار الناشئ عن !ôjò– •<br />
صنفرة المواد إلى تعريض صهة المستخدم والمارة<br />
للخطر. لذا يجب ارتداء كمامة أتربة مصممة خصيصاً<br />
للهماية من الأتربة والأدخنة، وتأكد ً أيضا من حماية<br />
الأشخاص الموجودين داخل منطقة العمل أو القادمين<br />
إليها.<br />
• يجب إزالة الغبار بالكامل بعد الانتهاء من الصنفرة.<br />
• يجب الاحتراس عند صنفرة الدهانات التي يهتمل أن<br />
يكون أحد مكوناتها الرصاص أو عند صنفرة<br />
الأخشاب والمعادن التي قد ينشأ عنها غبار سام:<br />
- لا تسمه للأطفال أو الهوامل بالاقتراب من منطقة<br />
العمل.<br />
- لا يجب تناول الأطعمة أو المشروبات أو التدخين<br />
في منطقة العمل.<br />
- يجب التخلص من جزيئات الغبار وأي ركام آخر<br />
بأمان.<br />
• هذا الجهاز غير مخصص لاستخدامه بواسطة<br />
الأشخاص (بما في ذلك الأطفال) ذوي القدرات<br />
الجسدية والذهنية والهسية والعقلية المتدنية، أو الذين<br />
لديهم خبرة أو معرفة قليلة بنواحي الاستخدام، إلا في<br />
ظل الإشراف عليهم أو إعطاءهم التعليمات المتعلقة<br />
باستخدام الجهاز من قِ بل الشخص المسوءول عن<br />
سلامتهم. كما يجب الإشراف على الأطفال لضمان<br />
عدم عبشهم بالجهاز.<br />
• يوضه دليل الإرشادات هذا أغراض استخدام الجهاز.<br />
وقد يتسبب استخدام أي ملهقات أو مرفقات أو تنفيذ<br />
أية عملية بهذا الجهاز بخلاف تلك الموصى بها في<br />
دليل الإرشادات هذا في حدوش إصابة شخصية و/أو<br />
تلف الممتلكات.<br />
• هذا الجهاز غير مخصص لاستخدامه بواسطة<br />
الأشخاص (بما في ذلك الأطفال) ذوي القدرات الجسدية<br />
والذهنية والهسية والعقلية المتدنية، أو الذين لديهم<br />
خبرة أو معرفة قليلة بنواحي الاستخدام، إلا في ظل<br />
الإشراف عليهم أو إعطاءهم التعليمات المتعلقة<br />
باستخدام الجهاز من قِ بل الشخص المسوءول عن<br />
سلامتهم.<br />
• يجب الإشراف على الأطفال لضمان عدم عبشهم<br />
بالجهاز.<br />
RGõàg’G<br />
تم قياس قيم انبعاش الاهتزازات المعلنة المذكورة في<br />
البيانات الفنية وإعلان المطابقة وفقًا لطريقة اختبار<br />
قياسية منصوص عليها بموجب المعيار EN 60745<br />
ويمكن استخدامها لمقارنة جهاز ما مع آخر. ويمكن<br />
استخدام قيمة انبعاش الاهتزازات المعلنة لإجراء تقييم أولي<br />
لنسبة التعرض للاهتزازات.<br />
!ôjò– يمكن أن تختلف قيمة انبعاش الاهتزازات أثناء<br />
الاستخدام الفعلي للجهاز الكهرباءي عن القيمة المعلنة<br />
حيش يتوقف ذلك على طرق استخدام الجهاز، وقد يزداد<br />
مستوى الاهتزاز عن المستوى المذكور.<br />
عند تقييم التعرض للاهتزاز لتهديد إجراءات السلامة<br />
المطلوبة بموجب المعيار EC/2002/44 لهماية<br />
الأشخاص الذين يستخدمون الأجهزة الكهرباءية بشكل<br />
منتظم في عملهم، يلزم مراعاة ما يلي في عملية تقييم<br />
التعرض للاهتزاز: الظروف الفعلية للاستخدام والطريقة<br />
التي يتم استخدام الجهاز بها، بما في ذلك أخذ كافة أجزاء<br />
دورة التشغيل في الاعتبار؛ مشل الأوقات التي يتم فيها<br />
إيقاف تشغيل الجهاز أو عندما يكون الجهاز في وضع<br />
السكون، بالإضافة إلى أوقات التشغيل.<br />
15
ARABIC<br />
الملصقات على الأجهزة<br />
تظهر الصور التوضيهية التالية على الجهاز:<br />
تحذير! لتقليل مخاطر الإصابة، يجب على<br />
المستخدم قراءة دليل الإرشادات.<br />
السلامة الكهرباءية<br />
هذا الجهاز معزول عزلاً مزدوجً ا؛ ولذلك، لا<br />
حاجة إلى سلك أرضي. وينبغي التأكد داءمًا<br />
من توافق مصدر التيار الكهرباءي مع الجهد<br />
الموضه على لوحة التصنيف.<br />
• في حالة تلف سلك التيار الكهرباءي، يجب استبداله<br />
من قِ بل الشركة المصنعة أو مركز صيانة معتمد لدى<br />
بلاك آند ديكر لتجنب المخاطر.<br />
المزايا<br />
يشتمل هذا الجهاز على بعض المزايا التالية أو جميعها.<br />
1. مفتاه تشغيل / إيقاف<br />
2. زر قفل<br />
3. فتهة استخراج الغبار<br />
4. قاعدة صنفرة<br />
5. ذراع مشبك ورق<br />
6. مفتاه تغيير السرعات<br />
التركيب<br />
تحذير! قبل تركيب أي ملهقات، تأكد أن الجهاز ليس قيد<br />
التشغيل وغير موصل بمصدر التيار الكهربي.<br />
تركيب صفاءه الصنفرة (الشكل أ)<br />
تحذير! لا تستخدم الجهاز مطلقاً دون تركيب ورق صنفرة<br />
أو أي ملهقات في مكانها المناسب.<br />
• قم بتنعيم ورقة الصنفرة بهك جانبها غير الكاشط<br />
بهافة سطه العمل.<br />
• قم برفع ذراعي مشبك ورقة الصنفرة (5).<br />
• ضع ورقة الصنفرة على قاعدة الصنفرة (4)، وتأكد أن<br />
الفتهات الموجودة في الورقة محاذية للفتهات<br />
الموجودة في القاعدة.<br />
• أدخل حافة ورقة الصنفرة في مشبك الورق الأمامي<br />
كما هو مبين بالشكل.<br />
• اضغط على ذراع مشبك الورق الأمامي (5) إلى أسفل.<br />
• اضغط بشكل خفيف على الورقة لتشبيتها، ثم أدخل<br />
الهافة الخلفية من الورقة في مشبك الورق الخلفي.<br />
• اضغط على ذراع مشبك الورق الخلفي (5) إلى أسفل.<br />
تركيب كيس الغبار وإزالته (الشكل ب)<br />
• قم بتركيب كيس الغبار (7) في فتهة استخراج الغبار<br />
.(3)<br />
• قم بلف كيس الغبار لتركيبه في مكانه المناسب<br />
بإحكام.<br />
• لإزالة كيس الغبار، قم بإجراء الخطوتين السابقتين<br />
بالعكس.<br />
التوصيل بمكنسة كهرباءية (الشكل ج)<br />
• أدخل المهول (8) في فتهة استخراج الغبار (3).<br />
• قم بتوصيل خرطوم المكنسة الكهرباءية (9)<br />
بالمهول.<br />
المخاطر المتبقية<br />
قد تنشأ مخاطر متبقية إضافية عند استخدام الجهاز والتي<br />
قد لا تكون مضمنة في تحذيرات السلامة المرفقة. وقد تنشأ<br />
تلك المخاطر عن سوء الاستخدام أو الاستخدام المطول، وما<br />
إلى ذلك.<br />
حتى مع تطبيق لواءه السلامة ذات الصلة واستخدام أدوات<br />
السلامة، لا يمكن تجنب بعض المخاطر المتبقية. تشمل هذه<br />
المخاطر المتبقية ما يلي:<br />
16
ARABIC<br />
• الإصابات الناتجة عن ملامسة أية أجزاء<br />
دوارة/متهركة.<br />
• الإصابات التي تحدش عند تغيير أية أجزاء أو شفرات<br />
أو ملهقات.<br />
• الإصابات الناتجة عن الاستخدام المطول للجهاز.<br />
وعند استخدام أي جهاز لفترات طويلة، يجب التوقف<br />
عن العمل لفترات فاصلة منتظمة.<br />
• ضعف السمع<br />
• المخاطر الصهية الناتجة عن استنشاق الغبار الناشئ<br />
عند استخدام الجهاز (على سبيل المشال: الاستخدام مع<br />
الأخشاب، وعلى وجه الخصوص خشب البلوط وخشب<br />
الزان والألواه الليفية متوسطة الكشافة "إم دي إف").<br />
الاستخدام<br />
تحذير! اترك الجهاز يعمل بسرعته العادية، ولا تحمله فوق<br />
طاقته.<br />
مفتاه تغيير السرعات<br />
يسمه لك مفتاه تغيير السرعات بتعديل سرعة الجهاز<br />
وفقاً لنوعية قطعة العمل.<br />
• اضبط مقبض التهكم (6) على السرعة المطلوبة.<br />
استخدم السرعة العالية للخشب، والسرعة المتوسطة<br />
للقشرات الخشبية والمواد الاصطناعية، والسرعة<br />
المنخفضة للزجاج الاكريليك والمعادن غير الهديدية<br />
وإزالة الطلاء.<br />
التشغيل والإيقاف<br />
• لتشغيل الجهاز، اضغط على مفتاه التشغيل/الإيقاف<br />
.(1)<br />
• بالنسبة للتشغيل المستمر، اضغط على زر القفل (2)<br />
واترك مفتاه التشغيل/الإيقاف.<br />
• لإيقاف الجهاز، اترك مفتاه التشغيل/الإيقاف.<br />
ولإيقاف الجهاز عندما يكون في وضع التشغيل<br />
المستمر، اضغط على مفتاه التشغيل/الإيقاف مرة<br />
أخرى ثم اتركه.<br />
إفراغ كيس الغبار<br />
يجب إفراغ كيس الغبار كل 10 دقاءق.<br />
• قم بهز كيس الغبار لإفراغ محتوياته.<br />
نصاءه للاستخدام الأمشل (الشكل د)<br />
• امسك الجهاز دوماً بكلتا اليدين.<br />
• لا تفرط في الضغط على الجهاز.<br />
• افهص دوماً حالة ورقة الصنفرة، واستبدلها عند<br />
الضرورة.<br />
• قم بالصنفرة دوماً في اتجاه خطوط الخشب.<br />
• عند صنفرة طبقات جديدة من الطلاء قبل فرد طبقة<br />
طلاء أخرى، استخدم ورقة صنفرة فاءقة النعومة.<br />
• عند صنفرة الأسطه غير مستوية للغاية، أو عند إزالة<br />
طبقات من الطلاء، ابدأ بورقة صنفرة خشنة. أما<br />
الأسطه الأخرى، فابدأ بورقة صنفرة متوسطة الخشونة.<br />
وفي كلتا الهالتين، قم بتغيير ورقة الصنفرة تدريجياً<br />
إلى ورقة صنفرة فاءقة النعومة للهصول على أسطه<br />
ملساء.<br />
• احصل من تاجر التجزءة على مزيد من المعلومات حول<br />
الملهقات المتوفرة.<br />
الصيانة<br />
هذا الجهاز مصمم ليعمل لفترات طويلة بأقل حد ممكن من<br />
الصيانة. ويعتمد الهصول على أداء ٍ مرض ومستمر على<br />
العناية المناسبة بالجهاز وتنظيفه بانتظام.<br />
تحذير! قبل إجراء أي صيانة، يجب إيقاف تشغيل الجهاز<br />
وفصله عن التيار الكهرباءي.<br />
• نظف فتهات التهوية في الجهاز بشكل دوري باستخدام<br />
فرشاة ناعمة أو قطعة قماش جافة.<br />
• نظف صندوق المهرك بانتظام باستخدام قطعة قماش<br />
رطبة. لا تستخدم أي مادة تنظيف كاشطة أو مذيبة.<br />
17
ARABIC<br />
استبدال قابس المأخذ الرءيسي<br />
في حالة الهاجة لتركيب قابس جديد للمأخذ الرءيسي،<br />
اتبع ما يلي:<br />
• تخلص من القابس القديم بشكل آمن.<br />
• صل سلك التوصيل البني اللون بالطرف الموصل<br />
بالتيار من القابس الجديد.<br />
• صل سلك التوصيل الأزرق اللون بالطرف المهايد.<br />
• إذا كان المنتج من الفئة 1 (موءرض)، صل السلك<br />
الأخضر/الأصفر اللون بالطرف الأرضي.<br />
تحذير! إذا كان المنتج من الفئة 2 المعزولة عزلاً مزدوجً ا<br />
(سلكان فقط في الكبل) فلا حاجة عندءذٍ لأي توصيل<br />
بالطرف الأرضي.<br />
اتبع تعليمات التركيب المرفقة مع القوابس عالية الجودة.<br />
ينبغي أن يكون لأي مصهر مستبدل نفس مقنن المصهر<br />
الأصلي المرفق مع المنتج.<br />
البيانات الفنية<br />
KA274E<br />
<strong>Type</strong>1<br />
220-240<br />
شدة التيار المتردد الجهد الكهربي 310<br />
وات التيار الكهرباءي الداخل<br />
6000–11000<br />
دقيقة 1- سرعة الدوران (دون حمل)<br />
× 115 230<br />
مم سطه قاعدة الصنفرة 2.5<br />
كجم الوزن 18
ARABIC<br />
¿Éª°†dG<br />
إذا ظهر خلل في منتج بلاك آند ديكر بسبب عيب في المواد<br />
أو التصنيع، في غضون 12 شهراً من تاريخ الشراء، فإن<br />
بلاك آند ديكر تضمن استبدال الأجزاء المعيبة أو استبدال<br />
هذه المنتجات لتوفير أقصى قدر من الراحة للعميل، إلا إذا:<br />
• تعرض المنتج لإساءة الاستخدام أو الإهمال.<br />
• لهقت أضرار جسيمة بالمنتج بسبب أجسام أو مواد<br />
غريبة أو حوادش.<br />
• حاول شخص آخر سوى وكلاء الصيانة المعتمدين أو<br />
عاملي الصيانة التابعين لبلاك آند ديكر إصلاه<br />
المنتج.<br />
للهصول على خدمات الضمان، يجب تقديم فاتورة الشراء<br />
للباءع أو وكيل الصيانة المعتمد. يمكنك معرفة موقع أقرب<br />
وكيل صيانة معتمد عن طريق الاتصال بمكتب بلاك آند<br />
ديكر المهلي في العنوان المبين في هذا الدليل. وبدلاً من<br />
ذلك، تتوفر قاءمة بوكلاء الصيانة المعتمدين لدى بلاك آند<br />
ديكر والتفاصيل الكاملة لخدمة ما بعد البيع وجهات<br />
الاتصال على موقعنا على الإنترنت:<br />
.www.2helpU.com<br />
تفضل بزيارة www.blackanddecker.ae لتسجيل<br />
منتجك الجديد من بلاك آند ديكر والاطلاع على المنتجات<br />
الجديدة والعروض الخاصة. تتوفر المزيد من المعلومات<br />
حول شركة بلاك آند ديكر ومجموعة منتجاتنا على<br />
.www.blackanddecker.ae<br />
áÄ«ÑdG ájɪM<br />
الجمع المنفصل. يلزم عدم التخلص من هذا<br />
المنتج مع القمامة المنزلية العادية.<br />
إذا لزم في يوم من الأيام استبدال منتج بلاك آند ديكر<br />
الخاص بك، أو إذا لم تعد تستخدمه، فلا تتخلص منه مع<br />
القمامة المنزلية الأخرى، بل تأكد من إتاحة هذا المنتج<br />
للجمع المنفصل.<br />
• توفر شركة بلاك آند ديكر مرفق لإعادة تدوير<br />
منتجات بلاك آند ديكر بمجرد وصولها إلى نهاية<br />
عمرها وعدم صلاحيتها للعمل. ويتم تقديم هذه<br />
الخدمة مجانًا. للاستفادة من هذه الخدمة، يرجى<br />
إعادة المنتج إلى أي وكيل صيانة معتمد والذي سوف<br />
يتولى بدوره جمع المنتجات نيابة عنا.<br />
• يمكنك التعرف على موقع أقرب وكيل صيانة معتمد<br />
من خلال الاتصال على مكتب بلاك آند ديكر المهلي<br />
في العنوان الموضه في هذا الدليل. وبدلاً من ذلك،<br />
توجد قاءمة بوكلاء الصيانة المعتمدين التابعين<br />
لشركة بلاك آند ديكر والتفاصيل الكاملة لخدمات ما<br />
بعد البيع ووساءل الاتصال الخاصة بنا على الإنترنت<br />
على الموقع الإلكتروني: .www.2helpU.com<br />
19
FRENCH<br />
1<br />
2<br />
6<br />
3<br />
5<br />
5<br />
4<br />
20
FRENCH<br />
5<br />
5<br />
3<br />
4<br />
7<br />
B<br />
5<br />
3<br />
8 9<br />
A<br />
C<br />
D<br />
21
FRENCH<br />
Utilisation prévue<br />
Votre ponceuse Black & Decker a été<br />
spécialement conçue pour poncer le bois, le<br />
métal, le plastique et les surfaces peintes. Cet<br />
outil a été conçu pour une utilisation<br />
exclusivement domestique.<br />
<strong>Instruction</strong>s de sécurité<br />
Consignes de sécurité générales pour les<br />
outils électriques<br />
Attention ! Prenez connaissance de<br />
tous les avertissements de sécurité et<br />
de toutes les instructions. Le<br />
non-respect des avertissements et des<br />
instructions indiqués ci-dessous peut entraîner<br />
une électrocution, un incendie ou de graves<br />
blessures.<br />
Conservez tous les avertissements et<br />
instructions pour référence future. La notion d'«<br />
outil électroportatif » mentionnée par la suite se<br />
rapporte à des outils électriques raccordés au<br />
secteur (avec câble de raccordement) ou<br />
fonctionnant sur piles (sans fil).<br />
1. Sécurité de la zone de travail<br />
a. Maintenez la zone de travail propre et bien<br />
éclairée. Un lieu de travail en désordre ou<br />
mal éclairé augmente le risque d'accidents.<br />
b. N'utilisez pas les outils électroportatifs dans<br />
un environnement présentant des risques<br />
d'explosion ni en présence de liquides, gaz<br />
ou poussières inflammables. Les outils<br />
électroportatifs génèrent des étincelles<br />
risquant d'enflammer les poussières ou les<br />
vapeurs.<br />
c. Tenez les enfants et autres personnes<br />
éloignés durant l'utilisation de l'outil<br />
électroportatif. En cas d'inattention, vous<br />
risquez de perdre le contrôle sur l'outil.<br />
2. Sécurité électrique<br />
a. La fiche de secteur de l'outil électroportatif<br />
doit convenir à la prise de courant. Ne<br />
modifiez en aucun cas la fiche. N'utilisez pas<br />
de fiches d'adaptateur avec des outils ayant<br />
une prise de terre. Les fiches non modifiées<br />
et les prises de courant appropriées<br />
réduisent le risque d'électrocution.<br />
b. Évitez le contact physique avec des surfaces<br />
mises à la terre telles que tuyaux, radiateurs,<br />
fours et réfrigérateurs. Il y a un risque élevé<br />
d'électrocution si votre corps est relié à la<br />
terre.<br />
22<br />
c. N'exposez pas l'outil électroportatif à la pluie<br />
ni à l'humidité. La pénétration d'eau dans un<br />
outil électroportatif augmente le risque<br />
d'électrocution.<br />
d. Préservez le câble d'alimentation. N'utilisez<br />
pas le câble à d'autres fins que celles<br />
prévues, notamment pour porter l'outil,<br />
l'accrocher voire le débrancher de la prise de<br />
courant. Maintenez le câble éloigné des<br />
sources de chaleur, des parties grasses, des<br />
bords tranchants ou des parties de l'outil en<br />
rotation. Un câble endommagé ou<br />
enchevêtré augmente le risque<br />
d'électrocution.<br />
e. Si vous utilisez l'outil électroportatif à<br />
l'extérieur, utilisez une rallonge homologuée<br />
pour utilisation à l'air libre. L'utilisation d'une<br />
rallonge électrique homologuée pour les<br />
applications extérieures réduit le risque<br />
d'électrocution.<br />
f. Si l'usage d'un outil dans un emplacement<br />
humide est inévitable, utilisez une<br />
alimentation protégée par un dispositif à<br />
courant différentiel résiduel (RCD). L'usage<br />
d'un RCD réduit le risque de choc électrique.<br />
3. Sécurité personnelle<br />
a. Restez vigilant, surveillez ce que vous faites.<br />
Faites preuve de bon sens quand vous<br />
utilisez l'outil électroportatif. N'utilisez pas<br />
l'outil lorsque vous êtes fatigué ou après<br />
avoir consommé de l'alcool, des drogues<br />
voire des médicaments. Un moment<br />
d'inattention lors de l'utilisation de l'outil peut<br />
entraîner de graves blessures.<br />
b. Utilisez un équipement de protection<br />
personnelle. Portez toujours une protection<br />
pour les yeux. Les équipements de protection<br />
personnelle tels que les masques<br />
anti-poussières, chaussures de sécurité<br />
antidérapantes, casques ou protections<br />
acoustiques utilisés dans des conditions<br />
appropriées réduisent les blessures.<br />
c. Évitez toute mise en marche involontaire.<br />
Vérifiez que l'interrupteur est en position arrêt<br />
avant de brancher l'outil au secteur ou au<br />
bloc de batteries, de le prendre ou de le<br />
porter. Transporter les outils en avec le doigt<br />
sur l'interrupteur ou les brancher avec<br />
l'interrupteur en position de marche est une<br />
source d'accidents.
d. Enlevez tout outil ou clé de réglage avant de<br />
mettre l'outil en marche. Une clé ou un outil<br />
se trouvant sur une partie en rotation peut<br />
causer des blessures.<br />
e. Adoptez une position confortable. Adoptez<br />
une position stable et gardez votre équilibre<br />
à tout moment. Vous contrôlerez mieux l'outil<br />
dans des situations inattendues.<br />
f. Portez des vêtements appropriés. Ne portez<br />
pas de vêtements flottants ou de bijoux.<br />
N'approchez pas les cheveux, vêtements ou<br />
gants des parties des pièces mobiles. Les<br />
vêtements amples, les bijoux ou les cheveux<br />
longs peuvent être attrapés dans les pièces<br />
en mouvement.<br />
g. Si des dispositifs servant à aspirer ou à<br />
recueillir les poussières doivent être utilisés,<br />
vérifiez qu'ils sont correctement raccordés et<br />
utilisés. Le fait d'aspirer la poussière permet<br />
de réduire les risques inhérents à la<br />
poussière.<br />
4. Utilisation des outils électroportatifs et<br />
précautions<br />
a. Ne surchargez pas l'outil. Utilisez l'outil<br />
électroportatif approprié pour le travail à<br />
effectuer. Avec l'outil électroportatif<br />
approprié, vous travaillerez mieux et avec<br />
plus de sécurité à la vitesse pour laquelle il a<br />
été conçu.<br />
b. N'utilisez pas un outil électroportatif dont<br />
l'interrupteur est défectueux. Un outil<br />
électroportatif qui ne peut plus être mis en ou<br />
hors fonctionnement est dangereux et doit<br />
être réparé.<br />
c. Déconnectez la prise de la source<br />
d'alimentation ou le pack-batterie de l'outil<br />
électrique avant tout réglage, changement<br />
d'accessoire voire rangement des outils<br />
électriques. Cette mesure de précaution<br />
empêche une mise en marche par mégarde.<br />
d. Rangez les outils électroportatifs hors de<br />
portée des enfants. Ne laissez pas les<br />
personnes n'étant pas familiarisées avec<br />
l'outil ou n'ayant pas lu ces instructions<br />
l'utiliser. Les outils électroportatifs sont<br />
dangereux lorsqu'ils sont utilisés par des<br />
personnes non initiées.<br />
FRENCH<br />
e. Prenez soin des outils électroportatifs.<br />
Vérifiez que les parties en mouvement<br />
fonctionnent correctement et qu'elles ne sont<br />
pas coincées ; vérifiez qu'il n'y a pas de<br />
pièces cassées ou endommagées<br />
susceptibles de nuire au bon fonctionnement<br />
de l'outil. S'il est endommagé, faites réparer<br />
l'outil avant de l'utiliser. De nombreux<br />
accidents sont dus à des outils<br />
électroportatifs mal entretenus.<br />
f. Maintenez les outils de coupe aiguisés et<br />
propres. Des outils soigneusement<br />
entretenus avec des bords tranchants bien<br />
aiguisés se coincent moins souvent et<br />
peuvent être guidés plus facilement.<br />
g. Utilisez l'outil électrique, les accessoires et<br />
forets, etc. conformément à ces instructions,<br />
en tenant compte des conditions de travail et<br />
des tâches à effectuer. L'utilisation des outils<br />
électroportatifs à d'autres fins que celles<br />
prévues peut entraîner des situations<br />
dangereuses.<br />
5. Réparations<br />
a. Faites réparer votre outil électroportatif<br />
uniquement par du personnel qualifié et<br />
seulement avec des pièces de rechange<br />
d'origine. Cela garantira le maintien de la<br />
sécurité de votre outil.<br />
Avertissements de sécurité<br />
supplémentaires pour les outils<br />
électriques<br />
Attention ! Avertissements de sécurité<br />
additionnels pour ponceuses<br />
• Tenez l’outil uniquement par les surfaces<br />
isolées des poignées, parce que la courroie<br />
peut mettre en contact avec son propre<br />
cordon électrique. Couper un câble sous<br />
tension met les parties métalliques de l’outil<br />
sous tension et peut provoquer une<br />
électrocution de l’utilisateur.<br />
• Utilisez des fixations ou tout autre moyen<br />
pratique pour fixer et soutenir la pièce à<br />
ouvrer sur une plate-forme stable. Si vous<br />
tenez la pièce à la main ou contre votre<br />
corps, elle est instable et vous pouvez en<br />
perdre le contrôle.<br />
23
24<br />
FRENCH<br />
• Attention ! L’inhalation ou le contact avec<br />
des poussières de sciure peuvent mettre en<br />
péril la santé de l’utilisateur et des personnes<br />
à proximité. Portez un masque contre la<br />
poussière spécialement conçu pour vous<br />
protéger des sciures et des fumées toxiques.<br />
Veillez également à ce que les personnes se<br />
trouvant à l'intérieur de la zone de travail ou<br />
y pénétrant soient également protégées.<br />
• Enlevez soigneusement toute poussière<br />
après le ponçage.<br />
• Faites spécialement attention lorsque vous<br />
poncez de la peinture pouvant être à base<br />
de plomb ou lorsque vous poncez des bois<br />
et des métaux pouvant produire de la<br />
poussière toxique.<br />
- Ne laissez pas les enfants ou les femmes<br />
enceintes entrer dans la zone de travail.<br />
- Ne mangez pas, ne buvez pas et ne<br />
fumez pas dans la zone de travail.<br />
- Nettoyez l'outil de toutes particules de<br />
poussière et autre débris.<br />
• Cet outil n'est pas destiné à être utilisé par<br />
des personnes (notamment des enfants)<br />
présentant des capacités physiques,<br />
sensorielles ou mentales limitées voire<br />
dépourvues de connaissance et<br />
d'expérience, sauf si elles sont supervisées<br />
ou ont reçu des instructions pour l'usage de<br />
l'appareil par une personne responsable de<br />
leur sécurité. Les enfants ne doivent pas<br />
jouer avec l’appareil.<br />
• Le domaine d'utilisation de l'outil est décrit<br />
dans le présent manuel. L’utilisation<br />
d’accessoires ou la réalisation d’opérations<br />
avec cet outil autres que ceux recommandés<br />
dans le présent manuel peut entraîner un<br />
risque de blessure ou de dégâts.<br />
Sécurité des tiers<br />
• Cet appareil n'est pas destiné à être utilisé<br />
par des personnes (notamment des enfants)<br />
présentant des capacités physiques,<br />
sensorielles ou mentales limitées voire<br />
dépourvues de connaissance et d'expérience,<br />
sauf si elles sont supervisées ou ont reçu des<br />
instructions pour l'usage de l'appareil par une<br />
personne responsable de leur sécurité.<br />
• Les enfants ne doivent pas jouer avec<br />
l'appareil.<br />
Vibration<br />
Les valeurs des émissions de vibrations<br />
mentionnées dans les données techniques et la<br />
déclaration de conformité ont été mesurées<br />
conformément à la méthode de test normalisée<br />
indiquée par EN 60745 et permettent les<br />
comparaisons entre outils. Les valeurs des<br />
émissions de vibrations peuvent également<br />
servir à une évaluation préliminaire de<br />
l'exposition.<br />
Attention ! Les valeurs des émissions de<br />
vibrations en utilisant réellement l'outil peuvent<br />
différer des valeurs déclarées en fonction du<br />
mode d'usage de l'outil. Le niveau de vibration<br />
peut dépasser le niveau indiqué.<br />
Pour évaluer l'exposition aux vibrations afin de<br />
déterminer les mesures de sécurité imposées<br />
par 2002/44/CE pour protéger les personnes<br />
utilisant régulièrement des outils électriques, une<br />
estimation de l'exposition aux vibrations devrait<br />
prendre en compte les conditions réelles et le<br />
mode d'utilisation de l'outil, notamment<br />
l'ensemble du cycle de fonctionnement ainsi<br />
l'arrêt de l'outil et son fonctionnement au ralenti,<br />
outre le démarrage.
FRENCH<br />
Étiquettes apposées sur l'outil<br />
Les pictogrammes suivants sont présents sur<br />
l'outil :<br />
Attention ! Afin de réduire les risques<br />
de blessures, l'utilisateur doit lire le<br />
manuel d'instructions.<br />
Sécurité électrique<br />
L'outil est doublement isolé ; par<br />
conséquent, aucun câble de masse<br />
n'est nécessaire. Vérifiez si le<br />
voltage mentionné sur la plaque signalétique de<br />
la machine correspond bien à la tension de<br />
secteur présente sur lieu.<br />
• Si le câble d'alimentation est endommagé, il<br />
doit être remplacé par le fabricant ou par un<br />
centre de réparation agréé Black & Decker<br />
afin d'éviter tout accident.<br />
Caractéristiques<br />
Cet outil comprend toutes ou certaines des<br />
caractéristiques suivantes.<br />
1. Interrupteur marche/arrêt<br />
2. Bouton de verrouillage<br />
3. Orifice d’évacuation de la poussière<br />
4. Base de ponçage<br />
5. Manette de serrage du papier<br />
6. Bouton de contrôle de vitesse variable<br />
Assemblage<br />
Attention ! Avant l'assemblage, assurez-vous<br />
que l'outil est éteint et débranché.<br />
Montage du papier abrasif<br />
(fig. A)<br />
Attention ! N'utilisez jamais l'outil sans feuille<br />
de ponçage ou accessoire en place.<br />
• Lissez le verso du papier abrasif sur une<br />
arête pour l'assouplir.<br />
• Relâchez les manettes de serrage du papier<br />
abrasif (5).<br />
• Placez la feuille sur la base de ponçage (4),<br />
en veillant à ce que les trous de la feuille<br />
coïncident avec les trous de la base.<br />
• Insérez le côté de la feuille de ponçage dans<br />
le premier cliquet comme illustré.<br />
• Appuyez sur la manette de serrage de la<br />
feuille avant (5) vers le bas.<br />
• Tout en exerçant une faible pression sur la<br />
feuille, insérez le côté arrière de la feuille<br />
dans le cliquet arrière.<br />
• Appuyez sur la manette de serrage de la<br />
feuille arrière (5) vers le bas.<br />
Montage et démontage du sac à<br />
poussières (fig. B)<br />
• Monter le sac à poussière (7) sur l'orifice<br />
d'aspiration de la poussière (3).<br />
• Tournez le sac à poussière jusqu’à ce qu’il se<br />
bloque.<br />
• Pour enlever le sac à poussière, procédez à<br />
l'envers.<br />
Branchement de l’aspirateur<br />
(fig. C)<br />
• Insérez l'adaptateur (8) dans l'orifice<br />
d'aspiration de la poussière (3).<br />
• Branchez le tuyau (9) de l'aspirateur à<br />
l'adaptateur.<br />
Risques résiduels<br />
L'utilisation d'un outil non mentionné dans les<br />
consignes de sécurité données peut entraîner<br />
des risques résiduels supplémentaires. Ces<br />
risques peuvent survenir si l'outil est mal utilisé,<br />
si l'utilisation est prolongée, etc.<br />
Malgré l'application des normes de sécurité<br />
correspondantes et la présence de dispositifs de<br />
sécurité, les risques résiduels suivants ne<br />
peuvent être évités. Ceci comprend :<br />
25
FRENCH<br />
• Les blessures dues au contact avec une<br />
pièce mobile/en rotation.<br />
• Les blessures causées en changeant des<br />
pièces, lames ou accessoires.<br />
• Les blessures dues à l'utilisation prolongée<br />
d'un outil. Une utilisation prolongée de l'outil<br />
nécessite des pauses régulières.<br />
• Déficience auditive.<br />
• Risques pour la santé causés par l'inhalation<br />
de poussières produites pendant l'utilisation<br />
de l'outil (exemple : travail avec du bois,<br />
surtout le chêne, le hêtre et les panneaux en<br />
MDF).<br />
Utilisation<br />
Attention ! Laissez l'outil fonctionner à sa<br />
propre vitesse. Ne le surchargez pas.<br />
Variateur de vitesse<br />
Le contrôle de la vitesse variable vous permet<br />
d'adapter la vitesse de l'outil au matériau de la<br />
pièce sur laquelle vous travaillez.<br />
• Ajustez la vitesse souhaitée à l'aide du<br />
bouton de commande (6). Utilisez une<br />
vitesse rapide pour le bois, une vitesse<br />
moyenne pour le bois contre-plaqué et les<br />
matières synthétiques, et une vitesse faible<br />
pour les métaux non ferreux et pour enlever<br />
de la peinture.<br />
Démarrage et arrêt<br />
• Pour allumer l'outil, appuyez sur l'interrupteur<br />
marche/arrêt (1).<br />
• Pour un fonctionnement en continu, appuyez<br />
sur le bouton de verrouillage (2) et relâchez<br />
l’interrupteur marche/arrêt.<br />
• Pour éteindre l’outil, relâchez le bouton<br />
marche/arrêt. Pour éteindre l’outil lorsqu’il<br />
est en fonctionnement continu, appuyez sur<br />
l’interrupteur marche/arrêt une fois de plus et<br />
relâchez-le.<br />
Comment vider le sac à<br />
poussière<br />
Le sac à poussière doit être vidé toutes les 10<br />
minutes.<br />
• Secouez le sac à poussière pour le vider.<br />
Conseils pour une utilisation<br />
optimale (fig. D)<br />
• Tenez toujours l'outil avec les deux mains.<br />
• N'exercez pas trop de pression sur l'outil.<br />
• Vérifiez régulièrement l'état de la feuille de<br />
ponçage. Remplacez-la lorsque cela est<br />
nécessaire.<br />
• Poncez toujours avec le grain correspondant<br />
au bois.<br />
• Lorsque vous poncez de nouvelles couches<br />
de peinture avant d'en appliquer une autre,<br />
utilisez un abrasif extra fin.<br />
• Pour les surfaces irrégulières ou lorsque vous<br />
enlevez des couches de peinture,<br />
commencez par un abrasif à gros grains. Sur<br />
d'autres surfaces, commencez avec un<br />
abrasif moyen. Dans les deux cas, changez<br />
graduellement et passez à un abrasif fin pour<br />
une finition douce.<br />
• Renseignez-vous chez votre revendeur pour<br />
plus d’informations sur les accessoires<br />
disponibles.<br />
Entretien<br />
Votre outil a été conçu pour fonctionner pendant<br />
longtemps avec un minimum d'entretien. Un<br />
fonctionnement continu satisfaisant dépend d'un<br />
nettoyage régulier et d'un entretien approprié de<br />
l'outil.<br />
Attention ! Avant d'effectuer tout entretien,<br />
éteignez et débranchez l'outil.<br />
• Nettoyez régulièrement les orifices de<br />
ventilation de votre outil à l'aide d'une brosse<br />
douce ou d'un chiffon sec.<br />
• Nettoyez régulièrement le compartiment du<br />
moteur à l'aide d'un chiffon humide. N'utilisez<br />
pas de produit abrasif ou à base de solvant.<br />
26
FRENCH<br />
Remplacement d’une prise<br />
électrique<br />
En cas d’installation d’une nouvelle prise:<br />
• Jetez l’ancienne prise.<br />
• Connectez le fil marron sur la borne sous<br />
tension de la nouvelle prise.<br />
• Connectez le fil bleu sur la borne neutre.<br />
• Si le produit est de classe I (terre), connecter<br />
le fil vert / jaune sur la borne terre.<br />
Attention! Si votre produit est de classe II avec<br />
double isolation (seulement 2 fils dans le cordon<br />
électrique), il n’y a aucune connexion à faire sur<br />
la borne terre.<br />
Suivez les instructions de montage fournies<br />
avec les prises de bonne qualité<br />
Tout fusible de rechange doit être du même<br />
calibre que le fusible d'origine fourni avec le<br />
produit.<br />
Caractéristiques techniques<br />
KA274E<br />
Tension VAC 220-240<br />
Puissance absorbée W 310<br />
Orbites (à vide) min -1 6.000 - 11.000<br />
Superficie de base mm 115 x 230<br />
de ponçage<br />
Poids kg 2,5<br />
27
FRENCH<br />
Protection de l'environnement<br />
Collecte séparée. Ce produit ne doit<br />
pas être jeté avec les déchets<br />
domestiques normaux.<br />
Si vous décidez de remplacer ce produit Black<br />
& Decker, ou si vous n'en avez plus l'utilité, ne<br />
le jetez pas avec vos déchets domestiques<br />
Rendez-le disponible pour une collecte séparée.<br />
• Black & Decker fournit un dispositif<br />
permettant de collecter et de recycler les<br />
produits Black & Decker lorsqu'ils ont atteint<br />
la fin de leur cycle de vie. Pour pouvoir<br />
profiter de ce service, veuillez retourner votre<br />
produit à un réparateur agréé qui se<br />
chargera de le collecter pour nous.<br />
• Pour connaître l'adresse du réparateur agréé<br />
le plus proche de chez vous, contactez le<br />
bureau Black & Decker à l'adresse indiquée<br />
dans ce manuel. Vous pourrez aussi trouvez<br />
un liste des réparateurs agréés de Black &<br />
Decker et de plus amples détails sur notre<br />
service après-vente sur le site Internet à<br />
l'adresse suivante : www.2helpU.com<br />
28
FRENCH<br />
Garantie<br />
Lorsqu’un appareil Black & Decker s’avère<br />
defectueux en raison d’un défaut matériel ou de<br />
fabrication dans les 12 mois à compter de la<br />
date d’achat, Black & Decker garantit le<br />
remplacement des pièces défectueuses ou de<br />
l’appareil afin de minimiser les désagréments<br />
causés au client, à l’exclusion des cas suivants:<br />
• Utilisation abusive de l’appareil ou appareil<br />
endommagé à cause de négligence.<br />
• Appareil endommagé par d’autres appareils,<br />
des substances ou par accident.<br />
• Réparations effectuées par des personnes<br />
autres qu’un réparateur agréé ou le service<br />
technique de Black & Decker.<br />
Pour avoir recours à la garantie, il est<br />
nécessaire de fournir une preuve d’achat à<br />
votre revendeur ou à un réparateur agréé. Pour<br />
connaitre l’adresse du réparateur agréé le plus<br />
proche, contactez le bureau Black & Decker à<br />
l’adresse indiquée dans ce manuel. Vous<br />
pouvez aussi trouver une liste des réparateurs<br />
agréés Black & Decker et de plus amples<br />
détails sur notre service après-vente en visitant<br />
notre site: www.2helpU.com.<br />
Visitez notre site Web www.blackanddecker.ae<br />
pour enregistrer votre nouveau produit Black &<br />
Decker et être informé des nouveaux produits et<br />
des offres spéciales. Pour plus d'informations<br />
concernant la marque Black & Decker et notre<br />
gamme de produits, consultez notre site<br />
www.blackanddecker.ae<br />
29
Names & Addresses for Black & Decker Service Concessionaries<br />
ALGERIA: Sarl Outillage Corporation, 08 Rue Med Boudiaf - Cheraga - Algiers, Algeria. Tel: (213-21) 375130, Fax: (213-21) 369667. AZERBAIJAN:<br />
Royalton Holdings Ltd. 41 Khagani St. Apt. 47 AZ 1001, Baku. Tel: (994-12) 4935544, Fax: (994-12) 5980378. BAHRAIN: Alfouz Services Co. WLL.,<br />
P.O. Box 26562, Tubli, Manama. Tel: (973) 17783562, Fax: (973) 17783479. EGYPT: El-Farab S.A.E 15 - Nabil El Wakkad Street, Dokki, Giza. Tel:<br />
(202) 37603946, Fax: 33352796. ETHIOPIA: Seif Tewfik Sherif, Arada Sub-City, Kebele 01/02, Global Insurance Building, 2nd Floor, Room 43,<br />
P.O. Box 2525, Addis Ababa, Ethiopia. Tel: (251-11) 1563968/ 1563969, Fax: (251-11) 1558009. IRAQ: Al Sard Co. for General Trading Ltd.<br />
Jbara Bldg. 3Flr, Al Rasheed St. Bagdad. Tel: (964) 18184102. Sakhar Group, Arrassat al-hindya Al Masbah, Bagdad. (964) 7400144446. JORDAN:<br />
Palestine Bldg. Matl. (Bashiti Hardware), 93 King Abdullah 2nd Street, Opp. ELBA House, P.O. Box 3005, Amman 11953, Tel: (962-6) 5349098, Fax:<br />
(962-6) 5330731. KENYA: Dextron Tools Ltd., P.O. Box 20121-00200, Shariff House, Kimathi Street, Nairobi. Tel: (254-20) 6905000/ 2358021, Fax:<br />
(254-20) 6905111/ 6905112. KUWAIT: Al Omar Technical Co., P.O. Box 4062, 13041 Safat, Kuwait. Tel: (965) 24848595/ 24840039, Fax:<br />
(965) 24845652. Fawaz Al Zayani Establishment, P.O. Box 42426, Shop No. 18, Al Humaizi Commercial Complex, Khalifa Al Jassim, Shuwaikh, Kuwait.<br />
Tel: (965) 24828710, Fax: (965) 24828716. LEBANON: Est. Shaya & Azar S.A.R.L., Boulvard, Jdeideh, Mar Takla-Bouchrieh, P.O. Box 90545,<br />
Jdeideh, Beirut. Tel: (961-1) 872305/ 872306, Fax: (961-1) 872303. LIBYA: (Benghazi) Sniydel st., Amr Ibn EL-Aas Rd. Tel: (+218) 92 5771120.<br />
(Tripoli) Al Barniq Service Center, Mokhazin elsukar st., ElFallah. Tel: (+218) 21 4808019. (Misrata) Al Hilal Service Center, Tawergha st. Tel:<br />
(+218) 51 2626743. MAURITIUS: Robert le Marie Limited, Old Moka Road, Bell Village, P.O. Box 161, Port Louis. Tel: (230) 2121865/ 2122847, Fax:<br />
(230) 2080843. MOROCCO: Ets. Louis Guillaud & Cie, 31, Rue Pierre Parent, Casablanca-21000. Tel: (+212) 522 305971, Fax: (+212) 522 444518.<br />
NIGERIA: Meridian Power Tools Ltd., Gr. Floor, #1 Alhaji Masha Road, Next to Teslim Balogun Stadium, Near National Stadium, Surulere, Lagos. Tel:<br />
(234-1) 7740431/ 7740410, Fax: (234-1) 7913798. OMAN: Al Jizzi Company LLC, P.O. Box 1704, P.C. 112 Ruwi, Oman. Tel: (968) 24832618/<br />
24835153, Fax: (968) 24831334. Al Hassan Technical & Construction Supplies Co. LLC., P.O. Box 1948, P.C. 112, Ruwi, Oman. Tel: (968) 24810575/<br />
24837054, Fax: (968) 24810287/ 248333080. Khimji Ramdas, P.O. Box 19, Post Code 100, Ghala, Muscat, Oman. Tel: (968) 24595906/ 907, Fax:<br />
(968) 24852752. Oman Hardware Co. LLC., P.O. Box 635, Ruwi-112. Tel: (968) 24815131, Fax: (968) 24816491. Oman Marketing & Service Co.<br />
(Omasco), P.O. Box 2734, Behind Honda Showroom, Wattayah, Oman. Tel: (968) 24560232/ 24560255, Fax: (968) 24560993. Oman Marketing &<br />
Service Co. (Omasco), Al Ohi, Sohar, Oman. Tel: (968) 26846379, Fax: (968) 26846379. Oman Marketing & Service Co. (Omasco), Sanaya, Salalah,<br />
Oman. Tel: (968) 23212290, Fax: (968) 23210936. PAKISTAN: Ammar Service & Spares, 60-Bank Arcade, Serai Road, Karachi, Pakistan. Tel:<br />
(92-21) 32426905, Fax: (92-21) 32427214. ZIT Co., Nasir & Bros., 2nd Floor, Qadri Center, Chowk Dalgran, Railway Road, Lahore. Te l :<br />
(92-42) 37670839, Fax: (92-42) 37652989. QATAR: Al Muftah Service Centre, Al Wakrah Road, P.O. Box 875, Doha, Qatar. Tel: (974) 4650880/<br />
4650110/ 4446868, Fax: (974) 4441415/ 4662599. Shaheen Electrical Works & Trading Co. WLL., Gate 34, St.44 Industriala Area, P.O. Box 9756,<br />
Doha. Tel: (974) 4600230/ 4600525, Fax: (974) 4601338. Teyseer Industrial Supplies & Services Co. WLL., 55, Al Wakalat St. (Between St. 18 & 19)<br />
Salwa Industrial Area, P.O. Box 40523, Doha, Qatar. Tel: (974) 4581536, Fax: (974) 4682024. SAUDI ARABIA: (Al Bahr) Mohamed Ahmed Bin Afif<br />
Est., P.O. Box 530, Yanbu, Al Bahr. Tel: (966-4) 3222626/ 3228867, Fax: (966-4) 3222210. (Al Khobar) Fawaz Ebrahim Al Zayani Trading Est.,<br />
P.O. Box 76026, Al Khobar # 31952, Tel: (966-3) 8140914, Fax: (966-3) 8140824. MSS (Al-Mojil Supply & Services) P.O. Box 450, Jubail 31951,<br />
Opp. Gulf Bridge Library & Riyadh House. Tel: (966-3) 3612850/ 3624487/ 3621729, Fax: (966-3) 3623589/ 3620783. (Dammam) Al Bawardi Tools &<br />
Hardware, P.O. Box 112, Dammam 31411. Tel: (966-3) 8330780/ 8348585 ext. 24, Fax: (966-3) 8336303. (Jeddah) Al Bawardi Tools & Hardware,<br />
P.O. Box 16905, Jeddah-21474. Tel: (966-2) 6444547, Fax: (966-2) 6439024. EAC (Al Yousef Contg. & Trdg. Est.), P.O. Box 30377, Jeddah -21477, Tel:<br />
(966-2) 6519912, Fax: (966-2) 6511153. (Madina) Garziz Trading for Bldg Mat & Decoration, P.O. Box 3364, Madina. Tel: (966-4) 8261490/ 8227636,<br />
Fax: (966-4) 8265741. (Riyadh) Al Bawardi Tools & Hardware, P.O. Box 68, Riyadh 11411. Tel: (966-1) 4484999, Fax: (966-1) 4487877.<br />
Industrial Material Organization (IMO), P.O. Box 623, Rail Street, Riyadh. Tel: (966-1) 4028010, Fax: (966-1) 4037970. Sulatn Garment factory (RSC),<br />
P.O. Box 29912, Riyadh 11467. Tel: (966-1) 4055148/ 4042889, Fax: (966) 4055148. SOUTH AFRICA: Trevco Power Tool Service 14 Steenbok Street,<br />
Koedoespoort, 0186, Pretoria, South Africa. Tel: (27-86) 1873826, Fax: (27-86) 5001771. TANZANIA: General Motors investment Ltd., P.O. Box 16541,<br />
14 Nyerere Road, Vingunguti, Dar-es-Salaam. Tel: (255 22) 2862661/ 2865022, Fax: (255 22) 2862667. TUNISIA: Societe Tunisienne De Maintenance<br />
(STM), Rue de la Physique. Nouvelle Zone Industrielle Ben Arous., 2013 Ben Arous, Tunisia. Tel: (+216) 71 389687, Fax: (+216) 71 385154. UAE:<br />
(Abu Dhabi) Light House Electrical, P.O. Box 120, Abu Dhabi, Tel: (971-2) 6726131, Fax: (971-2) 6720667. (Ajman) Al Sukoon Gen. Trdg. Co. LLC,<br />
P.O. Box 2975, Ajman. Tel: (971-6) 7435725/ 7438317, Fax: (971-6) 7437350. (Al Ain) Zillion Equipment and Spare Parts Trading LLC, P.O. Box 19740,<br />
Opp. Bin Sadal/ Trimix Redymix Sanaiya, Al Ain. Tel: (971-3) 7216690, Fax: (971-3) 7216103. (Dubai) Alebrah Engineering Service, P.O. Box 78954,<br />
Al Qusais, Dubai. Tel: (971-4) 2850044, Fax: (971-4) 2844802. Black & Decker (Overseas) GmbH, P.O. Box 5420, Dubai, Tel: (971-4) 8127400/<br />
8127406, Fax: (971-4)2822765. Ideal Star Workshop Eqpt. trading LLC, P.O. Box 37110, Al Quoz, Dubai. Tel: (971-4) 3474160, Fax: (971-4) 3474157.<br />
(Musaffah) Light House Electrical, P.O. Box 120, Abu Dhabi, Tel: (971-2) 5548315, Fax: (971-2) 5540461. (Sharjah) Mc Coy Middle East LLC,<br />
P.O. Box 25793, Sharjah, Tel: (971-6) 5395931, Fax: (971-6) 5395932. Burj Al Madeena, Industrial Area No.1, Opp. Pakistani Masjid, P.O. Box 37635,<br />
Sharjah. Tel: (971-6) 5337747, Fax: (971-6) 5337719. (Ras Al Khaimah) Mc Coy Middle East LLC, P.O. Box 10584, Ras Al Khaimah, Tel:<br />
(971-7) 2277095, Fax: (971-7) 2277096. UGANDA: The Building Center (U) Ltd., 52 Station Road, Kitgum House, P.O. Box 7436, Kampala, Uganda.<br />
Tel: (256-41) 4234567/ 4259754, Fax: (256-41) 4236413. YEMEN: (Aden) Middle East Trad. Co. Ltd. (METCO), Mualla Dakka, Aden, Yemen. Tel:<br />
(967-2) 222670, Fax: (967-2) 222670. (Sana'a) Middle East Trad. Co. Ltd. (METCO), Hayel St., Sana'a, Yemen. Tel: (967-1) 204201, Fax:<br />
(967-1) 204204. (Taiz) Middle East Trading Co. (METCO), P.O. Box 12363, 5th Flr, Hayel Saeed Anam Bldg, Al-Mugamma St. Taiz, Yemen. Tel:<br />
(967-4) 213455, Fax: (967-4) 219869.
≈ßr Ë ´Mu«Ê «∞∂Uzl<br />
¢U¸¥a «∞Ad«¡<br />
«∞d±e «∞∂d¥bÍ<br />
«∞FMu«Ê<br />
«ùßr<br />
WARRANTY REGISTRATION CARD<br />
YOUR NAME/<br />
YOUR ADDRESS<br />
POSTCODE<br />
DATE OF PURCHASE<br />
DEALER'S NAME & ADDRESS/<br />
PRODUCT MODEL NO. KA274E


