

Braun Clean & Charge, Clean & Renew, Syncro, 5491, 5492, 5493, 5494-Clean & Charge (Syncro) - Clean&Charge UK, FR, ES (USA, CDN, MEX)
Braun Clean & Charge, Clean & Renew, Syncro, 5491, 5492, 5493, 5494-Clean & Charge (Syncro) - Clean&Charge UK, FR, ES (USA, CDN, MEX)
Braun Clean & Charge, Clean & Renew, Syncro, 5491, 5492, 5493, 5494-Clean & Charge (Syncro) - Clean&Charge UK, FR, ES (USA, CDN, MEX)

Create successful ePaper yourself
Turn your PDF publications into a flip-book with our unique Google optimized e-Paper software.
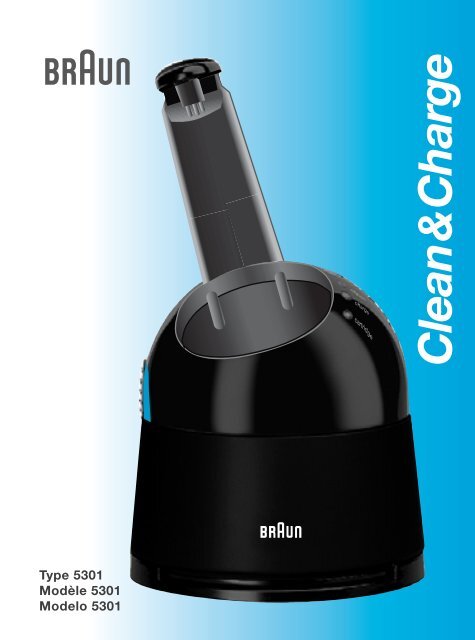
Type 5301<br />
Modèle 5301<br />
Modelo 5301<br />
<strong>Clean</strong>&<strong>Charge</strong>
English 6<br />
Français 12<br />
Español 18<br />
Thank you for purchasing a <strong>Braun</strong> product.<br />
We hope you are completely satisfied with<br />
your new <strong>Braun</strong> product.<br />
If you have any questions, please call:<br />
US residents<br />
1-800-BRAUN-11<br />
1-800-272-8611<br />
Canadian residents (905) 712-5400<br />
Merci d’avoir fait l’achat d’un produit <strong>Braun</strong>.<br />
Nous espérons que vous serez pleinement<br />
satisfait de votre nouveau produit <strong>Braun</strong>.<br />
Si vous avez des questions, veuillez appeler<br />
<strong>Braun</strong> Canada : (905) 712-5400<br />
Gracias por haber comprado un producto<br />
<strong>Braun</strong>.<br />
Esperamos que Ud. completamente<br />
satisfecha con su nuevo producto <strong>Braun</strong>.<br />
Si Ud. tiene alguna duda, por favor llame al:<br />
Cd. de México 387-1941<br />
Interior del país 01(800) 508-5800<br />
Internet<br />
www.<strong>Braun</strong>.com<br />
5-301-082/03/I-01<br />
<strong>USA</strong> / <strong>CDN</strong> / Mex.<br />
Printed in Germany<br />
Imprimé en Allemagne<br />
Impreso en Alemania
A<br />
3<br />
2<br />
4<br />
5<br />
select<br />
clean<br />
6<br />
1<br />
charge<br />
cartridge<br />
7<br />
8<br />
4
on/o f<br />
clean<br />
charge<br />
cartridge<br />
3<br />
select<br />
B<br />
C<br />
3 2 1 0<br />
automatic lock<br />
1<br />
2<br />
3 2 1 0<br />
automatic lock<br />
7570<br />
new<br />
select<br />
7570<br />
select<br />
new<br />
old<br />
clean<br />
charge<br />
cartridge<br />
5
English<br />
IMPORTANT SAFETY<br />
INSTRUCTIONS<br />
When using an electrical appliance, basic precautions should always be<br />
followed, including the following:<br />
Read all instructions before using this appliance.<br />
DANGER<br />
To reduce the risk of electric shock:<br />
1. Do not reach for an appliance that has fallen into water.<br />
Unplug immediately.<br />
2. Do not use while bathing or in a shower.<br />
3. Do not place, store or charge the appliance where it can fall or be pulled<br />
into a tub or sink. Do not place in or drop into water or other liquid.<br />
4. Except when charging, always unplug this appliance from the electrical<br />
outlet immediately after using.<br />
5. Unplug this appliance before cleaning.<br />
FOR HOUSEHOLD USE<br />
SAVE TH<strong>ES</strong>E INSTRUCTIONS<br />
6
WARNING<br />
To reduce the risk of burns, fire, electric shock, or injury to persons:<br />
1. Close supervision is necessary when this appliance is used by, on,<br />
or near children.<br />
2. Use this appliance only for its intended use as described in this manual.<br />
Do not use attachments not recommended by the manufacturer.<br />
3. The appliance should never be exposed to temperatures of less<br />
than 32 ºF / 0 ºC and more than 105 ºF/+40ºC for longer than a few hours.<br />
Keep the appliance and cord dry at all times. Do not handle with wet hands.<br />
Do not store in a d<strong>amp</strong> environment. To avoid damage do not wind<br />
the cord around the appliance. It is important to check the cord for damage<br />
periodically particularly at each end where the cord enters the plug.<br />
4. Never operate this appliance if it has a damaged cord or plug, if it is not<br />
working properly, if it has been dropped or damaged, or dropped into water.<br />
Return the appliance to a service center for examination and repair.<br />
5. Keep the cord away from heated surfaces.<br />
6. Never drop or insert any object into any opening.<br />
7. Do not use outdoors or operate where aerosol (spray) products are being<br />
used or where oxygen is being administered.<br />
8. Always attach plug to appliance first, then to outlet.<br />
To disconnect, turn all controls to «off», then remove plug from outlet.<br />
7
<strong>Braun</strong> <strong>Clean</strong>&<strong>Charge</strong> has been developed<br />
to automatically clean and charge your<br />
shaver. It also serves as a storage unit.<br />
For peak performance of your shaver, clean<br />
it daily in the <strong>Clean</strong>&<strong>Charge</strong>.<br />
During the automated cleaning process,<br />
the shaver is switched on and off at intervals<br />
to obtain best cleaning results. Since<br />
the specially formulated cleaning fluid also<br />
contains a small amount of oil, the<br />
cleaning procedure also fulfills the lubrication<br />
needs of your shaver.<br />
Important<br />
• Only use the power supply cord set supplied<br />
with the shaver.<br />
• In order to avoid any leakage of the cleaning<br />
fluid, place the appliance on a flat,<br />
stable surface. Be careful not to tip, move<br />
suddenly or transport in any way if a cleaning<br />
cartridge is installed.<br />
• Do not place the appliance in a mirror<br />
cabinet, nor store it over radiators, nor<br />
place it on polished or laquered surfaces.<br />
Do not expose to direct sunlight.<br />
• The appliance contains highly<br />
flammable liquid. Keep it away<br />
from sources of ignition.<br />
No smoking. Keep out of reach of<br />
children. Do not refill cartridge. Use only<br />
original <strong>Braun</strong> refill cartridge.<br />
• When cleaning the shaver, its protection cap<br />
should be removed.<br />
A Description<br />
1 Lift button for cartridge exchange<br />
2 Contact bow<br />
3 Release button<br />
4 Operation mode selector<br />
5 «clean» light:<br />
cleaning process indicator<br />
6 «charge» light:<br />
charging process indicator<br />
7 «cartridge» light:<br />
cartridge replacement indicator<br />
8 <strong>Clean</strong>ing cartridge<br />
Technical specifications<br />
• Power consumption:<br />
3 W when cleaning<br />
7 W when charging<br />
• Power supply: 100-240 V 2/ 50 or 60 Hz<br />
(automatic adaptation)<br />
• Input voltage: 12 V<br />
B Before using <strong>Clean</strong>&<strong>Charge</strong><br />
Only applies for rechargeable shavers:<br />
For the first charge of the shaver, connect<br />
the power supply cord set directly to the<br />
shaver, charge it for 4 hours and shave at<br />
least once.<br />
Only then, can the shaver be cleaned or<br />
recharged in the <strong>Clean</strong>&<strong>Charge</strong>.<br />
If the rechargeable battery is discharged,<br />
select the combined «clean + charge»<br />
program rather than the «clean» program<br />
alone.<br />
Installing the cartridge<br />
• Press the lift button (1) to open the<br />
housing.<br />
• Hold the cartridge down on a flat, stable<br />
surface (e.g. table).<br />
Carefully remove the lid from the cartridge.<br />
Slide the cartridge into the base as far as it<br />
will go.<br />
• Slowly close the housing by pushing it<br />
down until it locks.<br />
Replacing the cartridge<br />
After having pressed the lift button to<br />
open the housing, wait for a few seconds<br />
before removing the used cartridge.<br />
Before discarding the used cartridge, make<br />
sure to close the openings using the lid of the<br />
new cartridge, since the used cartridge will<br />
contain contaminated cleaning solution.<br />
8
C Operating your <strong>Clean</strong>&<strong>Charge</strong><br />
• Use the cord from your shaver and plug it<br />
into the <strong>Clean</strong>&<strong>Charge</strong> and then into a main<br />
outlet.<br />
Open the contact bow (2) by pressing the<br />
release button (3). After shaving, switch<br />
the shaver off and place it upside down<br />
into the <strong>Clean</strong>&<strong>Charge</strong> (without having<br />
released the shaver foil).<br />
• Select the operation mode by toggling<br />
with the mode selector (4):<br />
clean<br />
(about 15 min)<br />
clean + charge (about 75 min)<br />
charge (about 60 min)<br />
The corresponding lights will come on.<br />
(With cord shavers, only the «clean» function<br />
can be selected.)<br />
• Slide down the contact bow to connect<br />
the shaver and to start the selected program.<br />
If no program is selected, the default<br />
function «clean» will be started.<br />
(Shaver model 7570 only: The LCD display<br />
shows the remaining time of the running<br />
program in 5-minute steps.)<br />
• Do not interrupt a running program, as it<br />
leaves the shaver wet and not fit for use. If<br />
interruption is needed nonetheless, press the<br />
release button.<br />
• When the «cartridge» light illuminates constantly,<br />
the cleaning function is locked and<br />
a new cartridge has to be installed.<br />
Only then, the next cleaning cycle can be<br />
started.<br />
• A cleaning cartridge should be sufficient<br />
for about 30 cleaning cycles. With daily<br />
use, the cleaning cartridge should be<br />
replaced approx. every 4 weeks.<br />
• The hygienic cleaning solution cartridge<br />
contains alcohol which, once opened,<br />
will naturally evaporate slowly into the<br />
surrounding air. Each cartridge, if not used<br />
daily, should be replaced after approximately<br />
8 weeks.<br />
• Do not leave the appliance plugged-in<br />
without the shaver inserted.<br />
• <strong>Clean</strong> the housing from time to time with<br />
a d<strong>amp</strong> cloth, especially the opening<br />
where the shaver rests.<br />
D Accessories<br />
Refill cartridge (double pack) CCR 2,<br />
(#5331)<br />
Subject to change without notice.<br />
• After a program has finished, the<br />
corresponding light will go out.<br />
Prior to the next shave, press the release<br />
button to release the shaver.<br />
• When the «cartridge» light starts flashing,<br />
the remaining fluid in the cartridge is<br />
sufficient for approximately 5 more cleaning<br />
cycles. After these 5 cycles, the cleaning<br />
performance will be reduced and the<br />
cartridge has to be replaced.<br />
9
2 year limited warranty<br />
FOR <strong>USA</strong> ONLY<br />
<strong>Braun</strong> warrants this <strong>Braun</strong> appliance to be free of defects in material and<br />
workmanship for a period of two years from the date of original purchase.<br />
If the appliance exhibits such a defect, <strong>Braun</strong> will, at its option, either repair or<br />
replace it for the consumer without charge, provided the consumer:<br />
1. Returns the appliance, postage paid and insured, indicating the reasons for<br />
returning it to: Shaver Service Department, <strong>Braun</strong> U.S. Div., The Gillette Co.,<br />
400 Unicorn Park Drive, Woburn, MA 01801-3376, or one of its authorized<br />
service centers.<br />
2. Submits proof of date of original purchase.<br />
This warranty does not cover damage resulting from accident, misuse,<br />
abuse, dirt, water, t<strong>amp</strong>ering, unreasonable use, normal wear, servicing<br />
performed or attempted by unauthorized service agencies or failure to<br />
provide reasonable and necessary maintenance, including recharging.<br />
ALL IMPLIED WARRANTI<strong>ES</strong>, INCLUDING ANY IMPLIED WARRANTY OF<br />
MERCHANTABILITY OR FITN<strong>ES</strong>S FOR ANY PARTICULAR PURPOSE, ARE<br />
LIMITED IN DURATION TO 2 YEARS <strong>FR</strong>OM DATE OF ORIGINAL PURCHASE.<br />
IN NO EVENT WILL BRAUN BE R<strong>ES</strong>PONSIBLE FOR CONSEQUENTIAL<br />
DAMAG<strong>ES</strong> R<strong>ES</strong>ULTING <strong>FR</strong>OM THE USE OF THIS PRODUCT. Some states<br />
do not allow the exclusion or limitation of incidental or consequential damages,<br />
so the above limitation or exclusion may not apply to you.<br />
This warranty gives you specific legal rights, and you may also have other<br />
legal rights which vary from state to state.<br />
10
FOR CANADA ONLY<br />
2 year limited warranty<br />
In the event a <strong>Braun</strong> unit fails to function within 2 years from date of purchase,<br />
because of defects in material or workmanship, and the consumer returns the<br />
unit to an authorized service center, <strong>Braun</strong> Canada, will, at its option, either<br />
repair or replace the unit without additional charge to the consumer.<br />
This guarantee does not cover any product, which has been damaged<br />
by dropping, t<strong>amp</strong>ering, wrong current, servicing performed or attempted<br />
by unauthorized service agencies, misuse or abuse.<br />
Exclusion of Warranties: The foregoing warranty is the sole warranty<br />
offered by <strong>Braun</strong> Canada. <strong>Braun</strong> Canada hereby disclaims any implied warranty<br />
or merchantability or fitness for any particular purpose. In no event will <strong>Braun</strong><br />
Canada be responsible for consequential damages resulting from the use<br />
of this product.<br />
11
Français<br />
PRÉCAUTIONS<br />
IMPORTANT<strong>ES</strong><br />
Lors de l’utilisation d’appareils électriques, toujours prendre les mesures<br />
de précaution suivantes :<br />
Lire attentivement toutes les directives avant d’utiliser cet appareil.<br />
DANGER<br />
Pour réduire les risques de choc électrique, suivre les directives suivantes :<br />
1. Ne pas toucher l’appareil s’il est entré en contact avec de l’eau.<br />
Le débrancher immédiatement.<br />
2. Ne pas utiliser pendant le bain ou la douche.<br />
3. Ne pas placer ni ranger ni recharger l’appareil à un endroit d’où il peut tomber<br />
ou glisser dans une baignoire ou un lavabo. Ne pas immerger dans l’eau ni<br />
aucun autre liquide.<br />
4. Sauf dans le cas d’une recharge, toujours débrancher l’appareil<br />
immédiatement après l’utilisation.<br />
5. Débrancher l’appareil avant le nettoyage.<br />
POUR <strong>USA</strong>GE DOM<strong>ES</strong>TIQUE<br />
CONSERVER C<strong>ES</strong> DIRECTIV<strong>ES</strong><br />
12
AVERTISSEMENT<br />
Pour réduire les risques de brûlure, d’incendie, de choc électrique<br />
ou de blessure, suivre les directives suivantes :<br />
1. Exercer une surveillance attentive lorsque l’appareil est utilisé par ou pour<br />
des enfants ou près de ceux-ci.<br />
2. Ne pas utiliser cet appareil à des fins autres que celles indiquées dans ce<br />
manuel. Ne pas employer d’accessoires non recommandés par le fabricant.<br />
3. L’appareil ne doit en aucun cas être soumis à des températures inférieures<br />
à 0 ºC (32 ºF) ou supérieures à 40 ºC (105 ºF) pour plus de quelques heures.<br />
Tenir l’appareil et le cordon au sec en tout temps. Ne pas utiliser lorsque<br />
les mains sont humides. Ne pas ranger dans un endroit humide. Pour éviter<br />
les dommages, ne pas enrouler le cordon autour de l’appareil. Il est essentiel<br />
de vérifier périodiquement l’état du cordon, surtout les extrémités qui entrent<br />
dans la fiche.<br />
4. Ne jamais faire fonctionner un appareil dont la fiche ou le cordon est abîmé,<br />
qui n’est pas en bon état de fonctionnement, est tombé, a été endommagé<br />
ou mis en contact avec de l’eau. Retourner l’appareil à un centre de service<br />
après-vente agréé pour inspection et réparation.<br />
5. Ne pas laisser le cordon entrer en contact avec des surfaces chaudes.<br />
6. Ne jamais laisser tomber ni insérer d’objets dans les orifices de l’appareil.<br />
7. Ne pas utiliser à l’extérieur, dans un endroit où des produits en aérosol<br />
(vaporisateurs) sont utilisés ni là où l’on administre de l’oxygène.<br />
8. Toujours relier la fiche à l’appareil avant de brancher sur la prise de courant.<br />
Pour débrancher, placer tous les interrupteurs à « arrêt », puis retirer la fiche<br />
de la prise.<br />
13
<strong>Clean</strong>&<strong>Charge</strong> de <strong>Braun</strong> est conçu pour<br />
nettoyer et recharger automatiquement<br />
votre rasoir. Il sert également d’unité de<br />
rangement. Pour que votre rasoir fonctionne<br />
le mieux possible, nettoyez-le chaque jour<br />
au moyen de <strong>Clean</strong>&<strong>Charge</strong>.<br />
Pour obtenir un nettoyage optimal, l’appareil<br />
passe de marche à arrêt à intervalles<br />
réguliers pendant le processus de nettoyage<br />
automatique. Comme le liquide nettoyant à<br />
formule spéciale contient une petite quantité<br />
d’huile, le processus de nettoyage comble<br />
également les besoins de lubrification du<br />
rasoir.<br />
Important<br />
• N’utiliser que le cordon d’alimentation<br />
fourni avec le rasoir.<br />
• Pour éviter toute fuite de liquide nettoyant,<br />
placer l’appareil sur une surface plane et<br />
stable. Prendre garde de ne pas le faire<br />
tomber ni de le déplacer trop rapidement<br />
lorsque la cartouche de nettoyage est en<br />
place.<br />
• Ne pas mettre l’appareil dans une armoire à<br />
pharmacie ni sur un radiateur ou une surface<br />
polie ou laquée. Ne pas exposer<br />
directement au soleil.<br />
• L’appareil contient un liquide<br />
hautement inflammable. Tenir à l’abri<br />
de toute source d’ignition. S’abstenir<br />
de fumer. Garder hors de la portée des<br />
enfants. Ne pas laisser la cartouche ouverte.<br />
Ne pas recharger la cartouche. N’utiliser que<br />
les cartouches de rechange <strong>Braun</strong> d’origine.<br />
• Veillez à enlever le capot de protection<br />
transparent du rasoir lorsqu’il est dans le<br />
chargeur nettoyant.<br />
A Description<br />
1 Bouton de déverrouillage<br />
2 Élément de contact<br />
3 Bouton déclencheur<br />
4 Sélecteur de mode de fonctionnement<br />
« select »<br />
5 Voyant « clean » : indicateur de nettoyage<br />
6 Voyant « charge » : indicateur de recharge<br />
7 Voyant « cartridge » : indicateur de<br />
remplacement de la cartouche<br />
8 Cartouche de nettoyage<br />
Données techniques<br />
• Consommation d’énergie<br />
3 W pendant le nettoyage<br />
7 W pendant la recharge<br />
• Alimentation : 100-240 V2/ 50 ou 60 Hz<br />
(réglage automatique)<br />
• Tension d’entrée : 12 V<br />
B Avant d’utiliser <strong>Clean</strong>&<strong>Charge</strong><br />
Pour rasoirs rechargeables seulement:<br />
Lorsque vous chargez le rasoir pour la<br />
première fois, branchez le cordon<br />
d’alimentation directement sur le rasoir,<br />
chargez-le pendant 4 heures et utilisez-le au<br />
moins une fois.<br />
Le rasoir ne peut être nettoyé ou rechargé<br />
au moyen de l’appareil <strong>Clean</strong>&<strong>Charge</strong><br />
qu’après cette première étape.<br />
Si la pile rechargeable est déchargée, choisir<br />
la fonction combinée «clean + charge»<br />
(nettoyer + recharger) au lieu de la fonction<br />
« clean » (nettoyer) seulement.<br />
Installation de la cartouche<br />
• Appuyer sur le bouton de déverrouillage<br />
(1) pour ouvrir le boîtier.<br />
• Tenir la cartouche à plat sur une surface<br />
plane et stable (une table, par ex.).<br />
Retirer délicatement le couvercle de la<br />
cartouche. Glisser la cartouche dans la base<br />
aussi loin que possible.<br />
• Fermer doucement le boîtier, en appuyant<br />
jusqu’à ce qu’il s’enclenche.<br />
Remplacement de la cartouche<br />
Après avoir appuyé sur le bouton de<br />
déverrouillage pour ouvrir le boîtier, attendre<br />
quelques secondes avant de retirer la<br />
cartouche usagée.<br />
14
Avant de jeter la vieille cartouche, s’assurer<br />
de fermer les ouvertures à l’aide du<br />
couvercle de la cartouche neuve, la vieille<br />
cartouche contenant une solution nettoyante<br />
contaminée.<br />
C Utilisation de <strong>Clean</strong>&<strong>Charge</strong><br />
• Brancher le cordon d’alimentation du rasoir<br />
dans l’appareil <strong>Clean</strong>&<strong>Charge</strong> puis dans une<br />
prise murale.<br />
Ouvrir l’élément de contact (2) en<br />
appuyant sur le bouton déclencheur (3).<br />
Après le rasage, éteindre le rasoir et le placer<br />
à l’envers dans l’appareil <strong>Clean</strong>&<strong>Charge</strong><br />
(sans retirer la grille du rasoir).<br />
• Choisir le mode de fonctionnement en<br />
appuyant sur le sélecteur (4) :<br />
clean<br />
nettoyer<br />
(environ 15 min.)<br />
clean + charge nettoyer + charger<br />
(environ 75 min.)<br />
charge<br />
charger<br />
(environ 60 min.)<br />
Les voyants correspondants s’allument.<br />
(Avec les rasoirs à cordon, seule la fonction<br />
« clean » (nettoyer) est possible.)<br />
• Abaisser l’élément de contact pour<br />
connecter le rasoir et commencer l’opération<br />
choisie.<br />
Si on ne choisit aucune fonction, c’est la<br />
fonction « clean » (nettoyer) qui s’exécute<br />
par défaut.<br />
(Modèle de rasoir 7570 seulement:<br />
l’affichage à cristal liquide indique le temps<br />
qu’il reste à la fonction, par tranches de<br />
5 minutes.)<br />
• N’interrompez pas un programme en cours,<br />
le rasoir pourrait ne pas être sec et vous ne<br />
pourriez alors pas l’utiliser.<br />
Si une interruption est tout de même<br />
nécessaire, appuyer sur le bouton<br />
d’ouverture pour libérer le rasoir.<br />
• Lorsqu’une fonction est terminée, le voyant<br />
correspondant s’éteint. Avant d’utiliser le<br />
rasoir, appuyer sur le bouton déclencheur<br />
pour le dégager.<br />
• Quand le voyant de la cartouche «cartridge »<br />
clignote, cela signifie qu’il reste du liquide<br />
pour faire encore cinq cycles de nettoyage.<br />
Après ces cinq cycles, le rendement<br />
diminue; il faut donc changer de cartouche.<br />
• Lorsque le voyant de la cartouche<br />
« cartridge » reste allumé, cela veut dire qu’il<br />
est impossible d’utiliser la fonction «clean »<br />
(nettoyer) et qu’il faut changer la cartouche.<br />
Ce n’est qu’après avoir changé la cartouche<br />
qu’on peut utiliser de nouveau la fonction<br />
« clean » (nettoyer).<br />
• Une cartouche neuve donne environ trente<br />
nettoyages. Si on l’utilise chaque jour,<br />
on devrait changer de cartouche toute les<br />
quatre semaines environ.<br />
• La solution nettoyante contient de l’alcool.<br />
Une fois la cartouche ouverte, l’alcool<br />
s’évapore naturellement. Une cartouche qui<br />
n’est pas utilisée chaque jour dure environ<br />
huit semaines.<br />
• Débrancher l’appareil quand le rasoir n’y<br />
est pas.<br />
• Pour nettoyer le boîtier, en particulier<br />
l’ouverture où repose le rasoir, utiliser un<br />
linge humide.<br />
D Accessoires<br />
Paquet de deux cartouches de rechange<br />
CCR 2 (n° 5331)<br />
Sujet à changement sans préavis.<br />
15
POUR LE CANADA SEULEMENT<br />
Garantie restreinte de deux ans<br />
Advenant un défaut de fonctionnement d’un appareil <strong>Braun</strong> survenant au<br />
cours de la période de deux ans suivant la date d’achat, en raison d’un vice<br />
de matière ou de fabrication, et pourvu que le consommateur retourne l’appareil<br />
à un centre de service après-vente agréé, <strong>Braun</strong> Canada se réserve le choix<br />
de le réparer ou de le remplacer, sans aucuns frais supplémentaires pour le<br />
consommateur.<br />
La présente garantie ne couvre pas tout produit endommagé par une chute,<br />
une modification, l’utilisation d’un courant inapproprié, un entretien ou des<br />
tentatives d’entretien par des centres de service après-vente non agréés,<br />
un usage impropre ou abusif.<br />
Exclusion de garantie : La présente garantie est la seule garantie offerte<br />
par <strong>Braun</strong> Canada. Par la présente, <strong>Braun</strong> Canada rejette toute garantie<br />
implicite à l’égard de la qualité marchande ou de l’aptitude à des fins<br />
particulières. En aucun cas <strong>Braun</strong> ne sera tenue responsable des dommages<br />
indirects résultant de l’utilisation de ce produit.<br />
16
17
Español<br />
PRECAUCION<strong>ES</strong> IMPORTANT<strong>ES</strong><br />
DE SEGURIDAD<br />
Cuando utilice productos eléctricos, deben seguirse siempre ciertas<br />
precauciones de seguridad, incluyendo las siguientes:<br />
Lea cuidadosamente las instrucciones antes de usar este aparato.<br />
PELIGRO<br />
Para reducir el riesgo de una descarga eléctrica:<br />
1. No tome el aparato si éste se ha caído al agua.<br />
Desconéctelo inmediatamente.<br />
2. No lo utilice mientras se está bañando.<br />
3. No coloque o guarde el aparato en algún lugar de donde pueda caerse<br />
al lavabo o a la tina.<br />
No lo coloque en el agua u otro líquido, ni lo deje caer en ellos.<br />
4. Desconecte siempre el aparato del enchufe excepto, cuando se este<br />
cargando.<br />
5. Desconecte el aparato antes de limpiarlo.<br />
PARA USO DOM<strong>ES</strong>TICO<br />
CONSERVE<br />
<strong>ES</strong>TAS INSTRUCCION<strong>ES</strong><br />
18
ADVERTENCIA<br />
Para reducir el riesgo de quemaduras, descarga eléctrica, fuego o lesiones<br />
personales:<br />
1. Se debe supervisar detenidamente el uso de este aparato cuando sea<br />
empleado por niños o cerca de ellos.<br />
2. Este aparato debe ser utilizado solo y únicamente para los fines descritos<br />
en este manual. No utilice accesorios que no hayan sido recomendados<br />
por el fabricante.<br />
3. El aparato no debe ser expuesta a temperaturas inferiores a 0 °C ni<br />
superiores a + 40 °C, durante periodos largos de tiempo. Conserve el<br />
aparato y el cable siempre secos. No lo tome con las manos mojadas.<br />
No lo guarde en ambientes húmedos. Para evitar daños, no enrolle<br />
el cable alrededor del aparato. Es importante controlar periódicamente<br />
daños en el cable, particularmente en los extremos donde entra la<br />
clavija.<br />
4. Nunca use este aparato si el cable ha sufrido algún daño, si no esta<br />
funcionando adecuadamente, si el aparato esta dañado o lo ha dejado<br />
caer, o si lo ha sumergido en agua. Lleve su aparato a cualquier Centro<br />
de Servicio <strong>Braun</strong> para su revisión y reparación.<br />
5. Mantenga el cable lejos de superficies calientes.<br />
6. Nunca inserte ningún tipo de objeto en las ranuras del aparato.<br />
7. No usar al aire libre u operar cuando se estén usando productos en<br />
aerosol o cuando se administra oxígeno.<br />
8. Conecte siempre primero el cable al aparato y después la clavija al enchufe.<br />
Para desconectarlo apague el aparato y luego desenchufe la clavija.<br />
19
El <strong>Braun</strong> <strong>Clean</strong>&<strong>Charge</strong> se ha desarrollado<br />
para la limpieza, carga y depósito de su<br />
afeitadora. Limpie su afeitadora diariamente<br />
en el <strong>Clean</strong>&<strong>Charge</strong>.<br />
Durante el proceso automático de limpieza,<br />
la afeitadora se enciende y se apaga durante<br />
intervalos para conseguir los mejores<br />
resultados de limpieza. Como el líquido<br />
especialmente formulado para la limpieza<br />
contiene una pequeña cantidad de aceite,<br />
además del proceso de limpieza también<br />
satisface las necesidades de lubricación<br />
de la afeitadora.<br />
Importante<br />
• Utilice solo el cable de conexión a la red<br />
que se adjunta con la máquina.<br />
• Para evitar cualquier fuga del líquido de<br />
limpieza, sitúe el aparato sobre una<br />
superficie lisa y estable o utilice el soporte de<br />
pared que se incluye ( incluido en algunos<br />
modelos ). No vuelque, mueva o transporte<br />
el aparato si el cartucho de limpieza está<br />
instalado.<br />
• No sitúe el aparato en vitrinas con espejos,<br />
en radiadores, ni en superficies pulidas<br />
o lacadas. No exponga la afeitadora a la<br />
luz del sol.<br />
• Este aparato contiene líquido<br />
altamente inflamable. Manténgalo<br />
alejado de fuentes de ignición. No<br />
fume. Manténgalo alejado del alcance<br />
de los niños. No deje el cartucho abierto.<br />
No rellene el cartucho. Utilice sólo el<br />
cartucho original de <strong>Braun</strong>.l<br />
• Cuando limpie la afeitadora extraiga el<br />
protector de lámina previamente.<br />
A Descripción<br />
1 Botón de extracción para la sustitución<br />
de cartuchos<br />
2 Montura de contacto<br />
3 Botón de extracción<br />
4 Selector del modo operativo «select»<br />
5 Luz «clean»:<br />
indicador de proceso de limpieza<br />
6 Luz «charge»:<br />
indicador de proceso de carga<br />
7 Luz «cartridge»:<br />
indicador de repuesto de cartuchos<br />
8 Cartucho de limpieza<br />
Especificaciones técnicas<br />
• Potencia nominal:<br />
3 W en proceso de limpieza<br />
7 W en proceso de carga<br />
• Tensión de alimentación a través de<br />
conexión a red: 100-240 V2<br />
• Frecuencia nominal: 50 ó 60 Hz<br />
(adaptación automática)<br />
• Voltaje de la afeitadora: 12 V<br />
B Antes de usar el <strong>Clean</strong>&<strong>Charge</strong><br />
Sólo para afeitadoras recargables:<br />
Para la primera carga de la afeitadora<br />
conecte el cable de alimentación<br />
directamente a la afeitadora, cárguela<br />
durante 4 horas y aféitese al menos<br />
una vez.<br />
Sólo entonces la afeitadora se puede limpiar<br />
o recargar en el <strong>Clean</strong>&<strong>Charge</strong>.<br />
Si la batería recargable se descarga,<br />
seleccione el programa combinado «clean +<br />
charge» (limpieza + carga) en lugar del<br />
programa «clean» (limpieza).<br />
Instalación del cartucho<br />
• Presione el botón de extracción (1) para abrir<br />
la carcasa exterior.<br />
• Mantenga el cartucho sobre una superficie<br />
estable y lisa (ej.: una mesa).<br />
Retire la tapa del cartucho. Deslice el<br />
cartucho hacia el interior de la base.<br />
• Cierre con cuidado la carcasa exterior hasta<br />
que quede perfectamente ajustada.<br />
Sustitución del cartucho<br />
Tras haber presionado el botón de<br />
extracción para abrir la carcasa exterior<br />
espere unos segundos antes de retirar<br />
el cartucho usado.<br />
20
Antes de tirar el cartucho usado asegúrese<br />
de cerrar sus orificios de salida usando la<br />
tapa ya que el cartucho usado contiene una<br />
solución limpiadora contaminante.<br />
C Utilización de su <strong>Clean</strong>&<strong>Charge</strong><br />
• Conecte su <strong>Clean</strong>&<strong>Charge</strong> al cable de<br />
alimentación a la red. Abra la montura<br />
de contacto (2) presionando el botón de<br />
extracción (3). Después del afeitado, apague<br />
la afeitadora y colóquela de forma invertida<br />
en el interior del <strong>Clean</strong>&<strong>Charge</strong> (sin haber<br />
retirado la lámina).<br />
• Seleccione alternativamente los siguientes<br />
modos operativos (4):<br />
clean<br />
limpieza<br />
(alrededor de 15 minutos)<br />
clean + charge limpieza + carga<br />
(alrededor de 75 minutos)<br />
charge carga<br />
(alrededor de 60 minutos)<br />
Las correspondientes luces indicadoras<br />
se irán encendiendo. (Con las afeitadoras<br />
a cable, solo la función «clean» puede ser<br />
seleccionada.)<br />
• Deslice hacia abajo la montura de contacto<br />
para conectar la afeitadora y comenzar<br />
el programa seleccionado. Si no se<br />
selecciona ningún programa la función<br />
«clean» se conectará automáticamente.<br />
(Sólo para el modelo de afeitadora 7570:<br />
La pantalla de cristal líquido muestra<br />
el tiempo restante del programa en curso<br />
a intervalos de 5 minutos.)<br />
• No detenga un programa en curso ya<br />
que la afeitadora aún no está seca ni en<br />
condiciones de uso. No obstante si la<br />
interrupción es necesaria, presione el<br />
botón de extracción.<br />
• Después de que cada programa haya<br />
concluido, la luz correspondiente se<br />
apagará. Antes del siguiente afeitado,<br />
presione el botón de extracción para<br />
retirar la afeitadora.<br />
• Cuando la luz «cartridge» comienza<br />
a parpadear indica que tan solo le queda<br />
fluido para otros 5 ciclos de limpieza.<br />
Después de estos 5 ciclos la acción<br />
limpiadora disminuirá y el cartucho debe ser<br />
sustituido.<br />
• Cuando la luz «cartridge» aparece encendida<br />
constantemente, la función de limpieza se<br />
encuentra bloqueada y un nuevo cartucho<br />
debe ser instalado.<br />
Sólo entonces se puede realizar un nuevo<br />
ciclo de limpieza.<br />
• Un cartucho de limpieza debe ser suficiente<br />
para alrededor de 30 ciclos. Con el uso<br />
diario, el cartucho de limpieza se debería<br />
sustituir aproximadamente cada 4 semanas.<br />
• La solución de limpieza higiénica del<br />
cartucho contiene alcohol, por lo que una<br />
vez abierto, se irá evaporando de forma<br />
natural lentamente. Cada cartucho de<br />
limpieza, si no se usa a diario, se debería<br />
sustituir aproximadamente cada 8 semanas.<br />
• No deje el aparato conectado si la afeitadora<br />
no está insertada.<br />
• Limpie la carcasa exterior de vez en cuando<br />
con un trapo húmedo, especialmente<br />
el orificio donde descansa la afeitadora.<br />
D Accesorios<br />
Cartucho CCR 2 (# 5331)<br />
Sujeto a cambios sin previo aviso.<br />
Importado por:<br />
<strong>Braun</strong> de México y Compañía, de CV,<br />
Calle Cuatro No. 4,<br />
Fraccionamiento Industrial Alce Blanco,<br />
Naucalpan de Juárez, Edo. de México,<br />
C.P. 53370, Tel. (05) 387-19-00<br />
R.F.C. BME 830701 4Z0<br />
21
SÓLO PARA <strong>MEX</strong>ICO<br />
2 años de garantía limitada<br />
<strong>Braun</strong> de México garantiza que este producto está libre de cualquier defecto<br />
de fabricación o mano de obra por un período de un año a partir de la fecha<br />
de compra. Si llegara a mostrar algún defecto, <strong>Braun</strong> de México, salvo propia<br />
opinión, reparará o reemplazará el aparato sin cargo alguno.<br />
1. Devuelva el aparato por correo (gastos de envío y seguro pagados) indicando<br />
las razones de la devolución a: Departamento de Servicio, <strong>Braun</strong> de México<br />
y Cía. de C. V., Calle 4 No. 4, Fracc. Industrial Alce Blanco, C. P. 53370,<br />
Naucalpan, Edo. de Méx., o a alguno de nuestros centros de servicio<br />
autorizados.<br />
2. Adjunte nota de compra fechada.<br />
Esta garantía no <strong>amp</strong>ara defectos ocasionados por: accidente, falta de uso,<br />
abuso, falta de aseo, agua, pizotones, mal uso, intervención de centros de<br />
servicio no autorizados o falta de mantenimiento.<br />
TODAS LAS GARANTIAS IMPLICITAS INCLUYENDO CUALQUIER GARANTIA<br />
IMPLICITA COMERCIABLE O ADECUACION PARA CUALQUIER PROPOSITO<br />
PARTICULAR <strong>ES</strong>TAN LIMITADAS A UNA DURACION DE 2 AÑOS A PARTIR<br />
DE LA FECHA DE COMPRA. DE NINGUNA MANERA BRAUN DE <strong>MEX</strong>ICO<br />
SERA R<strong>ES</strong>PONSABLE POR DAÑOS INDIRECTOS QUE R<strong>ES</strong>ULTEN DEL<br />
USO DE <strong>ES</strong>TE PRODUCTO.<br />
22


