Create successful ePaper yourself
Turn your PDF publications into a flip-book with our unique Google optimized e-Paper software.
English<br />
9<br />
1<br />
2<br />
3<br />
4<br />
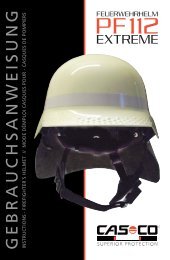
Thank you very much <strong>for</strong> choosing a helmet from <strong>CASCO</strong>. Protective <strong>helmets</strong> are personal<br />
protection equipment and they help to prevent head injuries or at least to significantly reduce them.<br />
Please spare a little time to read the following instructions including on how to adjust and wear your<br />
helmet. These are <strong>for</strong> your safety and <strong>for</strong> maximum possible com<strong>for</strong>t in wear.<br />
A: HELMET FIT<br />
1. Choosing the right helmet size<br />
A <strong>CASCO</strong> helmet can only protect you if it is worn correctly. Measure the circumference of your<br />
head at the widest point and then select the helmet size that fits. Always put on the helmet so that<br />
the size adjustment is at the back. The helmet must feel secure and com<strong>for</strong>table on the head. As<br />
long as it is worn correctly, this helmet is designed to stay on your head in an accident. To further<br />
improve how it sits please use the built-in size adjustment system.<br />
2. Using the size adjustment system<br />
A good fit is a precondition <strong>for</strong> the best possible protection. For that reason your helmet is equipped<br />
with one of the following size adjustment systems:<br />
press<br />
pull<br />
+ loosen - tighten<br />
1.<br />
HEAD RING WITH ZIP CLOSURE<br />
In the part of the headband level with the nape of the neck<br />
there is located a Zip closure. Pressing on the pin releases<br />
the adjustment mechanism and you can adjust the head size<br />
on a continuous scale. Reduce = push together; increase =<br />
press the pin and pull apart<br />
HEAD RING WITH<br />
DISK-FIT SYSTEM<br />
The adjustment of the head ring to the size of your head is<br />
made by means of the turning closure located at the nape of<br />
the neck. Turning it to the left opens or loosens the head ring.<br />
Turning it clockwise to the right tightens the head ring on a<br />
continuous scale.<br />
HEAD RING WITH<br />
DISK-FIT-COMFORT SYSTEM<br />
The adjustment of the head ring to the size of your head is<br />
made by means of the turning closure located at the nape of<br />
the neck. Turning to the left opens or loosens the head ring.<br />
Turning it clockwise to the right tightens the head ring on a<br />
continuous scale.<br />
The Disk-Fit-Com<strong>for</strong>t System is equipped with a height<br />
adjustment mechanism. So that you can get the most<br />
com<strong>for</strong>table helmet fit you can push the adjustment system up<br />
inside the helmet. To set it lower, hold the level (1) inside the<br />
helmet pressed while first pushing the adjustment system up to<br />
unfix then pulling on it.<br />
3. The correct helmet position<br />
Ensure helmet is always horizontally placed on your head, so that your<br />
<strong>for</strong>ehead is protected, but your vision not impaired. Your helmet should<br />
also be correctly positioned on the back of your head.<br />
4. Strap adjustment<br />
Your <strong>CASCO</strong> helmet has a strap adjustment system with a click-action<br />
buckle. Once adjusted, it can be quickly opened and closed again<br />
without further adjustment. After you’ve adjusted the helmet <strong>for</strong> your<br />
head size, put the helmet on in the right position (Diagram 5) and close<br />
the click-action buckle (Diagram 6). The straps must be tight and they<br />
must be of equal length directly underneath your ears at the point where<br />
they enter the strap adjustment buckle. Check the tightness of the straps<br />
and adjust too loose or too tight straps as follows:<br />
DOING UP STRAPS WITH A DROP-LOCK ADJUSTMENT<br />
BUCKLE<br />
If your helmet is fitted with a Drop Lock adjustment buckle, you open<br />
and close it by turning the position screw in order to adjust it.<br />
CAUTION: An open adjustment buckle may lead to displacement of the<br />
helmet in an accident and thereby lessen the helmet’s protective effect.<br />
Loop the left strap adjustment buckle (1) under your left ear whilst<br />
tightening the left neck strap (2) by pulling on the right neck strap (3).<br />
The left strap adjustment buckle should be positioned directly underneath<br />
your ear. Now close the left Drop-Lock strap adjustment buckle. Also<br />
position the right strap adjustment buckle (4) directly under your right ear.<br />
At this point the neck strap will be tightened directly with one of the two<br />
chin straps (5). Close the buckle lock and tighten the chin strap by<br />
pulling on the two free strap ends (6), until they sit com<strong>for</strong>tably under the<br />
chin. (Loosening the straps works in reverse order by loosening and<br />
pushing). The loose ends of the straps must be fed through the rubber<br />
O-Ring.<br />
DOING UP STRAPS WITH AN EASY-LOCK<br />
STRAP ADJUSTER<br />
If your helmet is equipped with an Easy-Lock strap adjustment buckle<br />
you open or close it by means of the clip lever (1) in order to make the<br />
adjustment; hold the strap adjustment buckle slightly outwards whilst<br />
doing this.<br />
CAUTION: An open strap adjustment buckle may lead to displacement of<br />
the helmet in an accident and thereby lessen the helmet’s protective<br />
effect.<br />
3.<br />
open<br />
4.<br />
push<br />
press<br />
5.<br />
close<br />
2.<br />
correct<br />
wrong<br />
pull<br />
1.<br />
1.<br />
6.<br />
5<br />
6<br />
7<br />
8<br />
9<br />
10