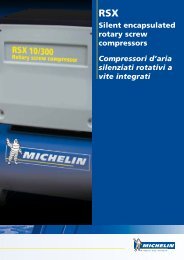
GM - TR - VX - AB - CCS
GM - TR - VX - AB - CCS
GM - TR - VX - AB - CCS

Create successful ePaper yourself
Turn your PDF publications into a flip-book with our unique Google optimized e-Paper software.
GB20ELEC<strong>TR</strong>ICAL CONNECTIONSingle-phase compressors are supplied with an electrical cable and atwo-pole + earth plug. The compressor must be connected to a groundedpower socket (fig.12).Three-phase compressors (L1+L2+L3+PE) must be installed by aspecialised technician. Three-phase compressors are supplied withouta plug. Connect a plug, with screw-on grommet and securing collar(fig.13), to the cable, consulting the table below.HP kW Power supply volt/ph Plug model2 – 3 – 4 1.5 – 2.2 – 3 220/380/3230/400/3 16A 3 pole + ground5.5 – 7.5 – 10 4 – 5.5 – 7.5 220/380/3230/400/3 32A 3 pole + groundNOTE: Compressors installed on the 500 lt tank, with capacity of HP7.5/55 kW and HP10/7.5 kW can be supplied a star/triangle starting controlunit, whereas the TANDEM (n. 2 pumping elements on the same tank)are supplied with a timed control unit for staggered starting of the twopumping elements.Installation instructions:– Secure the control unit box on a wall or on a fixed support, and provideit with a power cable with plug, of a diameter in proportion to itslength.– Any damage caused by incorrect connections of the power line tothe mains, automatically excludes warranty of electrical parts. To avoidconnection errors, we advise you to contact a specialised technician.IMPORTANT:Never use the ground socket instead of the neutral wire. The groundconnection must be made to meet safety standards(EN 60204).The plug of the power cable must not be used as a switch, but must befitted in a power socket controlled by a suitable differential switch (thermalbreaker).STARTINGCheck that the mains power matches that indicated on the electricaldata-plate (fig.14) – the permissible tolerance range is +/-5%. Whenfirst starting compressors operating on 3-phase voltage, check therotation direction of the cooling fan by comparing it with the direction ofthe arrow on the belt guard or on the protective housing. In the SILENTcompressor, check if the air flows is in the direction illustrated in fig.21A.Turn or press into position “0” (according to the type of pressure switchfitted on the appliance) the knob located on the upper section (fig. 15).Fit the plug in the power socket (fig. 12 - 13) and start the compressor,turning the pressure switch knob into position “I”. The compressor isfully automatic, and is controlled by the pressure switch which stops itwhen tank pressure reaches maximum value and restarts it when it fallsto minimum value. The pressure difference between maximum andminimum values is usually about 2 bar (29 psi).E.g.: the compressor stops when it reaches 8 bar (116 psi – maximumoperating pressure) and restarts automatically when the pressure insidethe tank drops to 6 bar (87 psi).After connecting the compressor to the power line, load it to maximumpressure and check exactly how the machine is operating.COMPRESSORS WITH D STARTINGCON<strong>TR</strong>OL UNIT (fig. 16)Fit the plug in the power socket (fig. 13) and turn the pressure switch toposition “I” (ON) (fig. 17). Turn the master power switch “A” on the controlunit to position I – power On is signalled by white indicator-light “E”going on. Turn switch “B” to position 1 to start the compressor. If theYsolenoid-valve indicator-light “D” and the motor (C) indicator-light (C) goon in that order, this means the machine is operating perfectly (fig. 18).TANDEM COMPRESSORS WITH TIMEDCON<strong>TR</strong>OL UNIT (fig. 17)Fit the plug in the power socket (fig. 13) and turn the pressure switch toposition “I” (ON). Turn the master power switch “A” on the control unit toposition I – power On is signalled by white indicator-light “E” going on.Turn switch “B” to start the compressor.Pos. 1 pumping element n. 1 only is operatingPos. 2 pumping element n. 2 only is operatingPos. 3 both pumping elements are operating simultaneously, at staggeredstarting times.The compressor is fully automatic, and is controlled by the pressureswitch which stops it when tank pressure reaches maximum value andrestarts it when it falls to minimum value.NOTE: The head/cylinder/delivery tube unit can reachhigh temperatures. Take care when working near these parts, and donot touch them to avoid possible burns (fig. 18 - 19).IMPORTANTThe electro-compressors must be connected to a power socket protectedby a suitable differential switch (thermal-breaker). The motor of <strong>GM</strong>-<strong>TR</strong>compressors is equipped with an automatic thermal breaker locatedinside the winding – this stops the compressor when motor temperaturereaches excessively high values.If the breaker is tripped, the compressors restarts automatically after10 to 15 minutes. The motors of compressor models <strong>VX</strong> are suppliedwith a manually resetting automatic amperometric thermal-breaker,located outside the terminal board cover.When the breaker is tripped, wait for a few minutes and then reset thebreaker manually (fig. 20).The motors of the <strong>AB</strong> series compressors are supplied with a manuallyresetting amperometric thermal-breaker, located on the terminal boardcover. When the breaker is tripped, wait for a few minutes and thenreset the breaker manually (fig. 20).The safety davice is automatic in three-phase and silent compressors.When the thermal-breaker is tripped, the pressure switch is released to“0” (OFF) position.Wait for a few minutes and return the pressure switch to “I” (ON) position(with the exception of models: <strong>AB</strong> 100/245-335 Three-phase - <strong>AB</strong> 150/245-335 Three-phase - <strong>AB</strong> 200/245-335 Three-phase). Forcompressors supplied with a control unit, the thermal-breaker is installedinside the control unit. When the thermal-breaker is tripped, observethe following procedure (fig. 22):• Turn the switches on the control unit cover to position “0”, open thecover and press push-button 1 of the thermal-breaker. Close thecover of the control unit and restart the compressor, observing theoperations described in the paragraph “Starting compressors withcontrol unit”.The same instructions apply to compressors powered at 60 Hz.ADJUSTING OPERATING PRESSURE (fig. 23)You do not have to use the maximum operating pressure at all times. Onthe contrary, the pneumatic tool being used often requires less pressure.On compressors supplied with a pressure reducer, operating pressuremust be correctly adjusted.Release the pressure reducer knob by pulling it up, adjust pressure tothe required value by turning the knob clockwise to increase pressureand anti-clockwise to reduce it. When you have obtained optimumpressure, lock the knob by pressing it downward (fig. 23). For pressurereducers equipped without a pressure gauge, the set pressure can beseen on the graduated scale located on the reducer body.