schema montaggio copertina WHITE.ai - MINOTTI
schema montaggio copertina WHITE.ai - MINOTTI
schema montaggio copertina WHITE.ai - MINOTTI

You also want an ePaper? Increase the reach of your titles
YUMPU automatically turns print PDFs into web optimized ePapers that Google loves.
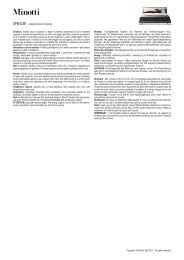
<strong>WHITE</strong>DESIGN: RODOLFO DORDONISCHEMA DI MONTAGGIOASSEMBLY TECHNICAL DIAGRAMM
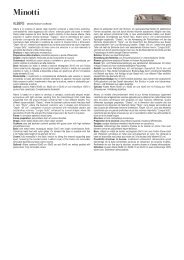
<strong>WHITE</strong>DESIGN: RODOLFO DORDONIBADCABABD- Estrarre i diversi elementi evidenziatidall’imballaggio top per il <strong>montaggio</strong> degli stessi.- Remove the various parts from the toppackaging for assembly.- Prendere i perni “A” e inserirli nei fori e avvitarli.- Take joining bolts “A” and screw into holes.- Serrare bene ciascun perno “A” utilizzando la chiave abrugola in dotazione “B”.- Tightly screw each joining bolt “A” using the Alleykey “B” provided.- Per garantire un perfetto fissaggio dei top e deglischienali sofà, serrare con la chiave a brugola indotazione “B” le manopole “D”.- To ensure that the sofa tops and backrests aresecured perfectly tighten the knobs “D” with thespanner “B” that has been provided.- Per l’unione di diversi elementi, utilizzare i ganci acremagliera fissati sotto i fusti, ed estrarli come infigura.- To join the various parts, use the rack locks fixedunder the frames, and pull them out as shown inthe picture.- Dopo aver estratto i ganci a cremagliera, avvicinare idiversi elementi per il loro fissaggio.- After removing the rack hooks, bring the variousparts closer together to secure them.BCA- Dettaglio di come utilizzare la chiave a brugola “B” per ilserraggio definitivo del perno “A” nei top. Inserire poi idistanziali in pvc “C” da interporre tra top e rivestimentodel divano.- Det<strong>ai</strong>l of how to use the Allen key “B” to securejoining bolt “A” in the top. Insert the PVC spacers “C”between the sofa top and upholstery.- Inserire i perni appena montati nei fori predisposti nelrivestimento del divano.- Insert the joining bolts that have just been assembledinto the appropriate holes in the sofa upholstery.- Lo stesso sistema di fissaggio viene utilizzato per glischienali dei sofà.- Use the same securing system for the sofabackrests.- Il sistema di fissaggio illustrato per i top, è ilmedesimo per i braccioli e gli schienali sofà. Quandonecessita lo s<strong>montaggio</strong> di questi elementi persfoderarli o per cambiarli di posizione come nelleimmagini di seguito, i passaggi sono gli stessi del<strong>montaggio</strong> ma da realizzare in sequenza inversa.- The securing system shown for the tops, is thesame for the sofa arm and back rests. When one ofthese parts needs to be removed to take off thecover or to change its position as in the picturesbelow, the steps are the same as for assembly butin the opposite order.- I passaggi seguenti evidenziano la possibilità diinvertire il posizionamento del bracciolo e del top.- The following steps show how the position of thearmrest and top can be inverted.- Il primo step è lo s<strong>montaggio</strong> delle manopole “D”, poisi sollevano semplicemente gli elementi e si spostanodi posizione.- First remove knobs “D”, then simply lift theparts and change their position.CCD- Nella foto sono evidenziati i distanziali “C” posti tra tope divano. Inserire il top con delicatezza parallelamentealla seduta e con la parte del top sempre a sbalzoverso l’esterno.- The photo shows the spacers “C” between the topand sofa. Carefully insert the top parallel to the seatand with the top part always jutting outwards.- Avvitare le manopoline in dotazione “D” nei foricorrispondenti sotto il divano (medesima operazione per ilfissaggio degli schienali sofà).- Screw the knobs “D” that have been provided into theappropriate holes under the sofa (repeat the operationfor the sofa backrests).- Dopo aver posizionato gli elementi come desiderato, siripetono i passaggi per il serraggio con le manopole indotazione “D”.- After placing the parts in the desired position,repeat the steps for securing with the knobs “D” thathave been provided.- Ove predisposti, la regolazione dei piedini tecnicidi servizio, avviene semplicemente avvitando esvitando il gommino come in figura.- When provided for, the technical feet can beadjusted by simply screwing and unscrewingthe rubber glide as shown in the picture.