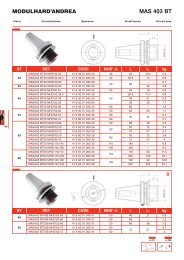
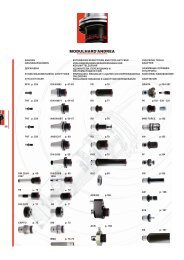
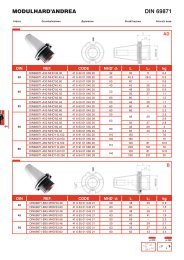
modulhard'andrea
modulhard'andrea
modulhard'andrea

Create successful ePaper yourself
Turn your PDF publications into a flip-book with our unique Google optimized e-Paper software.
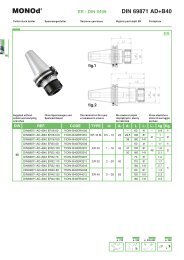
TRM<br />
Testarossa<br />
Testarossa<br />
Микрометрические<br />
расточные головки<br />
Testarossa<br />
Testarossa<br />
Testarossa<br />
TRM<br />
Ø 2.5 ~ 500<br />
TRM 16<br />
Ø 18 ~ 23<br />
TRM 20<br />
Ø 22 ~ 29<br />
TRM 25<br />
Ø 28 ~ 38<br />
TRM 32<br />
Ø 35.5 ~ 50<br />
TRM 40<br />
Ø 48 ~ 63<br />
TRM 50<br />
Ø 2.5 ~ 108<br />
TRM 50/63<br />
TRM 63/63<br />
Ø 6 ~ 125<br />
TRM 50/80<br />
TRM 80/80<br />
Ø 6 ~ 160<br />
TRM 80/125<br />
Ø 36 ~ 500<br />
2 m<br />
121<br />
IMPORTANT NOTE<br />
- Take care that the tools<br />
and tool holders are solidly<br />
blocked on the slide.<br />
The only manoeuvring or<br />
adjusting screws to be used<br />
for the operations for the<br />
heads are those listed in the<br />
Components section.<br />
- The screws not listed in the<br />
Components section should<br />
not be touched in order not<br />
to compromise the correct<br />
operation of the heads.<br />
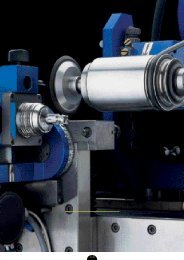
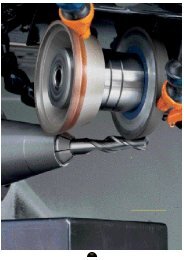
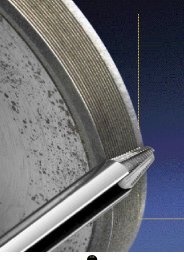
- Bit holders and boring bars<br />
should be assembled with<br />
the insert turned on the<br />
same direction as the screw<br />
(5) (see photo).<br />
- Remember to loosen the<br />
screw (5) before adjusting<br />
the vernier setting (4). Block<br />
the screw (5) at the end of<br />
the adjustment.<br />
The micrometric<br />
adjustment of POSITIVE<br />
Is carried out by turning<br />
the vernier (4) counter<br />
clockwise.<br />
The use of coolant on the<br />
TRM heads should be 40<br />
BAR max.<br />
WICHTIGER HINWEIS<br />
- Sicherstellen, dass Werkzeuge<br />
ВНИМАНИЕ<br />
- Убедитесь, что инструменты<br />
UWAGA<br />
und Plattenhalter fest auf или державки жестко<br />
dem Schlitten angebracht<br />
закреплены в салазках. В<br />
качестве маневровых или<br />
sind. Nur die Verstell- und регулировочных винтов<br />
Einstellschrauben, die wichtig могут быт использованы<br />
für den Einsatz des Kopfes<br />
sind, sind unter dem Punkt<br />
Komponenten aufgeführt.<br />
только перечисленные в<br />
разделе «Компоненты».<br />
- Не прикасайтесь к винтам,<br />
- Um die Funktionsweise<br />
не перечисленным в разделе<br />
«Компоненты», чтобы<br />
des Kopfes nicht zu<br />
не нарушить внутренних<br />
beeinträchtigen, dürfen заводских регулировок<br />
Schrauben, die nicht aufgeführt и тем самым точности<br />
sind, auch nicht verstellt<br />
werden.<br />
расточных<br />
и штанг.<br />
головок<br />
- Die Wendeschneidplatten - Направление режущей<br />
der Plattenhalter und<br />
пластины у кассет и оправок<br />
должно соответствовать<br />
Bohrstangen müssen in der маркировке, выбитой на<br />
gleichen Richtung, in der die салазках головки.<br />
Klemmschraube (5) sitzt,<br />
- Всегда ослабляйте<br />
montiert werden.<br />
зажимной винт (5) перед<br />
установкой значения<br />
нониуса (4). Затяните<br />
винт (5) после окончания<br />
регулировки.<br />
- Sicherstellen, dass die<br />
Klemmschraube (5) vor einer<br />
Schlitteneinstellung über die<br />
Skalenschraube (4) gelöst wird.<br />
Klemmschraube (5) nach dem<br />
Einstellen wieder festziehen.<br />
Die positive, mikrometrische<br />
Zustellung erfolgt durch<br />
Drehung der Skalenschraube<br />
(4) gegen den Uhrzeigersinn.<br />
Bei Verwendung von Kühlmittel<br />
bei den TRM-Köpfen darf der<br />
Druck maximal 40 Bar betrage<br />
Микрометрическая<br />
настройка в сторону<br />
увеличения размера<br />
осуществляется<br />
поворотом нониуса против<br />
часовой стрелки.<br />
Использование СОЖ в<br />
головках TRD должно<br />
осуществляться при<br />
максимальном давлении<br />
40BAR.<br />
- Upewni si czy narzdzie<br />
lub imak narzdziowy s<br />
dobrze zablokowane na<br />
gowicy. Naley posugiwa<br />
si jedynie rubami<br />
mocujcymi wytaczada<br />
lub regulujcymi gowice<br />
znajdujcymi si w dziale<br />
„Komponenty”<br />
- ruby nie wystpujce w<br />
dziale „Komponenty” nie<br />
mog by stosowane, gdy<br />
grozi to uszkodzeniem<br />
wytaczade i gowic<br />
mikrometrycznych.<br />
- Noe i wytaczaki naley<br />
montowa z pytk obrócon<br />
w t sam stron, co ruba<br />
(5) (zob. zdjcie).<br />
- Naley pamita o<br />
poluzowaniu ruby (5) przed<br />
wykonaniem regulacji z<br />
wykorzystaniem noniusza<br />
(4). Naley zablokowa rub<br />
(5) po zakoczeniu regulacji<br />
DODATNI regulacj<br />
mikrometryczn<br />
(zwikszenie rednicy<br />
wytaczanej) uzyskuje<br />
si obracajc noniusz w<br />
kierunku przeciwnym do<br />
ruchu wskazówek<br />
zegara (4).<br />
Cinienie chodziwa<br />
podawanego przez gowic<br />
TRM nie moe by wysze<br />
ni 40 BAR.<br />
ATTENZIONE<br />
- Assicurarsi che utensili<br />
e portautensili siano<br />
saldamente bloccati sulla<br />
slitta. Le viti di manovra<br />
o di regolazione utili per<br />
l’impiego delle testine sono<br />
solo quelle indicate nel<br />
punto Componenti.<br />
- Le viti non indicate nel<br />
punto Componenti non<br />
devono essere toccate per<br />
non compromettere il buon<br />
funzionamento delle testine.<br />
- Seggi e bareni devono<br />
essere montati con l’inserto<br />
rivolto dalla stessa parte del<br />
nonio (4) (vedere foto).<br />
- Ricordarsi di allentare la vite<br />
(5) prima di eseguire una<br />
regolazione del nonio (4).<br />
Bloccare la vite (5) a fine<br />
regolazione.<br />
La regolazione<br />
micrometrica POSITIVA si<br />
esegue ruotando in senso<br />
antiorario il nonio (4).<br />
L'impiego del refrigerante<br />
sulle testine TRM deve<br />
essere max. 40 BAR.