Istruzioni COURTCIRCUIT.pdf - Danese Milano
Istruzioni COURTCIRCUIT.pdf - Danese Milano
Istruzioni COURTCIRCUIT.pdf - Danese Milano
You also want an ePaper? Increase the reach of your titles
YUMPU automatically turns print PDFs into web optimized ePapers that Google loves.
IT<br />
EN<br />
Avvertenze<br />
La sicurezza elettrica di questo apparecchio è garantita<br />
con l’uso appropriato di queste istruzioni. Pertanto<br />
è necessario conservarle. Prima di ogni operazione<br />
sull’apparecchio disinserire la tensione di rete.<br />
• SORGENTE<br />
30 W ( 90 LED x 0,34 W)<br />
La sorgente è caratterizzata da una elevata vita utile. Nel<br />
caso fosse necessaria la sostituzione del led, rivolgersi<br />
esclusivamente al centro assistenza DANESE.<br />
<strong>Istruzioni</strong> di montaggio<br />
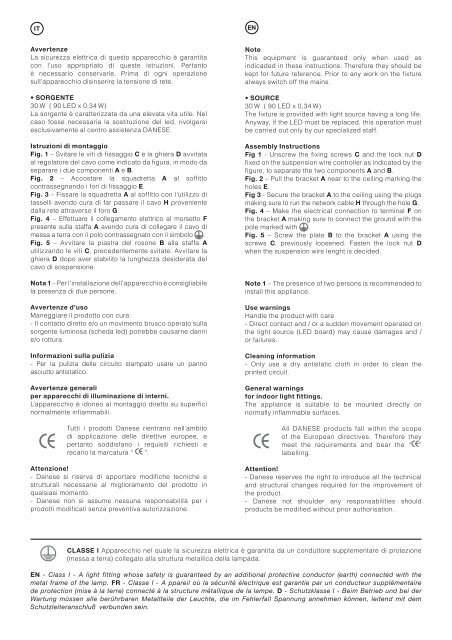
Fig. 1 – Svitare le viti di fissaggio C e la ghiera D avvitata<br />
al regolatore del cavo come indicato da figura, in modo da<br />
separare i due componenti A e B.<br />
Fig. 2 – Accostare la squadretta A al soffitto<br />
contrassegnando i fori di fissaggio E.<br />
Fig. 3 – Fissare la squadretta A al soffitto con l’utilizzo di<br />
tasselli avendo cura di far passare il cavo H proveniente<br />
dalla rete attraverso il foro G.<br />
Fig. 4 – Effettuare il collegamento elettrico al morsetto F<br />
presente sulla staffa A avendo cura di collegare il cavo di<br />
messa a terra con il polo contrassegnato con il simbolo .<br />
Fig. 5 – Avvitare la piastra del rosone B alla staffa A<br />
utilizzando le viti C, precedentemente svitate. Avvitare la<br />
ghiera D dopo aver stabilito la lunghezza desiderata del<br />
cavo di sospensione.<br />
Nota 1 – Per l’installazione dell’apparecchio è consigliabile<br />
la presenza di due persone.<br />
Avvertenze d’uso<br />
Maneggiare il prodotto con cura:<br />
- Il contatto diretto e/o un movimento brusco operato sulla<br />
sorgente luminosa (scheda led) potrebbe causarne danni<br />
e/o rottura.<br />
Informazioni sulla pulizia<br />
- Per la pulizia delle circuito stampato usare un panno<br />
asciutto antistatico.<br />
Avvertenze generali<br />
per apparecchi di illuminazione di interni.<br />
L’apparecchio è idoneo al montaggio diretto su superfici<br />
normalmente infiammabili.<br />
Tutti i prodotti <strong>Danese</strong> rientrano nell’ambito<br />
di applicazione delle direttive europee, e<br />
pertanto soddisfano i requisiti richiesti e<br />
recano la marcatura “ ”.<br />
Attenzione!<br />
- <strong>Danese</strong> si riserva di apportare modifiche tecniche e<br />
strutturali necessarie al miglioramento del prodotto in<br />
qualsiasi momento.<br />
- <strong>Danese</strong> non si assume nessuna responsabilità per i<br />
prodotti modificati senza preventiva autorizzazione.<br />
Note<br />
This equipment is guaranteed only when used as<br />
indicaded in these instructions. Therefore they should be<br />
kept for future reference. Prior to any work on the fixture<br />
always switch off the mains.<br />
• SOURCE<br />
30 W ( 90 LED x 0,34 W)<br />
The fixture is provided with light source having a long life.<br />
Anyway, if the LED must be replaced, this operation must<br />
be carried out only by our specialized staff.<br />
Assembly Instructions<br />
Fig 1 - Unscrew the fixing screws C and the lock nut D<br />
fixed on the suspension wire controller as indicated by the<br />
figure, to separate the two components A and B.<br />
Fig. 2 – Pull the bracket A near to the ceiling marking the<br />
holes E.<br />
Fig 3 - Secure the bracket A to the ceiling using the plugs<br />
making sure to run the network cable H through the hole G.<br />
Fig. 4 – Make the electrical connection to terminal F on<br />
the bracket A making sure to connect the ground with the<br />
pole marked with .<br />
Fig. 5 – Screw the plate B to the bracket A using the<br />
screws C, previously loosened. Fasten the lock nut D<br />
when the suspension wire lenght is decided.<br />
Note 1 – The presence of two persons is recommended to<br />
install this appliance.<br />
Use warnings<br />
Handle the product with care<br />
- Direct contact and / or a sudden movement operated on<br />
the light source (LED board) may cause damages and /<br />
or failures.<br />
Cleaning information<br />
- Only use a dry antistatic cloth in order to clean the<br />
printed circuit.<br />
General warnings<br />
for indoor light fittings.<br />
The appliance is suitable to be mounted directly on<br />
normally inflammable surfaces.<br />
All DANESE products fall within the scope<br />
of the European directives. Therefore they<br />
meet the requirements and bear the “ ”<br />
labelling.<br />
Attention!<br />
- <strong>Danese</strong> reserves the right to introduce all the technical<br />
and structural changes required for the improvement of<br />
the product.<br />
- <strong>Danese</strong> not shoulder any responsabilities should<br />
products be modified without prior authorisation.<br />
CLASSE I Apparecchio nel quale la sicurezza elettrica è garantita da un conduttore supplementare di protezione<br />
(messa a terra) collegato alla struttura metallica della lampada.<br />
EN - Class I - A light fitting whose safety is guaranteed by an additional protective conductor (earth) connected with the<br />
metal frame of the lamp. FR - Classe I - A ppareil où la sécurité électrique est garantie par un conducteur supplémentaire<br />
de protection (mise à la terre) connecté à la structure métallique de la lampe. D - Schutzklasse I - Beim Betrieb und bei der<br />
Wartung müssen alle berührbaren Metallteile der Leuchte, die im Fehlerfall Spannung annehmen können, leitend mit dem<br />
Schutzleiteranschluß verbunden sein.


