Create successful ePaper yourself
Turn your PDF publications into a flip-book with our unique Google optimized e-Paper software.
<strong>SP</strong>-<strong>200</strong><br />
Digital Piano<br />
Piano Numérique<br />
Digital-Piano<br />
Pianoforte Digitale<br />
User’s manual<br />
Mode d’emploi<br />
Bedienungseinleitung<br />
Manuale d’istruzioni<br />
ENGLISH<br />
FRANÇAIS<br />
DEUTSCH<br />
ITALIANO<br />
AI 2 Synthesis System
English<br />
User’s Manual<br />
Français<br />
Mode d’emploi<br />
Deutsch<br />
Bedienungseinleitung<br />
Italiano<br />
Manuale di istruzioni
<strong>SP</strong>-<strong>200</strong><br />
Digital Piano<br />
User’s Manual
PRECAUTIONS<br />
Location<br />
Using the unit in the following locations can<br />
result in a malfunction.<br />
• In direct sunlight<br />
• Locations of extreme temperature or humidity<br />
• Excessively dusty or dirty locations<br />
• Locations of excessive vibration<br />
Power supply<br />
Please connect the designated AC adapter to an<br />
AC outlet of the correct voltage. Do not connect it<br />
to an AC outlet of voltage other than that for<br />
which your unit is intended.<br />
Interference with other electrical devices<br />
This product contains a microcomputer. Radios<br />
and televisions placed nearby may experience<br />
reception interference. Operate this unit at a suitable<br />
distance from radios and televisions.<br />
Handling<br />
To avoid breakage, do not apply excessive force<br />
to the switches or controls.<br />
Care<br />
If the exterior becomes dirty, wipe it with a clean,<br />
dry cloth. Do not use liquid cleaners such as benzene<br />
or thinner, or cleaning compounds or flammable<br />
polishes.<br />
Keep this manual<br />
After reading this manual, please keep it for later<br />
reference.<br />
Keeping foreign matter out of your equipment<br />
• Never set any container with liquid in it near<br />
this equipment. if liquid gets into the equipment,<br />
it could cause a breakdown, fire, or electrical<br />
shock.<br />
• Be careful not to let metal objects get into the<br />
equipment. If something does slip into the<br />
equipment, unplug the AC adapter from the<br />
wall outlet. Then contact your nearest <strong>Korg</strong><br />
dealer or the store where the equipment was<br />
purchased.<br />
CE MARK FOR EUROPEAN HARMO-<br />
NIZED STANDARDS<br />
The CE mark that is attached to our company’s<br />
products of AC mains operated apparatus until<br />
December 31, 1996 means it conforms to the<br />
EMC Directive (89/336/EEC) and to the CE mark<br />
Directive (93/68/EEC).<br />
The CE mark that is attached after January 1,<br />
1997 means it conforms to the EMC Directive<br />
(89/336/EEC), to the CE mark Directive (93/68/<br />
EEC) and to the Low Voltage Directive (73/23/<br />
EEC).<br />
In addition, the CE mark that is attached to our<br />
company’s products of Battery operated apparatus<br />
means it conforms to the EMC Directive (89/336/<br />
EEC) and to the CE mark Directive (93/68/EEC).<br />
THE FCC REGULATION WARNING<br />
(FOR THE U.S.A. ONLY)<br />
This equipment has been tested and found to<br />
comply with the limits for a Class B digital<br />
device, pursuant to Part 15 of the FCC Rules.<br />
These limits are designed to provide reasonable<br />
protection against harmful interference in a residential<br />
installation. This equipment generates,<br />
uses, and can radiate radio frequency energy and,<br />
if not installed and used in accordance with the<br />
instructions, may cause harmful interference to<br />
radio communications. However, there is no guarantee<br />
that interference will not occur in a particular<br />
installation. If this equipment does cause<br />
harmful interference to radio or television reception,<br />
which can be determined by turning the<br />
equipment off and on, the user is encouraged to<br />
try to correct the interference by one or more of<br />
the following measures:<br />
• Reorient or relocate the receiving antenna.<br />
• Increase the separation between the equipment<br />
and receiver.<br />
• Connect the equipment into an outlet on a circuit<br />
different from that to which the receiver is<br />
connected.<br />
• Consult the dealer or an experienced radio/TV<br />
technician for help.<br />
4
Unauthorized changes or modification to this system<br />
can void the user’s authority to operate this<br />
equipment.<br />
DISCLAIMER<br />
The information contained in this manual has<br />
been carefully revised and checked through. Due<br />
to our constant efforts to improve our products,<br />
the specifications might differ to those in the manual.<br />
<strong>Korg</strong> is not responsible for any eventual differences<br />
found between the specifications and the<br />
contents of the instruction manual - the specifications<br />
being subject to change without prior notice<br />
WARRANTY<br />
KORG products are manufactured according to<br />
the strictest electrical and mechanical regulations<br />
that exist in various countries of the world. These<br />
products are warranted by the KORG distributor<br />
only in each country. Any KORG product that is<br />
not sold with the manufacturer’s or distributor’s<br />
warranty, or without a serial number, cannot benefit<br />
from servicing under the warranty. This regulation<br />
is for the consumer’s own protection.<br />
ASSISTANCE AND SERVICE FOR<br />
MUSICIANS<br />
For repairs, contact your nearest Authorized<br />
KORG Service Center. For more information on<br />
KORG products, and to find software and accessories<br />
for your piano, please contact your local<br />
Authorized KORG distributor.<br />
KORG ON THE INTERNET<br />
Home page <strong>Korg</strong> Inc.: “http://www.korg.co.jp”<br />
Home page <strong>Korg</strong> USA: “http://www.korg.com”<br />
Home page <strong>Korg</strong> Italy: “http://www.korg.it”<br />
DATA RESET<br />
When the instrument is turned off, all parameters<br />
are reset.<br />
© <strong>200</strong>1 <strong>Korg</strong> Italy Spa. Printed in Italy.<br />
5
CONTENTS<br />
Introduction . . . . . . . . . . . . . . . . . . . . . . . . . . . . . . . . . . . . . . . . . . . . . . . . . . . . . . . . . 7<br />
Main features . . . . . . . . . . . . . . . . . . . . . . . . . . . . . . . . . . . . . . . . . . . . . . . . . . . . . . . . . . . . . . . .7<br />
1 Panels . . . . . . . . . . . . . . . . . . . . . . . . . . . . . . . . . . . . . . . . . . . . . . . . . . . . . . . . . . . . . 8<br />
Front panel . . . . . . . . . . . . . . . . . . . . . . . . . . . . . . . . . . . . . . . . . . . . . . . . . . . . . . . . . . . . . . . . . .8<br />
Rear panel . . . . . . . . . . . . . . . . . . . . . . . . . . . . . . . . . . . . . . . . . . . . . . . . . . . . . . . . . . . . . . . . . .9<br />
2 Before you begin . . . . . . . . . . . . . . . . . . . . . . . . . . . . . . . . . . . . . . . . . . . . . . . . . . . . 10<br />
Connection with an external amplification . . . . . . . . . . . . . . . . . . . . . . . . . . . . . . . . . . . . . . . .10<br />
Using the headphones . . . . . . . . . . . . . . . . . . . . . . . . . . . . . . . . . . . . . . . . . . . . . . . . . . . . . . . .10<br />
Turning the instrument on . . . . . . . . . . . . . . . . . . . . . . . . . . . . . . . . . . . . . . . . . . . . . . . . . . . . .10<br />
Adjusting the volume . . . . . . . . . . . . . . . . . . . . . . . . . . . . . . . . . . . . . . . . . . . . . . . . . . . . . . . .11<br />
Listening to the Demo . . . . . . . . . . . . . . . . . . . . . . . . . . . . . . . . . . . . . . . . . . . . . . . . . . . . . . . .11<br />
3 Basic functions . . . . . . . . . . . . . . . . . . . . . . . . . . . . . . . . . . . . . . . . . . . . . . . . . . . . . 13<br />
Playing a single sound (Single mode) . . . . . . . . . . . . . . . . . . . . . . . . . . . . . . . . . . . . . . . . . . . .13<br />
Playing two sounds at the same time (Layer mode) . . . . . . . . . . . . . . . . . . . . . . . . . . . . . . . . .13<br />
Choosing the reverb and the chorus . . . . . . . . . . . . . . . . . . . . . . . . . . . . . . . . . . . . . . . . . . . . .14<br />
The damper pedal . . . . . . . . . . . . . . . . . . . . . . . . . . . . . . . . . . . . . . . . . . . . . . . . . . . . . . . . . . .15<br />
The metronome . . . . . . . . . . . . . . . . . . . . . . . . . . . . . . . . . . . . . . . . . . . . . . . . . . . . . . . . . . . . .15<br />
4 Other functions . . . . . . . . . . . . . . . . . . . . . . . . . . . . . . . . . . . . . . . . . . . . . . . . . . . . . 18<br />
Touch settings . . . . . . . . . . . . . . . . . . . . . . . . . . . . . . . . . . . . . . . . . . . . . . . . . . . . . . . . . . . . . .18<br />
Transpose . . . . . . . . . . . . . . . . . . . . . . . . . . . . . . . . . . . . . . . . . . . . . . . . . . . . . . . . . . . . . . . . . .19<br />
Fine tuning . . . . . . . . . . . . . . . . . . . . . . . . . . . . . . . . . . . . . . . . . . . . . . . . . . . . . . . . . . . . . . . . .19<br />
Selecting a temperament . . . . . . . . . . . . . . . . . . . . . . . . . . . . . . . . . . . . . . . . . . . . . . . . . . . . . .20<br />
5 MIDI . . . . . . . . . . . . . . . . . . . . . . . . . . . . . . . . . . . . . . . . . . . . . . . . . . . . . . . . . . . . . 22<br />
What is MIDI? . . . . . . . . . . . . . . . . . . . . . . . . . . . . . . . . . . . . . . . . . . . . . . . . . . . . . . . . . . . . . .22<br />
What can you do with MIDI? . . . . . . . . . . . . . . . . . . . . . . . . . . . . . . . . . . . . . . . . . . . . . . . . . .22<br />
Connections . . . . . . . . . . . . . . . . . . . . . . . . . . . . . . . . . . . . . . . . . . . . . . . . . . . . . . . . . . . . . . . .22<br />
Standard MIDI settings . . . . . . . . . . . . . . . . . . . . . . . . . . . . . . . . . . . . . . . . . . . . . . . . . . . . . . .23<br />
Selecting the transmission channel . . . . . . . . . . . . . . . . . . . . . . . . . . . . . . . . . . . . . . . . . . . . . .23<br />
Using the <strong>SP</strong>-<strong>200</strong> as a multitimbral tone generator . . . . . . . . . . . . . . . . . . . . . . . . . . . . . . . . . .24<br />
Local On/Off . . . . . . . . . . . . . . . . . . . . . . . . . . . . . . . . . . . . . . . . . . . . . . . . . . . . . . . . . . . . . . .24<br />
Program Change . . . . . . . . . . . . . . . . . . . . . . . . . . . . . . . . . . . . . . . . . . . . . . . . . . . . . . . . . . . .25<br />
Control Change . . . . . . . . . . . . . . . . . . . . . . . . . . . . . . . . . . . . . . . . . . . . . . . . . . . . . . . . . . . . .27<br />
MIDI Data Dump . . . . . . . . . . . . . . . . . . . . . . . . . . . . . . . . . . . . . . . . . . . . . . . . . . . . . . . . . . .27<br />
6 Appendix . . . . . . . . . . . . . . . . . . . . . . . . . . . . . . . . . . . . . . . . . . . . . . . . . . . . . . . . . . 30<br />
Troubleshooting . . . . . . . . . . . . . . . . . . . . . . . . . . . . . . . . . . . . . . . . . . . . . . . . . . . . . . . . . . . . .30<br />
Polyphony . . . . . . . . . . . . . . . . . . . . . . . . . . . . . . . . . . . . . . . . . . . . . . . . . . . . . . . . . . . . . . . . .30<br />
Technical specifications . . . . . . . . . . . . . . . . . . . . . . . . . . . . . . . . . . . . . . . . . . . . . . . . . . . . . .31<br />
Control panel shortcuts . . . . . . . . . . . . . . . . . . . . . . . . . . . . . . . . . . . . . . . . . . . . . . . 32<br />
Control panel and keyboard . . . . . . . . . . . . . . . . . . . . . . . . . . . . . . . . . . . . . . . . . . . 32<br />
MIDI Implementation Chart . . . . . . . . . . . . . . . . . . . . . . . . . . . . . . . . . . . . . . . . . . . 133<br />
6 Contents
INTRODUCTION<br />
Introduction<br />
Main features<br />
Wide range of sounds. Thirty different and expressive high-quality sounds,<br />
including a Stereo Concert Grand Piano. You can exploit the Layer function to<br />
simultaneously play two sounds.<br />
Effects. The <strong>SP</strong>-<strong>200</strong> provides built-in digital effects that can simulate the natural<br />
ambience of a concert hall (Reverb) and add richness to the sound (Chorus).<br />
Damper pedal simulation. The Damper pedal on the <strong>SP</strong>-<strong>200</strong> corresponds to the<br />
Damper or Forte pedal of an acoustic piano. On an acoustic piano, when you press<br />
this pedal, the pads (dampers) that stop the vibrations of the strings are lifted.<br />
Metronome. The built-in metronome allows you to select the time signature,<br />
tempo, and volume, and even use a bell sound as the accent.<br />
Touch control. You can choose from three different settings to adjust how the<br />
sound will respond to your keyboard playing dynamics.<br />
Temperaments. In addition to the Equal temperament, the <strong>SP</strong>-<strong>200</strong> allows you to<br />
select two alternative classical temperaments (Kirnberger and Werckmeister) for<br />
historically accurate performance of classical music. When selecting an acoustic<br />
piano sound, the typical Stretched Tuning is automatically selected.<br />
Adjustable pitch. The Transpose function lets you change the pitch of the piano,<br />
and the Pitch Control function allows you to make fine tune adjustments.<br />
MIDI capabilities. The <strong>SP</strong>-<strong>200</strong> supports the MIDI protocol, the standard that<br />
allows music data to be transferred between musical instruments and computers.<br />
MIDI allows two or more devices to control or be controlled by each other, and also<br />
allows you to use the <strong>SP</strong>-<strong>200</strong> as a 16-part multitimbral tone generator.<br />
Introduction 7
CHAPTER<br />
1<br />
Panels<br />
Front panel<br />
1 234 5 6<br />
7<br />
8 90<br />
1 MASTER VOLUME slider: Adjusts the volume for the Output and the Phones<br />
connectors.<br />
2 REVERB button: Turns the reverb on/off. This adds ambience to the sound.<br />
3 CHORUS button: Turns the chorus on/off. This makes the sound richer.<br />
4 TOUCH button: Lets you select the keyboard sensitivity.<br />
5 TRAN<strong>SP</strong>OSE/FUNCTION button: Multifunction button to be used in order to<br />
modify the transpose and fine tuning functions, to program the MIDI parameters<br />
and to carry on other adjustments.<br />
Note: When the instrument is turned off, all parameters are reset.<br />
6 BANK button: Selects one of the 3 available banks of sounds.<br />
7 SOUND SELECTION buttons: Press a button to select a sound (Single mode).<br />
You can press two buttons at the same time, to play two sounds at the same time on<br />
the keyboard (Layer mode).<br />
8 Chapter 1
8 TEMPO slider: Adjusts the metronome tempo.<br />
9 METRONOME button: Turns the metronome click on/off.<br />
0 DEMO button: Turns the demo mode on/off, to listen to the demo songs. Select the<br />
songs with the sound selection buttons (see number 7 above).<br />
Rear panel<br />
1<br />
2 3 4 5 6 7<br />
1 Music stand holes: Insert the music stand into these two holes. Please note that,<br />
the first times you use the music stand, you will need to apply some force to insert or<br />
remove it. Later, the rubbery plastic material of which the holes are made will adapt<br />
to the music stand, making the operation easier to carry on.<br />
2 MIDI (IN, OUT) connectors: Connectors that are used to connect other MIDI<br />
devices (sequencer, keyboards, etc.). OUT: Data output (to be connected to the<br />
MIDI IN connector of another MIDI device). IN: Data input (to be connected to the<br />
MIDI OUT connector of another MIDI device).<br />
3 DAMPER connector: Connect the supplied pedal to this connector.<br />
4 OUTPUT (L/MONO, R) connectors: Audio output. Connect these connectors to<br />
an external amplifying system. (With a hi-fi system use the AUX or TAPE connectors,<br />
not the PHONO connector). To amplify the <strong>SP</strong>-<strong>200</strong> in mono, connect the single<br />
L/MONO connector. Use the MASTER VOLUME slider to set the output<br />
volume.<br />
5 PHONES connector: Connect a pair of headphones to this jack.<br />
6 DC 12V IN connector: Connect the supplied AC adapter to this connector.<br />
7 POWER switch: On/off switch.<br />
Panels 9
CHAPTER<br />
2<br />
Before you begin<br />
Connection with an external amplification<br />
To amplify the <strong>SP</strong>-<strong>200</strong>, connect the OUTPUTs to a high-quality mixer, stereo hi-fi,<br />
or a couple of active monitors. When using a stereo hi-fi, connect the OUTPUTs to<br />
the AUX or TAPE inputs (never use the PHONO inputs). For mono amplification,<br />
connect only the L/MONO output.<br />
Using the headphones<br />
For playing or practicing during night hours, or when you don’t want to be heard by<br />
others in the same room, connect a pair of high-quality headphones (32Ω impedance<br />
suggested) to the appropriate connector on the rear panel. This connector is a<br />
standard 1/4” phone jack. If your headphones have a mini-jack adapter, grasp the<br />
adapter when plugging in or out the headphones.<br />
If you need to connect two sets of headphones, please contact your <strong>Korg</strong> reseller to<br />
ask for one of the many headphones distributors available on the market.<br />
Warning: When using headphones, protect your hearing by avoiding extended listening<br />
at high volumes.<br />
Turning the instrument on<br />
Insert the DC plug of the supplied AC adapter into the DC inlet of the <strong>SP</strong>-<strong>200</strong>, and<br />
then connect the AC plug to a wall socket; then press the POWER switch. When the<br />
instrument is on, the LEDs on the control panel will light up. To turn the instrument<br />
off, press the POWER switch again.<br />
Note: When the instrument is turned off, all parameters are reset.<br />
10 Chapter 2
Adjusting the volume<br />
Move the MASTER VOLUME slider towards the right to increase the volume;<br />
towards the left to decrease the volume. The maximum is “10”; the minimum<br />
(silence) is “0”. This control adjusts the output level of the headphones and of the<br />
OUTPUTs.<br />
Note: It is always better to start with a low volume and then increase gradually.<br />
Listening to the Demo<br />
The <strong>SP</strong>-<strong>200</strong> contains 30 pre-recorded demo songs. Listen to them to experience the<br />
rich sound and expressive potential of this instrument.<br />
Listen to all songs at once. You can listen to all demo songs with a single command.<br />
1 Press the DEMO button (or keep the TRAN<strong>SP</strong>OSE/FUNCTION button pressed,<br />
and press E1 on the keyboard). The sound selection buttons LED will blink sequentially<br />
from left to right. After a few seconds, playback will begin. All demo songs<br />
will be played back. After the last song, the playback will begin again from the first<br />
song.<br />
2 During playback, you can press a sound selection button to repeat just the current<br />
bank of ten demo songs. (There are three banks of ten demo songs each: 1-10, 11-<br />
20, 21-30).<br />
For example, if you press the CHOIR button while song number 1 is playing, song<br />
number 10 will immediately start playing, and the playback will cycle from song 1<br />
through song 10.<br />
3 Press the DEMO button to stop the playback and exit the demo mode.<br />
Listen to a specified song. You can select just one demo song to be played back.<br />
1 First of all, you must select one of the three demo song banks.<br />
• To select the first bank (1-10), press the DEMO button once. The LEDs will<br />
blink sequentially, from left to right.<br />
• To select the second bank (11-20), press the DEMO button a second time. All<br />
LEDs will blink at the same time.<br />
• To select the third bank (21-30), press the DEMO button a third time. Adjacent<br />
LEDs will blink alternatively<br />
2 Press one of the sound selection buttons to select the corresponding song in the<br />
selected bank. The LED on the selected demo button will stay on, while the other<br />
Before you begin 11
LEDs will turn off.<br />
After the end of the selected song, all the songs of the selected bank will be played<br />
back in cycle.<br />
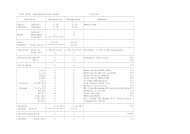
Button Bank 1 (1-10) Bank 2 (11-20) Bank 3 (21-30)<br />
PIANO 1<br />
F. Mendelssohn-Bartholdy:<br />
Prelude Op.104a,<br />
no.2<br />
<strong>Korg</strong> Original (M. Tempia):<br />
Reflection<br />
C.A. Debussy:<br />
Arabesque no.1<br />
PIANO 2<br />
F. Chopin: Nocturne<br />
Op.9, no.2<br />
S. Joplin: The Entertainer<br />
J.S. Bach: Two-voice<br />
invention no.13<br />
E.PIANO 1<br />
C.A. Debussy: Clair de<br />
lune<br />
<strong>Korg</strong> Original (M. Tempia):<br />
Jumper<br />
F. Chopin: Fantasie-<br />
Impromptu Op.66<br />
E.PIANO 2<br />
<strong>Korg</strong> Original (M. Tempia):<br />
Lullaby for a Little<br />
Star<br />
<strong>Korg</strong> Original (M. Tempia):<br />
All the Ones You<br />
Don’t Know<br />
J.S. Bach: Prelude in C<br />
major (from Das Wohltemeperierte<br />
Klavier)<br />
HARPSI<br />
/CLAV<br />
L. van Beethoven: Für<br />
Elise<br />
J.S. Bach: Italian Concert<br />
<strong>Korg</strong> Original (M. Tempia):<br />
Rubber Bob<br />
VIBES<br />
/GUITAR<br />
F. Chopin: Etude Op.10,<br />
no.3<br />
<strong>Korg</strong> Original (M. Tempia):<br />
Jazz in Spain<br />
R. Schumann: Traumarei,<br />
Op.15, no.7<br />
ORGAN 1<br />
W.A. Mozart: A la turque<br />
(from the Sonata in A-<br />
major K.331)<br />
<strong>Korg</strong> Original (M. Tempia):<br />
Cool “B”<br />
F. Mendelssohn-Bartholdy:<br />
Spring Song,<br />
Op.62, no.6<br />
ORGAN 2<br />
F. Chopin: Valse no.6 in<br />
D♭-major Op.64, no.1<br />
F. Mendelssohn-Bartholdy:<br />
Wedding March<br />
<strong>Korg</strong> Original (M. Tempia):<br />
Sunflowers<br />
STRINGS<br />
/PAD<br />
<strong>Korg</strong> Original (M. Tempia):<br />
Old Feather Blues<br />
J.S. Bach: Air on the G<br />
string<br />
P.D. Paradisi: Toccata in<br />
A major<br />
CHOIR<br />
<strong>Korg</strong> Original (M. Tempia):<br />
Noise of time<br />
<strong>Korg</strong> Original (M. Tempia):<br />
Voice Texture<br />
<strong>Korg</strong> Original (M. Tempia):<br />
Wet Raccoon Rag<br />
3 Press the DEMO button to stop the playback and exit the demo mode.<br />
Note: During the demo playback you can’t use the sound selection buttons to select<br />
sounds, or the REVERB and CHORUS buttons.<br />
Adjusting the tempo of the demo songs. Use the TEMPO slider to change the<br />
tempo of the selected demo song. Normally, the playback tempo of the demo song<br />
will not match the markings of the TEMPO slider.<br />
Note: You can’t use the metronome during the demo playback.<br />
Note: When a demo is selected, its original tempo is recalled.<br />
12 Chapter 2
CHAPTER<br />
3<br />
Basic functions<br />
Playing a single sound (Single mode)<br />
You can select a sound from the thirty sounds supplied with the instrument.<br />
1 Press one of the sound selection buttons in order to select a sound. The LED on the<br />
button you pressed will light.<br />
2 Use the BANK button to select one of the three available banks (1-10, 11-20, 21-<br />
30). Pressed a first time it selects Bank 2; pressed a second time it selects Bank 3;<br />
pressed a third time it selects Bank 1 again.<br />
Button Bank 1 # Bank 2 # Bank 3 #<br />
PIANO 1 Grand Piano 1 2 Bright Piano 2 Grand Piano 2 1<br />
PIANO 2 Classic Piano 2 Honky-Tonky 2 E.Grand Piano 1<br />
E.PIANO 1 Stage E.Piano 1 Club E.Piano 2 Thin E.Piano 2<br />
E.PIANO 2 Digital E.Piano 1 60’s E.Piano 1 Vintage E.Piano 2<br />
HARPSI/CLAV Harpsichord 1 Clav. 1 Wah Clav. 1<br />
VIBES/GUITAR Vibraphone 1 Marimba 1 Acoustic Guitar 1<br />
ORGAN 1 Jazz Organ 1 2 Jazz Organ 2 2 Jazz Organ 3 2<br />
ORGAN 2 Church Organ 1 3 Church Organ 2 1 Church Organ 3 1<br />
STRINGS/PAD Strings 1 Slow Strings 2 Warm Pad 2<br />
CHOIR Choir Hoo 1 Choir Doo 2 Choir Pad 2<br />
(#) These columns show the number of oscillators per voice exploited by each sound<br />
Playing two sounds at the same time (Layer mode)<br />
You can play two sounds at the same time on the keyboard. This is called the Layer<br />
mode.<br />
Basic functions 13
Note: When selecting the Layer mode, the total number of voices that can play at<br />
the same time is reduced, depending on the total number of oscillators exploited by<br />
the selected sounds.<br />
Note: You can’t select two sounds included under the same button.<br />
1 Press one of the sound selection buttons in order to select the first sound. The LED<br />
on the button you pressed will light. Use the BANK button to select a sound in one<br />
of the other banks.<br />
2 Press another sound selection button to select the second sound. The LED on the<br />
button you pressed will light. Use the BANK button to select a sound in one of the<br />
other banks.<br />
3 Press both buttons at the same time to select the sounds. Both LEDs will light.<br />
Note: Steps 1 and 2 are not required, if the right banks are already selected.<br />
Returning to the Single mode. To return to the Single mode, just press a single<br />
sound selection button.<br />
Adjusting the volume of sounds in Layer mode. To adjust the balance<br />
between the sounds in Layer mode, hold down the button of the sound whose level<br />
you wish to decrease, and repeatedly press the button of the sound whose level you<br />
wish to raise.<br />
Note: This setting will be memorized even after turning the Layer mode off, but<br />
will be lost when turning the instrument off. To save these settings, save them using<br />
the Data Dump function (see “MIDI Data Dump” on page 27).<br />
Choosing the reverb and the chorus<br />
The <strong>SP</strong>-<strong>200</strong> has two effects: reverb and chorus. The reverb simulates the sound<br />
reverberation in a room, while the chorus simulates a modulating effect that makes<br />
the sounds richer. The effect settings will be remembered even when selecting a different<br />
sound.<br />
Note: Effect settings made in Single mode are memorized even when selecting the<br />
Layer mode, but no change made in Layer mode will be preserved.<br />
When the instrument is turned on, the effect settings are reset to the factory settings.<br />
To save these settings, save them using the Data Dump function (see “MIDI Data<br />
Dump” on page 27).<br />
14 Chapter 3
1 Hold down the REVERB or CHORUS button, and press either the PIANO 1/L,<br />
PIANO 2/M, or E.PIANO1/H sound selection button to select the reverb or chorus<br />
depth.<br />
Button Reverb depth Chorus depth<br />
PIANO 1/L Light reverb Light chorus<br />
PIANO 2/M Normal reverb Normal chorus<br />
E.PIANO 1/H Deep reverb Deep chorus<br />
2 To check the currently selected reverb or chorus depth, hold down the REVERB or<br />
CHORUS button, and look at which of the above LEDs is turned on.<br />
3 To turn the reverb or chorus off, press the REVERB or CHORUS button. The LED<br />
on the button will turn off.<br />
The damper pedal<br />
The supplied pedal can be used as a damper pedal. If you connect to the DAMPER<br />
jack a <strong>Korg</strong> DS1H pedal (optional), you can use the half-pedalling, with a gradual<br />
resonance effect depending on the depth of the pedal pressure.<br />
In Layer mode, you can select the sound(s) to apply the pedal to.<br />
Note: When the instrument is turned on, the pedal settings are reset. To save these<br />
settings, save them using the Data Dump function (see “MIDI Data Dump” on<br />
page 27).<br />
1 Hold the TRAN<strong>SP</strong>OSE/FUNCTION button, and press the damper pedal. Each time<br />
you press the pedal, the LED on the sound selection button(s) where the damper<br />
pedal is active will light.<br />
2 When the pedal is assigned to the desired sound(s), release the TRAN<strong>SP</strong>OSE/<br />
FUNCTION button.<br />
The metronome<br />
The <strong>SP</strong>-<strong>200</strong> incorporates a metronome, with which you can set the tempo during<br />
practice.<br />
Starting and stopping the metronome. Press the METRONOME button to<br />
make the metronome start or stop. When turning on, the metronome is set according<br />
to the slider position, but you can adjust it with the procedure described below. After<br />
having listened to the demo, the tempo will be that of the last demo that had been<br />
listened to.<br />
Basic functions 15
Adjusting the metronome volume. While the metronome is playing, keep the<br />
METRONOME button pressed and repeatedly press the STRINGS/PAD button (or<br />
the B5 key) to lower the volume, or the CHOIR button (or the C6 key) to raise it. To<br />
reset the volume, simultaneously press the STRINGS/PAD and CHOIR buttons (or<br />
the B5 and C6 keys on the keyboard) while holding the METRONOME button.<br />
Key Effect Key Effect<br />
B5 Lower volume C6 Higher volume<br />
Adjusting the tempo using the TEMPO slider. Use the TEMPO slider to adjust<br />
the tempo. The range is = 40 ~ <strong>200</strong>.<br />
Numeric tempo input. In some cases, the tempo may not exactly match the markings<br />
on the TEMPO slider. If you need to specify a precise tempo value, you can use<br />
the numeric input.<br />
1 Hold down the METRONOME button.<br />
2 Use the keyboard to input the three-digit tempo value (insert a “0” before a twonumber<br />
value).<br />
Key Number Key Number<br />
C5 0 C#5 1<br />
D5 2 D#5 3<br />
E5 4 F5 5<br />
F#5 6 G5 7<br />
G#5 8 A5 9<br />
For example, to select a tempo value of 168, keep the METRONOME button<br />
pressed, then press C#5 (1), F#5 (6), G#5 (8). To select a tempo value of 85, keep<br />
the METRONOME button pressed, then press C5 (0), G#5 (8), F5 (5).<br />
16 Chapter 3
Selecting the time signature. You can add an accent to the first beat of a measure.<br />
Button<br />
Time signature<br />
PIANO 1 2 movements (2/4, 2/8...)<br />
PIANO 2 3 movements (3/4, 3/8...)<br />
E.PIANO 1 4 movements (4/4, 4/8...)<br />
E.PIANO 2 6 movements (6/4, 6/8...)<br />
1 While the metronome is working, keep the METRONOME button pressed and<br />
press the button that corresponds to the time signature you wish to use (see table<br />
above). The first movement of the measure will be accented.<br />
2 To deactivate the accent, keep the METRONOME button pressed and press the<br />
sound selection button whose LED is lit.<br />
Note: When the instrument is turned on, the accent is automatically disabled.<br />
Selecting a bell for the accent. The accented beat can be changed to a bell<br />
sound.<br />
1 While the metronome is playing, hold down the METRONOME button, then press<br />
the VIBES/GUITAR sound selection button. The LED on the button will light, and a<br />
bell sound will be heard on the first beat of the bar.<br />
2 To return to the normal accent, hold down the METRONOME button and press the<br />
HARPSI/CLAV sound selection button to switch on the LED on the HARPSI/<br />
CLAV button.<br />
Note: When the instrument is turned on, the bell is automatically disabled.<br />
Basic functions 17
CHAPTER<br />
4<br />
Touch settings<br />
Other functions<br />
The keyboard sensitivity, or touch, can be programmed. Keep the TOUCH button<br />
pressed, and press the appropriate button to select one of the available touch settings.<br />
Button<br />
PIANO 1/L<br />
PIANO 2/M<br />
E.PIANO 1/H<br />
Touch sensitivity<br />
Light. Loud notes can be produced even by playing lightly.<br />
Normal. Normal piano touch.<br />
Heavy. Loud notes can be produced only by playing very hard.<br />
To check the currently selected setting, hold down the TOUCH button, and look at<br />
which of the above LEDs is turned on.<br />
Note: When the instrument is turned on, the touch setting is reset to Normal.<br />
Alternatively, you can use the TRAN<strong>SP</strong>OSE/FUNCTION button and the keyboard.<br />
Hold the TRAN<strong>SP</strong>OSE/FUNCTION button, and press the key on keyboard that<br />
corresponds to the touch setting you wish to carry out (see table).<br />
Key<br />
B3<br />
C4<br />
D4<br />
Touch sensitivity<br />
Light. Loud notes can be produced even by playing lightly.<br />
Normal. Normal piano touch.<br />
Heavy. Loud notes can be produced only by playing very hard.<br />
18 Chapter 4
Transpose<br />
You can transpose the pitch of the instrument by one or more semitones higher or<br />
lower. This transposing allows you to easily tune the <strong>SP</strong>-<strong>200</strong> to another instrument<br />
played together, or to simplify a music with too many sharps or flats.<br />
Note: When the instrument is turned on, the transposing is reset.<br />
1 Hold the TRAN<strong>SP</strong>OSE/FUNCTION button, and press the key on keyboard that<br />
corresponds to the transpose you wish to carry out (see table). The TRAN<strong>SP</strong>OSE/<br />
FUNTION LED will remain lit up, to indicate that the transpose function is active.<br />
Key<br />
Effect<br />
F#6 — B6 6 — 1 semitones below<br />
C7<br />
Standard pitch<br />
C#7 — F7 1 — 5 semitones higher<br />
2 To get back to standard pitch, hold the TRAN<strong>SP</strong>OSE/FUNCTION button and press<br />
the C7 key. The TRAN<strong>SP</strong>OSE/FUNCTION LED will turn off.<br />
Fine tuning<br />
In order to adapt the <strong>SP</strong>-<strong>200</strong> pitch to that of another instrument, you can adjust the<br />
pitch in steps of 0.5 Hz over a range of A4 = 427.5 ~ 452.5 Hz. The standard tuning<br />
is A4 = 440 Hz.<br />
Note: The pitch will go back to standard level (A4 = 440 Hz) when the instrument is<br />
turned off, then on again.<br />
1 Hold the TRAN<strong>SP</strong>OSE/FUNCTION button, and press the corresponding key to<br />
change the pitch. Each time the B5 or C6 key is pressed, the pitch will be raised or<br />
lowered by 0.5 Hz.<br />
Other functions 19
2 To get back to standard pitch, hold the TRAN<strong>SP</strong>OSE/FUNCTION button and press<br />
the B5 and C6 buttons at the same time.<br />
Key<br />
B5<br />
B5+C6<br />
C6<br />
Fine tuning<br />
Lowers the pitch by 0.5 Hz<br />
Standard pitch (A4 = 440 Hz)<br />
Raises the pitch by 0.5 Hz<br />
Selecting a temperament<br />
There are numerous classical compositions that were composed using temperaments<br />
that differ from the “equal temperament” commonly used today.In order to<br />
reproduce the original sound of such compositions, the <strong>SP</strong>-<strong>200</strong> provides Kirnberger<br />
and Werckmeister classical temperaments, in addition to the equal temperament,<br />
allowing you to select from a total of three temperaments.<br />
To select one of the available temperaments, hold down the TOUCH button, then<br />
press the button corresponding to the desired temperament. To return to the equal<br />
tuning hold down the TOUCH button, then press the sound selection button whose<br />
LED is lit.<br />
Button<br />
HARPSI/CLAV<br />
VIBES/GUITAR<br />
Both LEDs<br />
turned off<br />
Temperament<br />
Werckmeister. This is the Werckmeister III scale invented by Andreas<br />
Werckmeister, the German organist and music theoretician. This scale<br />
was created in the later Baroque period to allow relatively free transposition.<br />
Kirnberger. This is the Kirnberger III scale invented by Johann Phillip<br />
Kirnberger in the early 18th century, and is used mainly for tuning harpsichords.<br />
Equal temperament. Nearly all keyboard instruments today use equal<br />
temperament. This temperament spaces all semitones at equal distances,<br />
and allows identical scales to be played in any key.<br />
To check the currently selected temperament, hold down the TOUCH button, and<br />
look at which of the above LEDs is turned on.<br />
Note: When the power is turned on, the equal temperament will be automatically<br />
selected.<br />
20 Chapter 4
About stretched tuning. In order to produce the most natural resonance, PIANO<br />
1 and PIANO 2 sounds use a “stretched tuning” that makes the notes of the lower<br />
range slightly flatter than equal temperament, and the upper range slightly sharper.<br />
This is how an acoustic piano is normally tuned by professional tuners.<br />
Other functions 21
CHAPTER<br />
5<br />
What is MIDI?<br />
MIDI<br />
MIDI, is the abbreviation of Musical Instrument Digital Interface. It is an international<br />
standard that was created to connect and transfer data between electronic<br />
musical instruments, computers and other devices.<br />
What can you do with MIDI?<br />
Thanks to MIDI, you can use the <strong>SP</strong>-<strong>200</strong> to control other instruments, use other<br />
instruments to control the <strong>SP</strong>-<strong>200</strong>, and use a sequencer to create complex musical<br />
pieces.<br />
When you use the <strong>SP</strong>-<strong>200</strong> keyboard or pedal, or select a sound, the notes, pedal activation<br />
and change in sound are transmitted to another instrument, or are recorded by<br />
a sequencer.<br />
Connections<br />
Always connect the MIDI OUT connector of the instrument to the MIDI IN connector<br />
of another instrument. Never connect two connectors of the same instrument to<br />
each other.<br />
Connect the MIDI OUT connector of the transmitting (master) device to the MIDI<br />
IN connector of the receiving (slave) device.<br />
To connect the <strong>SP</strong>-<strong>200</strong> to a computer, you need a MIDI interface for the computer,<br />
sequencing or musical notation software, and two standard MIDI cables. Connect<br />
the <strong>SP</strong>-<strong>200</strong> MIDI OUT connector to the MIDI IN connector of the computer. Connect<br />
the <strong>SP</strong>-<strong>200</strong> MIDI IN connector to the MIDI OUT connector of the computer.<br />
22 Chapter 5
Standard MIDI settings<br />
When turning the instrument on, the MIDI parameters of the <strong>SP</strong>-<strong>200</strong> are programmed<br />
as follows:<br />
Parameter<br />
Setting<br />
Transmission channel 1<br />
Reception channel(s) All 16 (1-16)<br />
Local<br />
ON<br />
Omni<br />
ON<br />
Selecting the transmission channel<br />
The standard MIDI has 16 separate channels available for transmission and reception<br />
of data. <strong>SP</strong>-<strong>200</strong> always receives on all 16 channels, and transmits on a single<br />
channel. To transmit data from the <strong>SP</strong>-<strong>200</strong>, you need to choose which of the 16<br />
channels you wish to transmit data on.<br />
Hold down the TRAN<strong>SP</strong>OSE/FUNCTION button, and press the note in the range<br />
C2–D#3 corresponding to the desired MIDI channel.<br />
Key Channel Key Channel<br />
C2 1 C#2 2<br />
D2 3 D#2 4<br />
E2 5 F2 6<br />
F#2 7 G2 8<br />
G#2 9 A2 10<br />
A#2 11 B2 12<br />
C3 13 C#3 14<br />
D3 15 D#3 16<br />
Note: When the power is turned on, channel 1 will automatically be selected.<br />
Note: By default, channel 10 will automatically be assigned to the metronome<br />
sound (notes D#5-E5).<br />
MIDI 23
Note: In Layer mode, the second sound transmits on the following channel. For<br />
example, if you select channel 7, the first sound will transmit on channel 7, while<br />
the second sound will transmit on channel 8. If you select channel 16, the first sound<br />
will transmit on channel 16, while the second sound will transmit on channel 1<br />
(cycling back to the first channel).<br />
Using the <strong>SP</strong>-<strong>200</strong> as a multitimbral tone generator<br />
When <strong>SP</strong>-<strong>200</strong> is controlled from an external MIDI device, it can work as a 16-part<br />
multitimbral tone generator. You can select a different sound on each of the 16 MIDI<br />
channels.<br />
1 Use a MIDI cable to connect the <strong>SP</strong>-<strong>200</strong>'s MIDI IN to the MIDI OUT of a<br />
sequencer etc.<br />
2 Transmit MIDI data from the connected sequencer (or other device). See “Program<br />
Change” on page 25 for instructions on how to select a sound using the MIDI Program<br />
Change message. Program Change reception should be activated on the <strong>SP</strong>-<br />
<strong>200</strong>.<br />
Read the other devices user’s manual for details on sending Program Change messages.<br />
Local On/Off<br />
Local is the parameter that allows you to establish whether the keyboard has to play<br />
the internal sounds and transmit MIDI data at the same time (Local On), or whether<br />
it just has to transmit MIDI data and not play the internal sound (Local Off).<br />
Local Off should be chosen when you wish to use the <strong>SP</strong>-<strong>200</strong> as a mute keyboard,<br />
to play another instrument. It should be chosen also when <strong>SP</strong>-<strong>200</strong> is connected to a<br />
sequencer via its MIDI IN and MIDI OUT connectors. This will avoid the notes to<br />
be played twice, by the keyboard and by the sequencer, producing an annoying<br />
“echo” effect.<br />
Normally, you will choose Local On (automatically selected when turning the <strong>SP</strong>-<br />
<strong>200</strong> on), so that playing the keyboard will produce sound.<br />
24 Chapter 5
Hold down the TRAN<strong>SP</strong>OSE/FUNCTION button, and press the PIANO 1 sound<br />
selection button. The Local setting will alternate to On/Off each time you press this<br />
button.<br />
Local status<br />
Local On<br />
Local Off<br />
PIANO 1 LED status<br />
Lit<br />
Dark<br />
Note: When the power is turned on, the Local will be automatically set to On.<br />
Program Change<br />
The sound of the <strong>SP</strong>-<strong>200</strong> can be selected via MIDI, by sending a Program Change<br />
message on the channel where you wish to assign the sound. The table enlists the<br />
Program Change numbers (numbering from 0-29; if the transmitting device uses<br />
numbers from 1-30, you will need to increment the number by one).<br />
Transmitting Program Change messages. You can send a MIDI Program<br />
Change message to a MIDI device connected to the <strong>SP</strong>-<strong>200</strong> MIDI OUT, to change<br />
its sound. When selecting one of the internal sounds of the <strong>SP</strong>-<strong>200</strong> by using the<br />
sound selection buttons, a MIDI Program Change number will be transmitted, as<br />
shown in the table below.<br />
Receiving Program Change messages. When a Program Change message is<br />
received from an external device, the corresponding internal sound will be selected<br />
on the <strong>SP</strong>-<strong>200</strong>, as shown in the following table. Only Program Change (PC) numbers<br />
in the range 0–29 have effect on the <strong>SP</strong>-<strong>200</strong>, while other numbers (30-127) are<br />
ignored.<br />
PC# Button Bank Sound<br />
0<br />
1 Grand Piano 1<br />
1 PIANO 1<br />
2 Bright Piano<br />
2 3 Grand Piano 2<br />
3<br />
1 Classic Grand Piano<br />
4 PIANO 2<br />
2 Honky-Tonky<br />
5 3 E.Grand Piano<br />
6<br />
1 Stage E.Piano<br />
7 E.PIANO 1<br />
2 Club E.Piano<br />
8 3 Thin E.Piano<br />
MIDI 25
PC# Button Bank Sound<br />
9<br />
1 Digital E.Piano<br />
10 E.PIANO 2<br />
2 60’s E.Piano<br />
11 3 Vintage E.Piano<br />
12<br />
1 Harpsichord<br />
13 HARPSI/CLAV 2 Clav.<br />
14 3 Wah Clav.<br />
15<br />
1 Vibraphone<br />
16 VIBES/GUITAR 2 Marimba<br />
17 3 Acoustic Guitar<br />
18<br />
1 Jazz Organ 1<br />
19 ORGAN1<br />
2 Jazz Organ 2<br />
20 3 Jazz Organ 3<br />
21<br />
1 Church Organ 1<br />
22 ORGAN2<br />
2 Church Organ 2<br />
23 3 Church Organ 3<br />
24<br />
1 Strings<br />
25 STRINGS/PAD 2 Slow Strings<br />
26 3 Warm Pad<br />
27<br />
1 Choir Hoo<br />
28 CHOIR<br />
2 Choir Doo<br />
29 3 Choir Pad<br />
Program Change enable/disable. To transmit and receive this kind of data, you<br />
must enable Program Change messages transmission and reception. Otherwise, you<br />
can disable Program Changes data.<br />
Hold down the TRAN<strong>SP</strong>OSE/FUNCTION button, and press the PIANO 2 sound<br />
selection button. Each time you press the switch, the setting will alternate between<br />
Enabled and Disabled.<br />
Program Change status<br />
Enable<br />
Cancel<br />
PIANO 2 LED status<br />
Lit<br />
Dark<br />
26 Chapter 5
Note: When the power is turned on, program changes will be enabled for all MIDI<br />
channels.<br />
Control Change<br />
When you operate the damper pedal, adjust the balance in Layer mode, or make<br />
other adjustments on the control panel, a Control Change message is sent to a connected<br />
external MIDI device. At the same time, <strong>SP</strong>-<strong>200</strong> can receive a Control<br />
Change message from an external MIDI device connected to its MIDI IN, to control<br />
the damper pedal, volume adjustment, and other data.<br />
Control Change enable/disable. To transmit and receive this kind of data, you<br />
must enable Control Change messages transmission and reception. Otherwise, you<br />
can disable Control Changes data.<br />
Hold down the TRAN<strong>SP</strong>OSE/FUNCTION button, and press the E.PIANO 1 sound<br />
selection button. Each time you press this button, the setting will alternate between<br />
Enabled and Disabled.<br />
Control Change status<br />
Enabled<br />
Disabled<br />
E.PIANO 1 LED status<br />
Lit<br />
Dark<br />
Note: When the power is turned on, Control Change messages will be enabled on<br />
all MIDI channels.<br />
MIDI Data Dump<br />
You can save the current sound settings (Single or Layer mode) on an external MIDI<br />
storage device, like a sequencer or a MIDI data filer. You can later reload these data<br />
into the <strong>SP</strong>-<strong>200</strong>, to restore a saved set of data.<br />
Warning: To avoid loosing data, read carefully read the owner's manual of your<br />
MIDI data filer.<br />
Hint: To avoid any trouble, don’t forget to deactivate System Exclusive data reception<br />
on the connected device.<br />
MIDI 27
The following table shows which data are saved with the Data Dump.<br />
Category<br />
Single mode<br />
Layer mode<br />
Data<br />
Reverb and chorus settings (on/off status, send level)<br />
Reverb and chorus settings (on/off status, send level),<br />
balance between sounds, damper pedal on/off status<br />
for each sound.<br />
Saving data to the data filer. Here is how to save the data of the <strong>SP</strong>-<strong>200</strong>.<br />
1 Use a MIDI cable to connect the <strong>SP</strong>-<strong>200</strong> MIDI OUT to the MIDI IN of the data<br />
filer.<br />
2 Prepare the data filer to receive MIDI data.<br />
3 On the <strong>SP</strong>-<strong>200</strong>, hold down the TRAN<strong>SP</strong>OSE/FUNCTION button, and press the<br />
VIBES/GUITAR sound selection button. The LEDs of the TRAN<strong>SP</strong>OSE/FUNC-<br />
TION and VIBES/GUITAR buttons will blink, indicating that the <strong>SP</strong>-<strong>200</strong> is ready to<br />
transmit the data dump.<br />
4 Press the TOUCH button. The data dump will begin, and the sound setting data will<br />
be transmitted to the data filer.<br />
During a data dump operation, the <strong>SP</strong>-<strong>200</strong> will not produce sound, and no other<br />
function will work. When the data dump is completed, you will return to normal<br />
playing condition.<br />
You may cancel a data dump operation before the data dump begins, by pressing the<br />
TRAN<strong>SP</strong>OSE/FUNCTION or VIBES/GUITAR button.<br />
Loading data from the data filer. You can load into the <strong>SP</strong>-<strong>200</strong> data you previously<br />
saved on a data filer.<br />
1 Use a MIDI cable to connect the MIDI IN of the <strong>SP</strong>-<strong>200</strong> to the MIDI OUT of the<br />
data filer.<br />
2 On the <strong>SP</strong>-<strong>200</strong>, hold down the TRAN<strong>SP</strong>OSE/FUNCTION button and press the<br />
VIBES/GUITAR sound selection button. The LEDs of the TRAN<strong>SP</strong>OSE/FUNC-<br />
TION and VIBES/GUITAR buttons will blink, and the <strong>SP</strong>-<strong>200</strong> will wait to receive<br />
the data dump.<br />
3 Set the data filer to send the sound setting data that were previously saved from the<br />
<strong>SP</strong>-<strong>200</strong>. Please read the data filer owner’s manual for details on data transmission.<br />
The <strong>SP</strong>-<strong>200</strong> will receive the data.<br />
28 Chapter 5
When the data dump is finished, the <strong>SP</strong>-<strong>200</strong> will return to the same status it was<br />
before the data dump.<br />
During a data dump operation, the <strong>SP</strong>-<strong>200</strong> will not produce sound, and no other<br />
function will work.<br />
You may cancel a data dump operation before the data dump begins, by pressing the<br />
TRAN<strong>SP</strong>OSE/FUNCTION or VIBES/GUITAR button.<br />
MIDI 29
CHAPTER<br />
6<br />
Troubleshooting<br />
Appendix<br />
If during use any of the following problems should occur, carefully examine the<br />
instrument to see if you can find out what the problem is, and try resolving it by following<br />
the suggestions below. If the instrument will still not function properly refer<br />
to your dealer or to an Authorized <strong>Korg</strong> Service Center.<br />
Problem Possible remedy Page<br />
The instrument<br />
will not turn on.<br />
No sound.<br />
Check that the AC adapter is correctly connected to the piano and<br />
the outlet.<br />
(1) Make sure that the volume is not set on 0. If it is, bring it up to<br />
an adequate level.<br />
(2) Make sure that the MIDI Local function is not set on OFF. If it<br />
is, set it to ON (or turn the instrument off and then on again).<br />
9<br />
11<br />
24<br />
Polyphony<br />
The <strong>SP</strong>-<strong>200</strong> contains sampled sounds, which have been recorded, analyzed and processed<br />
from the actual sounds of the original musical instruments. These sounds<br />
usually consist of one or more different samples reproduced by pressing a key.<br />
Sounds made of just one samples have a full polyphony of max. 60 voices, while<br />
sounds made of two samples have a limited polyphony of max. 30 notes. Therefore,<br />
when the number of sounding notes exceeds the limits, the sound will become discontinued.<br />
Furthermore, when playing in Layer mode with more than two notes, the max.<br />
polyphony depends on how many samples are used in total. Using the REVERB,<br />
CHORUS further reduces the polyphony, respectively, by 10 and 3 notes.<br />
30 Chapter 6
Technical specifications<br />
Specifications<br />
Keyboard<br />
Touch selection<br />
Tuning<br />
Sound generation<br />
Polyphony<br />
Sounds<br />
Effects<br />
Demo<br />
Metronome<br />
Pedal<br />
Connections<br />
Controls<br />
Power supply<br />
Power consumption<br />
Dimensions (W x D x H)<br />
Weight<br />
Accessories<br />
Options<br />
<strong>SP</strong>-<strong>200</strong><br />
88 notes, velocity sensitive, with hammer-action simulation<br />
Light, Normal, Heavy<br />
Transpose, Fine tuning, Temperament (Equal, Kirnberger,<br />
Werckmeister)<br />
Stereo PCM System<br />
60 notes (max). The use of 2-oscillator sounds, the Layer<br />
mode and/or the reverb or chorus reduces the maximum<br />
number of simultaneous notes.<br />
30 sounds in ROM<br />
Reverb, Chorus (3 levels each)<br />
30 incorporated demos<br />
Tempo, Time signature, Accent and Volume controls<br />
Damper (included). Half-pedalling supported with <strong>Korg</strong> DS1H<br />
(optional).<br />
Audio output (OUTPUT L/MONO, R), Headphones, MIDI (IN,<br />
OUT), Damper<br />
Power switch, Master Volume, Reverb, Chorus, Touch, Transpose/Function,<br />
Bank, Sound selectors, Tempo, Metronome,<br />
Demo<br />
DC12V, 500mA, center negative barrel, AC adapter<br />
(included)<br />
5 Watt<br />
52.3 x 11.2 x 4.8 inch (1328 x 285 x 122 mm)<br />
40.7 lbs (18,5 kg)<br />
DC12V, 500mA, center negative barrel, AC adapter; Damper<br />
Pedal; Music stand (all included)<br />
DS 1H - Damper Pedal with half-pedal control<br />
Sounds processed with INFINITY.<br />
<strong>Korg</strong> reserves the right to change the specifications without notice.<br />
Appendix 31
Control panel shortcuts<br />
…while pressing this one<br />
Keep this button pressed…<br />
PIANO 1 PIANO2 E.PIANO 1 E.PIANO 2 HARPSI/CLAV VIBES/GUITAR ORGAN 1 ORGAN 2 STRINGS/PAD CHOIR<br />
REVERB Depth = Low Depth = Medium Depth = High<br />
CHORUS Depth = Low Depth = Medium Depth = High<br />
TOUCH Light Normal Heavy Werckmeister Kirnberger<br />
METRONOME Time: 2/4 Time: 3/4 Time: 4/4 Time: 6/4 Accent Bell sound Metro Vol. Dec. Metro Vol. Inc.<br />
TRAN<strong>SP</strong>OSE/FUNCTION Local On/Off Prg.Change Rx/Tx Crl.Change Rx/Tx Data Dump<br />
Control panel and keyboard<br />
The following diagram shows the various functions you can access by holding the METRONOME or TRAN<strong>SP</strong>OSE/<br />
FUNCTION button down, while pressing one of the notes on the keyboard.<br />
METRONOME<br />
Numeric Tempo Input<br />
C5 = 0 C#5 = 1 D5 = 2<br />
D#5 = 3 E5 = 4 F5 = 5<br />
F#5 = 6 G5 = 7 G#5 = 8<br />
A5 = 9<br />
(Press both for Reset)<br />
Metronome Volume<br />
B5 = Decrease (-)<br />
C6 = Increase (+)<br />
Demo Start<br />
TRAN<strong>SP</strong>OSE<br />
/FUNCTION<br />
MIDI Channels<br />
C2 = Ch 01<br />
…<br />
D#3 = Ch 16<br />
Touch Setting<br />
B3 = Light<br />
C4 = Normal<br />
D4 = Heavy<br />
Tuning<br />
B5 = Down (-)<br />
C6 = Up (+)<br />
(Press both<br />
for Reset)<br />
Transpose<br />
F#6…B6 = -6…-1 st.<br />
C7 = Standard<br />
C#7…F7 = +1…+5 st.<br />
32
<strong>SP</strong>-<strong>200</strong><br />
Piano numérique<br />
Mode d’emploi
PRECAUTIONS<br />
Position de l’instrument<br />
L’instrument ne doit jamais être installé :<br />
• Aux rayons directs du soleil<br />
• Dans des milieux extrêmement froids ou<br />
humides<br />
• Dans des milieux particulièrement sales ou<br />
poussiéreux<br />
• Dans des milieux soumis à de fortes vibrations<br />
Alimentation<br />
Brancher l’adaptateur AC fourni à une prise secteur<br />
ayant un voltage adapté. Ne jamais brancher l’instrument<br />
à une prise secteur dont le voltage est différent<br />
de celui pour lequel l’appareil est prédisposé.<br />
Interférences avec d’autres dispositifs électriques<br />
Cet instrument est doté d’un micro-ordinateur.<br />
Des appareils tels que radios ou postes de télévision<br />
peuvent interférer sur son fonctionnement. Il<br />
faut donc l’installer à une distance appropriée de<br />
tels appareils.<br />
Manipulation<br />
Ne jamais appliquer une force excessive aux<br />
interrupteurs ou aux contrôles car ceci peut les<br />
endommager.<br />
Nettoyage<br />
Si le boîtier de l’appareil est sale, le nettoyer à<br />
l’aide d’un chiffon sec. Ne jamais utiliser des<br />
détergents liquides tels que mazout ou alcool, ou<br />
abrasifs ou détergents inflammables.<br />
Conserver ce mode d’emploi<br />
Après l’avoir lu, conserver le mode d’emploi pour<br />
de futures références.<br />
Ne jamais introduire dans l’appareil des objets<br />
ou des choses<br />
En aucun cas l’instrument ne doit être en contact<br />
avec des liquides. Si un liquide pénètre<br />
dans l’instrument, il y a danger de panne de<br />
courant, de feu, voire d’électrocution.<br />
• Ne jamais introduire des objets métalliques<br />
dans l’instrument. Si de tels objets pénètrent<br />
dans l’instrument, déconnecter l’adaptateur<br />
AC de la prise secteur et contacter le revendeur<br />
<strong>Korg</strong> ou le magasin le plus proche.<br />
MARQUE CE POUR L’HARMONISA-<br />
TION DES STANDARDS EUROPEENS<br />
La marque CE est apposée depuis le 31 décembre<br />
1996 sur nos produits qui utilisent la tension AC,<br />
conformément à la Directive EMC (89/336/CEE)<br />
et à la Directive sur la marque CE (93/68/CEE).<br />
La marque CE apposée depuis le 1 er janvier 1997<br />
indique la conformité aux Directives EMC (89/<br />
336/CEE), sur la marque CE (93/68/CEE) et à la<br />
Directive concernant la Basse Tension (73/23/<br />
EEC).<br />
De même, la marque CE apposée sur nos appareils<br />
faisant appel à l’alimentation sur piles indique<br />
la conformité à la Directive EMC (89/336/<br />
CEE) et à la Directive sur la marque CE (93/68/<br />
EEC).<br />
THE FCC REGULATION WARNING<br />
(FOR THE U.S.A. ONLY)<br />
This equipment has been tested and found to<br />
comply with the limits for a Class B digital<br />
device, pursuant to Part 15 of the FCC Rules.<br />
These limits are designed to provide reasonable<br />
protection against harmful interference in a residential<br />
installation. This equipment generates,<br />
uses, and can radiate radio frequency energy and,<br />
if not installed and used in accordance with the<br />
instructions, may cause harmful interference to<br />
radio communications. However, there is no guarantee<br />
that interference will not occur in a particular<br />
installation. If this equipment does cause<br />
harmful interference to radio or television reception,<br />
which can be determined by turning the<br />
equipment off and on, the user is encouraged to<br />
try to correct the interference by one or more of<br />
the following measures:<br />
• Reorient or relocate the receiving antenna.<br />
• Increase the separation between the equipment<br />
and receiver.<br />
• Connect the equipment into an outlet on a circuit<br />
different from that to which the receiver is<br />
connected.<br />
34
• Consult the dealer or an experienced radio/TV<br />
technician for help.<br />
Unauthorized changes or modification to this system<br />
can void the user’s authority to operate this<br />
equipment.<br />
CANADA<br />
THIS APPARATUS DOES NOT EXCEED THE<br />
“CLASS B” LIMITS FOR RADIO NOISE EMIS-<br />
SIONS FROM DIGITAL APPARATUS SET OUT<br />
IN THE RADIO INTERFERENCE REGULA-<br />
TION OF THE CANADIAN DEPARTMENT OF<br />
COMMUNICATIONS.<br />
LE PRESENT APPAREIL NUMERIQUE<br />
N’EMET PAS DE BRUIT RADIOELECTRIQUE<br />
DEPASSANT LES LIMITES APPLICABLES<br />
AUX APPAREILS NUMERIQUES DE LA<br />
“CLASSE B” PRESCRITES DANS LE REGLE-<br />
MENT SUR LE BROUILLAGE RADIOELEC-<br />
TRIQUE EDICTE PAR LE MINISTERE DES<br />
COMMUNICATIONS DU CANADA.<br />
SERVICE ET ASSISTANCE AU MUSICIEN<br />
Contactez le Service d’Assistance Agréé KORG<br />
le plus proche. Le revendeur Agréé KORG est à<br />
votre disposition pour toute ultérieure information<br />
concernant les produits, les logiciels et les accessoires<br />
pour piano.<br />
KORG SUR INTERNET<br />
Accueil <strong>Korg</strong> Inc. : www.korg.co.jp<br />
Accueil <strong>Korg</strong> France : www.korgfr.net<br />
Accueil <strong>Korg</strong> Canada : www.jamindustries.com<br />
Accueil <strong>Korg</strong> USA : www.korg.com<br />
Accueil <strong>Korg</strong> Italy : www.korg.it<br />
RETABLISSEMENT DES DONNEES<br />
Lors de la mise hors tension de l’instrument, tous<br />
les paramètres se rétablissent à leur valeur<br />
d’usine.<br />
RECLAMATIONS<br />
Les informations contenues dans cette publication<br />
ont été soigneusement préparées et vérifiées. Vu<br />
notre continuel engagement à l’amélioration de<br />
nos produits, il se peut que des spécifications<br />
soient différentes de celles détaillées dans le<br />
mode d’emploi. <strong>Korg</strong> décline toute responsabilité<br />
envers les éventuelles différences qui peuvent se<br />
présenter entre les spécifications et la description<br />
détaillée dans le mode d’emploi - les spécifications<br />
sont sujettes à modifications sans préavis.<br />
GARANTIE<br />
Les produits KORG sont fabriqués conformément<br />
aux plus rigoureuses spécifications en vigueur<br />
dans chaque pays. Ces produits sont garantis par<br />
le distributeur KORG dans le pays où ils ont été<br />
vendus. Le fabricant/distributeur décline toute<br />
responsabilité ou garantie envers tout produit<br />
KORG vendu démuni de garantie ou de numéro<br />
de série. Ceci afin de mieux garantir la protection<br />
et la sécurité de l’acheteur.<br />
© <strong>200</strong>1 <strong>Korg</strong> Italy Spa. Imprimé en Italie<br />
35
SOMMAIRE<br />
Introduction . . . . . . . . . . . . . . . . . . . . . . . . . . . . . . . . . . . . . . . . . . . . . . . . . . . . . . . . 37<br />
Caractéristiques principales . . . . . . . . . . . . . . . . . . . . . . . . . . . . . . . . . . . . . . . . . . . . . . . . . . . .37<br />
1 Faces avant et arrière . . . . . . . . . . . . . . . . . . . . . . . . . . . . . . . . . . . . . . . . . . . . . . . . 39<br />
Face avant . . . . . . . . . . . . . . . . . . . . . . . . . . . . . . . . . . . . . . . . . . . . . . . . . . . . . . . . . . . . . . . . .39<br />
Face arrière . . . . . . . . . . . . . . . . . . . . . . . . . . . . . . . . . . . . . . . . . . . . . . . . . . . . . . . . . . . . . . . .40<br />
2 A lire en premier . . . . . . . . . . . . . . . . . . . . . . . . . . . . . . . . . . . . . . . . . . . . . . . . . . . . 41<br />
Connexion à un système d’amplification externe . . . . . . . . . . . . . . . . . . . . . . . . . . . . . . . . . . .41<br />
Utiliser les casques . . . . . . . . . . . . . . . . . . . . . . . . . . . . . . . . . . . . . . . . . . . . . . . . . . . . . . . . . .41<br />
Mettre l’instrument sous tension . . . . . . . . . . . . . . . . . . . . . . . . . . . . . . . . . . . . . . . . . . . . . . . .41<br />
Régler le volume . . . . . . . . . . . . . . . . . . . . . . . . . . . . . . . . . . . . . . . . . . . . . . . . . . . . . . . . . . . .42<br />
Reproduire les Morceaux de Démonstration . . . . . . . . . . . . . . . . . . . . . . . . . . . . . . . . . . . . . . .42<br />
3 Fonctions de base . . . . . . . . . . . . . . . . . . . . . . . . . . . . . . . . . . . . . . . . . . . . . . . . . . . 45<br />
Jouer un timbre (mode Single) . . . . . . . . . . . . . . . . . . . . . . . . . . . . . . . . . . . . . . . . . . . . . . . . .45<br />
Jouer deux timbres à la fois (mode Layer) . . . . . . . . . . . . . . . . . . . . . . . . . . . . . . . . . . . . . . . .45<br />
Choisir les effets de réverbération et de chorus . . . . . . . . . . . . . . . . . . . . . . . . . . . . . . . . . . . . .46<br />
La pédale de résonance (damper) . . . . . . . . . . . . . . . . . . . . . . . . . . . . . . . . . . . . . . . . . . . . . . .47<br />
Le métronome . . . . . . . . . . . . . . . . . . . . . . . . . . . . . . . . . . . . . . . . . . . . . . . . . . . . . . . . . . . . . .47<br />
4 Fonctions diverses . . . . . . . . . . . . . . . . . . . . . . . . . . . . . . . . . . . . . . . . . . . . . . . . . . 50<br />
Réglage du toucher . . . . . . . . . . . . . . . . . . . . . . . . . . . . . . . . . . . . . . . . . . . . . . . . . . . . . . . . . .50<br />
Fonction Transpose . . . . . . . . . . . . . . . . . . . . . . . . . . . . . . . . . . . . . . . . . . . . . . . . . . . . . . . . . .51<br />
Accordage fin . . . . . . . . . . . . . . . . . . . . . . . . . . . . . . . . . . . . . . . . . . . . . . . . . . . . . . . . . . . . . .51<br />
Sélectionner un tempérament . . . . . . . . . . . . . . . . . . . . . . . . . . . . . . . . . . . . . . . . . . . . . . . . . .52<br />
5 MIDI . . . . . . . . . . . . . . . . . . . . . . . . . . . . . . . . . . . . . . . . . . . . . . . . . . . . . . . . . . . . . 54<br />
Le MIDI, qu’est-ce que c’est ? . . . . . . . . . . . . . . . . . . . . . . . . . . . . . . . . . . . . . . . . . . . . . . . . .54<br />
Que peut-on faire avec le MIDI? . . . . . . . . . . . . . . . . . . . . . . . . . . . . . . . . . . . . . . . . . . . . . . . .54<br />
Connexions . . . . . . . . . . . . . . . . . . . . . . . . . . . . . . . . . . . . . . . . . . . . . . . . . . . . . . . . . . . . . . . .54<br />
Réglages MIDI standards . . . . . . . . . . . . . . . . . . . . . . . . . . . . . . . . . . . . . . . . . . . . . . . . . . . . .55<br />
Sélectionner le canal de transmission . . . . . . . . . . . . . . . . . . . . . . . . . . . . . . . . . . . . . . . . . . . .55<br />
Utiliser le <strong>SP</strong>-<strong>200</strong> en tant que générateur de sons multimbres . . . . . . . . . . . . . . . . . . . . . . . . .56<br />
Local On/Off . . . . . . . . . . . . . . . . . . . . . . . . . . . . . . . . . . . . . . . . . . . . . . . . . . . . . . . . . . . . . . .56<br />
Program Change . . . . . . . . . . . . . . . . . . . . . . . . . . . . . . . . . . . . . . . . . . . . . . . . . . . . . . . . . . . .57<br />
Control Change . . . . . . . . . . . . . . . . . . . . . . . . . . . . . . . . . . . . . . . . . . . . . . . . . . . . . . . . . . . . .59<br />
MIDI Data Dump . . . . . . . . . . . . . . . . . . . . . . . . . . . . . . . . . . . . . . . . . . . . . . . . . . . . . . . . . . .59<br />
6 Appendice . . . . . . . . . . . . . . . . . . . . . . . . . . . . . . . . . . . . . . . . . . . . . . . . . . . . . . . . . 62<br />
Problèmes et solutions . . . . . . . . . . . . . . . . . . . . . . . . . . . . . . . . . . . . . . . . . . . . . . . . . . . . . . . .62<br />
Polyphonie . . . . . . . . . . . . . . . . . . . . . . . . . . . . . . . . . . . . . . . . . . . . . . . . . . . . . . . . . . . . . . . . .62<br />
Spécifications techniques . . . . . . . . . . . . . . . . . . . . . . . . . . . . . . . . . . . . . . . . . . . . . . . . . . . . .63<br />
Détails du tableau de commande . . . . . . . . . . . . . . . . . . . . . . . . . . . . . . . . . . . . . . . 64<br />
Tableau de commande et clavier . . . . . . . . . . . . . . . . . . . . . . . . . . . . . . . . . . . . . . . 64<br />
MIDI Implementation Chart . . . . . . . . . . . . . . . . . . . . . . . . . . . . . . . . . . . . . . . . . . . 133<br />
36 SOMMAIRE
INTRODUCTION<br />
Caractéristiques principales<br />
Introduction<br />
Vaste gamme de timbres. Trente timbres différents, d’excellente qualité, y inclut<br />
un timbre “Stereo Concert Grand Piano”. La fonction Layer permet de jouer deux<br />
timbres ensemble.<br />
Effets. Le <strong>SP</strong>-<strong>200</strong> est doté d’effets numériques qui simulent une salle de concert<br />
(Reverb) et étoffent le timbre (Chorus).<br />
Pédale de résonance Damper. La pédale Damper du <strong>SP</strong>-<strong>200</strong> correspond à la<br />
pédale de résonance ou “Forte” d’un piano acoustique. Lorsqu’on exerce une pression<br />
sur cette pédale du piano acoustique, les étouffoirs qui limitent les vibrations<br />
des cordes sont soulevés.<br />
Métronome. Le métronome incorporé permet de sélectionner la métrique du<br />
tempo, le tempo, le volume et, éventuellement, d’utiliser une clochette pour mettre<br />
l’accent.<br />
Contrôle du Toucher. Trois différents réglages de dynamique sont disponibles<br />
pour la réponse du clavier au toucher.<br />
Tempéraments. Le <strong>SP</strong>-<strong>200</strong> joue le tempérament Egal (Equal), ainsi que deux<br />
autres tempéraments classiques (Kirnberger et Werckmeister) pour une attentive<br />
reproduction historique de la musique classique. En sélectionnant un timbre de<br />
piano acoustique, le typique “Stretched Tuning” (cordes pincées) correspondant est<br />
automatiquement choisi.<br />
Réglage de la hauteur. La fonction Transpose permet de modifier la hauteur du<br />
timbre, tandis que la fonction Pitch Control permet d’effectuer un accordage fin.<br />
Caractéristiques MIDI. Le <strong>SP</strong>-<strong>200</strong> supporte le protocole MIDI, c’est à dire un<br />
protocole standard qui permet d’échanger des données musicales entre instruments<br />
Introduction 37
musicaux et ordinateurs. Le protocole MIDI permet à deux dispositifs (ou plus) de<br />
piloter ou d’être pilotés l’un l’autre ; le <strong>SP</strong>-<strong>200</strong> peut ainsi fonctionner comme un<br />
générateur sonore à 16 parties multitimbres.<br />
38 Introduction
CHAPITRE<br />
1<br />
Faces avant et arrière<br />
Face avant<br />
1 2 3 4 5 6<br />
7<br />
8 9 0<br />
1 Curseur MASTER VOLUME : Règle le volume des bornes Output et Phones.<br />
2 Bouton REVERB : Active/coupe l’effet de réverbération. Etoffe le son.<br />
3 Bouton CHORUS : Active/coupe l’effet de Chorus. Enrichit le son.<br />
4 Bouton TOUCH : Sélectionne la courbe de dynamique du toucher du clavier.<br />
5 Bouton TRAN<strong>SP</strong>OSE/FUNCTION : Bouton multifunctions que l’on utilise pour<br />
modifier la transposition et l’accordage fin, pour programmer les paramètres MIDI<br />
et effectuer d’autres réglages.<br />
Note : Lors de la mise hors tension de l’instrument, les paramètres se rétablissent à<br />
leur valeur d’usine.<br />
6 Bouton BANK : Sélectionne l’une des 3 banques de timbres disponibles.<br />
7 Boutons de sélection des timbres (SOUND SELECTION) : Appuyez sur l’un des<br />
boutons pour jouer le timbre indiqué (mode Single). Appuyez simultanément sur<br />
deux boutons pour jouer deux timbres (mode Layer).<br />
Faces avant et arrière 39
8 Curseur TEMPO : Règle le tempo du métronome.<br />
9 Bouton METRONOME : Active/coupe le clic du métronome.<br />
0 DEMO: Active/coupe le mode Demo, pour reproduire les morceaux de démonstration.<br />
Pour sélectionner les morceaux, appuyez sur les boutons de sélection des timbres<br />
(voir poste 7).<br />
Face arrière<br />
1<br />
2 3 4 5 6 7<br />
1 Pupitre : Introduire le pupitre dans les deux perçages prévus. La première fois que<br />
vous utilisez le pupitre, il faut exercer une certaine force pour l’introduire ou l’enlever.<br />
Successivement, les trous en plastique s’adapteront au pupitre et les opérations<br />
seront facilitées.<br />
2 Bornes MIDI (IN, OUT) : Bornes pour connecter des dispositifs tels que séquenceurs,<br />
claviers, etc. OUT : Sortie des données (à connecter à la borne MIDI IN d’un<br />
autre dispositif MIDI). IN : Entrée de données (à connecter la borne MIDI OUT<br />
d’un autre dispositif MIDI).<br />
3 DAMPER: Connecter la pédale fournie à cette borne.<br />
4 Bornes OUTPUT (L/MONO, R) : Sortie audio. Connecter une enceinte amplifiée<br />
à ces bornes. (Avec un système hi-fi doté de bornes AUX ou TAPE, et non la borne<br />
PHONO). Pour amplifier le <strong>SP</strong>-<strong>200</strong> en mono, connecter la borne L/MONO. Utiliser<br />
le curseur MASTER VOLUME pour régler le volume général.<br />
5 Borne PHONES : Pour connecter un casque.<br />
6 Borne DC 12V IN: Pour connecter l’adaptateur AC fourni.<br />
7 Interrupteur POWER : Interrupteur de mise sous/hors tension de l’instrument.<br />
40 Chapitre 1
CHAPITRE<br />
2<br />
A lire en premier<br />
Connexion à un système d’amplification externe<br />
Pour amplifier le <strong>SP</strong>-<strong>200</strong>, connectez les bornes OUTPUT à une table de mixage<br />
d’excellente qualité, à un système stéréo ou à une paire de retours de scène amplifiés.<br />
Si vous utilisez un système hi-fi stéréo, connectez les bornes OUTPUT aux<br />
bornes AUX ou TAPE (ne jamais utiliser les bornes PHONO). Pour amplifier en<br />
mono, connectez uniquement la borne L/MONO.<br />
Utiliser les casques<br />
Pour jouer et s’exercer durant la nuit ou ne pas déranger les autres personnes présentes<br />
dans la salle, connectez un casque d’excellente qualité (impédance 32Ω suggérée)<br />
à la borne prévue en face arrière. La borne est standard 1/4”. Si votre casque<br />
est doté d’un adaptateur, empoignez-le lorsque vous connectez/déconnectez le casque.<br />
Pour connecter deux casques, contactez votre revendeur <strong>Korg</strong> de confiance qui vous<br />
fournira toutes les informations relatives aux distributeurs de casques.<br />
Attention : Pour protéger l’ouïe, on déconseille une écoute prolongée à volume<br />
élevé avec le casque.<br />
Mettre l’instrument sous tension<br />
Introduire la fiche DC de l’adaptateur AC fourni dans la borne DC du <strong>SP</strong>-<strong>200</strong> et<br />
ensuite connecter la fiche AC à la prise secteur ; appuyer sur l’interrupteur POWER.<br />
Lorsque l’instrument est sous tension, les témoins du tableau de commande s’allument.<br />
Pour mettre l’instrument hors tension, appuyer de nouveau sur POWER.<br />
Note : Lors de la mise hors tension de l’instrument, les paramètres se rétablissent<br />
aux valeurs d’usine.<br />
A lire en premier 41
Régler le volume<br />
Pour augmenter le volume, déplacer le curseur MASTER VOLUME vers la droite ;<br />
vers la gauche pour le diminuer. La limite maximum est “10” ; celle minimum<br />
(silence) est “0”. Ce réglage contrôle le niveau de sortie du casque et des bornes<br />
OUTPUT.<br />
Note : On conseille de toujours commencer à jouer à faible volume et de l’augmenter<br />
par la suite.<br />
Reproduire les Morceaux de Démonstration<br />
30 morceaux de démonstration sont stockés dans le <strong>SP</strong>-<strong>200</strong>. Reproduisez-les pour<br />
écouter les riches timbres et le potentiel d’expression sonore de votre instrument.<br />
Reproduire tous les morceaux. Il suffit d’une seule commande pour reproduire<br />
tous les morceaux.<br />
1 Appuyez sur le bouton DEMO (ou enfoncez le bouton TRAN<strong>SP</strong>OSE/FUNCTION<br />
et appuyez sur la note E1 du clavier). Les témoins des boutons de sélection des timbres<br />
clignotent en séquence de gauche à droite. Après quelques secondes, la reproduction<br />
commence. Tous les morceaux de démonstration sont reproduits. A la fin du<br />
dernier morceau, la reproduction recommence depuis le premier.<br />
2 Pendant la reproduction, appuyez sur l’un des boutons de sélection des timbres pour<br />
répéter uniquement les dix morceaux de démonstration de la banque en cours. (Il y a<br />
trois banques de dix morceaux de démonstration chacune : 1-10, 11-20, 21-30).<br />
Par exemple, si vous appuyez sur le bouton CHOIR pendant la reproduction du<br />
morceau 1, le morceau 10 est immédiatement reproduit et ensuite le cycle recommence<br />
de 1 à 10.<br />
3 Appuyez sur DEMO pour arrêter la reproduction et quitter le mode de démonstration.<br />
Reproduire un morceau individuel. Vous pouvez sélectionner un morceau spécifique<br />
et le reproduire.<br />
1 D’abord, vous devez sélectionner l’une des trois banques de timbres disponibles.<br />
• Pour sélectionner la première banque (1-10), appuyez une fois sur le bouton<br />
DEMO. Les témoins clignotent l’un après l’autre, de gauche à droite.<br />
• Pour sélectionner la deuxième banque (11-20), appuyez de nouveau sur le bouton<br />
DEMO. Tous les témoins clignotent simultanément.<br />
• Pour sélectionner la troisième banque (21-30), appuyez une troisième fois sur le<br />
bouton DEMO. Les témoins adjacents clignotent de manière alternée.<br />
42 Chapitre 2
2 Appuyez sur le bouton de sélection des timbres correspondant à la banque sélectionnée.<br />
Le témoin du bouton de démonstration sélectionné reste allumé, tandis que<br />
les autres s’éteignent.<br />
A la fin de la reproduction du morceau sélectionné, tous les morceaux de la banque<br />
sélectionnée seront reproduits en cycle.<br />
Bouton Banque1 (1-10) Banque 2 (11-20) Banque 3 (21-30)<br />
PIANO 1<br />
PIANO 2<br />
E.PIANO 1<br />
E.PIANO 2<br />
HARPSI<br />
/CLAV<br />
VIBES<br />
/GUITAR<br />
ORGAN 1<br />
ORGAN 2<br />
STRINGS<br />
/PAD<br />
CHOIR<br />
F. Mendelssohn-Bartholdy:<br />
Prelude Op.104a,<br />
no.2<br />
F. Chopin: Nocturne<br />
Op.9, no.2<br />
C.A. Debussy: Clair de<br />
lune<br />
<strong>Korg</strong> Original (M. Tempia):<br />
Lullaby for a Little<br />
Star<br />
L. van Beethoven: Für<br />
Elise<br />
F. Chopin: Etude Op.10,<br />
no.3<br />
W.A. Mozart: A la turque<br />
(from the Sonata in A-<br />
major K.331)<br />
F. Chopin: Valse<br />
no.6 in D♭-major<br />
Op.64, no.1<br />
<strong>Korg</strong> Original (M. Tempia):<br />
Old Feather Blues<br />
<strong>Korg</strong> Original (M. Tempia):<br />
Noise of time<br />
<strong>Korg</strong> Original (M. Tempia):<br />
Reflection<br />
S. Joplin: The Entertainer<br />
<strong>Korg</strong> Original (M. Tempia):<br />
Jumper<br />
<strong>Korg</strong> Original (M. Tempia):<br />
All the Ones You<br />
Don’t Know<br />
J.S. Bach: Italian Concert<br />
<strong>Korg</strong> Original (M. Tempia):<br />
Jazz in Spain<br />
<strong>Korg</strong> Original (M. Tempia):<br />
Cool “B”<br />
F. Mendelssohn-Bartholdy:<br />
Wedding March<br />
J.S. Bach: Air on the G<br />
string<br />
<strong>Korg</strong> Original (M. Tempia):<br />
Voice Texture<br />
C.A. Debussy:<br />
Arabesque no.1<br />
J.S. Bach: Two-voice<br />
invention no.13<br />
F. Chopin: Fantasie-<br />
Impromptu Op.66<br />
J.S. Bach: Prelude in C<br />
major (from Das Wohltemeperierte<br />
Klavier)<br />
<strong>Korg</strong> Original (M. Tempia):<br />
Rubber Bob<br />
R. Schumann: Traumarei,<br />
Op.15, no.7<br />
F. Mendelssohn-Bartholdy:<br />
Spring Song,<br />
Op.62, no.6<br />
<strong>Korg</strong> Original (M. Tempia):<br />
Sunflowers<br />
P.D. Paradisi: Toccata in<br />
A major<br />
<strong>Korg</strong> Original (M. Tempia):<br />
Wet Raccoon Rag<br />
3 Appuyez sur DEMO pour arrêter la reproduction et quitter le mode de démonstration.<br />
Note : Pendant la reproduction des morceaux de démonstration, vous ne pouvez pas<br />
sélectionner un timbre en appuyant sur les boutons de sélection des timbres ou sur<br />
les boutons REVERB et CHORUS.<br />
Régler le tempo des morceaux de démonstration. A l’aide du curseur<br />
TEMPO, vous pouvez modifier le tempo du morceau de démonstration sélectionné.<br />
A lire en premier 43
Normalement, le tempo de reproduction des morceaux de démonstration n’est pas<br />
influencé par les positions du curseur TEMPO.<br />
Note : Vous ne pouvez pas utiliser le métronome pendant la reproduction d’un morceau<br />
de démonstration.<br />
Note : Lorsqu’un morceau de démonstration est sélectionné, c’est son tempo original<br />
qui est reproduit.<br />
44 Chapitre 2
CHAPITRE<br />
3<br />
Jouer un timbre (mode Single)<br />
Fonctions de base<br />
Sélectionner l’un des trente timbres à disposition.<br />
1 Appuyez sur l’un des boutons de sélection des timbres. Le témoin du bouton<br />
enfoncé s’allume.<br />
2 Appuyez sur le bouton BANK pour sélectionner l’une des trois banques disponibles<br />
(1-10, 11-20, 21-30). En appuyant une fois sur ce bouton, c’est la Banque 2 qui est<br />
sélectionnée ; en l’appuyant deux fois, c’est la Banque 3 qui est sélectionnée ; en<br />
l’appuyant trois fois, c’est la Banque 1 qui est de nouveau sélectionnée.<br />
Bouton Banque 1 # Banque 2 # Banque 3 #<br />
PIANO 1 Grand Piano 1 2 Bright Piano 2 Grand Piano 2 1<br />
PIANO 2 Classic Piano 2 Honky-Tonky 2 E.Grand Piano 1<br />
E.PIANO 1 Stage E.Piano 1 Club E.Piano 2 Thin E.Piano 2<br />
E.PIANO 2 Digital E.Piano 1 60’s E.Piano 1 Vintage E.Piano 2<br />
HARPSI/CLAV Harpsichord 1 Clav. 1 Wah Clav. 1<br />
VIBES/GUITAR Vibraphone 1 Marimba 1 Acoustic Guitar 1<br />
ORGAN 1 Jazz Organ 1 2 Jazz Organ 2 2 Jazz Organ 3 2<br />
ORGAN 2 Church Organ 1 3 Church Organ 2 1 Church Organ 3 1<br />
STRINGS/PAD Strings 1 Slow Strings 2 Warm Pad 2<br />
CHOIR Choir Hoo 1 Choir Doo 2 Choir Pad 2<br />
(#) Cette colonne détaille le nombre d’oscillateurs par voix exploités par chaque timbre<br />
Jouer deux timbres à la fois (mode Layer)<br />
Vous pouvez jouer deux timbres ensemble sur le clavier. C’est le mode Layer.<br />
Fonctions de base 45
Note : Lorsque le mode Layer est sélectionné, le nombre total de voix pouvant jouer<br />
simultanément est réduit, en fonction du nombre total d’oscillateurs exploités par<br />
les timbres sélectionnés.<br />
Note : Deux timbres prévus sous le même bouton ne peuvent pas être sélectionnés<br />
simultanément.<br />
1 Appuyez sur l’un des boutons de sélection des timbres pour sélectionner le premier<br />
timbre. Le témoin du bouton enfoncé s’allume. Appuyez sur le bouton BANK pour<br />
sélectionner un timbre dans une autre banque.<br />
2 Appuyez sur un autre bouton de sélection des timbres pour sélectionner le second<br />
timbre. Le témoin du bouton enfoncé s’allume. Appuyez sur le bouton BANK pour<br />
sélectionner un timbre dans une autre banque.<br />
3 Appuyez sur les deux boutons en même temps pour sélectionner les timbres. Les<br />
deux témoins s’allument.<br />
Note : Les opérations des postes 1 et 2 ne sont pas nécessaires si la bonne banque<br />
est sélectionnée.<br />
Rétablir le mode Single. Pour rétablir le mode Single, il suffit d’appuyer sur un<br />
seul bouton de sélection des timbres.<br />
Régler le volume des timbres en mode Layer. Pour régler le balancement des<br />
timbres en mode Layer, maintenez enfoncé le bouton du timbre duquel vous souhaitez<br />
diminuer le niveau et appuyez autant de fois que nécessaire sur le bouton du timbre<br />
duquel vous souhaitez augmenter le volume.<br />
Note : Ce réglage reste mémorisé même lorsque vous coupez le mode Layer, mais<br />
s’annule lors de la mise hors tension de l’instrument. Pour mémoriser ces réglages,<br />
il faut les sauvegarder par le biais de la fonction Data Dump (voir “MIDI Data<br />
Dump” on page 59).<br />
Choisir les effets de réverbération et de chorus<br />
Le <strong>SP</strong>-<strong>200</strong> est doté de deux effets : réverbération et chorus. La réverbération simule<br />
la réflexion du son dans une salle, tandis que le chorus simule un effet modulant qui<br />
étoffe le son. Les réglages de l’effet sont mémorisés même lorsque vous sélectionnez<br />
un timbre différent.<br />
Note : Les réglages des effets effectués en mode Single restent mémorisés même si<br />
vous sélectionnez le mode Layer, mais aucune des modifications effectuées en<br />
mode Layer ne sera mémorisée.<br />
46 Chapitre 3
Lors de la mise hors tension de l’instrument, les réglages des effets se rétablissent à<br />
leur valeur d’usine. Pour mémoriser ces réglages, il faut les sauvegarder par le biais<br />
de la fonction Data Dump (voir “MIDI Data Dump” on page 59).<br />
1 Enfoncez le bouton REVERB ou CHORUS et appuyez sur l’un des boutons de<br />
sélection des timbres PIANO 1/L, PIANO 2/M ou E.PIANO1/H pour sélectionner<br />
la profondeur de l’effet de réverbération ou de chorus.<br />
Bouton Profondeur de la réverbération Profondeur du chorus<br />
PIANO 1/L Réverbération faible Chorus faible<br />
PIANO 2/M Réverbération normale Chorus normal<br />
E.PIANO 1/H Réverbération profonde Chorus profond<br />
2 Pour vérifier la profondeur de la réverbération ou du chorus en cours, enfoncez le<br />
bouton REVERB ou CHORUS et regardez quel témoins s’allume.<br />
3 Pour couper l’effet de réverbération ou de chorus, appuyez sur le bouton REVERB<br />
ou CHORUS. Le témoin du bouton s’éteint.<br />
La pédale de résonance (damper)<br />
La pédale fournie peut être utilisée en tant que pédale d’étouffement. En connectant<br />
à la borne DAMPER une pédale <strong>Korg</strong> DS1H (en option), la fonction mi-pédale est<br />
disponible, permettant d’appliquer une résonance graduelle, en fonction de la pression<br />
exercée sur la pédale.<br />
En mode Layer, vous sélectionnez le(s) timbre(s) auxquels la pédale est affectée.<br />
Note : Lors de la mise sous tension de l’instrument, les réglages de la pédale se rétablissent<br />
à leur valeur d’usine. Pour mémoriser ces réglages, les sauvegarder par le<br />
biais de la fonction Data Dump (voir “MIDI Data Dump” on page 59).<br />
1 Enfoncez le bouton TRAN<strong>SP</strong>OSE/FUNCTION et appuyez sur la pédale d’étouffement.<br />
Chaque fois que vous appuyez sur la pédale, le témoin du bouton de sélection<br />
des timbres sur lequel la pédale est activée s’allume.<br />
2 Lorsque la pédale est ainsi affectée au(x) timbre(s) désiré(s), relâchez le bouton<br />
TRAN<strong>SP</strong>OSE/FUNCTION.<br />
Le métronome<br />
Le <strong>SP</strong>-<strong>200</strong> est doté d’un métronome qui vous permet de régler le tempo lorsque<br />
vous vous exercez.<br />
Fonctions de base 47
Lancer et arrêter le métronome. Appuyez sur METRONOME pour lancer le<br />
métronome ou l’arrêter. Lors de la mise sous tension de l’instrument, le métronome<br />
est réglé en fonction de la position du curseur, mais vous pouvez le régler à votre<br />
gré en procédant comme expliqué successivement. Si vous reproduisez un morceau<br />
de démonstration, le tempo en cours correspondra au dernier morceau de démonstration<br />
reproduit.<br />
Régler le volume du métronome. Lorsque le métronome est activé, enfoncez le<br />
bouton METRONOME et appuyez plusieurs fois sur STRINGS/PAD (ou sur la touche<br />
Si5) pour diminuer le volume, sur CHOIR (ou sur la touche Do6) pour l’augmenter.<br />
Pour rétablir le volume à ses valeurs d’usine, appuyez simultanément sur les<br />
deux boutons STRINGS/PAD et CHOIR (ou sur les touches Si5 et Do6 du clavier)<br />
tout en maintenant enfoncé le bouton METRONOME.<br />
Touche Effet Touche Effet<br />
Si5 Volume faible Do6 Volume élevé<br />
Régler le tempo par le biais du curseur TEMPO. Le curseur TEMPO permet<br />
de régler le tempo dans une plage de = 40 ~ <strong>200</strong>.<br />
Saisie numérique du tempo. Parfois, le battement du tempo prédisposé à l’aide<br />
du curseur TEMPO n’est pas assez précis. Pour introduire un tempo spécifique,<br />
vous pouvez utiliser une saisie numérique.<br />
1 Maintenez enfoncé le bouton METRONOME.<br />
2 Appuyez sur les touches du clavier pour saisir la valeur du tempo sur trois chiffres<br />
(insérer “0” avant une valeur à deux chiffres).<br />
Touche Numéro Touche Numéro<br />
Do5 0 Do#5 1<br />
Ré5 2 Ré#5 3<br />
Mi5 4 Fa5 5<br />
Fa#5 6 Sol5 7<br />
48 Chapitre 3
Touche Numéro Touche Numéro<br />
Sol#5 8 La5 9<br />
Par exemple, pour saisir la valeur 168, enfoncez le bouton METRONOME et<br />
appuyez sur Do#5 (1), Fa#5 (6), Sol#5 (8). Pour saisir une valeur de 85, enfoncez le<br />
bouton METRONOME et appuyez sur Do5 (0), Sol#5 (8), Fa5 (5).<br />
Sélectionner la “time signature”. Cette fonction permet d’accentuer le premier<br />
battement de la mesure.<br />
Bouton<br />
Métrique (Time signature)<br />
PIANO 1 2 mouvements (2/4, 2/8...)<br />
PIANO 2 3 mouvements (3/4, 3/8...)<br />
E.PIANO 1 4 mouvements (4/4, 4/8...)<br />
E.PIANO 2 6 mouvements (6/4, 6/8...)<br />
1 Avec le métronome activé, enfoncez le bouton METRONOME et appuyez sur le<br />
bouton correspondant à la time signature désirée (voir tableau précédent). Le premier<br />
mouvement de la mesure sera accentué.<br />
2 Pour couper l’accent, enfoncez le bouton METRONOME et appuyez sur le bouton<br />
de sélection des timbres dont le témoin est allumé.<br />
Note : Lors de la mise hors tension de l’instrument, l’accent est automatiquement<br />
désactivé.<br />
Sélectionner une clochette pour l’accent. Le battement accentué peut être<br />
remplacé par le son d’une clochette.<br />
1 Avec le métronome activé, enfoncez le bouton METRONOME et appuyez sur le<br />
bouton de sélection des timbres VIBES/GUITAR. Le témoin de ce bouton s’allume<br />
et une clochette résonne sur le premier battement de la mesure.<br />
2 Pour rétablir l’accent normal, enfoncez le bouton METRONOME et appuyez sur le<br />
bouton de sélection des timbres HARPSI/CLAV pour allumer le témoin du bouton<br />
HARPSI/CLAV.<br />
Note : Lors de la mise hors tension de l’instrument, la clochette est automatiquement<br />
désactivée.<br />
Fonctions de base 49
CHAPITRE<br />
4<br />
Réglage du toucher<br />
Fonctions diverses<br />
Vous pouvez régler la sensibilité du clavier ou réponse au toucher. Maintenez<br />
enfoncé le bouton TOUCH et appuyez sur le bouton correspondant au réglage de<br />
dynamique souhaité.<br />
Bouton<br />
PIANO 1/L<br />
PIANO 2/M<br />
E.PIANO 1/H<br />
Toucher<br />
Léger. Les notes graves sont reproduites même en appliquant un toucher<br />
léger.<br />
Normal. Toucher normal d’un piano.<br />
Lourd. Les notes graves ne sont reproduites que si l’on joue très fort.<br />
Pour vérifier le réglage en cours, enfoncez le bouton TOUCH et regardez lequel des<br />
témoins s’allume.<br />
Note : Lors de la mise sous tension de l’instrument, le toucher est réglé à Normal.<br />
Vous pouvez également utiliser le bouton TRAN<strong>SP</strong>OSE/FUNCTION et le clavier.<br />
Enfoncez le bouton TRAN<strong>SP</strong>OSE/FUNCTION et appuyez sur la touche du clavier<br />
correspondante au réglage désiré (voir tableau).<br />
Bouton<br />
Si3<br />
Do4<br />
Ré4<br />
Toucher<br />
Léger. Les notes graves sont reproduites même en appliquant un toucher<br />
léger.<br />
Normal. Toucher normal d’un piano.<br />
Lourd. Les notes graves ne sont reproduites que si l’on joue très fort.<br />
50 Chapitre 4
Fonction Transpose<br />
Vous pouvez transposer (décaler) la hauteur (ou accordage) de l’instrument par pas<br />
d’un ou de plusieurs demi-tons vers l’aiguë ou vers la grave. Cette fonction permet<br />
d’adapter facilement la tonalité de votre <strong>SP</strong>-<strong>200</strong> à un autre instrument dont vous<br />
jouez simultanément ou de simplifier un morceau présentant trop d’altérations.<br />
Note : Lors de la mise sous tension de l’instrument, la transposition est réglée à ses<br />
valeurs d’usine.<br />
1 Appuyez sur TRAN<strong>SP</strong>OSE/FUNCTION. Sur le clavier, appuyez sur la touche correspondante<br />
à la transposition souhaitée (voir tableau). Le témoin de TRAN<strong>SP</strong>OSE/<br />
FUNTION reste allumé en indiquant que la fonction de transposition est activée.<br />
Touche<br />
Fa#6 — Si6<br />
Do7<br />
Do#7 — Fa7<br />
Effet<br />
6 — 1 demi-tons plus graves<br />
Accordage standard<br />
1 — 5 demi-tons plus aigus<br />
2 Pour rétablir la hauteur standard, enfoncez le bouton TRAN<strong>SP</strong>OSE/FUNCTION et<br />
appuyez sur la touche Do7. Le témoin de TRAN<strong>SP</strong>OSE/FUNCTION s’éteint.<br />
Accordage fin<br />
Pour adapter la hauteur de votre <strong>SP</strong>-<strong>200</strong> à celle d’un autre instrument, vous pouvez<br />
la régler par pas de 0.5 Hz, dans la plage La4 = 427.5 ~ 452.5 Hz. L’accordage standard<br />
correspond à La4 = 440 Hz.<br />
Note : La hauteur est rétablie à l’accordage standard (La4 = 440 Hz) lors de la mise<br />
hors tension et de nouveau sous tension de l’instrument.<br />
1 Appuyez sur TRAN<strong>SP</strong>OSE/FUNCTION et appuyez sur la touche correspondante à<br />
la hauteur à modifier. Chaque fois que vous appuyez sur Si5 ou sur Do6, la hauteur<br />
augmentera ou diminuera de 0.5 Hz.<br />
Fonctions diverses 51
2 Pour rétablir l’accordage standard, maintenez enfoncé le bouton TRAN<strong>SP</strong>OSE/<br />
FUNCTION et appuyez sur les deux touches Si5 et Do6 simultanément.<br />
Touche<br />
Si5<br />
Si5+Do6<br />
Do6<br />
Accordage fin<br />
Diminue la hauteur de 0.5 Hz<br />
Hauteur normale (La4 = 440 Hz)<br />
Augmente la hauteur de 0.5 Hz<br />
Sélectionner un tempérament<br />
La plupart des compositions classiques utilisent des tempéraments différents du<br />
“tempérament égal” utilisé de nos jours. Afin de reproduire les timbres originaux de<br />
ces compositions, votre <strong>SP</strong>-<strong>200</strong> est doté des tempéraments classiques Kirnberger et<br />
Werckmeister, outre le tempérament égal. Il y a donc trois tempéraments à votre disposition.<br />
Pour en sélectionner un, enfoncez le bouton TOUCH et ensuite appuyez sur le bouton<br />
correspondant au tempérament souhaité. Pour rétablir le tempérament égal,<br />
enfoncez le bouton TOUCH et appuyez sur le bouton de sélection des timbres dont<br />
le témoin est allumé.<br />
Bouton<br />
HARPSI/CLAV<br />
VIBES/GUITAR<br />
Les deux<br />
témoins éteints<br />
Tempérament<br />
Werckmeister. C’est la gamme Werckmeister III inventée par Andreas<br />
Werckmeister, un organiste et théoricien musical allemand. Gamme du<br />
bas baroque/classique.<br />
Kirnberger. C’est la gamme Kirnberger III inventée par Johann Phillip Kirnberger<br />
au début du XVIII è siècle, pour clavecins.<br />
Tempérament égal. C’est la gamme normalement utilisée de nos jours<br />
dans le monde occidental, caractérisée par un intervalle égal entre tous<br />
les 12 demi-tons.<br />
Pour vérifier le tempérament en cours, maintenez enfoncé le bouton TOUCH et<br />
regardez lequel des témoins s’allume.<br />
Note : L’instrument se prédispose automatiquement avec le tempérament égal<br />
sélectionné lors de la mise sous tension.<br />
52 Chapitre 4
Strechted Tuning (cordes “pincées”). Afin de reproduire la résonance la plus<br />
naturelle, les timbres PIANO 1 et PIANO 2 utilisent la technique des “cordes pincées”<br />
: les notes graves seront légèrement plus altérées vers la grave que dans le<br />
tempérament égal, tandis que celles plus aiguës seront légèrement plus altérées vers<br />
l’aiguë. C’est ainsi que les accordeurs professionnels règlent normalement les pianos<br />
acoustiques.<br />
Fonctions diverses 53
CHAPITRE<br />
5<br />
Le MIDI, qu’est-ce que c’est ?<br />
MIDI<br />
MIDI est l’abréviation de Musical Instrument Digital Interface (interface numérique<br />
pour instruments musicaux). C’est un standard international conçu pour connecter<br />
et transférer des données entre instruments musicaux électroniques, ordinateurs et<br />
dispositifs divers.<br />
Que peut-on faire avec le MIDI?<br />
Le MIDI vous permet d’utiliser votre <strong>SP</strong>-<strong>200</strong> pour piloter d’autres instruments ou<br />
d’utiliser d’autres instruments pour piloter votre <strong>SP</strong>-<strong>200</strong>, ainsi que d’utiliser un<br />
séquenceur pour composer des morceaux musicaux complexes.<br />
Lorsque vous jouez sur le clavier de votre <strong>SP</strong>-<strong>200</strong>, ou vous appuyez sur la pédale,<br />
ou vous sélectionnez un timbre, les notes, l’activation de la pédale et le changement<br />
de timbres sont transmis à l’instrument connecté ou enregistré par le séquenceur.<br />
Connexions<br />
Il faut toujours connecter la borne MIDI OUT de l’instrument à la borne MIDI IN<br />
d’un autre instrument. Ne jamais connecter deux bornes du même instrument entre<br />
elles.<br />
Connectez la borne MIDI OUT du dispositif transmetteur (master-maître) à la borne<br />
MIDI IN du dispositif récepteur (slave-esclave).<br />
Pour connecter votre <strong>SP</strong>-<strong>200</strong> à un ordinateur, ce dernier doit être doté d’une interface<br />
MIDI, d’un logiciel de “sequecing” ou de notation musicale et de deux câbles<br />
MIDI standards. Connectez la borne MIDI OUT de votre <strong>SP</strong>-<strong>200</strong> à la borne MIDI<br />
IN de l’ordinateur. Connectez la borne MIDI IN de votre <strong>SP</strong>-<strong>200</strong> à la borne MIDI<br />
OUT de l’ordinateur.<br />
54 Chapitre 5
Réglages MIDI standards<br />
Lors de la mise sous tension de l’instrument, les paramètres MIDI de votre <strong>SP</strong>-<strong>200</strong><br />
sont réglés comme suit :<br />
Paramètre<br />
Réglage<br />
Canal de transmission 1<br />
Canaux de réception Tous les 16 (1-16)<br />
Local<br />
ON<br />
Omni<br />
ON<br />
Sélectionner le canal de transmission<br />
Le standard MIDI prévoit la transmission et la réception des données sur 16 canaux<br />
séparés. Votre <strong>SP</strong>-<strong>200</strong> reçoit sur les 16 canaux et transmet sur un seul canal. Pour<br />
transmettre des données depuis votre <strong>SP</strong>-<strong>200</strong>, vous devez sélectionnez le canal de<br />
transmission.<br />
Maintenez enfoncé le bouton TRAN<strong>SP</strong>OSE/FUNCTION et appuyez sur une touche,<br />
dans la plage de notes Do2–Ré#3, correspondante au canal MIDI souhaité.<br />
Touche Canal Touche Canal<br />
Do2 1 Do#2 2<br />
Ré2 3 Ré2 4<br />
Mi2 5 Fa2 6<br />
Fa#2 7 Sol2 8<br />
Sol#2 9 La2 10<br />
La#2 11 Si2 12<br />
Do3 13 Do#3 14<br />
Ré3 15 Ré#3 16<br />
Note : lors de la mise sous tension, l’instrument se prédispose automatiquement<br />
avec le canal 1 sélectionné.<br />
Note : D’usine, le canal 10 est automatiquement affecté au métronome (notes Ré#5-<br />
Mi5).<br />
MIDI 55
Note : En mode Layer, le second timbre est transmis sur le canal successif. Par<br />
exemple, si vous choisissez le canal 7, le premier timbre est transmis sur le canal 7,<br />
tandis que le second sur le canal 8. Si vous choisissez le canal 16, le second timbre<br />
est transmis sur le canal 1 (retour en cycle au premier canal).<br />
Utiliser le <strong>SP</strong>-<strong>200</strong> en tant que générateur de sons multimbres<br />
Si le <strong>SP</strong>-<strong>200</strong> est piloté par un dispositif MIDI externe, il peut fonctionner en tant<br />
que générateur de sons à 16 parties. Vous pouvez sélectionner un timbre différent<br />
sur chacun des 16 canaux MIDI.<br />
1 Utilisez un câble MIDI pour connecter la borne MIDI IN de votre <strong>SP</strong>-<strong>200</strong> à la borne<br />
MIDI OUT d’un séquenceur, etc.<br />
2 Transmettez les données MIDI depuis le séquenceur connecté (ou autre dispositif).<br />
Voir les instructions détaillées relatives à la sélection d’un timbre via un message de<br />
Changement de Program dans le chapitre “Program Change” on page 57. La réception<br />
de “Program Change” (changement de Program) s’active sur votre <strong>SP</strong>-<strong>200</strong>.<br />
Voir le mode d’emploi du dispositif connecté pour des informations détaillées relativement<br />
à l’envoi des messages de Changement de Program (Program Change).<br />
Local On/Off<br />
Local est un paramètre vous permettant de déterminer si le clavier doit jouer ses<br />
sons internes et transmettre simultanément les données MIDI (Local On) ou transmettre<br />
uniquement les données MIDI, sans jouer ses sons internes (Local Off).<br />
Local Off est utile si votre <strong>SP</strong>-<strong>200</strong> doit fonctionner en tant que clavier étouffé et<br />
donc pour jouer d’un autre instrument. Ce paramètre peut être sélectionné même si<br />
le <strong>SP</strong>-<strong>200</strong> est connecté à un séquenceur via ses bornes MIDI IN et MIDI OUT.<br />
Ainsi, les notes ne seront pas jouées deux fois, c’est à dire par le clavier et par le<br />
séquenceur, car cela produit un ennuyeux effet d’“écho”.<br />
Normalement, c’est Local On qui est automatiquement sélectionné lors de la mise<br />
sous tension de votre <strong>SP</strong>-<strong>200</strong> ; le clavier reproduit donc les sons.<br />
Maintenez enfoncé le bouton TRAN<strong>SP</strong>OSE/FUNCTION et appuyez sur le bouton<br />
de sélection des timbres [PIANO 1]. Le réglage de Local s’alterne de On à Off chaque<br />
fois que vous appuyez sur ce bouton.<br />
Etat de Local Etat du témoin de PIANO 1<br />
Local On<br />
Local Off<br />
Allumé<br />
Eteint<br />
56 Chapitre 5
Note : Lors de la mise sous tension de l’instrument, le paramètre Local est automatiquement<br />
réglé à On.<br />
Program Change<br />
Vous pouvez sélectionner les timbres de votre <strong>SP</strong>-<strong>200</strong> via MIDI, en envoyant un<br />
message de Program Change (Changement de Program) sur le canal auquel vous<br />
voulez affecter ce timbre. Le tableau liste les numéros de Program Change (numérotation<br />
de 0 à 29 ; si le dispositif qui transmet utilise la numérotation de 1 à 30, vous<br />
devez augmenter d’un la valeur du numéro).<br />
Transmission des messages de Program Change. Vous pouvez envoyer un<br />
message de Program Change MIDI à un dispositif MIDI connecté à la borne MIDI<br />
OUT de votre <strong>SP</strong>-<strong>200</strong> MIDI OUT, pour changer ses timbres. Si vous sélectionnez<br />
l’un des sons internes du <strong>SP</strong>-<strong>200</strong> en appuyant sur l’un des boutons de sélection des<br />
timbres, un numéro de Program Change MIDI sera transmis, comme indiqué dans<br />
le tableau.<br />
Réception des messages de Program Change. Lorsque vous recevez un message<br />
de Program Change transmis par un dispositif externe, le son interne correspondant<br />
sera sélectionné sur votre <strong>SP</strong>-<strong>200</strong>, comme indiqué dans le tableau.<br />
Uniquement les numéros de Program Change (PC) compris dans la plage 0–29 sont<br />
reconnus par le <strong>SP</strong>-<strong>200</strong>, tandis que les autres numéros (30-127) sont ignorés.<br />
PC# Bouton Banque Timbre<br />
0<br />
1 Grand Piano 1<br />
1 PIANO 1<br />
2 Bright Piano<br />
2 3 Grand Piano 2<br />
3<br />
1 Classic Grand Piano<br />
4 PIANO 2<br />
2 Honky-Tonky<br />
5 3 E.Grand Piano<br />
6<br />
1 Stage E.Piano<br />
7 E.PIANO 1<br />
2 Club E.Piano<br />
8 3 Thin E.Piano<br />
9<br />
1 Digital E.Piano<br />
10 E.PIANO 2<br />
2 60’s E.Piano<br />
11 3 Vintage E.Piano<br />
MIDI 57
PC# Bouton Banque Timbre<br />
12<br />
1 Harpsichord<br />
13 HARPSI/CLAV 2 Clav.<br />
14 3 Wah Clav.<br />
15<br />
1 Vibraphone<br />
16 VIBES/GUITAR 2 Marimba<br />
17 3 Acoustic Guitar<br />
18<br />
1 Jazz Organ 1<br />
19 ORGAN1<br />
2 Jazz Organ 2<br />
20 3 Jazz Organ 3<br />
21<br />
1 Church Organ 1<br />
22 ORGAN2<br />
2 Church Organ 2<br />
23 3 Church Organ 3<br />
24<br />
1 Strings<br />
25 STRINGS/PAD 2 Slow Strings<br />
26 3 Warm Pad<br />
27<br />
1 Choir Hoo<br />
28 CHOIR<br />
2 Choir Doo<br />
29 3 Choir Pad<br />
Activer/couper Program Change. Pour transmettre et recevoir ce type de données,<br />
vous devez activer la transmission et la réception des messages de Program<br />
Change. Sinon, vous devez couper les données de Program Changes.<br />
Maintenez enfoncé le bouton TRAN<strong>SP</strong>OSE/FUNCTION et appuyez sur le bouton<br />
de sélection des timbres PIANO 2. Chaque fois que vous appuierez sur ce bouton,<br />
les messages de Program Change seront activés/coupés.<br />
Etat de Program Change Etat du témoin de PIANO 2<br />
Activé<br />
Coupé<br />
Allumé<br />
Eteint<br />
Note : Lors de la mise sous tension de l’instrument, les messages de Program<br />
Change sont activés sur tous les canaux MIDI.<br />
58 Chapitre 5
Control Change<br />
Lorsque vous appuyez sur la pédale Damper, ou que vous réglez le balancement en<br />
mode Layer, ou que vous effectuez un réglage sur le tableau de commande, un message<br />
de Control Change (Changement de Contrôle) est envoyé au dispositif MIDI<br />
externe connecté. De même, votre <strong>SP</strong>-<strong>200</strong> reçoit les messages de Control Change<br />
transmis par un dispositif MIDI connecté à sa borne MIDI IN, qui pilote ainsi la<br />
pédale Damper, le réglage du volume et des réglages divers.<br />
Activer/couper les messages de Control Change. Pour transmettre et recevoir<br />
ce type de données, vous devez activer la transmission et la réception des messages<br />
de Control Change. Sinon, vous devez couper les données de Control Change.<br />
Maintenez enfoncé le bouton TRAN<strong>SP</strong>OSE/FUNCTION et appuyez sur le bouton<br />
de sélection des timbres E.PIANO 1. Chaque fois que vous appuierez sur ce bouton,<br />
les messages de Control Change seront activés/coupés.<br />
Etat de Control Change Etat du témoin de E.PIANO 1<br />
Activé<br />
Coupé<br />
Allumé<br />
Eteint<br />
Note : Lors de la mise sous tension de l’instrument, les messages de Control<br />
Change sont activés sur tous les canaux MIDI.<br />
MIDI Data Dump<br />
Vous pouvez sauvegarder les réglages des timbres en cours (mode Single ou Layer)<br />
sur un dispositif MIDI externe de sauvegarde, tel un séquenceur ou un MIDI “data<br />
filer” (dispositif de stockage). Successivement, vous pourrez ainsi recharger sur<br />
votre <strong>SP</strong>-<strong>200</strong> ces données.<br />
Attention : Pour éviter la perte de données, lire attentivement le mode d’emploi du<br />
MIDI “data filer”.<br />
Astuce : Pour éviter tout inconvénient, rappelez-vous de couper la réception des<br />
données en “System Exclusive” sur le dispositif connecté.<br />
Le tableau suivant liste les données sauvegardées via la fonction Data Dump.<br />
Catégorie<br />
Mode Single<br />
Données<br />
Réglages des effets de Réverbération et de Chorus<br />
(état on/off, niveau d’envoi)<br />
MIDI 59
Catégorie<br />
Mode Layer<br />
Données<br />
Réglages des effets de Réverbération et de Chorus<br />
(état on/off, niveau d’envoi), balancement des timbres,<br />
état on/off de la pédale Damper pour chaque timbre.<br />
Sauvegarder les données sur un “data filer”. Pour sauvegarder les données de<br />
votre <strong>SP</strong>-<strong>200</strong>, procédez comme suit :<br />
1 A l’aide d’un câble MIDI, connectez la borne MIDI OUT de votre <strong>SP</strong>-<strong>200</strong> à la<br />
borne MIDI IN du “data filer”.<br />
2 Prédisposez le “data filer” à la réception des données MIDI.<br />
3 Sur le <strong>SP</strong>-<strong>200</strong>, maintenez enfoncé le bouton TRAN<strong>SP</strong>OSE/FUNCTION et appuyez<br />
sur le bouton de sélection des timbres VIBES/GUITAR. Les témoins des boutons<br />
TRAN<strong>SP</strong>OSE/FUNCTION et VIBES/GUITAR clignotent, en indiquant ainsi que le<br />
<strong>SP</strong>-<strong>200</strong> est prêt au transfert de données.<br />
4 Appuyez sur le bouton TOUCH. Le transfert de données commence et les réglages<br />
des timbres sont transmis au “data filer”.<br />
Pendant l’opération de “data dump”, le <strong>SP</strong>-<strong>200</strong> est coupé et vous ne pouvez procéder<br />
à aucune autre opération. Lorsque le transfert de données est complété, le clavier<br />
se prédispose de nouveau à son fonctionnement normal.<br />
Pour annuler une opération de transfert de données avant qu’elle ne commence,<br />
appuyez sur le bouton TRAN<strong>SP</strong>OSE/FUNCTION ou VIBES/GUITAR.<br />
Charger des données sauvegardées sur un “data filer”. Les données précédemment<br />
sauvegardées sur un “data filer” peuvent être rechargées sur votre <strong>SP</strong>-<strong>200</strong>.<br />
1 A l’aide d’un câble MIDI, connectez la borne MIDI IN de votre <strong>SP</strong>-<strong>200</strong> à la borne<br />
MIDI OUT du “data filer”.<br />
2 Sur le <strong>SP</strong>-<strong>200</strong>, maintenez enfoncé le bouton TRAN<strong>SP</strong>OSE/FUNCTION et appuyez<br />
sur le bouton de sélection de timbres VIBES/GUITAR. Les témoins des boutons<br />
TRAN<strong>SP</strong>OSE/FUNCTION et VIBES/GUITAR clignotent, en indiquant ainsi que le<br />
<strong>SP</strong>-<strong>200</strong> est prêt à la réception du transfert de données.<br />
3 Prédisposez le “data filer” à retransmettre les réglages de timbres précédemment<br />
sauvegardés. Voir les informations détaillées relativement à la transmission de données<br />
sur le mode d’emploi du “data filer”.<br />
Le <strong>SP</strong>-<strong>200</strong> reçoit les données.<br />
Lorsque l’opération de “data dump” est terminée, votre <strong>SP</strong>-<strong>200</strong> se rétablit à l’état<br />
précédent à la réception des données.<br />
60 Chapitre 5
Pendant l’opération de “data dump”, le <strong>SP</strong>-<strong>200</strong> est coupé et vous ne pouvez procéder<br />
à aucune autre opération. Lorsque la réception de données est complétée, le<br />
témoin du bouton TOUCH s’éteint et l’instrument se rétablit à son fonctionnement<br />
normal.<br />
Pour annuler une opération de réception de données avant qu’elle ne commence,<br />
appuyez sur le bouton TRAN<strong>SP</strong>OSE/FUNCTION ou VIBES/GUITAR.<br />
MIDI 61
CHAPITRE<br />
6<br />
Problèmes et solutions<br />
Appendice<br />
Si lors de l’utilisation vous détectez les problèmes décrits, examinez l’instrument<br />
pour comprendre le problème et essayez de le résoudre en recourant aux conseils<br />
proposés. Si l’instrument continue à ne pas fonctionner correctement, adressez-vous<br />
à votre revendeur de confiance ou au Centre d’Assistance Agréé <strong>Korg</strong> le plus proche.<br />
Problème Possible solution Page<br />
L’instrument ne<br />
s’active pas lors<br />
de la mise sous<br />
tension.<br />
L’instrument<br />
n’émet aucun<br />
son.<br />
Vérifiez que l’adaptateur AC est correctement connecté au piano<br />
et à la prise secteur.<br />
(1) Contrôlez que le réglage du volume n’est pas à 0. Dans cette<br />
éventualité, réglez-le à un niveau approprié.<br />
(2) Contrôlez que la fonction MIDI Local n’est pas réglée à OFF,<br />
sinon réglez-la à ON (ou mettre hors tension et de nouveau sous<br />
tension l’instrument).<br />
40<br />
42<br />
56<br />
Polyphonie<br />
Votre <strong>SP</strong>-<strong>200</strong> est doté de timbres échantillonnés qui ont été enregistrés, analysés et<br />
traités à partir de sons contemporains d’instruments musicaux originaux. Ces sons<br />
proviennent généralement d'un ou de plusieurs échantillons reproduits en appuyant<br />
sur une touche. La polyphonie des sons composés d’un seul échantillon est de 60<br />
voix, tandis que les sons composés de deux échantillons ont une polyphonie réduite<br />
à 30 voix. Par conséquent, lorsque le nombre de notes excède ces limites, le son<br />
perd sa continuité.<br />
C’est ainsi qu’en mode Layer, si vous jouez plus de deux notes simultanément, la<br />
polyphonie maximum dépend du nombre d’échantillons utilisés au total. Si en plus<br />
62 Chapitre 6
vous utilisez REVERB et CHORUS, la polyphonie est ultérieurement réduite de 10<br />
et 3 notes.<br />
Spécifications techniques<br />
Spécifications<br />
<strong>SP</strong>-<strong>200</strong><br />
Clavier<br />
Réglage du toucher<br />
Accordage<br />
Génération de sons<br />
Polyphonie<br />
Timbres<br />
Effets<br />
Démo<br />
Métronome<br />
Pédales<br />
Connexions<br />
Contrôles<br />
Alimentation<br />
Consommation<br />
Dimensions (L x P x H)<br />
Poids<br />
88 notes lestées, sensibles à la dynamique du toucher<br />
Léger, Normal, Lourd<br />
Transposition, Accordage fin, Tempérament (Egal, Kirnberger,<br />
Werckmeister)<br />
Stereo PCM System<br />
60 notes (max). L’utilisation de timbres à 2 oscillateurs, du<br />
mode Layer et/ou des effets de réverbération ou chorus<br />
réduit le nombre maximum de notes jouées simultanément.<br />
30 timbres en ROM<br />
Réverbération, Chorus (chacun avec 3 niveaux)<br />
30 morceaux de démonstration incorporés<br />
Réglages du Tempo, de la Time signature (métrique), de<br />
l’Accent et du Volume<br />
Damper (fournie). Mi-pédale avec <strong>Korg</strong> DS1H (en option).<br />
Sorties Audio (OUTPUT L/MONO, R), Casques, MIDI (IN,<br />
OUT), Damper<br />
Interrupteur, Master Volume, Reverb, Chorus, Touch, Transpose/Function,<br />
Bank, sélecteurs de timbres, Tempo, Métronome,<br />
Démo<br />
DC12V, 500mA, pôle négatif au centre, adaptateur AC<br />
(fourni)<br />
5 Watts<br />
52.3 x 11.2 x 4.8 inch (1328 x 285 x 122 mm)<br />
40.7 lbs (18,5 kg)<br />
Accessoires DC12V, 500mA, pôle négatif au centre, adaptateur AC ;<br />
Pédale Damper ; Pupitre (tous fournis)<br />
Options<br />
DS 1H - Pédale Damper avec mi-pédale de contrôle<br />
Sounds processed with INFINITY.<br />
<strong>Korg</strong> se réserve le droit de modifier les spécifications sans préavis.<br />
Appendice 63
Détails du tableau de commande<br />
…pendant que vous appuyez sur celui-ci<br />
Maintenez ce bouton enfoncé…<br />
PIANO 1 PIANO2 E.PIANO 1 E.PIANO 2 HARPSI/CLAV VIBES/GUITAR ORGAN 1 ORGAN 2 STRINGS/PAD CHOIR<br />
REVERB Prof = Grave Prof = Moyen Prof = Aigu<br />
CHORUS Prof = Grave Prof = Moyen Prof = Aigu<br />
TOUCH Léger Normal Lourd Werckmeister Kirnberger<br />
METRONOME Tempo: 2/4 Tempo: 3/4 Tempo: 4/4 Tempo: 6/4 Accent Bell sound Metro Vol. Dec. Metro Vol. Inc.<br />
TRAN<strong>SP</strong>OSE/FUNCTION Local On/Off Prg.Change Rx/Tx Crl.Change Rx/Tx Data Dump<br />
Tableau de commande et clavier<br />
Le diagramme suivant indique les diverses fonctions accessibles en maintenant enfoncé le bouton METRONOME ou<br />
TRAN<strong>SP</strong>OSE/FUNCTION et en appuyant sur l'une des touches du clavier.<br />
METRONOME<br />
Numeric Tempo Input<br />
C5 = 0 C#5 = 1 D5 = 2<br />
D#5 = 3 E5 = 4 F5 = 5<br />
F#5 = 6 G5 = 7 G#5 = 8<br />
A5 = 9<br />
(Press both for Reset)<br />
Metronome Volume<br />
B5 = Decrease (-)<br />
C6 = Increase (+)<br />
Demo Start<br />
TRAN<strong>SP</strong>OSE<br />
/FUNCTION<br />
MIDI Channels<br />
C2 = Ch 01<br />
…<br />
D#3 = Ch 16<br />
Touch Setting<br />
B3 = Light<br />
C4 = Normal<br />
D4 = Heavy<br />
Tuning<br />
B5 = Down (-)<br />
C6 = Up (+)<br />
(Press both<br />
for Reset)<br />
Transpose<br />
F#6…B6 = -6…-1 st.<br />
C7 = Standard<br />
C#7…F7 = +1…+5 st.<br />
64
<strong>SP</strong>-<strong>200</strong><br />
Digital-Piano<br />
Bedienungsanleitung
VORSICHTSMASSNAHMEN<br />
Aufstellungsort<br />
Bei Benutzung des Instruments an folgenden<br />
Orten kann es zu Funktionsstörungen kommen.<br />
• In direktem Sonnenlicht<br />
• bei hohen Temperaturen oder hoher Luftfeuchtigkeit<br />
• in sehr staubigen oder schmutzigen Räumen<br />
• bei starken Vibrationen<br />
Stromversorgung<br />
Schließen Sie den Wechselstromstecker des<br />
Instruments an eine WS-Steckdose mit der richtigen<br />
Spannung an. Schließen Sie das Instrument<br />
keinesfalls an eine WS-Steckdose mit einer anderen<br />
als der angegebenen Spannung an.<br />
Interferenzen mit anderen elektrischen Geräten<br />
Das Instrument ist mit einem Computer ausgestattet.<br />
In der Nähe des Instruments befindliche<br />
Radio- und Fernsehgeräte können Empfangsstörungen<br />
erleiden. Stellen Sie das Instrument deshalb<br />
in einem gewissen Abstand von diesen<br />
Geräten auf.<br />
Handhabung<br />
Zur Vermeidung von Beschädigungen sind Schalter<br />
und Regler des Instruments ohne übertriebenen<br />
Kraftaufwand zu bedienen.<br />
Pflege<br />
Wenn die Außenseite des Instruments schmutzig<br />
ist, wischen Sie sie mit einem trockenen, sauberen<br />
Tuch ab. Verwenden Sie weder Flüssigreiniger<br />
wie Benzin oder Verdünner, noch Reinigungsoder<br />
brennbare Poliermittel.<br />
Aufbewahrung des Handbuches<br />
Nach Durchlesen des Handbuches ist dieses sorgfältig<br />
aufzubewahren, um jederzeit eingesehen<br />
werden zu können.<br />
Vermeidung von Fremdkörpern im Instrument<br />
• Stellen Sie keine Behältnisse mit Flüssigkeiten<br />
auf dem Instrument ab. Eindringende Flüssigkeiten<br />
können einen Geräteausfall, Brand<br />
oder Stromschlag verursachen.<br />
• Achten Sie darauf, dass keine Metallgegenstände<br />
ins Innere des Instruments geraten.<br />
Sollte dies dennoch einmal geschehen, ziehen<br />
Sie sofort den Stecker aus der Steckdose und<br />
wenden Sie sich an Ihren <strong>Korg</strong> Händler, bei<br />
dem Sie das Instrument gekauft haben.<br />
CE-ZEICHEN ZUR VEREINHEIT-<br />
LICHUNG DER EUROPÄISCHEN<br />
STANDARDS<br />
Das bis 31. Dezember 1996 vergebene CE-Zeichen,<br />
das unsere mit Wechselstrom betriebenen<br />
Produkte tragen, zeigt an, dass diese Instrumente<br />
der EMC Richtlinie (89/336/EWG) und der CE-<br />
Zeichen-Richtlinie (93/68/EEC) entsprechen.<br />
Das nach dem 1. Januar 1997 vergebene CE-Zeichen<br />
zeigt an, dass die Instrumente der EMC<br />
Richtlinie (89/336/EEC), der CE-Zeichen-Richtlinie<br />
(93/68/EEC) und der Niederspannungsrichtlinie<br />
(73/23/EEC) entsprechen<br />
Das CE-Zeichen auf unserern batteriegespeisten<br />
Instrumenten zeigt an, dass diese der EMC Richtlinie<br />
(89/336/EEC) und der CE-Zeichen-Richtlinie<br />
(93/68/EEC) entsprechen.<br />
HAFTUNGSAUSSCHLUSS<br />
Die im vorliegenden Handbuch enthaltenen Informationen<br />
wurden mit großer Sorgfalt geprüft und<br />
überarbeitet. Aufgrund des Bemühens, unsere<br />
Produkte ständig zu verbessern, können die technischen<br />
Daten jedoch von den Beschreibungen<br />
des Handbuches abweichen. <strong>Korg</strong> ist nicht verantwortlich<br />
für eventuelle Abweichungen zwischen<br />
den technischen Daten und den im Handbuch enthaltenen<br />
Beschreibungen. Technische Daten können<br />
jederzeit ohne Vorankündigung geändert<br />
werden.<br />
HAFTUNG<br />
Alle KORG Produkte werden entsprechend den in<br />
den verschiedenen Ländern geltenden Spezifikationen<br />
und erforderlichen Spannungen hergestellt.<br />
Sie unterliegen den Garantiebestimmungen<br />
der KORG Vertriebsfirmen in den einzelnen Län-<br />
66
dern. KORG Produkte, die ohne Garantiekarte<br />
und Seriennummer verkauft wurden, sind von<br />
Garantieleistungen und Haftungsansprüchen<br />
durch den Hersteller/Händler ausgeschlossen.<br />
Diese Vorschrift dient zu Ihrer eigenen Sicherheit.<br />
SERVICE UND KUNDENDIENSTLEI-<br />
STUNGEN FÜR MUSIKER<br />
Wenden Sie sich zwecks Kundendienstleistungen<br />
bitte an das nächste KORG Kundendienstzentrum.<br />
Ausführliche Informationen über KORG<br />
Produkte sowie über Software und Zubehör für<br />
Ihr Klavier erhalten Sie bei Ihrem KORG Händler.<br />
KORG IM INTERNET<br />
Home page <strong>Korg</strong> Deutschland.: www.korg.de<br />
Home page <strong>Korg</strong> Inc.: www.korg.co.jp<br />
Home page <strong>Korg</strong> USA: www.korg.com<br />
Home page <strong>Korg</strong> Italy: www.korg.it<br />
DATEN-RESET<br />
Wenn das Instrument ausgeschaltet wird, werden<br />
alle Parameter zurückgesetzt.<br />
© <strong>200</strong>1 <strong>Korg</strong> Italy Spa. Printed in Italy.<br />
67
INHALTSVERZEICHNIS<br />
Einführung . . . . . . . . . . . . . . . . . . . . . . . . . . . . . . . . . . . . . . . . . . . . . . . . . . . . . . . . . 69<br />
Hauptfunktionen . . . . . . . . . . . . . . . . . . . . . . . . . . . . . . . . . . . . . . . . . . . . . . . . . . . . . . . . . . . .69<br />
1 Paneele . . . . . . . . . . . . . . . . . . . . . . . . . . . . . . . . . . . . . . . . . . . . . . . . . . . . . . . . . . . 70<br />
Vorderseite . . . . . . . . . . . . . . . . . . . . . . . . . . . . . . . . . . . . . . . . . . . . . . . . . . . . . . . . . . . . . . . .70<br />
Rückseite . . . . . . . . . . . . . . . . . . . . . . . . . . . . . . . . . . . . . . . . . . . . . . . . . . . . . . . . . . . . . . . . . .71<br />
2 Bevor Sie beginnen . . . . . . . . . . . . . . . . . . . . . . . . . . . . . . . . . . . . . . . . . . . . . . . . . . 73<br />
Anschluss an einen externen Verstärker . . . . . . . . . . . . . . . . . . . . . . . . . . . . . . . . . . . . . . . . . .73<br />
Verwendung der Kopfhörer . . . . . . . . . . . . . . . . . . . . . . . . . . . . . . . . . . . . . . . . . . . . . . . . . . . .73<br />
Instrument einschalten . . . . . . . . . . . . . . . . . . . . . . . . . . . . . . . . . . . . . . . . . . . . . . . . . . . . . . . .73<br />
Lautstärke einstellen . . . . . . . . . . . . . . . . . . . . . . . . . . . . . . . . . . . . . . . . . . . . . . . . . . . . . . . . .74<br />
Demos abspielen . . . . . . . . . . . . . . . . . . . . . . . . . . . . . . . . . . . . . . . . . . . . . . . . . . . . . . . . . . . .74<br />
3 Basisfunktionen . . . . . . . . . . . . . . . . . . . . . . . . . . . . . . . . . . . . . . . . . . . . . . . . . . . . . 77<br />
Mit nur einem Klang spielen (Single Modus) . . . . . . . . . . . . . . . . . . . . . . . . . . . . . . . . . . . . . .77<br />
Mit zwei Klängen gleichzeitig spielen (Layer Modus) . . . . . . . . . . . . . . . . . . . . . . . . . . . . . . .77<br />
Hall- und Chorus-Effekt wählen . . . . . . . . . . . . . . . . . . . . . . . . . . . . . . . . . . . . . . . . . . . . . . . .78<br />
Das Damper Pedal . . . . . . . . . . . . . . . . . . . . . . . . . . . . . . . . . . . . . . . . . . . . . . . . . . . . . . . . . . .79<br />
Das Metronom . . . . . . . . . . . . . . . . . . . . . . . . . . . . . . . . . . . . . . . . . . . . . . . . . . . . . . . . . . . . . .80<br />
4 Weitere Funktionen . . . . . . . . . . . . . . . . . . . . . . . . . . . . . . . . . . . . . . . . . . . . . . . . . . 83<br />
Einstellung des Anschlags . . . . . . . . . . . . . . . . . . . . . . . . . . . . . . . . . . . . . . . . . . . . . . . . . . . . .83<br />
Transponierung . . . . . . . . . . . . . . . . . . . . . . . . . . . . . . . . . . . . . . . . . . . . . . . . . . . . . . . . . . . . .84<br />
Feinstimmung . . . . . . . . . . . . . . . . . . . . . . . . . . . . . . . . . . . . . . . . . . . . . . . . . . . . . . . . . . . . . .84<br />
Temperierung selektieren . . . . . . . . . . . . . . . . . . . . . . . . . . . . . . . . . . . . . . . . . . . . . . . . . . . . .85<br />
5 MIDI . . . . . . . . . . . . . . . . . . . . . . . . . . . . . . . . . . . . . . . . . . . . . . . . . . . . . . . . . . . . . 87<br />
Was ist MIDI? . . . . . . . . . . . . . . . . . . . . . . . . . . . . . . . . . . . . . . . . . . . . . . . . . . . . . . . . . . . . . .87<br />
Was leistet MIDI? . . . . . . . . . . . . . . . . . . . . . . . . . . . . . . . . . . . . . . . . . . . . . . . . . . . . . . . . . . .87<br />
Anschlüsse . . . . . . . . . . . . . . . . . . . . . . . . . . . . . . . . . . . . . . . . . . . . . . . . . . . . . . . . . . . . . . . . .87<br />
Standard MIDI Einstellungen . . . . . . . . . . . . . . . . . . . . . . . . . . . . . . . . . . . . . . . . . . . . . . . . . .88<br />
Übertragungskanal selektieren . . . . . . . . . . . . . . . . . . . . . . . . . . . . . . . . . . . . . . . . . . . . . . . . .88<br />
<strong>SP</strong>-<strong>200</strong> als multitimbraler Tongenerator . . . . . . . . . . . . . . . . . . . . . . . . . . . . . . . . . . . . . . . . . .89<br />
Local On/Off . . . . . . . . . . . . . . . . . . . . . . . . . . . . . . . . . . . . . . . . . . . . . . . . . . . . . . . . . . . . . . .89<br />
Program Change . . . . . . . . . . . . . . . . . . . . . . . . . . . . . . . . . . . . . . . . . . . . . . . . . . . . . . . . . . . .90<br />
Control Change . . . . . . . . . . . . . . . . . . . . . . . . . . . . . . . . . . . . . . . . . . . . . . . . . . . . . . . . . . . . .92<br />
MIDI Data Dump . . . . . . . . . . . . . . . . . . . . . . . . . . . . . . . . . . . . . . . . . . . . . . . . . . . . . . . . . . .93<br />
6 Anhang . . . . . . . . . . . . . . . . . . . . . . . . . . . . . . . . . . . . . . . . . . . . . . . . . . . . . . . . . . . 95<br />
Fehlerbeseitigung . . . . . . . . . . . . . . . . . . . . . . . . . . . . . . . . . . . . . . . . . . . . . . . . . . . . . . . . . . .95<br />
Polyphonie . . . . . . . . . . . . . . . . . . . . . . . . . . . . . . . . . . . . . . . . . . . . . . . . . . . . . . . . . . . . . . . . .95<br />
Technische Daten . . . . . . . . . . . . . . . . . . . . . . . . . . . . . . . . . . . . . . . . . . . . . . . . . . . . . . . . . . .96<br />
Bedienfeld-Kurzbefehle . . . . . . . . . . . . . . . . . . . . . . . . . . . . . . . . . . . . . . . . . . . . . . . 97<br />
Bedienfeld und Tastatur . . . . . . . . . . . . . . . . . . . . . . . . . . . . . . . . . . . . . . . . . . . . . . 97<br />
MIDI Implementation Chart . . . . . . . . . . . . . . . . . . . . . . . . . . . . . . . . . . . . . . . . . . . 133<br />
68 Inhaltsverzeichnis
EINFÜHRUNG<br />
Einführung<br />
Hauptfunktionen<br />
Großer Klangbereich. Dreißig verschiedene, ausdruckstarke Hochqualitätsklänge einschließlich<br />
ein Stereo-Konzertflügelklang. Sie können die Layer Funktion zum gleichzeitigen<br />
Spielen von zwei Klängen nutzen.<br />
Effekte. Das <strong>SP</strong>-<strong>200</strong> besitzt eingebaute, digitale Effekte, die die Klangeigenschaften einer<br />
Konzerthalle (Reverb) nachahmen und den Klang voller machen (Chorus).<br />
Damper Pedal-Simulation. Das Damper-Pedal des <strong>SP</strong>-<strong>200</strong> entspricht dem Damper- oder<br />
Forte-Pedal eines akustischen Klaviers. Wenn Sie bei einem akustischen Klavier dieses Pedal<br />
drücken, werden die Dämpfer (Dampers), die die Vibrationen der Saiten unterbrechen, angehoben.<br />
Metronom. Beim eingebauten Metronom können Sie die Taktunterteilung, das Tempo und<br />
die Lautstärke einstellen und darüber hinaus einen Glockenton zur Akzentuierung einsetzen.<br />
Anschlagsteuerung. Sie können drei verschiedene Einstellungen wählen, mit denen Sie<br />
festlegen, wie der Klang sich mit der Anschlagstärke verändern soll.<br />
Temperierungen. Neben der wohltemperierten Stimmung besitzt das <strong>SP</strong>-<strong>200</strong> zwei weitere<br />
klassische Stimmungen (Kirnberger und Werckmeister) zur historisch korrekten Wiedergabe<br />
klassischer Stücke. Wenn Sie einen akustischen Klavierklang wählen, wird automatisch die<br />
typisch gedehnte Temperierung selektiert.<br />
Einstellbare Tonhöhe. Die Transpose Funktion ermöglicht es, die Tonhöhe des Klaviers zu<br />
ändern, während die Pitch Control Funktion zur Feinabstimmung dient.<br />
MIDI-Funktionen. Das <strong>SP</strong>-<strong>200</strong> unterstützt das MIDI Protokoll, ein Standard, mit welchem<br />
Musikdaten zwischen Musikinstrumenten und Computern ausgetauscht werden können Mit<br />
MIDI können zwei oder mehr Instrumente gesteuert werden oder zur Steuerung eingesetzt<br />
werden; das <strong>SP</strong>-<strong>200</strong> kann als 16-Part multitimbraler Tongenerator eingesetzt werden.<br />
Einführung 69
KAPITEL<br />
1<br />
Paneele<br />
Vorderseite<br />
1 234 5 6<br />
7<br />
8 90<br />
1 MASTER VOLUME Schieberegler: Regelt die Lautstärke an den Ausgängen und<br />
Kopfhörerbuchsen.<br />
2 REVERB Taster: Schaltet den Halleffekt ein oder aus. Verleiht dem Klang einen<br />
Raumeffekt.<br />
3 CHORUS Taster: Schaltet den Choruseffekt ein oder aus. Damit erhält der Klang<br />
mehr Fülle.<br />
4 TOUCH Taster: Dient zur Einstellung der Anschlagdynamik.<br />
5 TRAN<strong>SP</strong>OSE/FUNCTION Taster: Multifunktionstaste zur Änderung der Transponier-<br />
und Feinstimmungsfunktionen, zur Programmierung der MIDI-Parameter<br />
sowie zur Ausführung weiterer Einstellungen.<br />
Anmerkung: Wenn das Instrument ausgeschaltet wird, werden alle Parameter wieder<br />
zurückgesetzt.<br />
6 BANK Taster: Selektiert eine der 3 verfügbaren Klangbänke.<br />
70 Kapitel 1
7 SOUND SELECTION Taster: Drücken Sie einen Taster zur Selektion eines<br />
Klangs (Single Modus). Sie können auch zwei Taster gleichzeitig drücken, wenn<br />
Sie zwei Klänge zur selben Zeit auf der Tastatur spielen wollen (Layer Modus).<br />
8 TEMPO Schieberegler: Dient zur Regelung des Metronom Tempos.<br />
9 METRONOME Taster: Schaltet das Ticken des Metronoms ein oder aus.<br />
0 DEMO Taster: Schaltet den Demo Modus zum Abspielen der Demo Songs ein<br />
oder aus. Selektieren Sie den gewünschten Song mit den Sound Selection Tastern<br />
(siehe Nummer 7 oben).<br />
Rückseite<br />
1<br />
2 3 4 5 6 7<br />
1 Löcher für Notenständer: Stecken Sie den Notenständer in diese beiden Löcher<br />
ein. Beachten Sie bitte, dass zum Einstecken und Herausziehen des Notenständers<br />
anfangs etwas Kraft erforderlich ist. Im Laufe der Zeit weitet sich das Kunststoffmaterial,<br />
mit dem die Löcher ausgekleidet sind, so dass der Vorgang erleichtert wird.<br />
2 MIDI (IN, OUT) Buchsen: Buchsen für den Anschluss anderer MIDI Geräte<br />
(Sequenzer, Keyboards usw.). OUT: Datenausgang (muss an die MIDI IN Buchse<br />
des anderen MIDI Geräts angeschlossen werden). IN: Dateneingang (muss an die<br />
MIDI OUT Buchse des anderen MIDI Geräts angeschlossen werden).<br />
3 DAMPER Buchse: Schließen Sie das mitgelieferte Pedal an diese Buchse an.<br />
4 OUTPUT (L/MONO, R) Buchsen: Audio Ausgänge. Schließen Sie diese Buchsen<br />
an eine externe Verstärkeranlage an. (Benutzen Sie bei HiFi-Anlagen die AUX- oder<br />
TAPE-Buchsen, nicht die PHONO-Buchse). Zur Monoverstärkung des <strong>SP</strong>-<strong>200</strong> ist<br />
nur die einzelne L/MONO Buchse anzuschließen. Zur Regelung der Ausgangs-lautstärke<br />
ist der MASTER VOLUME Schieberegler zu benutzen.<br />
Paneele 71
5 PHONES Buchsen: Schließen Sie an diese Buchse einen Kopfhörer an.<br />
6 DC 12V IN-Buchse: Schließen Sie den mitgelieferten Wechselstrom-Adapter an<br />
diese Buchse an.<br />
7 POWER Schalter: dient zum Ein- und Ausschalten des Instruments.<br />
72 Kapitel 1
KAPITEL<br />
2<br />
Bevor Sie beginnen<br />
Anschluss an einen externen Verstärker<br />
Zur Verstärkung des <strong>SP</strong>-<strong>200</strong> schließen Sie die OUTPUT Ausgänge an einen hochwertigen<br />
Mixer, eine Stereo-HiFi-Anlage oder aktive Bühnenlautsprecher an. Wenn<br />
Sie ein Stereo-HiFi benutzen schließen Sie die OUTPUT Ausgänge an die AUX<br />
oder TAPE Eingänge an (benutzen Sie keinesfalls die PHONO Eingänge). Zur<br />
Monoverstärkung sind nur die L/MONO Ausgänge anzuschließen.<br />
Verwendung der Kopfhörer<br />
Wenn Sie zu späten Stunden spielen oder üben wollen oder wenn Sie von anderen,<br />
im Raum anwesenden Personen nicht gehört werden wollen, schließen Sie das<br />
Instrument an einen hochwertigen Kopfhörer an (empfohlen wird eine Impedanz<br />
von 32Ω); die entsprechende Buchse befindet sich auf der Rückseite des Instruments.<br />
Es handelt sich um eine 1/4” Standard-Kopfhörerbuchse. Wenn Sie Kopfhörer<br />
mit Minibuchsen-Adapter besitzen, ziehen Sie diesen ab, wenn Sie die<br />
Kopfhörer ein- oder ausstecken.<br />
Wenn Sie zwei Kopfhörer anschließen wollen, wenden Sie sich bitte an Ihren <strong>Korg</strong><br />
Händler oder einen der zahlreichen Kopfhörer-Händler auf dem Markt.<br />
Warnung: Wenn Sie Kopfhörer benutzen, sollten Sie sich nicht zu lange hohen<br />
Lautstärken aussetzen.<br />
Instrument einschalten<br />
Stecken Sie den Gleichstromstecker des mitgelieferten Ws-Adapters in die Gs-<br />
Buchse des <strong>SP</strong>-<strong>200</strong>. Schließen Sie dann den Ws-Stecker in die Wandsteckdose ein<br />
und drücken Sie den POWER Schalter. Wenn das Instrument eingeschaltet ist,<br />
leuchten die LEDs des Bedienfeldes auf. Zum Ausschalten des Instruments drücken<br />
Sie erneut den POWER Schalter.<br />
Bevor Sie beginnen 73
Anmerkung: Beim Ausschalten des Instruments werden alle Parameter zurückgesetzt.<br />
Lautstärke einstellen<br />
Schieben Sie den MASTER VOLUME Schieberegler nach rechts, um die Lautstärke<br />
zu erhöhen bzw. nach links, um die Lautstärke zu vermindern. Der Maximalwert<br />
beträgt “10”, der Minimalwert (stumm) “0”. Mit diesem Regler wird der<br />
Ausgangspegel der Kopfhörer und der OUTPUT Ausgänge eingestellt.<br />
Anmerkung: Es empfiehlt sich, bei geringer Lautstärke zu beginnen und diese<br />
dann allmählich zu erhöhen.<br />
Demos abspielen<br />
Das <strong>SP</strong>-<strong>200</strong> enthält 30 werkseitig aufgenommene Demosongs. Spielen Sie die<br />
Songs ab, um einen Eindruck von der Klangfülle und den Ausdrucksmöglichkeiten<br />
Ihres Instruments zu erhalten.<br />
Alle Songs auf einmal abspielen. Mit einem einfachen Befehl können Sie alle<br />
Demosongs hintereinander abspielen.<br />
1 Drücken Sie den DEMO Taster (oder halten Sie den TRAN<strong>SP</strong>OSE/FUNCTION<br />
Taster gedrückt und drücken Sie gleichzeitig die Notentaste E1). Die LEDs der<br />
Klangauswahltaster blinken nacheinander von links nach rechts. Nach wenigen<br />
Sekunden beginnt die Wiedergabe. Nach dem letzten Song wird erneut der erste<br />
Song abgespielt.<br />
2 Während der Wiedergabe können Sie einen Klangauswahltaster drücken, um nur<br />
die Wiedergabe der zehn in der aktuellen Bank vorhandenen Demosongs zu wiederholen.<br />
(Es gibt drei Bänke mit je zehn Demosongs: 1-10, 11-20, 21-30).<br />
Wenn Sie beispielsweise den CHOIR Taster drücken, während Song Nummer 1<br />
abgespielt wird, wird sofort darauf Song Nummer 10 gespielt und die Wiedergabe<br />
erfolgt zyklisch von Nummer 1 bis Nummer 10.<br />
3 Drücken Sie nochmals den DEMO Taster, um die Wiedergabe zu unterbrechen und<br />
den Demo Modus zu verlassen.<br />
Einen bestimmten Song abspielen. Sie können auch einen ganz bestimmten<br />
Song wählen, den Sie abspielen möchten.<br />
1 Hierzu müssen Sie zuerst eine der drei Demosong Bänke wählen.<br />
• Zur Selektion der ersten Bank (1-10) drücken Sie einmal den DEMO Taster.<br />
Daraufhin blinken die LEDs hintereinander von links nach rechts.<br />
74 Kapitel 2
• Zur Selektion der zweiten Bank (11-20) drücken Sie den DEMO Taster ein<br />
zweites Mal. Nun blinken alle LEDs gleichzeitig.<br />
• Zur Selektion der dritten Bank (21-30) drücken Sie den DEMO Taster ein drittes<br />
Mal. Nun blinken abwechselnd die nebeneinander liegenden LEDs.<br />
2 Drücken Sie einen der Klangauswahltaster zur Selektion des gewünschten Song in<br />
der gewählten Bank. Die LED des selektierten Demosong leuchtet, während sich<br />
die übrigen LEDs ausschalten.<br />
Nach Beendigung der Wiedergabe des selektierten Song werden alle übrigen Songs<br />
der selektierten Bank zyklisch abgespielt.<br />
Taster Bank 1 (1-10) Bank 2 (11-20) Bank 3 (21-30)<br />
PIANO 1<br />
F. Mendelssohn-Bartholdy:<br />
Prelude Op.104a,<br />
no.2<br />
<strong>Korg</strong> Original (M. Tempia):<br />
Reflection<br />
C.A. Debussy:<br />
Arabesque no.1<br />
PIANO 2<br />
F. Chopin: Nocturne<br />
Op.9, no.2<br />
S. Joplin: The Entertainer<br />
J.S. Bach: Two-voice<br />
invention no.13<br />
E.PIANO 1<br />
C.A. Debussy: Clair de<br />
lune<br />
<strong>Korg</strong> Original (M. Tempia):<br />
Jumper<br />
F. Chopin: Fantasie-<br />
Impromptu Op.66<br />
E.PIANO 2<br />
<strong>Korg</strong> Original (M. Tempia):<br />
Lullaby for a Little<br />
Star<br />
<strong>Korg</strong> Original (M. Tempia):<br />
All the Ones You<br />
Don’t Know<br />
J.S. Bach: Prelude in C<br />
major (from Das Wohltemeperierte<br />
Klavier)<br />
HARPSI<br />
/CLAV<br />
L. van Beethoven: Für<br />
Elise<br />
J.S. Bach: Italian Concert<br />
<strong>Korg</strong> Original (M. Tempia):<br />
Rubber Bob<br />
VIBES<br />
/GUITAR<br />
F. Chopin: Etude Op.10,<br />
no.3<br />
<strong>Korg</strong> Original (M. Tempia):<br />
Jazz in Spain<br />
R. Schumann: Traumarei,<br />
Op.15, no.7<br />
ORGAN 1<br />
W.A. Mozart: A la turque<br />
(from the Sonata in<br />
A-major K.331)<br />
<strong>Korg</strong> Original (M. Tempia):<br />
Cool “B”<br />
F. Mendelssohn-Bartholdy:<br />
Spring Song,<br />
Op.62, no.6<br />
ORGAN 2<br />
F. Chopin: Valse no.6 in<br />
D♭-major Op.64, no.1<br />
F. Mendelssohn-Bartholdy:<br />
Wedding March<br />
<strong>Korg</strong> Original (M. Tempia):<br />
Sunflowers<br />
STRINGS<br />
/PAD<br />
<strong>Korg</strong> Original (M. Tempia):<br />
Old Feather Blues<br />
J.S. Bach: Air on the G<br />
string<br />
P.D. Paradisi: Toccata in<br />
A major<br />
CHOIR<br />
<strong>Korg</strong> Original (M. Tempia):<br />
Noise of time<br />
<strong>Korg</strong> Original (M. Tempia):<br />
Voice Texture<br />
<strong>Korg</strong> Original (M. Tempia):<br />
Wet Raccoon Rag<br />
3 Drücken Sie den DEMO Taster, um die Wiedergabe zu unterbrechen und den Demo<br />
Modus zu verlassen.<br />
Bevor Sie beginnen 75
Anmerkung: Während der Wiedergabe der Demosongs ist es nicht möglich, die<br />
Klangauswahltaster zur Auswahl der Klänge sowie die Taster REVERB und CHO-<br />
RUS zu betätigen.<br />
Regelung des Tempo der Demosongs. Wenn Sie das Tempo des selektierten<br />
Demosong ändern wollen, betätigen Sie den TEMPO Schieberegler. Normalerweise<br />
entspricht das Tempo des Demosong nicht den Markierungen des TEMPO Schiebereglers.<br />
Anmerkung: Während der Wiedergabe der Demosongs kann das Metronom nicht<br />
eingesetzt werden.<br />
Anmerkung: Bei Selektion eines Demosongs wird dessen ursprüngliches Tempo<br />
ausgerufen,<br />
76 Kapitel 2
KAPITEL<br />
3<br />
Basisfunktionen<br />
Mit nur einem Klang spielen (Single Modus)<br />
Sie können einen der dreißig im Instrument enthaltenen Klänge auswählen.<br />
1 Drücken Sie einen der Klangauswahltaster, um einen Klang zu selektieren. Die<br />
LED des Tasters schaltet sich ein.<br />
2 Mit dem BANK Taster selektieren Sie eine der drei verfügbaren Bänke (1-10, 11-<br />
20, 21-30). Bei einmaligen Drücken wird Bank 2, beim zweiten Drücken Bank 3<br />
und beim dritten Drücken erneut Bank 1 selektiert.<br />
Taster Bank 1 # Bank 2 # Bank 3 #<br />
PIANO 1 Grand Piano 1 2 Bright Piano 2 Grand Piano 2 1<br />
PIANO 2 Classic Piano 2 Honky-Tonky 2 E.Grand Piano 1<br />
E.PIANO 1 Stage E.Piano 1 Club E.Piano 2 Thin E.Piano 2<br />
E.PIANO 2 Digital E.Piano 1 60’s E.Piano 1 Vintage E.Piano 2<br />
HARPSI/CLAV Harpsichord 1 Clav. 1 Wah Clav. 1<br />
VIBES/GUITAR Vibraphone 1 Marimba 1 Acoustic Guitar 1<br />
ORGAN 1 Jazz Organ 1 2 Jazz Organ 2 2 Jazz Organ 3 2<br />
ORGAN 2 Church Organ 1 3 Church Organ 2 1 Church Organ 3 1<br />
STRINGS/PAD Strings 1 Slow Strings 2 Warm Pad 2<br />
CHOIR Choir Hoo 1 Choir Doo 2 Choir Pad 2<br />
(#) In diesen Spalten ist die Anzahl der Oszillatoren pro Stimme angegeben, die von den einzelnen<br />
Klängen benutzt werden.<br />
Mit zwei Klängen gleichzeitig spielen (Layer Modus)<br />
Sie können mit zwei Klängen gleichzeitig auf der Tastatur spielen. Diese Spielweise<br />
wird Layer Modus genannt.<br />
Basisfunktionen 77
Anmerkung: Wenn Sie den Layer Modus selektieren, ist die Anzahl der Stimmen,<br />
die gleichzeitig spielen können, herabgesetzt. Dies hängt von der Gesamtzahl der<br />
vom selektierten Klang benutzten Oszillatoren ab.<br />
Anmerkung: Es ist nicht möglich, zwei Klänge zu selektieren, die vom gleichen<br />
Taster angesteuert werden.<br />
1 Drücken Sie einen der Klangauswahltaster, um den ersten Klang zu selektieren. Die<br />
LED des gedrückten Tasters schaltet sich ein. Benutzen Sie den BANK Taster, um<br />
einen Klang in einer anderen Bank zu selektieren.<br />
2 Drücken Sie einen anderen Klangauswahltaster, um den zweiten Klang zu selektieren.<br />
Die LED des gedrückten Tasters schaltet sich ein. Benutzen Sie den BANK<br />
Taster, um einen Klang in einer anderen Bank zu selektieren.<br />
3 Drücken Sie beide Taster gleichzeitig, um die Klänge zu selektieren. Beide LEDs<br />
schalten sich ein.<br />
Anmerkung: Die Schritte 1 und 2 sind nicht erforderlich, wenn bereits die richtige<br />
Bank selektiert ist.<br />
Zum Single Modus zurückkehren. Um zum Single Modus zurückzukehren,<br />
drücken Sie einfach einen beliebigen Klangauswahltaster.<br />
Lautstärke der Klänge im Layer Modus regeln. Um die Lautstärke der Klänge<br />
im Layer Modus untereinander abzustimmen, halten Sie den Taster des Klanges<br />
gedrückt, dessen Lautstärke Sie vermindern wollen und drücken Sie mehrmals den<br />
Taster des Klanges, der lauter erklingen soll.<br />
Anmerkung: Diese Einstellung bleibt auch nach Ausschalten des Layer Modus<br />
gespeichert, wird bei Ausschalten des Instruments jedoch gelöscht. Wenn Sie diese<br />
Einstellungen erhalten wollen, müssen sie mit der Data Dump Funktion gespeichert<br />
werden (siehe “MIDI Data Dump” on page 93).<br />
Hall- und Chorus-Effekt wählen<br />
Das <strong>SP</strong>-<strong>200</strong> besitzt zwei Effekte: Hall und Chorus. Der Halleffekt ahmt die Klangeigenschaften<br />
eines Raumes nach, während Chorus einen Modulationseffekt nachahmt,<br />
der den Klang voller macht. Diese Effekteinstellungen bleiben auch dann<br />
erhalten, wenn ein anderer Klang selektiert wird.<br />
Anmerkung: Effekteinstellungen, die im Single Modus vorgenommen werden,<br />
bleiben auch im Layer Modus erhalten. Änderungen, die im Layer Modus vorgenommen<br />
werden, werden jedoch nicht gespeichert.<br />
78 Kapitel 3
Wenn das Instrument ausgeschaltet wird, werden die Effekte wieder auf die werkseitigen<br />
Einstellungen zurückgesetzt. Wenn Sie wollen, dass Ihre Einstellungen<br />
erhalten bleiben, müssen Sie diese mit der Data Dump Funktion speichern (siehe<br />
“MIDI Data Dump” on page 93).<br />
1 Halten Sie den Taster REVERB oder CHORUS gedrückt und drücken Sie gleichzeitig<br />
einen der Klangauswahltaster PIANO 1/L, PIANO 2/M oder E.PIANO1/H, um<br />
die Intensität des Hall-oder Chorus-Effekts einzustellen.<br />
Taster Hall-Intensität Chorus-Intensität<br />
PIANO 1/L Leichter Hall Leichter Chorus<br />
PIANO 2/M Normaler Hall Normaler Chorus<br />
E.PIANO 1/H Starker Hall Starker Chorus<br />
2 Zur Überprüfung der Intensität des selektierten Hall- oder Chorus-Effekts, halten<br />
Sie den REVERB oder CHORUS Taster gedrückt, um zu sehen, welche der oben<br />
genannten LEDs eingeschaltet ist.<br />
3 Zum Ausschalten des Hall- oder Chorus-Effekts drücken Sie den REVERB oder<br />
CHORUS Taster. Die LED des Tasters schaltet sich aus.<br />
Das Damper Pedal<br />
Das mitgelieferte Damper-Pedal kann wie ein Lautstärkepedal benutzt werden.<br />
Wenn ein <strong>Korg</strong> DS1H Pedal (Option) an die DAMPER Buchse anschließen, können<br />
Sie das Half-Damper-Effekt nutzen, wobei je nach aufgebrachtem Druck ein gradueller<br />
Resonanzeffekt erzielt wird.<br />
Im Layer Modus können Sie den Klang bzw. die Klänge selektieren, die dem Pedal<br />
zugewiesen werden sollen.<br />
Anmerkung: Wenn das Instrument ausgeschaltet wird, wird das Pedal wieder auf<br />
die werkseitigen Einstellungen zurückgesetzt. Wenn Sie wollen, dass Ihre Einstellungen<br />
erhalten bleiben, müssen Sie diese mit der Data Dump Funktion speichern<br />
(see “MIDI Data Dump” on page 93).<br />
1 Halten Sie den TRAN<strong>SP</strong>OSE/FUNCTION Taster gedrückt und drücken Sie gleichzeitig<br />
das Damper-Pedal. Bei jeder Betätigung des Pedals leuchtet die LED des/der<br />
Klangauswahltaster(s) auf, auf den das Pedal wirkt.<br />
2 Wenn das Pedal dem/den gewünschten Klang/Klängen zugewiesen ist, können Sie<br />
den TRAN<strong>SP</strong>OSE/FUNCTION Taster loslassen.<br />
Basisfunktionen 79
Das Metronom<br />
Das <strong>SP</strong>-<strong>200</strong> besitzt ein eingebautes Metronom, mit dem das Tempo beim Üben vorgegeben<br />
werden kann.<br />
Metronom starten und stoppen. Drücken Sie den METRONOME Taster, um<br />
das Metronom zu starten oder zu stoppen. Beim Einschalten ist das Metronom entsprechend<br />
der Schieberegler-Position eingestellt. Sie können diese Einstellung<br />
jedoch in der nachstehend beschriebenen Weise verändern. Nach dem Abspielen der<br />
Demosongs bleibt das Tempo des zuletzt abgespielten Demos eingestellt.<br />
Metronom-Lautstärke einstellen. Drücken Sie den METRONOME Taster, während<br />
das Metronom in Funktion ist. Drücken Sie dann mehrmals den STRINGS/<br />
PAD Taster (oder die Taste B5), um die Lautstärke zu vermindern, bzw. CHOIR<br />
(oder die Taste C6), um sie zu erhöhen. Um zur ursprünglichen Lautstärke zurückzukehren,<br />
drücken Sie gleichzeitig die beiden Taster STRINGS/PAD und CHOIR<br />
(oder die Tasten B5 und C6), während Sie den METRONOME Taster gedrückt halten.<br />
Notentaste Effekt Notentaste Effekt<br />
B5 geringere Lautstärke C6 höhere Lautstärke<br />
Tempo mit Hilfe des TEMPO Schieberegler regulieren. Benutzen Sie den<br />
TEMPO Schieberegler, um das Tempo zu verändern. Das Tempo kann im Bereich <br />
= 40 ~ <strong>200</strong> verändert werden.<br />
Numerische Tempoeingabe. In manchen Fällen stimmt das Tempo nicht exakt<br />
mit den Markierungen des TEMPO Schiebereglers überein. Wenn Sie einen<br />
bestimmten Tempowert einstellen wollen, können Sie das numerische Eingabeverfahren<br />
verwenden.<br />
1 Halten Sie den METRONOME Taster gedrückt.<br />
80 Kapitel 3
2 Benutzen Sie die Tastatur, um den dreistelligen Tempowert einzugeben (bei zweistelligen<br />
Werten ist eine “0” voranzustellen).<br />
Taste Nummer Taste Nummer<br />
C5 0 C#5 1<br />
D5 2 D#5 3<br />
E5 4 F5 5<br />
F#5 6 G5 7<br />
G#5 8 A5 9<br />
Um beispielsweise den Tempowert 168 einzustellen, halten Sie den METRONOME<br />
Taster gedrückt und drücken Sie gleichzeitig die Tasten C#5 (1), F#5 (6), G#5 (8).<br />
Zur Einstellung des Tempowertes 85 halten Sie den METRONOME Taster gedrückt<br />
und drücken gleichzeitig die Tasten C5 (0), G#5 (8), F5 (5).<br />
Taktunterteilung selektieren. Sie können den ersten Taktschlag betonen.<br />
Taster<br />
Taktunterteilung<br />
PIANO 1 2 Viertelnoten (2/4, 2/8...)<br />
PIANO 2 3 Viertelnoten (3/4, 3/8...)<br />
E.PIANO 1 4 Viertelnoten (4/4, 4/8...)<br />
E.PIANO 2 6 Viertelnoten (6/4, 6/8...)<br />
1 Halten Sie den METRONOME Taster bei laufendem Metronom gedrückt und drükken<br />
Sie gleichzeitig den Taster, der der gewünschten Taktunterteilung entspricht<br />
(siehe Tabelle oben). Nun wird die erste Viertelnote des Taktes betont.<br />
2 Zur Deaktivierung der Betonung halten Sie den METRONOME Taster gedrückt<br />
und drücken gleichzeitig den Klangauswahltaster, dessen LED leuchtet.<br />
Anmerkung: Beim Ausschalten des Instruments wird automatisch die Betonung<br />
deaktiviert.<br />
Glockenton für die Betonung selektieren. Der betonte Taktschlag kann auch in<br />
einen Glockenton verwandelt werden.<br />
Basisfunktionen 81
1 Halten Sie den METRONOME Taster bei laufendem Metronom gedrückt und drükken<br />
Sie gleichzeitig den VIBES/GUITAR Klangauswahltaster. Die LED des Tasters<br />
leuchtet auf und ein Glockenklang ertönt bei jeder ersten Viertelnote eines Taktes.<br />
2 Um wieder zur normalen Betonung zurückzukehren, halten Sie den METRONOME<br />
Taster gedrückt und drücken gleichzeitig den HARPSI/CLAV Klangauswahltaster,<br />
so dass sich die LED des HARPSI/CLAV Tasters einschaltet.<br />
Anmerkung: Beim Ausschalten des Instruments wird automatisch die Betonung<br />
deaktiviert.<br />
82 Kapitel 3
KAPITEL<br />
4<br />
Einstellung des Anschlags<br />
Weitere Funktionen<br />
Die Anschlagempfindlichkeit der Tastatur kann unterschiedlich eingestellt werden.<br />
Halten Sie den TOUCH Taster gedrückt und drücken Sie gleichzeitig den entsprechenden<br />
Taster zur Einstellung der gewünschten Anschlagempfindlichkeit.<br />
Taster<br />
PIANO 1/L<br />
PIANO 2/M<br />
E.PIANO 1/H<br />
Anschlagempfindlichkeit<br />
Leicht. Selbst bei leichtem Anschlag können laute Noten gespielt werden.<br />
Normal. Normaler Klavieranschlag.<br />
Schwer. Nur bei sehr starkem Anschlag werden laute Noten gespielt.<br />
Um die jeweilige Einstellung zu überprüfen, halten Sie den TOUCH Taster gedrückt<br />
und kontrollieren, welche der obigen LEDs eingeschaltet ist.<br />
Anmerkung: Beim Ausschalten des Instruments wird wieder die normale<br />
Anschlagempfindlichkeit eingestellt.<br />
Alternativ können auch TRAN<strong>SP</strong>OSE/FUNCTION Taster und Tastatur benutzt<br />
werden. TRAN<strong>SP</strong>OSE/FUNCTION Taster gedrückt halten und gleichzeitig die<br />
Notentaste drücken, die der gewünschten Einstellung entspricht (siehe Tabelle).<br />
Taste<br />
B3<br />
C4<br />
Anschlagempfindlichkeit<br />
Leicht. Selbst bei leichtem Anschlag können laute Noten gespielt werden.<br />
Normal. Normaler Klavieranschlag.<br />
Weitere Funktionen 83
Taste<br />
D4<br />
Anschlagempfindlichkeit<br />
Schwer. Nur bei sehr starkem Anschlag werden laute Noten gespielt.<br />
Transponierung<br />
Sie können die Stimmung des Instruments um einen oder mehrere Halbtöne nach<br />
oben oder unten transponieren. Die Transponierung ermöglicht es, das <strong>SP</strong>-<strong>200</strong> auf<br />
ein anderes Instrument abzustimmen oder ein Stück mit vielen zu hohen oder zu tiefen<br />
Tönen zu vereinfachen.<br />
Anmerkung: Beim Ausschalten des Instruments wird die Transponierung wieder<br />
aufgehoben.<br />
1 Halten Sie den TRAN<strong>SP</strong>OSE/FUNCTION Taster gedrückt und drücken Sie gleichzeitig<br />
die der gewünschten Transponierung entsprechende Taste auf der Tastatur<br />
(siehe Tabelle). Die LED des TRAN<strong>SP</strong>OSE/FUNTION Tasters leuchtet und zeigt<br />
dadurch an, dass die Transponierfunktion aktiviert wurde.<br />
Note<br />
Effekt<br />
F#6 — B6 6 — 1 Halbtöne nach unten<br />
C7<br />
Standardstimmung<br />
C#7 — F7 1 — 5 Halbtöne nach oben<br />
2 Um zur Standardstimmung zurückzukehren, drücken Sie den TRAN<strong>SP</strong>OSE/<br />
FUNCTION Taster und schlagen gleichzeitig die Taste C7 an. Die LED des<br />
TRAN<strong>SP</strong>OSE/FUNCTION Tasters erlischt.<br />
Feinstimmung<br />
Um die Stimmung des <strong>SP</strong>-<strong>200</strong> der eines anderen Instruments anzupassen, können<br />
Sie die Stimmung in Intervallen von 0.5 Hz im Bereich von A4 = 427.5 ~ 452.5 Hz<br />
einstellen. Die Standardstimmung ist A4 = 440 Hz.<br />
Anmerkung: Beim Aus- und erneuten Einschalten des Instruments wird automatisch<br />
wieder die Standardstimmung (A4 = 440 Hz) eingestellt.<br />
1 Drücken Sie den TRAN<strong>SP</strong>OSE/FUNCTION Taster.<br />
84 Kapitel 4
2 Schlagen Sie die entsprechende Notentaste zur Veränderung der Stimmung an. Bei<br />
jedem Drücken der Taste B5 oder C6 wird die Stimmung um 0.5 Hz höher oder tiefer.<br />
3 Um erneut die Standardstimmung einzustellen, halten Sie den TRAN<strong>SP</strong>OSE/<br />
FUNCTION Taster gedrückt und drücken gleichzeitig die Tasten B5 und C6.<br />
Note<br />
B5<br />
B5+C6<br />
C6<br />
Feinstimmung<br />
Stimmung wird um 0.5 Hz tiefer<br />
Standardstimmung (A4 = 440 Hz)<br />
Stimmung wird um 0.5 Hz höher<br />
Temperierung selektieren<br />
Zahlreiche klassische Stücke wurden in anderen Stimmungen komponiert als der<br />
heute gebräuchlichen wohltemperierten Stimmung. Um den ursprünglichen Klang<br />
dieser Kompositionen originalgetreu wiedergeben zu können, bietet das <strong>SP</strong>-<strong>200</strong><br />
neben der wohltemperierten Stimmung auch die klassischen Stimmungen Kirnberger<br />
und Werckmeister, so dass Sie aus insgesamt drei Stimmungen die jeweils am<br />
besten geeignete auswählen können.<br />
Zur Einstellung der gewünschten Stimmung halten Sie den TOUCH Taster gedrückt<br />
und drücken gleichzeitig den Taster, der der zu selektierenden Stimmung entspricht.<br />
Um zur wohltemperierten Stimmung zurückzukehren halten Sie den TOUCH Taster<br />
gedrückt und drücken gleichzeitig den Klangauswahltaster, dessen LED eingeschaltet<br />
ist.<br />
Taster<br />
HARPSI/CLAV<br />
VIBES/GUITAR<br />
Beide LEDs sind<br />
ausgeschaltet<br />
Temperament<br />
Werckmeister. Die Stimmung Werckmeister III wurde von dem deutschen<br />
Organisten und Musikgelehrten Andreas Werckmeister entwickelt. Sie<br />
entstand in der Zeit des Spätbarocks zur Ermöglichung relativ freier<br />
Transponierungen.<br />
Kirnberger. Die Stimmung Kirnberger III wurde von Johann Phillip Kirnberger<br />
zu Beginn des 18. Jahrhunderts entwickelt und wird vorzugsweise<br />
für Cembalos verwendet.<br />
Wohltemperierten Stimmung. Beinahe alle modernen Tasteninstrumente<br />
basieren auf dieser Stimmung. Die Halbtöne sind vollkommen gleichmäßig<br />
voneinander entfernt.<br />
Weitere Funktionen 85
Um die eingestellte Stimmung überprüfen zu können, halten Sie den TOUCH Taster<br />
gedrückt und kontrollieren, welche der obigen LEDs aufleuchtet.<br />
Anmerkung: Beim Ausschalten des Instruments wird automatisch wieder die<br />
wohltemperierten Stimmung eingestellt.<br />
Zum Thema “gedehnte Stimmung”. Zur Erzielung möglichst natürlicher Resonanzen<br />
wird bei den Klängen PIANO 1 und PIANO 2 eine “gedehnte Stimmung”<br />
verwendet, um die Noten in den tiefen Bereichen etwas dunkler und in den hohen<br />
Bereichen heller klingen zu lassen. Akustische Klaviere werden von professionellen<br />
Klavierstimmern normalerweise auf diese Weise gestimmt.<br />
86 Kapitel 4
KAPITEL<br />
5<br />
Was ist MIDI?<br />
MIDI<br />
MIDI ist die Abkürzung für Musical Instrument Digital Interface. Dies ist ein internationaler<br />
Standard für die Verbindung und die Datenübertragung zwischen elektronischen<br />
Instrumenten, Computern und anderen Geräten.<br />
Was leistet MIDI?<br />
Dank MIDI können Sie das <strong>SP</strong>-<strong>200</strong> zur Steuerung anderer Instrumente, oder umgekehrt,<br />
andere Instrumente zur Steuerung des <strong>SP</strong>-<strong>200</strong> einsetzen und einen Sequenzer<br />
zur Kreation komplexer Musikstücke benutzen.<br />
Wenn Sie die Tastatur oder das Pedal des <strong>SP</strong>-<strong>200</strong> benutzen oder einen Klang selektieren,<br />
werden die Noten, die Pedalaktivierung und die Klangänderungen an ein<br />
anderes Instrument übertragen oder von einem Sequenzer aufgenommen.<br />
Anschlüsse<br />
Schließen Sie stets die MIDI OUT Buchse des Instruments an die MIDI IN Buchse<br />
des anderen Instruments an. Verbinden Sie keinesfalls die beiden Buchsen desselben<br />
Instruments miteinander.<br />
Schließen Sie die MIDI OUT Buchse des übertragenden Instruments (Master) an<br />
die MIDI IN Buchse des empfangenden Instruments (Slave) an.<br />
Um das <strong>SP</strong>-<strong>200</strong> an einen Computer anzuschließen, benötigen Sie eine MIDI<br />
Schnittstelle am Computer, Software für Sequencing oder Notenaufzeichnung<br />
sowie zwei Standard MIDI Kabel. Schließen Sie die MIDI OUT Buchse des <strong>SP</strong>-<strong>200</strong><br />
an die MIDI IN Buchse des Computers und die MIDI IN Buchse des <strong>SP</strong>-<strong>200</strong> an die<br />
MIDI OUT Buchse des Computers an.<br />
MIDI 87
Standard MIDI Einstellungen<br />
Beim Einschalten des Instruments sind die MIDI Parameter des <strong>SP</strong>-<strong>200</strong> wie folgt<br />
programmiert:<br />
Parameter<br />
Einstellung<br />
Übertragungskanal 1<br />
Empfangskanal/kanäle Alle 16 (1-16)<br />
Local<br />
ON<br />
Omni<br />
ON<br />
Übertragungskanal selektieren<br />
Bei Standard MIDI stehen 16 Kanäle für die Übertragung und den Empfang von<br />
Daten zur Verfügung. Das <strong>SP</strong>-<strong>200</strong> empfängt immer auf allen 16 Kanälen und überträgt<br />
auf nur einem Kanal. Um Daten vom <strong>SP</strong>-<strong>200</strong> zu übertragen, müssen Sie<br />
zunächst festlegen, welcher der 16 Kanäle hierfür vorgesehen sein soll.<br />
Halten Sie den TRAN<strong>SP</strong>OSE/FUNCTION Taster gedrückt und drücken gleichzeitig<br />
die Notentaste im Bereich zwischen C2 und D#3, die dem vorgesehenen MIDI<br />
Kanal entspricht.<br />
Notentaste Kanal Notentaste Kanal<br />
C2 1 C#2 2<br />
D2 3 D#2 4<br />
E2 5 F2 6<br />
F#2 7 G2 8<br />
G#2 9 A2 10<br />
A#2 11 B2 12<br />
C3 13 C#3 14<br />
D3 15 D#3 16<br />
Anmerkung: Beim Einschalten des Instruments ist automatisch Kanal 1 eingestellt.<br />
Anmerkung: Als Default-Einstellung wird der Kanal 10 automatisch dem Metronom-Klang<br />
zugewiesen (Noten D#5-E5).<br />
88 Kapitel 5
Anmerkung: Im Layer Modus wird der zweite Klang jeweils auf dem nächsthöheren<br />
Kanal übertragen. Wenn Sie beispielsweise Kanal 7 selektieren, wird der erste<br />
Klang auf Kanal 7, der zweite Klang hingegen auf Kanal 8 übertragen. Wenn Sie<br />
Kanal 16 selektieren, wird der erste Klang auf Kanal 16, der zweite Klang hingegen<br />
auf Kanal 1 übertragen (nach 16 kehrt der Zähler auf 1 zurück).<br />
<strong>SP</strong>-<strong>200</strong> als multitimbraler Tongenerator<br />
Wenn das <strong>SP</strong>-<strong>200</strong> von einem externen MIDI-Gerät gesteuert wird, kann es als multitimbraler<br />
Tongenerator verwendet werden. Sie können auf jedem der 16 MIDI<br />
Kanäle einen anderen Klang wählen.<br />
1 Schließen Sie die MIDI In Buchse des <strong>SP</strong>-<strong>200</strong> mit einem MIDI Kabel an die MIDI<br />
OUT Buchse eines Sequenzers o.ä. an.<br />
2 Übertragen Sie MIDI Daten vom angeschlossenen Sequenzer (oder einem anderen<br />
Gerät). Detaillierte Anweisungen zur Selektion der Klänge unter Verwendung der<br />
MIDI Program Change Befehle finden Sie unter “Program Change” on page 90.<br />
Das <strong>SP</strong>-<strong>200</strong> muss natürlich für den Empfang von Program Change Befehlen aktiviert<br />
werden.<br />
Informationen zum Senden von Program Change Befehlen finden Sie in der Bedienungsanleitung<br />
des angeschlossenen Geräts.<br />
Local On/Off<br />
Local ist der Parameter, mit dem Sie festlegen, ob das Klavier gleichzeitig die internen<br />
Klänge spielen und MIDI Daten übertragen soll (Local On) oder ob es nur<br />
MIDI Daten übertragen, die internen Klänge aber nicht spielen soll (Local Off).<br />
Selektieren Sie Local Off, wenn das <strong>SP</strong>-<strong>200</strong> als stummes Keyboard verwendet werden<br />
soll, das auf einem anderen Instrument spielt. Diese Einstellung sollte auch<br />
dann gewählt werden, wenn das <strong>SP</strong>-<strong>200</strong> über seine MIDI IN und MIDI OUT Buchsen<br />
an einen Sequenzer angeschlossen ist. Auf diese Weise vermeiden Sie, dass<br />
bestimmte Noten zweimal, d.h. sowohl vom Keyboard als auch vom Sequenzer<br />
gespielt werden und einen unangenehmen Echoeffekt erzeugen.<br />
Normalerweise wählen Sie die Einstellung Local On (wird automatisch beim Einschalten<br />
des Instruments eingestellt), so dass beim Spielen des Keyboards der entsprechende<br />
Klang zu hören ist.<br />
MIDI 89
Halten Sie den TRAN<strong>SP</strong>OSE/FUNCTION Taster gedrückt und drücken Sie gleichzeitig<br />
den [PIANO 1] Klangauswahltaster. Die Local Einstellung wechselt bei<br />
jedem Tastendruck zwischen On und Off.<br />
Local Status<br />
Local On<br />
Local Off<br />
PIANO 1 LED Status<br />
eingeschaltet<br />
ausgeschaltet<br />
Anmerkung: Beim Einschalten des Instruments ist der Local Parameter automatisch<br />
auf On eingestellt.<br />
Program Change<br />
Der Klang des <strong>SP</strong>-<strong>200</strong> kann über MIDI selektiert werden, indem ein Program<br />
Change Befehl auf dem Kanal gesendet wird, dem der Klang zugewiesen werden<br />
soll. In der untenstehenden Tabelle finden Sie alle Program Change Nummern (zwischen<br />
0 und 29; wenn das übertragende Gerät Nummern zwischen 1 und 30 verwendet,<br />
muss die Nummer jeweils um eine Einheit erhöht werden).<br />
Program Change Befehle übertragen. Sie können einen MIDI Program Change<br />
Befehl an ein MIDI Gerät übertragen, das an die MIDI OUT Buchse des <strong>SP</strong>-<strong>200</strong><br />
angeschlossen ist, um dessen Klang zu ändern. Wenn Sie einen der internen Klänge<br />
des <strong>SP</strong>-<strong>200</strong> mit den Klangauswahltastern selektieren, wird eine entsprechende<br />
MIDI Program Change Nummer übertragen, wie aus der nachstehenden Tabelle zu<br />
ersehen ist.<br />
Program Change Befehle empfangen. Wenn ein Program Change Befehl von<br />
einem externen Gerät empfangen wird, wird auf dem <strong>SP</strong>-<strong>200</strong> der entsprechende<br />
interne Klang selektiert, wie aus der nachstehenden Tabelle zu ersehen ist. Nur Program<br />
Change (PC) Nummern zwischen 0 und 29 werden vom <strong>SP</strong>-<strong>200</strong> berücksichtigt.<br />
PC# Taster Bank Klang<br />
0<br />
1 Grand Piano 1<br />
1 PIANO 1<br />
2 Bright Piano<br />
2 3 Grand Piano 2<br />
3<br />
1 Classic Grand Piano<br />
4 PIANO 2<br />
2 Honky-Tonky<br />
5 3 E.Grand Piano<br />
90 Kapitel 5
PC# Taster Bank Klang<br />
6<br />
1 Stage E.Piano<br />
7 E.PIANO 1<br />
2 Club E.Piano<br />
8 3 Thin E.Piano<br />
9<br />
1 Digital E.Piano<br />
10 E.PIANO 2<br />
2 60’s E.Piano<br />
11 3 Vintage E.Piano<br />
12<br />
1 Harpsichord<br />
13 HARPSI/CLAV 2 Clav.<br />
14 3 Wah Clav.<br />
15<br />
1 Vibraphone<br />
16 VIBES/GUITAR 2 Marimba<br />
17 3 Acoustic Guitar<br />
18<br />
1 Jazz Organ 1<br />
19 ORGAN1<br />
2 Jazz Organ 2<br />
20 3 Jazz Organ 3<br />
21<br />
1 Church Organ 1<br />
22 ORGAN2<br />
2 Church Organ 2<br />
23 3 Church Organ 3<br />
24<br />
1 Strings<br />
25 STRINGS/PAD 2 Slow Strings<br />
26 3 Warm Pad<br />
27<br />
1 Choir Hoo<br />
28 CHOIR<br />
2 Choir Doo<br />
29 3 Choir Pad<br />
Program Change aktivieren/deaktivieren. Um diese Art von Daten übertragen<br />
und empfangen zu können, muss das Instrument für die Übertragung/Empfang von<br />
Program Change Befehlen aktiviert werden. Wenn dies nicht gewünscht wird, können<br />
Program Changes Daten deaktiviert werden.<br />
MIDI 91
Halten Sie den TRAN<strong>SP</strong>OSE/FUNCTION Taster gedrückt und drücken Sie gleichzeitig<br />
den PIANO 2 Klangauswahltaster. Bei jedem Tasterdruck wechselt die Einstellung<br />
zwischen “aktiviert” und “deaktiviert”.<br />
Program Change Status<br />
Aktivieren<br />
Deaktivieren<br />
PIANO 2 LED Status<br />
eingeschaltet<br />
ausgeschaltet<br />
Anmerkung: Beim Einschalten des Instruments sind Program Changes auf allen<br />
MIDI Kanälen aktiviert.<br />
Control Change<br />
Wenn Sie das Lautstärkepedal betätigen, die Balance-Einstellung im Layer Modus<br />
regulieren oder die entsprechenden Einstellungen auf dem Bedienfeld vornehmen,<br />
wird ein entsprechender Control Change Befehl an ein externes MIDI Gerät gesendet.<br />
In gleicher Weise kann das <strong>SP</strong>-<strong>200</strong> Control Change Befehle von einem externen<br />
MIDI Gerät empfangen, das an der MIDI IN Buchse des Instruments angeschlossen<br />
ist, um das Lautstärkepedal zu steuern und Lautstärke- oder sonstige Regulierungen<br />
vorzunehmen.<br />
Control Change aktivieren/deaktivieren. Um diese Art von Daten übertragen<br />
und empfangen zu können, muss das Instrument für die Übertragung/Empfang von<br />
Control Change Befehlen aktiviert werden. Wenn dies nicht gewünscht wird, können<br />
Control Change Daten deaktiviert werden.<br />
Halten Sie den TRAN<strong>SP</strong>OSE/FUNCTION Taster gedrückt und drücken Sie gleichzeitig<br />
den E.PIANO 1 Klangauswahltaster. Bei jedem Tasterdruck wechselt die Einstellung<br />
zwischen “aktiviert” und “deaktiviert”.<br />
Control Change Status<br />
aktiviert<br />
deaktiviert<br />
E.PIANO 1 LED Status<br />
eingeschaltet<br />
ausgeschaltet<br />
Anmerkung: Beim Einschalten des Instruments sind Control Change Befehle auf<br />
allen MIDI Kanälen aktiviert.<br />
92 Kapitel 5
MIDI Data Dump<br />
Die können die vorgenommenen Klang- (Single oder Layer Modus) auf einem<br />
externen MIDI Speichergerät, beispielsweise einem Sequenzer oder einem MIDI<br />
Datafiler abspeichern. Diese Daten können dann wieder ins <strong>SP</strong>-<strong>200</strong> geladen werden,<br />
um bestimmte Dateneinstellungen wieder zur Verfügung zu haben.<br />
Warnung: Zur Vermeidung von Datenverlusten sollten Sie die Bedienungsanleitung<br />
Ihres MIDI Datafiler sorgfältig durchlesen.<br />
Tipp: Zur Vermeidung jeder Art von Problemen empfiehlt es sich, den systemexklusiven<br />
Datenempfang im angeschlossenen Gerät zu deaktivieren.<br />
In der nachfolgenden Tabelle sind die Daten aufgeführt, die mit Data Dump gespeichert<br />
werden können.<br />
Kategorie<br />
Single Modus<br />
Layer Modus<br />
Daten<br />
Hall- und Chorus-Einstellungen (On/Off Status, Sendepegel)<br />
Hall- und Chorus-Einstellungen (On/Off Status, Sendepegel),<br />
Balance zwischen den Klängen, Lautstärkepedal<br />
On/Off Status für jeden Klang.<br />
Daten im Datafiler speichern. So können Sie die Daten Ihres <strong>SP</strong>-<strong>200</strong> speichern.<br />
1 Schließen Sie die MIDI OUT Buchse des <strong>SP</strong>-<strong>200</strong> mit einem MIDI Kabel an die<br />
MIDI IN Buchse des Datafiler an.<br />
2 Stellen Sie den Datafiler auf den Empfang von MIDI Daten ein.<br />
3 Halten Sie den TRAN<strong>SP</strong>OSE/FUNCTION Taster auf dem <strong>SP</strong>-<strong>200</strong> gedrückt und<br />
drücken Sie gleichzeitig den VIBES/GUITAR Klangauswahltaster. Die LEDs des<br />
TRAN<strong>SP</strong>OSE/FUNCTION Tasters und des VIBES/GUITAR Tasters blinken, um<br />
anzuzeigen, dass das <strong>SP</strong>-<strong>200</strong> für die Data Dump Übertragung bereit ist.<br />
4 Drücken Sie den TOUCH Taster. Die Data Dump Übertragung beginnt, d.h. die<br />
Klangeinstellungsdaten werden auf den Datafiler übertragen.<br />
Während des Data Dump sind die Klangerzeugung und die sonstigen Funktionen<br />
des <strong>SP</strong>-<strong>200</strong> blockiert. Nach Abschluss des Übertragungsvorgangs werden die normalen<br />
Spielfunktionen wiederhergestellt.<br />
Sie können den Data Dump Vorgang vor Beginn desselben durch Drücken des<br />
Tasters TRAN<strong>SP</strong>OSE/FUNCTION oder VIBES/GUITAR abbrechen.<br />
MIDI 93
Daten vom Datafiler laden. Die zuvor im Datafiler gespeicherten Daten können<br />
wieder ins <strong>SP</strong>-<strong>200</strong> geladen werden.<br />
1 Schließen Sie die MIDI IN Buchse des <strong>SP</strong>-<strong>200</strong> mit einem MIDI Kabel an die MIDI<br />
OUT Buchse des Datafiler an.<br />
2 Halten Sie den TRAN<strong>SP</strong>OSE/FUNCTION Taster des <strong>SP</strong>-<strong>200</strong> gedrückt und drücken<br />
Sie gleichzeitig den VIBES/GUITAR Klangauswahltaster. Die LEDs der TRANS-<br />
POSE/FUNCTION und VIBES/GUITAR Taster blinken, um anzuzeigen, dass das<br />
<strong>SP</strong>-<strong>200</strong> für den Empfang des Data Dump bereit ist.<br />
3 Stellen Sie den Datafiler entsprechend ein, um die zuvor gespeicherten Klangeinstellungsdaten<br />
des <strong>SP</strong>-<strong>200</strong> zu übertragen. Eingehende Informationen über die<br />
Datenübertragung lesen Sie bitte in der Bedienungsanleitung des Datafiler nach.<br />
Das <strong>SP</strong>-<strong>200</strong> empfängt die übertragenen Daten.<br />
Wenn das Data Dump beendet ist, befindet sich das <strong>SP</strong>-<strong>200</strong> wieder im gleichen Status<br />
wie vor der Übertragung.<br />
Während des Data Dump sind die Klangerzeugung und die sonstigen Funktionen<br />
des <strong>SP</strong>-<strong>200</strong> blockiert. Wenn das Data Dump beendet ist, schaltet sich die LED des<br />
TOUCH Tasters aus und die normalen Spielfunktionen werden wiederhergestellt.<br />
Sie können den Data Dump Vorgang vor Beginn desselben durch Drücken des<br />
TRAN<strong>SP</strong>OSE/FUNCTION oder VIBES/GUITAR Tasters abbrechen.<br />
94 Kapitel 5
KAPITEL<br />
6<br />
Fehlerbeseitigung<br />
Anhang<br />
Sollte während des Gebrauchs des Instruments eines der nachfolgend beschriebenen<br />
Probleme auftreten, kontrollieren Sie es sorgfältig und versuchen Sie, die Störung<br />
anhand der Vorschläge und Tipps zu beseitigen. Wenn das Instrument<br />
weiterhin nicht einwandfrei funktionieren sollte, wenden Sie sich bitte an Ihren<br />
Händler oder an ein autorisiertes <strong>Korg</strong> Kundendienstzentrum.<br />
Problem Mögliche Abhilfe Seite<br />
Instrument lässt<br />
sich nicht einschalten.<br />
Instrument<br />
bleibt stumm.<br />
Prüfen Sie, ob der Ws-Adapter richtig in das Klavier und die Netzsteckdose<br />
eingesteckt ist.<br />
(1) Versichern Sie sich, dass die Lautstärke nicht auf 0 eingestellt<br />
ist. Regulieren Sie die Lautstärke ggf. auf ein angemessenes<br />
Niveau.<br />
(2) Versichern Sie sich, dass die MIDI Local Funktion nicht auf<br />
OFF eingestellt ist. Sollte dies der Fall sein, stellen Sie ON ein<br />
(oder schalten Sie das Instrument aus und anschließend wieder<br />
ein).<br />
72<br />
74<br />
89<br />
Polyphonie<br />
Das <strong>SP</strong>-<strong>200</strong> enthält gesampelte Klänge, die durch die Aufnahme, Analyse und Bearbeitung<br />
der Klänge von Original-Musikinstrumenten entstehen. Diese Klänge<br />
bestehen normalerweise aus einem oder mehreren unterschiedlichen Samples, die<br />
durch Anschlagen einer Taste wiedergegeben werden. Klänge, die aus nur einem<br />
Sample bestehen, verfügen über die volle, 60 Stimmen umfassende Polyphonie,<br />
während die aus zwei Samples bestehenden Klänge eine begrenzte Polyphonie von<br />
max. 30 Noten besitzen. Wenn die Anzahl der erklingenden Noten diese Grenzwerte<br />
überschreitet, bricht der Klang zuweilen ab.<br />
Anhang 95
Wenn Sie im Layer Modus mit mehr als zwei Noten spielen, hängt die maximale<br />
Polyphonie davon ab, wieviele Samples insgesamt verwendet werden. Bei Verwendung<br />
der Funktionen REVERB und CHORUS vermindert sich die Polyphonie<br />
zusätzlich um weitere 10 bzw. 3 Noten.<br />
Technische Daten<br />
Daten<br />
Tastatur<br />
Anschlagempfindlichkeit<br />
Stimmungseinstellung<br />
Klangerzeugung<br />
Polyphonie<br />
Klänge<br />
Effekte<br />
Demo<br />
Metronom<br />
Pedal<br />
Anschlussbuchsen<br />
Regler<br />
Versorgung<br />
Leistungsaufnahme<br />
Abmessungen (B x T x H)<br />
Gewicht<br />
Zubehör<br />
Sonderaustattung<br />
<strong>SP</strong>-<strong>200</strong><br />
88 Noten, mit Anschlagdynamik und Hammersimulation<br />
Leicht, normal, schwer<br />
Transponierung, Feinstimmung Temperierung (Equal, Kirnberger,<br />
Werckmeister)<br />
Stereo PCM System<br />
60 Noten (max). Bei Verwendung von 2-Oszillatorenklängen,<br />
Layer Modus und/oder Hall bzw. Chorus vermindert sich die<br />
Anzahl der gleichzeitig spielenden Noten.<br />
30 Klänge im ROM<br />
Reverb, Chorus (jeweils 3 Stufen)<br />
30 programmierte Demosongs<br />
Regler für Tempo, Takt, Betonung und Lautstärke<br />
Damper (eingebaut). Halbpedalunterstützung mittels <strong>Korg</strong><br />
DS1H (Sonderaustattung).<br />
Audio Ausgang (OUTPUT L/MONO, R), Kopfhörer, MIDI (IN,<br />
OUT), Damper<br />
Netzschalter, Master Volume, Reverb, Chorus, Touch, Klangauswahltaster,<br />
Transpose/Function, Bank, Tempo, Metronom,<br />
Demo<br />
Gs 12V, 500mA, Minuspol in der Mitte, Ws-Adapter (im Lieferumfang<br />
enthalten)<br />
5 Watt<br />
1328 x 285 x 122 mm (52.3 x 11.2 x 4.8 inch)<br />
18,5 kg (40.7 lbs)<br />
Gs12V, 500mA, Minuspol in der Mitte, Ws-Adapter; Damper<br />
Pedal; Notenständer (alles im Lieferumfang enthalten)<br />
DS 1H - Damper Pedal mit Halbpedalregler<br />
Klangerzeugung mittels INFINITY TM<br />
<strong>Korg</strong> behält sich das Recht auf Änderungen ohne Vorankündigung vor.<br />
96 Kapitel 6
Bedienfeld-Kurzbefehle<br />
…halten Sie diesen Taster gedrückt<br />
Während des Drückens dieses Tasters…<br />
PIANO 1 PIANO2 E.PIANO 1 E.PIANO 2 HARPSI/CLAV VIBES/GUITAR ORGAN 1 ORGAN 2 STRINGS/PAD CHOIR<br />
REVERB Int = geringe Int = mittlere Int = hoch<br />
CHORUS Int = geringe Int = mittlere Int = hoch<br />
TOUCH Leicht Normal Stark Werckmeister Kirnberger<br />
METRONOME Takt: 2/4 Takt: 3/4 Takt: 4/4 Takt: 6/4 Betonung Glockenklang Metro Vol. Dec. Metro Vol. Inc.<br />
TRAN<strong>SP</strong>OSE/FUNCTION Local On/Off Prg.Change Rx/Tx Crl.Change Rx/Tx Data Dump<br />
Bedienfeld und Tastatur<br />
Das nachfolgende Diagramm zeigt verschiedene Funktionen, die Sie ansteuern können, indem Sie den METRONOME<br />
oder den TRAN<strong>SP</strong>OSE/FUNCTION Taster gedrückt halten und gleichzeitig eine Notentaste auf der Tastatur anschlagen.<br />
METRONOME<br />
Numeric Tempo Input<br />
C5 = 0 C#5 = 1 D5 = 2<br />
D#5 = 3 E5 = 4 F5 = 5<br />
F#5 = 6 G5 = 7 G#5 = 8<br />
A5 = 9<br />
(Press both for Reset)<br />
Metronome Volume<br />
B5 = Decrease (-)<br />
C6 = Increase (+)<br />
Demo Start<br />
TRAN<strong>SP</strong>OSE<br />
/FUNCTION<br />
MIDI Channels<br />
C2 = Ch 01<br />
…<br />
D#3 = Ch 16<br />
Touch Setting<br />
B3 = Light<br />
C4 = Normal<br />
D4 = Heavy<br />
Tuning<br />
B5 = Down (-)<br />
C6 = Up (+)<br />
(Press both<br />
for Reset)<br />
Transpose<br />
F#6…B6 = -6…-1 st.<br />
C7 = Standard<br />
C#7…F7 = +1…+5 st.<br />
Bedienfeld-Kurzbefehle 97
<strong>SP</strong>-<strong>200</strong><br />
Pianoforte Digitale<br />
Manuale di istruzioni
PRECAUZIONI<br />
Collocazione<br />
L’uso dello strumento in una delle situazioni<br />
seguenti può causarne il malfunzionamento.<br />
• Alla luce diretta del sole<br />
• In ambienti particolarmente caldi o umidi<br />
• In luoghi sporchi o polverosi<br />
• In luoghi soggetti a eccessive vibrazioni<br />
Alimentazione<br />
Collegate l’alimentatore esterno ad una presa di<br />
corrente del voltaggio indicato sull’alimentatore<br />
stesso. Non collegatelo ad una presa di corrente di<br />
voltaggio diverso.<br />
Interferenze con altri dispositivi elettronici<br />
Questo prodotto contiene un microprocessore,<br />
che può interferire con il funzionamento di apparecchi<br />
radio e televisivi posti nelle sue vicinanze.<br />
Usate questo dispositivo ad una certa distanza da<br />
apparecchi radio e televisivi.<br />
Maneggiare con cura<br />
Per evitarne la rottura, non forzate i pulsanti e i<br />
controlli.<br />
Manutenzione e pulizia<br />
Pulite le superfici con un panno morbido e<br />
asciutto. Non usate panni ruvidi, detergenti liquidi<br />
(quali benzene o diluenti), solventi organici o<br />
liquidi infiammabili.<br />
Conservate questo manuale<br />
Dopo la lettura, conservate il manuale per ulteriori<br />
consultazioni.<br />
Corpi estranei<br />
• Non appoggiate vasi, recipienti o bicchieri<br />
sullo strumento. Eventuali infiltrazioni di<br />
liquidi possono causare incendi e scosse elettriche,<br />
e comunque danneggiare irreparabilmente<br />
lo strumento.<br />
• Non fate cadere oggetti metallici, come spilli<br />
o monete, all’interno dello strumento. Se questo<br />
dovesse accadere, scollegate l’alimentatore<br />
dalla presa di corrente, e contattate il negoziante.<br />
MARCHIO CE PER L’ARMONIZZA-<br />
ZIONE DEGLI STANDARD EUROPEI<br />
Il marchio CE apposto sui prodotti della nostra<br />
azienda per gli apparati funzionanti in CA sino al<br />
31 Dicembre 1996 ne indica la conformità alla<br />
Direttiva EMC (89/336/EEC) e alla Direttiva sul<br />
marchio CE (93/68/EEC).<br />
Il marchio CE apposto dopo il 1° Gennaio 1997<br />
ne indica la conformità alla Direttiva EMC (89/<br />
336/EEC), alla Direttiva sul marchio CE (93/68/<br />
EEC) e alla Direttiva sulle Basse Tensioni (73/23/<br />
EEC).<br />
Inoltre, il marchio CE apposto sui prodotti della<br />
nostra azienda per gli apparati funzionanti a Batteria<br />
ne indica la conformità alla Direttiva EMC<br />
(89/336/EEC) e alla Direttiva sul marchio CE (93/<br />
68/EEC).<br />
RE<strong>SP</strong>ONSABILITÀ<br />
Le informazioni contenute in questo manuale<br />
sono state attentamente riviste e controllate. A<br />
causa del costante impegno a migliorare i nostri<br />
prodotti, le specifiche potrebbero differire da<br />
quanto descritto nel manuale. <strong>Korg</strong> non è responsabile<br />
per eventuali differenze tra le specifiche e<br />
la descrizione contenuta nel manuale d’istruzioni.<br />
Specifiche soggette a cambiamenti senza preavviso.<br />
GARANZIA<br />
I prodotti <strong>Korg</strong> sono costruiti in accordo alle più<br />
rigorose normative elettriche e meccaniche in<br />
vigore in vari paesi del mondo. Questi prodotti<br />
sono garantiti in ogni paese esclusivamente dal<br />
distributore <strong>Korg</strong>. I prodotti <strong>Korg</strong> non venduti con<br />
apposita garanzia del costruttore o del distributore,<br />
o privi di numero di serie, non possono usufruire<br />
di assistenza sotto garanzia. Questa norma è<br />
ad esclusiva tutela del consumatore.<br />
SERVIZIO E ASSISTENZA AL<br />
MUSICISTA<br />
Per riparazioni, rivolgetevi al più vicino Centro di<br />
Assistenza Autorizzato <strong>Korg</strong>. In Italia, per maggiori<br />
informazioni sui prodotti <strong>Korg</strong>, e per infor-<br />
100
mazioni su software musicale e accessori per il<br />
vostro pianoforte, contattate la hot-line allo 071-<br />
7391017.<br />
KORG SU INTERNET<br />
Home page <strong>Korg</strong> Inc.: “http://www.korg.co.jp”<br />
Home page <strong>Korg</strong> Italy: “http://www.korg.it”<br />
Home page <strong>Korg</strong> USA: “http://www.korg.com”<br />
CONSERVAZIONE DEI DATI<br />
Allo spegnimento dello strumento, tutti i parametri<br />
vengono riportati alla condizione iniziale.<br />
© <strong>200</strong>1 <strong>Korg</strong> Italy S.p.A. Stampato in Italia.<br />
101
INDICE GENERALE<br />
Introduzione . . . . . . . . . . . . . . . . . . . . . . . . . . . . . . . . . . . . . . . . . . . . . . . . . . . . . . 103<br />
Caratteristiche principali . . . . . . . . . . . . . . . . . . . . . . . . . . . . . . . . . . . . . . . . . . . . . . . . . . . . .103<br />
1 Prospetti . . . . . . . . . . . . . . . . . . . . . . . . . . . . . . . . . . . . . . . . . . . . . . . . . . . . . . . . . 105<br />
Pannello frontale . . . . . . . . . . . . . . . . . . . . . . . . . . . . . . . . . . . . . . . . . . . . . . . . . . . . . . . . . . .105<br />
Pannello posteriore . . . . . . . . . . . . . . . . . . . . . . . . . . . . . . . . . . . . . . . . . . . . . . . . . . . . . . . . .106<br />
2 Prima di iniziare . . . . . . . . . . . . . . . . . . . . . . . . . . . . . . . . . . . . . . . . . . . . . . . . . . . 108<br />
Collegare lo strumento ad un sistema di amplificazione . . . . . . . . . . . . . . . . . . . . . . . . . . . . .108<br />
Usare le cuffie . . . . . . . . . . . . . . . . . . . . . . . . . . . . . . . . . . . . . . . . . . . . . . . . . . . . . . . . . . . . .108<br />
Accendere lo strumento . . . . . . . . . . . . . . . . . . . . . . . . . . . . . . . . . . . . . . . . . . . . . . . . . . . . . .108<br />
Regolare il volume . . . . . . . . . . . . . . . . . . . . . . . . . . . . . . . . . . . . . . . . . . . . . . . . . . . . . . . . .109<br />
Ascoltare i brani dimostrativi . . . . . . . . . . . . . . . . . . . . . . . . . . . . . . . . . . . . . . . . . . . . . . . . .109<br />
3 Operazioni di base . . . . . . . . . . . . . . . . . . . . . . . . . . . . . . . . . . . . . . . . . . . . . . . . . 112<br />
Selezionare un solo suono (modo Single) . . . . . . . . . . . . . . . . . . . . . . . . . . . . . . . . . . . . . . . .112<br />
Selezionare due suoni allo stesso tempo (modo Layer) . . . . . . . . . . . . . . . . . . . . . . . . . . . . .112<br />
Scegliere il riverbero e il chorus . . . . . . . . . . . . . . . . . . . . . . . . . . . . . . . . . . . . . . . . . . . . . . .113<br />
Il pedale di risonanza . . . . . . . . . . . . . . . . . . . . . . . . . . . . . . . . . . . . . . . . . . . . . . . . . . . . . . . .114<br />
Il metronomo . . . . . . . . . . . . . . . . . . . . . . . . . . . . . . . . . . . . . . . . . . . . . . . . . . . . . . . . . . . . . .114<br />
4 Altre funzioni . . . . . . . . . . . . . . . . . . . . . . . . . . . . . . . . . . . . . . . . . . . . . . . . . . . . . . 117<br />
Regolazione del tocco . . . . . . . . . . . . . . . . . . . . . . . . . . . . . . . . . . . . . . . . . . . . . . . . . . . . . . .117<br />
Trasposizione . . . . . . . . . . . . . . . . . . . . . . . . . . . . . . . . . . . . . . . . . . . . . . . . . . . . . . . . . . . . . .118<br />
Intonazione fine . . . . . . . . . . . . . . . . . . . . . . . . . . . . . . . . . . . . . . . . . . . . . . . . . . . . . . . . . . . .118<br />
Selezione di un temperamento . . . . . . . . . . . . . . . . . . . . . . . . . . . . . . . . . . . . . . . . . . . . . . . . .119<br />
5 MIDI . . . . . . . . . . . . . . . . . . . . . . . . . . . . . . . . . . . . . . . . . . . . . . . . . . . . . . . . . . . . 121<br />
Che cos’è il MIDI? . . . . . . . . . . . . . . . . . . . . . . . . . . . . . . . . . . . . . . . . . . . . . . . . . . . . . . . . .121<br />
Che cosa si può fare con il MIDI? . . . . . . . . . . . . . . . . . . . . . . . . . . . . . . . . . . . . . . . . . . . . . .121<br />
Collegamenti . . . . . . . . . . . . . . . . . . . . . . . . . . . . . . . . . . . . . . . . . . . . . . . . . . . . . . . . . . . . . .121<br />
Impostazioni MIDI standard . . . . . . . . . . . . . . . . . . . . . . . . . . . . . . . . . . . . . . . . . . . . . . . . . .122<br />
Selezionare il canale di trasmissione . . . . . . . . . . . . . . . . . . . . . . . . . . . . . . . . . . . . . . . . . . . .122<br />
Usare <strong>SP</strong>-<strong>200</strong> come generatore sonoro multitimbrico . . . . . . . . . . . . . . . . . . . . . . . . . . . . . . .123<br />
Local On/Off . . . . . . . . . . . . . . . . . . . . . . . . . . . . . . . . . . . . . . . . . . . . . . . . . . . . . . . . . . . . . .123<br />
Program Change . . . . . . . . . . . . . . . . . . . . . . . . . . . . . . . . . . . . . . . . . . . . . . . . . . . . . . . . . . .124<br />
Control Change . . . . . . . . . . . . . . . . . . . . . . . . . . . . . . . . . . . . . . . . . . . . . . . . . . . . . . . . . . . .126<br />
MIDI Data Dump . . . . . . . . . . . . . . . . . . . . . . . . . . . . . . . . . . . . . . . . . . . . . . . . . . . . . . . . . .126<br />
6 Appendice . . . . . . . . . . . . . . . . . . . . . . . . . . . . . . . . . . . . . . . . . . . . . . . . . . . . . . . . 129<br />
Soluzione dei problemi . . . . . . . . . . . . . . . . . . . . . . . . . . . . . . . . . . . . . . . . . . . . . . . . . . . . . .129<br />
Polifonia . . . . . . . . . . . . . . . . . . . . . . . . . . . . . . . . . . . . . . . . . . . . . . . . . . . . . . . . . . . . . . . . .129<br />
Notazione inglese e notazione italiana . . . . . . . . . . . . . . . . . . . . . . . . . . . . . . . . . . . . . . . . . .130<br />
Specifiche tecniche . . . . . . . . . . . . . . . . . . . . . . . . . . . . . . . . . . . . . . . . . . . . . . . . . . . . . . . . .131<br />
Scorciatoie da pannello di controllo . . . . . . . . . . . . . . . . . . . . . . . . . . . . . . . . . . . . 132<br />
Pannello di controllo e tastiera . . . . . . . . . . . . . . . . . . . . . . . . . . . . . . . . . . . . . . . . 132<br />
MIDI Implementation Chart . . . . . . . . . . . . . . . . . . . . . . . . . . . . . . . . . . . . . . . . . . . 133<br />
102 Indice generale
INTRODUZIONE<br />
Caratteristiche principali<br />
Introduzione<br />
Grande quantità di suoni. Trenta suoni espressivi e di alta qualità, compreso un<br />
pianoforte a coda campionato in stereo. La funzione Layer permette di suonare<br />
insieme due suoni.<br />
Effetti. <strong>SP</strong>-<strong>200</strong> include due processori di effetti digitali, che permettono di simulare<br />
il riverbero naturale di una sala da concerto (Reverb) e aggiungere spessore al suono<br />
(Chorus).<br />
Simulazione del pedale di risonanza. Il pedale Damper dell’<strong>SP</strong>-<strong>200</strong> corrisponde<br />
al pedale di risonanza o del forte del pianoforte acustico. Nel pianoforte acustico,<br />
la pressione di questo pedale fa alzare gli smorzatori (“damper”), dei feltrini<br />
che fermano la vibrazione delle corde.<br />
Metronomo. Il metronomo incorporato permette di selezionare il metro (segnatura<br />
metrica), il tempo, il volume, e di marcare il primo movimento della misura con un<br />
suono di campanello.<br />
Regolazione del tocco. Potete scegliere tre diverse regolazioni del tocco, cioè<br />
della risposta della dinamica alla forza esercitata sulla tastiera.<br />
Accordature storiche. Oltre al normale temperamento equabile, con <strong>SP</strong>-<strong>200</strong> è<br />
possibile selezionare due temperamenti storici (Kirnberger e Werckmeister) per eseguire<br />
la musica classica in modo filologicamente accurato. Inoltre, quando si seleziona<br />
un suono di pianoforte acustico, viene selezionata automaticamente<br />
l’accordatura stirata.<br />
Intonazione regolabile. La funzione Transpose permette di cambiare l’intonazione<br />
del pianoforte in semitoni, mentre la funzione Pitch Control permette di eseguire<br />
aggiustamenti fini dell’intonazione.<br />
Introduzione 103
MIDI. <strong>SP</strong>-<strong>200</strong> è compatibile con il protocollo MIDI, lo standard che permette di collegare<br />
strumenti musicali diversi e computer. Il MIDI permette a due o più dispositivi<br />
di controllare od essere controllati, e permette di usare l’<strong>SP</strong>-<strong>200</strong> come<br />
generatore sonoro multitimbrico a 16 parti.<br />
104 Introduzione
CAPITOLO<br />
1<br />
Prospetti<br />
Pannello frontale<br />
1 234 5 6<br />
7<br />
8 90<br />
1 Cursore MASTER VOLUME: Regola il volume delle uscite audio (Output) e<br />
delle cuffie (Phones).<br />
2 Tasto REVERB: Attiva/disattiva il riverbero. Il riverbero aggiunge un ambiente al<br />
suono.<br />
3 Tasto CHORUS: Attiva/disattiva il chorus. Il chorus dona spessore al suono.<br />
4 Tasto TOUCH: Permette di regolare la sensibilità della tastiera.<br />
5 Tasto TRAN<strong>SP</strong>OSE/FUNCTION: Tasto multifunzione, da usare per cambiare la<br />
trasposizione e l’intonazione fine, per programmare i parametri del MIDI, e per eseguire<br />
altre regolazioni.<br />
Nota: Quando lo strumento viene spento, tutti i parametri vengono riportati al<br />
valore iniziale.<br />
6 Tasto BANK: Seleziona uno dei tre banchi di suoni.<br />
Prospetti 105
7 Tasti di SELEZIONE SUONI: Premete uno di questi tasti per selezionare un<br />
suono (modo Single). Potete premere insieme due tasti, per suonare due suoni allo<br />
stesso tempo (modo Layer).<br />
8 Cursore TEMPO: Regola il tempo del metronomo.<br />
9 Tasto METRONOME: Attiva/disattiva il metronomo.<br />
0 Tasto DEMO: Attiva/disattiva il modo Demo, che permette di ascoltare i brani<br />
dimostrativi. Selezionate i brani con i tasti di selezione suoni (vedi punto 7).<br />
Pannello posteriore<br />
1<br />
2 3 4 5 6 7<br />
1 Fori per l’inserimento del leggio: Inserite il leggio in questi fori. Le prime volte<br />
che lo si usa, occorre esercitare una certa forza per inserire od estrarre il leggio. In<br />
seguito, la plastica gommosa di cui sono circondati i fori diventerà più morbida,<br />
consentendo un più facile inserimento o estrazione.<br />
2 Connettori MIDI (IN, OUT): Connettori da usare per collegare altri dispositivi<br />
MIDI (sequencer, tastiere, ecc.). OUT: Uscita dati (da collegare al connettore MIDI<br />
IN di un altro dispositivo MIDI). IN: Ingresso dati (da collegare al connettore MIDI<br />
OUT di un altro dispositivo MIDI).<br />
3 Connettore DAMPER: Collegate il pedale fornito di serie a questo connettore.<br />
4 Connettori OUTPUT (L/MONO, R): Uscite audio. Collegate questi connettori ad<br />
un sistema di amplificazione. (Nel caso di impianti hi-fi, usate gli ingressi AUX o<br />
TAPE, e non l’ingresso PHONO). Per prelevare il segnale audio dell’<strong>SP</strong>-<strong>200</strong> in<br />
mono, collegare solo il connettore L/MONO. Usate il cursore MASTER VOLUME<br />
per regolare il volume di uscita.<br />
5 Connettore PHONES: Collegate le cuffie stereo a questa presa.<br />
106 Capitolo 1
6 Connettore DC 12V IN: Collegate l’alimentatore AC fornito di serie a questo connettore.<br />
7 Interruttore POWER: Interruttore di accensione/spegnimento.<br />
Prospetti 107
CAPITOLO<br />
2<br />
Prima di iniziare<br />
Collegare lo strumento ad un sistema di amplificazione<br />
Per amplificare <strong>SP</strong>-<strong>200</strong>, collegate le prese OUTPUT agli ingressi di un mixer, di un<br />
impianto hi-fi, o di diffusori amplificati di alta qualità. In un impianto hi-fi usate le<br />
prese AUX o TAPE (e non la presa PHONO). Per amplificare lo strumento in mono,<br />
collegate la sola presa L/MONO.<br />
Usare le cuffie<br />
Per suonare o esercitarvi durante le ore notturne, o quando non desiderate essere<br />
uditi da altre persone che si trovano nella stessa stanza, collegate delle cuffie di alta<br />
qualità (impedenza suggerita: 32Ω) all’apposito connettore situato nel pannello<br />
posteriore. Il connettore è un jack standard da 1/4” (6,3mm). Se le vostre cuffie sono<br />
dotate di un adattatore da mini-jack a jack da 1/4”, afferrate l’adattatore quando<br />
inserite o disinserite le cuffie.<br />
Se desiderate collegare più di una cuffia, rivolgetevi al rivenditore <strong>Korg</strong> per chiedere<br />
uno dei vari distributori di amplificazione per cuffie disponibili in commercio.<br />
Attenzione: Quando usate le cuffie, evitate l’ascolto ad alto volume per un tempo<br />
prolungato.<br />
Accendere lo strumento<br />
Collegate lo spinotto dell’alimentatore esterno all’apposito connettore di <strong>SP</strong>-<strong>200</strong>,<br />
poi la spina dell’alimentatore esterno alla presa di corrente; premete l’interruttore<br />
POWER per accendere lo strumento. Quando lo strumento è acceso, gli indicatori<br />
luminosi del pannello di controllo sono accesi. Per spegnere lo strumento premete<br />
nuovamente l’interruttore POWER.<br />
Nota: Allo spegnimento dello strumento, tutti i parametri vengono riportati alla<br />
condizione iniziale.<br />
108 Capitolo 2
Regolare il volume<br />
Muovete il cursore MASTER VOLUME verso destra per aumentare il volume;<br />
verso sinistra per diminuire il volume. Il valore massimo è “10”; il minimo (silenzio)<br />
è “0”. Questo controllo regola il livello di uscita delle uscite OUTPUT e della<br />
cuffia.<br />
Nota: È sempre meglio accendere lo strumento con un volume basso e poi aumentare<br />
il volume gradualmente.<br />
Ascoltare i brani dimostrativi<br />
<strong>SP</strong>-<strong>200</strong> contiene 30 brani dimostrativi preregistrati. Ascoltateli per rendervi conto<br />
della ricchezza timbrica e delle potenzialità espressive dello strumento.<br />
Ascoltare tutti i brani. Potete avviare l’esecuzione di tutti i brani con un solo<br />
comando.<br />
1 Premete il tasto DEMO (o tenete premuto il tasto TRAN<strong>SP</strong>OSE/FUNCTION e premete<br />
la nota E1 sulla tastiera) per entrare in modo Demo. Gli indicatori luminosi dei<br />
tasti di selezione suoni iniziano a lampeggiare in sequenza da sinistra a destra. Dopo<br />
alcuni secondi, ha inizio la riproduzione dei brani. Vengono eseguiti tutti i brani<br />
dimostrativi. Dopo l’ultimo brano, la riproduzione ricomincia dal primo brano.<br />
2 Durante la riproduzione, è possibile premere uno dei tasti di selezione suoni per<br />
mettere in ripetizione il solo banco corrente di dieci brani dimostrativi. (Ci sono tre<br />
banchi, ognuno comprendente dieci brani dimostrativi: 1-10, 11-20, 21-30).<br />
Per esempio, se premete il tasto CHOIR mentre sta suonando il brano numero 1, il<br />
brano numero 10 viene messo immediatamente in riproduzione. Al termine, verranno<br />
eseguiti in ciclo tutti i brani del banco 1-10.<br />
3 Premete il tasto DEMO per interrompere la riproduzione e uscire dal modo Demo.<br />
Ascoltare il brano selezionato. Potete selezionare un brano dimostrativo da<br />
ascoltare singolarmente.<br />
1 Innanzitutto, occorre selezionare uno dei tre banchi di brani dimostrativi.<br />
• Per selezionare il primo banco (1-10), premete una volta il tasto DEMO. Gli<br />
indicatori luminosi iniziano a lampeggiare in sequenza da sinistra a destra.<br />
• Per selezionare il secondo banco (11-20), premete il tasto DEMO una seconda<br />
volta. Gli indicatori luminosi iniziano a lampeggiare insieme.<br />
• Per selezionare il terzo banco (21-30), premete il tasto DEMO una terza volta.<br />
Gli indicatori luminosi adiacenti iniziano a lampeggiare alternativamente.<br />
Prima di iniziare 109
2 Premete il tasto di selezione suoni corrispondente al brano che desiderate selezionare nel<br />
banco corrente. L’indicatore luminoso del brano selezionato rimane acceso, mentre gli altri<br />
indicatori luminosi si spengono.<br />
Al termine del brano selezionato, tutti i brani del banco selezionato vengono eseguiti in ciclo.<br />
Tasto Banco 1 (1-10) Banco (11-20) Banco 3 (21-30)<br />
PIANO 1<br />
F. Mendelssohn-Bartholdy:<br />
Prelude Op.104a, no.2<br />
<strong>Korg</strong> Original (M. Tempia):<br />
Reflection<br />
C.A. Debussy:<br />
Arabesque no.1<br />
PIANO 2<br />
F. Chopin: Nocturne<br />
Op.9, no.2<br />
S. Joplin: The Entertainer<br />
J.S. Bach: Two-voice<br />
invention no.13<br />
E.PIANO 1<br />
C.A. Debussy: Clair de<br />
lune<br />
<strong>Korg</strong> Original (M. Tempia):<br />
Jumper<br />
F. Chopin: Fantasie-<br />
Impromptu Op.66<br />
E.PIANO 2<br />
<strong>Korg</strong> Original (M. Tempia):<br />
Lullaby for a Little<br />
Star<br />
<strong>Korg</strong> Original (M. Tempia):<br />
All the Ones You<br />
Don’t Know<br />
J.S. Bach: Prelude in C<br />
major (from Das Wohltemeperierte<br />
Klavier)<br />
HARPSI<br />
/CLAV<br />
L. van Beethoven: Für<br />
Elise<br />
J.S. Bach: Italian Concert<br />
<strong>Korg</strong> Original (M. Tempia):<br />
Rubber Bob<br />
VIBES<br />
/GUITAR<br />
F. Chopin: Etude Op.10,<br />
no.3<br />
<strong>Korg</strong> Original (M. Tempia):<br />
Jazz in Spain<br />
R. Schumann: Traumarei,<br />
Op.15, no.7<br />
ORGAN 1<br />
W.A. Mozart: A la turque<br />
(from the Sonata in<br />
A-major K.331)<br />
<strong>Korg</strong> Original (M. Tempia):<br />
Cool “B”<br />
F. Mendelssohn-Bartholdy:<br />
Spring Song,<br />
Op.62, no.6<br />
ORGAN 2<br />
F. Chopin: Valse no.6 in<br />
D♭-major Op.64, no.1<br />
F. Mendelssohn-Bartholdy:<br />
Wedding March<br />
<strong>Korg</strong> Original (M. Tempia):<br />
Sunflowers<br />
STRINGS<br />
/PAD<br />
<strong>Korg</strong> Original (M. Tempia):<br />
Old Feather Blues<br />
J.S. Bach: Air on the G<br />
string<br />
P.D. Paradisi: Toccata in<br />
A major<br />
CHOIR<br />
<strong>Korg</strong> Original (M. Tempia):<br />
Noise of time<br />
<strong>Korg</strong> Original (M. Tempia):<br />
Voice Texture<br />
<strong>Korg</strong> Original (M. Tempia):<br />
Wet Raccoon Rag<br />
3 Premete il tasto DEMO per interrompere la riproduzione e uscire dal modo Demo.<br />
Nota: Durante la riproduzione dei brani dimostrativi, non è possibile usare i tasti di<br />
selezione suoni per selezionare suoni diversi, né i tasti REVERB e CHORUS per<br />
attivare o disattivare gli effetti.<br />
Regolare il tempo dei brani dimostrativi. Usate il cursore TEMPO per cambiare<br />
il tempo del brano dimostrativo selezionato. In genere, il tempo del brano<br />
dimostrativo in esecuzione non corrisponde a quello indicato dal cursore TEMPO.<br />
Nota: Non è possibile usare il metronomo durante l’ascolto dei brani dimostrativi.<br />
110 Capitolo 2
Nota: Quando si seleziona un brano dimostrativo, viene automaticamente richiamato<br />
il suo tempo originale.<br />
Prima di iniziare 111
CAPITOLO<br />
3<br />
Operazioni di base<br />
Selezionare un solo suono (modo Single)<br />
Potete selezionare uno dei trenta suoni contenuti nello strumento.<br />
1 Premete uno dei tasti di selezione suoni per selezionare uno dei suoni. L’indicatore<br />
luminoso del tasto premuto si accende.<br />
2 Usate il tasto BANK per selezionare uno dei tre banchi disponibili (1-10, 11-20, 21-<br />
30). Premuto una prima volta, seleziona il Banco 2; premuto una seconda volta seleziona<br />
il Banco 3; premuto una terza volta, seleziona nuovamente il Banco 1.<br />
Tasto Banco 1 # Banco 2 # Banco 3 #<br />
PIANO 1 Grand Piano 1 2 Bright Piano 2 Grand Piano 2 1<br />
PIANO 2 Classic Piano 2 Honky-Tonky 2 E.Grand Piano 1<br />
E.PIANO 1 Stage E.Piano 1 Club E.Piano 2 Thin E.Piano 2<br />
E.PIANO 2 Digital E.Piano 1 60’s E.Piano 1 Vintage E.Piano 2<br />
HARPSI/CLAV Harpsichord 1 Clav. 1 Wah Clav. 1<br />
VIBES/GUITAR Vibraphone 1 Marimba 1 Acoustic Guitar 1<br />
ORGAN 1 Jazz Organ 1 2 Jazz Organ 2 2 Jazz Organ 3 2<br />
ORGAN 2 Church Organ 1 3 Church Organ 2 1 Church Organ 3 1<br />
STRINGS/PAD Strings 1 Slow Strings 2 Warm Pad 2<br />
CHOIR Choir Hoo 1 Choir Doo 2 Choir Pad 2<br />
(#) Queste colonne indicano il numero di oscillatori per voce utilizzati dal suono<br />
Selezionare due suoni allo stesso tempo (modo Layer)<br />
Potete suonare due suoni sulla tastiera allo stesso tempo. In questo modo, viene attivato<br />
il modo Layer.<br />
112 Capitolo 3
Nota: Quando si attiva il modo Layer, il numero totale di note che possono suonare<br />
allo stesso tempo viene ridotto, e dipende dal numero di oscillatori per voce utilizzato<br />
da ognuno dei suoni selezionati.<br />
Nota: Non è possibile selezionare due suoni accessibili mediante lo stesso tasto.<br />
1 Premete uno dei tasti di selezione suoni per selezionare il primo suono. L’indicatore<br />
luminoso del tasto premuto si accende. Usate il tasto BANK per selezionare un<br />
suono contenuto in un altro banco.<br />
2 Premete un altro tasto di selezione suoni per selezionare il secondo suono. L’indicatore<br />
luminoso del tasto premuto si accende. Usate il tasto BANK per selezionare un<br />
suono contenuto in un altro banco.<br />
3 Premete insieme i due tasti, per selezionare i due suoni. Gli indicatori luminosi dei<br />
due tasti si accendono.<br />
Nota: I passi 1 e 2 non sono necessari, se il banco giusto è già selezionato.<br />
Tornare al modo Single. Per tornare al modo Single, basta premere un solo tasto<br />
di selezione suoni.<br />
Regolare il volume dei timbri in modo Layer. Per regolare il bilanciamento tra i<br />
suoni in modo Layer, tenete premuto il tasto del suono di cui volete abbassare il<br />
volume, e premete ripetutamente il tasto del suono di cui volete alzare il volume.<br />
Nota: Questa regolazione viene memorizzata anche dopo aver disattivato il modo<br />
Layer, ma viene riportata ai valori iniziali quando si spegne lo strumento. Per salvare<br />
queste regolazioni, usate la funzione Data Dump (vedi “MIDI Data Dump” a<br />
pagina 126).<br />
Scegliere il riverbero e il chorus<br />
<strong>SP</strong>-<strong>200</strong> ha due effetti: riverbero e chorus. Il riverbero simula l’effetto di riverberazione<br />
del suono in una stanza, mentre il chorus riproduce un effetto di modulazione<br />
che rende il suono più ricco.<br />
Nota: Le impostazioni degli effetti eseguite in modo Single rimangono memorizzate<br />
quando si seleziona il modo Layer, mentre le impostazioni eseguite in modo<br />
Layer non vengono conservate.<br />
All’accensione dello strumento, gli effetti vengono riportati alle impostazioni iniziali.<br />
Per salvare le vostre impostazioni personali, usate la funzione Data Dump<br />
(vedi “MIDI Data Dump” a pagina 126).<br />
Operazioni di base 113
1 Tenete premuto il tasto REVERB o CHORUS, e premete uno dei tasti di selezione<br />
suoni PIANO 1/L, PIANO 2/M, o E.PIANO1/H per selezionare l’intensità del riverbero<br />
o del chorus.<br />
Tasto Intensità del riverbero Intensità del chorus<br />
PIANO 1/L Riverbero leggero Chorus leggero<br />
PIANO 2/M Riverbero normale Chorus normale<br />
E.PIANO 1/H Riverbero intenso Chorus intenso<br />
2 Per controllare l’intensità corrente del riverbero o del chorus, tenete premuto il tasto<br />
REVERB o CHORUS, e controllate quale tasto abbia l’indicatore luminoso acceso.<br />
3 Per disattivare il riverbero o il chorus, premete il tasto REVERB o CHORUS.<br />
L’indicatore luminoso del tasto premuto si spegne.<br />
Il pedale di risonanza<br />
Il pedale fornito di serie può essere usato come pedale di risonanza (damper). Se si<br />
collega al connettore DAMPER un pedale tipo <strong>Korg</strong> DS1H (opzionale), è possibile<br />
usare il mezzo pedale, che permette di attivare la risonanza delle corde in maniera<br />
graduale.<br />
In modo Layer, è possibile selezionare il suono (o i suoni) su cui attivare il pedale.<br />
Nota: All’accensione dello strumento, le impostazioni del pedale vengono inizializzate.<br />
Per salvare le impostazioni personali, usate la funzione Data Dump (vedi<br />
“MIDI Data Dump” a pagina 126).<br />
1 Tenete premuto il tasto TRAN<strong>SP</strong>OSE/FUNCTION, e premete il pedale. Ad ogni<br />
pressione del pedale, si accende l’indicatore luminoso del tasto (o dei tasti) di selezione<br />
suoni per cui il pedale è attivato.<br />
2 Una volta assegnato il pedale al suono o ai suoni desiderati, rilasciate il tasto<br />
TRAN<strong>SP</strong>OSE/FUNCTION.<br />
Il metronomo<br />
<strong>SP</strong>-<strong>200</strong> incorpora un metronomo, con il quale si può battere il tempo quando si studia<br />
un pezzo.<br />
Attivare e disattivare il metronomo. Premete il tasto METRONOME per<br />
avviare o fermare il metronomo. All’accensione dello strumento, il metronomo è<br />
regolato sul tempo del cursore METRONOME, ma è possibile selezionare un tempo<br />
114 Capitolo 3
diverso con la procedura descritta più avanti. Dopo aver ascoltato i brani dimostrativi,<br />
il tempo è quello dell’ultimo brano ascoltato.<br />
Regolare il volume del metronomo. Mentre il metronomo sta suonando, tenete<br />
premuto il tasto METRONOME e premete ripetutamente il tasto STRINGS/PAD (o<br />
la nota B5) per ridurre il volume, oppure il tasto CHOIR (o la nota C6) per aumentarlo.<br />
Per riportare il volume alla regolazione iniziale, premete insieme i tasti<br />
STRINGS/PAD e CHOIR (o le note B5 e C6 sulla tastiera) mentre continuate a<br />
tenere premuto il tasto METRONOME.<br />
Tasto Effetto Tasto Effetto<br />
STRINGS/PAD / B5 Volume maggiore CHOIR / C6 Volume minore<br />
Regolare il tempo mediante il cursore TEMPO. Usate il cursore TEMPO per<br />
regolare il tempo. L’ambito entro cui potete variare il tempo è = 40 ~ <strong>200</strong>.<br />
Inserimento numerico del tempo. In alcuni casi, il tempo potrebbe non corrispondere<br />
esattamente alle indicazioni del cursore TEMPO. Se desiderate inserire un<br />
valore di tempo preciso, potete inserire il valore in forma numerica.<br />
1 Tenete premuto il tasto METRONOME.<br />
2 Usate la tastiera per inserire un numero di tre cifre corrispondente al valore di tempo<br />
desiderato (inserite uno “0” prima di un numero a due cifre, p.es. “090”).<br />
Tasto Numero Tasto Numero<br />
C5 0 C#5 1<br />
D5 2 D#5 3<br />
E5 4 F5 5<br />
F#5 6 G5 7<br />
G#5 8 A5 9<br />
Per esempio, per selezionare un valore di tempo di 168, tenete premuto il tasto<br />
METRONOME, poi premete C#5 (1), F#5 (6), G#5 (8). Per selezionare un valore di<br />
Operazioni di base 115
tempo di 85, tenete premuto il tasto METRONOME, poi premete C5 (0), G#5 (8),<br />
F5 (5).<br />
Selezionare una segnatura metrica. Potete sottolineare il primo movimento<br />
della battuta con un accento.<br />
Tasto<br />
Segnatura metrica<br />
PIANO 1 2 movimenti (2/4, 2/8...)<br />
PIANO 2 3 movimenti (3/4, 3/8...)<br />
E.PIANO 1 4 movimenti (4/4, 4/8...)<br />
E.PIANO 2 6 movimenti (6/4, 6/8...)<br />
1 Mentre il metronomo è in funzione, tenete premuto il tasto METRONOME e premete<br />
il tasto corrispondente alla segnatura metrica che desiderate usare (vedi la<br />
tabella precedente). Il primo movimento della battuta viene accentato.<br />
2 Per disattivare l’accento, tenete premuto il tasto METRONOME e premete il tasto<br />
di selezione suoni il cui indicatore luminoso sia acceso.<br />
Nota: All’accensione dello strumento, l’accento viene automaticamente disattivato.<br />
Sottolineare l’accento con un suono di campanello. Il movimento accentato<br />
può essere sottolineato da un suono di campanello.<br />
1 Mentre il metronomo sta suonando, tenete premuto il tasto METRONOME, poi premete<br />
il tasto di selezione suoni VIBES/GUITAR. L’indicatore luminoso del tasto si<br />
accende, e il primo movimento della battuta viene sottolineato da un campanello.<br />
2 Per tornare all’accento normale, tenete premuto il tasto METRONOME e premete il<br />
tasto di selezione suoni HARPSI/CLAV per accenderne l’indicatore luminoso.<br />
Nota: All’accensione dello strumento, il campanello viene disattivato automaticamente.<br />
116 Capitolo 3
CAPITOLO<br />
4<br />
Regolazione del tocco<br />
Altre funzioni<br />
Potete regolare la risposta della tastiera al tocco. Tenete premuto il tasto TOUCH e<br />
premete il tasto corrispondete alla regolazione desiderata.<br />
Tasto<br />
PIANO 1/L<br />
PIANO 2/M<br />
E.PIANO 1/H<br />
Regolazione del tocco<br />
Leggero. È possibile produrre note a volume elevato anche suonando piano.<br />
Normale. Normale curva di dinamica del pianoforte.<br />
Duro. È possibile produrre note a volume elevato solo suonando molto forte.<br />
Per controllare l’impostazione selezionata, tenete premuto il tasto TOUCH, e verificate<br />
quale degli indicatori luminosi elencati nella tabella precedente sia acceso.<br />
Nota: All’accensione dello strumento, viene automaticamente selezionata la regolazione<br />
di tocco Normale.<br />
In alternativa, potete usare il tasto TRAN<strong>SP</strong>OSE/FUNCTION e la tastiera. Tenete<br />
premuto il tasto TRAN<strong>SP</strong>OSE/FUNCTION, e premete sulla tastiera la nota corrispondente<br />
alla regolazione di tocco desiderata (vedi tabella).<br />
Tasto<br />
B3<br />
C4<br />
D4<br />
Regolazione del tocco<br />
Leggero. È possibile produrre note a volume elevato anche suonando piano.<br />
Normale. Normale curva di dinamica del pianoforte.<br />
Duro. È possibile produrre note a volume elevato solo suonando molto forte.<br />
Altre funzioni 117
Trasposizione<br />
Potete trasporre l’intonazione dello strumento uno o più semitoni sopra o sotto. La<br />
trasposizione permette di accordare <strong>SP</strong>-<strong>200</strong> ad un altro strumento, o di semplificare<br />
l’esecuzione di brani con troppe alterazioni.<br />
Nota: All’accensione dello strumento, la trasposizione viene azzerata.<br />
1 Tenete premuto il tasto TRAN<strong>SP</strong>OSE/FUNCTION, e premete il tasto della tastiera<br />
che corrisponde alla trasposizione desiderata (vedi tabella). L’indicatore luminoso<br />
del tasto TRAN<strong>SP</strong>OSE/FUNTION rimane acceso, a ricordare che la trasposizione è<br />
attiva.<br />
Tasto<br />
Effetto<br />
F#6 — B6 6 — 1 semitoni sotto<br />
C7<br />
Intonazione standard<br />
C#7 — F7 1 — 5 semitoni sopra<br />
2 Per tornare all’intonazione standard, tenete premuto il tasto TRAN<strong>SP</strong>OSE/FUNC-<br />
TION e premete il tasto C7. L’indicatore luminoso del tasto TRAN<strong>SP</strong>OSE/FUNC-<br />
TION si spegne.<br />
Intonazione fine<br />
Per adeguare l’intonazione di <strong>SP</strong>-<strong>200</strong> a quella di un altro strumento, potete regolare<br />
l’intonazione in passi di 0,5 Hz, nell’ambito di A4 = 427,5 ~ 452,5 Hz. L’intonazione<br />
standard è A4 = 440 Hz.<br />
Nota: All’accensione dello strumento, l’intonazione viene riportata automaticamente<br />
all’intonazione standard (A4 = 440 Hz).<br />
1 Tenete premuto il tasto TRAN<strong>SP</strong>OSE/FUNCTION, e premete il tasto che corrisponde<br />
alla variazione di intonazione desiderata. Ogni volta che premete la nota B5<br />
o C6, l’intonazione viene abbassata o innalzata di 0,5 Hz.<br />
118 Capitolo 4
2 Per tornare all’intonazione standard, tenete premuto il tasto TRAN<strong>SP</strong>OSE/FUNC-<br />
TION e premete insieme i tasti B5 e C6.<br />
Tasto<br />
B5<br />
B5+C6<br />
C6<br />
Intonazione fine<br />
Abbassa l’intonazione di 0,5 Hz<br />
Intonazione standard (A4 = 440 Hz)<br />
Alza l’intonazione di 0,5 Hz<br />
Selezione di un temperamento<br />
Molte composizioni classiche sono state scritte per strumenti accordati su temperamenti<br />
diversi dal “temperamento equabile” normalmente in uso ai nostri giorni. Per<br />
riprodurre accuratamente la sonorità originale di queste composizioni, <strong>SP</strong>-<strong>200</strong><br />
include i temperamenti classici Kirnberger e Werckmeister, in aggiunta al temperamento<br />
equabile, per un totale di tre temperamenti fra cui scegliere.<br />
Per selezionare uno dei temperamenti disponibili, tenete premuto il tasto TOUCH e<br />
premete il tasto corrispondente al temperamento desiderato. Per tornare al temperamento<br />
equabile, tenete premuto il tasto TOUCH e premete il tasto di selezione suoni<br />
il cui indicatore luminoso sia acceso.<br />
Tasto<br />
HARPSI/CLAV<br />
VIBES/GUITAR<br />
Entrambi gli indicatori<br />
luminosi<br />
spenti<br />
Temperamento<br />
Werckmeister. Si tratta della scala Werckmeister III ideata dall’organista<br />
e teorico della musica tedesco Andreas Werckmeister. Questa scala fu<br />
creata nel tardo periodo barocco per consentire una più facile trasposizione<br />
dei brani.<br />
Kirnberger. Si tratta della scala Kirnberger III ideata da Johann Phillip<br />
Kirnberger all’inizio del XVIII secolo, usata soprattutto per l’accordatura<br />
del clavicembalo.<br />
Temperamento equabile. Quasi tutti gli strumenti a tastiera dei nostri<br />
giorni seguono questa accordatura, in cui tutti i semitoni sono uguali, ed<br />
è consentita qualsiasi trasposizione.<br />
Per verificare quale temperamento sia selezionato, tenete premuto il tasto TOUCH,<br />
e controllate quale indicatore luminoso sia acceso.<br />
Nota: All’accensione, viene automaticamente selezionato il temperamento equabile.<br />
Altre funzioni 119
L’accordatura stirata. Per produrre risonanze più naturali, i suoni dei tasti PIANO<br />
1 e PIANO 2 fanno ricorso all’“accordatura stirata”, che rende le note più basse leggermente<br />
più basse rispetto al temperamento equabile, e le note più acute leggermente<br />
più alte. È in questo modo che il pianoforte viene accordato dagli accordatori<br />
professionali.<br />
120 Capitolo 4
CAPITOLO<br />
5<br />
Che cos’è il MIDI?<br />
MIDI<br />
Il MIDI, acronimo di Musical Instrument Digital Interface (interfaccia digitale per<br />
strumenti musicali) è uno standard internazionale concepito per collegare e trasferire<br />
dati tra strumenti musicali elettronici, computer e altri dispositivi.<br />
Che cosa si può fare con il MIDI?<br />
Grazie al MIDI, potete usare <strong>SP</strong>-<strong>200</strong> per controllare altri strumenti, usare altri strumenti<br />
per controllare <strong>SP</strong>-<strong>200</strong>, usare un sequencer per creare complessi brani musicali.<br />
Quando si usano la tastiera e il pedale di <strong>SP</strong>-<strong>200</strong>, o si seleziona un suono, le note,<br />
l’attivazione del pedale e i cambi di suono vengono inviati ad un altro strumento, o<br />
vengono registrati da un sequencer.<br />
Collegamenti<br />
Collegate sempre la presa MIDI OUT di uno strumento alla presa MIDI IN di un<br />
altro. Non collegate mai due prese dello stesso strumento tra di loro.<br />
Collegate la presa MIDI OUT del dispositivo trasmittente (master) al connettore<br />
MIDI IN del dispositivo ricevente (slave).<br />
Per collegare <strong>SP</strong>-<strong>200</strong> ad un computer, occorrono un’interfaccia MIDI per il computer,<br />
un software di sequencing o notazione musicale, e due cavi MIDI standard. Collegate<br />
la presa MIDI OUT di <strong>SP</strong>-<strong>200</strong> alla presa MIDI IN del computer. Collegate la<br />
presa MIDI IN di <strong>SP</strong>-100 alla presa MIDI OUT del computer.<br />
MIDI 121
Impostazioni MIDI standard<br />
All’accensione i parametri MIDI di <strong>SP</strong>-<strong>200</strong> sono programmati come segue:<br />
Parametro<br />
Impostazione<br />
Canale di trasmissione 1<br />
Canali di ricezione Tutti (1-16)<br />
Local<br />
ON<br />
Omni<br />
ON<br />
Selezionare il canale di trasmissione<br />
Lo standard MIDI prevede 16 canali separati per la trasmissione e la ricezione dei<br />
dati. <strong>SP</strong>-<strong>200</strong> riceve sempre su tutti e 16 i canali, e trasmette su un solo canale. Per<br />
trasmettere dati da <strong>SP</strong>-<strong>200</strong>, occorre selezionare uno dei 16 canali su cui trasmettere<br />
i dati.<br />
Tenete premuto il tasto TRAN<strong>SP</strong>OSE/FUNCTION, e premete il tasto nell’ambito<br />
C2–D#3 che corrisponde al canale MIDI desiderato.<br />
Tasto Canale Tasto Canale<br />
C2 1 C#2 2<br />
D2 3 D#2 4<br />
E2 5 F2 6<br />
F#2 7 G2 8<br />
G#2 9 A2 10<br />
A#2 11 B2 12<br />
C3 13 C#3 14<br />
D3 15 D#3 16<br />
Nota: All’accensione, viene automaticamente selezionato il canale 1.<br />
Nota: Normalmente, il canale 10 è assegnato automaticamente al metronomo (note<br />
D#5-E5).<br />
122 Capitolo 5
Nota: In modo Layer, il secondo suono trasmette sul canale successivo a quello<br />
selezionato. Per esempio, se è selezionato il canale 7, il primo suono trasmette sul<br />
canale 7, mentre il secondo trasmette sul canale 8. Se è selezionato il canale 16, il<br />
primo suono trasmette sul canale 16, mentre il secondo trasmette sul canale 1 (una<br />
volta raggiunto l’ultimo canale, il conteggio ricomincia dal primo).<br />
Usare <strong>SP</strong>-<strong>200</strong> come generatore sonoro multitimbrico<br />
Quando <strong>SP</strong>-<strong>200</strong> è controllato da un dispositivo MIDI esterno, può funzionare come<br />
generatore sonoro multitimbrico a 16 parti. Potete selezionare un suono diverso su<br />
ognuno dei 16 canali MIDI disponibili.<br />
1 Usate un cavo MIDI per collegare la presa MIDI IN di <strong>SP</strong>-<strong>200</strong> alla presa MIDI<br />
OUT di un sequencer (o altro dispositivo master).<br />
2 Trasmettete dati MIDI dal sequencer (o altro dispositivo) collegato. Vedi “Program<br />
Change” a pagina 124 per informazioni sulla selezione dei suoni mediante messaggi<br />
MIDI di Program Change. La ricezione dei messaggi di Program Change deve<br />
essere attiva su <strong>SP</strong>-<strong>200</strong>.<br />
Consultate il manuale d’uso dell’altro dispositivo per maggiori informazioni su<br />
come inviare messaggi di Program Change.<br />
Local On/Off<br />
Con il Local si può stabilire se la tastiera deve suonare il suono interno del pianoforte,<br />
e allo stesso tempo trasmettere dati attraverso il MIDI OUT (Local On), o se<br />
deve solo trasmettere dati attraverso il MIDI OUT, ma non suonare il suono interno<br />
del pianoforte (Local Off).<br />
Il Local Off va scelto quando si vuole usare <strong>SP</strong>-<strong>200</strong> come tastiera muta, per pilotare<br />
un altro strumento MIDI. Va scelto anche quando <strong>SP</strong>-<strong>200</strong> è collegato ad un sequencer<br />
sia attraverso il MIDI IN che il MIDI OUT. Se non si ponesse <strong>SP</strong>-<strong>200</strong> in Local<br />
Off, le note già suonate dalla tastiera verrebbero rispedite ad <strong>SP</strong>-100 dal sequencer,<br />
creando un fastidioso effetto di eco.<br />
Normalmente, va scelto il Local On (selezionato automaticamente all’accensione),<br />
in modo che suonando sulla tastiera si possano suonare i suoni interni di <strong>SP</strong>-<strong>200</strong>.<br />
MIDI 123
Tenete premuto il tasto TRAN<strong>SP</strong>OSE/FUNCTION e premete il tasto di selezione<br />
suoni PIANO 1. Ad ogni pressione del tasto, lo stato del Local alterna fra On e Off.<br />
Stato del Local Stato dell’indicatore luminoso di PIANO 1<br />
Local On<br />
Local Off<br />
Acceso<br />
Spento<br />
Nota: All’accensione, viene automaticamente selezionato il Local On.<br />
Program Change<br />
È possibile selezionare via MIDI i suoni di <strong>SP</strong>-<strong>200</strong>, inviando allo strumento un messaggio<br />
di Program Change sul canale a cui desiderate assegnare il suono. La<br />
seguente tabella elenca i numeri di Program Change corrispondenti ai suoni di <strong>SP</strong>-<br />
<strong>200</strong> (numerazione 0-29; se il dispositivo trasmittente usa la numerazione 1-30,<br />
occorre aumentare il numero da trasmettere di uno).<br />
Trasmissione dei messaggi di Program Change. Per selezionare un suono,<br />
potete inviare un messaggio MIDI di Program Change ad un dispositivo MIDI collegato<br />
al MIDI OUT di <strong>SP</strong>-<strong>200</strong>. Quando si seleziona uno dei suoni interni di <strong>SP</strong>-<strong>200</strong><br />
mediante i tasti di selezione suoni, viene trasmesso un messaggio MIDI di Program<br />
Change, come mostrato nella seguente tabella.<br />
Ricezione dei messaggi di Program Change. Quando un messaggio di Program<br />
Change viene ricevuto da un dispositivo esterno, viene selezionato il corrispondente<br />
suono interno di <strong>SP</strong>-<strong>200</strong>, come mostrato dalla seguente tabella. Solo i<br />
numeri di Program Change (PC) compresi nell’ambito 0–29 hanno effetto su <strong>SP</strong>-<br />
<strong>200</strong>, mentre gli altri numeri (30-127) vengono ignorati.<br />
PC# Tasto Banco Suono<br />
0<br />
1 Grand Piano 1<br />
1 PIANO 1<br />
2 Bright Piano<br />
2 3 Grand Piano 2<br />
3<br />
1 Classic Grand Piano<br />
4 PIANO 2<br />
2 Honky-Tonky<br />
5 3 E.Grand Piano<br />
6<br />
1 Stage E.Piano<br />
7 E.PIANO 1<br />
2 Club E.Piano<br />
8 3 Thin E.Piano<br />
124 Capitolo 5
PC# Tasto Banco Suono<br />
9<br />
1 Digital E.Piano<br />
10 E.PIANO 2<br />
2 60’s E.Piano<br />
11 3 Vintage E.Piano<br />
12<br />
1 Harpsichord<br />
13 HARPSI/CLAV 2 Clav.<br />
14 3 Wah Clav.<br />
15<br />
1 Vibraphone<br />
16 VIBES/GUITAR 2 Marimba<br />
17 3 Acoustic Guitar<br />
18<br />
1 Jazz Organ 1<br />
19 ORGAN1<br />
2 Jazz Organ 2<br />
20 3 Jazz Organ 3<br />
21<br />
1 Church Organ 1<br />
22 ORGAN2<br />
2 Church Organ 2<br />
23 3 Church Organ 3<br />
24<br />
1 Strings<br />
25 STRINGS/PAD 2 Slow Strings<br />
26 3 Warm Pad<br />
27<br />
1 Choir Hoo<br />
28 CHOIR<br />
2 Choir Doo<br />
29 3 Choir Pad<br />
Attivazione/disattivazione dei Program Change. Per trasmettere e ricevere<br />
questo tipo di dati, occorre attivare la trasmissione e ricezione dei messaggi di Program<br />
Change. In caso contrario, è possibile disattivare i Program Change.<br />
Tenete premuto il tasto TRAN<strong>SP</strong>OSE/FUNCTION, e premete il tasto di selezione<br />
suoni PIANO 2. Ad ogni pressione del tasto, viene selezionato lo stato di Attivo e<br />
Non attivo.<br />
Stato del Program Change Stato dell’indicatore luminoso di PIANO 2<br />
Attivo<br />
Non attivo<br />
Acceso<br />
Spento<br />
MIDI 125
Nota: All’accensione dello strumento, la ricezione dei Program Change viene attivata<br />
su tutti i canali MIDI.<br />
Control Change<br />
Quando si usa il pedale di risonanza, si regola il bilanciamento dei suoni in modo<br />
Layer, o si eseguono altre regolazioni sul pannello di controllo, viene inviato un<br />
messaggio di Control Change ad un dispositivo MIDI collegato al MOIDI OUT di<br />
<strong>SP</strong>-<strong>200</strong>. Allo stesso modo, <strong>SP</strong>-<strong>200</strong> può ricevere messaggi di Control Change da un<br />
dispositivo MIDI collegato al suo MIDI IN, per controllare l’effetto del pedale di<br />
risonanza, la regolazione del volume e altri aspetti del funzionamento dello sturmento.<br />
Attivazione/disattivazione dei Control Change. Per trasmettere e ricevere questo<br />
tipo di dati, occorre attivare la trasmissione e ricezione dei messaggi di Control<br />
Change. In caso contrario, è possibile disattivare i Control Change.<br />
Tenete premuto il tasto TRAN<strong>SP</strong>OSE/FUNCTION, e premete il tasto di selezione<br />
suoni PIANO 1. Ad ogni pressione del tasto, viene selezionato lo stato di Attivo e<br />
Non attivo<br />
Stato del Control Change Stato dell’indicatore luminoso di E.PIANO 1<br />
Attivo<br />
Non attivo<br />
Acceso<br />
Spento<br />
Nota: All’accensione dello strumento, la ricezione dei Control Change viene attivata<br />
su tutti i canali MIDI.<br />
MIDI Data Dump<br />
Potete salvare le impostazioni personali dei suoni (nei modi Single o Layer) su un<br />
dispositivo di memorizzazione MIDI esterno, come un sequencer o un MIDI data<br />
filer. In seguito, potrete ricaricare questi dati in <strong>SP</strong>-<strong>200</strong>, per recuperare una serie di<br />
dati memorizzati.<br />
Attenzione: Per evitare di perdere dati, leggete attentamente le istruzioni fornite<br />
con il MIDI data filer.<br />
Suggerimento: Per evitare problemi, è meglio disattivare la ricezione dei dati di<br />
Sistema Esclusivo nel dispositivo collegato.<br />
126 Capitolo 5
La seguente tabella mostra i dati salvati con il Data Dump.<br />
Categoria<br />
Modo Single<br />
Modo Layer<br />
Dati<br />
Impostazioni del riverbero e del chorus (stato di on/off,<br />
livello della mandata)<br />
Impostazioni del riverbero e del chorus (stato di on/off,<br />
livello della mandata), bilanciamento tra i suoni, stato<br />
di on/off del pedale di risonanza per ogni suono.<br />
Salvataggio dei dati nel data filer. Ecco come salvare i dati di <strong>SP</strong>-<strong>200</strong>.<br />
1 Usate un cavo MIDI per collegare il MIDI OUT di <strong>SP</strong>-<strong>200</strong> al MIDI IN del data filer.<br />
2 Preparate il data filer per ricevere dati MIDI.<br />
3 In <strong>SP</strong>-<strong>200</strong>, tenete premuto il tasto TRAN<strong>SP</strong>OSE/FUNCTION, e premete il tasto di<br />
selezione suoni VIBES/GUITAR. L’indicatore luminoso dei tasti TRAN<strong>SP</strong>OSE/<br />
FUNCTION e VIBES/GUITAR inizia a lampeggiare, indicando che <strong>SP</strong>-<strong>200</strong> è<br />
pronto per il data dump.<br />
4 Premete il tasto TOUCH. Il data dump ha inizio, e le impostazioni dei suoni vengono<br />
trasmesse al data filer.<br />
Durante l’operazione di data dump, non è possibile suonare <strong>SP</strong>-<strong>200</strong> o attivare altre<br />
funzioni. Al termine del data dump, si ritorna al funzionamento normale.<br />
Potete interrompere un’operazione di data dump prima del suo avvio, premendo il<br />
tasto TRAN<strong>SP</strong>OSE/FUNCTION o il tasto VIBES/GUITAR.<br />
Caricamento dei dati dal data filer. Potete caricare in <strong>SP</strong>-<strong>200</strong> i dati in precedenza<br />
salvati in un data filer.<br />
1 Usate un cavo MIDI per collegare il MIDI IN di <strong>SP</strong>-<strong>200</strong> al MIDI OUT del data filer.<br />
2 In <strong>SP</strong>-<strong>200</strong>, tenete premuto il tasto TRAN<strong>SP</strong>OSE/FUNCTION e premete il tasto di<br />
selezione suoni VIBES/GUITAR. L’indicatore luminoso dei tasti TRAN<strong>SP</strong>OSE/<br />
FUNCTION e VIBES/GUITAR inizia a lampeggiare, e <strong>SP</strong>-<strong>200</strong> si pone in attesa dei<br />
dati.<br />
3 Preparate il data filer ad inviare i dati di impostazione dei suoni in precedenza salvati<br />
da <strong>SP</strong>-<strong>200</strong>. Leggete le istruzioni fornite con il data filer per informazioni sulla<br />
trasmissione dei dati.<br />
<strong>SP</strong>-<strong>200</strong> riceve i dati.<br />
Al termine del data dump, <strong>SP</strong>-<strong>200</strong> ritorna allo stato in cui si trovava prima del data<br />
dump.<br />
MIDI 127
Durante l’operazione di data dump, non è possibile suonare <strong>SP</strong>-<strong>200</strong> o attivare altre<br />
funzioni. Al termine del data dump, si ritorna al funzionamento normale.<br />
Potete interrompere un’operazione di data dump prima del suo avvio, premendo il<br />
tasto TRAN<strong>SP</strong>OSE/FUNCTION o il tasto VIBES/GUITAR.<br />
128 Capitolo 5
CAPITOLO<br />
6<br />
Soluzione dei problemi<br />
Appendice<br />
Se durante l’uso dovessero manifestarsi i problemi descritti, esaminate lo strumento<br />
per tentare di capire il problema, e cercate di risolverli seguendo i suggerimenti proposti.<br />
Se lo strumento continuasse a non funzionare correttamente, rivolgetevi al<br />
rivenditore o a un Centro di Assistenza Autorizzato <strong>Korg</strong>.<br />
Problema Possibile rimedio Pag.<br />
Lo strumento non si accende.<br />
Nessun suono udibile.<br />
Verificate che l’alimentatore sia collegato al pianoforte,<br />
e che la spina dell’alimentatore sia inserita<br />
correttamente nella presa di corrente.<br />
(1) Controllate che il volume non sia a posto 0. Se<br />
lo è, portatelo ad un livello adeguato.<br />
(2) Controllate che il Local non sia posto a OFF.<br />
Se lo è, ponetelo a ON. Oppure, spegnete e riaccendete<br />
lo strumento per reinizializzare tutti i<br />
parametri.<br />
107<br />
109<br />
123<br />
Polifonia<br />
<strong>SP</strong>-<strong>200</strong> contiene suoni campionati, cioè registrati dal suono degli strumenti musicali<br />
reali, successivamente elaborato. Questi suoni possono essere costituiti uno o più<br />
campioni diversi che vengono riprodotti quando si preme un tasto. I suoni costituiti<br />
da un solo campione hanno una polifonia massima di 60 voci, mentre i suoni costituiti<br />
da due campioni hanno una polifonia limitata ad un massimo di 30 note.<br />
Quando il numero di note suonate eccede il limite, le note suonate per prime vengono<br />
interrotte.<br />
Inoltre, quando si suonano più di due note in modo Layer, la polifonia massima<br />
dipende dal numero totale di suoni campionati che costituiscono i suoni utilizzati.<br />
Appendice 129
L’uso di REVERB e CHORUS riduce ulteriormente la polifonia, rispettivamente, di<br />
10 e 3 note.<br />
Notazione inglese e notazione italiana<br />
Nel testo vengono usati i nomi inglesi per le note della scala musicale. La seguente<br />
tabella elenca i nomi inglesi e il loro corrispettivo italiano.<br />
Inglese A B C D E F G<br />
Italiano La Si Do Re Mi Fa Sol<br />
Il numero che segue sempre la nota indica l’ottava di appartenenza, in notazione<br />
MIDI standard. C4 è il Do centrale del pianoforte.<br />
130 Capitolo 6
Specifiche tecniche<br />
Specifiche<br />
Tastiera<br />
Regolazione tocco<br />
Intonazione<br />
Generazione sonora<br />
Polifonia<br />
Suoni<br />
Effetti<br />
Demo<br />
Metronomo<br />
Pedale<br />
Connessioni<br />
Controlli<br />
Alimentazione<br />
Consumo<br />
Dimensioni (L x P x H)<br />
Peso<br />
Accessori<br />
Opzioni<br />
<strong>SP</strong>-<strong>200</strong><br />
88 note, sensibili alla dinamica, con simulazione di martelletto<br />
Leggero, Normale, Duro<br />
Trasposizione, Intonazione fine, Temperamento (Equabile,<br />
Kirnberger, Werckmeister)<br />
Sistema PCM stereo<br />
60 note (max). L’uso di suoni a due oscillatori, del modo<br />
Layer e/o del riverbero e del chorus, riduce il numero massimo<br />
di note.<br />
30 suoni in ROM<br />
Riverbero, Chorus (3 livelli ciascuno)<br />
30 brani dimostrativi incorporati<br />
Controlli di Tempo, Segnatura metrica, Accento e Volume<br />
Risonanza/Damper (fornito di serie). Supporto del mezzopedale<br />
con il <strong>Korg</strong> DS1H (opzionale).<br />
Uscite audio (OUTPUT L/MONO, R), Cuffie, MIDI (IN, OUT),<br />
Damper<br />
Interruttore di accensione (Power), Master Volume, Reverb,<br />
Chorus, Touch, Transpose/Function, Bank, Selezione suoni,<br />
Tempo, Metronome, Demo<br />
DC12V, 500mA, polo negativo al centro, alimentatore AC<br />
(fornito di serie)<br />
5 Watt<br />
1328 x 285 x 122 mm<br />
18,5 kg<br />
Alimentatore AC, DC12V, 500mA, polo negativo al centro;<br />
Pedale Damper; Leggio (tutti forniti di serie)<br />
DS 1H - Pedale Damper con controllo del mezzo-pedale<br />
Suoni elaborati con INFINITY.<br />
<strong>Korg</strong> si riserva il diritto di cambiare le specifiche senza preavviso.<br />
Appendice 131
Scorciatoie da pannello di controllo<br />
…mentre premete il tasto<br />
Tenete premuto il tasto…<br />
PIANO 1 PIANO2 E.PIANO 1 E.PIANO 2 HARPSI/CLAV VIBES/GUITAR ORGAN 1 ORGAN 2 STRINGS/PAD CHOIR<br />
REVERB Int. = Low Int. = Medium Int. = High<br />
CHORUS Int. = Low Int. = Medium Int. = High<br />
TOUCH Leggero Normale Duro Werckmeister Kirnberger<br />
METRONOME Metro: 2/4 Metro: 3/4 Metro: 4/4 Metro: 6/4 Accento Campanello Metro Vol. Dec. Metro Vol. Inc.<br />
TRAN<strong>SP</strong>OSE/FUNCTION Local On/Off Prg.Change Rx/Tx Crl.Change Rx/Tx Data Dump<br />
Pannello di controllo e tastiera<br />
Il seguente schema mostra le varie funzioni accessibili tenendo premuti i tasti METRONOME o TRAN<strong>SP</strong>OSE/FUNC-<br />
TION, mentre si preme uno dei tasti della tastiera.<br />
METRONOME<br />
Inser. numerico tempo<br />
C5 = 0 C#5 = 1 D5 = 2<br />
D#5 = 3 E5 = 4 F5 = 5<br />
F#5 = 6 G5 = 7 G#5 = 8<br />
A5 = 9<br />
(Prem. entrambi per reset)<br />
Volume metronomo<br />
B5 = Diminuzione (-)<br />
C6 = Aumento (+)<br />
Avvio demo<br />
TRAN<strong>SP</strong>OSE<br />
/FUNCTION<br />
Canali MIDI<br />
C2 = Ch 01<br />
…<br />
D#3 = Ch 16<br />
Regolazione tocco<br />
B3 = Leggero<br />
C4 = Normale<br />
D4 = Duro<br />
Intonazione fine<br />
B5 = Giù (-)<br />
C6 = Su (+)<br />
(Prem. entrambi<br />
per reset)<br />
Trasposizione<br />
F#6…B6 = -6…-1 st.<br />
C7 = Standard<br />
C#7…F7 = +1…+5 st.<br />
132
MIDI Implementation Chart<br />
KORG <strong>SP</strong>-<strong>200</strong> Digital Piano<br />
November 11, <strong>200</strong>1<br />
Function Transmitted Recognized Remarks<br />
Basic<br />
Channel<br />
Mode<br />
Note<br />
Number:<br />
Velocity<br />
Default 1 --<br />
Changed 1–16 1-16<br />
Default 1<br />
Messages X X<br />
Altered ******************<br />
15–113 0–127<br />
True Voice ****************** 21–108<br />
Note On O 9n, V=1–127 O 9n, V=1–127<br />
Note Off X X<br />
Poly (Key) X X<br />
Aftertouch<br />
Mono (Channel) X X<br />
Pitch Bend X O<br />
Control<br />
Change<br />
Program<br />
Change<br />
7 O O Volume *1<br />
11 X O Expression *1<br />
64 O O Damper Pedal *1, *3<br />
66 X O Sostenuto *1<br />
67 X O Soft Pedal *1, *3<br />
91 O O Reverb Depth *1<br />
93 O O Chorus Depth *1<br />
120, 121 X O All Sound Off, Reset All Ctrls<br />
0–29 0–29 *2<br />
True # ****************** 0–29<br />
System Exclusive O O<br />
System<br />
Common<br />
System<br />
Real Time<br />
Aux<br />
Messages<br />
Notes<br />
Mode 1:OMNI ON, POLY<br />
Mode 3:OMNI OFF, POLY<br />
:Song Position X X<br />
:Song Select X X<br />
:Tune X X<br />
:Clock X X<br />
:Commands X X<br />
Device Inquiry<br />
Sound Data Dump<br />
:Local On/Off X O<br />
:All Notes Off O X *4<br />
:Active Sensing O O<br />
:Reset X X<br />
*1: Transmitted/received when Control Changes are enabled<br />
*2: Transmitted/received when Program Changes are enabled<br />
*3: Half-pedal input/output value (0, 38, 74, 127)<br />
*4: All Notes Off is transmitted when exing the Layer mode and when selecting the Local Off status.<br />
Mode 2:OMNI ON, MONO<br />
Mode 4:OMNI OFF, MONO<br />
O: Yes<br />
X: No<br />
MIDI Implementation Chart 133
134
<strong>SP</strong>-<strong>200</strong><br />
Ich möchte mehr über die Club-Vorteile<br />
erfahren. Bitte senden Sie mir Informationsmaterial.
itte<br />
freimachen<br />
Der Service-Beleg hat nur in dem Land Gültigkeit,<br />
in dem das Instrument/Gerät bei einem autorisierten<br />
KORG-Händler gekauft wurde. Wenden Sie<br />
sich bitte bei Fragen an den Vertrieb Ihres Landes.<br />
Tragen Sie bitte die Seriennummer Ihres Instrumentes<br />
ein, und senden Sie diesen an die KORG Vertriebsfirma<br />
Ihres Landes.<br />
bitte<br />
freimachen<br />
KORG & MORE, a Division of<br />
Musik Meyer GmbH,<br />
Postfach 2147,<br />
35009 Marburg, Deutschland<br />
Musik Meyer AG, Spitalstr. 74<br />
8952 Schlieren, Schweiz
Address<br />
KORG ITALY Spa<br />
Via Cagiata, 85<br />
I-60027 Osimo (An)<br />
Italy<br />
Web servers<br />
www.korg.co.jp<br />
www.korg.com<br />
www.jam-ind.com<br />
www.korgfr.net<br />
www.korg.de<br />
www.korg.it<br />
PART NUMBER: MAN0001074<br />
© KORG Italy <strong>200</strong>1. All rights reserved<br />
<strong>SP</strong>-<strong>200</strong>