MAX COMBO NET - FTE Maximal
MAX COMBO NET - FTE Maximal
MAX COMBO NET - FTE Maximal

You also want an ePaper? Increase the reach of your titles
YUMPU automatically turns print PDFs into web optimized ePapers that Google loves.
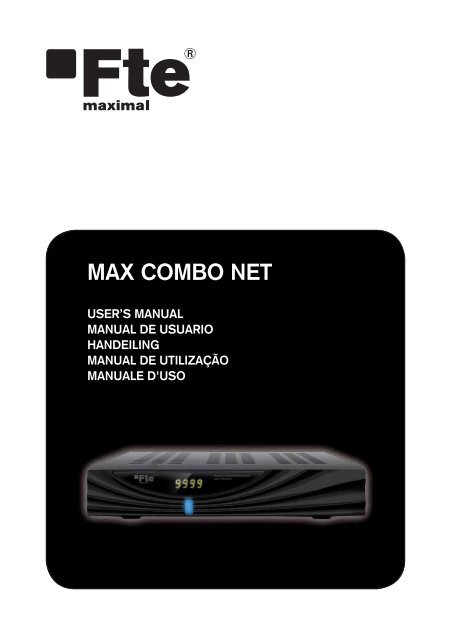
<strong>MAX</strong> <strong>COMBO</strong> <strong>NET</strong><br />
USER’S MANUAL<br />
MANUAL DE USUARIO<br />
HANDEILING<br />
MANUAL DE UTILIZAÇÃO<br />
MANUALE D'USO<br />
<strong>MAX</strong>_<strong>COMBO</strong>_<strong>NET</strong>_manual_print REV2.0.pdf 1 31/01/2013 12:51:18
<strong>MAX</strong>_<strong>COMBO</strong>_<strong>NET</strong>_manual_print REV2.0.pdf 2 31/01/2013 12:51:33
<strong>MAX</strong> <strong>COMBO</strong> <strong>NET</strong><br />
ENGLISH<br />
USER'S MANUAL<br />
<strong>MAX</strong>_<strong>COMBO</strong>_<strong>NET</strong>_manual_print REV2.0.pdf 3 31/01/2013 12:51:33
<strong>MAX</strong>_<strong>COMBO</strong>_<strong>NET</strong>_manual_print REV2.0.pdf 4 31/01/2013 12:51:33
TABLE OF CONTENTS<br />
GENERAL SAFETY 2<br />
GENERAL INFORMATION 3<br />
I. UNPACKING 3<br />
II. FEATURES 3<br />
III. REMOTE CONTROL UNIT (RCU) 4<br />
IV. HOW TO SETTING RCU FOR TV 6<br />
V. FRONT PANEL 8<br />
VI. REAR PANEL 9<br />
INSTALLING EQUIPMENT 10<br />
CHANNEL LIST GUIDE 11<br />
MENU GUIDE 13<br />
MAIN PAGE 13<br />
I. CHANNEL MANAGER 13<br />
II. INSTALLATION 15<br />
III. OPTIONS 20<br />
IV. UTILITY 22<br />
V. ACCESSORY 23<br />
PVR Guide 24<br />
TROUBLESHOOTING 31<br />
SPECIFICATIONS 32<br />
BRAND LIST 178<br />
To disconnect the apparatus from the mains, the plug must be pulled out<br />
from the mains socket, therefore the mains plug shall be readily operable.<br />
<strong>MAX</strong>_<strong>COMBO</strong>_<strong>NET</strong>_manual_print REV2.0.pdf 5 31/01/2013 12:51:33<br />
1
GENERAL SAFETY<br />
Please read the following recommended instructions carefully to avoid the risk of<br />
your physical Injury before the product is operated.<br />
Do not cover the receiver and keep clear space around the receiver for sufficient.<br />
Check the receiver’s operation voltage 90~250V, 50Hz~60Hz, 12V 2.5A Adaptor<br />
Keep liquid away from the receiver.<br />
The receiver shall not be exposed to dripping or splashing and no objects that filled<br />
with liquid shall not be placed on the receiver.<br />
Unplug the receiver from the wall outlet before cleaning.<br />
Use a soft cloth and a mild solution of washing-up liquid to clean the casing.<br />
Do not block the receiver’s ventilation slots which are provided for ventilation and<br />
protection from overheating.<br />
Please maintain the receiver in a free airflow.<br />
Do not allow the receiver to be exposed to hot, cold or humid condition.<br />
Do not use any cable and attachment that are not recommended as these may<br />
damage your equipment.<br />
Please unplug the receiver from the wall outlet and disconnect the cable between<br />
the receiver and the antenna when you will not use it for long time.<br />
Do not remove the cover to reduce the risk of electric shock.<br />
Do not attempt to service the receiver yourself.<br />
Refer all serving to qualified service personnel.<br />
Manual may be updated as new features.<br />
2<br />
WARNING<br />
<strong>MAX</strong>_<strong>COMBO</strong>_<strong>NET</strong>_manual_print REV2.0.pdf 6 31/01/2013 12:51:35
GENERAL INFORMATION<br />
I. UNPACKING<br />
Please ensure that the following items are included with the receiver in your packing.<br />
1) Remote Control Unit (RCU)<br />
2) Batteries (2EA)<br />
3) CD with user manual<br />
4) 12V 2.5A Adaptor<br />
II. FEATURES<br />
Supports MPEG-2, MPEG-4, H.264 and fully DVB compliant<br />
Satellite & Terrestrial receiver<br />
2 Slot smart card<br />
DiSEqC 1.0, 1.1 and 1.2<br />
Aspect ratio adjustment 4:3 (16/9 crop), 4:3 (16/9 letterbox), 16:9 (4/3 pillar box)<br />
User friendly OSD and operation<br />
Total 10,000 Channels Programmable<br />
Multi-language audio support / Multi-language menu text support<br />
Favorite channel selections<br />
Parental Guide and rating control<br />
EPG(Provider Electronic Program Guide) for On Screen Channel Information<br />
On-Screen Display with 65,536 Color<br />
Blind scan(Power Scan) & Powerful EPG<br />
Zoom Function in Pause<br />
Dolby Digital Bitstream Out through S/PDIF(Optical)<br />
Seletable output for 1080p, 1080i, 720p,576p and 576i format<br />
USB 2.0 Host (Access to HDD, USB memory, Others etc)<br />
Upgrade Software & Update Channel Database through USB 2.0 Port and RS232<br />
MP3 File Play by USB 2.0<br />
PVR Ready via USB<br />
Recorded file play on PC<br />
Reservation Recoding by EPG function<br />
Multimedia file play by USB 2.0<br />
Home streaming<br />
(2012 11 05) manual.indd 7 2012-11-05 8:48:08<br />
<strong>MAX</strong>_<strong>COMBO</strong>_<strong>NET</strong>_manual_print REV2.0.pdf 7 31/01/2013 12:51:36<br />
3
GENERAL INFORMATION<br />
4<br />
III. REMOTE CONTROL UNIT (RCU)<br />
<strong>MAX</strong>_<strong>COMBO</strong>_<strong>NET</strong>_manual_print REV2.0.pdf 8 31/01/2013 12:51:37
GENERAL INFORMATION<br />
III. REMOTE CONTROL UNIT (RCU)<br />
1. POWER Switch the receiver between operation and standby mode.<br />
2. MUTE Enable or disable the audio.<br />
3. TV Switch to TV mode.<br />
4. DVD Switch to DVD mode.<br />
5. VCR Switch to VCR mode.<br />
6. STB Switch to STB mode.<br />
7. TV / RADIO Switch between TV and Radio.<br />
8. RECALL Select the previously viewed channel.<br />
9. AV / TV Select the TV or AV mode.<br />
10. PR Select the previously viewed channel.<br />
11. Fn Network File Manager / Reboot.<br />
12. V. Format Switch to HD Type.<br />
13. ZOOM Select Zoom IN/OUT.<br />
14. Fn2 Reserved.<br />
15. Move down a page in the channel list.<br />
16. Move up a page in the channel list.<br />
17. V+ / V- Turn volume up or down.<br />
18. P+ / P- Change channels up or down on normal mode.<br />
19. Change channel or move to the item in the menu.<br />
20. Adjust the volume or move to left or move item in the menu.<br />
21. MENU Display the main menu on screen.<br />
22. EXIT Return to the previous menu or normal viewing mode from a menu.<br />
23. INFO Display the program information box on the screen and edit the name of favorite<br />
channel list.<br />
24. STOP Stop recording or playing.<br />
25. PLAY Display file lists and plays slow/normal.<br />
26. PAUSE Pause the playing picture or go to normal mode.<br />
27. RECORD Record the program.<br />
28. REWIND Start reverse playback and change the speed of reverse playback.<br />
29. F / F Start fast forward or fast motion playback and change the speed of forward playback.<br />
30. AUDIO Change the audio languages.<br />
31. EPG<br />
Display the TV or Radio program guide.<br />
32. Subtitles Enable subtitles mode.<br />
33. Teletext Enable teletext mode.<br />
34. Numeric buttons Select the TV or Radio service channels and individual menu.<br />
35. FAV Toggle the selected favorite mode.<br />
36. SAT Toggle the selected Satellite list.<br />
<strong>MAX</strong>_<strong>COMBO</strong>_<strong>NET</strong>_manual_print REV2.0.pdf 9 31/01/2013 12:51:37<br />
5
GENERAL INFORMATION<br />
6<br />
IV. HOW TO SETTING RCU FOR TV<br />
4<br />
2<br />
5<br />
<strong>MAX</strong>_<strong>COMBO</strong>_<strong>NET</strong>_manual_print REV2.0.pdf 10 31/01/2013 12:51:38<br />
3<br />
1
GENERAL INFORMATION<br />
IV. HOW TO SETTING RCU FOR TV<br />
I. Manual Search<br />
At first, Turn on the TV<br />
1) Press Device LED Key ( STB or TV or VCR or DVD ) + "OK" key at the same time during 2 or 3 seconds.<br />
Then the Device LED Lamp will be on Setting Mode.<br />
2) Find the 3-Digit code of Device in brand list and input 3-Digit code accordingly one by one. - The Device LED<br />
will be twinked ontime one by one also. When you finish inputting 3-Digit, the Device (TV or VCR or DVD) will be<br />
turned off one time.<br />
3) Then click OK to finish setting. (The Device LED will be turned off after twinkling 2 times.)<br />
*NOTE : If you are not able to find the TV code which you are watching currently, please perform the below "Auto<br />
Search". Then RCU will find the proper code automatically and it will work properly.<br />
II. Auto Search (Using Up or Down key)<br />
1) Press Device LED Key ( STB or TV or VCR or DVD ) + "OK" key at the same time during 2 or 3 seconds.<br />
Then the Device LED Lamp will be on Setting Mode.<br />
2) Press Up or Down Key of RCU to find out equivalent device. At the moment of RCU matching to the equivalent<br />
device, the device will be turned off.<br />
3) Then click OK to finish setting. (The Device LED will be turned off after twinkling 2 times.)<br />
III. Factory Reset<br />
1) Press TV LED + REC button at the same time during more than 5 seconds.<br />
2) Device LED will be turn off/on "TV DVD VCR STB" 3 times one by one and RCU will go to default mode.<br />
<strong>MAX</strong>_<strong>COMBO</strong>_<strong>NET</strong>_manual_print REV2.0.pdf 11 31/01/2013 12:51:38<br />
7
GENERAL INFORMATION<br />
V. FRONT PANEL<br />
8<br />
1. POWER Switch the receiver power On and Standby.<br />
2. USB To upgrade firmware / Recording.<br />
3. SMART SLOT Insert Smart Card.<br />
1<br />
3<br />
1 2 3<br />
5 6 7 10 12<br />
NOTE: All USB 2.0 flash drive may not be compatible with the product.<br />
2<br />
4 8 9 11<br />
<strong>MAX</strong>_<strong>COMBO</strong>_<strong>NET</strong>_manual_print REV2.0.pdf 12 31/01/2013 12:51:39
GENERAL INFORMATION<br />
VI. REAR PANEL<br />
1<br />
2<br />
3<br />
4 8 9 11<br />
1. AERIAL Connect to Terrestrial antenna cable.<br />
2. LOOP OUT Connect to another STB.<br />
3. SAT IN Connect to Satellite antenna cable.<br />
4. LOOP OUT Connect to another STB.<br />
5. TV SCART Connect to TV SCART cable.<br />
6. HDMI Connect to HDMI jack of TV.<br />
7. RS 232 Connect to personal computer for software upgrade.<br />
8. Ethernet Connect to Lan cable.<br />
9. USB Connect to USB device.<br />
10. OPTICAL Output for connecting to a amplifier.<br />
11. ADAPTOR Connect to Adaptor.<br />
12. POWER BUTTON Turn On/Off.<br />
5 6 7 10 12<br />
<strong>MAX</strong>_<strong>COMBO</strong>_<strong>NET</strong>_manual_print REV2.0.pdf 13 31/01/2013 12:51:39<br />
9
CHANNEL LIST GUIDE<br />
1. Normal Live Mode<br />
a) When you select one channel, information bar appears<br />
automatically on the screen for few seconds. This bar<br />
provides you the current channel information.<br />
b) Press INFO button to see the information during normal<br />
live mode.<br />
2. Simple Channel List<br />
a) Press OK on the normal live mode to go to the channel<br />
list.<br />
b) When detail channel list is displayed on screen press<br />
RED button to go to simple channel list.<br />
3. Detail Channel List<br />
a) Press OK on the normal live mode to go to the channel<br />
list.<br />
b) When simple channel list is displayed on screen press<br />
RED button to go to detail channel list.<br />
c) Press and to sort by Alphabet.<br />
d) Press SAT button to sort by Satellite and FAV<br />
button for Favorite 1~8.<br />
e) Press GREEN button to return to All Channel or EXIT to<br />
return to the current live channel.<br />
f) Press the SAT key to show Satellite Pop-UP Window then<br />
select satellite. Channel list of selected satellite will be<br />
displayed.<br />
g) Press the FAV key to show Favorite Pop-UP Window then<br />
select FAV list. Channel list of selected FAV will be displayed.<br />
h) Press the Green key then all searched channel list will<br />
be displayed.<br />
<strong>MAX</strong>_<strong>COMBO</strong>_<strong>NET</strong>_manual_print REV2.0.pdf 15 31/01/2013 12:51:39<br />
11
CHANNEL LIST GUIDE<br />
4.EPG (Electronic Program Guide)<br />
a) Press EPG button on the live mode.<br />
b) EPG of the current channel appears on the screen.<br />
c) Select the channel that you want to watch program.<br />
d) It will be appear like rightside picture.<br />
5. ZOOM IN/OUT<br />
a) By pressing ZOOM key in a normal live mode, you<br />
can use Zoom In/Out fuction.<br />
b) You can select zoom size with RED/GREEN key.<br />
c) You can select the start position with key.<br />
d) After select Zoom size and pisition, you can start<br />
zoom function with OK key.<br />
e) With key, you can move zooming screen.<br />
12<br />
<strong>MAX</strong>_<strong>COMBO</strong>_<strong>NET</strong>_manual_print REV2.0.pdf 16 31/01/2013 12:51:40
MENU GUIDE<br />
MAIN PAGE<br />
Press the MENU button on the RCU to open Main<br />
Page on the screen. Main Page will be displayed.<br />
1. You can move into the main page using <br />
on the RCU.<br />
2. Press OK to confirm your selection.<br />
3. Press EXIT to return to the previous menu or press<br />
MENU to go to the current live channel.<br />
I. Channel Manager<br />
II. Installations<br />
III. Options<br />
I. CHANNEL MANAGER<br />
This section may help you to organize channels according to your preference.<br />
1. Select Channel Manager in the Main Page with and press OK.<br />
2. TV Channel Manager Page displays on the screen.<br />
3. Select the mode that you want using .<br />
4. To see the channel that you choose, go to the channel and then press RED botton.<br />
5. Press EXIT to return to the previous menu or press MENU to go to the current live channel.<br />
I-1. Favorite<br />
I-2. Rename<br />
I-3. Move<br />
I-4. Lock<br />
I-5. Delete<br />
I-1. Favorite<br />
IV. Utility<br />
V. Accessory<br />
1. Using go to the Favorite mode then press<br />
YELLOW button to choose Favorite 1~8.<br />
2. Press OK on the channel that you want to add<br />
or delete.<br />
3. will be marked at the end of selected channel<br />
name bar. To delete press OK again.<br />
4. Selected channels will be automatically saved.<br />
5. If you want to check the saved Favorite Channel List<br />
go to other mode(Rename~Delete) except Favorite<br />
and then press FAV button to check Favorite 1~8.<br />
6. Press EXIT to return to the previous menu or press<br />
MENU to go to the current live channel.<br />
7. Press BLUE button to rename Favorite.<br />
<strong>MAX</strong>_<strong>COMBO</strong>_<strong>NET</strong>_manual_print REV2.0.pdf 17 31/01/2013 12:51:40<br />
13
MENU GUIDE<br />
14<br />
I. CHANNEL MANAGER<br />
I-2. Rename<br />
1. Usinggo to the Rename mode.<br />
2. Select the channel that you want to rename using and<br />
then press OK.<br />
3. Keypad Dialog displays on the screen.<br />
4. Edit the name entering NUMBERS and / or WORDS in the<br />
Keypad Dialog.<br />
5. Press EXIT to return to the previous menu or press MENU to<br />
go to the current live channel.<br />
I-3. Move<br />
1. Usinggo to the Move mode.<br />
2. Select channels which you want to move by pressing OK key.<br />
3. Move cursor that you want to place on than press GREEN button.<br />
4. Press EXIT to return to the previous menu or press MENU to<br />
go to the current live channel.<br />
I-4. Lock<br />
1. Using go to the Lock mode.<br />
2. Select the channel that you want to lock and then press OK.<br />
will be marked at the end of the selected channel name bar.<br />
To delete press OK again.<br />
3. Press EXIT to go to Main Page or press MENU to go to the<br />
current live channel.<br />
I-5. Delete<br />
1. Usinggo to the Delete mode.<br />
2. Select the channel that you want to delete and then press OK.<br />
will be marked on the selected channel number.<br />
To delete press Blue button again.<br />
3. Press YELLOW button to delete TP. Select one channel and<br />
press Blue button.<br />
All channels of that TP will be automatically selected.<br />
4. Press YELLOW button to delete Satellite. Select one channel<br />
and press Blue button. All channels of that the Satellite will<br />
be automatically selected.<br />
5. Press EXIT to return to the previous menu or press MENU to<br />
go to the current live channel.<br />
6. Message Box displays on the screen.<br />
7. Select OK on the Message Box and then press OK to delete<br />
the markedchannels.<br />
<strong>MAX</strong>_<strong>COMBO</strong>_<strong>NET</strong>_manual_print REV2.0.pdf 18 31/01/2013 12:51:40
MENU GUIDE<br />
II. INSTALLATION<br />
This section may help you to set up antenna and<br />
scan satellite or transponder, etc. Select Installations<br />
in Main Page using and press OK.<br />
Press EXIT to return to the previous menu or press<br />
MENU to go to the current live channel.<br />
II-1. Satellite Search<br />
II-2. DiSEqC Switch<br />
II-3. Motor Setup<br />
II-4. Terrestrial Search<br />
II-5. Home Streaming<br />
II-6. Factory Default<br />
II-1 Satellite Search<br />
1.You can move the cursor using and press OK<br />
when you select the value that you want.<br />
a) Satellite<br />
- Press OK to display the Satellite List Box.<br />
- Select the proper Satellite and then press OK.<br />
b) DiSEqC<br />
- Press OK to display the DiSEqC Port List.<br />
- Select the proper DiSEqC port and then press OK.<br />
c) LNB<br />
- Press OK to display the LNB Frequency List.<br />
- Select the proper LNB Frequency and then<br />
press OK.<br />
- You can also input directly the numbers using<br />
NUMBER KEY on the RCU.<br />
d) 22KHz Tone<br />
- Select the one among None, 0 KHz or 22 KHz<br />
depending on the user’s antenna switch box.<br />
e) Search Option<br />
- Press OK to display the Search Option list.<br />
- Select the Search Option that you want and then<br />
press OK.<br />
TP EDIT : To Edit TP, Press the RED<br />
button on the RCU.<br />
f) Search<br />
- Press Search to start scan channels.<br />
- SAT Rename : To rename SAT, Press the<br />
Green button on the RCU.<br />
<strong>MAX</strong>_<strong>COMBO</strong>_<strong>NET</strong>_manual_print REV2.0.pdf 19 31/01/2013 12:51:40<br />
15
MENU GUIDE<br />
II. INSTALLATION<br />
f) Motor Control<br />
Select the position using and then press OK.<br />
Message box displays on the screen.<br />
- Store Sat position : Stores the current position<br />
of the motor for the selected<br />
satellite.<br />
- Goto Sat Position : Moves the motor to the stored<br />
position of the selected satellite.<br />
- Goto Center : Goes to the center of the motor.<br />
- Limit off : disable East, West limit.<br />
- Set East Limit : Set current position as East Limit.<br />
g) Satellite Position<br />
- Input directly the position using NUMBER KEY on<br />
the RCU<br />
- Select the direction using (WEST / EAST).<br />
h) Search Option<br />
- Press OK to display the Search Option list.<br />
- Select the Search Option that you want and then<br />
press OK.<br />
2. Edit my local position<br />
- Press Green Button to edit local Position.<br />
a) Longitude<br />
- Input directly the Longitude using NUMBER KEY on the RCU.<br />
- Select the direction using (WEST / EAST).<br />
- Set West Limit : Set current position as<br />
West Limit.<br />
- Recaluation Position.<br />
- Reset Position : Resets all stored position<br />
of the motor.<br />
i) Search<br />
- Press Search to start scan channels.<br />
- Press OK to start scanning.<br />
TP EDIT : To Edit TP Press the RED button on<br />
the RCU.<br />
b) Latitude<br />
- Input directly the Latitude using UNMBER KEY on the RCU.<br />
- Select the direction using (NORTH/SOUTHd).<br />
3. Press EXIT to return to the previous menu or press MENU to go to the current live channel.<br />
<strong>MAX</strong>_<strong>COMBO</strong>_<strong>NET</strong>_manual_print REV2.0.pdf 21 31/01/2013 12:51:41<br />
17
MENU GUIDE<br />
18<br />
II. INSTALLATION<br />
II-4. Terrestrial Search<br />
1. Select Channel Search in Installation using <br />
and press OK.<br />
2. 1) Select the region where you are using .<br />
2) You can select searching type which you want among<br />
Auto and Manual using.<br />
3) Auto<br />
a) Select ‘Search’on the Screen and pres OK button to scan<br />
channels.<br />
b) Press Exit or Menu after finishing scanning.<br />
4) Manual<br />
a) Select Mux Channel which you want using .<br />
b) Frequency will be displayed automatically according to<br />
selected Mux Channel.<br />
II-5. Home Streaming<br />
1. PC setting<br />
***Execute 'Home Streaming' program.<br />
a) Go to ‘Preference’ Tab.<br />
b) Select ‘Default URL’ check-box and assign the download<br />
folder by using “Browse” button It is assigned to<br />
“c:\download” but must specify the destination folder<br />
personally to be able to receive movie files in PC.<br />
Note: Only default server available currently.<br />
2. STB setting<br />
a) Go to Home streaming menu ( Menu Accessory <br />
Network Home streaming ) and Click Home<br />
Streaming.<br />
b) IP-Name Edit Pad will appear & Input Server IP by<br />
numeric buttons of RCU.<br />
c) The IP address must be same as IP address shown in<br />
preference tap of Home Streaming program.<br />
<strong>MAX</strong>_<strong>COMBO</strong>_<strong>NET</strong>_manual_print REV2.0.pdf 22 31/01/2013 12:51:42
MENU GUIDE<br />
II. INSTALLATION<br />
3. Playing the Movie File by Home Streaming<br />
a) Press “Fn” key of RCU in normal view of STB and then the<br />
movie file list in PC will be appeared in TV Screen.<br />
b) Select the file which you want to see by using navigation<br />
keys of RCU and press “OK” buttons to play the movie file.<br />
Please see the right picture for better<br />
understanding.<br />
II-6. Factory Default<br />
Use Factory Default function only when you want<br />
to return the receiver to the condition of factory<br />
default. All settings and channels will be deleted.<br />
1. Select Factory Default in Installations using and press<br />
OK.<br />
2. Message box displays on the screen.<br />
3. Select OK to return the receiver to the condition of factory<br />
default and then press OK.<br />
4. Press EXIT to return to the previous menu or press MENU<br />
to go to the current live channel.<br />
<strong>MAX</strong>_<strong>COMBO</strong>_<strong>NET</strong>_manual_print REV2.0.pdf 23 31/01/2013 12:51:42<br />
19
MENU GUIDE<br />
III. OPTIONS<br />
This section may help you to set up OSD language,<br />
time, etc. Select Options in Main Page using <br />
and press OK.<br />
Press EXIT to return to the previous menu or<br />
press MENU to go to the current live channel.<br />
III-1. OSD Setup<br />
III-2. Control Panel<br />
III-3. Time Adjust<br />
III-4. Parental Lock<br />
III-1. OSD Setup<br />
1. Select OSD Setup in Options using and<br />
press OK.<br />
a) OSD Language<br />
- Press OK to display OSD Language list.<br />
- Select the language that you want and then<br />
press OK.<br />
b) Audio Language<br />
- Press OK to display Audio Language list.<br />
- Select the language that you want and then press OK.<br />
c) Subtitle Language<br />
- Press OK to display Subtitle.<br />
- Select the language that on want and then press OK.<br />
d) Display Info Bar<br />
- Press OK to display Display Info Bar time list.<br />
- Select the second that you want to display and then press OK.<br />
e) Transparency<br />
- Adjustment of transparency level.<br />
2. Press EXIT to return to the previous menu or press MENU to go to the current live channel.<br />
20<br />
<strong>MAX</strong>_<strong>COMBO</strong>_<strong>NET</strong>_manual_print REV2.0.pdf 24 31/01/2013 12:51:42
MENU GUIDE<br />
III. OPTIONS<br />
III-2. Control Panel<br />
1. Select TV Setup in Options using and press OK.<br />
a) HD Type<br />
- Select HD video Output.<br />
b) TV Type<br />
- Select your TV type.<br />
c) Aspect Ratio<br />
- Select screen ratio.<br />
d) Screen Control<br />
- Select screen display modes.<br />
e) Brightness<br />
- Adjustment of screen brightness.<br />
f) Contrast<br />
- Adjustment of screen contrast.<br />
g) Saturation<br />
- Adjustment of screen Saturation.<br />
2. Press EXIT to return to the previous menu or press MENU to<br />
go to the current live channel.<br />
III-3. Time Adjust<br />
Set your local time according to your location.<br />
1. Select Time Setup in Options usingand press OK.<br />
2. Time Adjust page displays on the screen.<br />
3. Move the cursor using, and press OK when you<br />
select the value that you want. (Input Hour directly using<br />
number keys on the RCU)<br />
4. Press EXIT to return to the previous menu or press MENU to<br />
go to the current live channel.<br />
III-4. Parental Lock Setup<br />
1. Select Parental Lock Setup in Options usingand press OK.<br />
2. Parental Lock Page displays on the screen.<br />
3. You can lock and unlock Parental Lock selecting ON or OFF<br />
using (For Channels).<br />
4. You can lock and unlock Install Lock selecting ON or OFF<br />
using (For Installation Settings).<br />
5. Enter new password if you want to change the current password.<br />
6. Confirm your new password entering new password again.<br />
7. Press EXIT to return to the previous menu or press MENU to go to the current live channel.<br />
Note. DEFAULT PASSWORD IS 0000<br />
<strong>MAX</strong>_<strong>COMBO</strong>_<strong>NET</strong>_manual_print REV2.0.pdf 25 31/01/2013 12:51:42<br />
21
ME NU GUIDE<br />
V. ACCESSORY<br />
This section may help you to use USB, etc.<br />
Select Utility in Main Page using and press OK.<br />
· V - 1. USB<br />
· V - 2. Smart Card<br />
· V - 3. Network / Videoclub<br />
V -1 USB<br />
The receiver is equipped with host.<br />
1. Select USB in Utility with and press OK.<br />
2. If you want to save Sofware or Database, press Green<br />
button on the R CU.<br />
3. Select the file which you want to s ave us ing and OK<br />
button.<br />
4. After downloading the selected file, the receiver will<br />
reboot automatically.<br />
V - 2 Smart Card<br />
The receiver is equipped with two slots of various Smart Card<br />
which have access to the scrambled the pay per view services.<br />
The programs that can be descrambled are determined by the<br />
smart card that you use.<br />
1. Select Smart Card in ACCESSORY menu with and press OK.<br />
2. Insert Smart Card into Slot 1 or 2, then STB displays<br />
Smart card name on the screen.<br />
4. Press EXIT to return to the previous menu or press MENU to<br />
go to current live channel.<br />
V - 3 Network / Videoclub<br />
This menu support multiple functions such as below:<br />
1. SW downloading by Web.<br />
2. Home-Streaming.<br />
3. Youtube.<br />
4. VideoClub.<br />
5. RSS feed / Twitter / Weather information.<br />
6. Downloading channel Data.<br />
<strong>MAX</strong>_<strong>COMBO</strong>_<strong>NET</strong>_manual_print REV2.0.pdf 27 31/01/2013 12:51:43<br />
23
PVR GUIDE<br />
24<br />
PVR GUIDE<br />
This section may help you how to use PVR function on<br />
this STB.<br />
I. Recommended Devices<br />
If you want to use PVR function, you need to prepare<br />
equipment as below.<br />
- External USB Hard Disk Drive.<br />
- Flash memory stick<br />
- Format Type: FAT16/32 (System does not support NTFS<br />
and other file system)<br />
II. Record Function<br />
II-1 Reserved Recording<br />
1. Time Reserved Recording<br />
: Set desired recording time- in “Utility Timer” to<br />
record at set time.<br />
NOTE : How to set up before you start “Time Record”<br />
- STB set up in default.<br />
- Please change “OFF” to “Recording” in Active menu.<br />
- Once you set “Recording” in Active menu, you will see<br />
the detail menu for PVR. ( Cycle, Channel Type, Channel<br />
name, Start Time, Duration).<br />
- Press the “Ok” button to select Channel Name.<br />
2. EPG Reserved Recording<br />
: Used to record a selected event from EPG.<br />
- Press the EPG button to go into EPG menu while watching<br />
a program on screen.<br />
- To select event play on time: Move from the EPG to<br />
select the event and press the “RECORD button” on RCU.<br />
- If you want cancellation, press more “RECORD button”<br />
once.<br />
- If you want several reserved recording, move and press<br />
the “RECORD button” on RCU.<br />
<strong>MAX</strong>_<strong>COMBO</strong>_<strong>NET</strong>_manual_print REV2.0.pdf 28 31/01/2013 12:51:44
PVR GUIDE<br />
PVR GUIDE<br />
II. Record Function<br />
II-2 Instant Recording<br />
- Press “RECORD button” on RCU to start recoding program.<br />
- While Recoding program<br />
- Press “PAUSE” key to execute “Time Shift”<br />
- You can use “LEFT/RIGHT button” to view desired time while<br />
recoding program.<br />
- Press “OK button” on RCU to display Recording file list<br />
During Recording you can watch also other channels which<br />
are located in same TP. In case of watching other channels<br />
during recording, You should come back to the recording<br />
channels in channel list to stop recording.<br />
- If you press “STOP button” on RCU, current program you are<br />
watching will stop and Live TV will be stored in USB memory<br />
space.<br />
<strong>MAX</strong>_<strong>COMBO</strong>_<strong>NET</strong>_manual_print REV2.0.pdf 29 31/01/2013 12:51:44<br />
25
26<br />
PVR GUIDE<br />
PVR GUIDE<br />
III. Playback Function<br />
- To play previously recorded program, press “Play button”on<br />
RCU.<br />
- Use the arrow buttons to select the file which you want to<br />
play and press “OK button” to play.<br />
- While Playing program.<br />
- If you press “LEFT/RIGHT button” on RCU button while<br />
recoding live TV or recorded file play, current program you<br />
ware watching will stop and picture will re-restart from<br />
where it was moved by “LEFT/RIGHT button” on RCU.<br />
IV. Trick Mode Function<br />
- If you want to play other recorded file during Playback,<br />
press “Play” button.<br />
- If you press “FF(Fast Forward) button” during Timeshift or<br />
Playback, the file will be played at 2X speed and if you press<br />
the “FF button” one more time, the file will be played to 8X<br />
speed.<br />
- If you press the “REW(Rewind) button” during Timeshift or<br />
Playback, the file will rewind at 2X speed and if you press<br />
the “REW button” one more time, the file will rewind to 8x<br />
speed.<br />
- FF/REW function will back to normal play if you press "PLAY<br />
button”.<br />
<strong>MAX</strong>_<strong>COMBO</strong>_<strong>NET</strong>_manual_print REV2.0.pdf 30 31/01/2013 12:51:45
PVR GUIDE<br />
PVR GUIDE<br />
V. Time Shift Function<br />
- If you want to execute “Time Shift” in Live mode You should<br />
set “On” of Time Shift In PVR Option (Accessory PVR <br />
TimeShift “ON”).<br />
- To star Time Shift in Live mode, press “PAUSE” to start.<br />
- Time shift will played during 30 minutes in Live Mode.<br />
- To start “Play back” during Timeshift press “PLAY” key.<br />
- You can move “play position” using LEFT/RIGHT button during<br />
Time Shift.<br />
VI. Format<br />
- You can do FAT32 Format the HDD formatted by FAT32 and<br />
NTFS also.<br />
- You can do Format also the multi partitioned HDD.<br />
- When NTFS formatted HDD is inserted, POPUP message<br />
will appear.<br />
- Press “OK” button to move to “C:, D:, E:, F: NEXT°” in case<br />
of Multi partitioned HDD.<br />
- In case of NTFS multi partitioned HDD, you must format by<br />
FAT 32.<br />
<strong>MAX</strong>_<strong>COMBO</strong>_<strong>NET</strong>_manual_print REV2.0.pdf 31 31/01/2013 12:51:45<br />
27
28<br />
PVR GUIDE<br />
PVR GUIDE<br />
VII. MP3 Play<br />
- Select MP3 file which you want to play in USB menu.<br />
- After you select MP3 file, MP3 play window will be executed.<br />
VIII. JPG View<br />
- Select JPG file which you want to see in USB menu.<br />
- Press OK to see the JPG which you want to.<br />
- You can rotate the image by using LEFT/RIGHT button.<br />
IX. Software Upgrade<br />
- Select * UAD file which you want to upgrade in USB menu.<br />
<strong>MAX</strong>_<strong>COMBO</strong>_<strong>NET</strong>_manual_print REV2.0.pdf 32 31/01/2013 12:51:46
PVR GUIDE<br />
PVR GUIDE<br />
X. How to play the record by PVR of 'HD-XXX' in<br />
PC or Divx Player<br />
X-1 How to play in PC<br />
A) Play KM Player.<br />
B) Select Language.<br />
1) Click right button of Mouse Language your language.<br />
C) Change the extension name of the recorded file to<br />
*.mpg”.<br />
Example : Welcome to A_131821 Welcome to<br />
A_131821.mpg<br />
D) Select the file which you want to play.<br />
1) Click right button of Mouse Open Files(S) Select.<br />
X-2 How to Play in “Divx Player”<br />
A) The file format must be changed to “.avi” format to play in<br />
DivX Player.<br />
B) Select a destination folder where to be saved the file which<br />
will be changed to *.avi.<br />
1) Click right button of Mouse Capture Select Capture<br />
Folder.<br />
C) Repeat A) B) C) D) of No.1 how to play in PC.<br />
D) Capture the fie which is being played currently to convert<br />
into *.avi.<br />
1) Click right button of Mouse Capture Video Quick<br />
Capture.<br />
2) Then the playing file is saved in designated folder by *.avi<br />
format.<br />
E) If the playing file is STB SD channel, it is saved by SD and If<br />
the file is HD or H.264 it saved by HD or H.264. If user does<br />
not have DivX player which can play HD or H.264 (at least<br />
CPU sigma8634), he must convert the file SD so that the<br />
general SD DivX player (CPU sigma8511) can play the file.<br />
<strong>MAX</strong>_<strong>COMBO</strong>_<strong>NET</strong>_manual_print REV2.0.pdf 33 31/01/2013 12:51:46<br />
29
PVR GUIDE<br />
30<br />
PVR GUIDE<br />
X-3 How to Convert the file by Divx Manager<br />
A) Play Divx Manager.<br />
1) Setting Model Rapsody RSH-250/350<br />
B) Select the folder where the file that you want to convert is.<br />
Then the file's information will appear.<br />
C) And select the file which you want to convert and select<br />
“Convert”.<br />
D) Select “Encoding Start” It starts “Converting”.<br />
NOTE: Web site for downloading<br />
1. Kmplayer<br />
1) Enter this site : http://2bwithu.tistory.com/245.<br />
2) Download 2 files to 1 folder and unzip the archived file.<br />
After unzip, you can install only click exe file.<br />
2. Divx Manger<br />
1) Enter this site :<br />
http://www.modix4u.co.kr/upboard/view.asp?fcprimkey=44<br />
2) Click below for English version.<br />
<strong>MAX</strong>_<strong>COMBO</strong>_<strong>NET</strong>_manual_print REV2.0.pdf 34 31/01/2013 12:51:46
PVR GUIDE<br />
PVR GUIDE<br />
X. How to play the record by PVR of 'HD-XXX' in<br />
PC or Divx Player<br />
X-1 How to play in PC<br />
A) Play KM Player.<br />
B) Select Language.<br />
1) Click right button of Mouse Language your language.<br />
C) Change the extension name of the recorded file to<br />
*.mpg”.<br />
Example : Welcome to A_131821 Welcome to<br />
A_131821.mpg<br />
D) Select the file which you want to play.<br />
1) Click right button of Mouse Open Files(S) Select.<br />
X-2 How to Play in “Divx Player”<br />
A) The file format must be changed to “.avi” format to play in<br />
DivX Player.<br />
B) Select a destination folder where to be saved the file which<br />
will be changed to *.avi.<br />
1) Click right button of Mouse Capture Select Capture<br />
Folder.<br />
C) Repeat A) B) C) D) of No.1 how to play in PC.<br />
D) Capture the fie which is being played currently to convert<br />
into *.avi.<br />
1) Click right button of Mouse Capture Video Quick<br />
Capture.<br />
2) Then the playing file is saved in designated folder by *.avi<br />
format.<br />
E) If the playing file is STB SD channel, it is saved by SD and If<br />
the file is HD or H.264 it saved by HD or H.264. If user does<br />
not have DivX player which can play HD or H.264 (at least<br />
CPU sigma8634), he must convert the file SD so that the<br />
general SD DivX player (CPU sigma8511) can play the file.<br />
<strong>MAX</strong>_<strong>COMBO</strong>_<strong>NET</strong>_manual_print REV2.0.pdf 35 31/01/2013 12:51:47<br />
29
SPECIFICATIONS<br />
.Conditional Access Module Interface<br />
Item Specification<br />
SMART CARD 2 SLOTS, ISO 7816, GSM11.11 and EMV (payment systems) compatibility<br />
. Tuner & Channel (DVB-S2)<br />
Item<br />
Specification<br />
Type 1 F Type, IEC169-24, Female<br />
Frequency Rage 950MHz to 2150MHz<br />
RF Impedance 75 Ohm unbanlanced<br />
Signal Level -65 to -25 dBm<br />
LNB Power 13.5/18.5Vdc +/- 5%, 0.5Amax, Overload Protected<br />
22KHz Tone Frequency : 22KHz +/- 2KHz, 0.6Vpp +/- 0.2V<br />
DiSEqC Control Version1.0, 1.2, Tone burst A/B<br />
Demodulation QPSK, 8PSK<br />
Input Symbol Rate<br />
FEC Decoder<br />
32<br />
DVB-S QPSK : 2~45 Msps<br />
DVB-S2 8PSK/QPSK : 10~30Msps<br />
1/2, 2/3, 3/4, 3/5, 4/5, 5/6, 8/9, 9/10 in DVB-S2 mode.<br />
1/2, 2/3, 3/4, 5/6 and 7/8 in DVB-S mode.<br />
. Tuner & Channel (DVB-T)<br />
Item Specification<br />
Type IEC60169-2(VHF/UHF) female, 75 ohm nominal<br />
Frequency Rage VHF : 170MHz to 230MHz<br />
UHF : 470MHz to 862MHz<br />
Signal Level -78.5dBm ~ -25dBm<br />
(64QAM, Code Rate 2/3, Guard Interval 1/8,Gaussian Channel)<br />
COFDM Spectrum COFDM 2K/8K-Carrier<br />
FEC Mode 1/2, 2/3, 3/4, 5/6, 7/8<br />
. System & Memory<br />
Item Specification<br />
Main Processor STi7110<br />
Flash Memory 8 Mbytes<br />
DDR Memory 128 Mbytes<br />
Channel Capacity Digital Channel : 10,000<br />
Front 1-Key(Power), 7-SEGMENT DISPLAY<br />
<strong>MAX</strong>_<strong>COMBO</strong>_<strong>NET</strong>_manual_print REV2.0.pdf 36 31/01/2013 12:51:47
SPECIFICATIONS<br />
. MPEG Transport Stream & A/V Decoding<br />
Item<br />
Specification<br />
Transport Stream 13818-1 MPEG-2, H.264/AVC Transport stream Specification<br />
Profile Level MPEG-2 MP@ML, MP@HL, MPEG-4 H.264/AVC<br />
Input Rate Max. 90Mbit/s<br />
Aspect Ratio 4:3, 16:9, Letter Box<br />
Frame Rate 25Hz for PAL, 30Hz for NTSC<br />
Video Resolution 576i, 576p, 720p, 1080i<br />
Teletext Through VBI<br />
Audio Decoding MPEG-1 Layer 1 & 2, Dolby Downmix<br />
Audio Mode Single Channel/Dual Channel Joint Stereo/Stereo<br />
Frequency Response 20~20kHz,
<strong>MAX</strong>_<strong>COMBO</strong>_<strong>NET</strong>_manual_print REV2.0.pdf 38 31/01/2013 12:51:48
<strong>MAX</strong> <strong>COMBO</strong> <strong>NET</strong><br />
ESPAÑOL<br />
MANUAL DE USUARIO<br />
<strong>MAX</strong>_<strong>COMBO</strong>_<strong>NET</strong>_manual_print REV2.0.pdf 39 31/01/2013 12:51:48
<strong>MAX</strong>_<strong>COMBO</strong>_<strong>NET</strong>_manual_print REV2.0.pdf 40 31/01/2013 12:51:48
INDICE<br />
SEGURIDAD GENERAL 38<br />
INFORMACIÓN GENERAL 39<br />
I. DESEMBALAJE 39<br />
II. CARACTERISTICAS 39<br />
III. MANDO A DISTANCIA(RCU) 40<br />
IV. COMO CONFIGURAR EL MANDO A DISTANCIA CON LA TV 42<br />
V. PANEL FRONTAL 44<br />
VI. PANEL TRASERO 45<br />
INSTALACIÓN DEL EQUIPO 46<br />
GUÍA LISTA DE CANALES 47<br />
GUÍA MENÚ 49<br />
MENÚ PRINCIPAL 49<br />
I . GESTOR DE CANALES 49<br />
I I. INSTALACIÓN 51<br />
III. OPCIONES 56<br />
IV. UTILIDAD 58<br />
V. ACCESORIOS 59<br />
PVR Guide 60<br />
SOLUCIÓN DE PROBLEMAS 67<br />
ESPECIFICACIONES 68<br />
Lista de Marca 178<br />
Para desconectar el receptor, la toma de corriente debe ser retirada del<br />
enchufe principal.<br />
<strong>MAX</strong>_<strong>COMBO</strong>_<strong>NET</strong>_manual_print REV2.0.pdf 41 31/01/2013 12:51:48<br />
37
SEGURIDAD GENERAL<br />
Por favor, leer las siguientes recomendaciones atentamente para evitar el riesgo de posibles<br />
daños del equipo.<br />
No cubrir el receptor y mantener limpio el espacio alrededor del equipo.<br />
Comprobar la tensión de entrada al receptor AC 90~240V, 50Hz~60Hz, 12V 2.5A Adaptor<br />
Mantener los lÍquidos lejos del receptor.<br />
El receptor no debe ser expuesto a goteos o salpicaduras, ni colocar objetos llenos de lÍquido<br />
en el receptor.<br />
Utilizar un trapo blando y un jabón de limpieza suave para limpiar la carcasa.<br />
No bloquear las salidas de ventilación del receptor, las cuales le<br />
protegen de calentamientos.<br />
Por favor, mantener el receptor en un espacio abierto.<br />
No permitir que el receptor sea expuesto a condiciones de mucho calor,<br />
frio ó humedad.<br />
No usar ningún cable ni accesorios no recomenados. Estos podrían dañar su equipo.<br />
Por favor, desconectar el receptor del enchufe y el cable de antena, cuando no se vaya a<br />
usar durante un largo tiempo.<br />
No quitar la tapadera para reducir el riesgo de descargas eléctrica.<br />
No intentar reparar equipo por Ud. mismo.<br />
Llevarlo a un servicio técnico autorizado.<br />
El Manual puede ser actualizado por las versiones.<br />
38<br />
AVISO<br />
<strong>MAX</strong>_<strong>COMBO</strong>_<strong>NET</strong>_manual_print REV2.0.pdf 42 31/01/2013 12:51:48
INFORMACIÓN GENERAL<br />
I.DESEMBALAJE<br />
Por favor, asegurarse de que los siguientes articulos están incluidos con el receptor.<br />
1) Mando a distancia (RCU)<br />
2) Pilas (2EA)<br />
3) CD con manual de usuario<br />
4) 12V 2.5A Adaptor<br />
II. CARATERISTICAS<br />
Soporta MPEG-2, MPEG-4, H.264 y toda la Norma DVB<br />
Receptor Digital HD Combo (Satelite y Terrestre)<br />
2 Lectores de Tarjetas<br />
DiSEqC 1.0, 1.1 y 1.2<br />
Ajuste de aspecto 4:3 (16/9 crop), 4:3 (16/9 letterbox), 16:9 (4/3 pillar box)<br />
OSD de fácil de manejo<br />
10.000 canales programables<br />
Soporta Audio Multi-lenguaje / Soporta Menu Multi-lenguaje<br />
Lista de favoritos<br />
Control paterno<br />
EPG (Guia Electronica de Programas) en pantalla<br />
Visualización en pantalla con 65.536 colores<br />
Búsqueda ciega y Potente EPG<br />
Función Zoom en Pausa<br />
Dolby Digital Bitstream a través de S / PDIF (óptico)<br />
Salida seleccionable 1080p, 1080i, 720p, 576p y 576i<br />
Puerto USB 2.0 (Acceso al disco duro, memoria USB, otros etc...)<br />
Actualización de software y lista de canales a través del puerto USB 2.0 y RS232<br />
Reproduce archivos de audio via USB 2.0<br />
Funciones PVR via USB<br />
Reproducir ficheros grabados en el ordenador<br />
Programar una grabación a traves de EPG<br />
Reproduce archivos de video via USB 2.0<br />
Home streaming<br />
(2012 11 05) manual.indd 43 2012-11-05 8:48:23<br />
<strong>MAX</strong>_<strong>COMBO</strong>_<strong>NET</strong>_manual_print REV2.0.pdf 43 31/01/2013 12:51:48<br />
39
INFORMACIÓN GENERAL<br />
40<br />
III MANDO A DISTANCIA (RCU)<br />
<strong>MAX</strong>_<strong>COMBO</strong>_<strong>NET</strong>_manual_print REV2.0.pdf 44 31/01/2013 12:51:48
INFORMACIÓN GENERAL<br />
III MANDO A DISTANCIA (RCU)<br />
1. POWER Conmuta al receptor entre operativo y en modo stand by.<br />
2. MUTE Habilita o deshabilita el audio.<br />
3. TV Modo de TV.<br />
4. DVD Modo de DVD.<br />
5. VCR Modo de VCR.<br />
6. STB Modo de STB.<br />
7. TV / RADIO Conmuta entre canales de TV y Radio.<br />
8. RECALL Selecciona el canal que estabamos viendo anteriormente.<br />
9. AV / TV Selecciona el modo TV ó Radio.<br />
10. PR Selecciona el canal que estabamos viendo anteriormente.<br />
11. Fn Administrador de archivos de red / Resetear.<br />
12. V. Format Cambia a Tipo HD.<br />
13. ZOOM Selecciona la opción ZOOM IN/OUT.<br />
14. Fn2 Reservado.<br />
15. Mueve abajo una página en la lista de canales.<br />
16. Mueve arriba un página en la lista de canales (Selecciona el zoom in/out).<br />
17. V+ / V- Sintoniza el volume arriba o abajo.<br />
18. P+ / P- Cambia canales arriba o abajo en el modo normal de canales.<br />
19. Cambia canales o mueve las opciones en el menú<br />
20. Ajusta el volumen ó mueve para la izda. Y dcha. en las del menú.<br />
21. MENU Muestra el menú principal en la pantalla.<br />
22. EXIT Regresa al menu anterior ó a la vista del modo normal desde un menú.<br />
23. INFO Muestra la caja de información del progarama en la pantalla y editar el nombre de<br />
lista de canal favorito.<br />
24. STOP Para la grabación ó la reproducción.<br />
25. PLAY Visualiza la lista de ficheros y reproduce a velocidad normal.<br />
26. PAUSE Hacer Pausa en la imagen ó volver a imagen norma.<br />
27. RECORD Grabar los programas.<br />
28. REWIND Se usa para rebobinar.<br />
29. F / F Se usa para avanzar rápidamente.<br />
30. AUDIO Change the audio languages.<br />
31. EPG<br />
Display the TV or Radio program guide.<br />
32. Subtitles Habilita el modo subtitulos.<br />
33. Teletext Habilita el modo teletexto.<br />
34. Numeric buttons Seleccionar canales de TV o Radio y menú individual.<br />
35. FAV Cambia la lista de favoritos seleccionados.<br />
36. SAT Cambia a la lista de satélites seleccionados.<br />
<strong>MAX</strong>_<strong>COMBO</strong>_<strong>NET</strong>_manual_print REV2.0.pdf 45 31/01/2013 12:51:48<br />
41
INFORMACIÓN GENERAL<br />
42<br />
IV. COMO CONFIGURAR EL MANDO A DISTANCIA A LA TV<br />
4<br />
2<br />
5<br />
<strong>MAX</strong>_<strong>COMBO</strong>_<strong>NET</strong>_manual_print REV2.0.pdf 46 31/01/2013 12:51:49<br />
3<br />
1
INFORMACIÓN GENERAL<br />
IV. COMO CONFIGURAR EL MANDO A DISTANCIA A LA TV<br />
I. Búsqueda manual<br />
En primer lugar, encienda su televisor.<br />
1) Pulse el botón ( STB o TV o VCR o DVD ) + "OK" al mismo tiempo durante 2 o 3 segundos. La luz del botón<br />
seleccionado se quedara fija y entrará en modo de programación.<br />
2) Encuentre el código de 3 dígitos en el listado por marcas e insértelo uno a uno. Cuando finalice de introducir<br />
los 3 dígitos, si es el correcto, el dispositivo (TV o VCR o DVD) se apagará.<br />
3) A continuación pulse OK para grabar la configuración. (La luz del botón seleccionado parpadeara dos veces).<br />
*NOTA: Si no son capaces de encontrar el código de TV que está usando actualmente, por favor, realice lo siguiente.<br />
"Búsqueda Automática". El RCU encontrará el código automáticamente y trabajará correctamente.<br />
II. Búsqueda automática (Usando teclas de canal arriba y canal abajo, CH+ y CH-).<br />
1) Pulse el botón ( STB o TV o VCR o DVD ) + "OK" al mismo tiempo durante 2 o 3 segundos. La luz del botón<br />
seleccionado se quedara fija y entrará en modo de programación.<br />
2) Presiona CH+ o CH- en el mando para encontrar un dispositivo equivalente. En el momento que el RCU<br />
encuentre el código correcto, el dispositivo (TV o VCR o DVD se apagará).<br />
3) A continuación pulse OK para grabar la configuración. (La luz del botón seleccionado parpadeara dos veces).<br />
III. Reseteo de fábrica<br />
1) Pulse Botón TV + REC al mismo tiempo durante más de 5 segundos.<br />
2) El botón seleccionado se apagará y se encenderá "TV, DVD, VCR STB" 3 veces uno a uno y el RCU volverá al<br />
modo por defecto.<br />
<strong>MAX</strong>_<strong>COMBO</strong>_<strong>NET</strong>_manual_print REV2.0.pdf 47 31/01/2013 12:51:49<br />
43
INFORMACIÓN GENERAL<br />
44<br />
V. PANEL FRONTAL<br />
1. POWER Conmuta el receptor entre encendido y Standby.<br />
2. USB Conectar al Puerto USB.<br />
3. LECTOR DE TARJETAS Insertar Tarjeta.<br />
1<br />
3<br />
5 6 7 10 12<br />
Nota: No todas las “memorias USB 2.0” son compatibles con nuestro producto.<br />
2<br />
1 2 3<br />
4 8 9 11<br />
<strong>MAX</strong>_<strong>COMBO</strong>_<strong>NET</strong>_manual_print REV2.0.pdf 48 31/01/2013 12:51:49
INFORMACIÓN GENERAL<br />
VI. PANEL TRASERO<br />
1<br />
2<br />
3<br />
4 8 9 11<br />
1. AERIAL Conectar al cable de antena Terrestre.<br />
2. LOOP OUT Conectar a otro STB (receptor).<br />
3. SAT IN Conectar al cable de antenna de Satélite.<br />
4. LOOP OUT Conectar a otro STB (receptor).<br />
5. TV SCART Conectar al cable EUROCONECTOR TV.<br />
6. HDMI Conectar a la entrada HDMI del TV.<br />
7. RS 232 Conectar al ordenador personal para actualizaciones de software.<br />
8. Ethernet Conectar al cable LAN.<br />
9. USB Conectar al Puerto USB.<br />
10. OPTICA Salida para conectar a un amplificador.<br />
11. ADAPTOR Conectar el adaptador.<br />
12. BOTÓN DE ALIMENTACIÓN Encendido / Apagado.<br />
5 6 7 10 12<br />
<strong>MAX</strong>_<strong>COMBO</strong>_<strong>NET</strong>_manual_print REV2.0.pdf 49 31/01/2013 12:51:49<br />
45
INSTALACIÓN DEL EQUIPO<br />
Esta sección explica varias maneras de conectar el receptor a tu TV, VCR<br />
y sistema HI-FI.<br />
Se puede elegir una de las siguientes configuraciones que recomendamos.<br />
Si tiene algún problema ó necesita ayuda, consulte a su distribidor ó punto de venta.<br />
Por favor comprobar que los siguientes articulos están incluidos con el receptor en su caja.<br />
I. CONECTAR EL RECEPTOR AL TV CON CABLE EUROCONECTOR<br />
I-1.Conectar el receptor al TV con cable euroconector<br />
Conectar un extremo del cable euroconector al conector TV SCART del panel trasero<br />
del receptor y el otro extremo al conector SCART del TV.<br />
46<br />
<strong>MAX</strong>_<strong>COMBO</strong>_<strong>NET</strong>_manual_print REV2.0.pdf 50 31/01/2013 12:51:49
GUÍA LISTA DE CANALES<br />
1. Modo de vista normal<br />
a) Cuando se selecciona un canal, la barra de información<br />
aparece automáticamente en la pantalla por unos pocos<br />
segundos. Esta barra proporciona la información del<br />
canal actua.<br />
b) Presionar la tecla INFO para ver la información durante<br />
el modo de vista normal.<br />
2. Lista sencilla de canales<br />
a) Presionar la tecla OK en el modo de vista mormal para ir<br />
a la lista de canales.<br />
b) Cuando es visualizado “detalles”en la lista de canales,<br />
presionar la recla ROJA para ir a la lista simple de<br />
canales.<br />
3. Lista de canales de Detalles<br />
a) Presionar la tecla OK en el modo de vista normal para ir<br />
a la lista de canales.<br />
b) Cuando la lista sencilla de canales es visualizada en la<br />
pantalla, presionar la tecia ROJA para ir a la lista de<br />
canales de Detalles.<br />
c) Presionar y para ordenar alfabéticamente.<br />
d) Presionar la tecla SAT para ordenar por satélite y la<br />
tecla FAV para favoritos 1-8.<br />
e) Presionar la tecla VERDE para volver a Todos los<br />
Canales ó SALIR (EXIT) para visualizar nuevamente el<br />
canal.<br />
f) Presionar la tecla SAT para mostrar la Ventana de<br />
Satélites y seleccionar un satélite. Será visualizada la<br />
Lista de Canales del satélite seleccionado.<br />
g) Presionar la tecla FAV para mostrar la Ventana de<br />
Favoritos y seleccionar una lista de FAV. Será visualizada<br />
la Lista de FAV seleccionada.<br />
h) Presionar la tecla Verde, entonces todos los canales<br />
encontrados serán visualizados.<br />
<strong>MAX</strong>_<strong>COMBO</strong>_<strong>NET</strong>_manual_print REV2.0.pdf 51 31/01/2013 12:51:49<br />
47
48<br />
GUÍA LISTA DE CANALES<br />
4.EPG (Guía Electrónica de Programas)<br />
a) Presionar la tecla EPG en el modo de vista normal.<br />
b) Aparecerá la EPG del canal actual en la pantalla.<br />
c) Seleccionar el canal deseado para ver la EPG.<br />
d) Aparecerá como la foto que esta en la derecha.<br />
5. ZOOM IN/OUT<br />
a) Presionando la tecla página arriba ( ) desde la<br />
vista normal de un canal, se puede usar la función<br />
Zoom In/Out.<br />
b) Se puede seleccionar el tamaño del zoom con las<br />
teclas ROJA / VERDE.<br />
c) Se puede seleccionar la posición de comienzo con la<br />
tecla .<br />
d) Después de seleccionar el tamaño del Zoom y posición,<br />
se puede empezar la función zoom con la tecla<br />
OK.<br />
e) Con la tecla se puede mover la pantalla del<br />
zoom.<br />
<strong>MAX</strong>_<strong>COMBO</strong>_<strong>NET</strong>_manual_print REV2.0.pdf 52 31/01/2013 12:51:50
GUÍA MENÚ<br />
MENÚ PRINCIPAL<br />
Presionar la tecla MENU del mando a distancia para abrir la<br />
pantalla de la página principal La página principal será<br />
mostrado.<br />
1. Puede moverse dentro del menú principal presionando<br />
del mando a distancia.<br />
2. Presionar OK para confirmar la selección.<br />
3. Presionar EXIT ó MENÚ para volver al menú anterior.<br />
I. Gestor de Canales<br />
II. Instalación<br />
III. Opciones<br />
Esta sección ayuda a organizar canales acorde a las preferencia.<br />
1. Seleccionar Gestor de Canales en el menú principal con y presionar OK.<br />
2. Aparacerá en la pantalla la página de gestor de canales T.<br />
3. Seleccionar el modo que se quiere uilizar .<br />
4. Para ver el canal que se quiere elegir, ir al canal y presionar la tecla ROJA.<br />
5. Presionar EXIT para volver al menú anterior ó presionar MENU para ir al canal actual que se estaba viendo.<br />
I-1. Favorito<br />
I-2. Renombrar<br />
I-3.Mover<br />
I-4. Bloquear<br />
I-5. Borrar<br />
I-1. Favorito<br />
IV. Utility<br />
V. Accessory<br />
I. Gestor de Canales<br />
1. Utilizando las teclas ir al modo favorito y<br />
presionar la tecla AMARILLA para elegir entre<br />
Favorito 1....8.<br />
2. Presionar OK en el canal que se quiere añadir ó borra.<br />
3. Una marca aparecerá al final del nombre del canal<br />
seleccionado. Para borrar presionar OK otra vez.<br />
4. Los canales seleccionados serán memorizados<br />
automáticamente.<br />
5. Si se quiere comprobar la Lista de Favoritos<br />
memorizada ir al otro modo (Renombrar-Borrar)<br />
excepto Favoritos y presionar la tecla FAV para<br />
comprobar Favoritos 1…8.<br />
6. Presionar EXIT para volver al menu anterior ó presionar MENU<br />
para volver al canal actual que se estaba viendo.<br />
7. Presionar la tecla AZUL para renombrar Favorito.<br />
<strong>MAX</strong>_<strong>COMBO</strong>_<strong>NET</strong>_manual_print REV2.0.pdf 53 31/01/2013 12:51:50<br />
49
50<br />
GUÍA MENÚ<br />
I. GESTOR DE CANALES<br />
I-2. Renombrar<br />
1. Utilizando las teclas ir al modo de Renombrar.<br />
2. Seleccionar el canal que se quiere renombrar utilizando<br />
presionar OK.<br />
3. Se visulaizará un teclado en la pantalla.<br />
4. Editar el nombre utilizando el teclado NÚMERICO y /ó PALABRAS .<br />
5. Presionar la tecla AMARILLA para renombrar Favorito 1..8 y presionar<br />
la tecla AZUL para renombrar el Satélite.<br />
6. Presionar EXIT para volver al menu anterior ó presionar MENU<br />
para ir al canal actual que se estaba viendo.<br />
I-3. Mover<br />
1. Utilizando las teclas ir al modo Mover.<br />
2. Seleccionar los canales que se quieren mover presionando la tecla OK .<br />
3. Mover el cursor al lugar donde se quiere mover y presionar<br />
la tecla VERDE.<br />
4. Presionar EXIT para volver al menú anterior ó presionar MENU<br />
para ir al canal actual que se estaba viendo.<br />
I-4. Bloquear<br />
1. Utilizando las teclas ir al modo Bloquear.<br />
2. Seleccionar los canales que se quiere bloquear y presionar OK.<br />
Aparecerá al final del nombre del canal seleccionado Para<br />
borrar presionar OK otra vez.<br />
3. Precionar EXIT para ir al menú principal ó presionar MENU para<br />
ir al canal actual que se estaba viendo.<br />
I-5. Borrar<br />
1. Utilizando las teclas ir al modo Borrar.<br />
2. Seleccionar el canal que se quiere Borrar y presionar OK.<br />
Aparecerá una ( ) en el número de canal seleccionado. Para<br />
borrar presionar la tecla AZUL otra vez.<br />
3. Presionar la tecla AMARILLA para borrar TP. Seleccionar un canal y presionar la tecla AZUL. Todos los canales<br />
de ese TP serán seleccionados automáticamente.<br />
4. Presionar la tecla AMARILLA para borrar un Satélite. Seleccionar un canal y presionar la tecla AZUL. Todos los<br />
canales de ese satélite serán seleccionados automáticamente.<br />
5. Presionar EXIT par air al menú anterior ó presionar MENU para ir al canal actual que se estaba viendo.<br />
6. Aparecerá en el display una caja con un mensaje.<br />
7. Seleccionar OK en la caja del mensaje y presionar OK para borrar los canales marcados.<br />
<strong>MAX</strong>_<strong>COMBO</strong>_<strong>NET</strong>_manual_print REV2.0.pdf 54 31/01/2013 12:51:50
GUÍA MENÚ<br />
II. INSTALACIÓN<br />
Esta sección ayuda a configurar la antena y buscar satélite<br />
ó transpondedores, etc…Seleccionar instalación en el<br />
menú principal y presionar OK. Presionar EXIT para ir al<br />
menú principal ó presionar MENU para volver al<br />
canal actual que se estaba viendo.<br />
II-1. Satélite Buscar<br />
II-2. Conmutador DiSEqC<br />
II-3. Configuración de Motor<br />
II-4. Terrestre Buscar<br />
II-5. Home Streaming<br />
II-6. Configuración de Fábrica<br />
II-1 Satélite Buscar<br />
1. Se puede mover el cursor utilizando presionando<br />
Ok, cunado se seleccione el valor deseado.<br />
a) Satélite<br />
- Presionar OK para visualizar la lista de satélites.<br />
- Seleccionar el satélite deseado y presionar OK.<br />
b) DiSEqC<br />
- Presionar OK para visualizar la lista de los puertos de<br />
DiSEqC.<br />
- Seleccionar el DiSEqC deseado y presionar OK.<br />
c) LNB<br />
- Presionar OK para visualizar la lista de<br />
frecuencias de LNB.<br />
- Selecionar el LNB deseado y presionar OK.<br />
- Se puede también introducir directamente los números utilizando<br />
el teclado numérico en el mando a distancia.<br />
d) 22KHz ToneTono 22KHz<br />
- Seleccionar entre Ninguno, 0 KHz ó 22 KHz<br />
dependiendo de la conmutación de antena.<br />
e) Opción Búsqueda<br />
- Presionar OK para visualizar la lista de Opciones de<br />
Búsqued.<br />
- Selecionar la opción Búsqueda deseada y presionar OK.<br />
f) Buscar<br />
- Presionar Buscar para empezar la búsqueda de canales.<br />
- Renombrar SAT: Para renombrar un SAT, presionar la tecla<br />
Verde en el mando a distancia.<br />
Editar : Para Editar un TP, presionar<br />
la tecla ROJA en el mando a<br />
distancia.<br />
<strong>MAX</strong>_<strong>COMBO</strong>_<strong>NET</strong>_manual_print REV2.0.pdf 55 31/01/2013 12:51:51<br />
51
GUÍA MENÚ<br />
II. INSTALACIÓN<br />
f) Control de Motor<br />
Seleccionar la posición utilizando y presionar OK.<br />
Aparecerá en la pantalla una caja de mensaje.<br />
- Memorizar la Posición del motor para el satélite<br />
seleccionado.<br />
- Ir a Posición Satélite : Mover el motor a la posición memorizada<br />
del satélite seleccionado.<br />
- Ir al centro: Ir al centro del motor.<br />
- Limit off: Eliminar los límites Este y Oeste.<br />
- Configurar Límite Este: Configurar la actual posición<br />
como Límite Este.<br />
- Configurar Límite Oeste: Configurar la actual posición<br />
como Límite Oeste.<br />
g) Posición de satélite<br />
- Introducir directamente la posición utilizando el<br />
teclado NUMÉRICO en el mando a distancia.<br />
- Seleccionar la dirección utilizando ( Oeste /<br />
Este).<br />
h) Opción Búsqueda<br />
- Presionar OK para visualizar la lista de Busqueda de<br />
canales.<br />
- Presionar la Opción de Búsqueda que se quiera y<br />
presionar OK.<br />
2. Editar la posición local<br />
- Presionar el teclado VERDE para editar la posición local.<br />
- Recalcular Posición.<br />
a) Longitud<br />
- Introducir directamente la longitud utilizando el teclado numérico del mando.<br />
- Seleccionar la dirección utilizando (Oeste/Este).<br />
b) Latitud<br />
- Introducir directamente la latitud utilizando el teclado numérico del mando.<br />
- Seleccionar la dirección (Norte/Sur).<br />
- Resetear Posición : Resetea todas la posiciones<br />
memorizadas del motor<br />
i) Buscar<br />
- Presionar Buscar para empezar la búsqueda de<br />
canales.<br />
- Presionar OK para empezar la búsqueda.<br />
TP EDIT : Para Editar TP, presionar el<br />
teclado ROJA en el mando a<br />
distancia.<br />
3. Presionar EXIT para regresar al menú anterior ó presionar MENU para ir al canal que se<br />
estaba viendo.<br />
<strong>MAX</strong>_<strong>COMBO</strong>_<strong>NET</strong>_manual_print REV2.0.pdf 57 31/01/2013 12:51:52<br />
53
GUÍA MENÚ<br />
54<br />
II. INSTALACIÓN<br />
II-4. Terrestre Buscar<br />
1. Seleccionar Buscar Canales en Instalación usando<br />
y presionar OK<br />
2. 1) Seleccionar la region desde donde se quiere hacer la<br />
búsqueda.<br />
2) Se puede seleccionar el tipo de búsqueda entre Auto y<br />
Manual usando.<br />
3) Auto<br />
a) Seleccionar “Buscar” en el pantalla y presionar la tecla<br />
OK para buscar canales.<br />
b) Presionar Exit ó Menú al termino de la búsqueda.<br />
4) Manual<br />
a) Seleccionar el Canal Mux el cual se quiere buscar<br />
utilizando .<br />
b) La Frecuencia será visualizada automáticamente según<br />
el Canal Mux seleccionado.<br />
II-5. Home Streaming<br />
1. Ajustes del PC<br />
***Ejecutar el programa “home streaming”.<br />
a) Ir a ‘Preference”.<br />
b) Seleccionar ‘Default URL’ y asignar la carpeta del PC<br />
usando la tecla “Browse” Por defecto está asignada la<br />
carpeta C:\download, pero debe especificar la carpeta<br />
de destino para poder recibir archivos de película en su<br />
PC.<br />
Nota: solo está disponible el servidor por defecto.<br />
2. Ajustes del STB<br />
a) Ir a Home streaming menu ( Menu Accesorios red<br />
Home streaming ) y click Home streaming.<br />
b) Aparece ventana para editar el nombre de la IP & el<br />
servidor de entrada IP con las teclas numéricas del<br />
mando a distancia.<br />
c) La dirección IP deberá ser igual a la IP de la carpeta<br />
preference en el programa home streaming.<br />
<strong>MAX</strong>_<strong>COMBO</strong>_<strong>NET</strong>_manual_print REV2.0.pdf 58 31/01/2013 12:51:52
GUIA MENU<br />
II. INSTALACION<br />
3. Reproduzca la película con home streaming.<br />
a) Pulse la tecla “Fn” y la lista de películas de su PC aparecerá<br />
en la pantalla de su televisor.<br />
b) Seleccione el archivo que usted desea ver y presione “OK”<br />
para reproducirlo.<br />
Por favor, mire la siguiente pantalla para entenderlo mejor.<br />
II-6. Confuguración de Fábrica<br />
Usar la función de Configuración de Fábrica solamente<br />
cuando se quiera volover al receptor a la condición de configuración<br />
de fábrica. Todas las configuraciones y canales<br />
serán borrados.<br />
1. Seleccionar Configuración de Fábrica en<br />
Instalación utilizando y presionar OK.<br />
2. Aparecerá en la pantalla una caja de mensaj.<br />
3. Seleccionar OK para volver al receptor a la<br />
condición de configuración de fábrica y presionar OK.<br />
4. Presionar EXIT para volver al menú anterior ó<br />
presionar MENU para ir al canal actual que se estaba viendo.<br />
<strong>MAX</strong>_<strong>COMBO</strong>_<strong>NET</strong>_manual_print REV2.0.pdf 59 31/01/2013 12:51:52<br />
55
GUÍA MENÚ<br />
III. OPCIONES<br />
Esta sección ayuda a confugurar el idioma del<br />
OSD, hora, etc. Seleccionar Opciones en el menu<br />
principal y presionar OK.<br />
Presionar EXIT para volver al menú anterio ó presionar<br />
MENU para ir al canal actual que se<br />
estaba viendo<br />
III-1. Configuración OSD<br />
III-2. Configuración TV<br />
III-3. Configuración Hora<br />
III-4. Configuración Bloqueo Patern<br />
III-1.Configuración OSD<br />
1. Seleccionar configuración OSD en Opciones<br />
utilizando y presionar OK .<br />
a) Idioma OSD<br />
- Presionar OK para visualizar la list de idiomas<br />
de OSD.<br />
- Seleccionar el idioma que se quiera y presionar OK.<br />
b) Idioma de Audio<br />
- Presionar OK para visualizar la list de idiomas de Audio.<br />
- Seleccionar el idioma que se quiera y presionar OK.<br />
c)Idioma subtítulos<br />
- Presionar OK para visualizar Subtítulos.<br />
- Seleccionar el idioma deseado y presionar OK.<br />
c) Barra de información del Display<br />
- Presionar OK para visualizar la lista de tiempo de barra de Información del display.<br />
- Selecciona los segundos que se quiere visualizar y pulsar OK.<br />
e) Transparencia<br />
- Ajuste de nivel de transparencia.<br />
2. Presionar EXIT para volver al menú anterior ó precionar MENU para volver al<br />
canal actual que se estaba viendo.<br />
56<br />
<strong>MAX</strong>_<strong>COMBO</strong>_<strong>NET</strong>_manual_print REV2.0.pdf 60 31/01/2013 12:51:52
GUÍA MENÚ<br />
III. OPCIONES<br />
III-2. Configuración de TV<br />
1. Seleccionar Configuración de TV en Opciones utilizando las<br />
teclas (arriba / abajo), y presionar OK.<br />
a) Tipo HD<br />
- Seleccionar la salida de video HD.<br />
b) Tipo TV<br />
- Seleccionar el tipo de TV.<br />
c) Relación de aspecto de pantalla<br />
- Seleccionar el ratio de pantalla.<br />
d) Control de Pantalla<br />
- Seleccionar el modo de visualización de pantalla.<br />
e) Brillo<br />
- Ajuste del brillo de pantalla.<br />
f) Contraste<br />
- Ajuste del contraste de pantalla.<br />
g) Saturación<br />
- Ajuste de la Saturación de la pantalla.<br />
2. Presionar EXIT para volver al menú anterior ó presionar<br />
MENU para volver al canal actual que se estaba viendo.<br />
III-3. Configuración de la Hora<br />
Configurar la hora local acorde a la localización donde estemos.<br />
1. Seleccionar Configuración Hora en Opciones y presionar OK.<br />
2. Aparecerá en la pantalla la página del Ajuste de Hor.<br />
3. Mover el cursor utilizando , y preionar OK cunado<br />
se haya seleccionado el valor adecuado (Introducir la hora<br />
directamente utilizando el tecaldo numérico del mando a distancia)<br />
4. Presionar EXIT para volver al menú anterior ó presionar<br />
MENU para volver al canal actual que se estaba viendo<br />
III-4. Configuración de Bloqueo Patern<br />
1. Seleccionar Configuración Bloqueo Paterno en Opciones y<br />
presionar OK.<br />
2. Aparecerá en la pantalla la página de Configuración<br />
Bloqueo Patern<br />
3. Se puede bloquear y desbloquear el Bloqueo Paterno<br />
seleccionando ON ó OFF utilizando .<br />
4. Se puede bloquear y desbloquear el Bloqueo de Instalación<br />
seleccionando ON ó OFF utilizando (para las configuraciones instaladas)<br />
5. Introducir la nueva contraseña (password), si se quiere cambiar la catual contraseña.<br />
6. Confirmar la nueva contraseña introduciendo la misma otra vez.<br />
7. Presionar EXIT para volver al menu para vlover al canal actual que se estaba viendo.<br />
Nota : CONTRASEÑA POR DEFECTO ES 0000<br />
<strong>MAX</strong>_<strong>COMBO</strong>_<strong>NET</strong>_manual_print REV2.0.pdf 61 31/01/2013 12:51:53<br />
57
GUÍA ME NÚ<br />
V. ACCESORIOS<br />
Esta sección ayuda a usar USB etc. Seleccionar<br />
Utilidades en la Página Pricipal utilizando<br />
· V - 1. USB<br />
· V - 2. (Smart Card) Menú Tarjeta<br />
· V - 3. Red / Videoclub<br />
V -1 USB<br />
Este receptor esta equipado con Puerto USB.<br />
1. Seleccionar USB en Utilidades uitilizando y presionar<br />
OK.<br />
2. Si des ea cambiar de modo (S/W upgrade, B ootL oader<br />
Upgrade), presionar el teclado ROJA del mando a distancia.<br />
3. Seleccionar el fichero que desea “actualizar” utilizando<br />
y pr es ionar OK .<br />
4. Una vez que haya “actualizado” el fichero seleccionado el<br />
receptor reiniciará automáticamente.<br />
V -2 (Smart Card) Menú Tarjeta<br />
El receptor está equipado con dos ranuras de tarjeta inteligente<br />
diversas que tienen acceso a los canales codificados de pago.<br />
Los programas que pueden verse encriptados son determinados<br />
por la tarjeta que se utilize.<br />
1. Seleccione Smartcard en el menú de accesorios con<br />
y pulse Aceptar.<br />
2. Inserte la tarjeta inteligente en la ranura 1 o 2, a continuación,<br />
mostrará el nombre de la tarjeta en la pantalla.<br />
3. El nombre de la ranura es diferente según cada tarjeta.<br />
4. Pulse EXIT para volver al menú anterior o presione MENU<br />
para ir al canal actual.<br />
V - 3 RED / Videoclub<br />
Este menú contiene múltiples funciones, como vemos<br />
a continuación:<br />
1. Descarga de software via red.<br />
2. Home-Streaming<br />
3. Youtube<br />
4. Videoclub<br />
5. RSS / Twitter / El tiempo<br />
6. Descarga lista de canales.<br />
<strong>MAX</strong>_<strong>COMBO</strong>_<strong>NET</strong>_manual_print REV2.0.pdf 63 31/01/2013 12:51:53<br />
59
PVR GUIDE<br />
PVR GUIDE<br />
I. Dispositivos Recomendados<br />
- Unidad de Disco Duro Externo USB.<br />
- Flash memory stick.<br />
- Tipo de Formato: FAT16/32 (el sistema no soporta NTFS,<br />
ni otros ficheros desistema).<br />
II. Función de Grabación<br />
II-1 Programar Grabación<br />
1. Programar la Hora de Grabación<br />
: Configurar la hora de grabación en ” Utilidades <br />
Temporizador ” para grabar a la hora deseada.<br />
NOTA : Configuración de la “Hora de Grabación”<br />
- El receptor está configurado por defecto como se muestra<br />
en la figura de abajo.<br />
- Cambiar “Apagado” a “Grabación” en la opción Activo.<br />
- Una vez está configurado en el menú Activo como<br />
“Recording”, se mostrará los detalles del menú para<br />
PVR (Modo, Tipo de Canal, Nombre de Canal, Hora de<br />
Comienzo, Duración).<br />
- Presionar la tecla “Ok” para seleccionar el Nombre del<br />
Canal.<br />
2. Programar una Grabación a través de la EPG<br />
: Utilizar la EPG para grabar un evento determinado.<br />
- Presionar la tecla EPG para ir al menú de EPG mientras<br />
se está viendo un programa en la pantalla.<br />
- Para seleccionar la hora de un evento: Mover dentro de<br />
la EPG al evento a seleccionar y presionar ”tecla<br />
RECORD” en el mando a distancia.<br />
- Si se quiere cancelar, presionar una vez mas la tecla<br />
“RECORD”.<br />
- Si se quiere programar varias grabaciones, mover y presionar<br />
la tecla “RECORD” en el mando a distancia.<br />
60<br />
<strong>MAX</strong>_<strong>COMBO</strong>_<strong>NET</strong>_manual_print REV2.0.pdf 64 31/01/2013 12:51:54
PVR GUIDE<br />
PVR GUIDE<br />
II. Función de Grabación<br />
II-2 Grabación inm ediata<br />
- Presionar la “tecla RECORD” en el mando a distancia para<br />
empezar la grabación.<br />
- Mientras se está grabando el programa.<br />
- Presionar la tecla “PAUSE” para ejecutar la opción de “Time<br />
Shift”.<br />
- Se puede usar las teclas “IZDA / DCHA” para ver el momento<br />
deseado al que se quiere volver de la grabación del programa.<br />
- Presionar la tecla “ OK ” en el mando a distancia para<br />
mostrar la lista de canales de la misma frecuencia que se<br />
pueden visualizar mientras se está grabando.<br />
Durante la Grabación se pueden ver otros canales, los cuales<br />
están situados en la misma frecuencia. En caso de ver otros<br />
canales durante la grabación. Se debe volver al canal que se<br />
está grabando si se desea parar la grabación.<br />
- Si se presiona la tecla “STOP” en el mando a distancia,<br />
parará la grabación y se almacenará en el dispositivo USB.<br />
<strong>MAX</strong>_<strong>COMBO</strong>_<strong>NET</strong>_manual_print REV2.0.pdf 65 31/01/2013 12:51:55<br />
61
62<br />
PVR GUIDE<br />
PVR GUIDE<br />
III. Función Reproducción<br />
- Para reproducir los programas grabados previamente, presionar<br />
la tecla “Play” en el mando a distancia.<br />
- Utilizar las teclas cursores (arriba / abajo) para seleccionar<br />
el fichero que se desea reproduciry presionar la tecla “OK”.<br />
- Mientras se está reproduciendo un programa.<br />
- Si se presiona las teclas “IZDA / DCHA” en el mando a distancia<br />
mientras se está reproduciendo un fichero, la imagen<br />
se parará y empezará la reproducción desde el momento al<br />
que se ha movido con los cursores del mando a distancia.<br />
Si se quiere reproducir otro fichero grabado durante una<br />
reproducción, presionar la tecla “Play”.<br />
IV. Función de avance y retroceso<br />
- Si se presiona la tecla “FF(avance rapido hacia adelante)”<br />
durante el Timeshift ó una reproducción, el fichero será<br />
reproducido a una velocidad de X2, y si se presiona una vez<br />
mas, el fichero será reproducido a una velocidad de X8.<br />
- Si se presiona la tecla “REW(Rebobinar)” durante el Time<br />
shift ó una reproducción, el fichero será rebobinado a una<br />
velocidad de X2 y si se presiona una vez mas, el fichero será<br />
rebobinado a una velocidad de X8.<br />
- Las funciones FF/REW volverán a su reproducción normal al<br />
presionar la tecla ”PLAY”.<br />
<strong>MAX</strong>_<strong>COMBO</strong>_<strong>NET</strong>_manual_print REV2.0.pdf 66 31/01/2013 12:51:55
PVR GUIDE<br />
PVR GUIDE<br />
V. Función TimeShift<br />
- Si se quiere ejecutar “Time Shift” en modo en vivo se debe<br />
configurar en “Encendido (On)” en la Opción PVR del Time<br />
Shift (Accesorios PVR TimeShift “ON”).<br />
- Para empezar el Time Shift en modo en vivo, presionar<br />
“PAUSE” para empezar.<br />
- El Time shift será reproducido durante 30 minutos en el<br />
Modo en Vivo.<br />
- Para empezar la “Reproducción” durante el Timeshift, presionar<br />
la tecla “PLAY”.<br />
- Se puede mover la “posición de reproducción” utilizando las<br />
teclas ” IZDA / DCHA “ durante el Time Shift.<br />
VI. Formatear<br />
- Se puede hacer un formato FAT32 al dispositivo USB,<br />
estando formateado anteriormente tanto en FAT32 como en<br />
NTFS.<br />
- Tambien se puede Formatear estando en multi-partición el<br />
dispositivo USB.<br />
- Cuando es insertado un dispositivo formateado en NTFS,<br />
aparecerá un mensaje como el mostrado en la figura de<br />
abajo.<br />
- Presionar la tecla “OK” para mover a “C:, D:, E:, F: NEXT” en<br />
caso de tener Multi partición.<br />
- En caso de haber una multi partición NTFS, se debe formatear<br />
a FAT 32<br />
<strong>MAX</strong>_<strong>COMBO</strong>_<strong>NET</strong>_manual_print REV2.0.pdf 67 31/01/2013 12:51:56<br />
63
64<br />
PVR GUIDE<br />
PVR GUIDE<br />
VII. Reproducció n MP3<br />
- Seleccionar el fichero MP3 que se desea reproducir dentro<br />
del menú USB.<br />
- Después de seleccionar el fichero MP3, aparecerá una ven<br />
tana de reproducción de ficheros MP3.<br />
VIII. Reproducir ficheros JPG<br />
- Seleccionar el fichero JPG que se desea ver dentro del<br />
menú USB.<br />
- Presionar la tecla OK para ver el fichero .JPG que se<br />
deseaver.<br />
- Se puede rotar la imagen utilizando las teclas IZDA / DCHA.<br />
IX. Software Upgrade<br />
- Seleccionar el fichero * UAD con el que se quiere actualizar<br />
en el menú USB<br />
<strong>MAX</strong>_<strong>COMBO</strong>_<strong>NET</strong>_manual_print REV2.0.pdf 68 31/01/2013 12:51:56
PVR GUIDE<br />
PVR GUIDE<br />
X. Como reproducir “el fichero grabado en la<br />
opció n PVR del HD-XXX” en el PC ó DivX<br />
Player<br />
X-1 Como Reproducir desde el PC<br />
A) Abrir el reproductor KM Player.<br />
B) Seleccionar el Idioma.<br />
1) Pulsar el botón derecho del ratón Idioma elegir<br />
idioma<br />
C) Cambiar la extension del nombre del fichero grabado a<br />
“.mpg”.<br />
Ejemplo: Welcome to A_131821 Welcome to<br />
A_131821.mpg<br />
D) Seleccionar el fichero que se desea reproducir.<br />
1) Pulsar el botón derecho del ratón Open Files(S) <br />
Abrir Fichero(S) Seleccionar.<br />
X-2 Com o R epro du cir co n el programa “DivX<br />
Player”<br />
A) El formato del fichero debe ser cambiado al formato “.avi”<br />
para reproducirlo en el DivX Player.<br />
B) Seleccionar una carpeta de destino donde será alma cenado<br />
el fichero, el cual fue cambiado a “.avi”.<br />
1) Pulsar el botón derecho del Ratón Capture Select<br />
Capture Folder.<br />
C) Repetir los puntos A) B) C) D) del No.1 en como<br />
reproducir en el PC.<br />
D) Capturar el fichero el cual está siendo reproducido actualmente<br />
para convertir a *.avi.<br />
1) Pulsar el botón derecho del Ratón Capture Video<br />
Quick Capture.<br />
2) Entonces el fichero es memorizado en la carpeta designada<br />
en el formato *.avi.<br />
E) Si el fichero de reproducción es un canal SD del receptor,<br />
es memorizado en SD y si el fichero es HD ó H.264 y el<br />
usuario no tiene el programa DivX player, el cual no puede<br />
reproducir HD ó H.264 (al menos CPU sigma8634), se debe<br />
convertir el fichero a SD para que el DivX player general SD<br />
(CPU sigma8511) pueda reproducir el fichero.<br />
<strong>MAX</strong>_<strong>COMBO</strong>_<strong>NET</strong>_manual_print REV2.0.pdf 69 31/01/2013 12:51:56<br />
65
PVR GUIDE<br />
PVR GUIDE<br />
X-3 Com o c onvertir el f iche ro en el Divx<br />
Manager<br />
A) Abrir el programa Divx Manager.<br />
1) Setting Model Rapsody RSH-250/350<br />
B) Seleccionar la carpeta donde se encuentra el fichero que<br />
se desea convertir. Entonces aparecerá la información del<br />
fichero.<br />
C) Seleccionar el fichero que se desea convertir y seleccionar<br />
“Convert”.<br />
D) Seleccionar “Encoding Start” Empezará “Converting”.<br />
NOTA: Página Web para descargar<br />
1. Kmplayer<br />
1) Enter this site : http://2bwithu.tistory.com/245.<br />
2) Descargar los 2 ficheros a una carpeta y descomprimir el<br />
fichero. Después de la descomprensión, se puede instalar<br />
pulsando el fichero .exe.<br />
2. Divx Manger<br />
1) Entrar en la web :<br />
http://www.modix4u.co.kr/upboard/view.asp?fcprimkey=44<br />
2) Pulsar para version Inglés.<br />
66<br />
<strong>MAX</strong>_<strong>COMBO</strong>_<strong>NET</strong>_manual_print REV2.0.pdf 70 31/01/2013 12:51:57
SOLUCIÓN DE PROBLEMAS<br />
Problema<br />
Nada aparece en el display<br />
frontal ó no enciende la<br />
fuente de alimentación<br />
No hay imagen<br />
No hay sonido<br />
El mando a distancia no funciona<br />
El canal no opera ó está codificado<br />
Aparece “ No señal” en la<br />
pantalla<br />
Comprobar, Tuner defectuoso<br />
Se ha olvidado la contraseña<br />
Solución<br />
Comprobar la conexión del cable de alimentación con el<br />
enchufe de la pared.<br />
Comprobar la antena y ajustarla.<br />
Comprobar la conexión del cable y corregirlo.<br />
Comprobar el canal y la salida de Vídeo.<br />
Comprobar el volumen del TV y del receptor.<br />
Comprobar el estado del mute del TV y del receptor.<br />
Comprobar la conexión del cable y corregirla.<br />
Cambiar las pilas.<br />
Apuntar directamente el mando a distancia al receptor.<br />
Comprobar que nada bloquea el panel frontal.<br />
Comprobar que el Módulo de Acceso Condicional y la<br />
tarjeta son las adecuadas para ver el canal seleccionado.<br />
Comprobar que el Módulo de Acceso Condicional y la<br />
tarjeta están correctamente insertados.<br />
Comprobar la fuerza y la calidad de la señal en el menú.<br />
Comprobar el LNB y cambiarlo si fuese necesario.<br />
Comprobar el cable del LNB.<br />
Comprobar la antena y ajustarla.<br />
Ir a Opción y seleccionar información de Sistema.<br />
Contactar con el distribuidor.<br />
<strong>MAX</strong>_<strong>COMBO</strong>_<strong>NET</strong>_manual_print REV2.0.pdf 71 31/01/2013 12:51:57<br />
67
ESPECIFICACIONES<br />
.Conditional Access Module Interface<br />
Item Specification<br />
SMART CARD 2 SLOTS, ISO 7816, GSM11.11 and EMV (payment systems) compatibility<br />
. Tuner & Channel (DVB-S2)<br />
Item<br />
Specification<br />
Type 1 F Type, IEC169-24, Female<br />
Frequency Rage 950MHz to 2150MHz<br />
RF Impedance 75 Ohm unbanlanced<br />
Signal Level -65 to -25 dBm<br />
LNB Power 13.5/18.5Vdc +/- 5%, 0.5Amax, Overload Protected<br />
22KHz Tone Frequency : 22KHz +/- 2KHz, 0.6Vpp +/- 0.2V<br />
DiSEqC Control Version1.0, 1.2, Tone burst A/B<br />
Demodulation QPSK, 8PSK<br />
Input Symbol Rate<br />
FEC Decoder<br />
68<br />
DVB-S QPSK : 2~45 Msps<br />
DVB-S2 8PSK/QPSK : 10~30Msps<br />
1/2, 2/3, 3/4, 3/5, 4/5, 5/6, 8/9, 9/10 in DVB-S2 mode.<br />
1/2, 2/3, 3/4, 5/6 and 7/8 in DVB-S mode.<br />
. Tuner & Channel (DVB-T)<br />
Item Specification<br />
Type IEC60169-2(VHF/UHF) female, 75 ohm nominal<br />
Frequency Rage VHF : 170MHz to 230MHz<br />
UHF : 470MHz to 862MHz<br />
Signal Level -78.5dBm ~ -25dBm<br />
(64QAM, Code Rate 2/3, Guard Interval 1/8,Gaussian Channel)<br />
COFDM Spectrum COFDM 2K/8K-Carrier<br />
FEC Mode 1/2, 2/3, 3/4, 5/6, 7/8<br />
. System & Memory<br />
Item Specification<br />
Main Processor STi7110<br />
Flash Memory 8 Mbytes<br />
DDR Memory 128 Mbytes<br />
Channel Capacity Digital Channel : 10,000<br />
Front 1-Key(Power), 7-SEGMENT DISPLAY<br />
<strong>MAX</strong>_<strong>COMBO</strong>_<strong>NET</strong>_manual_print REV2.0.pdf 72 31/01/2013 12:51:57
ESPECIFICACIONES<br />
. MPEG Transport Stream & A/V Decoding<br />
Item<br />
Specification<br />
Transport Stream 13818-1 MPEG-2, H.264/AVC Transport stream Specification<br />
Profile Level MPEG-2 MP@ML, MP@HL, MPEG-4 H.264/AVC<br />
Input Rate Max. 90Mbit/s<br />
Aspect Ratio 4:3, 16:9, Letter Box<br />
Frame Rate 25Hz for PAL, 30Hz for NTSC<br />
Video Resolution 576i, 576p, 720p, 1080i<br />
Teletext Through VBI<br />
Audio Decoding MPEG-1 Layer 1 & 2, Dolby Downmix<br />
Audio Mode Single Channel/Dual Channel Joint Stereo/Stereo<br />
Frequency Response 20~20kHz,
<strong>MAX</strong>_<strong>COMBO</strong>_<strong>NET</strong>_manual_print REV2.0.pdf 74 31/01/2013 12:51:58
<strong>MAX</strong> <strong>COMBO</strong> <strong>NET</strong><br />
DUTCH<br />
HANDEILING<br />
<strong>MAX</strong>_<strong>COMBO</strong>_<strong>NET</strong>_manual_print REV2.0.pdf 75 31/01/2013 12:51:58
<strong>MAX</strong>_<strong>COMBO</strong>_<strong>NET</strong>_manual_print REV2.0.pdf 76 31/01/2013 12:51:58
INDEX<br />
ALGEMENE VEILIGHEID 74<br />
ALGEMENE INFORMATIE 75<br />
I. INHOUD PAKKET 75<br />
I I. SPECIFICATIES 75<br />
III. AFSTANDSBEDIENING (RCU) 76<br />
IV. AFSTANDSBEDIENING INSTELLEN VOOR TV 78<br />
V. VOORKANT PANEEL 80<br />
VI. ACHTERKANT PANEEL 81<br />
INSTALLATIE 82<br />
KANALENLIJST 83<br />
MENU 85<br />
HOOFDMENU 85<br />
I. KANALENLIJST 85<br />
II. INSTALLATIE 87<br />
III. OPTIES 92<br />
IV. UTILITY 94<br />
V. ACCESSOIRES 95<br />
PVR Guide 96<br />
PROBLEMEN OPLOSSEN 103<br />
SPECIFICATIES 104<br />
MERKEN LIJST 178<br />
Om het apparaat volledig uit te schakelen dient men de stekker uit het<br />
stopcontact te verwijderen.<br />
<strong>MAX</strong>_<strong>COMBO</strong>_<strong>NET</strong>_manual_print REV2.0.pdf 77 31/01/2013 12:51:58<br />
73
74<br />
ALGEMENE VEILIGHEID<br />
WAARSCHUWING<br />
Lees eerst de veiligheidsvoorschriften om eventuele schade aan u of uw installatie te<br />
voorkomen.<br />
Bedek de ontvanger niet en houd de omringende omgeving schoon.<br />
Controleer de ingangsspanning AC 90~240V, 50Hz~60Hz12V 2.5A Adaptor<br />
Houd vloeistoffen op afstand van uw ontvanger.<br />
De ontvanger mag niet worden blootgesteld aan druppels of spetters, plaats ook geen<br />
voorwerpen met vloeistoffen op de ontvanger.<br />
Verwijder allereerst de stekker uit het stopcontact voordat u de ontvanger gaat reinigen.<br />
Gebruik een licht vochtige, zachte doek om de behuizing te reinigen.<br />
Blokkeer de ventilatie openingen van de ontvanger niet en houdt deze vrij.<br />
Plaats de ontvanger niet in een gesloten ruimte maar een goed geventileerde ruimte.<br />
Voorkom blootstelling van de ontvanger aan extreme hitte, kou en vochtigheid.<br />
Gebruik geen kabels of accessoires die niet aanbevolen zijn. Deze kunnen de installatie<br />
beschadigen.<br />
Bij lange tijd geen gebruik, verwijder stekker uit het stopcontact en haal de antennekabel uit<br />
de ontvanger.<br />
Verwijder nooit het deksel van de ontvanger in verband met mogelijke elektrische schokken.<br />
Repareer nooit zelf de ontvanger.<br />
Breng het naar een erkende reparateur.<br />
De handleiding kan aangepast worden in verband met nieuwe specificaties.<br />
<strong>MAX</strong>_<strong>COMBO</strong>_<strong>NET</strong>_manual_print REV2.0.pdf 78 31/01/2013 12:51:58
ALGEMENE INFORMATIE<br />
I. INHOUD PAKKET<br />
Verzeker u zelf dat de volgende voorwerpen in de verpakking zitten.<br />
1) Afstandsbediening (RCU)<br />
2) Batterijen (2EA)<br />
3) CD met handleiding<br />
4) 12V 2.5A Adaptor<br />
II. SPECIFICATIES<br />
Supports MPEG-2, MPEG-4, H.264 and fully DVB compliant<br />
Satellite & Terrestrial receiver<br />
2 Slot smart card<br />
DiSEqC 1.0, 1.1 and 1.2<br />
Aspect ratio adjustment 4:3 (16/9 crop), 4:3 (16/9 letterbox), 16:9 (4/3 pillar box)<br />
User friendly OSD and operation<br />
Total 10,000 Channels Programmable<br />
Multi-language audio support / Multi-language menu text support<br />
Favorite channel selections<br />
Parental Guide and rating control<br />
EPG(Provider Electronic Program Guide) for On Screen Channel Information<br />
On-Screen Display with 65,536 Color<br />
Blind scan(Power Scan) & Powerful EPG<br />
Zoom Function in Pause<br />
Dolby Digital Bitstream Out through S/PDIF(Optical)<br />
Seletable output for 1080p, 1080i, 720p,576p and 576i format<br />
USB 2.0 Host (Access to HDD, USB memory, Others etc)<br />
Upgrade Software & Update Channel Database through USB 2.0 Port and RS232<br />
MP3 File Play by USB 2.0<br />
PVR Ready via USB<br />
Recorded file play on PC<br />
Reservation Recoding by EPG function<br />
Multimedia file play by USB 2.0<br />
Home streaming<br />
(2012 11 05) manual.indd 79 2012-11-05 8:48:44<br />
<strong>MAX</strong>_<strong>COMBO</strong>_<strong>NET</strong>_manual_print REV2.0.pdf 79 31/01/2013 12:51:58<br />
75
76<br />
ALGEMENE INFORMATIE<br />
III. AFSTANDSBEDIENING (RCU)<br />
<strong>MAX</strong>_<strong>COMBO</strong>_<strong>NET</strong>_manual_print REV2.0.pdf 80 31/01/2013 12:51:58
ALGEMENE INFORMATIE<br />
III. AFSTANDSBEDIENING (RCU)<br />
1. POWER Ontvanger AAN of UIT.<br />
2. MUTE Geluid AAN of UIT.<br />
3. TV TV mode.<br />
4. DVD DVD mode.<br />
5. VCR VCR mode.<br />
6. STB STB mode.<br />
7. TV / RADIO Schakelt tussen TV en Radio.<br />
8. RECALL Selecteert het vorig bekeken kanaal.<br />
9. AV / TV Selecteert TV of AV.<br />
10. PR Selecteert vorige bekeken kanaal.<br />
11. Fn Network File Manager / Reboot.<br />
12. V. Format Schakelt naar HD type.<br />
13. ZOOM Selecteert ZOOM IN/OUT.<br />
14. Fn2 Gereserveerd.<br />
15. Pagina omlaag in kanalenlijst.<br />
16. Pagina omhoog in kanalenlijst. (Selecteert zoom in/uit).<br />
17. V+ / V- Volume harder of zachter.<br />
18. P+ / P- Kanaal op of neer.<br />
19. Veranderd kanalen of beweegt naar een item in het menu.<br />
20. Stelt het volume of beweegt naar links of beweegt naar item in het menu.<br />
21. MENU Hoofdmenu in beeld.<br />
22. EXIT Gaat terug naar vorig menu of om terug naar huidig kanaal.<br />
23. INFO Toont programma informatie in beelden kan de naam van de favorieten lijst<br />
veranderen.<br />
24. STOP Stopt opname of afspelen.<br />
25. PLAY Opname lijst oproepen of afspelen/slow motion.<br />
26. PAUSE Pauzeert afspelen.<br />
27. RECORD Opname programma.<br />
28. REWIND Terugspoelen in verschillende snelheden.<br />
29. F / F Vooruitspoelen in verschillende snelheden.<br />
30. AUDIO Veranderd de audio taal.<br />
31. EPG<br />
Toont de TV of Radio programma gids.<br />
32. Subtitles Activeer ondertitel modus.<br />
33. Teletext Activeert ondertiteling en teletekst.<br />
34. Numeric buttons Selecteer de TV of Radio kanalen en het individuele menu.<br />
35. FAV Toont de gewenste favorieten lijst.<br />
36. SAT Toont de geselecteerde satelliet lijst.<br />
<strong>MAX</strong>_<strong>COMBO</strong>_<strong>NET</strong>_manual_print REV2.0.pdf 81 31/01/2013 12:51:58<br />
77
78<br />
ALGEMENE INFORMATIE<br />
IV. AFSTANDSBEDIENING INSTELLEN VOOR TV<br />
4<br />
2<br />
5<br />
<strong>MAX</strong>_<strong>COMBO</strong>_<strong>NET</strong>_manual_print REV2.0.pdf 82 31/01/2013 12:51:59<br />
3<br />
1
ALGEMENE INFORMATIE<br />
IV. AFSTANDSBEDIENING INSTELLEN VOOR TV<br />
I. Handmatig zoeken<br />
In eerste instantie zet de tv aan.<br />
1) Druk op Device LED Key (STB of TV of VCR of dvd) + "OK"-toets, op hetzelfde moment, gedurende 2 of 3<br />
seconden. De Device LED key zal gaan branden en aan blijven staan.<br />
2) Zoek de 3-cijferige code behorende bij uw apparaat in de MERKEN lijst en voer de 3-cijferige code<br />
dienovereenkomstig een voor een in. – De Device LED key zal ook een voor een knipperen. Wanneer u klaar<br />
bent met het invoeren van de 3-cijferige code, zal het apparaat (TV of videorecorder of DVD) vanzelf<br />
uitschakelen.<br />
3) Klik vervolgens op OK om de instelling te voltooien. (De Device LED zal na 2 keer knipperen uitgaan.)<br />
*OPMERKING: Als u niet in staat bent om de TV-code te vinden, voert u het onderstaande uit. "Auto zoeken". De<br />
afstandsbediening zoekt voor u de juiste code automatisch en zal goed gaan werken.<br />
II. Automatisch zoeken (gebruik van Omhoog of Omlaag knop)<br />
1) Druk op Device LED Key (STB of TV of videorecorder of dvd) + "OK"-toets op hetzelfde moment gedurende<br />
2 of 3 seconden. De Device LED key zal gaan branden en aan blijven staan.<br />
2) Druk op Omhoog of Omlaag-toets van RCU om de juiste code te vinden. Op het moment dat de<br />
afstandsbediening de juiste code gevonden heeft wordt het apparaat automatisch uitgeschakeld.<br />
3) Klik vervolgens op OK om de instelling te voltooien. (De Device LED zal na 2 keer knipperen uitgaan.)<br />
III. Reset di fabbrica<br />
1) Druk op de TV LED + REC-toets op hetzelfde moment gedurende meer dan 5 seconden.<br />
2) LED-Device gaat UIT/AAN op "TV, DVD, VCR STB" 3 keer een voor een zodat de afstandsbediening naar<br />
standaard mode gaat.<br />
<strong>MAX</strong>_<strong>COMBO</strong>_<strong>NET</strong>_manual_print REV2.0.pdf 83 31/01/2013 12:51:59<br />
79
80<br />
ALGEMENE INFORMATIE<br />
V. VOORKANT PANEEL<br />
1. POWER Schakelt de ontvanger tussen Aan en Stand By.<br />
2. USB Verbinding voor USB Memory.<br />
Kaartlezer Slot Voer smartcard in.<br />
3.<br />
NOOT: Niet alle “USB 2.0 geheugens” zijn geschikt voor ons product.<br />
2<br />
1 2 3<br />
4 8 9 11<br />
<strong>MAX</strong>_<strong>COMBO</strong>_<strong>NET</strong>_manual_print REV2.0.pdf 84 31/01/2013 12:51:59
ALGEMENE INFORMATIE<br />
VI. ACHTERKANT PANEEL<br />
1<br />
2<br />
3<br />
4 8 9 11<br />
1. AERIAL Verbinding met terrestrische antennekabel.<br />
2. LOOP OUT Verbinding met andere ontvanger.<br />
3. SAT IN Verbinding met satellite antennekabel.<br />
4. LOOP OUT Verbinding met andere ontvanger.<br />
5. TV SCART Verbinding naar TV SCART kabel.<br />
6. HDMI Verbind HDMI kabel met TV.<br />
7. RS 232 Verbinding naar personal computer for software upgrade.<br />
8. Ethernet Verbinding naar LAN kabel.<br />
9. USB Verbinding voor USB Memory.<br />
10. OPTISCH Uitgang voor versterker.<br />
11. ADAPTOR Aansluiten op adapter.<br />
12. POWER BUTTON Schakelt AAN/UIT.<br />
5 6 7 10 12<br />
<strong>MAX</strong>_<strong>COMBO</strong>_<strong>NET</strong>_manual_print REV2.0.pdf 85 31/01/2013 12:51:59<br />
81
82<br />
INSTALLATIE<br />
Dit hoofdstuk beschrijft verschillende mogelijkheden voor het aansluiten van de ontvanger met een<br />
TV, VCR en HI-FI systeem.<br />
U kunt kiezen uit de volgende configuraties die wij beschrijven.<br />
Mocht u toch problemen ondervinden dan verwijzen wij u voor eventuele hulp naar de distributeur of<br />
verkooppunt.<br />
Controleer dat de volgende onderdelen in de verpakking samen met de ontvanger zitten.<br />
I. AANSLUITEN ONTVANGER MET TV<br />
I-1. Aansluiten van de ontvanger naar de TV via een Scart kabel<br />
Sluit het ene uiteinde van de Scart kabel aan de TV scart aansluiting aan de achterkant van uw ontvanger en<br />
het andere uiteinde aan de Scart aansluiting achter op uw TV<br />
<strong>MAX</strong>_<strong>COMBO</strong>_<strong>NET</strong>_manual_print REV2.0.pdf 86 31/01/2013 12:51:59
KANALENLIJST<br />
1. Normaal Beeld<br />
a) Als u een kanaal kiest verschijnt automatisch<br />
een informatiebalk in beeld gedurende een aantal<br />
seconden. Deze balk geeft informatie over het<br />
betreffende kanaal.<br />
b) Selecteer de INFO knop voor informatie tijdens<br />
normaal gebruik.<br />
2. Eenvoudige kanalenlijst<br />
a) Druk op de OK knop tijdens normaal gebruik om naar de<br />
kanalenlijst te gaan.<br />
b) Als de uitgebreide kanalenlijst verschijnt, kunt u via het<br />
selecteren van de RODE knop overgaan op eenvoudige<br />
kanalenlijst weergave.<br />
3. Uitgebreide Kanalenlijst<br />
a) Druk op de OK knop tijdens normaal gebruik om naar de<br />
Kanalenlijst te gaan.<br />
b) Als de eenvoudige kanalenlijst verschijnt, kunt u via het<br />
selecteren van de RODE knop overgaan op uitgebreide<br />
Kanalenlijst weergave.<br />
c) Selecteer en om alfabetisch te ordenen.<br />
d) Druk op de groene knop om terug te gaan naar Alle<br />
Kanalen of EXIT om terug te gaan naar het kijken van het<br />
kanaal.<br />
e) Druk de SAT knop in om het Satellieten Scherm op te<br />
roepen en kiest u dan de gewenste satelliet.<br />
De kanalenlijst van de bewuste satelliet zal dan in beeld<br />
komen.<br />
f) Druk de FAV knop in om het Favorieten scherm op te<br />
roepen en kiest u dan de gewenste Favorieten lijst. De<br />
kanalenlijst van de bewuste satelliet zal dan in beeld<br />
komen.<br />
g) Druk op de groene knop dan zullen all gevonden kanalen<br />
getoond worden.<br />
<strong>MAX</strong>_<strong>COMBO</strong>_<strong>NET</strong>_manual_print REV2.0.pdf 87 31/01/2013 12:51:59<br />
83
84<br />
KANALENLIJST<br />
4. EPG (Elektronische Programma Gids)<br />
a) Druk op de EPG knop tijdens normaal gebruik.<br />
b) Er verschijnt een scherm met de EPG van het<br />
bewuste kanaal.<br />
c) Selecteer het gewenste kanaal om de EPG te tonen.<br />
e) Verschijnt net als de foto rechts.<br />
5. ZOOM IN/OUT<br />
a) Door op de knop pagina opwaarts te drukken vanuit<br />
normaal gebruik kunt u in en uit zoomen.<br />
b) U kunt de gewenst vergroting kiezen met de<br />
ROOD/GROENE knop.<br />
c) U kunt de start positie kiezen met de knop.<br />
d) Na het kiezen van de Zoom grootte en positie kunt u<br />
de ZOOM functie starten met de “OK” knop.<br />
e) Met de knop kunt het ZOOM beeld<br />
verschuiven.<br />
<strong>MAX</strong>_<strong>COMBO</strong>_<strong>NET</strong>_manual_print REV2.0.pdf 88 31/01/2013 12:52:00
MENU<br />
HOOFDMENU<br />
Druk op de MENU knop om het scherm van het<br />
hoofdmenu te activeren Het hoofdmenu scherm verschijnt.<br />
1. U kunt door het hoofdmenu schuiven door op de knoppen<br />
te drukken van uw afstandsbediening.<br />
2. Druk op OK om uw selectie te activeren.<br />
3. Druk op EXIT om terug te keren naar het vorige menuscherm<br />
of op MENU om terug te keren naar het kanaal dat u aan het<br />
kijken was.<br />
I. KANALENLIJST<br />
II. INSTALLATIE<br />
III. OPTIES<br />
I. KANALENLIJST<br />
Deze selectie helpt u de kanalenlijst te wijzigen naar uw wensen.<br />
1. Kies kanalenlijst in het hoofdmenu en druk op OK.<br />
2. Er verschijnt een scherm waarin u de lijst kan wijzigen.<br />
3. Selecteer de gewenste wijzigingsvorm .<br />
4. Om het gewenste kanaal te tonen selecteert u het en drukt u op de rode knop.<br />
5. Druk op EXIT om terug te keren naar het vorige menuscherm of op MENU om<br />
terug te keren naar het kanaal dat u aan het kijken wasl.<br />
I-1. FAVORIETEN<br />
I-2. HERBENOEMEN<br />
I-3. SCHUIVEN<br />
I-4. BLOKKEREN<br />
I-5. VERWIJDEREN<br />
I-1. FAVORIETEN<br />
IV. UTILITY<br />
V. ACCESSOIRES<br />
1. Door gebruik te maken van de knoppen gaat u<br />
naar Favorieten en drukt u op de GELE knop om te<br />
kunnen kiezen tussen Favorieten 1~8.<br />
2. Druk op OK op het kanaal dat u wilt toevoegen of verwijderen.<br />
3. Een markering komt tevoorschijn achter gekozen<br />
kanaal. Om te verwijderen drukt u nogmaals op OK.<br />
4. De gekozen kanalen zullen automatisch opgeslagen worden.<br />
5. Als u de opgeslagen Favorietenlijst wilt bekijken gaat u<br />
via de andere optie (Herbenoemen-Verwijderen) behalve<br />
favorieten en drukt u op de FAV knop voor het inzien van<br />
Favorieten 1~8.<br />
6. Druk op EXIT om terug te keren naar het vorige menuscherm<br />
of op MENU om terug te keren naar het kanaal dat u aan het kijken was.<br />
7. Druk op de BLAUWE knop om de Favorieten te herbenoemen.<br />
<strong>MAX</strong>_<strong>COMBO</strong>_<strong>NET</strong>_manual_print REV2.0.pdf 89 31/01/2013 12:52:00<br />
85
86<br />
MENU<br />
I. KANALENLIJST<br />
I-2. HERBENOEMEN<br />
1. Door gebruik te maken van de knoppen kunt u naar<br />
Herbenoemen gaan.<br />
2. Selecteer het kanaal dat u wilt herbenoemen door gebruik te<br />
maken van en druk op OK.<br />
3. Er verschijnt een toetsenbord op het scherm.<br />
4. Wijzig de naam door gebruik te maken van de cijfers en/of<br />
letters in beeld.<br />
5. Druk op de GELE knop om Favorieten 1..8 te herbenoemen en<br />
druk op de BLAUWE knop om de satelliet te herbenoemen.<br />
6. Druk op EXIT om terug te keren naar het vorige menuscherm<br />
of druk op MENU om terug te keren naar het kanaal dat u aan<br />
het bekijken was.<br />
I-3. VERPLAATSEN<br />
1. Door gebruik te maken van de knoppengaat u naar<br />
de optie verplaatsen.<br />
2. Selecteer de kanalen die u wilt verschuiven door op de<br />
knop OK te drukken.<br />
3. Schuif de cursor naar de plek waar u het heen wilt verplaatsen<br />
en druk dan op de GROENE knop.<br />
4. Druk op EXIT om terug te keren naar het vorige menuscherm<br />
of druk op MENU om terug te keren naar het kanaal dat u aan<br />
het bekijken was.<br />
I-4. BLOKKEREN<br />
1. Door gebruik te maken van de knoppen kunt u naar de<br />
functie Blokkeren gaan.<br />
2. Selecteer de kanalen die u wilt blokkeren en druk dan op OK.<br />
Er verschijnt dan achter het geselecteerde kanaal. Om te<br />
verwijderen drukt u wederom op OK.<br />
3. Druk op EXIT om terug te keren naar het vorige menuscherm of druk<br />
op MENU om terug te keren naar het kanaal dat u aan het bekijken was.<br />
I-5. VERWIJDEREN<br />
1. Door gebruik te maken van de knoppen gaat u naar de<br />
functie VERWIJDEREN.<br />
2. Selecteer het kanaal dat u wilt verwijderen en druk op OK. Er verschijnt dan ( ) op het nummer van het gekozen<br />
kanaal. Om te verwijderen drukt u op de BLAUWE toets .<br />
3. Door op de GELE knop te drukken verwijderd u een TP. Kies een kanaal en druk op de BLAUWE knop.<br />
Alle kanalen van die bewuste TP zullen automatisch geselecteerd worden.<br />
4. Druk op de GELE knop om een satelliet te verwijderen. Selecteer een kanaal en druk dan op de BLAUWE knop. Alle<br />
kanalen van die bewuste satelliet zulle automatisch geselecteert worden.<br />
5. Druk op EXIT om terug te keren naar het vorige menuscherm of druk op MENU om terug te keren naar het kanaal<br />
dat u aan het bekijken was.<br />
6. Op het scherm verschijnt het volgende bericht.<br />
7. Kies OK in het verschenen bericht in het scherm en druk op OK om alle geselecteerde kanalen te verwijderen.<br />
<strong>MAX</strong>_<strong>COMBO</strong>_<strong>NET</strong>_manual_print REV2.0.pdf 90 31/01/2013 12:52:00
MENU<br />
II. INSTALLATIE<br />
Hier kunt u de antenne configureren en zoeken naar<br />
satellieten of transponders, etc. Selecteer installatie<br />
in het hoofdmenu en druk op OK.<br />
Druk op EXIT om terug te keren naar het vorige<br />
menuscherm of druk op MENU om terug te keren naar<br />
het kanaal dat u aan het bekijken was.<br />
II-1. SATELLIET ZOEKEN<br />
II-2. DISEQC SWITCH<br />
II-3. MOTOR SETUP<br />
II-4. TERRESTRISCH ZOEKEN<br />
II-5. HOME STREAMING<br />
II-6. FABRIEKSINSTELLINGEN<br />
II-1 SATELLIET ZOEKEN<br />
1.U kunt de cursor bewegen naar u keuze door gebruik te<br />
maken van en op OK te drukken.<br />
a) Satelliet<br />
- Druk op OK om de lijst met poorten van de<br />
DiSEqC te tonen.<br />
- Selecteer de gewenste satelliet en druk op OK.<br />
b) DiSEqC<br />
- Druk op OK om de lijst met poorten van de DiSEqC te tonen.<br />
- Kies de gewenste DiSEqC en druk op OK.<br />
c) LNB<br />
- Druk op OK om de lijst met frequenties te tonen.<br />
- Selecteer de gewenste frequentie en druk op OK.<br />
- U kunt ook rechtstreeks de frequentie waarden invoeren<br />
met behulp van uw afstandsbediening.<br />
d) 22KHz Tone<br />
- Kies uit Geen, 0 KHz ó 22 KHz afhankelijk van de Antenne<br />
instellingen.<br />
e) ZOEKEN<br />
- Druk op OK om de lijst met Zoek Opties te tonen.<br />
- Kies de gewenste zoekvorm en druk op OK.<br />
f) Search<br />
- Druk op ZOEKEN om de Zoekactie te beginnen.<br />
- SAT Herbenoemen: Om de SAT te herbenoemen,<br />
druk op de GROENE knop van<br />
uw afstandsbediening.<br />
TP WIJZIGEN<br />
Om een TP te WIJZIGEN, druk op de<br />
RODE knop van uw afstandsbediening.<br />
<strong>MAX</strong>_<strong>COMBO</strong>_<strong>NET</strong>_manual_print REV2.0.pdf 91 31/01/2013 12:52:01<br />
87
MENU<br />
II. INSTALLATIE<br />
f) Motor Controle<br />
Selecteer de positie door gebruik te maken van en druk<br />
op OK. Er verschijnt een scherm met een bericht in beeld.<br />
- Opslaan sat positie : Sla de positie van de motor voor de<br />
gewenste satelliet op.<br />
- Ga naar Satelliet Positie : Beweeg de motor naar de opgesla<br />
gen positie van de gewenste satelliet.<br />
- Ga naar 0 : Ga naar het middelpunt van de motor.<br />
- Limit off: Schakelt Oost, WEST limiet uit.<br />
- SET EAST limiet: Instellen huidige positie als OOST limiet.<br />
- SET WEST limiet: Instellen huidige positie als WEST limiet.<br />
g) Satelliet Positie<br />
- Voer rechtstreeks de positie in door gebruik te<br />
maken van de nummers op uw afstandsbediening.<br />
- Selecteer de richting door gebruik te maken van<br />
(WEST / OOST).<br />
h) Zoek Optie<br />
- Druk op OK om de lijst met Zoek Kanalen te tonen.<br />
- Selecteer de gewenste Zoek Optie en druk op OK.<br />
- Herbepalen Positie<br />
- RESET Positie : Reset alle opgeslagen<br />
posities van de motor.<br />
i) Zoeken<br />
- Druk op zoeken om kanalen zoeken te starten.<br />
- Druk op OK om het zoeken te starten.<br />
TP EDIT : Voor het wijzigen van de TP,<br />
druk op de RODE knop van de<br />
afstandsbediening<br />
2. Wijzig de lokale positie<br />
- Druk op de GROENE knop om de lokale positie te wijzigen.<br />
a) Longitude<br />
- Voer rechtstreeks de longitude in door gebruik te maken van de nummers op uw afstandsbediening.<br />
- Selecteer de richting door gebruik te maken van de knoppen (West / Oost).<br />
b) Latitude<br />
- Voer rechtstreeks de latitude in door gebruik te maken van de nummers op uw afstandsbediening.<br />
- Selecteer de richting door gebruik te maken van de knoppen (Noord / Zuid).<br />
3. Druk op EXIT om terug te keren naar het vorige menuscherm of druk op MENU om terug te keren naar het<br />
kanaal dat u aan het bekijken was.<br />
<strong>MAX</strong>_<strong>COMBO</strong>_<strong>NET</strong>_manual_print REV2.0.pdf 93 31/01/2013 12:52:02<br />
89
90<br />
MENU<br />
II. INSTALLATIE<br />
II-4. TERRESTRISCH ZOEKEN<br />
1. Selecteer Kanalen Zoeken in Installatie met en druk<br />
op OK.<br />
2. 1) Selecteer de regio waar u gebruik maakt van .<br />
2) U kunt het type zoeken zelf bepalen, zowel auto als<br />
handmatig met .<br />
3) Auto<br />
a) Selecteer “Zoeken” in het beeldscherm en druk op OK<br />
om kanalen te zoeken.<br />
b) Selecteer Exit of Menu na het beëindigen van het<br />
Zoeken.<br />
4) Handmatig<br />
a) Selecteer Mux kanaal die u wilt gebruiken met .<br />
b) Frequentie word automatisch weergegeven met<br />
geselecteerde Mux kanaal.<br />
II-5. HOME STREAMING<br />
1. PC-instelling<br />
***Eerst op de PC het Home streaming<br />
programma uitvoeren.<br />
a) Gaat u naar "Preferentie" Tabblad.<br />
b) Selecteer "standaard URL "selectie vakje en druk op de<br />
"Browse"knop. Standaard is toegewezen "c:\download",<br />
maar u kunt ook zelf een folder toewijzen.<br />
Opmerking: momenteel is alleen de standaard<br />
server beschikbaar.<br />
2. STB-instelling<br />
a) Ga naar de introductie pagina Streaming menu (menu<br />
Accessoire Network Home streaming) en klik<br />
op Home streaming.<br />
b) IP-name Bewerken zal worden weergegeven en invoer<br />
server IP door numerieke knoppen via RCU.<br />
c) Het IP adres moet hetzelfde zijn als IP-adres<br />
weergegeven wordt in Home Streaming streamingprogramma.<br />
<strong>MAX</strong>_<strong>COMBO</strong>_<strong>NET</strong>_manual_print REV2.0.pdf 94 31/01/2013 12:52:02
MENU<br />
II. INSTALLATIE<br />
3. Het film bestand afspelen via Home Streaming<br />
a) Druk de "Fn" knop van afstandsbedieing in selecteer<br />
“normale weergave” vervolgens zal er een film bestands<br />
lijst verschijnen.<br />
b) Selecteren het bestand dat u wilt zien van navigatie<br />
toetsen op de afstandsbediening en druk op "OK" knop om<br />
het filmbestand af te spelen.<br />
Neem Zie de onderstaande afbeelding.<br />
II-6. FABRIEKSINSTELLINGEN<br />
Gebruik Fabrieksinstellingen alleen als u de ontvanger in<br />
de oorspronkelijke staat van aankoop wilt brengen.<br />
Alle instellingen en kanalenlijsten zullen worden verwijderd.<br />
1. Selecteer Fabrieksinstellingen door gebruik te maken<br />
van de knoppen en op OK te drukken.<br />
2. Er verschijnt een bericht in beeld.<br />
3. Selecteer OK om de ontvanger naar de oorspronkelijke<br />
staat van aankoop te brengen en druk dan op OK.<br />
4. Druk op EXIT om terug te keren naar het vorige<br />
menuscherm of druk op MENU om terug te keren naar het<br />
kanaal dat u aan het bekijken was.<br />
<strong>MAX</strong>_<strong>COMBO</strong>_<strong>NET</strong>_manual_print REV2.0.pdf 95 31/01/2013 12:52:02<br />
91
III. OPTIES<br />
Deze optie helpt u bij het instellen van de menutaal, tijd,<br />
etc. Selecteer Opties in het hoofdmenu en druk op OK.<br />
Druk op EXIT om terug te keren naar het vorige<br />
menuscherm of druk op MENU om terug te keren<br />
naar het kanaal dat u aan het bekijken was.<br />
III-1. OSD CONFIGURATIE<br />
III-2. TV CONFIGURATIE<br />
III-3. TIJD INSTELLING<br />
III-4. KINDERSLOT<br />
III-1. OSD CONFIGURATIE<br />
1. Selecteer OSD Configuratie in Opties door<br />
gebruik te maken van en op OK te drukken<br />
a) OSD Taal<br />
- Druk op OK om de lijst met talen voor het OSD<br />
menu te tonen.<br />
- Selecteer de gewenste taal en druk op OK.<br />
b) Audio Taal<br />
- Druk op OK om de lijst met talen voor Audio te tonen.<br />
- Selecteer de gewenste taal en druk op OK.<br />
c) Taal ondertiteling<br />
- Kies OK om de ondertiteling te tonen.<br />
- Kies de gewenste taal en druk op OK.<br />
d) Informatiebalk in beeld<br />
- Druk op OK om de informatiebalk in beeld te tonen.<br />
- Selecteer het aantal seconden dat u de informatiebalk in beeld wilt hebben en druk op OK.<br />
e) transparantie<br />
- Instelling transparantie niveau.<br />
2. Druk op EXIT om terug te keren naar het vorige menuscherm of druk op MENU om terug te keren naar<br />
het kanaal dat u aan het bekijken was.<br />
92<br />
MENU<br />
<strong>MAX</strong>_<strong>COMBO</strong>_<strong>NET</strong>_manual_print REV2.0.pdf 96 31/01/2013 12:52:02
MENU<br />
III. OPTIES<br />
III-2. TV CONFIGURATIE<br />
1. Selecteer de TV configuratie in Opties door gebruik te maken<br />
van en druk op OK.<br />
a) HD Type<br />
- Selecteer HD video Uitgang.<br />
b) TV Type<br />
- Selecteer uw TV type.<br />
c) Aspect Ratio<br />
- Selecteer screen ratio.<br />
d) Screen Control<br />
- Select screen display modes.<br />
e) Brightness<br />
- Instellen van screen brightness.<br />
f) Contrast<br />
- Instellen van screen contrast.<br />
g) Saturation<br />
- Instellen van screen Saturation.<br />
2. Druk op EXIT om terug te keren naar het vorige menuscherm<br />
of druk op MENU om terug te keren naar het kanaal dat u<br />
aan het bekijken was.<br />
III-3. TIJD INSTELLING<br />
Stel de juiste lokale tijd in waar u zich bevindt.<br />
1. Selecteer Tijd Instellen in Opties en druk op OK.<br />
2. Het scherm Tijd Instellen zal tevoorschijn komen.<br />
3. Verschuif de cursor met behulp van , en druk op OK<br />
nadat u de gewenste waarde heeft geselecteerd. (Voer het<br />
juiste tijdstip in met behulp van de nummers op uw<br />
afstandsbediening).<br />
4. Druk op EXIT om terug te keren naar het vorige menuscherm<br />
of druk op MENU om terug te keren naar het kanaal dat u<br />
aan het bekijken was.<br />
III-4. KINDERSLOT INSTELLING<br />
1. Selecteer Kinderslot in Opties en druk op OK.<br />
2. Er verschijnt een scherm met Kinderslot Instellingen.<br />
3. U kunt Kinderslot In- of Uitschakelen door Aan of UIT te<br />
selecteren met behulp van .<br />
4. U kunt het blokkeren van de installatie In- of Uitschakelen<br />
door AAN of UIT te selecteren met behulp van (Voor de<br />
Installatie Instellingen).<br />
5. Voer het nieuwe paswoord in, als u het actuele paswoord wil wijzigen.<br />
6. Bevestig het nieuwe paswoord door het opnieuw in te voeren.<br />
7. Druk op EXIT om terug te keren naar het vorige menuscherm of druk op MENU om<br />
terug te keren naar het kanaal dat u aan het bekijken was.<br />
Noot : Het standaard paswoord is 0000<br />
<strong>MAX</strong>_<strong>COMBO</strong>_<strong>NET</strong>_manual_print REV2.0.pdf 97 31/01/2013 12:52:03<br />
93
ME NU<br />
V. ACCESSOIRES<br />
Hier kunt u hulp krijgen om de USB te gebruiken etc.<br />
Selecteer Utility in het hoofdmenu met behulp van en<br />
druk op OK .<br />
· V - 1. USB<br />
· V - 2. Smart Card<br />
· V - 3. Netwerk / Videoclub<br />
V -1 USB<br />
Deze ontvanger is voorzien van een USB poort.<br />
1. Selecteer USB en Utility door gebruik te maken van<br />
en druk op OK.<br />
2. Als u van laadinstelling wilt veranderen (S/W upgrade,<br />
B ootL oader Upgrade), drukt u op de R ODE toets van uw<br />
afs tands bediening.<br />
3. Selecteer het bestand dat u wilt upgraden door gebruik<br />
te maken van en druk op OK.<br />
4. Als u eenmaal de upgrade heeft uitgevoerd zal de<br />
ontvanger automatisch eenmaal UIT en weer AAN gaan.<br />
V - 2 Smart Card<br />
De ontvanger is voorzien van 2 sloten voor verschillende<br />
Smart Cards, welke toegang geven tot gecodeerde pay per view<br />
diensten. De programma´s die men can decoderen zijn bepaald<br />
door de Smart Card die men gebruikt.<br />
1. Selecteer de Smart Card in het ACCESSOIRES menu met<br />
en druk OK.<br />
2. Steek de Smart Card in slot 1 of 2, daarna ziet u in het menu<br />
de naam van de Smart Card verschijnen.<br />
3. De naam van het Slot verschilt per Smart Card die men gebruikt.<br />
4. Druk op EXIT om terug te gaan naar het vorige menu of druk op<br />
MENU om naar de huidige zender terug te keren.<br />
V - 3 Netwerk / Videoclub<br />
Dit menu ondersteund verschillende functies zoals hieronder<br />
beschreven.<br />
1. SW downloaden via het internet.<br />
2. Home streaming.<br />
3. Youtube.<br />
4. RSS feeds / Twitter / Weersvoorspelling.<br />
5. Downloaden van kanalen data.<br />
<strong>MAX</strong>_<strong>COMBO</strong>_<strong>NET</strong>_manual_print REV2.0.pdf 99 31/01/2013 12:52:04<br />
95
PVR GUIDE<br />
PVR GUIDE<br />
I. Aanbevolen Medium<br />
- Externe USB Harde Schijf.<br />
- Flash memory stick.<br />
- Format Type: FAT16/32 (Systeem accepteerd geen NTFS<br />
en andere file systemen.<br />
II. Opname Functies<br />
II-1 Geprogrammeerde opnames<br />
1. Tijd Opnames<br />
: Stel gewenste opname tijd in in “Utility Timer” om<br />
opeen gewenste tijd op te nemen.<br />
NOOT : Instellingen voordat u “Time Record” start.<br />
- STB menu start op standaard net als hieronder.<br />
- Verander “Uit” naar “Opname” in Actie menu.<br />
- Als u eenmaal “Opname” ingesteld heeft in Actie menu,<br />
ziet u het gedetailleerde menu voor PVR. (Functie,<br />
Kanaal Type, Kanaal naam, Start Tijd, Tijdsduur).<br />
- Selecteer “Ok” knop om kanaal naam te kiezen.<br />
2. EPG Opnames<br />
: Om op te nemen via EPG.<br />
- Selecteer de EPG knop terwijl u TV kijkt.<br />
- Om opname te selecteren: Beweeg de cursor naar het<br />
gewenste programma en druk op derode opname knop<br />
vanuw afstandsbediening.<br />
- Om de gewenste opname te verwijderen drukt u<br />
nogmaals op de opname knop van uwafstandsbediening.<br />
- Indien u meerdere opnames wil selecteren beweegt u de<br />
cursor verder en selecteert u degewenste programma’s<br />
door de rode opname knop te selecteren op uw<br />
afstandsbediening.<br />
96<br />
<strong>MAX</strong>_<strong>COMBO</strong>_<strong>NET</strong>_manual_print REV2.0.pdf 100 31/01/2013 12:52:04
PVR GUIDE<br />
PVR GUIDE<br />
II. Opname Functies<br />
II-2 Onmiddelijke Opname<br />
- Selecteer de rode opname knop om de opname te starten.<br />
- Terwijl u opneemt.<br />
- Selecteer de “PAUSE” knop om “Time Shift” op te starten.<br />
- U kunt de “links/rechts” knop gebruiken tijdens de opname.<br />
Selecteer “OK knop” op uw afstandsbeciening om de<br />
opname lijst te tonen.<br />
Tijdens de opname kunt u ook naar andere kanalen kijken<br />
met dezelfde frequentie. Ingeval van kijken naar een andere<br />
kanaal tijdens opname, moet u terug naar de opnamelijst om<br />
de opname te stoppen.<br />
- Indien u de “stop knop” selecteerd word de huidige opname<br />
gestopt en opgeslagen op uw USB schijf.<br />
<strong>MAX</strong>_<strong>COMBO</strong>_<strong>NET</strong>_manual_print REV2.0.pdf 101 31/01/2013 12:52:05<br />
97
PVR GUIDE<br />
PVR GUIDE<br />
III. Playback Functie<br />
- Om de eerdere opnames af te spleen selecteer “Play knop”<br />
van uw afstandsbediening.<br />
- Gebruik de pijlen om de gewenste opname te selecteren<br />
door middel van de OK knop.<br />
- Tijdens het kijken.<br />
- Indien u de links/rechts knop selecteert tijdens opname of<br />
afspelen zal het huidige program waar u naar kijkt stoppen<br />
en de opname zal beginnen met afspelen op de gewenste<br />
positie die u met links/rechts knop heft geselecteerd. Indien<br />
u een andere opname will afspelen selecteert u die met de<br />
play knop op uwafstandsbediening.<br />
IV. Terug/Door-spoelen Functie<br />
- Indien u de doorspoelen knop selecteert tijdens timeshift of<br />
afspelen, zal de file 2X sneller afgespeeld worden en als u<br />
nogmaals de knop indrukt dan zal hij 8X sneller gaan.<br />
- Indien u de terugspoelen knop selecteert tijdens timeshift of<br />
afspelen, zal de file 2X zo snelterug afspelen en als u nog<br />
maals de knop indrukt dan zal hij 8X sneller gaan.<br />
- Het vooruit/terugspoelen zal eindigen zodra u de play knop<br />
selecteert.<br />
98<br />
<strong>MAX</strong>_<strong>COMBO</strong>_<strong>NET</strong>_manual_print REV2.0.pdf 102 31/01/2013 12:52:05
PVR GUIDE<br />
PVR GUIDE<br />
V. TimeShift Functie<br />
- Indien u de timeshift wil inschakelen moet u in onderstaand<br />
menu de timeshift op AAN zetten. (Accessoires PVR <br />
TimeShift “AAN”).<br />
- Om de Time Shift te starten tijdens kijken selecteert u de<br />
“PAUZE” knop.<br />
- Time shift zal gedurende 30 minuten afspelen.<br />
- Voor het afspelen tijdens Timeshift selecteert u de Play<br />
knop.<br />
- U kunt de links/rechts knop gebruiken tijdens de Time Shift.<br />
VI. Format<br />
- U kunt FAT32 gebruiken en NTFS.<br />
- U kunt ook de multi partitie format gebruiken.<br />
- Als u NTFS gebruikt ziet u onderstaand bericht tevoorschijn<br />
komen.<br />
- Selecteer “OK” knop om naar “C:, D:, E:, F: te gaan en<br />
NEXT” in geval van Multi Partitie.<br />
- In geval van NTFS Multi partitie, moet u formateren naar<br />
FAT32.<br />
<strong>MAX</strong>_<strong>COMBO</strong>_<strong>NET</strong>_manual_print REV2.0.pdf 103 31/01/2013 12:52:06<br />
99
PVR GUIDE<br />
PVR GUIDE<br />
VII. MP3 Play<br />
- Selecteer MP3 file die u af wilt spelen.<br />
- Na het afspelen van de MP3 file, zal de MP3 scherm tevoor<br />
schijn komen.<br />
VIII. JPG Play<br />
- Selecteer JPG file die u wilt bekijken in het USB menu.<br />
- Selecteer “OK” om de JPG te bekijken.<br />
U kunt de afbeeldingen ook roteren indien gewenst met beh<br />
ulp van de links/rechts knoppen.<br />
IX. Software Upgrade<br />
- Selecteer UAD file die u in de STB wilt upgraden via het USB<br />
menu.<br />
100<br />
<strong>MAX</strong>_<strong>COMBO</strong>_<strong>NET</strong>_manual_print REV2.0.pdf 104 31/01/2013 12:52:06
PVR GUIDE<br />
PVR GUIDE<br />
X. Opgenomen files afspelen op uw PC of DIVX<br />
speler.<br />
X-1 Afsp ele n op PC.<br />
A) Afspelen KM Player.<br />
B) Selecteer Taal.<br />
1) Selecteer rechter muis knop Language uw taal.<br />
C) Verander de extensie van de opname in “*.mpg”.<br />
Voorbeeld : Welcome to A_131821 Welcome to<br />
A_131821.mpg<br />
D) Selecteer de file die u wilt afspelen.<br />
1) Selecteer rechter muis knop Open Files(S) >Select<br />
X-2 Afspelen op DIVX player.<br />
A) The file format moet “.avi” format zijn om te kunne<br />
afspelen.<br />
B) Selecteer een folderwaar u de files opslaat in *.avi.<br />
1) Selecteer rechter muis knop Capture Selecteer<br />
Capture Folder.<br />
C) Herhaal A) B) C) D) of No.1 afspelen op PC.<br />
D) Selecteer de file die u wilt converteren in *.avi.<br />
1) Selecteer rechter muis knop Capture Video Quick<br />
Capture.<br />
2) De file word opgeslagen in de eerder gekozen folder in<br />
*.avi format.<br />
E) Indien de file een STB SD kanaal is, is het opgeslagen in<br />
SD, indien de file HD of H.264 is word het opgeslagen in die<br />
desbetreffende vorm. Indien u een DIVX player heeft die die<br />
bestanden niet kan afspelen dient u de bestanden te<br />
converteren naar SD bestanden.<br />
<strong>MAX</strong>_<strong>COMBO</strong>_<strong>NET</strong>_manual_print REV2.0.pdf 105 31/01/2013 12:52:06<br />
101
PVR GUIDE<br />
PVR GUIDE<br />
X-3 Converteren met DIVX manager.<br />
A) Afspelen Divx Manager<br />
1) Setting Model Rapsody RSH-250/350<br />
B) Selecteer de bestemmingsfolder waar u de geconver<br />
teerde files wilt opslaan.<br />
C) Selecteer de files die u wilt converteren en selecteer<br />
“Convert”.<br />
D) Selecteer “Encoding Start” Converteren “start”.<br />
NOOT: Web site voor downloading<br />
1. Kmplayer<br />
1) Enter this site : http://2bwithu.tistory.com/245.<br />
2) Download 2 files naar 1 folder en unzip de gearchiveerde<br />
file. Na UNZIP kunt u installeren dmv de EXE file.<br />
2. Divx Manger<br />
1) Enter deze site :<br />
http://www.modix4u.co.kr/upboard/view.asp?fcprimkey=44<br />
2) Selecteer onderaan voor de engelse versie.<br />
102<br />
<strong>MAX</strong>_<strong>COMBO</strong>_<strong>NET</strong>_manual_print REV2.0.pdf 106 31/01/2013 12:52:07
PROBLEMEN OPLOSSEN<br />
Probleem<br />
Er verschijnt niets op de<br />
display<br />
Geen beeld<br />
Geen geluid<br />
Afstandbediening doet het<br />
niet<br />
Service doet het niet of<br />
gecodeerd<br />
“Geen signaal” in beeld<br />
Tuner defect<br />
U bent u pincode vergeten<br />
Oplossing<br />
Controleer of de stekker in het stopcontact zit.<br />
Controleer de schotel en stel deze juist af.<br />
Controleer de kabel aansluiting.<br />
Controleer kanaal en Video uitgang.<br />
Controleer het volume niveau van de TV en de ontvanger.<br />
Controleer de MUTE status van de TV en de ontvanger.<br />
Controleer de kabel aansluiting.<br />
Vervang de batterijen.<br />
Richt de afstandbediening juist naar de ontvanger.<br />
Controleer dat er geen obstakels tussen zitten.<br />
Controleer de CAM en Smartcard.<br />
Deze moeten juist ingevoerd zijn.<br />
Controleer de signaalsterkte en signaalkwaliteit in het menu.<br />
Controleer de LNB en vervang deze indien nodig.<br />
Controleer de LNB kabel.<br />
Controleer de schotel en stel deze indien nodig af.<br />
Ga naar Opties en selecteer Systeem Informatie.<br />
Neem contact op met uw service dienst.<br />
<strong>MAX</strong>_<strong>COMBO</strong>_<strong>NET</strong>_manual_print REV2.0.pdf 107 31/01/2013 12:52:07<br />
103
104<br />
SPECIFICATIES<br />
.Conditional Access Module Interface<br />
Item Specification<br />
SMART CARD 2 SLOTS, ISO 7816, GSM11.11 and EMV (payment systems) compatibility<br />
. Tuner & Channel (DVB-S2)<br />
Item<br />
Specification<br />
Type 1 F Type, IEC169-24, Female<br />
Frequency Rage 950MHz to 2150MHz<br />
RF Impedance 75 Ohm unbanlanced<br />
Signal Level -65 to -25 dBm<br />
LNB Power 13.5/18.5Vdc +/- 5%, 0.5Amax, Overload Protected<br />
22KHz Tone Frequency : 22KHz +/- 2KHz, 0.6Vpp +/- 0.2V<br />
DiSEqC Control Version1.0, 1.2, Tone burst A/B<br />
Demodulation QPSK, 8PSK<br />
Input Symbol Rate<br />
FEC Decoder<br />
DVB-S QPSK : 2~45 Msps<br />
DVB-S2 8PSK/QPSK : 10~30Msps<br />
1/2, 2/3, 3/4, 3/5, 4/5, 5/6, 8/9, 9/10 in DVB-S2 mode.<br />
1/2, 2/3, 3/4, 5/6 and 7/8 in DVB-S mode.<br />
. Tuner & Channel(DVB-T)<br />
Item Specification<br />
Type IEC60169-2(VHF/UHF) female, 75 ohm nominal<br />
Frequency Rage VHF : 170MHz to 230MHz<br />
UHF : 470MHz to 862MHz<br />
Signal Level -78.5dBm ~ -25dBm<br />
(64QAM, Code Rate 2/3, Guard Interval 1/8,Gaussian Channel)<br />
COFDM Spectrum COFDM 2K/8K-Carrier<br />
FEC Mode 1/2, 2/3, 3/4, 5/6, 7/8<br />
. System & Memory<br />
Item Specification<br />
Main Processor STi7110<br />
Flash Memory 8 Mbytes<br />
DDR Memory 128 Mbytes<br />
Channel Capacity Digital Channel : 10,000<br />
Front 1-Key(Power), 7-SEGMENT DISPLAY<br />
<strong>MAX</strong>_<strong>COMBO</strong>_<strong>NET</strong>_manual_print REV2.0.pdf 108 31/01/2013 12:52:07
SPECIFICATIES<br />
. MPEG Transport Stream & A/V Decoding<br />
Item<br />
Specification<br />
Transport Stream 13818-1 MPEG-2, H.264/AVC Transport stream Specification<br />
Profile Level MPEG-2 MP@ML, MP@HL, MPEG-4 H.264/AVC<br />
Input Rate Max. 90Mbit/s<br />
Aspect Ratio 4:3, 16:9, Letter Box<br />
Frame Rate 25Hz for PAL, 30Hz for NTSC<br />
Video Resolution 576i, 576p, 720p, 1080i<br />
Teletext Through VBI<br />
Audio Decoding MPEG-1 Layer 1 & 2, Dolby Downmix<br />
Audio Mode Single Channel/Dual Channel Joint Stereo/Stereo<br />
Frequency Response 20~20kHz,
<strong>MAX</strong>_<strong>COMBO</strong>_<strong>NET</strong>_manual_print REV2.0.pdf 110 31/01/2013 12:52:08
<strong>MAX</strong> <strong>COMBO</strong> <strong>NET</strong><br />
PORTUGUESE<br />
MANUAL DE UTILIZAÇÃO<br />
<strong>MAX</strong>_<strong>COMBO</strong>_<strong>NET</strong>_manual_print REV2.0.pdf 111 31/01/2013 12:52:08
<strong>MAX</strong>_<strong>COMBO</strong>_<strong>NET</strong>_manual_print REV2.0.pdf 112 31/01/2013 12:52:08
TABELA DE CONTEÚDO<br />
SEGURANÇA GERAL 110<br />
INFORMAÇÕES GERAIS 111<br />
I. DESEMBALAGEM 111<br />
II. Características 111<br />
III. Unidade de Telecomando (RCU) 112<br />
IV. COMO SINTONIZAR O TELECOMANDO (RCU) PARA TV 114<br />
V. PAINEL FRONTAL 116<br />
VI. PAINEL TRASEIRO 117<br />
INSTALAÇÃO DO EQUIPAMENTO 118<br />
GUIA Lista Canal 119<br />
GUIA do MENU 121<br />
PÁGINA PRINCIPAL 121<br />
I . Edição de canais 121<br />
I I. INSTALAÇÃO 123<br />
III. OPÇÕES 128<br />
IV. UTILIDADES 130<br />
V. Accessórios 131<br />
PVR Guide 132<br />
RESOLUÇÃO DE PROBLEMAS 139<br />
ESPECIFICAÇÕES 140<br />
LISTA Canais 178<br />
Para desligar o aparelho da corrente eléctrica, a ficha deve ser retirada da<br />
tomada eléctrica, a ficha eléctrica deve ser retirada com facilidade.<br />
<strong>MAX</strong>_<strong>COMBO</strong>_<strong>NET</strong>_manual_print REV2.0.pdf 113 31/01/2013 12:52:08<br />
109
110<br />
GERAL DE SEGURANÇA<br />
AVISO<br />
Por favor, leia as seguintes instruções cuidadosamente recomendado para evitar o risco de<br />
danos físicos antes do seu produto é operado.<br />
Não cubra o receptor e manter em torno de espaço livre suficiente para o receptor.<br />
Verificar o funcionamento do receptor tensão 90 ~ 250V, 50Hz ~ 60Hz, 12V 2.5A Adaptor<br />
Mantenha líquidos longe do receptor.<br />
O receptor não deve ser exposto a pingos ou salpicos e objectos cheios de líquidos, que não<br />
devem ser colocados no receptor.<br />
Desligue o receptor da tomada antes da limpeza.<br />
Utilize um pano macio e uma solução suave de líquido próprio para limpar a caixa externa<br />
do receptor.<br />
próprio para limpar a caixa externa do receptor.<br />
Não obstrua as ranhuras de ventilação do receptor, que são fornecidos para ventilação e<br />
protecção contra sobreaquecimento.<br />
Queira manter o receptor em um livre fluxo aéreo. Não permita que o receptor seja exposto<br />
ao calor, frio ou humidade ou condições adversas.<br />
Não utilize nenhum cabo que não seja recomendado, uma vez que estes podem danificar o<br />
equipamento.<br />
Por favor, desligue o receptor da tomada e desligue o cabo entre o receptor e na antena<br />
quando você não vai usá-lo por muito tempo.<br />
Não retire a tampa para reduzir o risco de choque eléctrico. Não tente reparar o receptor<br />
por si.<br />
Consulte todos os que servem para pessoal técnico qualificado.<br />
Manual pode ser actualizado, conforme novas funcionalidades e alterações. .<br />
<strong>MAX</strong>_<strong>COMBO</strong>_<strong>NET</strong>_manual_print REV2.0.pdf 114 31/01/2013 12:52:08
INFORMAÇÕES GERAIS<br />
I. DESEMBALAGEM<br />
Verifique se os seguintes itens estão incluídos com o receptor em sua embalagem.<br />
1) Unidade de Telecomando (RCU)<br />
2) Baterias (2XLR3(AAA))<br />
3) CD com manual do usuário<br />
4) 12V 2.5A Adaptor<br />
II. CARACTERISTICAS<br />
Suporta MPEG2, MPEG4, H.264 e toda a norma DVB<br />
Receptor satélite e terrestre<br />
2 Leitores Interface Comum<br />
DiSEqC 1.0, 1.1 & 1.2<br />
Ajuste do rácio de aspecto 4:3 (16/9 crop), 4:3 (16/9 letter box), 16:9 (4:3 pillar box)<br />
OSD e menus de fácil utilização<br />
Memoriza até 10.000 canais<br />
Suporte para audio multilingue<br />
Suporte para menús multilingue<br />
Lista de canais favoritos<br />
Controlo parental<br />
Guia Electrónico de Programação - EPG<br />
OSD com 63.536 cores<br />
Blind scan (Power Scan) e EPG<br />
Zoom em pausa<br />
Saída óptica Dolby Digital Bitstream S/PDIF<br />
Saída seleccionável: 1080i, 720p, 576p e 576i<br />
Porta USB 2.0 (acesso a Pendrives, memeorías USB, Outras)<br />
Actualização de Software e Base de Dados de Canais através da Porta USB 2.0 e RS232<br />
Leitura de files MP3 através da Porta USB 2.0<br />
Funções PVR Ready através da Porta USB<br />
Leitura de grabações no PC<br />
Programação de grabações através do EPG<br />
Leitura de files Multimedia através da Porta USB 2.0<br />
Home Streaming<br />
(2012 11 05) manual.indd 115 2012-11-05 8:49:09<br />
<strong>MAX</strong>_<strong>COMBO</strong>_<strong>NET</strong>_manual_print REV2.0.pdf 115 31/01/2013 12:52:08<br />
111
112<br />
INFORMAÇÕES GERAIS<br />
III. Unidade de Telecomando = (RCU)<br />
<strong>MAX</strong>_<strong>COMBO</strong>_<strong>NET</strong>_manual_print REV2.0.pdf 116 31/01/2013 12:52:08
INFORMAÇÕES GERAIS<br />
III. Unidade de Telecomando = (RCU)<br />
1. POWER pôr o receptor entre funcionamento e modo de espera.<br />
2. MUTE Liga ou desliga o som do receptor.<br />
3. TV TV modo.<br />
4. DVD DVD modo.<br />
5. VCR VCR modo.<br />
6. STB STB modo.<br />
7. TV / RADIO Comuta entre TV e Rádio.<br />
8. RECALL Selecciona o canal anteriormente vistos.<br />
9. AV / TV Selecciona o modo TV ou AV.<br />
10. PR Selecione o canal visto anteriormente.<br />
11. Fn Network File Manager / Reiniciar.<br />
12. V. Format Muda para HD Tipo.<br />
13. ZOOM ZOOM IN / OUT.<br />
14. Fn2 Reservados.<br />
15. Desloca para baixo em uma página a lista de canais.<br />
16. Desloca-se em uma página a lista de canais.<br />
17. V+ / V- Aumenta volume para cima ou para baixo.<br />
18. P+ / P- Muda canais para cima ou para baixo no modo normal.<br />
19. Mudanças canais ou move-se para o item do menu.<br />
20. Ajusta o volume ou se desloca para a esquerda ou mover o item no menu.<br />
21. MENU Apresenta o menu principal no ecrã.<br />
22. EXIT Retorna ao menu anterior ou modo de visualização normal de um menu.<br />
23. INFO Apresenta o programa INFO caixa informação no ecrã e editar o nome do canal<br />
favorito lista.<br />
24. STOP Pára a gravação ou reprodução.<br />
25. PLAY Mostra arquivo listas e joga lento/normal.<br />
26. PAUSE Interrompe a reprodução da imagem ou vá para o modo normal.<br />
27. RECORD Grava o programa.<br />
28. REWIND Estrelas inverter a reprodução e muda a velocidade de reprodução reversa.<br />
29. F / F Estados avançar ou movimento rápido reprodução e muda a velocidade do avanço<br />
reprodução.<br />
30. AUDIO Muda o áudio línguas.<br />
31. EPG<br />
Apresenta o guia de programas electrónico, de rádio ou TV.<br />
32. Subtitles Subtítulos LIGA modo.<br />
33. Teletext Teletexto Activa o modo de teletexto.<br />
34. Numeric buttons Selecciona o serviço de tel evisão ou de rádio e canais individuais menu.<br />
35. FAV Alterna o modo seleccionado favorito.<br />
36. SAT Altera o Satélite seleccionado da lista.<br />
<strong>MAX</strong>_<strong>COMBO</strong>_<strong>NET</strong>_manual_print REV2.0.pdf 117 31/01/2013 12:52:08<br />
113
114<br />
INFORMAÇÕES GERAIS<br />
IV. Como (Sintonizar o telecomando) RCU para TV.<br />
4<br />
2<br />
5<br />
<strong>MAX</strong>_<strong>COMBO</strong>_<strong>NET</strong>_manual_print REV2.0.pdf 118 31/01/2013 12:52:09<br />
3<br />
1
INFORMAÇÕES GERAIS<br />
IV. Como (Sintonizar o telecomando) RCU para TV.<br />
I. Busca manual<br />
Ligue a TV.<br />
1) Caregar na tecla do dispositivo escolhido ( STB ou TV ou VCR ou DVD ) e na tecla "OK" ao mesmo tempo<br />
durante 2 ou 3 segundos. Em seguida, a lâmpada LED do dispositivo indicará o Modo de Ajuste.<br />
2) Encontrar o código de três dígitos do dispositivo na lista da marca e entrar os três dígitos de acordo, um por<br />
um. - O LED do dispositivo piscará uma vez por cada dígito. Quando concluir a introdução dos 3 dígitos, o<br />
dispositivo (TV ou VCR ou DVD) será apagado uma vez.<br />
3) Clique em OK para finalizar a configuração. (O LED do dispositivo será apagado depois de piscar duas vezes.)<br />
*NOTA: Se você não for capaz de encontrar o código de TV que você tem, por favor realizar o abaixo. " Busca<br />
automática". Então o RCU vai encontrar o código correto automaticamente para funcionar corretamente.<br />
II. Busca automática (Usando as teclas Up ou Down)<br />
1) Caregar na tecla do dispositivo escolhido ( STB ou TV ou VCR ou DVD ) e na tecla "OK" ao mesmo tempo<br />
durante 2 ou 3 segundos. Em seguida, a lâmpada LED do dispositivo indicará o Modo de Ajuste.<br />
2) Pressione as teclas Up ou Down do telecomando para encontrar um dispositivo equivalente. No momento<br />
do telecomando encontrar a correspondência, o dispositivo se apagará.<br />
3) Clique em OK para finalizar a configuração. (O LED do dispositivo será apagado depois de piscar duas vezes.)<br />
III. Ajustes de Fábrica<br />
1) Caregar nas teclas TV LED + REC ao mesmo tempo durante 5 segundos.<br />
2) O LED do dispositivo "TV, DVD, VCR STB" piscarao 3 vezes um por um e o telecomando entrará en modo<br />
padrão.<br />
<strong>MAX</strong>_<strong>COMBO</strong>_<strong>NET</strong>_manual_print REV2.0.pdf 119 31/01/2013 12:52:09<br />
115
116<br />
INFORMAÇÕES GERAIS<br />
V. PAINEL FRONTAL<br />
1. POWER receptor ligado On e/ desligado OFF vigília.<br />
2. USB Liga a dispositivos USB.<br />
LECTOR DE TARJETAS Entrada de cartão de acesso SMART SLOT<br />
3.<br />
1<br />
3<br />
5 6 7 10 12<br />
NOTA: Todas as Memórias Pen Drive USB 2.0 podem não ser compatíveis com o produto.<br />
2<br />
1 2 3<br />
4 8 9 11<br />
<strong>MAX</strong>_<strong>COMBO</strong>_<strong>NET</strong>_manual_print REV2.0.pdf 120 31/01/2013 12:52:09
INFORMAÇÕES GERAIS<br />
VI. PAINEL TRASEIRO<br />
1<br />
2<br />
3<br />
4 8 9 11<br />
1. AERIAL Entrada que Conecta ao cabo da antena terrestre.<br />
2. LOOP OUT Liga a outro STB (receptor).<br />
3. SAT IN Liga a cabo da antena via satélite.<br />
4. LOOP OUT Liga a outro STB.<br />
5. TV SCART Liga a TV cabo SCART.<br />
6. HDMI Conecta conector HDMI para HDMI da TV.<br />
7. RS 232 Ligação RS 232 para computadores pessoais para actualização do<br />
software.<br />
8. Ethernet Liga ao cabo LAN.<br />
9. USB Liga a dispositivos USB.<br />
10. OPTICA Saída óptica para ligar a um amplificador.<br />
11. ADAPTOR Conectar-se ao adaptor.<br />
12. Botão POWER Liga / Desliga.<br />
5 6 7 10 12<br />
<strong>MAX</strong>_<strong>COMBO</strong>_<strong>NET</strong>_manual_print REV2.0.pdf 121 31/01/2013 12:52:09<br />
117
118<br />
INSTALAÇÃO DO EQUIPAMENTO<br />
Esta secção explica várias maneiras de conectar o receptor ao seu actual TV, videocassete e<br />
sistema Hi-Fi.<br />
Você pode escolher uma das seguintes configurações que recomendamos.<br />
Se você tem algum problema ou precisa de ajuda, consulte o seu fornecedor ou prestador de<br />
serviços.<br />
Verifique se os seguintes itens estão incluídos com o receptor em sua embalagem.<br />
I. Ligar o receptor para TV<br />
I-1. Ligar o receptor ao televisor com o cabo SCART<br />
Ligue uma extremidade do cabo SCART à TV SCART selo de alfândega no painel traseiro do receptor e a outra<br />
extremidade a uma tomada SCART na TV.<br />
<strong>MAX</strong>_<strong>COMBO</strong>_<strong>NET</strong>_manual_print REV2.0.pdf 122 31/01/2013 12:52:09
GUIA Lista de canais<br />
1. Ver Live Modo Normal<br />
a) Quando você seleccionar um canal de informação barra<br />
aparece automaticamente no ecrã durante alguns<br />
segundos. Esta barra fornece o canal actual informação.<br />
b) Pressione botão INFO para ver as informações ao vivo<br />
durante o modo normal.<br />
2. Lista Simples<br />
a) Pressione OK quando está a ver os canais e a lista de<br />
canais simples aparece no ecrã.<br />
b) Quando lista de canais é exibida no ecrã é a simples e<br />
quer mais detalhe pressione botão vermelho do<br />
telecomando para ir para a lista detalhada de canais.<br />
3. Lista de canais detalhada.<br />
a) Pressione OK no modo normal de ver canais, para ir<br />
para a lista de canais.<br />
b) Quando a lista simples está no ecrã, para aceder à lista<br />
detalhada é só pressionar botão vermelho para ir ao<br />
pormenor do canal e sua lista detalhada.<br />
c) Pressione e para classificar por Alfabeto.<br />
d) Pressione o botão para sábado ordenar por Satélite e<br />
FAV botão para o Favorito 1 ~ 8.<br />
e) Pressione botão verde para retornar ao Tudo canais ou<br />
EXIT para retornar ao vivo actual canal.<br />
f) Pressione a tecla para mostrar sábado Satélite janela<br />
pop-up, em seguida, seleccione satélite. Canal lista de<br />
satélite seleccionado será apresentado. .<br />
g) Pressione a tecla FAV para mostrar Favorita janela popup,<br />
em seguida, seleccione FAV lista. Canal FAV lista de<br />
seleccionados será exibido.<br />
h) Pressione a tecla verde, em seguida, todos os<br />
pesquisados canal lista será exibida.<br />
<strong>MAX</strong>_<strong>COMBO</strong>_<strong>NET</strong>_manual_print REV2.0.pdf 123 31/01/2013 12:52:10<br />
119
120<br />
GUIA Lista de canais<br />
4.EPG (Electronic Program Guide)<br />
a) Pressione o botão do EPG modo de viver.<br />
b) EPG do canal actual aparece no ecrã.<br />
c) Seleccione o canal que deseja assistir programa.<br />
d) Será exibido na imagem ecrã como lado direito<br />
(rightside).<br />
5. ZOOM IN/OUT<br />
a) Ao pressionar tecla ZOOM viver em um modo<br />
normal, você pode usar Zoom In / Out função.<br />
b) Você pode seleccionar o Zoom com tamanho, use as<br />
teclas vermelho / verde.<br />
c) Você pode seleccionar a posição inicial com <br />
chave.<br />
d) Após a escolha Zoom e tamanho posição, você pode<br />
iniciar com a função zoom tecla OK.<br />
e) Com chave, você pode mover zoom ecrã.<br />
<strong>MAX</strong>_<strong>COMBO</strong>_<strong>NET</strong>_manual_print REV2.0.pdf 124 31/01/2013 12:52:10
MENU GUIA<br />
Página principal<br />
Pressione o botão MENU telecomando =RCU para abrir<br />
principal Página no ecrã. Página principal onde será exibido.<br />
1.Você pode mover para a página principal Utilizando, <br />
sobre a RCU.<br />
2. Pressione OK para confirmar a sua selecção.<br />
3. Pressione EXIT para retornar ao menu anterior ou prima<br />
MENU para ir viver para o actual canal.<br />
I. Gestão de canais<br />
II. Instalações<br />
III. Opções<br />
I. Gestor de canais<br />
Esta secção pode ajudá-lo a organizar canais de acordo com sua preferência.<br />
1. Seleccione Gestor de canais na página principal com e pressione OK.<br />
2. TV Gestor de canais página exibe na ecrã.<br />
3. Seleccione o modo que pretende utilizar .<br />
4. Para ver o canal que você escolher, vá para o canal e, em seguida, prima RED( botão vermelho) BOTTON.<br />
5. Pressione EXIT para retornar ao menu anterior ou prima MENU para ir ver para o actual canal.<br />
I-1. Favorito<br />
I-2. Renomeie<br />
I-3.Mover<br />
I-4. Bloquear<br />
I-5. Excluir<br />
I-1. Favorito<br />
IV. Utilitário<br />
V. Acessórios.<br />
1. Usando vá para o modo favorito, em seguida, prima<br />
Botão AMARELO para escolher Favorito 1 ~ 8.<br />
2. Pressione OK no canal que pretende adicionar ou apagar.<br />
3. será marcado no final do canal seleccionado Nome do bar.<br />
Para apagar pressione OK novamente.<br />
4. Seleccionado canais será automaticamente guardado.<br />
5. Se quiser verificar o que salvou Favorito Lista de canais ir<br />
para outro modo (Rename(renomear) ~ Delete(apagar))<br />
excepto Favorito e, em seguida, pressione o botão para<br />
verificar FAV Favorito 1 ~ 8.<br />
6. Pressione EXIT para retornar ao menu anterior ou prima<br />
MENU para ir ver para o actual canal.<br />
7. Prima botão azul para mudar o nome favorito.<br />
<strong>MAX</strong>_<strong>COMBO</strong>_<strong>NET</strong>_manual_print REV2.0.pdf 125 31/01/2013 12:52:10<br />
121
122<br />
MENU GUIA<br />
I. Gestor de canais<br />
I-2. Renomeie<br />
1. Usando vá para o modo Renomear.<br />
2. Escolha o canal que pretende renomear usando e, em<br />
seguida, pressione OK.<br />
3. Diálogo teclado exibido na ecrã.<br />
4. Edite o nome digitando números e / ou palavras no teclado<br />
Diálogo.<br />
5. Pressione EXIT para retornar ao menu anterior ou prima MENU<br />
para ir ver para o actual canal.<br />
I-3. Mover<br />
1. Usando vá para o modo Mover.<br />
2. Seleccione canais que pretende mover, premindo tecla OK.<br />
3. Move o cursor que você deseja colocar no botão verde do que<br />
prima.<br />
4. Pressione EXIT para retornar ao menu anterior ou prima MENU<br />
para ir viver para o actual canal.<br />
I-4. Bloquear<br />
1. Usando vá para o modo Lock(bloquear).<br />
2. Escolha o canal que deseja bloquear e depois prima OK. será<br />
marcado no final do nome do canal seleccionado bar. Para apagar<br />
pressione OK novamente.<br />
3. Prima Sair para ir para a página principal ou prima MENU para ir<br />
para o canal actual viver.<br />
I-5. Excluir<br />
1. Usando vá para o modo Delete(apagar).<br />
2. Escolha o canal que pretende eliminar e, em seguida, pressione<br />
OK. será marcada no canal seleccionado número. Para apagar<br />
pressione novamente o botão azul.<br />
3. Pressione o botão para apagar AMARELO TP. Seleccione um canal e prima Azul botão. Todos os canais do TP<br />
que será seleccionado automaticamente.<br />
4. 4. Pressione o botão para apagar AMARELO Satélite. Seleccione um canal e prima Azul botão. Todos os canais<br />
de que o satélite será automaticamente seleccionado.<br />
5. Pressione EXIT para retornar ao menu anterior ou prima MENU para ir viver para o actual canal.<br />
6. Caixa de mensagem exibe na tela.<br />
7. Escolha OK na caixa de mensagem e, em seguida, pressione OK para apagar, os canais seleccionados.<br />
<strong>MAX</strong>_<strong>COMBO</strong>_<strong>NET</strong>_manual_print REV2.0.pdf 126 31/01/2013 12:52:10
MENU GUIA<br />
II. Instalação<br />
Esta secção pode ajudá-lo a criar e antena digitalizar ou<br />
transponder de satélite, etc Escolha Instalações na página<br />
principal utilizando e pressione OK. Pressione EXIT para<br />
retornar ao menu anterior ou prima MENU para ir viver para<br />
o actual canal.<br />
II-1. Satélite Pesquisa<br />
II-2. DiSEqC Switch<br />
II-3. Motor Instalação<br />
II-4. Pesquisa Terrestre<br />
II-5. Home Streaming<br />
II-6. Padrão de Fábrica<br />
II-1 Satélite Pesquisa<br />
1. É possível mover o cursor usando A e pressione OK<br />
quando você seleccionar o valor que você deseja.<br />
a) Satélite<br />
- Pressione OK para exibir a lista de satélites.<br />
- Escolha o bom Satélite e, em seguida, pressione OK.<br />
b) DiSEqC<br />
- Pressione OK para exibir a Lista de DiSEqC’s e suas Portas.<br />
- Seleccione a porta DiSEqC que quer, em seguida ,pressione OK.<br />
c) LNB<br />
- Pressione OK para exibir o LNB e sua lista de frequências.<br />
- Escolha o LNB frequência e, em seguida, pressione OK.<br />
- Pode também introduzir directamente os números usando<br />
tecla numérica sobre o telecomando RCU.<br />
d) 22KHz Tone<br />
- Escolha um entre os Nenhuma, 0 KHz ou 22 KHz,<br />
dependendo do usuário alternar antena caixa.<br />
e) Procurar Opção<br />
- Pressione OK para exibir a opção Pesquisa lista.<br />
- Seleccione a opção Pesquisa que pretende e, em seguida,<br />
pressione OK.<br />
f) Pesquisar<br />
- Prima Procurar para iniciar a digitalização canais.<br />
- SAT Renomear: Para renomear satélite, carregar no botão<br />
verde no telecomando.<br />
TP Edit : Para Editar TP, pressione a<br />
VERMELHO botão do<br />
telecomando.<br />
<strong>MAX</strong>_<strong>COMBO</strong>_<strong>NET</strong>_manual_print REV2.0.pdf 127 31/01/2013 12:52:11<br />
123
MENU GUIA<br />
II. Instalação<br />
f) Controle motor<br />
Seleccione a posição utilizando e, em seguida,<br />
pressione OK. Caixa de mensagem exibe no ecrã.<br />
- Memorizar posição de satélite: Armazena a posição<br />
actual do motor para o satélite seleccionado.<br />
- Goto sábado Posição: Move o motor para a posição de<br />
armazenados satélite seleccionado.<br />
- Goto Centro: Avança para o centro do motor.<br />
- Limite off: desactivar Leste, Oeste limite.<br />
- Fixação do Oriente Limite: Definir posição actual como<br />
Oriente Limite.<br />
- Fixação do Oeste Limite: Definir posição actual como<br />
West Limite.<br />
g) Localização de Satélites<br />
- Entrada directa na posição usando tecla numérica<br />
no RCU<br />
- Seleccione a direcção usando (OESTE /ESTE).<br />
h) Procurar Opção<br />
- Pressione OK para exibir a opção Pesquisa lista.<br />
- Seleccione a opção Pesquisa que pretende e, em<br />
seguida, pressione OK.<br />
2. Editar a minha posição locais<br />
- Pressione botão verde para editar locais posição.<br />
- Recalcular posição.<br />
a) Longitude<br />
- Entrada directa na Longitude usando tecla numérica sobre o telecomando.<br />
- Seleccione a direcção usando (ESTE / OESTE).<br />
b) Latitude<br />
- Entrada directa na Latitude UNMBER usando tecla do RCU.<br />
- Seleccione a direcção usando (NORTE / SOUTH).<br />
- Redefinir Posição: Resets todos armazenados<br />
posição do motor.<br />
i) Pesquisar<br />
- Prima Procurar para iniciar a digitalização canais.<br />
- Pressione OK para iniciar a pesquisa.<br />
TP EDIT edição de transponderes: Para<br />
Editar TP Pressione o botão vermelho no<br />
telecomando.<br />
3. Pressione EXIT para retornar ao menu anterior ou prima MENU para ir viver para o actual<br />
canal.<br />
<strong>MAX</strong>_<strong>COMBO</strong>_<strong>NET</strong>_manual_print REV2.0.pdf 129 31/01/2013 12:52:12<br />
125
126<br />
MENU GUIDE<br />
II. Instalação<br />
II-4. Pesquisa Terrestre<br />
1. Seleccione Pesquisa de canal em Instalação usando<br />
e pressione OK.<br />
2. 1) Escolha a região onde você está usando .<br />
2) Você pode seleccionar qual você quer pesquisar tipo<br />
entre Automático e manual usando .<br />
3) Auto<br />
a) Seleccione 'Procura' on no ecrã e pressione botão OK<br />
para pesquisar os canais do terrestre digital.<br />
b) Prima Sair ou Menu após acabamento<br />
digitalização.<br />
4) Manual<br />
a) Seleccione MUX canal que você deseja usar .<br />
b) Frequência será exibida automaticamente, de acordo<br />
com Canal o seleccionado MUX.<br />
II-5. Home Streaming<br />
1. Definições no PC<br />
***Execute o programa ‘Home Streaming’<br />
a) Vá para o menu ‘Preference’<br />
b) Escolha ‘Default URL’ para aceder á pasta download<br />
usando o botão que diz “Browse” É atribuído a "c: \<br />
download", mas deve especificar uma pasta de destino<br />
pessoal para ser capaz de receber arquivos de filme no<br />
PC.<br />
Nota: Servidor disponivel por defeito<br />
2. Definições no STB<br />
a) Vá ao menu Home streaming ( Menu Accessory <br />
Network Home streaming ) e clique em Home<br />
streaming.<br />
b) IP-Name Edit Pad vai aparecer, depois coloque o IP do<br />
servidor pelas teclas numéricas do controle remoto.<br />
c) O endereço de IP têm que ser o mesmo que o endereço<br />
de IP que aparece no menu preference no Home<br />
streaming.<br />
<strong>MAX</strong>_<strong>COMBO</strong>_<strong>NET</strong>_manual_print REV2.0.pdf 130 31/01/2013 12:52:12
MENU GUIA<br />
II. Instalação<br />
3. Ver o filme pelo Home Streaming<br />
a) Prima "Fn" no controle remoto no modo normal do<br />
Receptor e, em seguida a lista de arquivos dos filmes no<br />
PC aparecerá no ecrãn da TV.<br />
b) Selecione o arquivo que você deseja reproduzir usando as<br />
teclas de navegação do controle remoto e pressione "OK"<br />
para ver o arquivo do filme desejado.<br />
Por favor, veja as imagens para melhor compreensão.<br />
II-6. Padrão de Fábrica<br />
Use Default Factory função somente quando você quiser de<br />
devolver o receptor à condição de fábrica padrão. Todas as<br />
definições e os canais serão apagados.<br />
1. Seleccione fábrica em instalações usando e pressione<br />
OK.<br />
2. Caixa de mensagem exibe no ecrã.<br />
3. Seleccione OK para voltar ao receptor à condição de<br />
fábrica e, em seguida, pressione OK.<br />
4. Pressione EXIT para retornar ao menu anterior ou prima<br />
MENU para ir ver o actual canal.<br />
<strong>MAX</strong>_<strong>COMBO</strong>_<strong>NET</strong>_manual_print REV2.0.pdf 131 31/01/2013 12:52:12<br />
127
III. OPÇÕES<br />
Esta secção pode ajudá-lo a configurar OSD idioma,<br />
tempo, etc Escolha Opções na Página principal utilizando<br />
e pressione OK. Pressione EXIT para retornar ao<br />
menu anterior ou prima MENU para ir para ver o canal<br />
actual.<br />
III-1. Configuração do OSD<br />
III-2. Painel de Controle<br />
III-3. Hora Ajuste<br />
III-4. Bloqueio Parental.<br />
III-1. Configuração do OSD<br />
1. Seleccione Configuração do OSD em Opções e utilizando<br />
pressione OK.<br />
a) OSD Língua (Language) escolha da Língua<br />
- Pressione OK para exibir OSD lista de Línguas.<br />
- Seleccione o idioma que você deseja e então pressione OK.<br />
b) Audio Línguas<br />
- Pressione OK para exibir Audio lista de Língua.<br />
- Seleccione o idioma que você deseja e, em seguida, pressione OK.<br />
c)Subtítulos Língua<br />
- Pressione OK para exibir legendas.<br />
- Escolha o idioma em que deseja e, em seguida, pressione OK.<br />
c) Apresentar Info Bar<br />
- Pressione OK para exibir Display Info Bar tempo lista.<br />
- Escolha a segunda que você deseja exibir e, em seguida, pressione OK.<br />
e) Transparência<br />
- Ajuste de transparência nível.<br />
2. Pressione EXIT para retornar ao menu anterior ou prima MENU para ir viver para o actual<br />
canal.<br />
128<br />
MENU GUIA<br />
<strong>MAX</strong>_<strong>COMBO</strong>_<strong>NET</strong>_manual_print REV2.0.pdf 132 31/01/2013 12:52:12
MENU GUIA<br />
III. OPÇÕES<br />
III-2. Painel de Controle.<br />
1. 1. Seleccione Configuração na TV usando Opções e<br />
pressione OK.<br />
a) Tipo HD<br />
- Escolha a saída de vídeo HD.<br />
b) Tipo TV<br />
- Seleccione o seu tipo de televisor.<br />
c) Aspecto Ratio<br />
- Seleccione tela ratio.<br />
d) Ecrã Screen Controlo<br />
- Escolha o ecrã modos.<br />
e) Brilho<br />
- Ajuste de tela brilho.<br />
f) Contraste<br />
- Ajuste de tela contraste.<br />
g) Saturação<br />
- Ajuste de tela Saturação.<br />
2. Pressione EXIT para retornar ao menu anterior ou prima<br />
MENU para ir viver para o actual canal.<br />
III-3. Hora Ajuste<br />
Defina o seu horário local, de acordo com sua localização.<br />
1. Seleccione Configuração do Tempo em Opções usando <br />
e pressione OK.<br />
2. Hora Ajuste página exibe na tela.<br />
3. Mova o cursor usando , e pressione OK quando você<br />
seleccionar o valor que você deseja. (Entrada Hora directamente<br />
usando as teclas numéricas sobre RCU)<br />
4. Pressione EXIT para retornar ao menu anterior ou prima MENU<br />
para ir viver para o actual canal.<br />
III-4. Parental Lock(bloquear) Instalação código (000)<br />
1. Seleccione Bloqueio Parental configuração em Options opções usando<br />
e pressione OK.<br />
2. Parental Lock página exibe na tela.<br />
3. Você pode bloquear e desbloquear Parental Lock seleccionar ON<br />
ou OFF utilizando <br />
4. Você pode bloquear e desbloquear Instale Bloquear selecção ON ou OFF utilizando (para a instalação<br />
Definições).<br />
5. Digite uma nova senha se você quiser alterar a senha actual.<br />
*Nota. Senha padrão é 0000.<br />
6. Confirme a sua nova senha entrando nova senha novamente.<br />
7. Pressione EXIT para retornar ao menu anterior ou prima MENU para ir viver para o actual canal.<br />
<strong>MAX</strong>_<strong>COMBO</strong>_<strong>NET</strong>_manual_print REV2.0.pdf 133 31/01/2013 12:52:13<br />
129
ME NU GUIA<br />
V. ACESSÓRIO<br />
Esta secção pode ajudá-lo a usar USB, etc Seleccione<br />
Utilitário na página principal utilizando e<br />
pressione OK.<br />
· V - 1. USB<br />
· V - 2. Smart Card<br />
· V - 3. Rede / Videoclube<br />
V- 1 USB<br />
O r eceptor é equipado com o anfitr ião.<br />
1. Seleccione USB na Utilitário com e pressione OK.<br />
2. Se você quiser salvar Software ou Banco de Dados,<br />
pres s ione o botão verde s obre R CU.<br />
3. Seleccione o arquivo que você des eja s alvar us ando<br />
e o botão OK.<br />
4. Depois do download do arquivo seleccionado, o receptor<br />
irá reiniciar automaticamente.<br />
V - 2 Smart Card<br />
O receptor está equipado com dois Slots de Cartão Inteligente,<br />
de vários Operadores que têm acesso condicionado ao<br />
pagamento por serviços de visualização de canais (Pay per view).<br />
Os programas que podem ser descodificado é determinado pelo<br />
cartão inteligente que utiliza.<br />
1. Selecione Smart Card no menu ACESSÓRIO com e<br />
pressione OK.<br />
2. Insira Smart Card(cartão inteligente) no Slot 1 ou 2, então STB<br />
e ele exibe o nome do cartão inteligente na tela.<br />
3. O nome da Slot de cartões difere de acordo com cada cartão<br />
inteligente.<br />
4. Pressione EXIT para regressar ao menu anterior ou pressione<br />
MENU para ir para ver o corrente canal ao vivo.<br />
V - 3 Rede / Videoclube<br />
Este menu suporta múltiplas funções, como abaixo:<br />
1. SW Download pela Web (internet).<br />
2. Início-Streaming.<br />
3. Youtube.<br />
4. Clube de Vídeo.<br />
5. RSS informações feed / Twitter / Informação sobre Tempo.<br />
6. Download de dados do canal.<br />
<strong>MAX</strong>_<strong>COMBO</strong>_<strong>NET</strong>_manual_print REV2.0.pdf 135 31/01/2013 12:52:14<br />
131
PVR GUIDE<br />
PVR GUIDE<br />
I. Dispositivo Recomendado<br />
- Externa USB Disco rígido (Hard Disk Drive).<br />
- Memória Flash (PEN memory stick)<br />
- Tipo de formato: FAT16/32 (Sistema não dá suporte a<br />
sistema de arquivos NTFS e outros).<br />
II. Função Gravação.<br />
II-1 Gravação Guardada.<br />
1. Horário Reservado para Gravação.<br />
: Defina desejada tempo de gravação em "Utilitário<br />
Timer" para gravar na hora definida.<br />
NOTA : Como configurar antes de iniciar "Tempo /<br />
Gravar".<br />
- STB criado no padrão conforme abaixo.<br />
- Por favor, altere "OFF" para "Gravação" no, Active menu.<br />
- Uma vez que você defina "Gravação" no Active menu,<br />
você verá o m de canal, Nome do canal, hora de início e<br />
duração.<br />
- Pressione o botão “OK” para seleccionar o nome do<br />
canal.<br />
2. EPG Gravação Reservado<br />
: Usado para gravar um evento seleccionado a partir de<br />
EPG.<br />
- Pressione o botão para ir para info. EPG, EPG menu<br />
enquanto vê um programa no ecrã.<br />
- Para escolher ver um evento tempo: Mover a partir do<br />
EPG para seleccionar o evento e pressione o botão<br />
"RECORD " no telecomando.<br />
- Se você quiser cancelar, prima mais uma vez o botão<br />
"RECORD(gravação) " .<br />
- Se você quiser vários a programar para gravação, mova<br />
e pressione o "botão para gravar" no telecomando.<br />
132<br />
<strong>MAX</strong>_<strong>COMBO</strong>_<strong>NET</strong>_manual_print REV2.0.pdf 136 31/01/2013 12:52:14
PVR GUIDE<br />
PVR GUIDE<br />
II. Função Gravação.<br />
II-2 Gravação Instantânea<br />
- Pressione o botão "RECORD(gravar)" no telecomando para<br />
iniciar a gravação do programa.<br />
- Enquanto grava o programa.<br />
- Pressione o botão "PAUSE" chave para executar o "Time<br />
Shift”.<br />
- Você pode usar o botão "LEFT / RIGHT botão" para visualizar<br />
tempo desejado enquanto recodificação programa.<br />
- Pressione o botão"OK" para exibir no ecrã, no telecomando<br />
para arquivo lista de Gravação.<br />
Durante a gravação, é possível observar também outros<br />
canais que estão localizados na mesmo TP(frequência). No<br />
caso de quer assistir outros canais durante a gravação, Você<br />
deve voltar a gravar o canal na lista de canais e parar a<br />
gravação.<br />
- Se você pressionar "STOP" no telecomando, actual<br />
programa que você está assistindo TV Live irá parar e será<br />
armazenada no espaço de memória usb.<br />
<strong>MAX</strong>_<strong>COMBO</strong>_<strong>NET</strong>_manual_print REV2.0.pdf 137 31/01/2013 12:52:15<br />
133
PVR GUIDE<br />
PVR GUIDE<br />
III. Função Play = Ver.<br />
- Para ver o programa previamente gravado, prima "botão<br />
Play" no telecomando.<br />
- Utilize as teclas de seta para seleccionar o ficheiro que<br />
pretende reproduzir e prima "OK" para reproduzir.<br />
- Enquanto estiver vendo o programa.<br />
- Se você pressionar o botão "LEFT / RIGHT " no telecomando<br />
voltará a ver a TV ao vivo ou ver o arquivo gravado, actual<br />
programa ver assistindo você irá parar e voltar a imagem<br />
será reiniciado a partir de onde foi transferido pressionar o<br />
botão"LEFT / RIGHT " no telecomando. Se você quiser<br />
reproduzir outro ficheiro gravado Durante a reprodução,<br />
pressione o botão "Play".<br />
IV. Função Trick Mode.<br />
- Se você pressionar o botão "FF” (Fast Forward) " TimeShift<br />
ou durante a reprodução, o ficheiro será reproduzido a uma<br />
velocidade de 2x, e se você pressionar o botão "FF" mais<br />
uma vez, o arquivo será visionado a uma velocidade 8X.<br />
- Se você pressionar o botão"REW (Rewind)" TimeShift ou<br />
durante a reprodução, o ficheiro irá voltar a uma velocidade<br />
de 2x, e se você pressionar o "botão REW" mais uma vez, o<br />
arquivo fará o rebobinar a uma velocidade 8x.<br />
- FF / REW função irá voltar ao ver normal se você pressionar<br />
"botão PLAY".<br />
134<br />
<strong>MAX</strong>_<strong>COMBO</strong>_<strong>NET</strong>_manual_print REV2.0.pdf 138 31/01/2013 12:52:15
PVR GUIDE<br />
PVR GUIDE<br />
V. Função TimeShift<br />
- Se você quiser executar "Time Shift" no modo ver, Live<br />
Você deve definir "On" do Time Shift Na Opção PVR (PVR <br />
Accessório TimeShift "ON").<br />
- A estrela Time Shift no modo ver Live, prima "PAUSE" para<br />
iniciar.<br />
- Time Shift será visionado durante 30 minutos no modo ver<br />
Live.<br />
- Para começar a "Reprodução" durante TimeShift pressione<br />
o botão "PLAY".<br />
- Você pode mover-se "posição de ver" usando o botão<br />
ESQUERDA / DIREITA durante Time Shift.<br />
VI. Formato<br />
- Você pode fazer o FAT32 Formato o disco rígido (HDD)<br />
formatado por FAT32 e NTFS também.<br />
- Você pode fazer também o formato multi partilhada HDD.<br />
- Quando o NTFS formatado disco rígido é inserido, a seguir<br />
mensagem aparecerá.<br />
- Pressione o botão"OK" para mover para "C:, D:, E:, F:<br />
NEXT", em caso de Multi partilhada HDD.<br />
- No caso do NTFS multi partilhado no disco rígido(HDD), você<br />
deve pelo formato FAT 32<br />
<strong>MAX</strong>_<strong>COMBO</strong>_<strong>NET</strong>_manual_print REV2.0.pdf 139 31/01/2013 12:52:16<br />
135
PVR GUIDE<br />
PVR GUIDE<br />
VII. Ver MP3 Play<br />
- Escolha um arquivo MP3 que você quiser ver no menu USB.<br />
- FAT32.<br />
- Depois de seleccionar um arquivo MP3,para ver o MP3 na<br />
janela será executado.<br />
VIII. Ver JPG Play<br />
- Seleccionar arquivo JPG que você deseja ver no menu USB.<br />
- Pressione OK para ver o JPG que você quiser.<br />
- É possível rodar a imagem usando o botão LEFT / RIGHT.<br />
IX. Actualização de<br />
- Select * UAD arquivo que você deseja actualizar no menu<br />
USB.(deixe o receptor acabar e passar sozinho ao menu<br />
nesta operação os canais serão apagados e é necessário<br />
repor toda a programação.<br />
136<br />
<strong>MAX</strong>_<strong>COMBO</strong>_<strong>NET</strong>_manual_print REV2.0.pdf 140 31/01/2013 12:52:16
PVR GUIDE<br />
PVR GUIDE<br />
X. Como ver o "o arquivo gravado pelo PVR de<br />
HD-XXX" no PC ou DivX Player<br />
X-1 Como ver no PC.<br />
A) VER KM Player.<br />
B) Seleccione o Idioma<br />
1) Clique botão direito do mouse Língua Língua do<br />
seu idioma.<br />
C) Altere a extensão nome do arquivo gravado para<br />
"*.mpg"<br />
Exemplo: Bem-vindo ao A_131821 ao A_131821.mpg<br />
D) Seleccione o arquivo que você quer ver.<br />
1) Clique botão direito do rato Open files <br />
Seleccione<br />
X-2 Como ver em "DivX Player".<br />
A) O formato do arquivo deve ser alterado para ". Avi" para ver<br />
em formato DivX Player.<br />
B) Seleccione uma pasta de destino para onde se salvou o<br />
arquivo que será alterado para *. avi.<br />
1) Clique botão direito do rato e Seleccione Capturar <br />
Captura Pasta.<br />
C) Repetir A) B) C) D) de No.1 de como ver no PC.<br />
D) Capturar o ficheiro que é actualmente visto para o<br />
converter info. em *. avi<br />
1) Clique botão direito do rato Captura Captura de<br />
video rápida.<br />
2) Em seguida, o ficheiro é guardado para ver pasta<br />
designada por *. avi<br />
E) Se o arquivo está a ser visto no STB SD em canal, ele é<br />
salvo por SD e HD. Se o arquivo é salvo por ele ou H.264 HD<br />
ou H.264. Se o usuário não tem DivX ver se que pode ver ou<br />
H.264 HD (pelo menos CPU sigma8634), ele deve converter<br />
o arquivo de modo a que o SD SD geral DivX Player (CPU<br />
sigma8511) podeecutar o arquivo.<br />
<strong>MAX</strong>_<strong>COMBO</strong>_<strong>NET</strong>_manual_print REV2.0.pdf 141 31/01/2013 12:52:16<br />
137
PVR GUIDE<br />
PVR GUIDE<br />
X-3 Como converter o arquivo por Divx Manager<br />
A) Ver em Divx Manager.<br />
1) Defenir Acertos Modelo Rapsody RSH-250/350<br />
B) Seleccione a pasta onde o ficheiro que pretende é<br />
convertido. Então o arquivo de informação será exibido.<br />
C) e seleccione o arquivo que você deseja converter e<br />
seleccione "Converter".<br />
D) Seleccione “Codificação" "Iniciar Começar " Conversão".<br />
NOTA: Site para download.<br />
1. Kmplayer<br />
1) Enter this site : http://2bwithu.tistory.com/245.<br />
2) Download 2 ficheiros para 1 pasta e descompacte o arquivo<br />
armazenado. Após descompactar, você pode instalar<br />
apenas clique exe.<br />
2. Divx Manger<br />
1) Indicar este site :<br />
http://www.modix4u.co.kr/upboard/view.asp?fcprimkey=44<br />
2) Clique abaixo para a versão Inglês.<br />
138<br />
<strong>MAX</strong>_<strong>COMBO</strong>_<strong>NET</strong>_manual_print REV2.0.pdf 142 31/01/2013 12:52:17
TROUBLESHOOTING<br />
Problem<br />
Nothing appears on the Front<br />
Panel or No power supply<br />
No Picture<br />
No Sound<br />
Remote Control Unit dose not<br />
work<br />
Service is not running or<br />
scrambled<br />
“No Signal” on the screen<br />
Tuner Defective Check<br />
You have forgotten your<br />
secret PIN Code<br />
Solution<br />
Check that the power cable is plugged into the power<br />
socket.<br />
Check the dish and adjust it.<br />
Check the cable connection and correct it.<br />
Check channel and video output.<br />
Check the volume level of the TV and receiver.<br />
Check the mute status of TV and receiver.<br />
Check the cable connection and correct.<br />
Replace batteries.<br />
Aim the remote control unit directly to the receiver.<br />
Checking that nothing blocks the front panel.<br />
Check the Conditional Access Module and smart card are<br />
appropriate for the selected service.<br />
Check the Conditional Access Module and smart card are<br />
correctly inserted or not.<br />
Check the signal strength and the signal quality in the<br />
menu.<br />
Check the LNB and replace the LNB if necessary.<br />
Check the LNB cable.<br />
Check the Dish and adjust it.<br />
Go to the Option and select System Information.<br />
Contact your Service Provider.<br />
<strong>MAX</strong>_<strong>COMBO</strong>_<strong>NET</strong>_manual_print REV2.0.pdf 143 31/01/2013 12:52:17<br />
139
140<br />
SPECIFICATIONS<br />
.Conditional Access Module Interface<br />
Item Specification<br />
SMART CARD 2 SLOTS, ISO 7816, GSM11.11 and EMV (payment systems) compatibility<br />
. Tuner & Channel (DVB-S2)<br />
Item<br />
Specification<br />
Type 1 F Type, IEC169-24, Female<br />
Frequency Rage 950MHz to 2150MHz<br />
RF Impedance 75 Ohm unbanlanced<br />
Signal Level -65 to -25 dBm<br />
LNB Power 13.5/18.5Vdc +/- 5%, 0.5Amax, Overload Protected<br />
22KHz Tone Frequency : 22KHz +/- 2KHz, 0.6Vpp +/- 0.2V<br />
DiSEqC Control Version1.0, 1.2, Tone burst A/B<br />
Demodulation QPSK, 8PSK<br />
Input Symbol Rate<br />
FEC Decoder<br />
DVB-S QPSK : 2~45 Msps<br />
DVB-S2 8PSK/QPSK : 10~30Msps<br />
1/2, 2/3, 3/4, 3/5, 4/5, 5/6, 8/9, 9/10 in DVB-S2 mode.<br />
1/2, 2/3, 3/4, 5/6 and 7/8 in DVB-S mode.<br />
. Tuner & Channel(DVB-T)<br />
Item Specification<br />
Type IEC60169-2(VHF/UHF) female, 75 ohm nominal<br />
Frequency Rage VHF : 170MHz to 230MHz<br />
UHF : 470MHz to 862MHz<br />
Signal Level -78.5dBm ~ -25dBm<br />
(64QAM, Code Rate 2/3, Guard Interval 1/8,Gaussian Channel)<br />
COFDM Spectrum COFDM 2K/8K-Carrier<br />
FEC Mode 1/2, 2/3, 3/4, 5/6, 7/8<br />
. System & Memory<br />
Item Specification<br />
Main Processor STi7110<br />
Flash Memory 8 Mbytes<br />
DDR Memory 128 Mbytes<br />
Channel Capacity Digital Channel : 10,000<br />
Front 1-Key(Power), 7-SEGMENT DISPLAY<br />
<strong>MAX</strong>_<strong>COMBO</strong>_<strong>NET</strong>_manual_print REV2.0.pdf 144 31/01/2013 12:52:17
SPECIFICATIONS<br />
. MPEG Transport Stream & A/V Decoding<br />
Item<br />
Specification<br />
Transport Stream 13818-1 MPEG-2, H.264/AVC Transport stream Specification<br />
Profile Level MPEG-2 MP@ML, MP@HL, MPEG-4 H.264/AVC<br />
Input Rate Max. 90Mbit/s<br />
Aspect Ratio 4:3, 16:9, Letter Box<br />
Frame Rate 25Hz for PAL, 30Hz for NTSC<br />
Video Resolution 576i, 576p, 720p, 1080i<br />
Teletext Through VBI<br />
Audio Decoding MPEG-1 Layer 1 & 2, Dolby Downmix<br />
Audio Mode Single Channel/Dual Channel Joint Stereo/Stereo<br />
Frequency Response 20~20kHz,
<strong>MAX</strong>_<strong>COMBO</strong>_<strong>NET</strong>_manual_print REV2.0.pdf 146 31/01/2013 12:52:17
<strong>MAX</strong> <strong>COMBO</strong> <strong>NET</strong><br />
ITALIANO<br />
MANUALE D'USO<br />
<strong>MAX</strong>_<strong>COMBO</strong>_<strong>NET</strong>_manual_print REV2.0.pdf 147 31/01/2013 12:52:18
<strong>MAX</strong>_<strong>COMBO</strong>_<strong>NET</strong>_manual_print REV2.0.pdf 148 31/01/2013 12:52:18
INDICE<br />
SICUREZZA IN GENERALE 146<br />
INFORMAZIONI GENERALI 147<br />
I. IMBALLAGGIO 147<br />
II. CARATTERISTICHE 147<br />
III. TELECOMANDO (RCU) 148<br />
IV. COME IMPOSTARE IL TELECOMANDO PER LA TV 150<br />
V. PANNELLO FRONTALE 152<br />
VI. PANNELLO POSTERIORE 153<br />
INSTALLAZIONE APPARECCHIATURE 154<br />
GUIDA LISTA CANALI 155<br />
GUIDA DEI MENU 157<br />
PRIMA PAGINA 157<br />
I . CANALE MANAGER 157<br />
I I. INSTALLAZIONE 159<br />
III. OPZIONI 164<br />
IV. UTILITA’ 166<br />
V. ACCESSORI 167<br />
PVR Guide 168<br />
RISOLUZIONE DEI PROBLEMI 175<br />
SPECIFICHE 176<br />
LISTA DELLE MARCHE 178<br />
Per poter scollegare l'apparecchio dalla rete elettrica, la spina deve essere<br />
tolta dalla presa elettrica, pertanto, la spina di alimentazione deve essere<br />
facilmente accessibile.<br />
<strong>MAX</strong>_<strong>COMBO</strong>_<strong>NET</strong>_manual_print REV2.0.pdf 149 31/01/2013 12:52:18<br />
145
146<br />
SICUREZZA IN GENERALE<br />
ATTENZIONE<br />
Prima di mettere in funzione tale dispositivo si prega di leggere le seguenti istruzioni con<br />
attenzione per evitare il rischio di compromettere la propria integrità fisica.<br />
Non coprire il ricevitore e mantenere un sufficiente spazio libero attorno al ricevitore.<br />
Verificare la tensione di funzionamento del ricevitore massimo 90 ~ 250V, 50Hz ~ 60Hz , 12V<br />
2.5A Adaptor, tenere le sostanze liquide a una sufficiente distanza di sicurezza dal ricevitore.<br />
Il ricevitore non deve essere esposto a gocciolamenti o schizzi e nessun recipiente contenente<br />
liquidi deve essere posto sul ricevitore.<br />
Scollegare il ricevitore dalla presa a muro prima di pulirlo.<br />
Usare un panno morbido e una blanda soluzione detergente per pulire la custodia.<br />
Non bloccare le fessure di areazione del ricevitore che servono a proteggere il ricevitore da<br />
possibili surriscaldamenti.<br />
Si prega di mantenere il ricevitore al riparo di eventuali correnti d’aria.<br />
Non esporre il ricevitore a estreme condizioni di caldo, freddo o umidità.<br />
Non utilizzare alcun cavo o attacco non raccomandati in quanto questi possono causare<br />
danni alle apparecchiature.<br />
Si prega di scollegare il ricevitore dalla presa a muro e scollegare il cavo di collegamento<br />
del’antenna al ricevitore quando non usato per lungo tempo.<br />
Non rimuovere la custodia al fine di r ridurre il rischio di scosse elettriche.<br />
Non tentare di riparare il ricevitore voi stessi.<br />
Rivolgersi sempre ed esclusivamente a personale qualificato.<br />
Il manuale può essere aggiornato con nuove funzioni.<br />
<strong>MAX</strong>_<strong>COMBO</strong>_<strong>NET</strong>_manual_print REV2.0.pdf 150 31/01/2013 12:52:18
INFORMAZIONI GENERALI<br />
I. DISIMBALLAGGIO<br />
Si prega di assicurarsi che i sotto elencati elementi siano inclusi nell’imballaggio<br />
contenente il ricevitore.<br />
1) Telecomando (RCU)<br />
2) Batterie (2EA)<br />
3) CD con manuale d'uso<br />
4) Cavo A / V<br />
II. CARATTERISTICHE<br />
Supporta MPEG-2, MPEG-4, H.264 e pienamente compatibile DVB<br />
Ricevitore satellitare e terrestre combo<br />
2 Slot smart card<br />
DiSEqC 1.0, 1.1 e 1.2<br />
Rapporto di regolazione 4:3 (16/9 crop), 4:3 (16/9 letterbox), 16:9 (4/3 pillar box)<br />
Funzionamento OSD facile da usare<br />
Un totale di 10.000 canali programmabili<br />
Supporto audio multilingua<br />
Testo del menu multilingua<br />
Selezione canali preferiti<br />
Guida controllo parentale<br />
EPG (Guida Elettronica Programmi Provider) per le informazioni sullo schermo del canale<br />
On Screen Display a 65.536 colori<br />
Blind Scan e EPG completi<br />
Funzione zoom in pausa<br />
Uscita Dolby Digital Bitstream attraverso S/PDIF (ottica)<br />
Uscita selezionabile per i formati 1080p, 1080i, 720p, 576p e 576i<br />
Host USB 2.0 (Accesso a HDD, USB, ecc e altri)<br />
Aggiornamento Software & liste canali tramite porta USB 2.0, RS232 e ethernet.<br />
Riproduzione file MP3 da USB 2.0<br />
PVR Ready tramite USB (funzione di videoregistrazione)<br />
Riproduzione file registrati da PC<br />
Prenotazione registrazioni da funzioni EPG<br />
Riproduzione di file multimediali da USB 2.0<br />
Funzione Home streaming<br />
(2012 11 05) manual.indd 151 2012-11-05 8:49:41<br />
<strong>MAX</strong>_<strong>COMBO</strong>_<strong>NET</strong>_manual_print REV2.0.pdf 151 31/01/2013 12:52:18<br />
147
148<br />
INFORMAZIONI GENERALI<br />
III. TELECOMANDO (RCU)<br />
<strong>MAX</strong>_<strong>COMBO</strong>_<strong>NET</strong>_manual_print REV2.0.pdf 152 31/01/2013 12:52:18
INFORMAZIONI GENERALI<br />
III. TELECOMANDO (RCU)<br />
1. POWER Commuta il ricevitore tra funzionamento e modalità standby.<br />
2. MUTE Attiva o disattiva l'audio.<br />
3. TV modalità TV.<br />
4. DVD modalità DVD.<br />
5. VCR modalità VCR.<br />
6. STB modalità STB.<br />
7. TV / RADIO commuta tra TV e Radio.<br />
8. RECALL Seleziona il canale visualizzato in precedenza.<br />
9. AV / TV Seleziona la modalità TV o AV.<br />
10. PR Selezionare il canale precedentemente visto.<br />
11. Fn Gestione dei File di Rete / Riavvio.<br />
12. V. Format Commuta le tipologie HD.<br />
13. ZOOM Seleziona lo ZOOM IN / OUT.<br />
14. Fn2 Riservato.<br />
15. Si muove su una pagina della lista dei canali in senso discendente.<br />
16. Si muove su una pagina della lista dei canali in senso ascendente.<br />
17. V+ / V- Modula il volume tra alto e basso.<br />
18. P+ / P- Cambia i canali in su o in giù in modalità normale.<br />
19. Cambia i canali o permette di spostarsi a una voce nel menu.<br />
20. Regola il volume o permette di spostarsi a sinistra o a una voce nel menu.<br />
21. MENU Visualizza il menu principale sullo schermo.<br />
22. EXIT Torna al menu precedente o alla modalità di visualizzazione normale di un menu.<br />
23. INFO Visualizza la finestra delle informazioni del programma sullo schermo e modifica<br />
ilnome della lista dei canali preferiti.<br />
24. STOP ferma la registrazione o la riproduzione.<br />
25. PLAY mostra la lista dei file e riproduce in modalità lento / normale.<br />
26. PAUSE mette in pausa la riproduzione delle immagini o passa in modalità normale.<br />
27. RECORD Registra un dato programma.<br />
28. REWIND riproduce in senso inverso e modifica la velocità di riproduzione inversa.<br />
29. F / F avanzamento rapido o riproduzione veloce e modifica la velocità di riproduzione in<br />
avanti.<br />
30. AUDIO Cambia la lingua audio.<br />
31. EPG<br />
Visualizza la guida dei programmi TV o Radio.<br />
32. Subtitles Abilita la modalità sottotitoli.<br />
33. Teletext Attiva la modalità televideo.<br />
34. Numeric buttons Pulsanti numerici per selezionare i canali TV o radio e singoli menu.<br />
35. FAV Alterna la modalità preferita selezionata.<br />
36. SAT Alterna la lista dei Satelliti selezionata.<br />
<strong>MAX</strong>_<strong>COMBO</strong>_<strong>NET</strong>_manual_print REV2.0.pdf 153 31/01/2013 12:52:18<br />
149
150<br />
INFORMAZIONI GENERALI<br />
IV. COME IMPOSTARE IL TELECOMANDO PER LA TV<br />
4<br />
2<br />
5<br />
<strong>MAX</strong>_<strong>COMBO</strong>_<strong>NET</strong>_manual_print REV2.0.pdf 154 31/01/2013 12:52:18<br />
3<br />
1
INFORMAZIONI GENERALI<br />
IV. COME IMPOSTARE IL TELECOMANDO PER LA TV<br />
I. Ricerca Manuale<br />
Per iniziare, accendere il televisore.<br />
1) Premere il pulsante LED del telecomando (TV o VCR o DVD) + tasto "OK" allo stesso tempo, per 2 o 3 secondi.<br />
Da questo momento il LED del dispositivo sarà in modalità di impostazione.<br />
2) Scegli le 3 cifre del dispositivo, nella lista del marchio, quindi digita sulla tastiera le 3 cifre del codice uno per<br />
uno. - Una volta terminato l'inserimento dei 3-numeri, se corretti, il dispositivo selezionato (TV o VCR o DVD) si<br />
spegnerà.<br />
3) Fare clic su OK per completare l'impostazione. (Il dispositivo LED si spegne dopo 2 impulsi luminosi).<br />
*NOTA: Se nella lista non avete trovato il codice della vostra marca di TV, eseguire la seguente modalità:"Ricerca<br />
automatica". Quando il telecomando troverà il codice corretto, facendo una scansione automatica dei codici,<br />
avrete il controllo del vostro TV.<br />
II. Ricerca automatica (Utilizzare tasto Su o Giù)<br />
1) Premere il pulsante LED (TV o VCR o DVD) + tasto "OK" allo stesso tempo, per 2 o 3 secondi. Appena attivata<br />
questa modalità, si accenderà quindi il LED di riferimento.<br />
2) Premere i tasti freccia, Su o Giù sul telecomando per cercare il dispositivo equivalente fino al momento in<br />
qui l’ apparecchiatura da associare, si spegnerà.<br />
3) Fare clic su OK per completare l'impostazione. (Il dispositivo LED si spegne dopo 2 lampeggi).<br />
III. Reset di fabbrica<br />
1) Premere il pulsante LED + tasto REC, allo stesso tempo per più di 5 secondi.<br />
2) Il pulsante LED si spengono "TV, DVD, VCR STB" 3 volte uno per uno e il telecomando sarà resettato.<br />
<strong>MAX</strong>_<strong>COMBO</strong>_<strong>NET</strong>_manual_print REV2.0.pdf 155 31/01/2013 12:52:19<br />
151
152<br />
INFORMAZIONI GENERALI<br />
V. PANNELLO FRONTALE<br />
1 2 3<br />
1. POWER commuta le modalità acceso e stand-by del ricevitore .<br />
2. USB connessione per dispositivi USB.<br />
3. LECTOR DE TARJETAS Accesso per la smart card.<br />
1<br />
3<br />
5 6 7 10 12<br />
Nota: Non tutti i flash drive USB 2.0 potrebbero essere compatibili con il prodotto<br />
2<br />
4 8 9 11<br />
<strong>MAX</strong>_<strong>COMBO</strong>_<strong>NET</strong>_manual_print REV2.0.pdf 156 31/01/2013 12:52:19
INFORMAZIONI GENERALI<br />
VI. PANNELLO POSTERIORE<br />
1<br />
2<br />
3<br />
5 6 7 10 12<br />
4 8 9 11<br />
1. AERIAL Collegamento per il cavo dell’ antenna terrestre.<br />
2. LOOP OUT Connessione a un altro STB.<br />
3. SAT IN Collegamento al cavo dell'antenna satellitare.<br />
4. LOOP OUT Connessione a un altro STB.<br />
5. TV SCART Connessione alla TV tramite cavo SCART.<br />
6. HDMI Connessione per uno jack HDMI della TV.<br />
7. RS 232 Connessione per personal computer per aggiornamento software.<br />
8. Ethernet Connessione alla LAN cavo.<br />
9. USB Connessione per dispositivi USB.<br />
10. OPTICAL Uscita per collegamento ad un amplificatore.<br />
11. ADAPTOR Collegare un adattatore.<br />
12. Pulsante di ALIMENTAZIONE Tasto di accensione On / Off.<br />
<strong>MAX</strong>_<strong>COMBO</strong>_<strong>NET</strong>_manual_print REV2.0.pdf 157 31/01/2013 12:52:19<br />
153
154<br />
INSTALLAZIONE APPARECCHIATURE<br />
Questa sezione spiega i vari modi per collegare il ricevitore a vari sistemi TV, VCR e Hi-Fi.<br />
È possibile scegliere una delle seguenti configurazioni i consigliate. Se avete qualche problema o<br />
bisogno di aiuto, rivolgersi al rivenditore o fornitore di servizi.<br />
Si prega di assicurarsi che gli elementi elencati di seguito siano inclusi nella confezione del ricevitore.<br />
I. COLLEGAMENTO del ricevitore alla TV<br />
I-1. Collegare il ricevitore al televisore con il cavo SCART<br />
Collegare un'estremità del cavo SCART alla presa SCART TV sul pannello posteriore del ricevitore e l'altra<br />
estremità a una presa SCART sul televisore.<br />
<strong>MAX</strong>_<strong>COMBO</strong>_<strong>NET</strong>_manual_print REV2.0.pdf 158 31/01/2013 12:52:19
GUIDA DELLA LISTA DEI CANALI<br />
1. Modalità di visione standard<br />
a) Quando si seleziona un canale,la barra delle informazioni<br />
appare automaticamente sullo schermo per<br />
alcuni secondi. Questa barra fornisce tutte le informazioni<br />
del canale in visione.<br />
b) Premere il tasto INFO per visualizzare le informazioni<br />
durante la modalità di visione standard.<br />
2. Lista ordinaria dei canali<br />
a) Premere OK su modalità di visione standard per andare<br />
alla lista dei canali.<br />
b) Quando i dettagli della lista dei canali sono visualizzati<br />
sullo schermo premere il tasto rosso per andare alla<br />
lista ordinaria dei canali.<br />
3. Lista dettagliata dei canali<br />
a) Premere OK su modalità di visione standard per andare<br />
alla lista dei canali.<br />
b) Cuando la lista sencilla de canales es visualizada en la<br />
pantalla, presionar la tecia ROJA para ir a la lista de<br />
canales de Detalles.<br />
c) Premere i tasti e per ordinare in ordine alfabetico.<br />
d) Premere il tasto SAT per ordinare in ordine al satellite e<br />
il tasto FAV peri favoriti 1 ~ 8.<br />
e) Premere il tasto verde per tornare a tutti i canali o EXIT<br />
per tornare al canale corrente .<br />
f) Premere il tasto SAT per mostrare Satellite Pop-up ,<br />
quindi selezionare il satellite. Verrà visualizzato l’elenco<br />
dei canali del satellite selezionato.<br />
g) Premere il tasto FAV per mostrare la finestra dei Pop-up<br />
favoriti , quindi selezionare la lista FAV . Verrà visualizzata<br />
la lista dei canali FAV selezionata.<br />
h) Premere il tasto verde, quindi sarà visualizzata la lista di<br />
tutti i canali da ricercare.<br />
<strong>MAX</strong>_<strong>COMBO</strong>_<strong>NET</strong>_manual_print REV2.0.pdf 159 31/01/2013 12:52:19<br />
155
156<br />
GUIDA DELLA LISTA DEI CANALI<br />
4.EPG ( GUIDA ELETTRONICA DEI PROGRAMMI)<br />
a) Premere il tasto EPG in modalità di visione standard.<br />
b) Verrà visualizzata l’ EPG del canale corrente .<br />
c) Selezionare il canale di cui si desidera visionare il programma.<br />
d) Apparirà una immagine sul lato destro .<br />
5. ZOOM IN/OUT<br />
a) Premendo il tasto ZOOM in modalità di visione standard<br />
, è possibile utilizzare la funzione Zoom In / Out.<br />
b) È possibile selezionare le dimensioni dello zoom con<br />
i tasti ROSSO / VERDE.<br />
c) È possibile selezionare la posizione di partenza con i<br />
tasti .<br />
d) Dopo aver selezionato le dimensioni dello Zoom e la<br />
relativa posizione , è possibile avviare la funzione<br />
zoom con il tasto OK.<br />
e) Con i tasti è possibile spostare lo zoom<br />
sullo schermo.<br />
<strong>MAX</strong>_<strong>COMBO</strong>_<strong>NET</strong>_manual_print REV2.0.pdf 160 31/01/2013 12:52:20
GUIDA AI MENU<br />
PAGINA PRINCIPALE<br />
Premere il tasto MENU del telecomando per aprire la Pagina<br />
Principale sullo schermo. La pagina principale sarà visualizzata.<br />
1. È possibile spostarsi nella pagina principale con i tasti <br />
del telecomando.<br />
2. Premere OK per confermare la selezione.<br />
3. Premere EXIT per tornare al menu precedente oppure premere<br />
MENU per passare al canale della visione corrente .<br />
I. Canale Manager<br />
II. Installazione<br />
III. Opzioni<br />
In questa sezione è possibile organizzare i canali in base alle proprie preferenze.<br />
1. Selezionare Channel Manager nella pagina principale con i tasti e premere OK.<br />
2. La pagina TV Channel Manager sarà visualizzata sullo schermo.<br />
3. Selezionare la modalità che si desidera utilizzare con i tasti .<br />
4. Per visualizzare il canale selezionato , andare sul canale e quindi premere il tasto ROSSO.<br />
5. Premere EXIT per tornare al menu precedente oppure premere MENU per passare al canale corrente in<br />
visione.<br />
I-1. Favoriti<br />
I-2. Rinominare<br />
I-3. Spostare<br />
I-4. Blocco<br />
I-5. Eliminare<br />
I-1. Favoriti<br />
IV. Utility<br />
V. Accessori<br />
I. Canale Manager<br />
1. Utilizzando i tasti passare alla modalità preferita,<br />
quindi premere il tasto giallo per scegliere preferito 1 ~ 8.<br />
2. Premere OK sul canale che si desidera aggiungere o eliminare.<br />
3. La barra del none sarà evidenziata alla fine del canale<br />
selezionato . Per cancellare premere di nuovo OK.<br />
4. I canali selezionati saranno salvati automaticamente.<br />
5. Se si desidera controllare la lista dei canali preferiti<br />
salvata andare in un'altra modalità (Rinomina ~ Elimina),<br />
eccetto Favoriti e poi premere il tasto FAV per verificare i<br />
preferiti 1 ~ 8.<br />
6. Premere EXIT per tornare al menu precedente oppure<br />
premere MENU per passare al canale corrente in visione.<br />
7. Premere il tasto BLU per rinominare il preferito.<br />
<strong>MAX</strong>_<strong>COMBO</strong>_<strong>NET</strong>_manual_print REV2.0.pdf 161 31/01/2013 12:52:20<br />
157
158<br />
GUIDA AI MENU<br />
I. CANALE MANAGER<br />
I-2. Rinominare<br />
1. Utilizzando i tasti passare alla modalità Rinomina.<br />
2. Selezionare il canale che si desidera rinominare utilizzando i<br />
tasti presionar OK.<br />
3. Una tastiera di dialogo sarà visualizzata sullo schermo.<br />
4. Modificare il nome con l'immissione di cifre / o parole nel campo<br />
della tastiera di dialogo.<br />
5. Premere EXIT per tornare al menu precedente oppure premere<br />
MENU per andare al corrente canale in visione .<br />
I-3. Spostare<br />
1. Utilizzando i tasti andare in modalità Move.<br />
2. Selezionare i canali che si desidera spostare premendo il tasto OK.<br />
3. Spostare il cursore che si desidera inserire e quindi premere il<br />
tasto VERDE.<br />
4. Premere EXIT per tornare al menu precedente oppure premere<br />
MENU per andare al corrente canale in visione .<br />
I-4. Blocco<br />
1. Utilizzando i tasti passare alla modalità blocco.<br />
2. Selezionare il canale che si desidera bloccare e premere OK. Sarà<br />
evidenziato alla fine della barra del nome del canale selezionato.<br />
Per cancellare premere di nuovo OK.<br />
3. Premere EXIT per andare alla pagina principale o premere MENU<br />
per andare al canale corrente in visione.<br />
I-5. Eliminare<br />
1. Utilizzando i tasti passare alla modalità Elimina.<br />
2. Selezionare il canale che si desidera eliminare e quindi premere<br />
OK. Sarà evidenziato ( ) il numero del canale selezionato. Per<br />
cancellare premere di nuovo il tasto blu .<br />
3. Premere il tasto GIALLO per eliminare TP. Selezionare un canale e Premere il pulsante blu. Si selezionerà automaticamente<br />
,Tutti i canali TP .<br />
4. Premere il tasto GIALLO per eliminare il Satellite. Selezionare un canale e premere il pulsante blu. Si selezionerà<br />
automaticamente tutti i canali del satellite .<br />
5. Premere EXIT per tornare al menu precedente oppure premere MENU per andare al canale corrente in visione.<br />
6. Visualizzazione sullo schermo del Box dei messaggi.<br />
7. Selezionare OK nella finestra di messaggio e quindi premere OK per eliminare il canale evidenziato.<br />
<strong>MAX</strong>_<strong>COMBO</strong>_<strong>NET</strong>_manual_print REV2.0.pdf 162 31/01/2013 12:52:20
GUIDA AI MENU<br />
II. INSTALAZIONE<br />
In questa sezione è possibile configurare l'antenna e la scansione<br />
satellitare o transponder, ecc . Selezionare Istallazione<br />
nella pagina principale utilizzando i tastipremere OK.<br />
Premere EXIT per tornare al menu precedente oppure premere<br />
MENU per passare al canale corrente in visione.<br />
II-1. Ricerca satellite<br />
II-2. Modifica DiSEqC<br />
II-3. Setup motore<br />
II-4. Ricerca terrestre<br />
II-5. Home Streaming<br />
II-6. Default di fabbrica<br />
II-1 Ricerca satellite<br />
1. E’possibile spostare il cursore utilizzando i tasti e<br />
premere OK una volta selezionato il valore desiderato.<br />
a) Satélite<br />
- Premere OK per visualizzare l'elenco del Box dei Satelliti.<br />
- Selezionare il satellite più appropriato e premere OK.<br />
b) DiSEqC<br />
- Premere OK per visualizzare la lista DiSEqC Port.<br />
- Selezionare l’appropriata porta DiSEqC e premere OK.<br />
c) LNB<br />
- Premere OK per visualizzare la lista delle Frequenze LNB.<br />
- Selezionare la frequenza LNB più appropriata e quindi premere<br />
OK.<br />
- È anche possibile inserire direttamente le cifre usando i<br />
tasti numerici del telecomando.<br />
d) 22KHz Tone<br />
- Selezionare una delle opzioni None, 0KHz , 22 KHz a seconda<br />
della casella del commutatore d'antenna in uso .<br />
e) opzione di ricerca<br />
- Premere OK per visualizzare la lista Opzioni di ricerca .<br />
- Selezionare l'opzione di ricerca desiderata e quindi premere<br />
OK.<br />
f) Ricerca<br />
- Premere ricerca per avviare la scansione dei canali.<br />
- Rinomina del SAT : Per rinominare il SAT, premere il Tasto<br />
verde del telecomando.<br />
TP EDIT: Per modificare TP, Premere<br />
il tasto ROSSO del telecomando.<br />
<strong>MAX</strong>_<strong>COMBO</strong>_<strong>NET</strong>_manual_print REV2.0.pdf 163 31/01/2013 12:52:21<br />
159
GUIDA AI MENU<br />
II. INSTALLAZIONE<br />
f) Motor Control<br />
Selezionare la posizione utilizzando i tasti e premere<br />
OK. Sarà visualizzata sullo schermo una finestra di messaggio.<br />
- Memorizzazione della posizione Sat:<br />
memorizzare la posizione corrente del motore per il<br />
satellite selezionato.<br />
- Goto Sat Position: sposta il motore alla posizione memorizzata<br />
del satellite selezionato.<br />
- Goto Center: va al centro del motore.<br />
- Limite off: disabilita il limite Est, Ovest .<br />
- Set East Limit: Imposta la posizione corrente come limite<br />
orientale.<br />
- Set West Limit: Imposta la posizione corrente come limite<br />
occidentale.<br />
g) posizione satellitare<br />
- Immettere direttamente la posizione utilizzando i<br />
tasti numerici del telecomando.<br />
- Selezionare la direzione utilizzando (ovest /<br />
est).<br />
h) Search Option<br />
- Premere OK per visualizzare la lista delle opzioni di<br />
ricerca .<br />
- Selezionare l'opzione di ricerca che si desidera e poi<br />
2. Modifica della posizione locale<br />
- Premere il bottone verde per modificare la posizione locale.<br />
- Recalcuation position.<br />
- Reset Position: reimposta tutte le posizioni<br />
memorizzate del motore.<br />
premere OK.<br />
i) Ricerca<br />
- Premere ricerca per avviare la scansione dei<br />
canali.<br />
- Premere OK per avviare la scansione.<br />
a) longitudine<br />
-Immettere direttamente la Longitudine utilizzando i tasti numerici del telecomando.<br />
- Selezionare la direzione utilizzando i tasti (ovest / est).<br />
b) Latitudine<br />
- Immettere direttamente la Latitudine utilizzando i tasti numerici del telecomando.<br />
- Selezionare la direzione utilizzando (NORD / SUD).<br />
TP EDIT : Per modificare TP premere il<br />
pulsante rosso del telecomando.<br />
3. Premere EXIT per tornare al menu precedente oppure premere MENU per passare al canale<br />
corrente in visione.<br />
<strong>MAX</strong>_<strong>COMBO</strong>_<strong>NET</strong>_manual_print REV2.0.pdf 165 31/01/2013 12:52:22<br />
161
GUIDA AI MENU<br />
162<br />
II. INSTALLAZIONE<br />
II-4. Ricerca terrestre<br />
1. Selezionare Ricerca Canale in Installazione usando i<br />
tasti e premere OK.<br />
2. 1) Selezionare la regione di utilizzo con i tasti .<br />
2) È possibile selezionare il tipo di ricerca tra le opzioni<br />
automatico e manuale con i tasti .<br />
3) Auto<br />
a) Selezionare ricerca sullo schermo e premere il pulsante<br />
OK per eseguire la scansione dei canali.<br />
b) Premere Exit o Menu dopo aver terminato la scansione.<br />
4) Manuale<br />
a) Selezionare il Mux channel che si desidera utilizzare con i<br />
tasti .<br />
b) La frequenza sarà visualizzata automaticamente in base<br />
al canale Mux selezionato.<br />
II-5. Home Streaming<br />
1. Configurazione PC<br />
***Esecuzione del programma ‘Home Streaming’<br />
a) Andare sulla sezione ‘Preference’<br />
b) Selezionare ‘Default URL’ e assegnare la cartella<br />
desiderata per il download tramite il pulsante “Browse”<br />
La cartella preselezionata in automatico è “c:\download”<br />
ma può essere necessario modificare la cartella<br />
per essere in grado di ricevere correttamente i filmati<br />
sul PC.<br />
Nota: Il server predefinito è attualmente disponibile.<br />
2. Impostazione ricevitore<br />
a) Andare sul menu “Home streaming” ( Menu <br />
Accessori Rete Home streaming ) e clicca su<br />
“Home streaming”.<br />
b) Apparirà “IP-Name Edit” dove si dovrà immettere l’ indirizzo<br />
corretto dell’ IP del server con i tasti numerici del<br />
telecomando.<br />
c) L'indirizzo IP dovrà essere lo stesso di quello indicato<br />
nella casella di preferenza sul programma di Home<br />
Streaming alla cartella “Perference”.<br />
<strong>MAX</strong>_<strong>COMBO</strong>_<strong>NET</strong>_manual_print REV2.0.pdf 166 31/01/2013 12:52:22
GUIDA AI MENU<br />
II. INSTALLAZIONE<br />
3. Riproduzione del file video da Home Streaming<br />
a) Premendo il tasto “Fn” del telecomando nella visualizzazione<br />
normale del ricevitore apparirà l’ elenco dei filmati<br />
del PC sul tuo TV.<br />
b) Selezionando il file che si desidera visualizzare e utilizzando<br />
i tasti di navigazione del telecomando, premendo il pulsante<br />
"OK" verrà riprodotto il filmato.<br />
Si prega di visionare le immagini di questa pagina per poter<br />
migliorare la comprensione del testo.<br />
II-6. Default di fabbrica<br />
Usare la funzione Default di fabrica solo quando si desidera<br />
che il ricevitore ritorni alle impostazioni di fabbrica predefinite<br />
. Tutte le impostazioni dei canali saranno cancellate.<br />
1. Selezionare Factory Default in istallazione con i tasti e<br />
premere OK.<br />
2. Sarà visualizzata una finestra di messaggio sullo schermo.<br />
3. Selezionare OK per riportare il icevitore alle impostazioni<br />
di fabbrica predefinite e premere OK.<br />
4. Premere EXIT per tornare al menu precedente oppure premere<br />
MENU per andare al canale corrente in visione.<br />
<strong>MAX</strong>_<strong>COMBO</strong>_<strong>NET</strong>_manual_print REV2.0.pdf 167 31/01/2013 12:52:22<br />
163
III. OPZIONI<br />
In questa sezione è possibile configurare la lingua OSD,<br />
orario, ecc . Selezionare Opzioni nella pagina principale<br />
utilizzando i tasti e premere OK. Premere EXIT per<br />
tornare al menu precedente o premere MENU per passare<br />
al canale corrente in visione.<br />
III-1. OSD Setup<br />
III-2. Pannello di controllo<br />
III-3. Time Adjust<br />
III-4. Parental Lock<br />
III-1.OSD Setup<br />
1. Selezionare Setup OSD in Opzioni con i tasti <br />
e premere OK.<br />
a) Lingua OSD<br />
- Premere OK per visualizzare l'elenco delle Lingue OSD.<br />
- Selezionare la lingua che si desidera e poi premere OK.<br />
b) Lingua audio<br />
- Premere OK per visualizzare l'elenco delle Lingue audio.<br />
- Selezionare la lingua desiderata e premere OK.<br />
c) Lingua dei sottotitoli<br />
- Premere OK per la visualizzazione dei sottotitoli.<br />
- Selezionare la lingua desiderata, quindi premere OK.<br />
d) Visualizzazione della barra delle informazioni<br />
- Premere OK per visualizzare il Display della barra delle informazioni dell’orario.<br />
- Selezionare l’orario che si desidera visualizzare e premere OK.<br />
e) Trasparenza<br />
- Regolazione del livello di trasparenza.<br />
2. Premere EXIT per tornare al menu precedente oppure premere MENU per passare al<br />
canale corrente in visione.<br />
164<br />
GUIDA AI MENU<br />
<strong>MAX</strong>_<strong>COMBO</strong>_<strong>NET</strong>_manual_print REV2.0.pdf 168 31/01/2013 12:52:22
GUIDA AI MENU<br />
III. OPZIONI<br />
III-2. Pannello di controllo<br />
1. Selezionare Impostazione TV in Opzioni con i tasti e premere<br />
OK.<br />
a) Tipo di HD<br />
- Selezione dell’uscita video HD.<br />
b) Tipo TV<br />
- Selezione del tipo di TV.<br />
c) Aspect Ratio<br />
- Selezione del rapporto dello schermo.<br />
d) schermata di controllo<br />
- Selezione della modalità di visualizzazione dello schermo .<br />
e) Luminosità<br />
- Regolazione della luminosità dello schermo.<br />
f) Contrasto<br />
- Regolazione del contrasto dello schermo.<br />
g) Saturazione<br />
- Regolazione della saturazione dello schermo.<br />
2. Premere EXIT per tornare al menu precedente oppure<br />
premere MENU per andare al canale corrente in visione.<br />
III-3. Time Adjust<br />
Impostare l'ora locale in base alla propria posizione.<br />
1. Selezionare time setup in Opzioni con i tasti e premere OK.<br />
2. Appare sullo schermo la pagina per regolare l’ora.<br />
3. Spostare il cursore utilizzando i tasti e premere OK<br />
una volta selezionato il valore desiderato. (Immettere l’ora deside<br />
rata utilizzando direttamente i tasti numerici del telecomando).<br />
4. Premere EXIT per tornare al menu precedente oppure premere<br />
MENU per andare al canale corrente in visione.<br />
III-4. Impostatizione del blocco parentale<br />
1. Selezionare Parental Lock Setup in Opzioni con i tastie premere OK.<br />
2. Sullo schermo apparirà la pagina Parental Lock .<br />
3. È possibile bloccare e sbloccare il blocco parentale selezionando<br />
ON oppure OFF utilizzando i tasti <br />
4. È possibile bloccare e sbloccare Install Lock selezionando ON o<br />
OFF utilizzando i tasti (per l'installazione delle impostazioni).<br />
5. Inserire la nuova password, se si desidera modificare la password in uso.<br />
6. Confermare la nuova password .<br />
7. Premere EXIT per tornare al menu precedente oppure premere MENU per passare al canale corrente in visione.<br />
Nota : IL DEFAULT DELLA PASSWORD DI È 0000.<br />
<strong>MAX</strong>_<strong>COMBO</strong>_<strong>NET</strong>_manual_print REV2.0.pdf 169 31/01/2013 12:52:23<br />
165
GUIDA AI MENU<br />
V. ACCESSORI<br />
In questa sezione è possibile utilizzare USB, ecc.<br />
Selezionare utility nella pagina principale utilizzando i<br />
tasti e premere OK.<br />
· V - 1. USB<br />
· V - 2. Smart Card<br />
· V - 3. Network / Videoclub<br />
V- 1 USB<br />
Il ricevitore è dotato di porte.<br />
1. Selezionare USB in Utility con i tasti e premere OK.<br />
2. Se si desidera salvare il Software o il Database, premere<br />
il pulsante verde del telecomando.<br />
3. Selezionare il file che si desidera salvare utilizzando i<br />
tasti e OK.<br />
4. Dopo aver scaricato il file selezionato, il ricevitore si<br />
riavvierà automaticamente.<br />
V - 2 Smart Card<br />
Il ricevitore è dotato di due lettori di Smart Card che danno<br />
accesso ai servizi pay per view. I programmi possono essere<br />
decodificati tramite la vostra smart card in abbonamento.<br />
1. Selezionare Smart Card nel menù accessori con<br />
e premere OK.<br />
2. Inserire nel lettore Smart Card 1 o 2, il vostro abbonamento.<br />
Sullo schermo verrà visualizzata la codifica dell’ abbonamento,<br />
se supportato.<br />
3. Il nome sullo slot, cambia in base al tipo di codifica della<br />
smart card.<br />
4. Premere EXIT per tornare al menu precedente o premere<br />
MENU per andare alla visione dei canali.<br />
V - 3 Network / Videoclub<br />
Questo menu ha molteplici funzioni come di seguito elencato:<br />
1. Scaricamento da web del software di sistema.<br />
2. Home-Streaming.<br />
3. Youtube.<br />
4. Video Club.<br />
5. RSS feed / Twitter / Previsioni meteo.<br />
6. Scaricamento da web liste canali preimpostate.<br />
<strong>MAX</strong>_<strong>COMBO</strong>_<strong>NET</strong>_manual_print REV2.0.pdf 171 31/01/2013 12:52:23<br />
167
PVR GUIDE<br />
PVR GUIDE<br />
I. Dispositivi Raccomandati<br />
- External Hard Disk USB Drive.<br />
- Flash memory stick.<br />
- Formato Tipo: FAT16/32 (Il sistema non supporta NTFS e<br />
altri sistemi di file )<br />
II. Funzione di registrazione<br />
II-1 Programmare una registrazione a tempo<br />
1. Orario della registrazione programmata<br />
: Impostare l’orario registrazione programmata in<br />
"Utility Timer" per consentire la registrazione all’orario<br />
impostato.<br />
NOTA : Come impostare il tempo di registrazione<br />
- impostare STB , come qui di seguito.<br />
- Si prega di commutare "OFF" a "Registrazione" nel<br />
menu Active.<br />
- Dopo aver impostato "Registrazione" nel menu Active, è<br />
possibile visualizzare i dettagli del menu PVR. (Ciclo, tipo<br />
di canale, nome del canale, Ora d’inizio, Durata).<br />
- Premere il pulsante "Ok" per selezionare il nome del<br />
canale.<br />
2. EPG - Registrazione Programmata<br />
: Usato per registrare un evento selezionato da EPG.<br />
- Premere il tasto EPG per entrare nel menu EPG durante<br />
la visione di un programma sullo schermo.<br />
- Per selezionare l’orario di riproduzione dell’evento :<br />
selezionare all’interno dell’ EPG l'evento e premere il<br />
tasto "RECORD" sul telecomando.<br />
- Se si desidera cancellare, premere ancora una volta il<br />
pulsante "RECORD".<br />
- Se si desidera registrare più eventi programmati diversi ,<br />
eseguire le varie selezioni e premere il tasto "RECORD"<br />
sul telecomando.<br />
168<br />
<strong>MAX</strong>_<strong>COMBO</strong>_<strong>NET</strong>_manual_print REV2.0.pdf 172 31/01/2013 12:52:24
PVR GUIDE<br />
PVR GUIDE<br />
II. Funzione di registrazione<br />
II-2 Registrazione istantanea<br />
- Premere il pulsante "RECORD" sul telecomando per avviare<br />
la registrazione del programma.<br />
- Durante la registrazione del programma<br />
- Premere il tasto "PAUSE" per eseguire " Time Shift”<br />
- È possibile utilizzare i tasti "Left / Right " per visualizzare il<br />
tempo desiderato nel corso della registrazione del programma<br />
.<br />
- Premere il tasto "OK" sul telecomando per visualizzare la<br />
lista dei file registrati<br />
Durante la registrazione è possibile visionare anche altri<br />
canali che si trovano nella stessa TP. Nel caso si vogliano<br />
visionare altri canali durante la registrazione, si dovrebbe<br />
tornare ai canali di registrazione nella lista dei canali per<br />
interrompere la registrazione.<br />
- Se si preme il pulsante "STOP" del telecomando, il programma<br />
in corso di visione si fermerà e il programma in<br />
visione della TV sarà memorizzato nello spazio di memoria<br />
del telecomando .<br />
<strong>MAX</strong>_<strong>COMBO</strong>_<strong>NET</strong>_manual_print REV2.0.pdf 173 31/01/2013 12:52:25<br />
169
PVR GUIDE<br />
PVR GUIDE<br />
III. Funzione di riproduzione<br />
- Per riprodurre il programma registrato in precedenza, premere<br />
il tasto "Play" sul telecomando.<br />
- Utilizzare i tasti freccia per selezionare il file che si desidera<br />
riprodurre e premere "OK" per la riproduzione.<br />
- Durante la riproduzione del programma .<br />
- Se si premono i tasti "Left / Right" del telecomando, mentre<br />
si registra direttamente dalla TV in diretta o si riproduce un<br />
file registrato, il programma in visione si ferma, e le immagini<br />
ripartono da dove è stato spostato il tasto "left / right "<br />
del telecomando Se si desidera riprodurre altri file registrati<br />
durante la riproduzione, premere il pulsante "play".<br />
IV. Funzione della modalità Trick<br />
- Se si preme il tasto "FF” (Avanzamento veloce) durante il<br />
Time shift o la riproduzione, il file verrà riprodotto a velocità<br />
2X e se si premere il tasto "FF" ancora una volta, il file verrà<br />
riprodotto a 8x.<br />
- Se si preme il tasto "REW”(Riavvolgimento) durante il Time<br />
shift o la riproduzione, il file verrà riavvolto a velocità 2X e,<br />
se si preme il pulsante “REW "ancora una volta, il file verrà<br />
riavvolgimento a 8x.<br />
- Durante le funzioni FF / REW per tornare alla riproduzione<br />
normale, premere io tasto "PLAY".<br />
170<br />
<strong>MAX</strong>_<strong>COMBO</strong>_<strong>NET</strong>_manual_print REV2.0.pdf 174 31/01/2013 12:52:25
PVR GUIDE<br />
PVR GUIDE<br />
V. Funzione TimeShift<br />
- Se si desidera eseguire il "Time Shift" in modalità in diretta<br />
è necessario impostare Time Shift su "On" nelle opzioni PVR<br />
(Accessory PVR TimeShift su "ON").<br />
- Per la partenza del Time Shift in modalità in diretta , premere<br />
"PAUSE" per iniziare.<br />
- Time shift sarà riprodotto per 30 minuti in modalità in diretta.<br />
- Per avviare la "riproduzione" nel corso del Timeshift premere<br />
il tasto "Play".<br />
- È possibile spostarsi sulla posizione "play" con il pulsante<br />
left/ right durante il Time Shift.<br />
VI. Formato<br />
- Si può usare il formato FAT32 per la formattazione del disco<br />
rigido tramite FAT32 e NTFS.<br />
- Si può usare anche il formato multi partizionato del disco<br />
rigido.<br />
- Quando è inserita la formattazione NTFS del disco rigido ,<br />
appariranno i seguenti messaggi.<br />
- Premere il tasto "OK" per passare a "C:, D:, E:, F: ° NEXT" in<br />
caso di disco rigido Multi partizionato.<br />
- In caso di disco rigido multi partizionato con NTFS, è necessario<br />
il formato FAT 32.<br />
<strong>MAX</strong>_<strong>COMBO</strong>_<strong>NET</strong>_manual_print REV2.0.pdf 175 31/01/2013 12:52:25<br />
171
PVR GUIDE<br />
PVR GUIDE<br />
VII. Riproduzione MP3<br />
- Selezionare il file MP3 che si desidera riprodurre nel menu<br />
USB.<br />
- Dopo aver selezionato il file MP3, si formerà la finestra di<br />
riproduzione MP3.<br />
VIII. Riproduzione JPG<br />
- Selezionare il file JPG desiderato nel menu USB.<br />
- Premere OK per visualizzare l’JPG desiderato.<br />
- È possibile ruotare l'immagine utilizzando il pulsante left /<br />
right.<br />
IX. Aggiornamento S / W<br />
- Selezionare il file UAD che si desidera aggiornare nel menu<br />
USB.<br />
172<br />
<strong>MAX</strong>_<strong>COMBO</strong>_<strong>NET</strong>_manual_print REV2.0.pdf 176 31/01/2013 12:52:26
PVR GUIDE<br />
PVR GUIDE<br />
X. Come riprodurre 'il file registrato da PVR del<br />
HD-XXX "tramite PC o DivX Player<br />
X-1 Come riprodurre tramite PC<br />
A) Riproduzione KM Player.<br />
B) Selezione della lingua.<br />
1) Pulsante destro del Mouse Lingua la propria<br />
lingua.<br />
C) Modificare l’estensione del nome del file registrato in<br />
“mpg ".<br />
Esempio: Benvenuti a A_131821 Benvenuti<br />
A_131821.mpg<br />
D) Selezionare il file che si desidera riprodurre.<br />
1) Pulsante destro del Mouse Open files(S) <br />
Selezionare.<br />
X-2 Come riprodurre tramite "DivX Player"<br />
A) Il formato del file deve essere modificato in formato ". avi"<br />
per poterlo riprodurre tramite DivX Player.<br />
B) Selezionare una cartella di destinazione dove salvare il file<br />
che sarà modificato in ".avi".<br />
1) Pulsante destro del Mouse Capture Seleziona<br />
Acquisizione delle cartelle.<br />
C) Ripetere A) B) C) D) del n.1 come per la riproduzione<br />
tramite PC.<br />
D) Acquisizione del file, che si sta correntemente riproducendo<br />
da convertire in ".avi".<br />
1) Pulsante destro del Mouse Capture Video<br />
Acquisizione rapida.<br />
2) Quindi salvare la riproduzione dei file nella cartella designata<br />
per il formato ".avi".<br />
E) Se il file in riproduzione fa parte di un canale STB SD, è da<br />
salvare in SD e se il file è HD oppure H.26 è da salvare in<br />
HD oppure H.264. Se l’utente non dispone di un DivX player<br />
in grado di riprodurre HD o H.264 (almeno CPU<br />
sigma8634), si deve convertire il file SD in modo che il<br />
generico SD DivX Player (CPU sigma8511) possa riprodurre<br />
il file.<br />
<strong>MAX</strong>_<strong>COMBO</strong>_<strong>NET</strong>_manual_print REV2.0.pdf 177 31/01/2013 12:52:26<br />
173
PVR GUIDE<br />
PVR GUIDE<br />
X-3 Come convertire i file Divx Manager<br />
A) Riproduzione Divx Manager.<br />
1) Impostare Modello Rapsody RSH-250/350<br />
B) Selezionare la cartella in cui è posizionato il file che si<br />
desidera convertire. Quindi appariranno le informazioni del<br />
file.<br />
C) selezionare il file che si desidera convertire e Selezionare<br />
"Converti".<br />
D) Selezionare "Start Encoding" Inizia "Conversione".<br />
NOTA: Il sito Web per il trasferimento<br />
1. Kmplayer<br />
1) entrare in questo sito: http://2bwithu.tistory.com/245.<br />
2) Scaricare 2 file in 1 cartella e decomprimere il file archiviato.<br />
Dopo unzip, è possibile installare solo il file clic exe .<br />
2. Divx Manger<br />
1) entrare in questo sito:<br />
http://www.modix4u.co.kr/upboard/view.asp?fcprimkey=44<br />
2) Clicca qui sotto per la versione in lingua inglese.<br />
174<br />
<strong>MAX</strong>_<strong>COMBO</strong>_<strong>NET</strong>_manual_print REV2.0.pdf 178 31/01/2013 12:52:27
TROUBLESHOOTING<br />
Problem<br />
Nothing appears on the Front<br />
Panel or No power supply<br />
No Picture<br />
No Sound<br />
Remote Control Unit dose not<br />
work<br />
Service is not running or<br />
scrambled<br />
“No Signal” on the screen<br />
Tuner Defective Check<br />
You have forgotten your<br />
secret PIN Code<br />
Solution<br />
Check that the power cable is plugged into the power socket.<br />
Check the dish and adjust it.<br />
Check the cable connection and correct it.<br />
Check channel and video output.<br />
Check the volume level of the TV and receiver.<br />
Check the mute status of TV and receiver.<br />
Check the cable connection and correct.<br />
Replace batteries.<br />
Aim the remote control unit directly to the receiver.<br />
Checking that nothing blocks the front panel.<br />
Check the Conditional Access Module and smart card are<br />
appropriate for the selected service.<br />
Check the Conditional Access Module and smart card are<br />
correctly inserted or not.<br />
Check the signal strength and the signal quality in the<br />
menu.<br />
Check the LNB and replace the LNB if necessary.<br />
Check the LNB cable.<br />
Check the Dish and adjust it.<br />
Go to the Option and select System Information.<br />
Contact your Service Provider.<br />
<strong>MAX</strong>_<strong>COMBO</strong>_<strong>NET</strong>_manual_print REV2.0.pdf 179 31/01/2013 12:52:27<br />
175
176<br />
SPECIFICATIONS<br />
.Conditional Access Module Interface<br />
Item Specification<br />
SMART CARD 2 SLOTS, ISO 7816, GSM11.11 and EMV (payment systems) compatibility<br />
. Tuner & Channel (DVB-S2)<br />
Item<br />
Specification<br />
Type 1 F Type, IEC169-24, Female<br />
Frequency Rage 950MHz to 2150MHz<br />
RF Impedance 75 Ohm unbanlanced<br />
Signal Level -65 to -25 dBm<br />
LNB Power 13.5/18.5Vdc +/- 5%, 0.5Amax, Overload Protected<br />
22KHz Tone Frequency : 22KHz +/- 2KHz, 0.6Vpp +/- 0.2V<br />
DiSEqC Control Version1.0, 1.2, Tone burst A/B<br />
Demodulation QPSK, 8PSK<br />
Input Symbol Rate<br />
FEC Decoder<br />
DVB-S QPSK : 2~45 Msps<br />
DVB-S2 8PSK/QPSK : 10~30Msps<br />
1/2, 2/3, 3/4, 3/5, 4/5, 5/6, 8/9, 9/10 in DVB-S2 mode.<br />
1/2, 2/3, 3/4, 5/6 and 7/8 in DVB-S mode.<br />
. Tuner & Channel(DVB-T)<br />
Item Specification<br />
Type IEC60169-2(VHF/UHF) female, 75 ohm nominal<br />
Frequency Rage VHF : 170MHz to 230MHz<br />
UHF : 470MHz to 862MHz<br />
Signal Level -78.5dBm ~ -25dBm<br />
(64QAM, Code Rate 2/3, Guard Interval 1/8,Gaussian Channel)<br />
COFDM Spectrum COFDM 2K/8K-Carrier<br />
FEC Mode 1/2, 2/3, 3/4, 5/6, 7/8<br />
. System & Memory<br />
Item Specification<br />
Main Processor STi7110<br />
Flash Memory 8 Mbytes<br />
DDR Memory 128 Mbytes<br />
Channel Capacity Digital Channel : 10,000<br />
Front 1-Key(Power), 7-SEGMENT DISPLAY<br />
<strong>MAX</strong>_<strong>COMBO</strong>_<strong>NET</strong>_manual_print REV2.0.pdf 180 31/01/2013 12:52:27
SPECIFICATIONS<br />
. MPEG Transport Stream & A/V Decoding<br />
Item<br />
Specification<br />
Transport Stream 13818-1 MPEG-2, H.264/AVC Transport stream Specification<br />
Profile Level MPEG-2 MP@ML, MP@HL, MPEG-4 H.264/AVC<br />
Input Rate Max. 90Mbit/s<br />
Aspect Ratio 4:3, 16:9, Letter Box<br />
Frame Rate 25Hz for PAL, 30Hz for NTSC<br />
Video Resolution 576i, 576p, 720p, 1080i<br />
Teletext Through VBI<br />
Audio Decoding MPEG-1 Layer 1 & 2, Dolby Downmix<br />
Audio Mode Single Channel/Dual Channel Joint Stereo/Stereo<br />
Frequency Response 20~20kHz,
BRAND LIST<br />
TV<br />
BRAND CODE NO. BRAND CODE NO.<br />
ADMIRAL 072 081 160 161 096<br />
ADVENT 247<br />
AIKO 103<br />
AKAI 006 146 248<br />
ALARON 028<br />
AMARK 112 143<br />
AMERICA ACTION 043<br />
AMPRO 073<br />
ANAM 043 054 055 056 080 112<br />
AOC 058 006 004 112<br />
APEX DIGITAL 015 226<br />
AUDIOVOX 076 103 043<br />
BAYSONIC 043<br />
BELL&HOWELL 072<br />
BRADFORD 043<br />
BROKSONIC 096<br />
CANDLE 006 002 003 004<br />
CAPEHART 058<br />
CARVER 164<br />
CELEBRITY 001<br />
CETRONIC 043<br />
CINERAL 103 120<br />
CITIZEN 006 002 003 004 101 103 143<br />
CLASSIC 043<br />
CONCERTO 004<br />
CONTEC 043 051<br />
CORONADO 143<br />
CRAIG 043 054 028<br />
CROSLEY 164<br />
CROWN 043 143<br />
178<br />
CURTIS MATHES 006 004 101 143 011 072 081 120 164<br />
CXC 043<br />
DAEWOO 076 103 055 004 127 143 016 043 044<br />
125 120<br />
DAYTRON 004 143<br />
DENON 011<br />
DUMONT 004 073<br />
DWIN 161<br />
DYNASTY 043<br />
DYNATECH 062<br />
ELECTROBAND 001<br />
ELECTROHOME 024 076 143<br />
EMERSON 005 028 043 048 076 096 155 004 051<br />
143 151 153 154<br />
FISHER 007 057<br />
FUJITSU 164 028 198 246<br />
FUNAI 028 043 052 249<br />
FUTURETECH 043<br />
GATEWAY 242<br />
GE 006 073 144 160 161 004 008 009 034<br />
056 074 091 155 081 120<br />
GIBRALTER 004 073<br />
GOLDSTAR 004 106 119 110 112 113 127 143<br />
GRUNPY 028 043<br />
HALL MARK 004<br />
HARLEY DAVIDSON 028<br />
HARMAN KARDON 164<br />
HARVARD 043<br />
HITACHI 163 004 007 009 011 072 010 012 023<br />
075 143 158<br />
<strong>MAX</strong>_<strong>COMBO</strong>_<strong>NET</strong>_manual_print REV2.0.pdf 182 31/01/2013 12:52:27
BRAND LIST<br />
INFINITY 164<br />
INKEL 129<br />
INTEQ 073<br />
JBL 164<br />
JCB 001<br />
JCPENNEY 004 006 008 024 030 065 101 143 156<br />
160<br />
JENSEN 013<br />
JVC 038 001 034 083 206<br />
KENWOOD 006 001<br />
KLOSS 002 059<br />
KTV 006 043 143 154<br />
LG 004 106 119 110 112 113 127 143<br />
LODGE<strong>NET</strong> 072<br />
LOEWE 207 164<br />
LOGIK 072<br />
LUXMAN 004<br />
LXI 007 015 052 081 160 164<br />
MAGNAVOX 006 003 004 022 059 060 061 063 064<br />
127 164 094 160 028 250<br />
MAJESTIC 072<br />
MARANTZ 164 006<br />
MATSUI 164<br />
MATSUSHITA 080<br />
MEGATRON 004<br />
MEMOREX 004 007 072 028 096<br />
METZ 088<br />
MGA 024 006 004 042<br />
MIDLAND 073<br />
MINERVA 088<br />
MINUTZ 008<br />
MITSUBISHI 109 024 042 004 040 146 028 081 225<br />
MOTOROLA 081<br />
MTC 006 004 062 101<br />
MULTITECH 043<br />
NAD 015 025<br />
NEC 006 134 040 056 007 019 024 237<br />
NIKEI 043<br />
NIKKO 103<br />
NTC 103<br />
ONKING 043<br />
ONWA 043<br />
OPTIMUS 080<br />
OPTONICA 019 081<br />
ORION 096 201 202 203 204 205 028<br />
PANASONIC 034 056 080 164 208 222<br />
PHILCO 006 003 004 024 056 059 060 063 064<br />
127 143 164<br />
PHILIPS 164 005 038 093 127 006 003 004 059<br />
210<br />
PIONEER 023 025 135 176 004 018 006 209 234<br />
PORTLAND 004 143 103<br />
PRISM 034<br />
PROSCAN 144 160 161<br />
PROTON 004 058 143 171 173 112<br />
QUASAR 034 056<br />
RADIO SHACK 004 019 127 143 043<br />
RCA 160 161 144 156 065 006 004 023 024<br />
056 074 152 081<br />
REALISTIC 007 019<br />
RUNCO 072 073<br />
SAMPO 006 004 058 242<br />
SAMSUNG 004 101 127 133 143 160 089 105 211<br />
228 229<br />
SANSEI 120<br />
SANSUI 096<br />
<strong>MAX</strong>_<strong>COMBO</strong>_<strong>NET</strong>_manual_print REV2.0.pdf 183 31/01/2013 12:52:28<br />
179
180<br />
BRAND LIST<br />
SANYO 007 053 057 082 020<br />
SCOTCH 004<br />
SCOTT 004 005 028 043 048 143<br />
SEARS 004 007 015 028 030 057 082 094 143<br />
160 052 164<br />
SEMIVOX 043<br />
SEMP 015<br />
SHARP 081 014 019 028 004 022 143 175<br />
SIGNATURE 072<br />
SONY 001 126 139<br />
SOUNDESIGN 003 004 028 043<br />
SPECTRICON 112<br />
SQUAREVIEW 052<br />
SSS 004 043<br />
STARLITE 043<br />
SUPRE MACY 002<br />
SUPREME 001<br />
SYLVANIA 006 003 059 060 063 064 127 160 164<br />
044 249<br />
SYMPHONIC 052 249<br />
TANDY 081<br />
TATUNG 056 062<br />
TECHNICS 034 080<br />
TECHNOL ACE 028<br />
TECHWOOD 004<br />
TEKNIKA 002 003 004 024 028 043 072 101 143<br />
103 164<br />
TELERENT 072<br />
TERA 172<br />
TMK 004<br />
TNCI 073<br />
TOSHIBA 015 030 007 040 062 101<br />
TOTEVISION 143<br />
UNIVERSAL 008 009<br />
VIDEO CONCEPTS 146<br />
VIDIKRON 174 188 164<br />
VIDTECH 004<br />
WARDS 004 064 164 008 009 019 028 060 061<br />
063 072 074 143<br />
WESTING HOUSE 076<br />
YAMAHA 004 006<br />
YORK 004<br />
YUPITERU 043<br />
ZENITH 072 073 095 103 011 096<br />
ZONDA 112<br />
VCR<br />
ADMIRAL 025 053<br />
AIKO 117<br />
AIWA 034 161 101<br />
AKAI 043 046 124 146<br />
AMERICA_ACTION 117<br />
AMERICAN_HIGH 031<br />
AMPRO 072<br />
ANAM 031 103<br />
ASHA 040<br />
AUDIO_DYNAMICS 012 023 043<br />
AUDIOVOX 101<br />
BEAUMARK 040<br />
BROKSONIC 035 037 129 025<br />
CALIX 101<br />
CANON 028 031<br />
CAPEHART 108<br />
CCE 024 117<br />
CINERAL 117<br />
CITIZEN 101 117<br />
<strong>MAX</strong>_<strong>COMBO</strong>_<strong>NET</strong>_manual_print REV2.0.pdf 184 31/01/2013 12:52:28
BRAND LIST<br />
COLT 024<br />
CRAIG 003 040 135 024 101<br />
CUIRTIS_MATHES 031 041<br />
CYBERNEX 040<br />
DAEWOO 005 108 111 117 017 065 007 010<br />
DAYTRON 108<br />
DBX 012 023 043<br />
DYNATECH 034 053<br />
ELECTROHOME 059 101<br />
ELECTROPHONIC 101<br />
EMERSON 006 029 035 037 129 153 017 025 027<br />
031 034 036 046 101 131 138 117<br />
FISHER 003 010 008 009<br />
FUJI 031<br />
FUNAI 034<br />
GARRARD 034<br />
GE 031 072 144 147 063 107 109 040 053<br />
GO VIDEO 132 155 040 136<br />
GOLDSTAR 101 004 012 020<br />
HARLEY_DAVIDSON 034<br />
HARMAN_KARDON 012 045<br />
HARWOOD 024<br />
HITACHI 004 026 034 043 063 137 150<br />
HQ 034<br />
HUGHES 004<br />
INSTANTREPLAY 031<br />
JCL 031<br />
JCPENNEY 004 012 031 040 101<br />
JENSEN 043<br />
JVC 048 043 055 060 130 150 152 012 031<br />
KEC 101 117<br />
KENWOOD 034 150 014 048<br />
KLH 024<br />
KODAK 031 101<br />
LG 101 004 012 020<br />
LLOYD 034<br />
LOGIK 024<br />
LXI 003 009 017 034 101 004 106<br />
MAGIN 040<br />
MAGNASONIC 117<br />
MAGNAVOX 067 031 034 068 041 156 170<br />
MARANTZ 067 069 012 031<br />
MARTA 101<br />
MATSUI 027 030<br />
MATSUSHITA 031<br />
MEI 031<br />
MEMOREX 040 101 003 014 031 034 053 072 134<br />
139 025<br />
MGA 045 046 059<br />
MGN_TECHNOLOGY 040<br />
MINOLTA 004 020<br />
MITSUBISHI 059 061 051 004 046 020 045 053<br />
MOTOROLA 031 053<br />
MTC 034 040<br />
MULTITECH 024 034<br />
NEC 012 023 043 048<br />
NIKKO 101<br />
NOBLEX 040<br />
NORDMENDE 043<br />
OLYMPUS 031<br />
OPTIMUS 053 101<br />
OPTONICA 053 054<br />
ORION 025<br />
PANASONIC 031 070 133 140 163<br />
PENTAX 004 031 063 020<br />
PHILCO 031 034 067 025<br />
<strong>MAX</strong>_<strong>COMBO</strong>_<strong>NET</strong>_manual_print REV2.0.pdf 185 31/01/2013 12:52:28<br />
181
BRAND LIST<br />
PHILIPS 031 034 054 067 101 150<br />
PILOT 101<br />
PIONEER 021 004 048<br />
PORTLAND 108<br />
PROFITRONIC 040<br />
PROTEC 024<br />
PULSAR 072<br />
QUARTZ 014<br />
QUASAR 031 070 133 140 163 014<br />
RADIO_SHACK 123 034<br />
RADIX 101<br />
RANDEX 101<br />
RCA 107 109 144 041 031 004 020 034 040<br />
140 147 158 053<br />
REALISTIC 003 008 014 031 034 040 053 054 101<br />
010<br />
RICO 058<br />
RUNCO 072<br />
SALORA 014<br />
SAMSUNG 040 017 107 109 113 115 124122<br />
SANKY 053<br />
SANSUI 043 135 048 025 034<br />
SANYO 003 014 040 134<br />
SCOTT 017 037 129 131<br />
SEARS 003 004 008 014 017 081 101 010 031<br />
034<br />
SHARP 053 031 054 159<br />
SHINTOM 024<br />
SHOGUN 040<br />
SINGER 024<br />
SONY 001 057 058 003 052 053 031 154 171<br />
009 034<br />
SOUNDESIGN 034<br />
182<br />
STS 004<br />
SYLVANIA 031 034 059 067<br />
SYMPHONIC 034<br />
TANDY 034 010<br />
TATUNG 043<br />
TEAC 034 043<br />
TECHNICS 031 070<br />
TEKNIKA 031 034 101<br />
THOMAS 034<br />
TMK 006 040<br />
TOSHIBA 017 131 004 008 059 082 150<br />
TOTEVISION 040 101<br />
UNITECH 040<br />
VECTOR_RESEARCH 012<br />
VIDEO_CONCEPTS 012 034 046<br />
VIDEOSONIC 040<br />
WARDS 003 004 017 024 031 034 040 053 054<br />
131<br />
WESTINGHOUSE 024 025<br />
XR_1000 024 031 034<br />
YAMAHA 012 034 043<br />
ZENITH 072 034 001 058 080 101 153 048 025<br />
DVD<br />
AIWA 202<br />
ALPINE 221<br />
APEX_DIGITAL 251 246<br />
ARCAM 215<br />
CYBERHOME 220<br />
DAEWOO 220<br />
DENON 226 241<br />
FUNAI 208<br />
GE 230 231<br />
<strong>MAX</strong>_<strong>COMBO</strong>_<strong>NET</strong>_manual_print REV2.0.pdf 186 31/01/2013 12:52:28
BRAND LIST<br />
GOLDSTAR 235 239<br />
GO_VIDEO 201<br />
HARMAN_KARDON 243<br />
HITACHI 223<br />
HITEKER 246<br />
JVC 238<br />
KENWODD 216<br />
KLH 210<br />
LG 235 239<br />
MAGNAVOX 254 237<br />
MARANTZ 253 242<br />
MCINTOSH 217<br />
MEMOREX 207<br />
MITSUBISHI 227<br />
MYRYAD 224<br />
NAD 247 239<br />
NAKAMICHI 225<br />
ONKYO 240<br />
OPTIMUS 229<br />
PANASONIC 228 206 226<br />
PHILIPS 253 237 214 242<br />
PIONEER 255 222 229<br />
PROCEED 245<br />
PROSCAN 230 231<br />
RCA 230 231<br />
SAMSUNG 236 248 201<br />
SANSUI 205<br />
SANYO 204<br />
SHARP 252<br />
SONY 232 218 203<br />
SYLVANIA 208<br />
SYMPHONIC 208<br />
TATUNG 224<br />
TECHNICS 228<br />
THETA DIGITAL 229<br />
TOSHIBA 233 244 219 205<br />
VENTURER 209<br />
YAMAHA 249 226<br />
ZENITH 239 226 235 239<br />
<strong>MAX</strong>_<strong>COMBO</strong>_<strong>NET</strong>_manual_print REV2.0.pdf 187 31/01/2013 12:52:28<br />
183
ESPAÑA<br />
Mogoda, 110<br />
Pol. Industrial Can Salvatella<br />
08210 Barberà del Vallès<br />
(Barcelona) España<br />
Tel. +34 93 729 27 00<br />
Fax. +34 93 729 30 73<br />
info@ftemaximal.com<br />
www.ftemaximal.com<br />
DEUTSCHLAND<br />
Zweigniederlassung Deutschland<br />
Fürstenhof 68<br />
59368 Werne<br />
Amtsgericht Dortmund HRB 21674<br />
Ust-ID.Nr.: DE243384161<br />
Tel: +49 2389 92419 - 0<br />
Fax: +49 2389 92419 - 25<br />
info@ftemaximal.de<br />
www.ftemaximal.com<br />
FRANCE<br />
16 ZAE Les Mouilles<br />
74570 Groisy<br />
Tel.: + 33 04 50688017<br />
Fax: + 33 04 50688468<br />
fte@ftemaximal.fr<br />
www.ftemaximal.com<br />
PORTUGAL<br />
Rua José Carlos Ary dos Santos<br />
A-das-Lebres (Loures)<br />
2660-173 Santo Antão do Tojal<br />
Tel.: + 351 219838700<br />
Fax: + 351 219838709<br />
ftemaximal@ftemaximal.pt<br />
www.ftemaximal.com<br />
ITALIA<br />
Via Edison, 29<br />
42040 Calerno di<br />
Sant’Ilario d’Enza (RE)<br />
Tel.: + 39 0522 909701<br />
Fax.: + 39 0522 909748<br />
info@fte.it<br />
www.ftemaximal.com<br />
UNITED ARAB EMIRATES<br />
P.O.Box 262442<br />
Jebel Ali Free Zone<br />
Warehouse FZS5AB03<br />
Dubai<br />
Tel.: + 971 4 886 5700<br />
Fax: + 971 4 886 5701<br />
info@ftemaximal.com<br />
www.ftemaximal.com<br />
<strong>MAX</strong>_<strong>COMBO</strong>_<strong>NET</strong>_manual_print REV2.0.pdf 188 31/01/2013 12:52:28