You also want an ePaper? Increase the reach of your titles
YUMPU automatically turns print PDFs into web optimized ePapers that Google loves.
4. TECHNICAL DATA<br />
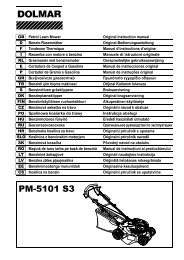
Model <strong>PM</strong>-<strong>5101</strong> <strong>S3</strong><br />
Engine type B&S 675EX series, ReadyStart<br />
Self Propel Yes<br />
Engine Displacement 190 cc<br />
Blade Width 510 mm<br />
Idle Speed 2,800/min<br />
Fuel Tank Capacity 1.0L<br />
Oil tank capacity 0.6L<br />
Grass catch bag capacity 65L<br />
Net Weight 37.7 kg<br />
Height adjustment<br />
Noise according to EN836<br />
20 – 75 mm, 5 adjustment<br />
Sound pressure level (LpA): 83.6 dB (A)<br />
Sound power level (LwA): 94.9 dB (A)<br />
Uncertainty (K):<br />
Vibration according to EN836<br />
3 dB (A)<br />
Vibration emission (ah): 4.17 m/s2 Uncertainty (K): 1.5 m/s2 5. ASSEMBLY<br />
5-1 ASSEMBLY THE FOLDING HANDLE<br />
A) Fix the lower handlebars into the unit body with<br />
locking knobs as shown. (Fig. 2, Fig. 3, Fig. 4, Fig. 5)<br />
B) Release the upper handlebars for folding. Connect the<br />
upper handle and the lower handle with the locking<br />
knob. (Fig. 6, Fig. 7)<br />
C) Position all cables over the handle shafts. Clamp them<br />
around the middle of lower handles by the cable<br />
clamps so that the cables are fixed on the outside of<br />
the machine. Otherwise the cables may be pinched by<br />
opening/closing the rear cover or forced by folding the<br />
upper handle. (Fig. 8)<br />
5-2 ASSEMBLY THE GRASS CATCHER<br />
1. To fit: Lift the rear cover and hang the grass catcher<br />
on the shaft of rear of mower. (Fig. 9, Fig. 10)<br />
2. To remove: Grasp and lift the rear cover, remove<br />
grass catcher.<br />
5-3 STARTER HANDLE<br />
Move the starter handle from the engine to the rope guide.<br />
(Fig. 11, Fig. 12)<br />
5-4 HEIGHT OF CUT<br />
Apply outward pressure to disengage lever from rack.<br />
Move lever forward or back to adjust height. (Fig. 13 and<br />
see clause 8-9)<br />
6. ADJUSTMENT FOR AN<br />
APPROPRIATE HANDLE<br />
HEIGHT<br />
1) Back out the locking knob which fixed the lower<br />
handle, refer to Fig. 14.<br />
2) Refer to Fig. 15, move the lower handle up and down,<br />
adjust it to the proper height.<br />
There is 3 adjusting height to be choose on this type<br />
lawn mower; at 1 height, lower handle to the ground is<br />
highest., 3 height is the lowest.<br />
3) Adjusting to the proper height, then fix the lower<br />
handle by the locking knobs.<br />
WARNING: The left side and right side of lower<br />
handle must adjust to the same height.<br />
7. “3 in 1”<br />
This lawn mower can be retrofitted from its normal<br />
function, based on the application purpose:<br />
From rear-discharge mower to:<br />
1. Mulching mower or<br />
2. Side-discharge mower.<br />
What is mulching?<br />
When mulching, the grass is cut in one working step, then<br />
finely chopped and returned to the grass strip as natural<br />
fertilizer.<br />
Hints for mulch-mowing:<br />
- Regular cut-back by max. 2 cm form 6 cm to 4cm grass<br />
height.<br />
- Use a sharp cutting knife - Do not mow wet grass<br />
- Set max. Motor speed<br />
- Only move at working pace<br />
- Regularly clean mulching wedge, housing inner side<br />
and mowing blade<br />
9