
Create successful ePaper yourself
Turn your PDF publications into a flip-book with our unique Google optimized e-Paper software.
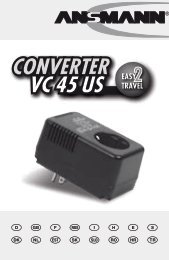
are inserted to the left or right of the 9V charging slot. Ensure that you insert the 9V<br />
battery in the correct direction for polarity according to the symbols in the charging slot.<br />
The charging indicator (LED) above the 9V charging slot lights red when the battery is<br />
inserted correctly and the START button has been pressed for about 2 seconds. After the<br />
timer for the 9V battery has timed-out, there will be an automatic mains cut off using<br />
Zero Watt Technology (if no round cells are inserted and still charging). If the charger is<br />
used continuously (without the Zero Watt function cut-off being invoked) please remove<br />
the 9V block battery after 20 hours.<br />
disPlaY oF tHe CHarging status For round Cells<br />
Charging: The LED at the appropriate charging slot lights red. On the LCD the battery<br />
icon will be filled up by 4 bars from bottom to top. The 4 bars in the battery<br />
icon will indicate the charging status in 25% steps. Depending on the<br />
battery voltage, the bottom one, two or three bars are permanently on<br />
while the other flashing bars fill up the battery icon.<br />
Ready: The LED at the appropriate charging slot lights green. On the LCD the<br />
battery icon is full and to the left of the battery icon “OK” is indicated. The<br />
fully charged battery is provided with a trickle charge until the charger<br />
disconnects itself automatically from mains.<br />
Error: The LED at the appropriate charging slot flashes red. On the LCD the full<br />
battery icon flashes and to the left of the battery icon “BAD” is indicated.<br />
The charger recognized a defective battery or a non rechargeable battery.<br />
After the automatic disconnection from the mains, all LED and the LCD switch off.<br />
disPlaY oF tHe CHarging status For tHe 9V BloCK<br />
Charging: The LED at the charging slot lights red. On the LCD there is no indication.<br />
After the automatic disconnection from the mains, the LED switches off.<br />
enVironMental CoMMents<br />
Do not dispose the device in the normal household waste. Please return it to your dealer<br />
or to your nearest recycling centre or collection point. Please recycle all packing materials<br />
for the sake of the environment. Batteries must not be disposed of in the household<br />
waste. Dispose batteries at a collection point or at an appropriate retail store.<br />
Care & MaintenanCe<br />
To make sure that the charger works properly, please keep the contacts in the charging<br />
slots free from dust or contamination. To clean the unit disconnect it from the mains or<br />
car and use only a dry cloth.<br />
teCHniCal data<br />
Input: 100-240V AC / 50-60Hz<br />
Charging currents: 1000mA / Mignon AA, Baby C, Mono D<br />
500mA / Micro AAA<br />
15mA / 9V Block E<br />
Max. charge capacity: 11000mAh for round cells<br />
280mAh for 9V Block<br />
disClaiMer<br />
Information in these operating instructions can be changed without prior notice.<br />
ANSMANN cannot accept liability for direct, indirect, accidental or other claims or<br />
consequential damages originated by not using this device as indicated by these<br />
operating instructions.<br />
warrantY notiCe<br />
We hereby offer a 3 year warranty on this charger. This does not apply to damages<br />
caused by low-quality batteries leaking inside the charger or non-observance of the<br />
operating instruction or physical damage due to lack of proper care.<br />
Technical details subject to change without prior notice. No liability accepted for typographical errors<br />
or omissions. 09/2010