You also want an ePaper? Increase the reach of your titles
YUMPU automatically turns print PDFs into web optimized ePapers that Google loves.
86<br />
GB<br />
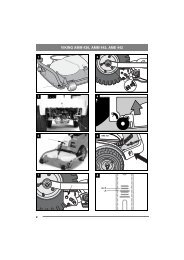
3. Place a drip tray under the radiator’s lower hose<br />
(fig. 19) and under the engine’s coolant plug<br />
(20:X).<br />
4. Detach the hose from the lower part of the radiator<br />
so that the used coolant runs into the drip<br />
tray. See fig. 19.<br />
5. Remove the engine coolant plug so that the used<br />
coolant runs into the drip tray.<br />
6. Flush the coolant system from the filler hole<br />
with running water from a water hose until the<br />
system is clean.<br />
7. Reinstall the hose in the lower part of the radiator<br />
and reinstall the coolant plug.<br />
8. Fill with new coolant according to “5.4”.<br />
Tighten to 40 Nm.<br />
6.12 Battery (27:B)<br />
Acid that comes into contact with eyes<br />
or skin causes serious injury. If you<br />
come into contact with acid,<br />
immediately rinse with water and<br />
contact a doctor.<br />
The battery is a valve-regulated battery with 12 V<br />
nominal voltage. The battery fluid does not need to<br />
and cannot be checked or topped up. The only<br />
maintenance that is required is charging, for example<br />
after extended storage.<br />
The battery must be fully charged<br />
before being used for the first time. The<br />
battery must always be stored fully<br />
charged. If the battery is stored while<br />
discharged, serious damage will occur.<br />
6.12.1 Charging with the engine<br />
The battery can also be charged using the engine’s<br />
alternator as follows:<br />
1. Install the battery in the machine as shown below.<br />
2. Place the machine outdoors or install an extraction<br />
device for the exhaust fumes.<br />
3. Start the engine according to the instructions in<br />
the user guide.<br />
4. Allow the engine to run continuously for 45<br />
minutes.<br />
5. Stop the engine. The battery will now be fully<br />
charged.<br />
6.12.2 Charging using battery charger<br />
When charging with the battery charger, a battery<br />
charger with continuous voltage must be used.<br />
Contact your dealer to purchase a battery charger<br />
with constant voltage.<br />
The battery can be damaged if a standard type<br />
battery charger is used.<br />
ENGLISH<br />
6.12.3 Removal/Installation<br />
The current must be cut using the main<br />
switch (27:Q) before disconnecting the<br />
battery.<br />
If the cables are interchanged, the<br />
generator and the battery will be<br />
damaged.<br />
Tighten the cables securely. Loose<br />
cables can cause a fire.<br />
The engine must never be driven with<br />
the battery disconnected. There is a risk<br />
of serious damage to the alternator and<br />
the electrical system.<br />
Remove/install the battery as follows:<br />
1. Remove the left-hand engine cover.<br />
2. Cut the power using the main switch (27:Q).<br />
3. Disconnect the battery’s cable connections and<br />
remove the battery.<br />
4. Install the battery in reverse order. Connect the<br />
red cable to the battery’s positive terminal (+)<br />
and the black cable to the battery’s negative terminal<br />
(-).<br />
5. Activate the main switch.<br />
6.12.4 Cleaning<br />
If the battery terminals are coated with oxide, they<br />
should be cleaned. Clean the battery terminals with<br />
a wire brush and grease them using terminal<br />
grease.<br />
6.13 Air filter, engine<br />
The engine must never be run when the<br />
air filter is damaged or without an air<br />
filter. Risk of serious engine damage.<br />
The air filter consists of two filters as follows:<br />
23:V Pre-filter<br />
23:U Inner air filter<br />
NOTE! Clean/replace the filters more often than<br />
stated in the maintenance schedule if the machine<br />
operates in dusty conditions.<br />
Clean/replace the air filters as follows.<br />
1. Remove the air filter housing (21:R) by removing<br />
the two clamps (21:T) and the screw (21:S).<br />
2. Open the filter housing by releasing the two<br />
clamps (23:X).<br />
3. Remove the pre-filter (23:V) and leave the inner<br />
filter (23:U) in place so that dust etc. does<br />
not penetrate the engine when the pre-filter is<br />
being blow cleaned.<br />
4. Blow clean the pre-filter. Take care not to damage<br />
the filter. Blow from the inside out using<br />
compressed air. The pressure must be 3-5 bar.<br />
If the pre-filter cannot be cleaned or if it is damaged<br />
it must be replaced.<br />
5. Clean the filter housing internally.