Mini Impianti Dentali - Maurizio Maggioni
Mini Impianti Dentali - Maurizio Maggioni
Mini Impianti Dentali - Maurizio Maggioni
Create successful ePaper yourself
Turn your PDF publications into a flip-book with our unique Google optimized e-Paper software.
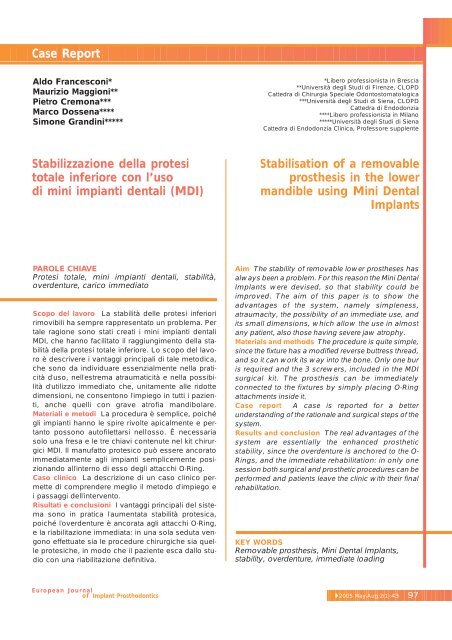
Case Report<br />
Aldo Francesconi*<br />
<strong>Maurizio</strong> <strong>Maggioni</strong>**<br />
Pietro Cremona***<br />
Marco Dossena****<br />
Simone Grandini*****<br />
Stabilizzazione della protesi<br />
totale inferiore con l’uso<br />
di mini impianti dentali (MDI)<br />
PAROLE CHIAVE<br />
Protesi totale, mini impianti dentali, stabilità,<br />
overdenture, carico immediato<br />
Scopo del lavoro La stabilità delle protesi inferiori<br />
rimovibili ha sempre rappresentato un problema. Per<br />
tale ragione sono stati creati i mini impianti dentali<br />
MDI, che hanno facilitato il raggiungimento della stabilità<br />
della protesi totale inferiore. Lo scopo del lavoro<br />
è descrivere i vantaggi principali di tale metodica,<br />
che sono da individuare essenzialmente nella praticità<br />
d’uso, nell’estrema atraumaticità e nella possibilità<br />
d’utilizzo immediato che, unitamente alle ridotte<br />
dimensioni, ne consentono l’impiego in tutti i pazienti,<br />
anche quelli con grave atrofia mandibolare.<br />
Materiali e metodi La procedura è semplice, poiché<br />
gli impianti hanno le spire rivolte apicalmente e pertanto<br />
possono autofilettarsi nell’osso. È necessaria<br />
solo una fresa e le tre chiavi contenute nel kit chirurgici<br />
MDI. Il manufatto protesico può essere ancorato<br />
immediatamente agli impianti semplicemente posizionando<br />
all’interno di esso degli attacchi O-Ring.<br />
Caso clinico La descrizione di un caso clinico permette<br />
di comprendere meglio il metodo d’impiego e<br />
i passaggi dell’intervento.<br />
Risultati e conclusioni I vantaggi principali del sistema<br />
sono in pratica l’aumentata stabilità protesica,<br />
poiché l’overdenture è ancorata agli attacchi O-Ring,<br />
e la riabilitazione immediata: in una sola seduta vengono<br />
effettuate sia le procedure chirurgiche sia quelle<br />
protesiche, in modo che il paziente esca dallo studio<br />
con una riabilitazione definitiva.<br />
*Libero professionista in Brescia<br />
**Università degli Studi di Firenze, CLOPD<br />
Cattedra di Chirurgia Speciale Odontostomatologica<br />
***Università degli Studi di Siena, CLOPD<br />
Cattedra di Endodonzia<br />
****Libero professionista in Milano<br />
*****Università degli Studi di Siena<br />
Cattedra di Endodonzia Clinica, Professore supplente<br />
Stabilisation of a removable<br />
prosthesis in the lower<br />
mandible using <strong>Mini</strong> Dental<br />
Implants<br />
Aim The stability of removable lower prostheses has<br />
always been a problem. For this reason the <strong>Mini</strong> Dental<br />
Implants were devised, so that stability could be<br />
improved. The aim of this paper is to show the<br />
advantages of the system, namely simpleness,<br />
atraumacity, the possibility of an immediate use, and<br />
its small dimensions, which allow the use in almost<br />
any patient, also those having severe jaw atrophy.<br />
Materials and methods The procedure is quite simple,<br />
since the fixture has a modified reverse buttress thread,<br />
and so it can work its way into the bone. Only one bur<br />
is required and the 3 screwers, included in the MDI<br />
surgical kit. The prosthesis can be immediately<br />
connected to the fixtures by simply placing O-Ring<br />
attachments inside it.<br />
Case report A case is reported for a better<br />
understanding of the rationale and surgical steps of the<br />
system.<br />
Results and conclusion The real advantages of the<br />
system are essentially the enhanced prosthetic<br />
stability, since the overdenture is anchored to the O-<br />
Rings, and the immediate rehabilitation: in only one<br />
session both surgical and prosthetic procedures can be<br />
performed and patients leave the clinic with their final<br />
rehabilitation.<br />
KEY WORDS<br />
Removable prosthesis, <strong>Mini</strong> Dental Implants,<br />
stability, overdenture, immediate loading<br />
European Journal<br />
of Implant Prosthodontics ◗ 2005 May-Aug;2(1):43 97
Francesconi A. et al.<br />
INTRODUZIONE<br />
La protesi totale inferiore ha sempre rappresentato<br />
un grosso problema per il dentista generico.<br />
Infatti, la perdita dei denti prima e l’inevitabile riassorbimento<br />
osseo che ne consegue conducono a<br />
una progressiva atrofia della cresta, che si manifesta<br />
prima in senso orizzontale e poi verticale, mettendo<br />
successivamente in risalto la linea miloioidea,<br />
linea obliqua interna, e, talvolta, la spina mentale<br />
superiore. Il tutto si accompagna a una progressiva<br />
diminuzione, fino anche alla totale scomparsa,<br />
della gengiva cheratinizzata (Carlsson e<br />
Persson, 1967) (5). In tali condizioni, nonostante gli<br />
sforzi per ottenere delle perfette impronte funzionali,<br />
spesso il risultato finale è deludente e la stabilità<br />
della protesi rimane comunque precaria.<br />
Per risolvere tali problemi negli anni Settanta il<br />
dottor Victor I. Sendax (odontoiatra newyorkese)<br />
ideò i minimpianti MDI (9). Grazie al disegno delle<br />
spire rivolte apicalmente, l’impianto può autofilettarsi<br />
nell’osso e, in tal modo, l’entità della compressione<br />
a carico di quest’ultimo è modesta e<br />
non destruente. Gli studi sperimentali condotti dal<br />
dottor Sendax evidenziano che un’ampiezza di<br />
1,8 mm è da considerarsi strutturalmente valida e<br />
consente all’impianto di scivolare e inserirsi nell’osso<br />
con trauma ridotto e con minore sforzo,<br />
purché le procedure preparatorie siano state eseguite<br />
correttamente. Oltre alla parte filettata presentano<br />
un collo, che emerge dalla mucosa, e<br />
una testa sferica che, ancorandosi a cappucci (O-<br />
Ring) fissati all’interno del manufatto protesico,<br />
conferisce stabilità a quest’ultimo.<br />
Gli impianti MDI sono realizzati in titanio e sono<br />
stati approvati dalla Federal Drugs Administration<br />
con certificazione in qualità di applicazioni<br />
intraosse e a lungo termine. Ciò significa che questi<br />
impianti, pur essendo di dimensioni notevolmente<br />
ridotte rispetto ai tradizionali (hanno un diametro<br />
di 1,8 mm), sono a tutti gli effetti degli<br />
impianti osteointegrati. Il primo impianto MDI è<br />
stato inserito nel 1976 e ha assolto le sue funzioni<br />
fino al 2001, con il decesso della paziente.<br />
Pertanto, le soluzioni protesiche che si avvalgono<br />
del loro uso devono essere considerate definitive,<br />
nel rispetto, naturalmente, dei classici protocolli<br />
di igiene e controllo periodico (1, 5, 7).<br />
Lo scopo del presente lavoro è quello di descri-<br />
98 ◗ 2005 May-Aug;2(1)44<br />
INTRODUCTION<br />
Removable prostheses have always been a crucial<br />
point for dentists general practitioners. So far, the<br />
advances in modern dentistry did not lead to<br />
completely satisfactory outcomes in this regard.<br />
Moreover, perfect stability is difficult to attain because<br />
of not only the tooth loss itself, but also the<br />
subsequent bone resorption, which leads to a<br />
progressive crest atrophy, at first in a horizontal and<br />
then in a vertical sense, continuing in the mylo-hyoid<br />
line, the internal oblique line and, though seldom,<br />
even in the upper chin spine. Moreover, in long-term<br />
denture wearers this is associated to bone decrease,<br />
and may result in a complete resorption of the<br />
keratinised gingiva (Carlsson and Persson, 1967) (5).<br />
In such conditions, notwhitstanding the important<br />
results obtained with functional impressions, the<br />
final outcome may not be completely satisfactory<br />
and denture stability is not enhanced. In order to<br />
solve this problem, in the 70’s Victor I. Sendax<br />
(practitioner in New York) devised the MDI miniimplants<br />
(9). Thanks to their modified reverse<br />
buttress thread, they can work their way into the<br />
bone (auto-advancement) so that the amount of<br />
compression on the bone itself is modest and not<br />
destructive. The experimental studies carried out by<br />
the deviser highlighted that a l.8 mm width was<br />
structurally correct and permitted the implant to slide<br />
and slip into the bone with little trauma or force,<br />
provided the preliminary procedures were correctly<br />
performed.<br />
The implant neck has a ball connection that is to be<br />
locked to O-Rings attachments placed inside the<br />
prosthesis, thus enhancing denture stability.<br />
MDI are dental implants made of titanium, and are<br />
approved by the FDA both for transitional and longterm<br />
applications. It means that these implants,<br />
though being remarkably smaller than current ones,<br />
are to all effects and purposes osseointegrated<br />
implants.<br />
The first mini-implant was placed in 1976 and it<br />
functioned until 2001, when that patient died.<br />
Therefore, any prosthetic rehabilitation using MDI<br />
mini-implants can withstand all the functions over<br />
the years as any fixture (1, 5, 7), of course, if<br />
supported by continuing follow-up and prophylaxis.<br />
The aim of this paper is to describe the use of MDI<br />
mini-implants through the report of a case.<br />
European Journal<br />
of Implant Prosthodontics
vere l’impiego dei minimpianti MDI attraverso l’esposizione<br />
di un caso clinico.<br />
MATERIALI E METODI<br />
I mini-impianti MDI sono costruiti in lega di titanio<br />
(Ti6 Al4 Va), più resistente rispetto al titanio commercialmente<br />
puro (9); questo ha permesso di eliminare,<br />
quasi completamente, il rischio di fratture<br />
durante l’inserzione e sotto il successivo carico.<br />
Studi istologici hanno inoltre dimostrato che attorno<br />
a questi impianti si forma osso sano, maturo e<br />
ben integrato. Gli MDI del dottor Sendax hanno<br />
una lunghezza di 10, 13, 15, 18 mm, permettendo<br />
così di raggiungere la profondità desiderata in<br />
tutte le situazioni anatomiche.<br />
Gli impianti sono commercializzati in confezioni<br />
sterili singole insieme con il kit necessario per il<br />
loro impiego.<br />
Secondo il protocollo dell’autore, per la preparazione<br />
del sito implantare è sufficiente una sola<br />
fresa spinta per metà o due terzi della lunghezza<br />
implantare prescelta. Vanno inseriti a cielo chiuso<br />
quattro impianti nella zona anteriore della mandibola,<br />
in particolare tra le emergenze dei due nervi<br />
mentonieri, mantenendo tra loro una distanza<br />
minima di 6-8 mm. La qualità ossea di questa<br />
zona (osso tipo D1 o D2, secondo la classificazione<br />
di Misch) (8), fa sì che anche in casi di edentulia<br />
prolungata si presti a essere utilizzata per l’inserzione<br />
d’impianti che possono sfruttare tutta l’altezza<br />
ossea disponibile, ottenendo così un’ottima<br />
stabilità primaria. Pertanto, i mini impianti MDI<br />
possono essere caricati immediatamente e la fissazione<br />
degli O-Ring all’interno della protesi può<br />
essere eseguita nella stessa seduta in cui vengono<br />
inseriti gli impianti.<br />
La descrizione del caso clinico che segue permette<br />
di comprendere i passaggi dell’intervento,<br />
secondo il protocollo dell’autore, e la componentistica<br />
chirurgica e protesica impiegata.<br />
CASO CLINICO<br />
Il paziente, portatore di protesi totale superiore e<br />
inferiore da molti anni, pur essendo ormai abituato<br />
all’ingombro dei manufatti rimovibili, si lamen-<br />
Stabilisation of a removable prosthesis in the lower mandible<br />
MATERIALS AND METHODS<br />
The MDI mini-implants are made of titanium alloy<br />
(Ti6 A14 Va), which proved to be better than pure<br />
titanium for dental purposes (9) in checking the risk of<br />
fractures during implant insertion and its subsequent<br />
loading. Besides, histological studies reported that<br />
healthy, mature and well integrated bone could be<br />
detected around these fixtures.<br />
MDI implants are manufactured in different lengths,<br />
10, 13, 15 and 18 mm, in order to suit any<br />
anatomical situation. They are individually sealed in<br />
a sterilised package, and marketed together with<br />
their surgery kit.<br />
According to the deviser’s protocol, four implants<br />
should be placed closed flap, using only one bur,<br />
inserted for one-half to two-third of the fixture length,<br />
in the front lower jaw, between the projections of the<br />
chin nerves, at a minimum distance from each other<br />
of 6-8 mm. This is because the bone quality of this<br />
area (bone type D1 or D2, according to Misch) (8)<br />
usually makes the implant placement possible even<br />
in case of long-term edentulism, taking advantage of<br />
the whole bone height available, and thus a good<br />
primary stability can be achieved.<br />
Moreover, the MDI mini-implants can be immediately<br />
loaded. The O-Ring attachments may be placed<br />
inside the prosthesis during the same surgical<br />
session of implant placement for immediate<br />
rehabilitation.<br />
In order to explain doctor Sendax’ technique, the<br />
surgical steps and the respective instruments, a case<br />
is reported.<br />
CASE REPORT<br />
A male subject, who had been wearing complete<br />
upper and lower removable prostheses for a long<br />
time, complained about the latter having grown<br />
progressively unstable over years, causing<br />
phonatory and masticatory distresses.<br />
After having obtained his informed consent, and<br />
having assessed he was eligible for this type of<br />
rehabilitation, the following procedure was<br />
performed.<br />
The distance between the median surface of the front<br />
premolar teeth on the lower prosthesis the subject<br />
had been wearing was measured (fig. 1) and then the<br />
European Journal<br />
of Implant Prosthodontics<br />
◗ 2005 May-Aug;2(1):45 99
Francesconi A. et al.<br />
tava che nel corso del tempo quello inferiore<br />
fosse sempre meno stabile, creando perciò<br />
disturbi alla fonazione e alla masticazione.<br />
Avendo spiegato il trattamento prescelto e avendo<br />
ottenuto il consenso del paziente, si procedeva<br />
a verificare la possibilità di attuare tale tipo di<br />
riabilitazione.<br />
Dapprima si misurava, sulla protesi del paziente,<br />
la distanza sulle superfici mesiali dei primi premolari<br />
(fig. 1). Si riportava poi tale distanza sulla<br />
cresta edentula (fig. 2). All’interno di questi due<br />
punti, che corrispondono alla posizione degli<br />
impianti più distali, si segnavano altri due punti,<br />
circa equidistanti, per il posizionamento degli<br />
ulteriori due impianti (fig. 3). In tal modo si determinava<br />
con precisione la posizione di quattro<br />
impianti, con una distanza minima di 6-8 mm tra<br />
di loro per essere certi di lavorare sempre nella<br />
zona intraforaminale.<br />
Si procedeva quindi alla creazione del sito<br />
implantare con un’unica fresa che, con movimento<br />
di va e vieni, e sotto abbondante irrigazione,<br />
veniva spinta solo per metà o due terzi della lunghezza<br />
finale (fig. 4).<br />
L’impianto stesso, che è di tipo autofilettante,<br />
nelle successive manovre di avvitamento provvedeva<br />
a crearsi la parte più profonda del suo letto,<br />
assicurandosi contemporaneamente una perfetta<br />
stabilità primaria.<br />
L’impianto veniva portato in sede mediante l’utilizzo<br />
del tappo della confezione stessa (fig. 5) e<br />
avvitato successivamente con una chiave specifica<br />
detta “avvitatore digitale” (fig. 6).<br />
Fig. 1: la distanza tra le superfici mesiali dei primi<br />
premolari.<br />
Fig. 1: the distance between the front premolar<br />
prosthetic teeth.<br />
100 ◗ 2005 May-Aug;2(1):46<br />
corresponding sites on the edentulous crest (fig. 2)<br />
were marked. Between the two spots, where the<br />
farthest fixtures would subsequently be placed, two<br />
more were marked, nearly equidistantly and at a<br />
minimum distance between each other of 6-8 mm,<br />
for the two remaining implant sites (fig. 3).<br />
In this way the sites of the four fixtures could be<br />
properly identified as well as the area undergoing<br />
surgery.<br />
The implant site was prepared using only one bur,<br />
moved backward and forward under abundant<br />
irrigation with saline solution, reaching half or twothirds<br />
of the final fixture length (fig. 4).<br />
Since the fixtures are self-tapping, the subsequent<br />
screwing procedures for the preparation of the<br />
alveolus are simplified, and primary stability is<br />
enhanced.<br />
The fixture was inserted by means of the cap,<br />
included in the kit (fig. 5), and subsequently screwed<br />
up by a hand screw (fig. 6). The latter allowed for a<br />
quick implant insertion, up to the point when the<br />
strength applied was felt as no more adequate for the<br />
implant further advancement. Then, keeping the<br />
insertion axis steady, a butterfly screw was used,<br />
with which the implant insertion was almost<br />
complete (fig. 7), thanks to its shape, that granted<br />
increased screwing strength.<br />
The last implant coils were threaded by means of a<br />
ratchet, until only the implant neck and the ball<br />
connection come out from the gingiva (fig. 8). A<br />
careful use of this key is recommended, in order to<br />
avoid implant neck fracture. The attention of the<br />
operator in this phase should be addressed to exert<br />
Fig. 2: la distanza riportata sul mascellare<br />
inferiore.<br />
Fig. 2: the distance measured is assessed in situ,<br />
on the lower jaw.<br />
European Journal<br />
of Implant Prosthodontics
Quest’ultimo permetteva una rapida inserzione<br />
dell’impianto, fino al punto in cui l’operatore avvertiva<br />
manualmente che la forza applicata non era<br />
più sufficiente a fare avanzare l’impianto stesso.<br />
Si procedeva quindi con una chiave a farfalla, che<br />
consentiva un’inserzione quasi completa (fig. 7),<br />
grazie alla sua forma che permetteva di applicare<br />
una maggiore forza di avvitamento, senza variare<br />
l’asse di inserzione.<br />
Le ultime spire dell’impianto venivano inserite,<br />
con l’ausilio della chiave a cricchetto, fino a far<br />
sporgere dalla mucosa solo la testa sferica ed il<br />
collo dell’impianto (fig. 8). L’utilizzo di questa chiave<br />
veniva fatto con cautela, per non rischiare la<br />
frattura del collo dell’impianto stesso. In questa<br />
fase l’operatore prestava attenzione all’applicazione<br />
di forze verticali e assiali, non laterali.<br />
Infine, si è proceduto secondo le modalità comunemente<br />
previste per l’inserzione degli impianti,<br />
Fig. 3: le sedi implantari evidenziate.<br />
Fig. 3: each implant site is marked on the gingiva.<br />
Fig. 5: l’impianto nella sua sede.<br />
Fig. 5: first implant placement.<br />
Stabilisation of a removable prosthesis in the lower mandible<br />
vertical and axial forces, rather than lateral ones.<br />
Eventually, the procedure is the same as that for all<br />
ordinary implants, and paying particular attention<br />
parallelism (fig. 9, 10).<br />
Once the surgical phase was ended, the O-Rings<br />
were fixed directly, inside the prosthesis, and the<br />
rehabilitation was completed.<br />
Before placing the O-Rings, it is mandatory that<br />
transparent rubber rings (spacers) be placed<br />
between the implant head and the gingiva, so to<br />
avoid the formation of any resin undercut that may<br />
prevent removing the prosthesis (fig. 11).<br />
O-Rings were marked with inactive silicone (fig. 12),<br />
so that those areas of the prosthesis that had to be<br />
subsequently hollowed (corresponding to the<br />
implant connection), could be quickly recognised<br />
(fig. 13).<br />
Once these seats were finished, the prosthesis fit was<br />
checked again into the mouth (fig. 13, 14).<br />
Fig. 4: perforazione con un’unica fresa.<br />
Fig. 4: for the perforation only one bur is necessary.<br />
Fig. 6: l’avvitamento con la chiave digitale.<br />
Fig. 6: implant screwed into its site with a hand screw.<br />
European Journal<br />
of Implant Prosthodontics ◗ 2005 May-Aug;2(1):47 101
Francesconi A. et al.<br />
Fig. 7: l’avvitamento con la chiave a farfalla.<br />
Fig. 7: the implant is screwed into its site with<br />
a butterfly screw.<br />
Fig. 9: l’inserzione degli altri impianti.<br />
Fig. 9: the remaining fixtures are placed.<br />
Fig. 11: i distanziatori e gli O-Ring posizionati.<br />
Fig. 11: spacers and O-Ring placed.<br />
controllando il parallelismo (fig. 9 e 10).<br />
Terminata la fase chirurgica, si passava subito<br />
alla fissazione degli O-Ring, all’interno della protesi,<br />
portando a termine così immediatamente il<br />
caso.<br />
102 ◗ 2005 May-Aug;2(1):48<br />
Fig. 8: l’avvitamento con il cricchetto.<br />
Fig. 8: the implant is screwed into its site with a ratchet.<br />
Fig. 10: tutti gli impianti in sede.<br />
Fig. 10: all implants in site.<br />
Fig. 12: la testa degli O-Ring segnata con il silicone.<br />
Fig. 12: the O-Ring heads marked with silicone.<br />
To match the original occlusion, enough room for the<br />
new structures coming up from the gingiva had to be<br />
made.<br />
Hollowed areas were then filled with self-curing resin;<br />
the prosthesis was replaced into the mouth, and the<br />
European Journal<br />
of Implant Prosthodontics
Fig. 13: i segni lasciati dal silicone all’interno della<br />
protesi.<br />
Fig. 13: silicone marks on the inside of the prosthesis.<br />
Fig. 15: controllo della protesi.<br />
Fig. 15: the prosthesis on site.<br />
Prima di posizionare gli O-Ring, è fondamentale<br />
inserire degli anelli di gomma trasparente (distanziatori)<br />
tra la testa dell’impianto e la mucosa, per<br />
impedire che la resina, una volta polimerizzata,<br />
portandosi in un sottosquadro, impedisca la rimozione<br />
della protesi (fig. 11).<br />
Gli O-Ring vanno segnati con del silicone non attivato<br />
(fig. 12), in modo da rilevare facilmente, all’interno<br />
della protesi, le zone da scaricare, corrispondenti<br />
all’emergenza degli impianti (fig. 13).<br />
La protesi veniva quindi scaricata, creando gli<br />
appositi alloggiamenti, e riprovata in bocca (figg.<br />
14 e 15).<br />
Se l’occlusione era ancora perfettamente corrispondente<br />
a quella originaria, avevamo creato lo<br />
spazio sufficiente per le nuove strutture emergenti<br />
dalla mucosa.<br />
Le zone scaricate venivano quindi riempite con<br />
resina a freddo e la protesi veniva riposizionata in<br />
Stabilisation of a removable prosthesis in the lower mandible<br />
Fig. 14: la protesi scaricata.<br />
Fig. 14: the hollows made in the prosthesis.<br />
Fig. 16: 16: la protesi dopo che sono stati fissati<br />
gli O-Ring.<br />
Fig. 16: the prosthesis after the O-Rings are placed.<br />
Fig. 17: la protesi lucidata.<br />
Fig. 17: the polished prosthesis.<br />
patient was asked to clench his teeth, until the resin<br />
had completely hardened.<br />
At this point the prosthesis was removed only to be<br />
finished, polished and eventually returned to the<br />
patient (fig. 16, 17), who was thus dismissed.<br />
European Journal<br />
of Implant Prosthodontics ◗ 2005 May-Aug;2(1):49 103
Francesconi A. et al.<br />
bocca, invitando il paziente a serrare i mascellari,<br />
fino alla completa polimerizzazione della resina.<br />
La protesi, a questo punto con gli O-Ring inglobati,<br />
veniva rimossa, semplicemente rifinita, lucidata<br />
e riconsegnata al paziente (fig. 16 e 17).<br />
RISULTATI E CONCLUSIONI<br />
Alla fine di un’unica seduta alla poltrona, il paziente<br />
può uscire dallo studio mantenendo la stessa<br />
protesi di cui era già portatore, ma con la piacevole<br />
sensazione di non sentirla più come un<br />
corpo estraneo e mobile nella sua bocca, ma<br />
come un adeguato sostituto alla dentatura perduta.<br />
Pur trattandosi di un vero e proprio atto chirurgico,<br />
l’estrema semplicità dell’intera procedura<br />
permette anche a un operatore non particolarmente<br />
esperto di tecniche implantari di portare<br />
facilmente a termine l’operazione. Da sottolineare<br />
inoltre che, per i motivi suddetti (estrema atraumaticità,<br />
finalizzazione in un’unica seduta), questa<br />
operazione, secondo la nostra esperienza, risulta<br />
sempre gradita ai pazienti e gratificante per l’operatore.<br />
Si può dunque concludere che il sistema<br />
MDI Sendax rappresenta, per pazienti già portatori<br />
di protesi totale, una valida alternativa ai sistemi<br />
implantologici tradizionali, che richiedono un<br />
costo biologico ed economico sicuramente maggiore.<br />
Si ringrazia Paolo Francesconi<br />
104 ◗ 2005 May-Aug;2(1):50<br />
RESULTS AND CONCLUSIONS<br />
It is to be stressed that in only one session the patient<br />
could leave the dental clinic with the prosthesis he<br />
had been wearing as he entered it, which in the<br />
meantime had acquired improved stability and fit.<br />
The procedure described is an extremely simple one<br />
that can be easily performed even by not longexperienced<br />
surgeons. Besides, it must be<br />
emphasised that, being a non-traumatic, single<br />
session procedure, it is both welcome to patients and<br />
rewarding to the practitioner.<br />
Thus, it can concluded that in long-standing<br />
removable prosthesis patients the MDI Sendax<br />
system is a valid alternative to traditional implant<br />
systems, that have a higher biological and economic<br />
cost.<br />
Thanks to Paolo Francesconi<br />
BIBLIOGRAFIA/REFERENCES<br />
1) Adell R, Lekholm U, Rockler B, Branemark PI. A 15year<br />
study of osseointegrated implants in the treatment<br />
of the edentulous jaw. Int J Oral Surg 1981<br />
Dec;10(6):387-416.<br />
2) Brånemark PL, Hansson BO, Adell R et al.<br />
Osseointegrated implants in the treatment of the edentuolous<br />
jaw: experience from a 10 year period. Scand<br />
J Plast Reconstr Surg Hand Surg 1977; 2(16):1-132.<br />
3) Brånemark PL. Osseointegration and its experimental<br />
background. J Prosthet Dent 1983;50(3):399-410.<br />
4) Burton EB, David ES, Francie N. <strong>Mini</strong> dental implant<br />
insertion with the auto-advance technique for ongoing<br />
application. J Oral Implantol 2001;27(1):32-7.<br />
5) Carlsson GE, Persson G. Morphologic changes of<br />
the mandible after extraction and wearing of dentures.<br />
A longitudinal, clinical, and x-ray cephalometric study<br />
covering 5 years. Odontol Revy 1967;18(1):27-54.<br />
6) Davies JE. Mechanisms of endosseous integration.<br />
Int J Prosthodont. 1998 Sep-Oct;11(5):391-401.<br />
7) McCracken M. Dental implant materials: commercially<br />
pure titanium and titanium alloys. J Prosthodont<br />
1999 Mar;8(1):40-3.<br />
8) Misch CE. Density of bone: effect on treatment<br />
plans, surgical approach, healing, and progressive<br />
boen loading. Int J Oral Implantol 1990;6(2):23-31.<br />
9) Sendax VI. <strong>Mini</strong> implants strategy offers a broad<br />
range of uses. Dent Today 1995;14(1):227-32.<br />
10) Steflik DE, Parr GR, Singh BB, Lake FT, Sisk AL,<br />
Howell FV, Shelton TW. Light microscopic and scanning<br />
electron microscopic analyses of dental implants retrieved<br />
from humans. J Oral Implantol. 1994;20(1):8-24.<br />
European Journal<br />
of Implant Prosthodontics


