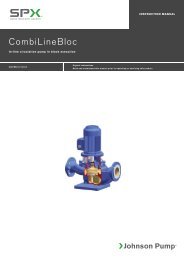
Submersible Bilge Pump - Johnson Pump
Submersible Bilge Pump - Johnson Pump
Submersible Bilge Pump - Johnson Pump

Create successful ePaper yourself
Turn your PDF publications into a flip-book with our unique Google optimized e-Paper software.
<strong>Submersible</strong> <strong>Bilge</strong> <strong>Pump</strong><br />
L1600, L2200, L4000<br />
IB-106 R04 (02/2012)<br />
INSTRUCTION MANUAL<br />
ORIGINAL INSTRUCTIONS/TRANSLATION OF ORIGINAL INSTRUCTIONS<br />
READ AND UNDERSTAND THIS MANUAL PRIOR TO OPERATING OR SERVICING THIS<br />
PRODUCT
Index - Indice<br />
Svenska .....................................................................................................................................4<br />
English .......................................................................................................................................6<br />
Deutsch .....................................................................................................................................8<br />
Français ...................................................................................................................................10<br />
Español ................................................................................................................................... 12<br />
Italiano ................................................................................................................................... 14<br />
Fig. ........................................................................................................................................... 16<br />
Besök www.johnson-pump.com för mer information om vår världsomspännande organisation, våra godkännanden, certifieringar och lokala representanter. SPX<br />
Corporation förbehåller sig rätten att ändra design och material utan föregående avisering. Designelement, konstruktionsmaterial och dimensioner som beskrivs i denna<br />
bulletin gäller endast som information och skall alltid bekräftas skriftligt för att vara gällande.<br />
For more information about our worldwide locations, approvals, certifications, and local representatives, please visit www.johnson-pump.com. SPX Corporation<br />
reserves the right to incorporate our latest design and material changes without notice or obligation. Design features, materials of construction and dimensional data,<br />
as described in this bulletin, are provided for your information only and should not be relied upon unless confirmed in writing.<br />
Für weitere Informationen über unsere weltweiten Standorte, Zulassungen, Zertifizierungen und unsere Vertreter vor Ort, besuchen Sie bitte unsere Webseite:<br />
www.johnson-pump.com. Die SPX Corporation behält sich das Recht vor, die neuesten Konstruktions- und Werkstoffänderungen ohne vorherige Ankündigung und<br />
ohne Verpflichtung hierzu einfließen zu lassen. Konstruktive Ausgestaltungen, Werkstoffe sowie Maßangaben, wie sie in dieser Mitteilung beschrieben sind, sind nur<br />
zur Information. Alle Angaben sind unverbindlich, es sei denn, sie wurden schriftlich bestätigt.<br />
Pour plus d’information sur nos succursales internationales, nos approbations, nos certifications et nos représentants locaux, veuillez consulter notre site Internet au<br />
www.johnson-pump.com. SPX Corporation se réserve le droit d’incorporer nos plus récents concepts ainsi que tout autre modification importante sans préavis ou<br />
obligation. Les éléments décoratifs, matériaux de construction et les données dimensionnelles, tels qu’énoncés dans ce communiqué, sont fournis pour votre information<br />
seulement et ne doivent pas être considérés comme officiels à moins d’avis contraire par écrit.<br />
Para más información sobre nuestras oficinas a nivel mundial, aprobaciones, certificaciones y representantes locales, por favor visite www.johnson-pump.com. SPX<br />
Corporation se reserva el derecho de incorporar nuestro diseño más reciente y cambios materiales sin necesidad de notificación previa u obligación de ningún tipo.<br />
Características de diseño, materiales de construcción y dimensiones, tal y como están descritas en este boletín, son proporcionadas sólo con fines informativos y no<br />
deben ser usados como referencia a menos que sean confirmados por escrito.<br />
Per ottenere maggiori informazioni sulle nostre sedi nel mondo, autorizzazioni, certificazioni, e rappresentanti locali, potete visitare il sito www.johnson-pump.com.<br />
La SPX Corporation si riserva il diritto di apportare cambiamenti ai propri design e materiali senza preavviso o vincolo. Le caratteristiche del design, i materiali di<br />
costruzione e i dati dimensionali, così come descritti nel presente bollettino, sono forniti solo per vostra informazione e non saranno oggetto di obbligazione salvo<br />
autorizzazione confermata per iscritto.<br />
Recreational Craft Directive 94/25/EEC<br />
Electromagnetic Compatibility Directive 89/336/EEC<br />
L1600 & L2200<br />
Garanti 3 år<br />
Warranty 3 years<br />
Garantie 3 Jahren<br />
Garantie 3 ans<br />
Garantía 3 años<br />
Garanzia 3 anni<br />
L4000<br />
Garanti 18 månader<br />
Warranty 18 months<br />
Garantie 18 Monaten<br />
Garantie 18 mois<br />
Garantía 18 meses<br />
Garanzia 18 mesi
Svenska<br />
Dränkbar länspump L1600, L2200 och L4000, 12/24 V<br />
Dränkbar länspump för pumpning av länsvatten i marin miljö. Installeras i kölsvinet.<br />
Säkerhetsföreskrifter<br />
• <strong>Pump</strong>en får inte användas till annan<br />
vätska än vatten/länsvatten.<br />
• Installera alltid pumpen enligt kopplingsschemat,<br />
se sid 16-17.<br />
• Använd den säkring som anges, se<br />
”Teknisk beskrivning” nedan.<br />
• Kabelanslutningarna ska avtätas med ett<br />
marint tätningsmedel.<br />
• Alla elektriska anslutningar måste placeras<br />
ovanför högsta slagvattennivå.<br />
• <strong>Pump</strong>en får inte köras torr.<br />
Teknisk beskrivning<br />
L1600 L2200 L4000<br />
Slanganslutning: 1¹⁄8"" 1¹⁄8" alt 1½" 1½" alt 2"<br />
Kapacitet, fritt utlopp<br />
(13,6V/27V): 100 l/min/(1 600 GPH) 130 l/min/(2 060 GPH) 258 l/min/(4 100 GPH)<br />
(12V/24V): 92 l/min/(1 450 GPH) 120 l/min/(1 900 GPH) 252 l/min/(4 000 GPH)<br />
Kapacitet, lyfthöjd 1m<br />
(13,6V/27V): 98 l/min/(1 550 GPH) 120 l/min/(1 900 GPH) 196 l/min/(3 100 GPH)<br />
(12V/24V): 88 l/min/(1 400 GPH) 110 l/min/(1 750 GPH) 164 l/min/(2 600 GPH)<br />
Spänning: 12/24 V DC 12/24 V DC 12/24 V DC<br />
Strömförbrukning: 12V – 7A 12V – 7.5A 12V – 19,5A<br />
24V – 3,5A 24V – 4,5A 24V – 10A<br />
Säkring: 12V – 10A 12V – 12A 12V – 25A<br />
24V – 6A 24V – 6A 24V – 15A<br />
<strong>Pump</strong>hus: Termoplast Termoplast Termoplast<br />
Axel: SS2343 SS2343 SS2343<br />
Axeltätning: Läpp Mekanisk, Mekanisk,<br />
kol/keramik kol/keramik<br />
Ledningsarea: 1,5 mm 2 1,5 mm 2 1,5 mm 2<br />
Max höjd: 149 mm 177 mm 216 mm<br />
Max dia: 108 mm 108 mm 121 mm<br />
Vikt: 1,3 kg 2,25 kg 2.45 kg<br />
Installation<br />
Typbeteckning<br />
<strong>Pump</strong>typ Art nr<br />
(EU) (USA)<br />
L1600 12 V 32-1600-01 16004-00<br />
L1600 24 V 32-1600-02 16084-00<br />
L2200 12 V 32-2200-01 22004<br />
L2200 24 V 32-2200-02 22084<br />
L4000 12 V 32-4000-01 40004<br />
L4000 24 V 32-4000-02 40084<br />
Följ anvisningarna noggrant för att uppnå maximal effekt.<br />
1. Ta bort filtret från pumpens nederdel genom att trycka in låstapparna på båda sidor om<br />
pumpen.<br />
2. Bestäm monteringsplats för pumpen, vilken vanligtvis placeras i kölens lägsta punkt.<br />
3. Placera filtret så att pumpens utlopp riktas åt rätt håll när pumpen monteras fast på filtret.<br />
4 Översättning av originalinstruktionerna
4. Montera filtret. Använd rostfria skruvar vid montering på trä. Ska pumpen monteras på<br />
metall eller glasfiber, skruva först fast en träplatta att fästa filtret på.<br />
5. Placera pumpen på filtret och se till att båda låstapparna ”snäpper” fast.<br />
6. Välj en plats där vattnet ska pumpas överbord – så högt som möjligt över vattenlinjen<br />
och så nära pumpen som möjligt. Installera en 28 mm (1¹⁄8") [L1600/L2200] alt 38 mm<br />
(1½")[L2200/L4000] alt 50 mm (2")[L4000] bordgenomföring. OBS! L4000 pumpen levereras<br />
med en avtagbar backventil för att minimera återflöde av vatten. Om vattnet<br />
står en längre tid i slangen kommer lite vatten att sippra tillbaka. Backventilen minskar<br />
även flödet till en viss del.<br />
7. Anslut en 28 mm (1¹⁄8")[L1600/L2200] alt 38 mm (1½")[L2200/L4000] alt 50 mm (2")<br />
[L4000] bränslesäker slang från pumpens utlopp till bordgenomföringen. Undvik skarpa<br />
veck och öglor. Om nödvändigt, fäst slangen. Obs! För att förhindra luftfickor är det viktigt att<br />
slangen inte riktas nedåt vid pumpens utlopp. Slangen ska hela tiden riktas uppåt.<br />
8. Anslut den bruna kabeln till batteriets pluspol (+) och den svarta till batteriets minuspol (-)<br />
eller jord. Se kopplingsschema sid 16-18.<br />
9. Viktigt! Alla elledningar måste klammas med kabelskarvarna så högt över länsvattnet som<br />
möjligt. Ta inte bort mer än nödvändigt av kabelisoleringen. Samtliga kabelskarvar ska tätas<br />
med ett marint tätningsmedel för att förhindra oxidation.<br />
Rengöring<br />
Översättning av originalinstruktionerna<br />
> Svenska<br />
Kontrollera regelbundet om filtret och impellern blivit igensatta av smuts. För att kunna göra rent, tryck in<br />
låstapparna och lyft pumphuset. Obs! Utloppsslangen behöver inte tas bort vid rengöring.<br />
Tillbehör<br />
Strömbrytarpanel 12 eller 24 V<br />
Art nr: (EU) 12 V – 34-1224 (USA) 82044<br />
24 V – 34-1225 82044-24<br />
Elektrisk installation med SPX <strong>Johnson</strong> <strong>Pump</strong> strömbrytarpanel<br />
Installera enligt kopplingsschemat på sid 16-17.<br />
UltimaSwitch<br />
Art nr: (EU) 34-36303 (USA) 36303<br />
<strong>Bilge</strong>Alert<br />
Art nr: (EU) 34-72303 (USA) 72303<br />
Elektronisk Nivåströmbrytare<br />
Art nr: (EU) 34-1900B-12V (USA) 36152 (12 V)<br />
34-1900B-24V 36252 (24 V)<br />
Automatisk nivåströmbrytare<br />
Art nr: (EU) 34-888 (USA) 26014<br />
Avfallshantering/materialåtervinning<br />
Vid avfallshantering ska produkten lämnas för destruktion/återvinning enligt gällande lagstiftning. Vid tilllämpliga<br />
fall demonteras och sorteras produkten i ingående materialfraktioner.<br />
5
English<br />
<strong>Submersible</strong> bilge pump L1600, L2200 and L4000, 12/24 V<br />
<strong>Submersible</strong> bilge pump for pumping bilge water in marine environment. To be installed in the keelson.<br />
Security<br />
• The pump may not be used for other<br />
liquids than water/bilge water.<br />
• Always install the pump according to the<br />
wiring diagram, see page 16-18.<br />
• Always use the fuse required, see<br />
”Design features” below.<br />
• The wire connections must be sealed with<br />
a marine sealant.<br />
• Insulation or cable sheathings must be<br />
placed above the highest bilge water level.<br />
• Do not run dry.<br />
Design features<br />
L1600 L2200 L4000<br />
Hose size: 1¹⁄8" 1¹⁄8" or 1½" 1½"or 2"<br />
Capacity, straight<br />
(13,6V/27V): 100 l/min/(1 600 GPH) 130 l/min/(2 060 GPH) 258 l/min/(4 100 GPH)<br />
(12V/24V): 92 l/min/(1 450 GPH) 120 l/min/(1 900 GPH) 252 l/min/(4 000 GPH)<br />
Capacity, 1m head<br />
(13,6V/27V): 98 l/min/(1 550 GPH) 120 l/min/(1 900 GPH) 196 l/min/(3 100 GPH)<br />
(12V/24V): 88 l/min/(1 400 GPH) 110 l/min/(1 750 GPH) 164 l/min/(2 600 GPH<br />
Voltage: 12/24 V DC 12/24 V DC 12/24 V DC<br />
Amperage: 12V – 7A 12V – 7.5A 12V – 19,5A<br />
24V – 3,5A 24V – 4,5A 24V – 10A<br />
Fuse size: 12V – 10A 12V – 12A 12V – 25A<br />
24V – 6A 24V – 6A 24V – 15A<br />
Body: Thermoplastic Thermoplastic Thermoplastic<br />
Shaft: SS2343 SS2343 SS2343<br />
Shaft seal: Lip seal Mechanical seal, Mechanical seal,<br />
carbon/ceramic carbon/ceramic<br />
Wire size: 1,5mm 2 1,5mm 2 14 Gage<br />
Max height: 149mm 177mm 216mm<br />
Max dia: 108mm 108mm 121mm<br />
Weight: 1,3 kg 2,25 kg 2,45kg<br />
Installation<br />
Type designation<br />
<strong>Pump</strong>type Part nr<br />
(EU) (USA)<br />
L1600 12 V 32-1600-01 16004-00<br />
L1600 24 V 32-1600-02 16084-00<br />
L2200 12 V 32-2200-01 22004<br />
L2200 24 V 32-2200-02 22084<br />
L4000 12 V 32-4000-01 40004<br />
L4000 24 V 32-4000-02 40084<br />
Please follow the installation instructions carefully to assure maximum efficiency in your bilge<br />
pump operation.<br />
1. Remove the strainer from the bottom of the pump by depressing the lock tabs on both<br />
sides of the pump.<br />
2. Determine the desired location for the pump. Usually it is placed in the lowest point of<br />
the bilge.<br />
6 Original instructions
3. Position the strainer so that the pump nozzle is in the proper position to connect to the<br />
discharge hose.<br />
4. Mount the strainer. If attaching the strainer to wood, fasten with stainless steel screws. If<br />
attaching the strainer to metal or fiberglass, first mount a wooden block and then fasten<br />
the strainer to the wooden block.<br />
5. Mount the pump on the strainer so that both locktabs ”snaps” into place.<br />
6. Select a point where the bilge water is to be pumped overboard as high as possible<br />
above the water line and at the shortest distance from the pump. Install a 1½"[L2200/<br />
L4000] or 1¹⁄8" [L1600/L2200] or 2"[L4000] thru-hull fitting. Note: The L4000 pump comes<br />
equipped with an integrated check valve to minimize back flow of water, however, over<br />
time water will seep back into the hull when the pump is not running. The use of flapper<br />
check valve will reduce maximum flow performance.<br />
7. Fasten a 1½"[L2200/L4000] or 1¹⁄8" [L1600/L2200] or 2"[L4000] fuel resistant hose<br />
from the pump outlet to the thru-hull fitting. Avoid sharp bends or loops. Support the hose<br />
if necessary. Note: In order to prevent air locks it is important that the hose not be allowed<br />
to dip below the pump outlet. The hose should be constantly rising.<br />
8. Connect the brown wire to the positive (+) terminal of the battery, and the black wire to<br />
the negative (-) termal of the battery. See wiring diagram, page 16-17.<br />
9. Important: All electrical wiring must be clamped with the connections well above the<br />
bilge water level. Do not remove the insulation more than necessary. All wiring connections<br />
should be sealed with a marine sealant to avoid oxidation.<br />
Maintenance<br />
Regularly check the pump to be sure that the filter base and impeller are not clogged with<br />
debris. To clean, push in the tabs and lift up the pump housing. Note! The discharge hose need<br />
not be removed.<br />
Accessories<br />
Panel 12 or 24 V<br />
Part No: (EU) 12 V – 34-1224 (USA) 82044<br />
24 V – 34-1225 82044-24<br />
Electrical installation with the SPX <strong>Johnson</strong> <strong>Pump</strong> panel<br />
Always install according to the wiring diagram on page 16-18.<br />
UltimaSwitch<br />
Part No: (EU) 34-36303 (USA) 36303<br />
<strong>Bilge</strong>Alert<br />
Part No: (EU) 34-72303 (USA) 72303<br />
Electronic Float Switch<br />
Part No: (EU) 34-1900B-12V (USA) 36152 (12 V)<br />
34-1900B-24V 36252 (24 V)<br />
Automatic Float Switch<br />
Part No: (EU) 34-888 (USA) 26014<br />
Waste handling & material recycling<br />
At the products end of life, please dispose of the product according to applicable law. Where<br />
applicable, please disassemble the product and recycle the parts material.<br />
Original instructions<br />
> English<br />
7
Deutsch<br />
<strong>Bilge</strong>-Tauchpumpe L1600, L2200 und L4000, 12/24 V<br />
Marine-Tauchpumpe zum Abpumpen von <strong>Bilge</strong>nwasser. Zur Installation im Kiel- oder <strong>Bilge</strong>nbereich.<br />
Sicherheitsvorschriften<br />
• Die <strong>Pump</strong>e darf nur zum Abpumpen von<br />
<strong>Bilge</strong>- und Seewasser verwendet werden.<br />
• Die <strong>Pump</strong>e muß gemäß dem Schaltplan<br />
auf Seite 16-18 installiert werden.<br />
• Immer die angegebene Sicherung ver-<br />
wenden. ”Technische Daten” siehe unten.<br />
• Die elektrischen Verbindungen müssen<br />
mit seewasserbeständigem Dichtmittel<br />
abgedichtet werden.<br />
• Alle elektrischen Verbindungen müssen<br />
in sicherem Abstand über dem Höchst-<br />
Wasserstand gelegt werden.<br />
• Die <strong>Pump</strong>e darf nicht trockenlaufen.<br />
Technische Daten<br />
L1600 L2200 L4000<br />
Schlauchdurchmesser: 1¹⁄8"" 1¹⁄8""oder 1½" 1½"oder 2"<br />
Leistung, bei geradem Auslauf<br />
(13,6V/27V): 100 l/min/(1 600 GPH) 130 l/min/(2 060 GPH) 258 l/min/(4 100 GPH)<br />
(12V/24V): 92 l/min/(1 450 GPH) 120 l/min/(1 900 GPH) 252 l/min/(4 000 GPH)<br />
Leistung bei 1m Förderhöhe<br />
(13,6V/27V): 98 l/min/(1 550 GPH) 120 l/min/(1 900 GPH) 196 l/min/(3 100 GPH)<br />
(12V/24V): 88 l/min/(1 400 GPH) 110 l/min/(1 750 GPH) 164 l/min/(2 600 GPH)<br />
Spannung: 12/24 V DC 12/24 V DC 12/24 V DC<br />
Stromaufnahme: 12V – 7A 12V – 7.5A 12V – 19,5A<br />
24V – 3,5A 24V – 4,5A 24V – 10A<br />
Sicherung: 12V – 10A 12V – 12A 12V – 15A<br />
24V – 6A 24V – 6A 24V – 7,5A<br />
Gehäuse: Thermoplastik Thermoplastik Thermoplastik<br />
Welle: SS2343 SS2343 SS2343<br />
Wellenabdichtung: Lippendichtung Gleitringdichtung, Gleitringdichtung<br />
Kohlenstoff/Keramik<br />
Kabelquerschnitt: 1,5mm 2 1,5mm 2 1,5mm 2<br />
Max. Höhe: 149mm 177mm 216mm<br />
Durchmesser: 108mm 108mm 121mm<br />
Gewicht: 1,3 kg 2,25 kg 2,45kg<br />
Einbau<br />
Modellvarianten<br />
<strong>Pump</strong>entyp Artikel Nr<br />
(EU) (USA)<br />
L1600 12 V 32-1600-01 16004-00<br />
L1600 24 V 32-1600-02 16084-00<br />
L2200 12 V 32-2200-01 22004<br />
L2200 24 V 32-2200-02 22084<br />
L4000 12 V 32-4000-01 40004<br />
L4000 24 V 32-4000-02 40084<br />
Bitte befolgen Sie diese Anweisungen sorgfältig. Nur so kann dafür garantiert werden, daß die<br />
<strong>Pump</strong>e einwandfrei und mit voller Leistung arbeitet.<br />
1. Saugkorb durch Drücken auf die beidseitigen Verriegelungen vom <strong>Pump</strong>en-unterteil<br />
demontierten.<br />
2. Den günstigsten Platz für die Montage der <strong>Pump</strong>e bestimmen. Dies sollte möglichst der<br />
tiefste Punkt in der <strong>Bilge</strong> sein.<br />
8 Übersetzung der Original-Betriebanleitungen
Übersetzung der Original-Betriebanleitungen<br />
> Deutsch<br />
3. Den Saugkorb so plazieren, daß der <strong>Pump</strong>enauslauf bei der Montage der <strong>Pump</strong>e in die richtige<br />
Richtung zeigt.<br />
4. Saugkorb montieren. Bei Montage auf Holz Schrauben aus Niro verwenden. Bei Anbringung auf<br />
Metall oder GFK zunächst eine Platte aus seewasserbeständigem Sperrholz montieren. Auf diese<br />
wird der Saugkorb befestigt.<br />
5. <strong>Pump</strong>enkörper auf den Saugkorb aufsetzen und dafür sorgen, daß die beiden Verriegelungszapfen<br />
fest einrast.<br />
6. Suchen Sie eine günstige Stelle für den Borddurchlaß aus. Dieser sollte möglichst hochüber der<br />
Wasserlinie und dennoch im kürzesten Abstand zur <strong>Pump</strong>e installiert werden. Der Borddurchlaß<br />
sollte eine Größe von 1¹⁄8" [L1600/L2200] oder 1½"[L2200/L4000] oder 2"[L4000] haben.<br />
Hinweis:Die L4000-<strong>Pump</strong>e ist zwar mit einem eingebauten Rückschlagventil ausgestattet um den<br />
Wasserrückfluss so gering wie möglich zu halten, aber über die Zeit wird doch Wasser in den<br />
Rumpf gelangen,wenn die <strong>Pump</strong>e nicht läuft. Durch den Einsatz eines Klappenrückschlagventils<br />
wird die maximale Förderleistung verringert.<br />
7. Installieren Sie einen ölbeständigen Schlauch von 1¹⁄8" [L1600/L2200] oder 1½"[L2200/L4000]<br />
oder 2"[L4000] Durchmesser zwischen dem <strong>Pump</strong>en-Schlauchstutzen und dem Borddurchlaß.<br />
Dieser sollte ohne enge Radien im direkten Weg von der <strong>Pump</strong>e zum Bord-durchlaß mit konstanter<br />
Steigung verlegt werden.<br />
8. Das braune Kabel muß an den Pluspol(+), das schwarze Kabel an den Minus pol (-) der Batterie<br />
geklemmt werden. Siehe Schaltplan Seite 16-17.<br />
9. Wichtig! Alle elektrischen Verbindungen müssen so installiert werden, daß sie sich in ausreichender<br />
Höhe über dem max. <strong>Bilge</strong>-Wasserstand befinden. Die Kabel so kurz wie möglich abisolieren.<br />
Sämtliche Kabelanschlüsse mit seewasserbeständiger Dichtmasse schützen, um Korrosionen zu<br />
vermeiden.<br />
Wartung<br />
Regelmäßig prüfen, ob Saugkorb und Flügelrad nicht durch Schmutz verstopft sind. Zwecks<br />
Durchführung der Reinigung: Verriegelungszapfen drücken und <strong>Pump</strong>engehäuse herausheben.<br />
VERMERK: Der Auslaufschlauch muß bei der Reinigung nicht entfernt werden.<br />
Zubehör<br />
Schalttafel 12 oder 24 V<br />
Artikel Nr: (EU) 12 V – 34-1224 (USA) 82044<br />
24 V – 34-1225 82044-24<br />
Elektrischer Anschluss mit SPX <strong>Johnson</strong> <strong>Pump</strong> Schalttafel<br />
Siehe Schaltplan Seite 16-18.<br />
UltimaSwitch<br />
Artikel Nr: (EU) 34-36303 (USA) 36303<br />
<strong>Bilge</strong>Alert<br />
Artikel Nr: (EU) 34-72303 (USA) 72303<br />
Elektronik-Schwimmerschalter<br />
Artikel Nr: (EU) 34-1900B-12V (USA) 36152 (12 V)<br />
34-1900B-24V 36252 (24 V)<br />
Automatischer Niveauschalter<br />
Artikel Nr: (EU) 34-888 (USA) 26014<br />
Entsorgung/Recycling<br />
Nach Lebensdauerende entsorgen Sie die <strong>Pump</strong>e nach den örtlichen Vorschriften.<br />
Nach Möglichkeit demontieren Sie Teile der <strong>Pump</strong>e um sie dem Recycling-Process zuzuführen.<br />
9
Français<br />
Pompe de cale submersible L1600 et L2200, 12/24 V<br />
Pompe de cale submersible pour eaux de cale en milieu marin. Pour installation en fond de<br />
cale.<br />
Instructions de sécurité<br />
• La pompe ne peut être utilisée que pour<br />
de l’eau ou pour les eaux de cale.<br />
• Brancher toujours la pompe selon le<br />
schéma électrique, page 16-18.<br />
• Utiliser le fusible indiqué, voir ”caractéristiques<br />
techniques” ci-dessous.<br />
• Les points de jonction du cablage doivent<br />
être étanchés à l’aide d’un produit hydrofuge.<br />
• Tous les points de jonction électriques<br />
doivent être placés au-dessus du niveau<br />
le plus haut des eaux de cale.<br />
• La pompe ne doit en aucun cas tourner à vide.<br />
Caractéristiques techniques<br />
L1600 L2200 L4000<br />
Diam. de tuyau: 28mm 28mm ou 38mm 38mm ou 50mm<br />
Débit, refoulement libre<br />
(13,6V/27V): 100 l/min/(1 600 GPH) 130 l/min/(2 060 GPH) 258 l/min/(4 100 GPH)<br />
(12V/24V): 92 l/min/(1 450 GPH) 120 l/min/(1 900 GPH) 252 l/min/(4 000<br />
GPH)<br />
Débit, refoulement à 1m<br />
(13,6V/27V): 98 l/min/(1 550 GPH) 120 l/min/(1 900 GPH) 196 l/min/(3 100 GPH)<br />
(12V/24V): 88 l/min/(1 400 GPH) 110 l/min/(1 750 GPH) 164 l/min/(2 600<br />
GPH)<br />
Voltage: 12/24 V DC 12/24 V DC 12/24 V DC<br />
Intensité: 12V – 7A 12V – 7.5A 12V – 19,5<br />
24V – 3,5A 24V – 4,5A 24V – 10A<br />
Fusible: 12V – 10A 12V – 12A 12V – 25A<br />
24V – 6A 24V – 6A 24V –15A<br />
Corps: Thermoplastique Thermoplastique Thermoplastique<br />
Arbre: SS2343 SS2343 SS2343<br />
Etanchéité arbre: Joint à lèvre Garniture mécanique, Garniture mécanique,<br />
carbone/céramique<br />
Section de câbles: 1,5mm 2 1,5mm 2 1,5mm 2<br />
Hauteur maxi: 149mm 177mm 216mm<br />
Diam. maxi: 108mm 108mm 121mm<br />
Poids: 1,3 kg 2,25 kg 2,45kg<br />
Installation<br />
Spécifications du modèle<br />
Modèle Référence<br />
(EU) (USA)<br />
L1600 12 V 32-1600-01 16004-00<br />
L1600 24 V 32-1600-02 16084-00<br />
L2200 12 V 32-2200-01 22004<br />
L2200 24 V 32-2200-02 22084<br />
L4000 12 V 32-4000-01 40004<br />
L4000 24 V 32-4000-02 40084<br />
Suivre méticuleusement les instructions ci-dessous afin d’obtenir un rendement optimum.<br />
1. Enlever le filtre de la partie inférieure de la pompe en enfonçant les verrous des deux côtés<br />
de la pompe.<br />
2. Déterminer l’emplacement de montage de la pompe, en général au point le plus bas de la cale.<br />
10 Traduction du manuel d'instruction d'origine
Traduction du manuel d'instruction d'origine<br />
> Français<br />
3. Placer le filtre pour que la sortie de la pompe soit dirigée dans le bon sens lorsque la<br />
pompe est fixée sur le filtre.<br />
4. Monter le filtre. Utiliser les vis inoxydables pour le montage sur du bois. Si la pompe doit<br />
être montée sur du métal ou des fibres de verre, commencer par visser une plaque en bois<br />
où sera fixé le filtre.<br />
5. Placer la pompe sur le filtre et s’assurer que les deux verrous sont bien enclenchés.<br />
6. Choisir un endroit par lequel les eaux de cale seront pompées et évacuées aussi haut que<br />
possible au-dessus de la ligne d’eau et le plus près possible de la pompe. Installer un raccord<br />
fileté de 28 mm [L1600/L2200] ou 38 mm [L2200/L4000] ou 50 mm [L4000] à travers<br />
la coque. Remarque: La pompe L4000 est équipée d’origine d’un clapet anti-retour pour<br />
réduire au minimum le reflux, cependant, après une longue période d’utilisation, l’eau<br />
contenue dans le circuit de refoulement peut refluer lentement. L’utilisation d’un clapet<br />
anti-retour réduit le débit de la pompe.<br />
7. Monter un tuyau résistant à l’essence de 28 mm [L1600/L2200] ou 38 mm [L2200/L4000] ou<br />
50 mm [L4000] entre la sortie de la pompe et le raccord fileté traversant la coque. Eviter<br />
les plis et les boucles. Fixer le tuyau si nécessaire. Important: Afin d’éviter les poches<br />
d’air, il est important de s’assurer que la sortie du tuyau ne soit pas dirigée vers le bas, mais<br />
toujours vers le haut.<br />
8. Relier le fil marron à la borne positive (+) de la batterie et relier le fil noir à la borne<br />
négative (-) de la batterie.<br />
9. Attention: Le câblage électrique doit être fixé de manière à ce que tous les raccords<br />
se trouvent au-dessus du niveau le plus haut des eaux de cale. N’enlever qu’un minimum<br />
d’isolant du bout des câbles. Tous les raccords doivent être bien protégés contre la corrosion<br />
à l’aide d’un produit résistant à l’eau.<br />
Nettoyage<br />
Vérifier régulièrement si le filtre et la turbine sont encrassés. Pour nettoyer, enfoncer les verrous et soulever<br />
le corps de pompe. Note! Le flexible de sortie n’a pas besoin d’être enlevé pour le nettoyage.<br />
Accessoires<br />
Tableau de commande 12 ou 24 V<br />
Référence: (EU) 12 V – 34-1224 (USA) 82044<br />
24 V – 34-1225 82044-24<br />
Installation électrique avec tableau de commande SPX <strong>Johnson</strong> <strong>Pump</strong><br />
Installer selon le schéma électrique à la page 16-18.<br />
UltimaSwitch<br />
Référence: (EU) 34-36303 (USA) 36303<br />
<strong>Bilge</strong>Alert<br />
Référence: (EU) 34-72303 (USA) 72303<br />
Interrupteur de commande electronique<br />
Référence: (EU) 34-1900B-12V (USA) 36152 (12 V)<br />
34-1900B-24V 36252 (24 V)<br />
Interrupteur automatique à flotteur<br />
Référence: (EU) 34-888 (USA) 26014<br />
Gestion des déchets/recyclage des matériaux<br />
Lorsque le matériel arrivera en fin de vie, veuillez le mettre au rebut en fonction des lois applicables.<br />
Lorsque c'est possible, veuillez démonter le matériel et recycler les pièces pouvant l'être<br />
11
Español<br />
Bomba de achique sumergible L1600, L2200 y L4000, 12/24 V<br />
Bomba de achique sumergible para achicar agua en ambientes marinos. Para instalación en la contraquilla.<br />
Instrucciones de seguridad<br />
• La bomba sólo debe utilizarse para agua.<br />
• Instalar la bomba según el esquema eléctrico<br />
de las páginas 16-18.<br />
• Poner el fusible indicado en ”Características<br />
técnicas”.<br />
• Todas las conexiones eléctricas deben<br />
sellarse con silicona marina.<br />
• Todas las conexiones eléctricas deben<br />
quedar por encima del nivel más alto de<br />
la sentina.<br />
• No debe funcionar en seco.<br />
Características técnicas<br />
L1600 L2200 L4000<br />
Conexión: 1¹⁄8" 1¹⁄8" alt 1½" 1½" alt 2"<br />
Caudal salida libre<br />
(13,6V/27V): 100 l/min/(1 600 GPH) 130 l/min/(2 060 GPH) 258 l/min/(4 100 GPH)<br />
(12V/24V): 92 l/min/(1 450 GPH) 120 l/min/(1 900 GPH) 252 l/min/(4 000 GPH)<br />
Caudal a 1m altura<br />
(13,6V/27V): 98 l/min/(1 550 GPH) 120 l/min/(1 900 GPH) 196 l/min/(3 100 GPH)<br />
(12V/24V): 88 l/min/(1 400 GPH) 110 l/min/(1 750 GPH) 164 l/min/(2 600 GPH)<br />
Tensión: 12/24 V DC 12/24 V DC 12/24 V DC<br />
Amperaje: 12V – 7A 12V – 7.5A 12V – 19,5A<br />
24V – 3,5A 24V – 4,5A 24V – 10A<br />
Fusible: 12V – 10A 12V – 12A 12V – 25A<br />
24V – 6A 24V – 6A 24V – 15A<br />
Cuerpo: Termoplástico Termoplástico Termoplástico<br />
Eje: SS2343 SS2343 SS2343<br />
Retén eje: Retén labidal Retén mecánico Retén mecánico,<br />
carbón/cerámico<br />
Conductor: 1,5mm 2 1,5mm 2 1,5mm 2<br />
Alto total: 149mm 177mm 216mm<br />
Ø total: 108mm 108mm 121mm<br />
Peso: 1,3 kg 2,25 kg 2,45kg<br />
Instalación<br />
Modelo<br />
Tipo Ref. No<br />
(EU) (USA)<br />
L1600 12 V 32-1600-01 16004-00<br />
L1600 24 V 32-1600-02 16084-00<br />
L2200 12 V 32-2200-01 22004<br />
L2200 24 V 32-2200-02 22084<br />
L4000 12 V 32-4000-01 40004<br />
L4000 24 V 32-4000-02 40084<br />
Se recomienda observar estrictamente estas instrucciones para asegurar la máxima eficacia de<br />
la bomba.<br />
1. Quitar el filtro de la parte inferior de la bomba presionando los ejes de cierre a ambos<br />
lados de la bomba.<br />
2. Determinar el lugar de montaje de la bomba. Generalmente se coloca en el punto más<br />
bajo de la sentina.<br />
12 Traducción de instrucciones originales
3. Colocar el filtro de manera que la salida de la bomba quede orientada para conectar la<br />
manguera.<br />
4. Montar el filtro. Utilizar tornillos de acero inoxidable si se hace el montaje sobre madera.<br />
Si la bomba se ha de montar sobre metal o fibra de vidrio, deberá colocarse una chapa de<br />
madera a la que se fijará el filtro.<br />
5. Colocar la bomba en el filtro y asegurarse que los dos pernos de cierre quedan bien encajados.<br />
6. Elegir un punto en que la salida del agua esté a la mayor distancia posible por encima de<br />
la línea de flotación y lo más cerca de la bomba. Nota: La bomba del L4000 viene provista<br />
de una válvula de control integrada que merma el caudal de retorno del agua, sin embargo,<br />
con el tiempo el agua vuelve a filtrarse en el casco cuando la bomba no trabaja. El<br />
uso de la válvula de retención reducirá al máximo la acción del flujo.<br />
7. Fijar la manguera de 1½"[L2200/L4000] ó 1¹⁄8"[L1600/L2200] ó 2"[L4000] resistente a<br />
hidrocarburos, entre la bomba y el pasacascos. Evitar coca y lazos. Si fuese necesario, fijar<br />
la manguera.<br />
Observación: Para evitar la entrada de aire, es importante que la manguera no quede por<br />
debajo de la salida de la bomba. La manguera debe tener una elevación constante.<br />
8. Conectar el cable marrón al positivo (+) y el cable negro al negativo (-).<br />
9. Importante: Todo el cableado debe fijarse de manera que las conexiones queden lo más<br />
alto posible por encima del nivel de agua de la sentina. Pelar los cables justo lo imprescindible.<br />
Todas las conexiones deben aislarse con silicona marina para evitar la corrosión.<br />
Mantenimiento<br />
Comprobar regularmente si el filtro y el impulsor están obturados por suciedad. Para limpiarlos,<br />
presionar los pernos de cierre y quitar la bomba. Nota: No es necesario quitar la manguera.<br />
Accesorios<br />
Panel 12 ó 24 V<br />
Ref. No: (EU) 12 V – 34-1224 (USA) 82044<br />
24 V – 34-1225 82044-24<br />
Instalación eléctrica con el panel de SPX <strong>Johnson</strong> <strong>Pump</strong><br />
Instalar según el esquema eléctrico de la página 16-18.<br />
UltimaSwitch<br />
Ref. No: (EU) 34-36303 (USA) 36303<br />
<strong>Bilge</strong>Alert<br />
Ref. No: (EU) 34-72303 (USA) 72303<br />
Interruptor de nivel electrónico<br />
Ref. No: (EU) 34-1900B-12V (USA) 36152 (12 V)<br />
34-1900B-24V 36252 (24 V)<br />
Interruptor flotante automático<br />
Ref. No: (EU) 34-888 (USA) 26014<br />
Desguace/Reciclado<br />
Al final de la vida del equipo disponga de este de acuerdo a la ley. Donde sea de aplicación<br />
desmonte el equipo y recicle los diferentes materiales.<br />
Traducción de instrucciones originales<br />
> Español<br />
13
Italiano<br />
Pompa di sentina sommersa L1600, L2200 a L4000, 12/24 V<br />
Pompa di sentina sommersa per pompare l’acqua di sentina in ambiente marino. Per installazione in<br />
stiva.<br />
Istruzioni di sicurezza<br />
• La pompa no si può usare per altri liquidi<br />
dell’acqua o dell’acqua di sentina.<br />
• Installare sempre la pompa secondo il<br />
schema elettrico nella pagina 16-18.<br />
• Usare il fusibile indicato, vedere le caratteristiche<br />
tecniche in basso.<br />
• I collegamenti elettrici dovrebbero essere<br />
sigillati con un sigillante marino.<br />
• Tutti i collegamenti elettrici devono essere<br />
posti al di sopra del livello più alto<br />
dell’acqua.<br />
• La pompa no puó girare a vuoto.<br />
Caratteristiche tecniche<br />
L1600 L2200 L4000<br />
Sezione tubo: 1¹⁄8" 1¹⁄8" o 1½" 1½" o 2"<br />
Portata massima<br />
(13,6V/27V): 100 l/min/(1 600 GPH) 130 l/min/(2 060 GPH) 258 l/min/(4 100 GPH)<br />
(12V/24V): 92 l/min/(1 450 GPH) 120 l/min/(1 900 GPH) 252 l/min/(4 000 GPH)<br />
Portata a 1mt di prevalenza<br />
(13,6V/27V): 98 l/min/(1 550 GPH) 120 l/min/(1 900 GPH) 196 l/min/(3 100 GPH)<br />
(12V/24V): 88 l/min/(1 400 GPH) 110 l/min/(1 750 GPH) 164 l/min/(2 600 GPH<br />
Voltaggio: 12/24 V DC 12/24 V DC 12/24 V DC<br />
Amperaggio: 12V – 7A 12V – 7.5A 12V – 19,5A<br />
24V – 3,5A 24V – 4,5A 24V – 10A<br />
Capacità fusibile: 12V – 10A 12V – 12A 12V – 25A<br />
24V – 6A 24V – 6A 24V – 15A<br />
Corpo: Termoplastico Termoplastico Termoplastico<br />
Albero: SS2343 SS2343 SS2343<br />
Guarnizione dell'albero: Guarnizioni a labbro Tenuta meccanica, Tenuta meccanica,<br />
carbonio/ceramica<br />
Area cavo: 1,5mm 2 1,5mm 2 1,5mm 2<br />
Altezza: 149mm 177mm 216mm<br />
Dimenzione: 108mm 108mm 121mm<br />
Peso: 1,3 kg 2,25 kg 2,45 kg<br />
Installazione<br />
Specifica del tipo<br />
Tipo Art No<br />
(EU) (USA)<br />
L1600 12 V 32-1600-01 16004-00<br />
L1600 24 V 32-1600-02 16084-00<br />
L2200 12 V 32-2200-01 22004<br />
L2200 24 V 32-2200-02 22084<br />
L4000 12 V 32-4000-01 40004<br />
L4000 24 V 32-4000-02 40084<br />
Si prega di seguire con attenzione le istruzioni di montaggio per garantire la massima efficacia di<br />
funzionamento alla vostra pompa di sentina.<br />
1. Rimuovere il filtro dalla parte inferiore della pompa, premendo all’interno entrambi i<br />
perni di bloccaggio posti ai lati della pompa stessa.<br />
2. Individuare il punto in cui installare la pompa, solitamente quello più basso della sentina.<br />
14 Traduzione delle istruzioni originali
Traduzione delle istruzioni originali<br />
> Italiano<br />
3. Sistemare il filtro in modo che la mandata della pompa, una volta che questa sia stata montata sul<br />
filtro, sia orientata nella direzione corretta.<br />
4. Installare il filtro, usando le viti in acciaio inossidabile nel caso il fissaggio avvenga direttamente su<br />
legno. Se avviene invece su fibra di vetro o metallo, andrà prima apposto un basamento in legno, e<br />
su questo fissato il filtro.<br />
5. Montare la pompa sul filtro, accertandosi che entrambi i perni ”scattino” in posizione di bloccaggio.<br />
6. Scegliere il punto da cui l’acqua di sentina deve essere pompata fuori bordo, il più alto possibile<br />
rispetto alla linea d’acqua ed alla minima distanza dalla pompa. Installare un attacco di 1½"o<br />
1¹⁄8" attraverso la carena. Nota: l’L400 viene fornito dotato di una valvola di controllo integrata<br />
per minimizzare il ritorno di acqua, comunque, nel tempo l’acqua si infiltrerà nello scafo quando la<br />
pompa non è in funzione. L’uso della valvola di controllo a pinna ridurrà le prestazioni con il flusso<br />
massimo.<br />
7. Collegare un tubo di 1½"[L2200/L4000] o 1¹⁄8"[L1600/L2200] o 2"[L4000] resistente ai carburanti<br />
dalla mandata della pompa all’attacco a carena. Evitare curve brusche o occhielli. Se necssario,<br />
supportare il tubo. Nota: per prevenire bolle d’aria è importante che il tubo non si immerga al di<br />
sotto della mandata della pompa. Il tubo dovrebbe essere costantemente sollevato.<br />
8. Collegare il cavo marrone al terminale + della batteria e il cavo nero al - della batteria – vedi schema<br />
a pagina 16-17.<br />
9. N.B. Tutti i collegamenti elettrici devono essere posti al di sopra del livello più alto dell’acqua<br />
di sentina. Non rimuovere più di necessario dall’isolamento dei cave. I collegamenti dei cavi<br />
dovrebbero essere sigilati con un sigillante marino per prevenire la corrosione.<br />
Pulizia<br />
Controllare regolarmente che filtro e girante non sia intasati dalle impurità. Per eseguire la pulizia, premere<br />
verso l’interno i perni di bloccaggio e sollevare il corpo pompa. Nota! Per effettuare la pulizia della<br />
pompa non è necessario estrarre il tubo di scarico.<br />
Accessori<br />
Pannello 12 o 24 V<br />
Art No: (EU) 12 V – 34-1224 (USA) 82044<br />
24 V – 34-1225 82044-24<br />
Installazione electrica con il pannello SPX <strong>Johnson</strong> <strong>Pump</strong><br />
Installare secondo il schema elettrico nella pagina 16-18.<br />
UltimaSwitch<br />
Art No: (EU) 34-36303 (USA) 36303<br />
<strong>Bilge</strong>Alert<br />
Art No: (EU) 34-72303 (USA) 72303<br />
Interruttore electtronico<br />
Art No: (EU) 34-1900B-12V (USA) 36152 (12 V)<br />
34-1900B-24V 36252 (24 V)<br />
Interruttore Automatico<br />
Art No: (EU) 34-888 (USA) 26014<br />
Gestione dei rifiuti/riciclaggio dei materiali<br />
Al termine della vita del prodotto si prega di smaltire il prodotto secondo le leggi in vigore per queste<br />
operazioni. Quando possibile, si raccomanda di smontare il prodotto e riciclare i materiali dei componenti.<br />
15
16<br />
UltimaSwitch<br />
Elektrisk installation utan strömbrytarpanel.<br />
Electrical installation without panel.<br />
Elektrische Installation ohne Schalttafel.<br />
Installation electrique sans panneau<br />
Instalación eléctrica sin panel<br />
Installazione elettrica senza pannello<br />
G<br />
H<br />
B<br />
A Länspump<br />
<strong>Bilge</strong> pump<br />
<strong>Bilge</strong>pumpe<br />
Pompe de cale<br />
Bomba achique<br />
Pompa di sentina<br />
F Svart(pump)<br />
Black(pump)<br />
Schwarz(<strong>Pump</strong>e)<br />
Noir(pompe)<br />
Negro(bomba)<br />
Nero(pompa)<br />
K<br />
A<br />
+ -<br />
C<br />
B Elektronisk UltimaSwitch<br />
Electronic UltimaSwitch<br />
Elektronik UltimaSwitch<br />
Interrupteur UltimaSwitch<br />
Interruptor UltimaSwitch<br />
Interruttore UltimaSwitch<br />
G Brun(#1)<br />
Brown(#1)<br />
Braun(#1)<br />
Marron(#1)<br />
Marrón(#1)<br />
Marrone(#1)<br />
E<br />
F<br />
H Brun/vit(#2)<br />
Brown/white(#2)<br />
Braun/weiss(#2)<br />
Marron/blanc(#2)<br />
Marrón/blanco(#2)<br />
Marrone/bianco(#2)<br />
Elektrisk installation med strömbrytarpanel.Electrical<br />
installation with panel.<br />
Elektrische Installation mit Schalttafel.<br />
Installation electrique avec panneau.<br />
Instalación eléctrica con panel.<br />
Installazione elettrica con pannello.<br />
Brun, nr 2<br />
Brown, No 2<br />
Braunes, Nr. 2<br />
Marron, No 2<br />
Marrón, No 2<br />
Marrone, No 2<br />
D<br />
Obs: Dessa kablar är redan anslutna<br />
Note: These cables are already connected<br />
Wichtig: Kabeln schon angeschlossen<br />
Important: Ces câbles sont déjà raccordés<br />
Advertencia: Estos cables ya van conectados<br />
Nota Bene: Questi cavi sono già collegati<br />
C Batteri<br />
DC supply<br />
Batterie<br />
Batterie<br />
Batería<br />
Batteria<br />
B<br />
D Panel<br />
Panel<br />
Schalttafel<br />
Panneau<br />
Panel<br />
Pannello<br />
J Switch<br />
Switch<br />
Schalter<br />
Interrupteur<br />
Interruptor<br />
Interruttore<br />
A<br />
Brun/vit, nr 1<br />
Brown/white, No 1<br />
Braunes/weiss, Nr. 1<br />
Marron/blanc, No 1<br />
Marrón/blanco, No 1<br />
Marrone/blanco, No 1<br />
+ -<br />
C<br />
E Brun(pump)<br />
Brown(pump)<br />
Braun(<strong>Pump</strong>e)<br />
Marron(pompe)<br />
Marrón((bomba)<br />
Marrone(pompa)<br />
K Säkring<br />
Fuse<br />
Sicherung<br />
Fusible<br />
Fusible<br />
Fusibile<br />
Brun (+)<br />
Brown (+)<br />
Braunes (+)<br />
Marron (+)<br />
Marrón (+)<br />
Marrone (+)<br />
Svart (-)<br />
Black (-)<br />
Schwarz (-)<br />
Noir (-)<br />
Negro (-)<br />
Nero (-)
AS888<br />
Elektrisk installation utan strömbrytarpanel.<br />
Electrical installation without panel.<br />
Elektrische Installation ohne Schalttafel.<br />
Installation electrique sans panneau<br />
Instalación eléctrica sin panel<br />
Installazione elettrica senza pannello<br />
G<br />
A Länspump<br />
<strong>Bilge</strong> pump<br />
<strong>Bilge</strong>pumpe<br />
Pompe de cale<br />
Bomba achique<br />
Pompa di sentina<br />
F Svart(pump)<br />
Black(pump)<br />
Schwarz(<strong>Pump</strong>e)<br />
Noir(pompe)<br />
Negro(bomba)<br />
Nero(pompa)<br />
B Automatisk nivåströmbrytare<br />
Automatic float switch<br />
Automatischer Niveauschalter<br />
Interrupteur automatique à flotteur<br />
Interruptor flotante automático<br />
Interruttore automatico<br />
G Brun<br />
Brown<br />
Braun<br />
Marron<br />
Marrón<br />
Marrone<br />
H Brun (Ultima)<br />
Brown (Ultima)<br />
Braun (Ultima)<br />
Marron (Ultima)<br />
Marrón (Ultima)<br />
Marrone (Ultima)<br />
Elektrisk installation med strömbrytarpanel.Electrical<br />
installation with panel.<br />
Elektrische Installation mit Schalttafel.<br />
Installation electrique avec panneau.<br />
Instalación eléctrica con panel.<br />
Installazione elettrica con pannello.<br />
C C<br />
F F<br />
A A<br />
E E<br />
B B<br />
C Batteri<br />
DC supply<br />
Batterie<br />
Batterie<br />
Batería<br />
Batteria<br />
D Panel<br />
Panel<br />
Schalttafel<br />
Panneau<br />
Panel<br />
Pannello<br />
G<br />
D<br />
E Brun(pump)<br />
Brown(pump)<br />
Braun(<strong>Pump</strong>e)<br />
Marron(pompe)<br />
Marrón((bomba)<br />
Marrone(pompa)<br />
17
A Länspump<br />
<strong>Bilge</strong> pump<br />
<strong>Bilge</strong>pumpe<br />
Pompe de cale<br />
Bomba achique<br />
Pompa di sentina<br />
18<br />
Elektrisk installation utan strömbrytarpanel, med<br />
elektronisk nivåströmbrytare<br />
Electrical installation without panel, with electronic<br />
float switch<br />
Elektrische Installation ohne Schalttafel, mit<br />
elektronischem Schwimmerschalter<br />
Installation electrique sans panneau, avec<br />
contacteur de niveau<br />
Instalación eléctrica con interruptor de nivel<br />
electrónico y sin panel<br />
Installazione elettrica senza pannello con interruttore<br />
electtronico<br />
F<br />
F Svart(pump)<br />
Black(pump)<br />
Schwarz(<strong>Pump</strong>e)<br />
Noir(pompe)<br />
Negro(bomba)<br />
Nero(pompa)<br />
E<br />
B Elektronisk nivåströmbrytare<br />
Electronic float switch<br />
Elektronik-Schwimmerschalter<br />
Interrupteur de commande electronique<br />
Interruptor de nivel electrónico<br />
Interruttore electtronico<br />
G Brun/röd(#1)<br />
Brown/red(#1)<br />
Braun/rot(#1)<br />
Marron/rouge(#1)<br />
Marrón/rojo(#1)<br />
Marrone/rosso(#1)<br />
H Brun(#2)<br />
Brown(#2)<br />
Braun(#2)<br />
Marron(#2)<br />
Marrón(#2)<br />
Marrone(#2)<br />
Elektrisk installation med strömbrytarpanel och<br />
elektronisk nivåströmbrytare<br />
Electrical installation with panel and electronic float<br />
switch<br />
Elektrische Installation mit Schalttafel und<br />
elektronischem Schwimmerschalter<br />
Installation electrique avec panneau et contacteur<br />
de niveau<br />
Instalación eléctrica con interruptor de nivel<br />
electrónico y panel<br />
Installazione elettrica con pannello e interrutore<br />
electtronico<br />
A A<br />
B B<br />
I G<br />
G<br />
D<br />
I<br />
J<br />
K<br />
H H<br />
C C<br />
E<br />
C Batteri<br />
DC supply<br />
Batterie<br />
Batterie<br />
Batería<br />
Batteria<br />
I Svart(#3)<br />
Black(#3)<br />
Schwarz(#3)<br />
Noir(#3)<br />
Negro(#3)<br />
Nero(#3)<br />
D Panel<br />
Panel<br />
Schalttafel<br />
Panneau<br />
Panel<br />
Pannello<br />
J Switch<br />
Switch<br />
Schalter<br />
Interrupteur<br />
Interruptor<br />
Interruttore<br />
F<br />
E Brun(pump)<br />
Brown(pump)<br />
Braun(<strong>Pump</strong>e)<br />
Marron(pompe)<br />
Marrón((bomba)<br />
Marrone(pompa)<br />
K Säkring<br />
Fuse<br />
Sicherung<br />
Fusible<br />
Fusible<br />
Fusibile
SPX FLOW TECHNOLOGY SWEDEN AB<br />
Nastagatan 19, P.O. Box 1436<br />
SE-701 14 Örebro, Sweden<br />
P: +46 (0)19 21 83 00<br />
F: +46 (0)19 27 23 72<br />
E: johnson-pump.marine@spx.com<br />
JOHNSON PUMPS OF AMERICA NC<br />
1625 Hunter Road, Suite B,<br />
Hanover Park, Illinois, 60133, USA<br />
P: +1 847 671 7867<br />
F: +1 847 671 7909<br />
E: johnson-pump.americas.marine@spx.com<br />
SPX reserves the right to incorporate our latest design and material<br />
changes without notice or obligation. Design features, materials of con-<br />
struction and dimensionals data, as described in this bulletin, are provided<br />
for your information only and should not be relied upon unless confirmed<br />
in writing.<br />
Please contact your local sales representative for product availability in<br />
your region. For more information visit www.spx.com.<br />
ISSUED 02/2012 IB-106 R04<br />
COPYRIGHT ©2012 SPX Corporation<br />
<strong>Submersible</strong> <strong>Bilge</strong><br />
<strong>Pump</strong><br />
L1600, L2200, L4000