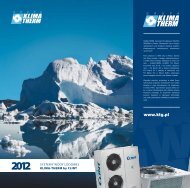
marvin - Klima-Therm
marvin - Klima-Therm
marvin - Klima-Therm

You also want an ePaper? Increase the reach of your titles
YUMPU automatically turns print PDFs into web optimized ePapers that Google loves.
Manutenzione / Maintenance<br />
Attenzione!<br />
Tutte le operazioni di manutenzione devono<br />
essere eseguite dopo aver tolto l’alimentazione<br />
elettrica del ventilconvettore.<br />
Ogni anno è opportuno un intervento di<br />
manutenzione straordinaria per la pulizia integrale<br />
del ventilconvettore interpellando il<br />
rivenditore o il centro di assistenza tecnica<br />
autorizzato.<br />
4.1 Pulizia unità<br />
Per la pulizia dell’unità utilizzare un panno moderatamente<br />
imbevuto con acqua e alcool ad<br />
una temperatura massima di 45° C.<br />
Asciugare con un panno morbido ed usare un<br />
pennello per la pulizia delle griglie.<br />
4.2 Pulizia filtri<br />
L’unità è costruita con moderne tecnologie che<br />
assicurano il corretto funzionamento e la massima<br />
efficenza nel tempo, per cui l’unica manutenzione<br />
ordinaria da effettuarsi è la pulizia del<br />
filtro dell’aria.<br />
Pulizia che assicura un ottimale funzionamento<br />
dell’unità e sopratutto una buona filtrazione<br />
dell’aria.<br />
Il filtro deve essere pulito a secco (aspirapolvere)<br />
oppure lavato ogni 15/20 giorni per ambienti<br />
non eccessivamente polverosi.<br />
Estrazione del filtro nei modelli con ripresa<br />
inferiore/posteriore.<br />
1) Per la sola versione VE, svitare le due viti di<br />
bloccaggio situate sotto la base del ventilconvettore<br />
(Fig. A).<br />
2) Estrarre il filtro (Fig. B) e pulirlo come segue:<br />
• Il filtro può essere pulito con un aspirapolvere<br />
oppure con acqua tiepida e detersivo neutro.<br />
• Se viene lavato, lasciarlo asciugare all’ombra.<br />
3) Rimettere il filtro asciutto nel suo alloggiamento<br />
e, per la sola versione VE, fissarlo con<br />
le viti di bloccaggio (Fig. A).<br />
Attenzione!<br />
Non usare benzina, solventi chimici polvere<br />
detergenti e/o abrasivi, lucidanti per mobili,<br />
panni ruvidi o carta vetrata.<br />
Estrazione del filtro nei modelli con ripresa<br />
frontale/inferiore.<br />
1) Con un cacciavite, attraverso l’asola della griglia<br />
di ripresa, fare pressione lateralmente sulla<br />
linguetta di sgancio (Fig. C).<br />
2) Togliere la griglia 1 ed estrarre il filtro 2 .<br />
3) Pulire il filtro come descritto per i modelli con<br />
ripresa inferiore/posteriore.<br />
4) Rimettere il filtro asciutto nel suo alloggiamento<br />
e rimontare la griglia.<br />
Attenzione!<br />
I filtri intasati provocano un minor rendimento<br />
del ventilconvettore.<br />
Fig. A<br />
Fig. B<br />
2<br />
1<br />
Fig. C<br />
Attention!<br />
All maintenance operations must be performed<br />
after disconnecting the electrical power<br />
supply from the fan coil unit.<br />
Each year, it is advisable to perform special<br />
maintenance for complete cleaning of<br />
the fan coil unit, contacting the retailer or<br />
the authorized technical customer service<br />
center.<br />
4.1 Unit cleaning<br />
To clean the unit use a cloth slightly dampened<br />
with water and alcohol at a maximum temperature<br />
of 45° C.<br />
Dry with a soft cloth and use a brush to clean<br />
the grilles.<br />
4.2 Filter cleaning<br />
The unit is manufactured with modern technologies<br />
which ensure proper operation and<br />
maximum efficiency over time, therefore the<br />
only regular maintenance to be performed is the<br />
cleaning of the air filter.<br />
This cleaning will ensure excellent performance<br />
of the unit and especially good air filtration.<br />
The filter must be cleaned dry with a vaccuum<br />
cleaner or washed every 15-20 days for rooms<br />
which are not overly dusty.<br />
Extracting the filter from units with bottom/<br />
back air intake.<br />
1) Unscrew the two fastening screws located<br />
under the base of the fan coil unit (Fig. A - VE<br />
version only).<br />
2) Extract the filter (Fig. B) and clean it as follows:<br />
• The filter can be cleaned with a vaccuum<br />
cleaner or with warm water and neutral detergent.<br />
• If it is washed, leave it to dry in the shade.<br />
3) Place the dry filter back in its housing and<br />
fasten it with the screws (Fig. A - VE version<br />
only).<br />
Attention!<br />
Do not use gasoline, chemical solvents,<br />
powder detergents and/or abrasives, furniture<br />
polish, rough cloths or sandpaper.<br />
Extracting the filter from units with front/<br />
bottom air intake.<br />
1) By a screwdriver, through the intake grill hole,<br />
press sideways the unfastening reed (Fig. C).<br />
2) Remove the grille 1 , and extract the filter<br />
2 .<br />
3) Clean the filter as described above.<br />
4) Place the dry filter in its housing and re-install<br />
the grille.<br />
Attention!<br />
Clogged filters may cause reduced performance<br />
of the fan coil unit.