CONFLOW Spa - Klinger Danmark A/S
CONFLOW Spa - Klinger Danmark A/S CONFLOW Spa - Klinger Danmark A/S
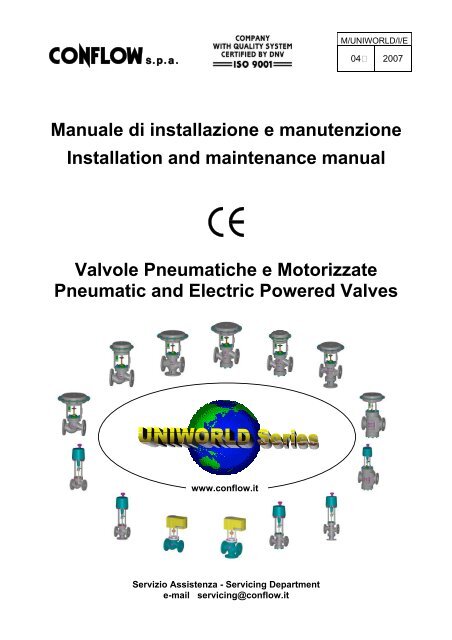
M/UNIWORLD/I/E 04 2007 Manuale di installazione e manutenzione Installation and maintenance manual Valvole Pneumatiche e Motorizzate Pneumatic and Electric Powered Valves www.conflow.it Servizio Assistenza - Servicing Department e-mail servicing@conflow.it
- Page 3 and 4: 1 INDICE Pag. INDEX Page INFORMAZIO
- Page 5 and 6: 1 - INFORMAZIONI GENERALI E DI SICU
- Page 7 and 8: 2.3.1 - COLLEGAMENTI ELETTRICI DELL
- Page 9 and 10: 2.4 - AVVIAMENTO NOTE GENERALI 2.4
- Page 11 and 12: 3.2 - TARATURA VALVOLE PNEUMATICHE
- Page 13 and 14: 4 - MANUTENZIONE 4 - MAINTENENCE !
- Page 15 and 16: 4.1.3 - VALVOLE PNEUMATICHE A 3 VIE
- Page 17 and 18: 4.1.5 - VALVOLE PNEUMATICHE 3 vie m
- Page 19 and 20: 4.1.7 - VALVOLE MOTORIZZATE 3 vie m
- Page 21 and 22: 4.2 - SOSTITUZIONE PREMISTOPPA 4.2
- Page 23 and 24: 4.2.4 - VALVOLE MOTORIZZATE A 3 VIE
- Page 25 and 26: 4.2.8 - VALVOLE MOTORIZZATE 3 vie d
- Page 27 and 28: 5 - INVERSIONE DELL’AZIONE 5 - RE
- Page 29 and 30: 7 - ANALISI DEI RISCHI 7 - HAZARDS
- Page 31 and 32: 7 - ANALISI DEI RISCHI 7 - HAZARDS
- Page 33 and 34: 8 - MANUALI ACCESSORI COLLEGATI 8 -
- Page 35 and 36: A. Descrizione Tipo / Description T
- Page 37 and 38: A. Descrizione / Description : Valv
- Page 39 and 40: A. Descrizione / Description : Valv
- Page 41 and 42: 9.8 / modA1 / Gruppo 2 - Art. 3 - P
- Page 44: Servizio Assistenza - Servicing Dep
M/UNIWORLD/I/E<br />
04 2007<br />
Manuale di installazione e manutenzione<br />
Installation and maintenance manual<br />
Valvole Pneumatiche e Motorizzate<br />
Pneumatic and Electric Powered Valves<br />
www.conflow.it<br />
Servizio Assistenza - Servicing Department<br />
e-mail servicing@conflow.it
1<br />
INDICE Pag. INDEX Page<br />
INFORMAZIONI GENERALI E DI<br />
SICUREZZA<br />
1<br />
1 GENERAL AND SAFETY<br />
INFORMATIONS<br />
2 ISTRUZIONI DI MONTAGGIO 1 2 INSTALLATION INSTRUCTIONS 1<br />
2.1 Montaggio sull’impianto note generali 1 2.1 Installation in the plant general inf. 1<br />
2.2 Montaggio valvole pneumatiche 2 2.2 Pneumatic valves installation 2<br />
2.3 Montaggio valvole motorizzate 2 2.3 Electric powered valves installation 2<br />
2.3.1<br />
Collegamenti elettrici<br />
motorizzate serie “EP”<br />
delle valvole<br />
3 2.3.1<br />
Wiring diagram of electric powered<br />
valves “EP” series<br />
3<br />
2.3.2<br />
Collegamenti elettrici delle valvole<br />
4 2.3.2<br />
Wiring diagram of electric powered<br />
4<br />
motorizzate serie “EPR”<br />
valves “EPR” series<br />
2.4 Avviamento note generali 5 2.4 Start-up general information 5<br />
2.5 Avviamento valvole pneumatiche 5 2.5 Start-up pneumatic valves 5<br />
2.6 Avviamento valvole motorizzate 5 2.6 Start-up electric powered valves 5<br />
2.7 Forze di serraggio dadi 6 2.7 Reccomended tightening torques 6<br />
3 TARATURA 6 3 CALIBRATION 6<br />
3.1 Note generali 6 3.1 General informations 6<br />
3.2 Taratura valvole pneum. di regolazione 6/7 3.2 Pneumatic control valves calibration 6/7<br />
3.3 Taratura valvole pneumatiche on-off 7 3.3 Pneumatic on-off valves calibration 7<br />
3.4 Taratura valvole motorizzate “EP” 8 3.4<br />
“EP” Electric<br />
calibration<br />
powered valves<br />
8<br />
3.4.1 Taratura interruttori interni serie “EP” 8 3.4.1 Limit switches calibration “EP” series 8<br />
3.4.2 Taratura rondelle a tazza serie “EP” 8 3.4.2. Disc springs setting “EP” series 8<br />
3.5 Taratura valvole motorizzate “EPR” 8 3.5<br />
“EPR” Electric<br />
calibration<br />
powered valves<br />
8<br />
3.5.1 Diagnostica serie “EPR” 8 3.5.1 Check-up “EPR” series 8<br />
4 MANUTENZIONE 9 4 MAINTENANCE 9<br />
4.1 Sostituzione guarnizione corpo 9 4.1 Replacement of body gasket 9<br />
4.1.1<br />
VALVOLE 2 VIE PNEUMATICHE<br />
TIPO 2000–2100–5000–5100 5800<br />
9/10 4.1.1<br />
2 WAYS PNEUMATIC VALVES<br />
TYPE 2000–2100–5000–5100–5800<br />
9/10<br />
4.1.2 VALVOLE A 2 VIE MOTORIZZATE<br />
TIPO 2000–2100–5000–5100 -5800<br />
9/10 4.1.2<br />
2 WAYS ELEC. POWERED VALVES<br />
TYPE 2000–2100–5000–5100-5800<br />
9/10<br />
VALVOLE A 3 VIE PNEUMATICHE<br />
TYPE 2600 – 2700 – 5600 – 5700<br />
4.1.3 TIPO 2600 – 2700 – 5600 – 5700 11 4.1.3 PNEUMATIC 3 WAYS VALVES 11<br />
DN 15 – DN 20<br />
DN 15 – DN 20<br />
VALVOLE A 3 VIE MOTORIZZATE<br />
TYPE 2600 – 2700 – 5600 – 5700<br />
4.1.4 TIPO 2600 – 2700 – 5600 – 5700 12 4.1.4 ELECTRIC POWERED 3 WAYS 12<br />
DN 15 – DN 20<br />
VALVES DN 15 – DN 20<br />
VALVOLE PNEUMATICHE<br />
PNEUMATIC VALVES 3 ways mixing<br />
4.1.5 3 vie miscelatrici DN 25 – DN 200 13 4.1.5 DN 25 – DN 200<br />
13<br />
TIPO 2600 - 5600<br />
TYPE 2600 – 5600<br />
VALVOLE PNEUMATICHE<br />
PNEUMATIC VALVES<br />
4.1.6 3 vie deviatrici DN 25 – DN 200<br />
14 4.1.6 3 ways deverting DN 25 – DN 200 14<br />
TIPO 2700 – 5700<br />
TYPE 2700 – 5700 DN 25 – DN 200<br />
VALVOLE MOTORIZZATE<br />
ELECTRIC POWERED VALVES<br />
4.1.7 3 vie miscelatrici DN 25 – DN 200 15 4.1.7 3 ways mixing DN 25 – DN 200<br />
15<br />
TIPO 2600 - 5600<br />
TYPE 2600 – 5600<br />
VALVOLE MOTORIZZATE<br />
ELECTRIC POWERED VALVES<br />
4.1.8 3 vie deviatrici DN 25 – DN 200<br />
16 4.1.8 3 ways deverting DN 25 – DN 200 16<br />
TIPO 2700 – 5700<br />
TYPE 2700 – 5700<br />
4.2 Sostituzione del premistoppa 17 4.2 Replacement of stuffing box packing 17<br />
4.2.1<br />
VALVOLE 2 VIE PNEUMATICHE<br />
TIPO 2000–2100–5000–5100–5800<br />
17 4.2.1<br />
2 WAYS PNEUMATIC VALVES<br />
TYPE 2000–2100–5000–5100–5800<br />
17<br />
4.2.2<br />
VALVOLE 2 VIE MOTORIZZATE Tipo<br />
2000 – 2100 – 5000 – 5100 – 5800<br />
17 4.2.2<br />
2 WAYS ELEC. POWERED VALVES<br />
TYPE 2000–2100–5000–5100–5800<br />
17<br />
VALVOLE A 3 VIE PNEUMATICHE<br />
TYPE 2600 – 2700 – 5600 – 5700<br />
4.2.3 TIPO 2600 – 2700 – 5600 – 5700 18 4.2.3 PNEUMATIC 3 WAYS VALVES 18<br />
DN 15 – DN 20<br />
DN 15 – DN 20<br />
VALVOLE A 3 VIE MOTORIZZATE<br />
TYPE 2600 – 2700 – 5600 – 5700<br />
4.2.4 TIPO 2600 – 2700 – 5600 – 5700 19 4.2.4 ELECTRIC POWERED 3 WAYS 19<br />
DN 15 – DN 20<br />
VALVES DN 15 – DN 20<br />
1
4.2.5<br />
4.2.6<br />
4.2.7<br />
4.2.8<br />
4.3<br />
4.4<br />
4.5<br />
INDICE Pag. INDEX Page<br />
VALVOLE PNEUMATICHE<br />
3 vie miscelatrici DN 25 – DN 200<br />
TIPO 2600 - 5600<br />
VALVOLE PNEUMATICHE<br />
3 vie deviatrici DN 25 – DN 200<br />
TIPO 2700 – 5700<br />
VALVOLE MOTORIZZATE<br />
3 vie miscelatrici DN 25 – DN 200<br />
TIPO 2600 - 5600<br />
VALVOLE MOTORIZZATE<br />
3 vie deviatrici DN 25 – DN 200<br />
TIPO 2700 – 5700<br />
Sostituzione del profilo otturatore e<br />
della tenuta soffice su valvole a due<br />
vie TIPO 2000 – 2100 – 5000 – 5100<br />
Sostituzione otturatore su valvole<br />
TIPO 2600-2700-5600-5700-5800<br />
Sostituzione della sede su tutti i tipi<br />
di valvola<br />
19 4.2.5<br />
20 4.2.6<br />
20 4.2.7<br />
21 4.2.8<br />
21 4.3<br />
22 4.4<br />
22 4.5<br />
PNEUMATIC VALVES 3 ways mixing<br />
DN 25 – DN 200<br />
TYPE 2600 – 5600<br />
PNEUMATIC VALVES<br />
3 ways deverting DN 25 – DN 200<br />
TYPE 2700 – 5700 DN 25 – DN 200<br />
ELECTRIC POWERED VALVES<br />
3 ways mixing DN 25 – DN 200<br />
TYPE 2600 – 5600<br />
ELECTRIC POWERED VALVES<br />
3 ways dIverting DN 25 – DN 200<br />
TYPE 2700 – 5700<br />
Replacement of plug profile and soft<br />
seal on two ways valve<br />
TYPE 2000 – 2100 – 5000 - 5100<br />
Plug replacement on valves<br />
TYPE 2600-2700-5600-5700-5800<br />
Seat replacement on every valve<br />
types<br />
4.6 Sostituzione della membrana 22 4.6 Replacement of actuator diaphragm 22<br />
5 INVERSIONE DELL’AZIONE 23 5 REVERSING THE ACTION 23<br />
6 ANOMALIE DI FUNZIONAMENTO 24 6 TROUBLES SHOOTING 24<br />
7 ANALISI DEI RISCHI 25-28 7 HAZARDS ANALYSIS 25-28<br />
8 MANUALI COLLEGATI 29 8 REFERING MANUALS 29<br />
8.1<br />
8.2<br />
9<br />
9.1<br />
9.2<br />
Manuali accessori per valvole<br />
pneumatiche<br />
Manuali accessori per valvole<br />
motorizzate<br />
DICHIARAZIONI DI CONFORMITA’<br />
STANDARD PED 97/23/CE<br />
mod.A/Vapore/Acqua Surr./Acqua PS16<br />
DN 15-200<br />
mod.A/Vapore/Acqua Surr./Acqua PS40<br />
DN 15-100<br />
29 8.1<br />
29 8.2<br />
9<br />
Accessories manuals for pneumatic<br />
valves<br />
Accessories manuals for electric<br />
powered valves<br />
STANDARD DECLARATIONS OF<br />
CONFORMITY PED 97/23/CE<br />
mod.A/Steam/Sup. Water/Water PS16<br />
DN 15-200<br />
mod.A/Steam/Sup. Water/Water PS40<br />
DN 15-100<br />
9.3 Art.3/Olio Diat. PS16 Acciaio DN 15-125 9.3 Art.3/Thermoil PS16 Steel DN 15-125<br />
9.4 Art.3/Olio Diat. PS10 Acciaio DN 150-200 9.4 Art.3/Thermoil PS10 Steel DN 150-200<br />
9.5 Art.3/Olio Diat. PS16 Ghisa DN 15-150 9.5 Art.3/Thermoil PS16 Cast Iron DN 15-150<br />
9.6 Art.3/Olio Diat. PS10 Ghisa DN 200 9.6 Art.3/Thermoil PS10 Cast Iron DN 200<br />
9.7 ModA1/ Gas 9.7 ModA1/ Gas<br />
9.8 ModA1/Vapore – acqua surriscaldata 9.8 ModA1/Steam – superheated water<br />
9.9 ModA1/Olio diatermico 9.9 ModA1/Diathermic oil<br />
9.1<br />
9.2<br />
19<br />
20<br />
20<br />
21<br />
21<br />
22<br />
22<br />
29<br />
29
1 - INFORMAZIONI GENERALI E DI SICUREZZA 1 – GENERAL AND SAFETY INFORMATIONS<br />
Prima di installare la valvola rimuovere le protezioni<br />
di plastica poste a copertura delle flange o degli<br />
attacchi di connessione.<br />
!<br />
!<br />
!<br />
!<br />
ATTENZIONE Durante la messa in<br />
funzione della valvola o durante l’esercizio<br />
non toccare il gruppo corpo che potrebbe<br />
condurre calore se il fluido impiegato è ad<br />
alta temperatura.<br />
ATTENZIONE Durante l’esercizio non<br />
toccare lo stelo perché é in movimento,<br />
potrebbe essere caldo e potrebbe<br />
intrappolare le dita o i vestiti.<br />
ATTENZIONE Prima di iniziare eventuali<br />
operazioni di manutenzione assicurarsi<br />
che la valvola non sia in pressione e/o<br />
calda.<br />
ATTENZIONE Per le valvole<br />
motorizzate, prima di effettuare qualsiasi<br />
operazione sull’attuatore, assicurarsi che<br />
l’alimentazione elettrica sia isolata da<br />
apposito interruttore e sia assicurata in<br />
caso di accensione accidentale.<br />
Non rimuovere la targhetta descrittrice fissata al<br />
castello poiché riporta il numero di matricola, dato<br />
indispensabile per rintracciare la valvola nel tempo.<br />
Si prega di fare espresso riferimento a tale numero<br />
per la fornitura di parti di ricambio.<br />
Non rimuovere la targhetta indicatrice della corsa che é<br />
il principale riferimento per la taratura della valvola.<br />
La mancata osservanza delle informazioni generali di<br />
sicurezza, delle norme vigenti e delle istruzioni di<br />
montaggio possono:<br />
• Causare pericolo per l’incolumità di chi sta<br />
eseguendo le manovre o di terzi<br />
• Danneggiare la stessa valvola o le cose adiacenti<br />
• Compromettere l’efficiente funzionamento della<br />
valvola stessa<br />
Before installing valve, remove plastic covers placed on<br />
flanges or connection ends.<br />
WARNING Be careful not to touch the<br />
body, whilst the valve is in operation, as<br />
this may be hot.<br />
WARNING Be careful not to touch the<br />
stem, whilst the valve is in operation, as<br />
this is moving, it may be hot and it’s<br />
possible trapping of fingers and clothes.<br />
WARNING Before starting maintenance<br />
be sure that the valve is not pressurized or<br />
hot.<br />
WARNING For electric powered valves,<br />
before to make any operations on the<br />
actuator, ansure that the main is isolated<br />
and secured aganist an accidental<br />
switching-on.<br />
Never remove description plate placed on the yoke as it<br />
shows all necessary data required to trace back a<br />
specific valve.<br />
Never remove the travel indicator plate which is the<br />
major reference for the valve calibration.<br />
In the event of non-observance of the general rules,<br />
safety informations and of the installation instructions,<br />
this may:<br />
• Cause danger to life and limb of the user or third<br />
party<br />
• Damage the valves and other property belonging to<br />
the owner<br />
• Endanger the efficient functioning of the valves<br />
2 - ISTRUZIONI DI MONTAGGIO 2 - INSTALLATION INSTRUCTONS<br />
2.1 - MONTAGGIO SUL’IMPIANTO NOTE GENERALI 2.1 - INSTALLATION IN THE PLANT GENERAL INF.<br />
Prima del montaggio della valvola effettuare una<br />
accurata pulizia della tubazione con aria compressa,<br />
acqua o altro fluido di soffiaggio per eliminare corpi<br />
estranei, scorie di saldatura e detriti vari che potrebbero<br />
danneggiare le superfici di tenuta della valvola.<br />
ATTENZIONE Montare la valvola con la<br />
freccia di direzione impressa sul corpo<br />
! nello stesso senso del fluido della<br />
tubazione.<br />
Viene comunque raccomandato il montaggio di un filtro<br />
a “Y” (ns. serie “FY”) sulla tubazione, a monte della<br />
valvola.<br />
Per misure fino al DN100, il montaggio della valvola può<br />
essere effettuato in posizione verticale od orizzontale.<br />
Per le valvole dal DN125 al DN200 è consigliato il<br />
montaggio in verticale per ovviare l’usura dovuta al<br />
peso e ai relativi sfregamenti, oltre che facilitare le<br />
operazioni di manutenzione.<br />
ATTENZIONE E’ vietato gravare la<br />
valvola con carichi estranei. E’ obbligo<br />
dell’installatore proteggere la valvola da<br />
sollecitazioni esterne.<br />
! !<br />
1<br />
!<br />
!<br />
!<br />
!<br />
Before installing a valve ensure that the pipes are<br />
cleaned with compressed air, water or other suitable<br />
fluids to remove any matter that may damage the seal<br />
surfaces of valve.<br />
!<br />
WARNING When installing a valve, make<br />
sure the direction arrow printed on its body<br />
and the pipe fluid are in the same direction.<br />
It is recommended that a “Y” strainer (our series “FY”) is<br />
fitted upstream the valve on the fluid pipe.<br />
Until DN100, the valve can be installed vertically or<br />
horizontally.<br />
From DN125 to DN200 sizes, is suggested a vertical<br />
installation to avoid wear and to make easy<br />
maintenance operations.<br />
WARNING External loads cannot be<br />
applied to the valve. The installer must take<br />
appropriate special measures to protect the<br />
valve from external stress.
2.2 – MONTAGGIO VALVOLE PNEUMATICHE 2.2 – PNEUMATIC VALVES INSTALLATION<br />
Se la valvola è equipaggiata di filtro riduttore è<br />
preferibile che questi sia montato verticalmente così<br />
da favorire lo scarico della condensa a mezzo<br />
dell’apposito disareatore.<br />
ATTENZIONE Se la valvola è equipaggiata<br />
di strumentazione (posizionatore pilota,<br />
! ecc.) usate particolare cura nel montaggio !<br />
!<br />
sulla tubazione poiché ogni colpo potrebbe<br />
provocare il danneggiamento degli<br />
accessori oppure la staratura degli stessi.<br />
ATTENZIONE Se la valvola è equipaggiata<br />
di volantino di testa per il comando<br />
manuale di emergenza, assicurarsi che<br />
durante il funzionamento automatico sia in<br />
posizione di completo riposo, questo per<br />
non ostacolare meccanicamente la corsa<br />
della valvola che potrebbe essere limitata.<br />
Il servomotore viene collegato alla fonte d’aria mediante<br />
un tubo del diametro di 4x6 mm.<br />
Tale diametro può essere maggiorato quanto maggiore<br />
è la distanza tra la fonte d’aria e la valvola.<br />
Le connessioni pneumatiche sono Ø 1/8” GAS F<br />
Ingresso AD = parte superiore della testata<br />
Ingresso AR = parte inferiore della testata<br />
Ingresso DE = parte superiore ed inferiore della testata<br />
Non installare le valvole in ambienti con temperature<br />
superiori ai 70 °C e inferiori ai – 10°C.<br />
Se l’attacco superiore è adibito a sfiato, proteggere lo<br />
stesso con un apposito raccordo o con un tubo curvo, al<br />
fine di non immettere liquidi e/o agenti atmosferici nella<br />
testata.<br />
If a valve is supplied with filter regulator , then this<br />
should be installed vertically. A screw placed at the<br />
bottom of the filter makes the elimination of condensate<br />
easier.<br />
WARNING When installing a valve fitted<br />
with a pilot positioner, regulator etc. care<br />
should be taken as any knock can cause<br />
damage to these fittings and may even<br />
affect their settings.<br />
WARNING Always ensure that the manual<br />
hand-wheel, located at the top of the<br />
actuator, is at a full rest position during<br />
automatic operation.<br />
This is to prevent any restriction to valve<br />
travel.<br />
The actuator is connected to the air source by a pipe<br />
4x6 mm.<br />
The diameter can be higher proportionally to the<br />
distance between the air source and the valve.<br />
The pneumatic connections are Ø 1/8” Rp ISO 7<br />
AD Input = Upper case part<br />
AR Input = Lower case part<br />
DE Input = Upper and Lower case part<br />
Do not install valves in environments at temperatures<br />
above 70 °C or less than –10 °C.<br />
If the upper connection is the exhaust, protect it with a<br />
nipple or with a curved pipe, to avoid the input of liquids<br />
or atmospheric agents into the actuator.<br />
2.3 – MONTAGGIO VALVOLE MOTORIZZATE 2.3 – ELECTRIC POWERED VALVES INSTALLATION<br />
!<br />
ATTENZIONE Prima di dare energia,<br />
assicurarsi che l’alimentazione elettrica sia<br />
corretta, isolata e assicurata in caso di<br />
accensione accidentale<br />
I cavi di alimentazione devono essere dimensionati in<br />
modo adeguato per la massima corrente richiesta<br />
dall’attuatore e devono corrispondere alle norme IEC<br />
227 e IEC 245.<br />
I cavi di colore giallo / verde possono essere usati solo<br />
per collegare la terra PE sulla base della cassa<br />
dell’attuatore.<br />
Gli attuatori elettrici non hanno un interruttore elettrico<br />
interno.<br />
Un interruttore per l’attuatore o un interruttore generale<br />
deve pertanto essere previsto nell’impianto in posizione<br />
vicina ed accessibile agli operatori.<br />
Detto interruttore deve essere indicato, con apposita<br />
targhetta, come interruttore principale dell’attuatore.<br />
L’impianto deve essere provvisto di fusibili per<br />
sovraccarichi di tensione corrispondenti agli standard<br />
IEC 364-4-41 con protezione classe 1 per le<br />
connessioni all’attuatore.<br />
Non installare le valvole in ambienti con temperature<br />
superiori ai 60 °C e inferiori ai – 10°C.<br />
2<br />
!<br />
!<br />
WARNING Before connecting to<br />
mains, be sure that the mains is<br />
corrected, isolated and secured<br />
against an accidental switching-on.<br />
The mains connecting cables must be suitably<br />
dimensioned to accept the max. current requirement of<br />
the actuator, and correspond to IEC 227 and IEC 245.<br />
The yellow –green coloured cables may anly be used<br />
for connecting to PE earth connection on housing plate.<br />
The electic actuators do not have an internal electrical<br />
power switch.<br />
A switch or power mains switch has therefore to be<br />
provided in the bulding installation.<br />
This should be positioned close to the device and be<br />
easily accessible to the user and shell be labelled as<br />
the mains isolator switch for the actuator.<br />
The building installation must also provide for power<br />
surge trips or fuses corresponding to standard IEC 364-<br />
4-41 with protection class 1, for the actuator<br />
connections.<br />
Do not install valves in environments at temperatures<br />
above 60 °C or less than –10 °C.
2.3.1 – COLLEGAMENTI ELETTRICI DELLE<br />
VALVOLE MOTORIZZATE SERIE “EP”<br />
I collegamenti elettrici Fig.2 devono essere effettuati da<br />
personale qualificato ed autorizzato.<br />
Rimuovere il coperchio come indicato nella Fig.1 e<br />
successivamente rimontarlo come indicato, facendo<br />
attenzione alla tacca di riferimento e spingendo con un<br />
piccola pressione.<br />
Ingrassare sempre l’ “O” ring serve per un facile<br />
smontaggio e rimontaggio del coperchio.<br />
Lo schema elettrico situato all’interno del coperchio<br />
dell’attuatore è vincolante per gli specifici collegamenti.<br />
FIG. 2<br />
Fig. 1<br />
3<br />
2.3.1. – WIRING DIAGRAM OF ELECTRIC POWERED<br />
VALVES “EP” SERIES<br />
The electric connections Fig.2 may be operated by<br />
skilled and authorized operating personnel.<br />
Remove the cover following the Fig.1 and after the<br />
operations replacing the cover align the markings on the<br />
cover edge with the groove in the actuator housing and<br />
push cover down until it sits over the “O” ring.<br />
Lightly grease the sealing ring to help mounting the<br />
cover.<br />
The wiring diagram inside the actuator cover is binding<br />
for the specific actuator connection.<br />
X1 – X2 – X3 = CAVO INTERNO - Internal wiring<br />
X4 = CONNESSIONE POTENZIOMETRO PER<br />
POSIZIONATORE<br />
Potentiometer connection for positioner<br />
X5/1 = NEUTRO - Neutral<br />
X5/2 = FASE PER APRIRE - Motor phase to open<br />
X5/4 = FASE PER CHIUDERE - Motor phase to close<br />
X5/6–X5/7 = TERMOSTATO CONNESSIONE LIBERA<br />
Thermostat as potential-free connection<br />
X6 = LIMITATORE DI CORSA ADDIZIONALE<br />
Additional stroke limit switch<br />
X7 = NON UTILIZZATO – Not used<br />
X8 = RESISTENZA DI RISCALDAMENTO<br />
Heating resistor<br />
X9 = II° POTENZIOMETRO – Potentiometer 2<br />
X10 = CONNESSIONE INTERRUTTORE DI<br />
POSIZIONE APERTA/CHIUSA POSIZIONAT.<br />
Connection for positioner fail-safe device<br />
PE = CONNESSIONE TERRA SUL SUPPORTO<br />
Earth connection on housing
2.3.2. – COLLEGAMENTI ELETTRICI DELLE<br />
VALVOLE MOTORIZZATE SERIE “EPR”<br />
I collegamenti elettrici Fig.2.1 devono essere effettuati<br />
da personale qualificato ed autorizzato.<br />
Rimuovere il coperchio come indicato nella Fig.1.1.<br />
Lo schema elettrico situato all’interno del coperchio<br />
dell’attuatore è vincolante per gli specifici collegamenti.<br />
AVF234S F132 (NC)<br />
AVF234S F232 (NO)<br />
y = 0-10V y = 4-20mA yo = 0-10V<br />
21 1 2a 2b 3u<br />
3i<br />
44<br />
21 1<br />
S1 S2 S3 S4<br />
On<br />
Off<br />
S1; S2 = Runtime<br />
S3; S4 = Characteristic<br />
Connection diagram<br />
100%<br />
0<br />
2a<br />
2b<br />
0 10V<br />
C<br />
Modul 220V AC 0372332001<br />
M<br />
24 V~<br />
Fig. 1.1<br />
1 2<br />
Fig. 2.1<br />
21 1<br />
Variant 1 (3pt)<br />
2a<br />
2a<br />
4<br />
2.3.2. – WIRING DIAGRAM OF ELECTRIC POWERED<br />
VALVES “EPR” SERIES<br />
The electric connections Fig.2.1 may be operated by<br />
skilled and authorized operating personnel.<br />
Remove the cover following the Fig.1.1<br />
2b<br />
Variant 2 (2pt)<br />
3<br />
The wiring diagram inside the actuator cover is binding<br />
for the specific actuator connection.<br />
2b<br />
3u 3i 44<br />
3u 3i 44<br />
A10359<br />
Modul Split - Range 0313529001<br />
Modul 2 auxiliary switches 6(2)A 12...250V<br />
0372333<br />
4 5 6 7 8 9<br />
MM 01/02 03
2.4 – AVVIAMENTO NOTE GENERALI 2.4 – START-UP GENERAL INFORMATIONS<br />
Le valvole vengono fornite tarate e collaudate, pronte<br />
per poter funzionare alle condizioni richieste dal cliente<br />
in fase d’ordine.<br />
Dopo essersi assicurati di aver rispettato tutte le<br />
avvertenze, aprire lentamente le valvole di<br />
intercettazione poste a monte e a valle della valvola.<br />
Valves are supplied, calibrated and tested to work in<br />
conditions set by the customer.<br />
With respect to all the safety conditions, open slowly the<br />
upstream and downstream isolating valves.<br />
IL PREMISTOPPA E’ ESENTE DA MANUTENZIONE. THE STUFFING BOX PACKING IS FREE OF<br />
MAINTENANCE.<br />
!<br />
!<br />
!<br />
ATTENZIONE Dopo la prima ora di<br />
funzionamento controllare il serraggio dei<br />
dadi che serrano l’insieme castello-bonnetcorpo,<br />
vedi 2.7 .<br />
ATTENZIONE Rispettare i valori indicati<br />
nella tabella 2.7 ogni qualvolta si effettuano<br />
operazioni di manutenzione.<br />
ATTENZIONE Se la valvola è<br />
equipaggiata di tenuta a SOFFIETTO, non<br />
ruotare mai lo stelo per nessun motivo.<br />
Una eventuale manovra sbagliata<br />
potrebbe provocare la torsione e la rottura<br />
del soffietto.<br />
WARNING Within the first hour of<br />
operation check the screws holding the<br />
yoke-bonnet and valve body, see 2.7 .<br />
WARNING Always respect the mentioned<br />
values, see table 2.7 when maintenance<br />
operations are involved.<br />
WARNING Never rotate the stem in<br />
valves fitted with a BELLOWS seal as this<br />
may result in twisting or breaking of the<br />
bellows.<br />
2.5 – AVVIAMENTO VALVOLE PNEUMATICHE 2.5 - START-UP PNEUMATIC VALVES<br />
- VALVOLE DI REGOLAZIONE Tipo<br />
2000 – 2600 – 2700 – 5000 – 5600 – 5700 -5800<br />
Le pressioni d’aria di comando standard sono :<br />
3-15 psi, 6-18 psi, 6-30 psi<br />
la massima pressione sul diaframma del<br />
servocomando non deve mai superare il valore di<br />
35 psi - 2,5 bar.<br />
- VALVOLE ON-OFF Tipo 2100 - 5100<br />
La massima pressione d’aria di comando è di<br />
Min. 2 bar e max 6 bar<br />
L’aria utilizzata deve essere assolutamente secca, priva<br />
quindi di olio o condensa che potrebbero danneggiare<br />
la membrana del servomotore o gli accessori<br />
eventualmente montati a bordo della valvola.<br />
- CONTROL VALVES Type<br />
2000 – 2600 – 2700 – 5000 – 5600 - 5700 – 5800<br />
The standard air control signals are :<br />
3-15 psi, 6-18 psi, 6-30 psi<br />
Maximum pressure on the actuator control, and<br />
consequently on the diaphragm, must not excess<br />
35 psi - 2,5 bar<br />
- ON-OFF VALVES Type 2100 - 5100<br />
The maximum control air pressure is<br />
Min. 2 bar and max. 6 bar<br />
The air must be absolutely dry and free from oil or<br />
condensate which may cause damage to the actuator<br />
diaphragm or auxiliary fittings on the valve i.e. pilot<br />
positioner, solenoid etc.<br />
2.6 – AVVIAMENTO VALVOLE MOTORIZZATE 2.6 – START-UP ELECTRIC POWERED VALVES<br />
- VALVOLE DI REGOLAZIONE TIPO<br />
2000 – 2600 – 2700 – 5000 – 5600 – 5700 - 5800<br />
I segnali standard sono :<br />
3 punti servocomando<br />
segnale continuo :<br />
4-20 mA … (2-10 V/EP) … (0-10V/EPR)<br />
- VALVOLE ON-OFF TIPO 2100 - 5100<br />
Segnale on-off con tensione apre e chiude<br />
Accendere l’interruttore principale posto a protezione<br />
del motore della valvola.<br />
Controllare attraverso il regolatore o il termostato che la<br />
valvola si muova in entrambe le direzioni APERTA /<br />
CHIUSA.<br />
5<br />
!<br />
!<br />
!<br />
- TYPE 2000 – 2600 –2700 – 5000 – 5600 – 5700 –<br />
5800 CONTROL VALVES<br />
The standard control signal are:<br />
3 points modulating<br />
continuos signal :<br />
4-20 mA … (2-10 V/EP) … (0-10V/EPR)<br />
- TYPE 2100 - 5100 EP ON-OFF VALVES<br />
On-Off signal, opens and closes<br />
Switch on the power mains.<br />
Check by electronic regulator or on-off electric signal if<br />
the valve opens and closes in both directions.
2.7 – FORZE DI SERRAGGIO DADI 2.7 – RECOMMENDED TIGHTENING TORQUES<br />
DIAMETRO VALVOLA DESIGNAZIONE DADO DIMENSIONE CHIAVE Nm<br />
Valve Sizing DN Locknut size <strong>Spa</strong>nner Nm<br />
15 – 20 M8 N° 4 13 15-20<br />
25 – 32 M8 N° 6 13 15-20<br />
40 – 50 M12 N° 6 19 25-30<br />
65 – 80 M16 N° 6 24 55-60<br />
100 M16 N° 8 24 70-80<br />
125 M16 N° 10 24<br />
Spirometal<br />
PTFE<br />
60-65<br />
65-70<br />
150 M20 N° 10 30<br />
Spirometal<br />
PTFE<br />
60-70<br />
70-75<br />
200 M20 N° 12 30<br />
Spirometal<br />
PTFE<br />
60-70<br />
70-75<br />
NOTA : Rispettare i valori sopra indicati ogni qualvolta<br />
si effettuano operazioni di manutenzione.<br />
3 – TARATURA 3 - CALIBRATION<br />
NOTE : Always respect the above mentioned values<br />
when maintenance operations are involved.<br />
3.1 - NOTE GENERALI 3.1 – GENERAL INFORMATIONS<br />
Le valvole vengono fornite tarate e collaudate, pronte<br />
per poter funzionare alle condizioni richieste dal cliente<br />
in fase d’ordine.<br />
3.2 – TARATURA VALVOLE PNEUMATICHE DI<br />
REGOLAZIONE<br />
Nel caso sia necessario ritarare la valvola di<br />
regolazione occorrono i seguenti strumenti :<br />
- un manometro a molla Bourdon con scala 0-40 psi<br />
- un filtro riduttore di pressione o un manipolatore<br />
d’ aria finemente regolabile nel campo 0-35 psi<br />
Applicato il filtro riduttore alla linea di aria compressa,<br />
si collega l’uscita dello stesso al manometro e quindi al<br />
servomotore della valvola di regolazione da ritarare.<br />
Controllare il valore di taratura delle molle indicato sulla<br />
targhetta descrittice fissata al castello, campo<br />
“segnale”.<br />
Per le valvole con AZIONE DIRETTA (AD=aria chiude),<br />
Figura di esempio Fig.3, regolare lentamente il riduttore<br />
registrandolo al valore di partenza della valvola.<br />
Ad esempio se il segnale previsto é 3-15 psi, la valvola<br />
deve incominciare a muoversi a 3 psi ed a 15 psi<br />
deve aver compiuto tutta la corsa arrivando sulla sede<br />
in posizione di chiusura.<br />
Se il segnale di partenza é inferiore a 3 psi é<br />
necessario :<br />
- allentare i dadi rif. n° 20 che serrano l’asta<br />
superiore rif. n° 22 con lo stelo inferiore rif. n° 6.<br />
- avvitare lo stelo inferiore rif. n° 6 per ottenere<br />
l’incremento del segnale di partenza.<br />
Se il segnale di partenza é superiore a 3 psi é<br />
necessario :<br />
- allentare i dadi rif. n° 20 che serrano l’asta<br />
superiore rif. n° 22 con lo stelo inferiore rif. n° 6.<br />
- svitare lo stelo inferiore rif. n° 6 per ottenere la<br />
diminuzione del segnale di partenza.<br />
6<br />
Valves are supplied, calibrated and tested to work in<br />
conditions set by the customer.<br />
3.2 – PNEUMATIC CONTROL VALVES CALIBRATION<br />
If further calibration is required, the equipment required<br />
is as follows :<br />
- a Bourdon spring pressure gauge, range 0-40 psi<br />
- a pressure filter regulator, or an air manipulator<br />
finely adjusted in the range 0-35 psi<br />
Fit the filter to the compressed air line, connecting the<br />
filter regulator outlet to the pressure gauge and then to<br />
the actuator of the pneumatic control valve to be<br />
calibrated.<br />
Check the spring calibration value. This is indicated on<br />
the description plate located on the yoke, range<br />
“signal”.<br />
For DIRECT ACTION valves (AD= air closes),example<br />
figure Fig.3, slowly adjust the regulator recording the<br />
valve start value.<br />
If the stated signal is 3-15 psi, the valve has to start<br />
moving at 3 psi and at 15 psi should complete the<br />
travel, reaching the seat in the closed position.<br />
If the start signal is less than 3 psi it is<br />
necessary :<br />
- loosen the travel indicator locknuts ref. n° 20<br />
between the upper stem ref. n° 22 and the lower<br />
stem ref. n° 6.<br />
- screw the lower stem ref. n° 6 to increase the start<br />
signal.<br />
If the start signal is higher than 3 psi it is<br />
necessary :<br />
- loosen the travel indicator locknuts ref. n° 20<br />
between the upper stem ref. n° 22 and the lower<br />
stem ref. n° 6.<br />
- unscrew the lower stem ref. n° 6 to decrease the<br />
start signal.
3.2 – TARATURA VALVOLE PNEUMATICHE DI<br />
REGOLAZIONE (segue)<br />
Per le valvole con AZIONE ROVESCIA (AR=aria apre),<br />
Figura di esempio Fig.4, operare come sopra.<br />
Ad esempio se il segnale previsto é 3-15 psi, la valvola<br />
deve incominciare a muoversi a 3 psi ed a 15 psi<br />
deve aver compiuto tutta la corsa arrivando alla totale<br />
apertura.<br />
Se il segnale di partenza é inferiore a 3 psi é<br />
necessario :<br />
- allentare i dadi rif. n° 20 che serrano l’asta<br />
superiore rif. n° 22 con lo stelo inferiore rif. n° 6.<br />
- svitare lo stelo inferiore rif. n° 6 per ottenere<br />
l’incremento del segnale di partenza.<br />
Se il segnale di partenza é superiore a 3 psi é<br />
necessario :<br />
- allentare i dadi rif. n° 20 che serrano l’asta<br />
superiore rif. n° 22 con lo stelo inferiore rif. n° 6.<br />
- avvitare lo stelo inferiore rif. n° 6 per ottenere la<br />
diminuzione del segnale di partenza.<br />
Attenzione ! In fase di ritaratura assicurarsi che la<br />
valvola compia tutta la corsa.<br />
Questa operazione può essere controllata visivamente<br />
osservando il disco indicatore rif. n° 21 scorrere sulla<br />
targhetta indicatrice della corsa rif. n° 19.<br />
Ripetere le operazioni di apertura / chiusura o<br />
chiusura / apertura fino a quando si sono ottenuti i<br />
giusti valori.<br />
3.2 – PNEUMATIC CONTROL VALVES CALIBRATION<br />
(to be continued)<br />
For REVERSE ACTION valves (AR=air opens),<br />
example figure Fig. 4, act as indicated above.<br />
If the stated signal is 3-15 psi, the valve has to start<br />
moving at 3 psi and at 15 psi should complete the<br />
travel, reaching the fully open position.<br />
If the start signal is less than 3 psi it is<br />
necessary :<br />
- loosen the travel indicator locknuts ref. n° 20<br />
between the upper stem ref. n° 22 and the lower<br />
stem ref. n° 6.<br />
- unscrew the lower stem ref. n° 6 to increase the<br />
start signal.<br />
If the start signal is higher than 3 psi it is<br />
necessary :<br />
- loosen the travel indicator locknuts ref. n° 20<br />
between the upper stem ref. n° 22 and the lower<br />
stem ref. n° 6.<br />
- screw the lower stem ref. n° 6 to decrease the start<br />
signal.<br />
Warning ! When re-calibrating ensure the valve<br />
completes its travel.<br />
This can be visually checked monitoring the travel<br />
indicator disc ref. n° 21 while is slides over the travel<br />
indicator plate ref. n° 19.<br />
Repeat the opening / closing or closing / opening<br />
operations until the correct values are obtained.<br />
3.3 – TARATURA VALVOLE PNEUMATICHE ON-OFF 3.3 – PNEUMATIC ON-OFF VALVES CALIBRATION<br />
Le valvole pneumatiche on-off vengono fornite già<br />
tarate secondo il segnale di comando, scelto dal<br />
cliente, ed in base alla pressione di ingresso del fluido.<br />
Le valvole on-off non richiedono ulteriori operazioni di<br />
ritaratura.<br />
Pneumatic on-off valves are supplied calibarted to the<br />
signal stated by the customer and depending on the<br />
inlet pressure of the fluid.<br />
No further calibration is necessary for pneumatic on-off<br />
valves.<br />
Fig. 3 “AD” Fig.4 “AR”<br />
7
3.4 – TARATURA VALVOLE MOTORIZZATE<br />
SERIE “EP”<br />
3.4.1 – TARATURA INTERRUTTORI INTERNI<br />
SERIE “EP”<br />
Le valvole vengono fornite tarate e collaudate, pronte per<br />
poter funzionare alle condizioni richieste dal cliente in<br />
fase d’ordine.<br />
Gli interruttori standard interni, servono per bloccare il<br />
motore in apertura e chiusura.<br />
La regolazione viene effettuata come indicato nella Fig.5<br />
Possono essere utilizzati anche per limitare la corsa della<br />
valvola.<br />
Nel caso un interruttore sia starato rispetto alla corsa<br />
meccanica, la frizione del motore è tarata per staccarsi<br />
automaticamente dopo circa 2’.<br />
3.4 – ELECTRIC POWERED VALVES CALIBRATION<br />
“EP” SERIES<br />
3.4.1. – LIMIT SWITCHES CALIBRATION<br />
“EP” SERIES<br />
Valves are supplied, calibrated and tested to work in<br />
conditions set by the customer.<br />
The standard limit switches serve to switch-off the<br />
actuator when the limits have been reached.<br />
For the calibration see Fig. 5.<br />
They can be used also for stroke – limitation.<br />
If the limit switches are not right calibrated after 2’ the<br />
friction of the actuator switch-off the system.<br />
3.4.2. – TARATURA RONDELLE A TAZZA SERIE “EP” 3.4.2. – DISC SPRINGS SETTING “EP” SERIES<br />
Il sistema delle rondelle a tazza ( vedi Fig.6) serve a<br />
pretensionare di circa 3 mm le rondelle stesse inserite<br />
nell’apposito alloggiamento. La disposizione è valida per<br />
tutti i tipi di valvole.<br />
L’aggiustaggio viene effettuato con l’apposita chiave in<br />
dotazione stringendo la ghiera n°2 fino al bloccaggio.<br />
QUESTA OPERAZIONE VA EFFETTUATA CON LA<br />
VALVOLA A META’ CORSA.<br />
1= INTERRUTTORE DI APERTURA<br />
Retracting spindle (OPEN)<br />
2= INTERRUTTORE DI CHIUSURA<br />
Extending spindle (CLOSE)<br />
The disc springs system ( see Fig.6) serve to compress<br />
about 3 mm. the same system. The arrangement is valid<br />
for all types of valves.<br />
The arrangement is made by the special tool enclosed<br />
locking the adjusting nut until the end.<br />
MAKE THIS OPERATION WITH THE VALVE AT THE<br />
MIDLE STROKE.<br />
FIG. 5 FIG. 6<br />
3.5 – TARATURA VALVOLE MOTORIZZATE<br />
SERIE “EPR”<br />
Non è necessaria nessuna taratura, l’attuatore esegue<br />
una procedura “autotuning”<br />
3.5 – ELECTRIC POWERED VALVES CALIBRATION<br />
“EPR” SERIES<br />
Any setting is requested. The actuator starts an<br />
“autotuning” process.<br />
3.5.1 – DIAGNOSTICA SERIE “EPR” 3.5.1 – CHECK-UP “EPR” SERIES<br />
Entrambi i LED lampeggiano in verde: tempo di attesa<br />
(45 s.) a funzione di disinserzione di emergenza decorsa.<br />
Entrambi i LED lampeggiano in rosso: inizializzazione.<br />
Un LED lampeggia in verde: Il motore compie una corsa<br />
in direzione del LED corrispondente.<br />
Un LED illuminato in verde: motore a riposo, ultima corsa<br />
in direzione del LED corrispondente.<br />
Un LED illuminato in rosso: fine corsa raggiunto.<br />
Posizione della valvola (aperta o chiusa) secondo il LED<br />
corrispondente.<br />
LED spenti: niente tensione di alimentazione o niente<br />
segnale di comando (per regolatore a 3 posizioni).<br />
Entrambi i LED lampeggiano rosso/verde: funzionamento<br />
manuale.<br />
8<br />
Both LEDs flash green: waiting period (45s) after<br />
emergency function has finished.<br />
Both LEDs flash red: initialization.<br />
One LED flashes green: drive extends, direction in<br />
accordance with LED.<br />
One LED lights up green: drive in rest position, last<br />
running direction in accordance with LED.<br />
One LED lights up red: end position reached. Valve<br />
position (open or closed) in accordance with LED.<br />
No LEDs light up: no power supply or no control (3 points<br />
mode).<br />
Both LEDs flash red/green: manual mode.
4 - MANUTENZIONE 4 - MAINTENENCE<br />
!<br />
ATTENZIONE PRIMA DI EFFETTUARE<br />
QUALSIASI OPERAZIONE DI MANUTENZIONE ,<br />
DARE ARIA AL SERVOMOTORE (1 BAR ) AL FINE<br />
DI COMPRIMERE LE MOLLE. DA QUESTO<br />
MOMENTO SI PUO’ ESTRARRE IL CASTELLO-<br />
SERVOMOTORE ED OGNI COMPONENTE<br />
COLLEGATO SENZA POSSIBILITA’ CHE LE MOLLE<br />
RIMANGONO PRIVE DI COMPRESSIONE.<br />
WARNING<br />
BEFORE TO MAKE ANY OPERATIONS OF<br />
MAINTENANCE, PRIOR TO REMOVAL THE YOKE-<br />
ACTUATOR ASSEMBLY, PUT INTOTHE ACTUATOR AIR<br />
PRESSURE OF 1 BAR. THIS OPERATION WILL<br />
ENSURE THE CORRECT RETURN SPRINGS AND THEY<br />
WILL BE NOT FALL OVER.<br />
4.1 - SOSTITUZIONE GUARNIZIONE CORPO 4.1 - REPLACEMENT OF BODY GASKET<br />
!<br />
ATTENZIONE SE LA VALVOLA É<br />
EQUIPAGGIATA DI TENUTA A SOFFIETTO,<br />
CONSIDERANDO LA COMPLESSITÀ DELLE<br />
OPERAZIONI PER LA SOSTITUZIONE DELLA<br />
GUARNIZIONE CORPO SI CONSIGLIA DI<br />
CONTATTARE IL NOSTRO SERVIZIO ASSISTENZA.<br />
4.1.1 - VALVOLE A 2 VIE PNEUMATICHE TIPO<br />
2000 – 2100 – 5000 – 5100 – 5800<br />
L’ operazione di sostituzione della guarnizione del corpo<br />
può essere eseguita con la valvola montata sulla<br />
tubazione.<br />
Per valvole ad AZIONE DIRETTA (AD=aria chiude),<br />
Fig. 7, procedere come segue :<br />
- svitare i dadi di fissaggio rif. n° 17 che serrano il<br />
castello rif. n° 18 sul corpo valvola rif. n° 1.<br />
- rimuovere contemporaneamente il castello rif. n° 18<br />
completo di ogni componente.<br />
- rimuovere la vecchia guarnizione rif. N° 9 e pulire<br />
accuratamente la sede di alloggiamento.<br />
- sostituire la guarnizione rif. n° 9.<br />
- procedere quindi al montaggio eseguendo le<br />
precedenti operazioni in senso inverso.<br />
Per valvole ad AZIONE ROVESCIA (AR=aria apre),<br />
Fig. 8, per sostituire la guarnizione del corpo procedere<br />
come sopra avendo cura però, prima di svitare i dadi<br />
di fissaggio rif. n° 17, di dare aria, ad una<br />
pressione che consenta alla valvola di compiere<br />
pochi millimetri di corsa, in modo da allontanare<br />
l’otturatore dalla sua sede.<br />
Per valvole a DOPPIO EFFETTO (DE=aria<br />
apre/chiude ), procedere come per la versione “AD”<br />
avendo cura però, prima di svitare i dadi di fissaggio<br />
rif. n° 17, di controllare che la valvola sia in posizione<br />
di tutta apertura in modo che l’otturatore sia allontanato<br />
dalla sua sede.<br />
(*) Attenzione ! per le valvole 5000 – 5100 - 5800<br />
Se si vuole sostituire anche la guarnizione inferiore,<br />
svitare i dadi, togliere la flangia inferiore rif. 1a e<br />
procedere alla sostituzione.<br />
Nessuna ritaratura é richiesta dopo la sostituzione della<br />
guarnizione del corpo.<br />
Si consiglia di utilizzare sempre guarnizioni originali e di<br />
ingrassare sempre lo stelo e l’asta superiore.<br />
4.1.2 - VALVOLE A 2 VIE MOTORIZZATE TIPO<br />
2000 – 2100 – 5000 – 5100 – 5800<br />
Aprire la valvola fino a metà corsa e procedere come<br />
segue rif. Fig. 9 e Fig.10 :<br />
- svitare i dadi di fissaggio rif. n° 17 che serrano il<br />
castello rif. n° 18 sul corpo valvola rif. n° 1.<br />
- rimuovere contemporaneamente il castello rif. n° 18<br />
completo di ogni componente.<br />
- rimuovere la vecchia guarnizione rif. n° 9 e pulire<br />
accuratamente la sede di alloggiamento.<br />
- sostituire la guarnizione rif. n° 9.<br />
- procedere quindi al montaggio eseguendo le<br />
precedenti operazioni in senso inverso. 9<br />
!<br />
!<br />
WARNING<br />
IN THE CASE OF VALVES FITTED WITH BELLOWS<br />
SEAL IT IS ADVISABLE TO CONTACT OUR SERVICING<br />
DEPARTMENT FOR THE REPLACEMENT OF BODY<br />
GASKET.<br />
4.1.1 – 2 WAYS PNEUMATIC VALVES TYPE<br />
2000 – 2100 – 5000 – 5100 – 5800<br />
The replacement of the body gasket can be carried out<br />
without removing the valve from the pipework.<br />
For DIRECT ACTION valves (AD=air closes), Fig. 7,<br />
proceed as follows :<br />
- unscrew the body locknuts ref. n° 17 fixing the yoke<br />
ref. n° 18 on the valve body ref. n° 1.<br />
- remove at the same time the yoke ref. n° 18<br />
complete of every components.<br />
- take off the old gasket ref. N° 9 and clean the casing<br />
thoroughly to get rid of any foreign material.<br />
- place the new gasket ref. n° 9.<br />
- for reassembling carry out the above procedure in<br />
reverse.<br />
For REVERSE ACTION valves (AR=air opens), Fig.<br />
8, to replace the gasket proceed as indicated above<br />
but having care, prior to loose the body locknuts ref. n°<br />
17, to supply air to the actuator at a suitable pressure<br />
capable to make few millimeters of stroke , i.e. to move<br />
the plug far from the seat.<br />
For DOUBLE ACTION valves (DE=air opens/closes),<br />
proceed as indicated for “AD” version but having care,<br />
prior to loose the body locknuts ref. n° 17 , to check the<br />
valve is in fully open position, i.e. the plug must be far<br />
from the seat.<br />
(*) Warning ! for 5000 – 5100 – 5800 types<br />
If you want to replace the lower body gasket, loose the<br />
locknuts, remove the bottom flange rif. 1a and proceed<br />
to the raplacement.<br />
After replacement of the body gasket no calibrations are<br />
necessary.<br />
Please note alwasy use the manufacturers<br />
recommended gasket and always grease the stem<br />
and the diaphragm rod.<br />
4.1.2 – 2 WAYS ELECTRIC POWERED VALVES<br />
TYPE 2000 – 2100 – 5000 – 5100 – 5800<br />
Open the valve until the midle stroke than proceed as<br />
follows ref. Fig. 9 and Fig. 10 :<br />
- unscrew the body locknuts ref. n° 17 fixing the yoke<br />
ref. n° 18 on the valve body ref. n° 1.<br />
- remove at the same time the yoke ref. n° 18<br />
complete of every components.<br />
- take off the old gasket ref. N° 9 and clean the casing<br />
thoroughly to get rid of any foreign material.<br />
- place the new gasket ref. n° 9.<br />
- for reassembling carry out the above procedure in<br />
reverse.
Fig. 7 5000 AD Fig. 8 5000 AR<br />
Fig. 9 2000 EP Fig. 10 5000 EP<br />
10
4.1.3 - VALVOLE PNEUMATICHE A 3 VIE<br />
TIPO 2600 – 2700 – 5600 - 5700 DN 15 – DN 20<br />
L’operazione di sostituzione della guarnizione corpo<br />
non può essere eseguita con la valvola montata sulla<br />
tubazione.<br />
Rif. Fig. 11 – 12 procedere come segue :<br />
- dare aria al servomotore ad una pressione tale che<br />
sia possibile allontanare di pochi millimetri l’<br />
otturatore dalla sede superiore o inferiore<br />
- allentare i dadi rif. n° 20 che serrano l’asta superiore<br />
rif. n° 22 con lo stelo inferiore rif. n° 6.<br />
- svitare i dadi di fissaggio rif. n° 17 che serrano il<br />
castello rif. n° 18 sul corpo valvola rif. n° 1.<br />
- svitare lo stelo inferiore rif. n° 6 e separarlo dall’asta<br />
superiore rif. n° 22.<br />
- rimuovere il castello rif. n° 18.<br />
- sfilare il bonnet rif. n° 7 (lo stelo rif. n° 6 rimarrà<br />
inserito nel corpo valvola).<br />
- rimuovere la vecchia guarnizione e pulire<br />
accuratamente la sede di alloggiamento.<br />
- sostituire la guarnizione rif. n° 9.<br />
- procedere quindi al montaggio eseguendo le<br />
precedenti operazioni in senso inverso.<br />
Attenzione ! per le valvole 5600 – 5700<br />
Se si vuole sostituire anche la guarnizione inferiore,<br />
svitare i dadi, togliere il tronchetto rif.1a e procedere<br />
alla sostituzione.<br />
4.1.3 – PNEUMATIC 3 WAYS VALVES<br />
TYPE 2600 – 2700 – 5600 – 5700 DN 15 – DN 20<br />
The replacement of the body gasket can not be carried<br />
out without removing the valve from the pipework.<br />
Ref. Fig. 11 – 12 proceed as follows :<br />
- supply air to the actuator at a suitable pressure<br />
capable to make few millimeters of stroke moving<br />
the plug far from the upper or lower seat<br />
- loosen the position indicator locknuts ref. n° 20<br />
between the diaphargm rod ref. n° 22 and the stem<br />
ref. n° 6.<br />
- unscrew the body locknuts ref. n° 17 fixing the yoke<br />
ref. n° 18 on the valve body ref. n° 1.<br />
- unscrew the stem ref. n° 6 and devide it from the<br />
diaphargm rod ref. n° 22.<br />
- remove the yoke ref. n° 18 and unthread the<br />
bonnet ref. n° 7 (the stem ref. n° 6 will remain into<br />
the valve body).<br />
- take off the old gasket and clean the casing<br />
thoroughly to get rid of any foreign material.<br />
- place the new gasket ref. n° 9.<br />
- for reassembling carry out the above procedure in<br />
reverse.<br />
Warning ! for 5600 – 5700 types<br />
If you want to replace the lower body gasket, loose the<br />
locknuts, remove the stud pipe rif. 1a and proceed to<br />
the raplacement.<br />
Fig. 11 2700 AD Fig. 12 5700 AD<br />
11
4.1.4 - VALVOLE MOTORIZZATE A 3 VIE<br />
TIPO 2600 – 2700 – 5600 - 5700 DN 15 – DN 20<br />
L’operazione di sostituzione della guarnizione corpo<br />
non può essere eseguita con la valvola montata sulla<br />
tubazione.<br />
Rif. Fig. 13 – 14<br />
procedere come segue :<br />
- dare tensione al servomotore in modo da allontanare<br />
di pochi millimetri l’ otturatore dalla sede superiore o<br />
inferiore.<br />
- allentare la ghiera ( rif. fig.6 pag. 7) rif. 2, allentare il<br />
grano di bloccaggio rif. 4 (rif. fig.6 pag.7) in modo da<br />
liberare lo stelo dell’otturatore rif. 6.<br />
- svitare i dadi di fissaggio rif. n° 17 che serrano la<br />
flangia di chiusura rif. n° 18 sul corpo valvola rif. n°<br />
1.<br />
- sfilare lo stelo inferiore rif. n° 6 e separarlo<br />
dall’attuatore rif. 23.<br />
- rimuovere l’attuatore completo rif. n° 23.<br />
- sfilare il bonnet rif. n° 7 (lo stelo rif. n° 6 rimarrà<br />
inserito nel corpo valvola).<br />
- rimuovere la vecchia guarnizione e pulire<br />
accuratamente la sede di alloggiamento.<br />
- sostituire la guarnizione rif. n° 9.<br />
- procedere quindi al montaggio eseguendo le<br />
precedenti operazioni in senso inverso.<br />
Attenzione ! per le valvole 5600 – 5700<br />
Se si vuole sostituire anche la guarnizione inferiore,<br />
svitare i dadi, togliere il tronchetto rif. 1a e procedere<br />
alla sostituzione.<br />
4.1.4 – ELECTRIC POWERED 3 WAYS VALVES<br />
TYPE 2600 – 2700 – 5600 – 5700 DN 15 – DN 20<br />
The replacement of the body gasket can not be carried<br />
out without removing the valve from the pipework.<br />
Ref. Fig. 13 – 14<br />
Proceed as follows :<br />
- power supply to the actuator in order to make few<br />
millimeters of stroke moving the plug far from the<br />
upper or lower seat.<br />
- unscrew the adjusting nut ( ref. Fig. 6 page 7) ref .<br />
n°2, unscrew the grub screw ref. n°4 (ref. fig.6<br />
pag.7) the stem ref. n° 6 must be free.<br />
- unscrew the body locknuts ref. n° 17 fixing the<br />
upper bonnet flange ref. n° 18 on the valve body<br />
ref. n° 1.<br />
- unscrew the stem ref. n° 6 and devide it from the<br />
actuator ref. n° 23.<br />
- remove the complete actuator ref. n° 23 and<br />
unthread the bonnet ref. n° 7 (the stem ref. n° 6 will<br />
remain into the valve body).<br />
- take off the old gasket and clean the casing<br />
thoroughly to get rid of any foreign material.<br />
- place the new gasket ref. n° 9.<br />
- for reassembling carry out the above procedure in<br />
reverse.<br />
Warning ! for 5600 – 5700 types<br />
If you want to replace the lower body gasket, loose the<br />
locknuts, remove the stud pipe rif. 1a and proceed to<br />
the raplacement.<br />
Fig. 13 2700 EP Fig. 14 5700 EP<br />
12
4.1.5 - VALVOLE PNEUMATICHE 3 vie miscelatrici<br />
TIPO 2600 – 5600 DN 25 – DN 200<br />
L’operazione di sostituzione della guarnizione corpo<br />
non può essere eseguita con la valvola montata sulla<br />
tubazione.<br />
Rif. Fig. 15 – 16 procedere come segue :<br />
- dare aria al servomotore ad una pressione tale che<br />
sia possibile allontanare di pochi millimetri l’<br />
otturatore dalla sede inferiore o superiore.<br />
- attraverso il tronchetto flangiato inferiore e mediante<br />
un’ apposita chiave, svitare i dadi di bloccaggio<br />
dell’ otturatore rif. n° 3, che serrano il profilo inferiore<br />
rif. n° 5 sullo stelo rif. n° 6, e rimuoverli unitamente<br />
alla rosetta rif. n° 4.<br />
- svitare i dadi di fissaggio rif. n° 17 che serrano il<br />
castello rif. n° 18 sul corpo valvola rif. n° 1.<br />
- rimuovere contemporaneamente il castello rif. n° 18,<br />
il bonnet rif. n° 7, lo stelo rif. n° 6 (il profilo<br />
dell’otturatore rif. n°5 rimarrà inserito nel corpo<br />
valvola).<br />
- rimuovere la vecchia guarnizione e pulire<br />
accuratamente la sede di alloggiamento.<br />
- sostituire la guarnizione rif. n° 9.<br />
- procedere quindi al montaggio eseguendo le<br />
precedenti operazioni in senso inverso.<br />
Attenzione ! per le valvole 5600<br />
Se si vuole sostituire anche la guarnizione inferiore,<br />
svitare i dadi, togliere il tronchetto rif. 1a e procedere<br />
alla sostituzione.<br />
4.1.5 – PNEUMATIC VALVES 3 ways mixing<br />
TYPE 2600 – 5600 DN 25 – DN 200<br />
The replacement of the body gasket can not be carried<br />
out without removing the valve from the pipework.<br />
Ref. Fig. 15 – 16 proceed as follows :<br />
- supply air to the actuator at a suitable pressure<br />
capable to make few millimeters of stroke moving<br />
the plug far from the lower or upper seat.<br />
- through the lower flanged connection and by means<br />
of suitable wrench loosen the plug locknuts ref.<br />
n° 3 fixing the lower plug profile ref. n° 5 on the stem<br />
ref. n° 6 and remove them together with the spring<br />
washer ref. n° 4.<br />
- unscrew the body locknuts ref. n° 17 fixing the yoke<br />
ref. n° 18 on the valve body ref. n° 1.<br />
- remove at the same time the yoke ref. n° 18, the<br />
bonnet ref. n° 7, the stem ref. n° 6 (the plug profile<br />
ref. n°5 will remain into the valve body).<br />
- take off the old gasket and clean the casing<br />
thoroughly to get rid of any foreign material.<br />
- place the new gasket ref. n° 9.<br />
- for reassembling carry out the above procedure in<br />
reverse.<br />
Warning ! for 5600 types<br />
If you want to replace the lower body gasket, loose the<br />
locknuts, remove the stud pipe rif. 1a and proceed to<br />
the raplacement.<br />
Fig. 15 2600 AD Fig. 16 5600 AD<br />
13
4.1.6 - VALVOLE PNEUMATICHE 3 vie deviatrici<br />
TIPO 2700 – 5700 DN 25 – DN 200<br />
L’operazione di sostituzione della guarnizione corpo<br />
non può essere eseguita con la valvola montata sulla<br />
tubazione.<br />
Rif. Fig. 17 – 18 procedere come segue :<br />
- dare aria al servomotore ad una pressione tale che<br />
sia possibile allontanare di pochi millimetri l’<br />
otturatore dalla sede inferiore o superiore.<br />
- attraverso il tronchetto flangiato inferiore e mediante<br />
un’ apposita chiave, svitare i dadi di bloccaggio<br />
dell’ otturatore rif. n° 3, che serrano il profilo inferiore<br />
rif. n° 5 sullo stelo rif. n° 6, e rimuoverli unitamente<br />
alla rosetta rif. n° 4.<br />
- svitare i dadi di fissaggio rif. n° 17 che serrano il<br />
castello rif. n° 18 sul corpo valvola rif. n° 1.<br />
- rimuovere contemporaneamente il castello rif. n° 18,<br />
il bonnet rif. n° 7, lo stelo rif. n° 6 con il profilo<br />
otturatore superiore rif. n° 5a.<br />
- rimuovere la vecchia guarnizione e pulire<br />
accuratamente la sede di alloggiamento.<br />
- sostituire la guarnizione rif. n° 9.<br />
- procedere quindi al montaggio eseguendo le<br />
precedenti operazioni in senso inverso.<br />
Attenzione ! per le valvole 5700<br />
Se si vuole sostituire anche la guarnizione inferiore,<br />
svitare i dadi, togliere il tronchetto rif. 1a e procedere<br />
alla sostituzione.<br />
4.1.6 – PNEUMATIC VALVES 3 ways deverting<br />
TYPE 2700 – 5700 DN 25 – DN 200<br />
The replacement of the body gasket can not be carried<br />
out without removing the valve from the pipework.<br />
Ref. Fig. 17 – 18 proceed as follows :<br />
- supply air to the actuator at a suitable pressure<br />
capable to make few millimeters of stroke moving<br />
the plug far from the lower or upper seat.<br />
- through the lower flanged connection and by means<br />
of suitable wrench loosen the plug locknuts ref.<br />
n° 3 fixing the lower plug profile ref. n° 5 on the stem<br />
ref. n° 6 and remove them together with the spring<br />
washer ref. n° 4.<br />
- unscrew the body locknuts ref. n° 17 fixing the yoke<br />
ref. n° 18 on the valve body ref. n° 1.<br />
- remove at the same time the yoke ref. n° 18, the<br />
bonnet ref. n° 7, the stem ref. n° 6 with the upper<br />
plug profile ref. n° 5a.<br />
- take off the old gasket and clean the casing<br />
thoroughly to get rid of any foreign material.<br />
- place the new gasket ref. n° 9.<br />
- for reassembling carry out the above procedure in<br />
reverse.<br />
Warning ! for 5700 types<br />
If you want to replace the lower body gasket, loose the<br />
locknuts, remove the stud pipe rif. 1a and proceed to<br />
the raplacement.<br />
Fig. 17 2700 AR Fig. 18 5700 AR<br />
14
4.1.7 - VALVOLE MOTORIZZATE 3 vie miscelatrici<br />
TIPO 2600 - 5600 DN 25 – DN 200<br />
L’operazione di sostituzione della guarnizione corpo<br />
non può essere eseguita con la valvola montata sulla<br />
tubazione.<br />
Rif. Fig. 19 - 20 procedere come segue :<br />
- dare tensione all’attuatore in modo da allontanare di<br />
pochi millimetri l’ otturatore dalla sede superiore o<br />
inferiore.<br />
- attraverso il tronchetto flangiato inferiore e mediante<br />
un’ apposita chiave, svitare i dadi di bloccaggio<br />
dell’ otturatore rif. n° 3, che serrano il profilo<br />
dell’otturatore rif. n° 5 sullo stelo rif. n° 6, e<br />
rimuoverli unitamente alla rosetta rif. n° 4.<br />
- svitare i dadi di serraggio rif. n° 17 che serrano la<br />
flangia di chiusura rif. n° 18 sul corpo valvola rif. n°<br />
1.<br />
- rimuovere contemporaneamente la flangia di chiusura<br />
rif. n° 18, lo stelo rif. n° 6 ed il bonnet rif. n° 7 (il<br />
profilo dell’otturatore rif. n° 5 rimarrà inserito nel<br />
corpo valvola).<br />
- rimuovere la vecchia guarnizione e pulire<br />
accuratamente la sede di alloggiamento.<br />
- sostituire la guarnizione rif. n° 9.<br />
- procedere quindi al montaggio eseguendo le<br />
precedenti operazioni in senso inverso.<br />
Attenzione ! per le valvole 5600<br />
Se si vuole sostituire anche la guarnizione inferiore,<br />
svitare i dadi, togliere il tronchetto rif. 1a e procedere<br />
alla sostituzione.<br />
4.1.7 – ELECTRIC POWERED VALVES 3 ways mixing<br />
TYPE 2600 – 5600 DN 25 – DN 200<br />
The replacement of the body gasket can not be carried<br />
out without removing the valve from the pipework.<br />
Ref. Fig. 19 - 20 proceed as follows :<br />
- power supply to the actuator in order to make few<br />
millimeters of stroke moving the plug far from the<br />
upper or lower seat.<br />
- through the lower flanged connection and by means<br />
of suitable wrench loosen the plug locknuts ref.<br />
n° 3 fixing the plug profile ref. n° 5 on the stem ref.<br />
n° 6 and remove them together with the spring<br />
washer ref. n° 4.<br />
- unscrew the body locknuts ref. n° 17 fixing the<br />
upper bonnet flange ref. n° 18 on the valve body<br />
ref. n° 1.<br />
- remove at the same time the yoke ref. n° 18, the<br />
stem ref. n° 6 and the bonnet ref. n° 7 (the plug<br />
profile ref. n° 5 will remain into the valve body).<br />
- take off the old gasket and clean the casing<br />
thoroughly to get rid of any foreign material.<br />
- place the new gasket ref. n° 9.<br />
- for reassembling carry out the above procedure in<br />
reverse.<br />
Warning ! for 5600 type<br />
If you want to replace the lower body gasket, loose the<br />
locknuts, remove the stud pipe rif. 1a and proceed to<br />
the raplacement.<br />
Fig. 19 2600 EP Fig. 20 5600 EP<br />
15
4.1.8 - VALVOLE MOTORIZZATE 3 vie deviatrici<br />
TIPO 2700 – 5700 DN 25 – DN 200<br />
L’operazione di sostituzione della guarnizione corpo<br />
non può essere eseguita con la valvola montata sulla<br />
tubazione.<br />
Rif. Fig. 21 – 22 procedere come segue :<br />
- dare tensione all’attuatore in modo da allontanare di<br />
pochi millimetri l’otturatore dalla sede superiore o<br />
inferiore.<br />
- attraverso il tronchetto flangiato inferiore e mediante<br />
un’ apposita chiave, svitare i dadi di bloccaggio<br />
dell’ otturatore rif. n° 3, che serrano il profilo inferiore<br />
rif. n° 5 sullo stelo rif. n° 6, e rimuoverli unitamente<br />
alla rosetta rif. n° 4.<br />
- svitare i dadi di fissaggio rif. n° 17 che serrano la<br />
flangia di chiusura rif. n° 18 sul corpo valvola rif. n°<br />
1.<br />
- rimuovere contemporaneamente l’attuatore rif. n° 23,<br />
il bonnet rif. n° 7, lo stelo rif. n° 6 con il profilo<br />
otturatore superiore rif. n° 5a.<br />
- rimuovere la vecchia guarnizione e pulire<br />
accuratamente la sede di alloggiamento.<br />
- sostituire la guarnizione rif. n° 9.<br />
- procedere quindi al montaggio eseguendo le<br />
precedenti operazioni in senso inverso.<br />
Attenzione ! per le valvole 5700<br />
Se si vuole sostituire anche la guarnizione inferiore,<br />
svitare i dadi, togliere il tronchetto rif. 1a e procedere<br />
alla sostituzione.<br />
4.1.8 – ELECTRIC POWERED VALVES 3 ways dev.<br />
TYPE 2700 – 5700 DN 25 – DN 200<br />
The replacement of the body gasket can not be carried<br />
out without removing the valve from the pipework.<br />
Ref. Fig. 21 – 22 proceed as follows :<br />
- power supply to the actuator in order to make few<br />
millimeters of stroke moving the plug far from the<br />
upper or lower seat.<br />
- through the lower flanged connection and by means<br />
of suitable wrench loosen the plug locknuts ref.<br />
n° 3 fixing the lower plug profile ref. n° 5 on the stem<br />
ref. n° 6 and remove them together with the spring<br />
washer ref. n° 4.<br />
- unscrew the body locknuts ref. n° 17 fixing the<br />
upper bonnet flange ref. n° 18 on the valve body<br />
ref. n° 1.<br />
- remove at the same time the complete actuator ref.<br />
n° 23, the bonnet ref. n° 7, the stem ref. n° 6 with the<br />
upper plug profile ref. n° 5a.<br />
- take off the old gasket and clean the casing<br />
thoroughly to get rid of any foreign material.<br />
- place the new gasket ref. n° 9.<br />
- for reassembling carry out the above procedure in<br />
reverse.<br />
Warning ! for 5700 types<br />
If you want to replace the lower body gasket, loose the<br />
locknuts, remove the stud pipe rif. 1a and proceed to<br />
the replacement.<br />
Fig. 21 2700 EP Fig. 22 5700 EP<br />
16
4.2 - SOSTITUZIONE PREMISTOPPA 4.2 - REPLACEMENT OF STUFFING BOX PACKING<br />
!<br />
ATTENZIONE SE LA VALVOLA É<br />
EQUIPAGGIATA DI TENUTA A SOFFIETTO,<br />
CONSIDERANDO LA COMPLESSITÀ DELLE<br />
OPERAZIONI PER LA SOSTITUZIONE DELLA<br />
GUARNIZIONE CORPO SI CONSIGLIA DI<br />
CONTATTARE IL NOSTRO SERVIZIO ASSISTENZA.<br />
4.2.1 - VALVOLE A 2 VIE PNEUMATICHE<br />
TIPO 2000 – 2100 – 5000 – 5100 – 5800<br />
L’ operazione di sostituzione del premistoppa può<br />
essere eseguita con la valvola montata sulla tubazione.<br />
Per valvole ad AZIONE DIRETTA (AD=aria chiude),<br />
fig.3 pag. n°6 fig.7 pag n°9 procedere come segue :<br />
- svitare i dadi di fissaggio rif. n° 17 che serrano il<br />
castello rif. n° 18 sul corpo valvola rif. n° 1.<br />
- rimuovere contemporaneamente il castello rif. n° 18<br />
completo di ogni componente.<br />
- svitare i dadi del profilo otturatore rif. n°3 estrarre la<br />
rosetta rif. n° 4 e il profilo otturatore rif. n°5<br />
- sfilare il bonnet completo rif. n° 7 e procedere alla<br />
sostituzione del premistoppa come indicato nella Fig.<br />
23<br />
- quando si cambia il premistoppa è necessario<br />
sostituire anche la guarnizione corpo rif. N° 9 vedi<br />
punto 4.1.1<br />
- procedere quindi al montaggio eseguendo le<br />
precedenti operazioni in senso inverso.<br />
Per valvole ad AZIONE ROVESCIA (AR=aria apre),<br />
fig. 4 pag.6 fig.8 pag.9 procedere come sopra, avendo<br />
cura però, prima di svitare i dadi di fissaggio rif. n°17, di<br />
dare aria, ad una pressione che consenta alla valvola<br />
di compiere pochi millimetri di corsa, in modo da<br />
allontanare l’otturatore dalla sua sede.<br />
Per valvole a DOPPIO EFFETTO (DE=aria<br />
apre/chiude ), procedere come per la versione “AD”<br />
avendo cura però, prima di svitare i dadi di fissaggio<br />
rif. n° 17, di controllare che la valvola sia in posizione<br />
di tutta apertura in modo che l’ otturatore sia<br />
allontanato dalla sua sede.<br />
Nessuna ritaratura é richiesta dopo la sostituzione del<br />
premistoppa. Si consiglia di utilizzare sempre<br />
guarnizioni originali e di ingrassare sempre lo stelo e l’<br />
asta superiore.<br />
4.2.2 - VALVOLE A 2 VIE MOTORIZZATE<br />
TIPO 2000 – 2100 – 5000 – 5100 – 5800<br />
Aprire la valvola fino a metà corsa e procedere come<br />
segue rif. Fig. 9 e Fig. 10 pag. 9:<br />
- svitare i dadi di fissaggio rif. n° 17 che serrano il<br />
castello rif. n° 18 sul corpo valvola rif. n° 1.<br />
- rimuovere contemporaneamente il castello rif. n° 18<br />
completo di ogni componente.<br />
- svitare i dadi del profilo otturatore rif. n°3 estrarre la<br />
rosetta rif. n° 4 e il profilo otturatore rif. n°5<br />
- sfilare il bonnet completo rif. n° 7 e procedere alla<br />
sostituzione del premistoppa come indicato nella Fig.<br />
23<br />
- quando si cambia il premistoppa è necessario<br />
sostituire anche la guarnizione corpo rif. N° 9 vedi<br />
punto 4. 1.2<br />
- procedere quindi al montaggio eseguendo le<br />
precedenti operazioni in senso inverso.<br />
17<br />
!<br />
WARNING<br />
IN THE CASE OF VALVES FITTED WITH BELLOWS SEAL<br />
IT IS ADVISABLE TO CONTACT OUR SERVICING<br />
DEPARTMENT FOR THE REPLACEMENT OF BODY<br />
GASKET.<br />
4.2.1 – 2 WAYS PNEUMATIC VALVES<br />
TYPE 2000 – 2100 – 5000 – 5100 – 5800<br />
The replacement of the stuffing box pac. can be carried<br />
out without removing the valve from the pipework.<br />
For DIRECT ACTION valves (AD=air closes), fig.3<br />
page 6 and fig.7 page 9 proceed as follows :<br />
- unscrew the body locknuts ref. n° 17 fixing the yoke<br />
ref. n° 18 on the valve body ref. n° 1.<br />
- remove at the same time the yoke ref. n° 18<br />
complete of every components.<br />
- unscrew the locknuts plug ref. n° 3, remove the<br />
washer ref. n°4 and the profile plug n° 5<br />
- take off the complete bonnet ref. n° 7 and proceed to<br />
the subsitution of the stuffing box packing as<br />
indicated on Fig. 23<br />
- when you change the stuffing box packing, is<br />
necessary remove also the body gasket ref. N° 9<br />
see 4.1.1 point<br />
- for reassembling carry out the above procedure in<br />
reverse.<br />
For REVERSE ACTION valves (AR=air opens), Fig.<br />
4 page 6 and Fig. 8 page 9, to replace the gasket<br />
proceed as indicated above but having care, prior to<br />
loose the body locknuts ref. n° 17, to supply air to the<br />
actuator at a suitable pressure capable to make few<br />
millimeters of stroke , i.e. to move the plug far from the<br />
seat.<br />
For DOUBLE ACTION valves (DE=air opens/closes),<br />
proceed as indicated for “AD” version but having care,<br />
prior to loose the body locknuts ref. n° 17 , to check the<br />
valve is in fully open position, i.e. the plug must be far<br />
from the seat.<br />
After replacement of the stuffing box packing no<br />
calibrations are necessary.<br />
Please note alwasy use the manufacturers<br />
recommended gasket and always grease the stem<br />
and the diaphragm rod.<br />
4.2.2 – 2 WAYS ELECTRIC POWERED VALVES<br />
TYPE 2000 – 2100 – 5000 – 5100 – 5800<br />
Open the valve until the midle stroke than proceed as<br />
follows ref. Fig. 9 and Fig. 10 page 9 :<br />
- unscrew the body locknuts ref. n° 17 fixing the yoke<br />
ref. n° 18 on the valve body ref. n° 1.<br />
- remove at the same time the yoke ref. n° 18<br />
complete of every components.<br />
- unscrew the locknuts plug ref. n° 3, remove the<br />
washer ref. n°4 and the profile plug n° 5<br />
- take off the complete bonnet ref. n° 7 and proceed to<br />
the subsitution of the stuffing box packing as<br />
indicated on Fig. 23<br />
- when you change the stuffing box packing, is<br />
necessary remove also the body gasket ref. N° 9<br />
see 4.1.2 point<br />
- for reassembling carry out the above procedure in<br />
reverse.
4.2.3 - VALVOLE PNEUMATICHE A 3 VIE<br />
TIPO 2600 – 2700 – 5600 - 5700 DN 15 – DN 20<br />
L’operazione di sostituzione del premistoppa può<br />
essere eseguita con la valvola montata sulla tubazione<br />
ma considerando la complessità delle operazioni si<br />
consiglia di eseguire la manutenzione con la valvola<br />
staccata dalla tubazione.<br />
Rif. Fig. 11 – 12 - 23 procedere come segue :<br />
- dare aria al servomotore ad una pressione tale che<br />
sia possibile allontanare di pochi millimetri l’ otturatore<br />
dalla sede superiore o inferiore<br />
- allentare i dadi rif. n° 20 che serrano l’asta superiore<br />
rif. n° 22 con lo stelo inferiore rif. n° 6.<br />
- svitare i dadi di fissaggio rif. n° 17 che serrano il<br />
castello rif. n° 18 sul corpo valvola rif. n° 1.<br />
- svitare lo stelo inferiore rif. n° 6 e separarlo dall’asta<br />
superiore rif. n° 22.<br />
- rimuovere il castello rif. n° 18.<br />
- sfilare il bonnet rif. n° 7 (lo stelo rif. n° 6 rimarrà<br />
inserito nel corpo valvola).<br />
- rimuovere il vecchio premistoppa e sostituirlo rif. Fig.<br />
23<br />
- quando si cambia il premistoppa è necessario<br />
sostituire anche la guarnizione corpo rif. N° 9 vedi<br />
punto 4.1.3<br />
- procedere quindi al montaggio eseguendo le<br />
precedenti operazioni in senso inverso.<br />
Fig. 23 PREMISTOPPA – Stuffing box packing<br />
18<br />
4.2.3 – PNEUMATIC 3 WAYS VALVES<br />
TYPE 2600 – 2700 – 5600 – 5700 DN 15 – DN 20<br />
The replacement of the stuffing box packing can be<br />
carried out without removing the valve from the<br />
pipework but considering that more complicated<br />
operations are involved, it is advisable to take out the<br />
valve from the pipework.<br />
Ref. Fig. 11 – 12 - 23 proceed as follows :<br />
- supply air to the actuator at a suitable pressure<br />
capable to make few millimeters of stroke moving the<br />
plug far from the upper or lower seat<br />
- loosen the position indicator locknuts ref. n° 20<br />
between the diaphargm rod ref. n° 22 and the stem<br />
ref. n° 6.<br />
- unscrew the body locknuts ref. n° 17 fixing the yoke<br />
ref. n° 18 on the valve body ref. n° 1.<br />
- unscrew the stem ref. n° 6 and devide it from the<br />
diaphargm rod ref. n° 22.<br />
- remove the yoke ref. n° 18 and unthread the bonnet<br />
ref. n° 7 (the stem ref. n° 6 will remain into the<br />
valve body).<br />
- take off the old stuffing box packing and replace it<br />
ref. Fig. 23.<br />
- when you change the stuffing box packing, is<br />
necessary remove also the body gasket ref. N° 9 see<br />
4.1.3 point<br />
- for reassembling carry out the above procedure in<br />
reverse.
4.2.4 - VALVOLE MOTORIZZATE A 3 VIE<br />
TIPO 2600 – 2700 – 5600 - 5700 DN 15 – DN 20<br />
L’operazione di sostituzione del premistoppa non può<br />
essere eseguita con la valvola montata sulla<br />
tubazione !<br />
Rif. Fig. 13 – 14<br />
procedere come segue :<br />
- dare tensione al servomotore in modo da allontanare<br />
di pochi millimetri l’ otturatore dalla sede superiore o<br />
inferiore.<br />
- allentare la ghiera ( rif. fig.6 pag. 7) rif. 2, allentare il<br />
grano di bloccaggio rif. 4 (rif. fig.6 pag.7) in modo da<br />
liberare lo stelo dell’otturatore rif. 6.<br />
- svitare i dadi di fissaggio rif. n° 17 che serrano la<br />
flangia di chiusura rif. n° 18 sul corpo valvola rif. n°<br />
1.<br />
- sfilare lo stelo inferiore rif. n° 6 e separarlo<br />
dall’attuatore rif. 23.<br />
- rimuovere l’attuatore completo rif. n° 23.<br />
- sfilare il bonnet rif. n° 7 (lo stelo rif. n° 6 rimarrà<br />
inserito nel corpo valvola).<br />
- rimuovere il vecchio premistoppa e sostituirlo rif. Fig.<br />
23<br />
- quando si cambia il premistoppa è necessario<br />
sostituire anche la guarnizione corpo rif. N° 9 vedi<br />
punto 4.1.4<br />
- procedere quindi al montaggio eseguendo le<br />
precedenti operazioni in senso inverso.<br />
4.2.5 - VALVOLE PNEUMATICHE 3 vie miscelatrici<br />
TIPO 2600 – 5600 DN 25 – DN 200<br />
L’operazione di sostituzione del premistoppa non può<br />
essere eseguita con la valvola montata sulla<br />
tubazione !<br />
Rif. Fig. 15 – 16 procedere come segue :<br />
- dare aria al servomotore ad una pressione tale che<br />
sia possibile allontanare di pochi millimetri l’<br />
otturatore dalla sede inferiore o superiore.<br />
- attraverso il tronchetto flangiato inferiore e mediante<br />
un’ apposita chiave, svitare i dadi di bloccaggio<br />
dell’ otturatore rif. n° 3, che serrano il profilo inferiore<br />
rif. n° 5 sullo stelo rif. n° 6, e rimuoverli unitamente<br />
alla rosetta rif. n° 4.<br />
- svitare i dadi di fissaggio rif. n° 17 che serrano il<br />
castello rif. n° 18 sul corpo valvola rif. n° 1.<br />
- rimuovere contemporaneamente il castello rif. n° 18,<br />
il bonnet rif. n° 7, lo stelo rif. n° 6 (il profilo<br />
dell’otturatore rif. n°5 rimarrà inserito nel corpo<br />
valvola).<br />
- sfilare il bonnet rif. n° 7 e rimuovere il vecchio<br />
premistoppa e sostituirlo rif. Fig. 23<br />
- quando si cambia il premistoppa è necessario<br />
sostituire anche la guarnizione corpo rif. N° 9 vedi<br />
punto 4.1.5<br />
- procedere quindi al montaggio eseguendo le<br />
precedenti operazioni in senso inverso.<br />
19<br />
4.2.4 – ELECTRIC POWERED 3 WAYS VALVES<br />
TYPE 2600 – 2700 – 5600 – 5700 DN 15 – DN 20<br />
The replacement of the stuffing box packing can not be<br />
carried out without removing the valve from the<br />
pipework !<br />
Ref. Fig. 13 – 14<br />
Proceed as follows :<br />
- power supply to the actuator in order to make few<br />
millimeters of stroke moving the plug far from the<br />
upper or lower seat.<br />
- unscrew the adjusting nut ( ref. Fig. 6 page 7) ref .<br />
n°2, unscrew the grub screw ref. n°4 (ref. fig.6<br />
pag.7) the stem ref. n° 6 must be free.<br />
- unscrew the body locknuts ref. n° 17 fixing the<br />
upper bonnet flange ref. n° 18 on the valve body<br />
ref. n° 1.<br />
- unscrew the stem ref. n° 6 and devide it from the<br />
actuator ref. n° 23.<br />
- remove the complete actuator ref. n° 23 and<br />
unthread the bonnet ref. n° 7 (the stem ref. n° 6 will<br />
remain into the valve body).<br />
- take off the old stuffing box packing and replace it<br />
ref. Fig. 23.<br />
- when you change the stuffing box packing, is<br />
necessary remove also the body gasket ref. N° 9<br />
see 4.1.4 point<br />
- for reassembling carry out the above procedure in<br />
reverse.<br />
4.2.5 – PNEUMATIC VALVES 3 ways mixing<br />
TYPE 2600 – 5600 DN 25 – DN 200<br />
The replacement of the stuffing box packing can not be<br />
carried out without removing the valve from the<br />
pipework !<br />
Ref. Fig. 15 – 16 proceed as follows :<br />
- supply air to the actuator at a suitable pressure<br />
capable to make few millimeters of stroke moving<br />
the plug far from the lower or upper seat.<br />
- through the lower flanged connection and by means<br />
of suitable wrench loosen the plug locknuts ref.<br />
n° 3 fixing the lower plug profile ref. n° 5 on the stem<br />
ref. n° 6 and remove them together with the spring<br />
washer ref. n° 4.<br />
- unscrew the body locknuts ref. n° 17 fixing the yoke<br />
ref. n° 18 on the valve body ref. n° 1.<br />
- remove at the same time the yoke ref. n° 18, the<br />
bonnet ref. n° 7, the stem ref. n° 6 (the plug profile<br />
ref. n°5 will remain into the valve body).<br />
- remove the bonnet ref. n°7 and take off the old<br />
stuffing box packing and replace it ref. Fig. 23.<br />
- when you change the stuffing box packing, is<br />
necessary remove also the body gasket ref. N° 9<br />
see 4.1.5 point<br />
- for reassembling carry out the above procedure in<br />
reverse.
4.2.6 - VALVOLE PNEUMATICHE 3 vie deviatrici<br />
TIPO 2700 – 5700 DN 25 – DN 200<br />
L’operazione di sostituzione del premistoppa non può<br />
essere eseguita con la valvola montata sulla<br />
tubazione !<br />
Rif. Fig. 17 – 18 procedere come segue :<br />
- dare aria al servomotore ad una pressione tale che<br />
sia possibile allontanare di pochi millimetri l’<br />
otturatore dalla sede inferiore o superiore.<br />
- attraverso il tronchetto flangiato inferiore e mediante<br />
un’ apposita chiave, svitare i dadi di bloccaggio<br />
dell’ otturatore rif. n° 3, che serrano il profilo inferiore<br />
rif. n° 5 sullo stelo rif. n° 6, e rimuoverli unitamente<br />
alla rosetta rif. n° 4.<br />
- svitare i dadi di fissaggio rif. n° 17 che serrano il<br />
castello rif. n° 18 sul corpo valvola rif. n° 1.<br />
- rimuovere contemporaneamente il castello rif. n° 18,<br />
il bonnet rif. n° 7, lo stelo rif. n° 6 con il profilo<br />
otturatore superiore rif. n° 5a.<br />
- sfilare il bonnet rif. n° 7 e rimuovere il vecchio<br />
premistoppa e sostituirlo rif. Fig. 23<br />
- quando si cambia il premistoppa è necessario<br />
sostituire anche la guarnizione corpo rif. N° 9 vedi<br />
punto 4.1.5<br />
- procedere quindi al montaggio eseguendo le<br />
precedenti operazioni in senso inverso.<br />
4.2.7 - VALVOLE MOTORIZZATE 3 vie miscelatrici<br />
TIPO 2600 - 5600 DN 25 – DN 200<br />
L’operazione di sostituzione del premistoppa non può<br />
essere eseguita con la valvola montata sulla<br />
tubazione !<br />
Rif. Fig. 19 - 20 procedere come segue :<br />
- dare tensione all’attuatore in modo da allontanare di<br />
pochi millimetri l’ otturatore dalla sede superiore o<br />
inferiore.<br />
- attraverso il tronchetto flangiato inferiore e mediante<br />
un’ apposita chiave, svitare i dadi di bloccaggio<br />
dell’ otturatore rif. n° 3, che serrano il profilo<br />
dell’otturatore rif. n° 5 sullo stelo rif. n° 6, e<br />
rimuoverli unitamente alla rosetta rif. n° 4.<br />
- svitare i dadi di serraggio rif. n° 17 che serrano la<br />
flangia di chiusura rif. n° 18 sul corpo valvola rif. n°<br />
1.<br />
- rimuovere contemporaneamente la flangia di chiusura<br />
rif. n° 18, lo stelo rif. n° 6 ed il bonnet rif. n° 7 (il<br />
profilo dell’otturatore rif. n° 5 rimarrà inserito nel<br />
corpo valvola).<br />
- sfilare il bonnet rif. n° 7 e rimuovere il vecchio<br />
premistoppa e sostituirlo rif. Fig. 23<br />
- quando si cambia il premistoppa è necessario<br />
sostituire anche la guarnizione corpo rif. N° 9 vedi<br />
punto 4.1.5<br />
- procedere quindi al montaggio eseguendo le<br />
precedenti operazioni in senso inverso.<br />
20<br />
4.2.6 – PNEUMATIC VALVES 3 ways deverting<br />
TYPE 2700 – 5700 DN 25 – DN 200<br />
The replacement of the stuffing box packing can not be<br />
carried out without removing the valve from the<br />
pipework !<br />
Ref. Fig. 17 – 18 proceed as follows :<br />
- supply air to the actuator at a suitable pressure<br />
capable to make few millimeters of stroke moving<br />
the plug far from the lower or upper seat.<br />
- through the lower flanged connection and by means<br />
of suitable wrench loosen the plug locknuts ref.<br />
n° 3 fixing the lower plug profile ref. n° 5 on the stem<br />
ref. n° 6 and remove them together with the spring<br />
washer ref. n° 4.<br />
- unscrew the body locknuts ref. n° 17 fixing the yoke<br />
ref. n° 18 on the valve body ref. n° 1.<br />
- remove at the same time the yoke ref. n° 18, the<br />
bonnet ref. n° 7, the stem ref. n° 6 with the upper<br />
plug profile ref. n° 5a.<br />
- remove the bonnet ref. n°7 and take off the old<br />
stuffing box packing and replace it ref. Fig. 23.<br />
- when you change the stuffing box packing, is<br />
necessary remove also the body gasket ref. N° 9<br />
see 4.1.5 point<br />
- for reassembling carry out the above procedure in<br />
reverse<br />
4.2.7 – ELECTRIC POWERED VALVES 3 ways mixing<br />
TYPE 2600 – 5600 DN 25 – DN 200<br />
The replacement of the stuffing box packing can not be<br />
carried out without removing the valve from the<br />
pipework !<br />
Ref. Fig. 19 - 20 proceed as follows :<br />
- power supply to the actuator in order to make few<br />
millimeters of stroke moving the plug far from the<br />
upper or lower seat.<br />
- through the lower flanged connection and by means<br />
of suitable wrench loosen the plug locknuts ref.<br />
n° 3 fixing the plug profile ref. n° 5 on the stem ref.<br />
n° 6 and remove them together with the spring<br />
washer ref. n° 4.<br />
- unscrew the body locknuts ref. n° 17 fixing the<br />
upper bonnet flange ref. n° 18 on the valve body<br />
ref. n° 1.<br />
- remove at the same time the yoke ref. n° 18, the<br />
stem ref. n° 6 and the bonnet ref. n° 7 (the plug<br />
profile ref. n° 5 will remain into the valve body).<br />
- remove the bonnet ref. n°7 and take off the old<br />
stuffing box packing and replace it ref. Fig. 23.<br />
- when you change the stuffing box packing, is<br />
necessary remove also the body gasket ref. N° 9<br />
see 4.1.5 point<br />
- for reassembling carry out the above procedure in<br />
reverse
4.2.8 - VALVOLE MOTORIZZATE 3 vie deviatrici<br />
TIPO 2700 – 5700 DN 25 – DN 200<br />
L’operazione di sostituzione del premistoppa non può<br />
essere eseguita con la valvola montata sulla<br />
tubazione !<br />
Rif. Fig. 21 – 22 procedere come segue :<br />
- dare tensione all’attuatore in modo da allontanare di<br />
pochi millimetri l’otturatore dalla sede superiore o<br />
inferiore.<br />
- attraverso il tronchetto flangiato inferiore e mediante<br />
un’ apposita chiave, svitare i dadi di bloccaggio<br />
dell’ otturatore rif. n° 3, che serrano il profilo inferiore<br />
rif. n° 5 sullo stelo rif. n° 6, e rimuoverli unitamente<br />
alla rosetta rif. n° 4.<br />
- svitare i dadi di fissaggio rif. n° 17 che serrano la<br />
flangia di chiusura rif. n° 18 sul corpo valvola rif. n°<br />
1.<br />
- rimuovere contemporaneamente l’attuatore rif. n° 23,<br />
il bonnet rif. n° 7, lo stelo rif. n° 6 con il profilo<br />
otturatore superiore rif. n° 5a.<br />
- sfilare il bonnet rif. n° 7 e rimuovere il vecchio<br />
premistoppa e sostituirlo rif. Fig. 23<br />
- quando si cambia il premistoppa è necessario<br />
sostituire anche la guarnizione corpo rif. N° 9 vedi<br />
punto 4.1.5<br />
- procedere quindi al montaggio eseguendo le<br />
precedenti operazioni in senso inverso.<br />
4.3 – SOSTITUZIONE DEL PROFILO OTTURATORE<br />
e DELLA TENUTA SOFFICE SU VALVOLE A DUE<br />
VIE TIPO 2000 – 2100 – 5000 - 5100<br />
!<br />
ATTENZIONE SE LA VALVOLA É<br />
EQUIPAGGIATA DI TENUTA A SOFFIETTO, NON<br />
RUOTARE LO STELO.<br />
Le valvole con soffietto DN125-200 sono equipag_<br />
giate di foro di ispezione Ø1/4" GAS F per verificare le<br />
eventuali perdite dal soffietto e per convogliare il<br />
fluido.<br />
Per valvole ad AZIONE DIRETTA (AD=aria chiude),<br />
Fig. 7 pagina n° 9 procedere come segue :<br />
- svitare i dadi di fissaggio rif. n° 17 che serrano il<br />
castello rif. n° 18 sul corpo valvola rif. n° 1.<br />
- rimuovere contemporaneamente il castello rif. n° 18<br />
completo di ogni componente.<br />
- svitare i dadi del profilo otturatore rif. n°3 estrarre la<br />
rosetta rif. n° 4 e sostituire il profilo otturatore rif. n°5<br />
- per l’eventuale sostituzione della tenuta soffice<br />
smontare il platorello sopra il profilo dell’otturatore e<br />
sostitire l’anello<br />
- quando si cambia il profilo otturatore è necessario<br />
sostituire anche la guarnizione corpo rif. N° 9 vedi<br />
punto 4.1.1<br />
- procedere quindi al montaggio eseguendo le<br />
precedenti operazioni in senso inverso.<br />
Per valvole ad AZIONE ROVESCIA (AR=aria apre),<br />
Fig. 8,pagina n° 9 procedere come sopra, avendo cura<br />
però, prima di svitare i dadi di fissaggio rif. n°17, di<br />
dare aria, ad una pressione che consenta alla valvola<br />
di compiere pochi millimetri di corsa, in modo da<br />
allontanare l’otturatore dalla sua sede.<br />
Per valvole a DOPPIO EFFETTO (DE=aria<br />
apre/chiude ), procedere come per la versione “AD”<br />
avendo cura però, prima di svitare i dadi di fissaggio<br />
rif. n° 17, di controllare che la valvola sia in posizione<br />
di tutta apertura in modo che l’ otturatore sia<br />
allontanato dalla sua sede.<br />
Nessuna ritaratura é richiesta dopo la sostituzione del<br />
profilo.<br />
21<br />
4.2.8 – ELECTRIC POWERED VALVES 3 ways dev.<br />
TYPE 2700 – 5700 DN 25 – DN 200<br />
The replacement of the stuffing box packing can not be<br />
carried out without removing the valve from the<br />
pipework !<br />
Ref. Fig. 21 – 22 proceed as follows :<br />
- power supply to the actuator in order to make few<br />
millimeters of stroke moving the plug far from the<br />
upper or lower seat.<br />
- through the lower flanged connection and by means<br />
of suitable wrench loosen the plug locknuts ref.<br />
n° 3 fixing the lower plug profile ref. n° 5 on the stem<br />
ref. n° 6 and remove them together with the spring<br />
washer ref. n° 4.<br />
- unscrew the body locknuts ref. n° 17 fixing the<br />
upper bonnet flange ref. n° 18 on the valve body<br />
ref. n° 1.<br />
- remove at the same time the complete actuator ref.<br />
n° 23, the bonnet ref. n° 7, the stem ref. n° 6 with the<br />
upper plug profile ref. n° 5a.<br />
- remove the bonnet ref. n°7 and take off the old<br />
stuffing box packing and replace it ref. Fig. 23.<br />
- when you change the stuffing box packing, is<br />
necessary remove also the body gasket ref. N° 9<br />
see 4.1.5 point<br />
- for reassembling carry out the above procedure in<br />
reverse<br />
4.3 – REPLACEMENT OF PLUG PROFIL and SOFT<br />
SEAL ON TWO WAYS VALVE<br />
TYPE 2000 –2100 – 5000 - 5100<br />
!<br />
WARNING<br />
IN THE CASE OF VALVES FITTED WITH BELLOWS SEAL<br />
DON’T TURN THE TRIM STEM.<br />
Valves with DN125-200 bellow are equipped with a<br />
Ø 1/4" Rp ISO7 inspection hole to check some fluid<br />
leakage from the bellow and to route the fluid.<br />
For DIRECT ACTION valves (AD=air closes), Fig. 7,<br />
page n° 9 proceed as follows :<br />
- unscrew the body locknuts ref. n° 17 fixing the yoke<br />
ref. n° 18 on the valve body ref. n° 1.<br />
- remove at the same time the yoke ref. n° 18<br />
complete of every components.<br />
- unscrew the locknuts plug ref. n° 3, remove the<br />
washer ref. n°4 and replace the plug profile ref. n° 5<br />
- for eventually replacement of the soft seal remove<br />
the plate over the profile plug and replace the soft<br />
ring<br />
- when you change the plu profile, is necessary<br />
remove also the body gasket ref. N° 9 see 4.1.1<br />
point<br />
- for reassembling carry out the above procedure in<br />
reverse.<br />
For REVERSE ACTION valves (AR=air opens), Fig.<br />
8, page n° 9 to replace the gasket proceed as<br />
indicated above but having care, prior to loose the<br />
body locknuts ref. n° 17, to supply air to the actuator at<br />
a suitable pressure capable to make few millimeters of<br />
stroke , i.e. to move the plug far from the seat.<br />
For DOUBLE ACTION valves (DE=air opens/closes),<br />
proceed as indicated for “AD” version but having care,<br />
prior to loose the body locknuts ref. n° 17 , to check the<br />
valve is in fully open position, i.e. the plug must be far<br />
from the seat.<br />
After replacement of the plug profile no calibrations are<br />
necessary.
4.4 – SOSTITUZIONE OTTURATORE SU VAVOLE TIPO<br />
2600 – 2700 – 5600 – 5700 - 5800<br />
Per la sostituzione degli otturatori di queste valvole Vi<br />
consigliamo di contattare il nostro Servizio Assistenza<br />
4.5 – SOSTITUZIONE DELLA SEDE SU TUTTE LE<br />
VALVOLE<br />
La sostituzione della sede o delle sedi è sempre<br />
sconsigliata, sarebbe preferibile sostituire l’intero corpo<br />
valvola.<br />
Qualora tale operazione fosse strettamente necessaria, Vi<br />
consigliamo di contattare il nostro Servizio Assistenza<br />
perché, considerando la complessità delle operazioni e gli<br />
utensili da utilizzare, non è possibile eseguirla<br />
sull’impianto.<br />
4.4 – PLUG REPLACEMENT ON VALVES<br />
TYPE 2600 – 2700 – 5600 – 5700 - 5800<br />
For the replacement of the plug of these valves it’s advisable<br />
to contact our Servicing Department<br />
4.5 – SEAT REPLACEMENT ON EVERY VALVE TYPES<br />
It is never suggested the replacement of the seat / s.<br />
It is preferable to replace the cast body with the seat / s.<br />
inside.<br />
In case the replacement of the seat / s is strictly necessary,<br />
considering that more complicated operations are involved<br />
and cannot be carried out on the plant, it is advisable to<br />
contact our Servicing Department.<br />
4.6 – SOSTITUZIONE DELLA MEMBRANA 4.6 – REPLACEMENT OF ACTUATOR DIAPHRAGM<br />
L’operazione di sostituzione della membrana può essere The replacement of the actuator diaphragm can be carried<br />
eseguita con la valvola montata sulla tubazione.<br />
out without removing the valve from the pipework.<br />
Rif. Fig. 24 - 25 procedere come segue :<br />
Ref. Fig. 24 - 25 proceed as follows :<br />
- svitare le viti di serraggio rif. N°36 e i dadi rif. n°34<br />
- unscrew bolts ref. 36 and locknuts ref.34<br />
- svitare la vite di serraggio membrana rif. n°33<br />
- unscrew the dipahragm locknut ref.n°33<br />
- per versione “AD” e “DE”<br />
- for “AD” and “DE” version<br />
- estrarre il distanziale rif. n°28<br />
- remove the diaphragm spacer ref. n°28<br />
- sfilare la membrana rif. n°29 e sostituirla<br />
- remove the diaphragm ref. n°29 and raplace it<br />
- procedere quindi al montaggio eseguendo le - for reassembling carry out the above procedure in<br />
precedenti operazioni in senso inverso.<br />
reverse<br />
- per versione “AR”<br />
- for “AR” version<br />
- estrarre la boccola membrana rif. n°32<br />
- remove the diaphragm bush ref n°32<br />
- estrarre le molle rif.n°31<br />
- remove the springs ref. n°31<br />
- estrarre il piatto membrana rif. n°30<br />
- remove the diaphragm plate ref n°30<br />
- sfilare la membrana rif. n°29 e sostituirla<br />
- remove the diaphragm ref. n°29 and replace it<br />
- procedere quindi al montaggio eseguendo le - for reassembling carry out the above procedure in<br />
precedenti operazioni in senso inverso.<br />
reverse<br />
Fig .24 VERSIONE “AD” version Fig. 25 VERSIONE “AR” version<br />
22
5 – INVERSIONE DELL’AZIONE 5 – REVERSING THE ACTION<br />
L’operazione di inversione dell’azione può essere<br />
eseguita con la valvola montata sulla tubazione.<br />
Rif. Fig. 26 procedere come segue :<br />
- Invertire i particolari come mostrato nel disegno<br />
Fig. 26 INVERSIONE DELL’AZIONE – Reversing the action<br />
23<br />
Reversing the action can be carried out without<br />
removing the valve from the pipework.<br />
Ref. Fig. 26 proceed as follows :<br />
- overtturn all the components showed on drawing<br />
VERSIONE “AD” Version VERSIONE “AR” Version
6 - ANOMALIE DI FUNZIONAMENTO<br />
Riportiamo qui di seguito alcuni inconvenienti che si possono verificare durante il funzionamento delle valvole ed i<br />
provvedimenti da adottare.<br />
INCONVENIENTI RISCONTRATI CAUSA PROVVEDIMENTO<br />
Lo stelo non compie la corsa completa perdita d’aria nel tubo di collegamento<br />
tra la valvola e lo strumento o la fonte<br />
d’aria<br />
perdita d’aria nella testata o<br />
servomotore<br />
localizzare ed eliminare la perdita<br />
stringere le viti perimetrali della testata<br />
L’attuatore elettrico non funziona Sostituire l’attuatore<br />
membrana forata sostituire la membrana<br />
depositi di scorie nel corpo valvola rimuovere i depositi<br />
spostamento della targhetta indice ritrovare il riferimento della corsa<br />
la strumentazione non eroga il segnale<br />
necessario<br />
ricercare le cause nella<br />
strumentazione<br />
Movimento a strappi dello stelo stelo corroso o grippato sostituire lo stelo<br />
sedimenti nella camera di tenuta dello<br />
stelo<br />
sostituire il bonnet con le tenute<br />
Perdita elevata con valvola chiusa tenuta soffice rovinata sostituire la tenuta<br />
tenuta metallica rovinata - il cono<br />
dell’otturatore o lo spigolo della sede<br />
rovinato<br />
pressione differenziale tra monte e<br />
valle della valvola troppo elevata<br />
smerigliare o sostituire l’otturatore,<br />
smerigliare o tornire il piano della<br />
sede<br />
sostituire il servomotore con uno di<br />
diametro idoneo<br />
Perdita del premistoppa “O” rings e / o anelli deteriorati sostituire gli “O” rings e gli anelli<br />
soffietto rotto contattare il nostro Servizio Assistenza<br />
6 - TROUBLES SHOOTING<br />
Herebelow some of the possible causes giving troubles during normal working conditions of the valves and the direction<br />
to follows in order to find the source of them :<br />
SYMPTOMS POSSIBLE CAUSE REMEDY<br />
No complete travel of the plug air leaks in the unit control pipings check and replace piping if necessary<br />
(Stem does not complete the travel) air leaks in the valve actuator tight bolts and nuts of diaphragm<br />
casings<br />
actuator diaphragm perforated replace the actuator diaphragm<br />
Electric powered actuator failed Replace the actuator<br />
foreign material inside the body remove them and clean the seating<br />
travel indicator plate not aligned align it to the travel indicator disc<br />
no correct control signal coming from<br />
the control system<br />
check the control system<br />
Trigger action of the stem corroded or seized stem replace the stem<br />
foreign material inside the bonnet replace the bonnet and the stuffing<br />
box packing<br />
High leakage of fluid through the valve<br />
in closed position<br />
soft seal is damaged replace the soft seal<br />
metal seating, plug shape or seat lap or replace the plug,<br />
are damaged<br />
lap or face the surface of the seat<br />
too high differential pressure (between not enough power of the pneumatic<br />
upstream<br />
pressures)<br />
and downstream actuator; replace it with a suitable one<br />
Leakage on stuffing box “O” rings and / or rings are damaged replace the “O” rings and the rings<br />
damaged or broken bellows seal contact our Servicing Department<br />
24
7 – ANALISI DEI RISCHI 7 – HAZARDS ANALYSIS<br />
Con questo documento vengono valutati i rischi connessi<br />
con l’apparecchiatura su indicata, che possono insorgere<br />
durante il suo utilizzo, installazione o movimentazione, in<br />
accordo a quanto previsto dalla Direttiva PED 97/23 CE<br />
Allegato 1 punto 1 e 2, vengono altresì indicate le<br />
prescrizioni a cui attenersi per evitare l’insorgere degli<br />
stessi.<br />
La classificazione delle soluzioni adottate è la seguente:<br />
a) soluzione per eliminare e/o ridurre il rischio<br />
b) applicazione delle opportune misure di protezione<br />
contro i rischi che non possono essere eliminati<br />
c) informazione degli utilizzatori circa i rischi residui<br />
CAUSA<br />
EFFETTO<br />
PERICOLO<br />
SOLUZIONE<br />
CAUSA<br />
Sovrapressione oltre la massima<br />
pressione ammissibile PS<br />
Rottura del corpo, cricche,<br />
deformazioni permanenti<br />
Proiezioni di parti metalliche,<br />
fuoriuscita del fluido<br />
a) Il corpo valvola è costruito con i<br />
dovuti margini di sicurezza<br />
b) L’impianto deve essere dotato<br />
degli accessori di sicurezza<br />
qualora le Direttive e/o Normative<br />
in vigore li prevedono<br />
c) In targhetta è riportata la massima<br />
pressione ammissibile<br />
Surriscaldamento (oltre la massima<br />
temperatura ammissibile TS)<br />
Analysis of hazards that may occur during normal working,<br />
installation and maintenance. In line with what is required<br />
by PED Directive 97/23/CE Annex 1 points 1 & 2 the<br />
manufacturer must follow the principles set out below in the<br />
following order to arrive at the most appropriate solution:<br />
a) eliminate or reduce hazards as far as is reasonably<br />
practicable<br />
b) apply appropriate protection measures against hazards<br />
which cannot be eliminated<br />
c) where appropriate, inform users of residual hazards<br />
CAUSE<br />
EFFECT<br />
RISK<br />
SOLUTION<br />
CAUSE<br />
Over-pressure (more than the<br />
maximum allowable pressure PS)<br />
Breaking of body, stress crack,<br />
permanent deformations.<br />
Discharge of metallic parts, leakage of<br />
fluid.<br />
a) The valve body is properly<br />
designed taking in account<br />
appropriate safety coefficients<br />
assured by the calculation<br />
method.<br />
b) The plant must be equipped with<br />
the appropriate safety equipments<br />
if are provided by PED Directive or<br />
by other countries rules<br />
c) On the identification plate is<br />
written the max allowable<br />
pressure.<br />
Over-temperature (more than the<br />
maximum allowable temperature TS)<br />
EFFETTO Sovrapressione interna EFFECT Internal over-pressures.<br />
PERICOLO<br />
Rottura o deformazione del corpo,<br />
fuoriuscita del fluido<br />
RISK<br />
Breaking or deformation of body valve,<br />
leakage of fluid.<br />
SOLUZIONE<br />
a) Il corpo valvola è costruito con i<br />
dovuti margini di sicurezza.<br />
b) L’impianto deve essere dotato di<br />
idonei dispositivi di controllo,<br />
contro il superamento della<br />
temperatura impostata.<br />
c) La temperatura massima è<br />
dichiarata sulle ns. specifiche<br />
tecniche e deve essere controllata<br />
da chi dimensiona e/o sceglie la<br />
valvola.<br />
25<br />
SOLUTION<br />
a) The valve body is properly<br />
designed taking in account<br />
appropriate safety coefficients<br />
assured by the calculation<br />
method.<br />
b) The plant must be equipped with<br />
appropriate control devices<br />
against over-temperature.<br />
c) The maximum allowable<br />
temperature TS is declared on our<br />
technical leaflets and must be<br />
ckeck during the sizing of the<br />
valve.
7 – ANALISI DEI RISCHI 7 – HAZARDS ANALYSIS<br />
CAUSA<br />
Forze di reazione a sollecitazione<br />
esterne<br />
CAUSE Reaction to external stresses<br />
EFFETTO Deformazione, cedimento strutturale EFFECT Deformation, structural settling.<br />
PERICOLO<br />
SOLUZIONE<br />
Rottura o deformazione del corpo,<br />
fuoriuscita del fluido<br />
a) È’ vietato gravare la valvola con<br />
carichi estranei, è obbligo<br />
dell’installatore proteggere la<br />
valvola da sollecitazioni esterne.<br />
b) Sul manuale sezione 2, punto 2.1<br />
è prescritto quanto indicato al<br />
punto a) e c).<br />
c) E’ compito dell’installatore<br />
verificare che l’apparecchio sia<br />
esente da pericoli dovuti a forze di<br />
reazione e/o sollecitazioni esterne.<br />
RISK<br />
SOLUTION<br />
Discharge of metallic parts, leakage of<br />
fluid.<br />
a) External loads cannot be applied<br />
to the valve; the installer must<br />
take appropriate special measures<br />
to protect the valve from external<br />
stresses.<br />
b) On present manual section 2,<br />
point 2.1 is written what descripted<br />
on point a) and c).<br />
c) The installer must ensure the<br />
valve is fitted with suitable<br />
accessories to meet damagelimitation<br />
requirements in the<br />
event of external stress.<br />
CAUSA Temperature di esercizio CAUSE Working temperature<br />
EFFETTO Parti metalliche a temperatura elevata EFFECT High surface temperature.<br />
PERICOLO Scottature RISK Burns.<br />
SOLUZIONE<br />
a) Installazione in zona protetta o<br />
coibentazione della valvola.<br />
b) Apposizione da parte<br />
dell’utilizzatore di idonea<br />
segnaletica di pericolo indicante<br />
che le parti possono raggiungere<br />
temperature pericolose . Nel<br />
manuale è chiaramente prescritto<br />
quanto indicato nella presente<br />
analisi.<br />
c) Coibentazione di protezione<br />
personale.<br />
26<br />
SOLUTION<br />
a) Installation in safe and/or<br />
protected places and/or insulation<br />
of the equipment.<br />
b) Instructions must be affixed to the<br />
equipment and also refer to<br />
hazards arising from dangerous<br />
surface temperatures.<br />
c) Insulation for personal protection.
7 – ANALISI DEI RISCHI 7 – HAZARDS ANALYSIS<br />
CAUSA<br />
EFFETTO<br />
PERICOLO<br />
SOLUZIONE<br />
CAUSA<br />
EFFETTO<br />
PERICOLO<br />
SOLUZIONE<br />
Valvole con attuatore elettrico,<br />
Tensione !<br />
Shock da scossa elettrica con<br />
successive conseguenze in funzione<br />
dell’esposizione.<br />
Pericolo di incolumità di chi sta<br />
eseguendo i lavori o di terzi.<br />
a) L’attuatore a norme CE<br />
89/336/EEC e 73/23/EEC e<br />
protetto da un coperchio IP 65<br />
DIN 40050 non rimuovere lo<br />
stesso senza sezionare o isolare<br />
la tensione di alimentazione.<br />
b) Un interruttore deve essere<br />
previsto e segnalato da apposita<br />
targhetta a sezionamento /<br />
isolamento dell’attuatore.<br />
L’impianto deve corrispondere agli<br />
standard IEC 364-4-41 con<br />
protezione classe 1 per le<br />
connessioni all’attuatore.<br />
c) Gli attuatori elettrici impiegati non<br />
hanno un interruttore, attenersi<br />
alle informazioni contenute nel<br />
manuale d’uso e installazione.<br />
Installazione e/o utilizzo non<br />
conforme a quanto prescritto o alle<br />
norme vigenti<br />
Installazione non appropriata, rottura<br />
dell’apparecchio.<br />
Cattivo funzionamento dell’impianto,<br />
uscita dei fluidi.<br />
a) L’installatore e/o l’utilizzatore<br />
devono informarsi sulle norme<br />
vigenti in materia e verificare la<br />
compatibilità con i fluidi utilizzati.<br />
b) Non applicabile.<br />
c) Nel manuale d’uso è prescritto al<br />
punto 1.<br />
27<br />
CAUSE Electric powered valves, Voltage !<br />
EFFECT<br />
RISK<br />
SOLUTION<br />
CAUSE<br />
EFFECT<br />
RISK<br />
SOLUTION<br />
Electric shock with following co be<br />
labellednseguences at the exposition.<br />
Cause danger to life and limb of the<br />
useres or third party.<br />
a) The actuator following CE<br />
89/336/EEC and 73/23/EEC is<br />
protected by a cover IP 65 DIN<br />
40050, don’t remove the same,<br />
ansure before to switch-off the<br />
main.<br />
b) A main switch has therefore to be<br />
provided and shell be labelled as<br />
the main isolator switch. The<br />
installation must corresponding to<br />
standard IEC 364-4-41 with<br />
protection class 1,for the actuator<br />
connections.<br />
c) The electric actuators don’t have<br />
an internal electrical power switch,<br />
following the instructions on the<br />
present manual.<br />
Installation and/or use not in<br />
accordance with directions and/or<br />
as laid down by law<br />
Non correct assembling, breaking of<br />
valve.<br />
Bad working of the plant, leakage of<br />
fluid.<br />
a) The installer and/or the user must<br />
take the necessary steps to<br />
comply with the rules as laid down<br />
by law and check the compatibility<br />
with the used fluids.<br />
b) Not applicable<br />
c) On the present manual is written<br />
at point 1.
7 – ANALISI DEI RISCHI 7 – HAZARDS ANALYSIS<br />
CAUSA<br />
Manutenzione della valvola con<br />
impianto in pressione<br />
CAUSE<br />
Maintenance of the valve with the<br />
plant under pressure<br />
EFFETTO Manutenzione non corretta EFFECT Incorrect maintenance.<br />
PERICOLO<br />
SOLUZIONE<br />
CAUSA<br />
Cattivo funzionamento dell’impianto,<br />
pericolo di proiezioni di particolari in<br />
pressione, pericolo di fuoriuscita del<br />
fluido<br />
a) Le attività di manutenzione<br />
devono essere effettuate con<br />
valvola intercettata.<br />
b) L’apparecchio deve essere privo<br />
di pressione idrostatica.<br />
c) L’apparecchio deve essere<br />
intercettato come prescritto nel<br />
manuale di uso e installazione.<br />
Ambiente esterno – carichi<br />
addizionali (vento e terremoto non<br />
applicabili)<br />
RISK<br />
SOLUTION<br />
CAUSE<br />
Bad working of the plant, danger of<br />
discharge of metallic parts, danger of<br />
leakage of fluid.<br />
a) The maintenance of the valve<br />
must be carried out with the<br />
equipment at atmospheric<br />
pressure.<br />
b) The valve must be without<br />
hydrostatic pressure.<br />
c) The fluids of the equipment must<br />
be intercepted.<br />
External environment – additional<br />
loads - (wind and earthquake not<br />
applicable)<br />
EFFETTO Deformazione, cedimento strutturale EFFECT Deformation, structural settling.<br />
PERICOLO<br />
Rottura o deformazione della valvola,<br />
fuoriuscita del fluido<br />
RISK<br />
Breaking or deformation of valve,<br />
leakage of fluid.<br />
SOLUZIONE<br />
a) Sostenere con appositi sostegni<br />
tutte le tubazioni di collegamento<br />
che gravano sulla valvola.<br />
b) I carichi sono indicati su richiesta<br />
del cliente dal ns. ufficio tecnico<br />
commerciale.<br />
c) Le strutture di sostegno i bulloni di<br />
fondazione e le fondazioni<br />
debbono essere idonee per tale<br />
carico.<br />
28<br />
SOLUTION<br />
a) Suitable support must be given to<br />
all pipework to stop any stress on<br />
valve.<br />
b) Loads are shown on request by<br />
our technical-commercial bureau.<br />
c) The foundations, bolts and<br />
pipework supports must be<br />
capable of supporting the weight<br />
of the valve.
8 – MANUALI ACCESSORI COLLEGATI 8 – REFERING ACCESSORIES MANUALS<br />
- Manuale di installazione – Istruzioni supplementari<br />
per ATEX 94/9/CE<br />
- Manuale di installazione e manutenzione valvole<br />
serie “antirumore” N° M/UNIWORLDLOWNOISE/I/E<br />
8.1 – MANUALI ACCESSORI PER VALVOLE<br />
PNEUMATICHE<br />
- Manuale Posizionatore pneumatico ed<br />
elettropneumatico N° M/PPL/EPL/I/E<br />
- Manuale Posizionatore elettropneumatico digitale<br />
N° M/SEL/I/E<br />
- Manuale Posizionatore SMART digitale N°<br />
M/SSL/I/E<br />
- Installation manual - supplementary instruction for<br />
ATEX 94/9/CE<br />
- “Low-noise” series installation and maintenance<br />
manual N° M/UNIWORLDLOWNOISE/I/E<br />
8.1 – ACCESSORIES MANUALS FOR PNEUMATIC<br />
VALVES<br />
- Pneumatic and electropneumatic pilot positioner<br />
Manual N° M/PPL/EPL/I/E<br />
- Electropneumatic digital pilot positioner<br />
Manual N° M/SEL/I/E<br />
- SMART digital pilot positioner<br />
Manual N° M/SSL/I/E<br />
- Manuale Filtro riduttore Serie AFR N° MAFR/I/E - Air filter regulator manual AFR Series N° MAFR/I/E<br />
- Manuale Convertitore elettropneumatico digitale N°<br />
M/IPC/I/E<br />
8.2 – MANUALI ACCESSORI PER VALVOLE<br />
MOTORIZZATE<br />
- Manuale Potenziometro<br />
N° M/POTENZIOMETRO/I/E<br />
- Electropneumatic digital converter manual N°<br />
M/IPC/I/E<br />
8.2 – ACCESSORIES MANUALS FOR ELECTRIC<br />
POWERED VALVES<br />
- Potentiometer manual<br />
N° M/POTENZIOMETRO/I/E<br />
- Manuale Posizionatore N° M/PASP/I/E - Positioner manual N° M/PASP/I/E<br />
- Manuale Trasmettitore di posizione<br />
N° M/PSPT02/I/E<br />
- Manuale Fine corsa meccanici<br />
N° M/FCEPSL/I/E<br />
- Manuale Attuatore intelligente “AMS”<br />
N° M/AMS/E<br />
Solo versione in Inglese<br />
- Scheda switches interni per attuatore AVF<br />
N° M/SWITCHESAVF/I/E<br />
29<br />
- Position transmitter manual<br />
N° M/PSPT02/I/E<br />
- Limit switches manual<br />
N° M/FCEPSL/I/E<br />
- Intelligent electric powered actuator “AMS” manual<br />
N° M/AMS/E<br />
- Internal switches datasheet for actuator AVF<br />
N° M/SWITCHESAVF/I/E
A. Descrizione Tipo / Description Type : 2000-2100-2200-2300-2400-2600-2700<br />
5000-5100-5200-5300-5400-5600-5700-5800<br />
Numero/i di matricola / Serial number/s : Vari / various<br />
riportato/i sulla targhetta identificatrice / marked on identification plate<br />
9.1 / modA / Vapore/Acqua surr./Acqua PS16 DN 15-200<br />
da DN 15 A DN 200 Massima pressione ammissibile / Max allowable pressure PS 16 bar<br />
materiale: ghisa EN-GJL-250 UNI EN 1561 / material: cast iron EN-GJL-250 UNI EN 1561<br />
(1) materiale: ghisa sferoidale GGG 40.3 UNI EN 1563 / material: SG iron GGG 40.3 UNI EN 1563<br />
(1) Valido solo per Tipo 2600 – 2700 / Valid only for type 2600 -2700<br />
B. Fluido Gruppo 2 Articolo 3, punto 1.3 lettera a) e (b), secondo trattino<br />
Group of fluid 2 Article 3, Section 1.3 (a) and (b), second indent<br />
C. Procedure di valutazione di conformità utilizzata :<br />
Conformity Assessment procedures followed :<br />
MODULO A (rif. Allegati II e III della Direttiva 97/23/CE)<br />
Module A (ref. PED 97/237/CE, annex II and III)<br />
Per quanto esposto si dichiara che gli apparecchi descritti ai punti A e B verificati in accordo al punto C, soddisfano i requisiti<br />
essenziali di sicurezza previsti nell’allegato I della Direttiva 97/23/CE e ad essa applicabili.<br />
We declare that the equipments mentioned on above point A and B, verified according to point C, are conformed to the most essential<br />
safety requirements as required by Directive 97/23/CE annex I.<br />
Le sopracitate apparecchiature sono conformi alla<br />
Direttiva macchine N° 98/37/CEE<br />
The above mention products are conformed to Machinery Directive N° 98/37/CEE<br />
Gli eventuali accessori e/o varianti di attuatore sono conformi alle seguenti Direttive:<br />
Eventually accessories and actuator variations are conformed to following Directive:<br />
Attuatori elettrici serie PSL …- AVF... 89/336/EEC - 73/23/EEC<br />
Electric powered actuator PSL - AVF series …<br />
Posizionatore elettropneumatico Tipo EPL – SEL – SSL 89/336/EEC<br />
Electropnaumatic Pilot Positioner Type EPL – SEL - SSL<br />
Posizionatore elettropneumatico Tipo EPL-EX Ex ia IIB T6<br />
Electropnaumatic Pilot Positioner Type EPL-EX<br />
Posizionatore pneumatico Tipo EPL-EXD Ex md IIB T6 ATEX 94/9/CE<br />
Pneumatic Pilot Positioner Type EPL-EXD<br />
Convertitore elettropneumatico Tipo IPC 89/336/EEC, 98/37/CE<br />
Electropneumatic Converter Type IPC<br />
Filtro riduttore Tipo AFR35 e AFR 80 98/37/CE<br />
Air filter regulator Type AFR 35 and AFR 80<br />
Via Lecco 69/71<br />
20041 AGRATE BRIANZA (MI) - ITALY<br />
DICHIARAZIONE DI CONFORMITA’<br />
AI SENSI DELL’ALLEGATO VII DIRETTIVA EUROPEA “PED” N° 97/23/CE<br />
Declaration of conformity according to PED DIRECTIVE N° 97/23/CE annex VII<br />
Sensore induttivo Tipo FCE/I2 – FCE/I4 CE CEE 89/336/EEC, DIN EN 50032 IP 68 IEC 68-2-14,<br />
approvato “US SAFETY SYSTEM” (UL)<br />
Inductive proximity switches Type FCE/I2 – FCE/I4<br />
Elettrovalvole Tipo EV3 24V CC - 24V – 110V – 220V 50/60 Hz 89/392/EEC Annex II B<br />
Solenoid valves Type EV3 24V CC – 24V – 110V – 220V 50/60 Hz<br />
CERTIFICATO DI CONFORMITA’. I prodotti sono stati verificati e ispezionati rispetto al nostro Sistema Controllo Qualita' UNI<br />
EN ISO 9001. Noi certifichiamo che questo prodotto corrisponde alla Vostra richiesta e che le sue caratteristiche sono in<br />
conformita' con le nostre specifiche tecniche.<br />
CERTIFICATE OF CONFORMITY This product has been manufactured, tested and inspected in accordance with our Quality Assurance<br />
System UNI EN ISO 9001. We certify that it contents correspond to the order placed and its performance is in conformance with our<br />
technical specifications.<br />
Data di rilascio 21/03/06<br />
Date of Issue
A. Descrizione Tipo / Description Type : 2000-2100-2200-2300-2400-2600-2700<br />
5000-5100-5200-5300-5400-5600-5700-5800<br />
Numero/i di matricola / Serial number/s : Vari / various<br />
riportato/i sulla targhetta identificatrice / marked on identification plate<br />
9.2 / modA / Vapore/Acqua Surr./Acqua PS40 DN 15-100<br />
da DN 15 A DN 100 Massima pressione ammissibile / Max allowable pressure PS 40 bar<br />
materiale: ACCIAIO CARBONIO 1.0619 – ASTM A 216 WCB – Acc. Inox CF8M 1.4408<br />
materials: carbon steel 1.0619 – ASTM A 216 WCB – Steinless steel CF8M 1.4408<br />
B. Fluido Gruppo 2 Articolo 3, punto 1.3 lettera a) e (b), secondo trattino<br />
Group of fluid 2 Article 3, Section 1.3 (a) and (b), second indent<br />
C. Procedure di valutazione di conformità utilizzata :<br />
Conformity Assessment procedures followed :<br />
MODULO A (rif. Allegati II e III della Direttiva 97/23/CE)<br />
Module A (ref. PED 97/237/CE, annex II and III)<br />
Per quanto esposto si dichiara che gli apparecchi descritti ai punti A e B verificati in accordo al punto C, soddisfano i requisiti<br />
essenziali di sicurezza previsti nell’allegato I della Direttiva 97/23/CE e ad essa applicabili.<br />
We declare that the equipments mentioned on above point A and B, verified according to point C, are conformed to the most essential<br />
safety requirements as required by Directive 97/23/CE annex I.<br />
Le sopracitate apparecchiature sono conformi alla<br />
Direttiva macchine N° 98/37/CEE<br />
The above mention products are conformed to Machinery Directive N° 98/37/CEE<br />
Gli eventuali accessori e/o varianti di attuatore sono conformi alle seguenti Direttive:<br />
Eventually accessories and actuator variations are conformed to following Directive:<br />
Attuatori elettrici serie PSL … - AVF... 89/336/EEC - 73/23/EEC<br />
Electric powered actuator PSL - AVF series …<br />
Posizionatore elettropneumatico Tipo EPL – SEL – SSL 89/336/EEC<br />
Electropnaumatic Pilot Positioner Type EPL – SEL - SSL<br />
Posizionatore elettropneumatico Tipo EPL-EX Ex ia IIB T6<br />
Electropnaumatic Pilot Positioner Type EPL-EX<br />
Posizionatore pneumatico Tipo EPL-EXD Ex md IIB T6 ATEX 94/9/CE<br />
Pneumatic Pilot Positioner Type EPL-EXD<br />
Convertitore elettropneumatico Tipo IPC 89/336/EEC, 98/37/CE<br />
Electropneumatic Converter Type IPC<br />
Filtro riduttore Tipo AFR35 e AFR 80 98/37/CE<br />
Air filter regulator Type AFR 35 and AFR 80<br />
Via Lecco 69/71<br />
20041 AGRATE BRIANZA (MI) - ITALY<br />
DICHIARAZIONE DI CONFORMITA’<br />
AI SENSI DELL’ALLEGATO VII DIRETTIVA EUROPEA “PED” N° 97/23/CE<br />
Declaration of conformity according to PED DIRECTIVE N° 97/23/CE annex VII<br />
Sensore induttivo Tipo FCE/I2 – FCE/I4 CE CEE 89/336/EEC, DIN EN 50032 IP 68 IEC 68-2-14,<br />
approvato “US SAFETY SYSTEM” (UL)<br />
Inductive proximity switches Type FCE/I2 – FCE/I4<br />
Elettrovalvole Tipo EV3 24V CC - 24V – 110V – 220V 50/60 Hz 89/392/EEC Annex II B<br />
Solenoid valves Type EV3 24V CC – 24V – 110V – 220V 50/60 Hz<br />
CERTIFICATO DI CONFORMITA’. I prodotti sono stati verificati e ispezionati rispetto al nostro Sistema Controllo Qualita' UNI<br />
EN ISO 9001. Noi certifichiamo che questo prodotto corrisponde alla Vostra richiesta e che le sue caratteristiche sono in<br />
conformita' con le nostre specifiche tecniche.<br />
CERTIFICATE OF CONFORMITY This product has been manufactured, tested and inspected in accordance with our Quality Assurance<br />
System UNI EN ISO 9001. We certify that it contents correspond to the order placed and its performance is in conformance with our<br />
technical specifications.<br />
Data di rilascio 21/03/06<br />
Date of Issue
A. Descrizione / Description : Valvole Tipo 2000-2100-2600-2700-5000-5100-5600-5700-5800<br />
Numero/i di matricola / Serial number/s : Vari / various<br />
riportato/i sulla targhetta identificatrice / marked on identification plate<br />
9.3 / Art.3 / Olio Diat. PS16 Acciaio DN 15-125<br />
da DN 15 A DN 125 Massima pressione ammissibile / Max allowable pressure PS 16 bar<br />
materiale Acciaio Carbonio 1.0619 – ASTM A 216 WCB – Acc. Inox CF8M 1.4408<br />
materials: carbon steel 1.0619 – ASTM A 216 WCB – stainless steel CF8M 1.4408<br />
B. Fluido Gruppo 1 Articolo 3, punto 1.3 lettera b), primo trattino<br />
Group of fluid 1 Article 3, Section 1.3 (b), first indent<br />
C. Procedure di valutazione di conformità utilizzata :<br />
Conformity Assessment procedures followed :<br />
Art. 3 Par. 3<br />
Art. 3 Par. 3<br />
Per quanto esposto si dichiara che gli apparecchi descritti ai punti A e B verificati in accordo al punto C, soddisfano i requisiti<br />
essenziali di sicurezza previsti nell’allegato I della Direttiva 97/23/CE e ad essa applicabili.<br />
We declare that the equipments mentioned on above point A and B, verified according to point C, are conformed to the most essential<br />
safety requirements as required by Directive 97/23/CE annex I.<br />
Le sopracitate apparecchiature sono conformi alla<br />
Direttiva macchine N° 98/37/CEE<br />
The above mention products are conformed to Machinery Directive N° 98/37/CEE<br />
Gli eventuali accessori e/o varianti di attuatore sono conformi alle seguenti Direttive:<br />
Eventually accessories and actuator variations are conformed to following Directive:<br />
Attuatori elettrici serie PSL … - AVF... 89/336/EEC - 73/23/EEC<br />
Electric powered actuator PSL - AVF... series …<br />
Posizionatore elettropneumatico Tipo EPL – SEL – SSL 89/336/EEC<br />
Electropnaumatic Pilot Positioner Type EPL – SEL - SSL<br />
Posizionatore elettropneumatico Tipo EPL-EX Ex ia IIB T6<br />
Electropnaumatic Pilot Positioner Type EPL-EX<br />
Posizionatore pneumatico Tipo EPL-EXD Ex md IIB T6 ATEX 94/9/CE<br />
Pneumatic Pilot Positioner Type EPL-EXD<br />
Convertitore elettropneumatico Tipo IPC 89/336/EEC, 98/37/CE<br />
Electropneumatic Converter Type IPC<br />
Filtro riduttore Tipo AFR35 e AFR 80 98/37/CE<br />
Air filter regulator Type AFR 35 and AFR 80<br />
Via Lecco 69/71<br />
20041 AGRATE BRIANZA (MI) - ITALY<br />
DICHIARAZIONE DI CONFORMITA’<br />
AI SENSI DELL’ALLEGATO VII DIRETTIVA EUROPEA “PED” N° 97/23/CE<br />
Declaration of conformity according to PED DIRECTIVE N° 97/23/CE annex VII<br />
Sensore induttivo Tipo FCE/I2 – FCE/I4 CE CEE 89/336/EEC, DIN EN 50032 IP 68 IEC 68-2-14,<br />
approvato “US SAFETY SYSTEM” (UL)<br />
Inductive proximity switches Type FCE/I2 – FCE/I4<br />
Elettrovalvole Tipo EV3 24V CC - 24V – 110V – 220V 50/60 Hz 89/392/EEC Annex II B<br />
Solenoid valves Type EV3 24V CC – 24V – 110V – 220V 50/60 Hz<br />
CERTIFICATO DI CONFORMITA’. I prodotti sono stati verificati e ispezionati rispetto al nostro Sistema Controllo Qualita' UNI<br />
EN ISO 9001. Noi certifichiamo che questo prodotto corrisponde alla Vostra richiesta e che le sue caratteristiche sono in<br />
conformita' con le nostre specifiche tecniche.<br />
CERTIFICATE OF CONFORMITY This product has been manufactured, tested and inspected in accordance with our Quality Assurance<br />
System UNI EN ISO 9001. We certify that it contents correspond to the order placed and its performance is in conformance with our<br />
technical specifications.<br />
Data di rilascio 21/03/06<br />
Date of Issue
A. Descrizione / Description : Valvole Tipo 5000-5600-5700-5800<br />
Numero/i di matricola / Serial number/s : Vari / various<br />
riportato/i sulla targhetta identificatrice / marked on identification plate<br />
da DN 150 - 200 Massima pressione ammissibile / Max allowable pressure PS 10 bar<br />
materiale Acciaio Carbonio 1.0619 – ASTM A 216 WCB – Acc. Inox CF8M 1.4408<br />
materials: carbon steel 1.0619 – ASTM A 216 WCB – stainless steel CF8M 1.4408<br />
B. Fluido Gruppo 1 Articolo 3, punto 1.3 lettera b), primo trattino<br />
Group of fluid 1 Article 3, Section 1.3 (b), first indent<br />
C. Procedure di valutazione di conformità utilizzata :<br />
Conformity Assessment procedures followed :<br />
Art. 3 Par. 3<br />
Art. 3 Par. 3<br />
9.4 / Art.3 / Olio Diat. PS10 Acciaio DN 150-200<br />
Per quanto esposto si dichiara che gli apparecchi descritti ai punti A e B verificati in accordo al punto C, soddisfano i requisiti<br />
essenziali di sicurezza previsti nell’allegato I della Direttiva 97/23/CE e ad essa applicabili.<br />
We declare that the equipments mentioned on above point A and B, verified according to point C, are conformed to the most essential<br />
safety requirements as required by Directive 97/23/CE annex I.<br />
Le sopracitate apparecchiature sono conformi alla<br />
Direttiva macchine N° 98/37/CEE<br />
The above mention products are conformed to Machinery Directive N° 98/37/CEE<br />
Gli eventuali accessori e/o varianti di attuatore sono conformi alle seguenti Direttive:<br />
Eventually accessories and actuator variations are conformed to following Directive:<br />
Attuatori elettrici serie PSL … - AVF... 89/336/EEC - 73/23/EEC<br />
Electric powered actuator PSL - AVF series …<br />
Posizionatore elettropneumatico Tipo EPL – SEL – SSL 89/336/EEC<br />
Electropnaumatic Pilot Positioner Type EPL – SEL - SSL<br />
Posizionatore elettropneumatico Tipo EPL-EX Ex ia IIB T6<br />
Electropnaumatic Pilot Positioner Type EPL-EX<br />
Posizionatore pneumatico Tipo EPL-EXD Ex md IIB T6 ATEX 94/9/CE<br />
Pneumatic Pilot Positioner Type EPL-EXD<br />
Convertitore elettropneumatico Tipo IPC 89/336/EEC, 98/37/CE<br />
Electropneumatic Converter Type IPC<br />
Filtro riduttore Tipo AFR35 e AFR 80 98/37/CE<br />
Air filter regulator Type AFR 35 and AFR 80<br />
Via Lecco 69/71<br />
20041 AGRATE BRIANZA (MI) - ITALY<br />
DICHIARAZIONE DI CONFORMITA’<br />
AI SENSI DELL’ALLEGATO VII DIRETTIVA EUROPEA “PED” N° 97/23/CE<br />
Declaration of conformity according to PED DIRECTIVE N° 97/23/CE annex VII<br />
Sensore induttivo Tipo FCE/I2 – FCE/I4 CE CEE 89/336/EEC, DIN EN 50032 IP 68 IEC 68-2-14,<br />
approvato “US SAFETY SYSTEM” (UL)<br />
Inductive proximity switches Type FCE/I2 – FCE/I4<br />
Elettrovalvole Tipo EV3 24V CC - 24V – 110V – 220V 50/60 Hz 89/392/EEC Annex II B<br />
Solenoid valves Type EV3 24V CC – 24V – 110V – 220V 50/60 Hz<br />
CERTIFICATO DI CONFORMITA’. I prodotti sono stati verificati e ispezionati rispetto al nostro Sistema Controllo Qualita' UNI<br />
EN ISO 9001. Noi certifichiamo che questo prodotto corrisponde alla Vostra richiesta e che le sue caratteristiche sono in<br />
conformita' con le nostre specifiche tecniche.<br />
CERTIFICATE OF CONFORMITY This product has been manufactured, tested and inspected in accordance with our Quality Assurance<br />
System UNI EN ISO 9001. We certify that it contents correspond to the order placed and its performance is in conformance with our<br />
technical specifications.<br />
Data di rilascio 21/03/06<br />
Date of Issue
A. Descrizione / Description : Valvole Tipo 2000-2100-2600-2700-5000-5100-5600-5700-5800<br />
Numero/i di matricola / Serial number/s : Vari / various<br />
riportato/i sulla targhetta identificatrice / marked on identification plate<br />
9.5 / Art.3 / Olio Diat. PS16 Ghisa DN 15-150<br />
da DN 15 A DN 150 Massima pressione ammissibile / Max allowable pressure PS 16 bar<br />
materiale: GHISA EN-GJL-250 UNI EN 1561 / material: cast iron EN-GJL-250 UNI EN 1561<br />
(1) materiale: ghisa sferoidale GGG 40.3 UNI EN 1563 / material: SG iron GGG 40.3 UNI EN 1563<br />
(1) Valido solo per Tipo 2600 – 2700 / Valid only for type 2600 -2700<br />
B. Fluido Gruppo 1 Articolo 3, punto 1.3 lettera b), primo trattino<br />
Group of fluid 1 Article 3, Section 1.3 (b), first indent<br />
C. Procedure di valutazione di conformità utilizzata :<br />
Conformity Assessment procedures followed :<br />
Art. 3 Par. 3<br />
Art. 3 Par. 3<br />
Per quanto esposto si dichiara che gli apparecchi descritti ai punti A e B verificati in accordo al punto C, soddisfano i requisiti<br />
essenziali di sicurezza previsti nell’allegato I della Direttiva 97/23/CE e ad essa applicabili.<br />
We declare that the equipments mentioned on above point A and B, verified according to point C, are conformed to the most essential<br />
safety requirements as required by Directive 97/23/CE annex I.<br />
Le sopracitate apparecchiature sono conformi alla<br />
Direttiva macchine N° 98/37/CEE<br />
The above mention products are conformed to Machinery Directive N° 98/37/CEE<br />
Gli eventuali accessori e/o varianti di attuatore sono conformi alle seguenti Direttive:<br />
Eventually accessories and actuator variations are conformed to following Directive:<br />
Attuatori elettrici serie PSL …- AVF... 89/336/EEC - 73/23/EEC<br />
Electric powered actuator PSL - AVF series …<br />
Posizionatore elettropneumatico Tipo EPL – SEL – SSL 89/336/EEC<br />
Electropnaumatic Pilot Positioner Type EPL – SEL - SSL<br />
Posizionatore elettropneumatico Tipo EPL-EX Ex ia IIB T6<br />
Electropnaumatic Pilot Positioner Type EPL-EX<br />
Posizionatore pneumatico Tipo EPL-EXD Ex md IIB T6 ATEX 94/9/CE<br />
Pneumatic Pilot Positioner Type EPL-EXD<br />
Convertitore elettropneumatico Tipo IPC 89/336/EEC, 98/37/CE<br />
Electropneumatic Converter Type IPC<br />
Filtro riduttore Tipo AFR35 e AFR 80 98/37/CE<br />
Air filter regulator Type AFR 35 and AFR 80<br />
Via Lecco 69/71<br />
20041 AGRATE BRIANZA (MI) - ITALY<br />
DICHIARAZIONE DI CONFORMITA’<br />
AI SENSI DELL’ALLEGATO VII DIRETTIVA EUROPEA “PED” N° 97/23/CE<br />
Declaration of conformity according to PED DIRECTIVE N° 97/23/CE annex VII<br />
Sensore induttivo Tipo FCE/I2 – FCE/I4 CE CEE 89/336/EEC, DIN EN 50032 IP 68 IEC 68-2-14,<br />
approvato “US SAFETY SYSTEM” (UL)<br />
Inductive proximity switches Type FCE/I2 – FCE/I4<br />
Elettrovalvole Tipo EV3 24V CC - 24V – 110V – 220V 50/60 Hz 89/392/EEC Annex II B<br />
Solenoid valves Type EV3 24V CC – 24V – 110V – 220V 50/60 Hz<br />
CERTIFICATO DI CONFORMITA’. I prodotti sono stati verificati e ispezionati rispetto al nostro Sistema Controllo Qualita' UNI EN ISO<br />
9001. Noi certifichiamo che questo prodotto corrisponde alla Vostra richiesta e che le sue caratteristiche sono in conformita' con le<br />
nostre specifiche tecniche.<br />
CERTIFICATE OF CONFORMITY This product has been manufactured, tested and inspected in accordance with our Quality Assurance<br />
System UNI EN ISO 9001. We certify that it contents correspond to the order placed and its performance is in conformance with our<br />
technical specifications.<br />
Data di rilascio 21/03/06<br />
Date of Issue
A. Descrizione / Description : Valvole Tipo 5000-5600-5700-5800<br />
Numero/i di matricola / Serial number/s : Vari / various<br />
riportato/i sulla targhetta identificatrice / marked on identification plate<br />
9.6 / Art.3 / Olio diat. PS10 Ghisa DN 200<br />
da DN 200 Massima pressione ammissibile / Max allowable pressure PS 10 bar<br />
materiale: GHISA EN-GJL-250 UNI EN 1561 / material: cast iron EN-GJL-250 UNI EN 1561<br />
materiale : ACCIAIO CARBONIO 1.0619 – ASTM A 216 WCB – ACC. INOX CF8M 1.4408<br />
materials : Carbon steel 1.0619 – ASTM A 216 WCB – Stainless steel CF8M 1.4408<br />
B. Fluido Gruppo 1 Articolo 3, punto 1.3 lettera b), primo trattino<br />
Group of fluid 1 Article 3, Section 1.3 (b), first indent<br />
C. Procedure di valutazione di conformità utilizzata :<br />
Conformity Assessment procedures followed :<br />
Art. 3 Par. 3<br />
Art. 3 Par. 3<br />
Per quanto esposto si dichiara che gli apparecchi descritti ai punti A e B verificati in accordo al punto C, soddisfano i requisiti<br />
essenziali di sicurezza previsti nell’allegato I della Direttiva 97/23/CE e ad essa applicabili.<br />
We declare that the equipments mentioned on above point A and B, verified according to point C, are conformed to the most essential<br />
safety requirements as required by Directive 97/23/CE annex I.<br />
Le sopracitate apparecchiature sono conformi alla<br />
Direttiva macchine N° 98/37/CEE<br />
The above mention products are conformed to Machinery Directive N° 98/37/CEE<br />
Gli eventuali accessori e/o varianti di attuatore sono conformi alle seguenti Direttive:<br />
Eventually accessories and actuator variations are conformed to following Directive:<br />
Attuatori elettrici serie PSL … - AVF ... 89/336/EEC - 73/23/EEC<br />
Electric powered actuator PSL - AVF series …<br />
Posizionatore elettropneumatico Tipo EPL – SEL – SSL 89/336/EEC<br />
Electropnaumatic Pilot Positioner Type EPL – SEL - SSL<br />
Posizionatore elettropneumatico Tipo EPL-EX Ex ia IIB T6<br />
Electropnaumatic Pilot Positioner Type EPL-EX<br />
Posizionatore pneumatico Tipo EPL-EXD Ex md IIB T6 ATEX 94/9/CE<br />
Pneumatic Pilot Positioner Type EPL-EXD<br />
Convertitore elettropneumatico Tipo IPC 89/336/EEC, 98/37/CE<br />
Electropneumatic Converter Type IPC<br />
Filtro riduttore Tipo AFR35 e AFR 80 98/37/CE<br />
Air filter regulator Type AFR 35 and AFR 80<br />
Via Lecco 69/71<br />
20041 AGRATE BRIANZA (MI) - ITALY<br />
DICHIARAZIONE DI CONFORMITA’<br />
AI SENSI DELL’ALLEGATO VII DIRETTIVA EUROPEA “PED” N° 97/23/CE<br />
Declaration of conformity according to PED DIRECTIVE N° 97/23/CE annex VII<br />
Sensore induttivo Tipo FCE/I2 – FCE/I4 CE CEE 89/336/EEC, DIN EN 50032 IP 68 IEC 68-2-14,<br />
approvato “US SAFETY SYSTEM” (UL)<br />
Inductive proximity switches Type FCE/I2 – FCE/I4<br />
Elettrovalvole Tipo EV3 24V CC - 24V – 110V – 220V 50/60 Hz 89/392/EEC Annex II B<br />
Solenoid valves Type EV3 24V CC – 24V – 110V – 220V 50/60 Hz<br />
CERTIFICATO DI CONFORMITA’. I prodotti sono stati verificati e ispezionati rispetto al nostro Sistema Controllo Qualita' UNI<br />
EN ISO 9001. Noi certifichiamo che questo prodotto corrisponde alla Vostra richiesta e che le sue caratteristiche sono in<br />
conformita' con le nostre specifiche tecniche.<br />
CERTIFICATE OF CONFORMITY This product has been manufactured, tested and inspected in accordance with our Quality Assurance<br />
System UNI EN ISO 9001. We certify that it contents correspond to the order placed and its performance is in conformance with our<br />
technical specifications.<br />
Data di rilascio 21/03/06<br />
Date of Issue
Via Lecco 69/71<br />
20041 AGRATE BRIANZA (MI) - ITALY<br />
9.7 / modA1 / Gruppo 1 – Art. 3 – Punto 1.3 – lettera a) primo trattino/gas<br />
DICHIARAZIONE DI CONFORMITA’<br />
AI SENSI DELL’ALLEGATO VII DIRETTIVA EUROPEA “PED” N° 97/23/CE<br />
Declaration of conformity according to PED DIRECTIVE N° 97/23/CE annex VII<br />
A. Descrizione Tipo / Description Type :2000-2100-2200-2300-2400-2600-2700<br />
5000-5100-5200-5300-5400-5600-5700-5800<br />
Numero/i di matricola / Serial number/s : Vari / various<br />
riportato/i sulla targhetta identificatrice / marked on identification plate<br />
A1. da DN 15 a DN 200 Max pressione ammissibile / Max allowable pressure PN 16<br />
materiale: ghisa EN-GJL-250 UNI EN 1561 / material: cast iron EN-GJL-250 UNI EN 1561<br />
A2. da DN 65 a DN 125 Max pressione ammissibile / Max allowable pressure PN 20 (ANSI 150)<br />
materiale: acc. carb. ASTM A 216 WCB – ACC. INOX CF8M 1.4408<br />
material: carbon steel ASTM A216 WCB – Stainless Steel CF8M 1.4408<br />
A3. da DN 32 a DN 100 Max pressione ammissibile / Max allowable pressure PN 40<br />
materiale: acc. carb. 1.0619 – ASTM A 216 WCB – ACC. INOX CF8M 1.4408<br />
material: carbon steel 1.0619 – ASTM A216 WCB – Stainless Steel CF8M 1.4408<br />
A4. da DN 32 a DN 100 Max pressione ammissibile / Max allowable pressure PN 50 (ANSI 300)<br />
materiale: acc. carb. ASTM A 216 WCB – ACC. INOX CF8M 1.4408<br />
material: carbon steel ASTM A216 WCB – Stainless Steel CF8M 1.4408<br />
B. Fluido Gruppo 1 Articolo 3, punto 1.3 lettera a), primo trattino<br />
Group of fluid 1 Article 3, Section 1.3 a), fisrt indent<br />
C. Procedure di valutazione di conformità utilizzata - Conformity Assessment procedures followed :<br />
MODULO A1 – CAT. II - Module A1- CAT. II<br />
Il monitoraggio è eseguito da DNV - MODULO UNO s.c.a.r.l. – Organismo Notificato con num. 0496<br />
Monitoring by DNV – MODULO UNO s.c.a.r.l. - Notified body num. 0496<br />
Le sopracitate apparecchiature sono conformi alla Direttiva macchine N° 98/37/CEE<br />
The above mention products are conformed to Machinery Directive N° 98/37/CEE<br />
Gli eventuali accessori e/o varianti di attuatore sono conformi alle seguenti Direttive:<br />
Eventually accessories and actuator variations are conformed to following Directive:<br />
Attuatori elettrici serie PSL …- AVF... 89/336/EEC - 73/23/EEC Electric powered actuator PSL-AVF series<br />
Posizionatore elettropneumatico Tipo EPL – SEL – SSL 89/336/EEC<br />
Electropneumatic Pilot Positioner Type EPL – SEL - SSL<br />
Posizionatore elettropneumatico Tipo EPL-EX Ex ia IIB T6 Electropnaumatic Pilot Positioner Type EPL-EX<br />
Posizionatore pneumatico Tipo EPL-EXD Ex md IIB T6 Pneumatic Pilot Positioner Type EPL-EXD ATEX 94/9/CE<br />
Convertitore elettropneumatico Tipo IPC 89/336/EEC, 98/37/CE Electropneumatic Converter Type IPC<br />
Filtro riduttore Tipo AFR35 e AFR 80 98/37/CE Air filter regulator Type AFR 35 and AFR 80<br />
Sensore induttivo Tipo FCE/I2 – FCE/I4 CE CEE 89/336/EEC, DIN EN 50032 IP 68 IEC 68-2-14,<br />
approvato “US SAFETY SYSTEM” (UL) Inductive proximity switches Type FCE/I2 – FCE/I4<br />
Elettrovalvole Tipo EV3 24V CC - 24V – 110V – 220V 50/60 Hz 89/392/EEC Annex II B<br />
Solenoid valves Type EV3 24V CC – 24V – 110V – 220V 50/60 Hz<br />
CERTIFICATO DI CONFORMITA’. I prodotti sono stati verificati e ispezionati rispetto al nostro Sistema Controllo Qualita' UNI<br />
EN ISO 9001. Noi certifichiamo che questo prodotto corrisponde alla Vostra richiesta e che le sue caratteristiche sono in<br />
conformita' con le nostre specifiche tecniche.<br />
CERTIFICATE OF CONFORMITY This product has been manufactured, tested and inspected in accordance with our Quality Assurance<br />
System UNI EN ISO 9001. We certify that it contents correspond to the order placed and its performance is in conformance with our<br />
technical specifications.<br />
Data di rilascio 21/03/06<br />
Date of Issue
9.8 / modA1 / Gruppo 2 – Art. 3 – Punto 1.3 – lettera a) secondo trattino/vapore<br />
Via Lecco 69/71<br />
20041 AGRATE BRIANZA (MI) - ITALY<br />
DICHIARAZIONE DI CONFORMITA’<br />
AI SENSI DELL’ALLEGATO VII DIRETTIVA EUROPEA “PED” N° 97/23/CE<br />
Declaration of conformity according to PED DIRECTIVE N° 97/23/CE annex VII<br />
A. Descrizione / Description : Valvole Tipo 5000-5100-5200-5300-5400-5600-5700-5800<br />
Numero/i di matricola / Serial number/s : Vari / various<br />
riportato/i sulla targhetta identificatrice / marked on identification plate<br />
A1. DN 250 Max pressione ammissibile / Max allowable pressure PN 16<br />
Materiale: ghisa EN-GJL-250 UNI EN 1561 / material: cast iron EN-GJL-250 UNI EN 1561<br />
A2. DN 200 Max pressione ammissibile / Max allowable pressure PN 20 (ANSI 150)<br />
Materiale: acc. carb. ASTM A 216 WCB – ACC. INOX CF8M 1.4408<br />
material: carbon steel ASTM A216 WCB – Stainless Steel CF8M 1.4408<br />
A3. da DN 125 a DN 200 Max pressione ammissibile / Max allowable pressure PN 40<br />
materiale: acc. carb. 1.0619 – ASTM A 216 WCB – ACC. INOX CF8M 1.4408<br />
material: carbon steel 1.0619 – ASTM A216 WCB – Stainless Steel CF8M 1.4408<br />
A4. da DN 125 a DN 200 Max pressione ammissibile / Max allowable pressure PN 50 (ANSI 300)<br />
materiale: acc. carb. ASTM A 216 WCB – ACC. INOX CF8M 1.4408<br />
material: carbon steel ASTM A216 WCB – Stainless Steel CF8M 1.4408<br />
B. Fluido Gruppo 2 Articolo 3, punto 1.3 lettera a), secondo trattino<br />
Group of fluid 2 Article 3, Section 1.3 a), second indent<br />
C. Procedure di valutazione di conformità utilizzata - Conformity Assessment procedures followed :<br />
MODULO A1 – CAT. II - Module A1- CAT. II<br />
Il monitoraggio è eseguito da DNV - MODULO UNO s.c.a.r.l.– Organismo Notificato con num. 0496<br />
Monitoring by DNV – MODULO UNO s.c.a.r.l. - Notified body num. 0496<br />
Le sopracitate apparecchiature sono conformi alla Direttiva macchine N° 98/37/CEE<br />
The above mention products are conformed to Machinery Directive N° 98/37/CEE<br />
Gli eventuali accessori e/o varianti di attuatore sono conformi alle seguenti Direttive:<br />
Eventually accessories and actuator variations are conformed to following Directive:<br />
Attuatori elettrici serie PSL …- AVF... 89/336/EEC - 73/23/EEC Electric powered actuator PSL-AVF series<br />
Posizionatore elettropneumatico Tipo EPL – SEL – SSL 89/336/EEC<br />
Electropneumatic Pilot Positioner Type EPL – SEL - SSL<br />
Posizionatore elettropneumatico Tipo EPL-EX Ex ia IIB T6 Electropnaumatic Pilot Positioner Type EPL-EX<br />
Posizionatore pneumatico Tipo EPL-EXD Ex md IIB T6 Pneumatic Pilot Positioner Type EPL-EXD 94/9/CE<br />
Convertitore elettropneumatico Tipo IPC 89/336/EEC, 98/37/CE Electropneumatic Converter Type IPC<br />
Filtro riduttore Tipo AFR35 e AFR 80 98/37/CE Air filter regulator Type AFR 35 and AFR 80<br />
Sensore induttivo Tipo FCE/I2 – FCE/I4 CE CEE 89/336/EEC, DIN EN 50032 IP 68 IEC 68-2-14,<br />
approvato “US SAFETY SYSTEM” (UL) Inductive proximity switches Type FCE/I2 – FCE/I4<br />
Elettrovalvole Tipo EV3 24V CC - 24V – 110V – 220V 50/60 Hz 89/392/EEC Annex II B<br />
Solenoid valves Type EV3 24V CC – 24V – 110V – 220V 50/60 Hz<br />
CERTIFICATO DI CONFORMITA’. I prodotti sono stati verificati e ispezionati rispetto al nostro Sistema Controllo Qualita' UNI<br />
EN ISO 9001. Noi certifichiamo che questo prodotto corrisponde alla Vostra richiesta e che le sue caratteristiche sono in<br />
conformita' con le nostre specifiche tecniche.<br />
CERTIFICATE OF CONFORMITY This product has been manufactured, tested and inspected in accordance with our Quality Assurance<br />
System UNI EN ISO 9001. We certify that it contents correspond to the order placed and its performance is in conformance with our<br />
technical specifications.<br />
Data di rilascio 21/03/06<br />
Date of Issue
Via Lecco 69/71<br />
20041 AGRATE BRIANZA (MI) - ITALY<br />
9.9 / modA1 / Gruppo 1 – Art. 3 – Punto 1.3 – lettera b) primo trattino/olio<br />
DICHIARAZIONE DI CONFORMITA’<br />
AI SENSI DELL’ALLEGATO VII DIRETTIVA EUROPEA “PED” N° 97/23/CE<br />
Declaration of conformity according to PED DIRECTIVE N° 97/23/CE annex VII<br />
A. Descrizione / Description : Valvole Tipo 2000-2100-2600-2700-5000-5100-5600-5700-5800<br />
Numero/i di matricola / Serial number/s : Vari / various<br />
riportato/i sulla targhetta identificatrice / marked on identification plate<br />
A1. Da DN 150 a DN 250 Max pressione ammissibile / Max allowable pressure PN 16<br />
Materiale: ghisa EN-GJL-250 UNI EN 1561 / material: cast iron EN-GJL-250 UNI EN 1561<br />
A2. Da DN 125 a DN 200 Max pressione ammissibile / Max allowable pressure PN 20 (ANSI 150)<br />
Materiale: acc. carb. ASTM A 216 WCB – ACC. INOX CF8M 1.4408<br />
material: carbon steel ASTM A216 WCB – Stainless Steel CF8M 1.4408<br />
A3. da DN 65 a DN 200 Max pressione ammissibile / Max allowable pressure PN 40<br />
materiale: acc. carb. 1.0619 – ASTM A 216 WCB – ACC. INOX CF8M 1.4408<br />
material: carbon steel 1.0619 – ASTM A216 WCB – Stainless Steel CF8M 1.4408<br />
A4. da DN 50 a DN 200 Max pressione ammissibile / Max allowable pressure PN 50 (ANSI 300)<br />
materiale: acc. carb. ASTM A 216 WCB – ACC. INOX CF8M 1.4408<br />
material: carbon steel ASTM A216 WCB – Stainless Steel CF8M 1.4408<br />
B. Fluido Gruppo 1 Articolo 3, punto 1.3 lettera b), primo trattino<br />
Group of fluid 1 Article 3, Section 1.3 b), first indent<br />
C. Procedure di valutazione di conformità utilizzata - Conformity Assessment procedures followed :<br />
MODULO A1 – CAT. II - Module A1- CAT. II<br />
Il monitoraggio è eseguito da DNV - MODULO UNO s.c.a.r.l. – Organismo Notificato con num. 0496<br />
Monitoring by DNV – MODULO UNO s.c.a.r.l. - Notified body num. 0496<br />
Le sopracitate apparecchiature sono conformi alla Direttiva macchine N° 98/37/CEE<br />
The above mention products are conformed to Machinery Directive N° 98/37/CEE<br />
Gli eventuali accessori e/o varianti di attuatore sono conformi alle seguenti Direttive:<br />
Eventually accessories and actuator variations are conformed to following Directive:<br />
Attuatori elettrici serie PSL …- AVF... 89/336/EEC - 73/23/EEC Electric powered actuator PSL-AVF series<br />
Posizionatore elettropneumatico Tipo EPL – SEL – SSL 89/336/EEC<br />
Electropneumatic Pilot Positioner Type EPL – SEL - SSL<br />
Posizionatore elettropneumatico Tipo EPL-EX Ex ia IIB T6 Electropnaumatic Pilot Positioner Type EPL-EX<br />
Posizionatore pneumatico Tipo EPL-EXD Ex md IIB T6 Pneumatic Pilot Positioner Type EPL-EXD ATEX 94/9/CE<br />
Convertitore elettropneumatico Tipo IPC 89/336/EEC, 98/37/CE Electropneumatic Converter Type IPC<br />
Filtro riduttore Tipo AFR35 e AFR 80 98/37/CE Air filter regulator Type AFR 35 and AFR 80<br />
Sensore induttivo Tipo FCE/I2 – FCE/I4 CE CEE 89/336/EEC, DIN EN 50032 IP 68 IEC 68-2-14,<br />
approvato “US SAFETY SYSTEM” (UL) Inductive proximity switches Type FCE/I2 – FCE/I4<br />
Elettrovalvole Tipo EV3 24V CC - 24V – 110V – 220V 50/60 Hz 89/392/EEC Annex II B<br />
Solenoid valves Type EV3 24V CC – 24V – 110V – 220V 50/60 Hz<br />
CERTIFICATO DI CONFORMITA’. I prodotti sono stati verificati e ispezionati rispetto al nostro Sistema Controllo Qualita' UNI<br />
EN ISO 9001. Noi certifichiamo che questo prodotto corrisponde alla Vostra richiesta e che le sue caratteristiche sono in<br />
conformita' con le nostre specifiche tecniche.<br />
CERTIFICATE OF CONFORMITY This product has been manufactured, tested and inspected in accordance with our Quality Assurance<br />
System UNI EN ISO 9001. We certify that it contents correspond to the order placed and its performance is in conformance with our<br />
technical specifications.<br />
Data di rilascio 21/03/06<br />
Date of Issue
Servizio Assistenza - Servicing Department<br />
e-mail servicing@conflow.it<br />
Via Lecco, 69/71<br />
20041 AGRATE BRIANZA (Milano) - ITALY<br />
telefono - phone : ++39 - (0)39 - 651705 / 650397<br />
fax : ++39 - (0)39 - 654018


