Polaris 2 - Peg Perego Official Website
Polaris 2 - Peg Perego Official Website
Polaris 2 - Peg Perego Official Website

You also want an ePaper? Increase the reach of your titles
YUMPU automatically turns print PDFs into web optimized ePapers that Google loves.
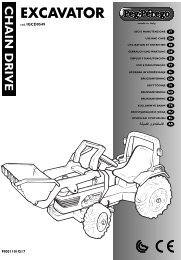
ASSEMBLY INSTRUCTIONS<br />
WARNING<br />
ASSEMBLY MUST ONLY BE CARRIED OUT BY<br />
ADULTS. TAKE CARE WHEN REMOVING THE<br />
VEHICLE FROM ITS PACKAGING. ALL THE<br />
SCREWS AND SMALL PARTS ARE CONTAINED IN<br />
A BAG INSIDE THE PACKAGING. THE BATTERY<br />
MAY ALREADY BE FITTED INSIDE THE ITEM.<br />
ASSEMBLY<br />
1 Remove the 4 fixing screws from the two seat<br />
base sections.<br />
2 Pull out and remove the two seat bases.<br />
3 Remove the fixing screws from the two rear<br />
base fixtures.<br />
4 Remove the two rear base locks.<br />
5 Pull the base in the direction of the arrow to<br />
fully remove the motor unit.<br />
6 Reposition and screw on both rear base locks.<br />
7 Lift the two shock absorbers (1). Insert them<br />
into the holes in the bodywork (2).<br />
8 Attach the shock absorbers to the bodywork<br />
with the two pins (one each side). Note: the<br />
packaging contains two spare pins.<br />
9 Insert the exhaust pipe as shown in the figure.<br />
10 Attach the exhaust pipe with the screw<br />
provided.<br />
11 Position the rear box.<br />
12 Insert the tabs on the front of the rear box into<br />
the bodywork (two each side).<br />
13 Fully insert the two metal tubes (one each side)<br />
as shown in the figure.<br />
14 Attach the rear box with the three screws<br />
provided. Important: the middle screw must be<br />
tightened as shown in the following figure.<br />
15 Press the pin to help align the screw holes.<br />
16 Before fitting the side supports, check the picture<br />
to make sure they match the grilles properly.<br />
17 Hook the lower ring of the support onto the<br />
grille, as shown in the figure.<br />
18 Complete the attachment process by fitting the<br />
upper ring. Make sure the front part of the grille<br />
is inserted properly.<br />
19 Picture A shows the front part of the grille when<br />
it is not yet fitted correctly. Picture B shows the<br />
grille fitted correctly.<br />
20 Insert the side guards as shown in the figure,<br />
taking care to fit the parts with the grid<br />
extending towards the outside. Complete the<br />
attachment by pushing the guards forward until<br />
they click into position.<br />
21 Pull out the side panels of the bodywork (1) and<br />
insert the side guard clips (2).<br />
22 Line up the inserts in the two side panels with<br />
the matching holes in the bodywork, as shown in<br />
the figure.<br />
23 Press the side panels of the bodywork at the two<br />
points shown in the figure to fix them in place.<br />
24 Secure the upper profiles of the cargo box with<br />
the screws provided.<br />
25 Complete the attachment of the rear box by<br />
fastening the two screws inside the cabin.<br />
26 Rear cover plate:<br />
A - Housing for attachment to bodywork.<br />
B - Housing for the insertion of metal tubes.<br />
C - Housing for the insertion of the exhaust<br />
pipe.<br />
D - Tabs for fixture to bodywork.<br />
27 Position the rear cover plate, matching the<br />
various points marked with the letters A, B and<br />
C.<br />
28 Lift the upper part of the rear cover plate to<br />
facilitate the engagement of the tabs (D).<br />
29 Secure the rear cover plate with the two screws<br />
as shown in the figure.<br />
30 Complete the attachment of the rear cover plate<br />
by fastening the screw under the exhaust pipe.<br />
31 Install with pressure the vertical tube of the roll<br />
bar showing in the drowing. Note: the pieces are<br />
mirrored, as shown in the figure is the left.<br />
32 Rotate the vertical tube to facilitate the inclusion<br />
of the side bars.<br />
33 Secure both vertical tubes using standard screw<br />
provided.<br />
34 Secure the side bars to the vertical tubes with<br />
screw.<br />
35 Place the back tubes. Note: The pieces are<br />
mirrored.<br />
36 Fix the rear tubes at the top.<br />
37 Secure the rear tubes in the lower.<br />
38 Put the band of the central clamps on the rear<br />
tubes (see proper orientation in the next<br />
picture)<br />
39 The band should be horizontal and not towards<br />
the top.<br />
40 Insert the central clamps into bands.<br />
41 Insert a screw and nut in the holes of the band.<br />
42 Secure the central clamps.<br />
43 Place the top of the rollbar. Mantain the holes<br />
represented by the letter A on the front and the<br />
holes represented by the letter B to the rear of<br />
the vehicle.<br />
44 Secure seat belt and the top of the rollbar to<br />
each vertical tube using screw provided in<br />
separate bag.<br />
45 Attach the three plastic rings to rollbar. The<br />
holes position is up and down the back of the<br />
vehicle.<br />
46 Mount the three fog lights on the roof bars and<br />
attach them with the screws provided (one per<br />
light).<br />
47 Front cover plate:<br />
A - Tabs for fixing to the bodywork.<br />
B - Housing for engagement with the bodywork.<br />
C - Housing for attachment to the base<br />
D - Tab for engagement to the hood.<br />
E - Hole for inserting the front roll bar.<br />
48 Position the front cover plate by inserting the<br />
points indicated with the letters A and B into the<br />
bodywork. Put a hand inside the bodywork at<br />
point B and squeeze it together with the mask to<br />
click it into place (as shown in the circle).<br />
49 Press on the central area of the front cover plate<br />
at the tab D to attach it to the hood.<br />
50 Press the lower part of the cover plate to engage<br />
the two tabs C.<br />
51 Position the front roll bar, sliding it onto the<br />
relevant pins.<br />
52 Take care with the bottom of the roll bar, which<br />
must be inserted into the hole E of the cover<br />
plate as shown in the picture.<br />
53 Attach the roll bar with the screw provided.<br />
54 Complete the attachment of the roll bar with<br />
the two screws at the front.<br />
55 Press together the two sections of the steering<br />
wheel to fully engage them.<br />
56 Insert the central steering wheel cap.<br />
57 Remove the plastic protectors from the steering<br />
shaft.<br />
58 Position the steering wheel, aligning the holes<br />
with those on the steering shaft.<br />
59 Attach the steering wheel with the threaded pin<br />
and the bolt (the bolt must be inserted into the<br />
hexagonal hole, the threaded pin in the circular<br />
hole), holding the bolt to keep it in place.<br />
60 Insert the passenger's handle into the hole on<br />
the dashboard.<br />
61 Attach the handle with the screws provided.<br />
62 Snap fit the petrol cap.<br />
63 Insert the seat base (removed previously) on the<br />
driver's side.<br />
64 Insert the battery (charged previously) into the<br />
compartment under the seat on the passenger's<br />
side.<br />
65 Thread the battery plug and the electrical system<br />
plug through the holes in the passenger’s seat<br />
base.<br />
66 Insert the seat base on the passenger side.<br />
67 Connect the battery and electrical system plugs.<br />
68 Fasten down the seat bases using 4 screws (two<br />
on each side).<br />
69 Insert the two short sections of the safety belts<br />
into the seat bases (in the holes near the gear<br />
lever), taking care to insert all of the section of<br />
belt highlighted in detail A. Note: the safety belt<br />
buckle buttons must be facing the gear lever, as<br />
shown in the figure.<br />
70 Unscrew the knobs from the seat base.<br />
71 Position the seat. Note: the seat can be adjusted<br />
in length to two different positions, depending on<br />
the height of the child.<br />
72 Screw the knobs back into position.<br />
73 Lower the seat.<br />
74 Tighten the safety screw. Repeat for the other<br />
seat.<br />
75 Install the two parts of the windshield as shown.<br />
Picture A shows the grille fitted correctly<br />
76 Secure the grille with the three screws.<br />
77 Place the windshield on the hood hooking the<br />
three central tabs.<br />
78 Fit the windscreen of the vehicle with screws<br />
79 Remove the protectors from the rear axle.<br />
80 Insert the axle into the rear of the vehicle, as<br />
shown in the figure.<br />
81 Position the driver in the inside of one of the<br />
two larger wheels.<br />
82 Slide the wheel onto the axle with the driver<br />
towards the vehicle.<br />
83 Slide a washer onto the axle.<br />
84 Fasten the wheel, tightening one of the four nuts<br />
supplied with the spanner provided.<br />
Repeat the fitting operations for the other rear<br />
wheel. Important: carry out the operations while<br />
holding the axle still on the opposite side with<br />
the help of the second spanner provided.<br />
85 Remove the protectors from the front axles.<br />
86 Slide a washer onto the axle.<br />
87 Slide one of the remaining wheels (narrower<br />
than the rear wheels) onto the axle.<br />
88 Slide a washer onto the axle.<br />
89 Fasten the wheel, tightening one of the two<br />
remaining bolts with the spanner provided.<br />
Repeat the fitting operations for the front wheel<br />
on the other side.<br />
90 Snap fit the four hub covers onto the wheels.<br />
FEATURES AND USE OF THE VEHICLE<br />
91 RADIO - Remove the two screws as shown in<br />
the figure to extract the radio and insert the<br />
batteries.<br />
92 Use a tool to lever the upper part of the radio<br />
front panel and extract it.<br />
93 Release the screw on the battery compartment<br />
cover.<br />
94 Insert two AA 1.5V batteries with the polarities<br />
as indicated. Close the battery compartment<br />
cover. Important: always tighten the screw.<br />
95 Insert the antenna and the radio into the housing<br />
on the dashboard.<br />
96 Radio functions:<br />
A - Socket for an MP3 reader jack.<br />
IMPORTANT!: Connect the MP3 reader (not<br />
included) to the vehicle radio using a cable NO<br />
longer than 150 cm.<br />
B - Radio station selector.<br />
C - On/Off buttons.<br />
D - Radio On indicator light.<br />
E - Volume control knob.<br />
F - Digital clock adjustment buttons.<br />
97 Driving cab features:<br />
A - Steering wheel.<br />
B - Fully functional radio (see fig 96).<br />
C - Speedometer and battery charge level panel<br />
(see fig 98).<br />
D - Passenger handle.<br />
E - Accelerator/electrical brake pedal (see fig<br />
99-100-101).<br />
F - Gear lever (see fig 102).<br />
G - Drinks holder (see fig 103).<br />
H - MP3 player storage compartment.<br />
98 CONTROL PANEL - The lower part of the<br />
control panel shows the battery charge level. The<br />
green light indicates that the battery is charged,<br />
orange indicates that the battery level is getting<br />
low and a red light indicates that the battery<br />
must be recharged. At the top of the control<br />
panel the greed LEDs light up progressively as<br />
the vehicle’s speed increases (they are for play<br />
purposes only and do not indicate the true<br />
speed of the vehicle).<br />
99 ACCELERATOR/ELECTRICAL BRAKE PEDAL<br />
SmartPedal Technology - When the<br />
accelerator pedal is pressed, the vehicle starts<br />
moving. When the pedal is released, the electrical<br />
brake is activated, automatically stopping the<br />
vehicle.<br />
100 The second gear lock is located on the pedal.<br />
When the vehicle is removed from its<br />
packaging, the second gear lock is positioned as<br />
shown in figure A (LOW), limiting the vehicle<br />
to the lower speed. When the second gear lock<br />
is positioned as shown in figure B (HIGH), the<br />
vehicle can travel at the faster speed.<br />
101 To adjust the second gear lock to position B<br />
(HIGH), release the second gear lock fixing<br />
screw and move the unit upwards. Important:<br />
always replace the fixing screw.<br />
102 GEAR LEVER - When the gear lever is in the<br />
vertical position, the vehicle travels forward at<br />
LOW or HIGH speed. When the gear lever is<br />
pulled back and the accelerator pedal is<br />
pressed at the same time, the vehicle travels in<br />
reverse.<br />
103 DRINKS HOLDER - There are two drinks<br />
holders for cans or bottles.<br />
104 REAR BOX and SUSPENSION - The rear of<br />
the vehicle has a spacious cargo box and real<br />
functional suspension on the wheels.<br />
105 WHEELS with RUBBER STRIPS Red Line<br />
Nitrile Traction - The wheels are fitted with<br />
a rubber strip for better grip on all surfaces,<br />
silent performance and greater driving comfort.<br />
106 SAFETY BELT - To fasten the safety belt, insert<br />
the end of the longer belt section into the<br />
buckle on the shorter belt section, pushing the<br />
two parts together.<br />
107 To release the safety belt, press the buckle<br />
button and at the same time separate the two<br />
elements.<br />
108 To change the length of the safety belt, move<br />
the adjuster as shown in the figure.<br />
REPLACING THE BATTERY<br />
PLEASE NOTE: THE PICTURES OF THE BATTERIES<br />
ARE FOR ILLUSTRATIVE PURPOSES ONLY. YOUR<br />
BATTERY MAY BE DIFFERENT FROM THE MODEL<br />
SHOWN. THIS DOES NOT AFFECT THE