Micromotore da studio Studio micromotor - Carlo De Giorgi
Micromotore da studio Studio micromotor - Carlo De Giorgi
Micromotore da studio Studio micromotor - Carlo De Giorgi

Create successful ePaper yourself
Turn your PDF publications into a flip-book with our unique Google optimized e-Paper software.
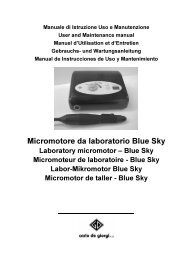
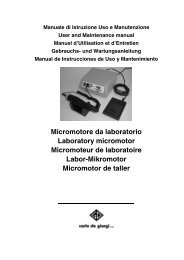
STUDIO MICROMOTOR<br />
4.1.3 - CHARGING THE BATTERY PACK<br />
The supplied mains power cable (to be connected to socket (6)) is used to<br />
charge the battery pack. The power supply voltage can be from 100<br />
(minimum) to 260V (maximum); depending on the input voltage, the time<br />
required for charging varies from a minimum of 24 hours to a maximum of 48<br />
hours (approx.).<br />
The first time you charge the battery pack we recommend charging time of 48<br />
hours. This period can be reduced for successive charges, but should never<br />
be less than 24 hours.<br />
Do not use the <strong>micromotor</strong> while the battery pack is being charged (switch (1)<br />
should be set to OFF).<br />
To protect the batteries from <strong>da</strong>mage, do not drain them completely. If the<br />
appliance remains unused for prolonged periods, charge the battery pack<br />
after the first two months of disuse and at regular intervals thereafter.<br />
4.2 - OPERATION AND USE<br />
4.2.1 - OPERATION<br />
The appliance should be placed on a work table in front of the operator.<br />
Check that the appliance is working by setting the main power switch (1) to<br />
ON so that green LED (3) illuminates, and then turning potentiometer (4) (the<br />
motor should start to rotate).<br />
The direction of tool rotation can be inverted by means of selector (5); rotation<br />
direction can be changed only when the motor is stopped or at minimum speed.<br />
If the motor fails to start, set the main power switch to OFF and check that the<br />
various connectors are correctly inserted.<br />
Always switch the appliance OFF after use.<br />
4.2.2 - OPERATOR<br />
The operator starts the appliance by means of a voluntary command,<br />
thereby assuming direct control of its operation.<br />
4.2.3 - SAFETY WARNINGS<br />
- Generic warnings are given in heading 3.2.3.<br />
- Do not attempt to lubricate the handpiece by injecting oil into the collet<br />
(part B Fig. 4 – model 541/00 only).<br />
- always check that the diameter of the tool shank is compatible with the<br />
collet (Model 541/00 only).<br />
- do not open the battery pack under any circumstances when it is<br />
connected to the mains for charging.<br />
GB - 12 <strong>Carlo</strong> de <strong>Giorgi</strong>