CDN22 MK5 Quickstart Guide - v4.3 - Numark
CDN22 MK5 Quickstart Guide - v4.3 - Numark
CDN22 MK5 Quickstart Guide - v4.3 - Numark

Create successful ePaper yourself
Turn your PDF publications into a flip-book with our unique Google optimized e-Paper software.
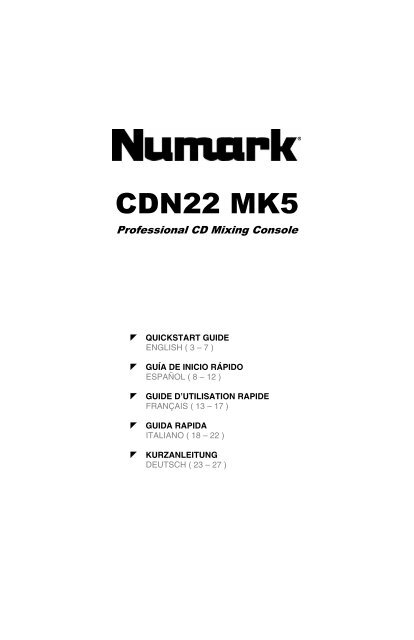
<strong>CDN22</strong> <strong>MK5</strong><br />
Professional CD Mixing Console<br />
� QUICKSTART GUIDE<br />
ENGLISH ( 3 – 7 )<br />
� GUÍA DE INICIO RÁPIDO<br />
ESPAÑOL ( 8 – 12 )<br />
� GUIDE D’UTILISATION RAPIDE<br />
FRANÇAIS ( 13 – 17 )<br />
� GUIDA RAPIDA<br />
ITALIANO ( 18 – 22 )<br />
� KURZANLEITUNG<br />
DEUTSCH ( 23 – 27 )
BOX CONTENTS<br />
� <strong>CDN22</strong> <strong>MK5</strong> CD player transport unit<br />
� <strong>CDN22</strong> <strong>MK5</strong> CD player control unit<br />
� Power cord<br />
� RCA cables (2 pair)<br />
� Control cable<br />
� Relay start cable<br />
� <strong>Quickstart</strong> <strong>Guide</strong><br />
� Safety & Warranty Information Booklet<br />
REGISTRATION<br />
Please go to http://www.numark.com to register your <strong>CDN22</strong> <strong>MK5</strong>. Registering your product ensures that we can keep you<br />
up-to-date with all the latest product developments and provide you with world-class technical support, should you run into any<br />
problems.<br />
GROUND RULES<br />
1. Make sure all items listed in the BOX CONTENTS section are included in the box.<br />
2. READ SAFETY & WARRANTY INFORMATION BOOKLET BEFORE USING THE PRODUCT.<br />
3. Study the connection diagram in this guide.<br />
4. Place mixer in an appropriate position for operation.<br />
5. Make sure all devices are turned off and all faders and gain knobs are set to “zero.”<br />
6. Connect all stereo input sources as indicated in the diagram.<br />
7. Connect the stereo outputs to power amplifier(s), tape decks, and/or other audio sources.<br />
8. Plug all devices into AC power.<br />
9. Switch everything on in the following order:<br />
• Audio input sources (i.e. turntables, CD players, etc.)<br />
• Mixer<br />
• Last, any amplifiers or output devices<br />
10. When turning off, always reverse this operation by:<br />
• Turning off amplifiers<br />
• Mixer<br />
• Last, any input devices<br />
CONNECTION DIAGRAM<br />
HOUSE AMP<br />
MONITORS<br />
POWER<br />
FADER START<br />
CABLES<br />
POWER<br />
3<br />
RCA CABLE<br />
CONTROL<br />
CABLE<br />
MIXER<br />
RCA CABLE<br />
CONTROL<br />
TRANSPORT
REAR PANEL FEATURES<br />
1. CONTROL CABLE<br />
CONNECTOR –<br />
Plug in the 8-pin<br />
cable included in<br />
here to connect the<br />
remote control and<br />
main CD unit<br />
together.<br />
2. POWER PLUG<br />
CONNECTOR –<br />
Plug your supplied<br />
power cord in here.<br />
3. VOLTAGE<br />
SELECTOR – Set<br />
this switch to the<br />
voltage for your<br />
location.<br />
4. RCA AUDIO CONNECTORS – Connect your CD player to your mixer from this level output.<br />
5. DIGITAL OUTPUT – This output's format is type 2, form 1, also known as S/PDIF (line Sony/Phillips Digital Interface<br />
Format). In order to use the digital output you should not use variable pitch slider and the pitch bend buttons. If you<br />
adjust the pitch, other devices may not read the digital output properly as the sampling rate changes.<br />
6. AUTO-START CONNECTORS – Use these connector to plug into your fader start-compatible mixer or connect them to<br />
each other to allow Relay Play.<br />
CD PLAYER FEATURES<br />
1. OPEN/CLOSE (Disc Tray Open/Close) –<br />
Press to load or eject the disc. Each press<br />
will open or close the disc tray on the<br />
transport.<br />
NOTE: Tray will not open unless the disc<br />
has been paused. Tray will automatically<br />
close after 30 seconds.<br />
2. TIME (Time Button) – Switches the time<br />
display between elapsed playing time and<br />
remaining time on the track and remaining<br />
time on the entire CD.<br />
3. SGL – Will cause just a single track to play<br />
or all tracks in order by pressing once or<br />
twice.<br />
4. LCD – Indicates all the functions, as they<br />
are occurring, with the CD. These functions<br />
are explained in the next section.<br />
5. TRACK (Track Buttons) – Used to select the track to be played.<br />
6. +10 (Track Button) – This button is for quickly advancing to higher tracks on a CD.<br />
7. PROGRAM – Depress this button and the unit will stop and the program indicator will light. Select each track to be<br />
programmed and press the PROGRAM button between selections. You can program up to 30 tracks. Press PLAY to<br />
start the program. To exit and erase program, either hold the program button down for more than 2 seconds while the<br />
unit is stopped, open the disc tray, or turn off the power.<br />
8. PITCH (Pitch Button) – Activates the Pitch Slider.<br />
9. PITCH SLIDER – The pitch can be changed up to +/-12% by pressing the PITCH button so the PITCH LED is lit, then<br />
moving the sliding fader. The pitch will not be changed if the PITCH LED is off.<br />
10. SEARCH WHEEL (OUTER RING) – 3 forward and 3 reverse speed positions for searching through songs. The more<br />
you turn the wheel in either direction the faster you search through the music.<br />
11. PITCH BEND / JOG WHEEL (INNER RING) – The jog wheel serves two functions depending on its current mode.<br />
a) If a track is not playing, the wheel will search slowly through a track's frames. To set a new frame cue point,<br />
rotate the wheel then begin playback when you have determined the proper position. Press CUE to return to that<br />
cue point.<br />
b) If a track is playing, the wheel will temporarily bend the pitch of the track. Rotating the wheel clockwise<br />
temporarily speeds it up while rotating it counterclockwise slows it down. This is a useful tool for beat-matching<br />
(see MATCHING TEMPOS & BEATS).<br />
12. CUE – Pressing the CUE button during playback returns the track to the position to the cue point and pauses playback.<br />
(See PLAY, PAUSE, & CUE OPERATIONS for more information.) Press and hold CUE to return the track to the cue<br />
point and begin playback. Release it to return to the cue point and pause playback.<br />
13. START/PAUSE (Play/Pause Button) - Each press of the Play/Pause Button causes the operation to change from play<br />
to pause or from pause to play.<br />
14. PITCH BEND -/+ – You can use these two pitch bend buttons to temporarily adjust the pitch and tempo of the music.<br />
4
LCD FEATURES<br />
1. PLAY: Active while the unit is actually playing a CD.<br />
2. PAUSE: Active when the unit is paused.<br />
3. CUE: Flashing when the unit is setting a cue point. Lit continuously<br />
when the unit is paused at a cue point.<br />
4. PROGRAM: Used for pre-programming the track order to<br />
automatically be played by the unit. This is a great function if you<br />
need to leave the CD player alone.<br />
5. TIME MODE: (Elapsed) is for showing time as it is taking place.<br />
(Remain) shows how much time is left on a particular track. This<br />
function is controlled by the TIME BUTTON.<br />
6. SINGLE: Shows when the unit is set to Single Play Mode (one track at a time). When this is not lit, it is in Continuous<br />
Play Mode (the CD will play continuously through all tracks). This function is controlled by the SGL button.<br />
7. PITCH: Is lit when the PITCH BUTTON is active.<br />
8. TIME BAR: Shows either time remaining or elapsed depending on the setting of the TIME BUTTON.<br />
9. PITCH/BPM: Shows the percentage change in pitch or current BPM.<br />
10. TRACK: Shows the current track that the unit is playing.<br />
11. MINUTES: Shows the minutes elapsed or remaining depending on mode setting.<br />
12. SECONDS: Shows the seconds elapsed or remaining depending on mode setting.<br />
13. FRAMES: The CD Player breaks down a second into 75 frames for accurate cueing. This shows the frames elapsed or<br />
remaining depending on mode setting.<br />
PLAY, PAUSE & CUE OPERATIONS<br />
PLAY & CUE<br />
Pressing the “PLAY/PAUSE”<br />
button starts the disc. Pressing<br />
the “CUE” button will reset the<br />
disc to the last place where the<br />
disc was started. This is called<br />
the cue point. By alternately<br />
pressing the “PLAY/PAUSE”<br />
button and the “CUE” button,<br />
the disc may be returned and<br />
played from the cue point any<br />
number of times. This function<br />
is called back cue.<br />
PLAY, PAUSE & CUE<br />
When play has been paused<br />
and then started again, the<br />
return position for the back cue<br />
will be updated to this new<br />
position.<br />
EDITING CUE POINT<br />
When the inner dial is turned<br />
while paused at the cue point, it<br />
will move the cue point. You<br />
will hear the track's audio as the<br />
player "scrubs" through the<br />
track until you find where you<br />
want to set your new cue point.<br />
Press “PLAY/PAUSE” then<br />
“CUE” to confirm the new cue<br />
point.<br />
Press "PLAY/PAUSE"<br />
to start music<br />
Play Interval<br />
Press "PLAY/PAUSE"<br />
to start music<br />
Adjust the "CUE" point<br />
with the jog wheel<br />
Back Cue Operation<br />
5<br />
Press "PLAY/PAUSE"<br />
to pause music<br />
Press "CUE" return to<br />
last starting point<br />
Press "PLAY/PAUSE"<br />
to start music<br />
Play Interval Play Interval<br />
Press "PLAY/PAUSE"<br />
to start music<br />
Play Interval<br />
Back Cue Operation<br />
Back Cue Operation<br />
Press "CUE" return to<br />
last starting point<br />
Position on Disc<br />
Press "CUE" return to<br />
last starting point<br />
Position on Disc<br />
Position on Disc
MATCHING TEMPOS & BEATS<br />
You can match your tracks' tempos by monitoring the music of both PLAYER 1 and PLAYER 2 by ear and adjusting the pitch.<br />
If the tempo of the music on one CD player is slower the other, move the slider to the ( + ) side to match the tempo. If it is<br />
faster, move the pitch slider to the ( - ) side. The following instructions give an example of how to do this.<br />
1. Press PLAY/PAUSE to start PLAYER 1. PLAYER 1 will begin playback.<br />
2. Press PLAY/PAUSE to start PLAYER 2. Now, both decks should be playing.<br />
3. Listen to PLAYER 2 in your headphones. If its tempo (in the headphones) is faster<br />
than that of PLAYER 1, slow down PLAYER 2's tempo using the pitch control.<br />
If PLAYER 2' tempo (in the headphones) is faster than that of PLAYER 1, speed up<br />
PLAYER 2's tempo using the pitch control.<br />
BEAT MATCHING USING PITCH BEND<br />
Once you have matched the tracks' tempos, you may still need to match their downbeats to create a smooth mix. You can do<br />
this by temporarily changing the pitch with the PITCH BEND/JOG WHEEL or PITCH BEND +/- buttons.<br />
After matching the tempos adjust the pitch temporarily as follows:<br />
When a track is ahead, rotate the jog wheel counterclockwise or press the PITCH BEND – button to temporarily<br />
slow it down.<br />
When a track is behind, rotate the jog wheel clockwise or press the PITCH BEND + button to temporarily speed<br />
it up.<br />
The pitch will change while the PITCH BEND/JOG WHEEL is rotated or the PITCH BEND +/- button is pressed. (The faster<br />
you rotate the wheel the greater the shift in pitch.) Release the wheel or stop pressing the PITCH BEND +/- buttons when the<br />
downbeats are aligned the way you want them and the track will return to its original tempo/pitch.<br />
EXAMPLE OF MIXING USING BOTH PLAYERS OF YOUR CD PLAYER<br />
While playing a disc on PLAYER 1, load a disc into PLAYER 2 and select your next track, match its pitch to the track playing on<br />
PLAYER1 and when you are ready use the crossfader on your mixer to fade from PLAYER 1 to PLAYER 2.<br />
Load a disc in PLAYER 1 and<br />
select the track and press PLAY.<br />
Load a disc in PLAYER 2 and<br />
select the track then play.<br />
Set and edit a start cue point on<br />
PLAYER 2<br />
Check your new cue point<br />
Do a MIX!<br />
PLAYER 1<br />
Load a disc and press the<br />
OPEN/CLOSE button.<br />
PLAYER 2<br />
Load a disc and press the<br />
OPEN/CLOSE button.<br />
PLAYER 2<br />
Press the Pause button of PLAYER 2.<br />
PLAYER 2<br />
Listen withthe monitorand press the play button.<br />
PLAYER 2<br />
With a matching downbeat from<br />
Player 1 press the play button.<br />
6<br />
PLAYER 1<br />
Select the track to be played.<br />
PLAYER 2<br />
Select the track to be played.<br />
PLAYER 2<br />
Rapidly search for a cue point using<br />
the outer wheel<br />
PLAYER2 Press the cue button then play to be<br />
sure of the set cue point.<br />
PLAYER 2<br />
If you are beat mixing, turn on your<br />
Pitch adjust a nd follow the directions<br />
for beat matching.<br />
PLAYER 1<br />
Press the PLAY button<br />
PLAYER 2<br />
Press the PLAY button<br />
PLAYER 2<br />
Slowly set the right cue point<br />
using the inner wheel<br />
PLAYER 2<br />
Reset the player to the Cue point<br />
by pressing Cue<br />
MIXER<br />
When you are happy with your mix<br />
move the cros sfader accordingly.
RELAY PLAY<br />
You can use <strong>CDN22</strong> <strong>MK5</strong>'s Relay Play feature to maintain a continuous flow of music between the two decks. When one deck's<br />
track or CD is finished playing, the opposite deck will start playback. That deck will play until the track or disc is finished, then<br />
the opposite deck will play again. Follow these steps to engage Relay Play:<br />
1. Connect the included Relay Play cable to both AUTO-START CONNECTORS on the <strong>CDN22</strong> <strong>MK5</strong> control unit's<br />
rear panel.<br />
2. Insert CDs into both sides of the transport unit.<br />
3. Press and hold the TIME buttons on both decks for 1-2 seconds until the LCD indicates "auto" and the track<br />
number begins to flash. This means Relay Play is active.<br />
4. If you want the decks to alternate playing individual tracks, press SGL on each deck until it enters Single Play Mode<br />
("Single" should be displayed on the LCD).<br />
If you want the decks to alternate playing whole CDs, press SGL on each deck until it enters Continuous Play Mode<br />
("Single" should not be displayed on the LCD).<br />
5. Press PLAY on either deck. When the track or CD reaches the end, the opposite deck will automatically begin<br />
playback.<br />
Note: You may also use Relay Play while in Program Mode (see PROGRAM under CD PLAYER FEATURES and LCD<br />
FEATURES), but if your decks are in Single Play Mode ("Single" will display on the LCD) while in Program Mode, playback for<br />
each deck will stop at the end of the last track in its program.<br />
FADER START<br />
You can use <strong>CDN22</strong> <strong>MK5</strong>'s fader start compatibility to start playback on a deck simply by crossfading to it on your remote mixer.<br />
Similarly, crossfading away from a deck will cue that deck as though you had pressed the CUE button. (Your mixer must be<br />
fader start-compatible for this to work.) Follow these steps to take advantage of <strong>CDN22</strong> <strong>MK5</strong>'s fader start feature:<br />
1. Connect standard 1/8" mono cables from each AUTO-START CONNECTOR on the <strong>CDN22</strong> <strong>MK5</strong> control unit's rear<br />
panel to its corresponding fader start input on your mixer.<br />
2. Insert CDs into both sides of the transport unit.<br />
3. Press and hold the TIME buttons on both decks for 1-2 seconds to activate <strong>CDN22</strong> <strong>MK5</strong>'s fader start capability.<br />
4. Refer to your mixer's manual for how to use it with a fader start device.<br />
7
CONTENIDO DE LA CAJA<br />
� <strong>CDN22</strong> <strong>MK5</strong> unidad transportadora de reproductor de CD<br />
� <strong>CDN22</strong> <strong>MK5</strong> unidad de control de reproductor de CD<br />
� Cable de alimentación<br />
� Cables conectores RCA (2 pars)<br />
� Cable del control<br />
� Cable del relay play<br />
� Guía de inicio rápido<br />
� Folleto de información sobre la seguridad y la garantía<br />
REGISTRO<br />
Visite http://www.numark.com y registre su <strong>CDN22</strong> <strong>MK5</strong>. El registro de su producto asegura que podamos mantenerle<br />
actualizado con los desarrollos de productos nuevos y brindarle apoyo técnico de categoría mundial en caso de que tenga<br />
algún problema.<br />
REGLAS BÁSICAS<br />
1. Asegúrese de que todos los artículos indicados en “Contenido de la caja" estén incluidos en la caja.<br />
2. LEA EL FOLLETO DE INFORMACIÓN SOBRE LA SEGURIDAD Y LA GARANTÍA ANTES DE UTILIZAR EL<br />
PRODUCTO.<br />
3. Estudie el diagrama de conexión incluido en esta guía.<br />
4. Coloque el mezclador en una posición adecuada para su funcionamiento.<br />
5. Asegúrese que todos los dispositivos estén apagados y que todos los faders y perillas de ganancia estén en posición<br />
«cero».<br />
6. Conecte todas las fuentes de entrada estéreo como se indica en el diagrama.<br />
7. Conecte las salidas estéreo a los amplificadores de potencia, bandejas de cinta magnética y/o otras fuentes de audio.<br />
8. Enchufe todos los dispositivos al suministro de corriente alterna.<br />
9. Encienda todo en el siguiente orden:<br />
� fuentes de entrada de audio (por ejemplo, giradiscos, reproductores de CD, etc.)<br />
� el mezclador<br />
� por último, cualquier amplificador o dispositivo de salida<br />
10. Al apagar, realice siempre esta operación en sentido inverso:<br />
� apague los amplificadores<br />
� el mezclador<br />
� por último, cualquier dispositivo de entrada<br />
DIAGRAMA DE CONEXIÓN<br />
AMPLIFICADOR DE<br />
AUDITORIO<br />
ALTAVOCES<br />
ALIMENTACIÓN<br />
CABLES DEL<br />
FADER START<br />
8<br />
CABLE CONECTORE<br />
ALIMENTACIÓN<br />
CABLE DEL<br />
CONTROL<br />
MEZCLADOR<br />
CABLE CONECTORE<br />
CONTROL<br />
TRANSPORTADORA
CARACTERÍSTICAS DEL PANEL TRASERO<br />
1. CONECTOR DEL<br />
CABLE DE<br />
CONTROL – Enchufe<br />
el cable de 8-pines<br />
que se incluye aquí<br />
para conectar el<br />
control remoto a la<br />
unidad principal de<br />
CD.<br />
2. CONECTOR DEL<br />
CABLE DE<br />
ALIMENTACIÓN IEC<br />
– Enchufe su cable de<br />
alimentación aquí.<br />
3. SELECTOR DE<br />
VOLTAJE – Ajuste<br />
este interruptor al<br />
voltaje de su<br />
ubicación.<br />
4. CONECTORES DE AUDIO RCA – Conecte su reproductor de CD a su mezclador desde esta salida de nivel de línea.<br />
5. SALIDA DIGITAL – El formato de esta salida es de tipo 2, forma 1, también conocido como S/PDIF (Sony/Phillips Digital Interface<br />
Format). Para poder usar la salida digital no debería usar un cursor de pitch variable y los botones del pitch bend. Si ajusta el<br />
pitch, otros dispositivos podrán tener problemas para leer la salida digital correctamente ya que la frecuencia de muestreo cambia.<br />
6. CONECTORES DE AUTO-START (Inicio automático) – Use estos conectores para enchufar en su mezclador compatible con<br />
fader start o conéctelos entre sí para permitir la reproducción alternada.<br />
CARACTERÍSTICAS DEL REPRODUCTOR DE CD<br />
1. ABRIR/CERRAR (Bandeja de disco Abrir/Cerrar) –<br />
Púlselo para introducir o expulsar el disco. Cada vez que lo<br />
pulse se abrirá o cerrará la bandeja del disco en la unidad.<br />
NOTA: La bandeja no se abrirá a menos que el disco haya<br />
sido detenido. La bandeja se cerrará automáticamente a los<br />
30 segundos.<br />
2. TIME (Botón de tiempo) – Cambia la visualización del<br />
tiempo entre el tiempo de reproducción transcurrido y el<br />
tiempo restante en la pista y el tiempo restante en todo el<br />
CD.<br />
3. SGL – Conmuta entre reproducción única y continua. En<br />
modo de reproducción única, aparece "Single" en la pantalla<br />
LCD y la reproducción en esa bandeja se detiene después<br />
de cada pista. En modo de reproducción continua, la<br />
bandeja reproduce las pistas en sucesión sin detenerse.<br />
4. PANTALLA LCD – Indica todas las funciones del CD a medida que van teniendo lugar. Estas funciones se explican en<br />
la siguiente sección.<br />
5. TRACK (Botones de pista) – Utilizados para seleccionar la pista que se va a reproducir.<br />
6. +10 (Botón de pista) – Este botón es utilizado para avanzar rápidamente en las pistas del CD.<br />
7. PROGRAMA – Pulse este botón y la unidad se detendrá y el indicador de programa se iluminará. Seleccione todas las<br />
pistas que desee programar y pulse el botón de PROGRAMA entre cada selección. Podrá programar hasta 30 pistas.<br />
Pulse PLAY para activar el programa. Para salir y borrar el programa, mantenga pulsado el botón de programa durante<br />
más de 2 segundos mientras la unidad está parada, abra la bandeja del disco, o apague la fuente de alimentación.<br />
8. PITCH (Botón de Pitch) – Activa el deslizador de tono (pitch).<br />
9. DESLIZADOR DEL PITCH – El pitch puede variar hasta un +/-12% pulsando el botón del PITCH de modo que el LED<br />
del pitch esté iluminado; tras esto, deslizando el fader. El pitch no variará si el LED del pitch está apagado (OFF).<br />
10. SEARCH WHEEL (RUEDA EXTERIOR) – esta rueda dispone de 3 posiciones de velocidad de avance y 3 de reverso<br />
para buscar dentro de las canciones. Cuanto más gire la rueda en cualquiera de las dos direcciones, más rápida será la<br />
búsqueda<br />
11. RUEDA DE INFLEXIÓN DE PITCH/AVANCE LENTO (ANILLO INTERIOR) – Esta rueda de avance lento tiene 2<br />
funciones dependiendo del modo en el que se encuentre.<br />
a) Si no se está reproduciendo una pista, la rueda busca lentamente a lo largo de los frames de la pista. Para<br />
determinar un nuevo punto cue de frame, gire la rueda y comience a reproducir una vez que haya determinado la<br />
posición adecuada. Pulse CUE para volver a ese punto cue.<br />
b) Si se está reproduciendo una pista, la rueda inflexiona temporalmente el pitch de la misma. Al girar la rueda en<br />
sentido horario, la acelera temporalmente, mientras que si se gira en sentido antihorario la desacelera. Ésta es<br />
una herramienta útil para igualar el beat (consulte CÓMO IGUALAR TEMPOS Y BEATS).<br />
12. CUE – Si se pulsa el botón CUE durante la reproducción, la pista vuelve a la posición del punto cue y se pone la<br />
reproducción en pausa. (Para más información, consulte OPERACIONES DE REPRODUCCIÓN, PAUSA Y CUE.)<br />
Pulse y mantenga pulsado CUE para regresar la pista al punto cue e iniciar la reproducción. Suéltelo para volver al<br />
punto cue y hacer una pausa en la reproducción.<br />
13. START/PAUSE (Botón de reproducción/pausa) – Cada vez que se pulsa el botón de reproducción/pausa esto hace<br />
que se cambie de reproducción a pausa o de pausa a reproducción.<br />
14. PITCH BEND -/+ – Puede usar estos dos botones de inflexión de pitch para ajustar temporalmente el pitch y el tempo<br />
de la música.<br />
9
CARACTERÍSTICAS DE LA PANTALLA LCD<br />
1. PLAY: Está activo si la unidad está reproduciendo un CD en ese<br />
momento.<br />
2. PAUSE: Está activo si la unidad está en pausa.<br />
3. CUE: Parpadea si la unidad está determinando un punto cue. Se ilumina<br />
de forma continua si la unidad está detenida en un punto cue.<br />
4. PROGRAMA: Se utiliza para programar con antelación el orden de las<br />
pistas que van a ser reproducidas automáticamente por la unidad. Esta<br />
es una función de gran utilidad si necesita dejar alejarse del reproductor<br />
de CD.<br />
5. MODO DE TIEMPO: “Transcurrido” muestra el tiempo a medida que va teniendo lugar; “restante” muestra cuánto<br />
tiempo queda en una pista determinada. Esta función se controla mediante el botón de TIEMPO (TIME).<br />
6. SINGLE (Única): Muestra cuando la unidad está configurada para reproducir en modo de pista única (una pista por<br />
vez. Cuando no está encendida, está en modo de reproducción continua (el CD se reproduce continuamente pasando<br />
por todas las pistas). Esta función se controla mediante el botón SGL.<br />
7. PITCH: Está iluminado cuando el botón de tono (pitch) está activado.<br />
8. BARRA DE TIEMPO: Muestra el tiempo restante o transcurrido dependiendo de la configuración del botón de tiempo.<br />
9. PITCH/BPM: Muestra el porcentaje de cambio del tono (pitch) o las BPM en ese momento.<br />
10. TRACK (PISTA): Muestra la pista que la unidad está reproduciendo en ese momento.<br />
11. MINUTOS: Muestra los minutos restantes o transcurridos dependiendo de la configuración del modo.<br />
12. SEGUNDOS: Muestra los segundos restantes o transcurridos dependiendo de la configuración del modo.<br />
13. FRAMES: El reproductor de CD divide un segundo en 75 frames para un cueing más preciso. Muestra los frames<br />
restantes o transcurridos dependiendo de la configuración del modo.<br />
OPERACIONES DE REPRODUCCIÓN, PAUSE Y CUE<br />
PLAY (REPRODUCCIÓN) Y CUE<br />
Pulsando el botón de<br />
“START/PAUSE” se pondrá el<br />
disco en funcionamiento.<br />
Pulsando el botón "CUE" se el<br />
disco comenzará de nuevo en<br />
la misma posición en la que<br />
comenzó anteriormente. Esto<br />
es lo que se llama punto cue.<br />
Pulsando los botones de<br />
“START/PAUSE” y “CUE”<br />
alternativamente, el disco<br />
podrá volver al mismo punto<br />
cue y reproducirse cuantas<br />
veces desee. Esta función se<br />
denomina back cue.<br />
PLAY (REPRODUCCIÓN), PAUSE Y CUE<br />
Cuando la reproducción se<br />
haya detenido y comenzado<br />
de nuevo, la posición de<br />
retorno para el back cue será<br />
actualizada a la nueva<br />
posición.<br />
MODIFICACIÓN DEL PUNTO CUE<br />
Cuando se gira el cuadrante<br />
interno durante una pausa en<br />
el punto cue, mueve ese<br />
punto. Oirá el audio de la pista<br />
mientras el reproductor<br />
“escarba” a lo largo de ella<br />
hasta que encuentre el lugar<br />
donde desea establecer su<br />
nuevo punto cue. Pulse<br />
“START/PAUSE” y luego<br />
“CUE” para confirmar el nuevo<br />
punto cue.<br />
10
CÓMO IGUALAR TEMPOS Y BEATS<br />
Puede igualar los tempos de sus pistas monitoreando la música de los REPRODUCTORES 1 y 2 de oído y ajustando el pitch.<br />
Si el tempo de la música de un reproductor de CD es más lento que el otro, mueva el cursor al lado ( + ) para igualarlos. Si es<br />
más rápido, desplace el cursor de pitch hacia el lado (-). Las siguientes instrucciones son un ejemplo de cómo hacerlo.<br />
1. Pulse START/PAUSE para iniciar el REPRODUCTOR 1. Este reproductor inicia la reproducción.<br />
2. Pulse START/PAUSE para iniciar el REPRODUCTOR 2. De esta forma, deberían estar reproduciendo ambas<br />
bandejas.<br />
3. Escuche el REPRODUCTOR 2 en sus auriculares. Si su tempo (en los auriculares)<br />
es más rápido que el del REPRODUCTOR 1, enlentezca el tempo del<br />
REPRODUCTOR 2 usando el control de pitch.<br />
Si el tempo DEL REPRODUCTOR 2 (en los auriculares) es más rápido que el del<br />
REPRODUCTOR 1, acelere el tempo del REPRODUCTOR 2 usando el control de<br />
pitch.<br />
IGUALACIÓN DEL BEAT HACIENDO USO DEL PITCH BEND<br />
Una vez que haya igualado los tempos de las pistas, todavía puede ser necesario igualar sus downbeats para crear una<br />
mezcla suave. Puede hacerlo cambiando temporalmente el pitch con la RUEDA DE INFLEXIÓN DE PITCH/AVANCE LENTO<br />
o los botones PITCH BEND +/-.<br />
Una vez haya igualado los tempos, ajuste el pitch temporalmente como se explica a continuación:<br />
Cuando una pista está adelantada, gire la rueda de avance lento en sentido antihorario o pulse el botón PITCH<br />
BEND – para enlentecerlo temporalmente.<br />
Cuando una pista está atrasada, gire la rueda de avance lento en sentido horario o pulse el botón PITCH BEND<br />
+ para acelerarlo temporalmente.<br />
El pitch cambia cuando se gira la RUEDA DE INFLEXIÓN DE PITCH/AVANCE LENTO o se pulsa el botón<br />
PITCH BEND +/-. (Cuanto más rápido gira la rueda mayor es el desplazamiento del pitch.) Suelte la rueda o deje de pulsar los<br />
botones PITCH BEND +/- cuando los downbeats están alineados de la manera que usted desea y la pista volverá a su<br />
tempo/pitch.<br />
EJEMPLO DE MEZCLA UTILIZANDO AMBOS REPRODUCTORES DE SU REPRODUCTOR DE CD<br />
Mientras reproduce un disco en el reproductor 1, inserte un disco en el reproductor 2 y seleccione la siguiente pista, iguale el<br />
pitch con el de la pista del reproductor 1 y, cuando esté listo, use el crossfader de su mezclador para pasar lentamente del<br />
reproductor 1 al reproductor 2.<br />
11
REPRODUCCIÓN ALTERNADA<br />
Es posible usar la función de reproducción alternada del <strong>CDN22</strong> <strong>MK5</strong> para mantener un flujo continuo de música entre las dos<br />
bandejas. Cuando se termina de reproducir una pista o CD de una bandeja, comienza a reproducir la bandeja opuesta. Esa<br />
bandeja reproduce hasta que termina la pista o disco y luego reproduce nuevamente la otra bandeja. Siga estos pasos para<br />
activar la reproducción alternada:<br />
1. Conecte el cable de reproducción alternada incluido a ambos CONECTORES DE INICIO AUTOMÁTICO del<br />
panel trasero de la unidad del control del <strong>CDN22</strong> <strong>MK5</strong>.<br />
2. Inserte CD en ambos lados de la unidad de transporte.<br />
3. Pulse y mantenga pulsados los botones TIME de ambas bandejas durante 1 a 2 segundos hasta que la pantalla<br />
LCD indique "auto" y comience a destellar el número de pista. Esto significa que la reproducción alternada está<br />
activa.<br />
4. Si desea que las bandejas alternen la reproducción de pistas individuales, pulse SGL en ambas bandejas hasta<br />
entrar en el modo de reproducción única (debe aparecer "Single" en la pantalla LCD).<br />
Si desea que las bandejas alternen la reproducción de CD completos, pulse SGL en ambas bandejas hasta<br />
entrar en el modo de reproducción continua (no debe aparecer "Single" en la pantalla LCD).<br />
5. Pulse REPRODUCIR en ambas bandejas. Cuando la pista o CD llega al final, la bandeja opuesta comienza<br />
automáticamente la reproducción.<br />
Nota: Puede usar también la reproducción alternada en el modo de programa (consulte PROGRAMA en CARACTERÍSTICAS<br />
DEL REPRODUCTOR DE CD y CARACTERÍSTICAS DE LA PANTALLA LCD), pero si sus bandejas están en modo de<br />
reproducción única (aparece "Single" en la pantalla LCD) mientras está en modo de programa, la reproducción de las bandejas<br />
se detiene al final de la última pista de su programa.<br />
FADER START<br />
Es posible usar la compatibilidad de <strong>CDN22</strong> <strong>MK5</strong> con fader start para comenzar la reproducción en una bandeja fundiendo<br />
simplemente hacia ella en su mezclador remoto. De la misma manera, al fundir para salir de una bandeja se realiza el cue de<br />
esa bandeja como si hubiera pulsado el botón CUE. (Su mezclador debe ser compatible con fader-start para que esto<br />
funcione.) Siga estos pasos para aprovechar la función fader start del <strong>CDN22</strong> <strong>MK5</strong>:<br />
1. Conecte cables mono estándar de 1/8" desde cada CONECTORES DE AUTO-START del panel trasero de la<br />
unidad de control del <strong>CDN22</strong> <strong>MK5</strong> a su entrada de fader start correspondiente de su mezclador.<br />
2. Inserte CD en ambos lados de la unidad de transporte.<br />
3. Pulse y mantenga pulsado los botones TIME en ambas bandejas por 1 ó 2 segundos para activar la capacidad de<br />
fader start del <strong>CDN22</strong> <strong>MK5</strong>.<br />
4. Consulte en el manual de su mezclador cómo usarlo con un dispositivo fader start.<br />
12
CONTENU DE LA BOÎTE<br />
� <strong>CDN22</strong> <strong>MK5</strong> unité de transport du lecteur CD<br />
� <strong>CDN22</strong> <strong>MK5</strong> unité de commande pour lecteur CD<br />
� Câble d'alimentation<br />
� Câbles de connexion RCA (2 paires)<br />
� Câble de commande<br />
� Câble de relay play<br />
� <strong>Guide</strong> d'utilisation simplifié<br />
� Le livret des consignes de sécurité et des informations concernant la garantie<br />
ENREGISTREMENT<br />
Veuillez visiter le site internet http://www.numark.com pour enregistrer votre nouveau <strong>CDN22</strong> <strong>MK5</strong>. L'enregistrement des<br />
produits vous permet d'être informé sur les toutes dernières nouveautés concernant les produits et de vous offrir un soutien<br />
technique de niveau international, si vous en aviez besoin.<br />
RÈGLES DE BASE<br />
1. Assurez-vous que tous les articles énumérés dans le contenu de la boîte de ce guide sont inclus dans la boîte.<br />
2. VEUILLEZ LIRE LE LIVRET DES CONSIGNES DE SÉCURITÉ ET DES INFORMATIONS SUR LA GARANTIE AVANT<br />
D'UTILISER LE PRODUIT.<br />
3. Examinez le schéma de connexion de ce guide.<br />
4. Placez la console de mixage en position de fonctionnement.<br />
5. Assurez-vous que tous les appareils sont hors tension et que tous les atténuateurs et le gain sont réglés à « zéro ».<br />
6. Connectez toutes les sources d'entrées stéréo tel qu'indiqué sur le schéma.<br />
7. Branchez toutes les sorties aux amplificateurs de puissance, aux lecteurs de cassette et aux sources audio.<br />
8. Branchez tous les appareils à une prise de courant alternatif (AC).<br />
9. Mettre tous les appareils sous tension dans l'ordre suivant.<br />
� sources d'entrée audio (c.-à-d.tourne-disques, lecteurs de disques compacts, etc.)<br />
� Consoles de mixage<br />
� en dernier, tous amplificateurs ou appareils de sortie<br />
10. Pour mettre hors tension, toujours inverser l'opération :<br />
� Éteindre les amplificateurs<br />
� Consoles de mixage<br />
� En dernier, tous les appareils d'entrée<br />
SCHÉMA DE CONNEXION<br />
AMP LOCAUX<br />
HAUT-PARLEURS<br />
COURANT<br />
CÂBLES START<br />
POTENTIOMÈTRE<br />
COURANT<br />
13<br />
CÂBLE DE<br />
CONNEXION<br />
CÂBLE DE<br />
CONNEXION UNITÉ DE<br />
COMMANDE<br />
CÂBLE DE<br />
COMMANDE<br />
CONSOLE DE<br />
MIXAGE<br />
UNITÉ DE<br />
TRANSPORT
CARACTÉRISTIQUES DU PANNEAU ARRIÈRE<br />
1. CONNECTEUR DU CÂBLE DE<br />
COMMANDE – Branchez le câble<br />
à 8 lames fourni dans cette prise<br />
pour brancher la commande à<br />
distance et le lecteur principal<br />
ensemble.<br />
2. CONNECTEUR CEI POUR<br />
CÂBLE D'ALIMENTATION –<br />
Brancher le câble d’alimentation<br />
fourni avec l’appareil dans cette<br />
prise.<br />
3. SÉLECTEUR DE TENSION –<br />
Régler la tension adéquatement<br />
pour votre région.<br />
4. CONNECTEUR AUDIO RCA –<br />
Cette sortie à niveau de ligne permet de brancher le lecteur de disques compacts à une console de mixage.<br />
5. SORTIE NUMÉRIQUE – Le format cette sorties est de type 2, forme 1, aussi nommé S/PDIF (Sony/Phillips Digital<br />
Interface Format). Pour utiliser la sortie numérique il faut éviter d'utiliser l'atténuateur de la hauteur tonale et la commande<br />
de vitesse de lecture. Si vous ajustez la hauteur tonale, les autres appareils peuvent ne pas pouvoir lire correctement la<br />
sortie numérique à cause des variations du taux d’échantillonnage.<br />
6. CONNECTEURE AUTO-START – Utilisez ces connecteurs afin de brancher une console de mixage compatible avec la<br />
fonction Fader Start ou branchez-les ensemble afin de permet la fonction Lecture Relayée.<br />
CARACTÉRISTIQUES DU LECTEUR CD<br />
1. OPEN/CLOSE (Ouvrir/fermer compartiment à disque) -<br />
Appuyez pour insérer ou éjecter un disque. Chaque fois que<br />
vous appuyez sur cette touche, le plateau s’ouvre ou se<br />
ferme. NOTE : Le plateau ne s’ouvre que si le disque est<br />
en mode pause. Le plateau se ferme automatiquement<br />
après 30 secondes.<br />
2. TIME (Durée) - Modifie le mode d’affichage de la durée<br />
entre le temps écoulé, le temps restant de la piste et le<br />
temps restant sur le disque.<br />
3. SGL – Chaque fois que vous appuyez sur cette touche, le<br />
lecteur alterne entre les modes de lecture simple et de<br />
lecture en continu. En mode lecture simple, « Single »<br />
apparaît à l’écran et la lecture s’arrête après chaque piste<br />
sur le module correspondant. En mode lecture en continu, le<br />
module fait la lecture consécutive des pistes sans s’arrêter.<br />
4. LCD DISPLAY (AFFICHEUR LCD) - Indique toutes les fonctions en cours du lecteur CD. Ces fonctions sont vues en<br />
détail dans la section suivante.<br />
5. Touches TRACK - Permet de sélectionner la piste à écouter.<br />
6. Touche +10 - Cette touche permet de sauter plusieurs pistes sur un CD.<br />
7. Touche PROGRAM - Lorsque cette touche est enfoncée, le lecteur cesse la lecture et l’indicateur de programme<br />
s’allume. Sélectionnez chaque piste à programmer et appuyez sur la touche PROGRAM entre chacunes des<br />
sélections. Vous pouvez programmer jusqu’à 30 pistes. Appuyez sur PLAY pour débuter le programme. Pour sortir et<br />
effacer le programme, vous pouvez maintenir la touche PROGRAM enfoncée pour plus de 2 secondes lorsque lecteur<br />
est arrêté, ouvrir le compartiment à disques ou encore, mettre l’appareil hors tension.<br />
8. Touche PITCH - Active l’atténuateur de tonalité.<br />
9. Atténuateur de tonalité - La tonalité peut être modifiée jusqu’à +/- 12 % en appuyant la touche PITCH jusqu’à ce que<br />
le PITCH LED (DEL de tonalité) s’allume, et en déplaçant ensuite l’atténuateur de tonalité. La tonalité ne peut être<br />
modifiée si le PITCH LED est éteint.<br />
10. Cadran de recherche (Cadran extérieur) - 3 vitesses avant et 3 vitesses arrière pour effectuer une recherche au sein<br />
d’une piste. Plus vous tournez le cadran rapidement d’un côté ou de l’autre, plus la recherche se fait rapidement<br />
11. VITESSE DE LECTURE/MOLETTE (ANNEAU INTÉRIEUR) – La molette permet de commander deux fonctions, selon<br />
le mode de lecture en cours :<br />
a) Si aucune piste n’est en cours de lecture, la molette permet de parcourir toutes les trames de la piste. Pour régler<br />
un nouveau point de repère, faites tourner la molette, puis lancez la lecture lorsque vous avez trouvé le bon point.<br />
Appuyer sur CUE pour retourner à ce point de repérage.<br />
b) Lorsque le module est en mode lecture, tourner la molette permet de modifier temporairement la vitesse de<br />
lecture de la piste. Tourner la molette dans le sens horaire permet d’augmenter la vitesse de la piste, alors que<br />
tourner dans le sens antihoraire permet de la diminuer. C’est un outil très pratique pour la synchronisation des<br />
tempos (reportez-vous à la section SYNCHRONISATION DU TEMPO ET DU RYTHME).<br />
12. Touche CUE - Appuyer sur la touche CUE durant la lecture permet de retourner au dernier point de repérage mémorisé<br />
et de faire un arrête de lecture. (Voir les sections FONCTIONS DE LECTURE/PAUSE ET DE CUE pour de plus amples<br />
renseignements.) Maintenez la touche CUE enfoncée pour retourner au point de repère et relancer la lecture de la<br />
piste. Relâchez la touche afin de retourner au point de repérage et faire un arrête de lecture.<br />
13. PLAY/PAUSE (Touche Lecture/Pause) - La touche PLAY/PAUSE permet de passer au mode lecture au mode pause<br />
et vice versa.<br />
14. PITCH BEND –/+ – Vous pouvez utiliser ces deux touches pour faire des ajustements temporaires à la tonalité ou au<br />
tempo de la musique en cours de lecture.<br />
14
CARACTÉRISTIQUES DE L'AFFICHEUR LCD<br />
1. PLAY: Activé lorsque le lecteur est en mode lecture.<br />
2. PAUSE : Activé lorsque le lecteur est en mode pausé.<br />
3. CUE : Clignote lorsque le lecteur programme un point de<br />
référence. Allumé lorsque le lecteur est en mode pause au point<br />
de référence.<br />
4. PROGRAM : Activé lorsque le lecteur est programmé pour faire la<br />
lecture automatique des pistes dans un ordre prédéterminé.<br />
Grâce à ette fonction vous n’êtes pas confiné à surveiller<br />
l’appareil.<br />
5. TIME MODE : (Elapsed) indique le temps écoulé;(Remain)<br />
indique le temps qu’il reste avant la fin de la piste. Cette fonction est contrôlée par la touche TIME.<br />
6. MODE DE LECTURE SIMPLE (SINGLE) : Indique que l'appareil est programmé pour faire la lecture d'une piste à la<br />
fois. Lorsque ceci est éteint, le module est en mode de lecture en continu, donc le CD dans son entier sera lu. Cette<br />
fonction est commandée par la touche SGL.<br />
7. PITCH : Allumé lorsque la touche PITCH est activée.<br />
8. TIME BAR : Indique le temps restant ou le temps écoulé en fonction du mode d’affichage de la touche TIME.<br />
9. PITCH/BPM : Indique le pourcentage de modification de la tonalité ou le BPM en cours.<br />
10. TRACK : Indique la piste en cours.<br />
11. MINUTES : Indique les minutes écoulées ou restantes en fonction du mode d’affichage sélectionné.<br />
12. SECONDS : Indique les secondes écoulées ou restantes en fonction du mode d’affichage sélectionné.<br />
13. FRAMES : Le lecteur CD divise une seconde en 75 frames pour une recherche plus précise. Indique les frames<br />
écoulées ou restantes en fonction du mode d’affichage sélectionné.<br />
FONCTIONS DE PLAY/PAUSE ET DE CUE<br />
LECTURE ET PRÉ-ÉCOUTE<br />
Appuyez sur la touche<br />
PLAY/PAUSE pour<br />
commencer la lecture du<br />
disque. Appuyer sur la<br />
touche CUE renvoie la<br />
lecture du disque au dernier<br />
point de départ. Ce point<br />
de départ s’appelle un point<br />
de référence. Appuyer sur<br />
la touche PLAY et ensuite<br />
sur la touche CUE permet<br />
de recommencer la lecture<br />
toujours au même endroit<br />
plusieurs fois. Cette<br />
fonction s’appelle la lecture<br />
de recherche inversée.<br />
PLAY/PAUSE ET CUE<br />
Lorsque la lecture est<br />
interrompue et<br />
recommencée, le lecteur<br />
programme ce nouvel<br />
endroit comme la position<br />
de retour pour la lecture de<br />
recherche inversée.<br />
MODIFICATION DU POINT DE RÉFÉRENCE<br />
Lorsque l’anneau intérieur<br />
est tourné lorsque la piste<br />
est pausée au point de<br />
repérage, ce point de<br />
repérage est déplacé.<br />
Lorsque la molette parcourt<br />
la piste, vous entendez<br />
l’audio de la piste défilée<br />
vous permettant de trouver<br />
et de régler un nouveau<br />
point de repère. Pour<br />
accepter le nouveau point<br />
de repère, appuyez sur la<br />
touche PLAY/PAUSE et<br />
ensuite sur la touche CUE.<br />
15
SYNCHRONISATION DU TEMPO ET DU RYTHME<br />
Vous pouvez synchroniser le tempo des deux pistes en contrôlant la musique du lecteur 1 et du lecteur 2 à l’oreille et en<br />
ajustant la vitesse de lecture. Lorsque le tempo de la musique du lecteur sélectionné est plus lent que celui de l'autre lecteur,<br />
déplacez l'atténuateur vers le côté (+) afin de synchroniser le tempo. Lorsqu'il est plus rapide, déplacez l'atténuateur vers le<br />
côté (-). Voici un exemple de synchronisation :<br />
1. Appuyez sur PLAY/PAUSE pour lancer le lecteur 1. Le lecteur 1 commence la lecture.<br />
2. Appuyez sur PLAY/PAUSE pour lancer le lecteur 2. Maintenant les deux modules devraient être en mode lecture.<br />
3. Écoutez le lecteur 2 dans votre casque d'écoute. Si son tempo (casque d’écoute) est<br />
plus rapide que celui du lecteur 1, diminuez le tempo du lecteur 2 à l’aide de la<br />
commande de tonalité (Pitch).<br />
Si le tempo du lecteur 2 (casque d'écoute) est plus rapide que celui du lecteur 1,<br />
augmentez le tempo du lecteur 2 à l’aide de la commande de tonalité (Pitch).<br />
SYNCHRONISATION DU RYTHME<br />
Une fois que vous avez synchronisé le tempo des pistes, il se peut que vous deviez synchroniser les battements afin de créer<br />
un enchaînement progressif. Vous pouvez le faire en modifiant temporairement la vitesse de lecture à l'aide de la molette ou<br />
des touches PITCH BEND +/- .<br />
Après avoir synchronisé le tempo, ajustez la vitesse de lecture :<br />
Lorsqu'une piste est en avance, tournez la molette dans le sens antihoraire ou appuyez sur la touche PITCH<br />
BEND – afin de la ralentir temporairement.<br />
Lorsqu'une piste est en retard, tournez la molette dans le sens horaire ou appuyez sur la touche PITCH BEND +<br />
afin de l’accélérer temporairement.<br />
La vitesse de lecture sera modifiée uniquement lorsque la molette sera tournée ou les touches PITCH BEND +/- seront<br />
enfoncées. (Plus vous tournez rapidement la roue, plus vous modifiez la vitesse.) Relâchez la molette ou les touches PITCH<br />
BEND +/- lorsque les battements sont synchronisés tel que désiré afin que la piste reprenne son tempo/tonalité original.<br />
UN EXEMPLE DE MIXAGE À L’AIDE DES DEUX LECTEURS DE VOTRE APPAREIL<br />
En même temps que le lecteur 1 fait la lecture d’un disque, insérez un disque dans le lecteur 2, sélectionnez une piste et<br />
synchronisez la tonalité à celle de la piste qui joue sur le lecteur 1. Lorsque vous êtes prêt, utilisez le crossfader de votre<br />
console pour passer du lecteur 1 au lecteur 2.<br />
16
LECTURE RELAYÉE<br />
Vous pouvez utiliser la fonction de lecture relayée du <strong>CDN22</strong> <strong>MK5</strong> afin d'enchaîner la lecture des deux modules. Lorsque la<br />
lecture de la piste ou du CD d’un des modules est terminée, l'autre module lancera automatiquement la lecture. Ce module fera<br />
la lecture jusqu’à ce que la piste ou le CD soit terminé, puis l'autre module relancera automatiquement la lecture. Voici la marche<br />
à suivre pour lancer la fonction de lecture relayée :<br />
1. Branchez le câble de lecture relayée aux deux connecteurs auto-start sur le panneau arrière du <strong>CDN22</strong> <strong>MK5</strong>.<br />
2. Insérez les CD dans les deux modules.<br />
3. Appuyez sur la touche TIME sur les deux modules et maintenez-les enfoncées pendant 1 à 2 secondes jusqu’à ce<br />
qu’« auto » s’affiche et que le numéro de la piste clignote à l'écran. Ceci indique que la lecture relayée est activée.<br />
4. Si vous désirez alterner la lecture des pistes, appuyez sur la touche SGL de chaque module jusqu’à ce que<br />
« Single » s’affiche.<br />
Si vous désirez alterner la lecture des CD, appuyez sur la touche SGL de chaque module jusqu’à ce qu'il entrer en<br />
mode en continu et que « Single » ne soit plus affiché.<br />
5. Appuyez sur PLAY sur un des modules. Lorsque la lecture de la piste ou du CD est terminée, l'autre module<br />
lancera automatiquement la lecture.<br />
Remarque : Vous pouvez également utiliser le mode lecture relayée en mode Program (reportez-vous à la section<br />
CARACTÉRISTIQUES DU LECTEUR CD et DE L'AFFICHEUR LCD), mais si les modules sont en mode de lecture simple<br />
(« Single » est affiché) en mode Program, la lecture de chaque module s’arrêtera après la dernière piste du programme.<br />
FONCTION FADER START<br />
Vous pouvez utiliser la fonction fader start du <strong>CDN22</strong> <strong>MK5</strong> afin de lancer la lecture sur un des modules à l’aide du crossfader de<br />
la console de mixage. De la même manière, vous pouvez pauser le module comme si vous aviez appuyé sur la touche CUE du<br />
module. (La console de mixage doit être compatible avec la fonction fader start.) Voici la marche à suivre pour lancer la fonction<br />
fader start du <strong>CDN22</strong> <strong>MK5</strong> :<br />
1. Branchez des câbles mono standard de 1/8 po aux deux connecteurs auto-start sur le panneau arrière du <strong>CDN22</strong><br />
<strong>MK5</strong> aux entrées fader start correspondantes de la console de mixage.<br />
2. Insérez les CD dans les deux modules.<br />
3. Appuyez sur la touche TIME sur les deux modules et maintenez-les enfoncées pendant 1 à 2 secondes afin<br />
d’activer la fonction fader start du <strong>CDN22</strong> <strong>MK5</strong>.<br />
4. Veuillez vous reporter au guide d’utilisation de la console de mixage pour de plus amples renseignements sur<br />
comment utiliser la fonction fader start.<br />
17
CONTENUTI DELLA CONFEZIONE<br />
� <strong>CDN22</strong> <strong>MK5</strong> unità di transporto lettore CD<br />
� <strong>CDN22</strong> <strong>MK5</strong> unità di controllo lettore CD<br />
� Cavo di alimentazione<br />
� Cavi di connessione RCA (2 paia)<br />
� Cavo di controllo<br />
� Cavo di relay play<br />
� Guida rapida<br />
� Libretto di istruzioni di sicurezza e garanzia<br />
REGISTRAZIONE<br />
Recarsi alla pagina http://www.numark.com per registrare il <strong>CDN22</strong> <strong>MK5</strong>. La registrazione del prodotto garantisce che<br />
possiamo tenervi aggiornati con tutti gli ultimissimi sviluppi del prodotto e offrirvi assistenza tecnica di livello mondiale, in caso<br />
di eventuali problemi.<br />
NORME FONDAMENTALI<br />
1. Assicurarsi che tutti gli elementi elencati sul frontespizio della presente guida si trovino nella confezione.<br />
2. LEGGERE ATTENTAMENTE IL LIBRETTO DELLE ISTRUZIONI DI SICUREZZA PRIMA DI UTILIZZARE IL<br />
PRODOTTO.<br />
3. Studiare con cura lo schema dei collegamenti fornito nella guida.<br />
4. Sistemare il mixer in una posizione adeguata all’uso.<br />
5. Assicurarsi che tutti i dispositivi siano spenti e che tutti i fader e le manopole di guadagno siano impostati su “zero”.<br />
6. Collegare tutte le sorgenti di ingresso stereo come indicato nello schema.<br />
7. Collegare le uscite stereo ad amplificatori, mangianastri e/o altre sorgenti audio.<br />
8. Collegare tutti i dispositivi all’alimentazione CA.<br />
9. Accendere tutto nel seguente ordine:<br />
� sorgenti di ingresso audio (giradischi, lettori CD, ecc.)<br />
� il mixer<br />
� infine, eventuali amplificatori o dispositivi di uscita<br />
10. Al momento dello spegnimento, invertire questa operazione spegnendo:<br />
� gli amplificatori<br />
� il mixer<br />
� infine, qualsiasi dispositivo di ingresso<br />
SCHEMA DEI COLLEGAMENTI<br />
AMPLIFICATORE<br />
SALA<br />
ALTOPARLANTI<br />
ELETTRICITÁ<br />
CAVI DI<br />
FADER<br />
START<br />
ELETTRICITÁ<br />
18<br />
CAVO DI<br />
CONNESSIONE CAVO DI<br />
CONTROLLO<br />
MIXER<br />
CAVO DI<br />
CONNESSIONE<br />
UNITÁ DI<br />
CONTROLLO<br />
UNITÁ DE<br />
TRANSPORTO
CARATTERISTICHE PANNELLO POSTERIORE<br />
1. CONETTORE DEL<br />
CAVO DI COMANDO –<br />
inserire il cavo a 8 poli in<br />
dotazione per collegare il<br />
telecomando e l’unità<br />
principale CD.<br />
2. PRESA CONENTTORE<br />
D'ALIMENTAZIONE IEC<br />
– inserire a questo livello<br />
il cavo di alimentazione in<br />
dotazione.<br />
3. SELETTORE<br />
VOLTAGGIO –<br />
impostare questo<br />
interruttore sul voltaggio<br />
locale.<br />
4. CONNETTORI AUDIO RCA – collegare il lettore CD al mixer tramite questa uscita a livello di linea.<br />
5. USCITA DIGITALE – Il formato di questa uscita è di tipo 2, formato 1, anche noto come S/PDIF (Sony/Phillips Digital<br />
Interface Format di linea). Per utilizzare l’uscita digitale bisogna evitare di servirsi del cursore del pitch variabile e i<br />
pulsanti di bend del pitch. Se si regola il pitch, infatti, altri dispositivi potrebbero non essere in grado di leggere<br />
adeguatamente l’uscita digitale in quanto la frequenza di campionamento cambia.<br />
6. CONNETTORI DI AVVIAMENTO AUTOMATICO – Servirsi di questi connettori per collegare un mixer compatibile con<br />
avviamento via fader oppure collegarli tra di loro per consentire la riproduzione Relay Play.<br />
CARATTERISTICHE LETTORE CD<br />
1. OPEN/CLOSE (Apertura/Chiusura del Vassoio del Disco)<br />
– Va premuto per caricare o estrarre il disco. Ciascuna<br />
pressione aprirà o chiuderà il vassoio.<br />
NOTA: Se il disco non è stato messo in pausa il vassoio non<br />
si aprirà. Il vassoio si chiuderà automaticamente dopo 30<br />
secondi.<br />
2. TIME (Tasto Time) – Commuta il tempo visualizzato a<br />
display tra tempo di riproduzione trascorso, tempo rimanente<br />
sulla singola traccia e tempo rimanente sull’intero CD.<br />
3. SGL – Commuta tra Single Play (riproduzione singola) e<br />
Continuous Play (riproduzione ininterrotta). In modalità Single<br />
Play, sul display LCD apparirà la scritta "Single" e la<br />
riproduzione su quel deck si interromperà al termine di<br />
ciascuna traccia. In modalità Continuous Play, il deck riprodurrà le tracce in successione, senza interrompersi.<br />
4. DISPLAY LCD - Indica le funzioni in corso sul CD. Le funzioni verranno descritte nel prossimo paragrafo.<br />
5. TRACK (Tasti Track) – Servono a scegliere le tracce da riprodurre.<br />
6. +10 (Tasto Track) – Questo tasto serve a passare velocemente a tracce successive del CD.<br />
7. PROGRAM – Premendo questo tasto l’apparecchio si ferma e si accende l’indicatore di programma. Selezionare<br />
ciascuna traccia da riprodurre e premere il tasto PROGRAM tra una selezione e l’altra. È possibile programmare fino a<br />
30 tracce. Premere PLAY per avviare il programma. Per uscire e cancellare il programma, mantenere la pressione sul<br />
tasto program per più di 2 secondi ad apparecchio fermo, aprire il vassoio del disco, o disconnettere l’alimentazione.<br />
8. PITCH (Tasto Pitch) - Attiva il Pitch Slider.<br />
9. PITCH SLIDER - Il pitch può essere modificato fino a +/-12% premendo il tasto PITCH in modo da accendere il LED del<br />
PITCH, e facendo scorrere il fader. Il pitch non verrà modificato se il LED è spento.<br />
10. ROTELLA SEARCH (ANELLO ESTERNO) - 3 velocità di ricerca delle canzoni in avanti e 3 indietro. Più viene ruotata<br />
la rotella in ciascuna direzione, maggiore sarà la velocità di ricerca della musica.<br />
11. PITCH BEND / JOG WHEEL (ANELLO INTERNO) – La jog wheel ha due funzioni, a seconda della modalità<br />
impostata:<br />
a) Se la traccia non è in corso di riproduzione, la rotella cercherà lentamente tra i frame della traccia stessa. Per<br />
impostare un nuovo punto cue di un frame, far ruotare la rotella, quindi avviare la riproduzione quando è stata<br />
determinata la posizione desiderata. Premere CUE per tornare a quel punto cue.<br />
b) Se la traccia è in corso di riproduzione, la rotella ne effettuerà temporaneamente il bend del pitch. Una rotazione<br />
della rotella in senso orario la accelera temporaneamente, mentre una rotazione in senso antiorario la rallenta.<br />
Questo strumento è molto utile per l’abbinamento del beat (si veda il paragrafo ABBINAMENTO DI TEMPO E<br />
BEAT.<br />
12. CUE – La pressione del tasto CUE durante la riproduzione fa tornare la traccia a livello del punto cue e interrompe<br />
momentaneamente la riproduzione. (Per maggiori informazioni, si veda il paragrafo USO DEI COMANDI PLAY, PAUSE<br />
E CUE.) Tenere premuto CUE per far tornare la traccia al punto cue e avviare la riproduzione. Lasciare la pressione per<br />
tornare al punto cue e interrompere momentaneamente la riproduzione.<br />
13. PLAY/PAUSE – Ciascuna pressione del tasto PLAY/PAUSE provoca il passaggio dalla riproduzione alla pausa e<br />
viceversa.<br />
14. PITCH BEND -/+ – Servirsi di questi due tasti per modificare temporaneamente il pitch e il tempo della musica.<br />
19
CARATTERISTICHE LCD<br />
1. PLAY: Ativo quando l’apparecchio riproduce un CD.<br />
2. PAUSE: Attivo quando l’apparecchio è in pausa.<br />
3. CUE: Lampeggia quando l’apparecchio sta impostando un<br />
punto cue. È acceso in maniera fissa in pausa e al punto cue.<br />
4. PROGRAM: Usato per pre-programmare l’ordine di<br />
riproduzione automatica delle tracce. Questa è un’ottima<br />
funzione nel caso in cui si debba lasciare il lettore CD da solo.<br />
5. TIME MODE: (Elapsed) mostra il tempo trascorso in via di<br />
riproduzione.(Remain) mostra il tempo rimasto di una traccia<br />
specifica. Questa funzione è comandata tramite il TASTO<br />
TIME.<br />
6. SINGLE: Mostra quando l’apparecchio è impostato sulla modalità di riproduzione Single Play (una traccia alla volta).<br />
Quando questo indicatore non è acceso, si trova in modalità di riproduzione continua (Continuous Play) (il CD riprodurrà<br />
ininterrottamente tutte le tracce). Questa funzione è controllata dal tasto SGL.<br />
7. PITCH: È acceso quando il TASTO PITCH è attivo.<br />
8. TIME BAR: Mostra il tempo rimanente o quello trascorso, a seconda dell’impostazione del TASTO TIME.<br />
9. PITCH/BPM: Mostra la percentuale di cambiamento del pitch o del BPM corrente.<br />
10. TRACK: Mostra la traccia in riproduzione.<br />
11. MINUTES: Mostra i minuti trascorsi o rimanenti, a seconda dell’impostazione.<br />
12. SECONDS: A seconda dell’impostazione, mostra i secondi trascorsi o rimanenti.<br />
13. FRAMES: Il lettore CD suddivide un secondo in 75 frame per effettuare un cueing preciso. Questo mostra i frame<br />
trascorsi o rimanenti a seconda dell’impostazione.<br />
USO DEI COMMANDI PLAY/PAUSE E CUE<br />
PLAY E CUE<br />
Premendo il tasto<br />
“PLAY/PAUSE” il disco viene<br />
avviato. La pressione del tasto<br />
“CUE” imposterà il disco<br />
sull’ultima posizione in cui era<br />
stato avviato. Questo viene<br />
chiamato punto cue.<br />
Premendo i tasti<br />
“PLAY/PAUSE” e “CUE” in<br />
maniera alternata, il disco può<br />
tornare ad essere avviato dal<br />
punto cue quante volte si<br />
vuole. Questa funzione<br />
prende il nome di back cue.<br />
PLAY, PAUSE E CUE<br />
Quando la riproduzione è stata<br />
interrotta momentaneamente e<br />
quindi ripresa, la posizione di<br />
ritorno per il back cue verrà<br />
aggiornata su questa nuova<br />
posizione.<br />
PER MODIFICARE IL PUNTO CUE<br />
Quando la rotella interna viene<br />
fatta girare durante una pausa a<br />
livello del punto cue, sposterà<br />
quest’ultimo. L’audio della<br />
traccia si udrà come se il lettore<br />
“grattasse” lungo la traccia fino<br />
a quando non si trova il punto in<br />
cui si desidera impostare il<br />
nuovo punto cue. Premere<br />
“PLAY/PAUSE” e quindi “CUE”<br />
per confermare il nuovo punto<br />
cue.<br />
20
ABBINAMENTO DI TEMPO E BEAT<br />
È possibile abbinare il tempo delle tracce monitorando la musica di PLAYER 1 e PLAYER 2 a orecchio e regolando il pitch. Se il<br />
tempo della musica su un lettore CD è più lento dell’altro, spostare il cursore verso il lato ( + ) per abbinare il tempo. Se è più<br />
veloce, spostare il cursore del pitch verso il lato ( - ). Le seguenti istruzioni dimostrano come procedere:<br />
1. Premere PLAY/PAUSE per avviare il PLAYER 1. Il PLAYER 1 inizia la riproduzione.<br />
2. Premere PLAY/PAUSE per avviare il PLAYER 2. Ora entrambi i deck dovrebbero suonare.<br />
3. Ascoltare il PLAYER 2 in cuffia. Se il relativo tempo (in cuffia) risulta più veloce di<br />
quello del PLAYER 1, rallentare il tempo del PLAYER 2 servendosi del comando di<br />
regolazione del pitch.<br />
Se il relativo tempo (in cuffia) risulta più lento di quello del PLAYER 1, accelerare il<br />
tempo del PLAYER 2 servendosi del comando di regolazione del pitch.<br />
ABBINAMENTO DEL BEAT SERVENDOSI DEL COMANDO DI BEND DEL PITCH<br />
Una volta abbinato il tempo delle tracce, può ancora essere necessario abbinarne il beat di attacco per creare un mix uniforme.<br />
Questo può essere fatto modificando temporaneamente il pitch servendosi del comando PITCH BEND/JOG WHEEL o dei tasti<br />
PITCH BEND +/-.<br />
Dopo aver abbinato il tempo, regolare temporaneamente il pitch come segue:<br />
Quando una traccia è avanti, ruotare la jog wheel in senso antiorario oppure premere il tasto PITCH BEND –<br />
per rallentarla.<br />
Quando una traccia è indietro, ruotare la jog wheel in senso orario oppure premere il tasto PITCH BEND +<br />
per accelerarla.<br />
Il pitch cambierà durante la rotazione del PITCH BEND/JOG WHEEL oppure durante la pressione del tasto PITCH BEND +/-.<br />
(Più si ruota rapidamente la rotella, maggiore sarà lo spostamento del pitch.) Quando gli attacchi sono allineati come<br />
desiderato, lasciare la rotella o interrompere la pressione sui tasti PITCH BEND +/-; la traccia tornerà al suo tempo/pitch<br />
originario.<br />
ESEMPIO DI MISSAGGIO EFFETTUATO UTILIZZANDO ENTRAMBI I LETTORI DEL LETTORE CD<br />
Durante la riproduzione di un disco sul PLAYER 1, caricare un disco nel PLAYER 2 e selezionare la traccia successiva,<br />
regolare il pitch accordandolo a quello della traccia in riproduzione sul PLAYER1 e una volta pronti, utilizzare il crossfader del<br />
mixer per sfumare dal PLAYER 1 al PLAYER 2.<br />
21
FUNZIONE RELAY PLAY<br />
Si può utilizzare la funzione Relay Play del <strong>CDN22</strong> <strong>MK5</strong> per mantenere un flusso costante di musica tra i due deck. Quando la<br />
riproduzione della traccia o del CD presente su uno dei deck è terminata, l’altro deck inizierà a suonare. Quel deck suonerà fino<br />
a quando la traccia o il disco non è finito, quindi il primo deck suonerà nuovamente. Per attivare il Relay Play procedere come<br />
segue:<br />
1. Collegare il cavo Relay Play in dotazione a entrambi i CONNETTORI DI AVVIAMENTO AUTOMATICO a livello del<br />
pannello posteriore del <strong>CDN22</strong> <strong>MK5</strong>.<br />
2. Inserire CD in entrambi i lati dell’unità di trasporto.<br />
3. Tenere premuti i pulsanti TIME su entrambi i deck per 1-2 secondi fino a quando lo schermo LCD non indica "auto"<br />
e il numero di traccia non inizia a lampeggiare. Ciò significa che il Relay Play è attivo.<br />
4. Se si desidera che i deck alternino la riproduzione di singole tracce, premere SGL su ciascun deck fino a quando<br />
non entra in modalità Single Play ("Single" dovrebbe apparire a display sullo schermo LCD).<br />
Se si desidera che i deck alternino la riproduzione di interi CD, premere SGL su ciascun deck fino a quando non<br />
entra in modalità Continuous Play ("Single" non dovrebbe apparire a display sullo schermo LCD).<br />
5. Premere PLAY su uno dei due deck. Quando la traccia o il CD giungono al termine, l'altro deck inizierà<br />
automaticamente la riproduzione.<br />
Nota bene: si può anche utilizzare la funzione Relay Play in modalità Program (si veda PROGRAM in CARATTERISTICHE<br />
LETTORE CD e CARATTERISTICHE LCD), ma se i deck si trovano in modalità Single Play (e "Single" appare a display sullo<br />
schermo LCD) in modalità Program, la riproduzione di ciascun deck verrà interrotta al termine dell’ultima traccia del rispettivo<br />
programma.<br />
FADER START<br />
Si può utilizzare la compatibilità fader start del <strong>CDN22</strong> <strong>MK5</strong> per avviare la riproduzione su un deck semplicemente sfumandola<br />
con il crossfader sul mixer remoto. Allo stesso modo, sfumare con il crossfader da un deck effettuerà il cueing di quel deck come<br />
se fosse stato premuto il tasto CUE. (Affinché questo funzioni, il mixer deve essere compatibile fader start.) Procedere come<br />
segue per sfruttare la funzione fader start del <strong>CDN22</strong> <strong>MK5</strong>:<br />
1. Collegare cavi standard mono da 1/8" da ciascun CONNETTORI DI AVVIAMENTO AUTOMATICO sul pannello<br />
posteriore dell’unità di controllo del <strong>CDN22</strong> <strong>MK5</strong> al corrispondente ingresso fader start a livello del mixer.<br />
2. Inserire CD in entrambi i lati dell’unità di trasporto.<br />
3. Tenere premuti i tasti TIME su entrambi i deck per 1-2 secondi per attivare la funzione fader start del <strong>CDN22</strong> <strong>MK5</strong>.<br />
4. Fare riferimento al manuale del mixer per informazioni sull’uso con un dispositivo fader start.<br />
22
INHALT DER VERPACKUNG<br />
� <strong>CDN22</strong> <strong>MK5</strong> Transport einheit für CD-spieler<br />
� <strong>CDN22</strong> <strong>MK5</strong> Steuerungseinheit für CD-spieler<br />
� IEC-Genormtes Stromkabel<br />
� RCA-Verbindungskabel (doppelpaar)<br />
� Steuerungskabel<br />
� Startkabel für Relay-Play<br />
� Kurzanleitung<br />
� Broschüre mit den Sicherheits- und Garantierichtlinien<br />
REGISTRIERUNG<br />
Registrieren Sie Ihren <strong>CDN22</strong> <strong>MK5</strong> bitte auf http://www.numark.de. Dadurch geben Sie uns die Möglichkeit, Ihnen<br />
Informationen bei Produktaktualisierungen zukommen zu lassen und Ihnen bei möglichen Problemen den bestmöglichen<br />
technischen Support zu bieten.<br />
GRUNDREGELN<br />
1. Vorderseite der Anleitung abgebildeten Bestandteile im Karton befinden.<br />
2. LESEN SIE VOR DER VERWENDUNG DES PRODUKTS DIE SICHERHEITSHINWEISE.<br />
3. Sehen Sie sich die Anschlussübersicht in dieser Anleitung an.<br />
4. Stellen Sie den Mixer in einer für den Betrieb geeigneten Position auf<br />
5. Achten Sie darauf, dass alle Geräte ausgeschaltet sind und dass alle Fader und Gain Regler Ihres Mixers auf dem<br />
niedrigsten Wert stehen.<br />
6. Verbinden Sie alle Stereo Eingangsquellen, wie in der Anschlussübersicht gezeigt, mit dem Mixer.<br />
7. Schließen Sie die Stereo Ausgänge an Verstärker, Kassettendecks oder andere Audiogeräte an.<br />
8. Schließen Sie alle Geräte an den Stromkreis an.<br />
9. Schalten Sie die Geräte in der folgenden Reihenfolge ein:<br />
� Audio Eingangsquellen (z.B. Turntables, CD Player, usw.)<br />
� Mixer<br />
� Zuletzt Verstärker und Ausgangsgeräte<br />
10. Schalten Sie Ihr System IMMER in genau der umgekehrten Reihenfolge aus, indem Sie:<br />
� Zuerst Verstärker<br />
� Dann den Mixer<br />
� Und am Schluss die Eingangsquellen ausschalten<br />
ANSCHLUSSÜBERSICHT<br />
HOUSE VERSTÄRKER<br />
AKTIVEMONITOREN<br />
ELEKTRISCHER STROM<br />
STARTKABEL<br />
FÜR FADER<br />
RCA<br />
VERBINDUNGSKABEL<br />
ELEKTRISCHER STROM<br />
23<br />
STEUERUNGSKABEL<br />
MIXER<br />
RCA<br />
VERBINDUNGSKABEL<br />
STEUERUNGSEINHEIT<br />
TRANSPORT EINHEIT
ÜBERSICHT ÜBER DIE RÜCKSEITE<br />
1. ANSCHLUSS FÜR<br />
KONTROLLKABEL –<br />
Schliessen Sie das<br />
beigefügte 8-polige Kabel<br />
hier an, um die<br />
Fernbedienungseinheit und<br />
die CD-Haupteinheit<br />
miteinander zu verkabeln<br />
2. ANSCHLUSS<br />
GENORMTEN<br />
FÜR IEC-<br />
NETZSTECKER –<br />
Schliessen Sie hier das<br />
mitgelieferte<br />
an.<br />
Stromkabel<br />
3. SPANNUNGSUMSCHALE<br />
TER – Stellen Sie diesen<br />
Schalter auf die für Ihren<br />
Aufenthaltsort richtige<br />
4.<br />
Stromspannung ein.<br />
RCA-TONANSCHLÜSSE – Schliessen Sie Ihren CD-Spieler von diesen Line-Pegelausgängen an Ihr Mischpult an.<br />
5. DIGITALER AUSGANG – Die Ausgabe erfolgt in Format Typ 2, Form 1, auch als S/PDIF bekannt (Sony/Phillips Digital Interface<br />
Format). Um den digitalen Ausgang zu benützen, sollten Sie den verstellbaren Pitch-Slider (Schieberegler für Tonhöhe/Tempo) und<br />
die Buttons für Pitch-Bend (gleitende Tonhöhenverschiebung) nicht verwenden. Falls Sie den Pitch (Tonhöhe/Tempo) adjustieren,<br />
kann es vorkommen, dass andere Geräte die digitale Ausgabe nicht korrekt lesen, da sich die Abtastrate verändert.<br />
6. FERNBEDIENUNGSSTARTVERBINDUNGEN - Verwenden Sie diesen Anschluss, um ein Mischpult mit Fader-Start-Funktion<br />
anzuschließen oder verbinden Sie sie miteinander, um Relay-Play zu ermöglichen.<br />
CD-SPIELER BEDIENELEMENTE<br />
1. AUF/ZU (Disc-Einlegevorrichtung Auf/Zu) – Drücken Sie hier,<br />
um die Disc einzulegen oder herauszunehmen. Jedes Betätigen<br />
wird die Einlegevorrichtung auf der Schiene öffnen oder<br />
schliessen.<br />
HINWEIS: Die Einlegevorrichtung öffnet nur dann, wenn die CD<br />
pausiert ist. Die Einlegevorrichtung schliesst nach 30 Sekunden<br />
automatisch.<br />
2. ZEIT (Zeittaste) – Schaltet die Zeitanzeige zwischen vergangener<br />
Abspielzeit, verbleibender Abspielzeit des Titels und verbleibender<br />
Abspielzeit der gesamten CD..<br />
3. SGL – Wechselt zwischen den Modi Einzelwiedergabe und<br />
Durchgehende Wiedergabe. Im Modus Einzelwiedergabe wird am<br />
LCD “Single” angezeigt und die Wiedergabe stoppt nach jedem<br />
Track. Im Modus Durchgehende Wiedergabe werden die Tracks<br />
des Decks nacheinander ohne Stopps durchgehend abgespielt.<br />
4. LCD-ANZEIGE- Zeigt alle CD-Funktionen während des Ablaufs an. Diese Funktionen werden im nächsten Abschnitt erläutert.<br />
5. TITEL (Titeltasten) - Diese Tasten werden benutzt, um den Titel, welcher gespielt werden soll, auszuwählen.<br />
6. +10 (Titeltaste) – Diese Taste dient zum schnellen Anwählen von höher numerierten Titeln auf der CD.<br />
7. PROGRAMM – Drücken Sie diese Taste herunter, wird das Gerät anhalten und die Programmanzeige leuchtet auf. Wählen Sie<br />
alle Titel, welche in das Programm aufgenommen werden sollen, aus und drücken Sie die PROGRAMM-Taste nach jeder Wahl.<br />
Sie können bis zu 30 Titel vorprogrammieren. Drücken Sie PLAY, um das Programm zu starten. Um aus dem Programm<br />
auszusteigen oder es zu löschen, halten Sie entweder die Programmtaste für mehr als 2 Sekunden gedrückt während das Gerät<br />
gestoppt ist, öffnen die Einlegevorrichtung oder schalten den Strom ab.<br />
8. TONLAGE (Tonlagentaste) – Aktiviert den Tonlagenschieberegler.<br />
9. TONLAGEN-SCHIEBEREGLER – Die Tonlage kann bis zu +/-12% verändert werden, indem man die TONLAGE-Taste drückt, so<br />
daß das TONLAGE LED aufleuchtet und dann den Schiebeblendregler bewegt. Die Tonlage wird nicht verändert, wenn das<br />
TONLAGE LED nicht aufleuhtet.<br />
10. SUCHRAD (ÄUßERER RING) - 3 vorwärts und 3 rückwärts Geschwindigkeitsstellungen um Musikstücke zu durchsuchen. Je<br />
mehr das Rad in die eine oder andere Richtung gedreht wird, umso schneller wird das Musikstück durchsucht.<br />
11. PITCH BEND / JOG WHEEL (INNERER RING) – Je nach angewähltem Modus erfüllt das Jog-Wheel zwei Funktionen.<br />
a) Wenn kein Track spielt, kann mit demJog-Wheel eine langsame Suche durch den Track ausgeführt werden. Um einen<br />
neuen Frame-Cue-Punkt zu setzen, drehen Sie das Rad und beginnen Sie mit der Wiedergabe sobald Sie die gewünschte<br />
Stelle gefunden haben. Drücken Sie CUE, um zu diesem Cue-Punkt zurückzuspringen.<br />
b) Falls ein Track spielt, so wird das Jog Wheel die Tonhöhe des Tracks vorübergehend beugen. Wenn Sie das Rad im<br />
Uhrzeigersinn drehen, so wird der Track vorübergehend schneller abgespielt, wenn Sie das Rad gegen den Uhrzeigersinn<br />
drehen wird der Track vorübergehend langsamer abgespielt. Dies ist ein wertvolles Tool für das Synchronisieren von Beats<br />
(siehe ANGLEICHEN VON TEMPI & BEATS).<br />
12. CUE – Wenn Sie den CUE Button während der Wiedergabe drücken, springt der Track zum Cue-Punkt zurück und pausiert die<br />
Wiedergabe. (Siehe PLAY/PAUSE & CUE FUNKTIONEN für nähere Information). Halten Sie CUE gedrückt, um den Track zum<br />
Cue-Punkt zurückspringen zu lassen und die Wiedergabe zu beginnen. Lassen Sie los, um zum Cue-Punkt zurückzugehen und<br />
pausieren Sie die Wiedergabe.<br />
13. START/PAUSE (Play/Pause-Taste) – Jedes Drücken der Play/Pause-Taste schaltet zwischen Abspielen und Pausieren und<br />
umgekehrt um.<br />
14. PITCH BEND -/+ – Verwenden Sie die beiden Pitch Bend Tasten, um den Pitch und das Tempo der Musik zeitweilig zu ändern.<br />
24
LCD-ANZEIGEELEMENTE<br />
1. PLAY: Aktiviert, während das Gerät eine CD abspielt.<br />
2. PAUSE: Aktiviert, wenn das Gerät pausiert.<br />
3. CUE: Blinkt, wenn das Gerät einen Cue-Punkt setzt. Leuchtet<br />
ununterbrochen, wenn das Gerät an einem Cue-Punkt pausiert.<br />
4. PROGRAM: Wird verwendet, um die Titelfolge, welches das<br />
Gerät automatisch abspielen soll, vorzuprogrammieren. Dies<br />
ist eine hervorragende Funktion für den Fall, daß Sie den CD-<br />
Spieler sich selbst überlassen müssen.<br />
5. TIME MODE: (Abgelaufen) zeigt die Zeit im tatsächlichen<br />
Abspielverlauf an.(Verbleibend) zeigt an, wieviel Zeit für einen<br />
bestimmten Titel verbleibt. Diese Funktion wird über die ZEIT-<br />
Taste gesteuert.<br />
6. SINGLE: Zeigt an wenn sich das Gerät im Modus Einzelwiedergabe (immer nur ein Track) befindet. Leuchtet dies nicht auf, so<br />
befindet sich das Gerät im Modus Durchgehende Wiedergabe (alle Tracks auf der CD werden nacheinander abgespielt). Diese<br />
Funktion wird durch den SGL Button gesteuert.<br />
7. PITCH: Leuchtet auf, wenn die TONLAGE-TASTE aktiviert ist.<br />
8. TIME BAR: Zeigt entweder die verbleibende oder die abgelaufene Zeit an, je nach Einstellung der ZEIT-TASTE.<br />
9. PITCH/BPM: Zeigt die prozentuale Veränderung der Tonlage oder die augenblicklichen TPM.<br />
10. TRACK: Zeigt an, welchen Titel das Gerät im Augenblick abpielt.<br />
11. MINUTES: Zeigt entweder die vergangenen oder verbleibenden Minuten an, je nach Einstellung der Betriebsart.<br />
12. SECONDS: Zeigt entweder die vergangenen oder verbleibenden Sekunden an, je nach Einstellung der Betriebsart.<br />
13. FRAMES: Für exaktes Cueing unterteilt der CD-Spieler eine Sekunde in 75 Rahmen. Zeigt entweder die vergangenen oder<br />
verbleibenden Rahmen an, je nach Einstellung der Betriebsart.<br />
PLAY / PAUSE & CUE FUNKTIONEN<br />
PLAY & CUE<br />
Ein Drücken der<br />
“PLAY/PAUSE”-Taste startet<br />
die Disc. Wird die “CUE”-<br />
Taste gedrückt, wird die Disc<br />
zum letzten Anfangspunkt<br />
zurückgesetzt. Dies ist der<br />
Cue-Punkt. Abwechselndes<br />
Drücken der Tasten<br />
“PLAY/PAUSE” und “CUE”<br />
führt zum beliebig oftmaligen Abspielen der CD, angefangen von derselben Position. Diese Funktion wird Rück-Cue genannt.<br />
PLAY / PAUSE & CUE<br />
Falls das Abspielen pausiert<br />
und dann wieder gestartet<br />
wurde, wird die<br />
Rückkehrposition für das<br />
Rück-Cue auf diese neue<br />
Position festgelegt.<br />
EDITIERUNG CUE-PUNKT<br />
Wird das innere Rad<br />
während des Festlegens<br />
eines Cue-Punkts gedreht,<br />
kann ein neuer Cue-Punkt<br />
gefunden werden. Der CD-<br />
Spieler wird wiederholt kleine<br />
Teile der CD abspielen<br />
während Sie die gewünschte<br />
Position anwählen. Sie<br />
können bestätigen, daß der<br />
neue Cue-Punkt der<br />
Gewünschte ist, indem Sie<br />
“PLAY/PAUSE” und dann<br />
“CUE” drücken.<br />
25
ANGLEICHEN VON TEMPI & BEATS<br />
Sie können die Tempi Ihrer Tracks angleichen, indem Sie die Musik von PLAYER 1 und PLAYER 2 abhören und den Pitch<br />
nach Gehör anpassen. Ist die Musik eines CD-Players langsamer, als die des anderen, bewegen Sie den Schieber zur<br />
Plusseite (+) hin, um das Tempo anzupassen. Ist die Musik schneller, bewegen Sie den Schieber zur Minusseite (-) hin.<br />
Folgende Anleitung soll diesen Vorgang veranschaulichen:<br />
1. Drücken Sie PLAY/PAUSE, um PLAYER 1 zu starten. PLAYER 1 beginnt mit der Wiedergabe.<br />
2. Drücken Sie PLAY/PAUSE, um PLAYER 2 zu starten. Nun sollten beide Decks spielen.<br />
3. Hören Sie PLAYER 2 über Ihre Kopfhörer ab. Falls das Tempo (der Musik in Ihren<br />
Kopfhörern) schneller ist, als das Tempo von PLAYER 1, verlangsamen Sie mit dem<br />
Pitch-Control-Regler das Tempo von PLAYER 2.<br />
Falls das Tempo von PLAYER 2 (in Ihren Kopfhörern) schneller als das Tempo von<br />
PLAYER 1 ist, beschleunigen Sie mit dem Pitch-Control-Regler das Tempo von<br />
PLAYER 2.<br />
ANGLEICHEN VON BEATS UNTER VERWENDUNG DER PITCH-BEND-FUNKTION<br />
Wenn Sie die Tempi der Tracks angeglichen haben, müssen Sie vielleicht noch die Taktanfänge angleichen, um einen weichen<br />
Übergang zu erzielen. Sie können dies tun, indem Sie vorübergehend den Pitch mit dem PITCH BEND/JOG WHEEL oder den<br />
PITCH BEND +/- Buttons verändern.<br />
So verändern Sie für kurze Zeit den Pitch, nachdem Sie die Tempi angeglichen haben:<br />
Wenn ein Track zu weit vorne ist, drehen Sie das Jog Wheel gegen den Uhrzeigersinn oder drücken<br />
Sie den PITCH-BEND (-) Button, um den Track vorübergehend zu verlangsamen.<br />
Wenn ein Track zu weit hinten ist, drehen Sie das Jog Wheel im Uhrzeigersinn oder drücken Sie<br />
den PITCH-BEND (+) Button, um den Track vorübergehend zu beschleunigen.<br />
Der Pitch verändert sich, während das PITCH BEND/JOG WHEEL gedreht wird oder der PITCH BEND +/-<br />
Button gedrückt wird. (Je schneller Sie das Rad drehen, desto größer ist die Verschiebung des Pitch). Lassen Sie das Rad oder<br />
die PITCH BEND +/- Buttons los, sobald Sie die Taktanfänge angeglichen haben, und der Track spielt wieder in seinem<br />
ursprünglichen Pitch (Tempo und Tonhöhe).<br />
BEISPIELE ZUM MIXEN MIT BEIDEN CD-SPIELERN<br />
Während SPIELER 1 eine CD abspielt, legen Sie eine Disc in SPIELER 2 und wählen Sie Ihr nächstes Musikstück aus, bringen<br />
Sie die Tonlage in Einklang mit dem Musikstück auf SPIELER 1 und wenn Sie fertig sind, blenden Sie mit dem Überblendregler<br />
Ihres Mixers von SPIELER 1 auf SPIELER 2 über.<br />
26
RELAY-PLAY<br />
Sie können den Relay-Play-Feature des <strong>CDN22</strong> <strong>MK5</strong> verwenden, um eine durchgehende Musikwiedergabe zwischen den<br />
beiden Decks herzustellen. Sobald der Track oder die CD des ersten Decks bis zum Ende durchgespielt wurde, beginnt das<br />
zweite Deck mit der Wiedergabe. Das zweite Deck wird solange spielen, bis der Track oder die CD am Ende angelangt ist.<br />
Danach beginnt das erste Deck erneut mit der Wiedergabe. Führen Sie folgende Schritte aus, um Relay-Play zu aktivieren:<br />
1. Verbinden Sie das Relay-Play-Kabel mit beiden Fernbedienungsstartverbindungen an der Rückseite des <strong>CDN22</strong><br />
<strong>MK5</strong>.<br />
2. Legen Sie auf jeder Seite der Transporteinheit eine CD ein.<br />
3. Halten Sie die TIME Buttons auf beiden Decks etwa 1-2 Sekunden lang gedrückt bis am LCD “auto” angezeigt wird<br />
und die Tracknummer zu blinken beginnt. Das bedeutet, dass Relay-Play nun aktiv ist.<br />
4. Falls Sie möchten, dass das Deck abwechselnd einzelne Tracks wiedergibt, drücken Sie auf jedem Deck SGL, bis<br />
in den Einzelwiedergabe-Modus gewechselt wird (in der LCD-Anzeige sollte nun “Single” angezeigt werden).<br />
Falls Sie möchten, dass das Deck abwechselnd ganze CDs wiedergibt, drücken Sie auf jedem Deck SGL, bis in<br />
den Modus Durchgehende Wiedergabe gewechselt wird (in der LCD-Anzeige sollte “Single” nicht angezeigt<br />
werden).<br />
5. Drücken Sie PLAY auf einem der Decks. Wenn der Track oder die CD am Ende angelangt ist, beginnt das andere<br />
Deck automatisch mit der Wiedergabe.<br />
Hinweis: Sie können Relay-Play auch verwenden während Sie sich im Programm-Modus befinden (siehe PROGRAM unter CD-<br />
SPIELER BEDIENELEMENTE und LCD-ANZEIGEELEMENTE), aber falls Ihre Decks im Modus Einzelwiedergabe sind (am<br />
LCD erscheint “Single”), während sie sich im Programm-Modus befinden, stoppt die Wiedergabe jedes Decks am Ende des<br />
letzten Track in seinem Programm.<br />
FADER-START<br />
Sie können die Fader-Start-Kompatibilität des <strong>CDN22</strong> <strong>MK5</strong> nutzen, um mit der Wiedergabe eines Decks zu beginnen, indem<br />
Sie an ihrem Mixer einfach auf das entsprechende Deck crossfaden. Gleichermaßen bewirkt ein Crossfaden vom Deck weg eine<br />
Cue-Funktion dieses Decks, so als hätten Sie den CUE-Button betätigt. (Ihr Mixer muss für die Fader-Start-Funktion kompatibel<br />
sein.) Führen Sie folgende Schritte aus, um die Vorteile des <strong>CDN22</strong> <strong>MK5</strong> Fader-Start zu nutzen:<br />
1. Verbinden Sie Standard 3,5 mm Monokabel (1/8") von jeder Fernbedienungsstartverbindung an der Rückseite des<br />
<strong>CDN22</strong> <strong>MK5</strong> mit dem entsprechenden Fader-Start-Eingang auf Ihrem Mixer.<br />
2. Legen Sie auf jeder Seite der Transporteinheit eine CD ein.<br />
3. Halten Sie die TIME Buttons auf beiden Decks etwa 1-2 Sekunden lang gedrückt bis, um die Fader-Start-Funktion<br />
des <strong>CDN22</strong> <strong>MK5</strong> zu aktivieren.<br />
4. Nähere Informationen wie Sie den Mixer mit einem Fader-Start-Gerät verwenden, lesen Sie bitte im Handbuch<br />
Ihres Mixers nach.<br />
27
SPECIFICATIONS<br />
QUANTIZATION: 16-bit linear/channel, 3-beam laster<br />
OVERSAMPLING RATE: 8 times<br />
FREQUENCY RESPONSE: 20 Hz – 20 kHz<br />
CHANNEL SEPARATION: 89 dB<br />
THD+N: 0.01%<br />
SNR (IHF-A): 90 dB<br />
OUTPUT LEVEL: 2.0V rms<br />
SHORT ACCESS TIME: < 1.7 sec (play next track)<br />
LONG ACCESS TIME: < 3 sec (Track 1 � Track 20)<br />
START TIME: < 0.3 sec<br />
PITCH CONTROL RANGE: ± 12%<br />
PITCH BEND: ± 16%<br />
DIGITAL OUTPUT: Type 2, form 1, S/PDIF<br />
DIMENSIONS (W x H x D): Transport Unit: 19" x 3.5" x 10.375" (without feet)<br />
Control Unit: 19" x 3.5" x 3.667" (without feet)<br />
WEIGHT: Transport Unit: 11 lbs.<br />
Control Unit: 4.4 lbs.<br />
POWER SUPPLY: 115/230V AC, 50/60 Hz<br />
100V AC, 50/60 Hz (for Japan)<br />
220V AC, 60 Hz (for Korea)<br />
POWER CONSUMPTION: 20 W<br />
www.numark.com<br />
MANUAL VERSION 4.3