

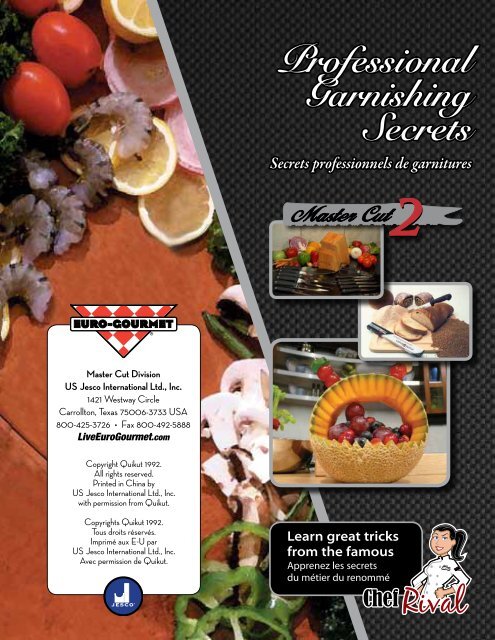
Professional Garnishing Secrets Secrets professionnels ... - US Jesco
Professional Garnishing Secrets Secrets professionnels ... - US Jesco
Professional Garnishing Secrets Secrets professionnels ... - US Jesco

You also want an ePaper? Increase the reach of your titles
YUMPU automatically turns print PDFs into web optimized ePapers that Google loves.
Master Cut Division<br />
<strong>US</strong> <strong>Jesco</strong> International Ltd., Inc.<br />
1421 Westway Circle<br />
Carrollton, Texas 75006-3733 <strong>US</strong>A<br />
800-425-3726 • Fax 800-492-5888<br />
LiveEuroGourmet.com<br />
Copyright Quikut 1992.<br />
All rights reserved.<br />
Printed in China by<br />
<strong>US</strong> <strong>Jesco</strong> International Ltd., Inc.<br />
with permission from Quikut.<br />
Copyrights Quikut 1992.<br />
Tous droits réservés.<br />
Imprimé aux E-U par<br />
<strong>US</strong> <strong>Jesco</strong> International Ltd., Inc.<br />
Avec permission de Quikut.<br />
<strong>Professional</strong><br />
<strong>Garnishing</strong><br />
<strong>Secrets</strong><br />
<strong>Secrets</strong> <strong>professionnels</strong> de garnitures<br />
Learn great tricks<br />
from the famous<br />
Apprenez les secrets<br />
du métier du renommé
MasterCut 2 Steak Knives & Blocks<br />
Order your<br />
MasterCut<br />
Knife Block<br />
Commandez<br />
votre bloque<br />
MasterCut Knife<br />
Order 4 More<br />
Steak Knives<br />
Commandez 4<br />
couteaux à steak<br />
de plus<br />
Master Cut Knives have evolved over several<br />
generations of use by our professional<br />
demonstration team. Our knives go through<br />
thousands of hours of demanding use in front<br />
of live audiences. This insures that Master<br />
Cut Knives work the way you expect them to<br />
in your kitchen. Stainless steel blades never<br />
need sharpening.<br />
Les couteaux Master Cut Knives ont évolués à<br />
travers plusieurs générations d’usage par notre<br />
équipe de démonstrateurs <strong>professionnels</strong>.<br />
Nos couteaux sont utilisés de façon exigente<br />
durant des milliers d’heures devant des<br />
auditoires en direct. Ceci assure que les<br />
couteaux Master Cut Knives font le travail de<br />
la manière dont vous vous en attendez dans<br />
votre cuisine. Les lames en acier inoxidable<br />
n’ont jamais besoin d’être aiguisées.<br />
Call Now 1-800-425-3726<br />
or check us out at <strong>US</strong><strong>Jesco</strong>.com<br />
Appellez maintenant 1-800-425-3726<br />
ou visitez <strong>US</strong><strong>Jesco</strong>.com<br />
Innovative<br />
Products Online<br />
visit <strong>US</strong><strong>Jesco</strong>.com<br />
At <strong>US</strong><strong>Jesco</strong>.com, you will see more unique and<br />
innovative cleaning and houseware products.<br />
You can watch instructional videos, download<br />
and print FREE user manuals, reciepes,<br />
and even garnishing secrets.<br />
Watch<br />
Instructional Videos<br />
on our products at<br />
<strong>US</strong><strong>Jesco</strong>.com<br />
1 22
Chef’s Envy Food Slicer<br />
Order your<br />
Chef’s Envy Slicer<br />
Commandez<br />
votre Chef’s Envy<br />
<strong>Professional</strong> Preparation<br />
Revealed<br />
The Chef’s Envy <strong>Professional</strong><br />
Slicer brings the tools of the<br />
Commercial Kitchen to your home.<br />
Providing uniformity, safety and control to<br />
vegetable preparation, which is a key ingredient<br />
for perfect meal preparation.<br />
Thick and Thin Slicing / Shredding and Chopping<br />
Comes with the Slicer, Julienne Blade, Thick<br />
Julienne, Safety Handle. Master Cut 2 tripletempered<br />
stainless steel blades slicing blades<br />
with a Lifetime Guarantee.<br />
• Fruits & Vegetables • Potatoes<br />
• Pan Fried Onions • Zucchini<br />
• Carrots • Celery<br />
• Corn-off-the-Cob • Cole Slaw<br />
• Julienne French Fries<br />
Order your Chef’s<br />
Envy Caddy<br />
Commandez<br />
votre Chef’s Envy Caddy<br />
Hold all of the components<br />
of the Chef’s Envy Slicer in<br />
one compact container.<br />
Call Now 1-800-425-3726<br />
or check us out at <strong>US</strong><strong>Jesco</strong>.com<br />
Appellez maintenant 1-800-425-3726<br />
ou visitez <strong>US</strong><strong>Jesco</strong>.com<br />
<strong>Professional</strong><br />
<strong>Garnishing</strong><br />
<strong>Secrets</strong><br />
<strong>Secrets</strong> <strong>professionnels</strong> de garnitures<br />
Turn ordinary fruits and vegetables into<br />
extraordinary works of art with your <strong>Garnishing</strong> Kit.<br />
With the 3-piece <strong>Garnishing</strong> Kit plus the traditional<br />
paring knife you can create all the exciting designs<br />
featured in this booklet.<br />
With a little practice and experimentation you’ll<br />
soon be creating your own garnish decorations to<br />
add color and artistry to your food presentations.<br />
Transformez vos fruits et légumes ordinaires<br />
en d’extraordinaires oeuvres d’arts avec votre<br />
trousse de présentation.<br />
Avec l’ensemble de présentation 3 pièces et le<br />
traditionnel couteau d’office vous pouvez créer tous<br />
les styles excitants mis en vedette dans ce livret.<br />
Avec un peu de pratique et d’expérience vous<br />
pourrez créer vos propres décorations qui<br />
ajouteront couleur et touche d’art à la<br />
présentation de vos plats.<br />
Learn great tricks<br />
from the famous<br />
Apprenez les secrets du<br />
métier du renommé<br />
21 2
<strong>Garnishing</strong> Tools (Outils de présentations)<br />
“DiVinci Knife”<br />
<strong>Garnishing</strong> Tool<br />
Also know as the “decorator tool,” this serrated knife<br />
is used to make...<br />
• “Moby Melon”<br />
• Cabbage Basket<br />
• Decorator Sections<br />
• Tomato Shell<br />
• Decorator Slices<br />
Traditional Paring Knife<br />
The “Razor Blade with a Handle”<br />
• Tomato Fleur-De-Lis<br />
• Tomato Blossom<br />
• Tomato Butterfly<br />
• Peeling Pachyderm<br />
• Cucumber Fish - “Moby Pickle”<br />
• Cucumber Lily<br />
• Pepper Palm<br />
• Beet Lily<br />
• Rose Petals<br />
• Onion Mum<br />
• Cucumber Rose<br />
“Couteau Di Vinci”<br />
Outil de présentation<br />
Aussi connu sous le nom d’ « Outil de décorations »,<br />
ce couteau dentelé est utilisé pour faire :<br />
• « Melon Moby » Sections décoratives<br />
• Tomates coquilles<br />
• Tranches décoratives<br />
Couteau d’office traditionnel<br />
La « lame de rasoir avec une poignée »<br />
• Tomate fleur de lis<br />
• Tomato éclose<br />
• Tomate papillon<br />
• Pachyderme pelé<br />
• Poisson en concombre «Cornichon Moby»<br />
• Lis en concombre<br />
• Palmier en poivron<br />
• Lis en bettrave<br />
• Pétal de rose<br />
• Onion en chrysanthème<br />
• Rose en concombre<br />
Chef’s Rival Chopper<br />
The Chef’s Rival Chopper is a manual food processor<br />
that makes cumbersome electric processors a thing<br />
of the past. With its unique design and convenient<br />
attachments (included), the Chef’s Rival Chopper<br />
makes cooking and baking easy for even the most<br />
inexperienced cook.<br />
The Chef’s Rival Chopper comes with Master Cut 2<br />
blades and Standard and Metric Bowl Measurements.<br />
Here are just some of the things you can do quickly<br />
and easily with the Chef’s Rival Chopper:<br />
Chop or mix these items in the Chef’s Rival:<br />
• Fruit Sauces • Baby Foods<br />
• Milkshakes • Salsa<br />
• Omelets • Dressings<br />
• Sauces • Soups & Stews<br />
• Crushes Ice • Chops Vegetables<br />
Your Chef’s Rival 9 Attachment Set<br />
with its 6 Included Attachments Affords<br />
Endless Possibilities in the Kitchen.<br />
NINE<br />
Call Now 1-800-425-3726<br />
or check us out at <strong>US</strong><strong>Jesco</strong>.com<br />
Appellez maintenant 1-800-425-3726<br />
ou visitez <strong>US</strong><strong>Jesco</strong>.com<br />
3 20<br />
99
1<br />
3<br />
19<br />
Cucumber Lily (Cucumber Lily)<br />
Cucumber Lily<br />
A large cucumber is best for this garnish since it’s the easiest to<br />
form. Starting at the middle of the cucumber, take your paring<br />
knife and holding it like a pen or pencil, scribe or cut a straight<br />
line into the cucumber (about 3” long) on an angle. Go back to<br />
where you started and draw another straight line connecting to<br />
your first cut. Continue all the way around the cucumber until<br />
you get to where you started. Separate the cucumber by holding<br />
it at both ends so you now have two pieces.<br />
To complete this lovely garnish peel the skin from the cucumber all<br />
the way to the end of the vee cuts. Do all the petals the same until<br />
you have gone all the way around. Do your second half the same way.<br />
Now fill a bowl with ice cold water and soak your cucumber (petals<br />
down) for 30 minutes. This will flare the skin and form your lily.<br />
Use for decorations or try this: Scoop out the center seeds using the<br />
back of your food decorator and refill with cocktail sauce and put<br />
your cooked shrimp over the sides to form a beautiful shrimp cocktail.<br />
Cucumber Lily<br />
Privilégier un gros concombre pour cette présentation<br />
puisqu’il sera plus facile à former. En commençant au milieu du<br />
concombre, prendre votre couteau d’office et le tenir comme<br />
un stylo ou un crayon, tracer ou couper une ligne droite dans<br />
le concombre (environ 3’’ de long) en angle. Revenir là où vous<br />
avez commencé et tirer une autre ligne droite qui communique<br />
à votre première coupure. Continuer tout autour du concombre<br />
jusqu'à ce que vous arriviez là où vous avez commencé. Séparer<br />
le concombre en le tenant aux deux extrémités, vous avez<br />
maintenant deux morceaux.<br />
Pour compléter cette jolie présentation, éplucher la pelure<br />
du concombre entièrement jusqu’à la fin des coupures en V.<br />
Faire tous les pétales identiques jusqu'à ce que vous ayé fait le<br />
tour complet du concombre. Faire votre deuxième moitié de la<br />
même manière. Remplir maintenant un bol d'eau froide glacée<br />
et tremper votre concombre (les pétales en bas) pendant 30<br />
minutes. Cela fera briller la pelure et formera votre lis.<br />
Utiliser comme décoration ou essayer ceci : creuser les graines du<br />
centre en utilisant le revers de votre décorateur d'aliments et le<br />
remplir à nouveau avec une sauce à cocktail et placer vos crevettes<br />
cuites sur les côtés pour former un beau cocktail de crevettes.<br />
2<br />
4<br />
20<br />
1<br />
3<br />
Cucumber Fish (Poisson en concombre)<br />
Cucumber Fish<br />
Use a medium sized cucumber and cut off a portion so that a flat<br />
side is formed. If the cucumber is curved, cut the flat so the curve<br />
is upwards from the table. Up from the flat portion and near one<br />
end, cut a wedge to form a mouth. Near each end of the wedge<br />
use the point of the paring knife to cut two small circles through<br />
the skin to make the eyes. Then behind the eyes and mouth on<br />
each side, cut two or three tiny wedges to make the gills.<br />
Slice off 1/3 of either side away from the mouth to produce<br />
pieces that will make the tail.<br />
Cut two slots at the end away from the mouth and insert the<br />
tail sections. These pieces may need to be shortened so that<br />
they are in proper proportion to the length of the cucumber.<br />
Cut two slots in the top of the cucumber right behind each<br />
other with the first slot starting where the gills start. Take the<br />
pieces removed to form the flat bottom and cut in half with a<br />
diagonal slice. Use these two pieces to make the fins.<br />
Poisson en concombre<br />
Utiliser un concombre de grandeur moyenne et coupez une<br />
portion de manière à former un côté plat. Si le concombre est<br />
courbé, couper le côté plat de manière à ce que la courbe soit<br />
au dessus de la table. Au dessus de la portion plate et près<br />
d’une extrémité, couper un coin pour former la bouche. Près<br />
de chaque extrémité du coin, utiliser la pointe du couteau<br />
d’office pour couper deux petits cercles à travers la peau pour<br />
former les yeux. Ensuite, derrière les yeux et la bouche de<br />
chaque côté, couper deux ou trois petites entailles pour faire<br />
les branchies.<br />
Trancher le 1/3 de l’un ou l’autre des côtés de la bouche afin de<br />
produire des morceaux qui vont créer la queue.Couper deux<br />
fentes à l’extrémité, loin de la bouche et insérer les sections de<br />
la queue. Ces pièces devront peut-être être raccourcies afin<br />
d’être proportionnelles à la longuur du concombre.<br />
Couper deux fentes au haut du concombre juste derrière l’une<br />
de l’autre de manière à ce que la première fente débute où<br />
commencent les branchies. Prendre les morceaux qui ont été<br />
enlevés pour former la base plate et couper en deux, en tranches<br />
diagonales. Utiliser ces deux pièces pour former les nageoires.<br />
2<br />
4<br />
4
1<br />
3<br />
Onion Mum (Onion en chrysanthème)<br />
Onion Mum<br />
Choose a large, round white or Spanish red onion. Place root<br />
end down. Using the sharp paring knife, make even cuts about<br />
halfway into the center of the onion from the top through 3/4<br />
of the way to the bottom (root end).<br />
Place a toothpick in the root end and place the entire onion in<br />
hot water for a few minutes. This will help remove the onion<br />
odor. Then soak the onion cut side down in ice water to help<br />
open the petals.<br />
To add a touch of color, place food coloring in the ice water.<br />
The longer you soak the onion, the deeper the color.<br />
Onion en chrysanthème<br />
Choisir un gros onion, rond blanc ou espagnol rouge. Placer la<br />
racine vers le bas. Utiliser le couteau d’office affûté, faire des<br />
incisions environ à mi-chemin jusqu’au centre de l’onion à partir<br />
du haut jusqu’au 3/4 du chemin vers la base (racine).<br />
Placer un cure-dents dans la racine et placer l'oignon entier<br />
dans l'eau chaude pendant quelques minutes. Cela aidera à<br />
enlever l'odeur de l'oignon. Tremper alors l'oignon coupé côté<br />
vers le bas dans l'eau glacée pour aider à ouvrir les pétales.<br />
Pour ajouter une touche de couleur, placer du colorant<br />
alimentaire dans l'eau glacée. Plus longtemps vous trempez<br />
l'oignon, plus profonde est la couleur.<br />
5<br />
2<br />
1<br />
3<br />
Vegetable Curls (Légumes recourbés)<br />
Vegetable Curls<br />
A spiral slicer can help turn such solid vegetables as potatoes, radishes,<br />
or beets into a continuous curl effect. For best results use an Idaho<br />
baking potato. Using a paring knife, prepare the vegetable for the spiral<br />
slicer by forming into a uniformly shaped cylinder. Start the threaded<br />
portion of the spiral slicer into the center of one end of the vegetable.<br />
Place your index finger behind the top of the tool furthest away from<br />
screw, and push in a clockwise direction so that it works its way<br />
downward through the vegetable cutting a single spiral slice.<br />
Use different vegetable curls to add color and interest to a variety of<br />
dishes or by bringing the ends together and holding with a toothpick,<br />
as a container for pate, olives, or pickles.<br />
Veggie Chips<br />
For a fun snack, you can create your own potato, carrot, banana (very<br />
firm) and zucchini chips. After creating the curls hold the spiral cut piece<br />
upright and, using the paring knife, make one downward slice through<br />
the entire piece, creating individual circles. Serve raw with dip or fry in<br />
oil until crisp.<br />
Note: Spiral Slicer not included in <strong>Garnishing</strong> Set.<br />
Légumes recourbés<br />
Un éminceur en spirale peut aider à rendre les légumes solides<br />
comme les pommes de terre, les radis, ou les betteraves en effet de<br />
boucle continue. Pour un meilleur résultat utiliser une pomme de terre<br />
au four Idaho. En utilisant un couteau d’office, préparer le légume pour<br />
l'éminceur en spirale en formant un cylindre uniforme. Commencer<br />
par mettre la portion vissée de l'éminceur en spirale au centre d'une<br />
extrémité d’un légume.<br />
Placer votre index derrière le haut de l'instrument le plus loin de la vis<br />
et pousser dans le sens des aiguilles d’une montre afin qu'il fasse son<br />
travail vers le bas du légume faisant une tranche en spirale unique.<br />
Utiliser des boucles de légumes variés pour ajouter de la couleur et de<br />
la vie à une variété de plats ou en attachant les bouts en les faisant tenir<br />
par un cure-dents, comme un récipient pour pâté, olives, ou marinades.<br />
Croustilles de légumes<br />
Pour une collation amusante, créer vos propres croustilles de pomme<br />
de terre, de carotte, de banane (très ferme) et de courgette. Après avoir<br />
créé la spirale, la maintenir droite, et en utilisant le couteau d’office,<br />
faire une tranche du haut en bas du morceau entier, créant des cercles<br />
individuels. Servir cru avec la trempette ou frire dans l’huile jusqu'à ce<br />
qu’ils soient croustillants.<br />
Notez : l'éminceur en spirale n’est pas inclu dans l’ensemble de décoration.<br />
2<br />
18
1<br />
3<br />
Decorator Slices (Tranches décoratives)<br />
Decorator Slices<br />
Using lemons, limes, or oranges, cut parallel grooves from<br />
one end to the other all around the fruit using a food<br />
decorator. In this case, it’s the raised hole in the handle<br />
of the food decorator that does the trick. Push the raised<br />
portion into the skin of the fruit and draw the tool down<br />
to gouge out the necessary grooves.<br />
Slice the fruit at right angles to the grooves and pick out<br />
any seeds that are still clinging to the fruit. Decorator slices<br />
can be served on meat and fish dishes, or any of a wide<br />
variety of uses.<br />
Tranches décoratives<br />
En utilisant des citrons, des limes, ou des oranges, couper<br />
des sillons parallèles d'un bout à l’autre du fruit en utilisant<br />
un décorateur d'aliments. Dans ce cas-ci, c’est le trou<br />
surélevé dans la poignée du décorateur d'aliments qui fait<br />
le truc. Pouz Couper le fruit à angle droit aux sillons et<br />
enlever toutes les graines qui se cramponnent toujours au<br />
fruit. Les tranches décoratives peuvent être servies sur la<br />
viande et les plats de poisson, ou n'importe laquelle d'une<br />
très grande variété d'utilisations.<br />
17<br />
2<br />
1<br />
3<br />
Peeling Pachyderm (Pachyderme pelé)<br />
Peeling Pachyderm<br />
Here is a charming elephant to add whimsy and fun to your<br />
garnishes. Lemons, limes, grapefruits, or oranges can provide<br />
the basic element. Make a vee cut just above the stem of<br />
the fruit to form the tail, then opposite that, cut what looks<br />
like the stem portion of a champagne glass to form the<br />
trunk. With the paring knife, pull the peel from the fruit<br />
at each cut.<br />
Midway between the tail and trunk cuts, cut a curve through<br />
the peel to form the ears. Again lift the peel away from the<br />
fruit to give the ears definition.<br />
Using marshmallows and gumdrops attached with<br />
toothpicks, you can create the feet and eyes.<br />
Pachyderme pelé<br />
Voici un éléphant charmant pour ajouter fantaisie et<br />
amusement à vos garnitures. Les citrons, les limes, les<br />
pamplemousses, ou les oranges peuvent être l'élément<br />
fondamental. Découper en V juste au-dessus de la tige du<br />
fruit pour former la queue, ensuite à l’opposé, couper ce qui<br />
ressemble au pied d'une flûte à champagne pour former le<br />
tronc. Avec le couteau d’office, peler la peau du fruit aux<br />
endroits coupés.<br />
À mi-chemin entre la queue et les cou pures du tronc,<br />
couper une courbe dans la pelure pour former les oreilles.<br />
Soulever de nouveau la pelure loin du fruit pour donner de<br />
la définition aux oreilles.<br />
En utilisant des guimauves et des jujubes attachés par des<br />
cure-dents, vous pouvez créer les pattes et les yeux.<br />
2<br />
6
1<br />
3<br />
Tomato Blossom (Tomate éclose)<br />
Tomato Blossom<br />
On as nearly perfectly round tomato as possible, slice off the<br />
stem portion and on the opposite portion, cut a small vee<br />
wedge. Make additional vee wedges as long as the size of the<br />
tomato will allow. Each additional vee wedge will be slightly<br />
larger than the one before.<br />
Peel the skin away from the meat of the last sections almost<br />
to the vee cut.<br />
Press the vee shaped sections toward your cutting board<br />
or plate so that they form the distinctive blossom.<br />
Tomate éclose<br />
Sur une tomate le plus parfaitement ronde que<br />
poossible, trancher la portion de la tige et sur la portion<br />
opposée, couper un petit coin en V. Faire des coins en<br />
V supplémentaires aussi longtemps que la taille de la<br />
tomate le permet. Chaque coin en V supplémentaire sera<br />
légèrement plus grand que celui qui le précède.<br />
Peler la peau de la majorité des dernières sections<br />
presque j’usqu’aux coupes en V.<br />
Appuyez sur les sections en V vers votre planche à<br />
découper ou votre assiette afin qu'elles forment des<br />
rangées distinctives.<br />
7<br />
2<br />
4<br />
Decorator Sections (Sections décoratives)<br />
1 2<br />
Decorator Sections<br />
The technique using the food decorator as shown below<br />
with the tomato shell can be applied to a variety of fruits<br />
such as melons and citrus to form decorative sections of<br />
fruit. Simply push the tool into the fruit and connect the<br />
cuts to form a vee pattern around the sections.<br />
After making the cuts all around the fruit, pull the sections<br />
apart. Cottage cheese with maraschino cherries make an<br />
excellent adornment, while plain yogurt might be your<br />
selection instead.<br />
Sections décoratives<br />
La technique en utilisant le décorateur d'aliments tel que<br />
montrée ci-dessous avec la coquille de tomate peut être<br />
appliquée à une variété de fruits comme les melons et les<br />
agrumes pour former des quartiers décoratifs de fruits.<br />
Pousser simplement l'instrument dans le fruit et raccorder les<br />
coupures pour former un dessin en V autour des quariers.<br />
Après avoir fait les entailles tout autour du fruit, démonter les<br />
sections. Le fromage cottage avec les cerises de marasquin<br />
font une excellente décoration, alors que le yogourt pourrait<br />
tout simplement être votre sélection de choix.<br />
16
Tomato Shell (Tomates coquilles)<br />
1 2<br />
Tomato Shell<br />
Take a large ripe tomato and using a food decorator, cut a<br />
zig zag line about a third of the way down from the stem<br />
end by pushing the point end of the tool and connect the<br />
cuts. Remove the stem part and dig out the meat of the<br />
tomato to form the shell.<br />
The shell can then be stuffed with a variety of fillings such<br />
as tuna salad, cottage cheese, or vegetable dip.<br />
Tomates coquilles<br />
Prendre une grande tomate mûre et en utilisant un<br />
décorateur d'aliments, couper une ligne en zig zag à environ<br />
un tiers du chemin à partir de la tige en poussant la pointe<br />
de l'instrument et raccorder les coupures. Enlever la partie<br />
de la tige et enlever la chair de la tomate pour former la<br />
coquille.<br />
La coquille peut alors être farcie avec une variété de<br />
trempettes comme la salade de thon, du fromage cottage,<br />
ou de la trempette à légumes.<br />
15<br />
1 2<br />
Rose Petals (Pétales de rose)<br />
Rose Petals<br />
Starting at the stem end, peel the skin from a solid, meaty<br />
tomato which has no spots or marks on the skin. The start<br />
of the cut can be made as if you were going to slice off<br />
the stem end, but then begin to angle your paring knife<br />
downward around the tomato. Make a single, continuous<br />
strip holding as little of the meat as possible on the strip.<br />
A strip about 3/4” wide will give you the best results.<br />
Create the petals by rolling the strip in a coil, starting with<br />
the end away from the stem. A toothpick will hold the<br />
petals together. This same technique can be used with<br />
radishes and beets to create the rose petal effect.<br />
Pétales de rose<br />
En commençant à la tige, éplucher la pelure d'une tomate<br />
généreuse en chair qui n'a aucune tache ou marque sur la<br />
pelure. Le début de la coupure peut être faite comme si vous<br />
alliez détacher la fin de la tige, mais commencer ensuite à<br />
placer votre couteau d’office en angle vers le bas autour de<br />
la tomate. Faire une bande simple, continuer en tenant ainsi<br />
le moins de chair que possible sur la bande. Une bande de ¾’’<br />
de large vous donnera les meilleurs résultats.<br />
Créer les pétales en roulant la bande en forme de rouleau,<br />
en commençant avec l’extrémité opposée à la tige. Un<br />
cure-dents maintiendra les pétales ensemble. Cette même<br />
technique peut être utilisée avec les radis et les betteraves<br />
pour créer l'effet de pétales.<br />
8
1<br />
3<br />
Beet Lily (Lis en bettrave)<br />
Beet Lily<br />
Slice off a third of the beet on the stem end, and then make<br />
four vertical cuts at a slight angle inward at 90 degrees to<br />
each other so that the cuts meet.<br />
Carve a circle around the entire beet starting between any<br />
two petals and end where you began.<br />
Continue making vertical cuts at a slight angle with each<br />
new cut facing the opening between two previous cuts.<br />
This creates the petals of the lily. The size of the beet will<br />
determine the amount of petals you can create.<br />
By putting the completed lily in very cold water will cause<br />
the petals to tend to open even more. Potatoes, radishes,<br />
and other solid root vegetables can be used as well for<br />
interesting results.<br />
Lis en bettrave<br />
Trancher un tiers de la betterave à la tige et faire ensuite<br />
quatre entailles verticales à un angle faible vers l'intérieur,<br />
à 90 degrés l'une de l'autre, afin que les entailles se<br />
rencontrent. Sculpter un cercle autour de la betterave<br />
entière commençant entre n'importe quels deux pétales<br />
et terminer où vous avez commencé.<br />
Continuer à faire des entailles verticales à un angle faible<br />
de façon à ce que chaque nouvelle entaille fasse face à<br />
l'ouverture entre deux entailles précédentes. Cela crée les<br />
pétales du lis. La grandeur de la betterave déterminera la<br />
quantité de pétales que vous pouvez créer.<br />
En mettant le lis terminé dans l'eau très froide les pétales<br />
auront tendance à s'ouvrir davantage. Les pommes<br />
de terre, les radis et autres légumes à racines solides<br />
peuvent également être utilisés pour obtenir des résultats<br />
intéressants.<br />
9<br />
2<br />
1<br />
3<br />
Tomato Fleur-De-Lis (Tomate fleur de lis)<br />
Tomato Fleur-De-Lis<br />
Place the stem of a solid tomato down and cut a slice from<br />
its center. Cut the slice in half and peel the skin away from<br />
the meat of the tomato.<br />
Separate these in an arrangement of petals. Make three<br />
parallel cuts with each of the remaining sections and cut<br />
them in the center as before. Place these on top of the<br />
first sections of the flower.<br />
Tomate fleur de lis<br />
Placer la tige d'une tomate solide en bas et couper une<br />
tranche à partir du centre. Couper la tranche à moitié<br />
et éplucher la peau loin de la chair de la tomate.Séparer<br />
celles-ci dans un arrangement de pétales.<br />
Faire trois coupes parallèles avec chacune des sections<br />
restantes et les couper dans le centre comme auparavant.<br />
Placer ces dernières sur le haut des premières sections<br />
de la fleur.<br />
2<br />
14
1<br />
3<br />
Tomato Butterfly<br />
Tomato Butterfly<br />
Use a medium size tomato cut into four wedges just the way<br />
you would for a salad. Take one of your wedges and peel<br />
back the skin (as thin as you can) just about 3/4 of the way<br />
down the wedge.<br />
Holding the wedge and skin together, take your paring<br />
knife and slice the wedge (skin side down) straight down<br />
the middle but not completely in half. Be sure to leave the<br />
bottom skin attached.<br />
Now hold the tomato with both hands and bend back the<br />
wedge to flare and open, and you have a beautiful little<br />
butterfly. The result makes a perfect decoration on salads<br />
or your dinner plate.<br />
Tomato Butterfly<br />
Utiliser une tomate de taille moyenne coupée en quatre<br />
comme pour mettre dans une salade. Prendre un des<br />
quartiers et éplucher la pelure (aussi finement que possible)<br />
à peu près au 3/4 du bas du quartier.<br />
En maintenant le quartier et la pelure, prendre votre<br />
couteau d’office et couper le quartier (le côté de la pelure<br />
vers le bas) directement au milieu, mais pas complètement<br />
jusqu’au bas. S’assurer de laisser la pelure attachée.<br />
Maintenant, tenir la tomate avec les deux mains et la<br />
tourner en arrière pour évaser et ouvrir le quartier<br />
et obtenez un beau petit papillon. Le résultat fait une<br />
décoration parfaite pour les salades ou votre plat principal.<br />
13<br />
2<br />
1<br />
3<br />
Cucumber Rose (Rose en concombre)<br />
Cucumber Rose<br />
Select a large, straight cucumber. Using the sharp paring knife,<br />
start at the smaller end of the cucumber and cut 6-10 very thin<br />
slices of increasing size. Soak slices in lightly salted water for<br />
about 10 minutes.<br />
Roll up the smallest slice. Select the next smallest slice and<br />
roll it around the first. Continue adding slices, choosing the<br />
next smaller, then the next, until the flower is full. Insert<br />
toothpicks in an “X” across the base of the flower to hold<br />
the slices in place. Nestle in greens to hide the toothpicks.<br />
Rose en concombre<br />
Choisir un grand concombre droit. En utilisant le couteau<br />
d’office affûté, commencer du côté le plus étroit du<br />
concombre et couper 6-10 tranches en commençant par<br />
des tranches très fines et en augmentant la largeur des<br />
tranches. Tremper les tranches dans de l'eau légèrement<br />
salée environ 10 minutes.<br />
Enrouler la plus petite tranche. Choisir la plus petite tranche<br />
suivante et l’enrouler autour de la première. Continuer à<br />
ajouter des tranches, en choisissant la plus petite suivante,<br />
puis la suivante, jusqu'à ce que la fleur soit pleine. Insérer<br />
les cure-dents en X à travers la base de la fleur pour tenir<br />
les tranches en place. Déposer sur de la laitue pour cacher<br />
les cure-dents.<br />
2<br />
10
1<br />
3<br />
Moby Melon Melon Moby<br />
Moby Melon<br />
Choose a melon with a long oval shape rather that one that<br />
is round. Cut a thin slice off the bottom of the melon (see<br />
dotted line) to create a flat surface.<br />
Using a wide-tipped marker, draw cutting lines as shown.<br />
Slice the portion to be discarded into quarters, then cut<br />
an “X” through the rind to prevent splitting.<br />
Remove the center section and using a large metal spoon,<br />
scoop out the watermelon meat, leaving a hollow shell.<br />
(Save the center meat.)<br />
Using your food decorator garnishing tool, make even zig zag<br />
cuts all around the edge of the melon as shown. Use a sharp<br />
paring knife to carve the mouth and eyes.<br />
Fill “Moby Melon” with melon balls (cantaloupe, honeydew,<br />
watermelon) and/or mixed fresh fruit.<br />
Melon Moby<br />
Choisir un melon avec une longue forme ovale plutôt qu’un<br />
melon rond. Couper une tranche fine au bas du melon (voir<br />
le trait pointillé) afin de créer une surface plate.<br />
Utiliser un marqueur à grosse pointe, tracer les lignes<br />
telles que montrées. Couper la portion à laisser de côté en<br />
quartiers, couper ensuite un X dans la couenne pour prévenir<br />
qu’elle se fende.<br />
Enlever la section de centre et utiliser une grande cuillère<br />
en métal pour ramasser la chair du melon afin qu’il ne reste<br />
qu’une coquille creuse. (Sauver la chair du centre.)<br />
En utilisant votre instrument de garniture pour décorer les<br />
aliments, faire des coupures en zig zag tout autour du bord du<br />
melon comme montré. Utiliser le couteau d’office affuté pour<br />
sculpter la bouche et les yeux.<br />
Remplir le « Melon de Moby » avec les boules de melon<br />
(le cantaloup, le melon miel, le melon d’eau) et-ou des fruits<br />
frais mélangés.<br />
11<br />
2<br />
4<br />
1<br />
3<br />
Pepper Palm (Palmier en poivron)<br />
Pepper Palm<br />
Take a large, fat carrot and slice off the large end to form a<br />
flat base, then nip off the small end. With your paring knife<br />
start at the large end, carefully take small cuts vertically on<br />
the carrot, angling slightly inward. Make a row of these cuts<br />
around the fat end, then start another row with the first cut<br />
of the new row between where two cuts come together on<br />
the previous row. Make these rings of cuts until the entire<br />
carrot is covered.<br />
Use a green pepper to form the top of the tree. Stem downward,<br />
cut each rounded section of the pepper in a scallop to give it the<br />
shape of foliage, then cut small wedges in the edges to create<br />
the palm frond effect. Remove the core and seeds.<br />
Connect the pepper foliage to the small end of the carrot<br />
with a toothpick. A thick slice of potato forms a good base,<br />
with toothpicks holding the carrot tree to it. A few small<br />
cuttings of parsley add color to the base.<br />
Palmier en poivron<br />
Prendre une longue et grosse carotte et couper la grosse<br />
extrémité pour former une base plate, couper ensuite<br />
la petite extrémité. Avec votre couteau d’office, faire<br />
soigneusement des petites entailles verticales sur la carotte,<br />
en inclinant légèrement le couteau vers l'intérieur. Faire une<br />
rangée de ces entailles autour de la la grosse extrémité,<br />
commencer ensuite une autre rangée dont la première<br />
entaille de la nouvelles rangée débute entre deux entailles<br />
qui se réunissent sur la rangée précédente. Faire ces anneaux<br />
d’entailles jusqu'à ce que la carotte entière soit couverte.<br />
Utiliser un poivron vert pour former le haut de l'arbre. Tige<br />
vers le bas, couper chaque section arondie du poivron en<br />
coquille pour lui donner la forme de feuillage, couper ensuite<br />
de petits coins dans les bords pour créer l'effet des feuilles<br />
palmées du palmier. Enlever le coeur et les graines.<br />
Raccorder le feuillage du poivron à la fine extrémité de la<br />
carotte avec un cure-dents. Une tranche épaisse de pomme<br />
de terre forme une bonne base, avec les cure-dents qui<br />
tiennent le tronc en carotte. Quelques petites entailles de<br />
persil ajoutent de la couleur à la base.<br />
12<br />
2