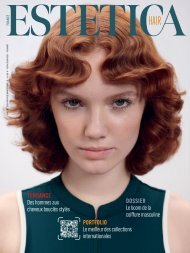
Estetica Magazine FRANCE (2/2020 COLLECTION)
Estetica Magazine est la revue leader de l'univers de la coiffure. Fondée en Italie, en 1946, et diffusée aujourd'hui dans plus de 60 pays à travers le monde, elle est devenue la référence internationale pour tous les coiffeurs et les professionnels dans le domaine de la beauté. Technique, mode, formation et tendance sont au cœur de chaque nouveau numéro d'Estetica. Toutes les informations, pour les versions print et digitale, sont disponibles sur notre site www.esteticanetwork.com
Estetica Magazine est la revue leader de l'univers de la coiffure. Fondée en Italie, en 1946, et diffusée aujourd'hui dans plus de 60 pays à travers le monde, elle est devenue la référence internationale pour tous les coiffeurs et les professionnels dans le domaine de la beauté. Technique, mode, formation et tendance sont au cœur de chaque nouveau numéro d'Estetica. Toutes les informations, pour les versions print et digitale, sont disponibles sur notre site www.esteticanetwork.com

Create successful ePaper yourself
Turn your PDF publications into a flip-book with our unique Google optimized e-Paper software.
<strong>FRANCE</strong><br />
<strong>COLLECTION</strong><br />
TENDANCE<br />
Un glamour chic<br />
de caractère<br />
TECHNIQUE<br />
Coupe et couleur<br />
pour être au top !
TONUCIA NATURAL FILLER INSUFFLEZ UNE NOUVELLE JEUNESSE À VOS CHEVEUX<br />
#LiftMyHairUp *<br />
REPULPE ET REDENSIFIE<br />
LES CHEVEUX<br />
AFFINÉS ET FATIGUÉS<br />
ACTIFS 100 % D’ORIGINE NATURELLE<br />
Véritable booster de jeunesse pour votre chevelure, le nouveau rituel en 3 étapes TONUCIA NATURAL FILLER redensifie, hydrate et repulpe<br />
instantanément les cheveux affinés et fatigués par le temps qui passe. Au cœur des formules aussi expertes que sensorielles, un trésor naturel<br />
aux innombrables bienfaits : l’acide hyaluronique végétal like, extrait de la graine de Tamarin. Cet actif inédit possède un incroyable pouvoir<br />
d’hydratation en continu pour une chevelure repulpée et redensifiée en profondeur. Il est associé à l’extrait naturel de mélisse, pour limiter<br />
la dégradation du collagène et préserver la jeunesse du cuir chevelu. Comme vous, vos cheveux rayonnent de beauté. Insufflez une nouvelle<br />
jeunesse à vos cheveux !<br />
LE CULTE DU CHEVEU<br />
www.renefurterer.com<br />
INFORMATIONS, CONSEILS ET DÉPOSITAIRES AGRÉÉS : 0 826 00 19 19 (0,15€/MN) SALON ET INSTITUT RENÉ FURTERER, 15 PLACE DE LA MADELEINE, PARIS 8 ÈME
COMPLEXE 5 L’EXPÉRIENCE REVITALISANTE AUX HUILES ESSENTIELLES CHAUDES<br />
TONIFIE LE CUIR CHEVELU<br />
POUR DONNER FORCE ET BEAUTÉ<br />
À VOS CHEVEUX<br />
LE SECRET POUR DES CHEVEUX BEAUX ET FORTS : C’EST UN CUIR CHEVELU SAIN !<br />
Révélez toute la force et la beauté de vos cheveux avec le concentré végétal Complexe 5. Ce soin culte riche en huiles essentielles chaudes<br />
de lavande et d’orange aux vertus stimulantes est une véritable cure de vitalité pour votre cuir chevelu. Étape incontournable avant votre<br />
shampooing, l’application de ce soin sera l’occasion d’un massage bienfaisant et vous fera vivre un moment de bien être inégalé. Relaxant<br />
et embaumé de senteurs, Complexe 5 tonifie le cuir chevelu et fortifie les cheveux dès la racine. Plus denses, plus résistants, plus vigoureux,<br />
ils retrouvent une beauté éclatante.<br />
LE CULTE DU CHEVEU<br />
www.renefurterer.com<br />
INFORMATIONS, CONSEILS ET DÉPOSITAIRES AGRÉÉS : 0 826 00 19 19 (0,15€/MN) SALON ET INSTITUT RENÉ FURTERER, 15 PLACE DE LA MADELEINE, PARIS 8 ÈME
BAB3091RDTE<br />
Lissage sublime<br />
Ce lisseur Titanium Ionic de BaBylissPRO est une édition spéciale incontournable.<br />
Ses plaques 28 x 110mm en titanium subliment la chevelure lors du lissage et je<br />
gagne un temps fou. Grâce à la technologie ionique, mes clientes repartent avec des<br />
cheveux doux, souples et brillants. Le lissage obtenu résiste parfaitement aux temps<br />
les plus humides. Enfin le réglage de la température jusqu’à 230°C me permet de<br />
l’utiliser sur les chevelures les plus difficiles et de réaliser de nombreux types de<br />
lissages techniques.<br />
BAB7000IGE<br />
Brushing parfait<br />
Je suis complètement Fan du sèche-cheveux BaBylissPRO<br />
Rapido et de sa nouvelle couleur Light Bronze.<br />
Toujours aussi performant il me fait gagner un temps fou !<br />
Les brushings que je réalise sont vraiment parfaits et durent<br />
dans le temps. Comme il est ultra léger (399g), je ne ressens<br />
aucune tension musculaire. Grâce à son silencieux, je peux<br />
converser facilement, mes clients et moi sommes dans le<br />
confort!<br />
FX8700RE<br />
#Tabloids<br />
Liberté d’expression<br />
J’adore travailler avec cette tondeuse de coupe sans fil<br />
REDFX de BaBylissPRO4Artists.<br />
Avec sa lame plate Nickel Titanium et carbone je réalise<br />
toutes sortes de coupes aussi bien masculines que<br />
féminines. C’est une tondeuse vraiment très professionnelle,<br />
ultra performante et fiable. Grâce à son autonomie de 2<br />
heures, je n’ai pas besoin de la charger souvent. J’adore sa<br />
nouvelle couleur rouge à laquelle l’or donne encore plus<br />
d’éclat.<br />
Collection Automne-Hiver 20-21<br />
« En cette année <strong>2020</strong> si particulière, j’ai imaginé une collection explosive,<br />
à l’instar d’un dance floor des années 1990 où tout le monde lâche prise<br />
et s’oublie le temps d’une musique.<br />
«Tabloids» est une collection chère à mon coeur, j’y aborde toutes mes<br />
coupes préférées, allant de la longue chevelure glamour au carré court<br />
sophistiqué.<br />
Je pense qu’il est temps d’oser, qu’en pensez-vous ? » Eric Zemmour<br />
Découvre<br />
ma collection Tabloids<br />
Hair: @ericzemmour|Photo: @stephanegagnard |Make-up: @makeupbykellymcclain |Stylist: @yuliamoatti_stylist |Video: @beampictures |Model: @kekevirginie
Hair: René Furterer<br />
<strong>FRANCE</strong><br />
<strong>COLLECTION</strong><br />
sommaire<br />
DIRECTEUR DE LA PUBLICATION<br />
Roberto Pissimiglia<br />
DIRECTEUR EDITORIAL<br />
INTERNATIONAL<br />
Sergi Bancells<br />
RÉDACTRICE EN CHEF<br />
ESTETICANETWORK<br />
Laura Castelli<br />
ÉQUIPE RÉDACTIONNELLE<br />
Sara El Basyony, Serena Monachesi<br />
RÉALISATION GRAPHIQUE<br />
Manuela Artosi, Davide Cardente<br />
RÉDACTRICE EN CHEF ADJOINTE <strong>FRANCE</strong><br />
Marie Coccoluto<br />
m.coccoluto@estetica-france.com<br />
PUBLICITÉ & RP <strong>FRANCE</strong><br />
Catherine Du Villard<br />
pub@estetica-france.com<br />
COLLABORATEURS<br />
Lucia Preziosi,<br />
Cristina Hernández, Marie Scarano<br />
Editeur & Directeur Responsable :<br />
Roberto Pissimiglia<br />
Edité & diffusé par ESTYLE sous License<br />
de ESTETICA Edizioni ESAV Srl – Turin / Italie<br />
ESTYLE– 5 rue du Helder 75009 Paris /France<br />
Sarl au capital de 76 500 € - RCS Paris B 390 684 553<br />
Dépôt légal à parution<br />
Commission Paritaire 0119 T 88377<br />
PRINTED IN ITALY BY<br />
GrafArt<br />
Venaria Reale (TO)<br />
annonceurs<br />
AIPP<br />
BABYLISSPRO<br />
KEUNE HAIRCOSMETICS<br />
OBJECTIF COIFFURE<br />
RENE FURTERER<br />
WAHL<br />
Collection<br />
Pour un style<br />
tout en élégance<br />
Technique<br />
Des coupes et couleurs<br />
qui ont du caractère<br />
AVIS AUX ABONNÉ(E)S<br />
(ART. 13 DU RÈGLEMENT UE 679/2016)<br />
Aux termes de l’art. 13 du Règlement UE 679/2016,<br />
notre société procédera au traitement des données à<br />
caractère personnel que vous nous avez fourni dans<br />
le respect de la norme en matière de protection du<br />
traitement des données à caractère personnel ainsi que<br />
des obligations et des garanties des normes légales,<br />
contractuelles et réglementaires.<br />
Les données de l’abonné(e) ne pourront être connues<br />
que d’entités spécialement autorisées et instruites par<br />
notre société et d’entités tierces en vue de l’exécution<br />
des activités d’organisation et économiques liées à<br />
l’abonnement (ex. : gestion de l’expédition, mise sous<br />
pli, envoi de lettres) et ne seront pas communiquées à<br />
des tiers dans des finalités non consenties par la loi ou<br />
sans votre accord explicite. Elles seront conservées aux<br />
fins de l’envoi de nos publications et pendant la durée<br />
nécessaire à la réalisation des finalités de mise à jour<br />
professionnelle pour lesquelles elles ont été recueillies.<br />
Le responsable du traitement est la société Edizioni Esav<br />
S.r.l. - Via Cavour 50, 10123 Turin (Italie). La personne<br />
concernée pourra à tout moment exercer les droits<br />
prévus par le Règlement (art. 15 Droit d’accès ;<br />
art.16 Droit de rectification ; art. 17 Droit à<br />
l’effacement) en écrivant à<br />
Edizioni Esav - edizioniesav@pec.it.<br />
Tous droits réservés –<br />
Reproduction intégrale ou partielle interdite.<br />
POUR S’ABONNER<br />
Tel: +33 (0) 1 53 24 53 24<br />
e-mail: diffusion@estetica-france.com<br />
online: www.esteticamagazine.fr
Offre exclusive<br />
+50 %<br />
DE PRODUIT OFFERT ! *<br />
=<br />
MÊME PRODUIT, MÊME PRIX<br />
+ DE PRESTATIONS !<br />
75<br />
au prix du 50ml !<br />
75ml<br />
au prix du 50ml ! *<br />
PRIX PRO : 8¤ 30 HT<br />
PRIX VIP : 6¤ 56 HT<br />
www.bleulibellule.com<br />
*Offre valable jusqu’à épuisement des stocks dans les magasins Bleu Libellule participants et sur le site www.bleulibellule.com. Offre réservée aux étudiants et professionnels de la coiffure et de l’esthétique sur présentation d’un justificatif.<br />
Bénéficiez du tarif format 50mL pour l’achat d’un format Majirel 75mL de L’Oréal Professionnel. Bénéficiez du méchier Majirel offert pour l’achat de 15 tubes Majirel 75mL de L’Oréal Professionnel.
UN LOOK PER OGNI OCCASIONE.<br />
L’AUTUNNO / INVERNO È UN<br />
PERIODO DI CONTRASTI...COLORE E<br />
STILE SI UNISCONO IN UNA CALDA<br />
LUMINOSITÀ PER SCRIVERE LA LORO<br />
STORIA PIÙ GLAMOUR.<br />
A look for<br />
every occasion.<br />
Autumn/winter is a<br />
as colour & style<br />
unite in a warm glow<br />
to tell their own<br />
subtle story.<br />
Creative Director: Simon Ellis/Hair: Schwarzkopf Professional Team Essential Looks<br />
Photo: Simon Emmett, Kapturing/Make-up: Helge Branscheidt/Styling: Adelaida Cue Bär<br />
EIN LOOK FÜR JEDE GELEGENHEIT.<br />
HERBST UND WINTER LIEBEN<br />
KONTRASTE. FARBE & STYLING<br />
VERSCHMELZEN ZU EINEM<br />
WARMEN GLOW UND ERZÄHLEN<br />
IHRE EIGENE, FEINE GESCHICHTE.<br />
UN LOOK POUR CHAQUE OCCASION.<br />
L’AUTOMNE-HIVER EST UNE SAISON<br />
TOUT EN CONTRASTES. COULEURS<br />
ET STYLES S’UNISSENT EN UNE<br />
CHALEUREUSES LUMINOSITÉ POUR<br />
ÉCRIRE LEUR HISTOIRE LA PLUS<br />
GLAMOUR.<br />
UN LOOK PARA CADA OCASIÓN.<br />
OTOÑO/INVIERNO ES UNA ÉPOCA DE<br />
CONTRASTES, CON EL COLOR Y EL<br />
ESTILO UNIDOS EN UN CÁLIDO<br />
RESPLANDOR PARA CONTAR SU<br />
PROPIA Y SUTIL HISTORIA.
Art Director: Yuri Coppari/Hair: La Biosthétique Artistic Team Italia
Corkscrew curls!<br />
They’re always all about the texture.<br />
Hair: Alexander Kiryliuk/Photo: David Arnal/Make-up: Miguel Silva/Styling: Ángel Cabezuelo
Hair: Franck Provost<br />
Hair: Saint Algue<br />
Hair: Evos/Photo: Ivan Genasi<br />
Make-up: Alessio Giovannelli<br />
The streetscape tells another story...
Hair: Alfaparf Milano/Photo: Paul Maffi/Make-up: Martina D’Andrea
Hair: Alfaparf Milano/Photo: Paul Maffi/Make-up: Martina D’Andrea<br />
...with choppy end to be totally ‘in’.
Hair: Angelo Seminara, Goldwell Global Ambassador/Colour: Angelo Seminara and Takashi Kurokawa<br />
Photo: Txema Yeste/Make-up: Daniel Kolaric/Stylist: Niccolo Torelli/Products: Goldwell
Hair: Adam Reed for ghd/Photo: Claire Rothstein/Make-up: Claudine Blythman/Styling: Ozzy Shah
Hair: Gio TheNewKid Rotterdam @ Wahl Artistic Team Germany/Photo: Pierre Heinemann @ Wahl Germany/Styling: Artisan the Label<br />
Could this be the<br />
first Tango in Paris<br />
(post Covid)?
Sleek or Ultra Chic<br />
Will the enigma ever get solved?<br />
Hair: Stefano Lorenzi @ Aldo Coppola/Photo: Giacomo Licheri
Hair: Hannah Lennon, Charlie Miller/Photo: Jason Miller, Charlie Miller/Make-up: Ebony Smith, Glam Candy<br />
Hair & Art Direction: Gianluca Grechi/Photo: Leonardo Bigagli/Make-up: Lorenzo Zavatta<br />
Hair: Groupe VOG – Mon Coiffeur Exclusif
Hair: Groupe VOG – Vog Coiffure
Hair: Giovanni Iovino for Cotril/Photo: Andrea Varano<br />
It’s the<br />
perfect<br />
hold...<br />
...to feel the wind<br />
in her hair.
Hair: Salvo Filetti for Compagnia della Bellezza
Hair & Art Direction: Carlo Di Donato, Dario Manzan for Mitù/Photo: Lorenzo Sampaolesi<br />
Make-up: Michela Bonafoni/Styling: Mirko Burin @ Freelance Fashion agency/Products: Wella Professionals<br />
Careful, you’ll be<br />
dazzled by chic.
Hair: Mickael Ribeiro for Olivia Garden/Photo: Gael Thill<br />
There is only one true desire:
Hair: Osmo Creative Team/Photo: Tony Le-Britton/Make-up: Justine Collins<br />
Hair: Osmo Creative Team<br />
Photo: Tony Le-Britton/Make-up: Justine Collins<br />
Hair: Antoine @ Art de l’âme/Photo: Ghost Vision Production/Make-up: École Michel Dumas
Hair: Thomas Hills, Lauren Killick @ TH1 Hair/Photo: Richard Miles/Make-up: Claire DeGraft/Styling: Bernard Connolly
And that’s talking<br />
about the hair!<br />
Hair: Eric Maurice/Photo: Latil Pascal/Make-up: Ambre Thomas/Styling: Patrice Catanzaro
Hair: John Paul Mitchell Systems Artistic Team<br />
Hit the<br />
highway...<br />
...without a hair<br />
out of place.
Hair: D. Machts Group/Photo: Natascha Lindemann/Make-up: MUD Studio Berlin<br />
Hair: Adrián Pardo Hair Studio/Photo: Dani Durán/Make-up: Naiara Blánquez<br />
Styling: Jarvy Blánquez/Products: Pulp Riot, Living Proof, Nyx, L’Oréal<br />
Hair: Xavier Arcarons @ Xavier Arcarons Perruquers/Photo: Esteban Roca/Make-up: Nacho Sanz
Hair: Laetitia Guenaou/Photo: Przemysław Choła/Make-up: Karolina Supernak/Styling: Patrycja Dziewit<br />
The ultimate finish in<br />
shades of copper.<br />
So bright they<br />
almost look polished.
Hair: Christian Ríos/Photo: Esteban Roca /Make-up: Nacho Sanz /Styling: Christian Ríos/Products: Revlon Professional España, Kevin Murphy Spain
Art Direction: Mauro Galzignato for Kemon/Hair: Davide Carlucci, Maurizio Di Saverio, Riccardo Rogari @ Kemon Crew<br />
Photo: Gosha Pavlenko/Make-up: Eleonora Juglair/Styling: Alessia Caliendo/Products: Kemon
...on the trail of the<br />
blonde bombshells.<br />
Art director: Miquel García Cotado/Hair: Revlon Professional Artistic Team/Photo: Miguel Reveriego/Make-up: Dani Rull
Creative Director: Simon Ellis/Hair: Schwarzkopf Professional Team Essential Looks<br />
Photo: Simon Emmett, Kapturing/Make-up: Helge Branscheidt<br />
Hair: Alcina/Photo: Jette Stolte Hair: Paul Stafford/Photo: Lee Mitchell/Make-up: DJ Griffin/Products: Denman
Hair & Art Direction:/Tom Connell for Davines/Colour: Ashleigh Hodges/Photo: Stefano Galuzzi/Make-up: Victoria Martin<br />
A short response...<br />
...to anyone who believes<br />
that long hair reigns.
Hair: Rudy Mostarda, Creative Styling Director Wella Professionals Italy/Photo: Stratis Kas/Make-up: Claudia Zambello/Styling: Chiara Condoleo<br />
He just happened<br />
to be there as<br />
you were passing:
Creative Director: Toni Pellegrino/Hair: The Club/Photo: Danilo Falà/Make-up: Fausto Cavaleri<br />
Styling: Eleonora Papetti, Riccardo Rubino/Products: Wella Professionals
Art Direction: Sara Vaccarecci/Hair: Michele Minciotti and Sens.ùs Creative Team <strong>2020</strong>/21<br />
Photo: Mauro Mancioppi/Make-up: Vania Cesarato/Styling: Veronica Spadaro<br />
Mid-length, long-length... always<br />
check out the finish.
Hair: Lucca & Yvan Estatoff/Photo: Bruno Estatoff/Make-up: Morgane Guillet<br />
Hair: Nadia Bouchikhi/Photo: Daniel Pister/Make-up: Kathleen Henocque<br />
Hair: Mica Academy for Farmagan
Hair: Jonathan Andrew for Fudge Professional/Photo: Simon Songhurst<br />
Make-up: Mario Brooksbank/Styling: Oliver Vaugyhn<br />
Veronica Lake<br />
knew her stuff.
step by step<br />
technical steps<br />
YOUR <strong>COLLECTION</strong> OF<br />
SO YOU CAN CREATE<br />
SOME OF THE LATEST<br />
SEASONAL HAIR LOOKS
MOSER<br />
Hair: Kathrin Eissler, Fatih Hairdressing<br />
Photo: Miriam Nickel<br />
Make-up: Deborah Hörz
1 2<br />
3<br />
4 5<br />
6<br />
7<br />
ENGLISH 1- Starting with the sides at temple level, divide out a line backwards and evenly shorten the lower section. 2- Evenly shorten the hair at the nape of the neck with<br />
Genio Pro Fading Edition and a 4.5mm lift. 3- Make all hair a uniform length in the lower third of the back of the head. 4- Remove hair from the nape and trim the<br />
contours precisely with the cutting head closed, along the neck and around the ears. 5- Shape the beard with the freehand technique and shave off any excess around the<br />
neck with Mobile Shaver MOSER. 6- Before drying off, precisely define the line with a comb. Then, dry the upper part of the hair carefully, proceeding from the side<br />
towards the back. 7- Finally, finish the hair with styling products, such as a fixing cream.<br />
ITALIANO 1- Partendo dai lati (al livello delle tempie), dividere la linea di riferimento all’indietro e accorciare uniformemente i lati inferiori. 2- Accorciare uniformemente i<br />
capelli sulla nuca con Genio Pro Fading Edition e un rialzo da 4,5 mm. 3- Riportare tutti i capelli alla stessa lunghezza nel terzo inferiore del retro della testa. 4- Rimuovere<br />
il rialzo e lavorare i contorni con precisione con la testina di taglio chiusa, lungo il collo e intorno alle orecchie. 5- Modellare la barba con la tecnica a mano libera e rasare<br />
l’eccesso sul collo con Mobile Shaver MOSER. 6- Prima di procedere all’asciugatura, definire con precisione la riga con un pettine. In seguito, asciugare la parte superiore<br />
dei capelli con cura, procedendo dal lato verso dietro. 7- Infine, sistemare i capelli con dei prodotti per lo styling, ad esempio una crema fissante.<br />
DEUTSCH 1- Von den Seiten ausgehend (auf Schläfenhöhe) die Bezugslinie nach hinten abteilen und die unteren Seiten gleichmäßig kürzen. 2- Die Haare im Nackenbereich<br />
mit Genio Pro Fading Edition und dem Aufsatz für 4,5 mm gleichmäßig kürzen. 3- Alle Haare im unteren Drittel des Hinterkopfes auf die gleiche Länge bringen. 4- Den<br />
Aufsatz entfernen und die Konturen im Nacken und um die Ohren herum mit geschlossenem Schneidkopf präzise nacharbeiten. 5- Den Bart in Freihandtechnik in Form<br />
bringen und die restlichen Haare am Hals mit dem Mobile Shaver MOSER rasieren. 6- Vor dem Trocknen mit dem Kamm genau den Scheitel definieren. Danach den oberen<br />
Teil des Haares vorsichtig von der Seite nach hinten trocknen. 7- Abschließend das Haar mit Stylingprodukten, wie beispielsweise einer Fixiercreme, fixieren.<br />
FRANÇAIS 1- En partant des côtés (au niveau des tempes), divisez la ligne de guidage vers l’arrière et raccourcissez uniformément les côtés inférieurs. 2- Raccourcissez<br />
uniformément la nuque avec la Genio Pro Fading Edition et le contre-peigne de 4,5 mm. 3- Ensuite, ramenez les cheveux à la même longueur dans le tiers inférieur de<br />
l’arrière de la tête. 4- Retirez le contre-peigne et travaillez les contours avec précision avec la tête de coupe fermée, le long du cou et dans la zone des oreilles. 5- Façonnez la<br />
barbe en utilisant la technique à main levée et rasez proprement l’excès de poils sur le cou avec le Mobile Shaver MOSER. 6- Avant le brushing, redéfinissez la raie<br />
précisément avec le peigne. Ensuite, coiffez les cheveux du haut soigneusement du côté vers l’arrière. 7- Enfin, mettez les cheveux en forme avec des produits coiffant<br />
comme la pommade par exemple.<br />
ESPAÑOL 1- Comenzar por los lados (al nivel de las sienes), dividir la línea guía hacia atrás y acortar uniformemente la parte inferior. 2- Acortar uniformemente el cabello<br />
en la nuca con Genio Pro Fading Edition regulado a 4.5 mm. 3- A continuación, llevar todo el cabello a la misma longitud en el tercio inferior de la parte posterior de la<br />
cabeza. 4- Quitar el contrapeine y trabajar los contornos con precisión con el cabezal de corte cerrado, a lo largo del cuello y en la zona de las orejas. 5- Dar forma a la<br />
barba con la técnica de mano libre y afeitar el exceso de pelo en el cuello con la afeitadora Mobile Shaver MOSER. 6- Antes de continuar con el secado, definir con<br />
precisión la línea con el peine. Luego peinar cuidadosamente la parte superior del cabello, trabajando del lado hacia atrás. 7- Terminar modelando con productos para el<br />
estilismo, como una crema fijadora.<br />
step by step 1
Coiffeur en France<br />
Art Direction: Raphaël Perrier<br />
Hair: Equipe Coiffeur en France<br />
Photo: Duy Ha Minh
1 2 3 4<br />
5 6 7 8 9<br />
10 11 12<br />
ENGLISH CUT 1- Start by tracing a separation from one ear tip to the other, passing through the central point of the head. Then trace another separation from the temporal bone to the parietal<br />
bone on both sides. 2- Draw a separation on the centre line at the nape of the neck, then define the length at 180 °. Continue in the same way across the entire nape area. 3- Divide the middle<br />
zone into 5 vertical separations. Starting from the median, project the entire area horizontally and cut at 45 °. Project the median onto the nearest side section, then cut at a 45 ° angle. Blend in<br />
the entire area. 4- Add texture to the area with diagonal sections using a razor. Also add texture over the occipital bone to soften the volume. 5- Cut diagonally with a razor to keep more length<br />
in the front. Repeat on the other side. 6- Create a rectangle from one temporal bone to another through the centre. Draw a central line from the bridge of the nose on each side, project the<br />
entire area horizontally and cut 180 ° with a razor. Finish with the side sections by creating a seam between the centre and the sides. 7- Trace a separation from the parietal bone to the centre<br />
point on each side. Starting with the triangles near the edges, project each of the areas perpendicular to the ground. Take a reference section from the marginal area and cut at 180 °. Proceed in<br />
the same way across both areas. Twist the entire area in the centre in one smooth motion, then cut 180° to the ground. COLOUR 8/9- Apply 20 vol. Iridescent copper blonde mixture to the<br />
roots. Make a section in a circle, 2 cm from the frontal point to the occipital bone, passing under the parietal bones. Spread the root mixture on the lower part. 10- Draw a section parallel to<br />
the 2cm section. Work on the tips by brushing with a 20 vol. whitening mixture. 11- Create a section, parallel to the previous one, then apply the root dye mixture over the tips. Continue<br />
alternating between light and dark tones. 12- Develop. Rinse and apply a golden copper or light blond patina as desired. Develop, then rinse off with a post-colour shampoo.<br />
ITALIANO TAGLIO 1- Tracciare una separazione da una punta dell’orecchio all’altra, passando per il vertice. Tracciare una separazione dall’osso temporale all’osso parietale su entrambi i lati.<br />
2- Tracciare sezioni sulla linea centrale all’altezza della nuca, poi definire la lunghezza a 180°. Proseguire allo stesso modo su tutta la zona della nuca. 3- Dividere la zona intermedia in 5<br />
separazioni verticali. Partire dalla mediana, proiettare l’intera area parallela e tagliare a 45 °. Proiettare la mediana sulla sezione laterale più vicina, quindi tagliare con un angolo a 45 °. Sfumare<br />
l’intera area. 4- Texturizzare l’area con sezioni diagonali usando la tecnica del taglio a rasoio. Texturizzare anche sull’osso occipitale per ammorbidire il volume. 5- Proiettare l’intera area<br />
perpendicolare al terreno, quindi tagliare in diagonale con un rasoio per mantenere più lunghezza nella parte anteriore. Ripetere sull’altro lato. 6- Creare un rettangolo da un osso temporale<br />
all’altro passando per il vertice. Disegnare una riga centrale a metà del sopracciglio su ciascun lato, proiettare l’intera area perpendicolare al pavimento e tagliare a 180 ° con un rasoio. Terminare<br />
con le sezioni laterali creando una giunzione tra il centro e il lato. 7- Disegnare una separazione dell’osso parietale fino al punto centrale su ciascun lato. Iniziare con i triangoli vicino ai margini,<br />
proiettare ciascuna delle aree perpendicolarmente al suolo. Prendere una ciocca di riferimento dalla zona marginale e tagliare a 180 °. Procedere allo stesso modo su entrambe le aree. Sul<br />
triangolo in cima proiettare l’intera perpendicolare al suolo. Torcere l’intera area al centro con un movimento uniforme, quindi tagliare a 180 °. COLORE 8/9- Applicare alle radici la miscela<br />
biondo rame cangiante a 20 vol. Creare una sezione in un cerchio, a 2 cm dal punto frontale all’osso occipitale, passando sotto le ossa parietali. Stendere il composto delle radici nella parte<br />
inferiore. 10- Disegnare una sezione parallela ai primi 2 cm di spessore. Lavorare sulle punte pennellando con una miscela sbiancante a 20 vol. 11- Creare una sezione, parallela alla precedente,<br />
quindi allungare sulle punte la miscela colorante delle radici. Continuare alternando toni chiari e scuri. 12- Lasciare in posa. Risciacquare e applicare la patina rame dorato o biondo chiaro<br />
secondo il riflesso desiderato. Lasciare in posa, risciacquare con uno shampoo post colorazione.<br />
DEUTSCH SCHNITT 1- Scheitel von einer Ohrspitze zur anderen über den Mittelpunkt des Kopfes ziehen. Auf beiden Seiten einen Scheitel vom Schläfenbein zum Scheitelbein ziehen. 2- In<br />
der Mitte des Nackens einen Scheitel auf der Mittellinie ziehen, Länge bei 180° definieren. Im gesamten Nackenbereich fortfahren. 3- Den Zwischenbereich am Hinterkopf in fünf vertikale<br />
Abschnitte teilen. Im Winkel von 45° nach unten schneiden. Den gesamten Bereich weich gestalten. 4- Den diagonalen Schnittbereich mit der Rasiermessertechnik texturieren. 5- Mit<br />
einem Rasiermesser diagonal schneiden, um mehr Länge an der Vorderseite zu erhalten. Auf der anderen Seite wiederholen. 6- Von einem Schläfenbein zum anderen über den Mittelteil<br />
des Kopfes ein Rechteck erzeugen. Auf jeder Seite einen Scheitel auf der Mitte der Augenbraue ziehen, den gesamten Bereich senkrecht nach unten ausrichten und mit einem Rasiermesser<br />
im Winkel von 180° schneiden. Zum Abschluss der seitlichen Partien eine Verbindung zwischen ihnen und der Mitte herstellen. 7- Auf jeder Seite einen Scheitel vom Scheitelbein zum<br />
Mittelpunkt ziehen. Eine Strähne des Seitenbereichs als Bezugspunkt nehmen und im Winkel von 180° schneiden. Auf beiden Seiten wiederholen. Die Mitte mit einer gleichmäßigen<br />
Bewegung verdrehen und im Winkel von 180° zum Boden schneiden. FARBE 8/9- Ansatz: changierende Mischung Blond Kupfer mit 20 Vol. Einen kreisförmigen Abschnitt von der<br />
Stirnseite bis zum Hinterhauptbein, 2 cm unterhalb des Scheitelknochens, abteilen. Ansatzmischung am unteren Hinterkopf auftragen. 10- Einen weiteren, parallelen Abschnitt von 2 cm<br />
Dicke abteilen. Auf die Spitzen Aufhellung mit 20 Vol. auftragen. 11- Einen weiteren Abschnitt abteilen,und die Ansatzfarbe bis in die Spitzen verteilen. Mit abwechselnd hellen und<br />
dunklen Tönen fortfahren. 12- Einwirken lassen. Ausspülen und goldene oder hellblonde Kupferpatina auftragen. Einwirken lassen, mit einem Farbshampoo waschen.<br />
FRANÇAIS COUPE 1- Créer une section d’une oreille à l’autre en passant par le point d’équilibre, puis de l’os temporal à l’os pariétal. Tracer une séparation d’une oreille à l’autre en passant par l’os<br />
occipital. 2- Tracer une division médiane au niveau de la nuque puis définir la longueur à 180°. 3- Diviser la zone intermédiaire en 5 sections verticales. Projeter l’ensemble de la zone, parallèle<br />
au sol et couper à 45°. Projeter la section médiane sur celle latérale la plus proche, puis couper en suivant la mèche témoin à 45°. Graduer l’ensemble. 4- Texturiser les sections en diagonale au<br />
rasoir, ainsi qu’au niveau de l’os occipital pour un volume plus doux. 5- Perpendiculaire au sol, couper la section au rasoir en diagonale afin de conserver la longueur sur l’avant. Procéder de<br />
l’autre côté. 6- Créer un rectangle d’un os temporal à l’autre en passant par le point d’éclatement. Tracer une séparation médiane à mi sourcil. Perpendiculaire au sol, couper à 180° au rasoir.<br />
Finir par les sections latérales en créant une jonction avec les côtés. 7- Tracer une séparation de l’os pariétal jusqu’au point d’éclatement. Commencer à couper par les triangles proches de la<br />
frange. A l’aide d’une mèche, couper à 180°. Poursuivre sur les deux zones. Vriller l’ensemble de la zone au centre avec une tension régulière puis couper à 180° par rapport au sol. COULEUR<br />
8/9- Appliquer sur les racines le mélange blond irisé cuivré à 20 vol. Créer une section en cercle, à 2 cm après la pointe frontale jusqu’à l’os occipital. Allonger sur la partie basse le mélange des<br />
racines. 10- Tracer une section parallèle de 2 cm d’épaisseur. Travailler les pointes en painting avec le mélange décolorant à 20 vol. 11- Créer une section parallèle, puis allonger sur les pointes,<br />
le mélange des racines. Poursuivre en alternant les tonalités. 12- Poser. Rincer et appliquer la patine blond clair doré cuivré. Laisser poser, rincer avec un shampooing post coloration.<br />
ESPAÑOL CORTE 1- Trazar una sección de oreja a oreja, luego desde el hueso temporal hasta el hueso parietal de cada lado. 2- Trazar una separación central en la nuca y definir<br />
la longitud a 180°. Continuar por toda la zona. 3- Dividir la zona intermedia en 5 partes verticales. Comenzar en la mediana, proyectar toda el área paralela al suelo y cortar<br />
con una ángulo de 45° respecto al suelo. Proyectar la mediana a la sección lateral más cercana. Cortar a 45°. 4- Texturizar el área con secciones diagonales a peine y navaja.<br />
5- Proyectar toda el área perpendicular al suelo y luego cortar en diagonal con una navaja. Repetir en el otro lado. 6- Crear un rectángulo de un hueso temporal a otro pasando<br />
por el punto central. Trazar una raya central a mitad de la ceja en cada lado, proyectar toda el área perpendicular al suelo y cortar a 180° con una navaja. Terminar con las<br />
secciones laterales creando una unión entre el centro y el lado. 7- Trazar una separación del hueso parietal hasta el punto central en cada lado. Comenzar con los triángulos<br />
cerca del flequillo, proyectar cada una de las zonas perpendiculares al suelo. Tomar un mechón guía en el flequillo y cortar a 180° en ambas partes. Sobre el triángulo superior,<br />
proyectar el conjunto perpendicularmente al suelo. Girar toda la parte en el centro con una tensión uniforme. Cortar 180° respecto al suelo. COLOR 8/9- Aplicar en la raíz la<br />
mezcla de rubio cobrizo iridiscente a 20 vol. Crear una sección circular a 2 cm del punto frontal al hueso occipital, pasando por debajo de los huesos parietales. Extender la<br />
mezcla de las raíces a la parte inferior. 10- Dibujar una sección paralela a la primera de 2 cm de grosor. Trabajar las puntas con una mezcla decolorante a 20 vol. 11- Crear una<br />
sección paralela a la anterior, luego llevar hacia las puntas la mezcla colorante de las raíces. Continuar alternando tonos claros y oscuros. 12- Dejar actuar. Enjuagar y aplicar la<br />
pátina cobre dorado o rubio. Dejar actuar y lavar.un champú post-colorante.<br />
step by step 2
ghd<br />
Hair: Adam Reed<br />
Photo: Claire Rothstein<br />
Make-up: Claudine Blythman<br />
Styling: Ozzy Shah
2 3<br />
1<br />
4<br />
5<br />
6<br />
7<br />
8 9<br />
ENGLISH 1- Prep the hair with ghd root lift spray and starting at the nape, place a size 3 ghd ceramic vented radial brush under the section and smooth flat all the hair<br />
using ghd helios directing the air flow down the hair. 2- In the same section, place ghd helios over the hair and curve the hair around the brush and direct the airflow over<br />
it. 3- Start to twist and unloop the hair as you travel down, always directing the airflow around the brush. 4- Continue until you reach the ends of the hair. 5- Continue<br />
until all the hair, apart from the front hair line, has been curled this way. 6- Detail the crown by rolling the hair over the brush. 7- Detail the hair line by rolling the hair in<br />
the centre. 8- Toward the sides start to roll up and away from the face. 9- Pinch and pull to conch the crown.<br />
ITALIANO 1- Preparare i capelli con ghd root lift spray e, partendo dalla nuca, posizionare una spazzola radiale ventilata ghd in ceramica taglia 3 sotto la sezione;<br />
lisciare tutti i capelli usando ghd Helios direzionando il flusso d’aria lungo i capelli. 2- Nella stessa sezione, posizionare ghd Helios sui capelli e arrotolarli attorno alla<br />
spazzola, dirigendovi il flusso d’aria. 3- Iniziare ad attorcigliare e sciogliere i capelli mentre si procede verso il basso direzionando sempre il flusso d’aria intorno alla<br />
spazzola. 4- Continuare fino a raggiungere le estremità dei capelli. 5- Lavorare fino a quando tutti i capelli, a parte quelli della parte anteriore, siano stati arricciati in<br />
questo modo. 6- Rifinire la corona arrotolando i capelli sulla spazzola. 7- Acconciare l’attaccatura dei capelli arrotolandoli verso il centro. 8- Cominciare ad arrotolare<br />
allontanandosi dal viso verso il lato della testa. 9- Pizzicare e definire per ultimare lo styling della corona.<br />
DEUTSCH 1- Die Haare mit dem ghd Root Lift Spray ausgehend vom Nacken vorbereiten. Hierzu eine ghd Keramik Rundbürste mit Belüftungsstärke 3 unter der Sektion<br />
positionieren; alle Haare mithilfe von ghd helios glätten und hierbei den Luftfluss entlang der Haare leiten. 2- In der gleichen Sektion ghd helios auf dem Haar positionieren und<br />
diese um die Bürste wickeln und dabei den Luftfluss dorthin richten. 3- Beginnen, das Haar aufzuwickeln und loszulassen, während man nach unten arbeitend fortfährt und<br />
hierbei stets den Luftfluss um die Bürste richten. 4- So fortfahren, bis die Haarspitzen erreicht werden. 5- Auf diese Weise weiterarbeiten, bis alle Haare, die Vorderhaarlinie<br />
ausgenommen, auf diese Weise gewellt wurden. 6- Die Krone durch das Wickeln des Haars auf die Bürste detaillieren. 7- Den Ansatz durch das Wickeln des Haars Richtung<br />
Mitte stylen. 8- Mit dem Aufwickeln beginnen und sich dabei vom Gesicht Richtung Kopfseite entfernen. 9- Zum Stylen der Krone das Haar zupfen und ziehen.<br />
FRANÇAIS 1- Préparer la chevelure avec le spray ghd Root Lift. Utiliser une brosse ronde ventilée ghd en céramique, taille 3, en partant de la nuque. Lisser tous les cheveux<br />
à l’aide de ghd Helios en dirigeant le flux d’air tout le long de la chevelure. 2- Toujours sur la section de la nuque, placer ghd Helios sur les cheveux et les enrouler autour de<br />
la brosse. 3- Enrouler et dérouler les cheveux sur eux-mêmes, toujours en dirigeant le flux d’air autour de la brosse, vers le bas. 4- Continuer de la même manière jusqu’aux<br />
pointes. 5- Poursuivre ainsi sur l’ensemble de la chevelure, sauf sur la partie avant. 6- Travailler à présent la couronne en enroulant totalement les cheveux sur la brosse.<br />
7- Travailler les racines vers l’arrière. 8- Continuer progressivement vers les côtés. 9- Froisser aux doigts pour bien positionner les différentes mèches sur le haut de tête.<br />
ESPAÑOL 1- Preparar el cabello con el spray ghd root lift y, empezando por la nuca, colocar un cepillo radial para secado en cerámica ghd del tamaño 3 debajo de la<br />
sección y alisar todo el cabello usando ghd helios dirigiendo el flujo de aire hacia abajo. 2- En la misma sección, colocar ghd helios sobre el cabello y curvar el cabello<br />
alrededor del cepillo y orientar el flujo de aire hacia el mismo. 3- Empezar a enrollar y desenrollar el cabello a medida que se baja, dirigiendo el flujo de aire siempre<br />
alrededor del cepillo. 4- Continuar hasta llegar a las puntas del cabello. 5- Seguir hasta que todo el cabello, excepto la línea frontal del mismo, se haya rizado de esta<br />
manera. 6- Trabajar la corona enrollando el cabello sobre el cepillo. 7- Por último, la línea del cabello enrollando el cabello en el centro. 8- En los lados comenzar a ondular<br />
alejándose del rostro. 9- Coger y tirar para ajustar la corona.<br />
step by step 3
Lorenzo Marchelle<br />
Hair: Lorenzo Marchelle by Attilio Artistic Team<br />
for Alfaparf Milano<br />
Photo: Vanessa Polignano<br />
Make-up: Davide Maisano
1 2 3 4<br />
COLOUR FORMULA<br />
• Complete colour lift using BB Bleach<br />
Easy Lift 7 tone at 20 Volume. Blend with<br />
Harmonizers .01 at 10 Volumi<br />
• Root toning: 59 g. Evolution of the<br />
Color 9 Grey Black + 1 g Evolution of the<br />
Color 410 at 10 Volume<br />
• Lengths and ends toning: 55 g Color<br />
Wear 10.21 + 5 g Color Wear 9 Metallic Silver with<br />
Attivatore 5 Volume. Slides toner with Color<br />
Wear 9 Ultra Violet, Revolution Pastel Blue,<br />
Revolution Pastel Green and Revolution Clear<br />
5 6 7 8<br />
9 10 11 12 13<br />
ENGLISH 1- Create a rounded separation from the end of the eyebrows, passing through the crown line, using the top of the head as a reference point. Create a central<br />
parting from the top of the head towards the nose-line. 2/3/4- With the lower section left free, proceed to cut with comb over scissors, to create uniformity. Start working<br />
on the sub-section closest to the eyes, working one said and then the other. Cut slightly diagonally following the roundness of the head. Cut in, finger-thickness, strand by<br />
strand. 5- In the front section, select a sub-section and bring it towards the nape of the neck. 6/7- Select a triangular section. Cut straight across using the club-cutting<br />
technique, working a point from the eyeline down towards the tip of the nose. 8/9/10- Proceed on the other side, following the same line, making sure that a tip is created<br />
in the direction of the nose. Complete the entire section, up to the top of the head, using the same points of reference. 11/12- In the back area, join the lengths with the<br />
fringe, rotating around the head. This will create an inverted bob, starting from the fringe instead of the back area. 13- Deconstruct as you wish, leaving the top area longer<br />
to allow you to customize the styling.<br />
ITALIANO 1- Creare una separazione tondeggiante da fine sopracciglio destro a fine sopracciglio sinistro, passando per la linea di corona, in riferimento al vertice. Creare<br />
una scriminatura centrale dal vertice a riferimento naso. 2/3/4- In tutta la sezione sottostante, lasciata libera, procedere a tagliare a pettine e forbice, per creare aderenza.<br />
Indifferentemente da destra o da sinistra, partire dalla sub-sezione più vicina agli occhi. Tagliare leggermente in diagonale seguendo la rotondità della testa. Tagliare<br />
in ciocca su ciocca con lo spessore delle proprie dita. Completare anche dall’altro lato, partendo dalla sub-sezione più frontale, creando delle diagonali che seguono la<br />
rotondità della testa. 5- Nella sezione frontale, selezionare una sub-sezione e portarla verso la nuca. 6/7- Selezionare una sezione triangolare. Prendere come riferimento<br />
punta, naso e occhio, tagliare in Club-Cutting. 8/9/10- Procedere sull’altro lato, con la stessa inclinazione, facendo sì che si crei una punta in direzione del naso. Completare<br />
tutta la sezione, fino al vertice, in riferimento alla ciocca guida sottostante. 11/12- Nella zona posteriore congiungere la lunghezza alla frangia, ruotando intorno alla<br />
testa. Si creerà così un bob invertito, partendo dalla frangia anziché dalla zona posteriore, come di consueto. 13- Destrutturare a piacimento lasciando più lunga la zona<br />
del vertice che permetterà di personalizzare lo styling.<br />
DEUTSCH 1- Vom Ende der rechten Augenbraue bis zum Ende der linken Augenbraue einen runden Scheitel ziehen, der in Bezug auf den Scheitelpunkt durch die<br />
Scheitellinie verläuft. Einen mittleren Scheitel vom Scheitelpunkt bis zur Bezugslinie der Nase ziehen. 2/3/4- Im gesamten unteren freigelassenen Abschnitt mit Kamm<br />
und Schere fortfahren, um einen Übergang zu schaffen. Von rechts oder links mit dem den Augen nächstgelegenen Unterabschnitt beginnen. Der Rundung des Kopfes<br />
folgend leicht schräg schneiden. Mit der Dicke der Finger Strähne für Strähne schneiden. Auf der anderen Seite ebenfalls vervollständigen. Mit dem frontalsten<br />
Unterabschnitt beginnen, wobei Diagonalen geschaffen werden, die der Rundheit des Kopfes folgen. 5- Aus dem Frontbereich eine Untersektion abteilen und diese in<br />
Richtung Nacken bringen. 6/7- Einen dreieckigen Abschnitt abteilen. Nase und Ohren als Bezugspunkt für die Spitze nehmen und in Club-Cutting schneiden. 8/9/10- Auf<br />
der anderen Seite mit der gleichen Schräge fortfahren und eine Spitze in Richtung Nase kreieren. Den gesamten Abschnitt bis zum oberen Ende durcharbeiten, wobei die<br />
jeweils darunterliegende Strähne den Bezugspunkt bildet. 11/12- Die Länge des hinteren Bereiches um den gesamten Kopf herum mit dem Pony verbinden. Dadurch<br />
entsteht ein umgedrehter Bob, der vom Pony und nicht wie üblich vom Hinterkopf beginnt. 13- Nach Belieben die Struktur auflösen, wobei der Scheitelbereich länger<br />
bleiben sollte, damit das Styling angepasst werden kann.<br />
FRANÇAIS 1- Créer une division en arrondie allant d’un sourcil à l’autre en passant par le vertex. Puis créer une seconde séparation partant du vertex vers l’arrête du nez.<br />
2/3/4- La partie supérieure, laissée libre, sera coupée au peigne et aux ciseaux. Commencer indifféremment par la partie droite ou gauche. Commencer par la partie la plus<br />
proche de l’œil. Couper légèrement en arrondie, en suivant la forme du crâne. Travailler mèche à mèche de façon régulière. Procéder de la même manière de l’autre côté du<br />
visage. 5- Sur la section frontale, délimiter une sous-division en la ramenant vers la nuque. 6/7- Tracer une section triangulaire en prenant comme référence la ligne<br />
“nez-oeil”, puis procéder à la coupe selon la technique du club-cutting. 8/9/10- Procéder à présent de l’autre côté en utilisant la même inclinaison de façon à diriger le<br />
mouvement vers le nez. Poursuivre jusqu’au vertex, en suivant la mèche guide. 11/12- Sur la partie arrière, utiliser la longueur de la frange, en tournant tout autour du<br />
crâne. Créer ainsi un bob inversé, en partant de la frange et non plus de la partie postérieure, comme à l’accoutumée. 13- Déstructurer la coupe selon le goût de chacun en<br />
laissant plus de longueurs au niveau du vertex pour personnaliser le styling.<br />
ESPAÑOL 1- Crear una separación redondeada desde el final de la ceja derecha hasta el final de la ceja izquierda, pasando por la línea de la coronilla en referencia al vértice.<br />
Crear una partición central desde el vértice hasta la referencia de la nariz. 2/3/4- En toda la sección inferior, dejándola libre, proceder a cortar con peine y tijeras, para<br />
crear adherencia. Independientemente de derecha o izquierda, empezar con la subsección más cercana a los ojos. Cortar ligeramente en diagonal siguiendo la redondez de<br />
la cabeza. Cortar mechón por mechón usando el grosor de los dedos como medida. Completar también en el otro lado, partiendo de la subsección más frontal, creando<br />
diagonales que siguen la redondez de la cabeza. 5- En la sección frontal, seleccionar una subsección y llevarla a la nuca. 6/7- Seleccionar una sección triangular. Tomar<br />
como referencia punta, nariz y ojo, cortar en Club-Cutting. 8/9/10- Proceder con el otro lado, con el mismo ángulo, asegurándose que se cree una punta en dirección de la<br />
nariz. Completar toda la sección, hasta el vértice, tomando como referencia el mechón guía inferior. 11/12- En la zona posterior unir el largo al flequillo, girando alrededor<br />
de la cabeza. Esto creará un bob invertido, comenzando por el flequillo en lugar de la zona posterior, como es habitual. 13- Desestructurar libremente, dejando la parte del<br />
vértice más larga lo que permitirá personalizar el estilismo.<br />
step by step 4
Biguine<br />
Hair: Biguine Paris<br />
Photo: Anaïs Biguine<br />
Make-up: Biguine Makeup<br />
Products: Wella Professionals<br />
Coordination: Brian Feinman
1<br />
2 3 4<br />
5<br />
6 7<br />
COLOR FORMULAS<br />
• Wella Professionnals Blondorplex 6%<br />
• Patine 20gr 9,31 Koleston & 20gr 1,9<br />
& 20gr Post Color<br />
• Wella Plex N°2<br />
8 9 10 11<br />
ENGLISH 1- Decide on the desired length then proceed with the cut. 2- Start the cut by working through the ends. 3- Continue by sectioning off and working up through<br />
successive sections. 4- Align the sides with the baseline. 5- After drying the hair, thin out and scale the ends to create texture to the lengths. 6- Prepare the Balayage.<br />
Separate the sections. Proceed by wrapping the sections in foil, with the Luxelights technique on the V section using an oblique brush. 7- Proceed through the subsequent<br />
sections using a wider brush for a more intense effect. 8- Create shading through the root area. 9- At the end of the exposure time, rinse and apply the repair mask. Twist<br />
the strands to make the product penetrate better. 10- Dry the hair by styling with an air cushion brush to give lift to the roots. 11- Work the roots with your fingertips to<br />
get more texture, then distribute suitable styling products through the hair to give finish, movement and colour.<br />
ITALIANO 1- Stabilire la lunghezza desiderata per procedere al taglio. 2- Iniziare il taglio tracciando la base del carré. 3- Proseguire tracciando la base delle sezioni<br />
successive. 4- Allineare i lati sulla base tracciata in precedenza. 5- Dopo aver asciugato i capelli, sfoltire le punte con una scalatura e insistendo sulla parte superiore per<br />
creare un volume armonioso. 6- Preparare il balayage. Separare le sezioni. Procedere avvolgendo le ciocche nell’alluminio, con la tecnica Luxelights sulla sezione a V con<br />
un pennello obliquo. 7- Procedere sulle sezioni successive con un pennello più largo per un effetto più intenso. 8- Creare delle sfumature lungo l’attaccatura delle radici.<br />
9- Terminato il tempo di posa risciacquare e applicare la maschera riparatrice. Attorcigliare le ciocche per far penetrare meglio il prodotto. 10- Asciugare i capelli<br />
mettendo in piega con una spazzola con cuscinetto d’aria per gonfiare meglio le radici. 11- Lavorare le radici con le dita per ottenere maggiore volume, poi distribuire sulla<br />
capigliatura i prodotti di styling più adatti per conferire texture, valorizzare il taglio, il movimento e il colore.<br />
DEUTSCH 1- Die gewünschte Schnittlänge bestimmen. 2- Den Schnitt mit einer geraden Grundlinie beginnen. 3- Weitere Abschnitte auf Grundlage der Grundlinie<br />
schneiden. 4- Die Seiten an die zuvor geschnittene Grundlinie angleichen. 5- Nach dem Trocknen der Haare die Spitzen mit einer Stufung ausdünnen, wobei besonders<br />
am Oberkopf ein harmonisches Volumen entstehen soll. 6- Balayage vorbereiten. Abschnitte abteilen. Fortfahren, indem die Strähnen in Aluminiumfolie gewickelt<br />
werden, wobei die Luxelights-Technik auf der V-Sektion mit einem schrägen Pinsel angewendet wird. 7- Bei den folgenden Abschnitten mit einem breiteren Pinsel<br />
fortfahren, um eine intensivere Wirkung zu erzielen. 8- Entlang den Haaransätzen Schattierungen erzeugen. 9- Nach Ablauf der Einwirkzeit ausspülen und eine<br />
regenerierende Haarmaske auftragen. Die Strähnen verdrehen, um das Produkt besser einarbeiten zu können. 10- Die Haare mit einer luftgepolsterten Bürste trocknen,<br />
damit die Ansätze mehr Volumen erhalten. 11- Für mehr Volumen die Ansätze mit den Fingern bearbeiten. Anschließend die am besten geeigneten Stylingprodukte auf<br />
dem Haar verteilen, um Textur, Schnitt, Bewegung und Farbe zur Geltung zu bringen.<br />
FRANÇAIS 1- Evaluer la longueur souhaitée pour procéder à la coupe. 2- Tracer la base carrée. 3- Continuer à tracer la base carrée par séparations successives. 4- Aligner<br />
les côtés sur la base tracée. 5- Après avoir séché les cheveux, alléger toutes les pointes en effilage en insistant sur le dessus pour un volume plus harmonieux. 6- Préparation<br />
du balayage. Séparations sur mesure. Technique enveloppement feuilles en aluminium selon la technique Luxelights en V avec un pinceau biseauté. 7- Continuer avec<br />
un pinceau plus large pour un effet plus intense. 8- Faire des voiles sur la bordure au départ des racines. 9- Le temps de pose terminé. Rincer puis appliquer le soin reconstituant.<br />
Tourner les mèches en torsades pour une meilleure pénétration du produit. 10- Séchage à l’aide d’une brosse pneumatique en décollant les racines. 11- Redécoller les<br />
racines à l’aide des doigts pour plus de volume, puis texturiser à l’aide des produits coiffants adaptés afin de mettre en valeur la coupe, le mouvement et la couleur.<br />
ESPAÑOL 1- Definir la longitud deseada para proceder con el corte. 2- Iniciar el corte delimitando la base del carré. 3- Continuar trazando la base de las secciones<br />
sucesivas. 4- Alinear los lados sobre la base trazada anteriormente. 5- Después de haber secado el cabello, aligerar las puntas con un escalado e insistir en la parte superior<br />
para crear un volumen armónico. 6- Preparar el balayage. Separar las secciones. Proceder envolviendo los mechones en aluminio, con la técnica Luxelights y con una<br />
sección a V con un pincel oblicuo. 7- Continuar en las siguientes secciones con un pincel más ancho para un efecto más intenso. 8- Crear un degradado en la parte de la<br />
raíz. 9- Finalizado el tiempo de exposición, aclarar y aplicar la mascarilla reparadora. Girar sobre si mismos los mechones para que el producto penetre mejor. 10- Secar<br />
el cabello peinándolo con un cepillo para dar volumen a las raíces. 11- Trabajar las raíces con los dedos para conseguir más volumen, luego aplicar sobre el cabello los<br />
productos más adecuados para conferir textura, y potenciar el corte, el movimiento y el color.<br />
step by step 5
Schwarzkopf Professional<br />
Creative Director: Simon Ellis<br />
Hair: Richard Ashforth, Tyler Johnston, Lesley Jennison<br />
Photo: Simon Emmett, Kapturing<br />
Make-up: Helge Branscheidt<br />
Styling: Adelaida Cue Bär
1<br />
2 3 4 5 6<br />
7<br />
8<br />
9<br />
10<br />
11<br />
ENGLISH CUT 1- Divide hair in five sections. 2- Section 1) Lower head: Create a horizontal baseline, which is cut blunt under the comb. 3- Section 2) Separate the middle<br />
headband horizontally. Create a slight overhang in pointcut technique. 4- Section 3) and 4) left and right lower front head section: Create a pointed line that runs<br />
diagonally backwards and stands for itself without being connected. 5- Blow-dry hair with a styling brush, follow with a straightening iron. 6- Section 5) Finalize the upper<br />
head length in slice cut. Focus on a slight increase in length towards the face conture. 7- The fringe-section: Create a triangular section from the highest point of the head<br />
to the temple. Work strong textures into the fringe-line by point cutting in horizontal sections. COLOUR 8- On the upper head split a narrow trapezoid. Begin with the<br />
narrow side of the trapezoid just behind the highest point of the head and end with the broad side 3cm before the front conture. Pre-lighten the trapezoid with<br />
Schwarzkopf Professional Igora Royal Vario Blond Plus in back to back slices in length and tip. Do not lighten the roots. 9- Color the remaning hair globally with a dark<br />
ebony tone of the Schwarzkopf Professional Igora Vibrance line. 10- Treat hair with Schwarzkopf Professional Fibre Clinix Tribond series, blow-dry and separate the upper<br />
pre-lightened section. The Color Blender is intended to blend, dap, to soften or apply color in a versatile way. 11- Freehand-blending, Petal technique (the application of<br />
several nuances): The blond veil is dotted with color: medium, silver-gray mauve, medium rosewood pink and bright calcified petrol beige.<br />
ITALIANO TAGLIO 1- Dividere i capelli in cinque sezioni. 2- Sezione 1) Testa inferiore: creare una linea di base orizzontale e tagliare a filo pettine. 3- Sezione 2) Separare<br />
l’arco centrale orizzontalmente. Creare una leggera sporgenza usando la tecnica pointcut. 4- Sezione 3) e 4) Sezione anteriore inferiore sinistra e destra: creare una linea<br />
appuntita che corra diagonalmente all’indietro e che stia separata, senza punti di contatto. 5- Asciugare i capelli con una spazzola per lo styling, quindi con la piastra.<br />
6- Sezione 5) Finalizzare la lunghezza superiore della testa in slice cut. Concentrarsi su un leggero aumento della lunghezza verso il viso. 7- Frangia: creare una sezione<br />
triangolare dal punto più alto verso le tempie. Lavorare texturizzando in punta di forbice in senso orizzontale. COLORE 8- Sulla parte superiore della testa realizzare uno<br />
stretto trapezio. Iniziare con il lato stretto del trapezio dietro il punto più alto della testa e terminare con il lato largo 3 cm prima della parte anteriore. Pre-schiarire il<br />
trapezio con Schwarzkopf Professional Igora Royal Vario Blond Plus in slice su tutta la lunghezza. Non schiarire le radici. 9- Colorare i capelli rimanenti globalmente con<br />
una tonalità scura ebano della linea Schwarzkopf Professional Igora Vibrance. 10- Trattare i capelli con Schwarzkopf Professional Fiber serie Clinix Tribond, asciugare<br />
e separare la sezione pre-illuminata. Il Color Blender ha lo scopo di sfumare, tamponare, ammorbidire o applicare il colore in modo versatile. 11- Miscelazione a mano libera,<br />
tecnica Petal (l’applicazione di diverse sfumature): il velo biondo è punteggiato di colore: medio, grigio argento malva, rosa palissandro medio e beige petrolio brillante.<br />
DEUTSCH SCHNITT 1- Das Haar in 5 Sektionen einteilen. 2- Sektion 1) Unterkopf: Erstellen Sie eine horizontale Basislinie, stumpf unter dem Kamm geschnitten. 3- Sektion<br />
2) Mittleres Hinterkopfband horizontal unterteilen. Im Pointcut einen leichten Überhang kreieren. 4- Sektion 3 und 4: Linke und rechte untere Vorderkopfpartie in einer<br />
Unverbundenheit eine leicht diagonal nach hinten verlaufende Linie im Pointcut arbeiten. 5- Das Haar im Wrapdry mit der Stylingbrush im natürlichen Fall föhnen und<br />
dann glätten. 6- Sektion 5: Den Oberkopf im Slicecut mit leichter Längenzunahme zur Gesichtskontur finalisieren. 7- Die Ponysektion: Dreiecksabteilung vom höchsten<br />
Punkt des Kopfes zur Tampel kreieren, dann horizontal im Pointcut starke Texturen in die Ponylinie einarbeiten. FARBE 8- Am Oberkopf ein schmales Trapez kurz hinter<br />
dem höchsten Punkt des Kopfes abteilen und mit der breiten Seite 3cm vor der Stirnkontur enden lassen. Folie auf Folie (back to back) Slicetechnik mit Schwarzkopf<br />
Professional Igora Vario Blond Plus Blondierung in Länge und Spitze aufhellen. Ansätze nicht blondieren. 9- Die restlichen Haare global mit einem dunklen Ebenholzton<br />
der Schwarzkopf Professional Igora Vibrance Range colorieren. 10- Haare pflegen und föhnen, obere, aufgehellte Sektion nochmals abteilen. Der Color Blender: Der Color<br />
Blender vereinfacht das Verschmelzen, Tupfen, Aussoften von Farben. 11- In der Petallingtechnik (das Applizieren von mehreren Nuancen auf einer Abteilung) den<br />
blonden Schleier mit Farbe austupfen: Farben: mittleres, silbergraues Mauve, ein mittleres, Rosenholzpink und ein helles, gekalktes Petrolbeige. Abwechselnd, freihändig<br />
mit dem neuen Color Blender, blütenblattförmig auftupfen und verblenden.<br />
FRANÇAIS COUPE 1- Diviser les cheveux en cinq sections. 2- Section 1 : sur la partie inférieure du crâne, dessiner à l’aide du peigne une ligne de base horizontale puis<br />
couper. 3- Section 2 : Libérer la partie centrale en la ramenant sur la première section. Couper légèrement plus long que la section précédente en utilisant la technique du<br />
pointcut. 4- Sections 3 et 4 : Créer à partir de ces deux sections, situées à droite et à gauche, une ligne en diagonale, sans connection, avec les sections précédentes.<br />
5- Sécher les cheveux à l’aide d’un fer à lisser. 6- Section 5 : Finaliser à présent les longueurs du haut de tête par pallier. Laisser légèrement plus de longueur sur la partie<br />
avant du visage. 7- Créer une section triangulaire à partir des points les plus hauts du visage, au niveau des tempes. Travailler la frange, par section horizontale, afin de lui<br />
apporter plus de texture. COULEUR 8- Sur le dessus de tête, créer une section en forme de trapèze étroit. Commencer sur la partie la plus étroite, située au niveau du front,<br />
puis finir par les côtés les plus larges de 3 cm. Eclaircir cette section avec Schwarzkopf Professional Igora Royal Vario Blond Plus, sur les longueurs et pointes. Ne pas<br />
éclaircir les racines. 9- Colorez le reste de la chevelure avec une tonalité plus foncée ; un ton Brun de la ligne Schwarzkopf Professional Igora Vibrance. 10- Traiter les<br />
cheveux avec Fibre Clinix Tribond de Schwarzkopf Professional. Procéder au séchage puis isoler la partie éclaircie précédemment. Utiliser le Color Blender, conçu pour<br />
mélanger et appliquer la couleur de façon ciblée. 11- Appliquer le mélange à main levée selon la technique du pétale (mélange de différentes nuances). Le voile blond est<br />
recouvert de différentes tonalités de gris argent mauve, rose des bois, beige, etc.<br />
ESPAÑOL CORTE 1- Dividir el cabello en cinco secciones. 2- Sección 1) Parte inferior del cráneo: Crear una línea con base horizontal, que se corta recta debajo del peine.<br />
3- Sección 2) Separar el arco central horizontalmente. Crear una ligera punta con la técnica de pointcut. 4- Sección 3) y 4) sección frontal inferior izquierda y derecha:<br />
Crear una línea y dirigirla diagonalmente hacia atrás, debe quedar suelta, sin conexión. 5- Secar el cabello con un cepillo y luego con una plancha alisadora. 6- Sección 5)<br />
Finalizar la longitud de la parte superior del cráneo con un corte a capas. Realizar un un ligero aumento de longitud hacia el contorno del rostro. 7- Sección del flequillo:<br />
Crear una sección triangular desde el punto más alto de la cabeza hacia las sienes. Texturizar intensamente la zona del flequillo usando el point cutting en secciones<br />
horizontales. COLOR 8- En la parte superior de la cabeza se forma un estrecho trapecio. Empezar con el lado estrecho del trapecio justo detrás del punto más alto de la<br />
cabeza y terminar con el lado ancho a 3 cm de la raíz frontal. Pre-aclarar el trapecio con Schwarzkopf Professional Igora Royal Vario Blond Plus en la parte posterior, tanto<br />
en longitudes como en puntas. No aplicarlo en las raíces. 9- Teñir la totalidad del cabello remanente con una tonalidad ébano de la línea Schwarzkopf Professional Igora<br />
Vibrance. 10- Tratar el cabello con la serie Schwarzkopf Professional Fiber Clinix Tribond, secar y separar la parte superior pre-iluminada. El Color Blender está diseñado<br />
para mezclar, dar un ligero toque, esfumar o aplicar color de una manera versátil. 11- Mezclar a mano libre, técnica Petal (aplicación de varios matices): El velo rubio está<br />
salpicado de color: medio, malva gris-plateado, rosa palisandro medio y beige petróleo calcificado brillante.<br />
step by step 6
Kin Cosmetics<br />
Hair Design: Xevi Jubany for Kin Cosmetics<br />
Color Design: Leonie Ollacarizqueta<br />
e Xavi Rosés for Kin Cosmetics<br />
Photo: Marcos Domingo<br />
Make-up: Concha Rodríguez<br />
Styling: Ángel Cabezuelo
1 2<br />
4<br />
5 6<br />
3<br />
7 8 9<br />
10<br />
11<br />
12<br />
ENGLISH COLOUR 1- Begin with the lower occipital area. Section off with foil applying Kinblond mixed with Color Plus Oxydant 10 V at 1 + 2, leaving 1 cm of the root. Work<br />
upwards and develop for 50 minutes, checking hair condition. 2- Remove foil an excess product. 3- Apply Kinessences Blondes Bleaching Cream mixed with Kinessences<br />
Developer 12 V at 1 + 2 to the roots and develop for 30 minutes, checking hair condition. 4- Wash with Kinmaster Equilibrant Shampoo and towel dry. Tone the hair to eliminate<br />
the yellow highlights using Kinessences Blonde Beautifier tone 04 Lilac Blonde mixed with Kinessences Developer 6 V at 1 + 5. Leave 5 minutes. 5- Wash with Kinmaster<br />
Equilibrant Shampoo and dry. Divide the hair into 3 horizontal zones. 6- In the middle zone, apply Kinessences Blonde Beautifier tone 01 Pink Blonde mixed with Kinessences<br />
Developer 6 V at 1 + 6 to the roots, leaving the ends uncoloured. 7- In the upper area draw out interwoven sections. Apply a global covering of Kinessences Blonde Beautifier<br />
Ringtone 01 Pink Blonde mixed with Kinessences Developer 6 V at 1 + 6. 8- On the subsequent section, apply Kinessences Blonde Beautifier tone 01 Pink Blonde mixed with<br />
Kinessences Developer 6 V at 1 + 6 to the roots. Using a sponge, put Kinactif Color Conditioner on the ends and develop for 35 minutes. 9- Make 7 sections. CUT 10- Cut the lower<br />
partition into reverse diagonal sections, at 90° and a cut angle of 90°. 11- In the intermediate zone, work through vertical sections at 90º, an interior finger of 45º. 12- Cut the upper<br />
zone in front diagonal sections at 90º with a finger angle of 90º creating a slight elongation towards the face.<br />
ITALIANO COLORE 1- Iniziare con l’area occipitale inferiore. Dividere le zone con strisce di alluminio applicando Kinblond miscelato con Color Plus Oxydant 10 V a 1 + 2,<br />
lasciando 1 cm di radice. Lavorare verso l’alto e lasciar agire per 50 minuti, controllando lo stato dei capelli. 2- Rimuovere dalle strisce l’eccesso di prodotto 3- Applicare<br />
Kinessences Blondes Bleaching Cream miscelato con Kinessences Developer 12 V a 1 + 2 sulle radici e lasciar agire per 30 minuti, controllando lo stato dei capelli. 4- Lavare<br />
con Kinmaster Equilibrant Shampoo e tamponare. Tonalizzare i capelli per eliminare i riflessi gialli utilizzando Kinessences Blonde Beautifier tone 04 Lilac Blonde miscelato<br />
con Kinessences Developer 6 V a 1 + 5. Lasciare agire per 5 minuti. 5- Lavare con Kinmaster Equilibrant Shampoo e asciugare. Dividere i capelli in 3 zone orizzontali. 6- Nella<br />
zona centrale, applicare Kinessences Blonde Beautifier tono 01 Pink Blonde miscelato con Kinessences Developer 6 V a 1 + 6 sulle radici, lasciando le estremità incolore.<br />
7- Nella parte superiore creare delle sezioni intrecciate. Applicare una copertura totale di Kinessences Blonde Beautifier Ringtone 01 Pink Blonde miscelato con Kinessences<br />
Developer 6 V a 1 + 6. 8- Nella sezione successiva, applicare Kinessences Blonde Beautifier tono 01 Pink Blonde miscelato con Kinessences Developer 6 V a 1 + 6 sulle radici.<br />
Usando una spugna, applicare Kinactif Color Conditioner sulle punte e lasciar agire per 35 minuti. 9- Creare 7 sezioni. TAGLIO 10- Tagliare la partizione inferiore in sezioni<br />
diagonali inverse a 90 ° e con un angolo di taglio di 90 °. 11- Nella zona intermedia, lavorare con sezioni verticali a 90º, con un angolo interno di 45º. 12- Tagliare la zona<br />
superiore in sezioni diagonali anteriori a 90º con un angolo di 90° creando un leggero allungamento verso il viso.<br />
DEUTSCH FARBE 1- Am unteren Hinterkopfbereich beginnen. Einzelne Abschnitte mit Alufolie abteilen und Kinblond gemischt mit Color Plus Oxydant 10 V bei 1 + 2 auftragen,<br />
wobei 1 cm vom Ansatz freibleiben sollte. Nach oben durcharbeiten und 50 Minuten einwirken lassen. Regelmäßig den Zustand des Haares überprüfen. 2- Über-schüssige Farbe<br />
von den Streifen entfernen 3- Kinessences Blondes Blonde Blondierungscreme gemischt mit Kinessences Entwickler 12 V bei 1 + 2 auf die Ansätze auftragen und 30 Minuten<br />
einwirken lassen und regelmäßig den Zustand des Haares überprüfen. 4- Mit Kinmaster Equilibrant Shampoo waschen und danach trocken tupfen. Die Haare zur Beseitigung<br />
gelber Strähnchen mit dem Kinessences Blonde Beautifier Ton 04 Lila Blond gemischt mit Kinessences Entwickler 6 V bei 1 + 5 tönen. Für fünf Minuten einwirken lassen. 5- Mit<br />
Kinmaster Equilibrant Shampoo waschen und danach die Haare trocknen. Die Haare in drei horizontale Bereiche unterteilen. 6- Im mittleren Bereich Kinessences Blonde<br />
Beautifier Ton 01 Pink Blonde gemischt mit Kinessences Entwickler 6 V bei 1 + 6 auf die Ansätze auftragen, wobei die Spitzen ausgelassen werden. 7- Im oberen Bereich gedrehte<br />
Strähnen abteilen. Komplett mit Kinessences Blonde Beautifier Ringtone 01 Pink Blonde gemischt mit Kinessences Developer 6 V bei 1 + 6 einstreichen. 8- Im nächsten Bereich<br />
Kinessences Blonde Beautifier Ton 01 Pink Blonde gemischt mit Kinessences Entwickler 6 V bei 1 + 6 auf die Ansätze auftragen. Auf die Spitzen mit einem Schwamm Kinactif<br />
Farbconditioner auftragen und 35 Minuten einwirken lassen. 9- Sieben Abschnitte abteilen. SCHNITTE 10- Die untere Sektion in gegenläufige diagonale Abschnitte mit einem<br />
Winkel von 90° und einem Schnittwinkel von 90° schneiden. 11- In der mittleren Zone mit senkrechten Abschnitten mit einem Winkel von 90º und einem innen liegenden<br />
Winkel von 45º arbeiten. 12- Den oberen Bereich in diagonalen frontalen Abschnitten mit einem Winkel von 90° schneiden. Die Abschnitte mit einem Winkel von 90° auf das<br />
Gesicht ausrichten, um eine leichte Verlängerung dahin zu erreichen.<br />
FRANÇAIS COULEUR 1- Démarrer par la section située sur la zone occipitale inférieure. Diviser cette section à l’aide de feuilles d’aluminium et appliquer à 1 cm des racines la tonalité<br />
Kinblond, mélangée à Color Plus 10 Vol, en 1+2. Travailler vers le haut et laisser agir 50 min en contrôlant régulièrement l’évolution. 2- Eliminer l’excès de produit. 3- Appliquer à<br />
présent sur les racines Kinessences Blondes Bleaching Cream , mélangée à Kinessences Developer 12 V en 1 + 2. Laisser poser 30 min en contrôlant régulièrement l’évolution. 4- Laver<br />
les cheveux avec Kinmaster Equilibrant Shampoo, puis essorer. Réaliser à présent une patine afin d’éliminer les reflets jaunes à l’aide de la tonalité Kinessences Blonde Beautifier 04 Lilac<br />
Blonde, mélangée à Kinessences Developer 6 V en 1 + 5. Laisser poser 5 min. 5- Laver de nouveau les cheveux avec Kinmaster Equilibrant Shampoo, puis sécher. Diviser à présent les<br />
cheveux en trois sections horizontales. 6- Sur la partie centrale, appliquer Kinessences Blonde Beautifier 01 Pink Blonde mélangée avec Kinessences Developer 6 V en 1 + 6. Ne pas<br />
appliquer la couleur sur les pointes. 7- Sur la partie supérieure, créer des sections vrillées et appliquer Kinessences Blonde Beautifier Ringtone 01 Pink Blonde mélangée avec<br />
Kinessences Developer 6 V en 1 + 6. 8- Sur la section suivante, appliquer uniquement sur les racines Kinessences Blonde Beautifier 01 Pink Blonde mélangée avec Kinessences<br />
Developer 6 V a 1 + 6. Utiliser une éponge pour appliquer Kinactif Color Conditioner sur les pointes et laisser agir 35 min. 9- Délimiter 7 sections. COUPE 10- Couper la partie<br />
inférieure en sections diagonales inversées à 90°, avec un angle de coupe à 90°. 11- Dans la partie intermédiaire, travailler la section en vertical à 90°, avec un angle interne à 45°.<br />
12- Couper à présent la partie supérieure en sections diagonales internes à 90° avec un angle de coupe à 90° en créant légèrement plus de longueur vers le visage.<br />
ESPAÑOL COLOR 1- Crear velos muy finos con papel de plata aplicando Kinblond con Color Plus Oxydant 10 V a 1+2, dejando 1 cm de raíz. Trabajar desde el occipital inferior de<br />
forma ascendente y dejar 50’. 2- Retirar el papel de plata y el exceso de producto siguiendo el orden del montaje. 3- Aplicar en raíz Kinessences Blondes Bleaching Cream mezclada<br />
con Kinessences Developer 12 V a 1+2. Dejar 30’. 4- Lavar con Kinmaster Equilibrant Shampoo y secar con una toalla. Matizar con Kinessences Blonde Beautifier 04 Lilac Blonde<br />
mezclado con Kinessences Developer 6 V a 1+ 5. Dejar 5’. 5- Lavar con y secar completamente el cabello. Dividirlo en 3 zonas horizontales. 6- En la intermedia, aplicar en raíz<br />
Kinessences Blonde Beautifier tono 01 Pink Blonde mezclado con Kinessences Developer 6 V a 1+6. 7- En la zona superior trazar velos intercalados. Aplicar un velo global con<br />
Kinessences Blonde Beautifier tono 01 Pink Blonde con Kinessences Developer 6 V a 1+6. 8- En el siguiente velo, aplicar en raíz la misma mezcla. Con una esponja, depositar<br />
Kinactif Color Conditioner en puntas difuminando el color de raíz. Dejar 35’. CORTE 9- Realizar 7 particiones. 10- Cortar la partición inferior en secciones diagonales posteriores,<br />
con una elevación de 90° y un ángulo de corte de 90°, sobre su propia base. 11- En la zona intermedia, secciones verticales, con elevación de 90º, ángulo de dedos de 45º interior, sobre<br />
su base, tomando como medida la partición anterior. 12- Con el largo máximo de la partición interior como referencia, corta la zona superior mediante secciones diagonales<br />
anteriores, con una elevación de 90º, transportar cada una a la anterior y crear un ligero alargamiento a medida que llegamos al rostro.<br />
step by step 7
DISCOVER<br />
ESTETICAEXPORT.COM<br />
A new digital way to enhance<br />
international business is<br />
now available!<br />
An editorial and digital<br />
service supporting hair & beauty<br />
product manufacturers in enterprises<br />
into new international markets.<br />
JOIN US TODAY!<br />
www.esteticaexport.com
THE WORLD’S<br />
MOST<br />
RENOWNED<br />
AWARDS<br />
IN THE<br />
HAIRDRESSING<br />
INDUSTRY<br />
Association Internationale Presse<br />
Professionnelle Coiffure<br />
5, Rue Boudreau<br />
75009 PARIS (France)<br />
Don’t miss the opportunity... visit now<br />
www.aipp.net<br />
www.aippcoiffure.com
Keune Haircosmetics annonce<br />
son plan de développement durable<br />
Pour les personnes. Pour la planète<br />
Pour les générations futures<br />
Nous repensons, recyclons<br />
et réduisons l’utilisation<br />
des plastiques<br />
Nous ne faisons jamais<br />
de tests sur les animaux<br />
Nous offrons des conditions<br />
de travail équitables<br />
Nous traitons tout le monde<br />
comme membre de la famille<br />
Nous aimons les arbres<br />
et les forêts<br />
Nous luttons contre<br />
le gaspillage<br />
Nous tirons notre source<br />
d’énergie du soleil<br />
Nous économisons<br />
activement l’eau<br />
Nous éduquons<br />
les personnes dans le besoin<br />
En tant qu’entreprise familiale, nous croyons fermement qu’il est de notre responsabilité de prendre soin de<br />
la planète et de ses habitants. Pas seulement pour nous, mais surtout pour les générations futures.<br />
Notre engagement pour un avenir plus durable se décline en neuf piliers : l’énergie, l’eau, la protection des<br />
forêts, le plastique, l’éducation des plus démunis, la réduction des déchets, le bien-être animal, l’égalité des<br />
chances et les bonnes conditions de travail.<br />
KeuneFrance<br />
KeuneFrance<br />
www.keune.com/fr