

Brother PS-3100/3700 - Guide utilisateur pour PS-3100
Brother PS-3100/3700 - Guide utilisateur pour PS-3100
Brother PS-3100/3700 - Guide utilisateur pour PS-3100

You also want an ePaper? Increase the reach of your titles
YUMPU automatically turns print PDFs into web optimized ePapers that Google loves.
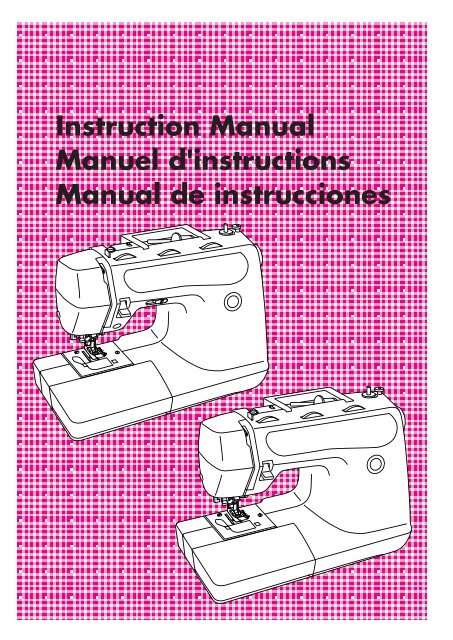
Instruction Manual<br />
Manuel d'instructions<br />
Manual de instrucciones
"IMPORTANT SAFETY INSTRUCTIONS"<br />
When using this machine, basic safety precautions should always be taken ,<br />
including the following:<br />
"Read all instructions before using."<br />
DANGER – To reduce the risk of electric shock:<br />
1. The machine should never be left unattended when plugged in. Always unplug this machine from the electrical outlet<br />
immediately after using and before cleaning.<br />
2. Always unplug before changing the light bulb.<br />
Replace bulb with same type rated 12 volts 5 watts (for Model <strong>PS</strong>-2470, <strong>PS</strong>-<strong>3100</strong>).<br />
Replace bulb with same type rated 15 watts (for Model <strong>PS</strong>-2360, <strong>PS</strong>-2250).<br />
WARNING – To reduce the risk of burns, fire, electric shock, or injury to persons:<br />
1. Do not allow this machine to be used as a toy. Close attention is necessary when the machine is used by or near children.<br />
2. Use this machine only for its intended use as described in this manual. Use only accessories recommended by the<br />
manufacturer as contained in this manual.<br />
3. Never operate this machine if it has a damaged cord or plug, if it is not working properly, if it has been dropped or damaged,<br />
or dropped into water. Return the machine to the nearest authorized dealer or service center for examination, repair,<br />
electrical or mechanical adjustment.<br />
4. Never operate the machine with any air openings blocked. Keep ventilation openings of the machine and foot control free<br />
from the accumulation of lint, dust, and loose cloth.<br />
5. Never drop or insert any object into any opening.<br />
6. Do not use outdoors.<br />
7. Do not operate where aerosol (spray) products are being used or where oxygen is being administered.<br />
8. To disconnect, turn the main switch to the symbol “O” position which represents off, then remove plug from outlet.<br />
9. Do not unplug by pulling on cord. To unplug, grasp the plug, not the cord.<br />
10. Keep fingers away from all moving parts. Special care is required around the machine needle.<br />
11. Always use the proper needle plate. The wrong plate can cause the needle to break.<br />
12. Do not use bent needles.<br />
13. Do not pull or push fabric while stitching. It may deflect the needle causing it to break.<br />
14. Switch the machine to the symbol “O” position when making any adjustments in the needle area, such as threading<br />
needle, changing needle, threading bobbin, or changing the presser foot, and the like.<br />
15. Always unplug the machine from the electrical outlet when removing covers, lubricating, or when making any of the user<br />
service adjustments mentioned in the instruction manual.<br />
16. The machine is not intended for use by young children or infirm persons without supervision.<br />
17. Young children should be supervised to ensure that do not play with this machine.<br />
"SAVE THESE INSTRUCTIONS"<br />
"This machine is intended for household use."
“IMPORTANTES CONSIGNES DE SECURITE”<br />
Lors de l’utilisation de la machine à coudre, il convient de toujours suivre les consignes de sécurité<br />
essentielles et de prendre notamment les précautions suivantes:<br />
“Lire toutes les instructions avant d’utiliser la machine.”<br />
DANGER – Pour réduire le risque de décharge électrique:<br />
1. Ne jamais laisser la machine sans surveillance lorsqu’elle est branchée. Toujours débrancher la machine à coudre après son utilisation<br />
et avant de procéder au nettoyage.<br />
2. Toujours débrancher la machine avant de remplacer l'ampoule de la lampe d'éclairage.<br />
Utiliser une ampoule de 12 volts 5 watts (<strong>pour</strong> les modèles <strong>PS</strong>-2470, <strong>PS</strong>-<strong>3100</strong>), du même type que celle d'origine.<br />
Utiliser une ampoule de 15 watts (<strong>pour</strong> les modèles <strong>PS</strong>-2360, <strong>PS</strong>-2250), du même type que celle d'origine.<br />
AVERTISSEMENT – Pour réduire le risque de brûlures, d’incendie, de choc électrique ou de blessures:<br />
1. Ne pas utiliser cette machine comme un jouet. Il convient de faire particulièrement attention lorsqu’elle est utilisée par des enfants<br />
ou dans leur entourage.<br />
2. Ne jamais utiliser cette machine à d’autres fins que celles <strong>pour</strong> lesquelles elle a été conçue, telles que décrites dans le présent manuel.<br />
Utiliser uniquement les accessoires recommandés par le fabricant tels que repris dans le manuel.<br />
3. Ne jamais faire fonctionner la machine si le cordon d’alimentation ou la fiche ont été endommagés, s’il y a un problème de<br />
fonctionnement, si elle est tombée ou a été abîmée, ou si elle a été plongée dans du liquide. Retourner la machine à coudre au revendeur<br />
autorisé ou au service technique le plus proche afin qu’on puisse l’examiner, la réparer ou effectuer certains réglages électriques ou<br />
mécaniques.<br />
4. Ne jamais faire fonctionner la machine si l’un des orifices de ventilation est obstrué. Veiller à ce que ces orifices et la commande au<br />
pied ne soient jamais encombrés de peluches, poussières et morceaux de tissus.<br />
5. Ne jamais laisser tomber ou insérer des objets dans ces ouvertures.<br />
6. Ne pas utiliser la machine à l’extérieur.<br />
7. Ne pas faire fonctionner la machine en cas d’utilisation de produits aérosols (vaporisateurs) ou d’administration d’oxygène.<br />
8. Pour l’éteindre, mettre l’interrupteur principal sur le symbole “O” <strong>pour</strong> “Off”, puis retirer la fiche de la prise.<br />
9. Ne jamais débrancher en tirant sur le cordon d’alimentation. Pour débrancher, saisir la fiche (et non le cordon) et tirer.<br />
10. Tenir ses doigts à l’écart de toute pièce mobile. Faire tout spécialement attention aux abords de l’aiguille.<br />
11. Toujours utiliser la plaque à aiguille adéquate. Une mauvaise plaque peut casser l’aiguille.<br />
12. Ne jamais utiliser d’aiguilles tordues.<br />
13. Ne pas tirer ou pousser le tissu en cousant. Cela peut entraver le fonctionnement de l’aiguille et causer sa rupture.<br />
14. Toujours éteindre la machine (mettre sur l’interrupteur principal sur “O”) avant d’effectuer des réglages à proximité de l’aiguille, tels<br />
que l’enfilage, le changement d’aiguille, la mise en place de la canette ou le changement de pied-de-biche, etc.<br />
15. Toujours débrancher la machine à coudre avant de retirer les plaques de protection, de la graisser ou avant d’effectuer tout réglage<br />
accessible à l’<strong>utilisateur</strong> tels que mentionnés dans le présent manuel d’utilisation.<br />
16. Ne jamais laisser les jeunes enfants ou les personnes handicapées utiliser la machine à coudre sans surveillance.<br />
17. Ne jamais laisser les jeunes enfants jouer avec la machine.<br />
“CONSERVER CES INSTRUCTIONS”<br />
“Cette machine à coudre est prévue <strong>pour</strong> un usage domestique.”
“IMPORTANTES INSTRUCCIONES DE<br />
SEGURIDAD”<br />
Cuando se usa una máquina de coser, debe seguirse unas precauciones básicas y<br />
que vienen incluidas a continuación.<br />
“Leer las instrucciones antes de usar”<br />
PELIGRO – Para reducir el riesgo de una descarga eléctrica.<br />
1. La máquina no debe dejarse nunca desatendida mientras esté conectada. Desconectar la máquina<br />
de la red eléctrica inmediatamente después de su uso y antes de limpiarla.<br />
2. Antes de cambiar la bombilla, asegúrese siempre de que la máquina de coser está apagada.<br />
Cambie la bombilla por otra del mismo tipo de 12 V y 5 W (para los modelo <strong>PS</strong>-2470, <strong>PS</strong>-<strong>3100</strong>).<br />
Cambie la bombilla por otra del mismo tipo de 15 W (para los modelo <strong>PS</strong>-2360, <strong>PS</strong>-2250).<br />
CUIDADO – Para reducir el riesgo de quemaduras, fuego, descargas eléctricas o causar<br />
daños a personas.<br />
1. No usar la máquina como un juguete.<br />
Prestar atención si fuese necesario cuando la máquina está siendo usada por niños o cerca de ellos.<br />
2. Usar la máquina de coser solamente como se describe en este manual.<br />
Usar únicamente los accesorios recomendados por el fabricante y que vienen especificados en este manual.<br />
3. Nunca haga funcionar la máquina de coser si el cordón de alimentación o la clavija están deteriorados, si no funciona<br />
correctamente, si se ha caído o si estuvo mojada. Entregar la máquina de coser al centro de servicio autorizado más cercano<br />
para que la examinen, la reparen o hagan los ajustes eléctricos o mecánicos que correspondan.<br />
4. No usar la máquina con los orificios de ventilación bloqueados. Mantener los orificios de ventilación<br />
de la máquina de coser y el pedal sin acumulacíon de povo. Suciedad y restos de tejido.<br />
5. No introducir no insertar objetos en los orificios de ventilación.<br />
6. No usar al, aire libre.<br />
7. No usar mientras se estén utilizando productos aerosoles (spray) o en lugares donde se esté administrando oxígeno.<br />
8. Para desconectar, girar el interruptor hasta la posición del símbolo “O” que representa off, luego desconectar el enchufe de<br />
la red.<br />
9. Nunca desconectar el enchufe tirando del cable. Para desconectar la máquina, tirar de la clavija y no del cable.<br />
10. Mantener los dedos alejados de todas las partes movibles de la máquina. Tener un cuidado especial<br />
con la aguja.<br />
11. Usar siempre la placa de agujas apropiada. Una placa de agujas impropia puede producir la rotura<br />
de la aguja.<br />
12. No usar agujas torcidas.<br />
13. No presionar ni tirar del tejido mientras se está cosiendo. Esto podría doblar la aguja y romperla.<br />
14. Apagar la máquina de coser, poniendo el interruptor principal en la posición cerrada (en “O”) cuando quiera realizar algún<br />
ajuste en el área de la aguja tal como enhebrar la aguja, cambiarla, bobinar la canilla, cambiar el prensatelas y operaciones<br />
similares.<br />
15. Desconectar siempre la máquina de la red eléctrica cuando se retiren las tapas, para lubricar, o cuando quiera realizar algún<br />
tipo de ajuste mecánico tal como mencionado en el manual de instrucciones.<br />
16. La máquina de coser no está pensada para el uso de los niños o personas enfermas sin supervisión.<br />
17. Evite que los niños jueguen con la máquina de coser.<br />
“CONSERVE ESTE MANUAL DE INSTRUCCIONES”<br />
“Esta máquina de coser es para uso doméstico”
FOR USERS IN UK, EIRE, MALTA AND CYPRUS ONLY.<br />
If this machine is fitted with a 3 pin non-rewireable BS plug then please read the following.<br />
IMPORTANT (in the United Kingdom)<br />
Main supply (AC 230/240V~, 50Hz)<br />
DO NOT cut off the main plug from equipment. If the plug<br />
fitted is not suitable for the power point in your home or the<br />
cable is too short to reach a power point, then obtain an<br />
appropriate safety approved extension lead or consult your<br />
dealer.<br />
BE SURE to replace the fuse only with an identical approved<br />
type, as originally fitted and to replace the fuse cover.<br />
If none the less the main plug is cut off be sure to remove the<br />
fuse and dispose of the plug immediately, to avoid a possible<br />
shock hazard by inadvertent connection to the main supply.<br />
IMPORTANT (in the other countries)<br />
If the available socket outlet is not suitable for the plug<br />
supplied with this equipment, it should be cut off and an<br />
appropriate three pin plug fitted. With alternative plugs an<br />
approved fuse must be fitted in the plug.<br />
NOTE: The plug severed from the main leads must be<br />
destroyed as a plug with bared flexible cords is hazardous if<br />
engaged in a live socket outlet. In the event of replacing the<br />
plug fuse, use a fuse approved by ASTA to BS 1362, i.e.<br />
carrying the ASA mark, rating as marked on plug.<br />
Always replace the fuse cover. Never use plugs with the fuse<br />
cover omitted.<br />
WARNING: DO NOT CONNECT EITHER WIRE TO THE<br />
EARTH TERMINAL WHICH IS MARKED WITH<br />
THE LETTER ‘E’, BY THE EARTH SYMBOL OR COL-<br />
OURED GREEN OR YELLOW.<br />
The wires in this main lead are coloured in accordance with<br />
the following code:<br />
Blue<br />
Brown<br />
Neutral<br />
Live<br />
As the colours of the wiring in the main lead of this appliance<br />
may not correspond with the coloured markings identifying<br />
the terminals in your plug, proceed as follows:<br />
The wire which is coloured blue must be connected to the<br />
terminal which is marked with the letter ‘N’ or coloured black<br />
or blue.<br />
The wire which is coloured brown must be connected to the<br />
terminal which is marked with the letter ‘L’ or coloured red or<br />
brown.<br />
Connecting Plugs and Main Power / Sewing Light Switch<br />
( Model <strong>PS</strong>-2470, <strong>PS</strong>-<strong>3100</strong> )<br />
1<br />
2
(Model <strong>PS</strong>-2360, <strong>PS</strong>-2250)<br />
1<br />
2<br />
1. Connect the power cord or three-prong plug into the<br />
machine.<br />
2. Connect the electrical supply plug into a wall outlet.<br />
- When leaving the machine unattended, the main switch of<br />
the machine should be switched off or the plug must be<br />
removed from the socket outlet.<br />
Turn on or off the switch for the main power and sew-light.<br />
1 Turn on<br />
2 Turn off<br />
- When servicing the machine, or when removing covers or<br />
changing bulbs, the machine or the electrical set must<br />
unplugged.
PLEASE READ BEFORE USING THIS MACHINE<br />
For safe operation<br />
1. Be sure to keep your eye on the needle while sewing. Do not touch the balance wheel, thread take-up, needle, or other<br />
moving parts.<br />
2. Remember to turn off the power switch and unplug the cord when:<br />
• Operation is completed<br />
• Replacing or removing the needle or any other parts<br />
• A power failure occurs during use<br />
• Maintaining the machine<br />
• Leaving the machine unattended.<br />
3. Do not store anything on the foot controller.<br />
4. Plug the machine directly into the wall. Do not use extension cords.<br />
For a longer service life<br />
1. When storing this machine, avoid direct sunlight and high humidity locations. Do not use or store the machine near a space<br />
heater, iron, halogen lamp, or other hot objects.<br />
2. Use only neutral soaps or detergents to clean the case. Benzene, thinner, and scouring powders can damage the case<br />
and machine, and should never be used.<br />
3. Do not drop or hit the machine.<br />
4. Always consult the operation manual when replacing or installing any assemblies, the presser feet, needle, or other parts<br />
to assure correct installation.<br />
For repair or adjustment<br />
In the event a malfunction occurs or adjustment is required, first follow the troubleshooting table in the back of the operation<br />
manual to inspect and adjust the machine yourself. If the problem persists, please consult your local authorized dealer.
VEUILLEZ LIRE CES INFORMATIONS AVANT<br />
D’UTILISER CETTE MACHINE<br />
Pour une utilisation en toute sécurité<br />
1. Surveillez toujours l’aiguille en cousant. Ne touchez pas la poulie, le levier de remontée du fil, l’aiguille , ou autre pièces mobiles.<br />
2. N’oubliez pas de mettre la machine hors tension et de la débrancher :<br />
• Son utilisation terminée<br />
• Lors du remplacement ou <strong>pour</strong> retirer toute autre pièce<br />
• A la suite d’une coupure de courant durant son utilisation<br />
• Lors de l’entretien de la machine<br />
• Lorsque la machine ne sera pas surveillée<br />
3. Ne posez rien sur la pédale.<br />
4. Branchez la machine directement au mur. N’utilisez pas de rallonge.<br />
Pour assurer un usage de longue durée<br />
1. Ne rangez pas cette machine dans des endroits exposés directement à la lumière du soleil ou des endroits très humides. N’utilisez pas<br />
et ne rangez pas la machine près d’un chauffage, d’objets en fer, d’une lampe à halogène ou tout autre objet chaud.<br />
2. Utilisez uniquement des détersifs ou détergents neutres <strong>pour</strong> nettoyer le boîtier. La benzène les solvants et les poudres à récurer peuvent<br />
endommager le boîtier et la machine, par conséquent ne les utilisez jamais.<br />
3. Ne faites pas tomber et ne cognez jamais la machine.<br />
4. Consultez toujours le mode d’emploi <strong>pour</strong> remplacer ou installer tout assemblage, les pieds-de-biche, l’aiguille ou autre pièce <strong>pour</strong><br />
une installation correcte.<br />
Lors de réparations<br />
Lors d’un mauvais fonctionnement ou d’une modification nécessaire, suivez en premier le tableau des pannes à l’arrière du mode d’emploi<br />
<strong>pour</strong> inspecter ou ajuster la machine vous-même. Si le problème persiste, veuillez consulter votre revendeur local autorisé.
LEA ESTE MANUAL ANTES DE USAR ESTA MÁQUINA<br />
Para un funcionamiento seguro<br />
1. Esté siempre atento a la aguja cuando cosa. No toque la polea, el tirahilo, la aguja u otras piezas móviles.<br />
2. Acuérdese de apagar la máquina y desenchufarla de la corriente cuando:<br />
• Termine la labor<br />
• Recambie o retire la aguja y otras piezas<br />
• Ocurra un fallo eléctrico durante la costura<br />
• Realice tareas de mantenimiento<br />
• Deje la máquina desatendida<br />
3. No deje ningún objeto encima del pedal.<br />
4. Enchufe la máquina directamente a la toma de contacto de la pared. No utilice alargos.<br />
Para un servicio más duradero<br />
1. Evite exponer la máquina a la luz directa del sol y no la guarde en sitios húmedos. No utilice o guarde la máquina cerca de<br />
una fuente de calor, plancha, lámpara halógena u otros objetos candentes.<br />
2. Utilice sólo detergentes o jabones neutros para limpiar la carcasa. Gasolina, diluyentes y polvos de limpieza pueden dañar<br />
la carcasa y la máquina; no los utilice nunca.<br />
3. No deje caer o golpee la máquina.<br />
4. Consulte siempre el manual de funcionamiento cuando tenga que reponer o instalar cualquier pieza, como el pie prensatela<br />
o la aguja. Así, asegurará una adecuada instalación.<br />
Para reparaciones o ajustes<br />
En el caso de que ocurra una malfunción o se requiera un reajuste, consulte primero la tabla de solución de problemas al final<br />
del manual de funcionamiento para inspeccionar y ajustar usted mismo la máquina. Si el problema continúa, recurra a su<br />
distribuidor autorizado local.
TABLE OF CONTENTS<br />
KNOWING YOUR SEWING MACHINE<br />
PRINCIPAL PARTS ......................................................... 1<br />
ACCESSORIES ............................................................... 5<br />
Optional Accessories .............................................. 5<br />
OPERATING YOUR SEWING MACHINE ....................... 7<br />
Connecting Plugs ................................................... 7<br />
Main Power/Sewing Light Switch ........................... 9<br />
Foot Controller ...................................................... 10<br />
Checking the Needle ............................................ 11<br />
Replacing the Needle ........................................... 11<br />
Changing the Presser Foot .................................. 13<br />
Flat Bed Attachment ............................................. 14<br />
VARIOUS CONTROLS .................................................. 15<br />
Pattern Selection Dial ........................................... 15<br />
RECOMMENDED WIDTHS AND LENGTHS FOR<br />
STITCHES ..................................................................... 17<br />
Stitch Length Dial ................................................. 26<br />
Stitch Width Dial ................................................... 28<br />
Reverse Sewing Lever ......................................... 29<br />
Feed Dog Position Switch .................................... 30<br />
Start/Stop Button .................................................. 31<br />
Sewing Speed Controller ...................................... 32<br />
Converting to Free-arm Style ............................... 32<br />
THREADING THE MACHINE ........................................ 33<br />
Winding the Bobbin .............................................. 33<br />
Lower Threading................................................... 37<br />
Upper Threading................................................... 39<br />
Using Needle Threader ........................................ 41<br />
Manually Drawing Up Lower Thread .................... 43<br />
Twin Needle Sewing ............................................. 44<br />
Thread Tension .................................................... 46<br />
FABRIC/THREAD/NEEDLE COMBINATIONS .............. 47<br />
BUTTONHOLE AND BUTTON SEWING<br />
Making a Buttonhole (For 1-step BH Type) .......... 63<br />
Odd-shaped buttons that do not fit into<br />
the button holder plate .......................................... 65<br />
Making a Buttonhole (For 4-step BH Type ) ......... 66<br />
Buttonhole Fine Adjustment ................................. 69<br />
Button Sewing ...................................................... 72<br />
USING ATTACHMENTS AND APPLICATIONS<br />
Zipper Insertion..................................................... 73<br />
Gathering .............................................................. 73<br />
Darning ................................................................. 75<br />
Appliqués .............................................................. 76<br />
Monogramming and Embroidering ....................... 77<br />
OPTIONAL ACCESSORIES .......................................... 79<br />
Using the Walking Foot ........................................ 79<br />
Using the Spring-action Quilting Foot ................... 81<br />
Using the 1/4-Inch Quilting Foot ........................... 83<br />
MAINTENANCE<br />
Changing the Light Bulb ....................................... 85<br />
Cleaning ............................................................... 87<br />
Performance Check List ....................................... 89<br />
Repacking the Machine ........................................ 95<br />
INDEX<br />
STRAIGHT AND ZIGZAG STITCHING<br />
PLEASE READ BEFORE SEWING ............................... 49<br />
Straight Stitching .................................................. 50<br />
Zigzag Stitching .................................................... 53<br />
BUILT-IN STITCHES<br />
Blind Hem Stitching .............................................. 54<br />
Shell Tuck Stitching .............................................. 55<br />
Elastic Stitching .................................................... 56<br />
Double Action Stitching ........................................ 57<br />
Scallop Stitching ................................................... 58<br />
Decorative Stitching.............................................. 59<br />
Patchwork ............................................................. 60<br />
Overedge Stitching ............................................... 61<br />
Feather Stitching .................................................. 62<br />
Triple Zigzag Stretch Stitching.............................. 62
TABLE DES MATIÈRES<br />
CONNAITRE SA MACHINE A COUDRE<br />
PIÈCES PRINCIPALES ........................................................... 2<br />
ACCESSOIRES ........................................................................ 6<br />
Accessoires en option ..................................................... 6<br />
FONCTIONNEMENT DE LA MACHINE A COUDRE......... 8<br />
Raccordement ................................................................. 8<br />
Interrupteur principal/de la lampe................................... 9<br />
Pédale ............................................................................ 10<br />
Vérification de l’aiguille ............................................... 12<br />
Pour remplacer l’aiguille .............................................. 12<br />
Changement de pied-de-biche ...................................... 13<br />
Plateau ........................................................................... 14<br />
DESCRIPTIF DES DIFFERENTES COMMANDES ............ 16<br />
Sélecteur de modèle de point ........................................ 16<br />
LONGUEURS ET LARGEURS RECOMMANDEES POUR<br />
CHAQUE POINT .................................................................... 20<br />
Sélecteur de longueur de point...................................... 27<br />
Sélecteur de largeur de point ........................................ 28<br />
Levier de couture en marche arrière ............................. 29<br />
Levier des griffes d’entraînement ................................. 30<br />
Bouton Marche/Arrêt .................................................... 31<br />
Levier de contrôle de la plage de vitesse ...................... 32<br />
Conversion en modèle bras libre .................................. 32<br />
ENFILAGE DE LA MACHINE ............................................. 34<br />
Remplissage de la canette ............................................. 34<br />
Enfilage inférieur .......................................................... 38<br />
Mise en place du fil supérieur ....................................... 40<br />
Utilisation de l’enfileur ................................................. 42<br />
Remontée manuelle du fil de la canette ........................ 43<br />
Couture avec l’aiguille jumelée .................................... 44<br />
Tension des fils ............................................................. 46<br />
COMBINAISONS TISSU/FIL/AIGUILLE ............................ 47<br />
COUTURE DE BOUTONNIERES ET DE BOUTONS<br />
Pour coudre une boutonnière (Type BH 1 étape) ......... 64<br />
Boutons aux formes irrégulières qui ne s'insèrent<br />
pas dans la plaque à boutons ......................................... 65<br />
Pour coudre une boutonnière (Type BH 4 étapes) ........ 66<br />
Equilibrage des boutonnières ........................................ 70<br />
Pour coudre un bouton .................................................. 72<br />
UTILISATION DES ACCESSOIRES ET LEURS APPLI-<br />
CATIONS<br />
Insertion de fermeture à glissière .................................. 74<br />
Pour froncer un tissu ..................................................... 74<br />
Reprisage ...................................................................... 75<br />
Appliques ...................................................................... 76<br />
Monogrammes et broderies .......................................... 78<br />
ACCESSOIRES EN OPTION ................................................ 80<br />
Utilisation du pied-de-biche mobile ............................. 80<br />
Utilisation du pied <strong>pour</strong> quilts avec effet de ressort ..... 82<br />
Utilisation d'un pied quilting 1/4" ................................. 84<br />
ENTRETIEN<br />
Remplacement de l’ampoule ........................................ 86<br />
Nettoyage ...................................................................... 88<br />
Liste de vérification en cas de défaillances .................. 91<br />
Emballage de la machine .............................................. 95<br />
INDEX<br />
POINTS DROITS ET POINTS ZIGZAG<br />
A LIRE AVANT DE COMMENCER À COUDRE ............... 49<br />
Point droit ..................................................................... 51<br />
Point zigzag .................................................................. 53<br />
POINTS INCLUS<br />
Surjer ............................................................................. 54<br />
Plissé ............................................................................. 55<br />
Point élastique ............................................................... 56<br />
Point renforcé ................................................................ 57<br />
Feston ............................................................................ 58<br />
Points décoratifs ............................................................ 59<br />
Patchwork (Assemblage) .............................................. 60<br />
Overlock élastique ........................................................ 61<br />
Point plume ................................................................... 62<br />
Triple point zigzag ........................................................ 62
CONTENIDO<br />
CONOZCA SU MÁQUINA DE COSER<br />
ELEMENTOS PRINCIPALES ............................................... 2<br />
ACCESORIOS ................................................................... 6<br />
Accesorios opcionales ............................................. 6<br />
FUNCIONAMIENTO DE LA MÁQUINA DE COSER ......... 8<br />
Conexión de los enchufes ....................................... 8<br />
Interruptor principal/luz de cosido........................... 9<br />
Pedal ..................................................................... 10<br />
Verificación de la aguja ......................................... 12<br />
Cambio de la aguja ............................................... 12<br />
Cambio del prensatelas ......................................... 13<br />
Plataforma ............................................................. 14<br />
DISTINTOS MANDOS .................................................... 16<br />
Selector de puntadas ............................................. 16<br />
ANCHOS Y LARGOS RECOMENDADOS PARA CADA<br />
PUNTADA ...................................................................... 23<br />
Selector de largo de puntada ................................. 27<br />
Selector de ancho de puntada ............................... 28<br />
Pulsador de retroceso ............................................ 29<br />
Palanca de los alimentadores ................................ 30<br />
Pulsador de puesta en Marcha/Parada ................... 31<br />
Palanca de control de zona de velocidad .............. 32<br />
Conversión en modalidad de brazo libre ............... 32<br />
ENHEBRADO DE LA MÁQUINA .................................... 34<br />
Bobinado de la canilla........................................... 34<br />
Enhebrado inferior ................................................. 38<br />
Enhebrado superior ............................................... 40<br />
Uso del enhebrador ............................................... 42<br />
Levantar manualmente el hilo inferior ................... 43<br />
Costura con aguja doble ........................................ 44<br />
Tensión de los hilos ............................................... 46<br />
COMBINACIONES DE TEJIDO/HILO/AGUJA ................. 48<br />
OJALES Y COSTURA DE BOTONES<br />
Para coser ojales (Para tipo BH en una operación) .... 64<br />
Botones con formas extrañas que no caben en el<br />
soporte del botón .................................................. 65<br />
Para coser ojales<br />
(Para tipo BH en cuatro operaciones) .................... 66<br />
Ajuste fino de los ojales ......................................... 70<br />
Costura de botones ................................................ 72<br />
USO DE ACCESORIOS Y APLICACIONES<br />
Inserción de cremalleras ........................................ 74<br />
Fruncido ................................................................ 74<br />
Zurcido ................................................................. 75<br />
Aplicaciones.......................................................... 76<br />
Monogramas y bordados ....................................... 78<br />
ACCESORIOS OPCIONALES .......................................... 80<br />
Utilización del pie caminante................................ 80<br />
Utilización del prensatelas enguatador accionado<br />
por muelle ............................................................. 82<br />
Utilización del prensatela para pespunte 1/4 ......... 84<br />
MANTENIMIENTO<br />
Cambio de la bombilla .......................................... 86<br />
Limpieza ............................................................... 88<br />
Listado de posibles incidencias ............................. 93<br />
Embalaje de la máquina ........................................ 95<br />
ÍNDICE<br />
PUNTADAS RECTAS Y ZIGZAG<br />
LEA ESTO POR FAVOR ANTES DE COSER ..................... 49<br />
Puntadas rectas...................................................... 51<br />
Puntadas zigzag..................................................... 53<br />
PUNTADAS INCORPORADAS<br />
Puntadas invisibles ................................................ 54<br />
Puntada ondas ....................................................... 55<br />
Puntada elástica .................................................... 56<br />
Puntada de acción doble ....................................... 57<br />
Ondas decorativas ................................................. 58<br />
Puntadas decorativas ............................................. 59<br />
Patchwork ............................................................. 60<br />
Puntada por encima de la orilla ............................. 61<br />
Puntada pluma ...................................................... 62<br />
Triple puntada zigzag elástica ............................... 62
KNOWING YOUR SEWING MACHINE<br />
CONNAITRE SA MACHINE A COUDRE<br />
CONOZCA SU MÁQUINA DE COSER<br />
PRINCIPAL PARTS<br />
(Model <strong>PS</strong>-2470, <strong>PS</strong>-<strong>3100</strong>)<br />
1 BOBBIN WINDER (Page 33)<br />
Winds the thread onto the bobbin to be used for the lower thread.<br />
2 STITCH LENGTH DIAL (Page 15, 26)<br />
Controls the length of the stitches.<br />
3 SPOOL PIN AND SPOOL CAP (Page 33, 39)<br />
6<br />
7<br />
8<br />
F<br />
G<br />
H<br />
I<br />
9 0<br />
J<br />
E<br />
A<br />
K<br />
5 4 3 2 1<br />
D<br />
B<br />
L<br />
C<br />
4 STITCH WIDTH DIAL (Page 28)<br />
Controls the stitch width.<br />
5 UPPER TENSION CONTROL DIAL (Page 46)<br />
Controls the tension of the upper thread.<br />
6 BUTTONHOLE LEVER (Page 63)<br />
7 NEEDLE THREADER (Page 41)<br />
8 FLAT BED ATTACHMENT WITH ACCESSORY COMPART-<br />
MENT (Page 14, 32)<br />
9 ZIGZAG PRESSER FOOT (Page 5, 13)<br />
: START/STOP BUTTON (Page 31)<br />
Touch to start or stop machine.<br />
A FEED DOG POSITION SWITCH (Page 30)<br />
B REVERSE SEWING LEVER (Page 29)<br />
Push for stitching in the reverse direction.<br />
C SEWING SPEED CONTROLLER (Page 32)<br />
Controls the speed range.<br />
D PATTERN INDICATION WINDOW (Page 15)<br />
Shows the stitch number to be performed.<br />
E HOLE FOR VERTICAL SPOOL PIN (Page 44)<br />
Used to hold a second spool of thread for twin needle sewing.<br />
F BALANCE WHEEL<br />
G PATTERN SELECTION DIAL (Page 15)<br />
Turn in either direction to select the desired stitch.<br />
H MAIN POWER/SEWING LIGHT SWITCH (Page 9)<br />
Turn on/off the main power/sewing light switch.<br />
I FOOT CONTROLLER JACK (Page 10)<br />
Insert for foot controller operation.<br />
J CORD JACK (Page 7)<br />
Connect machine to power supply.<br />
K BUTTONHOLE FINE ADJUSTMENT SCREW (Page 69)<br />
L PRESSER FOOT LEVER (Page 39)<br />
M FOOT CONTROLLER (Page 10)<br />
Used to control sewing speed/start and stop.<br />
M<br />
1
PIÈCES PRINCIPALES<br />
(Modèle <strong>PS</strong>-2470, <strong>PS</strong>-<strong>3100</strong>)<br />
1 DEVIDOIR (Page 34)<br />
Sert à enrouler le fil sur la canette.<br />
2 SELECTEUR DE LONGUEUR DE POINT (Page 16, 27)<br />
Contrôle la longueur des points.<br />
3 PORTE-BOBINE/DISQUE BLOQUE-BOBINE (Page 34, 40)<br />
4 SELECTEUR DE LARGEUR DE POINT (Page 28)<br />
Contrôle la largeur du point.<br />
5 SELECTEUR DE TENSION SUPERIEURE (Page 46)<br />
Contrôle la tension du fil supérieur.<br />
6 LEVIER POUR BOUTONNIERES (Page 64)<br />
7 ENFILEUR (Page 42)<br />
8 PLATEAU ET COMPARTIMENT D’ACCESSOIRES (Page 14,<br />
32)<br />
9 PIED-DE-BICHE POUR POINTS ZIGZAGS (Page 6, 13)<br />
: BOUTON DE MISE EN MARCHE/ARRET (Page 31)<br />
Basculer le bouton <strong>pour</strong> mettre la machine en marche ou l’arrêter.<br />
A LEVIER D'ABAISSEMENT DES GRIFFES D'ENTRAINE-<br />
MENT (Page 30)<br />
B LEVIER DE COUTURE EN MARCHE ARRIERE (Page 29)<br />
Pousser le bouton <strong>pour</strong> coudre en arrière.<br />
C LEVIER DE CONTROLE DES PLAGES DE VITESSES (Page 32)<br />
Contrôle les plages de vitesses.<br />
D FENETRE D'INDICATION DU MODELE DE POINT (Page 16)<br />
Indique le numéro de point sélectionné.<br />
E ORIFICE POUR PORTE-BOBINE SUPPLEMENTAIRE (Page 44)<br />
Sert à placer une seconde bobine de fil lors de la couture avec une<br />
aiguille jumelée.<br />
F VOLANT A MAIN<br />
G SELECTEUR DE MODELE DE POINT (Page 16)<br />
Tourner dans l'une ou l'autre direction <strong>pour</strong> selectionner le point désiré<br />
H INTERRUPTEUR PRINCIPAL/DE LA LAMPE (Page 9)<br />
Eteint ou allume la machine et la lampe d’éclairage.<br />
I CONNECTEUR DE LA PEDALE DU RHEOSTAT (Page 10)<br />
Brancher la fiche <strong>pour</strong> que la pédale du rhéostat puisse fonctionner.<br />
J FICHE DU CORDON D’ALIMENTATION (Page 8)<br />
Sert à raccorder la machine à une prise de courant.<br />
K VIS DE REGLAGE FIN DES BOUTONNIERES (Page 70)<br />
L LEVIER DU PIED-DE-BICHE (Page 40)<br />
M PEDALE DU RHEOSTAT (Page 10)<br />
Sert à contrôler la vitesse de couture, la mise en marche et l'arrêt.<br />
ELEMENTOS PRINCIPALES<br />
(Modelo <strong>PS</strong>-2470, <strong>PS</strong>-<strong>3100</strong>)<br />
1 DISPOSITIVO DE BOBINADO DE LA CANILLA (Página 34)<br />
Hace bobina para la canilla que va a ser utilizada como hilo<br />
inferior.<br />
2 SELECTOR DE LARGO DE PUNTADA (Página 16, 27)<br />
Controla el largo de las puntadas.<br />
3 EJE DEL CARRETE Y PORTA CARRETES (Página 34, 40)<br />
4 SELECTOR DE ANCHO DE PUNTADA (Página 28)<br />
Controla el ancho de las puntadas.<br />
5 DISCO DE CONTROL DE LA TENSIÓN SUPERIOR (Página 46)<br />
Controla la tensión del hilo superior.<br />
6 PALANCA DE OJALES (Página 64)<br />
7 ENHEBRADOR DE AGUJAS (Página 42)<br />
8 PLATAFORMA CON COMPATIMENTO DE ACCESORIOS (Página<br />
14, 32)<br />
9 PRENSATELAS ZIGZAG (Página 6, 13)<br />
: BOTÓN DE PUESTA EN MARCHA/PARADA (Página 31)<br />
Apriete el botón para poner la máquina en marcha o pararla.<br />
A PALANCA DE ALIMENTADORES (Página 30)<br />
B PULSADOR DE RETROCESO (Página 29)<br />
Apriete el pulsador para coser hacia atrás.<br />
C PALANCA DE CONTROL DEL RANGO DE VELOCIDAD (Página 32)<br />
Controla el rango de velocidad.<br />
D INDICADOR DE PUNTADA (Página 16)<br />
Muestra el número de puntada que se debe realizar.<br />
E ORIFICO PARA EL PORTA CARRETES VERTICAL (Página 44)<br />
Sirve para poner un segundo carrete de hilo, para coser con una<br />
aguja doble.<br />
F RUEDA MANUAL/POLEA<br />
G SELECTOR DE PUNTADAS (Página 16)<br />
Gírelo en cualquier sentido para seleccionar la puntada deseada.<br />
H INTERRUPTOR PRINCIPAL/LUZ DE COSIDO (Página 9)<br />
Enciende o apaga la máquina así como la luz de costura.<br />
I CONECTADOR DEL PEDAL (Página 10)<br />
Inserte la clavija del pedal para que éste funcione.<br />
J CLAVIJA DEL CORDÓN DE ALIMENTACIÓN (Página 8)<br />
Permite conectar la máquina a una toma de corriente.<br />
K TORNILLO DE AJUSTE FINO DE LOS OJALES (Página 70)<br />
L PALANCA DEL PRENSATELAS (Página 40)<br />
M PEDAL (Página 10)<br />
Se utiliza para controlar la velocidad, el inicio y el final del cosido.<br />
KNOWING YOUR SEWING MACHINE<br />
CONNAITRE SA MACHINE A COUDRE<br />
CONOZCA SU MÁQUINA DE COSER<br />
2
KNOWING YOUR SEWING MACHINE<br />
CONNAITRE SA MACHINE A COUDRE<br />
CONOZCA SU MÁQUINA DE COSER<br />
5 2 1 B<br />
4<br />
3<br />
PRINCIPAL PARTS<br />
(Model <strong>PS</strong>-2360, <strong>PS</strong>-2250)<br />
1 BOBBIN WINDER (Page 33)<br />
Winds the thread onto the bobbin to be used for the lower thread.<br />
2 STITCH LENGTH DIAL (Page 15, 26)<br />
Controls the length of the stitches.<br />
3 SPOOL PIN AND SPOOL CAP (Page 33, 39)<br />
*6<br />
* 7<br />
8<br />
D<br />
E<br />
F<br />
G<br />
9<br />
C<br />
: A<br />
H<br />
I<br />
4 STITCH WIDTH DIAL (Page 28)<br />
Controls the stitch width.<br />
5 UPPER TENSION CONTROL DIAL (Page 46)<br />
Controls the tension of the upper thread.<br />
6 BUTTONHOLE LEVER (Page 63)<br />
*<strong>PS</strong>-2360 only<br />
7 NEEDLE THREADER (Page 41)<br />
*<strong>PS</strong>-2360 only<br />
8 FLAT BED ATTACHMENT WITH ACCESSORY COMPART-<br />
MENT (Page 14, 32)<br />
9 ZIGZAG PRESSER FOOT (Page 5, 13)<br />
: REVERSE SEWING LEVER (Page 29)<br />
Push for stitching in the reverse direction.<br />
A FEED DOG POSITION SWITCH (Page 30)<br />
B PATTERN INDICATION WINDOW (Page 15)<br />
Shows the stitch number to be performed.<br />
C HOLE FOR VERTICAL SPOOL PIN (Page 44)<br />
Used to hold a second spool of thread for twin needle sewing.<br />
D BALANCE WHEEL<br />
E PATTERN SELECTION DIAL (Page 15)<br />
Turn in either direction to select the desired stitch.<br />
F MAIN POWER/SEWING LIGHT SWITCH (Page 9)<br />
Turn on/off the main power/sewing light switch.<br />
G FOOT CONTROLLER JACK (Page 7)<br />
Insert the foot controller plug for operation and connect the<br />
machine to the power supply.<br />
H BUTTONHOLE FINE ADJUSTMENT SCREW (Page 69)<br />
I PRESSER FOOT LEVER (Page 39)<br />
J FOOT CONTROLLER (Page 10)<br />
Used to control sewing speed/start and stop.<br />
J<br />
3
PIÈCES PRINCIPALES<br />
(Modèle <strong>PS</strong>-2360, <strong>PS</strong>-2250)<br />
1 DEVIDOIR (Page 34)<br />
Sert à enrouler le fil sur la canette.<br />
2 SELECTEUR DE LONGUEUR DE POINT (Page 16, 27)<br />
Contrôle la longueur des points.<br />
3 PORTE-BOBINE/DISQUE BLOQUE-BOBINE (Page 34, 40)<br />
4 SELECTEUR DE LARGEUR DE POINT (Page 28)<br />
Contrôle la largeur du point.<br />
5 SELECTEUR DE TENSION SUPERIEURE (Page 46)<br />
Contrôle la tension du fil supérieur.<br />
6 LEVIER POUR BOUTONNIERES (Page 64)<br />
* <strong>PS</strong>-2360 seulement<br />
7 ENFILEUR (Page 42)<br />
* <strong>PS</strong>-2360 seulement<br />
8 PLATEAU ET COMPARTIMENT D’ACCESSOIRES (Page 14,<br />
32)<br />
9 PIED-DE-BICHE POUR POINTS ZIGZAGS (Page 6, 13)<br />
: LEVIER COUTURE EN MARCHE ARRIERE (Page 29)<br />
Appuyer <strong>pour</strong> coudre en sens inverse<br />
A LEVIER D'ABAISSEMENT DES GRIFFES D'ENTRAINE-<br />
MENT (Page 30)<br />
B FENETRE D'INDICATION DU MODELE DE POINT (Page 16)<br />
Indique le point sélectionné.<br />
C ORIFICE POUR PORTE-BOBINE VERTICAL (Page 44)<br />
Sert à placer une seconde bobine de fil <strong>pour</strong> la couture avec une aiguille<br />
jumelée.<br />
D VOLANT A MAIN<br />
E SELECTEUR DE MODELE DE POINT (Page 16)<br />
Tourner dans l'une ou l'autre direction <strong>pour</strong> selectionner le point désiré<br />
F INTERRUPTEUR PRINCIPAL/DE LA LAMPE (Page 9)<br />
Sert à mettre la machine sous/hors tension et à allumer/éteindre la<br />
lampe d'éclairage.<br />
G CONNECTEUR DE LA PEDALE DU RHEOSTAT (Page 7)<br />
Brancher la fiche <strong>pour</strong> que la pédale du rhéostat puisse fonctionner et<br />
brancher la machine sur une prise d'électiaté.<br />
H VIS D'EQUILIBRAGE DES BOUTONNIERES (Page 70)<br />
I LEVIER DU PIED-DE-BICHE (Page 40)<br />
J PEDALE DU RHEOSTAT (Page 10)<br />
Sert à contrôler la vitesse de couture, la mise en marche et l'arrêt.<br />
ELEMENTOS PRINCIPALES<br />
(Modelo <strong>PS</strong>-2360, <strong>PS</strong>-2250)<br />
1 DISPOSITIVO DE BOBINADO DE LA CANILLA (Página 34)<br />
Hace bobina para la canilla que va a ser utilizada como hilo<br />
inferior.<br />
2 SELECTOR DE LARGO DE PUNTADA (Página 16, 27)<br />
Controla el largo de las puntadas.<br />
3 EJE DEL CARRETE Y PORTA CARRETES (Página 34, 40)<br />
4 SELECTOR DE ANCHO DE PUNTADA (Página 28)<br />
Controla el ancho de las puntadas.<br />
5 DISCO DE CONTROL DE LA TENSIÓN SUPERIOR (Página 46)<br />
Controla la tensión del hilo superior.<br />
6 PALANCA DE OJALES (Página 64)<br />
* <strong>PS</strong>-2360 solamente<br />
7 ENHEBRADOR DE AGUJAS (Página 42)<br />
* <strong>PS</strong>-2360 solamente<br />
8 PLATAFORMA CON COMPATIMENTO DE ACCESORIOS (Página<br />
14, 32)<br />
9 PRENSATELAS ZIGZAG (Página 6, 13)<br />
: PULSADOR DE RETROCESO (Página 29)<br />
Apriete el pulsador para coser hacia atrás.<br />
A PALANCA DE ALIMENTADORES (Página 30)<br />
B INDICADOR DE PUNTADA (Página 16)<br />
Muestra el número de puntada que se debe realizar.<br />
C ORIFICIO PARA EL PORTABOBINAS VERTICAL (Página 44)<br />
Sirve para poner un segundo carrete de hilo para coser con una<br />
aguja doble.<br />
D RUEDA MANUAL/POLEA<br />
E SELECTOR DE PUNTADAS (Página 16)<br />
Gírelo en cualquier sentido para seleccionar la puntada deseada.<br />
F INTERRUPTOR PRINCIPAL/LUZ DE COSIDO (Página 9)<br />
Encienda/apague el interruptor principal/luz de cosido.<br />
G RECEPTÁCULO DEL PEDAL (Página 7)<br />
Inserte la clavija del pedal para que éste funcione y enchufe la<br />
máquina a la fuente de alimentación.<br />
H TORNILLO DE AJUSTE FINO DE LOS OJALES (Página 70)<br />
I PALANCA DEL PRENSATELAS (Página 40)<br />
J PEDAL (Página 10)<br />
Se utiliza para controlar la velocidad, el inicio y el final del cosido.<br />
KNOWING YOUR SEWING MACHINE<br />
CONNAITRE SA MACHINE A COUDRE<br />
CONOZCA SU MÁQUINA DE COSER<br />
4
KNOWING YOUR SEWING MACHINE<br />
CONNAITRE SA MACHINE A COUDRE<br />
CONOZCA SU MÁQUINA DE COSER<br />
1 X59370-051 2 SA156<br />
XA5539-051<br />
3 X57117-051 4 X57521-001<br />
5 XA4911-151<br />
(<strong>PS</strong>-2470, <strong>PS</strong>-2360, <strong>PS</strong>-<strong>3100</strong>)<br />
X59369-251<br />
(<strong>PS</strong>-2250)<br />
ACCESSORIES<br />
1 Zipper Foot (1 pc.)<br />
2 Bobbin (3 pcs.) SA156 (For U.S.A)<br />
XA5539-051 (For other countries)<br />
Replacements (10-piece set)<br />
3 Needle Pack (Regular Single Needle No. 14) (3 pcs.)<br />
4 Twin Needle (1 pc.)<br />
5 Buttonhole Foot (1 pc.)<br />
6 Satin Stitch Foot (1 pc.)<br />
7 Spool Cap (Large) (1 pc.)<br />
8 Spool Cap (Small) (1 pc.)<br />
9 Cleaning Brush (1 pc.)<br />
0 Extra Spool Pin (1 pc.)<br />
A Screwdriver (1 pc.)<br />
B Seam Ripper (1 pc.)<br />
C Hard Case (1 pc.) (Model <strong>PS</strong>-2470, <strong>PS</strong>-2360, <strong>PS</strong>-<strong>3100</strong>)<br />
D Dust Cover (1 pc.) (Model <strong>PS</strong>-2250)<br />
6 137988-101 7 130012-054 8 130013-054<br />
9 X59476-051 < 130920-051<br />
A X55467-051 B X54243-001<br />
Parts Code for Zigzag Presser Foot: 137748-101<br />
Parts Code for Spool Cap (Medium): X55260-153<br />
(Model <strong>PS</strong>-2470, <strong>PS</strong>-<strong>3100</strong>)<br />
Foot Controller: Model N5V<br />
Parts Code: XA3931-051<br />
NOTE (For U.S.A. only):<br />
This foot controller can be used for Model <strong>PS</strong>-2470, <strong>PS</strong>-<strong>3100</strong>.<br />
(Model <strong>PS</strong>-2360, <strong>PS</strong>-2250)<br />
Foot Controller: Model N<br />
Parts Code: J00360-051 (110/120V Area)<br />
XA6400-051 (220/240V Area)<br />
XA6402-051 (U.K.)<br />
XA6404-051 (Australia, New Zealand)<br />
XA6434-051 (110/220V Dual Ara)<br />
NOTE (For U.S.A. only):<br />
Foot Controller: Model N<br />
Parts Code: J00360-051 (110/120V Area)<br />
This foot controller can be used for Model <strong>PS</strong>-2360, <strong>PS</strong>-2250.<br />
C X52769-656 D X53984-054<br />
The above accessories are stored in the flat bed attachment. These<br />
accessories have been designed to help complete most sewing<br />
tasks.<br />
1 SA140<br />
X81065-002<br />
3 SA125<br />
X80980-002<br />
2 SA129<br />
X81021-002<br />
Optional Accessories<br />
1 Walking Foot SA140 (For U.S.A)<br />
X81065-002 (For other countries)<br />
2 Springaction Quilting Foot<br />
SA129 (For U.S.A)<br />
X81021-002 (For other countries)<br />
3 1/4-Inch Quilting Foot<br />
SA125 (For U.S.A)<br />
X80980-002 (For other countries)<br />
NOTE:<br />
The content of accessories depends on model.<br />
5
ACCESSOIRES<br />
1 Pied <strong>pour</strong> fermeture à glissière (1 pc)<br />
2 Canettes de rechange (3 pcs) SA156 (<strong>pour</strong> les Etats-Unis)<br />
XA5539-051 (<strong>pour</strong> les autres pays)<br />
Rechanges (Jeu de 10 pièces)<br />
3 Jeu d’aiguilles (aiguilles normales No 14) (3 pcs)<br />
4 Aiguille jumelée (1 pc)<br />
5 Pied <strong>pour</strong> boutonnières (1 pc)<br />
6 Pied <strong>pour</strong> point de bourdon (1 pc)<br />
7 Disque bloque-bobine (grand) (1 pc)<br />
8 Disque bloque-bobine (petit) (1 pc)<br />
9 Brosse (1 pc)<br />
: Porte bobine supplémentaire (1 pc)<br />
A Tournevis (1 pc)<br />
B Coupe fils (1 pc)<br />
C Etui rigide (1 pc) (Modèle <strong>PS</strong>-2470, <strong>PS</strong>-2360, <strong>PS</strong>-<strong>3100</strong>)<br />
D Couvercle (1 pc) (Modèle <strong>PS</strong>-2250)<br />
ACCESORIOS<br />
1 Pata de cremalleras (1 pza)<br />
2 Canilla (3 pzas) SA156 (para EE UU)<br />
XA 5539-051 (para otros países)<br />
Recambios (paquete de 10 piezas)<br />
3 Paquete de agujas (agujas simples normales No 14) (3 pzas)<br />
4 Aguja doble (1 pza)<br />
5 Prensatelas para ojales (1 pza)<br />
6 Prénsatela para puntada de realce (1 pza)<br />
7 Tope para carretes (grande) (1 pza)<br />
8 Tope para carretes (pequeño) (1 pza)<br />
9 Cepillo (1 pza)<br />
: Porta carretes extra (1 pza)<br />
A Destornillador (1 pza)<br />
B Cortador para abrir costuras (1 pza)<br />
C Caja rígida (1 pza) (Modelo <strong>PS</strong>-2470, <strong>PS</strong>-2360, <strong>PS</strong>-<strong>3100</strong>)<br />
D Funda guardapolvo (1 pza) (Modelo <strong>PS</strong>-2250)<br />
KNOWING YOUR SEWING MACHINE<br />
CONNAITRE SA MACHINE A COUDRE<br />
CONOZCA SU MÁQUINA DE COSER<br />
Code des éléments <strong>pour</strong> le pied Zigzag: 137748-101<br />
Code des éléments <strong>pour</strong> le Dique blque-bobine (moyen): X55260-153<br />
(Modèle <strong>PS</strong>-2470, <strong>PS</strong>-<strong>3100</strong>)<br />
Pédale du rhéostat: Modèle N5V<br />
Code de référence: XA3931-051<br />
REMARQUE (<strong>pour</strong> les Etats-Unis uniquement):<br />
La présente pédale peut servir <strong>pour</strong> les modèles de machines à coudre <strong>PS</strong>-<br />
2470, <strong>PS</strong>-<strong>3100</strong>.<br />
(Modèle <strong>PS</strong>-2360, <strong>PS</strong>-2250)<br />
Pédale du rhéostat: Modèle N<br />
Codes de référence: J00360-051 (zone de 110/120V)<br />
XA6400-051 (zone de 220/240V)<br />
XA6402-051 (Royaume-Uni)<br />
XA6404-051 (Australie, Nouvelle Zélande)<br />
XA6434-051 (zone mixte 110/220V)<br />
REMARQUE (<strong>pour</strong> les Etats-Unis uniquement):<br />
Pédale du rhéostat: Modèle N<br />
Code de référence: J00360-051 (zone de 110/120V)<br />
La présente pédale peut servir <strong>pour</strong> le modèle de machine à coudre <strong>PS</strong>-<br />
2360, <strong>PS</strong>-2250.<br />
Les accessoires mentionnés ci-dessus se trouvent à l'intérieur de la table<br />
d'extension. Ils ont été conçus <strong>pour</strong> vous permettre de réaliser la plupart<br />
des tâches de couture<br />
Código del prensatelas para la puntada zigzag: 137748-101<br />
Código del prensatelas para la tope para carretes (mediana):<br />
X55260-153<br />
(Modelo <strong>PS</strong>-2470, <strong>PS</strong>-<strong>3100</strong>)<br />
Pedal: modelo N5V<br />
Código: XA3931-051<br />
NOTA (sólo para EE UU):<br />
Este pedal puede utilizarse para los modelos de máquinas de coser<br />
<strong>PS</strong>-2470, <strong>PS</strong>-<strong>3100</strong>.<br />
(Modelo <strong>PS</strong>-2360, <strong>PS</strong>-2250)<br />
Pedal: modelo N<br />
Códigos: J00360-051 (110/120 V Área)<br />
XA6400-051 (220/240 V Área)<br />
XA6402-051 (RU)<br />
XA6404-051 (Australia y Nueva Zelanda)<br />
XA6434-051 (110/220 V Área Dual)<br />
NOTA (sólo para EE UU):<br />
Pedal: modelo N<br />
Código: J00360-051 (110/120 V Área)<br />
Este pedal puede utilizarse para el modelo de máquina de coser <strong>PS</strong>-<br />
2360, <strong>PS</strong>-2250.<br />
Los accesorios anteriores están almacenados en la mesa extensible.<br />
Han sido diseñados para ayudar en la realización de la mayoría de<br />
tareas de cosido.<br />
Accessoires en option<br />
Accesorios opcionales<br />
1 Pied mobile SA140 (<strong>pour</strong> les Etats-Unis)<br />
X81065-002 (<strong>pour</strong> les autres pays)<br />
2 Pied-de-biche à ressort <strong>pour</strong> piqués<br />
SA129 (<strong>pour</strong> les Etats-Unis)<br />
X81021-002 (<strong>pour</strong> les autres pays)<br />
3 Pied quilting 1/4" SA125 (<strong>pour</strong> les Etats-Unis)<br />
X80980-002 (<strong>pour</strong> les autres pays)<br />
REMARQUE:<br />
Le contenu de la trousse d'accessoires peut varier en fonction des modèles.<br />
1 Pie caminante SA140 (para EE UU)<br />
X81065-002 (para otros países)<br />
2 Prensatelas enguatador<br />
SA129 (para EE UU)<br />
X81021-002 (para otros países)<br />
3 Prensatela para pespunte 1/4<br />
SA125 (para EE UU)<br />
X80980-002 (para otros países)<br />
NOTA:<br />
El contenido de los accesorios depende del modelo.<br />
6
KNOWING YOUR SEWING MACHINE<br />
CONNAITRE SA MACHINE A COUDRE<br />
CONOZCA SU MÁQUINA DE COSER<br />
(Model <strong>PS</strong>-2470, <strong>PS</strong>-<strong>3100</strong>)<br />
OPERATING YOUR<br />
SEWING MACHINE<br />
Connecting Plugs<br />
1. Connect the power cord plug into the machine.<br />
2. Connect the power supply plug into a wall outlet.<br />
(Model <strong>PS</strong>-2360, <strong>PS</strong>-2250)<br />
CAUTION<br />
1. When leaving the machine unattended, the main switch of<br />
the machine should be switched off or the plug must be<br />
removed from the socket-outlet.<br />
2. When servicing the machine, or when removing covers or<br />
changing bulbs, the machine or the electrical set must be<br />
unplugged.<br />
3. For U.S.A. only<br />
This appliance has a polarized plug (one blade wider than<br />
the other). To reduce the risk of electric shock, this plug is<br />
intended to fit in a polarized outlet only one way. If the plug<br />
does not fit fully in the outlet, reverse the plug.<br />
If it still does not fit, contact a qualified electrician to install<br />
the proper outlet. Do not modify the plug in any way.<br />
WARNING<br />
• Use only regular household electricity for the power<br />
source. Using other power sources may result in fire,<br />
electric shock, or damage to the machine.<br />
• Turn off the main power and remove the plug in the<br />
following circumstances:<br />
- When you are away from the machine<br />
- After using the machine<br />
- When the power fails during use<br />
- When the machine does not operate correctly due to<br />
a bad connection or a disconnection<br />
- During electrical storms<br />
CAUTION<br />
• Do not use extension cords or multi-plug adapters with<br />
many other appliances plugged in to them. Fire or<br />
electric shock may result.<br />
• Do not touch the plug with wet hands. Electric shock<br />
may result.<br />
• When unplugging the machine, always turn off the main<br />
power first. Always grasp the plug to remove it from the<br />
outlet. Pulling on the cord may damage the cord, or lead<br />
to fire or electric shock.<br />
• Do not allow the power cord to be cut, damaged, modified,<br />
forcefully bent, pulled, twisted, or bundled. Do not<br />
place heavy objects on the cord. Do not subject the cord<br />
to heat. These things may damage the cord and cause<br />
fire or electric shock. If the cord or plug is damaged, take<br />
the machine to your authorized dealer for repairs before<br />
continuing use.<br />
• Unplug the power cord if the machine is not to be used<br />
for a long period of time. Otherwise a fire may result.<br />
7
FONCTIONNEMENT DE LA<br />
MACHINE A COUDRE<br />
Raccordement<br />
1. Raccorder la fiche du cordon d’alimentation à la machine.<br />
2. Brancher la fiche d’alimentation à une prise secteur.<br />
PRECAUTION:<br />
1. Lorsque la machine n’est pas utilisée, coupez l’interrupteur d’alimentation<br />
principal de la machine ou débranchez la machine de la<br />
prise secteur.<br />
2. Lors de l’entretien de la machine, ou lorsque vous changez ou<br />
retirez les ou ampoules, la machine ou sa partie électrique doit être<br />
débranchée.<br />
3. Pour les Etats-Unis uniquement<br />
Cette machine à coudre est équipée d'une fiche polarisée, c'est-àdire<br />
d'une fiche qui possède une lame plus large que l'autre. Par<br />
mesure de sécurité, il existe une seule manière d'introduire cette<br />
fiche dans une prise de courant. Si elle ne s'insère pas dans la prise,<br />
essayer dans l'autre sens. Si vous ne parvenez toujours pas à<br />
l'enfoncer dans la prise, veuillez prendre contact avec un électricien<br />
qualifié afin qu'il vienne remplacer la prise. Ne jamais<br />
modifier la fiche.<br />
FUNCIONAMIENTO DE LA<br />
MÁQUINA DE COSER<br />
Conexión de los enchufes<br />
1. Conecte la clavija del cordón de alimentación a la máquina.<br />
2. Conecte el enchufe de alimentación a una toma de corriente.<br />
PRECAUCIÓN:<br />
1. Si deja la máquina desatendida, debe apagar el interruptor<br />
principal de la corriente o desenchufar el cable de la toma de<br />
corriente.<br />
2. Cuando repare la máquina, retire tapas o cambie la bombilla,<br />
desenchufe la máquina de la corriente.<br />
3. Sólo para EE UU<br />
Esta máquina está provista de un enchufe polarizado (un borne<br />
más ancho que el otro). Como medida de seguridad, existe una<br />
sola manera de introducir el enchufe en la toma de corriente. Si<br />
no puede introducir el enchufe a fondo en la toma de corriente,<br />
cambie de lado el enchufe. Si sigue sin poderlo introducir,<br />
póngase en contacto con un electricista cualificado para que le<br />
instale una toma de corriente adecuada. No intente modificar el<br />
enchufe.<br />
KNOWING YOUR SEWING MACHINE<br />
CONNAITRE SA MACHINE A COUDRE<br />
CONOZCA SU MÁQUINA DE COSER<br />
AVERTISSEMENT<br />
• Utilisez uniquement l’alimentation domestique normale <strong>pour</strong><br />
alimenter votre machine. L’utilisation d’autres sources d’alimentation<br />
<strong>pour</strong>rait causer des incendies, électrocutions ou<br />
endommager la machine.<br />
• Mettez hors tension et débranchez de la prise murale dans les<br />
cas suivants :<br />
- Lorsque vous n’êtes pas près de la machine<br />
- Après avoir utilisé la machine<br />
- En cas de coupure de courant durant l’utilisation de la<br />
machine<br />
- Lorsque la machine ne fonctionne pas correctement à cause<br />
d’une mauvaise connexion ou d’un débranchement<br />
- Durant les orages<br />
AVISO<br />
• Utilice sólo la corriente de casa normal para la alimentación<br />
de la máquina. El uso de otras fuentes de alimentación puede<br />
provocar incendio, descarga eléctrica o averías en la máquina.<br />
• Apague la máquina y desenchufe el cable de la corriente en<br />
la siguientes situaciones:<br />
- Cuando esté alejado de la máquina<br />
- Después de usar la máquina<br />
- Cuando la alimentación se corta durante el funcionamiento<br />
- Si la máquina no funciona correctamente debido a una<br />
mala conexión o a una desconexión<br />
- Durante tormentas con relámpagos<br />
ATTENTION<br />
• N’utilisez pas de rallonge ni d’adaptateurs multiples <strong>pour</strong><br />
brancher cette machine avec d’autres appareils. Autrement il<br />
y aurait risque d’électrocution ou d’incendie.<br />
• Ne touchez pas la fiche si vous avez les mains mouillées.<br />
Autrement vous risqueriez de vous électrocuter.<br />
• Lorsque vous débranchez la machine, veuillez toujours mettre<br />
la machine hors tension en premier. Tenez toujours la fiche<br />
<strong>pour</strong> la retirer de la prise murale. Si vous tirez sur le cordon,<br />
celui-ci <strong>pour</strong>rait être endommagé et il y aurait risque d’incendie<br />
ou d’électrocution.<br />
• Ne pas couper, endommager, modifier, plier avec force, tirer<br />
sur, tordre ou lier le cordon d’alimentation. Ne placez jamais<br />
d’objets lourds sur le cordon. Ne placez jamais le cordon près<br />
d’une source de chaleur. Toutes ces actions <strong>pour</strong>raient endommager<br />
le cordon et vous risqueriez un incendie ou une électrocution.<br />
Si le cordon ou la fiche est endommagé, veuillez apporter<br />
votre machine à votre revendeur autorisé <strong>pour</strong> la faire<br />
réparer avant de continuer de l’utiliser.<br />
• Débranchez le cordon d’alimentation si la machine n’est pas<br />
utilisée pendant une longue période de temps. Autrement il y<br />
aurait risque d’incendie.<br />
PRECAUCIÓN<br />
• No utilice cables de alargo ni adaptadores con demasiados<br />
aparatos conectados. Podría producirse un incendio o una<br />
descarga eléctrica.<br />
• No toque el enchufe con las manos mojadas. Podría recibir<br />
una descarga eléctrica.<br />
• Desenchufe siempre la máquina antes de desmontarla. Sujete<br />
siempre el enchufe para sacarlo de la toma de corriente. Si<br />
tira del cable, podría dañarlo o provocar un incendio o una<br />
descarga eléctrica.<br />
• No corte, estropee, cambie, fuerce, doble, estire, tuerza o<br />
enrolle el cable. No apoye objetos pesados sobre el cable. No<br />
exponga el cable al calor. Todo esto podría estropear el cable<br />
y causar un incendio o una descarga eléctrica. Si el cable está<br />
estropeado, lleve la máquina a su distribuidor autorizado<br />
para que la repare antes de utilizarla de nuevo.<br />
• Desenchufe el cable de la corriente si no va a utilizar la<br />
máquina durante un largo período de tiempo. De otra manera,<br />
podría producirse un incendio.<br />
8
KNOWING YOUR SEWING MACHINE<br />
CONNAITRE SA MACHINE A COUDRE<br />
CONOZCA SU MÁQUINA DE COSER<br />
(Model <strong>PS</strong>-2470, <strong>PS</strong>-<strong>3100</strong>)<br />
Main Power/Sewing<br />
Light Switch<br />
This switch turns the main power/sewing light on or off.<br />
1 Turn on (toward the “I” mark)<br />
2 Turn off (toward the “O” mark)<br />
1<br />
2<br />
(Model <strong>PS</strong>-2360, <strong>PS</strong>-2250)<br />
1<br />
2<br />
Interrupteur principal/de la lampe<br />
Cet interrupteur permet d’allumer et d’éteindre la machine ainsi que la<br />
lampe de couture.<br />
1 Allumer (pousser vers la marque “I”)<br />
2 Eteindre (pousser vers la marque “O”)<br />
Interruptor principal/luz de cosido<br />
Este interruptor permite apagar y encender la máquina y la luz.<br />
1 Encender (hacia la marca “I”)<br />
2 Apagar (hacia la marca “O”)<br />
9
Foot Controller<br />
1<br />
When the foot controller is depressed lightly, the machine will run<br />
at a low speed. When the pressure on the foot controller is<br />
increased, the machine’s speed will increase. When pressure on<br />
the foot controller is released, the machine will stop. Care should be<br />
taken that nothing is placed on the foot controller when the machine<br />
is not in use.<br />
1 Foot controller<br />
CAUTION<br />
Do not allow fabric pieces and dust to collect in the foot<br />
controller. Doing so could cause a fire or an electric shock.<br />
KNOWING YOUR SEWING MACHINE<br />
CONNAITRE SA MACHINE A COUDRE<br />
CONOZCA SU MÁQUINA DE COSER<br />
(Model <strong>PS</strong>-2470, <strong>PS</strong>-<strong>3100</strong>)<br />
(Model <strong>PS</strong>-2470, <strong>PS</strong>-<strong>3100</strong>)<br />
1. With the sewing machine turned off, insert the foot controller<br />
plug into its jack on the sewing machine.<br />
1<br />
1 Foot controller<br />
2 Foot controller jack<br />
* The speed set using the sewing speed controller is the foot<br />
controller’s maximum sewing speed.<br />
* When the foot controller is being used, the Start/Stop button has<br />
no effect on the sewing.<br />
2<br />
NOTE (For U.S.A. only):<br />
(Model <strong>PS</strong>-2470, <strong>PS</strong>-<strong>3100</strong>)<br />
Foot Controller: Model N5V<br />
This foot controller can be used for Model <strong>PS</strong>-2470, <strong>PS</strong>-<strong>3100</strong>.<br />
(Model <strong>PS</strong>-2360, <strong>PS</strong>-2250)<br />
Foot Controller: Model N<br />
This foot controller can be used for Model <strong>PS</strong>-2360, <strong>PS</strong>-2250.<br />
Pédale<br />
Lorsque l’on appuie légèrement sur la pédale, la machine va fonctionner<br />
à faible vitesse. Si l’on augmente la pression, la vitesse de couture de la<br />
machine va augmenter également. La machine s’arrête lorsque la pression<br />
sur la pédale est relâchée. Il faut cependant veiller à ne rien placer sur la<br />
pédale lorsque la machine n’est pas utilisée.<br />
1 Pédale du rhéostat<br />
REMARQUE<br />
Veillez à ce que des morceaux de tissu ou de la poussière ne<br />
s’accumulent pas dans la pédale. En effet, vous risqueriez de<br />
provoquer un incendie ou de vous électrocuter.<br />
(Modèle <strong>PS</strong>-2470, <strong>PS</strong>-<strong>3100</strong>)<br />
1. Lorsque la machine est éteinte, introduisez la prise de la pédale dans<br />
le jack correspondant de la machine à coudre.<br />
1 Pédale de commande<br />
2 Prise de la pédale<br />
* La vitesse définie à l’aide du sélecteur de vitesse de couture correspond<br />
à la vitesse de couture maximum de la pédale de commande.<br />
* Lorsque vous utilisez la pédale de commande, la touche Marche/Arret<br />
n’affecte pas le fonctionnement de la machine.<br />
REMARQUE (<strong>pour</strong> les Etats-Unis uniquement):<br />
(Modèle <strong>PS</strong>-2470, <strong>PS</strong>-<strong>3100</strong>)<br />
Pédale du rhéostat: Modèle N5V<br />
La présente pédale peut servir <strong>pour</strong> les modèles de machines à coudre<br />
<strong>PS</strong>-2470, <strong>PS</strong>-<strong>3100</strong>.<br />
(Modèle <strong>PS</strong>-2360, <strong>PS</strong>-2250)<br />
Pédale du rhéostat: Modèle N<br />
La présente pédale peut servir <strong>pour</strong> le modèle de machine à coudre <strong>PS</strong>-<br />
2360, <strong>PS</strong>-2250.<br />
Pedal<br />
Al presionar ligeramente el pedal, la máquina funcionará a baja<br />
velocidad. Al aumentar la presión, se incrementa también la velocidad<br />
de la máquina. Al soltar el pedal, la máquina se para. Asegúrese<br />
siempre de no poner ningún objeto sobre el pedal cuando la máquina<br />
no esté utilizada.<br />
1 Pedal<br />
PRECAUCIÓN<br />
Evite que trozos de tela y polvo entren en el pedal. De lo<br />
contrario, podría producirse un incendio o una descarga eléctrica.<br />
(Modelo <strong>PS</strong>-2470, <strong>PS</strong>-<strong>3100</strong>)<br />
1. Con la máquina de coser apagada introduzca la clavija del pedal<br />
en la toma apropiada.<br />
1 Pedal<br />
2 Toma del pedal<br />
* El ajuste del selector de velocidad determina la velocidad máxima<br />
de cosido del pedal.<br />
* Cuando utilice el pedal, el botón Inicio/Parada no afectará a la costura.<br />
NOTA (sólo para EE UU):<br />
(Modelo <strong>PS</strong>-2470, <strong>PS</strong>-<strong>3100</strong>)<br />
Pedal: modelo N5V<br />
Este pedal puede utilizarse para los modelos de máquinas de coser<br />
<strong>PS</strong>-2470, <strong>PS</strong>-<strong>3100</strong>.<br />
(Modelo <strong>PS</strong>-2360, <strong>PS</strong>-2250)<br />
Pedal: modelo N<br />
Este pedal puede utilizarse para el modelo de máquina de coser <strong>PS</strong>-<br />
2360, <strong>PS</strong>-2250.<br />
10
KNOWING YOUR SEWING MACHINE<br />
CONNAITRE SA MACHINE A COUDRE<br />
CONOZCA SU MÁQUINA DE COSER<br />
Checking the Needle<br />
The sewing needle must always be straight and sharp for smooth<br />
sewing.<br />
2<br />
1<br />
To Check the Needle Correctly:<br />
To check the needle, place the flat side of the needle on a flat<br />
surface. Check the needle from the top and the sides. Throw away<br />
any bent needles.<br />
1 Parallel space<br />
2 Level surface (bobbin cover, glass, etc.)<br />
* Place a level surface under the needle.<br />
Replacing the Needle<br />
CAUTION<br />
• Turn the main power switch to OFF before changing the<br />
needle. If the main power is left on and Start/Stop button<br />
is pressed or foot controller is stepped on, the machine<br />
will start and injury may result.<br />
• Use only sewing machine needles for home use. Other<br />
needles may bend or break and cause injury.<br />
• Never sew with a bent needle. A bent needle will easily<br />
break and cause injury.<br />
2<br />
1<br />
1. Remove the power supply plug from the outlet.<br />
2. Raise the needle bar to its highest position.<br />
3. Lower the presser foot.<br />
4. Remove the needle by loosening the needle clamp screw.<br />
1 Presser foot lever<br />
CAUTION<br />
Do not loosen or tighten the needle clamp screw with a strong<br />
force, otherwise it may be damaged.<br />
3<br />
4<br />
5. With the flat side of the needle facing the back, insert the new<br />
needle all the way to the top of the needle stopper (viewing<br />
window) in the needle clamp. Use a screwdriver to securely<br />
tighten the needle clamp screw.<br />
2 Needle stopper<br />
3 Hole for setting needle<br />
4 Flat side of needle<br />
CAUTION<br />
Be sure to push in the needle until it touches the stopper,<br />
and securely tighten the needle clamp screw with a screwdriver.<br />
If the needle is not completely inserted or the needle<br />
clamp screw is loose, the needle may break or the machine<br />
may be damaged.<br />
11
Vérification de l’aiguille<br />
L’aiguille doit toujours être droite et pointue <strong>pour</strong> piquer correctement.<br />
Pour contrôler correctement une aiguille :<br />
Pour contrôler l’aiguille, placez le côté plat de l’aiguille sur une surface<br />
plane. Vérifiez l’aiguille à partir du haut et des côtés. Jetez toutes les<br />
aiguilles tordues.<br />
1 Espace parallèle<br />
2 Surface plane (couvercle de bobine, plaque de verre,<br />
etc.)<br />
* Placez l’aiguille sur une surface plane.<br />
Verificación de la aguja<br />
La aguja de costura siempre debe estar bien recta y afilada para una<br />
buena costura.<br />
Para comprobar la aguja:<br />
Para revisar la aguja, coloque la parte plana de la aguja sobre una<br />
superficie plana. Compruebe la aguja por la parte superior y los<br />
laterales. Tire las agujas que estén dobladas.<br />
1 Espacio paralelo<br />
2 Superficie plana (tapa de la bobina, cristal, etc.)<br />
* Coloque la superficie plana debajo de la aguja.<br />
KNOWING YOUR SEWING MACHINE<br />
CONNAITRE SA MACHINE A COUDRE<br />
CONOZCA SU MÁQUINA DE COSER<br />
Pour remplacer l’aiguille<br />
Cambio de la aguja<br />
ATTENTION<br />
• Avant de changer l’aiguille, mettez la machine hors tension. Si<br />
la machine est sous tension et que vous appuyez accidentellement<br />
sur la touche Marche/Arrêt ou sur la pèdale, la machine<br />
démarrera et vous risquez de vous blesser.<br />
• Utilisez uniquement des aiguilles à coudre <strong>pour</strong> machine à<br />
usage domestique. Les autres aiguilles risquent de se tordre ou<br />
de casser, et de vous blesser.<br />
• Ne jamais coudre avec une aiguille tordue. Les risques d’accidents<br />
dus à une aiguille tordue sont élevés.<br />
1. Retirer la fiche de la prise de courant.<br />
2. Remonter complètement l’aiguille.<br />
3. Abaisser le pied-de-biche.<br />
4. Retirer l'aiguille en desserrant la fixation.<br />
1 Levier du pied-de-biche<br />
ATTENTION<br />
N’appuyez pas trop sur la vis du support d’aiguille. Sinon, vous<br />
risquez d’endommager l’aiguille ou la machine.<br />
5. Le côté plat de l’aiguille tourné vers l’arrière, enfoncez la nouvelle<br />
aiguille jusqu’au haut de la butée d’aiguille (fenêtre de contrôle) du<br />
support d’aiguille. A l’aide d’un tournevis, fixez soigneusement la vis<br />
du support d’aiguille.<br />
2 Butée d’aiguille<br />
3 Trou de fixation de l’aiguille<br />
4 Côté plat de l’aiguille<br />
ATTENTION<br />
Veillez à enfoncer l’aiguille jusqu’à ce qu’elle touche la butée et à<br />
visser soigneusement la vis de support de l’aiguille à l’aide d’un<br />
tournevis. Si l’aiguille n’est pas entièrement insérée ou si la vis du<br />
support d’aiguille n’est pas correctement vissée, l’aiguille risque<br />
de casser ou la machine d’être endommagée.<br />
PRECAUCIÓN<br />
• Desenchufe la máquina de coser de la alimentación antes de<br />
cambiar la aguja. Si deja la máquina enchufada a la corriente<br />
y aprieta el botón Marcha/Parada o pisa el pedal, la máquina<br />
se pondrá en marcha y podría causar lesiones.<br />
• Utilice sólo agujas de máquina de coser para uso doméstico.<br />
Otras agujas podrían doblarse o romperse y causar lesiones.<br />
• Nunca cosa con una aguja doblada. Una aguja doblada se<br />
rompe fácilmente y podría hacerle daño.<br />
1. Retire el enchufe de alimentación de la toma de corriente.<br />
2. Levante la barra de la aguja a su posición más alta.<br />
3. Baje el prensatelas.<br />
4. Retire la aguja, aflojando la abrazadera de la aguja.<br />
1 Palanca del prensatelas<br />
PRECAUCIÓN<br />
No apriete el tornillo de la presilla de la aguja. De lo contrario,<br />
podría estropear la aguja o la máquina.<br />
5. Con la parte plana de la aguja mirando hacia la parte trasera de<br />
la máquina, inserte la nueva aguja hasta el final de la cavidad<br />
(mirilla) en la presilla de la aguja. Utilice el destornillador para<br />
apretar bien el tornillo de la presilla de la aguja.<br />
2 Cavidad<br />
3 Orificio para la aguja<br />
4 Parte plana de la aguja<br />
PRECAUCIÓN<br />
Asegúrese de empujar la aguja hasta que llegue al tope de la<br />
cavidad y apriete fuertemente el tornillo de la presilla de la aguja<br />
con un destornillador. Si la aguja no está completamente insertada<br />
o el tornillo de la presilla de la aguja está suelto, la aguja<br />
podría romperse o la máquina podría estropearse.<br />
12
KNOWING YOUR SEWING MACHINE<br />
CONNAITRE SA MACHINE A COUDRE<br />
CONOZCA SU MÁQUINA DE COSER<br />
Changing the Presser Foot<br />
CAUTION<br />
• Always turn off the power before changing the presser<br />
foot. If the power is on and the Start/Stop button is<br />
pressed or foot controller is stepped on, the machine<br />
will start and may cause injury.<br />
• Always use the correct presser foot for the selected<br />
stitch pattern. If the wrong presser foot is used, the<br />
needle may strike the presser foot and bend or break,<br />
and may cause injury.<br />
• Only use presser feet for this machine. Using other<br />
presser feet may lead to accident or injury.<br />
It may be necessary to change the presser foot according to your<br />
sewing needs.<br />
SNAP-ON TYPE<br />
1. Raise the needle to its highest position by turning the balance<br />
wheel toward you (counter clockwise) and raise the presser foot<br />
lever.<br />
2. Release the foot by raising the lever located at the back of the<br />
holder.<br />
3. Place a different presser foot on the needle plate so that the bar<br />
on the presser foot is in line with the slot on the shank.<br />
4. Lower the presser foot lever and fix the presser foot onto the<br />
shank. If the presser foot is in the correct location, the bar should<br />
snap in.<br />
Changement de pied-de-biche<br />
Cambio del prensatelas<br />
ATTENTION<br />
• Mettez toujours la machine hors tension avant de changer le<br />
pied-de-biche. Si la machine est sous tension et que la touche<br />
Marche/Arrêt ou la pèdale est enfoncée, la machine démarrera<br />
et vous risquez de vous blesser.<br />
• Utilisez toujours le pied-de-biche qui correspond au motif de<br />
point sélectionné. Si vous n’utilisez pas le bon modèle de piedde-biche,<br />
l’aiguille risque de le toucher, de se tordre ou de<br />
casser, et de vous blesser.<br />
• Utilisez uniquement les pieds-de-biche conçus <strong>pour</strong> cette machine.<br />
Si vous utilisez d’autres pieds-de-biche, vous risquez de<br />
vous blesser.<br />
En fonction des besoins, il peut s’avérer nécessaire de changer le pied-debiche.<br />
MODELE A CLIQUET<br />
1. Remonter complètement l’aiguille en tournant le volant vers soi (dans<br />
le sens opposé aux aiguilles d’une montre) et lever le pied-de-biche.<br />
2. Libérer le pied en levant le levier situé à l’arrière du support.<br />
3. Placer un pied différent sur la plaque à aiguille de telle manière que la<br />
tige du pied-de-biche s’aligne avec la fente de la fixation.<br />
4. Abaisser le levier du pied-de-biche et fixer le pied sur l’axe. Si le piedde-biche<br />
est mis correctement, la tige devrait se mettre en place d’elle<br />
même avec un déclic.<br />
PRECAUCIÓN<br />
• Desenchufe siempre la máquina de la alimentación antes de<br />
cambiar el pie prensatela. Si la máquina de coser está<br />
enchufada a la corriente y pulsa el botón Marcha/Parada o si<br />
pisa el pedal, la máquina se pondrá en funcionamiento y<br />
podría hacerse daño.<br />
• Utilice siempre el pie prensatela adecuado para el pespunte<br />
seleccionado. Si utiliza un pie prensatela inadecuado, la<br />
aguja podría chocar contra el pie prensatela y doblarse o<br />
romperse, lo que puede causar lesiones.<br />
• Use el pie prensatela sólo para esta máquina de coser. Si usa<br />
otro pie prensatela, podría causar una avería o hacerse daño.<br />
Según sus necesidades de costura, puede ser necesario cambiar el<br />
prensatelas.<br />
TIPO DE ENGANCHE DE GOLPE<br />
1. Levante la aguja a su posición más alta, girando la ruedecilla hacia<br />
usted (en el sentido contrario al de las manecillas de un reloj) y<br />
levante la palanca del prensatelas.<br />
2. Suelte el prensatelas levantando la palanca que hay en la parte<br />
trasera del soporte.<br />
3. Coloque otro prensatelas en la placa de agujas de tal forma que<br />
la barra del prensatelas quede alineada con la ranura del soporte.<br />
4. Baje la palanca del prensatelas y fije el prensatelas en el soporte.<br />
Si el prensatelas está bien colocado, la barra debe engancharse de<br />
golpe.<br />
13
Flat Bed Attachment<br />
The accessories are stored in a compartment under the flat bed<br />
attachment cover, which can be opened by flipping it toward you.<br />
KNOWING YOUR SEWING MACHINE<br />
CONNAITRE SA MACHINE A COUDRE<br />
CONOZCA SU MÁQUINA DE COSER<br />
Plateau<br />
Les accessoires sont rangés dans un compartiment sous la plateau. Vous<br />
pouvez l'ouvrir en la faisant pivoter vers vous.<br />
Plataforma<br />
Los accesorios están almacenados en un compartimiento situado<br />
debajo de la tapa de la plataforma. Para abrir la tapa, tire de ella hacia<br />
usted.<br />
14
KNOWING YOUR SEWING MACHINE<br />
CONNAITRE SA MACHINE A COUDRE<br />
CONOZCA SU MÁQUINA DE COSER<br />
<strong>PS</strong>-2470,<br />
<strong>PS</strong>-<strong>3100</strong><br />
1 2 3 4 5 6 7 8 9 10 11 12 13 14 15 16<br />
17 18 19 20 21 22 23 24 25 26 27 28 29 30 31<br />
VARIOUS CONTROLS<br />
Pattern Selection Dial<br />
3<br />
1<br />
CAUTION<br />
When you use the Pattern Selection Dial to select a pattern,<br />
turn the balance wheel to the front (counter-clockwise) by<br />
hand to set the needle in the highest position before selecting<br />
the pattern. If the needle is in the down position when the<br />
Pattern Selection Dial is turned, the needle, presser foot, or<br />
fabric may be damaged.<br />
2<br />
To select a stitch, simply turn the Pattern Selection Dial, located on<br />
the right side of the machine. The Pattern Selection Dial may be<br />
turned in either direction. The following page shows the recommended<br />
range of stitch lengths and widths.<br />
1 Pattern selection dial<br />
2 Pattern number<br />
3<br />
The stitches that are available depend on the Stitch Length Dial<br />
setting. If the Stitch Length Dial is set between 0 and 4.5, any of the<br />
stitches in the top row can be selected. If the Stitch Length Dial is<br />
set to SS, any of the stitches in the bottom row can be selected.<br />
4<br />
·<br />
3<br />
·<br />
2<br />
·<br />
1<br />
F<br />
3 Stitch length dial<br />
3<br />
SS<br />
15
<strong>PS</strong>-2360<br />
<strong>PS</strong>-2250<br />
1 2 3 4 5 6 7 8 9 10 11 12 13<br />
14 15 16 17 18 19 20 21 22 23 24 25<br />
1<br />
2 3 4 5 6 7 8<br />
KNOWING YOUR SEWING MACHINE<br />
CONNAITRE SA MACHINE A COUDRE<br />
CONOZCA SU MÁQUINA DE COSER<br />
9 10 11 12 13 14 15<br />
DESCRIPTIF DES<br />
DIFFERENTES COMMANDES<br />
Sélecteur de modèle de point<br />
ATTENTION<br />
Lorsque le sélecteur de modèle de point est utilisé <strong>pour</strong> sélectionner<br />
un point, tourner le volant vers l’avant (sens antihoraire) à la main<br />
<strong>pour</strong> mettre l’aiguille dans sa position haute avant de sélectionner le<br />
point. Si l’aiguille est dans sa position basse, l’aiguille, la pédale ou le<br />
tissu risque d’être endommagé.<br />
Pour sélectionner un point, il suffit de tourner le sélecteur de modèles situé<br />
sur le côté droit de la machine, dans l’une ou l’autre direction. A la page<br />
suivante, vous trouverez une liste des plages de longueur et de largeur<br />
recommandées <strong>pour</strong> chaque point.<br />
1 Sélecteur de modèle de point<br />
2 Numéro du modèle de point<br />
DISTINTOS MANDOS<br />
Selector de puntadas<br />
PRECAUCIÓN<br />
Cuando utilice el selector de puntadas, antes de seleccionar la<br />
puntada gire la ruedecilla hacia delante (hacia la izquierda) con la<br />
mano para poner la aguja en la posición más alta. Si gira el selector<br />
de puntada con la aguja en la poción bajada, la aguja, el prénsatelas<br />
o el tejido podrían dañarse.<br />
Para seleccionar una puntada, sólo hace falta girar el selector de<br />
puntadas, situado en la derecha de la máquina. Este selector se puede<br />
girar en cualquier sentido. En la página siguiente, se indican las zonas<br />
recomendadas de largos y anchos de puntadas.<br />
1 Selector de puntadas<br />
2 Número de puntada<br />
Les points disponibles dépendent du réglage du sélecteur de longueur de<br />
point. Si ce sélecteur est réglé entre 0 et 4,5, vous pouvez sélectionner<br />
n'importe quel point de la rangée supérieure. Si le sélecteur est réglé sur<br />
SS, vous pouvez sélectionner tout point de la rangée inférieure.<br />
3 Sélecteur de longueur de point.<br />
Las puntadas disponibles dependen de la posición del selector de<br />
largo de puntada. Si está situado entre 0 y 4,5, pueden seleccionarse<br />
todas las puntadas que aparecen en la fila superior. Si está situado en<br />
SS, pueden seleccionarse todas las puntadas que aparecen en la fila<br />
inferior.<br />
3 Selector de largo de puntada<br />
16
KNOWING YOUR SEWING MACHINE<br />
CONNAITRE SA MACHINE A COUDRE<br />
CONOZCA SU MÁQUINA DE COSER<br />
RECOMMENDED WIDTHS AND LENGTHS FOR STITCHES<br />
(Model <strong>PS</strong>-2470, <strong>PS</strong>-<strong>3100</strong>)<br />
PATTERN STITCH NAME<br />
RECOMMENDED WIDTH RECOMMENDED INSTRUCTION<br />
mm (inch) LENGTH mm (inch) MANUAL PAGE<br />
1-STEP AUTOMATIC 3-5 (Dial 4-7) F-1.5<br />
BUTTONHOLE (1/8-3/16) (1/64-1/16)<br />
63<br />
STRAIGHT STITCH<br />
6.5 1-4.5<br />
(1/4) (1/16-3/16)<br />
50, 73, 75<br />
BLIND HEM STITCH<br />
3-6.5 F-2<br />
(1/8-1/4) (1/64-1/16)<br />
54<br />
ELASTIC STITCH<br />
3-6.5 F-2.5<br />
(1/8-1/4) (1/64-3/32)<br />
56<br />
SCALLOP STITCH<br />
3-6.5 F-1.5<br />
(1/8-1/4) (1/64-1/16)<br />
58<br />
BRIDGING STITCH 3-6.5 F-3<br />
RAMPART STITCH<br />
DOUBLE ACTION STITCH (1/8-1/4) (1/64-1/8)<br />
57<br />
ELASTIC SHELL TUCK STITCH<br />
3-6.5 F-3<br />
(1/8-1/4) (1/64-1/8)<br />
61<br />
ARROWHEAD STITCH<br />
TRIANGLE STITCH 3-6.5 F-1<br />
PARALLELOGRAM STITCH (1/8-1/4) (1/64-1/16)<br />
59<br />
BEAD STITCH<br />
STRETCH BLIND HEM STITCH<br />
SHELL TUCK STITCH<br />
ZIGZAG STITCH<br />
TRIPLE STRETCH STITCH<br />
ELASTIC OVERLOCK STITCH<br />
FEATHER STITCH<br />
DECORATIVE STITCH<br />
DECORATIVE STITCH<br />
3-6.5 F-1.5<br />
(1/8-1/4) (1/64-1/16)<br />
3-6.5 F-3<br />
(1/8-1/4) (1/64-1/8)<br />
0-6.5 F-4.5<br />
(0-1/4) (1/64-3/16)<br />
6.5 SS Fixed<br />
(1/4) 2.5 (3/32)<br />
3-6.5 SS Fixed<br />
(1/8-1/4) 2.5 (3/32)<br />
3-6.5 SS Fixed<br />
(1/8-1/4) 2.5 (3/32)<br />
6.5 SS Fixed<br />
(1/4) 2.5 (3/32)<br />
3-6.5 SS Fixed<br />
(1/8-1/4) 2.5 (3/32)<br />
DECORATIVE STITCH<br />
6.5 SS Fixed<br />
(1/4) 2.5 (3/32)<br />
DECORATIVE HEM 3-6.5 SS Fixed<br />
STITCH (1/8-1/4) 2.5 (3/32)<br />
FAGOTING STITCH<br />
COMB STITCH<br />
3-6.5 SS Fixed<br />
(1/8-1/4) 2.5 (3/32)<br />
3-6.5 SS Fixed<br />
(1/8-1/4) 2.5 (3/32)<br />
ELASTIC OVERLOCK STITCH<br />
3-6.5 SS Fixed<br />
(1/8-1/4) 2.5 (3/32)<br />
TRIPLE ZIGZAG STRETCH 3-6.5 SS Fixed<br />
STITCH (1/8-1/4) 2.5 (3/32)<br />
54<br />
55<br />
53, 72, 76, 77<br />
50<br />
61<br />
62<br />
59<br />
59<br />
59<br />
57<br />
60<br />
61<br />
61<br />
62<br />
17
RECOMMENDED WIDTHS AND LENGTHS FOR STITCHES<br />
(Model <strong>PS</strong>-2360)<br />
PATTERN STITCH NAME<br />
RECOMMENDED WIDTH RECOMMENDED INSTRUCTION<br />
mm (inch) LENGTH mm (inch) MANUAL PAGE<br />
1-STEP AUTOMATIC 3-5 (Dial 4-7) F-1.5<br />
BUTTONHOLE (1/8-3/16) (1/64-1/16)<br />
STRAIGHT STITCH<br />
BLIND HEM STITCH<br />
ELASTIC STITCH<br />
6.5 1-4.5<br />
(1/4) (1/16-3/16)<br />
3-6.5 F-2<br />
(1/8-1/4) (1/64-1/16)<br />
3-6.5 F-2.5<br />
(1/8-1/4) (1/64-3/32)<br />
63<br />
50, 73, 75<br />
3-6.5 F-1.5<br />
SCALLOP STITCH<br />
(1/8-1/4) (1/64-1/16)<br />
58<br />
BRIDGING STITCH 3-6.5 F-3<br />
RAMPART STITCH 57<br />
DOUBLE ACTION STITCH (1/8-1/4) (1/64-1/8)<br />
ELASTIC SHELL TUCK STITCH<br />
BEAD STITCH<br />
STRETCH BLIND HEM STITCH<br />
SHELL TUCK STITCH<br />
ZIGZAG STITCH<br />
TRIPLE STRETCH STITCH<br />
ELASTIC OVERLOCK STITCH<br />
FEATHER STITCH<br />
DECORATIVE STITCH<br />
DECORATIVE STITCH<br />
3-6.5 F-3<br />
(1/8-1/4) (1/64-1/8)<br />
3-6.5 F-1<br />
(1/8-1/4) (1/64-1/16)<br />
3-6.5 F-1.5<br />
(1/8-1/4) (1/64-1/16)<br />
3-6.5 F-3<br />
(1/8-1/4) (1/64-1/8)<br />
0-6.5 F-4.5<br />
(0-1/4) (1/64-3/16)<br />
6.5 SS Fixed<br />
(1/4) 2.5 (3/32)<br />
3-6.5 SS Fixed<br />
(1/8-1/4) 2.5 (3/32)<br />
3-6.5 SS Fixed<br />
(1/8-1/4) 2.5 (3/32)<br />
6.5 SS Fixed<br />
(1/4) 2.5 (3/32)<br />
3-6.5 SS Fixed<br />
(1/8-1/4) 2.5 (3/32)<br />
DECORATIVE STITCH<br />
6.5 SS Fixed<br />
(1/4) 2.5 (3/32)<br />
DECORATIVE HEM 3-6.5 SS Fixed<br />
STITCH (1/8-1/4) 2.5 (3/32)<br />
FAGOTING STITCH<br />
COMB STITCH<br />
3-6.5 SS Fixed<br />
(1/8-1/4) 2.5 (3/32)<br />
3-6.5 SS Fixed<br />
(1/8-1/4) 2.5 (3/32)<br />
ELASTIC OVERLOCK STITCH<br />
3-6.5 SS Fixed<br />
(1/8-1/4) 2.5 (3/32)<br />
TRIPLE ZIGZAG STRETCH 3-6.5 SS Fixed<br />
STITCH (1/8-1/4) 2.5 (3/32)<br />
54<br />
56<br />
61<br />
59<br />
54<br />
55, 72, 76, 77<br />
53<br />
50<br />
61<br />
62<br />
59<br />
59<br />
59<br />
57<br />
60<br />
61<br />
61<br />
62<br />
KNOWING YOUR SEWING MACHINE<br />
CONNAITRE SA MACHINE A COUDRE<br />
CONOZCA SU MÁQUINA DE COSER<br />
18
KNOWING YOUR SEWING MACHINE<br />
CONNAITRE SA MACHINE A COUDRE<br />
CONOZCA SU MÁQUINA DE COSER<br />
RECOMMENDED WIDTHS AND LENGTHS FOR STITCHES<br />
(Model <strong>PS</strong>-2250)<br />
PATTERN STITCH NAME<br />
RECOMMENDED WIDTH RECOMMENDED INSTRUCTION<br />
mm (inch) LENGTH mm (inch) MANUAL PAGE<br />
4-STEP AUTOMATIC 3-5 (Dial 4-7) F-1.5<br />
BUTTONHOLE (1/8-3/16) (1/64-1/16)<br />
STRAIGHT STITCH<br />
6.5 1-4.5<br />
(1/4) (1/16-3/16)<br />
ZIGZAG STITCH<br />
0-6.5 F-4.5<br />
(0-1/4) (1/64-3/16)<br />
DOUBLE ACTION STITCH<br />
3-6.5 F-3<br />
(1/8-1/4) (1/64-1/8)<br />
STRETCH BLIND HEM STITCH<br />
3-6.5 F-1.5<br />
(1/8-1/4) (1/64-1/16)<br />
BLIND HEM STITCH<br />
3-6.5 F-2<br />
(1/8-1/4) (1/64-1/16)<br />
SHELL TUCK STITCH<br />
3-6.5 F-3<br />
(1/8-1/4) (1/64-1/8)<br />
ELASTIC STITCH<br />
3-6.5 F-2.5<br />
(1/8-1/4) (1/64-3/32)<br />
TRIPLE STRETCH STITCH<br />
6.5 SS Fixed<br />
(1/4) 2.5 (3/32)<br />
TRIPLE ZIGZAG STRETCH 3-6.5 SS Fixed<br />
STITCH (1/8-1/4) 2.5 (3/32)<br />
FAGOTING STITCH<br />
3-6.5 SS Fixed<br />
(1/8-1/4) 2.5 (3/32)<br />
COMB STITCH<br />
3-6.5 SS Fixed<br />
(1/8-1/4) 2.5 (3/32)<br />
ELASTIC OVERLOCK STITCH<br />
3-6.5 SS Fixed<br />
(1/8-1/4) 2.5 (3/32)<br />
ELASTIC OVERLOCK STITCH<br />
3-6.5 SS Fixed<br />
(1/8-1/4) 2.5 (3/32)<br />
FEATHER STITCH<br />
3-6.5 SS Fixed<br />
(1/8-1/4) 2.5 (3/32)<br />
66<br />
50, 73, 75<br />
53, 72, 76, 77<br />
57<br />
54<br />
54<br />
55<br />
56<br />
50<br />
62<br />
60<br />
61<br />
61<br />
61<br />
62<br />
19
LONGUEURS ET LARGEURS RECOMMANDEES POUR CHAQUE POINT<br />
(Modèle <strong>PS</strong>-2470, <strong>PS</strong>-<strong>3100</strong>)<br />
MODÈLE NOM DU POINT<br />
LARGEUR RECOMMANDÉE LONGUEUR RECOMMANDÉE PAGE DU MANUEL<br />
(EN MM)<br />
(EN MM)<br />
BOUTONNIÈRE AUTOMATIQUE 3-5 (Disque 4-7) F-1,5<br />
EN 1 PHASE (1/8-3/16) (1/64-1/16)<br />
POINT DROIT<br />
6,5 1-4,5<br />
(1/4) (1/16-3/16)<br />
POINT OURLET INVISIBLE<br />
3-6,5 F-2<br />
(1/8-1/4) (1/64-1/16)<br />
POINT ELASTIQUE<br />
3-6,5 F-2,5<br />
(1/8-1/4) (1/64-3/32)<br />
FESTON<br />
3-6,5 F-1,5<br />
(1/8-1/4) (1/64-1/16)<br />
POINT PONT 3-6,5 F-3<br />
POINT EN REMPARTS<br />
POINT RENFORCÉ (1/8-1/4) (1/64-1/8)<br />
PLISSE ELASTIQUE<br />
3-6,5 F-3<br />
(1/8-1/4) (1/64-1/8)<br />
POINT FLECHE<br />
POINT TRIANGULAIRE 3-6,5 F-1<br />
POINT EN PARALLELOGRAMME (1/8-1/4) (1/64-1/16)<br />
FESTON DOUBLE<br />
POINT ÉLASTIQUE INVISIBLE<br />
POINT PICOT<br />
POINT ZIGZAG<br />
POINT TRIPRE<br />
OVERLOCK ÉLASTIQUE<br />
POINT PLUME<br />
POINT DECORATIF<br />
POINT DECORATIF<br />
POINT DECORATIF<br />
3-6,5 F-1,5<br />
(1/8-1/4) (1/64-1/16)<br />
3-6,5 F-3<br />
(1/8-1/4) (1/64-1/8)<br />
0-6,5 F-4,5<br />
(0-1/4) (1/64-3/16)<br />
6,5 SS Fixe<br />
(1/4) 2,5 (3/32)<br />
3-6,5 SS Fixe<br />
(1/8-1/4) 2,5 (3/32)<br />
3-6,5 SS Fixe<br />
(1/8-1/4) 2,5 (3/32)<br />
6,5 SS Fixe<br />
(1/4) 2,5 (3/32)<br />
3-6,5 SS Fixe<br />
(1/8-1/4) 2,5 (3/32)<br />
6,5 SS Fixe<br />
(1/4) 2,5 (3/32)<br />
OUTLET INVISIBLE 3-6,5 SS Fixe<br />
DÉCORATIF (1/8-1/4) 2,5 (3/32)<br />
POINT FAGOT<br />
POINT PEIGNE<br />
OVERLOCK ÉLASTIQUE<br />
TRIPLE POINT ZIGZAG<br />
3-6,5 SS Fixe<br />
(1/8-1/4) 2,5 (3/32)<br />
3-6,5 SS Fixe<br />
(1/8-1/4) 2,5 (3/32)<br />
3-6,5 SS Fixe<br />
(1/8-1/4) 2,5 (3/32)<br />
3-6,5 SS Fixe<br />
(1/8-1/4) 2,5 (3/32)<br />
64<br />
51, 74, 75<br />
54<br />
56<br />
58<br />
57<br />
61<br />
59<br />
54<br />
55<br />
53, 72, 76, 78<br />
51<br />
61<br />
62<br />
59<br />
59<br />
59<br />
57<br />
60<br />
61<br />
61<br />
62<br />
KNOWING YOUR SEWING MACHINE<br />
CONNAITRE SA MACHINE A COUDRE<br />
CONOZCA SU MÁQUINA DE COSER<br />
20
KNOWING YOUR SEWING MACHINE<br />
CONNAITRE SA MACHINE A COUDRE<br />
CONOZCA SU MÁQUINA DE COSER<br />
LONGUEURS ET LARGEURS RECOMMANDEES POUR CHAQUE POINT<br />
(Modèle <strong>PS</strong>-2360)<br />
MODÈLE NOM DU POINT<br />
LARGEUR RECOMMANDÉE LONGUEUR RECOMMANDÉE PAGE DU MANUEL<br />
(EN MM)<br />
(EN MM)<br />
BOUTONNIÈRE AUTOMATIQUE 3-5 (Disque 4-7) F-1,5<br />
EN 1 PHASE (1/8-3/16) (1/64-1/16)<br />
POINT DROIT<br />
POINT OURLET INVISIBLE<br />
POINT ELASTIQUE<br />
6,5 1-4,5<br />
(1/4) (1/16-3/16)<br />
3-6,5 F-2<br />
(1/8-1/4) (1/64-1/16)<br />
3-6,5 F-2,5<br />
(1/8-1/4) (1/64-3/32)<br />
3-6,5 F-1,5<br />
FESTON<br />
(1/8-1/4) (1/64-1/16)<br />
POINT PONT 3-6,5 F-3<br />
POINT EN REMPARTS<br />
POINT RENFORCÉ (1/8-1/4) (1/64-1/8)<br />
PLISSE ELASTIQUE<br />
FESTON DOUBLE<br />
POINT ÉLASTIQUE INVISIBLE<br />
POINT PICOT<br />
POINT ZIGZAG<br />
POINT TRIPRE<br />
OVERLOCK ÉLASTIQUE<br />
POINT PLUME<br />
POINT DECORATIF<br />
POINT DECORATIF<br />
POINT DECORATIF<br />
3-6,5 F-3<br />
(1/8-1/4) (1/64-1/8)<br />
3-6,5 F-1<br />
(1/8-1/4) (1/64-1/16)<br />
3-6,5 F-1,5<br />
(1/8-1/4) (1/64-1/16)<br />
3-6,5 F-3<br />
(1/8-1/4) (1/64-1/8)<br />
0-6,5 F-4,5<br />
(0-1/4) (1/64-3/16)<br />
6,5 SS Fixe<br />
(1/4) 2,5 (3/32)<br />
3-6,5 SS Fixe<br />
(1/8-1/4) 2,5 (3/32)<br />
3-6,5 SS Fixe<br />
(1/8-1/4) 2,5 (3/32)<br />
6,5 SS Fixe<br />
(1/4) 2,5 (3/32)<br />
3-6,5 SS Fixe<br />
(1/8-1/4) 2,5 (3/32)<br />
6,5 SS Fixe<br />
(1/4) 2,5 (3/32)<br />
OUTLET INVISIBLE 3-6,5 SS Fixe<br />
DÉCORATIF (1/8-1/4) 2,5 (3/32)<br />
POINT FAGOT<br />
POINT PEIGNE<br />
OVERLOCK ÉLASTIQUE<br />
TRIPLE POINT ZIGZAG<br />
3-6,5 SS Fixe<br />
(1/8-1/4) 2,5 (3/32)<br />
3-6,5 SS Fixe<br />
(1/8-1/4) 2,5 (3/32)<br />
3-6,5 SS Fixe<br />
(1/8-1/4) 2,5 (3/32)<br />
3-6,5 SS Fixe<br />
(1/8-1/4) 2,5 (3/32)<br />
64<br />
51, 74, 75<br />
54<br />
56<br />
58<br />
57<br />
61<br />
59<br />
54<br />
55, 72, 76, 78<br />
53<br />
51<br />
61<br />
62<br />
59<br />
59<br />
59<br />
57<br />
60<br />
61<br />
61<br />
62<br />
21
LONGUEURS ET LARGEURS RECOMMANDEES POUR CHAQUE POINT<br />
(Modèle <strong>PS</strong>-2250)<br />
MODÈLE NOM DU POINT<br />
LARGEUR RECOMMANDÉE LONGUEUR RECOMMANDÉE PAGE DU MANUEL<br />
(EN MM)<br />
(EN MM)<br />
BOUTONNIÈRE AUTOMATIQUE 3-5 (Disque 4-7) F-1,5<br />
EN 4 PHASE (1/8-3/16) (1/64-1/16)<br />
POINT DROIT<br />
POINT ZIGZAG<br />
POINT RENFORCÉ<br />
POINT ÉLASTIQUE INVISIBLE<br />
POINT OURLET INVISIBLE<br />
POINT PICOT<br />
POINT ELASTIQUE<br />
POINT TRIPRE<br />
TRIPLE POINT ZIGZAG<br />
POINT FAGOT<br />
POINT PEIGNE<br />
OVERLOCK ÉLASTIQUE<br />
OVERLOCK ÉLASTIQUE<br />
POINT PLUME<br />
6,5 1-4,5<br />
(1/4) (3/64-3/16)<br />
0-6,5 F-4,5<br />
(0-1/4) (1/64-3/16)<br />
3-6,5 F-3<br />
(1/8-1/4) (1/64-1/8)<br />
3-6,5 F-1,5<br />
(1/8-1/4) (1/64-1/16)<br />
3-6,5 F-2<br />
(1/8-1/4) (1/64-1/16)<br />
3-6,5 F-3<br />
(1/8-1/4) (1/64-1/8)<br />
3-6,5 F-2,5<br />
(1/8-1/4) (1/64-3/32)<br />
6,5 SS Fixe<br />
(1/4) 2,5 (3/32)<br />
3-6,5 SS Fixe<br />
(1/8-1/4) 2,5 (3/32)<br />
3-6,5 SS Fixe<br />
(1/8-1/4) 2,5 (3/32)<br />
3-6,5 SS Fixe<br />
(1/8-1/4) 2,5 (3/32)<br />
3-6,5 SS Fixe<br />
(1/8-1/4) 2,5 (3/32)<br />
3-6,5 SS Fixe<br />
(1/8-1/4) 2,5 (3/32)<br />
3-6,5 SS Fixe<br />
(1/8-1/4) 2,5 (3/32)<br />
66<br />
51, 74, 75<br />
53, 72, 76, 78<br />
57<br />
54<br />
54<br />
55<br />
56<br />
51<br />
62<br />
60<br />
61<br />
61<br />
61<br />
62<br />
KNOWING YOUR SEWING MACHINE<br />
CONNAITRE SA MACHINE A COUDRE<br />
CONOZCA SU MÁQUINA DE COSER<br />
22
KNOWING YOUR SEWING MACHINE<br />
CONNAITRE SA MACHINE A COUDRE<br />
CONOZCA SU MÁQUINA DE COSER<br />
ANCHOS Y LARGOS RECOMENDADOS PARA CADA PUNTADA<br />
(Modelo <strong>PS</strong>-2470, <strong>PS</strong>-<strong>3100</strong>)<br />
PUNTADA NOMBRE<br />
ANCHO ECOMENDADO EN LARGO RECOMENDADO EN PÁGINA DEL<br />
mm (pulgadas) mm (pulgadas) MANUAL<br />
OJAL AUTOMÁTICO 3-5 (Dial 4-7) F-1,5<br />
DE 1 PASO (1/8-3/16) (1/64-1/16)<br />
PUNTADA RECTA<br />
PUNTADA INVISIBLE<br />
PUNTADA ELÁSTICA<br />
6,5 1-4,5<br />
(1/4) (1/16-3/16)<br />
3-6,5 F-2<br />
(1/8-1/4) (1/64-1/16)<br />
3-6,5 F-2,5<br />
(1/8-1/4) (1/64-3/32)<br />
64<br />
51, 74, 75<br />
PUNTADA FESTÓN<br />
3-6,5 F-1,5<br />
(1/8-1/4) (1/64-1/16)<br />
58<br />
PUNTADA PUENTE 3-6,5 F-3<br />
PUNTADA ONDAS ABIERTAS<br />
PUNTADA DE ACCIÓN DOBLE (1/8-1/4) (1/64-1/8)<br />
57<br />
PUNTADA ONDAS 3-6,5 F-3<br />
ELÁSTICAS (1/8-1/4) (1/64-1/8)<br />
61<br />
PUNTADA FLECHA<br />
PUNTADA TRIÁNGULO 3-6,5 F-1<br />
PUNTADA PARALELOGRAMO (1/8-1/4) (1/64-1/16)<br />
59<br />
PUNTADA FESTÓN DOBLE<br />
PUNTADA INVISIBLE 3-6,5 F-1,5<br />
ELÁSTICA (1/8-1/4) (1/64-1/16)<br />
54<br />
PUNTADA ONDAS<br />
PUNTADA ZIGZAG<br />
3-6,5 F-3<br />
(1/8-1/4) (1/64-1/8)<br />
0-6,5 F-4,5<br />
(0-1/4) (1/64-3/16)<br />
TRIPLE PUNTADA PESPUNTO<br />
6,5 SS Fija<br />
(1/4) 2,5 (3/32)<br />
PUNTADA OVERLOCK 3-6,5 SS Fija<br />
ELÁSTICA (1/8-1/4) 2,5 (3/32)<br />
PUNTADA PLUMA<br />
PUNTADA DECORATIVA<br />
PUNTADA DECORATIVA<br />
3-6,5 SS Fija<br />
(1/8-1/4) 2,5 (3/32)<br />
6,5 SS Fija<br />
(1/4) 2,5 (3/32)<br />
3-6,5 SS Fija<br />
(1/8-1/4) 2,5 (3/32)<br />
PUNTADA DECORATIVA<br />
6,5 SS Fija<br />
(1/4) 2,5 (3/32)<br />
PUNTADA DECORATIVA 3-6,5 SS Fija<br />
INVISIBLE (1/8-1/4) 2,5 (3/32)<br />
PUNTADA FAGOTING<br />
3-6,5 SS Fija<br />
(1/8-1/4) 2,5 (3/32)<br />
PUNTADA PEINE<br />
3-6,5 SS Fija<br />
(1/8-1/4) 2,5 (3/32)<br />
PUNTADA OVERLOCK 3-6,5 SS Fija<br />
ELÁSTICA (1/8-1/4) 2,5 (3/32)<br />
TRIPLE PUNTADA ZIGZAG 3-6,5 SS Fija<br />
ELÁSTICA (1/8-1/4) 2,5 (3/32)<br />
54<br />
56<br />
55<br />
53, 72, 76, 78<br />
51<br />
61<br />
62<br />
59<br />
59<br />
59<br />
57<br />
60<br />
61<br />
61<br />
62<br />
23
ANCHOS Y LARGOS RECOMENDADOS PARA CADA PUNTADA<br />
(Modelo <strong>PS</strong>-2360)<br />
PUNTADA NOMBRE<br />
ANCHO ECOMENDADO EN LARGO RECOMENDADO EN PÁGINA DEL<br />
mm (pulgadas) mm (pulgadas) MANUAL<br />
OJAL AUTOMÁTICO 3-5 (Dial 4-7) F-1,5<br />
DE 1 PASO (1/8-3/16) (1/64-1/16)<br />
PUNTADA RECTA<br />
PUNTADA INVISIBLE<br />
PUNTADA ELÁSTICA<br />
PUNTADA FESTÓN<br />
PUNTADA PUENTE<br />
PUNTADA ONDAS ABIERTAS<br />
PUNTADA DE ACCIÓN DOBLE<br />
6,5 1-4,5<br />
(1/4) (1/16-3/16)<br />
3-6,5 F-2<br />
(1/8-1/4) (1/64-1/16)<br />
3-6,5 F-2,5<br />
(1/8-1/4) (1/64-3/32)<br />
3-6,5 F-1,5<br />
(1/8-1/4) (1/64-1/16)<br />
3-6,5 F-3<br />
(1/8-1/4) (1/64-1/8)<br />
PUNTADA ONDAS 3-6,5 F-3<br />
ELÁSTICAS (1/8-1/4) (1/64-1/8)<br />
PUNTADA FESTÓN DOBLE<br />
3-6,5 F-1<br />
(1/8-1/4) (1/64-1/16)<br />
PUNTADA INVISIBLE 3-6,5 F-1,5<br />
ELÁSTICA (1/8-1/4) (1/64-1/16)<br />
PUNTADA ONDAS<br />
PUNTADA ZIGZAG<br />
3-6,5 F-3<br />
(1/8-1/4) (1/64-1/8)<br />
0-6,5 F-4,5<br />
(0-1/4) (1/64-3/16)<br />
TRIPLE PUNTADA PESPUNTO<br />
6,5 SS Fija<br />
(1/4) 2,5 (3/32)<br />
PUNTADA OVERLOCK 3-6,5 SS Fija<br />
ELÁSTICA (1/8-1/4) 2,5 (3/32)<br />
PUNTADA PLUMA<br />
PUNTADA DECORATIVA<br />
PUNTADA DECORATIVA<br />
3-6,5 SS Fija<br />
(1/8-1/4) 2,5 (3/32)<br />
6,5 SS Fija<br />
(1/4) 2,5 (3/32)<br />
3-6,5 SS Fija<br />
(1/8-1/4) 2,5 (3/32)<br />
PUNTADA DECORATIVA<br />
6,5 SS Fija<br />
(1/4) 2,5 (3/32)<br />
PUNTADA DECORATIVA 3-6,5 SS Fija<br />
INVISIBLE (1/8-1/4) 2,5 (3/32)<br />
PUNTADA FAGOTING<br />
3-6,5 SS Fija<br />
(1/8-1/4) 2,5 (3/32)<br />
PUNTADA PEINE<br />
3-6,5 SS Fija<br />
(1/8-1/4) 2,5 (3/32)<br />
PUNTADA OVERLOCK 3-6,5 SS Fija<br />
ELÁSTICA (1/8-1/4) 2,5 (3/32)<br />
TRIPLE PUNTADA ZIGZAG 3-6,5 SS Fija<br />
ELÁSTICA (1/8-1/4) 2,5 (3/32)<br />
64<br />
51, 74, 75<br />
54<br />
56<br />
58<br />
57<br />
61<br />
59<br />
54<br />
55, 72, 76, 78<br />
53<br />
51<br />
61<br />
62<br />
59<br />
59<br />
59<br />
57<br />
60<br />
61<br />
61<br />
62<br />
KNOWING YOUR SEWING MACHINE<br />
CONNAITRE SA MACHINE A COUDRE<br />
CONOZCA SU MÁQUINA DE COSER<br />
24
KNOWING YOUR SEWING MACHINE<br />
CONNAITRE SA MACHINE A COUDRE<br />
CONOZCA SU MÁQUINA DE COSER<br />
ANCHOS Y LARGOS RECOMENDADOS PARA CADA PUNTADA<br />
(Modelo <strong>PS</strong>-2250)<br />
PUNTADA NOMBRE<br />
ANCHO ECOMENDADO EN LARGO RECOMENDADO EN PÁGINA DEL<br />
mm (pulgadas) mm (pulgadas) MANUAL<br />
OJAL AUTOMÁTICO DE 3-5 (Dial 4-7) F-1,5<br />
4 PASO (1/8-3/16) (1/64-1/16)<br />
PUNTADA RECTA<br />
6,5 1-4,5<br />
(1/4) (3/64-3/16)<br />
PUNTADA ZIGZAG<br />
0-6,5 F-4,5<br />
(0-1/4) (1/64-3/16)<br />
PUNTADA DE ACCIÓN 3-6,5 F-3<br />
DOBLE (1/8-1/4) (1/64-1/8)<br />
PUNTADA INVISIBLE 3-6,5 F-1,5<br />
ELÁSTICA (1/8-1/4) (1/64-1/16)<br />
PUNTADA INVISIBLE<br />
3-6,5 F-2<br />
(1/8-1/4) (1/64-1/16)<br />
PUNTADA ONDAS<br />
3-6,5 F-3<br />
(1/8-1/4) (1/64-1/8)<br />
PUNTADA ELÁSTICA<br />
3-6,5 F-2,5<br />
(1/8-1/4) (1/64-3/32)<br />
TRIPLE PUNTADA 6,5 SS Fija<br />
PESPUNTO (1/4) 2,5 (3/32)<br />
TRIPLE PUNTADA ZIGZAG 3-6,5 SS Fija<br />
ELÁSTICA (1/8-1/4) 2,5 (3/32)<br />
PUNTADA FAGOTING<br />
3-6,5 SS Fija<br />
(1/8-1/4) 2,5 (3/32)<br />
PUNTADA PEINE<br />
3-6,5 SS Fija<br />
(1/8-1/4) 2,5 (3/32)<br />
PUNTADA OVERLOCK 3-6,5 SS Fija<br />
ELÁSTICA (1/8-1/4) 2,5 (3/32)<br />
PUNTADA OVERLOCK 3-6,5 SS Fija<br />
ELÁSTICA (1/8-1/4) 2,5 (3/32)<br />
PUNTADA PLUMA<br />
3-6,5 SS Fija<br />
(1/8-1/4) 2,5 (3/32)<br />
66<br />
51, 74, 75<br />
53, 72, 76, 78<br />
57<br />
54<br />
54<br />
55<br />
56<br />
51<br />
62<br />
60<br />
61<br />
61<br />
61<br />
62<br />
25
Stitch Length Dial<br />
1<br />
Depending on your selected stitch, you may need to adjust the stitch<br />
length for best results.<br />
The numbers marked on the Stitch Length Dial represent the length<br />
of the stitch in millimeters (mm).<br />
THE HIGHER THE NUMBER, THE LONGER THE STITCH.<br />
The “0” setting does not feed the material. This is used for sewing<br />
on a button.<br />
The “F” area is used for making a Satin Stitch (a dense zigzag stitch)<br />
which can be used in making buttonholes and decorative stitches.<br />
The position needed for making the Satin Stitch varies according to<br />
the material and thread being used. To determine the exact dial<br />
position, you should first test the stitch and length settings on a<br />
scrap of fabric to observe the feeding of the material.<br />
KNOWING YOUR SEWING MACHINE<br />
CONNAITRE SA MACHINE A COUDRE<br />
CONOZCA SU MÁQUINA DE COSER<br />
1 Stitch length dial<br />
2 Length<br />
3 Fine → SS<br />
4 Coarse<br />
2<br />
3 4<br />
3<br />
2<br />
· ·<br />
1<br />
CAUTION<br />
Do not set the Stitch Length Dial in the range shown by A. If<br />
the machine is started while the dial is set in the range shown<br />
by A, the fabric will not feed correctly and the fabric or<br />
machine may be damaged.<br />
Turn the dial to the left past “0” for the SS position.<br />
SS (Fixed 2.5)<br />
A<br />
· 4 · 3 · 2 · 1 · F · 0 ................. SS<br />
CAUTION<br />
If the stitches get bunched together, lengthen the stitch<br />
length and continue sewing. Do not continue sewing without<br />
lengthening the stitch length, otherwise the needle may<br />
break and cause injury.<br />
26
KNOWING YOUR SEWING MACHINE<br />
CONNAITRE SA MACHINE A COUDRE<br />
CONOZCA SU MÁQUINA DE COSER<br />
1<br />
2<br />
3 4<br />
3<br />
2<br />
· ·<br />
1<br />
A<br />
· 4 · 3 · 2 · 1 · F · 0 ................. SS<br />
Sélecteur de longueur de point<br />
En fonction du point sélectionné, il est possible de régler la longueur de<br />
point <strong>pour</strong> obtenir les meilleurs résultats.<br />
Les chiffres inscrits sur le sélecteur de longueur de point représentent la<br />
longueur du point en millimètres (mm).<br />
PLUS LE CHIFFRE SERA ELEVE PLUS LE POINT SERA LONG.<br />
Le réglage “0” n’entraînera pas le tissu à coudre. Il sert à coudre les<br />
boutons.<br />
La zone “F” sert à réaliser un point de bourdon (un point zigzag serré) qui<br />
peut servir à coudre des boutonnières ou comme point fantaisie décoratif.<br />
La position idéale <strong>pour</strong> le point de bourdon variera en fonction du tissu et<br />
du fil utilisés. Pour déterminer la position exacte, il est préférable de tester<br />
d’abord les réglages de point et de longueur sur un bout de tissu <strong>pour</strong><br />
observer son entraînement.<br />
1 Sélecteur de longueur de point<br />
2 Longueur<br />
3 Fin → SS<br />
4 Gros<br />
ATTENTION<br />
Ne pas régler le sélecteur de longueur de point dans la plage indiquée<br />
par A. Si la machine se met en marche lorsque le sélecteur est dans<br />
la plage indiqué par A, le tissu n’avancera pas correctement et le tissu<br />
ou la machine risque d’être endommagé.<br />
Selector de largo de puntada<br />
Según la puntada seleccionada, puede ser necesario ajustar su largo<br />
para lograr mejores resultados.<br />
Los números indicados en el disco representan el largo de las<br />
puntadas en milímetros.<br />
CUANTO MAS ALTO EL NUMERO, MAS LARGA LA PUNTADA.<br />
El ajuste “0” no alimenta el tejido. Sirve para coser un botón.<br />
La zona “F” se usa para realizar bordados de realce (una puntada<br />
densa en zigzag), que puede servir para coser ojales o como puntadas<br />
decorativas. La posición necesaria para realizar puntadas de realce<br />
varia dependiendo del tejido e hilo utilizados. Para determinar la<br />
posición exacta del botón, conviene primero probar la puntada y los<br />
ajustes de largo en un pedazo de tejido para ver como se alimenta el<br />
material.<br />
1 Selector de largo de puntada<br />
2 Largo<br />
3 Fina → SS<br />
4 Más largo<br />
PRECAUCIÓN<br />
No ponga el selector de puntada en el rango mostrado por A. Si<br />
pone la máquina en marcha con el selector puesto en el rango<br />
mostrado por A, el tejido no avanzará correctamente y el tejido o<br />
la máquina podrían dañarse.<br />
Tourner le sélecteur vers la gauche, après la position “0”, <strong>pour</strong> atteindre<br />
la position SS .<br />
SS (Fixe 2,5)<br />
Para colocarse en la posición SS , gire el selector hacia la<br />
izquierda más allá de “0”.<br />
SS (Fija 2,5)<br />
ATTENTION<br />
Si les points se tassent, allongez le point et continuez de coudre. Ne<br />
continuez pas de coudre sans allonger le point, autrement l’aiguille<br />
<strong>pour</strong>rait se casser et vous blesser.<br />
PRECAUCIÓN<br />
Si las puntadas se amontonan, alargue la longitud de la puntada<br />
y siga cosiendo. No continúe cosiendo sin alargar la puntada; de<br />
lo contrario, podría romper la aguja y causar lesiones.<br />
27
Stitch Width Dial<br />
1<br />
Depending on the stitch selected, you may need to adjust the stitch<br />
width.<br />
The numbers marked on the dial represent the stitch width.<br />
THE HIGHER THE NUMBER, THE WIDER THE STITCH.<br />
1 Stitch width dial<br />
CAUTION<br />
Do not adjust the stitch width while the needle is in the fabric.<br />
Otherwise, the needle or fabric may be damaged.<br />
KNOWING YOUR SEWING MACHINE<br />
CONNAITRE SA MACHINE A COUDRE<br />
CONOZCA SU MÁQUINA DE COSER<br />
NOTE:<br />
When you choose the Straight Stitch or the Triple Stretch Stitch you<br />
can change the needle position from left to right.<br />
7<br />
6<br />
5<br />
2<br />
1<br />
0<br />
Sélecteur de largeur de point<br />
En fonction du point sélectionné, il peut s’avérer nécessaire d’en régler la<br />
largeur.<br />
Les chiffres inscrits sur le sélecteur représentent la largeur réelle du point.<br />
PLUS LE CHIFFRE SERA ELEVE, PLUS LE POINT SERA LARGE.<br />
1 Sélecteur de largeur de point<br />
ATTENTION<br />
Ne pas régler la largeur de point pendant que l’aiguille est dans le<br />
tissu. Sinon, l’aiguille ou le tisseur risque d’être abîmé.<br />
Selector de ancho de puntada<br />
Según el modelo de puntada seleccionado, se necesitará o no ajustar<br />
el ancho de puntada.<br />
Los números indicados en el selector representan el ancho de las<br />
puntadas.<br />
A MAYOR NUMERO SELECCIONADO, MAYOR ANCHO DE PUN-<br />
TADA.<br />
1 Selector de ancho de puntada<br />
PRECAUCIÓN<br />
No ajuste el ancho de puntada mientras la aguja esté metida en el<br />
tejido. De lo contrario, la aguja o el tejido podrían dañarse.<br />
REMARQUE:<br />
Lorsque le point droit ou le triple point élastique sont sélectionnés, la<br />
position de l'aiguille peut être changée de la gauche au à droite.<br />
NOTA:<br />
Cuando elige la puntada recta o la triple puntada elástica, es posible<br />
cambiar la posición de la aguja de izquierda a derecha.<br />
28
KNOWING YOUR SEWING MACHINE<br />
CONNAITRE SA MACHINE A COUDRE<br />
CONOZCA SU MÁQUINA DE COSER<br />
Reverse Sewing Lever<br />
Reverse sewing is used for back tacking and reinforcing seams.<br />
(Model <strong>PS</strong>-2360, <strong>PS</strong>-2250)<br />
To sew in reverse, push the Reverse Sewing Lever in as far as<br />
possible and hold in that position while pressing lightly on the foot<br />
pedal. To sew forward, release the Reverse Sewing Lever. The<br />
machine will then sew forward.<br />
(Model <strong>PS</strong>-2470, <strong>PS</strong>-<strong>3100</strong>)<br />
To sew in reverse when the foot controller is not used, push the<br />
Reverse Sewing Lever in as far as possible and hold it. The<br />
machine will sew slowly in reverse.<br />
When the foot controller is used, push this lever and hold it while<br />
pressing lightly on the foot pedal. Then, the machine will sew at<br />
ordinary speed in reverse.<br />
1 Reverse sewing lever<br />
1<br />
Levier de couture en marche arrière<br />
Utiliser la couture en marche arrière <strong>pour</strong> arrêter ou renforcer une couture.<br />
(Modèle <strong>PS</strong>-2360, <strong>PS</strong>-2250)<br />
Pour coudre en arrière, pousser au maximum le levier de couture en<br />
marche arrière, et le maintenir dans cette position tout en appuyant<br />
légèrement sur la pédale. Pour coudre à nouveau vers l’avant, relâcher le<br />
levier.<br />
(Modèle <strong>PS</strong>-2470, <strong>PS</strong>-<strong>3100</strong>)<br />
Appuyer sur ce levier et le maintenir enfoncé sans appuyer à fond sur la<br />
pédale du rhéostat. La machine va coudre lentement, en arrière.<br />
Lorsque le levier est relâché, la machine va se remettre àcoudre en marche<br />
avant.<br />
Appuyer sur ce levier et le maintenir enfoncé tout en appuyant sur la pédale<br />
du rhéostat. La machine va alors coudre en arrière, à une vitesse normale.<br />
Pulsador de retroceso<br />
La costura hacia atrás se usa para remates y para reforzar las costuras.<br />
(Modelo <strong>PS</strong>-2360, <strong>PS</strong>-2250)<br />
Para coser hacia atrás, apriete a fondo el pulsador de retroceso y manténgalo<br />
en esa posición mientras presiona ligeramente el pedal. Para volver<br />
a coser hacia adelante, suelte el pulsador.<br />
(Modelo <strong>PS</strong>-2470, <strong>PS</strong>-<strong>3100</strong>)<br />
Mientras presiona el pedal, apriete el pulsador y manténgalo apretado.<br />
La máquina coserá a velocidad normal y al revés.<br />
Al soltar el pulsador, la máquina va a volver a coser hacia adelante.<br />
Si aprieta el pulsador y lo mantiene apretado sin presionar el pedal,<br />
la máquina va a coser despacio hacia atrás.<br />
1 Pulsador de retroceso<br />
1 Levier de couture en marche arrière<br />
29
Feed Dog Position Switch<br />
Use the Feed Dog Position Switch to raise or lower the feed dogs<br />
according to the job that is being done. When monogramming,<br />
embroidering, darning or sewing on buttons, the feed dogs should<br />
be lowered. (The garment will not be fed.)<br />
NOTE:<br />
When raising or lowering the feed dogs, move the Feed Dog<br />
Position Switch as far as possible to the appropriate side. Since the<br />
feed dogs can not be lowered using the Feed Dog Position Switch<br />
immediately after they are raised, turn the balance wheel toward<br />
you once and after the feed dogs are raised, lower them using the<br />
Feed Dog Position Switch.<br />
1 Feed dog position switch<br />
2 Down position<br />
3 Up position<br />
KNOWING YOUR SEWING MACHINE<br />
CONNAITRE SA MACHINE A COUDRE<br />
CONOZCA SU MÁQUINA DE COSER<br />
3 2 1<br />
Levier des griffes d’entraînement<br />
Utiliser le levier des griffes d’entraînement <strong>pour</strong> relever ou abaisser les<br />
griffes en fonction du travail à effectuer. Lors de la création de monogrammes,<br />
de broderies, lors de reprisages ou de la couture de boutons, les griffes<br />
d’entraînement doivent être abaissées (l’ouvrage ne sera pas entraîné).<br />
REMARQUE:<br />
Pour relever ou abaisser les griffes d’entraînement, déplacer le levier aussi<br />
loin que possible dans le sens souhaité. Etant donné que les griffes ne<br />
peuvent pas être abaissées à l’aide du levier lorsqu’elles viennent de<br />
remonter, il convient d’abord de tourner le volant vers soi et dès que les<br />
griffes sont relevées, les abaisser à l’aide du levier.<br />
1 Levier des griffes d’entraînement<br />
2 Marque de la position élevée<br />
3 Pour les abaisser<br />
Palanca de los alimentadores<br />
Utilice la palanca de los alimentadores para levantar o bajar los<br />
dientes de los alimentadores de conformidad con el trabajo a<br />
realizar. Para monogramas, bordados, zurcidos o para la costura de<br />
botones, los alimentadores deben ser bajados (para que el tejido no<br />
se alimente).<br />
NOTA:<br />
Al subir o bajar los alimentadores, conviene desplazar la palanca de<br />
los alimentadores lo más posible hacia la posición deseada. Dado<br />
que los alimentadores no pueden ser bajados con la palanca inmediatamente<br />
después de su subida, gire primero la ruedecilla hacia<br />
usted y, cuando los alimentadores se encuentren subidos, bájelos<br />
con la palanca arriba mencionada.<br />
1 Palanca de los alimentadores<br />
2 Posición baja<br />
3 Posición alta<br />
30
KNOWING YOUR SEWING MACHINE<br />
CONNAITRE SA MACHINE A COUDRE<br />
CONOZCA SU MÁQUINA DE COSER<br />
(Model <strong>PS</strong>-2470, <strong>PS</strong>-<strong>3100</strong>)<br />
Start/Stop Button<br />
Pressing the Start/Stop Button once starts the machine; pressing<br />
the button again stops the machine.<br />
• The machine sews at a slow speed when sewing with the button<br />
held down.<br />
• The needle stops in its highest position when sewing stops.<br />
1<br />
1 Start/Stop button<br />
When you turn on the main power switch, the Start/Stop Button light<br />
will be red, and will change to green after about 1 second. This<br />
shows that sewing is possible. When you turn off the power, the light<br />
of the button will also turn off.<br />
While the bobbin is being wound (the bobbin winder shaft is moved<br />
to the right), the button lights up in orange.<br />
(Modèle <strong>PS</strong>-2470, <strong>PS</strong>-<strong>3100</strong>)<br />
Bouton Marche/Arrêt<br />
Appuyer sur le bouton Marche/Arrêt <strong>pour</strong> démarrer la machine; réappuyer<br />
sur ce bouton <strong>pour</strong> l'arrêter.<br />
• Lorsque vous maintenez le bouton enfoncé, la machine coud lentement<br />
• L'aiguille s'arrête à sa position la plus haute.<br />
1 Bouton Marche/Arrêt<br />
Lorsque la machine est allumée, le bouton de marche/arrêt s’allume en<br />
rouge et devient vert une seconde plus tard. Il est alors possible de coudre.<br />
Lorsque vous éteignez la machine, le bouton s’éteint aussi.<br />
Pendant le bobinage de la canette (la broche du dévidoir est placée à<br />
droite), la diode orange est allumée.<br />
(Modelo <strong>PS</strong>-2470, <strong>PS</strong>-<strong>3100</strong>)<br />
Pulsador de puesta en<br />
Marcha/Parada<br />
Presione una vez el pulsador de puesta en Marcha/Parada para<br />
conectar la máquina de coser; presione el botón otra vez para pararla.<br />
• La máquina cose a baja velocidad si se cose con el pulsador<br />
apretado hacia abajo.<br />
• La aguja se detiene en su posición más elevada cuando se deja de<br />
coser.<br />
1 Pulsador de puesta en Marcha/Parada<br />
Cuando active el interruptor de alimentación principal, el pulsador<br />
de puesta en Marcha/Parada se encenderá en rojo, y cambiará a<br />
verde después de 1 segundo aproximadamente. Esto muestra que es<br />
posible coser. Cuando desconecte la alimentación, también se<br />
apagará la luz del pulsador.<br />
Cuando la canilla se está bobinando (el eje de hacer canilla se<br />
desplaza a la derecha), el pulsador emite una luz naranja).<br />
31
(Model <strong>PS</strong>-2470, <strong>PS</strong>-<strong>3100</strong>)<br />
1<br />
Sewing Speed Controller<br />
Controls the speed range.<br />
When the foot controller is used, you can control maximum speed<br />
with the sewing speed controller.<br />
The sewing speed controller should be set at right (fastest) position<br />
for normal usage with foot controller.<br />
1 Sewing speed controller<br />
KNOWING YOUR SEWING MACHINE<br />
CONNAITRE SA MACHINE A COUDRE<br />
CONOZCA SU MÁQUINA DE COSER<br />
Converting to Free-arm Style<br />
Free-arm sewing is convenient for sewing tubular and hard-toreach<br />
areas on a garment. To change your machine to the free-arm<br />
style, simply lift out the flat bed attachment.<br />
1<br />
1 Slide the flat bed attachment to the left.<br />
1 Flat bed attachment<br />
1<br />
(Modèle <strong>PS</strong>-2470, <strong>PS</strong>-<strong>3100</strong>)<br />
Levier de contrôle de<br />
la plage de vitesse<br />
Permet de contrôler la plage de vitesse.<br />
En cas d’utilisation de la pédale du rhéostat, il est possible de contrôler la<br />
vitesse maximum grâce au levier de contrôle de la plage de vitesse.<br />
Le levier de contrôle doit être positionné à droite (grande vitesse) <strong>pour</strong> une<br />
utilisation normale de la pédale.<br />
1 Levier de contrôle de la plage de vitesse<br />
(Modelo <strong>PS</strong>-2470, <strong>PS</strong>-<strong>3100</strong>)<br />
Palanca de control de<br />
zona de velocidad<br />
Controla la zona de velocidad.<br />
Si se usa el pedal, se puede controlar una velocidad máxima gracias<br />
a la palanca de control de zona de velocidad.<br />
La palanca debe estar puesta a la derecha (velocidad más rápida) para<br />
un uso normal del pedal.<br />
1 Palanca de control de la zona de velocidad<br />
Conversion en modèle bras libre<br />
La couture à bras libre s’impose <strong>pour</strong> des coutures tubulaires ou <strong>pour</strong> des<br />
endroits difficiles à atteindre sur des vêtements. Pour obtenir la configuration<br />
à bras libre, il suffit de soulever et de retirer la plateau.<br />
1 Glisser la plateau vers la gauche.<br />
1 Plateau<br />
Conversión en modalidad<br />
de brazo libre<br />
La costura con brazo libre es práctica para coser zonas tubulares y<br />
difíciles de acceso en los tejidos. Para transformar su máquina en esa<br />
modalidad, sólo hace falta levantar el plataforma y sacarlo.<br />
1 Deslice el plataforma hacia la izquierda.<br />
1 Plataforma<br />
32
KNOWING YOUR SEWING MACHINE<br />
CONNAITRE SA MACHINE A COUDRE<br />
CONOZCA SU MÁQUINA DE COSER<br />
THREADING<br />
THE MACHINE<br />
1<br />
2<br />
Winding the Bobbin<br />
(Model <strong>PS</strong>-2470, <strong>PS</strong>-<strong>3100</strong>)<br />
CAUTION<br />
• If the thread spool and/or spool cap are set incorrectly,<br />
the thread may tangle on the spool pin.<br />
• Use the spool cap (large, medium, or small) that is<br />
closest in size to the thread spool. If a spool cap smaller<br />
than the thread spool is used, the thread may become<br />
caught in the slit on the end of the spool.<br />
1<br />
1<br />
2<br />
1. Place the spool of thread on the horizontal spool pin and firmly<br />
hold it with a spool cap so that the spool of thread will not turn.<br />
Pass the thread through the thread guide as shown following the<br />
dotted line on the machine.<br />
2<br />
1<br />
CAUTION<br />
Use only bobbins recommended by the manufacturer of<br />
this machine (see page 5). Using other bobbins may result<br />
in damage or injury.<br />
2<br />
(Model <strong>PS</strong>-2470, <strong>PS</strong>-<strong>3100</strong>)<br />
2. Place the bobbin on the bobbin winder shaft. Push the bobbin<br />
winder shaft to the right.<br />
3<br />
3<br />
1 Spring on the shaft<br />
2 Groove of the bobbin<br />
* Align the groove of the bobbin with the spring on the shaft.<br />
(Model <strong>PS</strong>-2360, <strong>PS</strong>-2250)<br />
3. Wind the thread clockwise around the bobbin four or five times,<br />
pass the end of the thread through the slit in the bobbin winder<br />
seat, and then pull the thread in the direction shown in the<br />
illustration. Use the cutter to cut the thread.<br />
3 Bobbin winder seat<br />
3<br />
1<br />
2<br />
(Model <strong>PS</strong>2360, <strong>PS</strong>-2250)<br />
2. Pass the end of the thread through the hole on the bobbin from<br />
the inside.<br />
Place the bobbin onto the bobbin winder shaft and slide the<br />
bobbin winder shaft to the right. Turn the bobbin clockwise, by<br />
hand, until the spring on the shaft slides into the groove of the<br />
bobbin.<br />
1 Spring on the shaft<br />
2 Groove of the bobbin<br />
3 Bobbin winder seat<br />
3. While holding the end of the thread, gently depress the foot<br />
controller to wind the thread around the bobbin a few times.<br />
Then stop the machine.<br />
Trim the excess thread above the bobbin.<br />
33
ENFILAGE DE<br />
LA MACHINE<br />
Remplissage de la canette<br />
ATTENTION<br />
• Si la bobine et/ou le couvercle de bobine sont mal positionnés,<br />
le fil risque de s’emmêler sur le porte-bobine.<br />
• Utilisez la taille de couvercle de bobine (grand, moyen ou petit)<br />
qui se rapproche le plus de celle de la bobine de fil. Si vous<br />
utilisez un couvercle de bobine plus petit que la bobine de fil,<br />
le fil risque de se bloquer dans la fente située à l’extrémité de<br />
la bobine.<br />
ENHEBRADO DE LA<br />
MÁQUINA<br />
Bobinado de la canilla<br />
PRECAUCIÓN<br />
• Si el carrete de hilo o la tapa del carrete no están colocados<br />
correctamente, el hilo podría enredarse en el portacarrete.<br />
• Utilice la tapa del carrete (grande, mediana o pequeña) que<br />
mejor se adapte a la medida del carrete de hilo. Si la tapa del<br />
carrete es más pequeña que el carrete de hilo, éste podría<br />
engancharse en la ranura en el borde del carrete.<br />
KNOWING YOUR SEWING MACHINE<br />
CONNAITRE SA MACHINE A COUDRE<br />
CONOZCA SU MÁQUINA DE COSER<br />
1. Placer la bobine de fil sur le porte-bobine horizontal et la bien la tenir<br />
avec le couvercle <strong>pour</strong> que la bobine de fil ne tourne pas. Faire passer<br />
le fil dans le guide-fil comme indiqué par les pointillés sur la machine.<br />
1. Coloque un carrete de hillo en el eje horizontal previsto y<br />
manténgalo firmente con un tope para que no dé vueltas. Pase el<br />
hilo por la guía, siguiendo la línea de puntos marcada en la<br />
máquina.<br />
ATTENTION<br />
Utilisez uniquement les canettes recommandées par le fabricant<br />
de cette machine (voir page 6). Si vous utilisez d’autres types de<br />
canettes, vous risquez de vous blesser ou d’endommager la machine.<br />
(Modèle <strong>PS</strong>-2470, <strong>PS</strong>-<strong>3100</strong>)<br />
2. Placer la canette sur la broche du dévidoir et pousser l'axe vers la droite.<br />
1 Ressort de la broche<br />
2 Rainure de la canette<br />
* Aligner la rainure de la canette sur le ressort de la broche du dévidoir<br />
3. Faire quatre ou cinq tours en enroulant le fil autour de la canette, dans<br />
le sens des aiguilles d'une montre, passer l'extrémité du fil par la fente<br />
du siège du dévidoir et tirer le fil dans le sens illustré. Couper le fil avec<br />
le coupe-fils.<br />
3 Siège du dévidoir<br />
PRECAUCIÓN<br />
Use sólo bobinas recomendadas por el fabricante de esta máquina<br />
(vea página 6). El uso de otras bobinas puede causar daños o<br />
lesiones.<br />
(Modelo <strong>PS</strong>-2470, <strong>PS</strong>-<strong>3100</strong>)<br />
2. Coloque la canilla en el eje de hacer canilla.<br />
Empuje el eje de hacer canilla hacia la derecha.<br />
1 Resorte del eje<br />
2 Surco de la canilla<br />
* Alinee el surco de la canilla con el resorte del eje.<br />
3. Dé cuatro o cinco vueltas de hilo alrededor de la canilla en el<br />
sentido de las agujas del reloj, pase el final del hilo a través de la<br />
ranura de la base del girador de la canilla y empuje el hilo en la<br />
dirección que indica el dibujo.<br />
Corte el hilo con el cortador.<br />
3 Base del girador de la canilla<br />
(Modèle <strong>PS</strong>-2360, <strong>PS</strong>-2250)<br />
2. Faire passer l’extrémité du fil dans le trou sur la bobine de l’intérieur.<br />
Placer la bobine sur le broche dévidoir et pousser le dévidoir vers la<br />
droite. Tourner la bobine dans le sens horaire à la main jusqu'à ce que<br />
le ressort de l’broche rentre dans la fente de la bobine.<br />
1 Ressort de la broche<br />
2 Rainure de la canette<br />
3 Siège du dévidoir<br />
(Modelo <strong>PS</strong>-2360, <strong>PS</strong>-2250)<br />
2. Pase extremo del hilo por el orificio de la canilla a partir del<br />
nterior.<br />
Coloque la canilla en el eje del girador de canilla y deslice dicho<br />
eje hacia la derecha. Gire la canilla en el sentido de las manecillas<br />
de un reloj, con la mano, hasta que el muelle impulsor del eje se<br />
deslice dentro de la ranura de la canilla.<br />
1 Muelle impulsor<br />
2 Ranura de la canilla<br />
3 Base del girador de la canilla<br />
3. Tout en tenant l’extrémité du fil, appuyer légèrement sur la pédale <strong>pour</strong><br />
bobiner le fil plusieurs fois autour de la bobine. Arrêter ensuite la<br />
machine.<br />
Couper le fil qui ressort de la bobine.<br />
3. Sujetando el extremo del hilo, presione suavemente el pedal para<br />
que el hilo dé vueltas alrededor de la canilla. Luego pare la<br />
máquina.<br />
Deshaga el exceso de hilo arriba de la canilla.<br />
34
KNOWING YOUR SEWING MACHINE<br />
CONNAITRE SA MACHINE A COUDRE<br />
CONOZCA SU MÁQUINA DE COSER<br />
(Model <strong>PS</strong>-2470, <strong>PS</strong>-<strong>3100</strong>)<br />
(Model <strong>PS</strong>-2470, <strong>PS</strong>-<strong>3100</strong>)<br />
4. Slide the sewing speed controller to its maximum (as far to the<br />
right as possible).<br />
5. Push the Start/Stop button. The machine will stop automatically<br />
when the bobbin is full.<br />
6. After the bobbin has stopped moving, push the Start/Stop button<br />
to stop the machine.<br />
1 Sewing speed controller<br />
1<br />
CAUTION<br />
When removing the bobbin, do not pull on the bobbin winder<br />
seat. Doing so could loosen or remove the bobbin winder seat,<br />
resulting in damage to the machine.<br />
7. Cut the thread, slide the bobbin winder shaft to the left and<br />
remove the bobbin.<br />
(Model <strong>PS</strong>-2360, <strong>PS</strong>-2250)<br />
(Mode <strong>PS</strong>-2360, <strong>PS</strong>-2250)<br />
4. Step down on the foot controller to start.<br />
5. After the machine stops automatically when the bobbin is full,<br />
take your foot off of the foot controller.<br />
CAUTION<br />
When removing the bobbin, do not pull on the bobbin winder<br />
seat. Doing so could loosen or remove the bobbin winder seat,<br />
resulting in damage to the machine.<br />
6. Cut the thread, slide the bobbin winder shaft to the left and<br />
remove the bobbin.<br />
NOTE:<br />
The needle bar does not move when the bobbin winding shaft is slid<br />
to the right.<br />
Immediately after winding the bobbin, it is normal to hear the sound<br />
of the clutch engaging when beginning to sew or manually turning<br />
the balance wheel.<br />
CAUTION<br />
Be sure to follow the process described. If the thread is not<br />
cut completely, and the bobbin is wound, when the thread<br />
runs low it may tangle around the bobbin and cause the<br />
needle to break.<br />
CAUTION<br />
Setting the bobbin improperly may cause the thread tension<br />
to loosen, breaking the needle and resulting in injury.<br />
1 Wound evenly<br />
2 Wound poorly<br />
1 2<br />
35
(Modèle <strong>PS</strong>-2470, <strong>PS</strong>-<strong>3100</strong>)<br />
4. Faire glisser le levier de contrôle de la plage de vitesse vers la position<br />
maximum (le plus possible vers la droite).<br />
5. Appuyer sur le bouton Marche/Arrêt. La machine s'arrête automatiquement<br />
lorsque la canette est pleine.<br />
6. Lorsque la canette ne tourne plus, appuyer sur le bouton Marche/Arrêt<br />
<strong>pour</strong> arrêter la machine.<br />
1 Levier de controle des plages de vitesses<br />
ATTENTION<br />
Lorsque vous retirez la canette, ne tirez pas sur la le siège du dévidoir<br />
de canette. Vous risqueriez de déboîter ou d’enlever la le siège du<br />
dévidoir et d’endommager la machine.<br />
7. Couper le fil, faire glisser l'axe du dévidoir vers la gauche et retirer la<br />
canette.<br />
(Modelo <strong>PS</strong>-2470, <strong>PS</strong>-<strong>3100</strong>)<br />
4. Deslice la palanca del control de velocidad hacia la derecha y a<br />
fondo (velocidad máxima).<br />
5. Presione el pulsador de puesta en Marcha/Parada. La máquina se<br />
parará automáticamente cuando la canilla esté llena.<br />
6. Cuando la canilla se haya detenido, presione el pulsador de<br />
puesta en Marcha/Parada para desconectar la máquina.<br />
1 Palanca de control del rango de velocidad<br />
PRECAUCIÓN<br />
Cuando extraiga la bobina, no presione la base del girador de<br />
canilla. De lo contrario, podría aflojar o sacar la base del portabobina<br />
y provocar una avería en la máquina de coser.<br />
7. Corte el hilo, deslice el eje de hacer canilla hacia la izquierda y<br />
retire la canilla.<br />
KNOWING YOUR SEWING MACHINE<br />
CONNAITRE SA MACHINE A COUDRE<br />
CONOZCA SU MÁQUINA DE COSER<br />
(Modèle <strong>PS</strong>-2360, <strong>PS</strong>-2250)<br />
4. Appuyer sur la pédale du rhéostat <strong>pour</strong> commencer à coudre<br />
5. Lorsque la machine s'arrête automatiquement parce que la canette est<br />
pleine, retirer le pied de la pédale.<br />
ATTENTION<br />
Lorsque vous retirez la canette, ne tirez pas sur la le siège du dévidoir<br />
de canette. Vous risqueriez de déboîter ou d’enlever la le siège du<br />
dévidoir et d’endommager la machine.<br />
6. Couper le fil, faire glisser l'axe du dévidoir vers la gauche et retirer la<br />
canette.<br />
REMARQUE:<br />
La barre à aiguille ne se déplace pas lorsque la broche du dévidoir est<br />
glissée vers le butoir de la canette la droite.<br />
Immédiatement après le remplissage de la canette, il est normal d'entendre<br />
la machine embrayer lorsque l'on commence à coudre ou que l'on tourne<br />
le volant à la main.<br />
(Modelo <strong>PS</strong>-2360, <strong>PS</strong>-2250)<br />
4. Pise el pedal para comenzar a coser.<br />
5. Cuando la máquina se detenga automáticamente porque la<br />
canilla está llena, retire el pie del pedal.<br />
PRECAUCIÓN<br />
Cuando extraiga la bobina, no presione la base del girador de<br />
canilla. De lo contrario, podría aflojar o sacar la base del portabobina<br />
y provocar una avería en la máquina de coser.<br />
6. Corte el hilo, deslice el eje de hacer canilla hacia la izquierda y<br />
retire la canilla.<br />
NOTA:<br />
La barra de la aguja no se despla zará cuando el eje de bobinado de<br />
la canilla se deslice hacia la derecha.<br />
Inmediatamente después de bobinar la canilla, si empieza a coser o<br />
gira la polea, normalmente oirá el sonido del encaje del embrague.<br />
ATTENTION<br />
Veillez à bien suivre la procédure décrite. Si le fil n’est pas<br />
complètement, que vous bobinez la canette et que le fil est détendu,<br />
il risque de s’emmêler autour de la canette et de casser l’aiguille.<br />
ATTENTION<br />
Si vous n’installez pas correctement la canette, il se peut que la<br />
tension du fil se relâche, que l’aiguille casse et que vous vous<br />
blessiez.<br />
PRECAUCIÓN<br />
Asegúrese de seguir el proceso descrito. Si no corta el hilo<br />
completamente y la bobina está enrollada, es posible que,<br />
cuando el hilo corra lentamente, éste se enrolle alrededor de la<br />
bobina y rompa la aguja.<br />
PRECAUCIÓN<br />
Si la bobina no está colocada correctamente, el hilo puede<br />
perder tensión, romper la aguja y causar alguna lesión.<br />
1 Bobiné correctement<br />
2 Mal bobiné<br />
1 Bobinado correcto<br />
2 Bobinado incorrecto<br />
36
KNOWING YOUR SEWING MACHINE<br />
CONNAITRE SA MACHINE A COUDRE<br />
CONOZCA SU MÁQUINA DE COSER<br />
Lower Threading<br />
CAUTION<br />
Setting the bobbin improperly may cause the thread tension<br />
to loosen, breaking the needle and resulting in injury.<br />
1 2<br />
1 Wound evenly<br />
2 Wound poorly<br />
CAUTION<br />
Be sure to turn off the power. If you accidentally press the<br />
Start/Stop button or step on the foot controller and the<br />
machine begins to operate, injury could result.<br />
1. Raise the needle to its highest position by turning the balance<br />
wheel toward you (counterclockwise) and raise the presser foot<br />
lever.<br />
2. Slide the button and open the cover.<br />
1 Slide button<br />
2 Cover<br />
2<br />
1<br />
3. Insert bobbin and deliver thread end through the slit, then pull the<br />
thread to cut.<br />
CAUTION<br />
Be sure the bobbin is set so the thread unrolls in the correct<br />
direction. If the thread unrolls in the wrong direction, it may<br />
cause the thread tension to be incorrect or the needle to<br />
break.<br />
1<br />
2<br />
4. Replace the bobbin cover. Place the left tab in place (see arrow<br />
1 at left), then press lightly on the right side (see arrow 2 at left)<br />
until the cover clicks into place.<br />
* You can begin sewing immediately without drawing up the<br />
bobbin thread.<br />
37
Enfilage inférieur<br />
ATTENTION<br />
Si vous n’installez pas correctement la canette, il se peut que la<br />
tension du fil se relâche, que l’aiguille casse et que vous vous<br />
blessiez.<br />
1 Bobiné correctement<br />
2 Mal bobiné<br />
ATTENTION<br />
Ne pas oublier d'éteindre la machine. La machine peut se mettre<br />
en marche et causer des blessures si le bouton de Marche/Arrêt ou<br />
la pédale est enfoncé accidentellement.<br />
Enhebrado inferior<br />
PRECAUCIÓN<br />
Si la bobina no está colocada correctamente, el hilo puede<br />
perder tensión, romper la aguja y causar alguna lesión.<br />
1 Bobinado correcto<br />
2 Bobinado incorrecto<br />
PRECAUCIÓN<br />
Asegúrese de desconectar la alimentación. Si presiona<br />
accidentalmente el botón de puesta en Marcha/Parada o pisa el<br />
pedal y la máquina se pone en marcha, podrá hacerse daño.<br />
KNOWING YOUR SEWING MACHINE<br />
CONNAITRE SA MACHINE A COUDRE<br />
CONOZCA SU MÁQUINA DE COSER<br />
1. Remonter complètement l’aiguille en tournant le volant vers soi (dans<br />
le sens opposé aux aiguilles d’une montre) et lever le levier du piedde-biche.<br />
2. Faire glisser le bouton et ouvrir le couvercle.<br />
1 Glisser le bouton<br />
2 Couvercle<br />
1. Levante la aguja a su posición más alta, girando la ruedecilla hacia<br />
usted (en el sentido contrario al de las manecillas de un reloj) y<br />
levante la palanca del prensatelas.<br />
2. Deslice el botón y abra la tapa.<br />
1 Deslizar el botón<br />
2 Tapa<br />
3. Introduire la canette et faire passer le fil par la rainure puis tirer le fil<br />
<strong>pour</strong> le couper.<br />
3. Introduzca la canilla y pase el cabo del hilo por la ranura. Luego,<br />
tire del hilo para cortarlo.<br />
ATTENTION<br />
Veillez à ce que la canette soit placée de façon à ce que le fil se<br />
déroule dans le bon sens. Si le fil se déroule dans le mauvais sens,<br />
la tension du fil risque de ne pas être correcte ou l’aiguille risque<br />
de casser.<br />
PRECAUCIÓN<br />
Asegúrese de que la bobina está colocada de tal manera que el<br />
hilo se enrolla en la dirección correcta. Si el hilo se enrolla en la<br />
dirección equivocada, la tensión del hilo podría ser incorrecta o<br />
la aguja podría romperse.<br />
4. Replacez le couvercle du compartiment à canette. Mettez le taquet de<br />
gauche en place (voir flèche 1 à gauche) et appuyez doucement sur le<br />
côté droit (voir flèche 2 à gauche) jusqu’à ce que le couvercle soit en<br />
place (vous devez entendre un déclic).<br />
* Vous pouvez commencer à coudre immédiatement, sans remonter le<br />
fil de la canette.<br />
4. Abra la tapa de la bobina. Coloque la presilla izquierda (vea la<br />
flecha 1 a la izquierda) y luego presione ligeramente en la parte<br />
derecha (vea la flecha 2 a la izquierda) hasta que la tapa se ajuste<br />
en su lugar.<br />
* Puede empezar a coser inmediatamente, sin necesidad de levantar<br />
el hilo de la bobina.<br />
38
KNOWING YOUR SEWING MACHINE<br />
CONNAITRE SA MACHINE A COUDRE<br />
CONOZCA SU MÁQUINA DE COSER<br />
1<br />
4<br />
2<br />
5<br />
3<br />
Upper Threading<br />
1. Raise the presser foot using the Presser Foot Lever.<br />
2. Raise the needle to its highest position by turning the balance<br />
wheel toward you (counterclockwise).<br />
1<br />
1 Presser foot lever<br />
3. Place a spool of thread on the horizontal spool pin and press a<br />
spool cap onto the spool pin to hold the thread spool firmly in<br />
place.<br />
The thread end should come from the bottom front of the spool.<br />
CAUTION<br />
• If the thread spool and/or spool cap are set incorrectly,<br />
the thread may tangle on the spool pin and cause the<br />
needle to break.<br />
• Use the spool cap (large, medium, or small) that is<br />
closest in size to the thread spool. If a spool cap smaller<br />
than the thread spool is used, the thread may become<br />
caught in the slit on the end of the spool and cause the<br />
needle to break.<br />
CAUTION<br />
Be sure to thread the machine properly. Improper threading<br />
can cause the thread to tangle and break the needle, leading<br />
to injury.<br />
2<br />
4. Deliver the upper thread as shown in this diagram.<br />
5. Make sure to guide the thread through the thread take-up lever<br />
from the right to the left.<br />
2 Thread take-up lever<br />
6. Place thread behind the guide above the needle.<br />
NOTE:<br />
If the thread take-up lever is lowered, the upper thread can not be<br />
wrapped around the thread take-up lever. Be sure to raise the<br />
Presser Foot Lever and the thread take-up before feeding the upper<br />
thread.<br />
Incorrectly feeding the thread may cause sewing problems.<br />
39
1<br />
5<br />
4<br />
3<br />
2<br />
KNOWING YOUR SEWING MACHINE<br />
CONNAITRE SA MACHINE A COUDRE<br />
CONOZCA SU MÁQUINA DE COSER<br />
Mise en place du fil supérieur<br />
1. Remonter le pied-de-biche à l’aide du levier correspondant.<br />
2. Remonter complètement l’aiguille en tournant le volant vers soi (dans<br />
le sens opposé aux aiguilles d’une montre).<br />
1 Levier du pied-de-biche.<br />
3. Placer une bobine de fil sur l’axe horizontal et mettre un disque bloquebobine<br />
<strong>pour</strong> maintenir le fil en place.<br />
Léxtrémité du fil doit provenir du côté inférieur avant de la bobine.<br />
Enhebrado superior<br />
1. Levante el prensatelas con la palanca correspondiente.<br />
2. Levante la aguja a su posición más alta, girando la ruedecilla hacia<br />
usted (en el sentido contrario al de las manecillas de un reloj).<br />
1 Palanca del prensatelas<br />
3. Coloque un carrete de hilo en el portabobinas horizontal previsto<br />
y manténgalo firmemente con el fleje para que no se mueva.<br />
El final del hilo debe proceder de la parte inferior del carrete.<br />
ATTENTION<br />
• Si la bobine et/ou le couvercle de bobine sont mal positionnés,<br />
le fil risque de s’emmêler sur le porte-bobine et l’aiguille risque<br />
de se casser.<br />
• Utilisez la taille de couvercle de bobine (grand, moyen ou petit)<br />
qui se rapproche le plus de celle de la bobine de fil. Si vous<br />
utilisez un couvercle de bobine plus petit que la bobine de fil,<br />
le fil risque de se bloquer dans la fente située à l’extrémité de<br />
la bobine et l’aiguille risque de casser.<br />
PRECAUCIÓN<br />
• Si el carrete de hilo o la tapa del carrete no están colocados<br />
correctamente, el hilo podría enredarse en el portacarrete y<br />
romper la aguja.<br />
• Utilice la tapa del carrete (grande, mediana o pequeña) que<br />
mejor se adapte a la medida del carrete de hilo. Si la tapa del<br />
carrete es más pequeña que el carrete de hilo, éste podría<br />
engancharse en la ranura en el borde del carrete y romper la<br />
aguja.<br />
ATTENTION<br />
Veillez à enfiler correctement le fil dans la machine. Si vous<br />
n’enfilez pas correctement le fil, il risque de s’emmêler, l’aiguille<br />
<strong>pour</strong>rait casser et vous <strong>pour</strong>riez vous blesser.<br />
4. Mettre le fil en place en suivant la ligne de pointillés du diagramme.<br />
5. Bien veiller à guider le fil de la droite vers la gauche du levier releveur.<br />
2 Releveur de fil<br />
6. Placer le fil derrière le guide-fils, au-dessus de l’aiguille.<br />
REMARQUE:<br />
Si le releveur de fil est abaissé, le fil supérieur ne peut pas être mis dans<br />
le releveur.<br />
Toujours relever le levier du pied-de-biche et le releveur de fil avant le<br />
chargement du fil supérieur.<br />
Un mauvais chargement du fil peut en effet provoquer des problèmes de<br />
couture.<br />
PRECAUCIÓN<br />
Asegúrese de enhebrar correctamente. Si no enhebra la aguja<br />
correctamente, podría enredarse el hilo y romperse la aguja, lo<br />
que puede causar lesiones.<br />
4. Enhebre el hilo superior tal como indica el diagrama.<br />
5. Asegúrese de guiar el hilo por la palanca tirahilos, de la derecha<br />
a la izquierda.<br />
2 Palanca tirahilos<br />
6. Coloque el hilo detrás de la guía, arriba de la aguja.<br />
NOTA:<br />
Si la palanca tirahilos está bajada, el hilo superior no podrá enrrollarse<br />
alrededor de la palanca tirahilos. Asegúrese de levantar la palanca<br />
del prensatelas y el tirahilos antes de cargar el hilo superior.<br />
Si carga incorrectamente el hilo, pueden surgir problemas al coser.<br />
40
KNOWING YOUR SEWING MACHINE<br />
CONNAITRE SA MACHINE A COUDRE<br />
CONOZCA SU MÁQUINA DE COSER<br />
(Model <strong>PS</strong>-2470, <strong>PS</strong>-2360, <strong>PS</strong>-<strong>3100</strong>)<br />
1<br />
Using Needle Threader<br />
2<br />
Turn power switch to “O”.<br />
1. Lower the presser foot lever.<br />
2. Turn the balance wheel toward you (counter-clockwise) to raise<br />
the needle holder to the highest position.<br />
3<br />
1 Needle holder<br />
2 Needle threader lever<br />
2<br />
4<br />
1<br />
CAUTION<br />
When using the needle threader, be sure the needle holder is<br />
in the highest position. Otherwise, the hook may be damaged.<br />
3. While lowering the needle threader lever, hook the thread onto<br />
the guide.<br />
4. Pull down the needle threader lever as much as possible, then<br />
rotate the lever toward the back of the machine (away from you).<br />
Make sure that the hook passes through the eye of the needle<br />
and grabs the thread.<br />
• Hold the thread in front of the needle in order to make sure that<br />
the hook grabs it.<br />
1 Needle holder<br />
2 Needle threader lever<br />
3 <strong>Guide</strong><br />
4 Hook holder<br />
5. While lightly holding the thread, rotate the needle threader lever<br />
toward the front of the machine (toward you). The hook will pull<br />
the thread through the needle.<br />
5 Hook<br />
6 Thread<br />
6. Raise the needle threader lever and pull out about 5 cm (2") of<br />
thread through the needle toward the back of the sewing<br />
machine.<br />
5 5 6<br />
CAUTION<br />
The needle threader can only be used with home sewing<br />
machine needles size 75/11-100/16. Check the table on<br />
page 47 for appropriate needle and thread combinations.<br />
Note that, if you are using transparent nylon mono-filament<br />
thread, only needles in the range of 90/14-100/16 can be<br />
used.<br />
CAUTION<br />
The needle threader can not be used to thread the needle<br />
when you are using decorative threads or specialty needles<br />
like the twin needle and wing needle. When using those<br />
types of threads or needles, thread the eye of the needle<br />
manually. Make sure the main power switch is OFF when<br />
threading the needle manually.<br />
41
(Modèle <strong>PS</strong>-2470, <strong>PS</strong>-2360, <strong>PS</strong>-<strong>3100</strong>)<br />
(Modelo <strong>PS</strong>-2470, <strong>PS</strong>-2360, <strong>PS</strong>-<strong>3100</strong>)<br />
Utilisation de l’enfileur<br />
Mettre l’interrupteur principal sur “O”.<br />
1. Abaisser le levier du pied-de-biche.<br />
2. Tourner le volant vers soi (sens antihoraire) <strong>pour</strong> mettre le porteaiguille<br />
dans sa plus haute position.<br />
1 Axe de l’aiguille<br />
2 Levier de l’enfileur d’aiguille<br />
ATTENTION:<br />
Lors de l’utilisation de l’enfileur, toujours aligner le bas de l’axe de<br />
l’aiguille sur le bas du support du crochet d’enfilage avant d’abaisser<br />
le levier enfileur. Sinon, vous risquez d’endommager le crochet.<br />
3. Tout en abaissant le levier enfileur d’aiguille, accrocher le fil dans le<br />
guide-fil.<br />
4. Abaisser le levier enfileur au maximum puis le tourner vers l’arrière de<br />
la machine (l’éloigner de soi). S’assurer que le crochet passe par le<br />
chas de l’aiguille et attrape le fil.<br />
• Tenir le fil vers l’avant de l’aiguille <strong>pour</strong> s’assurer que le crochet<br />
l’attrape.<br />
1 Axe de l’aiguille<br />
2 Levier de l’enfileur d’aiguille<br />
3 <strong>Guide</strong>-fil<br />
4 Support du crochet<br />
5. Tenir légèrement le fil et tourner le levier de l’enfileur d’aiguille vers<br />
l’avant de la machine (vers soi). Le crochet tirera le fil par le chas de<br />
l’aiguille.<br />
5 Crochet<br />
6 Fil<br />
6. Relever le levier de l’enfileur d’aiguille et tirer environ 5 cm de fil par<br />
le chas de l’aiguille, vers l’arrière de la machine à coudre.<br />
ATTENTION<br />
Le levier de l’enfileur d’aiguille ne peut être utilisé qu’avec des<br />
aiguilles de machine à coudre de tailles 75/11 à 100/16. Consultez<br />
le tableau page 47 <strong>pour</strong> déterminer la combinaison fil/aiguille<br />
appropriée. Remarque : Si vous utilisez du fil nylon transparent à<br />
un seul filament, vous pouvez uniquement utiliser les aiguilles de<br />
la gamme 90/14 à 100/16.<br />
ATTENTION<br />
Le levier de l’enfileur d’aiguille ne peut pas être utilisé <strong>pour</strong> faire<br />
passer les fils décoratifs ou lorsque des aiguilles spéciales sont<br />
utilisées, par exemple les doubles aiguilles et les aiguille à ailette.<br />
Lorsque vous utilisez ce type de fils ou d’aiguilles, passez le fil à la<br />
main. Assurez-vous au préalable que l’interrupteur d’alimentation<br />
principal est sur OFF (arrêt).<br />
Uso del enhebrador<br />
Desenchufar la máquina, interruptor principale a “O”.<br />
1. Baje la palanca de la pata del prensatelas.<br />
2. Gire la ruedecilla hacia usted (hacia la izquierda) para levantar el<br />
portaagujas a tope.<br />
1 Enhebrador<br />
2 Palanca del enhebrador<br />
PRECAUCIÓN:<br />
Cuando use el enhebrador, asegúrese de alinear la parte inferior del<br />
soporte de la aguja con la parte inferior del soporte del gancho del<br />
enhebrador antes de bajar la palanca del enhebrador. Si no lo hace,<br />
puede dañar el gancho del enhebrador.<br />
3. Al mismo tiempo que baja la palanca del enhebrador, enganche<br />
el hilo en la guía.<br />
4. Baje la palanca del enhebrador lo máximo posible y gírela hacia<br />
la parte trasera de la máquina (en sentido contrario a usted).<br />
Asegúrese de que el gancho pase por el ojo de la aguja y enganche<br />
el hilo.<br />
• Sujete el hilo frente a la aguja para asegurarse de que quede<br />
enganchado.<br />
1 Enhebrador<br />
2 Palanca del enhebrador<br />
3 Guía<br />
4 Soporte del gancho<br />
5. Al mismo tiempo que sujeta suavemente el hilo, gire la palanca<br />
del enhebrador hacia la parte delantera de la máquina (hacia<br />
usted). El gancho empujará el hilo a través de la aguja.<br />
5 Gancho<br />
6 Hilo<br />
6. Levante la palanca del enhebrador y saque aproximadamente<br />
5 cm (2") del hilo por la aguja hacia la parte posterior de la<br />
máquina de coser.<br />
PRECAUCIÓN<br />
El enhebrador sólo admite agujas de máquinas de coser domésticas<br />
con medidas de 75/11 - 100/16. Consulte la lista en la<br />
página 48 para las combinaciones adecuadas de aguja e hilo.<br />
Note que, si utiliza hilo de nailon transparente monofilamentado,<br />
sólo podrá usar las agujas con medidas entre 90/14 y 100/16.<br />
PRECAUCIÓN<br />
La palanca del enhebrador de aguja no podrá emplearla para<br />
enhebrar cuando esté utilizando hilos decorativos o agujas<br />
especiales tales como la aguja doble o la aguja de orejetas.<br />
Cuando utilice esos tipos de hilos o de agujas, pase manualmente<br />
el hilo por el ojo de la aguja. Asegúrese de desactivar el<br />
interruptor principal de alimentación cuando enhebre la aguja<br />
manualmente.<br />
KNOWING YOUR SEWING MACHINE<br />
CONNAITRE SA MACHINE A COUDRE<br />
CONOZCA SU MÁQUINA DE COSER<br />
42
KNOWING YOUR SEWING MACHINE<br />
CONNAITRE SA MACHINE A COUDRE<br />
CONOZCA SU MÁQUINA DE COSER<br />
Manually Drawing Up<br />
Lower Thread<br />
When sewing gathers or darts, the lower thread can be manually<br />
drawn up so that it will have some excess.<br />
1. Pass the thread along the groove in the direction of the arrow,<br />
and leave it there without cutting it.<br />
• The bobbin cover should still be removed.<br />
2. While lightly holding the end of the upper thread, slowly turn the<br />
balance wheel to the front (counter-clockwise) once by hand to<br />
lower and then raise the needle.<br />
3. Pull on the upper thread to draw up the lower thread.<br />
4. Pull out about 10 cm (4") of both threads and place them toward<br />
the back of the machine under the presser foot.<br />
1 Upper thread<br />
2 Lower thread<br />
1<br />
2<br />
Remontée manuelle du fil de la canette<br />
Lorsque la couture fronce ou plisse, vous pouvez remonter manuellement<br />
un excédent de fil de la canette.<br />
1. Passer le fil le long de la rainure dans le sens de la flèche et le laisser<br />
là, sans le couper.<br />
• Le couvercle de la navette doit être retiré.<br />
2. Tenir légèrement l'extrémité du fil supérieur et imprimer lentement un<br />
tour au volant manuel l'avant (anthoriaire) <strong>pour</strong> abisser et relever<br />
l'aiguille.<br />
txt_Sp<br />
Levantar manualmente<br />
el hilo inferior<br />
Al coser fruncidos o pinzas, puede levantar manualmente el hilo<br />
inferior para que haya un cierto exceso de hilo.<br />
1. Pase el hilo por la ranura siguiendo la dirección de la flecha y<br />
déjelo ahí sin cortarlo.<br />
• La tapa de la canilla no debe estar colocada.<br />
2. Coja con suavidad el final del hilo superior y dé con cuidado una<br />
vuelta con la mano a la ruedecilla hacia delante (hacia la<br />
izguierda) para bajar la aguja.<br />
3. Tirer sur le fil supérieur <strong>pour</strong> remonter le fil inférieur.<br />
4. Tirer environ 10 cm (4") des deux fils et les placer vers l'arrière de la<br />
machine, sous le pied-de-biche.<br />
1 Fil supérieur<br />
2 Fil inférieur<br />
3. Tire del hilo superior para levantar el hilo inferior.<br />
4. Saque unos 10 cm (4") de ambos hilos y colóquelos en dirección<br />
a la parte trasera de la máquina, debajo del prensatelas.<br />
1 Hilo superior<br />
2 Hilo inferior<br />
43
Twin Needle Sewing<br />
Your machine is designed for twin needle sewing, which allows you<br />
to sew with two top threads. You can use the same color or two<br />
different colors of thread for making decorative stitches. Any of the<br />
patterns, except the buttonhole pattern, can be sewn with the twin<br />
needle. When using the Straight Stitch, the Stitch Width Dial should<br />
be set so that the needle is in the center position (between 3 and 4).<br />
However, when other patterns are used, set the Stitch Width Dial<br />
between 0 and 5. See page 28 for details on adjusting the Stitch<br />
Width Dial.<br />
CAUTION<br />
• Use only twin needles made for this machine (part code<br />
X57521-001). Other needles could break, resulting in<br />
damage.<br />
• When sewing with the twin needle, be sure the Stitch<br />
Width Dial is not set above 5 since this may cause the<br />
needle to hit the needle plate and break.<br />
• Do not sew with bent needles. The needle could break<br />
and cause injury.<br />
• When using the twin needle, be sure to use zigzag<br />
presser foot only.<br />
KNOWING YOUR SEWING MACHINE<br />
CONNAITRE SA MACHINE A COUDRE<br />
CONOZCA SU MÁQUINA DE COSER<br />
INSERTING THE TWIN NEEDLE<br />
Insert in the same way a single needle is inserted (refer to page 11).<br />
The flat side of the needle should face toward the back and the<br />
rounded side should face toward you.<br />
Couture avec l’aiguille jumelée<br />
Cette machine à coudre a été conçue <strong>pour</strong> pouvoir être utilisée avec une<br />
aiguille jumelée, permettant ainsi de coudre avec deux fils supérieurs. Il<br />
est possible d’utiliser la même couleur de fil ou deux fils de couleurs<br />
différentes <strong>pour</strong> obtenir des points fantaisie décoratifs. Tous les modèles<br />
de points, à l’exception de la couture de boutonnières, peuvent être réalisés<br />
avec l’aiguille jumelée. Lors de l’utilisation du point droit, le sélecteur de<br />
largeur de point doit être réglé de telle sorte que l’aiguille se trouve au<br />
centre (entre 3 et 4). Lorsque les autres points sont utilisés, le sélecteur peut<br />
être réglé entre 0 et 5. Voir page 28 <strong>pour</strong> de plus amples détails concernant<br />
le réglage du sélecteur de largeur de point.<br />
txt_Sp<br />
Costura con aguja doble<br />
Su máquina de coser ha sido concebida para poder utilizar una aguja<br />
doble y permitir la costura con dos hilos superiores. Puede usar el<br />
mismo color de hilo o dos hilos de colores distintos para puntadas<br />
decorativas. La aguja doble permite coser cualquiera de los patrones,<br />
exceptuando él para hacer ojales. Sin embargo, cuando selecciona<br />
la puntada recta, el selector de ancho de puntada debe estar ajustado<br />
de tal forma que la aguja se encuentre en la posición central (entre<br />
3 y 4). Para los otros modelos de puntadas, dicho selector puede estar<br />
ajustado entre 0 y 5. Véase la página 28 para mayores detalles sobre<br />
el ajuste del selector de ancho de puntada.<br />
ATTENTION<br />
• Utilisez uniquement les aiguilles jumelées conçues <strong>pour</strong> cette<br />
machine (code de la pièce X57521-001). Les autres aiguilles<br />
risqueraient de se casser et d’endommager la machine.<br />
• Lors de la couture avec une aiguille jumelée, le sélecteur de<br />
largeur de point ne doitt pas être réglé sur une valeur supérieure<br />
à 5 car sinon l’aiguille <strong>pour</strong>rait percuter la plaque et se<br />
rompre.<br />
• N’utilisez pas d’aiguilles tordues <strong>pour</strong> coudre. L’aiguille <strong>pour</strong>rait<br />
se casser et vous blesser.<br />
• Lorsque vous utilisez l’aiguille jumelée, n’oubliez pas d’utiliser<br />
uniquement le pied-de-biche <strong>pour</strong> zigzag.<br />
PRECAUCIÓN<br />
• Utilice sólo las agujas dobles específicas para esta máquina<br />
(código de pieza X57521-001). De lo contrario, la aguja<br />
podría romperse y causar una avería.<br />
• Al coser con una aguja doble, debe asegurarse que el selector<br />
de ancho de puntada no está ajustado en un valor superior a<br />
5 ya que en esas circunstancias, la aguja podría golpear la<br />
placa de agujas y romperse.<br />
• No cosa con agujas dobladas. De otra manera, la aguja podría<br />
romperse y causar lesiones.<br />
• Si usa la aguja doble, asegúrese de usar solamente el pie<br />
prensatela de zigzag.<br />
MISE EN PLACE DE L’AIGUILLE JUMELEE<br />
Introduire l’aiguille comme <strong>pour</strong> une aiguille normale (veuillez vous<br />
référer à la page 12). Le côté plat de l’aiguille doit être tourné vers l’arrière<br />
et l’arrondi doit se situer face à l’<strong>utilisateur</strong>.<br />
PARA INTRODUCIR LA AGUJA DOBLE<br />
Introdúzcala de la misma manera que una aguja simple (véase página<br />
12). La parte plana de la aguja debe estar cara hacia atrás mientras<br />
que la parte redonda está cara a usted.<br />
44
KNOWING YOUR SEWING MACHINE<br />
CONNAITRE SA MACHINE A COUDRE<br />
CONOZCA SU MÁQUINA DE COSER<br />
PLACING THE EXTRA SPOOL PIN<br />
Place the vertical spool pin in the hole found on top of the machine<br />
near the horizontal spool pin. Place the second spool of thread onto<br />
the vertical spool pin as shown in fig. A.<br />
A<br />
TWIN NEEDLE THREADING<br />
Each needle should be threaded separately.<br />
B<br />
2<br />
1<br />
1. Threading the Right Needle<br />
Follow the same instructions for single needle threading using<br />
the thread from the spool on the extra spool pin. See page 39 for<br />
more details.<br />
2. Threading the Left Needle<br />
Thread the left needle in the same manner that the right needle<br />
was threaded, but do not pass the thread through the thread<br />
guide above the needle before passing it through the eye of the<br />
left needle as shown below in fig. B.<br />
1 Right needle thread passes through this guide.<br />
2 Left needle thread passes in front of this guide.<br />
CAUTION<br />
The needle threader can not be used. Thread the twin needle<br />
by hand, from front to back. Using the needle threader may<br />
result in damage to the machine.<br />
POUR PLACER UN PORTE-BOBINE SUPPLEMENTAIRE<br />
Placer le porte-bobine vertical dans l’orifice qui se trouve au-dessus de la<br />
machine, près du porte-bobine horizontal. Placer la seconde bobine de fil<br />
sur l’axe vertical comme le montre la fig. A.<br />
ENFILAGE DE L’AIGUILLE JUMELEE<br />
Chaque aiguille doit être enfilée séparément.<br />
1. Enfilage de l’aiguille de droite<br />
Respecter les instructions fournies <strong>pour</strong> l’enfilage d’une seule aiguille<br />
mais en utilisant le fil de la bobine placée sur le porte-bobine supplémentaire.<br />
Voir page 40 <strong>pour</strong> de plus amples détails.<br />
2. Enfilage de l’aiguille de gauche<br />
Enfiler l’aiguille de gauche de la même manière que l’aiguille de droite<br />
mais sans passer le fil par le guide-fils situé au-dessus de l’aiguille.<br />
Passer directement le fil par le chas de l’aiguille gauche, comme le<br />
montre la fig. B.<br />
1 Le fil de l’aiguille droite passe par le guide-fils.<br />
2 Le fil de l’aiguille gauche passe devant le guide-fils.<br />
ATTENTION<br />
Vous ne pouvez utiliser l’enfileur d’aiguille. Enfilez l’aiguille jumelée<br />
manuellement, de l’avant à l’arrière. Si l’enfileur d’aiguille est utilisé,<br />
la machine <strong>pour</strong>rait être endommagée.<br />
COLOCADO EL EJE DE CARRETE SUPLEMENTARIO<br />
Coloque el eje de carrete vertical en el orificio previsto arriba de la<br />
máquina, cerca del eje horizontal. Instale el segundo carrete de hilo<br />
en el eje vertical, tal como ilustrado en la fig. A.<br />
ENHEBRADO DE LA AGUJA DOBLE<br />
Cada una de las agujas debe ser enhebrada por separado.<br />
1. Enhebrado de la aguja derecha<br />
Observe las mismas instrucciones que para el enhebrado de una<br />
sola aguja, pero utilizando el hilo del carrete colocado en el porta<br />
carretes extra. (véase página 40 para mayores detalles al respecto).<br />
2. Enhebrado de la aguja izquierda<br />
Enhebre la aguja izquierda de la misma manera que la aguja<br />
derecha. Sin embargo, no hay que pasar el hilo por la guía que se<br />
sitúa arriba de la aguja. Conviene pasarlo directamente por el ojo<br />
de la aguja izquierda, tal como ilustrado arriba en la fig. B.<br />
1 El hilo de la aguja derecha pasa por la guía.<br />
2 El hilo de la aguja izquierda pasa delante de la guía.<br />
PRECAUCIÓN<br />
No utilice el enhebrador. Enhebre la aguja doble con la mano, de<br />
delante atrás. Si usa el enhebrador, podría estropear la máquina.<br />
45
A<br />
B<br />
1<br />
3<br />
1<br />
3<br />
2<br />
2<br />
5<br />
4<br />
6<br />
4<br />
5<br />
5<br />
~<br />
~<br />
4<br />
4<br />
~<br />
~<br />
3<br />
3<br />
Thread Tension<br />
Thread tension will affect the quality of your stitches. It may need to<br />
be adjusted when you change fabric or thread type.<br />
NOTE:<br />
It is recommended that a test sample be made on a fabric scrap<br />
before sewing on your project.<br />
Possible misadjustments and their results.<br />
Upper tension is too tight. (Fig. A)<br />
Locks appear on the surface of the fabric.<br />
<br />
Decrease the tension by turning the Upper Tension Control<br />
Dial to a lower number.<br />
Upper tension is too loose. (Fig. B)<br />
Locks appear on the reverse side of the fabric.<br />
<br />
Increase the tension by turning the Upper Tension Control Dial<br />
to a higher number.<br />
KNOWING YOUR SEWING MACHINE<br />
CONNAITRE SA MACHINE A COUDRE<br />
CONOZCA SU MÁQUINA DE COSER<br />
C<br />
2<br />
CORRECT TENSION (Fig. C)<br />
Correct tension is important since too much or too little tension<br />
will weaken your seams or cause puckers on your fabric.<br />
1<br />
3<br />
4<br />
1 Surface<br />
2 Reverse side<br />
3 Upper thread<br />
4 Lower thread<br />
5 Locks appear on surface of fabric<br />
6 Locks appear on reverse side of fabric<br />
Tension des fils<br />
La tension des fils affecte la qualité des points. Vous devrez parfois la<br />
régler lors du changement de tissu ou de type de fil.<br />
REMARQUE:<br />
Il est conseillé de toujours effectuer une couture d'essai sur une chute de<br />
tissu avant de coudre sur l'ouvrage proprement dit.<br />
Mauvais réglages possibles et leurs conséquences<br />
Le fil supérieur est trop tendu. (Fig. A)<br />
Des boucles se forment à l'endroit du tissu.<br />
<br />
Diminuer la tension en tournant le disque vers un nombre inférieur.<br />
Le fil supérieur est trop lâche. (Fig. B)<br />
Des boucles se forment à l'envers du tissu.<br />
<br />
Augmenter la tension en tournant le disque vers un nombre supérieur.<br />
TENSION CORRECTE (Fig. C)<br />
Il est essentiel de procéder à un réglage correct de la tension des fils<br />
<strong>pour</strong> avoir des coutures solides sans que le tissu ne fronce.<br />
1 Endroit<br />
2 Envers<br />
3 Fil supérieur<br />
4 Fil de canette<br />
5 Des boucles apparaissent sur l’endroit du tissu<br />
6 Des boucles apparaissent sur l’envers du tissu<br />
txt_Sp<br />
Tensión de los hilos<br />
La tensión de los hilos afectará la calidad de las puntadas: puede<br />
requerir cierto ajuste cuando cambia de tejido o hilo.<br />
NOTA:<br />
Le recomendamos hacer una prueba en un pedazo de tela antes de<br />
empezar a coser en el tejido de trabajo.<br />
Ajustes erróneos posibles y sus resultados<br />
El hilo superior es demasiado tirante (Fig. A)<br />
Aparecen bagas en la superficie del tejido.<br />
<br />
Disminuya la tensión al poner el disco en un número inferior.<br />
La tensión del hilo superior es insuficiente (Fig. B)<br />
Aparecen bagas en el revés del tejido.<br />
<br />
Aumente la tensión al poner el disco en un número superior.<br />
TENSIÓN CORRECTA (Fig. C)<br />
Es ecesario tener una tensión correcta dado que una tensión<br />
insuficiente o demasiado fuerte va a debilitar sus costuras o<br />
fruncir el tejido.<br />
1 Derecho<br />
2 Revés<br />
3 Hilo superior<br />
4 Hilo de bobina<br />
5 Aparece pelusa en la superficie del tejido<br />
6 Aparece pelusa en el reverso del tejido<br />
46
KNOWING YOUR SEWING MACHINE<br />
CONNAITRE SA MACHINE A COUDRE<br />
CONOZCA SU MÁQUINA DE COSER<br />
FABRIC/THREAD/NEEDLE COMBINATIONS<br />
Medium weight fabric<br />
Lightweight fabric<br />
Heavyweight fabric<br />
Stretch fabric<br />
Fabric<br />
Broadcloth<br />
Taffeta<br />
Flannel,<br />
Gabardine<br />
Lawn, Batiste<br />
Georgette<br />
Challis, Satin<br />
Denim<br />
Corduroy<br />
Tweed<br />
Jersey<br />
Tricot<br />
Thread<br />
Type<br />
Cotton, Polyester<br />
Synthetic mercerized<br />
Polyester<br />
Cotton, Polyester<br />
Synthetic mercerized<br />
Polyester<br />
Cotton, Polyester<br />
Synthetic mercerized<br />
Polyester<br />
Polyester<br />
Size<br />
60 - 80<br />
60 - 80<br />
50 - 80<br />
60 - 80<br />
60 - 80<br />
50 - 80<br />
30 - 50<br />
50<br />
50<br />
50 - 60<br />
Size of needle<br />
75/11 - 90/14<br />
65/9 - 75/11<br />
90/14 - 100/16<br />
Ball point needle (golden colored)<br />
75/11 - 90/14<br />
For top stitching<br />
Buttonhole twist<br />
Synthetic mercerized<br />
Cordonnet<br />
30<br />
30<br />
90/14 - 100/16<br />
NOTE:<br />
1. For transparent nylon thread, always use needle 90/14 - 100/16.<br />
2. The same thread is usually used for the bobbin thread and upper threading.<br />
CAUTION<br />
Be sure to follow the needle, thread, and fabric combinations listed in the table. Using an improper combination, especially a<br />
heavyweight fabric (i.e., denim) with a small needle (i.e., 65/9 - 75/11), may cause the needle to bend or break, and lead to injury.<br />
Also, the seam may be uneven, the fabric may pucker, or the machine may skip stitches.<br />
COMBINAISONS TISSU/FIL/AIGUILLE<br />
Tissu moyen<br />
Tissu léger<br />
Tissu lourd<br />
Tissu élastique<br />
Tissu<br />
Drap fin<br />
Taffetas<br />
Flanelle,<br />
Gabardine<br />
Linon, Batiste<br />
Crêpe georgette<br />
Challis, Satin<br />
Toile de jean<br />
Velours côtelé<br />
Tweed<br />
Jersey<br />
Tricot<br />
Fil<br />
Type<br />
Coton, Polyester<br />
Mercerisé synthétique<br />
Polyester<br />
Coton, Polyester<br />
Mercerisé synthétique<br />
Polyester<br />
Coton<br />
Mercerisé synthétique<br />
Polyester<br />
Polyester<br />
Taille<br />
60 - 80<br />
60 - 80<br />
50 - 80<br />
60 - 80<br />
60 - 80<br />
50 - 80<br />
30 - 50<br />
50<br />
50<br />
50 - 60<br />
Taille de l’aiguille<br />
75/11 - 90/14<br />
65/9 - 75/11<br />
90/14 - 100/16<br />
Aiguille à pointe boule (dorée)<br />
75/11 - 90/14<br />
Pour couture supérieure<br />
Mercerisé synthétique<br />
Cordonnet<br />
30<br />
30<br />
90/14 - 100/16<br />
REMARQUE:<br />
1. Pour le fil en nylon transparent, toujours utiliser une aiguille 90/14 à 100/16.<br />
2. En général, on utilise le même fil <strong>pour</strong> la canette et l’enfilage supérieur.<br />
ATTENTION<br />
Veillez à respecter les combinaisons d’aiguille, fil et tissu du tableau. Si vous utilisez une combinaison inadéquate, et surtout du tissu lourd (par<br />
ex. : toile de jean) avec une petite aiguille (par ex. : 65/9 à 75/11), vous risquez de tordre ou de casser l’aiguille, et de vous blesser. En outre,<br />
il se peut que la couture soit irrégulière, que le tissu fronce ou que la machine saute des points.<br />
47
COMBINACIONES DE TEJIDO/HILO/AGUJA<br />
Tejido mediano<br />
Tejido ligero<br />
Tejido pesado<br />
Tejido elástico<br />
Tejido<br />
Paño<br />
Tafetán<br />
Franela,<br />
Gabardina<br />
Lino, Batista<br />
Punto Georgette<br />
Challis, Satén<br />
Mahón<br />
Cordura<br />
Cheviot<br />
Jersey<br />
Punto<br />
Hilo<br />
Tipo<br />
Algodón, Poliéster<br />
Mercerización sintética<br />
Poliéster<br />
Algodón, Poliéster<br />
Mercerización sintética<br />
Poliéster<br />
Algodón<br />
Mercerización sintética<br />
Poliéster<br />
Poliéster<br />
Medida<br />
60 - 80<br />
60 - 80<br />
50 - 80<br />
60 - 80<br />
60 - 80<br />
50 - 80<br />
30 - 50<br />
50<br />
50<br />
50 - 60<br />
Medida de la aguja<br />
75/11 - 90/14<br />
65/9 - 75/11<br />
90/14 - 100/16<br />
Aguja de punta redonda (color dorado)<br />
75/11 - 90/14<br />
KNOWING YOUR SEWING MACHINE<br />
CONNAITRE SA MACHINE A COUDRE<br />
CONOZCA SU MÁQUINA DE COSER<br />
Para costuras sobrepuestas<br />
Torzal para ojales<br />
Mercerización sintética<br />
Cordoncillo de seda<br />
30<br />
30<br />
90/14 - 100/16<br />
NOTA:<br />
• Para hilo de nailon transparente, use siempre agujas 90/14 - 100/16.<br />
• Para el hilo de la bobina y el hilo superior, se suele utilizar siempre el mismo hilo.<br />
PRECAUCIÓN<br />
Asegúrese de utilizar las combinaciones de aguja, hilo y tejido listadas en la tabla. Si sigue una combinación inadecuada, especialmente<br />
una tela gruesa, como el mahón, con una aguja pequeña (65/9 - 75/11), podría doblar o romper la aguja y causar lesiones. Además, la costura<br />
puede resultar irregular, la tela puede fruncirse o se pueden escapar pespuntes.<br />
48
STRAIGHT AND ZIGZAG STITCHING<br />
POINTS DROITS ET POINTS ZIGZAG<br />
PUNTADAS RECTAS Y ZIGZAGE<br />
PLEASE READ BEFORE SEWING<br />
CAUTION<br />
• To avoid injury, pay special attention to the needle while the machine is in operation. Keep your hands away from moving<br />
parts while the machine is in operation.<br />
• Do not stretch or pull the fabric during sewing. Doing so may lead to injury.<br />
• Do not use bent or broken needles. Doing so may lead to injury.<br />
• Take care that the needle does not strike basting pins or other objects during sewing. Otherwise, the needle may break and<br />
cause injury.<br />
• If stitches become bunched, lengthen the stitch length setting before continuing sewing. Otherwise, the needle may break<br />
and cause injury.<br />
• Always use the correct presser foot. If the wrong presser foot is used, the needle may strike the presser foot and bend or<br />
break, resulting in injury.<br />
• When you turn the balance wheel by hand, always turn it to the front (counter-clockwise). Turning it the other way may cause<br />
the thread to tangle, and result in damage to the needle or fabric or injury.<br />
A LIRE AVANT DE COMMENCER À COUDRE<br />
ATTENTION<br />
• Pour éviter toute blessure, faites particulièrement attention à l’aiguille lorsque la machine est en marche. Ne laissez pas les mains près des<br />
pièces mobiles lorsque la machine est en marche.<br />
• Ne tendez pas et ne tirez pas sur le tissu durant le travail de couture; vous <strong>pour</strong>riez vous blesser.<br />
• N’utilisez pas d’aiguilles tordues ou cassées; vous <strong>pour</strong>riez vous blesser.<br />
• Veillez à ce que l’aiguille ne frappe pas d’épingles ou autres objets durant la couture. Sinon, l'aiguille risque de casser et de vous blesser.<br />
• Si les points se tassent, utilisez une longueur de point supérieure avant de continuer de coudre. Sinon, l'aiguille risque de casser et de vous<br />
blesser.<br />
• Utilisez toujours le correct pied-de-biche. Si vous n’utilisez pas le bon modèle de pied-de-biche, l’aiguille risque de le toucher, de se tordre<br />
ou de casser, et de vous blesser.<br />
• Le volant doit toujours être tourné à la main vers l’avant (sens antihoraire). S’il est tourné dans l’autre sens le fil peut s’emmêler et l’aiguille<br />
ou le tissu peut être endommagé. On peut aussi se blesser.<br />
LEA ESTO POR FAVOR ANTES DE COSER<br />
PRECAUCIÓN<br />
• Para evitar lesiones, preste especial atención a la aguja cuando la máquina esté en funcionamiento. Mantenga las manos alejadas de<br />
las piezas móviles mientras la máquina esté en funcionamiento.<br />
• No empuje o estire la tela durante la costura. Podría causar daños.<br />
• No utilice agujas dobladas o rotas. Podría causar daños.<br />
• Asegúrese de que la aguja no tropieza con las patillas del hilvanado durante la costura. De otra manera, la aguja podría romperse y causar<br />
lesiones.<br />
• Si las puntadas se amontonan, alargue la puntada antes de continuar. De otra manera, la aguja podría romperse y causar lesiones.<br />
• Coloque siempre el pie prensatela adecuado. Si utiliza un pie prensatela inadecuado, la aguja podría chocar contra el pie prensatela<br />
y doblarse o romperse, lo que puede causar lesiones.<br />
• Cuando gire la ruedecilla a mano, gírela siempre hacia delante (hacia la izquierda). Si la gira hacia el otro lado el hilo podrá enredarse,<br />
y hacer que la aguja o el tejido se dañen o usted se lastime.<br />
49
Straight Stitching<br />
Pattern Stitch Length Stitch Width<br />
(Straight Stitch) 1-4.5<br />
(Triple Stretch Stitch)<br />
STARTING SEWING<br />
1. Turn the Pattern Selection Dial to show your desired stitch in the<br />
Pattern Indication Window. Setting the Pattern Selection Dial to<br />
Straight Stitch or Triple Stretch Stitch is required.<br />
2. Raise the needle to its highest position and lift the presser foot<br />
lever.<br />
3. Pull the upper thread toward the back of the presser foot.<br />
4. Place the fabric under the presser foot and position the needle<br />
1 cm (3/8") from the edge of the fabric.<br />
5. Lower the presser foot.<br />
SS<br />
6.5<br />
(Model <strong>PS</strong>-2360, <strong>PS</strong>-2250)<br />
6. To backtack, push down the Reverse Sewing Lever as far as<br />
possible, then step down on the foot controller to start reverse<br />
sewing.<br />
7. Release the Reverse Sewing Lever and start sewing in the<br />
forward direction by applying pressure to the foot controller.<br />
(Model <strong>PS</strong>-2470, <strong>PS</strong>-<strong>3100</strong>)<br />
6. To backtack, push down the Reverse Sewing Lever as far as<br />
possible to start reverse sewing.<br />
7. Release the Reverse Sewing Lever and press the Start/Stop<br />
Button to start sewing in the forward direction.<br />
* When the foot controller is used, step 6 and 7 are the same as<br />
for Model <strong>PS</strong>-2360, <strong>PS</strong>-2250.<br />
STRAIGHT AND ZIGZAG STITCHING<br />
POINTS DROITS ET POINTS ZIGZAG<br />
PUNTADAS RECTAS Y ZIGZAGE<br />
* Reverse sewing is used for locking the end of seams and where<br />
reinforcement is needed.<br />
CAUTION<br />
Be sure the needle does not strike a basting pin, or any<br />
other objects, during sewing. The thread could tangle or the<br />
needle could break, causing injury.<br />
CHANGING SEWING DIRECTION<br />
1. Stop the machine at the point where you wish to change<br />
direction with the needle still in the fabric.<br />
2. Raise the presser foot and turn the fabric to line up its new<br />
direction using the needle as a turning point.<br />
3. Lower the presser foot and start sewing in the new direction.<br />
FINISHING SEWING<br />
Reverse stitching is used to lock the threads at the end of the seam<br />
or wherever reinforcement is needed.<br />
1. Stitch to the end of the seam and stop.<br />
2. Push the Reverse Sewing Lever and stitch backwards for 1 cm<br />
(3/8") from the end of the fabric.<br />
50
STRAIGHT AND ZIGZAG STITCHING<br />
POINTS DROITS ET POINTS ZIGZAG<br />
PUNTADAS RECTAS Y ZIGZAGE<br />
Point droit<br />
Puntadas rectas<br />
Modèle de point Longueur de point Largeur de point<br />
(Point droit) 1-4,5<br />
6,5<br />
(Point triple)<br />
SS<br />
Modelo de puntada Largo de puntada Ancho de puntada<br />
(Puntada recta) 1-4,5<br />
6,5<br />
(Triple puntada pespunto) SS<br />
POUR COMMENCER À COUDRE<br />
1. Tourner le sélecteur de modèle de point <strong>pour</strong> que le point souhaité<br />
s’affiche dans la fenêtre d’indication. Mettre le sélecteur sur le point<br />
droit ou le triple point élastique selon les besoins.<br />
2. Remonter complètement l’aiguille et relever le levier du pied-debiche.<br />
3. Tirer le fil supérieur vers l’arrière du pied-de-biche.<br />
4. Placer le tissu sous le pied-de-biche et mettre l’aiguille à 1 cm du bord<br />
du tissu.<br />
5. Abaisser le pied-de-biche.<br />
(Modèle <strong>PS</strong>-2360, <strong>PS</strong>-2250)<br />
6. Pour coudre en marche arrière, appuyer au maximum sur le levier de<br />
couture arrière, puis appuyer sur la pédale <strong>pour</strong> commencer à coudre.<br />
7. Relâcher le levier de couture en marche arrière et commencer à coudre<br />
en avant en appuyant sur la pédale.<br />
(Modèle <strong>PS</strong>-2470, <strong>PS</strong>-<strong>3100</strong>)<br />
6. Pour coudre en marche arrière, appuyer au maximum sur le levier de<br />
couture arrière <strong>pour</strong> commencer à coudre.<br />
7. Relâcher le levier de couture en marche arrière et appuyez sur le bouton<br />
Marche/Arrêt <strong>pour</strong> commencer à coudre en avant.<br />
* Si la pédale est utilisée, les étapes 6 et 7 sont identiques à celles du<br />
modèle <strong>PS</strong>-2360, <strong>PS</strong>-2250.<br />
* La couture en marche arrière sert à arrêter ou à renforcer les coutures.<br />
PARA EMPEZAR A COSER<br />
1. Gire el selector de puntada hasta que la puntada que desea<br />
aparezca en el indicador de puntada. Es necesario situar el<br />
selector de puntada en puntada recta o en triple puntada pespunte.<br />
2. Levante la aguja a su posición más alta y levante la palanca del<br />
prensatelas.<br />
3. Tire el hilo superior hacia la parte de atrás del prensatelas.<br />
4. Coloque el tejido debajo del prensatelas y posicione la aguja a 1<br />
cm (3/8") de la orilla del tejido.<br />
5. Baje el prensatelas.<br />
(Modelo <strong>PS</strong>-2360, <strong>PS</strong>-2250)<br />
6. Para retroceder, baje a fondo el pulsador de retroceso, luego<br />
presione el pedal para empezar a coser hacia atrás.<br />
7. Suelte el pulsador de retroceso y empiece a coser hacia delante<br />
presionando el pedal.<br />
(Modelo <strong>PS</strong>-2470, <strong>PS</strong>-<strong>3100</strong>)<br />
6. Para retroceder, baje a fondo el pulsador de retroceso para<br />
empezar a coser hacia atrás.<br />
7. Suelte el pulsador de retroceso y apriete el botón de puesta en<br />
Marcha/Parada para empezar a coser hacia delante.<br />
* Cuando utilice el pedal, los pasos 6 y 7 son iguales que para los<br />
modelo <strong>PS</strong>-2360, <strong>PS</strong>-2250.<br />
* El cosido hacia atrás se utiliza para rematar el final de costuras y<br />
cuando es necesario reforzar.<br />
ATTENTION<br />
Pendant la couture, veillez à ce que l’aiguille ne touche pas une<br />
épingle placée <strong>pour</strong> maintenir le tissu ou tout autre objet. Le fil<br />
risquerait de s'emmêler ou l’aiguille <strong>pour</strong>rait casser et vous<br />
blesser.<br />
PRECAUCIÓN<br />
Asegúrese de que la aguja no roza el alfiler o cualquier otro<br />
objeto. El hilo podría enrollarse o la aguja podría romperse y<br />
causar lesiones.<br />
POUR MODIFIER LE SENS DE LA COUTURE<br />
1. Arrêter la machine à l’endroit où vous souhaitez changer de sens de<br />
couture, en veillant à ce que l’aiguille soit bien piquée dans le tissu.<br />
2. Relever le pied-de-biche et faire pivoter le tissu autour de l’axe formé<br />
par l’aiguille, <strong>pour</strong> l’orienter dans la nouvelle direction.<br />
3. Abaisser le pied-de-biche et commencer à coudre dans le nouveau<br />
sens.<br />
POUR TERMINER LA COUTURE<br />
Utiliser la marche arrière <strong>pour</strong> arrêter les fils à la fin d’une couture ou <strong>pour</strong><br />
la renforcer.<br />
1. Piquer jusqu’au bout de la couture puis arrêter la machine.<br />
2. Appuyer sur le levier de couture en marche arrière et coudre en arrière<br />
sur 1 cm à partir du bord du tissu.Removing the Material from the<br />
Machine.<br />
CAMBIO DE SENTIDO DE COSTURA<br />
1. Pare la máquina donde quiera cambiar de sentido, con la aguja<br />
picada en el tejido.<br />
2. Levante el prensatelas y gire el tejido en la dirección que debe<br />
seguir, usando la aguja como placa giratoria.<br />
3. Baje el prensatelas y empiece a coser en la nueva dirección tal<br />
como ilustrado.<br />
PARA TERMINAR LAS COSTURAS<br />
La puntada de retroceso se usa para trabar los hilos al final de una<br />
costura o en cualquier punto donde sea necesario reforzar la costura.<br />
1. Cosa hasta el final de la costura y pare.<br />
2. Apriete el pulsador de retroceso y cosa hacia atrás sobre 1 cm (3/<br />
8") a partir de la orilla del tejido.<br />
51
REMOVING THE MATERIAL FROM THE MACHINE<br />
(Model <strong>PS</strong>-2360, <strong>PS</strong>-2250)<br />
1. Stop the machine.<br />
Raise the needle to its highest position and make sure that the<br />
thread take-up lever is also in its highest position.<br />
(Model <strong>PS</strong>-2470, <strong>PS</strong>-<strong>3100</strong>)<br />
1. Press the Start/Stop Button again. The needle stops in its<br />
highest position.<br />
1<br />
2. Lift the presser foot and pull the fabric out gently to the left side.<br />
3. Cut both threads with the thread cutter located on the left side of<br />
the machine.<br />
1 Thread cutter<br />
4. To prepare the machine for the next seam, pull about 10 cm (4")<br />
of thread through the toes of the presser foot toward the back of<br />
the machine.<br />
TOP STITCHING AND STRETCH MATERIALS<br />
Straight Stitch is used for top stitching and sewing lightweight<br />
fabrics.<br />
Triple Stretch Stitch is used for stretch fabrics.<br />
STRAIGHT AND ZIGZAG STITCHING<br />
POINTS DROITS ET POINTS ZIGZAG<br />
PUNTADAS RECTAS Y ZIGZAGE<br />
POUR RETIRER LE TISSU DE LA MACHINE<br />
(Modèle <strong>PS</strong>-2360, <strong>PS</strong>-2250)<br />
1. Arrêter la machine.<br />
Relever complètement l'aiguille et s'assurer que le releveur de fil est<br />
également à sa position la plus haute.<br />
(Modèle <strong>PS</strong>-2470, <strong>PS</strong>-<strong>3100</strong>)<br />
1. Réappuyer sur le bouton "Marche/Arret". L'aiguille s'arrête dans sa<br />
position la plus haute.<br />
2. Relever le pied-de-biche et dégager doucement le tissu vers la gauche.<br />
3. Couper les deux fils avec le coupe-fils situé sur le côté gauche de la<br />
machine.<br />
1 Coupe-fils<br />
4. Afin de préparer la machine <strong>pour</strong> la couture suivante, tirer environ 10<br />
cm de fil et le passer entre les branches du pied-de-biche, vers l’arrière<br />
de la machine.<br />
“HAUTE COUTURE” ET TISSUS ÉLASTIQUES<br />
Le point droit sert <strong>pour</strong> la haute couture et <strong>pour</strong> la couture de tissus fins.<br />
Le triple point élastique s’utilise <strong>pour</strong> les tissus élastiques.<br />
PARA RETIRAR EL TEJIDO DE LA MÁQUINA<br />
(Modelo <strong>PS</strong>-2360, <strong>PS</strong>-2250)<br />
1. Pare la máquina.<br />
Levante al máximo la aguja y asegúrese de que la palanca del<br />
tirahilos también está en su posición más elevada.<br />
(Modelo <strong>PS</strong>-2470, <strong>PS</strong>-<strong>3100</strong>)<br />
1. Presione de nuevo el pulsador de puesta en Marcha/Parada. La<br />
aguja se detiene en su posición más alta.<br />
2. Levante el prensatelas y saque suavemente el tejido por la<br />
izquierda.<br />
3. Corte ambos hilos con el cortador ubicado en la parte izquierda<br />
de la máquina.<br />
1 Cortador de hilos<br />
4. Con el fin de dejar la máquina preparada para la próxima costura,<br />
tire unos 10 cm (4") del hilo inferior y páselo por los salientes del<br />
prensatelas hacia la parte posterior de la máquina.<br />
PUNTADAS EN DERECHO Y TEJIDOS ELÁSTICOS<br />
La puntada recta sirve para la costura superior y para la costura de<br />
tejidos ligeros.<br />
La puntada de triple pespunte se usa para los tejidos elásticos.<br />
52
STRAIGHT AND ZIGZAG STITCHING<br />
POINTS DROITS ET POINTS ZIGZAG<br />
PUNTADAS RECTAS Y ZIGZAGE<br />
Zigzag Stitching<br />
Pattern Stitch Length Stitch Width<br />
(Zigzag Stitch) F-4.5 0-6.5<br />
ZIGZAG STITCH<br />
Select the Zigzag Stitch using the Pattern Selection Dial. Then,<br />
select the Stitch Length and the Stitch Width.<br />
It is recommended to sew using the Straight Stitch at the beginning<br />
and end of the Zigzag Stitches.<br />
(This acts as a reinforcement stitch.)<br />
SATIN STITCH<br />
When the Zigzag Stitch length is set in the “F” range, it produces a<br />
Satin Stitch (a dense Zigzag Stitch). The Satin Stitch can be used<br />
for making decorative stitches. Select the Zigzag Stitch, then set the<br />
stitch length in the “F” range and set the desired stitch width.<br />
When sewing a satin stitch, use a slightly loose upper thread<br />
tension to produce more beautiful stitches.<br />
* If you use the Satin Stitch Foot, it is easy to see the fabric and<br />
to produce more beautiful stitches.<br />
Point zigzag<br />
Puntadas zigzag<br />
Modèle de point Longueur de point Largeur de point<br />
(Point zigzag) F-4,5 0-6,5<br />
POINT ZIGZAG<br />
Sélectionner le point zigzag avec le sélecteur de modèle de point. Choisir<br />
ensuite la longueur et la largeur du point.<br />
Il est conseillé de coudre des points droits au début et à la fin des points<br />
zigzag (<strong>pour</strong> renforcer la couture).<br />
POINT DE BOURDON<br />
Pour coudre en points de bourdon (points zigzag serrés) et effectuer des<br />
points fantaisie, le sélecteur de longueur de point doit être mis sur “F”.<br />
Sélectionner le point zigzag puis régler la longueur de point dans la zone<br />
“F” et définir la largeur de point souhaitée.<br />
Lors de la couture de points de bourdon, relâcher légèrement la tension du<br />
fil supérieur <strong>pour</strong> produire de plus beaux points.<br />
* Avec le pied <strong>pour</strong> point de bourdon, on peut mieux voir le tissu et faire<br />
de plus beaux points.<br />
Modelo de puntada<br />
Largo de puntada Ancho de puntada<br />
(Puntada zigzag) F-4,5 0-6,5<br />
PUNTADAS ZIGZAG<br />
Seleccione la puntada zigzag con el selector de puntadas. Luego,<br />
elija el largo y ancho de la puntada.<br />
Se recomienda coser siempre unas puntadas rectas al principio y al<br />
final de una costura de puntadas zigzag.<br />
(Actúa como puntada de refuerzo.)<br />
PUNTADA DE REALCE<br />
Cuando se define el largo de la puntada en la parte “F”, se coserán<br />
puntadas tupidas (puntada zigzag muy cerradas) que pueden servir<br />
para hacer puntadas decorativas. Seleccione la puntada zigzag y<br />
luego coloque el selector de largo de puntada en la zona “F” y ajuste<br />
el ancho deseado.<br />
Al coser bordados de realce, disminuya ligeramente la tensión del<br />
hilo superior y conseguirá puntadas más bonitas.<br />
* Si utiliza el prénsatela para puntada de realce, le resultará fácil ver<br />
el tejido y conseguir puntadas aun más bellas.<br />
53
Blind Hem Stitching<br />
Pattern Stitch Length Stitch Width<br />
(Blind Hem Stitch) F-2<br />
(Stretch Blind Hem Stitch)<br />
F-1.5<br />
3-6.5<br />
The Blind Hem Stitch is used to finish the edge of a project like the<br />
hem of a pair of pants without the stitch showing. Use the Blind Hem<br />
Stitch for any non-stretch fabrics and the Stretch Blind Hem Stitch<br />
for stretch fabrics.<br />
1. Both the threads should be the same color as the fabric.<br />
2. Fold back the fabric to the desired location of the hem as shown<br />
in fig. A. Then, fold the edge of the fabric as in fig. B. Leave a<br />
6 mm (15/64") overlap at the edge.<br />
3. Set the Pattern Selection Dial to Blind Hem Stitch or Stretch<br />
Blind Hem Stitch and set the stitch length and width.<br />
4. Sew on the fold as in fig. C.<br />
5. When the fabric is unfolded you will have a Blind Stitch hem as<br />
shown in fig. D.<br />
1 Right side of fabric<br />
2 Wrong side of fabric<br />
NOTE:<br />
The Stretch Blind Hem Stitch is useful for stretch fabrics.<br />
Surjer<br />
Puntadas invisibles<br />
Modèle de point Longueur de point Largeur de point<br />
(Point ourlet invisible) F-2<br />
3-6,5<br />
(Point élastique invisible) F-1,5<br />
Modelo de puntada Largo de puntada Ancho de puntada<br />
(Puntada invisible) F-2<br />
3-6,5<br />
(Puntada invisible elástica) F-1,5<br />
Le point d’ourlet invisible sert à terminer le bord d’un ouvrage, comme le<br />
bas de pantalons, sans que le point apparaisse. Utiliser le point d’ourlet<br />
invisible <strong>pour</strong> tous les tissus non extensibles et le point élastique invisible<br />
<strong>pour</strong> les tissus élastiques.<br />
1. Les deux fils utilisés doivent être de la même couleur que le tissu à<br />
coudre.<br />
2. Plier le tissu à la taille souhaitée <strong>pour</strong> l’ourlet, (comme le montre la fig.<br />
A) puis replier le bord en faisant chevaucher de 6 mm (voir fig. B.)<br />
3. Mettre le sélecteur de modèle de point sur point ourlet invisible ou<br />
point élastique invisible et régler la longueur et la largeur du point.<br />
4. Coudre sur le repli (comme le montre la fig.C.).<br />
5. Lorsque le tissu est déplié, on obtient un ourlet invisible, tel qu’indiqué<br />
dans la fig.D.<br />
1 Endroit du tissu<br />
2 Envers du tissu<br />
REMARQUE:<br />
Utiliser le point élastique invisible <strong>pour</strong> coudre des tissus élastiques.<br />
La puntada de dobladillo invisible sirve para terminar la orilla de una<br />
prenda, tal como el borde inferior de los pantalones, sin que se vea<br />
la costura. Utilice la puntada de dobladillo invisible para todos los<br />
tejidos que no sean elásticos y la puntada invisible elástica para los<br />
tejidos elásticos.<br />
1. Ambos hilos deben ser del mismo color que el tejido.<br />
2. Doble el tejido según la orilla que desee hacer tal como ilustra la<br />
fig. A. Luego, dele la vuelta tal como indica la fig. B. Deje unos<br />
6 mm (15/64") sin coser para esconderlos.<br />
3. Ponga el selector de puntada en puntada invisible o puntada<br />
invisible elástica y ajuste el largo y ancho de la puntada.<br />
4. Cosa en el pliegue tal como muestra la fig. C.<br />
5. Al desdoblar el tejido, tendrá un dobladillo con puntada invisible<br />
tal como lo muestra la fig. D.<br />
1 Lado derecho de la te<br />
2 Dorso de la tela<br />
NOTA:<br />
La puntada elástica invisible (Puntada invisible elástica) se recomienda<br />
para tejidos elásticos.<br />
BUILT-IN STITCHES<br />
POINTS INCLUS<br />
PUNTADAS INCORPORADAS<br />
2<br />
1 1 2<br />
A B C D<br />
1<br />
2<br />
2<br />
1<br />
54
BUILT-IN STITCHES<br />
POINTS INCLUS<br />
PUNTADAS INCORPORADAS<br />
Shell Tuck Stitching<br />
Pattern Stitch Length Stitch Width<br />
(Shell Tuck Stitch) F-3 3-6.5<br />
The Shell Tuck Stitch can be used to sew a picot (lace like) edge on<br />
a lightweight fabric.<br />
1. Set the Pattern Selection Dial to Shell Tuck Stitch.<br />
2. Sew the fabric on the bias, placing it under the presser foot so<br />
that the straight stitches are sewn on the seamline and the<br />
zigzag stitches are sewn slightly over the folded edge.<br />
3. This stitch requires a tighter thread tension than normal.<br />
4. Sew at a slow speed.<br />
Plissé<br />
Puntada ondas<br />
Modèle de point Longueur de point Largeur de point<br />
(Point picot) F-3 3-6,5<br />
Utiliser ce point <strong>pour</strong> réaliser une lisière à picot (semblable à de la dentelle)<br />
sur un tissu léger.<br />
1. Mettre le sélecteur de modèle de point sur le point coquille.<br />
2. Coudre le tissu sur le biais après l’avoir placé sous le pied-de-biche de<br />
sorte que la machine puisse coudre des points droits sur la ligne de<br />
couture et des points zigzag légèrement au-dessus du bord replié.<br />
3. La tension du fil supérieur doit être légèrement plus forte que la<br />
normale.<br />
4. Coudre lentement.<br />
Modelo de puntada<br />
Largo de puntada Ancho de puntada<br />
(Puntada ondas) F-3 3-6,5<br />
La puntada ondas puede usarse para coser una puntilla (como encaje)<br />
en un tejido fino.<br />
1. Ponga el selector de puntada en la puntada ondas.<br />
2. Cosa el tejido en el sesgo, situándolo debajo del prensatelas de tal<br />
forma que la puntada recta se cosa en líneas formando costura y<br />
que las puntadas zigzag cosan las puntillas de los dobladillos.<br />
3. Este trabajo requiere aumentar un poco más la tensión de hilo que<br />
en condiciones normales.<br />
4. Coser a velocidad lenta.<br />
55
A<br />
Elastic Stitching<br />
Pattern Stitch Length Stitch Width<br />
(Elastic Stitch) F-2.5 3-6.5<br />
B<br />
The Elastic Stitch can be used for 3 functions: mending, sewing<br />
elastic or joining fabric. Each is explained below.<br />
Set the Pattern Selection Dial to Elastic Stitch.<br />
MENDING<br />
1. Place the reinforcement fabric under area to be mended.<br />
2. Following the line of the tear, sew using the Elastic Stitch as<br />
illustrated in fig. A.<br />
SEWING ELASTIC<br />
1. Place the elastic on the fabric.<br />
2. As you sew, stretch the elastic both in the front and behind the<br />
presser foot as shown in fig. B.<br />
C<br />
JOINING FABRIC<br />
The Elastic Stitch can be used to join two pieces of fabric together<br />
and is very effective when sewing knitted fabrics. When nylon<br />
thread is used, the stitch will not be visible.<br />
1. Place the edge of the two pieces of fabric together and center<br />
them under the presser foot.<br />
2. Sew them together using the Elastic Stitch taking care to keep<br />
the two fabric edges close together as shown in fig. C.<br />
Point élastique<br />
Puntada elástica<br />
Modèle de point Longueur de point Largeur de point<br />
(Point élastique) F-2,5 3-6,5<br />
Le point élastique possède trois fonctions principales: le raccommodage,<br />
la couture d’élastiques ou l’assemblage de tissus. Chacune de ces trois<br />
fonctions se trouve détaillée ci-dessous.<br />
Mettre le sélecteur de modèle de point sur le point élastique.<br />
REPRISAGE<br />
1. Placer la toile de renfort sous la zone à repriser.<br />
2. Coudre en suivant la ligne de la déchirure. Coudre au point élastique<br />
comme le montre la fig. A.<br />
Modelo de puntada<br />
Largo de puntada Ancho de puntada<br />
(Puntada elástica) F-2,5 3-6,5<br />
Se puede usar la puntada elástica para tres operaciones: los remiendos,<br />
la inserción de gomas elásticas y como puntada de unión para juntar<br />
dos tejidos.<br />
Ponga el selector de puntadas en la puntada elástica.<br />
REMIENDOS<br />
1. Coloque la tela de refuerzo debajo de la zona a rematar.<br />
2. Siguiendo la línea de la rasgadura, cosa con la puntada elástica tal<br />
como ilustrado en la fig. A.<br />
BUILT-IN STITCHES<br />
POINTS INCLUS<br />
PUNTADAS INCORPORADAS<br />
COUTURE D’ELASTIQUES<br />
1. Placer l’élastique sur le tissu.<br />
2. A mesure que l’on coud, tendre l’élastique de part et d’autre du piedde-biche<br />
(voir fig. B).<br />
ASSEMBLAGE DE TISSUS<br />
Le point élastique peut servir à assembler deux morceaux de tissu. Il<br />
s’avère particulièrement efficace <strong>pour</strong> la couture de tricots. Avec du fil<br />
nylon, la couture sera invisible.<br />
1. Placer bord à bord les deux pièces de tissu et les centrer sous le piedde-biche.<br />
2. Les assembler avec le point élastique, en prenant bien soin de garder<br />
les deux pièces bord à bord, comme le montre la fig.C.<br />
INSERCION DE GOMAS ELASTICAS<br />
1. Ponga la goma sobre el tejido.<br />
2. A medida que esté cosiendo, estire el elástico tanto delante como<br />
detrás del prensatelas tal como se muestra en la fig. B.<br />
PUNTADA DE UNION<br />
La puntada elástica puede servir para unir dos trozos de tejido y<br />
resulta muy eficiente para la costura de prendas de punto. Si se usa<br />
un hilo de nilón, la puntada resultará invisible.<br />
1. Junte las orillas de ambos trozos de tejido y céntrelas debajo del<br />
prensatelas.<br />
2. Cosalas juntas con la puntada elástica, teniendo sumo cuidado en<br />
mantener las dos orillas de los tejidos muy juntas, tal como se<br />
aprecia en la fig. C.<br />
56
BUILT-IN STITCHES<br />
POINTS INCLUS<br />
PUNTADAS INCORPORADAS<br />
Double Action Stitching<br />
Pattern Stitch Length Stitch Width<br />
(Bridging Stitch)<br />
(Rampart Stitch) F-3 3-6.5<br />
(Double Action Stitch)<br />
(Decorative Hem Stitch) SS 3-6.5<br />
These stitches are used for joining two pieces of fabric, for example,<br />
when making patchwork.<br />
Set the Pattern Selection Dial to Double Action Stitch, Bridging<br />
Stitch, etc.<br />
Point renforcé<br />
Puntada de acción doble<br />
Modèle de point Longueur de point Largeur de point<br />
(Point pont)<br />
Modelo de puntada<br />
(Puntada puente)<br />
Largo de puntada Ancho de puntada<br />
(Point en remparts) F-3 3-6,5<br />
(Point renforcé)<br />
(Puntada ondas abiertas) F-3 3-6,5<br />
(Puntada de acción doble)<br />
(Ourlet invisible décoratif) SS 3-6,5<br />
(Puntada decorativa<br />
invisible)<br />
SS 3-6,5<br />
Ces points servent à assembler deux morceaux de tissu, par exemple <strong>pour</strong><br />
faire du patchwork.<br />
Mettre le sélecteur de modèle de point sur le point renforcé ou le point<br />
pont.<br />
Estas puntadas sirven para unir piezas de tejido o realizar trabajos<br />
como el patchwork.<br />
Coloque el selector de puntadas en la puntada de acción doble o en<br />
la puntada puente.<br />
57
Scallop Stitching<br />
Pattern Stitch Length Stitch Width<br />
(Scallop Stitch) F-1.5 3-6.5<br />
This machine automatically produces a Scallop Stitch which may<br />
be used as a decorative edging.<br />
1. Set the Pattern Selection Dial to Scallop Stitch.<br />
2. Sew the Scallop Stitch along the edge of the material.<br />
3. If desired, trim around the scallop with scissors to create a<br />
scalloped edge. Be careful not to cut the thread.<br />
* If you use the Satin Stitch Foot, it is easy to see the fabric and<br />
to produce more beautiful stitches.<br />
Feston<br />
Ondas decorativas<br />
Modèle de point Longueur de point Largeur de point<br />
(Feston) F-1,5 3-6,5<br />
Cette machine crée automatiquement un point de feston qui peut servir à<br />
réaliser des lisières décoratives (à picots).<br />
1. Mettre le sélecteur de modèle de point sur le point de feston.<br />
2. Effectuer le point de feston le long de la lisière du tissu.<br />
3. Si on le souhaite, découper autour des coquilles à l’aide d’une paire de<br />
ciseaux <strong>pour</strong> festonner le tissu. Faire attention cependant de ne pas<br />
couper le fil.<br />
Modelo de puntada<br />
Largo de puntada Ancho de puntada<br />
(Puntada festón) F-1,5 3-6,5<br />
Esta máquina puede realizar automáticamente unas ondas decorativas<br />
que pueden servir para decorar los bordes de la tela.<br />
1. Coloque el selector de puntadas en la puntada festón.<br />
2. Cosa las ondas decorativas a lo largo del borde del material.<br />
3. Si lo desea, corte el borde con tijeras, siguiendo las ondas para<br />
crear un borde festonado. Sin embargo, tenga sumo cuidado en<br />
no cortar el hilo.<br />
BUILT-IN STITCHES<br />
POINTS INCLUS<br />
PUNTADAS INCORPORADAS<br />
* Avec le pied <strong>pour</strong> point de bourdon, on peut mieux voir le tissu et faire<br />
de plus beaux points.<br />
* Si utiliza el prénsatela para puntada de realce, le resultará fácil ver<br />
el tejido y conseguir puntadas aun más bellas.<br />
58
BUILT-IN STITCHES<br />
POINTS INCLUS<br />
PUNTADAS INCORPORADAS<br />
Decorative Stitching<br />
Pattern Stitch Length Stitch Width<br />
(Arrowhead Stitch)*<br />
(Triangle Stitch)*<br />
(Parallelogram Stitch)*<br />
F-1 3-6.5<br />
(Bead Stitch)*<br />
(Decorative Stitch) 3-6.5<br />
(Decorative Stitch)<br />
SS<br />
6.5<br />
These stitches can be used for making decorative top stitching and<br />
for smocking.<br />
Set the Pattern Selection Dial to Triangle Stitch, Bead Stitch, etc.<br />
* If you use the Satin Stitch Foot, it is easy to see the fabric and<br />
to produce more beautiful stitches.<br />
Points décoratifs<br />
Puntadas decorativas<br />
Modèle de point Longueur de point Largeur de point<br />
(Point Fleche)*<br />
Modelo de puntada<br />
(Puntada flecha)*<br />
Largo de puntada Ancho de puntada<br />
(Point triangulaire)*<br />
(Point en parallelogramme)*<br />
F-1 3-6,5<br />
(Puntada triángulo)*<br />
(Puntada paralelogramo)*<br />
F-1 3-6,5<br />
(Feston double)*<br />
(Puntada festón doble)*<br />
(Point decoratif) 3-6,5<br />
(Puntada decorativa) 3-6,5<br />
(Point decoratif)<br />
SS<br />
6,5<br />
(Puntada decorativa)<br />
SS<br />
6,5<br />
Ces points peuvent servir <strong>pour</strong> la réalisation de points de fantaisie<br />
décoratifs ou <strong>pour</strong> la création de fronces.<br />
Mettre le sélecteur de modèle de point sur le point triangulaire ou le point<br />
perle.<br />
* Avec le pied <strong>pour</strong> point de bourdon, on peut mieux voir le tissu et faire<br />
de plus beaux points.<br />
Estas puntadas pueden utilizarse para hacer puntadas decorativas en<br />
los bordes y para smocking.<br />
Coloque el selector de puntadas en la puntada triángulo o en la<br />
puntada de festón doble.<br />
* Si utiliza el prénsatela para puntada de realce, le resultará fácil ver<br />
el tejido y conseguir puntadas aun más bellas.<br />
59
Patchwork<br />
Pattern Stitch Length Stitch Width<br />
(Fagoting Stitch) SS 3-6.5<br />
This stitch is used to join two pieces of fabric while leaving a space<br />
between their edges.<br />
1<br />
1. Fold over the edges of the two pieces of fabric for the hem and<br />
baste the edges to a thin piece of paper leaving a small space<br />
between them.<br />
2. Set the Pattern Selection Dial to Fagoting Stitch.<br />
3. Stitch along the edge, pulling both threads slightly when beginning<br />
to sew.<br />
• Use thicker than normal threads for sewing.<br />
4. After sewing, remove the basting and the paper. Finish by tying<br />
knots on the reverse side at the beginning and the end of the<br />
seams.<br />
1.5 mm<br />
1 First needle drop<br />
Patchwork (Assemblage)<br />
Patchwork<br />
Modèle de point Longueur de point Largeur de point<br />
(Point fagot) SS 3-6,5<br />
Ce point serv à réunir deux morceaux de tissu tout en laissant un espace<br />
entre leurs bords respectifs.)<br />
1. Replier les bords des deux morceaux de tissu <strong>pour</strong> faire un ourlet et les<br />
faufiler à du papier fin en laissant un petit espace entre les deux.<br />
2. Mettre le sélecteur de modèle de point sur le point fagot.<br />
3. Piquer le long des bords, en tirant légèrement des deux fils au début.<br />
• Utiliser des fils plus épais que <strong>pour</strong> une couture normale.<br />
4. Après avoir terminé, défaufiler et retirer le papier. Achever en faisant<br />
un noeud à l’envers du tissu, à chaque extrémité des coutures.<br />
1 Début du premier point.<br />
Modelo de puntada<br />
Largo de puntada Ancho de puntada<br />
(Puntada fagoting) SS 3-6,5<br />
Esta puntada sirve para juntar dos piezas de tejido dejando un espacio<br />
entre las dos orillas.)<br />
1. Doble las orillas de las dos piezas de tejido para el dobladillo e<br />
hilvánelas a un papel fino dejando un pequeño espacio entre<br />
ambas piezas.<br />
2. Sitúe el selector de puntada en puntada fagoting.<br />
3. Cosa a lo largo de las orillas, tirando ligeramente de ambos hilos<br />
al comienzo.<br />
• Use hilos más gruesos de lo normal.<br />
4. Después de coser, quite los hilvanes y el papel. Anude los cabos<br />
de los hilos del comienzo y final de la costura por el revés.<br />
BUILT-IN STITCHES<br />
POINTS INCLUS<br />
PUNTADAS INCORPORADAS<br />
1 Primer pespunto de la aguja.<br />
60
BUILT-IN STITCHES<br />
POINTS INCLUS<br />
PUNTADAS INCORPORADAS<br />
A<br />
Overedge Stitching<br />
Pattern Stitch Length Stitch Width<br />
(Elastic Shell Tuck Stitch) F-3<br />
(Elastic Overlock Stitch)*<br />
(Comb Stitch)<br />
SS<br />
3-6.5<br />
B<br />
C<br />
(Elastic Overlock Stitch)<br />
These stitches are used to join together seams and finish them in<br />
one operation. The Elastic Overlock Stitches are useful when<br />
sewing stretch materials.<br />
1. Set the Pattern Selection Dial to Comb Stitch, either Elastic<br />
Overlock Stitch, or Elastic Shell Tuck Stitch.<br />
2. Position the fabric under the presser foot so that the seamline (or<br />
arrowhead point) is approximately 3 mm (1/8") to the left of the<br />
center of the presser foot. This stitch works best with a seam<br />
allowance of approximately 6.5 mm (1/4") as this allows the right<br />
(zigzag) side of the stitch to overlock the cut edge of the fabric<br />
as shown in fig. A.<br />
3. If the seam allowance is wider than the stitch pattern, trim away<br />
any excess fabric after stitching.<br />
A finished Elastic Overlock Stitch is shown in fig. B.<br />
* When sewing the Elastic Overlock Stitch, position the fabric so<br />
that its edge is on the left of the needle. (See fig. C)<br />
Overlock élastique<br />
Puntada por encima de la orilla<br />
Modèle de point Longueur de point Largeur de point<br />
(Plisse Elastique) F-3<br />
Modelo de puntada<br />
(Puntada ondas elásticas) F-3<br />
Largo de puntada Ancho de puntada<br />
(Overlock élastique)*<br />
(Point Peigne)<br />
SS<br />
3-6,5<br />
(Puntada overlock elástica)*<br />
(Puntada peine)<br />
SS<br />
3-6,5<br />
(Overlock élasrique)<br />
(Puntada overlock elástica)<br />
Ces points servent à assembler des coutures et à les terminer en une seule<br />
opération. Les points overlock élastiques sont utiles <strong>pour</strong> la couture de<br />
tissus élastiques.<br />
1. Mettre le sélecteur de modèle de point sur le point peigne, sur le point<br />
overlock étroit (surjet étroit), sur le point overlock élastique ou sur le<br />
point plissé élastique<br />
2. Placer le tissu sous le pied-de-biche de telle manière que la couture<br />
(point d’épine) se trouve à environ 3 mm à gauche du centre du piedde-biche.<br />
Ce point donne d’excellents résultats avec une marge de<br />
couture de 6.5 mm, ce qui permet au côté droit (côté zigzag) du point<br />
de piquer le bord coupé du tissu comme le montre la fig. A.<br />
3. Si l’écart est supérieur à la taille du point, couper l’excédent de tissu<br />
après avoir piqué.<br />
La fig. B. montre un point overlock élastique terminé.<br />
* Pour la couture de points overlock élastiques, positionner le tissu de<br />
sorte que le bord soit à gauche de l'aiguille. (Voir fig. C)<br />
Estas puntadas se usan para juntar costuras y acabarlas en una sola<br />
operación. Las puntadas overlock elásticas son útiles para cuando se<br />
cosen materiales elásticos.<br />
1. Sitúe el selector de puntada en puntada peine, puntada overlock<br />
estrecha, puntada overlock elástica o puntada ondas elástica.<br />
2. Coloque el tejido debajo del prensatelas para que la línea de<br />
costura (con la puntada de flecha) quede unos 3 mm (1/8") a la<br />
izquierda del centro del prensatelas. Esta puntada da los mejores<br />
resultados con una tolerancia de costura de unos 6.5 mm (1/4")<br />
dado que así permite a la parte derecha (zigzag) de la puntada<br />
enganchar la orilla cortada del tejido tal como ilustrado en la fig.<br />
A.<br />
3. Si la tolerancia de costura es más ancha que la puntada, corte<br />
cualquier pedazo de tejido que sobre después de coser.<br />
En la fig. B, puede ver una puntada overlock elástica acabada.<br />
* Cuando cosa con la puntada overlock elástica, ponga el tejido de<br />
forma que su borde quede a la izquierda de la aguja. (Consulte la<br />
Fig. C)<br />
61
Feather Stitching<br />
Pattern Stitch Length Stitch Width<br />
(Feather Stitch) SS 3-6.5<br />
Use the Feather Stitch as a decorative top stitch or when hemming<br />
blankets, tablecloths or draperies or when embroidering.<br />
1. Set the Pattern Selection Dial to Feather Stitch.<br />
2. Place the fabric right side up and sew 1 cm (3/8") from the edge<br />
of the fabric.<br />
3. Trim close to the stitching.<br />
This stitch will prevent the fabric from unravelling.<br />
Triple Zigzag Stretch Stitching<br />
Pattern Stitch Length Stitch Width<br />
(Triple Zigzag Stretch Stitch) SS 3-6.5<br />
This stitch can be used to sew heavyweight stretch fabrics wherever<br />
a Zigzag Stitch could be used. The Triple Zigzag Stretch Stitch<br />
can also be used as a decorative top stitch.<br />
Set the Pattern Selection Dial to Triple Zigzag Stretch Stitch.<br />
Point plume<br />
Puntada pluma<br />
Modèle de point Longueur de point Largeur de point<br />
(Point plume) SS 3-6,5<br />
Utiliser le point plume comme point fantaisie ou comme point d’ourlet<br />
<strong>pour</strong> les couvertures, nappes, tentures ou <strong>pour</strong> des travaux de broderie.<br />
1. Mettre le sélecteur de modèle de point sur le point plume (point<br />
d’épine).<br />
2. Placer le tissu à l’endroit et coudre 1 cm à partir du bord.<br />
3. Couper le tissu au ras des points.<br />
Ce point empêche le tissu de s’effilocher.<br />
Modelo de puntada<br />
Largo de puntada Ancho de puntada<br />
(Puntada pluma) SS 3-6,5<br />
La puntada pluma puede usarse como puntada de tope decorativo o<br />
para el dobladillo de frazadas, manteles, cortinas o bien para<br />
bordado.<br />
1. Coloque el selector de puntadas en la puntada pluma.<br />
2. Coloque el tejido con el derecho arriba y cosa 1 cm (3/8") a partir<br />
de la orilla.<br />
3. Corte el tejido cerca de las puntadas.<br />
Esta puntada impedirá que el tejido se deshilache.<br />
BUILT-IN STITCHES<br />
POINTS INCLUS<br />
PUNTADAS INCORPORADAS<br />
Triple point zigzag<br />
Triple puntada zigzag elástica<br />
Modèle de point Longueur de point Largeur de point<br />
Modelo de puntada<br />
Largo de puntada Ancho de puntada<br />
(Triple point zigzag) SS 3-6,5<br />
(Triple puntada SS 3-6,5<br />
zigzag elástica)<br />
Utiliser ce point <strong>pour</strong> coudre des tissus élastiques épais là où un point<br />
zigzag <strong>pour</strong>rait être utilisé. Le point rick-rack peut aussi servir de point<br />
fantaisie de “haute couture”.<br />
Mettre le sélecteur de modèle de point sur le triple point zigzag élastique.<br />
Esta puntada puede servir para coser materiales gruesos y pesados<br />
siempre y cuando una puntada zigzag pueda utilizarse. Esta puntada<br />
elástica de triple pespunto o puntada festón triple también puede<br />
servir como puntada decorativa en el derecho del tejido.<br />
Coloque el selector de puntadas en la triple puntada zigzag elástica.<br />
62
BUTTONHOLE AND BUTTON SEWING<br />
COUTURE DE BOUTONNIERES ET DE BOUTONS<br />
OJALES Y COSTURA DE BOTONES<br />
A<br />
1<br />
A<br />
(Model <strong>PS</strong>-2470, <strong>PS</strong>-2360, <strong>PS</strong>-<strong>3100</strong>)<br />
Making a Buttonhole<br />
(For 1-step BH Type)<br />
B<br />
2<br />
Pattern Stitch Length Stitch Width Foot<br />
F-1.5<br />
3-5<br />
(Dial 4-7) Buttonhole Foot<br />
3<br />
NOTE:<br />
1. It is recommended to practice making a buttonhole on a scrap<br />
piece of fabric before attempting it on the actual garment.<br />
2. When making buttonholes on soft fabrics, place a stabilizer<br />
material on the underside of the fabric.<br />
C<br />
4<br />
One-step buttonhole-making is a simple process that provides<br />
reliable results.<br />
MAKING A BUTTONHOLE<br />
1. Using tailor’s chalk, mark the position of the buttonhole on the<br />
fabric.<br />
2. Set the Pattern Selection Dial to Buttonhole.<br />
D<br />
5<br />
a<br />
NOTE:<br />
Set the Stitch Width Dial to “7” for a buttonhole with an actual width<br />
of 5 mm or to “4” for a 3-mm-width buttonhole.<br />
3. Attach the buttonhole foot, pull open the button holder and insert<br />
a button. (See fig. B)<br />
* The size of the buttonhole is determined by the button inserted<br />
into the button holder.<br />
4. Align the red line on the presser foot with the mark on the fabric,<br />
then lower the Presser Foot Lever. Be sure to pass the thread<br />
under the presser foot and pull it toward you. (See fig. C)<br />
NOTE:<br />
Do not lower the Presser Foot Lever while pushing in the area of the<br />
presser foot marked a in fig.C. Otherwise the buttonhole will not<br />
be sewn with the correct size.<br />
1 Do not close this gap.(Fig.A)<br />
2 Align the lines on the presser foot.<br />
5. Pull down the buttonhole lever to its lowest position, then lightly<br />
push it toward the back of the machine. (See fig. D)<br />
3 Button holder<br />
4 Mark on fabric<br />
5 Line on presser foot<br />
6. Hold the upper thread and step down on the foot controller (or<br />
press the Start/Stop Button) to begin sewing.<br />
CAUTION<br />
Pulling the thread too strongly may bend or break the<br />
needle, and lead to injury.<br />
3<br />
7. Stitches 1, 2, 3 and 4 are automatically sewn, then stop the<br />
machine.<br />
2 4<br />
1<br />
63
(Modèle <strong>PS</strong>-2470, <strong>PS</strong>-2360, <strong>PS</strong>-<strong>3100</strong>)<br />
Pour coudre une boutonnière<br />
(Type BH 1 étape)<br />
(Modelo <strong>PS</strong>-2470, <strong>PS</strong>-2360, <strong>PS</strong>-<strong>3100</strong>)<br />
Para coser ojales<br />
(Para tipo BH en una operación)<br />
Modèle de Longueur de Largeur de Pied-de<br />
point point point -biche<br />
F-1,5<br />
3-5 Pied <strong>pour</strong><br />
(Disque 4-7) boutonnières<br />
REMARQUE:<br />
1. Il est vivement recommandé de s’entraîner au préalable sur une chute<br />
de tissu avant de coudre la boutonnière sur le tissu souhaité.<br />
2. Lors de la couture de boutonnières sur des tissus légers, placer une<br />
pièce de renfort à l’envers du tissu.<br />
La réalisation de boutonnières (en une seule opération) constitue une<br />
méthode simple <strong>pour</strong> obtenir d’excellents résultats.<br />
POUR FAIRE UNE BOUTONNIERE<br />
1. A l’aide de craie de tailleur, marquer la position de la boutonnière sur<br />
le tissu.<br />
2. Mettre le sélecteur de modèle de point sur la position Boutonnières.<br />
REMARQUE:<br />
Régler le sélecteur de largeur de point sur "7" <strong>pour</strong> coudre une boutonnière<br />
d'une largeur réelle de 5 mm ou sur "4" <strong>pour</strong> une boutonnière de 3 mm de<br />
large.<br />
3. Fixer le pied <strong>pour</strong> boutonnières, tirer <strong>pour</strong> ouvrir la plaque à boutons<br />
et y déposer un bouton. (Voir fig. B)<br />
* Le taille de la boutonnière dépend du bouton introduit dans la plaque<br />
à boutons.<br />
4. Aligner la marque rouge du pied-de-biche sur la marque du tissu puis<br />
abaisser le levier du pied-de-biche.<br />
Passer le fil sous le pied-de-biche et le tirer vers soi. (Voir fig. C)<br />
REMARQUE:<br />
Ne pas abaisser le levier du pied-de-biche tant que vous exercez une<br />
pression sur la zone du pied-de-biche marquée a dans la fig.C. Sinon, la<br />
boutonnière n'aura pas les dimensions voulues.<br />
1 Ne pas obstruer ce vide (Fig. A)<br />
2 Aligner les marques avec la ligne du pied-de-biche<br />
5. Abaisser complètement le levier du pied-de-biche puis le pousser<br />
légèrement vers l'arrière de la machine. (Voir fig. D)<br />
3 Plaque à boutons<br />
4 Marque sur le tissu<br />
5 Ligne sur le pied-de-biche<br />
6. Tenir le fil supérieur et appuyer sur la pédale (ou appuyer sur le bouton<br />
Marche/Arrêt) <strong>pour</strong> commencer à coudre.<br />
Modelo de Largo de Ancho de<br />
puntada puntada puntada<br />
F-1,5<br />
Prensatelas<br />
3-5 Prensatelas<br />
(Dial 4-7) para ojales<br />
NOTA:<br />
1. Le recomendamos hacer una prueba de costura de ojales en un<br />
pedazo de tela antes de empezar a hacerla en el tejido de trabajo.<br />
2. Para hacer ojales en materiales muy finos, coloque un material<br />
estabilizador debajo del tejido.<br />
La función de costura de ojales en una sola operación es un proceso<br />
simple que ofrece increíbles resultados.<br />
COSIDO DEL OJAL<br />
1. Con jaboncillo, marque la posición del ojal en el tejido.<br />
2. Sitúe el selector de puntada en ojales.<br />
NOTA:<br />
Sitúe el selector de ancho de puntada en "7" para coser ojales con una<br />
anchura real de 5 mm, o en "4" para ojales de 3 mm de anchura.<br />
3. Coloque el prensatelas para ojales, tire del soporte del botón hasta<br />
abrirlo e inserte un botón (véase fig. B).<br />
* El botón insertado en el soporte del botón determina el tamaño del<br />
ojal.<br />
4. Alinee la línea roja del prensatelas con la marca del tejido y baje<br />
la palanca del prensatelas. Asegúrese de pasar el hilo por debajo<br />
del prensatelas y tire de él hacia usted (véase fig. C).<br />
NOTA:<br />
No baje la palanca del prensatelas mientras esté presionando la zona<br />
del prensatelas marcada como a en la fig. C, ya que cosería un ojal<br />
de tamaño incorrecto.<br />
1 Permita este espacio. (Fig. A)<br />
2 Alinee las líneas en el prensatelas.<br />
5. Coloque la palanca del prensatelas en su posición más baja y<br />
empújela suavemente hacia la parte trasera de la máquina (véase<br />
fig. D).<br />
3 Prensatelas<br />
4 Marca en el tejido<br />
5 Línea en el prensatelas<br />
6. Sujete el hilo superior y presione el pedal (o apriete el botón de<br />
puesta en Marcha/Parada) para empezar a coser.<br />
ATTENTION<br />
Si vous tirez trop fort sur le fil, vous risquez de plier ou de casser<br />
l’aiguille et de vous blesser.<br />
7. La machine coud automatiquement les points 1, 2, 3 et 4 puis elle<br />
s'arrête.<br />
PRECAUCIÓN<br />
Si tira del hilo demasiado, puede doblar o romper la aguja y<br />
causar lesiones.<br />
7. Las puntadas 1, 2, 3 y 4 se hayan cosido, pare la ináquina de<br />
coser.<br />
BUTTONHOLE AND BUTTON SEWING<br />
COUTURE DE BOUTONNIERES ET DE BOUTONS<br />
OJALES Y COSTURA DE BOTONES<br />
64
BUTTONHOLE AND BUTTON SEWING<br />
COUTURE DE BOUTONNIERES ET DE BOUTONS<br />
OJALES Y COSTURA DE BOTONES<br />
(Model <strong>PS</strong>-2470, <strong>PS</strong>-2360, <strong>PS</strong>-<strong>3100</strong>)<br />
Odd-shaped buttons that do not<br />
fit into the button holder plate<br />
Add the button diameter to its thickness, then set the buttonhole<br />
presser foot scale to this measurement. The distance in the scale<br />
between two lines of the same length is 0.5 cm (3/16").<br />
2<br />
1<br />
4<br />
5<br />
6<br />
3<br />
Example:<br />
For a button with a diameter of 1.5 cm (9/16") and a thickness of<br />
1 cm (3/8"), the scale should be set at 2.5 cm (1").<br />
1 Thickness [1 cm (3/8")]<br />
2 Diameter [1.5 cm (9/16")]<br />
3 Button holder plate<br />
4 Scale<br />
5 Diameter + thickness [2.5 cm (1")]<br />
6 0.5 cm (3/16")<br />
(Modèle <strong>PS</strong>-2470, <strong>PS</strong>-2360, <strong>PS</strong>-<strong>3100</strong>)<br />
Boutons aux formes irrégulières qui ne<br />
s'insèrent pas dans la plaque à boutons<br />
Additionner le diamètre du bouton et son épaisseur, puis régler la réglette<br />
du pied-de-biche <strong>pour</strong> boutonnières en fonction de cette mesure. Sur cette<br />
réglette, deux lignes de même longueur correspondent à un intervalle de<br />
0,5 cm.<br />
Exemple:<br />
Pour un bouton de 1,5 cm de diamètre et de 1 cm d'épaisseur, mettre la<br />
réglette sur 2,5 cm.<br />
1 Epaisseur (1 cm)<br />
2 Diamètre (1,5 cm)<br />
3 Plaque à boutons<br />
4 Réglette<br />
5 Diamètre + épaisseur (2,5 cm)<br />
6 0,5 cm<br />
(Modelo <strong>PS</strong>-2470, <strong>PS</strong>-2360, <strong>PS</strong>-<strong>3100</strong>)<br />
Botones con formas extrañas que no<br />
caben en el soporte del botón<br />
Añada el diámetro del botón a su grosor y coloque la escala del<br />
prensatelas de ojales en esta medida. La distancia entre dos líneas de<br />
igual longitud de la escala es de 0,5 cm. (3/16")<br />
Ejemplo:<br />
Para un botón cuyo diámetro es de 1,5 cm (9/16") y de 1 cm (3/8") de<br />
grosor, la escala debe situarse en 2,5 cm (1").<br />
1 Grosor [1 cm (3/8")]<br />
2 Diámetro [1,5 cm (9/16")]<br />
3 Soporte del botón<br />
4 Escala<br />
5 Diámetro + grosor [2,5 cm (1")]<br />
6 0,5 cm (3/16")<br />
65
(Model <strong>PS</strong>-2250)<br />
Making a Buttonhole<br />
(For 4-step BH Type )<br />
Pattern Stitch Length Stitch Width Foot<br />
F-1.5 3-5 Buttonhole Foot<br />
(Dial 4-7)<br />
2<br />
1<br />
NOTE:<br />
1. It is recommended to practice making a buttonhole on a scrap<br />
piece of fabric before attempting it on the actual garment.<br />
2. When making buttonholes on soft fabrics, place a stabilizer<br />
material on the underside of the fabric.<br />
Buttonhole-making is a simple process that provides reliable<br />
results.<br />
MAKING A BUTTONHOLE<br />
1. Using tailor’s chalk, mark the position and length of the buttonhole<br />
on the fabric.<br />
2. Attach the buttonhole foot and push the frame back until it stops<br />
with the plastic insert in the front of the frame.<br />
3. The front bar tack will be sewn first. Place the fabric under the<br />
presser foot so that the center of the front bar tack mark is<br />
directly under the center of the presser foot and aligned with the<br />
two red lines as shown.<br />
1 Front of chalk mark<br />
2 Red lines<br />
(Modèle <strong>PS</strong>-2250)<br />
Pour coudre une boutonnière<br />
(Type BH 4 étapes)<br />
(Modelo <strong>PS</strong>-2250)<br />
Para coser ojales<br />
(Para tipo BH en cuatro operaciones)<br />
Modèle de Longueur de Largeur de Pied-de<br />
point point point -biche<br />
F-1,5<br />
3-5 Pied <strong>pour</strong><br />
(Disque 4-7) boutonnières<br />
REMARQUE:<br />
1. Il est conseillé de s’exercer à faire des boutonnières d’abord sur un<br />
morceau de tissu.<br />
2. Lorsque les boutonnières sont cousues sur du tissu légers, mettre un<br />
stabilisateur sous le tissu.<br />
Modelo de Largo de Ancho de<br />
puntada puntada puntada<br />
F-1,5<br />
Prensatelas<br />
3-5 Prensatelas<br />
(Dial 4-7) para ojales<br />
NOTA:<br />
1. Se recomienda practicar la costura de ojales en un pedazo de<br />
tejido antes de hacerlo realmente en las prendas.<br />
2. Para hacer ojales en materiales muy finos, coloque un material<br />
estabilizador debajo del tejido.<br />
La couture de boutonnières est simple et garantit de bons résultats.<br />
Couture d’une boutonnière<br />
POUR COUDRE UNE BOUTONNIÈRE<br />
1. Marquer la position et la longueur de la boutonnière à la craie.<br />
2. Fixer le pied <strong>pour</strong> boutonnière et repousser le cadre jusqu'à ce qu’il<br />
s’arrête avec l’insertion de plastique à l’avant du cadre.<br />
3. Le point de bâti avant est cousu en premier. Placer le tissu sous le pied<br />
de biche de sorte que le centre du point de bâti avant soit directement<br />
sous le centre du pied de biche et aligné sur les deux lignes rouges<br />
comme indiqué.<br />
1 Marque à la craie<br />
2 Lignes rouges<br />
La función que le permite coser ojales es un proceso simple que<br />
ofrece increíbles resultados.<br />
COSIDO DEL OJAL<br />
1. Con jaboncillo, marque la posición y el largo del ojal en el tejido.<br />
2. Instale la pata para ojales y vuelva a empujar el marco hasta que<br />
se pare y la inserción plástica se encuentre delante del marco.<br />
3. Primero, se cose el remate de la parte delantera del ojal. Coloque<br />
el tejido debajo del prensatelas de tal manera que la marca del<br />
centro de la barra caiga directamente debajo del centro del<br />
prensatelas y quede alineada con las dos líneas rojas, tal como<br />
ilustra.<br />
1 Parte delantera de la marca con jaboncillo.<br />
2 Líneas rojas<br />
BUTTONHOLE AND BUTTON SEWING<br />
COUTURE DE BOUTONNIERES ET DE BOUTONS<br />
OJALES Y COSTURA DE BOTONES<br />
66
BUTTONHOLE AND BUTTON SEWING<br />
COUTURE DE BOUTONNIERES ET DE BOUTONS<br />
OJALES Y COSTURA DE BOTONES<br />
MAKING A BUTTONHOLE<br />
Step Sewn Portion Pattern How to Sew<br />
Step 1<br />
(Front bar<br />
tack)<br />
a<br />
1. Set the pattern selection dial to “a”.<br />
2. Lower the presser foot and sew 5 to 6 stitches.<br />
3. Stop the machine when the needle is at the left side of the stitches, then raise<br />
the needle from the material.<br />
Step 2<br />
(Left side)<br />
b<br />
1. Turn the pattern selection dial to “b”.<br />
2. Sew the predetermined length of the tailor’s chalk line.<br />
3. Stop the machine when the needle is at the left side of the stitch, then raise the<br />
needle.<br />
Step 3<br />
(Back bar<br />
tack)<br />
c<br />
1. Turn the pattern selection dial to “c” (same position as in step 1).<br />
2. Sew 5 to 6 stitches.<br />
3. Stop the machine when the needle is at the right side of the stitch, then raise the<br />
needle from the material.<br />
Step 4<br />
(Right side)<br />
1. Set the pattern selection dial to “d”.<br />
2. Sew the right side until the needle reaches the stitches sewn in step 1.<br />
d<br />
POUR FAIRE UNE BOUTONNIÈRE<br />
Phase Partie cousue Modèle Comment coudre<br />
txt_F<br />
1er temps<br />
(barre d’arrêt<br />
avant de la<br />
boutonnière)<br />
a<br />
1. Mettre le sélecteur de modèle sur “a”.<br />
2. Abaisser le pied-de-biche et coudre 5 ou 6 points.<br />
3. Arrêter la machine lorsque l’aiguille se trouve à gauche des points et relever l’aiguille du<br />
tissu.<br />
2 ème temps<br />
(côté gauche)<br />
b<br />
1. Mettre le sélecteur de modèle sur “b”.<br />
2. Coudre la longueur de la ligne pré-définie à la craie.<br />
3. Arrêter la machine lorsque l’aiguille se trouve à gauche des points et lever l’aiguille.<br />
3 ème temps<br />
(barre d’arrêt<br />
arrière de la<br />
boutonnière)<br />
4 ème temps<br />
(côté droit)<br />
c<br />
1. Mettre le sélecteur de modèle sur “c” (même position que 1).<br />
2. Coudre 5 à 6 points.<br />
3. Arrêter la machine lorsque l’aiguille se trouve à droite des points et lever l’aiguille du<br />
tissu.<br />
1. Mettre le sélecteur de modèle sur “d”.<br />
2. Coudre la lèvre droite jusqu’à ce que l’aiguille atteigne les points formés à la phase 1.<br />
PARA COSER OJALES<br />
d<br />
Pasos Parte Cosida Número de puntada Como Coser<br />
Paso 1<br />
(Remate de la<br />
parte<br />
delantera)<br />
a<br />
1. Ponga el selector de puntada en “a”.<br />
2. Baje el prensatelas y cosa de 5 a 6 puntadas.<br />
3. Pare la máquina cuando la aguja esté a la izquierda de las puntadas, luego levante<br />
la aguja del tejido.<br />
Paso 2<br />
(Lado<br />
izquierdo)<br />
b<br />
1. Gire el selector de puntada en “b”.<br />
2. Cosa la línea del jaboncillo de la longitud predeterminada.<br />
3. Pare la máquina cuando la aguja esté a la izquierda de la puntada y luego levante<br />
la aguja.<br />
Paso 3<br />
(Remate de la<br />
parte trasera)<br />
c<br />
1. Gire el selector de puntada en “c” (en la misma posición que en el a paso 1).<br />
2. Cosa 5 ó 6 puntadas.<br />
3. Pare la máquina cuando la aguja esté a la derecha de la puntada y luego levante la<br />
aguja del tejido.<br />
Paso 4<br />
(Lado<br />
derecho)<br />
67<br />
d<br />
1. Ponga el selector de puntada en “d”.<br />
2. Cosa la parte derecha hasta que la aguja llegue a las puntadas cosidas en el Paso<br />
1.
(Model <strong>PS</strong>-2470, <strong>PS</strong>-2360, <strong>PS</strong>-2250, <strong>PS</strong>-<strong>3100</strong>)<br />
SECURING THE STITCHING AND CUTTING THE BUTTON-<br />
HOLE<br />
1. To secure the stitching, turn the material 90 degrees<br />
counterclockwise and sew Straight Stitches to the end of the<br />
front bar tack of the buttonhole.<br />
2. Remove the material from the machine. It is recommended that<br />
pins be placed across both ends of the buttonhole as protection<br />
against cutting the stitches.<br />
3. Cut an opening in the middle of the buttonhole with a seam ripper<br />
tool. Be careful not to cut through any stitches.<br />
CAUTION<br />
When using the seam ripper to open the buttonhole, do not<br />
put your hand or finger in the path of the ripper. The ripper<br />
may slip and cause injury.<br />
(Modèle <strong>PS</strong>-2470, <strong>PS</strong>-2360, <strong>PS</strong>-2250, <strong>PS</strong>-<strong>3100</strong>)<br />
COMMENT ARRETER LA COUTURE ET OUVRIR LA BOU-<br />
TONNIERE<br />
1. Pour arrêter la couture, tourner le tissu de 90˚ dans le sens inverse des<br />
aiguilles d’une montre et coudre des points droits jusqu’au bout de la<br />
partie avant de la bride d’arrêt de la boutonnière.<br />
2. Retirer le tissu de la machine. Il est vivement conseillé de placer des<br />
épingles à chaque extrémité de la boutonnière afin de ne pas couper les<br />
barrettes.<br />
3. Couper une ouverture au milieu de la boutonnière à l’aide du découdvite,<br />
en veillant bien à ne couper aucune couture.<br />
(Modelo <strong>PS</strong>-2470, <strong>PS</strong>-2360, <strong>PS</strong>-2250, <strong>PS</strong>-<strong>3100</strong>)<br />
PARA COMPLETAR LAS PUNTADAS Y CORTAR EL OJAL<br />
1. Para asegurar las puntadas, gire el tejido a 90 grados en el sentido<br />
contrario al de las manecillas de un reloj y cosa unas Puntadas<br />
Rectas hasta el final de la línea del remate de la parte delantera.<br />
2. Retire el tejido de la máquina. Se recomienda colocar alfileres en<br />
ambos extremos del ojal para evitar el corte de las puntadas.<br />
3. Corte una apertura en el medio del ojal con el cortador especial<br />
que sirve para abrir costuras. Tenga cuidado en no cortar ninguna<br />
puntada.<br />
ATTENTION<br />
Lorsque vous utilisez le découd-vite <strong>pour</strong> ouvrir la boutonnière, ne<br />
mettez pas votre main ou vos doigts en face du découd-vite. Le<br />
découd-vite risque de glisser et de vous blesser.<br />
PRECAUCIÓN<br />
Cuando use el abreojales para abrir el ojal, no ponga la mano o<br />
el dedo en la dirección del corte. Se le podría escapar el<br />
abreojales y hacerse daño.<br />
BUTTONHOLE AND BUTTON SEWING<br />
COUTURE DE BOUTONNIERES ET DE BOUTONS<br />
OJALES Y COSTURA DE BOTONES<br />
68
BUTTONHOLE AND BUTTON SEWING<br />
COUTURE DE BOUTONNIERES ET DE BOUTONS<br />
OJALES Y COSTURA DE BOTONES<br />
Buttonhole Fine Adjustment<br />
2<br />
3 4<br />
5<br />
F<br />
1<br />
5<br />
If the stitching on the two sides of the buttonhole do not appear<br />
uniform, the following adjustments can be made.<br />
1. Set the Stitch Length Dial at “F-1.5” and stitch the right side of<br />
the buttonhole on a scrap of fabric while observing how the<br />
material is fed.<br />
2. If the right side of the buttonhole is too coarse or fine, adjust the<br />
feeding of the material with the Stitch Length Dial.<br />
1 Right row<br />
2 Stitch length<br />
3 Shorter<br />
4 Longer<br />
5 Adjusted stitch<br />
3. After obtaining a satisfactory feeding on the right side, stitch the<br />
left side of the buttonhole and observe the feeding.<br />
4. If the left side is too coarse or fine compared to the right side,<br />
adjust the buttonhole fine adjustment screw as described below.<br />
F<br />
6<br />
F<br />
If the left side is too coarse, turn the screw with the enclosed<br />
large screwdriver in the – direction.<br />
If the left side is too fine, turn the screw with the enclosed large<br />
screwdriver in the + direction.<br />
This adjustment allows both sides of the buttonhole to appear<br />
uniform.<br />
6 Stitch length dial<br />
7 Buttonhole fine adjusting screw<br />
8 Right row<br />
9 Adjusted stitch<br />
7<br />
8<br />
9 9<br />
+ –<br />
+ –<br />
69
Equilibrage des boutonnières<br />
Si les points de chaque côté de la boutonnière sont dissemblables, procéder<br />
aux réglages suivants:<br />
1. Mettre le sélecteur de longueur de point sur “F-1,5” et coudre la lèvre<br />
gauche de la boutonnière sur un morceau de tissu <strong>pour</strong> vérifier son<br />
entraînement.<br />
2. Si le côté gauche de la boutonnière est trop dense ou trop espacé, régler<br />
l’entraînement du tissu à l’aide du sélecteur de longueur de point.<br />
1 Lévre droit<br />
2 Longueur de point<br />
3 Plus court<br />
4 Plus long<br />
5 Au cas où<br />
3. Lorsque l'entraînement de la lèvre droite est satisfaisant, coudre la<br />
lèvre gauche et observer son entraînement.<br />
4. Si la lèvre gauche est trop dense ou trop espacée par rapport à la lèvre<br />
droite, régler la vis d'équilibrage des boutonnières comme indiqué cidessous.<br />
Ajuste fino de los ojales<br />
Si las puntadas en ambos lados del ojal no parecen ser uniformes, se<br />
pueden hacer los siguientes ajustes.<br />
1. Sitúe el selector de largo de puntada en "F-1,5" y cosa la parte<br />
derecha del ojal en un pedazo de tejido, vigilando la alimentación<br />
del tejido.<br />
2. Si la parte derecha del ojal es demasiado gruesa o fina, ajuste la<br />
alimentación del tejido con el selector de largo de puntada.<br />
1 Lado derecho<br />
2 Largo de puntada<br />
3 Más corto<br />
4 Más largo<br />
5 En caso que<br />
3. Una vez obtenida una buena alimentación en el lado derecho,<br />
cosa la parte izquierda del ojal y vigile la alimentación.<br />
4. Si la parte izquierda es demasiado gruesa o fina respecto a la<br />
derecha, ajuste el tornillo de ajuste fino del ojal, tal como se<br />
describe a continuación.<br />
Si le côté gauche est trop dense, tourner la vis dans le sens du –.<br />
Si le côté droit est trop fin, tourner la vis dans le sens du +.<br />
Ce réglage rend les deux lèvres de la boutonnière uniformes.<br />
6 Sélecteur de longueur de point<br />
7 Vis d’équilibrage des boutonnières<br />
8 Lèvre droite<br />
9 Point ajusté<br />
Si la parte derecha es demasiada gruesa, con el destornillador<br />
grande incluido, gire el tornillo en el sentido del –.<br />
Si la parte derecha es demasiada fina, gire dicho tornillo en el<br />
sentido del +.<br />
Este ajuste permite que ambos lados del ojal parezcan uniformes.<br />
6 Dial de longitud de puntada<br />
7 Tornillo de ajuste fino de ojal<br />
8 Lado derecho<br />
9 Puntada ajustada<br />
BUTTONHOLE AND BUTTON SEWING<br />
COUTURE DE BOUTONNIERES ET DE BOUTONS<br />
OJALES Y COSTURA DE BOTONES<br />
70
BUTTONHOLE AND BUTTON SEWING<br />
COUTURE DE BOUTONNIERES ET DE BOUTONS<br />
OJALES Y COSTURA DE BOTONES<br />
A<br />
B<br />
For 1-Step BH Type<br />
(Model <strong>PS</strong>-2470, <strong>PS</strong>-2360, <strong>PS</strong>-<strong>3100</strong>)<br />
When the buttonhole is not sewn correctly:<br />
There are two different procedures for correcting buttonhole<br />
sewing, depending on which part of the buttonhole is not sewn<br />
correctly.<br />
Correction Procedure 1 (See fig. A)<br />
1. Raise the Presser Foot Lever, then remove the fabric, upper<br />
thread and lower thread.<br />
2. Pull the buttonhole lever slightly toward you.<br />
3. Sew about 10 stitches with no fabric, upper thread, or lower<br />
thread in the machine.<br />
4. Place the fabric under the presser foot, and set the upper and<br />
lower thread again, then lightly push the buttonhole lever toward<br />
the back of the machine and sew the buttonhole from the<br />
beginning.<br />
Correction Procedure 2 (See fig. B)<br />
1. Raise the Presser Foot Lever, then remove the fabric and all of<br />
the sewn thread.<br />
2. Place the fabric under the presser foot again, then lightly push<br />
the buttonhole lever toward the back of the machine and sew the<br />
buttonhole from the beginning.<br />
NOTE:<br />
When you are finished sewing all buttonholes be sure to raise the<br />
buttonhole lever.<br />
If the buttonhole lever is pushed toward the back of the machine<br />
while sewing any stitch other than a buttonhole, the buttonhole feed<br />
will be used and the stitch will not be sewn correctly.<br />
If the buttonhole lever is accidentally pushed when you are sewing<br />
a stitch other than a buttonhole, remove the fabric and thread from<br />
the machine, raise the buttonhole lever, and sew about 20 stitches.<br />
Then sew the intended stitch.<br />
Type BH 1 étape<br />
(Modèle <strong>PS</strong>-2470, <strong>PS</strong>-2360, <strong>PS</strong>-<strong>3100</strong>)<br />
Lorsque la couture de la boutonnière n'est pas correcte:<br />
Vous pouvez corriger la couture d'une boutonnière de deux manières<br />
différentes, selon la partie de la boutonnière qui n'est pas bien cousue.<br />
Méthode de correction 1 (voir fig. A)<br />
1. Lever le levier du pied de biche, enlever le tissu, le fil supérieur et le<br />
fil inférieur.<br />
2. Tirer légèrement le levier des boutonnières vers soi.<br />
3. Coudre environ 10 points sans tissu, avec le fil supérieur et le fil<br />
inférieur dans la machine.<br />
4. Mettre le tissu sous le pied de biche et remettre les fils supérieur et<br />
inférieur. Puis pousser légèrement le levier des boutonnières vers<br />
l'arrière de la machine et coudre la boutonnière depuis le début.<br />
Méthode de correction 2 (voir fig. B)<br />
1. Relever le levier du pied-de-biche puis retirer le tissu et tout le fil<br />
cousu.<br />
2. Remettre le tissu sous le pied-de-biche puis pousser légèrement le<br />
levier des boutonnières vers l'arrière de la machine et coudre la<br />
boutonnière depuis le début.<br />
REMARQUE:<br />
Lorsque la boutonnière est terminée, ne pas oublier de relever le levier.<br />
Si vous poussez le levier des boutonnières vers l'arrière de la machine<br />
pendant la couture d'un point autre qu'une boutonnière, sans coudre de<br />
boutonnière, l'entraînement <strong>pour</strong> boutonnières sera utilisé et le point ne<br />
sera pas correct.<br />
Si le levier est poussé accidentellement lors de la couture d’un autre point,<br />
enlevez le tissu et tirer le fil de la machine, lever le levier de boutonnière<br />
et coudre 20 points. Coudre ensuite le point souhaité.<br />
Para tipo BH en una operación<br />
(Modelo <strong>PS</strong>-2470, <strong>PS</strong>-2360, <strong>PS</strong>-<strong>3100</strong>)<br />
Ojales mal cosidos:<br />
Existen dos procedimientos diferentes para corregir el cosido de los<br />
ojales, en función de la parte del ojal que se ha cosido de forma<br />
incorrecta.<br />
Procedimiento de corrección 1 (Véase fig. A)<br />
1. Suba la palanca del prénsatela, y después retire el tejido, y los<br />
hilos superior e inferior.<br />
2. Tire ligeramente hacia usted de la palanca de ojales.<br />
3. Cosa unas diez puntadas sin el tejido, ni los hilos superior e<br />
inferior en la máquina.<br />
4. Ponga el tejido debajo del prénsatela, y vuelva a colocar los hilos<br />
superior e inferior, presione ligeramente la palanca de ojales<br />
hacia la parte trasera de la máquina y cosa el ojal desde el<br />
principio.<br />
Procedimiento de corrección 2 (véase fig. B)<br />
1. Levante la palanca del prensatelas y retire el tejido y todo el hilo<br />
cosido.<br />
2. Vuelva a colocar le tejido debajo del prensatelas, presione<br />
ligeramente la palanca de ojales hacia la parte trasera de la<br />
máquina y cosa el ojal desde el principio.<br />
NOTA:<br />
Cuando haya terminado de coser todos los ojales, asegúrese de subir<br />
la palanca de ojales.<br />
Si se empuja hacia la parte posterior de la máquina la palanca de<br />
ojales al coser una puntada que no sea un ojal, entrará en acción la<br />
alimentación de ojales y la puntada no se coserá correctamente.<br />
Si empuja accidentalmente la palanca de ojales cuando esté cosiendo<br />
con una puntada que no sea la de ojal, retire el tejido y el hilo de<br />
la máquina, suba la palanca de ojales, y cosa una 20 puntadas.<br />
Después cosa con la puntada que realmente quiere.<br />
71
Button Sewing<br />
Pattern Stitch Length Stitch Width Foot<br />
(Zigzag Stitch) 0 Less than 6.5<br />
Zigzag Presser<br />
Foot<br />
1. Measure the distance between the holes and set the appropriate<br />
stitch width using the Stitch Width Dial. For example, if the<br />
distance between the holes is 1.5 mm, set the stitch width to 1.5.<br />
2. Change the foot to the Zigzag presser foot.<br />
3. Lower the feed dogs by setting the Feed Dog Position Switch to<br />
the Down Position as shown on page 30.<br />
4. Place a button between the foot and the fabric and make sure<br />
that the needle enters the holes without hitting the button. If it hits<br />
see Step 1.<br />
5. At a slow speed, sew approximately 10 stitches.<br />
6. Remove the material from the machine. Cut the upper and lower<br />
threads and tie both threads at the back of the material.<br />
CAUTION<br />
Make sure the needle does not strike the button during<br />
sewing. The needle may break, leading to injury.<br />
Pour coudre un bouton<br />
Costura de botones<br />
Modèle de Longueur de Largeur de Pied-de<br />
point point point -biche<br />
(Point zigzag) 0 Moins de 6,5 Pied <strong>pour</strong> zigzag<br />
Modelo de Largo de Ancho de<br />
puntada puntada puntada<br />
(Puntada<br />
zigzag)<br />
0 Menos de 6,5<br />
Prensatelas<br />
Prénsatelas<br />
para zigzag<br />
1. Mesurer la distance entre les trous du bouton et régler la largeur de<br />
point appropriée à l’aide du sélecteur correspondant. Par exemple, si<br />
la distance entre les trous est de 1,5 mm, régler la largeur de point sur<br />
1,5.<br />
2. Remplacer le pied habituel par un pied <strong>pour</strong> zigzac.<br />
3. Abaisser les griffes d’entraînement en mettant le levier correspondant<br />
sur la position abaissée, comme indiqué à la page 30.<br />
4. Placer un bouton entre le pied et le tissu et veiller à ce que l’aiguille<br />
pique dans les trous sans heurter le bouton. Si jamais elle heurte le<br />
bouton, veuillez vous reporter au point 1.<br />
5. Coudre environ 10 points à faible vitesse.<br />
6. Retirer le tissu de la machine. Couper les fils inférieur et supérieur puis<br />
les nouer sur l’envers du tissu.<br />
ATTENTION<br />
Pendant la couture, veillez à ce que l´aiguille ne touche pas le<br />
bouton. L´aiguille risque de casser et vous <strong>pour</strong>riez vous blesser.<br />
1. Mida la distancia entre los orificios y ajuste el ancho de puntada<br />
correspondiente con el selector adecuado. Por ejemplo, si la<br />
distancia es de 1,5 mm, ajuste el ancho de puntada en 1,5.<br />
2. Cambie el prensatelas por uno para zigzag.<br />
3. Baje los dientes de los alimentadores poniendo su palanca en la<br />
posición baja, tal como se indica en la página 30.<br />
4. Coloque un botón entre el prensatelas y el tejido y asegúrese de<br />
que la aguja pase por los agujeros sin picar el botón. Si golpea el<br />
botón, véase el punto 1.<br />
5. Cosa unas 10 puntadas a baja velocidad.<br />
6. Retire el tejido de la máquina. Corte los hilos inferior y superior y<br />
haga un nudo con ambos en el revés del tejido.<br />
PRECAUCIÓN<br />
Asegúrese de que la aguja no roza el botón mientras cose. La<br />
aguja podría romperse y causar lesiones.<br />
BUTTONHOLE AND BUTTON SEWING<br />
COUTURE DE BOUTONNIERES ET DE BOUTONS<br />
OJALES Y COSTURA DE BOTONES<br />
72
USING ATTACHMENTS AND APPLICATIONS<br />
UTILISATION DES ACCESSOIRES ET LEURS APPLICATIONS<br />
USO DE ACCESORIOS Y APLICACIONES<br />
A<br />
1 2<br />
Zipper Insertion<br />
Pattern Stitch Length Stitch Width Foot<br />
(Straight Stitch) 2-3 3.5 (center) Zipper Foot<br />
B<br />
3<br />
The zipper foot is used to sew various types of zippers and can<br />
easily be positioned to the right or left side of the needle.<br />
When sewing the right side of the zipper, attach the shank to the left<br />
pin of the zipper foot. When sewing the left side of the zipper, attach<br />
the shank to the right pin of the zipper foot. (See fig. A)<br />
1. Set the Pattern Selection Dial to Straight Stitch. Set the Stitch<br />
Length between 2 and 3.<br />
Set the Stitch Width 3.5 (center).<br />
2. Lower the presser foot lever and fix either the left or right pin of<br />
the zipper foot onto the shank.<br />
3. Fold the edge of the material 2 cm (3/4") and place the zipper<br />
under the folded portion.<br />
4. Lower the needle into the notch located either on the left or right<br />
side of the zipper foot.<br />
CAUTION<br />
Turn the balance wheel to make sure the needle does not<br />
strike the presser foot. If another stitch is selected, the<br />
needle will strike the presser foot, causing the needle to<br />
break, possibly leading to injury.<br />
5. Sew from the bottom of the zipper toward the top on both sides.<br />
The needle should be positioned on the zipper side of the foot<br />
for best results. (See fig. B)<br />
6. To sew the opposite side of the zipper, release<br />
the foot by pressing the button located at the back of the presser<br />
foot, install the zipper foot on the other side of the zipper and<br />
continue sewing using the other side notch.<br />
1 Zipper foot<br />
2 Right pin for sewing the left side of the zipper<br />
3 Left pin for sewing the right side of the zipper<br />
CAUTION<br />
Make sure the needle does not strike the zipper during<br />
sewing. If the needle strikes the zipper, the needle may<br />
break, leading to injury.<br />
Gathering<br />
Pattern<br />
Stitch Length<br />
(Straight Stitch) 4<br />
1. Set the Pattern Selection Dial to Straight Stitch.<br />
2. Loosen the tension of the upper thread so that the lower thread<br />
lies on the underside of the material.<br />
3. Sew a single row or multiple rows of Straight Stitch.<br />
4. Pull the lower thread(s) to gather the material.<br />
73
Insertion de fermeture à glissière<br />
Modèle de Longueur de Largeur de Pied-de<br />
point point point -biche<br />
(Point droit) 2-3 3,5<br />
(au centre)<br />
Pied (à semelle étroite)<br />
<strong>pour</strong> fermetures à<br />
glissière<br />
Le pied à semelle étroite permet de coudre de nombreux types de<br />
fermetures à glissière et peut aisément être installé à droite ou à gauche de<br />
l’aiguille.<br />
Lors de la couture de la partie droite de la fermeture à glissière, fixer la<br />
semelle à la partie gauche du pied approprié. Lors de la couture du côté<br />
droit, installer la semelle à la partie droite du pied. Voir fig. A.<br />
1. Mettre le sélecteur de modèle de point sur le point droit et régler la<br />
longueur de point entre 2 et 3.<br />
Régler la largeur de point sur 3.5 (au centre).<br />
2. Abaisser le levier du pied-de-biche et fixer la partie gauche ou droite<br />
du pied <strong>pour</strong> fermetures à glissière dans l’encoche.<br />
3. Plier le bord du tissu à 2 cm et placer la fermeture à glissière sous la<br />
partie pliée.<br />
4. Abaisser l’aiguille et la faire passer dans l’encoche située à gauche ou<br />
à droite du pied <strong>pour</strong> fermetures à glissière.<br />
Inserción de cremalleras<br />
Modelo de Largo de Ancho de<br />
puntada puntada puntada<br />
Prensatelas<br />
(Puntada 2-3 3,5 Pata de<br />
recta) (centro) cremalleras<br />
La pata de cremalleras sirve para coser varios tipos de cremalleras y<br />
puede colocarse fácilmente hacia la izquierda o derecha de la aguja.<br />
Cuando la cremallera se cose por el lado derecho, instale la pata<br />
deslizándola hacia la izquierda. Cuando se cose la cremallera por el<br />
lado izquierdo, instale la pata deslizándola hacia la derecha, tal<br />
como lo muestra la fig. A.<br />
1. Coloque el selector de puntadas en la puntada recta. Ajuste el<br />
largo de puntada entre 2 y 3.<br />
Sitúe el ancho de punzada en 3.5(center).<br />
2. Baje la palanca del prensatelas y coloque el eje izquierdo o<br />
derecho de la pata de cremalleras en la zanca.<br />
3. Doble la orilla del tejido a 2 cm (3/4") y coloque la cremallera<br />
debajo de la parte doblada.<br />
4. Baje la aguja en la hendidura situada a la izquierda o derecha de<br />
la pata de cremalleras.<br />
USING ATTACHMENTS AND APPLICATIONS<br />
UTILISATION DES ACCESSOIRES ET LEURS APPLICATIONS<br />
USO DE ACCESORIOS Y APLICACIONES<br />
ATTENTION<br />
Tournez le volant <strong>pour</strong> vous assurer que l´aiguille ne touche pas le<br />
pied-de-biche. Si vous sélectionnez un autre point, l´aiguille touchera<br />
le pied-de-biche, l´aiguille se cassera et vous risquez de vous<br />
blesser.<br />
PRECAUCIÓN<br />
Gire la rueda de graduación para comprobar que la aguja no roza<br />
el pie prensatela. Si selecciona otro tipo de puntada, la aguja<br />
chocará contra el pie prensatela, romperá la aguja y podrá<br />
hacerse daño.<br />
5. Coudre la fermeture à glissière de bas en haut, des deux côtés. Pour<br />
obtenir les meilleurs résultats, il est recommandé de placer l’aiguille<br />
du côté de la fermeture à glissière par rapport au pied. Voir fig. B.<br />
6. Pour coudre le côté opposé de la fermeture à glissière, libérer le pied<br />
en appuyant sur le bouton situé à l’arrière, installer le pied <strong>pour</strong><br />
fermeture à glissière de l’autre côté de la fermeture et continuer à<br />
coudre en faisant passer l’aiguille par l’autre encoche.<br />
1 Pied <strong>pour</strong> fermetures à glissière<br />
2 Axe de droite <strong>pour</strong> coudre le côté gauche de la fermeture<br />
à glissière.<br />
3 Axe de gauche <strong>pour</strong> coudre le côté droit de la fermeture<br />
à glissière.<br />
5. Cuesa a partir de la parte inferior de la cremallera hacia la parte<br />
superior, por ambos lados. Para mejores resultados, se debe<br />
colocar la aguja del lado de la pata y de la cremallera. Véase fig.<br />
B para mayores detalles.<br />
6. Para coser el lado opuesto de la cremallera, suelte la pata al<br />
apretar el botón situado en su parte posterior, instale la pata en el<br />
otro lado de la cremallera y siga cosiendo, pasando la aguja por<br />
la hendidura del otro lado.<br />
1 Pata de cremalleras<br />
2 Eje derecho para coser la parte izquierda de la<br />
cremallera<br />
3 Eje izquierdo para coser la parte derecha de la<br />
cremallera<br />
ATTENTION<br />
Pendant la couture, assurez-vous que l´aiguille ne touche pas la<br />
fermeture à glissière. Si l´aiguille touche la fermeture à glissière,<br />
l´aiguille risque de casser et vous <strong>pour</strong>riez vous blesser.<br />
PRECAUCIÓN<br />
Asegúrese de que la aguja no roza la cremallera mientras cose.<br />
Si la aguja choca contra la cremallera, podría romperse y causar<br />
lesiones.<br />
Pour froncer un tissu<br />
Fruncido<br />
Modèle de point<br />
Longueur de point<br />
(Point droit) 4<br />
1. Mettre le sélecteur de modèle de point sur le point droit.<br />
2. Relâcher la tension du fil supérieur afin que le fil inférieur reste tendu<br />
à l’envers du tissu.<br />
3. Coudre une seule rangée de points droits ou plusieurs rangées à<br />
intervalles réguliers.<br />
4. Tirer sur le ou les fils inférieurs <strong>pour</strong> froncer le tissu.<br />
Modelo de puntada<br />
Largo de puntada<br />
(Puntada recta) 4<br />
1. Coloque el selector de puntadas en la puntada recta.<br />
2. Suelte la tensión del hilo superior para que el hilo inferior se<br />
encuentre tirante en el revés del tejido.<br />
3. Cosa una línea simple o varias líneas de puntadas rectas.<br />
4. Tire del o de los hilos inferiores para fruncir el tejido.<br />
74
USING ATTACHMENTS AND APPLICATIONS<br />
UTILISATION DES ACCESSOIRES ET LEURS APPLICATIONS<br />
USO DE ACCESORIOS Y APLICACIONES<br />
Darning<br />
Pattern Stitch Length Foot Feed Dog<br />
(Straight Stitch) Any<br />
Zigzag Presser<br />
Foot<br />
Down Position<br />
1. Lower the feed dogs by setting the Feed Dog Position Switch to<br />
the Down Position as shown on page 30.<br />
2. Set the Pattern Selection Dial to Straight Stitch.<br />
3. Place the portion to be darned under the presser foot together<br />
with a fabric for reinforcement.<br />
4. Lower the presser foot.<br />
5. Begin sewing alternating between gently drawing the work away<br />
from you and pulling it toward you.<br />
6. Repeat this motion until the portion to be darned is filled with<br />
parallel lines of stitching.<br />
Reprisage<br />
Zurcido<br />
Modèle Longueur Pied-de- Griffes<br />
de point de point biche d’entraînement<br />
(Point droit) N’importe Pied <strong>pour</strong> Abaissées<br />
quelle longueur zigzag<br />
1. Abaisser les griffes d’entraînement en mettant le levier correspondant<br />
sur la position abaissée, comme indiqué à la page 30.<br />
2. Mettre le sélecteur de modèle de point sur le point droit.<br />
3. Placer la partie à repriser sous le pied-de-biche avec une toile de<br />
renfort.<br />
4. Abaisser le pied-de-biche.<br />
5. Commencer à coudre en donnant au tissu un mouvement de va-et-vient<br />
(en le poussant et en le tirant doucement).<br />
6. Répéter l’opération jusqu’à ce que la partie à repriser soit remplie de<br />
lignes de points parallèles.<br />
Modelo de puntada Largo de puntada Prensatelas Alimentadores<br />
(Puntada Cualquiera Prénsatelas Bajados<br />
recta)<br />
para zigzag<br />
1. Baje los alimentadores poniendo la palanca correspondiente en<br />
la posición baja tal como se explica en la página 30.<br />
2. Coloque el selector de puntadas en la puntada recta.<br />
3. Ponga la parte de tejido que se debe zurcir debajo del prensatelas,<br />
con un tejido de refuerzo.<br />
4. Baje el prensatelas.<br />
5. Empiece a coser empujando y tirando alternativamente del tejido.<br />
Cuando la placa de zurcir está puesta en la máquina, los sobre el<br />
tejido.<br />
6. Repita esta operación hasta que el zurcido se haya completado,<br />
creando unas cuantas líneas de puntadas paralelas.<br />
75
Appliqués<br />
Pattern<br />
Stitch Length<br />
(Zigzag Stitch) F-2<br />
An appliqué is created by cutting a contrasting piece of fabric into<br />
a shape to be used as a decoration on a garment or project.<br />
1. Baste the cut design to the fabric in the location where desired.<br />
2. Carefully sew around the edge of the cutout design with a Zigzag<br />
Stitch in the fine stitch length.<br />
3. Cut away the surplus fabric outside of the stitching.<br />
4. Remove the basting, if necessary.<br />
* If you use the Satin Stitch Foot, it is easy to see the fabric and<br />
to produce more beautiful stitches.<br />
USING ATTACHMENTS AND APPLICATIONS<br />
UTILISATION DES ACCESSOIRES ET LEURS APPLICATIONS<br />
USO DE ACCESORIOS Y APLICACIONES<br />
NOTE:<br />
Make reinforcing Straight Stitches at the beginning and the end of<br />
the stitching to secure.<br />
CAUTION<br />
Be careful that the needle does not strike a basting pin<br />
during sewing. Striking a pin can cause the needle to break,<br />
resulting in injury.<br />
Appliques<br />
Aplicaciones<br />
Modèle de point<br />
Longueur de point<br />
(Points zigzag) F-2<br />
Pour créer une applique, il suffit de découper un morceau d’un tissu<br />
contrastant et de lui donner la forme d’une décoration à appliquer sur un<br />
vêtement ou sur un ouvrage.<br />
1. Faufiler le motif découpé à l’endroit souhaité.<br />
2. Coudre soigneusement le contour du motif en points zigzag avec une<br />
fine longueur de point.<br />
3. Couper la partie de tissu dépassant de la couture.<br />
4. Défaufiler, si nécessaire.<br />
* Avec le pied <strong>pour</strong> point de bourdon, on peut mieux voir le tissu et faire<br />
de plus beaux points.<br />
REMARQUE:<br />
Faire quelques points droits à chaque extrémité <strong>pour</strong> renforcer la couture.<br />
Modelo de puntada<br />
Largo de puntada<br />
(Puntada zigzag) F-2<br />
Si queremos colocar un aplique de piel etc. que haga contraste, para<br />
utilizarla como decoración en una prenda.<br />
1. Hilvane la aplicación recortada al tejido, en donde desee ponerla.<br />
2. Cosa cuidadosamente los bordes del diseño con una puntada<br />
zigzag en un largo de puntada fino.<br />
3. Recorte el tejido sobrante que quede fuera del pespunte.<br />
4. Quite los hilvanes, si fuera necesario.<br />
* Si utiliza el prénsatela para puntada de realce, le resultará fácil ver<br />
el tejido y conseguir puntadas aun más bellas.<br />
NOTA:<br />
Haga unas puntadas rectas como refuerzo al principio y al final de las<br />
puntadas para que no puedan deshacerse.<br />
ATTENTION<br />
Assurez-vous que l’aiguille ne frappera pas d’épingles durant la<br />
couture. Autrement l’aiguille <strong>pour</strong>rait casser et vous blesser.<br />
PRECAUCIÓN<br />
Asegúrese de que la aguja no tropieza con los alfileres durante<br />
la costura. Si tropieza con un alfiler, podría romperse la aguja y<br />
causar lesiones.<br />
76
USING ATTACHMENTS AND APPLICATIONS<br />
UTILISATION DES ACCESSOIRES ET LEURS APPLICATIONS<br />
USO DE ACCESORIOS Y APLICACIONES<br />
Monogramming and<br />
Embroidering<br />
Pattern Stitch Length Stitch Width Foot Feed Dog<br />
(Zigzag Stitch) Any Any None Down Position<br />
PREPARING FOR MONOGRAMMING AND EMBROIDERING<br />
1. Lower the feed dogs by setting the Feed Dog Position Switch to<br />
the Down Position as shown on page 30.<br />
2. Set the Pattern Selection Dial to the appropriate Zigzag Stitch<br />
setting.<br />
3. Draw the lettering (for monogramming) or design (for embroidering)<br />
on the surface of the fabric.<br />
4. Stretch the fabric between embroidery hoops as firmly as<br />
possible with the underside of the fabric on the bottom of the<br />
inside hoop.<br />
5. Place the work under the needle and lower the presser bar with<br />
the foot removed.<br />
6. Pull the lower thread up through the work at the starting position<br />
by turning the balance wheel and make a few holding stitches.<br />
7. Grip the hoop with the thumb and forefingers of both hands while<br />
pressing the fabric with the middle and third fingers and supporting<br />
the outside of the hoop with your smaller fingers.<br />
MONOGRAMMING<br />
1. Sew, moving the hoop slowly along the lettering at a constant<br />
speed.<br />
2. Secure with a few straight stitches at the end of the last letter.<br />
EMBROIDERING<br />
1. Stitch the outline of the design by moving the embroidery hoop.<br />
2. Fill in the design alternating from the outline of the design to the<br />
inside and from the inside to the edge of the outline until the<br />
design is completely filled in. Keep the stitching close together.<br />
NOTE:<br />
A long stitch is made by moving the embroidery hoop rapidly and a<br />
short stitch is made by moving it slowly.<br />
3. Secure with a few Straight Stitches at the end of the design.<br />
77
Monogrammes et broderies<br />
Modèle de Longueur de Largeur de Pied-de Griffe<br />
point point point -biche d'entraînement<br />
(Point N’importe N’importe Sans Abaissée<br />
zigzag) quelle longueur quelle largeur pied<br />
PREPARATION AVANT DE FAIRE DES MONOGRAMMES OU<br />
DES BRODERIES<br />
1. Abaisser les griffes d’entraînement en mettant le levier respectif sur la<br />
position abaissée, comme indiqué à la page 30.<br />
2. Mettre le sélecteur de modèle sur le numéro de point zigzag adéquat.<br />
3. Dessiner les lettres (monogrammes) ou le motif (broderies) sur l’endroit<br />
du tissu.<br />
4. Tendre au maximum l’ouvrage sur le tambour, en maintenant l’envers<br />
du tissu dans le fond du cercle intérieur.<br />
5. Placer l’ouvrage sous l’aiguille et abaisser la barre sans pied du piedde-biche.<br />
6. Tirer le fil inférieur à travers l’ouvrage, au point de départ. Pour ce<br />
faire, tourner le volant vers soi et piquer quelques points de maintien.<br />
7. Saisir le tambour des deux mains, avec le pouce et l’index, tout en<br />
appuyant sur le tissu avec le majeur et l’annulaire de chaque main. Les<br />
auriculaires serviront à tenir l’extérieur du tambour.<br />
Monogramas y bordados<br />
Modelo de Largo de Ancho de<br />
puntada puntada puntada<br />
Prensatelas Alimentadores<br />
(Puntada Cualquiera Cualquiera Quitarlo, sin Bajados<br />
zigzag)<br />
prensatelas<br />
PREPARACIÓN PARA MONOGRAMAS Y BORDADOS<br />
1. Baje los alimentadores poniendo la palanca correspondiente en<br />
la posición baja tal como se explica en la página 30.<br />
2. Ponga el selector de puntadas en la puntada zigzag apropiada.<br />
3. Dibuje las letras (para monogramas) o el diseño (para bordados)<br />
en el derecho del tejido.<br />
4. Estire el tejido en el bastidor tanto como pueda y si es posible con<br />
el revés abajo del círculo interior.<br />
5. Coloque la tela debajo de la aguja y baje la barra del prensatelas,<br />
aunque no haya ningún prensatelas puesto.<br />
6. Girando la ruedecilla, pase el hilo inferior por el trabajo y cosa<br />
unas cuantas puntadas para asegurarlo.<br />
7. Sujete el bastidor con el pulgar e índice de cada mano, presione<br />
el tejido con los dedos medios y anulares y aguante los exteriores<br />
del bastidor con los meñiques.<br />
USING ATTACHMENTS AND APPLICATIONS<br />
UTILISATION DES ACCESSOIRES ET LEURS APPLICATIONS<br />
USO DE ACCESORIOS Y APLICACIONES<br />
MONOGRAMMES<br />
1. Coudre en déplaçant lentement le tambour le long des lettres, à une<br />
vitesse constante.<br />
2. Arrêter la couture par quelques points droits à la fin de la dernière lettre.<br />
BRODERIES<br />
1. Piquer le contour du motif en déplaçant le tambour au fur et à mesure.<br />
2. Remplir le motif de points en cousant alternativement du contour vers<br />
l’intérieur du motif et de l’intérieur vers la ligne du contour. Garder les<br />
points bien rapprochés.<br />
REMARQUE:<br />
Pour obtenir de grands points, déplacer rapidement le tambour. Pour faire<br />
un petit point, le déplacer lentement.<br />
3. Arrêter par quelques points droits à la fin du motif.<br />
MONOGRAMAS<br />
1. Cosa moviendo el bastidor lentamente por las letras, a una<br />
velocidad constante.<br />
2. Termine con unas puntadas rectas de seguridad al final de la<br />
última letra.<br />
BORDADO<br />
1. Remarque el contorno del diseño, moviendo el bastidor de<br />
acuerdo con el dibujo.<br />
2. Rellene el motivo de puntadas, adelantando alternativamente del<br />
contorno hacia el interior y del interior hacia la orilla del contorno<br />
hasta que el motivo quede completamente cubierto de puntadas,<br />
teniendo siempre cuidado en mantener las puntadas muy juntas.<br />
NOTA:<br />
Se pueden realizar puntadas largas al mover el bastidor<br />
rápidamente y puntadas cortas al moverlo lentamente.<br />
3. Termine con unas puntadas rectas de seguridad al final del dibujo.<br />
78
USO DE ACCESORIOS Y APLICACIONES<br />
UTILISATION DES ACCESSOIRES ET LEURS APPLICATIONS<br />
USING ATTACHMENTS AND APPLICATIONS<br />
OPTIONAL ACCESSORIES<br />
A<br />
Using the Walking Foot<br />
1<br />
Pattern Stitch Length Stitch Width<br />
(Straight Stitch)<br />
3-4<br />
1-4.5<br />
(Zigzag Stitch) 0-6.5<br />
2<br />
This foot is very useful for sewing materials such as vinyl cloth,<br />
synthetic leather, thin leather, etc. These materials are difficult to<br />
feed when sewing. The walking foot prevents such materials from<br />
crumpling, slipping or sticking between presser foot and material<br />
due to even feeding of upper and lower materials.<br />
NOTE:<br />
Use this foot only for straight sewing and zigzag stitching. Do not<br />
use other patterns.<br />
1. Remove the power supply plug from the outlet.<br />
2. Raise the needle and the presser foot.<br />
3. Loosen the presser foot screw to remove the presser foot holder.<br />
(See fig. A)<br />
4. Attach the forked section of the connecting lever to the needle<br />
clamp, install the walking foot to the presser bar. (See fig. B)<br />
5. Lower the presser foot lever and then tighten the accessory<br />
presser bar holder fixing screw. (See fig. C)<br />
1<br />
1 Forked part of operation lever<br />
2 Presser bar holder<br />
B<br />
1 Use a screwdriver<br />
CAUTION<br />
• Use the screwdriver to tighten the screw securely. If the<br />
screw is loose, the needle may strike the presser foot<br />
and cause injury.<br />
• Be sure to turn the balance wheel toward the front of the<br />
machine to check that the needle does not strike the<br />
presser foot. If the needle strikes the presser foot, injury<br />
may result.<br />
• Be careful not to touch the needle doring this time,<br />
otherwise injury may result.<br />
C<br />
CAUTION<br />
When sewing with the walking foot, sew at medium to low<br />
speeds.<br />
79
ACCESSOIRES EN OPTION<br />
Utilisation du pied-de-biche mobile<br />
Modèle de point Longueur de point Largeur de point<br />
(Point droit)<br />
3-4<br />
1-4,5<br />
(Point zigzag) 0-6,5<br />
Ce pied convient parfaitement <strong>pour</strong> la couture de matériaux comme du<br />
tissu vinylé, du cuir synthétique, du cuir fin, etc. L'entraînement de ces<br />
matières est généralement difficile et ce pied mobile évite qu'ils ne<br />
froncent, glissent ou collent entre le pied-de-biche et le tissu, en garantissant<br />
un entraînement régulier de la partie supérieure et de la partie<br />
inférieure de l'ouvrage.<br />
REMARQUE:<br />
Ce pied ne peut pas servir <strong>pour</strong> d'autres modèles de points.<br />
Il est réservé aux points DROIT et ZIGZAG.<br />
1. Retirer la fiche d'alimentation de la prise de courant.<br />
2. Relever l'aiguille et le pied-de-biche.<br />
3. Desserrer la vis du pied-de-biche <strong>pour</strong> retirer le support du pied-debiche.<br />
(Voir fig. A)<br />
4. Fixer la partie fourchue du levier de connexion à la barre de l'aiguille,<br />
installer le pied mobile sur la barre du pied-de-biche. (Voir fig. B)<br />
5. Abaisser le levier du pied-de-biche puis serrer la vis de fixation du<br />
support de la barre du pied. (Voir fig. C)<br />
ACCESORIOS OPCIONALES<br />
Utilización del pie caminante<br />
Modelo de puntada<br />
Largo de puntada Ancho de puntada<br />
(Puntada recta)<br />
3-4<br />
1-4,5<br />
(Puntada zigazg) 0-6,5<br />
Este pie resulta muy útil para coser materiales como la tela de vinilo,<br />
el cuero sintético, cuero fino etc. Es complicado alimentar la máquina<br />
con estos materiales, y el pie caminante impide que se arruguen,<br />
que resbalen o que queden trabados en el prensatelas al coser al<br />
mismo tiempo los materiales superior e inferior.<br />
NOTA:<br />
Sólo puede utilizar este pie para coser puntadas rectas y puntadas<br />
zigzag. No lo use para otras puntadas.<br />
1. Retire el enchufe de la toma de corriente.<br />
2. Levante la aguja y el prensatelas.<br />
3. Afloje el tornillo del prensatelas para retirar el soporte del<br />
prensatelas (véase fig. A).<br />
4. Sujete la horquilla de la palanca de conexión a la abrazadera de<br />
la aguja e instale el pie caminante en la barra prensadora (véase<br />
fig. B).<br />
5. Baje la palanca del prensatelas y apriete el tornillo de fijación del<br />
soporte de la barra prensadora accesoria (véase fig. C).<br />
USING ATTACHMENTS AND APPLICATIONS<br />
UTILISATION DES ACCESSOIRES ET LEURS APPLICATIONS<br />
USO DE ACCESORIOS Y APLICACIONES<br />
1 Partie fourchue du levier d'activation<br />
2 Support de la barre du pied<br />
1 Utiliser un tournevis<br />
ATTENTION<br />
• Utilisez le tournevis <strong>pour</strong> bien serrer la vis. Si la vis n’est pas<br />
suffisamment serrée, l’aiguille risque de toucher le pied-debiche<br />
et de vous blesser.<br />
• N’oubliez pas de faire tourner le volant vers l’avant de la<br />
machine <strong>pour</strong> vérifier que l’aiguille ne touche pas le pied-debiche.<br />
Si l’aiguille touche le pied-de-biche, vous risquez de vous<br />
blesser.<br />
• Veillez à ne pas toucher l’aiguille pendant cette opération,<br />
sinon vous risqueriez de vous blesser.<br />
ATTENTION<br />
Lorsque vous cousez à l’aide du pied à double entraînement, utilisez<br />
une vitesse moyenne ou basse.<br />
1 Horquilla de la palanca de operaciones.<br />
2 Soporte de la barra prensadora.<br />
1 Utilice o un destornillador<br />
PRECAUCIÓN<br />
• Use el destornillador para apretar el tornillo fuertemente. Si<br />
el tornillo está suelto, la aguja podría chocar contra el pie<br />
prensatela y causar lesiones.<br />
• Gire la rueda de graduación hacia la parte delantera de la<br />
máquina de coser para comprobar que la aguja no roza el pie<br />
prensatela. Si la aguja roza el pie prensatela, podría hacerse<br />
daño.<br />
• Procure no tocar la aguja durante la operación, pues podría<br />
hacerse daño.<br />
PRECAUCIÓN<br />
Cuando cosa con el pie móvil, ajuste la velocidad entre media y baja.<br />
80
USO DE ACCESORIOS Y APLICACIONES<br />
UTILISATION DES ACCESSOIRES ET LEURS APPLICATIONS<br />
USING ATTACHMENTS AND APPLICATIONS<br />
A<br />
OPTIONAL ACCESSORIES<br />
Using the Spring-action<br />
Quilting Foot<br />
Pattern Stitch Length Stitch Width Feed Dog<br />
(Straight Stitch) Any 3.5 (center) Down position<br />
B<br />
2<br />
1<br />
A<br />
The Spring -action Quilting Foot is useful for darning and freemotion<br />
machine quilting.<br />
1. Remove the power supply plug from the outlet.<br />
2. Raise the needle and the presser foot.<br />
3. Loosen the presser foot screw to remove the presser foot holder.<br />
(See fig. A)<br />
4. Attach the quilting foot, making sure that part indicated by A in<br />
the illustration is above the needle clamp screw, then lower the<br />
Presser Foot Lever and tighten the presser foot screw.<br />
* Be sure that the needle clamp screw is firmly tightened.<br />
(See fig. B)<br />
3<br />
1 Use a screwdriver.<br />
2 Presser Foot Screw<br />
3 Needle Clamp Screw<br />
C<br />
CAUTION<br />
• Be careful not to touch the needle during this time,<br />
otherwise injury may result.<br />
• Use the screwdriver to tighten the presser foot holder<br />
screw securely. If the screw is loose, the needle may<br />
strike the presser foot and cause injury.<br />
• Be sure to turn the balance wheel toward the front of the<br />
machine to check that the needle does not strike the<br />
presser foot. If the needle strikes the presser foot, injury<br />
may result.<br />
B<br />
5. Lower the feed dogs by setting the Feed Dog Position Switch to<br />
the Down Position as shown on page 30.<br />
6. Set the Pattern Selection Dial to Straight Stitch.<br />
* Before starting to sew, draw the quilting design on the fabric.<br />
7. Use both hands to keep the fabric firmly stretched and move the<br />
fabric to sew over the drawn design. (See fig. C)<br />
B Quilting design (Line)<br />
(Model <strong>PS</strong>-2470, <strong>PS</strong>-<strong>3100</strong>)<br />
D<br />
8. The stitch length depends on how quickly the fabric is moved<br />
and on the machine’s sewing speed. Sew slowly and move the<br />
fabric at a constant speed to sew uniform stitches. (See fig. D)<br />
(Model <strong>PS</strong>-2470, <strong>PS</strong>-<strong>3100</strong>)<br />
81
ACCESSOIRES EN OPTION<br />
Utilisation du pied <strong>pour</strong> quilts avec<br />
effet de ressort<br />
Modèle de Longueur Largeur de Griffe<br />
point de point point d'entraînement<br />
(Point droit)<br />
N'importe quelle<br />
longueur<br />
3,5(au centre) Abaissée<br />
Le pied <strong>pour</strong> quilts avec effet de ressort sert à repriser ou à assembler<br />
librement des bouts de tissu à la machine.<br />
1. Retirer la fiche d'alimentation de la prise de courant.<br />
2. Relever l'aiguille et le pied-de-biche.<br />
3. Desserrer la vis du pied-de-biche <strong>pour</strong> retirer le support du pied-debiche.<br />
(Voir fig. A)<br />
4. Fixer le pied-de-biche, en veillant à insérer la partie marquée A sur<br />
l'illustration s'adapte à la vis de support de l'aiguille, puis abaisser le<br />
levier du pied-de-biche et resserrer la vis du pied-de-biche.<br />
* S'assurer que la vis du support de l'aiguille est bien serrée. (Voir fig. B)<br />
1 Utiliser un tournevis<br />
2 Vis du pied-de-biche<br />
3 Vis du support de l'aiguille<br />
ATTENTION<br />
• Veillez à ne pas toucher l’aiguille pendant cette opération,<br />
sinon vous risqueriez de vous blesser.<br />
• Utilisez le tournevis <strong>pour</strong> bien serrer la vis du support de piedde-biche.<br />
Si la vis n’est pas suffisamment serrée, l’aiguille<br />
risque de toucher le pied-de-biche et de vous blesser.<br />
• N’oubliez pas de faire tourner le volant vers l’avant de la<br />
machine <strong>pour</strong> vérifier que l’aiguille ne touche pas le pied-debiche.<br />
Si l’aiguille touche le pied-de-biche, vous risquez de vous<br />
blesser.<br />
5. Abaisser les griffes d'entraînement en mettant le levier d'entraînement<br />
sur la position abaissée comme indiqué à la page 30.<br />
6. Mettre le sélecteur de modèle de point sur le point droit.<br />
* Avant de commencer à coudre, tracer le motif à piquer sur le tissu.<br />
7. Tenir le tissu fermement, à deux mains, en le gardant bien tendu et le<br />
déplacer <strong>pour</strong> coudre sur le motif dessiné. (Voir fig. C)<br />
B Motif à piquer (ligne)<br />
8. La longueur du point dépend de la vitesse de déplacement du tissu et<br />
de la vitesse de couture de la machine. Coudre lentement et déplacer<br />
le tissu à une vitesse constante <strong>pour</strong> obtenir des points uniformes. (Voir<br />
fig.D)<br />
(Modèle <strong>PS</strong>-2470, <strong>PS</strong>-<strong>3100</strong>)<br />
ACCESORIOS OPCIONALES<br />
Utilización del prensatelas<br />
enguatador accionado por muelle<br />
Modelo de Largo de Ancho de<br />
puntada puntada puntada<br />
Alimentadores<br />
(Puntada recta) Cualquiera 3,5 (centro) Posición baja<br />
El prensatelas enguatador accionado por muelle sirve para zurcir y<br />
para coser acolchados con libertad de movimiento de la máquina.<br />
1. Retire el enchufe de la toma de corriente.<br />
2. Levante la aguja y el prensatelas.<br />
3. Afloje el tornillo del prensatelas y retire el soporte del prensatelas<br />
(véase fig. A).<br />
4. Coloque el prensatelas enguatador y asegúrese de que la parte<br />
indicada como A en el dibujo queda sujeta al tornillo de la<br />
abrazadera de la aguja. Baje la palanca del prensatelas y apriete<br />
el tornillo del prensatelas.<br />
* Asegúrese de que el tornillo de la abrazadera de la aguja está bien<br />
apretado (véase fig. B).<br />
1 Utilice o un destornillador<br />
2 Tornillo del prensatelas<br />
3 Tornillo de la abrazadera de la aguja<br />
PRECAUCIÓN<br />
• Procure no tocar la aguja durante la operación, pues podría<br />
hacerse daño.<br />
• Use el destornillador para apretar fuertemente tornillo del<br />
soporte del pie prensatela. Si el tornillo está suelto, la aguja<br />
podría chocar contra el pie prensatela y causar lesiones.<br />
• Gire la rueda de graduación hacia la parte delantera de la<br />
máquina de coser para comprobar que la aguja no roza el pie<br />
prensatela. Si la aguja roza el pie prensatela, podría hacerse<br />
daño.<br />
5. Afloje los alimentadores situando la palanca de los alimentadores<br />
en posición baja, tal como aparece en la página 30.<br />
6. Sitúe el selector de puntada en puntada recta.<br />
* Antes de empezar a coser, dibuje el acolchado en el tejido.<br />
7. Sujete firmemente el tejido con las dos manos, manténgalo<br />
estirado y cósalo siguiendo el dibujo (véase fig. C).<br />
B Dibujo del acolchado (línea)<br />
8. El largo de puntada depende de la velocidad con que se mueve<br />
el tejido y de la velocidad de cosido de la máquina. Cosa<br />
lentamente y mueva el tejido a una velocidad constante para<br />
conseguir unas puntadas uniformes (véase fig. D).<br />
(Modelo <strong>PS</strong>-2470, <strong>PS</strong>-<strong>3100</strong>)<br />
USING ATTACHMENTS AND APPLICATIONS<br />
UTILISATION DES ACCESSOIRES ET LEURS APPLICATIONS<br />
USO DE ACCESORIOS Y APLICACIONES<br />
82
USO DE ACCESORIOS Y APLICACIONES<br />
UTILISATION DES ACCESSOIRES ET LEURS APPLICATIONS<br />
USING ATTACHMENTS AND APPLICATIONS<br />
A<br />
OPTIONAL ACCESSORIES<br />
Using the 1/4-Inch Quilting Foot<br />
Pattern Stitch Length Stitch Width<br />
(Straight Stitch) 2-2.5 3.5 (center)<br />
1<br />
The 1/4-Inch Quilting Foot is used to sew fixed seam allowance 6.5<br />
mm (1/4") when piecing together a quilt. (See fig. A)<br />
1. Set the Pattern Selection Dial to Straight Stitch.<br />
Set the Stitch Length between 2 and 2.5.<br />
Set the Stitch Width 3.5 (center).<br />
2. Change the foot to the 1/4-Inch Quilting Foot.<br />
1 Seam allowance (1/4", 6.5mm)<br />
B<br />
2<br />
3<br />
3. Position the presser foot over the fabric and sew as shown in fig.<br />
B and C.<br />
• Achieving an accurate seam allowance. (See fig. B)<br />
2 Beginning of stitching.<br />
3 Align this mark with edge of fabric.<br />
4 End of stitching<br />
5 Align this mark with edge of fabric.<br />
• Quickly stitch together a quilt. (See fig. C)<br />
4<br />
6 Top of fabric.<br />
7 Seam (1/8", 3.2mm)<br />
5<br />
C<br />
6<br />
7<br />
83
ACCESSOIRES EN OPTION<br />
Utilisation d'un pied quilting 1/4"<br />
Modèle de point Longueur de point Largeur de point<br />
(Point droit) 2-2,5 3,5 (au centre)<br />
Le pied quilting 1/4" sert à coudre des ouvrages en gardant une marge fixe<br />
de 6,5 mm lors de l'assemblage des différents éléments à piquer. (Voir fig.<br />
A)<br />
1. Régler le sélecteur de modèle de point sur le point droit.<br />
Régler la longueur de point entre 2 et 2,5<br />
Régler la largeur de point sur 3,5 (au centre).<br />
2. Remplacer le pied-de-biche par le pied quilting 1/4".<br />
1 Marge de couture (6,5 mm)<br />
ACCESORIOS OPCIONALES<br />
Utilización del prensatela para<br />
pespunte 1/4<br />
Modelo de puntada<br />
Largo de puntada Ancho de puntada<br />
(Puntada recta) 2-2,5 3,5 (centro)<br />
El prensatela para pespunte 1/4 se utiliza para coser costuras con una<br />
anchura fija de 6,5 mm (1/4") al juntar las partes de un acolchado<br />
(véase fig. A).<br />
1. Sitúe el selector de puntadas en puntada recta.<br />
Sitúe el selector de largo de puntada entre 2 y 2,5.<br />
Sitúe el ancho de puntada en 3,5 (centro).<br />
2. Coloque el prensatela para pespunte 1/4.<br />
USING ATTACHMENTS AND APPLICATIONS<br />
UTILISATION DES ACCESSOIRES ET LEURS APPLICATIONS<br />
USO DE ACCESORIOS Y APLICACIONES<br />
3. Placer le pied sur le tissu et coudre comme indiqué sur les fig. B et C.<br />
1 Anchura de la costura (1/4", 6,5 mm)<br />
3. Coloque el prensatelas sobre el tejido, y cosa tal como se indica<br />
en las figuras B y C.<br />
• Pour laisser une marge de couture régulière. (Voir fig. B)<br />
2 Début de la couture<br />
3 Aligner cette marque sur le bord du tissu.<br />
4 Fin de la couture<br />
5 Aligner cette marque sur le bord du tissu.<br />
• Pour assembler rapidement un quilt. (Voir fig. C)<br />
6 Dessus du tissu<br />
7 Couture (3,2 mm)<br />
• Para hacer una anchura de la costura correcta. (véase fig. B)<br />
2 Principio de la puntada<br />
3 Alinee esta marca con el borde del tejido.<br />
4 Final de la puntada<br />
5 Alinee esta marca con el borde del tejido.<br />
• Cosido rápido de un acolchado. (véase fig. C)<br />
6 Parte superior del tejido.<br />
7 Costura (1/8", 3,2 mm)<br />
84
MAINTENANCE<br />
ENTRETIEN<br />
MANTENIMIENTO<br />
Changing the Light Bulb<br />
CAUTION<br />
• Turn off the main power switch and unplug the machine<br />
before changing the light bulb. If the main power switch<br />
is on when the light bulb is changed, an electric shock<br />
may result. If the machine is on and Start/Stop button is<br />
pressed or foot controller is stepped on, injuries may<br />
result.<br />
• To avoid burns, give the light bulb time to cool before<br />
changing it.<br />
A<br />
1. Remove the power supply plug from the outlet.<br />
2. Loosen the screw on the reverse side of sewing head as shown<br />
in fig. A.<br />
3. Remove the light cover from the machine as illustrated in fig. A.<br />
(Model <strong>PS</strong>-2470, <strong>PS</strong>-<strong>3100</strong>)<br />
B<br />
(Model <strong>PS</strong>-2470, <strong>PS</strong>-<strong>3100</strong>)<br />
4. Replace the sewing light bulb. (See fig. B)<br />
1 Bulb<br />
1 Pull out<br />
2 Push in<br />
1<br />
2<br />
1<br />
(Model <strong>PS</strong>-2360, <strong>PS</strong>-2250)<br />
B<br />
1<br />
(Model <strong>PS</strong>-2360, <strong>PS</strong>-2250)<br />
4. Replace the sewing light bulb. (See fig. B)<br />
1 Bulb<br />
1 Loosen<br />
2 Tighten<br />
1<br />
2<br />
C<br />
5. Reattach the light cover and fasten the screw as shown in fig.<br />
C.<br />
85
Remplacement de l’ampoule<br />
Cambio de la bombilla<br />
ATTENTION<br />
• Avant de changer l’ampoule, mettez la machine hors tension et<br />
débranchez-la. Si la machine est sous tension lorsque l’ampoule<br />
est changée, une décharge électrique peut se produire, et si l’on<br />
appuie accidentellement sur la touche Marche/Arrêt ou sur la<br />
pédale, on risque de se blesser.<br />
• Pour éviter de vous brûler, attendez que l’ampoule refroidisse<br />
avant de la changer.<br />
PRECAUCIÓN<br />
• Apague y desenchufe la máquina de coser de la corriente<br />
antes de cambiar la bombilla. Si cambia la bombilla con la<br />
máquina encendida, podrá sufrir una descarga eléctrica. Si la<br />
máquina está enchufada y aprieta por accidente el botón<br />
Marcha/Parada o pisa el pedal, podría hacerse daño.<br />
• Para evitar quemaduras, deje enfriar la bombilla antes de<br />
cambiarla.<br />
1. Retirer la fiche d’alimentation de la prise de courant.<br />
2. Desserrer la vis à l'arrière de la tête de couture comme illustré sur la<br />
fig. A.<br />
3. Retirer le capot comme le montre la fig. A.<br />
1. Desenchufe la máquina.<br />
2. Afloje el tornillo de la cubierta de la máquina, tal como se indica<br />
en la fig. A.<br />
3. Retire la cubierta de la máquina tal como se indica en la fig. A.<br />
(Modèle <strong>PS</strong>-2470, <strong>PS</strong>-<strong>3100</strong>)<br />
4. Remplacer l’ampoule de la lampe. Voir fig. B.<br />
(Modelo <strong>PS</strong>-2470, <strong>PS</strong>-<strong>3100</strong>)<br />
4. Cambie la bombilla tal como se muestra en la fig. B.<br />
MAINTENANCE<br />
ENTRETIEN<br />
MANTENIMIENTO<br />
1 Ampoule<br />
1 Tirer<br />
2 Enfoncer<br />
1 Bombilla<br />
1 Tirar<br />
2 Presionar<br />
(Modèle <strong>PS</strong>-2360, <strong>PS</strong>-2250)<br />
4. Remplacer l’ampoule de la lampe. Voir fig. B.<br />
1 Ampoule<br />
1 Desserrer<br />
2 Resserrer<br />
(Modelo <strong>PS</strong>-2360, <strong>PS</strong>-2250)<br />
4. Cambie la bombilla tal como se muestra en la fig. B.<br />
1 Bombilla<br />
1 Aflojar<br />
2 Apretar<br />
5. Rattacher le capot et resserrer la vis comme l’indique la fig. C.<br />
5. Vuelva a colocar la cubierta y apriete el tornillo tal como indica<br />
la fig. C.<br />
86
MAINTENANCE<br />
ENTRETIEN<br />
MANTENIMIENTO<br />
A<br />
Cleaning<br />
CAUTION<br />
Be sure to unplug the machine before cleaning it. Otherwise,<br />
electric shock or injury may result.<br />
B<br />
1. Remove the power supply plug from the outlet.<br />
2. Raise the needle and the presser foot.<br />
3. Loosen the presser foot screw and the needle clamp screw to<br />
remove the presser foot holder and the needle. (See fig. A)<br />
4. Remove the needle plate using a coin to remove the screws.<br />
(See fig. B)<br />
1 Use a coin or screwdriver.<br />
1<br />
2<br />
3<br />
5. Turn the balance wheel toward you until the notch of shuttle<br />
aligns with the shelf of race as shown in the illustration.<br />
2 Notch of shuttle race<br />
3 Shelf of race<br />
CAUTION<br />
Be sure to turn the balance wheel towards the front of the<br />
machine. Turning the balance wheel in the other direction may<br />
damage the machine.<br />
6. Remove the race. (See fig. C)<br />
7. Clean out lint and dust.<br />
* Use soft fabric to clean the race. DO NOT OIL the race or shuttle.<br />
(See fig. D)<br />
C<br />
4 Race<br />
5 Shuttle<br />
* DO NOT OIL.<br />
D<br />
4<br />
CAUTION<br />
• Do not use a damaged race or shuttle. Otherwise, the<br />
thread may tangle and cause a poor finish, or the needle<br />
may break. You can get the proper parts from your<br />
authorized dealer.<br />
• Be sure to insert the race in the correct position. Otherwise,<br />
the needle may break.<br />
8. Assemble the race first then the needle plate.<br />
When installing the race, be sure that the notch of shuttle is in the<br />
same position that it was when the shuttle hook was removed<br />
and that the shelf on the race aligns with the spring.<br />
Install the needle plate by sliding it to the left (the reverse of its<br />
removal procedure).<br />
5<br />
6 Notch of shuttle<br />
7 Shelf<br />
8 Spring<br />
6<br />
7 8<br />
87
Nettoyage<br />
Limpieza<br />
ATTENTION<br />
Veillez à débrancher le cordon d’alimentation de la machine avant<br />
de la nettoyer. Sinon, vous risquez de vous électrocuter ou de vous<br />
blesser.<br />
1. Retirer la fiche de la prise secteur.<br />
2. Relever l’aiguille et le pied-de-biche.<br />
3. Desserrer la vis du pied-de-biche et la vis de fixation de l’aiguille afin<br />
de pouvoir déposer le support du pied-de-biche et l’aiguille. Voir fig.<br />
A.<br />
4. Retirer la plaque à aiguille avec une pièce de monnaie <strong>pour</strong> desserrer<br />
les vis. (Voir fig. B)<br />
PRECAUCIÓN<br />
Asegúrese de desenchufar la máquina antes de limpiarla. De otra<br />
manera, podría recibir una descarga eléctrica.<br />
1. Retire la clavija de la toma de corriente.<br />
2. Levante la aguja y el prensatelas.<br />
3. Suelte el tornillo del prensatelas y el tornillo de ajuste de la aguja<br />
para sacar el soporte del prensatelas y la aguja. Véase fig. A.<br />
4. Retire la placa de agujas con una moneda para aflojar los tornillos.<br />
(véase fig. B).<br />
1 Utilice una moneda o un destornillador<br />
1 Utiliser une pièce de monnaie ou un tournevis.<br />
5. Faire tourner le volant vers soi jusqu'à ce que l'encoche de la coursière<br />
s'aligne sur le socle de la coursière comme illustré.)<br />
2 Encoche de la coursière<br />
3 Base de la coursière<br />
ATTENTION<br />
N’oubliez pas de faire tourner le volant vers l’avant de la machine. Si<br />
vous tournez le volant dans l’autre sens, vous risquez d’endommager<br />
la machine.<br />
6. Retirer le crochet de la navette. Voir fig. C.<br />
7. Nettoyer la bourre et les poussières.<br />
* Utiliser un chiffon doux <strong>pour</strong> nettoyer le crochet de la navette. NE PAS<br />
GRAISSER le crochet ni la coursière. Voir fig. D.<br />
4 Crochet de la navette<br />
5 Coursière<br />
* NE JAMAIS HUILER.<br />
5. Gire la ruedecilla hacia usted hasta que la muesca en la pista de<br />
la lanzadera quede alineada con la repisa de la pista gancho de<br />
la lanzadera, tal como se indica en el dibujo.<br />
2 Muesca en la pista de la lanzadera<br />
3 Repisa de la pista<br />
PRECAUCIÓN<br />
Gire la rueda de graduación hacia la parte delantera de la máquina.<br />
Si gira la rueda en el otro sentido, podría averiar la máquina.<br />
6. Retire el garfio de la lanzadera. Véase fig. C.<br />
7. Limpie el polvo y las suciedades.<br />
* Utilice un trapo suave para limpiar el garfio de la lanzadera. NO<br />
ENGRASE el garfio de la lanzadera o la pista. Véase fig. D.<br />
* NO LUBRICAR.<br />
4 Garfio de la lanzadera<br />
5 Pista de la lanzadera<br />
MAINTENANCE<br />
ENTRETIEN<br />
MANTENIMIENTO<br />
ATTENTION<br />
• N’utilisez pas de boîtier de canette ou des logements<br />
endommagés. Sinon, le fil risque de s’emmêler et de donner de<br />
mauvais résultats, ou l’aiguille risque de casser. Vous trouverez<br />
les pièces adéquates chez votre revendeur habituel.<br />
• Veillez à remettre le boîtier de la canette dans la bonne<br />
position. Sinon, l’aiguille risque de casser.<br />
8. Monter d'abord la coursière puis la plaque à aiguilles.<br />
Lors de la mise en place de la coursière, l'encoche de la narette doit se<br />
trouver dans la même position que lors de son retrait et le socle de la<br />
coursière doit s'aligner sur le ressort.<br />
Remettre la plaque à aiguille en place en la faisant glisser vers la<br />
gauche (dans le sens contraire de la procédure de retrait).<br />
6 Encoche sur la coursière<br />
7 Base<br />
8 Ressort<br />
PRECAUCIÓN<br />
• No utilice un cangrejo o una lanzadera estropeados. De otra<br />
manera, el hilo podría enrollarse y causar un acabado feo o<br />
la aguja podría romperse. Puede adquirir las piezas adecuadas<br />
en cualquier tienda especializada.<br />
• Asegúrese de que coloca el cangrejo en la posición correcta.<br />
Si no, la aguja podría romperse.<br />
8. Monte la pista, y a continuación la placa de agujas.<br />
Al instalar el gancho la pista, asegúrese de que la muesca de la<br />
lanzadera sigue en la misma posición en que estaba cuando se<br />
retiró el gancho de la lanzadera, y asegúrese de que la repisa<br />
sobre la posta está alineada con el muelle.<br />
Coloque la placa de agujas deslizándola hacia la izquierda (en el<br />
sentido opuesto a cuando la retiró).<br />
6 Muesca en la pista de la lanzadera<br />
7 Repisa<br />
8 Muelle<br />
88
MAINTENANCE<br />
ENTRETIEN<br />
MANTENIMIENTO<br />
PERFORMANCE CHECK LIST<br />
Whenever sewing difficulties are encountered, review the section in this instruction manual that details the operation you are performing to<br />
make sure you are correctly using the machine. If the problem continues, the following check list may help you to improve the operation.<br />
If you still have difficulties, contact your nearest authorized service center.<br />
With the model <strong>PS</strong>-2470/<strong>PS</strong>-<strong>3100</strong>, you can use the sewing speed controller to adjust the sewing speed. When sewing at the slowest speed,<br />
skipped stitches may easily occur depending on the type of thread and fabric used. If this occurs, sew at a faster speed.<br />
UPPER THREAD<br />
BREAKS<br />
LOWER THREAD<br />
BREAKS<br />
SKIPPED<br />
STITCHES<br />
LOOP IN SEAM<br />
FABRIC<br />
PUCKERS<br />
Upper thread is not<br />
correctly installed.<br />
Lower thread is<br />
tangled.<br />
Needle is incorrectly<br />
inserted.<br />
Thread tension is<br />
incorrect.<br />
Thread tension is<br />
too tight.<br />
Page 39<br />
No<br />
Page 37<br />
No<br />
Page 11<br />
No<br />
Page 46<br />
No<br />
Page 46<br />
No<br />
Upper thread is<br />
tangled.<br />
Bobbin is not<br />
threaded properly in<br />
the race.<br />
Inferior needle is<br />
used.<br />
Threading is not<br />
correct.<br />
Page 39<br />
No<br />
Page 37<br />
No<br />
Page 11<br />
No<br />
Page 39<br />
No<br />
Upper thread<br />
tension is too tight.<br />
The combination of<br />
needle size/thread<br />
size/fabric is<br />
incorrect.<br />
Wrong needle is<br />
used.<br />
Page 46<br />
No<br />
Page 47<br />
No<br />
Page 11<br />
No<br />
Spool of thread is<br />
not correctly<br />
installed.<br />
Lint is clinging to the<br />
bottom of the needle<br />
plate.<br />
The combination of<br />
needle size/thread<br />
size/fabric is<br />
incorrect.<br />
Page 39<br />
No<br />
Page 87<br />
No<br />
Page 47<br />
No<br />
Needle is bent or<br />
not sharp.<br />
Threading is not<br />
correct.<br />
Page 11<br />
No<br />
Page 39<br />
No<br />
The combination of<br />
needle size/thread<br />
size/fabric is<br />
incorrect.<br />
Page 47<br />
No<br />
CONTACT YOUR LOCAL SERVICE CENTER<br />
89
FABRIC DOES<br />
NOT FEED<br />
PROPERLY<br />
NEEDLE<br />
BREAKS<br />
MACHINE IS<br />
NOISY OR SLOW<br />
MACHINE DOES<br />
NOT START<br />
Stitch Length Dial is<br />
set at no feeding.<br />
("0")<br />
Needle is not<br />
correctly inserted.<br />
Lint is clinging to the<br />
bottom of the needle<br />
plate.<br />
Power supply plug is<br />
removed from outlet.<br />
Page 26<br />
No<br />
The combination of<br />
needle size/thread<br />
size/fabric is<br />
incorrect.<br />
Page 11<br />
No<br />
Inferior needle is<br />
used.<br />
Page 87<br />
No<br />
Page 7<br />
No<br />
Main power switch<br />
is turned off.<br />
MAINTENANCE<br />
ENTRETIEN<br />
MANTENIMIENTO<br />
Page 47<br />
No<br />
Page 11<br />
No<br />
Page 9<br />
No<br />
Inferior needle is<br />
used.<br />
The combination of<br />
needle size/thread<br />
size/fabric is<br />
incorrect.<br />
The bobbin winder<br />
shaft is slid to the<br />
right.<br />
Page 11<br />
No<br />
Page 47<br />
No<br />
Page 33<br />
No<br />
Thread is tangled.<br />
Fabric is pulled<br />
excessively. Let the<br />
feed dogs move the<br />
fabric. Do not pull<br />
the fabric.<br />
Foot controller is not<br />
used correctly.<br />
Page 39<br />
No<br />
No<br />
Page 10<br />
No<br />
Feed Dog Position<br />
Switch in down<br />
position.<br />
Page 30<br />
No<br />
(Model <strong>PS</strong>-2470, <strong>PS</strong>-2360,<br />
<strong>PS</strong>-<strong>3100</strong>)<br />
The buttonhole lever<br />
is pushed toward<br />
the back of the<br />
machine.<br />
(Model <strong>PS</strong>-2470,<br />
<strong>PS</strong>-<strong>3100</strong>)<br />
Start/Stop button will<br />
not work when foot<br />
controller is plugged<br />
into machine.<br />
Page 10<br />
Page 63<br />
No<br />
CONTACT YOUR LOCAL SERVICE CENTER<br />
90
MAINTENANCE<br />
ENTRETIEN<br />
MANTENIMIENTO<br />
LISTE DE VÉRIFICATION EN CAS DE DÉFAILLANCES<br />
En cas de problème, consulter d’abord le chapitre voulu dans le présent manuel <strong>pour</strong> s’assurer de la bonne utilisation de la machine. Si le problème persiste,<br />
la liste de vérification suivante peut vous aider à y remédier.<br />
Si malgré cela, le problème persiste, veuillez vous mettre en contact avec le service technique agréé le plus proche.<br />
Avec le modèle <strong>PS</strong>-2470/<strong>PS</strong>-<strong>3100</strong>, la pédale peut être utilisée <strong>pour</strong> régler la vitesse de couture. Pendant la couture à la vitesse minimale, des points peuvent<br />
facilement être manqués selon le type de fil et le tissu utilisés. Le cas échéant, coudre plus rapidement.<br />
RUPTURE DU<br />
FIL SUPERIEUR<br />
RUPTURE DU<br />
FIL INFERIEUR<br />
DES POINTS<br />
SAUTENT<br />
LA COUTURE<br />
FAIT DES<br />
BOUCLES<br />
LE TISSU<br />
FRONCE<br />
Le fil supérieur n’est<br />
pas bien enfilé.<br />
Le fil inférieur est<br />
emmêlé.<br />
L’aiguille est mal<br />
installée.<br />
Mauvaise tension des<br />
fils.<br />
Le fil est trop tendu.<br />
Page 40<br />
Non<br />
Page 38<br />
Non<br />
Page 12<br />
Non<br />
Page 46<br />
Non<br />
Page 46<br />
Non<br />
Le fil supérieur est<br />
emmêlé.<br />
La canette est mal<br />
installée dans le<br />
crochet de la navette.<br />
Une aiguille inférieure<br />
est utilisée.<br />
L’enfilage est<br />
mauvais.<br />
Page 40<br />
Non<br />
Page 38<br />
Non<br />
Page 12<br />
Non<br />
Page 40<br />
Non<br />
Le fil supérieur est<br />
trop tendu.<br />
La combinaison<br />
aiguille/fil/tissu est<br />
incorrecte.<br />
Le calibre de l’aiguille<br />
est incorrect.<br />
Page 46<br />
Non<br />
Page 47<br />
Non<br />
Page 12<br />
Non<br />
La bobine de fil est<br />
mal installée.<br />
Des peluches sont<br />
accrochées à la plaque<br />
à aiguille.<br />
La combinaison<br />
aiguille/fil/tissu n’est<br />
pas correcte.<br />
Page 40<br />
Non<br />
Page 88<br />
Non<br />
Page 47<br />
Non<br />
L’aiguille est tordue<br />
ou trop peu pointue.<br />
L’enfilage n’est pas<br />
correct.<br />
Page 12<br />
Non<br />
Page 40<br />
Non<br />
La combinaison<br />
aiguille/fil/tissu n’est<br />
pas<br />
correcte.<br />
Page 47<br />
Non<br />
CONTACTER LE CENTRE TECHNIQUE LE PLUS PROCHE<br />
91
L’ENTRAINE-<br />
MENT DU TISSU<br />
N’EST PAS<br />
CORRECT<br />
L’AIGUILLE<br />
CASSE<br />
LA MACHINE<br />
EST BRUYANTE<br />
OU LENTE<br />
LA MACHINE<br />
NE DEMARRE<br />
PAS<br />
Le sélecteur de<br />
longueur de point est<br />
réglé sur la zone “sans<br />
entraînement”<br />
L’aiguille est mal<br />
installée.<br />
Des peluches sont<br />
accrochées sous la<br />
plaque à aiguille.<br />
La fiche d’alimentation<br />
est retirée de la<br />
prise.<br />
Page 27<br />
Non<br />
La combinaison<br />
aiguille/fil/tissu est<br />
incorrecte.<br />
Page 12<br />
Non<br />
Une aiguille inférieure<br />
est utilisée.<br />
Page 88<br />
Non<br />
Page 8<br />
Non<br />
L’interrupteur<br />
principal est éteint.<br />
MAINTENANCE<br />
ENTRETIEN<br />
MANTENIMIENTO<br />
Page 47<br />
Non<br />
Page 12<br />
Non<br />
Page 9<br />
Non<br />
Une aiguille inférieure<br />
est utilisée.<br />
La combinaison<br />
aiguille/fil/tissu est<br />
incorrecte.<br />
L’axe du dévidoir est<br />
glissé vers la droite.<br />
Page 12<br />
Non<br />
Page 47<br />
Non<br />
Page 34<br />
Non<br />
Le fil est emmêlé.<br />
Le tissu est tiré avec<br />
excès. Laisser les<br />
griffes<br />
entraîner le tissu sans<br />
le tirer.<br />
La pédale n’est pas<br />
utilisée correctement.<br />
Page 40<br />
Non<br />
Non<br />
Page 10<br />
Non<br />
Le levier des griffes<br />
d’entraînement est en<br />
position abaissée.<br />
Page 30<br />
Non<br />
(Modèle <strong>PS</strong>-2470, <strong>PS</strong>-2360,<br />
<strong>PS</strong>-<strong>3100</strong>)<br />
Le levier des<br />
boutonnières est<br />
poussé vers l'arrière de<br />
la machine.<br />
(Modèle <strong>PS</strong>-2470,<br />
<strong>PS</strong>-<strong>3100</strong>)<br />
Le bouton Marche/Arrêt<br />
ne fonctionne pas lorsque<br />
la pédale est branchée<br />
sur la machine.<br />
Page 10<br />
Page 64<br />
Non<br />
CONTACTER LE CENTRE TECHNIQUE LE PLUS PROCHE<br />
92
MAINTENANCE<br />
ENTRETIEN<br />
MANTENIMIENTO<br />
LISTADO DE POSIBLES INCIDENCIAS<br />
Cada vez que encuentre dificultades al coser, vuelva a consultar la parte de este manual de instrucciones que detalla la operación que está<br />
realizando, para comprobar que usa correctamente la máquina. Si el problema persiste, el siguiente listado le puede ayudar a mejorar el<br />
funcionamiento.<br />
Si persiste el problema a pesar de estas medidas, póngase en contacto con el servicio técnico autorizado más cercano.<br />
Con el modelo <strong>PS</strong>-2470/<strong>PS</strong>-<strong>3100</strong>, podrá utilizar el controlador de velocidad de cosido para ajustar la velocidad de cosido. Cuando cosa a la<br />
velocidad más baja, podrán ocurrir fácilmente saltos de puntada dependiendo del tipo de hilo y de tejido utilizados. Si se diera el caso, cosa<br />
a una velocidad mayor.)<br />
ROTURA DEL<br />
HILO SUPERIOR<br />
ROTURA DEL<br />
HILO INFERIOR<br />
SALTO DE PUNTA-<br />
DAS<br />
BAGAS EN LAS<br />
PUNTADAS<br />
ARRUGAS EN<br />
EL TEJIDO<br />
El hilo superior no<br />
está bien enhebrado<br />
El hilo inferior está<br />
enredado<br />
La aguja está mal<br />
colocada<br />
La tensión de los<br />
hilos no es correcta<br />
La tensión de los<br />
hilos es demasiada<br />
fuerte<br />
Página 40<br />
No<br />
Página 38<br />
No<br />
Página 12<br />
No<br />
Página 46<br />
No<br />
Página 46<br />
No<br />
El hilo superior está<br />
enredado<br />
La canilla no está<br />
bien enhebrada en el<br />
garfio<br />
Se está usando una<br />
aguja inferior<br />
Los hilos no están<br />
bien enhebrados<br />
Página 40<br />
No<br />
Página 38<br />
No<br />
Página 12<br />
No<br />
Página 40<br />
No<br />
El hilo superior es<br />
demasiado tirante<br />
La combinación<br />
tamaño de aguja/<br />
grueso de hilo/tejido<br />
no es correcta<br />
El tamaño de la<br />
aguja no corresponde<br />
Página 46<br />
No<br />
Página 48<br />
No<br />
Página 12<br />
No<br />
El carrete está mal<br />
colocado<br />
Hay polvo en el<br />
fondo de la placa de<br />
agujas<br />
La combinación<br />
tamaño de aguja/<br />
grueso de hilo/tejido<br />
no es correcta<br />
Página 40<br />
No<br />
Página 88<br />
No<br />
Página 48<br />
No<br />
La aguja está<br />
doblada o gastada<br />
El hilo no está bien<br />
enhebrado<br />
Página 12<br />
No<br />
Página 40<br />
No<br />
La combinación<br />
tamaño de aguja/<br />
grueso de hilo/tejido<br />
no es correcta<br />
Página 48<br />
No<br />
PONGASE EN CONTACTO CON EL SERVICIO TECNICO LOCAL<br />
93
EL TEJIDO NO<br />
ARRASTRA BIEN<br />
LA AGUJA SE<br />
ROMPE<br />
LA MAQUINA ES<br />
RUIDOSA O<br />
FUNCIONA MUY<br />
DESPACIO<br />
LA MAQUINA NO<br />
ARRANCA<br />
El selector de largo<br />
de puntada está<br />
puesto para que el<br />
tejido no alimente<br />
La aguja está mal<br />
colocada<br />
Hay polvo en la<br />
placa de agujas<br />
Está desenchufada<br />
Página 27<br />
No<br />
La combinación<br />
tamaño de aguja/<br />
grueso de hilo/tejido<br />
no es correcta<br />
Página 12<br />
No<br />
Se está usando una<br />
aguja inferior<br />
Página 88<br />
No<br />
Páginae 8<br />
El interruptor<br />
principal está<br />
apagado<br />
No<br />
MAINTENANCE<br />
ENTRETIEN<br />
MANTENIMIENTO<br />
Página 48<br />
No<br />
Página 12<br />
No<br />
Página 9<br />
No<br />
Se está usando una<br />
aguja inferior<br />
La combinación<br />
tamaño de aguja/<br />
grueso de hilo/tejido<br />
no es correcta<br />
El eje de bobinado<br />
de la canilla está<br />
deslizado hacia la<br />
derecha<br />
Página 12<br />
No<br />
Página 48<br />
No<br />
Página 34<br />
No<br />
El hilo está enredado<br />
Se tira del tejido con<br />
demasiada fuerza.<br />
Deje que el arrastre<br />
lo aliment solos. No<br />
tire del tejido.<br />
No se usa bien el<br />
pedal<br />
Página 40<br />
No<br />
No<br />
Página 10<br />
No<br />
La palanca de los<br />
alimentadores está<br />
en la posición baja<br />
Página 30<br />
No<br />
(Modelo <strong>PS</strong>-2470,<br />
<strong>PS</strong>-2360, <strong>PS</strong>-<strong>3100</strong>)<br />
La palanca de ojales<br />
está colocada hacia<br />
atrás.<br />
(Modelo <strong>PS</strong>-2470,<br />
<strong>PS</strong>-<strong>3100</strong>)<br />
El botón Arrancar/parar<br />
no funcionará cuando el<br />
pedal esté enchufado a<br />
la máquina.<br />
Página 10<br />
Página 64<br />
No<br />
PONGASE EN CONTACTO CON EL SERVICIO TECNICO LOCAL<br />
94
MAINTENANCE<br />
ENTRETIEN<br />
MANTENIMIENTO<br />
(Model <strong>PS</strong>-2250)<br />
Repacking the Machine<br />
Keep the carton and packing materials for future use. It may<br />
become necessary to reship the machine. Improper packing or<br />
improper packing material could result in damage during shipping.<br />
Instructions for repacking the machine are illustrated.<br />
* Hard case (1) and packing materials (2, 3) are included only<br />
with <strong>PS</strong>-2470/<strong>PS</strong>-<strong>3100</strong> and <strong>PS</strong>-2360.<br />
(Model <strong>PS</strong>-2470, <strong>PS</strong>-2360, <strong>PS</strong>-<strong>3100</strong>)<br />
3<br />
1<br />
2<br />
IMPORTANT<br />
This packing material is designed to prevent damage in<br />
transit. Save this packing material in the event it is needed to<br />
transport this machine.<br />
Emballage de la machine<br />
Conserver le carton et les matériaux d’emballage <strong>pour</strong> pouvoir les réutiliser<br />
dans le futur ou <strong>pour</strong> réexpédier la machine. Un emballage mal fait ou avec<br />
des matériaux inadéquats <strong>pour</strong>rait occasionner des dégâts pendant le<br />
transport. Voir les instructions <strong>pour</strong> remettre la machine dans son emballage<br />
d’origine.<br />
* Etui rigide (1) et materiaux d’emballage fournis (2, 3) avec les <strong>PS</strong>-<br />
2470/<strong>PS</strong>-<strong>3100</strong> et <strong>PS</strong>-2360.<br />
Embalaje de la máquina<br />
Guarde la caja de cartón y el embalaje por si acaso necesita<br />
transportar la máquina en el futuro. Un embalaje inadecuado o con<br />
materiales inapropiados puede causarle daños a la máquina durante<br />
el transporte. Para embalar la máquina correctamente, sírvase seguir<br />
las instrucciones que se ilustran.<br />
* La caja rígida (1) y materiales de embalaje (2, 3) solamente se<br />
incluyn con los modelos <strong>PS</strong>-2470/<strong>PS</strong>-<strong>3100</strong> y <strong>PS</strong>-2360.<br />
IMPORTANT<br />
Cet emballage a été conçu <strong>pour</strong> protéger la machine pendant le<br />
transport. Conservez-le au cas où il serait nécessaire de déménager<br />
la machine.<br />
IMPORTANTE<br />
El material de embalaje está diseñado para prevenir daños<br />
durante el transporte. Guárdelo siempre en caso de que tenga<br />
que volver a transportar la máquina.<br />
95
Page<br />
1/4-Inch Quilting Foot ............................................... 3, 83<br />
A<br />
Accessories .................................................................... 5<br />
Appliqués ..................................................................... 76<br />
Arrowhead Stitch .......................................................... 59<br />
B<br />
Bead Stitch ................................................................... 59<br />
Blind Hem Stitch........................................................... 54<br />
Bobbin Winder.............................................................. 33<br />
Bridging Stitch .............................................................. 57<br />
Button Sewing .............................................................. 72<br />
Buttonhole Fine Adjustment ......................................... 69<br />
Buttonhole Fine Adjustment Screw .............................. 69<br />
Buttonhole Lever .......................................................... 63<br />
C<br />
Changing Light Bulb ..................................................... 85<br />
Changing the Presser Foot .......................................... 13<br />
Checking the Needle .................................................... 11<br />
Cleaning ....................................................................... 87<br />
Comb Stitch.................................................................. 61<br />
Connecting Plugs ........................................................... 7<br />
Cord Jack ....................................................................... 7<br />
D<br />
Darning......................................................................... 75<br />
Decorative Hem Stitch ................................................. 57<br />
Decorative Stitch .......................................................... 59<br />
Double Action Stitch ..................................................... 57<br />
E<br />
Elastic Overlock Stitch ................................................. 61<br />
Elastic Shell Tuck Stitch ............................................... 61<br />
Elastic Stitch................................................................. 56<br />
Embroidering ................................................................ 77<br />
F<br />
Fabric/Thread/Needle Combinations ........................... 47<br />
Fagoting Stitch ............................................................. 60<br />
Feather Stitch ............................................................... 62<br />
Feed Dog Position Switch ............................................ 30<br />
Flat Bed Attachment with Accessory<br />
Compartment ......................................................... 14, 32<br />
Foot Controller ............................................................. 10<br />
Foot Controller Jack ................................................. 7, 10<br />
G<br />
Gathering ..................................................................... 73<br />
H<br />
Hole for Vertical Spool Pin ........................................... 44<br />
L<br />
Lower Threading .......................................................... 37<br />
M<br />
Main Power/Sewing Light Switch ................................... 9<br />
Manually Drawing Up Lower Thread ............................ 43<br />
Monogramming ............................................................ 77<br />
N<br />
Needle Threader .......................................................... 41<br />
Page<br />
O<br />
Overedge Stitching....................................................... 61<br />
P<br />
Parallelogram Stitch ..................................................... 59<br />
Patchwork .................................................................... 60<br />
Pattern Indication Window ........................................... 15<br />
Pattern Selection Dial................................................... 15<br />
Performance Check List ............................................... 89<br />
Presser Foot Lever....................................................... 39<br />
Principal Parts ................................................................ 1<br />
R<br />
Race ............................................................................ 87<br />
Rampart Stitch ............................................................. 57<br />
Repacking the Machine................................................ 95<br />
Reverse Sewing Lever ................................................. 29<br />
S<br />
Satin Stitch Foot ..................................... 3, 53, 58, 59, 76<br />
Scallop Stitch ............................................................... 58<br />
Sewing Speed Controller ............................................. 32<br />
Shell Tuck Stitch .......................................................... 55<br />
Shuttle .......................................................................... 87<br />
Spool Pin and Spool Cap ....................................... 33, 39<br />
Springaction Quilting Foot ........................................ 3, 81<br />
Start/Stop Button .......................................................... 31<br />
Stitch Length Dial ................................................... 15, 26<br />
Stitch Width Dial ........................................................... 28<br />
Straight Stitch ................................................... 50, 73, 75<br />
Stretch Blind Hem Stitch .............................................. 54<br />
T<br />
Thread Tension ............................................................ 46<br />
Triangle Stitch .............................................................. 59<br />
Triple Stretch Stitch ...................................................... 50<br />
Triple Zigzag Stretch Stitch .......................................... 62<br />
Twin Needle Sewing .................................................... 44<br />
U<br />
Upper Tension Control Dial .......................................... 46<br />
Upper Threading .......................................................... 39<br />
Using Needle Threader ................................................ 41<br />
W<br />
Walking Foot ............................................................ 3, 79<br />
Winding the Bobbin ...................................................... 33<br />
Z<br />
Zigzag Presser Foot ................................................. 5, 13<br />
Zigzag Stitch .............................................. 53, 72, 76, 77<br />
Zipper Foot ............................................................... 3, 73<br />
Zipper Insertion ............................................................ 73<br />
INDEX<br />
INDEX<br />
ÍNDICE<br />
96
INDEX<br />
INDEX<br />
ÍNDICE<br />
Page<br />
A<br />
Accessoires .............................................................................. 6<br />
Appliques ............................................................................... 76<br />
B<br />
Bouton de mise en marche/arret ............................................ 31<br />
Broberies ............................................................................... 78<br />
C<br />
Changement de pied-de-biche ............................................... 13<br />
Combinaisons tissu/fil/aiguille .............................................. 47<br />
Connecteur de la pedale du rheostat .................................. 7, 10<br />
Coursière ............................................................................... 88<br />
Couture avec l'aiguille jumelée ............................................. 44<br />
Crochet de la navette ............................................................. 88<br />
D<br />
Devidoir ................................................................................. 34<br />
E<br />
Emballage de la machine ....................................................... 95<br />
Enfilage inférieur ................................................................... 38<br />
Enfileur .................................................................................. 42<br />
Equilibrage des boutonnières ................................................ 70<br />
F<br />
Fenetre d'indication du modele de point ................................ 16<br />
Feston double ........................................................................ 59<br />
Feston .................................................................................... 58<br />
Fiche du cordon d'alimentation ............................................... 8<br />
I<br />
Insertion de fermeture à glissière .......................................... 74<br />
Interrupteur principal/de la lampe ........................................... 9<br />
L<br />
Levier d'abaissement des griffes d'entrainement ................... 30<br />
Levier de controle des plages de vitesses .............................. 32<br />
Levier de couture en marche arriere ...................................... 29<br />
Levier du pied-de-biche ......................................................... 40<br />
Levier <strong>pour</strong> boutonnieres ....................................................... 64<br />
Liste de vérification en cas de défaillances ........................... 91<br />
M<br />
Mise en place du fil supérieur ............................................... 40<br />
Monogrammes ....................................................................... 78<br />
N<br />
Nettoyage ............................................................................... 88<br />
O<br />
Orifice <strong>pour</strong> porte-bobine supplementaire............................. 44<br />
Outlet invisible décoratif ....................................................... 57<br />
Overlock élastique ................................................................. 61<br />
Page<br />
P<br />
Patchwork (Assemblage) ....................................................... 60<br />
Pedale du rheostat .................................................................. 10<br />
Pédale .................................................................................... 10<br />
Pièces principales .................................................................... 2<br />
Pied mobile ........................................................................ 3, 80<br />
Pied <strong>pour</strong> fermeture à glissière .......................................... 4, 74<br />
Pied <strong>pour</strong> point de bourdon ............................. 4, 53, 58, 59, 76<br />
Pied quilting 1/4" ............................................................... 3, 84<br />
Pied-de-biche à ressort <strong>pour</strong> piqués ................................... 3, 82<br />
Pied-de-biche <strong>pour</strong> points zigzags ..................................... 6, 13<br />
Plateau et compartiment d'accessoires ............................ 14, 32<br />
Plisse elastique ...................................................................... 61<br />
Point decoratif ....................................................................... 59<br />
Point droit .................................................................. 51, 74, 75<br />
Point elastique ....................................................................... 56<br />
Point élastique invisible ......................................................... 54<br />
Point en parallelogramme ...................................................... 59<br />
Point en remparts ................................................................... 57<br />
Point fagot ............................................................................. 60<br />
Point fleche ............................................................................ 59<br />
Point ourlet invisible ............................................................. 54<br />
Point peigne ........................................................................... 61<br />
Point picot .............................................................................. 55<br />
Point plume ............................................................................ 62<br />
Point pont .............................................................................. 57<br />
Point renforcé ........................................................................ 57<br />
Point triangulaire ................................................................... 59<br />
Point tripre ............................................................................. 51<br />
Point zigzag ......................................................... 53, 72, 76, 78<br />
Porte-bobine/disque bloque-bobine ................................. 34, 40<br />
Pour coudre un bouton .......................................................... 72<br />
Pour froncer un tissu .............................................................. 74<br />
R<br />
Raccordement .......................................................................... 8<br />
Remontée manuelle du fil de la canette ................................. 43<br />
Remplacement de l'ampoule .................................................. 86<br />
Remplissage de la canette ...................................................... 34<br />
Reprisage ............................................................................... 75<br />
S<br />
Selecteur de largeur de point ................................................. 28<br />
Selecteur de longueur de point ........................................ 16, 27<br />
Selecteur de modele de point ................................................. 16<br />
Selecteur de tension superieure ............................................. 46<br />
T<br />
Tension des fils ...................................................................... 46<br />
Triple point zigzag ................................................................. 62<br />
U<br />
Utilisation de l'enfileur .......................................................... 42<br />
V<br />
Vérification de l'aiguille ........................................................ 12<br />
Vis de reglage fin des boutonnieres....................................... 70<br />
97
Página<br />
A<br />
Accesorios ...................................................................... 6<br />
Ajuste fino de los ojales ................................................ 70<br />
Aplicaciones ................................................................. 76<br />
B<br />
Bobinado de la canilla .................................................. 34<br />
Bordados....................................................................... 78<br />
Botón de puesta en marcha/parada ............................... 31<br />
C<br />
Cambio de la bombilla.................................................. 86<br />
Cambio del prensatelas ................................................. 13<br />
Clavija del cordón de alimentación ................................ 8<br />
Combinaciones de tejido/hilo/aguja .............................. 48<br />
Conectador del pedal ................................................ 7, 10<br />
Conexión de los enchufes ............................................... 8<br />
Costura con aguja doble ............................................... 44<br />
Costura de botones ....................................................... 72<br />
D<br />
Disco de control de la tensión superior ......................... 46<br />
Dispositivo de bobinado de la canilla ........................... 34<br />
E<br />
Eje del carrete y porta carretes ................................ 34, 40<br />
Elementos principales ..................................................... 2<br />
Embalaje de la máquina ................................................ 95<br />
Enhebrado inferior ........................................................ 38<br />
Enhebrado superior ....................................................... 40<br />
Enhebrador de agujas .................................................... 42<br />
F<br />
Fruncido ....................................................................... 74<br />
G<br />
Garfio de la lanzadera................................................... 88<br />
I<br />
Indicador de puntada .................................................... 16<br />
Inserción de cremalleras ............................................... 74<br />
Interruptor principal/luz de cosido .................................. 9<br />
L<br />
Levantar manualmente el hilo inferior ........................... 43<br />
Limpieza ....................................................................... 88<br />
Listado de posibles incidencias ..................................... 93<br />
M<br />
Monogramas ................................................................. 78<br />
O<br />
Orifico para el porta carretes vertical ............................ 44<br />
Página<br />
P<br />
Palanca de alimentadores ............................................. 30<br />
Palanca de control del rango de velocidad ................... 32<br />
Palanca de ojales .......................................................... 64<br />
Palanca del prensatelas ................................................. 40<br />
Pata de cremalleras ................................................... 4, 74<br />
Patchwork ..................................................................... 60<br />
Pedal ............................................................................ 10<br />
Pie caminante ........................................................... 3, 80<br />
Pista de la lanzadera ..................................................... 88<br />
Plataforma con compartimento de accesorios ......... 14, 32<br />
Prensa telas zigzag .................................................... 6, 13<br />
Prensatela para pespunte 1/4..................................... 3, 84<br />
Prénsatela para puntada de realce ........... 4, 53, 58, 59, 76<br />
Prensatelas enguatador.............................................. 3, 82<br />
Pulsador de retroceso .................................................... 29<br />
Puntada de acción doble .............................................. 57<br />
Puntada decorativa ....................................................... 59<br />
Puntada decorativa invisible ......................................... 57<br />
Puntada elástica ............................................................ 56<br />
Puntada fagoting ........................................................... 60<br />
Puntada festón .............................................................. 58<br />
Puntada festón doble .................................................... 59<br />
Puntada flecha .............................................................. 59<br />
Puntada invisible........................................................... 54<br />
Puntada invisible elástica .............................................. 54<br />
Puntada ondas abiertas ................................................. 57<br />
Puntada ondas elásticas ................................................ 61<br />
Puntada ondas .............................................................. 55<br />
Puntada overlock elástica.............................................. 61<br />
Puntada paralelogramo ................................................. 59<br />
Puntada peine ............................................................... 61<br />
Puntada pluma .............................................................. 62<br />
Puntada por encima de la orilla .................................... 61<br />
Puntada puente ............................................................. 57<br />
Puntada recta .................................................... 51, 74, 75<br />
Puntada triángulo .......................................................... 59<br />
Puntada zigzag............................................ 53, 72, 76, 78<br />
S<br />
Selector de ancho de puntada ....................................... 28<br />
Selector de largo de puntada ................................... 16, 27<br />
Selector de puntadas ..................................................... 16<br />
T<br />
Tensión de los hilos ...................................................... 46<br />
Tornillo de ajuste fino de los ojales ............................... 70<br />
Triple puntada pespunto ............................................... 51<br />
Triple puntada zigzag elástica ....................................... 62<br />
U<br />
Uso del enhebrador ...................................................... 42<br />
V<br />
Verificación de la aguja ................................................ 12<br />
Z<br />
Zurcido ......................................................................... 75<br />
INDEX<br />
INDEX<br />
ÍNDICE<br />
98
ENGLISH<br />
FRANÇAIS<br />
ESPAÑOL<br />
194279-0111<br />
Printed in Taiwan


