Aufbauanleitung - Karibu
Aufbauanleitung - Karibu
Aufbauanleitung - Karibu

Create successful ePaper yourself
Turn your PDF publications into a flip-book with our unique Google optimized e-Paper software.
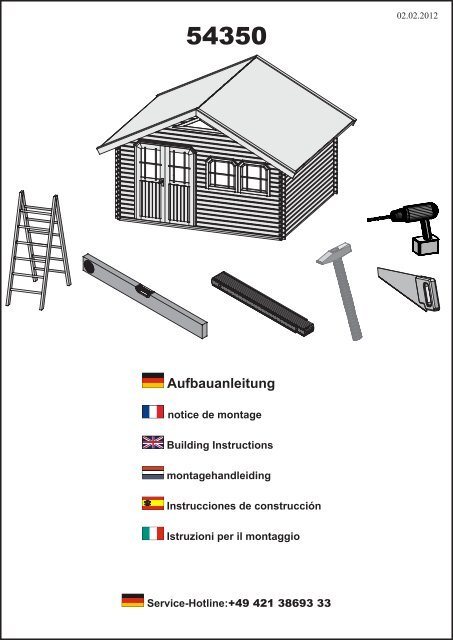
54350<br />
<strong>Aufbauanleitung</strong><br />
notice de montage<br />
Building Instructions<br />
montagehandleiding<br />
Instrucciones de construcción<br />
Istruzioni per il montaggio<br />
Service-Hotline:+49 421 38693 33<br />
02.02.2012
Vergleichen Sie zuerst die<br />
Materialliste mit Ihrem Paketinhalt! Bitte ha�<br />
ben Sie Verständnis, dass Beanstandungen<br />
nur im nicht aufgebauten Zustand bearbei�<br />
tet werden können!<br />
Vergeli�k Vergeli�k eerst de li�st li�st �an �an ma� ma�<br />
terialen met de inhoud �an uw pakket!<br />
Reclamaties kunnen alleen in behandeling<br />
worden genomen zolang de onderdelen<br />
nog niet zi�n gemonteerd!<br />
1 x A1 1515 x 45 x 18mm ID 21585<br />
4 x A2 2100 x 45 x 18mm ID 19547<br />
5 x A3 1940 x 95 x 18mm ID 15495<br />
4 x A4 2750 x 95 x 18mm ID 42095<br />
12 x A5 250 x 140 x 26mm ID 21602<br />
1 x A6 625 x 38 x 28mm ID 42302<br />
4 x A7 3990 x 60 x 40mm ID 28695<br />
6 x W1 272 x 121 x 40mm ID 42299<br />
34 x W2 3570 x 121 x 40mm ID 29485<br />
18 x W3 4170 x 121 x 40mm ID 23023<br />
2 x W4 4170 x 71 x 40mm ID 29547<br />
Commencez par comparer la liste<br />
du matériel a�ec le contenu de �otre pa�<br />
quet! Sachez que nous traitons uniquement<br />
les réclamations concernant le matériel à<br />
l’état non monté!<br />
En primer lugar, compare la lista<br />
de material con el contenido del paquete.<br />
Rogamos entienda que las reclamaciones<br />
sólo pueden ser tramitadas antes de mon�<br />
tar el ob�eto!<br />
54350<br />
6 x W5 381 x121 x40mm ID 42298<br />
16 x W6 485 x121 x40mm ID 38777<br />
10 x W7 2200x121x40mm ID 29548<br />
2 x W8 4140x1066x40mm ID 29914<br />
1 x G1 2500 x113x40mm ID 49369<br />
1 x G2 2902 x113x40mm ID 49368<br />
1 x G3 2500 x113x40mm ID 49370<br />
1 x G4 2902 x113x40mm ID 49367<br />
2 x G5 154 x 113 x 18mm ID 49383<br />
First compare the list of materials<br />
with your package contents! Please under�<br />
stand that complaints can be processed in<br />
the non�built status only!<br />
Confrontate questa distinta mate� mate�<br />
riali prima con il contenuto del pacchetto!<br />
Vi preghiamo di comprendere che e�entuali<br />
reclami possono essere accolti solo prima<br />
del montaggio!<br />
4 x Y1 198 x 52 x 23mm ID 21324<br />
2 x Y2 1304 x 52 x 23mm<br />
8 x Y3 185 x 52 x 23mm ID 21325<br />
4 x Y4 563 x 52 x 23mm<br />
1 x D1 ID 14157<br />
3 x M1 3920x140x78mm ID 29911<br />
4 x Z1 2750x140x26mm ID 49417<br />
90 × B1 2700 × 96 × 18mm ID 19569
2 x ID 13695<br />
1 x ID 21088<br />
1 × ID 16034<br />
3 x 10m² ID 37962<br />
70 x 4 x 25mm ID 5841<br />
80 x 4 x 35mm ID 3687<br />
60 x 4 x 50mm ID 3688<br />
60 x 4 x 60mm ID 21207<br />
8 x 4,5 x 80mm ID 9204<br />
4 x 6 x 120mm ID 9205<br />
250 x 4 x 70mm ID 39352<br />
1000 x ID 5621<br />
300 x ID 3949<br />
2 x ID 16337<br />
1 x ID 15979
01<br />
Z 1<br />
A 3<br />
Y 1/2<br />
W 6<br />
A 2<br />
G 1<br />
D 1<br />
A 5<br />
A 4<br />
G 4<br />
G 5<br />
W 8<br />
W 1<br />
A 5<br />
W 2<br />
A 1<br />
B 1<br />
A 4<br />
W 7<br />
Z 1<br />
A 5<br />
M 1<br />
Y 3/4<br />
W 4<br />
A 4<br />
W 3<br />
Z 1<br />
A 5<br />
W 5<br />
A 7<br />
W 8<br />
W 3<br />
M 1<br />
A 4<br />
W 4<br />
A 5<br />
A 7<br />
B 1<br />
A 7<br />
M 1<br />
G 5<br />
G 3<br />
A 5<br />
A 2<br />
W 2<br />
G 2<br />
Z 1<br />
A 3
02 2x<br />
03<br />
04<br />
04.3<br />
04.1<br />
04.3<br />
A 7 = A<br />
90°<br />
04.1<br />
A 7<br />
4×70<br />
4×70<br />
A<br />
3990 mm<br />
W 4<br />
04.2<br />
04.4<br />
A 7<br />
4,5×80<br />
W 4<br />
Ø4mm<br />
04.4<br />
A 7<br />
4×70<br />
4×70<br />
ca 60mm<br />
ca 40mm<br />
A 7 = A<br />
3415 mm<br />
04.3<br />
!
05<br />
4×70<br />
W 2<br />
4×70<br />
06 4×70<br />
4×70<br />
07<br />
15x W 6<br />
W 6<br />
16x<br />
W 3<br />
W 2<br />
W 3<br />
W 7<br />
W 7<br />
6x W 1<br />
8x W 7<br />
4×70<br />
4×70<br />
16x W 3<br />
6x W 5<br />
W 2<br />
16x<br />
W 2<br />
4×70<br />
4×70<br />
!<br />
4×70<br />
4×70<br />
4×70<br />
4×70<br />
4×70<br />
4×70<br />
4×70<br />
4×70<br />
4×70<br />
4×70<br />
4×70<br />
4×70<br />
4×70<br />
4×70
Verschraubung Ausschnitte<br />
Vissage découpes<br />
20mm<br />
20mm<br />
4×60<br />
Cut-outs for screw connections<br />
Vastschroeven uitsparingen<br />
4×60<br />
Atornilladura recorte<br />
Fissaggio tavole<br />
Verschraubung Ausschnitte<br />
Holz hat ein natürliches Quell und Schwindverhalten. Dadurch „wächst“ und „schrumpft“ Ihr Haus im Laufe eines Jahres. Kürzere Holzbohlen (Front) passen sich<br />
schneller als längere Bohlen den aktuellen klimatischen Bedingungen an. Dadurch kann es zu Spaltenbildungen kommen. Um diese Spaltenbildung zu verringern aber<br />
gleichzeitig das natürliche Quell- und Schwindverhalten des Holzes zu gewährleisten müssen Sie an Fenster und Türausschnitten die jeweils zwei direkt übereinandersitzenden<br />
Bohlen miteinander verbinden. Verwenden Sie dafür Spax 4 x 60. Bohren Sie die Bohlen bei einer Verschraubung immer vor. Hinweis: Schräge Bohrungen ohne<br />
Abrutschen: Die ersten 3 bis 5mm den Bohrer senkrecht zur Holzoberfläche ansetzen und erst dann im gewünschten Winkel bohren.<br />
Vissage découpes<br />
Le bois a un comportement naturel de gonflement et de rétractation. C’est ainsi que votre pavillon «se gonfle» et «se rétracte» au cours d’une année. Les madriers de bois<br />
plus courts (façade) s’adaptent plus rapidement aux conditions climatiques que les madriers plus longs. Ceci peut entraîner des fentes. Pour réduire cette formation de<br />
fentes tout en garantissant que le bois puisse se comporter de manière naturelle, vous devez raccorder au niveau des fenêtres et des découpes de porte les deux madriers<br />
respectivement situés l’un sous l’autre. A cet effet, utilisez des Spax 4 x 60. Lors de vissages, veuillez toujours percer un trou préalable dans les madriers. Remarque: pour<br />
percer des trous inclinés sans déraper, veuillez tenirr la perceuse de manière perpendiculaire lors des premiers 3-5 mm, puis percer ensuite dans l’angle souhaité.<br />
Cut-outs for screw connections<br />
Wood is subject to a natural process of swelling and contraction. For this reason, over the course of the year your house “grows” and “shrinks”. Shorter wooden boards<br />
(front) adapt faster than long boards to the momentary climatic conditions. This can result in cracking. In order to reduce this cracking and at the same time allow for<br />
the natural growth and shrinkage behaviour of the wood, at the window and door recesses you must join each two boards positioned directly over each other. For this<br />
purpose, use 4 x 60 Spax joints. Always pre-drill the boards for screw can drill obliquely into the wood without slipping connections. Note: You away by setting on the<br />
drill vertically for the first 3-5 mm and only then drilling obliquely.<br />
Vastschroeven uitsparingen<br />
Hout zet uit en krimpt van nature. Daardoor zal ook uw huisje in de loop van een jaar „uitzetten“ en „krimpen“. Kortere houten delen (front) passen zich sneller danlangere<br />
delen aan de verschillende klimatologische omstandigheden aan. Daardoor kunnen er zich spleten vormen. Om de vorming van deze spleten te verminderen, maar tegelijkertijd<br />
het natuurlijke uitzet- en krimpgedrag van het hout te waarborgen, moet u bij raam- en deuruitsparingen telkens de twee direct boven elkaar bevindende delen met<br />
elkaar verbinden. Gebruik daarvoor spax-schroeven 4 x 60. Boor de delen bij het vastschroeven altijd voor. Opmerking: schuin boren in hout zonder weg te glijden gaat<br />
het beste door de eerste 3-5 mm de boor haaks op de oppervlakte van het hout te houden en pas daarna onder de gewenste hoek te boren.<br />
Atornilladura recorte<br />
La madera tiene un comportamiento natural de hinchamento y encogimiento. Debido al mismo, su casa „crece“ y se „encoge“ a lo largo del año. Los tablones de madera<br />
cortos (parte delantera) se adaptan más rápido que los largos a las condiciones climatológicas. Para reducir esta formación de ranuras pero, al mismo tiempo, garantizar<br />
el proceso natural de hinchamiento y encogimiento de la madera, tiene que unir en la ventana y los recortes de la puerta entre sí los dos tableros que están justo uno sobre<br />
otro. Utilice para ello Spax 4 x 60. Perfore siempre previamente los tablones antes de efectuar el atornillamiento. Advertencia: Para efectuar perforaciones inclinadas en<br />
la madera sin resbalar hacer los primeros 3-5 mm con la broca vertical respecto a la superficie y después inclinar en el ángulo deseado.<br />
Fissaggio tavole<br />
È naturale che il legno lavori dilatandosi e restringendosi. Per questo la vostra casa „cresce“ e „si contrae“ nel corso dell’anno. Le assi più brevi (quelle frontali) si adattano<br />
alle situazioni climatiche più velocemente di quelle più lunghe. Per questo si può avere la formazione di crepe. Per minimizzare il rischio dela formazione di crepe ma allo<br />
stesso tempo per permettere le contrazioni e dilatazioi del legno, sulle aperture della finestra e della porta collegare le due assi direttamente in contatto tra loro. Utilizzare<br />
a tal fine viti a croce da 4 x 60. Preforare sempre le assi prima di avvitarle. Avviso: Per fare dei fori obliqui nel legno senza che la punta scivoli si può dapprima fare un<br />
foro perpendicolare per 3-5 mm e poi iniziare a forare con l’angolo desiderato.<br />
4×60
08<br />
09<br />
09.1 A<br />
09.1 B<br />
09.1<br />
A<br />
B<br />
G 1<br />
4×70<br />
280mm<br />
4×70<br />
4×70<br />
G 4<br />
G 5<br />
4×70<br />
!!! A=B !!!<br />
Ø3mm<br />
Ø3mm<br />
4×35<br />
3<br />
4×35<br />
7<br />
B<br />
A<br />
G 5<br />
G 3<br />
4×70<br />
G 2<br />
4×70
10<br />
10.1<br />
10.2<br />
W 8<br />
6×120 6×120 10.1 10.2 10.3 6×120 10.4 6×120<br />
11<br />
Ø5mm<br />
Ø5mm<br />
M 1<br />
M 1<br />
W 8<br />
10.3<br />
M 1<br />
10.4<br />
Ø5mm Ø5mm
12<br />
12.1<br />
12.2<br />
12.2<br />
12 + 12.1 + 12.2 12 + 12.1 712.2<br />
4x<br />
A 5A<br />
5<br />
4x<br />
12.1<br />
4×50<br />
4x<br />
4x<br />
4×70<br />
4x<br />
4x 4x<br />
A 5<br />
A 5<br />
Ø3mm<br />
A 5<br />
A 5 A 5<br />
Ø3mm<br />
A 5<br />
Ø3mm<br />
4×50<br />
A 5<br />
A 5<br />
4x<br />
A 5 A 5<br />
4x
13<br />
13.1 13.3 13.5<br />
14<br />
13.1<br />
13.2<br />
B 1<br />
13.3<br />
13.2 13.4<br />
13.4<br />
13.5<br />
B 1
Montage Dachpappe<br />
Montage Couverture en<br />
carton bitumé<br />
ca 10cm<br />
ca 10cm<br />
Roofing felt installation<br />
Montage dakvilt<br />
Montaje de tela asfáltica<br />
Montaggio del cartone catramato<br />
Montage Dachpappe Montage Couverture en carton bitumé Roofing felt installation<br />
Achtung, dies ist nur ein Verlegebeispiel. Die Anzahl<br />
der Dachpappbahnen richtet sich nach Ihrer<br />
Hausgröße. Stöße von Dachpappe während einer<br />
Bahn sind mit einem Überschlag von 10cm der<br />
Dachpappe durchzuführen. Bei Verwendung von<br />
nur 4 Bahnen keine Firstbahn verwenden, seitliche<br />
Bahnen mit über den First legen.<br />
Achtung! Das Dach ist nicht begehbar. Die Konstruktion<br />
ist für eine Gesamtbelastung (Schnee,<br />
Wind) und nicht für eine Punktbelastung ausgelegt.<br />
Zur Montage empfehlen wir eine bauseitige Abstützung<br />
des Daches von unten.<br />
Achtung! Wenn Sie ein Haus mit Satteldach haben,<br />
sollten Sie bei der Verwendung von Schindeln<br />
keine Voreindeckung mit Dachpappe vornehmen.<br />
Bei Häusern mit Tonnendach verlegen Sie bitte<br />
Dachpappe unter die Schindeln. Damit Sie lange<br />
Freude an Ihrem Gartenhaus haben, sollten Sie diese<br />
Dacheindeckung nach 2 Jahren erneuern.<br />
Attention, il s’agit uniquement d’un exemple<br />
de pose. Le nombre de bandes de carton bitumé<br />
dépend de la taille de la maison. La jointure du<br />
carton bitumé sur une bande doit être réalisée avec<br />
une superposition de 10 cm. Si 4 bandes seulement<br />
sont utilisées, ne pas avoir recours à une bande de<br />
faîte, appliquer les bandes latérales sur le faîte.<br />
Attention ! Ne pas marcher sur le toit ! La construction<br />
peut supporter une charge répartie sur sa<br />
totalité (neige, vent), et non concentrée sur un point<br />
précis. Lors du montage, il vous est recommandé<br />
d’étayer le toit par en dessous.<br />
Attention ! Si votre maison possède un toit en<br />
bâtière, ne pas poser de couverture préalable en<br />
carton bitumé pour les couvertures en bardeaux.<br />
Pour les maisons avec toit en berceau, poser du<br />
carton bitumé sous les bardeaux. Pour profiter le<br />
plus longtemps possible de votre maison de jardin,<br />
renouveler la couverture du toit tous les deux ans.<br />
ca 5cm<br />
ca 10cm<br />
Note! This description is only an example. The<br />
number of required rolls of roofing felt depends on<br />
the actual size of the summer house. When joining<br />
rolls of roofing felt end to end, the overlap must<br />
be 10 cm. When using just 4 rolls of roofing felt,<br />
always cover the horizontal ridge beam with the<br />
rolls from both sides.<br />
Caution! The roof is not safe to walk on. The roof<br />
is designed for a total load (snow, wind) and not for<br />
a point load. We recommend you to always support<br />
the roof from below during installation.<br />
Caution! When using shingles to cover a house<br />
with a gable roof, never use roofing felt as a<br />
preliminary covering. Always install the roofing<br />
felt underneath the shingles for houses with an<br />
arched roof. To ensure maximum enjoyment of<br />
your summer house, renew the roof covering every<br />
two years.
Montage Dachpappe<br />
Montage Couverture en<br />
carton bitumé<br />
ca 10cm<br />
ca 10cm<br />
Roofing felt installation<br />
Montage dakvilt<br />
Montaje de tela asfáltica<br />
Montaggio del cartone catramato<br />
ca 5cm<br />
Montage dakvilt Montaje de tela asfáltica Montaggio del cartone catramato<br />
Let op, dit is slechts een montagevoorbeeld. Het<br />
aantal dakviltbanen is afhankelijk van de grootte<br />
van uw huis. Voegen van dakvilt tijdens een baan<br />
dienen met een overlapping van 10cm uitgevoerd<br />
te worden. Bij gebruik van slechts vier banen geen<br />
firstbaan gebruiken, banen aan de zijkant ook over<br />
de first leggen.<br />
Let op! Het dak is niet beloopbaar. De constructie is<br />
ontworpen voor een totaalbelasting (sneeuw, wind)<br />
en niet voor een puntbelasting. Voor de montage<br />
adviseren we te voorzien in een zelf aan te brengen<br />
steun voor het dak van onderen.<br />
Let op! Wanneer u een huis met zadeldak hebt, zou<br />
u bij het gebruik van dakshingles geen voorafdekking<br />
met dakvilt moeten aanbrengen. Bij huizen<br />
met een boogdek dient u dakvilt onder de shingles<br />
aan te brengen. Om lang plezier van uw tuinhuisje<br />
te hebben, zou u deze dakafdekking na twee jaar<br />
moeten vervangen.<br />
Cuidado, éste es sólo un ejemplo de instalación.<br />
La cantidad de tiras de tela asfáltica depende del<br />
tamaño de su caseta. Las juntas de tela en una tira<br />
se realizan solapando la tela asfáltica 10 cm. Cuando<br />
sólo se empleen cuatro tiras no se debe utilizar<br />
ninguna tira de cumbrera, sino colocar las tiras<br />
laterales sobre la cumbrera.<br />
¡Atención! El techo no es transitable. La construcción<br />
está preparada para cargas totales (nieve, viento)<br />
y no para cargas puntuales. Para el montaje se<br />
recomienda apuntalar el techo por debajo.<br />
¡Atención! Si tiene una casa con tejado a dos<br />
aguas, en caso de utilizar cubierta de ripias no se<br />
debería cubrir previamente con tela asfáltica. En<br />
las casas con tejado en forma de tonel, por favor<br />
coloque la tela asfáltica debajo de la cubierta de<br />
ripias. Para disfrutar de su caseta de jardín durante<br />
mucho tiempo se aconseja renovar la cubierta del<br />
tejado cada 2 años.<br />
ca 10cm<br />
Attenzione, questo è solo un esempio di posa! La<br />
quantità dei rulli di cartone catramato dipende dalle<br />
dimensioni della casa. Le congiunzioni del cartone<br />
catramato in una corsia vanno con una sovrapposizione<br />
di 10 cm dei due pezzi di cartone catramato.<br />
Se si impiegano 4 file non disporne una sul colma<br />
ma far passare un bordo oltre il colmo stesso.<br />
Attenzione! Non salire sul tetto. La costruzione<br />
è progettata per un carico diffuso (neve, vento) e<br />
non per una concentrazione puntuale del peso. Per<br />
il montaggio si consiglia un supporto del tetto con<br />
una costruzione posta sotto di esso.<br />
Attenzione! Se si utilizza la scandola per rivestire<br />
il tetto, non si dovrebbe utilizzare il rivestimento<br />
in cartone catramato. Per case con tetto a botte,<br />
posare il cartone catramato sotto la scandola. Per<br />
garantire una lunga durata della casetta da giardino,<br />
è necessario rinnovare la copertura del tetto ogni<br />
2 anni.
15 2x<br />
16<br />
17<br />
Z 1<br />
A 2<br />
A 2 + A 2 = 1820mm<br />
Z 1<br />
Ø3mm<br />
4×35<br />
4x<br />
1820 mm<br />
Z 1<br />
4x<br />
A 2<br />
Z 1<br />
A 2 = 1820mm
18 2x<br />
20<br />
A 3 = 380mm<br />
21<br />
6x<br />
A 3 = 1600mm<br />
A 3<br />
7x<br />
A 4<br />
1600 mm<br />
A 4<br />
A 3<br />
4x<br />
19 1x<br />
4×35<br />
Ø3mm<br />
Ø3mm<br />
A 4<br />
4×35<br />
4x<br />
380 mm<br />
A 3 = 380mm<br />
Ø3mm<br />
A 4<br />
A 3<br />
4×35<br />
A 3<br />
A 3 = 1600mm
22<br />
24<br />
25<br />
A 1<br />
4×35<br />
22.1<br />
Ø3mm<br />
4×70<br />
4×70<br />
Ø3mm<br />
Ø3mm<br />
22.1<br />
23<br />
4×35<br />
Ø3mm
55341 55343<br />
Türmontage<br />
Assemblage de porte<br />
Door assembly<br />
Assemblage van de deur<br />
Montaje de la puerta<br />
Assemblea del portello<br />
Service-Hotline:+49 421 38693 33<br />
22.05.2012
Vergleichen Sie zuerst die Materialliste<br />
mit Ihrem Paketinhalt! Bitte haben Sie<br />
Verständnis, dass Beanstandungen nur im<br />
nicht aufgebauten Zustand bearbeitet werden<br />
können!<br />
Vergeli�k Vergeli�k eerst de li�st li�st �an �an ma- materialen<br />
met de inhoud �an uw pakket!<br />
Reclamaties kunnen alleen in behandeling<br />
worden genomen zolang de onderdelen<br />
nog niet zi�n gemonteerd!<br />
1 x DFT1 ID 39641<br />
1 x DFT2 ID 39643<br />
2 x DFT3 ID 39647-1<br />
1 x DFT4 ID 39647-2<br />
2 x DFT5 ID 39645<br />
1 x DFT6 ID 39658<br />
Commencez par comparer la liste<br />
du matériel a�ec le contenu de �otre paquet!<br />
Sachez que nous traitons uniquement<br />
les réclamations concernant le matériel à<br />
l’état non monté!<br />
En primer lugar, compare la lista<br />
de material con el contenido del paquete.<br />
Rogamos entienda que las reclamaciones<br />
sólo pueden ser tramitadas antes de montar<br />
el ob�eto!<br />
55341 55343<br />
First compare the list of materials<br />
with your package contents! Please understand<br />
that complaints can be processed in<br />
the non-built status only!<br />
Confrontate questa distinta matemateriali prima con il contenuto del pacchetto!<br />
Vi preghiamo di comprendere che e�entuali<br />
reclami possono essere accolti solo prima<br />
del montaggio!<br />
1 x ID 15979
01 Leim<br />
Coller<br />
Glue<br />
Lijm<br />
Pegamento<br />
Colla<br />
02<br />
03<br />
03.1<br />
03.1<br />
DFT 6<br />
22mm<br />
DFT 3<br />
03.2<br />
B<br />
90°<br />
22mm<br />
DFT 4<br />
A<br />
03.2<br />
04<br />
DFT 3<br />
!!! A=B !!!<br />
6h
05<br />
07<br />
07.1<br />
1490mm<br />
1900mm<br />
06<br />
07.1
08<br />
10<br />
20mm<br />
10.1<br />
09<br />
10.1
11<br />
14<br />
2x<br />
DFT 5<br />
Leim<br />
Coller<br />
Glue<br />
Lijm<br />
Pegamento<br />
Colla<br />
DFT 5<br />
DFT 5<br />
15<br />
12<br />
13<br />
Y 1<br />
Y 1<br />
Y 2<br />
Y 2<br />
Die Hütchenprofile dürfen nur mit der Tür und nicht<br />
mit dem Haus verschraubt werden! De afdekprofielen<br />
mogen uitsluitend op het deur, niet op het huisje worden<br />
vastgeschroefd! Les profils de panne sont à visser à<br />
la porte, non à la maison! Screw the capping profiles<br />
onto the door only, not onto the cabin! Los perfiles<br />
de sombrerete sólo se pueden atornillar a la puerta, no a<br />
la caseta! I cappellotti possono essere avvitati solo al<br />
portello, non alla casa!<br />
4×20<br />
4×20<br />
Ø3mm<br />
Ø3mm<br />
Y 1<br />
Die Hütchenprofile dürfen nur mit der Tür und nicht<br />
mit dem Haus verschraubt werden! De afdekprofielen<br />
mogen uitsluitend op het deur, niet op het huisje worden<br />
vastgeschroefd! Les profils de panne sont à visser à<br />
la porte, non à la maison! Screw the capping profiles<br />
onto the door only, not onto the cabin! Los perfiles<br />
de sombrerete sólo se pueden atornillar a la puerta, no a<br />
la caseta! I cappellotti possono essere avvitati solo al<br />
portello, non alla casa!<br />
Y 1
16<br />
16.1<br />
16.1-3 16.1-4 16.1-5<br />
17<br />
17.1<br />
16.1-1 16.1-2<br />
17.1-1<br />
17.1-2<br />
Ø10mm
01<br />
02<br />
03<br />
04<br />
05<br />
ID 21088<br />
1190mm<br />
303mm
13695 16337 21325<br />
<strong>Aufbauanleitung</strong><br />
notice de montage<br />
Building Instructions<br />
montagehandleiding<br />
Instrucciones de construcción<br />
Istruzioni per il montaggio<br />
Service-Hotline:+49 421 38693 33
Vergleichen Sie zuerst die<br />
Materialliste mit Ihrem Paketinhalt! Bitte ha�<br />
ben Sie Verständnis, dass Beanstandungen<br />
nur im nicht aufgebauten Zustand bearbei�<br />
tet werden können!<br />
Vergeli�k Vergeli�k eerst de li�st li�st �an �an ma� ma�<br />
terialen met de inhoud �an uw pakket!<br />
Reclamaties kunnen alleen in behandeling<br />
worden genomen zolang de onderdelen<br />
nog niet zi�n gemonteerd!<br />
1 x F1 790 x 790 x 63mm<br />
1 x F2 675 x 675 x 50mm<br />
1 x F3<br />
1 x F4<br />
Commencez par comparer la liste<br />
du matériel a�ec le contenu de �otre pa�<br />
quet! Sachez que nous traitons uniquement<br />
les réclamations concernant le matériel à<br />
l’état non monté!<br />
En primer lugar, compare la lista<br />
de material con el contenido del paquete.<br />
Rogamos entienda que las reclamaciones<br />
sólo pueden ser tramitadas antes de mon�<br />
tar el ob�eto!<br />
13695 16337<br />
1 x F5<br />
1 x F6<br />
1 x F7<br />
1 x F8<br />
1 x F9<br />
12 x<br />
First compare the list of materials<br />
with your package contents! Please under�<br />
stand that complaints can be processed in<br />
the non�built status only!<br />
Confrontate questa distinta mate� mate�<br />
riali prima con il contenuto del pacchetto!<br />
Vi preghiamo di comprendere che e�entuali<br />
reclami possono essere accolti solo prima<br />
del montaggio!
01<br />
01.1<br />
60mm<br />
F 2<br />
01.1<br />
F 9<br />
F 8<br />
F 8<br />
01.2<br />
F 4<br />
01.2<br />
F 4<br />
55mm
02<br />
F 1<br />
02.1<br />
03 03.1<br />
03.1 03.2<br />
02.1<br />
F 2<br />
F 6<br />
F 1<br />
03.2<br />
Bündig!<br />
Affleurement!<br />
Gelijk!<br />
Aras!<br />
Flush!<br />
Combacia!<br />
F 6<br />
F 5<br />
F 7
04<br />
05<br />
05.2<br />
05.2<br />
F 2<br />
04.1<br />
05.1<br />
F 3<br />
F 5<br />
F 2<br />
F 1<br />
04.1<br />
05.1<br />
F 4<br />
F 5<br />
F 3<br />
Führen Sie F3 durch F4 hindurch + Festschrauben<br />
Mettez le F3 per F4 + Visser<br />
Put F3 through F4 + Screw on<br />
Gezette F3 door F4 + Schroef<br />
Pase el F3 con F4 + Tornillo encendido<br />
Faccia passare il F3 con F4 + Vite sopra
01<br />
109mm<br />
535mm<br />
1520mm<br />
02 03<br />
2x 2x<br />
04<br />
535mm<br />
758mm<br />
109mm
05<br />
06<br />
07<br />
A 6<br />
05.1<br />
05.1<br />
4×35<br />
Ø3mm
08<br />
09 2x<br />
Y 3/4<br />
Y 3/4<br />
Y 3/4<br />
4x25<br />
Y 3/4<br />
Ø3mm<br />
Die Hütchenprofile dürfen nur mit dem Fenster und<br />
nicht mit dem Haus verschraubt werden!<br />
De afdekprofielen mogen uitsluitend op het raam, niet<br />
op het huisje worden vastgeschroefd!<br />
Les profils de panne sont à visser à la fenêtre, non à la<br />
maison!<br />
Screw the capping profiles onto the window only, not<br />
onto the cabin!<br />
Los perfiles de sombrerete sólo se pueden atornillar a<br />
la ventana, no a la caseta!<br />
I cappellotti possono essere avvitati solo alla finestra,<br />
non alla casa!