EC 2002 antistatic
EC 2002 antistatic
EC 2002 antistatic
- No tags were found...

You also want an ePaper? Increase the reach of your titles
YUMPU automatically turns print PDFs into web optimized ePapers that Google loves.
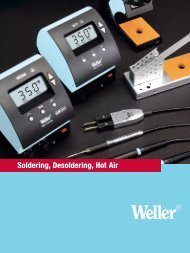
Available COD version temperature socketsTemp. Model Order No.210°C Encoder socket 210 52611799260°C Encoder socket 260 52611899310°C Encoder socket 310 52610199350°C Encoder socket 350 52610499385°C Encoder socket 385 52611499410°C Encoder socket 410 52610999440°C Encoder socket 440 52611299MaintenanceThe temperature sensor (52641099 Exploded view) is encased in stainless steel. Thishasa cone-shaped tip for optimal heat contact and has been exactly adjusted for the solderingtip. This arrangement ensures the best possible temperature transfer. Please be surethat this opening is not impaired by dirt, foreign bodies or deformation since these willaffect the temperature regulation.3. Potential equalisationPotential equalisation of the soldering tip can be achieved using the 4mm metal socketon the front side of the unit. Building up of a potential-free work place including a goodearthing is recommended, e.g. when soldering highly integrated MOS components.Potential equalisation is factory set with 0 Ohm impedance. R/C filter 120 KOhm/22nFis possible by disconnecting a wire jumper on the regulator circuit board (circuit diagrampoint 7).As a practical supplement for building up an ESD work place, we recommend the pushbutton adapter 52609699.Picture: Push button adapter, see page 524. Working recommendationsNever use the soldering iron without a tip. Doing so will damage the heating elementand temperature sensor.Always be sure that the soldering tip is properly tinned during pauses in soldering andwhen replacing the soldering iron into the holder. Don't use aggressive fluxing agents.Any mechanical treatment of the soldering tip destroys the electro-plated protectivecoating of the soldering tip and decreases its lifetime.There is a possibility to attach the safety support rack to the control unit. The safetysupport rack can be attached to the left or the right side of the control unit and lockedby sliding it back.After setting the temperature with the potentiometer, the knob can be fixed in place bytightening the screw located below the turn knob underneath the control unit with ascrewdriver (Philips No. 1).The Soldering Station has been adjusted for a medium soldering tip. Temperaturedeviations can occur due to tip changes and by use of other tip forms.5. Safety noticesThe manufacturer assumes no liability for uses other than those specified in the OperationManual as well as any self-made changes to the unit.This Operation Manual and the warning notices therein should be read carefully as wellas kept in good view and near the soldering unit. Failure to observe these warningnotices can lead to accidents, injuries or damage to health.The WELLER Soldering Station <strong>EC</strong> <strong>2002</strong> complies with the <strong>EC</strong> Declaration of Conformityaccording to the fundamental safety standards of the directive 89/336/EWG, 73/23/EWG and 89/392/EWG.6. Accessory list53311099 Soldering iron set MPR-3053311199 Soldering iron set MLR-2153312099 Desoldering set WT-5051305099 Reflow soldering device EXIN-552702699 Pre-heating plate WHP-5052503099 Thermal wire stripper WST-5052910699 FE 25 soldering iron 25W with device for solder vapour suction52515399 FE 50 soldering iron 50W with device for solder vapour suction52609699 Push button adapter for potential equalisation52911599 Adapter kit for COD version19<strong>EC</strong><strong>2002</strong>.pm651911.03.<strong>2002</strong>, 11:06 Uhr