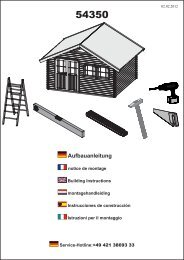
Aufbauanleitung - Karibu
Aufbauanleitung - Karibu
Aufbauanleitung - Karibu

You also want an ePaper? Increase the reach of your titles
YUMPU automatically turns print PDFs into web optimized ePapers that Google loves.
54279<br />
<strong>Aufbauanleitung</strong><br />
notice de montage<br />
Building Instructions<br />
montagehandleiding<br />
Instrucciones de construcción<br />
Istruzioni per il montaggio<br />
Service-Hotline:+49 421 38693 33<br />
01.08.2012
Vergleichen Sie zuerst die Materialliste<br />
mit Ihrem Paketinhalt! Bitte haben Sie<br />
Verständnis, dass Beanstandungen nur im<br />
nicht aufgebauten Zustand bearbeitet werden<br />
können!<br />
Vergeli�k Vergeli�k eerst de li�st li�st �an �an ma- materialen<br />
met de inhoud �an uw pakket!<br />
Reclamaties kunnen alleen in behandeling<br />
worden genomen zolang de onderdelen<br />
nog niet zi�n gemonteerd!<br />
1 x A1 1515 x 45 x 18mm ID 21585<br />
4 x A2 2100 x 45 x 18mm ID 19547<br />
4 x A3 2150 x 95 x 18mm ID 55071<br />
2 x A4 400 x 120 x 18mm ID 21291<br />
6 x A5 250 x 140 x 26mm ID 21602<br />
2 x A6 3090 x 60 x 40mm ID 28694<br />
2 x A7 3690 x 60 x 40mm ID 28688<br />
88 × B1 2090 × 96 × 18mm ID 44693<br />
30 x W1 212 x121 x40mm ID 55469<br />
32 x W2 3270 x 121 x 40mm ID 21962<br />
16 x W3 3870 x 121 x 40mm ID 21961<br />
Commencez par comparer la liste<br />
du matériel a�ec le contenu de �otre paquet!<br />
Sachez que nous traitons uniquement<br />
les réclamations concernant le matériel à<br />
l’état non monté!<br />
En primer lugar, compare la lista<br />
de material con el contenido del paquete.<br />
Rogamos entienda que las reclamaciones<br />
sólo pueden ser tramitadas antes de montar<br />
el ob�eto!<br />
54279<br />
2 x W4 3870 x 71 x 40mm ID 43452<br />
30 x W5 411 x121 x40mm ID 23364<br />
2 x W6 1192x121x40mm ID 55468<br />
2 x W7 3870x537x40mm ID 55074<br />
1 x G1 2500 x108x40mm ID 55195<br />
1 x G2 2602 x108x40mm ID 56514<br />
First compare the list of materials<br />
with your package contents! Please understand<br />
that complaints can be processed in<br />
the non-built status only!<br />
Confrontate questa distinta mate- materiali<br />
prima con il contenuto del pacchetto!<br />
Vi preghiamo di comprendere che e�entuali<br />
reclami possono essere accolti solo prima<br />
del montaggio!<br />
1 x G3 2500 x108x40mm ID 55194<br />
1 x G4 2602 x108x40mm ID 56515<br />
4 x Y1 700 x 33 x 22mm ID 20994<br />
1 x Y2 1520 x 33 x 22mm ID 20993<br />
1 x Y3 1520 x 110 x 26mm ID 48135<br />
3 x M1 3620x140x78mm ID 28815
3 x M2 472 x140 x 78mm ID 42137<br />
4 x Z1 2150 x 140 x 26mm ID 58120<br />
2 x E1 ID 54073<br />
2 x L1 600 x 38 x 28mm ID 55471<br />
2 x L2 1695 x 38 x 28mm<br />
1 x L3 1515 x 38 x 28mm ID 15990<br />
2 x L4 1830 x 38 x 28mm<br />
1 x D1 ID 47177<br />
2 x D2 1547 x 22 x 18mm ID 55470<br />
2 x D3 1630 x 22 x 18mm ID 47180<br />
1 x 7,5m² ID 3710<br />
1 x 10m² ID 37962<br />
2 x ID 16337<br />
1 x ID 15980<br />
70 x 4 x 25mm ID 5841<br />
60 x 4 x 35mm ID 3687<br />
60 x 4 x 50mm ID 3688<br />
60 x 4 x 60mm ID 21207<br />
8 x 4,5 x 80mm ID 9204<br />
4 x 6 x 120mm ID 9205<br />
200 x 4 x 70mm ID 39352<br />
1000 x ID 5621<br />
300 x ID 3949<br />
1 x ID 16034
01<br />
Y 1<br />
A 3<br />
Z 1<br />
E 1<br />
G 1<br />
Y 1<br />
D 2<br />
M 2<br />
W 5<br />
W 2<br />
A 2<br />
G 4<br />
W 1<br />
D 1<br />
D 3<br />
B 1<br />
Y 3<br />
M 2<br />
W 7<br />
Y 2<br />
D 3<br />
A 1<br />
A 6<br />
M 1<br />
M 2<br />
E 1<br />
A 5<br />
W 1<br />
A 3<br />
D 2<br />
M 1<br />
Y 1<br />
Y 1<br />
W 7<br />
W 3<br />
B 1<br />
W 4<br />
A 5<br />
M 1<br />
A 7<br />
W 5<br />
A 6<br />
A 5<br />
W 4<br />
W 6<br />
Z 1<br />
A 4<br />
A 7<br />
A 3<br />
W 2<br />
A 2<br />
A 3<br />
G 3<br />
Z 1<br />
G 2
02 Leim<br />
2x<br />
D 2<br />
Coller<br />
Glue<br />
Lijm<br />
Pegamento<br />
Colla<br />
03 04 05 06<br />
2x 2x 2x 2x<br />
07<br />
A 6<br />
90°<br />
E 1<br />
3690 mm<br />
A 7<br />
4,5×80<br />
Ø4mm<br />
A 7<br />
L 2<br />
L 1<br />
L 1<br />
ca 60mm<br />
ca 40mm<br />
A 6<br />
3090 mm<br />
L 2<br />
!
08<br />
08.3<br />
09<br />
4×70<br />
08.1<br />
08.3<br />
08.1<br />
W 2<br />
4×70<br />
4×70<br />
4×70<br />
Ø3mm<br />
Ø3mm<br />
W 4<br />
08.2<br />
08.4<br />
W 4<br />
08.4<br />
4×70<br />
4×70<br />
4×70<br />
W 2<br />
08.3<br />
Ø3mm<br />
Ø3mm<br />
4×70<br />
!
10<br />
11<br />
4×70<br />
15x<br />
W 2<br />
4×70<br />
W 6<br />
W 6<br />
15x W 3<br />
15x W 5 15x W 1 15x W 1 15x W 5<br />
4×70<br />
W 3<br />
15x<br />
W 2<br />
4×70<br />
4×70<br />
4×70<br />
4×70<br />
4×70<br />
4×70<br />
4×70<br />
4×70<br />
4×70<br />
4×70<br />
4×70<br />
4×70<br />
4×70
Verschraubung Ausschnitte<br />
Vissage découpes<br />
20mm<br />
20mm<br />
4×60<br />
Cut-outs for screw connections<br />
Vastschroeven uitsparingen<br />
4×60<br />
Atornilladura recorte<br />
Fissaggio tavole<br />
Verschraubung Ausschnitte<br />
Holz hat ein natürliches Quell und Schwindverhalten. Dadurch „wächst“ und „schrumpft“ Ihr Haus im Laufe eines Jahres. Kürzere Holzbohlen (Front) passen sich<br />
schneller als längere Bohlen den aktuellen klimatischen Bedingungen an. Dadurch kann es zu Spaltenbildungen kommen. Um diese Spaltenbildung zu verringern aber<br />
gleichzeitig das natürliche Quell- und Schwindverhalten des Holzes zu gewährleisten müssen Sie an Fenster und Türausschnitten die jeweils zwei direkt übereinandersitzenden<br />
Bohlen miteinander verbinden. Verwenden Sie dafür Spax 4 x 60. Bohren Sie die Bohlen bei einer Verschraubung immer vor. Hinweis: Schräge Bohrungen ohne<br />
Abrutschen: Die ersten 3 bis 5mm den Bohrer senkrecht zur Holzoberfläche ansetzen und erst dann im gewünschten Winkel bohren.<br />
Vissage découpes<br />
Le bois a un comportement naturel de gonflement et de rétractation. C’est ainsi que votre pavillon «se gonfle» et «se rétracte» au cours d’une année. Les madriers de bois<br />
plus courts (façade) s’adaptent plus rapidement aux conditions climatiques que les madriers plus longs. Ceci peut entraîner des fentes. Pour réduire cette formation de<br />
fentes tout en garantissant que le bois puisse se comporter de manière naturelle, vous devez raccorder au niveau des fenêtres et des découpes de porte les deux madriers<br />
respectivement situés l’un sous l’autre. A cet effet, utilisez des Spax 4 x 60. Lors de vissages, veuillez toujours percer un trou préalable dans les madriers. Remarque: pour<br />
percer des trous inclinés sans déraper, veuillez tenirr la perceuse de manière perpendiculaire lors des premiers 3-5 mm, puis percer ensuite dans l’angle souhaité.<br />
Cut-outs for screw connections<br />
Wood is subject to a natural process of swelling and contraction. For this reason, over the course of the year your house “grows” and “shrinks”. Shorter wooden boards<br />
(front) adapt faster than long boards to the momentary climatic conditions. This can result in cracking. In order to reduce this cracking and at the same time allow for<br />
the natural growth and shrinkage behaviour of the wood, at the window and door recesses you must join each two boards positioned directly over each other. For this<br />
purpose, use 4 x 60 Spax joints. Always pre-drill the boards for screw can drill obliquely into the wood without slipping connections. Note: You away by setting on the<br />
drill vertically for the first 3-5 mm and only then drilling obliquely.<br />
Vastschroeven uitsparingen<br />
Hout zet uit en krimpt van nature. Daardoor zal ook uw huisje in de loop van een jaar „uitzetten“ en „krimpen“. Kortere houten delen (front) passen zich sneller danlangere<br />
delen aan de verschillende klimatologische omstandigheden aan. Daardoor kunnen er zich spleten vormen. Om de vorming van deze spleten te verminderen, maar tegelijkertijd<br />
het natuurlijke uitzet- en krimpgedrag van het hout te waarborgen, moet u bij raam- en deuruitsparingen telkens de twee direct boven elkaar bevindende delen met<br />
elkaar verbinden. Gebruik daarvoor spax-schroeven 4 x 60. Boor de delen bij het vastschroeven altijd voor. Opmerking: schuin boren in hout zonder weg te glijden gaat<br />
het beste door de eerste 3-5 mm de boor haaks op de oppervlakte van het hout te houden en pas daarna onder de gewenste hoek te boren.<br />
Atornilladura recorte<br />
La madera tiene un comportamiento natural de hinchamento y encogimiento. Debido al mismo, su casa „crece“ y se „encoge“ a lo largo del año. Los tablones de madera<br />
cortos (parte delantera) se adaptan más rápido que los largos a las condiciones climatológicas. Para reducir esta formación de ranuras pero, al mismo tiempo, garantizar<br />
el proceso natural de hinchamiento y encogimiento de la madera, tiene que unir en la ventana y los recortes de la puerta entre sí los dos tableros que están justo uno sobre<br />
otro. Utilice para ello Spax 4 x 60. Perfore siempre previamente los tablones antes de efectuar el atornillamiento. Advertencia: Para efectuar perforaciones inclinadas en<br />
la madera sin resbalar hacer los primeros 3-5 mm con la broca vertical respecto a la superficie y después inclinar en el ángulo deseado.<br />
Fissaggio tavole<br />
È naturale che il legno lavori dilatandosi e restringendosi. Per questo la vostra casa „cresce“ e „si contrae“ nel corso dell’anno. Le assi più brevi (quelle frontali) si adattano<br />
alle situazioni climatiche più velocemente di quelle più lunghe. Per questo si può avere la formazione di crepe. Per minimizzare il rischio dela formazione di crepe ma allo<br />
stesso tempo per permettere le contrazioni e dilatazioi del legno, sulle aperture della finestra e della porta collegare le due assi direttamente in contatto tra loro. Utilizzare<br />
a tal fine viti a croce da 4 x 60. Preforare sempre le assi prima di avvitarle. Avviso: Per fare dei fori obliqui nel legno senza che la punta scivoli si può dapprima fare un<br />
foro perpendicolare per 3-5 mm e poi iniziare a forare con l’angolo desiderato.<br />
4×60
12<br />
A<br />
B<br />
13 G 4<br />
13.1 A<br />
13.1 B<br />
G 1<br />
13.1<br />
4×70<br />
470mm<br />
4×70<br />
4×70<br />
4×70<br />
A 4<br />
!!! A=B !!!<br />
Ø3mm<br />
Ø3mm<br />
4×35<br />
3<br />
4×35<br />
7<br />
A 4<br />
A<br />
B<br />
G 3<br />
4×70<br />
G 2<br />
4×70
14 14.1<br />
14.3<br />
33mm 33mm<br />
14.1 6×120<br />
14.2<br />
Ø5mm<br />
14.3 6×120<br />
14.4<br />
Ø5mm<br />
W 7<br />
W 7<br />
14.4<br />
6×120<br />
Ø5mm<br />
6×120<br />
Ø5mm<br />
14.2
15<br />
16.1<br />
16.2<br />
4x<br />
16 + 16.1 + 16.2 16 + 16.1<br />
16 16.1<br />
16.2<br />
M 2<br />
4x<br />
A 5<br />
A 5<br />
4x<br />
M 1<br />
4x<br />
M 2<br />
4x<br />
A 5<br />
M 1<br />
A 5<br />
Ø3mm<br />
4x<br />
Ø3mm<br />
Ø3mm<br />
4×50<br />
M 1<br />
4×50<br />
4×70<br />
M 2<br />
4x<br />
4x<br />
A 5<br />
716.2<br />
A 5<br />
4x
17<br />
17.1 17.3 17.5<br />
18<br />
17.1<br />
17.2<br />
17.2<br />
B 1<br />
17.3<br />
17.4<br />
17.4<br />
17.5<br />
B 1
Montage Dachpappe<br />
Montage Couverture en<br />
carton bitumé<br />
ca 10cm<br />
ca 10cm<br />
Roofing felt installation<br />
Montage dakvilt<br />
Montaje de tela asfáltica<br />
Montaggio del cartone catramato<br />
Montage Dachpappe Montage Couverture en carton bitumé Roofing felt installation<br />
Achtung, dies ist nur ein Verlegebeispiel. Die Anzahl<br />
der Dachpappbahnen richtet sich nach Ihrer<br />
Hausgröße. Stöße von Dachpappe während einer<br />
Bahn sind mit einem Überschlag von 10cm der<br />
Dachpappe durchzuführen. Bei Verwendung von<br />
nur 4 Bahnen keine Firstbahn verwenden, seitliche<br />
Bahnen mit über den First legen.<br />
Achtung! Das Dach ist nicht begehbar. Die Konstruktion<br />
ist für eine Gesamtbelastung (Schnee,<br />
Wind) und nicht für eine Punktbelastung ausgelegt.<br />
Zur Montage empfehlen wir eine bauseitige Abstützung<br />
des Daches von unten.<br />
Achtung! Wenn Sie ein Haus mit Satteldach haben,<br />
sollten Sie bei der Verwendung von Schindeln<br />
keine Voreindeckung mit Dachpappe vornehmen.<br />
Bei Häusern mit Tonnendach verlegen Sie bitte<br />
Dachpappe unter die Schindeln. Damit Sie lange<br />
Freude an Ihrem Gartenhaus haben, sollten Sie diese<br />
Dacheindeckung nach 2 Jahren erneuern.<br />
Attention, il s’agit uniquement d’un exemple<br />
de pose. Le nombre de bandes de carton bitumé<br />
dépend de la taille de la maison. La jointure du<br />
carton bitumé sur une bande doit être réalisée avec<br />
une superposition de 10 cm. Si 4 bandes seulement<br />
sont utilisées, ne pas avoir recours à une bande de<br />
faîte, appliquer les bandes latérales sur le faîte.<br />
Attention ! Ne pas marcher sur le toit ! La construction<br />
peut supporter une charge répartie sur sa<br />
totalité (neige, vent), et non concentrée sur un point<br />
précis. Lors du montage, il vous est recommandé<br />
d’étayer le toit par en dessous.<br />
Attention ! Si votre maison possède un toit en<br />
bâtière, ne pas poser de couverture préalable en<br />
carton bitumé pour les couvertures en bardeaux.<br />
Pour les maisons avec toit en berceau, poser du<br />
carton bitumé sous les bardeaux. Pour profiter le<br />
plus longtemps possible de votre maison de jardin,<br />
renouveler la couverture du toit tous les deux ans.<br />
ca 5cm<br />
ca 10cm<br />
Note! This description is only an example. The<br />
number of required rolls of roofing felt depends on<br />
the actual size of the summer house. When joining<br />
rolls of roofing felt end to end, the overlap must<br />
be 10 cm. When using just 4 rolls of roofing felt,<br />
always cover the horizontal ridge beam with the<br />
rolls from both sides.<br />
Caution! The roof is not safe to walk on. The roof<br />
is designed for a total load (snow, wind) and not for<br />
a point load. We recommend you to always support<br />
the roof from below during installation.<br />
Caution! When using shingles to cover a house<br />
with a gable roof, never use roofing felt as a<br />
preliminary covering. Always install the roofing<br />
felt underneath the shingles for houses with an<br />
arched roof. To ensure maximum enjoyment of<br />
your summer house, renew the roof covering every<br />
two years.
Montage Dachpappe<br />
Montage Couverture en<br />
carton bitumé<br />
ca 10cm<br />
ca 10cm<br />
Roofing felt installation<br />
Montage dakvilt<br />
Montaje de tela asfáltica<br />
Montaggio del cartone catramato<br />
Montage dakvilt Montaje de tela asfáltica Montaggio del cartone catramato<br />
Let op, dit is slechts een montagevoorbeeld. Het<br />
aantal dakviltbanen is afhankelijk van de grootte<br />
van uw huis. Voegen van dakvilt tijdens een baan<br />
dienen met een overlapping van 10cm uitgevoerd<br />
te worden. Bij gebruik van slechts vier banen geen<br />
firstbaan gebruiken, banen aan de zijkant ook over<br />
de first leggen.<br />
Let op! Het dak is niet beloopbaar. De constructie is<br />
ontworpen voor een totaalbelasting (sneeuw, wind)<br />
en niet voor een puntbelasting. Voor de montage<br />
adviseren we te voorzien in een zelf aan te brengen<br />
steun voor het dak van onderen.<br />
Let op! Wanneer u een huis met zadeldak hebt, zou<br />
u bij het gebruik van dakshingles geen voorafdekking<br />
met dakvilt moeten aanbrengen. Bij huizen<br />
met een boogdek dient u dakvilt onder de shingles<br />
aan te brengen. Om lang plezier van uw tuinhuisje<br />
te hebben, zou u deze dakafdekking na twee jaar<br />
moeten vervangen.<br />
Cuidado, éste es sólo un ejemplo de instalación.<br />
La cantidad de tiras de tela asfáltica depende del<br />
tamaño de su caseta. Las juntas de tela en una tira<br />
se realizan solapando la tela asfáltica 10 cm. Cuando<br />
sólo se empleen cuatro tiras no se debe utilizar<br />
ninguna tira de cumbrera, sino colocar las tiras<br />
laterales sobre la cumbrera.<br />
¡Atención! El techo no es transitable. La construcción<br />
está preparada para cargas totales (nieve, viento)<br />
y no para cargas puntuales. Para el montaje se<br />
recomienda apuntalar el techo por debajo.<br />
¡Atención! Si tiene una casa con tejado a dos<br />
aguas, en caso de utilizar cubierta de ripias no se<br />
debería cubrir previamente con tela asfáltica. En<br />
las casas con tejado en forma de tonel, por favor<br />
coloque la tela asfáltica debajo de la cubierta de<br />
ripias. Para disfrutar de su caseta de jardín durante<br />
mucho tiempo se aconseja renovar la cubierta del<br />
tejado cada 2 años.<br />
ca 5cm<br />
ca 10cm<br />
Attenzione, questo è solo un esempio di posa! La<br />
quantità dei rulli di cartone catramato dipende dalle<br />
dimensioni della casa. Le congiunzioni del cartone<br />
catramato in una corsia vanno con una sovrapposizione<br />
di 10 cm dei due pezzi di cartone catramato.<br />
Se si impiegano 4 file non disporne una sul colma<br />
ma far passare un bordo oltre il colmo stesso.<br />
Attenzione! Non salire sul tetto. La costruzione<br />
è progettata per un carico diffuso (neve, vento) e<br />
non per una concentrazione puntuale del peso. Per<br />
il montaggio si consiglia un supporto del tetto con<br />
una costruzione posta sotto di esso.<br />
Attenzione! Se si utilizza la scandola per rivestire<br />
il tetto, non si dovrebbe utilizzare il rivestimento<br />
in cartone catramato. Per case con tetto a botte,<br />
posare il cartone catramato sotto la scandola. Per<br />
garantire una lunga durata della casetta da giardino,<br />
è necessario rinnovare la copertura del tetto ogni<br />
2 anni.
19 2x<br />
20<br />
21<br />
Z 1<br />
A 2 + A 2 = 1435mm<br />
A 2<br />
Z 1<br />
1435 mm<br />
5x<br />
4×35<br />
Z 1<br />
Ø3mm<br />
A 2<br />
5x<br />
Z 1<br />
A 2 = 1435mm
22<br />
23<br />
23.1<br />
4×35<br />
Ø3mm<br />
A 3<br />
A 3<br />
23.2<br />
23.2<br />
23.1<br />
A 3<br />
4×35<br />
Ø3mm<br />
A 3
24<br />
25<br />
26<br />
4×35<br />
Ø3mm<br />
4×70<br />
4×70<br />
A 1<br />
Ø3mm<br />
Ø3mm
15980 15990 20993 47177<br />
47180 48135 BB<br />
Türmontage<br />
Assemblage de porte<br />
Door assembly<br />
Assemblage van de deur<br />
Montaje de la puerta<br />
Assemblea del portello<br />
Service-Hotline:+49 421 38693 33
Vergleichen Sie zuerst die<br />
Materialliste mit Ihrem Paketinhalt! Bitte ha�<br />
ben Sie Verständnis, dass Beanstandungen<br />
nur im nicht aufgebauten Zustand bearbei�<br />
tet werden können!<br />
Vergeli�k Vergeli�k eerst de li�st li�st �an �an ma� ma�<br />
terialen met de inhoud �an uw pakket!<br />
Reclamaties kunnen alleen in behandeling<br />
worden genomen zolang de onderdelen<br />
nog niet zi�n gemonteerd!<br />
1 x DFT1 ID 47179<br />
1 x DFT2 ID 47178<br />
1 x DFT3 ID 39637�1<br />
1 x DFT4 ID 39637�2<br />
1 x DFT5 ID 39637�3<br />
1 x DFT6 ID 39658<br />
Commencez par comparer la liste<br />
du matériel a�ec le contenu de �otre pa�<br />
quet! Sachez que nous traitons uniquement<br />
les réclamations concernant le matériel à<br />
l’état non monté!<br />
En primer lugar, compare la lista<br />
de material con el contenido del paquete.<br />
Rogamos entienda que las reclamaciones<br />
sólo pueden ser tramitadas antes de mon�<br />
tar el ob�eto!<br />
15980 15990 20993 47177 47180 48135 BB<br />
First compare the list of materials<br />
with your package contents! Please under�<br />
stand that complaints can be processed in<br />
the non�built status only!<br />
Confrontate questa distinta mate� mate�<br />
riali prima con il contenuto del pacchetto!<br />
Vi preghiamo di comprendere che e�entuali<br />
reclami possono essere accolti solo prima<br />
del montaggio!<br />
2 x D2 ID 47180<br />
1 x ID 15980<br />
1 x L3 1515 x 38 x 28mm<br />
2 x L4 1830 x 38 x 28mm<br />
ID 15990<br />
1 x Y2 1520 x 33 x 22mm ID 20993<br />
1 x Y3 1520 x 70 x 26mm ID 48135
01 Leim<br />
Coller<br />
Glue<br />
Lijm<br />
Pegamento<br />
Colla<br />
02<br />
03<br />
DFT 3<br />
DFT 5<br />
DFT 4<br />
02.1<br />
02.1<br />
DFT 5<br />
02.1<br />
!
04<br />
04.1<br />
06<br />
04.1<br />
30mm<br />
B<br />
04.2<br />
90°<br />
04.2<br />
30mm<br />
A<br />
07<br />
!!! A=B !!!<br />
05<br />
6h
08<br />
20mm<br />
10 11<br />
L 4<br />
12 13<br />
Y 3<br />
L 3<br />
L 4<br />
09<br />
Die Hütchenprofile dürfen nur mit der Tür und nicht mit dem<br />
Haus verschraubt werden! De afdekprofielen mogen uitsluitend op het<br />
deur, niet op het huisje worden vastgeschroefd! Les profils de panne<br />
sont à visser à la porte, non à la maison! Screw the capping profiles<br />
onto the door only, not onto the cabin! Los perfiles de sombrerete sólo<br />
se pueden atornillar a la puerta, no a la caseta!<br />
essere avvitati solo al portello, non alla casa!<br />
I cappellotti possono<br />
4x25<br />
Ø3mm
14<br />
16<br />
17<br />
2x<br />
D 2<br />
Y 2<br />
15<br />
DFT 1<br />
Die Hütchenprofile dürfen nur mit der Tür und nicht mit dem<br />
Haus verschraubt werden! De afdekprofielen mogen uitsluitend op het<br />
deur, niet op het huisje worden vastgeschroefd! Les profils de panne<br />
sont à visser à la porte, non à la maison! Screw the capping profiles<br />
onto the door only, not onto the cabin! Los perfiles de sombrerete sólo<br />
se pueden atornillar a la puerta, no a la caseta!<br />
essere avvitati solo al portello, non alla casa!<br />
I cappellotti possono<br />
4x25<br />
DFT 2<br />
Ø3mm<br />
Leim<br />
Coller<br />
Glue<br />
Lijm<br />
Pegamento<br />
Colla
18<br />
19<br />
18.1<br />
19.1<br />
18.1-1<br />
18.1-2<br />
19.1-1<br />
19.1-2<br />
Ø10mm
Handling • Wartung • Pflege<br />
der Tür<br />
Usage • Maintenance •<br />
Entretien de la porte<br />
Instandhaltung ist Voraussetzung für eine Gewährleistung<br />
Zur nachhaltigen Sicherung der Gebrauchstauglichkeit und Werthaltigkeit,<br />
ist auch während des Gewährleistungszeitraumes eine fachgerechte<br />
Wartung und Pflege erforderlich, die nicht in die Gewährleistungsverpflichtung<br />
eingeschlossen ist. Defekte müssen sofort nach der<br />
Entdeckung behoben werden.<br />
Holzschutztechnische Behandlung der Tür<br />
Alle Bauteile der Tür müssen immer holzschutztechnisch behandelt<br />
werden. Die Stellen des Holzes, die später durch den Aufbau nicht<br />
mehr zugänglich sind sollten vor dem Aufbau vollständig behandelt<br />
werden.<br />
Behandeln Sie das Produkt mit Bläuesperrgrund, anschließend versehen<br />
Sie es mit einem zweifachen Schutzanstrich einer offenporigen<br />
Holzschutzlasur. Spätestens alle zwei Jahre sollten Sie einen Schutzanstrich<br />
wiederholen.<br />
Bei den Türen ist zu beachten, dass die eingesetzten Werkstoffplatten<br />
bei ungeeigneten Anstrichstoffen farbliche Abweichungen zu den Türen<br />
bekommen.<br />
Bei farbigen und kesseldruckimprägnierten Häusern müssen lediglich<br />
die naturbelassenen Holzstellen (Sägeschnitte) und Teile nachbehandelt<br />
werden.<br />
Eine gleichmäßige Farbdeckung ist im Innenbereich durch einmaliges<br />
Überstreichen zu erreichen. Verwenden Sie dazu einen offenporigen<br />
Wasserdispersionslack auf Acrylharzbasis.<br />
Um eine hohe Lebensdauer Ihres Produktes zu gewährleisten sollten<br />
beschädigte Stellen sofort repariert werden. Dazu die beschädigte<br />
Stelle leicht anschleifen und erneut mit Farbe versehen. Erkundigen<br />
Sie sich nach geeigneten Lasuren bei Ihrem Farbenfachberater.<br />
Weiterhin kann man, um eine hohe Lebensdauer der Tür zu gewährleisten<br />
und die Schlagregendichtigkeit zu erhöhen, den Holz-Fensterscheibenübergang<br />
mit geeigneten Abdichtmassen versiegeln.<br />
Wurden diese Pflegemaßnamen nicht sachgemäß durchgeführt,<br />
kann es zu Formänderungen, Bläue, Pilzbefall<br />
der Türen und Zargen und Verlust der Gewährleistung<br />
kommen.<br />
Reinigung<br />
Regelmäßige Reinigung und Pflege ist eine Grundvoraussetzung zur<br />
Erhaltung der Lebensdauer und Funktionsfähigkeit hochwertiger<br />
Produkte. Es sind Außen- und Innenseiten und auch der Falzbereich<br />
zu reinigen. Die Reinigungsmittel müssen dabei auf das entsprechende<br />
Material abgestimmt sein, was vor Beginn der Arbeiten zu prüfen ist.<br />
Verformung der Tür<br />
Holz reagiert auf Umwelteinflüsse. So kommt es je nach Witterung<br />
zum Quellen und Schwinden des Holzes. Dadurch treten Maßabweichungen<br />
und leichte Verformungen auf.<br />
Um die Schließfähigkeit der Tür zu erhalten, muss je nach Witterung<br />
die Tür durch Rein- und Rausdrehen an der Bänder ausgerichtet werden.<br />
Ein Verzug der Türen ist zu akzeptieren, solange die<br />
Funktion durch die hier aufgeführten Einstellmöglichkeiten<br />
gewährleistet ist.<br />
Für Schäden die durch Gewalteinwirkungen entstehen, besteht kein<br />
Gewährleistungsanspruch.<br />
Handling • Maintenance • Care<br />
of the door<br />
Handling • Onderhoud •<br />
Schoonmaken van de deur<br />
Manejo • Mantenimiento •<br />
Cuidado de la puerta<br />
Installazione • Manutenzione •<br />
Cura del portoncino<br />
Einstellen der Tür<br />
Die Tür muss genau ausgerichtet werden damit eine einwandfreie<br />
Funktion gegeben ist. Der Türrahmen muss rechtwinklig und lotrecht<br />
eingebaut sein. Weiterhin muss der Türrahmen so montiert sein, dass<br />
er oben und unten die selbe Breite hat.<br />
Schließt die Tür nicht, oder ein Türblatt hängt schief, kann dies durch<br />
leichtes Rein- oder Herausdrehen der Einschraubbänder berichtigt<br />
werden. Bis zu 5 Umdrehungen kann man diese Bänder rausdrehen.<br />
Wenn Sie eine Doppelflügeltür haben, muss der Feststellflügel stets<br />
nach oben und unten mittels der dafür vorgesehenen Beschlägen gesichert<br />
werden.<br />
Beispiele für die Einstellung der Türen:<br />
Einschraubband
Handling • Wartung • Pflege<br />
der Tür<br />
Usage • Maintenance •<br />
Entretien de la porte<br />
La garantie liée au matériel est subordonnée à son entretien.<br />
Afin d’assurer au matériel un fonctionnement et une valeur durables,<br />
une maintenance et un entretien appropriés pendant toute la durée<br />
de la garantie sont nécessaires mais ne font pas partie intégrale de<br />
la garantie. Il convient de remédier aux anomalies ou aux défauts<br />
aussitôt après leur constatation.<br />
Technique de traitement pour la préservation du bois<br />
Les éléments de la porte au complet font l’objet d’une technique de<br />
traitement de préservation du bois. Après le montage, certaines parties<br />
du bois ne seront plus accessibles. Elles seront par conséquent traitées<br />
entièrement avant le montage.<br />
Apposer avec une couche d’anti-corrosif sur le bois puis passer deux<br />
couches de lasure à pores ouverts pour bois. Repasser une couche de<br />
lasure de protection au moins tous les deux ans.<br />
Noter qu’une peinture non appropriée pour les panneaux en<br />
contreplaqué peut donner ultérieurement une couleur différente de<br />
celle des portes.<br />
En ce qui concerne les maisonnettes prépeintes et autoclavées, seuls<br />
les emplacements où le bois brut apparaît, tels que les parties sciées et<br />
les divers éléments, doivent subir un traitement complet.<br />
Il suffit de passer une seule couche sur la surface intérieure pour<br />
obtenir une couleur homogène.<br />
Pour ce faire, il est conseillé d’utiliser une laque à dispersion aqueuse<br />
et à pores ouverts à base de résine acrylique.<br />
Afin d’assurer au produit une longévité maximum, il est recommandé de<br />
réparer immédiatement les parties endommagées qui seront légèrement<br />
poncées dans un premier temps puis enduites d’une nouvelle couche<br />
de peinture. Renseignez-vous sur les lasures appropriées auprès de<br />
votre magasin de peintures.<br />
Pour obtenir une longévité maximum de la porte et une optimisation<br />
de son imperméabilité contre les intempéries, colmater les espaces<br />
entre l’encadrement et la vitre de la fenêtre avec un mastic ou une pâte<br />
de colmatage adaptés.<br />
Ces mesures d’entretien, si elles ne sont pas appliquées de<br />
manière appropriée, peuvent provoquer des déformations,<br />
des attaques de corrosion, des attaques fongiques des<br />
portes et des encadrements et entraînent la perte de la<br />
garantie liée au produit.<br />
Nettoyage<br />
Un nettoyage et un entretien réguliers garantissent une longévité<br />
maximum et un excellent fonctionnement des produits de haute qualité.<br />
Nettoyer les parois extérieures et intérieures ainsi que les jointures.<br />
Les produits de nettoyage doivent être appropriés au matériel à traiter.<br />
Vérifier leur compatibilité avant le commencement des travaux.<br />
Déformation de la porte<br />
Le bois réagit sous l’influence de son environnement. C’est ainsi qu’il<br />
gonfle et qu’il se resserre selon le temps qu’il fait. Il peut en résulter<br />
des variations de proportions et des déformations.<br />
C’est pourquoi, afin d’obtenir la fermeture exacte d’une porte, il est<br />
nécessaire de procéder à un ajustement de la fixation au cours des<br />
changements de saison en enfonçant les fiches vers l’intérieur ou en<br />
les dévissant vers l’extérieur.<br />
Une déformation des portes est acceptable dans la<br />
mesure où son fonctionnement est assuré par les diverses<br />
possibilités de réglage décrites ici.<br />
Handling • Maintenance • Care<br />
of the door<br />
Handling • Onderhoud •<br />
Schoonmaken van de deur<br />
Manejo • Mantenimiento •<br />
Cuidado de la puerta<br />
Installazione • Manutenzione •<br />
Cura del portoncino<br />
Aucun droit de garantie ne sera reconnu en cas de dégâts provenant de<br />
manipulations violentes.<br />
Réglage de la porte<br />
Pour obtenir un fonctionnement parfait, la porte doit être assemblée<br />
avec précision. L’encadrement doit être assemblé à angle droit et à la<br />
verticale. Il doit également présenter la même largeur dans sa partie<br />
supérieure et dans sa partie inférieure.<br />
Si une porte ne ferme pas ou si un battant est de travers, enfoncer les<br />
fiches à visser ou les dévisser légèrement vers l’extérieur (5 rotations<br />
sont possibles). Dans le cas d’une porte à deux battants, le battant de<br />
verrouillage doit toujours être fixé en haut et en bas avec les ferrures<br />
prévues à cet effet.<br />
Exemples de réglage des portes:<br />
Fiches à visser
Handling • Wartung • Pflege<br />
der Tür<br />
Usage • Maintenance •<br />
Entretien de la porte<br />
The guarantee is conditional on proper upkeep!<br />
For lasting protection of the value and suitability for use, professional<br />
care and maintenance is also recommended during the warranty<br />
period; this is not included in the warranty obligations. Defects must<br />
be repaired immediately upon detection.<br />
Wood protection treatment of the door<br />
All parts of the door must receive wood protection treatment. Those<br />
sections of the wood, which will not be accessable after installation,<br />
should receive complete treatment before installation.<br />
Treat the product with a blue stain blocking coat; afterwards apply<br />
a double protective coating of an open-pored wood-protection glaze.<br />
Application of a protective coating should be repeated at least every<br />
two years.<br />
Please beware that the inserted plates of other material may come to<br />
differ in colour to the doors if you use unsuitable coating material.<br />
With coloured and boiler pressure impregnated houses, only the exposed<br />
natural wood (saw cuts) and parts should need extra treatment.<br />
You can obtain an even colour covering in inside areas with one coat<br />
of paint.<br />
For that you should use an open-pored, acrylic based water dispersed<br />
lacquer.<br />
In order to guarantee a long service life of your product you should<br />
repair damaged areas immediately. Do this by whetting the damaged<br />
area and apply a new coat of paint.<br />
Enquire about suitable glazes at your local paint retailer.<br />
Furthermore, you can seal the joining of the wood-window pane with a<br />
suitable sealant to guarantee a long service life of the door and prevent<br />
leakage from heavy rain.<br />
If these precautions of care are not properly carried out, it<br />
can result in deformation, blue stain, fungus infestation<br />
in the doors and frames and loss of warranty.<br />
Cleaning<br />
Regular cleaning and care is a prerequisite for preserving the service<br />
life and functionality of high-value products. Cleaning is to take place<br />
outside, inside and also in the rabbet-area.<br />
The cleaning agent used must be suitable for the relevant material;<br />
please do a test before you start cleaning.<br />
Deformation of the door<br />
Wood reacts to environmental influences. Weather exposure will lead<br />
to swelling and contraction of the wood. This causes variances of<br />
dimensions and slight deformation.<br />
Dependant on the weather exposure, the door may need realignment<br />
by turning the hinges in- or outwards.<br />
Some door warpage is acceptable as long as the door<br />
can be made to function through the alignment options<br />
specified here.<br />
The warranty does not cover damage caused by use of excessive<br />
force.<br />
Handling • Maintenance • Care<br />
of the door<br />
Handling • Onderhoud •<br />
Schoonmaken van de deur<br />
Manejo • Mantenimiento •<br />
Cuidado de la puerta<br />
Installazione • Manutenzione •<br />
Cura del portoncino<br />
Adjustment of the door<br />
The door must be accurately adjusted to ensure trouble-free operation.<br />
The door frames must be installed right-angled and perpendicular.<br />
Furthermore, they must be installed so the width of the frame is the<br />
same at the top and bottom.<br />
If the door doesn’t close or if one panel is askew, this can be rectified<br />
by limited in- or outwards turning of the hinges. You can turn the<br />
hinges outwards up to 5 rotations. If you have a double-door, the door<br />
to be secured must always be correctly aligned at the top and bottom<br />
with the appropriate hinges.<br />
Examples of the adjustment of the doors:<br />
Hinge
Handling • Wartung • Pflege<br />
der Tür<br />
Usage • Maintenance •<br />
Entretien de la porte<br />
Onderhoud is een voorwaarde voor garantie!<br />
Om de bruikbaarheid en waardevastheid duurzaam te waarborgen, is<br />
ook tijdens de garantieperiode deskundig onderhoud noodzakelijk; dit<br />
maakt geen deel uit van de garantieverplichting. Defecten moeten onmiddellijk<br />
na ontdekking ervan worden verholpen.<br />
Houtbeschermingstechnische behandeling van de deur<br />
Alle onderdelen van de deur moeten altijd houtbeschermingstechnisch<br />
worden behandeld. De plaatsen van het hout die later als het huisje is<br />
gemonteerd niet meer toegankelijk zijn, dient u vóór het opbouwen<br />
volledig te behandelen.<br />
Behandel de deur vóór het opbouwen met antiblauwmiddel, daarna<br />
voorzien van een dubbele beschermende coating van ademende houtbeschermende<br />
beits. Uiterlijk om de twee jaar dient u de deklaag over<br />
te schilderen.<br />
Bij de deurtjes moet in acht worden genomen dat de gebruikte platen<br />
materiaal in geval van ongeschikte soorten verf kleurafwijkingen<br />
t.o.v. de rest van de deurtjes krijgen.<br />
Bij geverfde en onder vacuümdruk geïmpregneerde huisjes hoeven alleen<br />
de naturel houten onderdelen (zaagkant) en houtdelen te worden<br />
nabehandeld.<br />
Een gelijkmatig dekkende kleur kan binnen door één keer overschilderen<br />
worden verkregen. Gebruik daarvoor een ademende watergedragen<br />
dispersielak op acrylharsbasis.<br />
Om een lange levensduur van uw product te garanderen, dienen beschadigde<br />
plaatsen onmiddellijk te worden gerepareerd. Daarvoor de beschadigde<br />
plaats licht opschuren en van een nieuwe verflaag voorzien.<br />
Informeer naar geschikte beitsen bij uw verfspeciaalzaak.<br />
Verder kunt u, om een lange levensduur van de deur te waarborgen en<br />
de slagregendichtheid te verbeteren, de overgang tussen het hout en de<br />
ruiten met een geschikte kit afdichten.<br />
Als deze onderhoudsmaatregelen niet oordeelkundig<br />
worden uitgevoerd, bestaat het risico van vormveranderingen,<br />
blauwheid, schimmelaantasting van de deuren<br />
en kozijnen en daarmee verlies van de garantie.<br />
Schoonmaken<br />
Regelmatig schoonmaken en onderhoud is een basisvoorwaarde voor<br />
het behoud van de levensduur en de goede werking van hoogwaardige<br />
producten. Binnen en buitenkanten alsmede de sponning moeten goed<br />
worden schoongehouden.<br />
Daarbij moeten de schoonmaakmiddelen zijn afgestemd op het betreffende<br />
materiaal, hetgeen vóór het begin van de werkzaamheden dient<br />
te worden gecontroleerd.<br />
Vervorming van de deur<br />
hout reageert op omgevingsinvloeden. Zo zal het hout afhankelijk van<br />
de weersomstandigheden opzwellen en krimpen. Daardoor treden er<br />
maatafwijkingen en lichte vervormingen op.<br />
Om ervoor te zorgen dat de deur goed blijft sluiten, moet afhankelijk<br />
van de weersgesteldheid de deur door in- en uitschroeven van de<br />
scharnieren worden afgesteld.<br />
Iets scheeftrekken van de deuren moet worden geaccepteerd<br />
zolang de werking door de hier genoemde instelmogelijkheden<br />
is gewaarborgd.<br />
Voor schade die ontstaat door het toepassen van geweld bestaat geen<br />
aanspraak op garantie.<br />
Handling • Maintenance • Care<br />
of the door<br />
Handling • Onderhoud •<br />
Schoonmaken van de deur<br />
Manejo • Mantenimiento •<br />
Cuidado de la puerta<br />
Installazione • Manutenzione •<br />
Cura del portoncino<br />
Instellen van de deur<br />
De deur moet nauwkeurig worden afgesteld om goed te kunnen werken.<br />
Het deurkozijn moet haaks en loodrecht zijn gemonteerd. Verder<br />
moet het frame zo zijn gemonteerd dat het boven en onder even breed<br />
is.<br />
Als de deur niet sluit of een deurblad hangt scheef, dan kan dit worden<br />
gecorrigeerd door de schroefscharnieren iets naar binnen of naar<br />
buiten te draaien. Deze scharnieren kunnen max. 5 slagen naar buiten<br />
worden gedraaid. Als u een dubbele openslaande deur heeft, moet het<br />
vaste gedeelte steeds naar boven toe en met behulp van het daarvoor<br />
bedoelde sluitwerk worden vastgezet.<br />
Voorbeelden voor het instellen van de deuren:<br />
Schroefscharnier
Handling • Wartung • Pflege<br />
der Tür<br />
Usage • Maintenance •<br />
Entretien de la porte<br />
¡Para cualquier garantía es condición previa que se<br />
realice la conservación!<br />
Para asegurar de forma duradera la utilidad y el valor también es<br />
necesario que se realice durante el periodo de validez de la garantía<br />
el mantenimiento y cuidado apropiados, que no están incluidos en<br />
las obligaciones de la garantía. Los defectos deberán ser reparados<br />
inmediatamente después de detectarse.<br />
Tratamiento técnico protector de madera de la puerta<br />
Todas las piezas constructivas de la puerta deberán tratarse siempre<br />
según la técnica para protección de madera. Aquellas partes o zonas<br />
de la madera que, tras el montaje, ya no serán accesibles deberán ser<br />
tratadas completamente antes de proceder a su montaje.<br />
Trate usted el producto con una imprimación protectora contra el hongo<br />
de azuleo, a continuación aplíquele dos manos de barniz protector de<br />
madera de poros abiertos. Como muy tarde cada dos años se debería<br />
aplicar de nuevo una mano de protección.<br />
En las puertas deberá tenerse en cuenta que las planchas utilizadas<br />
pueden presentar variaciones de color, si no se utilizan los materiales<br />
de pintura apropiados.<br />
En casas de colores e impregnadas por medio de caldera a presión<br />
solamente se deberán tratar posteriormente las zonas (cortes serrados)<br />
y piezas o partes de madera que se hayan dejado al natural.<br />
En el interior se deberá conseguir una cubrición de pintura homogénea<br />
mediante la aplicación de una sola mano.<br />
A fin de garantizar una larga duración de vida útil de su producto las<br />
zonas o partes dañadas se deberán reparar de inmediato. Para ello<br />
se lijarán un poco las zonas dañadas y se volverá a aplicar pintura.<br />
Infórmese sobre los barnices apropiados en su asesor técnico de<br />
colores. Para garantizar una larga duración de vida útil de la puerta y<br />
para aumentar la impermeabilidad a la lluvia que viene de lado por el<br />
viento se deberán sellar las transiciones entre la madera y el vidrio de<br />
la ventana con alguna masilla selladora adecuada.<br />
Si no se han llevado a cabo correctamente estas medidas de<br />
conservación y cuidado, podrán producirse deformaciones,<br />
hongos de azuleo y hongos en general en las puertas, bordes<br />
y cercos, con lo que se puede extinguir la garantía.<br />
Limpieza<br />
La limpieza y el cuidado periódicos son condición previa básica<br />
para mantener la vida útil y la funcionalidad de los productos de alta<br />
calidad. También se deberán limpiar las partes interiores y exteriores<br />
en la zona de los encajes y las ensambladuras. Los detergentes o<br />
agentes limpiadores deberán ser apropiados para cada material en<br />
cuestión. Se deberá comprobar la idoneidad de dichos agentes antes<br />
de comenzar el trabajo.<br />
Deformación de la puerta<br />
La madera reacciona a las influencias del medio ambiente. Así,<br />
según el clima que haga, pueden producirse hinchamientos y<br />
encogimientos de la madera. Debido a este fenómeno se producen<br />
variaciones o desviaciones de las medidas y dimensiones y, por tanto,<br />
ligeras deformaciones. Para mantener la capacidad de cierre de la<br />
puerta se adaptará la misma, según las condiciones climáticas y sus<br />
repercusiones, girando hacia fuera o hacia adentro los pernios.<br />
Se podrá aceptar una deformación de la puerta, siempre que su<br />
funcionamiento siga garantizado mediante las posibilidades<br />
de ajuste indicadas en las presentes instrucciones.<br />
Handling • Maintenance • Care<br />
of the door<br />
Handling • Onderhoud •<br />
Schoonmaken van de deur<br />
Manejo • Mantenimiento •<br />
Cuidado de la puerta<br />
Installazione • Manutenzione •<br />
Cura del portoncino<br />
No se asumirá garantía alguna por aquellos daños que hayan sido<br />
causados por acción violenta.<br />
Ajustar la puerta<br />
La puerta deberá estar exactamente alineada a fin de que su<br />
funcionamiento perfecto esté garantizado. El marco de la puerta deberá<br />
estar montado en ángulo recto y perpendicularmente. Asimismo el<br />
marco de la puerta deberá estar montado de manera que tenga el<br />
mismo ancho arriba que abajo.<br />
Si la puerta no cierra o una hoja de la misma está torcida, se podrá<br />
corregir roscando o desenroscando un poco los pernios. Estos pernios<br />
se pueden desenroscar hasta 5 vueltas. Si tiene usted una puerta de dos<br />
hojas, la hoja de retención siempre se deberá fijar tanto arriba como<br />
abajo con los herrajes correspondientes previstos para dicho fin.<br />
Ejemplos para ajustar las puerta:<br />
Pernio de roscar
Handling • Wartung • Pflege<br />
der Tür<br />
Usage • Maintenance •<br />
Entretien de la porte<br />
Una corretta manutenzione è la premessa per il ricorso<br />
alla garanzia.<br />
Per garantire l’idoneità all’uso del portoncino e mantenerne inalterato<br />
il valore nel tempo, anche durante il periodo della garanzia sono<br />
necessarie una manutenzione e una cura adeguate che non sono<br />
comprese nell’obbligo della garanzia. Eventuali difetti devono essere<br />
corretti subito dopo il rilevamento.<br />
Trattamento protettivo del portoncino<br />
Tutte le parti in legno del portoncino devono essere sempre sottoposte<br />
a trattamento protettivo. Prima dell’installazione, è necessario eseguire<br />
il trattamento integrale dei punti che successivamente non risulteranno<br />
più accessibili.<br />
Nel caso venga utilizzato un prodotto contro il turchino, prevedere<br />
successivamente l’applicazione di un doppio strato di impregnante per<br />
legno a poro aperto. Si consiglia di ripetere l’applicazione dello strato<br />
protettivo al massimo ogni due anni.<br />
É necessario ricordare che, in caso di utilizzo di vernici non adatte,<br />
le placche in plastica inserite potranno presentare delle differenze<br />
cromatiche rispetto ai portoncini.<br />
Nel caso di edifici colorati e impregnati a pressione, il trattamento<br />
successivo interesserà solamente i punti e le parti in legno lasciati al<br />
naturale<br />
Una copertura del colore uniforme nell’area interna deve essere<br />
raggiunta verniciando una volta la parte interna con una vernice a base<br />
di resine acriliche in dispersione acquosa a poro aperto.<br />
Per assicurare una lunga durata del prodotto, eventuali punti<br />
danneggiati devono essere riparati in modo tempestivo, carteggiando<br />
leggermente e applicando nuovamente il colore.<br />
Il vostro rivenditore di fiducia saprà consigliarvi degli impregnanti<br />
adatti.<br />
Per garantire una lunga durata del portoncino e aumentarne la tenuta<br />
all’acqua, è inoltre possibile sigillare la giunzione vetro-legno con<br />
un’apposita pasta.<br />
Un’esecuzione non corretta delle operazioni indicate può<br />
determinare la comparsa di deformazioni, azzurramento<br />
e funghi sul legno di porte e telai e il conseguente decadimento<br />
della garanzia.<br />
Pulizia<br />
Una pulizia e una cura regolari sono essenziali ai fini della durata e<br />
dell’efficienza di prodotti pregiati. La pulizia deve essere effettuata<br />
sul lato interno, su quello esterno e anche nella scanalatura nel telaio.<br />
Prima di iniziare la pulizia, verificare la compatibilità dei detergenti<br />
con il materiale da pulire.<br />
Deformazione del portoncino<br />
Il legno reagisce alle condizioni ambientali. Il rigonfiamento e il ritiro,<br />
cui può essere soggetto il legno a seconda delle condizioni atmosferiche,<br />
comportano variazioni dimensionali e lievi deformazioni.<br />
Affinchè il portoncino continui a chiudersi correttamente, può rendersi<br />
necessario un intervento sulle cerniere, avvitandole o svitandole, a<br />
seconda delle condizioni atmosferiche.<br />
Finché il funzionamento viene garantito dalle possibilità<br />
di regolazione indicate, la deformazione del portoncino è<br />
considerata accettabile.<br />
La garanzia non copre danni derivanti dall’uso di forza.<br />
Handling • Maintenance • Care<br />
of the door<br />
Handling • Onderhoud •<br />
Schoonmaken van de deur<br />
Manejo • Mantenimiento •<br />
Cuidado de la puerta<br />
Installazione • Manutenzione •<br />
Cura del portoncino<br />
Regolazione del portoncino<br />
Per assicurare il corretto funzionamento del portoncino, lo stesso deve<br />
essere posizionato con precisione. Il telaio deve essere incassato in<br />
posizione perpendicolare al pavimento e ad angolo retto. Il telaio va<br />
inoltre montato in modo da avere la stessa larghezza sia superiormente<br />
che inferiormente.<br />
Se il portoncino non si chiude o un battente non è ben bilanciato,<br />
il problema può essere corretto intervenendo sulle cerniere a vite,<br />
avvitandole e svitandole fino a 5 giri. Nel caso di portoncini a doppio<br />
battente, il battente fisso deve essere sempre assicurato verso l’alto e<br />
verso il basso per mezzo degli appositi meccanismi.<br />
Esempio di regolazione del portoncino:<br />
Cerniera a vite
54073<br />
<strong>Aufbauanleitung</strong><br />
notice de montage<br />
Building Instructions<br />
montagehandleiding<br />
Instrucciones de construcción<br />
Istruzioni per il montaggio<br />
Service-Hotline:+49 421 38693 33
Vergleichen Sie zuerst die<br />
Materialliste mit Ihrem Paketinhalt! Bitte ha�<br />
ben Sie Verständnis, dass Beanstandungen<br />
nur im nicht aufgebauten Zustand bearbei�<br />
tet werden können!<br />
Vergeli�k Vergeli�k eerst de li�st li�st �an �an ma� ma�<br />
terialen met de inhoud �an uw pakket!<br />
Reclamaties kunnen alleen in behandeling<br />
worden genomen zolang de onderdelen<br />
nog niet zi�n gemonteerd!<br />
1 x F1 600 x 1695 x 135mm<br />
1 x F2 488 x 1583 x 415mm<br />
1 x F3<br />
1 x F4<br />
Commencez par comparer la liste<br />
du matériel a�ec le contenu de �otre pa�<br />
quet! Sachez que nous traitons uniquement<br />
les réclamations concernant le matériel à<br />
l’état non monté!<br />
En primer lugar, compare la lista<br />
de material con el contenido del paquete.<br />
Rogamos entienda que las reclamaciones<br />
sólo pueden ser tramitadas antes de mon�<br />
tar el ob�eto!<br />
16337 54073 55470<br />
1 x F5<br />
1 x F6<br />
1 x F7<br />
1 x F8<br />
1 x F9<br />
12 x<br />
First compare the list of materials<br />
with your package contents! Please under�<br />
stand that complaints can be processed in<br />
the non�built status only!<br />
Confrontate questa distinta mate� mate�<br />
riali prima con il contenuto del pacchetto!<br />
Vi preghiamo di comprendere che e�entuali<br />
reclami possono essere accolti solo prima<br />
del montaggio!<br />
1 x D2 1547 x 22 x 18mm ID 55470
01<br />
01.1<br />
60mm<br />
F 2<br />
F 9<br />
01.1<br />
F 8<br />
F 8<br />
01.2<br />
01.2<br />
F 4<br />
F 4<br />
30mm
02<br />
F 1<br />
02.1<br />
03 03.1<br />
03.1<br />
F 1<br />
F 2<br />
02.1<br />
F 6<br />
03.2<br />
03.2<br />
Bündig!<br />
Affleurement!<br />
Gelijk!<br />
Aras!<br />
Flush!<br />
Combacia!<br />
F 6<br />
F 5<br />
F 7
04<br />
05<br />
05.2<br />
F 1<br />
F 2<br />
04.1<br />
05.1<br />
F 5<br />
F 3<br />
F 2<br />
04.1<br />
05.1<br />
05.2<br />
F 4<br />
F 5<br />
F 3
01 Y 1<br />
4x25<br />
Y 1<br />
02 2x<br />
Die Hütchenprofile dürfen nur mit dem Fenster und nicht mit dem<br />
Haus verschraubt werden!<br />
Ø3mm<br />
De afdekprofielen mogen uitsluitend op het raam, niet op het huisje<br />
worden vastgeschroefd!<br />
Les profils de panne sont à visser à la fenêtre, non à la maison!<br />
Screw the capping profiles onto the window only, not onto the cabin!<br />
Los perfiles de sombrerete sólo se pueden atornillar a la ventana, no<br />
a la caseta!<br />
I cappellotti possono essere avvitati solo alla finestra, non alla casa!