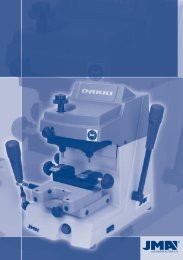
MÃQUINA DUPLICADORA CAPRI Manual de ... - JMA Polska.
MÃQUINA DUPLICADORA CAPRI Manual de ... - JMA Polska.
MÃQUINA DUPLICADORA CAPRI Manual de ... - JMA Polska.
- No tags were found...

Create successful ePaper yourself
Turn your PDF publications into a flip-book with our unique Google optimized e-Paper software.
1.- PRESENTACIÓN Y ASPECTOS GENERALES1.1 GENERALIDADES1.2 TRANSPORTE Y EMBALAJE1.3 ETIQUETA IDENTIFICADORAespañol2.- CARACTERÍSTICAS DE LA MÁQUINA2.1 FAMILIAS DE LLAVES2.2 ACCESORIOS2.3 ALMACÉN DE HERRAMIENTAS2.4 CIRCUITO ELÉCTRICO2.5 DATOS TÉCNICOS2.6 ELEMENTOS PRINCIPALES DE LA MÁQUINA2.7 COMPONENTES Y PARTES FUNCIONALES2.7.1 caMBIO DE FRESA Y DE PALPADOR (21)2.7.2 BLOQUEO DEL CARRO EN EL FIN DEL RECORRIDO DEL EJE “Y”2.7.3 MORDAZA (6)2.7.4 MUELLEO DEL PALPADOR (11)2.7.5 MUELLEO Y BLOQUEO DEL CARRO EN EL EJE “X” (5 and 4)2.7.6 PALANCA DE APOYO PARA LLAVES TUBULARES2.7.7 VELOCIDAD DE FRESA (17)2.7.8 disPLAY-TECLADO (1)2.7.9 reGULACIÓN VERTICAL DEL PALPADOR (15)2.7.10 control DE LA FUERZA DE DUPLICADO3.- CIFRADO3.1 PROCESO DE CIFRADO3.2 CIFRADO DE LLAVES3.2.1 Llaves KA-2, KA-3 y KA-4.3.2.2 llave KE-1.3.2.3 llave SEA-1.3.2.4 llaves OP-WH.P y OP-WY.P3.2.5 llaves ME-3.P y ME-4.P3.2.6 llaves TUBULARES3.2.7 llaves FIC-2 y FIC-33.2.8 llaves WIN-1D, WIN-2D, WIN-3D y WIN-4D.3.2.9 llave JIS-4.P3.2.10 llave FO-6.P3.2.11 lave MCM-10.3.2.12 llave TE-T60 y TE-T804.- MANTENIMIENTO4.1 SUSTITUCIÓN DE LAS GARRAS DE LA MORDAZA4.2 REGLAJE DE LAS GARRAS4.2.1 Reglaje NORMAL4.2.2 Reglaje <strong>de</strong> PRECISIÓN4.3 SUSTITUCIÓN DE LOS FUSIBLES4.4 TENSADO Y SUSTITUCIÓN DE LA CORREA4.5 SUSTITUCIÓN DEL MOTOR4.6 SUSTITUCIÓN DEL DISPLAY-TECLADO4.7 SUSTITUCIÓN DE LA TARJETA ELECTRÓNICA DE CONTROL4.8 SUSTITUCIÓN DE LA TARJETA DE POTENCIA Y DEL DISYUNTOR5.- SEGURIDAD6.- ELIMINACIÓN DE DESHECHOS6.1 EMBALAJE6.2 VIRUTA6.3 MÁQUINA7.- TABLA LLAVE-FRESA-PALPADOR-INCLINACIÓN-ADAPTADOR8.- EXPLOSIONADO
2.7.4 Muelleo <strong>de</strong>l palpador (11)Existen dos maneras diferentes <strong>de</strong> utilizar el palpador, en función <strong>de</strong>l trabajo que vayaa realizarse:- Palpador con muelleo. El muelleo <strong>de</strong>l palpador se utiliza única y exclusivamentepara el cifrado <strong>de</strong> llaves <strong>de</strong> puntos.- Palpador bloqueado. El palpador bloqueado se utiliza para realizar operaciones<strong>de</strong> duplicado con avance <strong>de</strong>l carro. En general, para el cifrado <strong>de</strong> llaves <strong>de</strong> regata.Para activar o <strong>de</strong>sactivar el muelleo <strong>de</strong>l palpador, basta con hacer girar 180º (mediavuelta) la maneta <strong>de</strong> muelleo <strong>de</strong>l palpador.Cuando se activa el muelleo <strong>de</strong>l palpador, la punta <strong>de</strong>l palpador se sitúa ligeramentepor <strong>de</strong>bajo <strong>de</strong> su posición <strong>de</strong> ajuste respecto <strong>de</strong> la fresa. Esta posición <strong>de</strong>l palpador nospermite que se pueda introducir suavemente en el agujero <strong>de</strong> la llave original, antes<strong>de</strong> que la fresa comience el fresado <strong>de</strong> la llave a duplicar. De esta manera se evitanvibraciones y <strong>de</strong>splazamientos bruscos <strong>de</strong>l carro.Para conocer en cualquier momento el estado <strong>de</strong>l palpador (con muelleo o bloqueado),disponemos en el display-teclado <strong>de</strong> la máquina <strong>de</strong> un indicador que nos ofrece estainformación. Si el piloto está iluminado, el muelleo está activado. Por el contrario, si elpiloto está apagado, el palpador está bloqueado.2.7.5 Muelleo y bloqueo <strong>de</strong>l carro en el eje “ X “ (5 y 4)El sistema <strong>de</strong> muelleo <strong>de</strong>l carro en el eje “X”, recomendamos utilizarlo para realizar losfresados laterales <strong>de</strong> las llaves <strong>de</strong> regata.El bloqueo <strong>de</strong>l carro en el eje “X “, recomendamos utilizarlo para realizar fresados opuntos en línea recta.2.7.6 Palanca <strong>de</strong> apoyo para llaves tubularesLa máquina duplicadora <strong>CAPRI</strong> dispone en su lateral superior izquierdo, <strong>de</strong> una palancaabatible que ayuda a hacer más cómodo el duplicado <strong>de</strong> las llaves tubulares, regatas,etc…., al disponer <strong>de</strong> un punto <strong>de</strong> apoyo para la mano que acciona la palanca <strong>de</strong>traslación <strong>de</strong> los carros.2.7.7 Velocidad <strong>de</strong> la fresa (17)La máquina dispone <strong>de</strong> un selector <strong>de</strong> velocidad situado en su lateral <strong>de</strong>recho y quepermite seleccionar la velocidad <strong>de</strong> giro <strong>de</strong> la fresa. Como concepto general pue<strong>de</strong><strong>de</strong>cirse que la velocidad <strong>de</strong> giro <strong>de</strong>pen<strong>de</strong> <strong>de</strong>l material <strong>de</strong> la fresa:- Posición I: Para trabajar con fresa <strong>de</strong> HSS (6.000 rpm)- Posición II: Para trabajar con fresa <strong>de</strong> METAL DURO (11.000 rpm)- Posición O: Fresa parada.2.7.8 Display-teclado (1)Indicadores REGLAJE DEL PALPADOR.La luz <strong>de</strong> la izquierda se encien<strong>de</strong> cuando el palpador está tocando la llave.La luz <strong>de</strong> la <strong>de</strong>recha se encien<strong>de</strong> cuando fresa está tocando la llave.Indicador visual <strong>de</strong> FUERZA.Nos indica la fuerza óptima a realizar durante el duplicado.NOTA: El sistema <strong>de</strong> control <strong>de</strong> fuerza, a<strong>de</strong>más <strong>de</strong>l indicador visual también dispone<strong>de</strong> un indicador sonoro que nos avisa mediante un pitido cuando hemos alcanzado lafuerza óptima <strong>de</strong> duplicado. Este indicador sonoro se pue<strong>de</strong> activar-<strong>de</strong>sactivar pulsandoal mismo tiempo las teclas MODE y ON-OFF.2.7.9 Regulación vertical <strong>de</strong>l palpador (15)Por cada cambio <strong>de</strong> fresa-palpador, <strong>de</strong>be realizarse la regulación vertical <strong>de</strong>l palpador.Para po<strong>de</strong>r utilizar el sistema electrónico <strong>de</strong> regulación vertical <strong>de</strong>l palpador, es necesarioque el display-teclado esté activo (cuando está activo, aparece una luz <strong>de</strong> colorver<strong>de</strong> al lado <strong>de</strong> la tecla ON-OFF).Estando el display-teclado activo, es posible activar-<strong>de</strong>sactivar el sistema electrónico<strong>de</strong> regulación vertical <strong>de</strong>l palpador, pulsando la tecla MODE.Para realizar el reglaje vertical <strong>de</strong>l palpador, actuar <strong>de</strong> la siguiente manera:• Amarrar la fresa y el palpador en sus correspondientes portaherramientas.Asegurarse <strong>de</strong> que han quedado amarrados, haciendo tope hacia arriba.• Amarrar dos llaves iguales en las mordazas <strong>de</strong> la máquina.• Quitar el muelleo <strong>de</strong>l palpador (palpador bloqueado).• Bajar el cabezal, hasta apoyar la fresa y el palpador sobre las llaves situadas enlas mordazas. Entonces, se dará una <strong>de</strong> las siguientes tres situaciones:AZUL IZQUIERDA. Si únicamente se encien<strong>de</strong> la luz <strong>de</strong> la izquierda, indica queel palpador está tocando la llave, pero la fresa no. Por lo tanto, que hay que girarla rueda <strong>de</strong> regulación <strong>de</strong>l palpador hacia la izquierda, hasta que se enciendan lasdos luces <strong>de</strong> reglaje.AZUL DERECHA. Si únicamente se encien<strong>de</strong> la luz <strong>de</strong> la <strong>de</strong>recha, indica que lafresa está tocando la llave, pero el palpador no. Por lo tanto, que hay que girar larueda <strong>de</strong> regulación <strong>de</strong>l palpador hacia la <strong>de</strong>recha, hasta que se enciendan las dosluces <strong>de</strong> reglaje.AZUL IZQUIERDA Y DERECHA. Indica que tanto la fresa como el palpador, estántocando sus respectivas llaves. Esto quiere <strong>de</strong>cir que la altura <strong>de</strong>l palpador estáreglada.españolNOTA IMPORTANTE: Al realizar el reglaje <strong>de</strong> altura <strong>de</strong>l palpador, hay que tener encuenta el tipo <strong>de</strong> llave que vamos a duplicar. Si se trata <strong>de</strong> una llave <strong>de</strong> REGATA, hayque aplicar muy poca fuerza a la palanca <strong>de</strong> accionamiento <strong>de</strong>l cabezal (que no seencienda ninguna luz <strong>de</strong>l indicador visual <strong>de</strong> fuerza). En cambio, si se trata <strong>de</strong> una llave<strong>de</strong> PUNTOS, se tienen que encen<strong>de</strong>r las dos luces azules <strong>de</strong> reglaje, al mismo tiempoque el indicador <strong>de</strong> fuerza indica la fuerza i<strong>de</strong>al <strong>de</strong> duplicado para llaves <strong>de</strong> puntos (paraello, hay que ejercer una ligera fuerza sobre la palanca <strong>de</strong> accionamiento <strong>de</strong>l cabezal).2.7.10 Control <strong>de</strong> fuerza <strong>de</strong> duplicadoTecla ON-OFF.Presionándola, las funciones <strong>de</strong>l display-teclado pasan a modo ACTIVO. Junto a la teclaaparecerá una luz ver<strong>de</strong>.Presionándola <strong>de</strong> nuevo, el display-teclado pasa a un estado <strong>de</strong> “STAND-BY”. Junto ala tecla aparecerá una luz roja.Tecla ILUMINACION.Presionándola, se encien<strong>de</strong>n los diodos <strong>de</strong> iluminación (si están apagados) o se apagansi están encendidos.Esta tecla funciona in<strong>de</strong>pendientemente <strong>de</strong>l estado <strong>de</strong> la tecla “ON-OFF”.Indicador MUELLEO.Si la luz azul está encendida, nos indica que al palpador está en estado <strong>de</strong> MUELLEOACTIVADO.Si la luz azul está apagada, nos indica que el palpador está BLOQUEADO (muelleo <strong>de</strong>sactivado).Tecla MODE.Esta tecla sirve para activar-<strong>de</strong>sactivar el funcionamiento <strong>de</strong>l sistema <strong>de</strong> regulaciónvertical <strong>de</strong>l palpador.La máquina <strong>CAPRI</strong> dispone <strong>de</strong> un revolucionario sistema <strong>de</strong> control <strong>de</strong> fuerza <strong>de</strong> duplicado.Se trata <strong>de</strong> un sistema patentado, que a la hora <strong>de</strong> duplicar llaves <strong>de</strong> PUNTOS,nos indica la fuerza óptima a realizar sobre la palanca <strong>de</strong> accionamiento <strong>de</strong>l cabezal.Para ello, dispone <strong>de</strong> dos indicadores:Indicador visual. La fuerza óptima <strong>de</strong> duplicado se alcanza cuando la línea <strong>de</strong>luces llega a la flecha blanca.Indicador sonoro. Cuando la línea <strong>de</strong> luces llega a la flecha blanca, la máquinaemite un pitido. Este indicador sonoro, se pue<strong>de</strong> activar-<strong>de</strong>sactivar pulsando almismo tiempo las teclas MODE y ON-OFF.Este sistema <strong>de</strong> control <strong>de</strong> fuerza <strong>de</strong> duplicado nos permite obtener llaves <strong>de</strong> PUNTOScon una gran precisión. Duplicaremos los agujeros <strong>de</strong> la llave exactamente con la mismafuerza con la que hemos reglado la altura <strong>de</strong>l palpador. De esta manera se obtienela máxima precisión en el duplicado <strong>de</strong> llaves <strong>de</strong> PUNTOS.3.- CIFRADO3.1 PROCESO DE CIFRADO• Encienda la máquina accionando el interruptor general situado en la parte trasera<strong>de</strong>recha <strong>de</strong> la máquina.• Para mejorar la visibilidad <strong>de</strong> la zona <strong>de</strong> trabajo, active la iluminación accionando
españolel interruptor situado en el display-teclado.• Con ayuda <strong>de</strong> la tabla que se incluye en el presente manual, seleccionar la fresa yel palpador necesarios para cifrar la llave.• Cambiar la fresa y el palpador.• Bloquear momentáneamente el carro en el fin <strong>de</strong> recorrido <strong>de</strong>l eje “Y”.• Amarrar la llave original en la parte izquierda <strong>de</strong> la mordaza, y la llave a cifrar enla parte <strong>de</strong>recha. A la hora <strong>de</strong> amarrar las llaves, hay que tener en cuenta los siguientes<strong>de</strong>talles:- TOPE DE LA LLAVE. Pue<strong>de</strong> tratarse <strong>de</strong> una llave <strong>de</strong> “tope-cuello” (Fig. 4.A),o <strong>de</strong>“tope-punta” (Fig. 4.B).- ADAPTADOR. En algún mo<strong>de</strong>lo <strong>de</strong> llave muy concreto, pue<strong>de</strong> ser necesaria lautilización <strong>de</strong> un adaptador.- INCLINACIÓN. Algunas llaves tienen los puntos inclinados, por lo que será necesariogirar la mordaza.3.2.4 Llaves OP-WH.P y OP-WY.P• Utilizar la fresa-palpador: F-11 / P-11.• El amarre <strong>de</strong> la llave en la mordaza se realiza haciendo “tope punta”.• Es preciso bloquear el palpador (<strong>de</strong>sactivar el muelleo).• NOTA: Después <strong>de</strong> realizar la regulación vertical <strong>de</strong>l palpador, hay que bajar muyligeramente el palpador, girando para ello la rueda <strong>de</strong> regulación 5 puntos hacia la<strong>de</strong>recha. Después, hay que introducir el palpador en el canal <strong>de</strong>l paletón y bloquear elcabezal <strong>de</strong> la máquina. Después hay que subir ligeramente el palpador, para que ésteno arrastre la llave.• NOTA: Es recomendable utilizar el sistema <strong>de</strong> muelleo <strong>de</strong>l carro.• NOTA: Se recomienda realizar una pasada <strong>de</strong> <strong>de</strong>sbaste y luego otra pasada <strong>de</strong>acabado siguiendo todo el perfil <strong>de</strong>l dibujo <strong>de</strong> la llave. Se mecanizará en sentido <strong>de</strong>scen<strong>de</strong>nte(<strong>de</strong>s<strong>de</strong> la punta <strong>de</strong> la llave hacia la cabeza).• Hacer la regulación vertical <strong>de</strong>l palpador.• Activar los sistemas que simplifican el trabajo <strong>de</strong> duplicado:- PALPADOR: Activar o <strong>de</strong>sactivar el muelleo <strong>de</strong>l palpador, en función <strong>de</strong>l tipo <strong>de</strong>llave a cifrar.- CARRO: En función <strong>de</strong>l mo<strong>de</strong>lo <strong>de</strong> llave, pue<strong>de</strong> ser interesante activar el muelleo<strong>de</strong>l carro, o el bloqueo <strong>de</strong>l carro en la dirección “X”.- APOYO: en función <strong>de</strong>l mo<strong>de</strong>lo <strong>de</strong> llave, pue<strong>de</strong> ser interesante utilizar la palanca<strong>de</strong> apoyo para llaves tubulares.• Poner en marcha el giro <strong>de</strong> la fresa, eligiendo previamente una <strong>de</strong> las dos velocida<strong>de</strong>sdisponibles.• Proce<strong>de</strong>r al cifrado <strong>de</strong> la llave. Si la llave es <strong>de</strong> puntos, utilizar la ayuda <strong>de</strong>l sistema<strong>de</strong> “control <strong>de</strong> fuerza <strong>de</strong> duplicado”.3.2 CIFRADO DE LLAVES3.2.1 Llaves KA-2, KA-3 y KA-4.• Dependiendo <strong>de</strong>l mo<strong>de</strong>lo <strong>de</strong> llave a duplicar, se utiliza una pareja fresa-palpadordiferente. Mirar en la tabla.• El amarre <strong>de</strong> la llave en la mordaza se realiza haciendo “tope cuello”.• Dependiendo <strong>de</strong>l mo<strong>de</strong>lo <strong>de</strong> llave a duplicar, es necesario girar las mordazas segúnel ángulo requerido. Mirar en la tabla.• Es preciso activar el muelleo <strong>de</strong>l palpador.• Para aumentar la precisión <strong>de</strong>l cifrado, utilizar el sistema <strong>de</strong> “Control <strong>de</strong> fuerza <strong>de</strong>duplicado”.• NOTA: Los puntos tallados <strong>de</strong> la llave KA-3 <strong>de</strong>ben ir siempre en la parte más baja<strong>de</strong> la mordaza.• NOTA: Los puntos tallados <strong>de</strong> la llave KA-2 <strong>de</strong>ben ir siempre en la parte más alta<strong>de</strong> la mordaza.Ver Fig. 53.2.2 Llave KE-1.• Utilizar la fresa-palpador: F-1 / P-1.• El amarre <strong>de</strong> la llave en la mordaza se realiza haciendo “tope cuello”, pero introduciendola llave por la parte <strong>de</strong> atrás.• Es necesario posicionar las mordazas con un ángulo <strong>de</strong> inclinación <strong>de</strong> 5º.• Es preciso activar el muelleo <strong>de</strong>l palpador.• Para aumentar la precisión <strong>de</strong>l cifrado, utilizar el sistema <strong>de</strong> “Control <strong>de</strong> fuerza <strong>de</strong>duplicado”.• NOTA: Los puntos tallados <strong>de</strong> la llave KE-1 <strong>de</strong>ben ir siempre en la parte más alta<strong>de</strong> la mordaza.• NOTA: Para el duplicado <strong>de</strong> los puntos laterales, hay que utilizar el adaptadorcorrespondiente.Ver Fig. 63.2.3 Llave SEA-1.• Utilizar la fresa-palpador: F-3 / P-3.• El amarre <strong>de</strong> la llave en la mordaza se realiza haciendo “tope cuello”.• Es preciso bloquear el palpador (<strong>de</strong>sactivar el muelleo).• NOTA: Después <strong>de</strong> realizar la regulación vertical <strong>de</strong>l palpador, hay que bajar muyligeramente el palpador, girando para ello la rueda <strong>de</strong> regulación 5 puntos hacia la<strong>de</strong>recha. Después, hay que introducir el palpador en el canal <strong>de</strong>l paletón y bloquear elcabezal <strong>de</strong> la máquina. Después hay que subir ligeramente el palpador, para que ésteno arrastre la llave.• NOTA: Entrar por el centro <strong>de</strong>l canal sin tocar los laterales, y en la segunda pasadaentrar por el lateral <strong>de</strong>recho y salir por el lateral izquierdo, sin hacer nada <strong>de</strong> presión(únicamente apoyando ligeramente el palpador).• NOTA: Para el duplicado <strong>de</strong> los puntos laterales utilizar la fresa-palpador F-1 / P-1.Hacer “tope cuello”. Activar el muelleo <strong>de</strong>l palpador, y utilizar el sistema <strong>de</strong> “Control <strong>de</strong>fuerza <strong>de</strong> duplicado”.Ver Fig. 7Ver Fig. 83.2.5 Llaves ME-3.P y ME-4.P• Utilizar la fresa-palpador: F-11 / P-11.• El amarre <strong>de</strong> la llave en la mordaza, se realiza utilizando el adaptador AD-MM2.- Posicionar el adaptador sobre la mordaza, haciendo “tope punta”.- Introducir la llave en el adaptador.- Al mismo tiempo que amarramos el adaptador en la mordaza, la llave quedaamarrada en el adaptador.• Es preciso bloquear el palpador (<strong>de</strong>sactivar el muelleo).• NOTA: Después <strong>de</strong> realizar la regulación vertical <strong>de</strong>l palpador, hay que bajar muyligeramente el palpador, girando para ello la rueda <strong>de</strong> regulación 5 puntos hacia la<strong>de</strong>recha. Después, hay que introducir el palpador en el canal <strong>de</strong>l paletón y bloquear elcabezal <strong>de</strong> la máquina. Después hay que subir ligeramente el palpador, para que ésteno arrastre la llave.• NOTA: Es recomendable utilizar el sistema <strong>de</strong> muelleo <strong>de</strong>l carro.Ver Fig. 93.2.6 Llaves TUBULARES• Utilizar la fresa-palpador: F-8 / P-8.• Amarrar la llave en la “V” <strong>de</strong> la mordaza.• Es preciso activar el muelleo <strong>de</strong>l palpador.• La operación <strong>de</strong> tallado resultará más cómoda si apoyamos la mano que acciona lapalanca <strong>de</strong> accionamiento <strong>de</strong>l carro, sobre la palanca <strong>de</strong> apoyo para llaves tubulares.Ver fig. 103.2.7 Llaves FIC-2 y FIC-3• Utilizar la fresa-palpador: F-11 / P-11.• Amarrar la llave en la mordaza, apoyándola en el fondo y empujándola hacia lacara anterior <strong>de</strong> la mordaza.• Es preciso bloquear el palpador (<strong>de</strong>sactivar el muelleo).• Bloquear el cabezal <strong>de</strong> la máquina a una altura tal, que la fresa pase sobre lamordaza pero sin rozarla.• Proce<strong>de</strong>r al tallado <strong>de</strong> los dos lados superiores.• Girar las llaves teniendo cuidado <strong>de</strong> quitar las rebabas para asegurar el correctoposicionamiento y amarre <strong>de</strong> la llave, y proce<strong>de</strong>r al tallado <strong>de</strong> los otros dos lados <strong>de</strong> lallave.Ver Fig. 113.2.8 Llaves WIN-1D, WIN-2D, WIN-3D y WIN-4D.• Utilizar la fresa-palpador: F-15 / P-15.• Amarrar en la mordaza dos llaves en bruto, y realizar sobre ellas la regulaciónvertical <strong>de</strong>l palpador.• Amarrar la llave original con el <strong>de</strong>ntado hacia arriba (tal y como indica el dibujo).• Es preciso bloquear el palpador (<strong>de</strong>sactivar el muelleo).• Introducir el palpador exactamente en uno <strong>de</strong> los puntos, y bloquear el cabezal <strong>de</strong>la máquina a esa altura.• Proce<strong>de</strong>r al tallado.Ver Fig. 123.2.9 Llave JIS-4.P• Utilizar la fresa-palpador: F-11 / P-11.• El amarre <strong>de</strong> la llave en la mordaza, se realiza utilizando el adaptador AD-MJ.- Posicionar el adaptador sobre la mordaza, haciendo “tope punta”.- Introducir la llave en el adaptador, haciendo “tope cuello” contra la placa quegira. En esta posición, amarrar la llave en su adaptador.• Es preciso bloquear el palpador (<strong>de</strong>sactivar el muelleo).Ver Fig. 13
3.2.10 Llave FO-6.P• Utilizar la fresa-palpador F-22 / P-22.• El amarre <strong>de</strong> la llave en la mordaza, se realiza utilizando su adaptador correspondiente.- Posicionar y amarrar los adaptadores sobre la mordaza.- Al colocar la llave, hay que tener cuidado <strong>de</strong> que que<strong>de</strong> bien plana, para que losdos tallados que<strong>de</strong>n por igual.• Es preciso bloquear el palpador (<strong>de</strong>sactivar el muelleo).• Introducir el palpador <strong>de</strong>ntro <strong>de</strong>l canal <strong>de</strong> una letra. Bloquear el cabezal <strong>de</strong> lamáquina, y subir el palpador ligeramente para que no talone contra el adaptador.• Proce<strong>de</strong>r al tallado.2) Mientras se bloquea la contratuerca con una llave fija <strong>de</strong> 14, introducir una llaveallen <strong>de</strong> 5 por el orificio que ha quedado <strong>de</strong>scubierto en la maneta <strong>de</strong> la mordaza, y<strong>de</strong>senroscarla.3) Posicionar la mordaza con un ángulo <strong>de</strong> inclinación <strong>de</strong> 45º, y girando manualmenteel husillo, extraerlo por uno <strong>de</strong> los laterales. Una vez extraído el husillo, la garra móvilqueda liberada y ya la po<strong>de</strong>mos retirar.4) Para montar la nueva garra móvil, actuar <strong>de</strong> manera inversa.NOTA IMPORTANTE: Cuando se reemplaza la garra fija izquierda o la garra fija <strong>de</strong>recha,siempre hay que hacer el reglaje <strong>de</strong> la pareja <strong>de</strong> garras que se ha reemplazado.En cambio, si se reemplaza la garra móvil, no es necesario realizar ninguna operación<strong>de</strong> reglaje en las garras.españolVer Fig. 14Lectura <strong>de</strong>l código <strong>de</strong> la llave original• La llave original tiene 6 posiciones <strong>de</strong> duplicado, que están <strong>de</strong>finidas mediante lasletras: A, B, C, D, E y F, según se muestra en la siguiente figura• En cada una <strong>de</strong> las posiciones que posee la llave, existen 4 distintas combinacionesposibles (<strong>de</strong>finidas mediante números), que ahora señalamos y vamos a numerar:1 2 3 4Ver Fig. 174.2 REGLAJE DE LAS GARRASSiempre que se reemplaza la garra fija izquierda o la garra fija <strong>de</strong>recha, hay que hacerel reglaje <strong>de</strong> la pareja <strong>de</strong> garras que se ha reemplazado. En cambio, el reemplazo <strong>de</strong> lagarra móvil no conlleva ninguna operación <strong>de</strong> reglaje en las garras.Existen dos maneras diferentes <strong>de</strong> realizar el reglaje <strong>de</strong> las garras:Reglaje NORMALReglaje <strong>de</strong> PRECISION4.2.1 Reglaje NORMALSe trata <strong>de</strong> un reglaje rápido y sencillo, con el que conseguimos un reglaje aceptablecomo para po<strong>de</strong>r duplicar llaves con cierta precisión.Para realizar este reglaje, seguir los siguientes pasos:1) Amarrar los dos ejes <strong>de</strong> reglaje en sus correspondientes portaherramientas, <strong>de</strong>forma que hagan tope en el interior <strong>de</strong>l portaherramientas y que la parte cónica <strong>de</strong> losejes <strong>de</strong> reglaje que<strong>de</strong>n en el exterior.• La “altura” n.º1, nos indica que no se <strong>de</strong>be duplicar. La posición n.º2 nos señala quehay un pequeño rebaje en la llave y que cuando es algo mayor correspon<strong>de</strong> a la alturan.º3. La altura n.º4 es el mayor <strong>de</strong> los rebajes <strong>de</strong> la llave.• Entonces cogeríamos la llave y marcaríamos las combinaciones <strong>de</strong> cada una <strong>de</strong> las6 posiciones, tal y como señalamos a continuación, a modo <strong>de</strong> ejemplo:POSICIÓN A B C D E FCOMBINACIÓN 3 4 1 2 4 2NOTA: La serie <strong>de</strong> números <strong>de</strong> la combinación es el código <strong>de</strong> la llave.3.2.11 Llave MCM-10.• Colocación especial en la mordaza. Ver figura.Ver fig.153.2.12 Llave TE-T60 y TE-T80• Colocación especial en la mordaza. La llave TE-T60 se amarra como se indica en eldibujo.• La llave TE-T80 tiene la particularidad que para mecanizar el lado izquierdo seamarra como la TE-T60 y para mecanizar el lado <strong>de</strong>recho hay que amarrar la llave por laparte posterior <strong>de</strong> la mordaza (como en el caso <strong>de</strong> la MCM-10).2) La garra fija izquierda <strong>de</strong>l lado <strong>de</strong>recho <strong>de</strong> la mordaza, y la garra fija <strong>de</strong>recha <strong>de</strong>llado izquierdo <strong>de</strong> la mordaza, no tienen posibilidad <strong>de</strong> regulación, ya que van posicionadasmediante pasadores. Por lo tanto, hay que montarlas guiándolas por suspasadores, y a continuación amarrarlas mediante sus correspondientes tornillos.Ver Fig. 164.- MANTENIMIENTOA la hora <strong>de</strong> ejecutar cualquier operación <strong>de</strong> mantenimiento, es necesario cumplir lossiguientes requisitos:1. Nunca se <strong>de</strong>be efectuar ninguna operación con la máquina en marcha.2. Se <strong>de</strong>be <strong>de</strong>sconectar el cable <strong>de</strong> la conexión eléctrica.3. Se han <strong>de</strong> seguir estrictamente las indicaciones <strong>de</strong>l manual.4. Utilizar piezas originales <strong>de</strong> repuesto.4.1 SUSTITUCIÓN DE LAS GARRAS DE LA MORDAZALa mordaza <strong>de</strong> la máquina <strong>CAPRI</strong> dispone <strong>de</strong> tres parejas <strong>de</strong> garras (garra fija izquierda,garra fija <strong>de</strong>recha y garra móvil). En el caso <strong>de</strong> que alguna <strong>de</strong> ellas resultase dañada,pue<strong>de</strong>n reemplazarse por garras nuevas, <strong>de</strong> manera in<strong>de</strong>pendiente.Para reemplazar la “garra fija izquierda” (A) o la “garra fija <strong>de</strong>recha” (B), basta con <strong>de</strong>senroscarlos dos tornillos <strong>de</strong> amarre que la sujetan, y extraerlas tirando <strong>de</strong> ellas haciaarriba. Para montar las nuevas garras, actuar <strong>de</strong> manera inversa.Para reemplazar la “garra móvil” (C), hay que seguir los siguientes pasos:1) Extraer con ayuda <strong>de</strong> un cutter o similar, la tapa negra <strong>de</strong> plástico que tiene lamaneta <strong>de</strong> la mordaza.3) Por lo tanto, sabiendo que en cada pareja <strong>de</strong> garras hay una que tiene su posiciónfija, tenemos que reglar la otra garra respecto <strong>de</strong> la que tiene su posición fija.4) Colocar los tornillos <strong>de</strong> la garra a reglar, pero sin apretarlos. De forma que la garrase pueda mover con la mano, pero que a su vez no tenga posibilidad <strong>de</strong> levantarserespecto <strong>de</strong> la superficie don<strong>de</strong> va apoyada5) Proce<strong>de</strong>r a reglar la garra:
español5.1) Introducir el eje <strong>de</strong> reglaje <strong>de</strong>l palpador, en el orificio Nº1 <strong>de</strong> la garra.5.2) Hacer coincidir el eje <strong>de</strong> reglaje <strong>de</strong> la fresa, en el orificio Nº1 <strong>de</strong> la otra garra.5.3) Elevar el cabezal y realizar la misma operación, pero en el orificio Nº2 <strong>de</strong> lasgarras.5.4) Volver a repetir el punto anterior tantas veces como sea necesario, hasta quelos ejes <strong>de</strong> reglaje entren suavemente y sin forzar, tanto en el orificio Nº1 comoen el Nº2.4) Con ayuda <strong>de</strong> la llave allen <strong>de</strong> 1,5 especial <strong>de</strong> brazo corto, <strong>de</strong>senroscar alre<strong>de</strong>dor<strong>de</strong> 1 vuelta los dos tornillos prisioneros <strong>de</strong> regulación <strong>de</strong> la garra (son los dos tornillosprisioneros situados entre la maneta <strong>de</strong> la mordaza y la garra que vamos a reglar).5) A continuación, montar cualquier pareja <strong>de</strong> Fresa-Palpador en sus correspondientesportaherramientas, pero al revés (con las puntas <strong>de</strong> corte hacia el interior <strong>de</strong>l portaherramientas.Bajar el cabezal <strong>de</strong> la máquina, y bloquearlo a una altura en la cuál lasherramientas puedan tocar los laterales <strong>de</strong> la garras.6) Activar el sistema electrónico <strong>de</strong> regulación vertical <strong>de</strong>l palpador.7) Apoyar el extremo <strong>de</strong> la garra que está amarrada (la que tiene su posición fija),contra el lateral <strong>de</strong> la herramienta. <strong>Manual</strong>mente, <strong>de</strong>splazar la garra a reglar en ladirección <strong>de</strong> la maneta <strong>de</strong> la mordaza, y manteniendo la presión sobre la garra en esadirección, <strong>de</strong>splazarla frontalmente hasta que también toque lateralmente su correspondienteherramienta. En esta posición, apretar ligeramente los tornillos <strong>de</strong> amarre<strong>de</strong> la garra. Sabremos cuándo las herramientas están tocando sus correspondientesgarras, porque las luces <strong>de</strong>l sistema electrónico <strong>de</strong> regulación vertical <strong>de</strong>l palpador, seiluminarán.5.5) Con los dos ejes <strong>de</strong> reglaje introducidos en los orificios Nº1, bloquear el cabezal,y amarrar ligeramente el tornillo B.5.6) Con los dos ejes <strong>de</strong> reglaje introducidos en los orificios Nº2, bloquear el cabezal,y amarrar ligeramente el tornillo A.5.7) Repetir la operación <strong>de</strong>l punto anterior, pero amarrando <strong>de</strong>finitivamente lostornillos A y B.5.8) Una vez terminado el reglaje, con ayuda <strong>de</strong> la llave allen <strong>de</strong> 1,5 especial <strong>de</strong>brazo corto, apretar los dos tornillos prisioneros situados entre la maneta <strong>de</strong> lamordaza y la garra que hemos reglado. De esta manera, aseguramos una mayorconsistencia en la fijación <strong>de</strong> la garra que hemos reglado.4.2.2 Reglaje <strong>de</strong> PRECISIÓNSe trata <strong>de</strong> un reglaje que requiere <strong>de</strong> cierta <strong>de</strong>streza, y con el que conseguimos unreglaje muy preciso <strong>de</strong> las garras reemplazadas.Para realizar este reglaje, seguir los siguientes pasos:1) La garra fija izquierda <strong>de</strong>l lado <strong>de</strong>recho <strong>de</strong> la mordaza, y la garra fija <strong>de</strong>recha <strong>de</strong>llado izquierdo <strong>de</strong> la mordaza, no tienen posibilidad <strong>de</strong> regulación, ya que van posicionadasmediante pasadores. Por lo tanto, hay que montarlas guiándolas por suspasadores, y a continuación amarrarlas mediante sus correspondientes tornillos.8) A continuación, separar la garra móvil <strong>de</strong> la garra a reglar, girando para ello lamaneta <strong>de</strong> la mordaza.9) Colocar la herramienta alineada con uno <strong>de</strong> los tornillos <strong>de</strong> amarre <strong>de</strong> la garra, yen esta posición apoyar la herramienta contra la garra que está amarrada (la que tienesu posición fija). En este momento, y manteniendo en todo momento una muy ligerapresión entre la herramienta y la garra que está amarrada (la que tiene su posición fija),ir apretando muy <strong>de</strong>spacio, el tornillo prisionero que está alineado con la herramientay con el tornillo <strong>de</strong> la garra. Llegará un momento en el que se encen<strong>de</strong>rá la segunda luz<strong>de</strong>l sistema electrónico <strong>de</strong> regulación vertical <strong>de</strong>l palpador. Cuando llegue ese momento,<strong>de</strong>jar <strong>de</strong> apretar el tornillo prisionero.10) Colocar la herramienta alineada con el otro tornillo <strong>de</strong> amarre <strong>de</strong> la garra, y volvera realizar la misma operación.11) Revisar <strong>de</strong> nuevo que las garras han quedado regladas en esas dos posiciones(frente a los tornillos <strong>de</strong> amarre), y si fuese necesario, retocar ligeramente la posición<strong>de</strong> la garra apretando muy ligeramente el correspondiente tornillo prisionero.2) Por lo tanto, sabiendo que en cada pareja <strong>de</strong> garras hay una que tiene su posiciónfija, tenemos que reglar la otra garra respecto <strong>de</strong> la que tiene su posición fija.3) Colocar los tornillos <strong>de</strong> la garra a reglar, pero sin apretarlos. De forma que la garrase pueda mover con la mano, pero que a su vez no tenga posibilidad <strong>de</strong> levantarserespecto <strong>de</strong> la superficie don<strong>de</strong> va apoyada.12) Ya se ha realizado el reglaje, por lo que ahora hay que apretar con fuerza los dostornillos <strong>de</strong> amarre <strong>de</strong> la garra.13) Por último, apretar un poco los dos prisioneros <strong>de</strong> regulación <strong>de</strong> la garra. De estamanera, aseguramos una mayor consistencia en la fijación <strong>de</strong> la garra que hemos reglado.4.3 SUSTITUCIÓN DE LOS FUSIBLESEn el caso <strong>de</strong> que la máquina no se ponga en marcha cuando se accionen los interruptores<strong>de</strong> marcha, es necesario comprobar los fusibles. Esta operación se realiza <strong>de</strong> lasiguiente manera:1) Apagar la máquina mediante el interruptor general y <strong>de</strong>sconectar el cable <strong>de</strong> alimentación.2) Extraer el porta-fusible que se encuentra <strong>de</strong>bajo <strong>de</strong>l interruptor general.3) Comprobar (usar un tester) si algún fusible está fundido, y en su caso, sustituirlopor otro <strong>de</strong>l mismo tipo y valor.4.4 TENSADO Y SUSTITUCIÓN DE LA CORREAPara revisar el tensado <strong>de</strong> la correa o para sustituir la misma, <strong>de</strong>ben seguirse los siguientespasos:1) Apagar la máquina mediante el interruptor general, y <strong>de</strong>sconectar el cable <strong>de</strong> alimentación.2) Desatornillar los 4 tornillos (5) que amarran el “guarda <strong>de</strong>l cabezal” y extraerlo. Lostornillos se encuentran en el lateral <strong>de</strong>recho, en el lateral izquierdo, en la parte superior,y en la parte trasera. Para po<strong>de</strong>r extraer el “guarda <strong>de</strong>l cabezal”, es necesario introducirpreviamente y hasta su tope, el “pulsador <strong>de</strong> bloqueo <strong>de</strong> la fresa” (E).3) Aflojar pero sin soltar, los 4 tornillos (6) que sujetan el motor.4) Aflojar pero sin soltar, las 2 tuercas <strong>de</strong> contratuerca (7).Tensado: Girando los dos tornillos <strong>de</strong> tensado (8), se produce el <strong>de</strong>splazamiento<strong>de</strong>l motor hacia la parte trasera <strong>de</strong> la máquina. Cuando se observe que la correa dispone<strong>de</strong> la tensión requerida, volver a apretar las dos tuercas <strong>de</strong> contratuerca (7), y lostornillos (6) que sujetan el motor.Sustitución: Aflojar pero sin soltar, los 2 tornillos <strong>de</strong> tensado <strong>de</strong> la correa (8).Extraer la correa estropeada y sustituirla por una nueva. Girando los dos tornillos <strong>de</strong>tensado (8), se produce el <strong>de</strong>splazamiento <strong>de</strong>l motor hacia la parte trasera <strong>de</strong> la máqui-
na. Cuando se observe que la correa dispone <strong>de</strong> la tensión requerida, volver a apretarlas dos tuercas <strong>de</strong> contratuerca (7), y los tornillos (6) que sujetan el motor.5) Volver a colocar y amarrar el “guarda <strong>de</strong>l cabezal”.Ver Fig. 184.5 SUSTITUCIÓN DEL MOTOREsta operación se realiza <strong>de</strong> la siguiente manera:1) Apagar la máquina mediante el interruptor general, y <strong>de</strong>sconectar el cable <strong>de</strong> alimentación.2) Desatornillar los 4 tornillos (5) que amarran el “guarda <strong>de</strong>l cabezal” y extraerlo. Lostornillos se encuentran en el lateral <strong>de</strong>recho, en el lateral izquierdo, en la parte superior,y en la parte trasera. Para po<strong>de</strong>r extraer el “guarda <strong>de</strong>l cabezal”, es necesario introducirpreviamente y hasta su tope, el “pulsador <strong>de</strong> bloqueo <strong>de</strong> la fresa” (E).3) Desatornillar los 6 tornillos (9) que amarran el “guarda <strong>de</strong>l motor” (F) y extraerlo.4) Extraer la correa (G).5) Desconectar los cables <strong>de</strong> alimentación que llegan hasta el motor.6) Desatornillar los 4 tornillos (6) que sujetan el motor.7) Extraer el motor.8) Accediendo a la parte inferior <strong>de</strong>l motor con un <strong>de</strong>stornillador plano, bloquear eleje <strong>de</strong>l motor y manualmente girar la polea (H) hasta extraerla (la rosca es a izquierdas).9) Desenroscar los 4 tornillos (10) que amarran la chapa-soporte <strong>de</strong>l motor y extraerla.10) Para montar el nuevo motor, efectuar las mismas operaciones pero <strong>de</strong> manerainversa.Ver Fig. 194.6 SUSTITUCIÓN DEL DISPLAY-TECLADOEsta operación se realiza <strong>de</strong> la siguiente manera:1) Apagar la máquina mediante el interruptor general, y <strong>de</strong>sconectar el cable <strong>de</strong> alimentación.2) Desatornillar los 4 tornillos (5) que amarran el “guarda <strong>de</strong>l cabezal” y extraerlo. Lostornillos se encuentran en el lateral <strong>de</strong>recho, en el lateral izquierdo, en la parte superior,y en la parte trasera. Para po<strong>de</strong>r extraer el “guarda <strong>de</strong>l cabezal”, es necesario introducirpreviamente y hasta su tope, el “pulsador <strong>de</strong> bloqueo <strong>de</strong> la fresa” (E).3) Desconectar el cable plano, que conecta el display-teclado (K) con la tarjeta electrónica<strong>de</strong> control.4) Despegar el viejo display-teclado (K) <strong>de</strong>l “Guarda <strong>de</strong>l cabezal”, y extraerlo.5) Para montar el nuevo display-teclado, efectuar las mismas operaciones pero <strong>de</strong>manera inversa.Ver Fig. 204.7 SUSTITUCIÓN DE LA TARJETA ELECTRÓNICA DECONTROLEsta operación se realiza <strong>de</strong> la siguiente manera:1) Apagar la máquina mediante el interruptor general, y <strong>de</strong>sconectar el cable <strong>de</strong> alimentación.2) Desatornillar los 4 tornillos (5) que amarran el “guarda <strong>de</strong>l cabezal” y extraerlo. Lostornillos se encuentran en el lateral <strong>de</strong>recho, en el lateral izquierdo, en la parte superior,y en la parte trasera. Para po<strong>de</strong>r extraer el “guarda <strong>de</strong>l cabezal”, es necesario introducirpreviamente y hasta su tope, el “pulsador <strong>de</strong> bloqueo <strong>de</strong> la fresa” (E).3) Desconectar el conector principal <strong>de</strong> la tarjeta electrónica <strong>de</strong> control (L)4) Desconectar el cable plano, que conecta el display-teclado con la tarjeta electrónica<strong>de</strong> control (L).5) Desatornillar los 3 tornillos (11) que sujetan la tarjeta electrónica <strong>de</strong> control (L) al“guarda <strong>de</strong>l cabezal”, y extraerla.6) Para montar la nueva tarjeta electrónica <strong>de</strong> control, efectuar las mismas operacionespero <strong>de</strong> manera inversa.5.- SEGURIDADPara su seguridad, le recomendamos que siga las siguientes pautas:• No intente arrancar o manipular la máquina hasta que todos los temas <strong>de</strong> seguridad,instrucciones para la instalación, guía <strong>de</strong>l operario y procedimientos <strong>de</strong> mantenimiento,hayan sido cumplimentados y entendidos.• Desconecte siempre el suministro eléctrico, antes <strong>de</strong> realizar cualquier trabajo <strong>de</strong>limpieza o mantenimiento.• Mantenga la máquina siempre limpia, así como su entorno.• Trabajar con las manos secas.• Utilizar siempre gafas <strong>de</strong> protección, aunque la máquina ya disponga <strong>de</strong> protecciones.• Asegúrese <strong>de</strong> que la máquina tenga toma a tierra.Recomendamos trabajar con la máquina a una altura en la cuál el usuario se encuentrecómodo:• Lo más recomendable es trabajar sentado en una silla. Ajustar la altura <strong>de</strong> la sillahasta que los ojos <strong>de</strong>l usuario que<strong>de</strong>n a la altura <strong>de</strong> la parte más superior <strong>de</strong> la máquina.• Si se trabaja <strong>de</strong> pie, <strong>de</strong>pendiendo <strong>de</strong> la altura <strong>de</strong>l usuario es recomendable colocarun alzador entre la mesa y la máquina, <strong>de</strong> manera que los ojos <strong>de</strong>l usuario que<strong>de</strong>n a laaltura <strong>de</strong> la parte más superior <strong>de</strong> la máquina.6.- ELIMINACIÓN DE DESHECHOSPor <strong>de</strong>secho se entien<strong>de</strong> cualquier sustancia u objeto proce<strong>de</strong>nte <strong>de</strong> activida<strong>de</strong>s humanaso <strong>de</strong> ciclos naturales, abandonada o <strong>de</strong>stinada a ser abandonada.6.1 EMBALAJE• Como el embalaje en el que se suministra la <strong>CAPRI</strong> es <strong>de</strong> cartón, el mismo sepodría reciclar como embalaje.• Como <strong>de</strong>secho, se equipara a los <strong>de</strong>sechos sólidos urbanos y por lo tanto no sepue<strong>de</strong> tirar más que en los contenedores especiales para cartón.• Los cascos que protegen la máquina <strong>de</strong>ntro <strong>de</strong> la caja <strong>de</strong> cartón, son <strong>de</strong> materialpolimérico equiparable a los <strong>de</strong>sechos sólidos urbanos y por lo tanto, no se pue<strong>de</strong>neliminar más que en las instalaciones normales <strong>de</strong> eliminación <strong>de</strong> <strong>de</strong>sechos.6.2 VIRUTA• Los residuos proce<strong>de</strong>ntes <strong>de</strong> la duplicación <strong>de</strong> llaves, están clasificados como <strong>de</strong>sechosespeciales, pero se equiparan a los <strong>de</strong>sechos sólidos urbanos, como por ejemploun estropajo metálico.• Estos <strong>de</strong>sechos se eliminarán según como los clasifiquen las leyes vigentes en laUE, entregándolos en las instalaciones especiales <strong>de</strong> eliminación <strong>de</strong> <strong>de</strong>sechos.6.3 MÁQUINA• Antes <strong>de</strong> efectuar la <strong>de</strong>molición <strong>de</strong> la máquina es preciso ponerla fuera <strong>de</strong> servicio,cortando el suministro <strong>de</strong> energía eléctrica y separando las piezas <strong>de</strong> plástico <strong>de</strong> laspiezas metálicas.• Tras efectuar esta operación se podrán eliminar todos los <strong>de</strong>sechos, en conformidadcon las leyes en vigor en el país don<strong>de</strong> se utiliza la máquina.7.- TABLA LLAVE-FRESA-PALPADOR-INCLINA-CIÓN-ADAPTADORespañolVer Fig. 214.8 SUSTITUCIÓN DE LA TARJETA DE POTENCIA Y DELDISYUNTOREsta operación se realiza <strong>de</strong> la siguiente manera:1) Apagar la máquina mediante el interruptor general, y <strong>de</strong>sconectar el cable <strong>de</strong> alimentación.2) Desatornillar las 4 patas (P) <strong>de</strong> la máquina, y extraerlas.3) Desatornillar los 5 tornillos (12) que amarran la “Chapa <strong>de</strong> protección inferior”, yretirarla.4) Desconectar todos los cables <strong>de</strong> la tarjeta que queramos reemplazar, anotandopreviamente la posición <strong>de</strong> cada cable.5) Para liberar la tarjeta <strong>de</strong> potencia (M) o el disyuntor (N), basta con presionar sobrelas lengüetas <strong>de</strong> cada uno <strong>de</strong> los 4 pivotes que la sustentan, y tirar <strong>de</strong> la tarjeta haciaarriba.6) Para montar la nueva tarjeta <strong>de</strong> potencia o el nuevo disyuntor, efectuar las mismasoperaciones pero <strong>de</strong> manera inversa.Ver Fig. 22Para po<strong>de</strong>r trabajar a<strong>de</strong>cuadamente, la máquina se completa con una serie <strong>de</strong> accesorios:Ver lista al final8.- EXPLOSIONADOVer figura 23
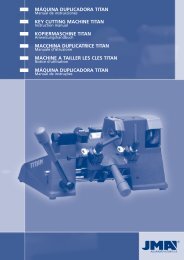
englishKEY CUTTING MACHINEcapriINSTRUCTION MANUAL
1.- PRESENTATION AND GENERAL ASPECTS1.1 GENERAL POINTS1.2 TRANSPORT AND PACKING1.3 IDENTIFICATION LABEL2. - CHARACTERISTICS OF THE MACHINE2.1 FAMILIES OF KEYS2.2 ACCESSORIES2.3 TOOL STORE2.4 ELECTRIC CIRCUIT2.5 TECHNICAL DATA2.6 MAIN ELEMENTS OF THE MACHINE2.7 COMPONENTS AND FUNCTIONAL PARTS2.7.1 cHanging the cutter and tracer point (21)2.7.2 Blocking the sli<strong>de</strong> at the end of the “Y” axis travel2.7.3 clamp (6)2.7.4 tracer point spring mechanism (11)2.7.5 sPring mechanism and blocking the sli<strong>de</strong> on the “X” axis (5 and 4)2.7.6 support lever for tubular keys2.7.7 cutter speed (17)2.7.8 Keypad-display (1)2.7.9 Vertical adjustment of the tracer point (15)2.7.10 control of cutting forceenglish3.- CUTTING3.1 CUTTING PROCESS3.2 KEY CUTTING3.2.1 KA-2, KA-3 and KA-4 keys.3.2.2 KE-1 key.3.2.3 SEA-1 key.3.2.4 OP-WH.P and OP-WY.P keys3.2.5 ME-3.P and ME-4.P keys3.2.6 TUBULAR keys3.2.7 FIC-2 and FIC-3 keys3.2.8 WIN-1D, WIN-2D, WIN-3D and WIN-4D keys.3.2.9 JIS-4.P key3.2.10 FO-6.P key3.2.11 MCM-10 key.3.2.12 TE-T60 and TE-T80 keys4.- MAINTENANCE4.1 REPLACING THE CLAMP JAWS4.2 ADJUSTING THE JAWS4.2.1 NORMAL adjustment4.2.2 PRECISION adjustment4.3 REPLACING THE FUSES4.4 TIGHTENING AND REPLACING THE BELT4.5 REPLACING THE MOTOR4.6 REPLACING THE KEYPAD-DISPLAY4.7 REPLACING THE ELECTRONIC CONTROL CARD4.8 REPLACING THE POWER CARD AND CIRCUIT BREAKER5.- SAFETY6.- WASTE DISPOSAL6.1 PACKING6.2 SWARF6.3 MACHINE7.- KEY-CUTTER-TRACER POINT-ANGLE CUT-ADAPTOR TABLE8.- EXPLO<strong>de</strong>d view
1.- PRESENTATION AND GENERAL ASPECTS1.1 GENERAL POINTSThe <strong>CAPRI</strong> key cutting machine has been <strong>de</strong>signed on the basis of safety standardscurrently in force in the EU.The safety of the personnel involved in handling this type of machines can only beachieved with a well <strong>de</strong>signed worker safety programme, like the implementation ofa maintenance programme and following recommen<strong>de</strong>d advice as well as compliancewith the safety standards inclu<strong>de</strong>d in this manual.Although the machine is not difficult to install, it is best not to try to install, adjust oruse it without having first read this manual.The machine leaves our factory ready for use and only requires calibration operationsfor the tools that are going to be used.Socket.Connection plate.3-position switch.Transformer.Motor.Keypad-display.Control card.Cutter.Tracer point.Clamp.Lighting LED.Force sensor.See Figure 2english1.2 TRANSPORT AND PACKINGThe machine comes in a robust cardboard box protected with packing foam with thefollowing dimensions:Width = 520 mm; Height = 650 mm; Depth = 575 mmWeight of machine plus packing = 30 Kg.When you unpack the machine, check carefully to see if it has suffered any damageduring transportation.If you find any problems, please inform the carrier immediately and do not do anythingwith the machine until the carrier’s agent has carried out an inspection.To move the machine from one place to another, get hold of the machine by the base,and not by any other part.1.3 IDENTIFICATION LABELThe <strong>CAPRI</strong> key cutting machine has an i<strong>de</strong>ntificationlabel, giving the machine’s serial orregistration number, the manufacturer’s nameand address, the CE mark and year of manufacture.2. - CHARACTERISTICS OF THE MACHINEThe <strong>CAPRI</strong> machine is a highly robust and precision key cutting machine, which standsout for having a clamp that enables many different types of keys to be clamped, withoutthe need for any adaptors.It incorporates a novel force control system, which increases cutting precision.2.1 FAMILIES OF KEYSThe <strong>CAPRI</strong> machine cuts the following types of keys, among others:- Dimple keys- Wave keys- Tubular keys- FIC-2 and FIC-3 keys- WIN-1D, WIN-2D, WIN-3D and WIN-4D keys- JIS-4.P keys- FO-6.P keys2.2 ACCESSORIESThe machine is supplied with a number of accessories for its use and maintenance. Allthese accessories can be housed in the machine’s tool store.- 2 fuses (housed in the bottom of the tool store)- Set of Allen keys (5, 3 and 2.5)- 1 special 1.5 short-arm Allen key- 2 tip-stop strips- 2 jaw adjustment rods.- 2 adaptors for CHI-1T tubular key- Cutters: F-1 and F-13- Tracer points: T-1 and T-13.2.5 TECHNICAL DATAMotor: Single phase 400 W. ,230 V - 50 Hz (Optional: Single phase 400W, 110V – 60Hz)Cutter: HSS (Optional: Hard metal)Cutter speed: 6,000 and 11,000 r.p.m.Clamps: Two clamping faces and 0 / 45 º tiltingDisplacement: On three axes with precision roller gui<strong>de</strong>s.Effective stroke: X axis = 71 mm; Y axis = 62 mm; Z axis = 40 mmLighting: LEDDimensions: Width = 430 mm, Depth = 385 mm and Height = 485 mmWeight: 25 Kg2.6 MAIN ELEMENTS OF THE MACHINE1.- Keypad-display2.- Clamp-hol<strong>de</strong>r sli<strong>de</strong> (X – Y axes)3.- Sli<strong>de</strong> activation lever, x – y axes4.- Knob to block clamp-hol<strong>de</strong>r sli<strong>de</strong>, x axis5.- Sli<strong>de</strong> spring mechanism activation wheel, x-axis6.- Clamp7.- Lever to block clamp rotation8.- Clamp knob9.- Head (Z axis)10.- Lever to activate and block head, z axis11.- Tracer point spring mechanism knob12.- Tool-hol<strong>de</strong>r13.- Cutter14.- Tracer point15.- Tracer point height adjustment wheel16.- Main switch17.- Motor speed selector (2 speeds)18.- Lighting LEDs19.- Swarf protector20.- Tool store21.- Cutter blocking buttonSee Figure 32.7 COMPONENTS AND FUNCTIONAL PARTS2.7.1 Changing the cutter and tracer point (21)To release the cutter, you have to press the cutter blocking button and at the same timerotate the tool-hol<strong>de</strong>r by hand.After removing the cutter to be replaced, insert the new cutter and secure it in the toolhol<strong>de</strong>r,making sure that its end butts up against the insi<strong>de</strong> of the tool-hol<strong>de</strong>r.The tracer point is replaced in the same way as the cutter. The only difference to bear inmind is that the rotation of the tracer point is always blocked internally.2.7.2 Blocking the sli<strong>de</strong> at the end of the “Y” axis travelIn or<strong>de</strong>r to prevent the sli<strong>de</strong> from moving in the “Y” direction, whilst the key cuttingmachine is holding the keys in the clamp, the sli<strong>de</strong> has been equipped with momentaryblocking in that direction.To active this blocking, just move the sli<strong>de</strong> as far as it will go in the direction towardsto the key cutting machine.To <strong>de</strong>activate the blocking, just move the sli<strong>de</strong> forward, exercising a little force.2.3 TOOL STOREThe machine has a tool store, which is fitted to the top of the machine. It can be removedand laid directly on a table (in this way providing extra space on top of the machine,which can be used for keeping keys, accessories, etc…).2.4 ELECTRIC CIRCUITThe main components of the electric and electronic circuits are as follows:2.7.3 Clamp (6)The features of the clamp on the <strong>CAPRI</strong> key cutting machine are superior to those of anynormal machine on the market, as it has two separate clamping faces. In addition, theclamps can be blocked in any rotation position between 45º 0º -45º.2.7.4 Tracer point spring mechanism (11)The tracer point can be used in two different ways, <strong>de</strong>pending on the work you aregoing to do:
- Tracer point with spring mechanism. The tracer point spring mechanism isonly used for cutting dimple keys.- Tracer point blocked. The blocked tracer point is used to carry out cuttingoperations with the sli<strong>de</strong> forward. In general, for cutting wave keys.To activate or <strong>de</strong>activate the tracer point spring mechanism, you just have to turn thetracer point spring mechanism knob 180º (half turn).When the tracer point spring mechanism is activated, the tracer point tip is locatedslightly below its adjustment position in relation to the cutter. This tracer point positionenables you to insert it gently into the hole in the original key, before the cutter startscutting the key to be copied. This avoids any vibrations and sud<strong>de</strong>n movements of thesli<strong>de</strong>.To find out the status of the tracer point at any time (with spring mechanism or blocked),there is an indicator on the machine’s keypad-display which provi<strong>de</strong>s this information. Ifthe light is on, the spring mechanism is activated. On the other hand, if the light is off,the tracer point is blocked.2.7.5 Spring mechanism and blocking of the sli<strong>de</strong> on the“X” axis (5 and 4)We recommend that you use the spring mechanism for the sli<strong>de</strong> on the “X” axis to carryout lateral cutting of wave keys.We recommend you use the blocking of the sli<strong>de</strong> on the “X” axis for cutting or dimplingin a straight line.2.7.6 Support lever for tubular keysThe <strong>CAPRI</strong> key cutting machine has a fold-away lever on its top-left si<strong>de</strong> which helps tomake cutting tubular keys, wave keys, etc. more comfortable, as it serves as a supportpoint for the hand activating the sli<strong>de</strong> travel lever.2.7.7 Cutter speed (17)The machine has a speed selector on its right si<strong>de</strong>, which enables you to select thecutter rotation speed. In general terms, you can say that the rotation speed <strong>de</strong>pendson the cutter material:- Position I: To work with an HSS cutter (6,000 rpm)- Position II: To work with a HARD METAL cutter (11,000 rpm)- Position O: Cutter at rest.2.7.8 Keypad-display (1)The light on the left comes on when the tracer point is touching the key.The light on the right comes on when the cutter is touching the key.FORCE visual indicator.Indicates the i<strong>de</strong>al force to be applied during cutting.NOTE: In addition to the visual indicator, the force control system also has an audibleindicator that emits a sound when you have achieved the i<strong>de</strong>al cutting force. This audibleindicator can be activated-<strong>de</strong>activated by pressing the MODE and ON-OFF buttonsat the same time.2.7.9 Vertical adjustment of the tracer point (15)Each time the cutter-tracer point is changed, the tracer point has to be vertically adjusted.In or<strong>de</strong>r to be able to use the tracer point electronic vertical adjustment system, thekeypad-display must be active (when it is active, a green light appears next to theON-OFF button).When the keypad-display is active, you can activate-<strong>de</strong>activate the tracer point electronicvertical adjustment system by pressing the MODE button.To vertically adjust the tracer point, proceed as follows:• Secure the cutter and tracer point in their corresponding tool-hol<strong>de</strong>rs. Make surethat they have been secured, inserted upwards as far as they go.• Secure two similar keys in the machine clamps.• Release the tracer point spring mechanism (tracer point blocked).• Lower the head, until the cutter and the tracer point rest on the keys in theclamps. Then, one of the following three situations will occur:LEFT BLUE LIGHT. If only the blue light on the left comes on, this means thatthe tracer point is touching the key, but the cutter is not. Therefore, you have toturn the cutter adjustment wheel to the left, until both adjustment lights some on.RIGHT BLUE LIGHT. If only the blue light on the right comes on, this means thatthe cutter is touching the key, but the tracer point is not. Therefore, you have toturn the tracer point adjustment wheel to the right, until both adjustment lightscome on.LEFT AND RIGHT BLUE LIGHTS. This means that both the cutter and tracerpoint are touching their respective keys. This means that the height of the tracerpoint has been adjusted.IMPORTANT NOTE: When adjusting the height of the tracer point, you need to bearin mind the type of key you are going to cut. If it is a WAVE key, very little force needsto be applied to the head activation lever (on the visual force indicator no light shouldcome on). On the other hand, if it is a DIMPLE key, the blue adjustment lights have tocome on, and the force indicator should indicate the i<strong>de</strong>al cutting force for dimple keys(to achieve this, you have to apply a slight force on the head activation lever).english2.7.10 Control of cutting forceON-OFF buttonPress it for the keypad-display functions to go into ACTIVE mo<strong>de</strong>. A green light willappear next to the button.Press it again for the keypad-display to go into STAND-BY mo<strong>de</strong>. A red light will appearnext to the button.Lighting buttonPress it to switch on the lighting dio<strong>de</strong>s (if they are off) or switch them off if they are on.This button operates in<strong>de</strong>pen<strong>de</strong>ntly of the status of the “ON-OFF” button.SPRING MECHANISM indicatorIf the blue light is on, this means that the tracer point is in SPRING MECHANISM AC-TIVATED mo<strong>de</strong>.If the blue light is off, this means that the tracer point is BLOCKED (spring mechanism<strong>de</strong>activated).MODE buttonThis button is for activating-<strong>de</strong>activating operation of the tracer point vertical adjustmentsystem.TRACER POINT ADJUSTMENT indicators.The <strong>CAPRI</strong> machine has a revolutionary cutting force control system. This is a patentedsystem, which when you are cutting DIMPLE keys, indicates the i<strong>de</strong>al force to exerciseon the head activation lever. It has two indicators for this purpose:Visual indicator. The i<strong>de</strong>al cutting force is achieved when the line of lights reachesthe white arrow.Audible indicator. When the line of lights reaches the white arrow, the machineemits a sound. This audible indicator can be activated-<strong>de</strong>activated by pressing theMODE and ON-OFF buttons at the same time.This cutting force control system enables you to cut DIMPLE keys with great precision.You will cut the holes in the key with exactly the same force with which you haveadjusted the height of the tracer point. In this way, you obtain maximum precision incutting DIMPLE keys.3.- CUTTING3.1 CUTTING PROCESS• Switch on the machine using the main switch located on the back right-hand si<strong>de</strong>of the machine.• To improve visibility in the work area, activate the lighting by turning on the switchlocated on the keypad-display.• With the help of the table provi<strong>de</strong>d in this manual, select the cutter and tracerpoint necessary to cut the key.• Change the cutter and tracer point.• Momentarily block the sli<strong>de</strong> at the end of the “Y” axis travel.• Secure the original key in the left si<strong>de</strong> of the clamp, and the key to be cut in theright si<strong>de</strong>. When securing the keys, bear in mind the following <strong>de</strong>tails:- KEY STOP. It may be a key which is stopped from being inserted further by itsshoul<strong>de</strong>rs (Fig. 4.A), or a key stopped by its tip (Fig. 4.B).- ADAPTOR. For some very specific types of key, it may be necessary to use anadaptor.
- ANGLE CUT. Some keys have angle cut dimples, for which it is necessary torotate the clamp.• Carry out the vertical adjustment of the tracer point.• Activate the systems which simplify the cutting work:TRACER POINT: Activate or <strong>de</strong>activate the tracer point spring mechanism,<strong>de</strong>pending on the type of key being cut.SLIDE: Based on the mo<strong>de</strong>l of key, it may be a good i<strong>de</strong>a to activate the sli<strong>de</strong>spring mechanism, or block the sli<strong>de</strong> in the “X” direction.SUPPORT: Depending on the type of key, it may be a good i<strong>de</strong>a to use the supportlever for tubular keys.• Start rotating the cutter, having first selected one of the two speeds available.• Proceed to cut the key. If it is a dimple key, use the help of the cutting forcecontrol system.3.2.5 ME-3.P and ME-4.P keys• Use cutter-tracer point pair: F-11 / P-11.• Secure the key in the clamp using the AD-MM2 adaptor.- Position the adaptor on the clamp, so that it is stopped by the tip.- Insert the key into the adaptor.- As you secure the adaptor in the clamp, the key is secured in the adaptor.• It is necessary to block the tracer point (<strong>de</strong>activate the spring mechanism).• NOTE: After vertically adjusting the tracer point, you need to slightly lower thetracer point, by turning the adjustment wheel 5 points to the right. Then you have toinsert the tracer point in the channel of the bit and block the machine head. Next slightlyraise the tracer point so that it does not drag the key.• NOTE: We recommend using the sli<strong>de</strong> spring mechanism system.english3.2 CUTTING KEYS3.2.1 KA-2, KA-3 and KA-4 keys.• Different pairs of cutters and tracer points are used <strong>de</strong>pending on the key to be cut.See table.• The key is secured in the clamp when its shoul<strong>de</strong>rs stop it from being inserted anyfurther.• Depending on the mo<strong>de</strong>l of key to be cut, it is necessary to rotate the clamps basedon the angle required. See table.• It is necessary to activate the tracer point spring mechanism.• Use the cutting force control system to increase cutting precision.• NOTE: The dimples cut on the KA-3 key must always be on the lowest part of theclamp.• NOTE: The dimples cut on the KA-2 key must always be on the highest part of theclamp.See Fig. 53.2.2 KE-1 key.• Use cutter-tracer point pair: F-1 / P-1.• The key is secured in the clamp when its shoul<strong>de</strong>rs stop it from being inserted anyfurther, but in this case it is inserted from the back.• It is necessary to position the clamps at an angle of 5º.• It is necessary to activate the tracer point spring mechanism.• Use the cutting force control system to increase cutting precision.• NOTE: The dimples cut on the KE-1 key must always be on the highest part of theclamp.• NOTE: You have to use the relevant adaptor to cut the lateral dimples.See Fig. 63.2.3 SEA-1 key.• Use cutter-tracer point pair: F-3 / P-3.• The key is secured in the clamp when its shoul<strong>de</strong>rs stop it from being inserted anyfurther.• It is necessary to block the tracer point (<strong>de</strong>activate the spring mechanism).• NOTE: After vertically adjusting the tracer point, you need to slightly lower thetracer point, by turning the adjustment wheel 5 points to the right. Then you have toinsert the tracer point in the channel of the bit and block the machine head. Next slightlyraise the tracer point so that it does not drag the key.• NOTE: Enter through the middle of the channels without touching the si<strong>de</strong>s, and onthe second pass enter from the right si<strong>de</strong> and exit from the left, without exercising anypressure (just gently supporting the tracer point).• NOTE: To cut the lateral dimples, use the cutter-tracer point combination: F-1 /P-1. Insert until shoul<strong>de</strong>rs stop the key from going in any further. Activate the tracerpoint spring mechanism and use the cutting force control system.See Fig. 73.2.4 OP-WH.P and OP-WY.P keys• Use cutter-tracer point pair: F-11 / P-11.• The key is secured in the clamp when its tip stops it from being inserted any further.• It is necessary to block the tracer point (<strong>de</strong>activate the spring mechanism).• NOTE: After vertically adjusting the tracer point, you need to slightly lower thetracer point, by turning the adjustment wheel 5 points to the right. Then you have toinsert the tracer point in the channel of the bit and block the machine head. Next slightlyraise the tracer point so that it does not drag the key.• NOTE: We recommend using the sli<strong>de</strong> spring mechanism system.• NOTE: We recommend you do a roughing pass and then another finishing passfollowing the whole profile of the pattern of the key. Machine in a downward direction(from the tip of the key to the head).See Fig. 93.2.6 TUBULAR KEYS• Use cutter-tracer point pair: F-8 / P-8.• Secure the key in the clamp “V”.• It is necessary to activate the tracer point spring mechanism.• The cutting operation is more comfortable if you rest the hand activating the sli<strong>de</strong>activation lever on the support lever for tubular keys.See Fig. 103.2.7 FIC-2 and FIC-3 keys• Use cutter-tracer point pair: F-11 / P-11.• Secure the key in the clamp, resting it against the bottom and pushing it towardsthe front face of the clamp.• It is necessary to block the tracer point (<strong>de</strong>activate the spring mechanism).• Block the machine head at a height at which the cutter passes over the clamp butwithout brushing against it.• Cut the two top si<strong>de</strong>s.• Turn the keys taking care to remove any burrs to ensure correct positioning andclamping of the key, and cut the other two si<strong>de</strong>s of the key.See Fig. 113.2.8 WIN-1D, WIN-2D, WIN-3D and WIN-4D keys.• Use cutter-tracer point pair: F-15 / P-15.• Secure two key blanks in the clamp, and use them to vertically adjust the tracerpoint.• Clamp the original key with the teeth facing upwards (as shown in the drawing).• It is necessary to block the tracer point (<strong>de</strong>activate the spring mechanism).• Insert the tracer point precisely in one of the dimples, and block the machine headat that height.• Start cutting.See Fig. 123.2.9 JIS-4.P key• Use cutter-tracer point pair: F-11 / P-11.• Secure the key in the clamp using the AD-MJ adaptor.-Position the adaptor on the clamp, so that it is stopped by the tip.-Insert the key into the adaptor, until its shoul<strong>de</strong>rs are stopped by the plate thatrotates. In this position, clamp the key in the adaptor.• It is necessary to block the tracer point (<strong>de</strong>activate the spring mechanism).See Fig. 133.2.10 FO-6.P key• Use cutter-tracer point pair: F-22 / P-22.• Secure the key in the clamp, using the relevant adaptor.- Position and secure the adaptors on the clamp.- When positioning the key, make sure that it is really flat, so that the two cutsare the same.• It is necessary to block the tracer point (<strong>de</strong>activate the spring mechanism).• Insert the tracer point if the groove of a letter. Block the machine head and raisethe tracer point slightly so that it does not knock against the adaptor.• Start cutting.See Fig. 14Reading the co<strong>de</strong> on the original key• The original key has 6 cutting positions, which are <strong>de</strong>fined by the letters: A, B, C, D, Eand F, as shown in the figure below.See Fig. 8• In each of the key’s positions, there are 4 different possible combinations (<strong>de</strong>fined bynumbers), which we are going to indicate and number:
4.2.1 NORMAL adjustmentThis is a quick, simple adjustment, which will give you an acceptable adjustmentenabling you to cut keys with a certain amount of precision.To carry out this adjustment, follow these steps:1) Secure the two adjustment rods in their relevant tool-hol<strong>de</strong>rs, inserting then as faras they will go into the tool-hol<strong>de</strong>r, with the tapered part of the adjustment rods on theoutsi<strong>de</strong>.1 2 3 4• Height no. 1, indicates that it should not be cut. Position no. 2 indicates there is asmall notch in the key and when it is slightly <strong>de</strong>eper this is position no. 3. Height no. 4is the <strong>de</strong>epest notch in the key.• You then take the key and mark the combinations of each of the 6 positions, asshown below, by way of example:POSITION A B C D E FCOMBINATION 3 4 1 2 4 2englishNOTE: The series of combination numbers is the key co<strong>de</strong>.3.2.11 MCM-10 key.• Special positioning in the clamp. See figure.2) The left fixed jaw on the right-hand si<strong>de</strong> of the clamp and the right fixed jaw on theleft-hand si<strong>de</strong> of the clamp cannot be adjusted, as they are held in position by meansof pins. So you have to fit them, by guiding them with their pins and then securing themwith their corresponding screws.See Fig.153.2.12 TE-T60 and TE-T80 keys• Special positioning in the clamp. The TE-T60 is clamped as shown in the drawing.• The TE-T80 key has the peculiarity that to machine the left si<strong>de</strong> it is clamped likethe TE-T60 and to machine the right si<strong>de</strong> the key has to be clamped by the back part ofthe clamp (like with the MCM-10 key).See Fig. 164.- MAINTENANCEWhen carrying out any maintenance work, it is necessary to meet the following requirements:1. Never carry out any maintenance work with the machine switched on.2. Unplug the machine.3. Strictly adhere to the indications in this manual.4. Only use original spare parts.3) Therefore, knowing that in each pair of jaws there is one with a fixed position, youhave to adjust the other jaw in relation to the one with the fixed position.4) Insert the screws for the jaw to be adjusted, but do not tighten them. So that thejaw can be moved by hand, but cannot lift up from the surface it is resting on.4.1 REPLACING THE CLAMP JAWSThe <strong>CAPRI</strong> machine’s clamp has three pairs of jaws (left fixed jaw, right fixed jaw andmoving jaw). If any of them become damaged, you can replace them with new jaws,separately.To replace the left fixed jaw (A) or the right fixed jaw (B), you just have to undo the twoscrews securing them, and remove them by pulling them upwards. Reverse the processto fit the new jaws.To replace the moving jaw (C), you need to follow the steps below:1) With the help of a cutter or something similar, remove the clamp knob’s blackplastic cover.2) Whilst locking the locknut with a size 14 spanner, insert a no. 5 Allen key into thehole revealed in the clamp knob, and unscrew it.3) Tilt the clamp 45º, and manually turning the spindle, remove it from one of thesi<strong>de</strong>s. Once the spindle has been removed, the moving jaw is released and you canremove it.4) To fit the new moving jaw, simply reverse the process.5) Adjust the jaw:5.1) Insert the tracer point adjustment rod into hole no. 1 in the jaw.5.2) Make the cutter adjustment rod coinci<strong>de</strong> with hole no. 1 in the other jaw.5.3) Raise the head and carry out the same operation, with hole no. 2 in the jaws.5.4) Repeat this operation as many times as necessary until the adjustment rodsenter smoothly without the need for any force, in both hole no. 1 and holeno. 2.IMPORTANT NOTE: When you replace the left fixed jaw or the right fixed jaw, youalways have to adjust the pair of jaws that has been replaced. On the other hand, if youreplace the moving jaw, it is not necessary to carry out any adjustment on the jaws.See Fig. 174.2 ADJUSTING THE JAWSWhenever you replace the left fixed jaw or the right fixed jaw, you have to adjust thepair of jaws that has been replaced. On the other hand, the replacement of the movingjaw does not require any adjustment to the jaws.There are two different ways of adjusting the jaws:NORMAL adjustmentPRECISION adjustment5.5) With the two adjustment rods inserted in holes no. 1, block the head, andslightly tighten screw B.5.6) With the two adjustment rods inserted in holes no. 2, block the head andslightly tighten screw A.5.7) Repeat the above operation, but fully tightening screws A and B.5.8) Once you have completed the adjustment process, with the help of the specialshort-arm 1.5 Allen key, tighten the two setscrews located between the clampknob and the jaw you have adjusted. This will ensure that the jaw you have adjustedis tightly secured.
4.2.2 PRECISION adjustmentThis adjustment requires a certain amount of skill, and ensures that the replaced jawsare very precisely adjusted.To carry out this adjustment, follow these steps:1) The left fixed jaw on the right-hand si<strong>de</strong> of the clamp and the right fixed jaw on theleft-hand si<strong>de</strong> of the clamp cannot be adjusted, as they are held in position by meansof pins. So you have to fit them, by guiding them with their pins and then securing themwith their corresponding screws.english2) Therefore, knowing that in each pair of jaws there is one with a fixed position, youhave to adjust the other jaw in relation to the one with the fixed position.3) Insert the screws for the jaw to be adjusted, but do not tighten them. So that thejaw can be moved by hand, but cannot lift up from the surface it is resting on.12) You have now completed the adjustment. Now you have to fully tighten the twoscrews securing the jaw.13) Finally, tighten the two jaw adjustment setscrews a little. This will ensure that thejaw you have adjusted is tightly secured.4.3 REPLACING THE FUSESIf the machine does not start when you activate the on-off switches, you need to checkthe fuses. You can do this in the following way:1) Switch of the machine using the main switch and unplug it.2) Remove the fuse-hol<strong>de</strong>r which is un<strong>de</strong>r the main switch.3) Use a tester to check if a fuse has blown and, if so, replace it with one of the sametype and value.4) With the help of the special short-arm 1.5 Allen key, unscrew the two jaw adjustmentsetscrews about 1 turn (these are the two setscrews located between theclamp knob and jaw you are going to adjust).5) Then, insert any cutter-tracer point pair in their corresponding tool-hol<strong>de</strong>rs, butthe wrong way around (with the cutting tips insi<strong>de</strong> the tool-hol<strong>de</strong>r). Lower the machinehead, and block it at a height at which the tools can touch the si<strong>de</strong>s of the jaws.6) Activate the tracer point electronic vertical adjustment system.7) Rest the end of the jaw that is clamped (the one with the fixed position) againstthe si<strong>de</strong> of the tool. <strong>Manual</strong>ly, move the jaw to be adjusted in the direction of the clampknob, and maintaining pressure on the jaw in that direction, move it forward until it alsotouches the si<strong>de</strong> of its corresponding tool. In this position, tighten the screws securingthe jaw a little. You will know when the tools are touching their corresponding jaws,because the tracer point electronic vertical adjustment system’s lights will come on.8) Then, separate the moving jaw from the jaw to be adjusted, turning the clamp knobto do so.9) Position the tool in alignment with one of the screws securing the jaw, and in thisposition rest the tool against the jaw that is clamped (the one with the fixed position).Then, keeping at all times a slight pressure between the tool and the jaw that is clamped(the one with the fixed position), very slowly tighten the setscrew aligned with thetool and the jaw screw. The moment will come when the second light on the tracer pointelectronic vertical adjustment system will come on. When this happens, stop tighteningthe setscrew.10) Position the tool in alignment with the other screw securing the jaw, and carry outthe same operation again.11) Check again that the jaws are adjusted in those two positions (in front of theclamping screws), and if necessary, slightly adjust the position of the jaw tightly veryslightly the corresponding setscrew.4.4 TIGHTENING AND REPLACING THE BELTTo check the tightness of the belt or to replace it, follow these steps:1) Switch off the machine using the main switch, and unplug it.2) Undo the 4 screws (5) securing the head guard and remove it. The screws are onthe right si<strong>de</strong>, the left si<strong>de</strong>, on the top and at the back. To remove the head guard it isnecessary first of all to push the cutter locking button right in as far as it will go (E).3) Loosen but do not undo the 4 screws (6) securing the motor.4) Loosen but do not undo the 2 locknut nuts (7).Tightening: When you turn the two tightening screws (8), the motor moves towardsthe back of the machine. When you see that the belt is tight enough, tighten up the twolocknut nuts (7) again, and the screws (6) securing the motor.Replacement: Loosen but do not undo the 2 screws tightening the belt (8). Remove thedamaged belt and replace it with a new one. When you turn the two tightening screws(8), the motor moves towards the back of the machine. When you see that the belt istight enough, tighten up the two locknut nuts (7) again, and the screws (6) securingthe motor.5) Put the head guard back and secure it in place.See Fig. 184.5 REPLACING THE MOTORYou can carry out this operation in the following way:1) Switch off the machine using the main switch and unplug it.2) Undo the 4 screws (5) securing the head guard and remove it. The screws are onthe right si<strong>de</strong>, the left si<strong>de</strong>, on the top and at the back. To remove the head guard it isnecessary first of all to push the cutter locking button right in as far as it will go (E).3) Undo the 6 screws (9) securing the motor guard (F) and remove it.4) Remove the belt (G).5) Disconnect the power cables going to the motor.6) Undo the 4 screws (6) securing the motor.7) Remove the motor.8) Access the bottom of the motor with a flat screwdriver, block the motor shaft andmanually turn the pulley (H) until it comes out (it is left-threa<strong>de</strong>d).9) Undo the 4 screws (10) securing the motor support plate and remove it.10) To fit the new motor, reverse the procedure above.See Fig. 194.6 REPLACING THE KEYBOARD-DISPLAYYou can carry out this operation in the following way:1) Switch off the machine using the main switch, and unplug it.2) Undo the 4 screws (5) securing the head guard and remove it. The screws are onthe right si<strong>de</strong>, the left si<strong>de</strong>, on the top and at the back. To remove the head guard it isnecessary first of all to push the cutter locking button right in as far as it will go (E).3) Disconnect the flat cable connecting the keypad-display (K) to the electronic controlcard.4) Release the old keypad-display (K) from the head guard and remove it.5) To fit the new keypad-display, reverse the procedure above.See Fig. 20
4.7 REPLACING THE ELECTRONIC CONTROL CARDYou can carry out this operation in the following way:1) Switch off the machine using the main switch and unplug it.2) Undo the 4 screws (5) securing the head guard and remove it. The screws are onthe right si<strong>de</strong>, the left si<strong>de</strong>, on the top and at the back. To remove the head guard it isnecessary first of all to push the cutter locking button right in as far as it will go (E).3) Disconnect the electronic control card’s main connector (L)4) Disconnect the flat cable connecting the keypad-display (K) to the electronic controlcard5) Undo the 3 screws (11) securing the electronic control card (L) to the head guardand remove it.6) To fit a new electronic control card, reverse the procedure above.See Fig. 214.8 REPLACING THE POWER CARD AND CIRCUITBREAKERYou can carry out this operation in the following way:1) Switch off the machine using the main switch and unplug it.2) Unscrew the machine’s 4 feet (P) and remove them.3) Undo the 5 screws (12) the lower protection plate and remove it.4) Disconnect all the cables from the card you want to replace, noting down beforehandthe position of each cable.5) To release the power card (M) or the circuit breaker (N), just press on the lugs oneach of the 4 pins holding it, and pull the card up.6) To fit the new power card or circuit breaker, just reverse the procedure above.6.3 MACHINE• Before <strong>de</strong>molishing the machine it is necessary to put it out of action first, cuttingoff the electricity supply and separating the plastic parts from the metal parts.• After carrying out this operation, all the waste can be disposed of in compliancewith the laws in force in the country in which the machine was used.7.- KEY-CUTTER-TRACER POINT-ANGLE CUT-ADAPTOR TABLETo be able to do the work properly, the machine has a series of accessories:See final list.8.- EXPLODED VIEWSee Fig. 23englishSee Fig. 225.- SAFETYFor your safety, we recommend that you follow these gui<strong>de</strong>lines:• Do not try and start or operate the machine until all the safety aspects, installationinstructions, operators’ gui<strong>de</strong> and maintenance procedures have been complied withand un<strong>de</strong>rstood.• Always disconnect the mains electricity supply, before carrying out any cleaning ormaintenance work.• Always keep the machine and the area around it clean.• Work with dry hands.• Use protective goggles, even if the machine is fitted with guards.• Make sure that the machine has an earth connection.We recommend that you work with the machine at a height at which you feel comfortable:• It is best to work whilst sat in a chair. Adjust the height of the chair so that youreyes are at the height of the highest part of the machine.• If you work standing up, <strong>de</strong>pending on your height, it is advisable to place somethingbetween the table and the machine to raise the machine so that your eyes arelevel with the highest part of the machine.6.- WASTE DISPOSALWaste is un<strong>de</strong>rstood to be any substance or object from human activities or naturalcycles, that is no longer being used or not inten<strong>de</strong>d for any further use.6.1 PACKING• As the packing the <strong>CAPRI</strong> comes in is ma<strong>de</strong> of cardboard, it can be recycled aspacking.• As waste, it is comparable to solid urban waste and, therefore, can only be disposedin special containers for cardboard.• The elements protecting the machine insi<strong>de</strong> the cardboard box are ma<strong>de</strong> of polymericmaterial comparable to solid urban waste and, therefore, can only be disposed ofin the normal installations for waste disposal.6.2 SWARF• The waste from the key cutting process is classified as special waste, but is comparableto solid urban waste, like for example a metal scouring pad.• This waste shall be disposed of as classified by the laws currently in force in theEU, by taking it to special installations for waste disposal.
francaiseMACHINE DUPLICATRICEcapriNOTICE D’UTILISATION
TABLE DES MATIÈRES1.1 GÉNÉRALITÉS1.2 TRANSPORT ET EMBALLAGE1.3 PLAQUE SIGNALÉTIQUE2. - CARACTÉRISTIQUES DE LA MACHINE2.1 FAMILLES DE CLÉS2.2 ACCESSOIRES2.3 MAGASIN À OUTILS2.4 CIRCUIT ÉLECTRIQUE2.5 CARACTÉRISTIQUES TECHNIQUES2.6 PRINCIPAUX ÉLÉMENTS DE LA MACHINE2.7 COMPOSANTS ET PARTIES FONCTIONNELLES2.7.1 Changement <strong>de</strong> fraise et <strong>de</strong> palpeur (21)2.7.2 Verrouillage du chariot en fin <strong>de</strong> course <strong>de</strong> l’axe “Y”2.7.3 Étau (6)2.7.4 Dispositif d’ai<strong>de</strong> à ressort du palpeur (11)2.7.5 Dispositif d’ai<strong>de</strong> à ressort et verrouillage du chariot sur l’axe “ X “ (5 et 4)2.7.6 Levier d’appui pour clés tubulaires2.7.7 Vitesse <strong>de</strong> la fraise (17)2.7.8 Afficheur-clavier (1)2.7.9 Réglage vertical du palpeur (15)2.7.10 Contrôle <strong>de</strong> la force <strong>de</strong> reproduction3.- CHIFFRAGE3.1 PROCESSUS DE CHIFFRAGE3.2 CHIFFRAGE DES CLÉS3.2.1 Clés KA-2, KA-3 et KA-4.3.2.2 Clé KE-1.3.2.2 Clé SEA-1.3.2.4 Clés OP-WH.P et OP-WY.P3.2.5 Clés ME-3.P et ME-4.P3.2.6 Clés TUBULAIRES3.2.7 Clés FIC-2 et FIC-33.2.8 Clés WIN-1D, WIN-2D, WIN-3D et WIN-4D.3.2.9 Clé JIS-4.P3.2.10 Clé FO-6.P3.2.11 Clé MCM-10.3.2.12 Clé TE-T60 et TE-T804.- MAINTENANCE4.1 REMPLACEMENT DES MORS DE L’ÉTAU4.2 RÉGLAGE DES MORS4.2.1 Réglage NORMAL4.2.2 Réglage <strong>de</strong> PRÉCISION4.3 CHANGEMENT DES FUSIBLES4.4 TENSION ET CHANGEMENT DES COURROIES4.5 CHANGEMENT DU MOTEUR4.6 REMPLACEMENT DE L’AFFICHEUR-CLAVIER4.7 REMPLACEMENT DE LA CARTE ÉLECTRONIQUE DE CONTRÔLE-COMMANDE4.8 REMPLACEMENT DE LA CARTE DE PUISSANCE ET DU DISJONCTEUR5.- SÉCURITÉ6.- ÉLIMINATION DES DÉCHETS6.1 EMBALLAGE6.2 COPEAUX6.3 MACHINE7.- TABLE CLÉ-FRAISE-PALPEUR-INCLINAISON-ADAPTATEUR8.- VUE ÉCLATÉEfrancaise
francaise1.1 GÉNÉRALITÉSLa machine duplicatrice <strong>de</strong> clés modèle <strong>CAPRI</strong> a été conçue en tenant compte <strong>de</strong>s réglementations<strong>de</strong> sécurité en vigueur dans la C.E.E.La sécurité du personnel appelé à manœuvrer ce type <strong>de</strong> machines ne peut être assuréequ’à partir d’une procédure <strong>de</strong> sécurité personnelle minutieuse, basée sur la mise enplace d’un programme <strong>de</strong> maintenance et le suivi <strong>de</strong>s recommandations ainsi que sur lerespect <strong>de</strong>s consignes <strong>de</strong> sécurité préconisées dans cette notice.Même si l’installation <strong>de</strong> la machine n’offre aucune difficulté, il est préférable <strong>de</strong> ne pasessayer <strong>de</strong> l’installer, <strong>de</strong> la régler et <strong>de</strong> la manipuler sans lire d’abord la notice.La machine sort <strong>de</strong> notre usine prête à l’emploi et ne <strong>de</strong>man<strong>de</strong> que quelques opérationsd’étalonnage en fonction <strong>de</strong>s outils qui vont être utilisés.1.2 TRANSPORT ET EMBALLAGELa machine est livrée dans une boîte en carton robuste, protégée par une moussed’emballage, aux dimensions suivantes :Largeur = 520 mm ; hauteur = 650 mm ; profon<strong>de</strong>ur = 575 mmPoids <strong>de</strong> la duplicatrice avec l’emballage = 30 kgAu déballage <strong>de</strong> la machine, l’examiner soigneusement pour vérifier qu’elle n’a souffertaucun dommage pendant le transport.Si une anomalie est détectée, avertir immédiatement le transporteur et ne pas toucherà la machine jusqu’à ce que son agent ait effectué l’inspection correspondante.Pour déplacer la machine d’un endroit à l’autre, la saisir par sa base et non par sesautres parties.1.3 PLAQUE SIGNALÉTIQUELa machine duplicatrice modèle <strong>CAPRI</strong> porteune plaque signalétique où sont mentionnésson numéro <strong>de</strong> série ou d’immatriculation, lenom et l’adresse du fabricant, la marque CE etl’année <strong>de</strong> fabrication.2. - CARACTÉRISTIQUES DE LA MACHINELa machine <strong>CAPRI</strong> est une duplicatrice à la fois robuste et <strong>de</strong> haute précision qui secaractérise par les multiples possibilités <strong>de</strong> serrage qu’autorise son étau, sans avoir àrecourir à <strong>de</strong>s pièces rapportées ou à <strong>de</strong>s adaptateurs.Par ailleurs, elle incorpore un système innovant <strong>de</strong> contrôle <strong>de</strong> force qui accroît la précisiondu copiage.2.1 FAMILLES DE CLÉSQuelques types <strong>de</strong> clés pouvant être reproduits avec la duplicatrice <strong>CAPRI</strong> :- Clés à points- Clés à vagues- Clés tubulaires- Clés FIC-2 et FIC-3- Clés WIN-1D, WIN-2D, WIN-3D et WIN-4D- Clés JIS-4.P- Clés FO-6.P2.2 ACCESSOIRESLa machine est livrée avec une panoplie d’accessoires pour son usage et son entretien.Tous ces accessoires peuvent être rangés dans le magasin à outils dont dispose lamachine.- 2 fusibles (logés dans le bas du magasin)- Clés allen <strong>de</strong> 5, <strong>de</strong> 3 et <strong>de</strong> 2.5- 1 Clé allen spécial à bras court <strong>de</strong> 1,5.- 2 Plaquettes <strong>de</strong> butée en pointe- 2 Axes pour le réglage <strong>de</strong>s mors.- 2 Adaptateurs pour la clé tubulaire CHI-1T- Fraises : F-1 et F-13- Palpeurs : T-1 et T-13.2.3 MAGASIN À OUTILSLa duplicatrice comporte un magasin à outils monté dans sa partie supérieure. Il peutêtre retiré pour être installé directement sur un plan <strong>de</strong> travail (pour dégager par exempleun espace supplémentaire dans le haut <strong>de</strong> la machine où déposer clés, accessoires,etc…).2.4 CIRCUIT ÉLECTRIQUELes principaux composants du circuit électrique et électronique sont les suivants :1. Prise <strong>de</strong> courant2. Plaque à bornes3. Interrupteur 3 positions.4. Transformateur5. Moteur6. Afficheur-clavier7. Carte <strong>de</strong> contrôle-comman<strong>de</strong>8. Fraise9. Palpeur10. Étau11. Dio<strong>de</strong>s électroluminescentes d’éclairage.12. Capteur <strong>de</strong> forceVoir Figure 22.5 CARACTÉRISTIQUES TECHNIQUESMoteur : monophasé 400 W, 230 V - 50 Hz (en option : monophasé 400W, 110V – 60Hz)Fraise : HSS (en option : métal dur)Vitesse fraise : 6000 et 11 000 tr/minMors : à <strong>de</strong>ux faces <strong>de</strong> serrage et basculants 0 / 45 ºDéplacement : sur trois axes avec gui<strong>de</strong>s à rouleaux <strong>de</strong> précision.Courses utiles : axe X = 71 mm ; axe Y = 62 mm ; axe Z = 40 mmÉclairage: dio<strong>de</strong>s DELDimensions : largeur = 430 mm, profon<strong>de</strong>ur = 385 mm et hauteur = 485 mmPoids : 25 kg2.6 PRINCIPAUX ÉLÉMENTS DE LA MACHINE1.- Afficheur-clavier2.- Chariot porte-étau (axes X – Y)3.- Levier <strong>de</strong> manœuvre <strong>de</strong>s chariots, axes x – y4.- Pommeau <strong>de</strong> verrouillage du chariot porte-étau, axe x5.- Roue <strong>de</strong> manœuvre du système <strong>de</strong> dispositif d’ai<strong>de</strong> à ressort du chariot, axe x6.- Étau7.- Levier <strong>de</strong> verrouillage <strong>de</strong> la rotation <strong>de</strong> l’étau8.- Pommeau <strong>de</strong> l’étau9.- Tête (axe Z)10.- Levier <strong>de</strong> manœuvre et <strong>de</strong> verrouillage <strong>de</strong> la tête, axe z11.- Manette du dispositif d’ai<strong>de</strong> à ressort du palpeur12.- Porte-outils13.- Fraise14.- Palpeur15.- Roue <strong>de</strong> réglage <strong>de</strong> la hauteur du palpeur16.- Interrupteur général17.- Bouton <strong>de</strong> vitesse du moteur (2 vitesses)18.- DEL d’éclairage19.- Protecteur <strong>de</strong> copeaux20.- Magasin à outils21.- Poussoir <strong>de</strong> verrouillage <strong>de</strong> la fraiseVoir figure 32.7 COMPOSANTS ET PARTIES FONCTIONNELLES2.7.1 Changement <strong>de</strong> fraise et <strong>de</strong> palpeur (21)Pour libérer la fraise, presser son bouton <strong>de</strong> verrouillage tout en faisant tourner à lamain le porte-outil.Après avoir retiré la fraise à remplacer, introduire la nouvelle fraise et la serrer sur leporte-outil en veillant à faire butée avec sa pointe à l’intérieur du porte-outil.Le palpeur se change <strong>de</strong> la même façon que la fraise. La seule différence à prendre encompte est que la rotation du palpeur se trouve toujours bloquée intérieurement.2.7.2 Verrouillage du chariot en fin <strong>de</strong> course <strong>de</strong> l’axe “Y”Pour éviter le déplacement du chariot dans le sens “Y” pendant le serrage <strong>de</strong>s clés dansl’étau, le chariot a été doté d’un verrouillage momentané sur cet axe.Pour activer ce verrouillage, il suffit <strong>de</strong> déplacer le chariot jusqu’à sa fin <strong>de</strong> course endirection du duplicateur.Pour le déverrouillage, déplacer le chariot vers l’avant en exerçant une légère pression.2.7.3 Étau (6)Les prestations <strong>de</strong> l’étau <strong>de</strong> la duplicatrice <strong>CAPRI</strong> sont supérieures à celles d’une machinecourante du marché grâce à ses <strong>de</strong>ux faces <strong>de</strong> serrage indépendantes. De plus,les mors peuvent être verrouillés sur n’importe quelle position <strong>de</strong> rotation entre 45º,0º et -45º.
2.7.4 Dispositif d’ai<strong>de</strong> à ressort du palpeur (11)Il existe <strong>de</strong>ux façons possibles d’utiliser le palpeur en fonction du travail à réaliser :- Palpeur avec dispositif d’ai<strong>de</strong> à ressort. Le dispositif d’ai<strong>de</strong> à ressort dupalpeur sert uniquement et exclusivement au chiffrage <strong>de</strong>s clés à points.- Palpeur bloqué. Le palpeur bloqué s’utilise pour les opérations <strong>de</strong> copiage avecavance du chariot. En général, il sert au chiffrage <strong>de</strong>s clés à vagues.Pour activer ou désactiver ce dispositif d’ai<strong>de</strong>, il suffit <strong>de</strong> tourner <strong>de</strong> 180º (<strong>de</strong>mitour)sa manette.Lorsque le dispositif d’ai<strong>de</strong> à ressort du palpeur est activé, la pointe <strong>de</strong> ce <strong>de</strong>rnier sesitue légèrement en <strong>de</strong>ssous <strong>de</strong> sa position <strong>de</strong> réglage par rapport à la fraise. Cetteposition du palpeur permet une introduction en douceur dans le trou <strong>de</strong> la clé originale,avant que la fraise ne commence le fraisage <strong>de</strong> la clé à copier. Ceci évite les vibrationset les déplacements brusques du chariot.Pour connaître à tout moment l’état du palpeur (avec dispositif d’ai<strong>de</strong> à ressort ou bloqué),l’afficheur-clavier <strong>de</strong> la machine comporte un indicateur qui nous renseigne à cesujet. Si le voyant est allumé, le dispositif d’ai<strong>de</strong> à ressort est activé. En revanche, s’ilest éteint, le palpeur est bloqué.2.7.5 Dispositif d’ai<strong>de</strong> à ressort et verrouillage du chariotsur l’axe “ X “ (5 et 4)Nous conseillons d’utiliser le système <strong>de</strong> dispositif d’ai<strong>de</strong> à ressort du chariot sur l’axe“X” pour effectuer les fraisages latéraux <strong>de</strong>s clés à vagues.Par contre, nous recommandons le blocage du chariot sur l’axe “X “ pour les fraisagesou points en ligne droite.2.7.6 Levier d’appui pour clés tubulairesLa duplicatrice <strong>CAPRI</strong> dispose, sur le haut <strong>de</strong> son flanc gauche, d’un double levier rabattablequi rend plus commo<strong>de</strong> le copiage <strong>de</strong> clés tubulaires, à vagues, etc., .en offrantun point d’appui pour la main qui manœuvre le levier <strong>de</strong> translation <strong>de</strong>s chariots.2.7.7 Vitesse <strong>de</strong> la fraise (17)La machine comporte un bouton <strong>de</strong> réglage <strong>de</strong> la vitesse, situé sur son côté droit, quipermet <strong>de</strong> choisir la vitesse <strong>de</strong> rotation <strong>de</strong> la fraise. En règle générale, la vitesse <strong>de</strong>rotation va dépendre du matériau <strong>de</strong> la fraise :- Position I : pour travailler avec <strong>de</strong>s fraises en HSS (6000 t/min)- Position II : pour travailler avec <strong>de</strong>s fraises en MÉTAL DUR (11 000 t/min)- Position O : fraise arrêtée.2.7.8 Afficheur-clavier (1)Indicateurs RÉGLAGE DU PALPEUR.Le voyant <strong>de</strong> gauche s’allume quand le palpeur touche la clé.Le voyant <strong>de</strong> droite s’allume quand la fraise touche la clé.Indicateur visuel <strong>de</strong> FORCE.Il indique la force optimale à exercer pendant la reproduction.NOTA: Outre l’indicateur visuel, le système <strong>de</strong> contrôle <strong>de</strong> force dispose aussi d’unindicateur sonore qui avertit par un bip que la force optimale <strong>de</strong> reproduction est atteinte.Cet indicateur sonore peut être activé-désactivé en pressant en même temps lestouches MODE et ON-OFF.2.7.9 Réglage vertical du palpeur (15)À chaque changement <strong>de</strong> fraise-palpeur, il est nécessaire <strong>de</strong> régler verticalement lepalpeur.Pour pouvoir utiliser le système électronique <strong>de</strong> réglage vertical du palpeur, l’afficheurclavierdoit être actif (quand il est actif, un voyant vert s’allume à côté <strong>de</strong> la toucheON-OFF).Avec l’afficheur-clavier actif, il est possible d’activer-désactiver le système électronique<strong>de</strong> réglage vertical du palpeur en pressant la touche MODE.Pour réaliser le réglage vertical du palpeur, procé<strong>de</strong>r <strong>de</strong> la façon suivante :• Serrer la fraise et le palpeur sur leur poupée. S’assurer qu’ils sont bien fixés enfaisant butée vers le haut.• Serrer <strong>de</strong>ux clés i<strong>de</strong>ntiques dans les étaux <strong>de</strong> la machine.• Éliminer le dispositif d’ai<strong>de</strong> à ressort du palpeur (palpeur bloqué).• Descendre la tête jusqu’à ce que la fraise et le palpeur reposent sur les clés situéesdans les étaux. Une <strong>de</strong>s trois situations ci-après est alors possible :BLEU GAUCHE. Si seul s’allume le voyant <strong>de</strong> gauche, cela signifie que le palpeurtouche la clé, mais pas la fraise. Il faut donc tourner la roue <strong>de</strong> réglage du palpeurvers la gauche jusqu’à ce que s’allument les <strong>de</strong>ux voyants <strong>de</strong> réglage.BLEU DROITE. Si seul s’allume le voyant <strong>de</strong> droite, cela signifie que la fraisetouche la clé, mais pas le palpeur. Il faut donc tourner la roue <strong>de</strong> réglage du palpeurvers la droite jusqu’à ce que s’allument les <strong>de</strong>ux voyants <strong>de</strong> réglage.BLEU GAUCHE ET DROITE. Ces voyants allumés indiquent qu’aussi bien la fraiseque le palpeur touchent leurs clés respectives. La hauteur du palpeur est maintenantréglée.francaiseREMARQUE IMPORTANTE: En effectuant le réglage en hauteur du palpeur, attentionau type <strong>de</strong> clé à reproduire. S’il s’agit d’une clé À VAGUES, il faut appliquer très peu<strong>de</strong> force au levier <strong>de</strong> manœuvre <strong>de</strong> la tête (le voyant <strong>de</strong> l’indicateur visuel <strong>de</strong> force nedoit pas s’allumer). En revanche, pour une clé À POINTS, les <strong>de</strong>ux voyants bleus <strong>de</strong>réglage doivent s’allumer en même temps que l’indicateur <strong>de</strong> force indique la forceidéale <strong>de</strong> copiage pour les clés à points (pour cela, exercer une légère force sur le levier<strong>de</strong> manœuvre <strong>de</strong> la tête).2.7.10 Contrôle <strong>de</strong> la force <strong>de</strong> reproductionTouche ON-OFFEn pressant ce bouton, les fonctions <strong>de</strong> l’afficheur-clavier passent en mo<strong>de</strong> ACTIF. Unvoyant vert s’allume à côté <strong>de</strong> la touche.En la pressant <strong>de</strong> nouveau, l’afficheur-clavier passe en mo<strong>de</strong> “STAND-BY”. Un voyantrouge s’allume à côté <strong>de</strong> la touche.Touche ÉCLAIRAGEEn la pressant, les dio<strong>de</strong>s d’éclairage s’allument (si elles sont éteintes) ou s’éteignent(si elles sont allumées).Cette touche fonctionne indépendamment <strong>de</strong> l’état <strong>de</strong> la touche “ON-OFF”.Indicateur DISPOSITIF D’AIDE À RESSORTSi la lumière bleue est allumée, cela signifie que le palpeur est en état <strong>de</strong> DISPOSITIFD’AIDE À RESSORT ACTIVÉ.Si elle est éteinte, cela signifie que le palpeur est BLOQUÉ (dispositif d’ai<strong>de</strong> à ressortdésactivé).Touche MODECette touche sert à activer-désactiver le fonctionnement du système <strong>de</strong> réglage verticaldu palpeur.La duplicatrice <strong>CAPRI</strong> est dotée d’un système <strong>de</strong> contrôle <strong>de</strong> la force <strong>de</strong> reproductionrévolutionnaire. Il s’agit d’un système breveté qui, au moment <strong>de</strong> copier <strong>de</strong>s clés àPOINTS, nous indique la force optimale à exercer sur le levier <strong>de</strong> manœuvre <strong>de</strong> la tête.Pour ce faire, il dispose <strong>de</strong> <strong>de</strong>ux indicateurs :➢ Indicateur visuel. La force optimale <strong>de</strong> reproduction est atteinte quand la ligne<strong>de</strong> traits lumineux atteint la flèche blanche.➢ Indicateur sonore. Un bip se fait entendre quand la ligne <strong>de</strong> traits atteint laflèche blanche. Cet indicateur sonore peut être activé-désactivé en pressant enmême temps les touches MODE et ON-OFF.Ce système <strong>de</strong> contrôle <strong>de</strong> la force <strong>de</strong> reproduction permet d’obtenir <strong>de</strong>s clés à POINTSd’une gran<strong>de</strong> précision. Les trous <strong>de</strong> la clé sont reproduits avec exactement la mêmeforce que celle appliquée pour régler la hauteur du palpeur. Une précision parfaite estainsi obtenue lors du copiage <strong>de</strong>s clés à POINTS.3.- CHIFFRAGE3.1 PROCESSUS DE CHIFFRAGE• Allumer la machine en intervenant sur l’interrupteur général placé à l’arrière àdroite.• Pour améliorer la visibilité <strong>de</strong> la zone <strong>de</strong> travail, allumer l’éclairage en intervenant
sur l’interrupteur placé sur l’afficheur-clavier.• À l’ai<strong>de</strong> <strong>de</strong> la table qui figure dans la présente notice, sélectionner la fraise et lepalpeur nécessaires pour chiffrer la clé.• Changer la fraise et le palpeur.• Verrouiller momentanément le chariot en fin <strong>de</strong> course <strong>de</strong> l’axe “Y”• Serrer la clé originale sur la gauche <strong>de</strong> l’étau et la clé à chiffrer sur la droite.Attention aux détails suivants au moment <strong>de</strong> serrer les clés :- BUTÉE DE LA CLÉ. Il peut s’agir d’une clé à “butée en col” (Fig. 4.A) ou à “butéeen pointe” (Fig. 4.B).- ADAPTATEUR. Certains modèles <strong>de</strong> clés précis exigent l’emploi d’un adaptateur.- INCLINAISON. Certaines clés comportant <strong>de</strong>s points inclinés ren<strong>de</strong>nt nécessairela rotation <strong>de</strong> l’étau.• Procé<strong>de</strong>r au réglage vertical du palpeur.• Activer les systèmes qui simplifient le travail <strong>de</strong> copiage :- PALPEUR : Activer ou désactiver le dispositif d’ai<strong>de</strong> à ressort du palpeur en fonctiondu type <strong>de</strong> clé à chiffrer.- CHARIOT : selon le modèle <strong>de</strong> clé, il peut être intéressant d’activer le dispositifd’ai<strong>de</strong> à ressort du chariot, ou son blocage, sur l’axe “X”.- APPUI : en fonction du modèle <strong>de</strong> clé, il peut être intéressant d’utiliser le levierd’appui pour clés tubulaires.• Mettre en marche la rotation <strong>de</strong> la fraise en choisissant d’abord l’une <strong>de</strong>s <strong>de</strong>uxvitesses disponibles.• Procé<strong>de</strong>r au chiffrage <strong>de</strong> la clé. Si la clé est à points, s’ai<strong>de</strong>r avec le système <strong>de</strong>“contrôle <strong>de</strong> force <strong>de</strong> la reproduction”.palpeur dans le canal du panneton et verrouiller la tête <strong>de</strong> la machine. Puis remonterlégèrement le palpeur pour qu’il n’entraîne pas la clé.• NOTA : Il est conseillé d’utiliser le système <strong>de</strong> dispositif d’ai<strong>de</strong> à ressort du chariot.• NOTA : Il est recommandé d’effectuer une passe d’ébauche, puis une autre passe<strong>de</strong> finition en suivant tout le profil <strong>de</strong> <strong>de</strong>ssin <strong>de</strong> la clé. Usiner en sens <strong>de</strong>scendant (<strong>de</strong> lapointe <strong>de</strong> la clé vers la tête).Voir Fig. 83.2.5 Clés ME-3.P et ME-4.P• Utiliser la fraise-palpeur : F-11 / P-11.• Le serrage <strong>de</strong> la clé dans l’étau se fait à l’ai<strong>de</strong> <strong>de</strong> l’adaptateur AD-MM2.-Positionner l’adaptateur sur l’étau en “butée en pointe”.-Introduire la clé dans l’adaptateur.-En même temps que le serrage <strong>de</strong> l’adaptateur dans l’étau, la clé reste serréedans l’adaptateur.• Bloquer le palpeur (désactiver le dispositif d’ai<strong>de</strong> à ressort).• NOTA : après avoir réglé verticalement le palpeur, <strong>de</strong>scendre celui-ci très légèrementen tournant la roue <strong>de</strong> réglage <strong>de</strong> 5 points vers la droite. Introduire ensuite lepalpeur dans le canal du panneton et verrouiller la tête <strong>de</strong> la machine. Puis remonterlégèrement le palpeur pour qu’il n’entraîne pas la clé.• NOTA : Il est conseillé d’utiliser le système <strong>de</strong> dispositif d’ai<strong>de</strong> à ressort du chariot.Voir Fig. 9francaise3.2 CHIFFRAGE DES CLÉS3.2.1 Clés KA-2, KA-3 et KA-4.• En fonction du modèle <strong>de</strong> clé à copier, utiliser une paire <strong>de</strong> fraise-palpeur différente.Consulter la table.• Le serrage <strong>de</strong> la clé dans l’étau s’effectue par “butée en col”.• Selon le modèle <strong>de</strong> clé à copier, faire tourner l’étau jusqu’à l’angle nécessaire.Consulter la table.• Activer le dispositif d’ai<strong>de</strong> à ressort du palpeur.• Pour augmenter la précision du chiffrage, utiliser le système <strong>de</strong> “Contrôle <strong>de</strong> force<strong>de</strong> la reproduction”.• NOTA : Les points taillés <strong>de</strong> la clé KA-3 doivent toujours se trouver dans la zone laplus basse <strong>de</strong> l’étau.• NOTA : Les points taillés <strong>de</strong> la clé KA-2 doivent toujours se trouver dans la zone laplus haute <strong>de</strong> l’étau.Voir Fig. 53.2.2 Clé KE-1.• Utiliser la fraise-palpeur : F-1 / P-1.• Le serrage <strong>de</strong> la clé dans l’étau s’effectue par “butée en col”, mais en introduisantla clé par l’arrière.• Positionner les étaux sur un angle d’inclinaison <strong>de</strong> 5º.• Activer le dispositif d’ai<strong>de</strong> à ressort du palpeur.• Pour augmenter la précision du chiffrage, utiliser le système <strong>de</strong> “Contrôle <strong>de</strong> force<strong>de</strong> la reproduction”.• NOTA : Les points taillés <strong>de</strong> la clé KE-1 doivent toujours se trouver dans la zone laplus haute <strong>de</strong> l’étau.• NOTA : Pour le copiage <strong>de</strong>s points latéraux, utiliser l’adaptateur correspondant.Voir Fig. 63.2.6 Clés TUBULAIRES• Utiliser la fraise-palpeur : F-8 / P-8.• Serrer la clé dans le “V” <strong>de</strong> l’étau.• Activer le dispositif d’ai<strong>de</strong> à ressort du palpeur.• L’opération <strong>de</strong> taillage sera plus commo<strong>de</strong> en appuyant la main qui manœuvre lelevier du chariot sur le levier d’appui pour clés tubulaires.Voir Fig. 103.2.7 Clés FIC-2 et FIC-3• Utiliser la fraise-palpeur : F-11 / P-11.• Serrer la clé dans l’étau en l’appuyant sur le fond et en la poussant vers la faceavant <strong>de</strong> l’étau.• Bloquer le palpeur (désactiver le dispositif d’ai<strong>de</strong> à ressort).• Bloquer la tête <strong>de</strong> la machine à une hauteur telle que la fraise puisse passer surl’étau, mais sans le frôler.• Procé<strong>de</strong>r au taillage <strong>de</strong>s <strong>de</strong>ux côtés supérieurs.• Tourner les clés en veillant à éliminer les barbes pour assurer un bon positionnementet serrage <strong>de</strong> la clé et procé<strong>de</strong>r au taillage <strong>de</strong>s <strong>de</strong>ux autres côtés <strong>de</strong> la clé.Voir Fig. 113.2.8 Clés WIN-1D, WIN-2D, WIN-3D et WIN-4D.• Utiliser la fraise-palpeur : F-15 / P-15.• Serrer dans l’étau <strong>de</strong>ux ébauches et réaliser sur elles le réglage vertical du palpeur.• Serrer la clé originale avec la <strong>de</strong>nture vers le haut (comme le montre le <strong>de</strong>ssin).• Bloquer le palpeur (désactiver le dispositif d’ai<strong>de</strong> à ressort).• Introduire le palpeur exactement dans l’un <strong>de</strong>s points et verrouiller la tête <strong>de</strong> lamachine à cette hauteur.• Procé<strong>de</strong>r au taillage.3.2.2 Clé SEA-1.• Utiliser la fraise-palpeur : F-3 / P-3.• Le serrage <strong>de</strong> la clé dans l’étau s’effectue par “butée en col”.• Bloquer le palpeur (désactiver le dispositif d’ai<strong>de</strong> à ressort).• NOTA : après avoir réglé verticalement le palpeur, <strong>de</strong>scendre celui-ci très légèrementen tournant la roue <strong>de</strong> réglage <strong>de</strong> 5 points vers la droite. Introduire ensuite lepalpeur dans le canal du panneton et verrouiller la tête <strong>de</strong> la machine. Puis remonterlégèrement le palpeur pour qu’il n’entraîne pas la clé.• NOTA : entrer par le centre du canal, sans toucher les côtés, et, à la secon<strong>de</strong>passe, entrer par le côté droit et sortir par le côté gauche, sans exercer aucune pression(uniquement en appuyant légèrement le palpeur).• NOTA : pour la reproduction <strong>de</strong>s points latéraux, utiliser la fraise-palpeur F-1 / P-1en serrant par “butée en col”. Activer le dispositif d’ai<strong>de</strong> à ressort du palpeur et utiliserle système <strong>de</strong> “Contrôle <strong>de</strong> force <strong>de</strong> la reproduction”.Voir Fig. 73.2.4 Clés OP-WH.P et OP-WY.P• Utiliser la fraise-palpeur : F-11 / P-11.• Le serrage <strong>de</strong> la clé dans l’étau s’effectue par “butée en pointe”.• Bloquer le palpeur (désactiver le dispositif d’ai<strong>de</strong> à ressort).• NOTA : après avoir réglé verticalement le palpeur, <strong>de</strong>scendre celui-ci très légèrementen tournant la roue <strong>de</strong> réglage <strong>de</strong> 5 points vers la droite. Introduire ensuite leVoir Fig. 123.2.9 Clé JIS-4.P• Utiliser la fraise-palpeur : F-11 / P-11.• Le serrage <strong>de</strong> la clé dans l’étau se fait à l’ai<strong>de</strong> <strong>de</strong> l’adaptateur AD-MJ.-Positionner l’adaptateur sur l’étau en “butée en pointe”.-Introduire la clé dans l’adaptateur en “butée en col” contre la plaquette qui tourne.Dans cette position, serrer la clé dans son adaptateur.• Bloquer le palpeur (désactiver le dispositif d’ai<strong>de</strong> à ressort).Voir Fig. 133.2.10 Clé FO-6.P• Utiliser la fraise-palpeur F-22 / P-22.• Le serrage <strong>de</strong> la clé dans l’étau se fait à l’ai<strong>de</strong> <strong>de</strong> l’adaptateur correspondant.- Positionner et serrer les adaptateurs sur l’étau.- Attention, en plaçant la clé, à ce qu’elle soit bien plane, pour que les <strong>de</strong>ux taillagessoient pareils.• Bloquer le palpeur (désactiver le dispositif d’ai<strong>de</strong> à ressort).• Introduire le palpeur dans le canal d’une lettre. Verrouiller la tête <strong>de</strong> la machine etremonter légèrement le palpeur pour qu’il ne talonne pas l’adaptateur.• Procé<strong>de</strong>r au taillage.
Voir Fig. 14Lecture du co<strong>de</strong> <strong>de</strong> la clé originale• La clé originale a 6 positions <strong>de</strong> reproduction, définies par les lettres A, B, C, D, Eet F, comme le montre la figure ci-<strong>de</strong>ssous.• Pour chacune <strong>de</strong>s positions que possè<strong>de</strong> la clé, il existe 4 combinaisons différentespossibles (définies par <strong>de</strong>s numéros), énumérées ci-après :4.2 RÉGLAGE DES MORSAprès avoir remplacé le mors fixe gauche ou le mors fixe droit, ne pas oublier <strong>de</strong> réglerla paire <strong>de</strong> mors neuve. En revanche, dans le cas du mors mobile, aucune opération <strong>de</strong>réglage n’est nécessaire.Il existe <strong>de</strong>ux façons <strong>de</strong> procé<strong>de</strong>r au réglage <strong>de</strong>s mors :➢ Réglage NORMAL➢ Réglage <strong>de</strong> PRÉCISION4.2.1 Réglage NORMALIl s’agit d’un réglage rapi<strong>de</strong> et simple qui assure toutefois un réglage acceptable pourla reproduction <strong>de</strong>s clés avec une certaine précision.Séquence d’opération <strong>de</strong> ce réglage :1) Serrer les <strong>de</strong>ux axes <strong>de</strong> réglage dans les porte-outils correspondants <strong>de</strong> façon à cequ’ils soient en butée à l’intérieur du porte-outils et que la partie conique <strong>de</strong>s axes resteà l’intérieur.1 2 3 4• L’“inclinaison” nº 1 indique qu’il ne faut pas reproduire. L’inclinaison nº 2 indiquequ’il y a un petit biseau sur la clé qui, quand il est plus grand, correspond à l’inclinaisonnº 3. L’inclinaison nº 4 correspond au plus grand <strong>de</strong>s biseaux <strong>de</strong> la clé.• Il s’agit alors <strong>de</strong> prendre la clé et <strong>de</strong> marquer les combinaisons <strong>de</strong> chacune <strong>de</strong>s 6positions, comme il est montré ci-après à titre d’exemple :POSITION A B C D E FCOMBINAISON 3 4 1 2 4 2NOTA : La série <strong>de</strong> numéros <strong>de</strong> la combinaison est le co<strong>de</strong> <strong>de</strong> la clé.3.2.11 Clé MCM-10.• Mise en place spéciale dans l’étau. Voir la figure.Voir Fig.152) Le mors fixe gauche du côté droit <strong>de</strong> l’étau et le mors fixe droit du côté gauche <strong>de</strong>l’étau ne sont pas réglables car ils sont positionnés au moyen <strong>de</strong> goujons. Il faut doncles monter en les guidant avec leurs goujons, puis les serrer au moyen <strong>de</strong>s vis correspondantes.francaise3.2.12 Clé TE-T60 et TE-T80• Mise en place spéciale dans l’étau. La clé TE-T60 se serre comme le montre le<strong>de</strong>ssin.• La clé TE-T80 présente la particularité que pour usiner le côté gauche elle se serrecomme la TE-T60 et pour usiner le côté droit il faut serrer la clé par l’arrière <strong>de</strong> l’étau(comme dans le cas <strong>de</strong> la clé MCM-10).Voir Fig. 164.- MAINTENANCEAvant toute opération <strong>de</strong> maintenance, les conditions suivantes doivent être réunies :1. Ne jamais effectuer <strong>de</strong> tâche avec la machine en marche.2. Débrancher la duplicatrice.3. Suivre rigoureusement les consignes <strong>de</strong> cette notice.4. Utiliser <strong>de</strong>s pièces <strong>de</strong> rechange originales.3) Ainsi donc, puisque nous savons que pour chaque paire <strong>de</strong> mors l'un <strong>de</strong> ceux-ci aune position fixe, l’autre se règlera par rapport à celui en position fixe.4) Placer les vis du mors à régler, mais sans les serrer. <strong>de</strong> sorte que le mors puisseêtre déplacé à la main, mais en l'empêchant toutefois <strong>de</strong> se soulever par rapport à sasurface d’appui.4.1 REMPLACEMENT DES MORS DE L’ÉTAUL’étau <strong>de</strong> la duplicatrice <strong>CAPRI</strong> comporte trois paires <strong>de</strong> mors (mors fixe gauche, morsfixe droit et mors mobile). Si l’une d’elle est endommagée, elle peut être remplacéeséparément par une paire neuve.Pour remplacer le “mors fixe gauche” (A) ou le “mors fixe droit” (B), il suffit <strong>de</strong> dévisserles <strong>de</strong>ux vis <strong>de</strong> serrage qui le tiennent et <strong>de</strong> les extraire en tirant vers le haut. Procé<strong>de</strong>rà l’inverse pour le montage <strong>de</strong>s mors neufs.Pour remplacer le “mors mobile” (C), la séquence d’opération est la suivante :1) Extraire à l’ai<strong>de</strong> d’un cutter ou similaire le couvercle plastique noir <strong>de</strong> la manette<strong>de</strong> l’étau.2) Tout en bloquant le contre-écrou avec une clé fixe <strong>de</strong> 14, introduire une clé allen <strong>de</strong> 5dans l’orifice qui se dégage sur la manette <strong>de</strong> l’étau et dévisser.3) Positionner l’étau sur un angle <strong>de</strong> 45º et en tournant manuellement la brochel’extraire par l’un <strong>de</strong>s côtés. Une fois la broche retirée, le mors mobile reste libéré etpeut être déposé.4) Procé<strong>de</strong>r à l’inverse pour le montage du mors mobile neuf.REMARQUE IMPORTANTE: Après avoir remplacé le mors fixe gauche ou le mors fixedroit, ne pas oublier <strong>de</strong> régler la paire <strong>de</strong> mors neuve. En revanche, dans le cas du morsmobile, aucune opération <strong>de</strong> réglage n’est nécessaire.Voir Fig. 175) Procé<strong>de</strong>r au réglage du mors :5.1) Introduire l’axe <strong>de</strong> réglage du palpeur dans l’orifice Nº1 du mors.5.2) Faire coïnci<strong>de</strong>r l’axe <strong>de</strong> réglage <strong>de</strong> la fraise avec l’orifice Nº1 <strong>de</strong> l’autre mors.5.3) Relever la tête et effectuer la même opération, cette fois-ci dans l’orifice Nº2<strong>de</strong>s mors.5.4) Répéter l’étape précé<strong>de</strong>nte autant <strong>de</strong> fois que nécessaire jusqu’à ce que lesaxes <strong>de</strong> réglage entrent en douceur et sans forcer, tant dans l’orifice Nº1 quedans le Nº2.
francaise5.5) Avec les <strong>de</strong>ux axes <strong>de</strong> réglage introduits dans les orifices Nº1, verrouiller latête et serrer légèrement la vis B5.6) Avec les <strong>de</strong>ux axes <strong>de</strong> réglage introduits dans les orifices Nº2, verrouiller latête et serrer légèrement la vis A.5.7) Répéter l’étape précé<strong>de</strong>nte, mais en serrant définitivement les vis A et B.5.8) Une fois le réglage terminé, à l’ai<strong>de</strong> <strong>de</strong> la clé allen <strong>de</strong> 1,5 spéciale à bras court,serrer les <strong>de</strong>ux vis prisonnières situées entre la manette <strong>de</strong> l’étau et le mors quivient d'être réglé. Ceci garantit une plus gran<strong>de</strong> sécurité <strong>de</strong> la fixation du mors quenous venons <strong>de</strong> régler.4.2.2 Réglage <strong>de</strong> PRÉCISIONIl s’agit d’un réglage qui exige une certaine habileté mais qui permet <strong>de</strong> réaliser unréglage très précis <strong>de</strong>s mors remplacés.Séquence d’opération <strong>de</strong> ce réglage :1) Le mors fixe gauche du côté droit <strong>de</strong> l’étau et le mors fixe droit du côté gauche <strong>de</strong>l’étau ne sont pas réglables car ils sont positionnés au moyen <strong>de</strong> goujons. Il faut doncles monter en les guidant avec leurs goujons, puis les serrer au moyen <strong>de</strong>s vis correspondantes.8) Puis écarter le mors mobile du mors à régler en faisant tourner la manette <strong>de</strong>l’étau.9) Placer l’outil aligné sur l’une <strong>de</strong>s vis <strong>de</strong> serrage du mors et, dans cette position,appuyer l’outil contre le mors qui est serré (celui en position fixe). À ce moment, et enmaintenant à tout instant une très légère pression entre l’outil et le mors qui est serré(celui en position fixe), serrer très lentement la vis prisonnière alignée sur l’outil etsur la vis du mors. À un moment donné, le second voyant du système électronique <strong>de</strong>réglage vertical du palpeur s’allumera. À ce moment, cesser <strong>de</strong> serrer la vis prisonnière.10) Placer l’outil aligné sur l’autre vis <strong>de</strong> serrage du mors et répéter la même opération.11) Réviser le réglage <strong>de</strong>s mors dans ces <strong>de</strong>ux positions (face aux vis <strong>de</strong> serrage) pour,si nécessaire, retoucher légèrement la position du mors en resserrant très légèrementla vis prisonnière correspondante.12) Une fois le réglage réalisé, resserrer fermement les <strong>de</strong>ux vis <strong>de</strong> serrage du mors.13) Pour terminer, resserrer légèrement les <strong>de</strong>ux prisonnières <strong>de</strong> réglage du mors. Cecigarantit une plus gran<strong>de</strong> sécurité <strong>de</strong> la fixation du mors que nous venons <strong>de</strong> régler.2) Ainsi donc, puisque nous savons que pour chaque paire <strong>de</strong> mors l'un <strong>de</strong> ceux-ci aune position fixe, l’autre se règlera par rapport à celui en position fixe.3) Placer les vis du mors à régler, mais sans les serrer, <strong>de</strong> sorte que le mors puisseêtre déplacé à la main, mais en l'empêchant toutefois <strong>de</strong> se soulever par rapport à sasurface d’appui.4.3 CHANGEMENT DES FUSIBLESSi la machine ne se met pas en marche en intervenant sur les interrupteurs <strong>de</strong> marche,procé<strong>de</strong>r à la vérification <strong>de</strong>s fusibles. La séquence est la suivante :1) Éteindre la machine sur l’interrupteur général et la débrancher.2) Extraire le porte-fusibles qui se trouve sous l’interrupteur général.3) Vérifier à l’ai<strong>de</strong> d’un testeur si l’un <strong>de</strong>s fusibles est grillé pour, si nécessaire, leremplacer par un autre <strong>de</strong> même type et valeur.4) À l’ai<strong>de</strong> <strong>de</strong> la clé allen <strong>de</strong> 1,5 spéciale à bras court, dévisser d’un tour environ les<strong>de</strong>ux vis prisonnières <strong>de</strong> réglage du mors (ce sont les <strong>de</strong>ux prisonnières situées entre lamanette <strong>de</strong> l’étau et le mors à régler).5) Monter ensuite une paire quelconque <strong>de</strong> Fraise-Palpeur dans les porte-outils correspondants,mais à l’envers (avec les pointes <strong>de</strong> coupe vers l'intérieur du porte-outils).Descendre la tête <strong>de</strong> la machine et la verrouiller à une hauteur à laquelle les outilspeuvent toucher les flancs du mors.6) Activer le système électronique <strong>de</strong> réglage vertical du palpeur.7) Appuyer l’extrémité du mors qui est serré (celui en position fixe) contre le côté<strong>de</strong> l’outil. À la main, déplacer le mors à régler dans le sens <strong>de</strong> la manette <strong>de</strong> l’étauet, en maintenant la pression sur le mors dans cette direction, le déplacer frontalementjusqu’à ce que lui aussi touche latéralement l’outil correspondant. Dans cetteposition, serrer légèrement les vis <strong>de</strong> serrage du mors. Lorsque les outils touchent lesmors correspondants, nous en sommes avertis par l’allumage <strong>de</strong>s voyants du systèmeélectronique <strong>de</strong> réglage vertical du palpeur.4.4 TENSION ET CHANGEMENT DES COURROIESSéquence <strong>de</strong> révision <strong>de</strong> la tension <strong>de</strong> la courroie et <strong>de</strong> changement :1) Éteindre la machine sur l’interrupteur général et la débrancher.2) Desserrer les 4 vis (5) qui tiennent le “capot <strong>de</strong> la tête” et retirer celui-ci. Les visse trouvent sur le côté droit, sur le côté gauche, dans le haut et à l’arrière. Pour pouvoirretirer le “capot <strong>de</strong> la tête”, introduire d’abord à fond le “bouton <strong>de</strong> verrouillage <strong>de</strong> lafraise” (E).3) Desserrer, mais sans les enlever, les 4 vis (6) qui retiennent le moteur.4) Desserrer, mais sans les enlever, les 2 écrous <strong>de</strong> contre-écrou (7).Tension : En tournant les vis <strong>de</strong> tension (8), le moteur recule à l’arrière <strong>de</strong> lamachine. Une fois que la courroie présente la tension voulue, resserrer les <strong>de</strong>uxécrous <strong>de</strong> contre-écrou (7) et les vis (6) <strong>de</strong> maintien du moteur.Remplacement : Desserrer, mais sans les enlever, les 2 vis <strong>de</strong> tension <strong>de</strong> lacourroie (8). Extraire la courroie détériorée et la remplacer par une neuve. En tournantles vis <strong>de</strong> tension (8), le moteur recule à l’arrière <strong>de</strong> la machine. Une fois quela courroie présente la tension voulue, resserrer les <strong>de</strong>ux écrous <strong>de</strong> contre-écrou(7) et les vis (6) <strong>de</strong> maintien du moteur.5) Replacer et resserrer le “capot <strong>de</strong> la tête”.Voir Fig. 184.5 CHANGEMENT DU MOTEURLa séquence est la suivante :1) Éteindre la machine sur l’interrupteur général et la débrancher.2) Desserrer les 4 vis (5) qui tiennent le “capot <strong>de</strong> la tête” et retirer celui-ci. Les visse trouvent sur le côté droit, sur le côté gauche, dans le haut et à l’arrière. Pour pouvoir
etirer le “capot <strong>de</strong> la tête”, introduire d’abord à fond le “bouton <strong>de</strong> verrouillage <strong>de</strong> lafraise” (E).3) Desserrer les 6 vis (9) qui tiennent le “capot <strong>de</strong> la tête” et retirer celui-ci.4) Retirer la courroie (G).5) Déconnecter les câbles d’alimentation du moteur.6) Desserrer les 4 vis (6) <strong>de</strong> maintien du moteur.7) Déposer le moteur.8) En accédant à la partie inférieure du moteur avec un tournevis plat, bloquer l’axedu moteur et, à la main, faire tourner la poulie (H) jusqu’à pouvoir la retirer (filetage àgauche).9) Desserrer les 4 vis (10) qui tiennent la chape-support du moteur et la retirer.10) Pour le montage du nouveau moteur, procé<strong>de</strong>r <strong>de</strong> même, mais à l’inverse.Voir Fig. 19à ce que les yeux <strong>de</strong> l’usager soient à la hauteur <strong>de</strong> la partie la plus haute <strong>de</strong> la machine.• Dans le travail <strong>de</strong>bout, et selon la taille <strong>de</strong> l’usager, il convient <strong>de</strong> placer une rehausseentre le plan <strong>de</strong> travail et la machine afin que les yeux <strong>de</strong> l’usager soient à lahauteur <strong>de</strong> la partie la plus haute <strong>de</strong> la duplicatrice.6.- ÉLIMINATION DES DÉCHETSLe terme déchet désigne toute substance, ou objet, issue <strong>de</strong>s activités humaines ou <strong>de</strong>cycles naturels, abandonnée ou <strong>de</strong>stinée à être abandonnée.4.6 REMPLACEMENT DE L’AFFICHEUR-CLAVIERLa séquence est la suivante :1) Éteindre la machine sur l’interrupteur général et la débrancher.2) Desserrer les 4 vis (5) qui tiennent le “capot <strong>de</strong> la tête” et retirer celui-ci. Les visse trouvent sur le côté droit, sur le côté gauche, dans le haut et à l’arrière. Pour pouvoirretirer le “capot <strong>de</strong> la tête”, introduire d’abord à fond le “bouton <strong>de</strong> verrouillage <strong>de</strong> lafraise” (E).3) Débrancher le câble plat qui relie l’afficheur-clavier (K) à la carte <strong>de</strong> contrôle-comman<strong>de</strong>électronique.4) Décoller le l’afficheur-clavier (K) du “capot <strong>de</strong> la tête” et le retirer.5) Pour le montage du nouvel afficheur-clavier, procé<strong>de</strong>r <strong>de</strong> même, mais à l’inverse.Voir Fig. 204.7 REMPLACEMENT DE LA CARTE ÉLECTRONIQUE DECONTRÔLE-COMMANDELa séquence est la suivante :1) Éteindre la machine sur l’interrupteur général et la débrancher.2) Desserrer les 4 vis (5) qui tiennent le “capot <strong>de</strong> la tête” et retirer celui-ci. Les visse trouvent sur le côté droit, sur le côté gauche, dans le haut et à l’arrière. Pour pouvoirretirer le “capot <strong>de</strong> la tête”, introduire d’abord à fond le “bouton <strong>de</strong> verrouillage <strong>de</strong> lafraise” (E).3) Débrancher le connecteur principal <strong>de</strong> la carte électronique (L)4) Débrancher le câble plat qui relie l’afficheur-clavier à la carte électronique (L).5) Desserrer les 3 vis (11) <strong>de</strong> maintien <strong>de</strong> la carte électronique (L) sur le “capot <strong>de</strong> latête” et la retirer.6) Pour le montage <strong>de</strong> la nouvelle carte électronique <strong>de</strong> contrôle-comman<strong>de</strong>, procé<strong>de</strong>r<strong>de</strong> même, mais à l’inverse.Voir Fig. 214.8 REMPLACEMENT DE LA CARTE DE PUISSANCE ETDU DISJONCTEURLa séquence est la suivante :1) Éteindre la machine sur l’interrupteur général et la débrancher.2) Dévisser les 4 pieds (P) <strong>de</strong> la machine et les retirer.3) Dévisser les 5 vis (12) qui tiennent la “chape inférieure” et la retirer.4) Débrancher tous les câbles <strong>de</strong> la carte à remplacer en notant d’abord la position <strong>de</strong>chaque câble.5) Pour dégager la carte <strong>de</strong> puissance (M) ou le disjoncteur (N), il suffit <strong>de</strong> presser leslanguettes <strong>de</strong> chacun <strong>de</strong>s 4 pivots qui la supportent et <strong>de</strong> tirer la carte vers le haut.6) Pour le montage <strong>de</strong> la nouvelle carte <strong>de</strong> puissance ou du nouveau disjoncteur,procé<strong>de</strong>r <strong>de</strong> même, mais à l’inverse.6.1 EMBALLAGE• Comme l’emballage <strong>de</strong> la <strong>CAPRI</strong> est en carton, il peut être recyclé tel quel.• Comme déchet, il est considéré comme un déchet soli<strong>de</strong> urbain et doit donc êtrejeté dans un conteneur spécial pour carton.• Les éléments qui protègent la machine dans sa boîte en carton sont en matièrepolymère, classée comme déchet soli<strong>de</strong> urbain, et ne peuvent donc être éliminés quevia <strong>de</strong>s installations normales d’élimination <strong>de</strong> déchets.6.2 COPEAUX• Les résidus issus <strong>de</strong> la reproduction <strong>de</strong>s clés sont considérés comme <strong>de</strong>s déchetsspéciaux, mais ils équivalent à <strong>de</strong>s déchets soli<strong>de</strong>s urbains comme, par exemple, uneéponge métallique.• Ces déchets sont à éliminer selon leur classement selon la législation en vigueurdans l’UE en les transportant dans <strong>de</strong>s installations spéciales d’élimination <strong>de</strong> déchets.6.3 MACHINE• Avant <strong>de</strong> procé<strong>de</strong>r au démantèlement <strong>de</strong> la machine, la mettre hors service encoupant son alimentation électrique et séparer les pièces en plastique <strong>de</strong>s pièces métalliques.• Après ces opérations, toutes les pièces seront éliminées dans le respect <strong>de</strong> lalégislation en vigueur dans le pays d’utilisation <strong>de</strong> la machine.7.- TABLE CLÉ-FRAISE-PALPEUR-INCLINAI-SON-ADAPTATEURPour pouvoir travailler correctement, la machine est fournie avec une panoplied’accessoires:Voir la liste ci-<strong>de</strong>ssous8.- VUE ÉCLATÉEVoir Fig.23francaiseVoir Fig. 225.- SÉCURITÉPour votre sécurité, nous vous conseillons <strong>de</strong> respecter les consignes suivantes :• Ne pas essayer <strong>de</strong> faire démarrer ou <strong>de</strong> manipuler la machine tant que toutes lesconsignes <strong>de</strong> sécurité, les instructions d’installation et les procédures <strong>de</strong> maintenancen’auront pas été respectées et comprises.• Avant tout travail <strong>de</strong> nettoyage ou d’entretien, couper toujours l’alimentation électrique.• Conserver toujours la machine et son environnement propres.• Travailler avec les mains sèches.• Utiliser toujours <strong>de</strong>s lunettes <strong>de</strong> sécurité, même si la machine est dotée <strong>de</strong> protections.• Vérifier la mise à la terre <strong>de</strong> la machine.Disposer l’installation <strong>de</strong> telle sorte que l’usager puisse travailler commodément.• Il est préférable <strong>de</strong> pouvoir travailler assis. Régler la hauteur <strong>de</strong> la chaise <strong>de</strong> façon
<strong>de</strong>utschDUPLIZIERMASCHINEcapriBEDIENUNGSANLEITUNG
1.- VORSTELLUNG UND ALLGEMEINE ASPEKTE1.1 ALLGEMEINES1.2 TRANSPORT UND VERPACKUNG1.3 TYPENSCHILD2. - SPEZIFIKATIONEN DER MASCHINE2.1 SCHLÜSSELFAMILIEN2.2 ZUBEHÖR2.3 WERKZEUGMAGAZIN2.4 ELEKTRISCHER SCHALTKREIS2.5 TECHNISCHE DATEN2.6 WESENTLICHE BESTANDTEILE DER MASCHINE2.7 KOMPONENTEN UND FUNKTIONELLE BAUTEILE2.7.1 Wechsel <strong>de</strong>r Fräse und <strong>de</strong>s Fühlers (21)2.7.2 Blockierung <strong>de</strong>s Schlittens am En<strong>de</strong> <strong>de</strong>s Verfahrwegs <strong>de</strong>r Achse “Y”2.7.3 Spannbacken (6)2.7.4 Abfe<strong>de</strong>rung <strong>de</strong>s Fühlers (11)2.7.5 Abfe<strong>de</strong>rung <strong>de</strong>s Schlittens an <strong>de</strong>r Achse “X” (5 und 4)2.7.6 Stützhebel für röhrenförmige Schlüssel2.7.7 Geschwindigkeit <strong>de</strong>r Fräse (17)2.7.8. Anzeige –Tastatur (1)2.7.9 Vertikale Einstellung <strong>de</strong>s Fühlers (15)2.7.10 Kontrolle <strong>de</strong>r Kopierkraft3.- FRÄSEN3.1 SCHNEIDEVORGANG3.2 SCHNEIDEN VON SCHLÜSSELN3.2.1 Schlüssel KA-2, KA-3 und KA-4.3.2.2 Schlüssel KE-1.3.2.3 Schlüssel SEA-1.3.2.4 Schlüssel OP-WH.P und OP-WY.P3.2.5 Schlüssel ME-3.P und ME-4.P3.2.6 Röhrenförmige Schlüssel3.2.7 Schlüssel FIC-2 und FIC-33.2.8 Schlüssel WIN-1D, WIN-2D, WIN-3D und WIN-4D.3.2.9 Schlüssel JIS-4.P3.2.10 Schlüssel FO-6.P3.2.11 Schlüssel MCM-10.3.2.12 Schlüssel TE-T60 und TE-T80<strong>de</strong>utsch4.- INSTANDHALTUNG4.1 AUSTAUSCH DER BACKEN DER SPANNVORRICHTUNG4.2 EINSTELLEN DER BACKEN4.2.1 NORMALE Einstellung4.2.2 Einstellung mit PRÄZISION4.3 AUSTAUSCH DER SICHERUNGEN4.4 RIEMEN SPANNEN ODER AUSTAUSCHEN4.5 AUSTAUSCH DES MOTORS4.6 AUSTAUSCH DER ANZEIGE -TASTATUR4.7 AUSTAUSCH DER ELEKTRONISCHEN STEUERPLATINE4.8 AUSTAUSCH DER LEISTUNGSKARTE UND DES UNTERBRECHUNGSSCHALTERS5.- SICHERHEIT6.- BESEITIGUNG VON ABFALL6.1 VERPACKUNG6.2 SPÄNE6.3 MASCHINE7.- TABELLE SCHLÜSSEL – FRÄSE – FÜHLER – NEIGUNG - ADAPTER8.- EXPLOSIONSZEICHNUNG
1.- VORSTELLUNG UND ALLGEMEINE ASPEKTE1.1 ALLGEMEINESDie Dupliziermaschine <strong>CAPRI</strong> wur<strong>de</strong> unter Beachtung <strong>de</strong>r bestehen<strong>de</strong>n Normen für Sicherheitin <strong>de</strong>r EU konstruiert.Die Sicherheit das Personals, das diese Art an Maschinen bedient, wird nur mit einemProgramm erreicht, das speziell für die Sicherheit <strong>de</strong>s Personals entwickelt wur<strong>de</strong>, wiemit <strong>de</strong>r Umsetzung eines Programms zur Instandhaltung und Kontrolle <strong>de</strong>r gemachtenEmpfehlungen sowie die Einhaltung <strong>de</strong>r Sicherheitsnormen, die in diesem Handbuchnie<strong>de</strong>rgelegt sind.Auch wenn die Aufstellung <strong>de</strong>r Maschine keinerlei Schwierigkeiten mit sich bringt, istes vorzuziehen, sie nicht aufzustellen, einzustellen o<strong>de</strong>r zu handhaben, bevor diesesHandbuch gelesen wor<strong>de</strong>n ist.Die Maschine ist beim Verlassen unserer Fabrik bereit zur Benutzung und es müssen nurArbeiten zur Kalibrierung <strong>de</strong>r einzusetzen<strong>de</strong>n Werkzeuge ausgeführt wer<strong>de</strong>n.1.2 TRANSPORT UND VERPACKUNGDie Maschine wird in einem stabilen Karton geliefert, geschützt mit einer Schaumstoffverpackung<strong>de</strong>r folgen<strong>de</strong>n Abmessungen:Breite = 520 mm; Höhe = 650 mm; Tiefe = 575 mmMaschinengewicht plus Verpackung = 30 Kg.Wenn die Maschine ausgepackt wird, prüfen Sie sie aufmerksam darauf, ob siewährend <strong>de</strong>s Transports beschädigt wur<strong>de</strong>.Wenn Sie eine Anomalie feststellen, teilen Sie dies sofort <strong>de</strong>m Transportunternehmenmit. Setzen Sie die Maschine nicht ein, bis <strong>de</strong>r Spediteur die entsprechen<strong>de</strong> Untersuchungangestellt hat.Um die Maschine an einen an<strong>de</strong>ren Ort zu bringen, heben Sie sie an <strong>de</strong>r Basis an undnicht an einem an<strong>de</strong>ren Teil.2.4 ELEKTRISCHER SCHALTKREISDie wesentlichen Komponenten <strong>de</strong>s elektrischen und elektronischen Schaltkreises sinddie folgen<strong>de</strong>n:1. Stromanschluss.2. Anschlussplatine.3. Schalter mit 3 Positionen.4. Transformator.5. Motor.6. Anzeige -Tastatur.7. Steuerungskarte.8. Fräse.9. Fühler.10. Spannvorrichtung.11. Leuchtdio<strong>de</strong>n zur Beleuchtung.12. Kraftsensor.Siehe Abbildung 22.5 TECHNISCHE DATENMotor: Einphasig 400 W. ,230 V - 50 Hz (optional: einphasig 400W, 110V - 60Hz )Fräse: HSS (optional: Hartmetall)Fräsgeschwindigkeit: 6.000 und 11.000 Upm.Spannbacken: Zweiseitig zum Spannen und kippbar 0 / 45 ºVerfahren: auf drei Achsen mit Führungen auf Präzisionslagern.Nutzbarer Lauf: Achse X = 71 mm; Achse Y = 62 mm; Achse Z = 40 mmBeleuchtung: Leuchtdio<strong>de</strong>nAbmessungen: Breite = 430 mm, Tiefe = 385 mm und Höhe = 485 mmGewicht: 25 Kg<strong>de</strong>utsch1.3 TYPENSCHILDDie Dupliziermaschine <strong>CAPRI</strong> ist mit einemTypenschild ausgestattet, mit Spezifikationen<strong>de</strong>r Serienummer o<strong>de</strong>r Kennzeichen <strong>de</strong>r Maschine,Name und Adresse <strong>de</strong>s Herstellers zurFertigung, Marke CE und Jahr <strong>de</strong>r Herstellung.2. - SPEZIFIKATIONEN DER MASCHINEDie Maschine <strong>CAPRI</strong> ist eine sehr robuste und genaue Dupliziermaschine, die sich durchvielfältige Möglichkeiten zum Einspannen auszeichnet, die ein Spannen ohne Aufsätzeo<strong>de</strong>r Adapter erlaubt.Sie schließt ein neuartiges System zur Kontrolle <strong>de</strong>r Kopierkraft ein, welche die Genauigkeitbeim Kopieren erhöht.2.1 SCHLÜSSELFAMILIENMit <strong>de</strong>r Maschine <strong>CAPRI</strong> können die folgen<strong>de</strong>n Schlüsseltypen dupliziert wer<strong>de</strong>n:- Bohrmul<strong>de</strong>nschlüssel- Schlüssel vom Regata-Typ- Röhrenschlüssel- Schlüssel FIC-2 und FIC-3- Schlüssel WIN-1D, WIN-2D, WIN-3D und WIN-4D- Schlüssel JIS-4.P- Schlüssel FO-6.P2.2 ZUBEHÖRDie Maschine wird mit einigen Zubehörteilen für die Benutzung und Instandhaltunggeliefert. Das gesamte Zubehör kann in einem Werkzeugkasten gelagert wer<strong>de</strong>n, über<strong>de</strong>n die Maschine verfügt.- 2 Sicherungen (angebracht im unteren Teil <strong>de</strong>s Magazins für das Werkzeug)- Inbusschlüssel <strong>de</strong>r Größe 5, 3 und 2.5- 1 spezieller Inbusschlüssel <strong>de</strong>r Größe 1,5 und kurzer Seite- 2 spitze Anschlagbleche- 2 Achsen für das Einstellen <strong>de</strong>r Spannbacken- 2 Adapter für röhrenförmige Schlüssel CHI-1T- Fräsen: F-1 und F-13- Fühler: T-1 und T-13.2.3 WERKZEUGMAGAZINDie Maschine verfügt über einen Werkzeugkasten, <strong>de</strong>r im oberen Teil <strong>de</strong>r Maschineangebracht ist. Er kann herausgenommen wer<strong>de</strong>n, um ihn direkt auf einen Tisch zustellen (damit wird ein zusätzlicher Raum im oberen Teil <strong>de</strong>r Maschine geschaffen, woSchlüssel, Zubehör, etc… abgelegt wer<strong>de</strong>n können).2.6 WESENTLICHE BESTANDTEILE DER MASCHINE1.- Anzeige -Tastatur2.- Spannbackenschlitten (Achsen X – Y)3.- Hebel für <strong>de</strong>n Antrieb <strong>de</strong>r Schlitten, Achsen x – y4.- Knauf zur Blockierung <strong>de</strong>s Spannbackenschlittens, Achse X5.- Rad zur Betätigung <strong>de</strong>r Abfe<strong>de</strong>rung <strong>de</strong>s Schlittens, Achse x6.- Spannbacken7.- Hebel zur Blockierung <strong>de</strong>r Spannbackendrehung8.- Spannbackenknauf9.- Kopf (Achse Z)10.- Hebel für <strong>de</strong>n Antrieb und Blockierung <strong>de</strong>s Kopfs, Achse z11.- Griff <strong>de</strong>r Abfe<strong>de</strong>rung <strong>de</strong>s Fühlers12.- Werkzeughalter13.- Fräse14.- Fühler15.- Rad zur Regulierung <strong>de</strong>r Fühlerhöhe16.- Hauptschalter17.- Wahlschalter für die Geschwindigkeit <strong>de</strong>s Motors (2 Geschwindigkeiten)18.- LEDs zur Beleuchtung19.- Schutz gegen Späne20.- Werkzeugmagazin21.- Taste zur Blockierung <strong>de</strong>r FräseSiehe Abbildung 32.7 KOMPONENTEN UND FUNKTIONELLE BAUTEILE2.7.1 Wechsel <strong>de</strong>r Fräse und <strong>de</strong>s Fühlers (21)Um die Fräse zu lösen, muss die Taste zur Blockierung <strong>de</strong>r Fräse zur gleichen Zeit gedrücktwer<strong>de</strong>n, während mit <strong>de</strong>r Hand <strong>de</strong>r Werkzeugträger gedreht wird.Wenn die zu ersetzen<strong>de</strong> Fräse herausgenommen wur<strong>de</strong>, wird die neue Fräse eingesetztund geklemmt. Dabei versichern wir uns darüber, dass ihr En<strong>de</strong> im Werkzeugträger amAnschlag anliegt.Der Fühler wird in <strong>de</strong>r gleichen Form wie die Fräse gewechselt. Der einzige zu beachten<strong>de</strong>Unterschied ist, dass die Drehung <strong>de</strong>s Fühlers intern blockiert wird.2.7.2 Blockierung <strong>de</strong>s Schlittens am En<strong>de</strong> <strong>de</strong>s Verfahrwegs<strong>de</strong>r Achse “Y”Da sich <strong>de</strong>r Schlitten nicht in Richtung “Y” bewegen soll, während im Kopierer dieSchlüssel in <strong>de</strong>n Spannbacken einspannt wer<strong>de</strong>n, wur<strong>de</strong> <strong>de</strong>r Schlitten mit einer vorübergehen<strong>de</strong>nBlockierung in diese Richtung versehen .Um diese Blockierung zu betätigen, reicht es, <strong>de</strong>n Schlitten bis zum Anschlag <strong>de</strong>s Verfahrwegsin Richtung <strong>de</strong>s Kopierers zu bringen.Um diese Blockierung zu <strong>de</strong>saktivieren, reicht es, <strong>de</strong>n Schlitten mit etwas Kraft nachvorne zu bewegen.
2.7.3 Spannbacken (6)Die Leistungen <strong>de</strong>r Spannbacken <strong>de</strong>r Dupliziermaschine <strong>CAPRI</strong> sind höher als die einergewöhnlichen Maschine auf <strong>de</strong>m Markt, <strong>de</strong>nn sie verfügen über zwei unabhängige Seiten.Zu<strong>de</strong>m können die Spannbacken in je<strong>de</strong>r Position in einem Winkel zwischen 45º 0º-45º geklemmt wer<strong>de</strong>n.Wenn das blaue Licht erleucht ist, zeigt uns das an, dass <strong>de</strong>r Fühler mit AKTIVIERTERABFEDERUNG arbeitet.Wenn das blaue Licht nicht brennt ist, zeigt uns das an, dass <strong>de</strong>r Fühler BLOCKIERT ist(Abfe<strong>de</strong>rung <strong>de</strong>saktiviert).2.7.4 Abfe<strong>de</strong>rung <strong>de</strong>s Fühlers (11)Es gibt zwei verschie<strong>de</strong>ne Arten zur Benutzung <strong>de</strong>s Fühlers, gemäß <strong>de</strong>r Tätigkeit dieausgeführt wer<strong>de</strong>n soll:Fühler mit Abfe<strong>de</strong>rung. Die Abfe<strong>de</strong>rung <strong>de</strong>s Fühlers wird einzig und allein fürdas Kopieren von Bohrmul<strong>de</strong>nschlüsseln benutzt.Blockierter Fühler. Der blockierte Fühler wird benutzt, um Schlüssel mit Vorschub<strong>de</strong>s Schlittens zu kopieren. Im Allgemeinen für das Schnei<strong>de</strong>n von Schlüsselnvom Typ Regata.Zum Aktivieren o<strong>de</strong>r Desaktivieren <strong>de</strong>s Fühlers reicht es aus, <strong>de</strong>n Griff für Abfe<strong>de</strong>rung<strong>de</strong>s Fühlers um 180º zu drehen (halbe Drehung).Wenn die Abfe<strong>de</strong>rung <strong>de</strong>s Fühlers aktiviert ist, wird die Spitze <strong>de</strong>s Fühlers leicht unterihrer Einstellposition in Bezug auf die Fräse platziert. Diese Position <strong>de</strong>s Fühlers erlaubtes, dass er weich in die Öffnung <strong>de</strong>s Originalschlüssels eingebracht wer<strong>de</strong>n kann, bevordas Schnei<strong>de</strong>n <strong>de</strong>s Schlüssels beginnt. So wer<strong>de</strong>n Vibrationen und schroffe Bewegungen<strong>de</strong>s Schlittens vermie<strong>de</strong>n.Um in je<strong>de</strong>m Augenblick <strong>de</strong>n Status <strong>de</strong>s Fühlers (mit Abfe<strong>de</strong>rung o<strong>de</strong>r blockiert) zuerfahren, verfügt die Maschine in ihrem Display über eine Anzeige, die uns diese Informationanzeigt. Ist die Leuchtanzeige beleuchtet, ist die Abfe<strong>de</strong>rung aktiviert. ImGegenteil, wenn die Leuchtanzeige ausgeschaltet ist, ist <strong>de</strong>r Fühler blockiert.2.7.5 Abfe<strong>de</strong>rung <strong>de</strong>s Schlittens an <strong>de</strong>r Achse “X” (5 und 4)Wir empfehlen das System zur Abfe<strong>de</strong>rung <strong>de</strong>s Schlittens an <strong>de</strong>r Achse “X” für seitlicheSchnei<strong>de</strong>vorgänge bei Schlüsseln vom Typ Regata einzusetzen.Wir empfehlen, die Blockierung an <strong>de</strong>r Achse “X” für Schnei<strong>de</strong>vorgänge in Längsrichtungvon Punkten einzusetzen.2.7.6 Stützhebel für röhrenförmige SchlüsselDie Dupliziermaschine <strong>CAPRI</strong> verfügt auf <strong>de</strong>r linken Seite über einen Hebel zum Herunterklappen,<strong>de</strong>r dabei hilft, die röhrenförmigen Schlüssel, Regatta-Schlüssel, etc.komfortabler zu duplizieren, weil man über einen Punkt zum Aufstützen für die Handhat, die <strong>de</strong>n Hebel für die Verschiebung <strong>de</strong>s Schlittens betätigt.2.7.7 Geschwindigkeit <strong>de</strong>r Fräse (17)Die Maschine verfügt über einen Schalter zu Auswahl <strong>de</strong>r Geschwindigkeit, <strong>de</strong>r sich an<strong>de</strong>r rechten Seite befin<strong>de</strong>t und die Drehzahl <strong>de</strong>r Fräse auswählt. Allgemein ausgedrückt,kann gesagt wer<strong>de</strong>n, dass die Geschwindigkeit <strong>de</strong>r Drehung vom Material <strong>de</strong>r Fräseabhängt:- Position I: Für Arbeiten mit einer Fräse HSS (6.000 Upm)- Position I: Für Arbeiten mit einer HARTMETALL Fräse (11.000 Upm)- Position O: Fräse gestoppt.2.7.8. Anzeige –Tastatur (1)Taste für Betriebsmodus:Diese Taste dient zum Aktivierung - Desaktivieren <strong>de</strong>s Systems zur vertikalen Regulierung<strong>de</strong>s Fühlers.Anzeigen zur EINSTELLUNG DES FÜHLERS.Die Leuchte links leuchtet auf, wenn <strong>de</strong>r Fühler <strong>de</strong>n Schlüssel berührt.Sichtanzeige für KOPIERKRAFT.Gibt uns die optimale Kraft an, die während <strong>de</strong>s Duplizierens eingesetzt wer<strong>de</strong>n soll.HINWEIS: Das System zur Kontrolle <strong>de</strong>r eingesetzten Kraft verfügt neben <strong>de</strong>r Sichtanzeigeauch über ein Tonsignal, das uns anzeigt, wenn <strong>de</strong>r optimale Krafteinsatzzum Duplizieren erreicht ist. Dieses Tonsignal kann aktiviert – <strong>de</strong>saktiviert wer<strong>de</strong>n,wenn man zur gleichen Zeit die Tasten MODE und ON-OFF drückt.2.7.9 Vertikale Einstellung <strong>de</strong>s Fühlers (15)Vor je<strong>de</strong>m Wechsel <strong>de</strong>r Fräse-Fühler, sollte eine vertikale Einstellung <strong>de</strong>s Fühlers ausgeführtwer<strong>de</strong>n.Um das elektronische System zur vertikalen Einstellung <strong>de</strong>s Fühlers benutzen zu können,ist es notwenig, dass die Anzeige -Tastatur aktiviert ist (wenn sie aktiviert ist,leuchtet das grüne Licht an <strong>de</strong>r Seite <strong>de</strong> Taste ON-OFF).Wenn die Anzeige -Tastatur aktiv ist, ist es möglich, das elektronische System zurvertikalen Einstellung <strong>de</strong>s Fühlers zu aktivieren - <strong>de</strong>saktivieren, wenn die Taste MODEgedrückt wird.Um die vertikale Einstellung <strong>de</strong>s Fühlers vorzunehmen, gehen sie in <strong>de</strong>r folgen<strong>de</strong>n Form vor:• Befestigen Sie die Fräse und <strong>de</strong>n Fühlers in ihren entsprechen<strong>de</strong>nWerkzeugträgern. Versichern Sie sich darüber, dass sie am Anschlag sitzenund richtig angezogen sind.• Spannen Sie zwei gleiche Schlüssel in die Spannbacken <strong>de</strong>r Maschine ein.• Schalten sie die Abfe<strong>de</strong>rung <strong>de</strong>s Fühlers ab (blockierter Fühler).• Senken Sie <strong>de</strong>n Kopf ab, bis die Fräse und <strong>de</strong>r Fühler auf <strong>de</strong>n Schlüsseln in <strong>de</strong>nSpannbacken aufsitzen. Dann ergibt sich eine <strong>de</strong>r folgen<strong>de</strong>n drei Situationen:BLAU LINKS. Wenn nur die die Leuchte links aufleuchtet, zeigt das an,dass nur<strong>de</strong>r Fühler <strong>de</strong>n Schlüssel berührt, aber die Fräse nicht. Dann muss das Rad zurEinstellung <strong>de</strong>s Fühlers nach links gedreht wer<strong>de</strong>n, bis die bei<strong>de</strong>n Leuchten zurEinstellung aufleuchten.BLAU RECHTS. Wenn nur die die Leuchte rechts aufleuchtet, zeigt das an, dassnur die Fräse <strong>de</strong>n Schlüssel berührt, aber <strong>de</strong>r Fühler nicht. Dann muss das Radzur Einstellung <strong>de</strong>s Fühlers nach rechts gedreht wer<strong>de</strong>n, bis die bei<strong>de</strong>n Leuchtenzur Einstellung aufleuchten.BLAU LINKS UND RECHTS. Zeigt an, dass sowohl die Fräse und <strong>de</strong>r Fühlerdie entsprechen<strong>de</strong>n Schlüssel berühren. Das be<strong>de</strong>utet, dass die Fühlerhöhe eingestelltist.<strong>de</strong>utschTaste ON-OFF.Beim Drücken wer<strong>de</strong>n die Funktionen <strong>de</strong>r Anzeige - Tastatur AKTIVIERT. Neben <strong>de</strong>r Tasteleuchtet ein grünes Licht auf.Beim erneuten Drücken wird wie<strong>de</strong>r in <strong>de</strong>n Status “STAND-BY” gewechselt. Neben <strong>de</strong>rTaste leuchtet ein rotes Licht auf.WICHTIGER HINWEIS: Bei <strong>de</strong>r Einstellung <strong>de</strong>r Fühlerhöhe muss <strong>de</strong>r Typ <strong>de</strong>s Schlüsselsin Betracht gezogen wer<strong>de</strong>n, <strong>de</strong>r kopiert wer<strong>de</strong>n soll. Han<strong>de</strong>lt es sich um einenSchlüssel vom Typ Regata, darf nur sehr wenig Kraft am Hebel zum Antrieb <strong>de</strong>s Kopfs(es sollte kein Licht auf <strong>de</strong>r Anzeige für die eingesetzte Kraft leuchten) angewen<strong>de</strong>twer<strong>de</strong>n. Wenn es sich im Gegenteil aber um einen BOHRMULDENSCHLÜSSELhan<strong>de</strong>lt, dann müssen die bei<strong>de</strong>n blauen Leuchten zur Einstellung erleuchtet sein,während gleichzeitig auch <strong>de</strong>r Anzeiger für die optimale Kopierkraft von Bohrmul<strong>de</strong>nschlüsselangeben muss (dafür muss leicht <strong>de</strong>r Hebel zum Antrieb <strong>de</strong>s Kopfs betätigtwer<strong>de</strong>n).2.7.10 Kontrolle <strong>de</strong>r KopierkraftTaste BELEUCHTUNG.Beim Drücken wer<strong>de</strong>n die Leuchtdio<strong>de</strong>n zur Beleuchtung eingeschaltet (wenn sie istausgeschaltet waren) o<strong>de</strong>r abgeschaltet, wenn sie erleucht sind.Diese Taste ist unabhängig zum Status <strong>de</strong>r Taste “ON-OFF”.Anzeige zur ABFEDERUNG.Die Maschine <strong>CAPRI</strong> verfügt über ein revolutionäres System zur Kontrolle <strong>de</strong>r Kopierkraft.Es han<strong>de</strong>lt sich um ein patentiertes System, das uns beim Kopieren vonBOHRMULDENSCHLÜSSELN die optimale Stärke angibt, mit <strong>de</strong>r auf <strong>de</strong>n Hebel zumAntrieb <strong>de</strong>s Kopfs eingewirkte wer<strong>de</strong>n soll. Dafür verfügt das Gerät über zwei Indikatoren:Sichtanzeige. Die optimale Stärke zum Duplizieren wird erreicht, wenn die Leuchtenam weißen Pfeil angelangt sind.Tonsignal. Wenn die optimale Stärke zum Duplizieren erreicht ist, wird die <strong>de</strong>rMaschine einen Piepston aussen<strong>de</strong>n. Dieses Tonsignal kann aktiviert - <strong>de</strong>sakti-
• Führen Sie <strong>de</strong>n Fühler exakt in einen <strong>de</strong>r Punkte ein und blockieren Sie die Maschineauf dieser Höhe.• Führen Sie <strong>de</strong>n Schnei<strong>de</strong>vorgang durch.Siehe Abb. 123.2.9 Schlüssel JIS-4.P• Benutzen Sie das folgen<strong>de</strong> Paar für Fräse-Fühler: F-11 / P-11.• Beim Einspannen <strong>de</strong>s Schlüssels in <strong>de</strong>n Spannbacken wird <strong>de</strong>r Adapter AD-MJbenutzt.- Positionieren Sie <strong>de</strong>n Adapter auf <strong>de</strong>n Spannbacken als "spitzer Anschlag".- Setzen Sie <strong>de</strong>n Schlüssel in <strong>de</strong>n Adapter ein, Anschlag "langer Hals” gegen diedrehen<strong>de</strong> Platte. Spannen Sie in dieser Position <strong>de</strong>n Schlüssel in seinen Adapterein.• Es ist angezeigt, <strong>de</strong>n Fühler zu blockieren (<strong>de</strong>saktivieren <strong>de</strong>r Abfe<strong>de</strong>rung).Siehe Abb. 133.2.10 Schlüssel FO-6.P• Benutzen Sie das Paar für Fräse - Fühler F-22 / P-22.• Beim Einspannen <strong>de</strong>s Schlüssels in <strong>de</strong>n Spannbacken wird <strong>de</strong>r entsprechen<strong>de</strong>Adapter benutzt.- Positionieren Sie <strong>de</strong>n Adapter auf <strong>de</strong>n Spannbacken.- Beim Einsetzen <strong>de</strong>s Schlüssels achten Sie darauf, dass er gut plan aufliegt, damitdie Fräsungen gleich wer<strong>de</strong>n.• Es ist angezeigt, <strong>de</strong>n Fühler zu blockieren (<strong>de</strong>saktivieren <strong>de</strong>r Abfe<strong>de</strong>rung).• Führen Sie <strong>de</strong>n Fühler in <strong>de</strong>n Kanal eines Buchstabens ein. Blockieren Sie <strong>de</strong>n Kopf<strong>de</strong>r Maschine, heben Sie <strong>de</strong>n Fühler leicht an, damit er nicht gegen <strong>de</strong>n Adapter fährt.• Führen Sie <strong>de</strong>n Schnei<strong>de</strong>vorgang durch.Siehe Abb. 14Einlesen <strong>de</strong>s Co<strong>de</strong>s <strong>de</strong>s Original-Schlüssels.• Der Original- Schlüssel verfügt über 6 Positionen zum Kopieren, die über Buchstaben<strong>de</strong>finiert sind: A, B, C, D, E und F, so wie es auf <strong>de</strong>r folgen<strong>de</strong>n Abbildung gezeigtwird.• In je<strong>de</strong>r einzelnen dieser Positionen dieses Schlüssels gibt es 4 verschie<strong>de</strong>nemögliche Kombinationen (<strong>de</strong>finiert über Zahlen), die wir nun zeigen und nummerieren:4.- INSTANDHALTUNGBei <strong>de</strong>r Durchführung von Operationen zur Instandhaltung ist es notwenig, die folgen<strong>de</strong>nVorgaben einzuhalten:1. Es dürfen niemals solche Arbeiten durchgeführt wer<strong>de</strong>n, wenn die Maschine in Betriebist.2. Das Stromkabel muss aus <strong>de</strong>r Steckdose gezogen wer<strong>de</strong>n.3. Die Anweisungen <strong>de</strong>s Handbuchs müssen dabei strikt befolgt wer<strong>de</strong>n.4. Verwen<strong>de</strong>n Sie ausschließlich Originalersatzteile.4.1 AUSTAUSCH DER BACKEN DER SPANNVORRICHTUNGDie Spannvorrichtung <strong>de</strong>r Maschine <strong>CAPRI</strong> verfügt über drei Backenpaare (feste Backelinks, feste Backe rechts und bewegliche Backe). Wenn eine davon beschädigt ist, könnenSie gegen neue Backen unabhängig voneinan<strong>de</strong>r ausgetauscht wer<strong>de</strong>n.Zum Austausch <strong>de</strong>r “feste Backe links” (A) o<strong>de</strong>r <strong>de</strong>r “feste Backe rechts” (B) reicht esaus, die zwei Schrauben zu lösen, welche sie halten. Danach nimmt man sie nach obenheraus. Zum Montieren <strong>de</strong>r neuen Backe geht man in <strong>de</strong>r umgekehrten Reihenfolge vor.Zum Austausch <strong>de</strong>r “beweglichen Backe” (C) müssen die folgen<strong>de</strong>n Schritte ausgeführtwer<strong>de</strong>n:1) Entfernen Sie mit einem Cutter o<strong>de</strong>r etwas ähnlichem <strong>de</strong>n schwarzen Plastik<strong>de</strong>ckelam Griff <strong>de</strong>r Spannvorrichtung.2) Während mit einem Schlüssel <strong>de</strong>r Größe 14 die Kontermutter blockiert wird, führtman einen Inbusschlüssel <strong>de</strong>r Größe 5 in die Öffnung ein, die im Griff <strong>de</strong>r Spannvorrichtungnun frei gewor<strong>de</strong>n ist und schraubt sie los.3) Positionieren Sie die Spannbacken mit einem Winkel von 45º und drehen Sie manuelldie Spin<strong>de</strong>l und nehmen Sie sie seitlich heraus. Ist die Spin<strong>de</strong>l herausgenommen,ist die bewegliche Backe frei und kann herausgenommen wer<strong>de</strong>n.4) Zum Montieren <strong>de</strong>r neuen beweglichen Backe geht man in <strong>de</strong>r umgekehrten Reihenfolgevor.WICHTIGER HINWEIS: Wenn die feste Backe links o<strong>de</strong>r rechts getauscht wird, mussstets das getauschte Backenpaar eingestellt wer<strong>de</strong>n. Beim Austausch <strong>de</strong>r beweglichenBacke ist dagegen keinerlei Einstellungsoperation <strong>de</strong>r Backen notwendig.Siehe Abb. 174.2 EINSTELLEN DER BACKENNach je<strong>de</strong>m Austausch <strong>de</strong>r feste Backen links o<strong>de</strong>r rechts, muss stets das getauschteBackenpaar eingestellt wer<strong>de</strong>n. Beim Austausch <strong>de</strong>r beweglichen Backe ist dagegenkeinerlei Einstellungsoperation <strong>de</strong>r Backen notwendig.Es gibt zwei verschie<strong>de</strong>ne Möglichkeiten zur Einstellung <strong>de</strong>r Backen:NORMALPRÄZISION<strong>de</strong>utsch1 2 3 4• Die “Höhe” Nr.1 gibt an, dass nicht dupliziert wer<strong>de</strong>n darf. Die Position Nr. 2 gibtan, dass es ein kleiner Einschnitt im Schlüssel ist und wenn er etwas größer ist, gehörter zur Höhe Nr. 3. Die Höhe Nr. 4 ist <strong>de</strong>r tiefste Einschnitt <strong>de</strong>s Schlüssels.• Wir nehmen <strong>de</strong>n Schlüssel und markieren die Kombinationen für je<strong>de</strong>n einzelnen<strong>de</strong>r 6 Positionen, so wie es in <strong>de</strong>r Folge als Beispiel gezeigt wird:4.2.1 NORMALE EinstellungEs han<strong>de</strong>lt sich um einen schnellen und einfachen Vorgang, mit <strong>de</strong>m eine akzeptableEinstellung erreicht wird, um Schlüssel mit einer gewissen Genauigkeit zu kopieren.Um diese Einstellung durchzuführen, gehen Sie nach folgen<strong>de</strong>n Schritten vor:1) Spannen Sie bei<strong>de</strong> Achsen zur Einstellung in ihren entsprechen<strong>de</strong>n Werkzeugträgerein. Sie müssen dabei im Inneren am Anschlag in <strong>de</strong>n Werkzeugträgern anliegenund <strong>de</strong>r konische Teil <strong>de</strong>r Einstellachsen bleiben außen.POSITION A B C D E FKOMBINATION 3 4 1 2 4 2HINWEIS: Die Nummernfolgen <strong>de</strong>r Kombination ist <strong>de</strong>r Co<strong>de</strong> <strong>de</strong>s Schlüssels.3.2.11 Schlüssel MCM-10.• Spezielles Anbringen in <strong>de</strong>r Spannvorrichtung. Siehe Abbildung.Siehe Abb.153.2.12 Schlüssel TE-T60 und TE-T80• Spezielles Anbringen in <strong>de</strong>r Spannvorrichtung. Den Schlüssel TE-T60 wird so eingespannt,wie es auf <strong>de</strong>r Zeichnung gezeigt wird.• Der Schlüssel TE-T80 hat die Beson<strong>de</strong>rheit, dass er für die Bearbeitung <strong>de</strong>r linkenSeite so eingespannt wird wie <strong>de</strong>r TE-T60. Für die Bearbeitung <strong>de</strong>r rechten Seite musser von <strong>de</strong>r hinteren Seite <strong>de</strong>r Spannbacken her eingespannt wer<strong>de</strong>n (wie im Fall <strong>de</strong>sMCM-10).2) Die feste Backe links <strong>de</strong>r rechten Seite <strong>de</strong>r Spannvorrichtung und die feste Backerechts <strong>de</strong>r linken Seite <strong>de</strong>r Spannvorrichtung verfügen über keine Möglichkeit zur Einstellung,da sie über Stifte positioniert wer<strong>de</strong>n. Deshalb wer<strong>de</strong>n sie bei <strong>de</strong>r Montagedurch die Stifte geführt und in <strong>de</strong>r Folge durch die entsprechen<strong>de</strong>n Schrauben festgezogen.Siehe Abb. 16
12) Damit ist die Einstellung ausgeführt und nun müssen mit Kraft die bei<strong>de</strong>n Halteschrauben<strong>de</strong>r Backe angezogen wer<strong>de</strong>n.13) Schlussendlich ziehen Sie die zwei Stiftschrauben zur Einstellung <strong>de</strong>r Backe nochetwas an. In dieser Form wird die Einstellung <strong>de</strong>r Backe gesichert, die eingestellt wor<strong>de</strong>nist.4.6 AUSTAUSCH DER ANZEIGE -TASTATURDiese Überprüfung geht folgen<strong>de</strong>rmaßen vor sich:1) Schalten Sie die Maschine über <strong>de</strong>n Hauptschalter ab, und ziehen Sie das Kabelaus <strong>de</strong>r Steckdose.2) Lösen Sie die 4 Schrauben (5) <strong>de</strong>s “Kopfhalters”, und nehmen Sie ihn heraus. DieSchrauben befin<strong>de</strong>n sich an <strong>de</strong>r rechten und linken Seite sowie im oberen und im hinterenTeil. Um <strong>de</strong>n “Kopfhalter” herausnehmen zu können, ist es notwenig, die “Taste zurBlockierung <strong>de</strong>r Fräse” (E) bis zum Anschlag einzudrücken.3) Ziehen sie das Flachkabel ab, welches die Anzeige- Tastatur (K) mit <strong>de</strong>r Steuerplatineverbin<strong>de</strong>t.4) Lösen Sie die alte Anzeige -Tastatur (K) vom "Kopfhalter”, und nehmen Sie sieheraus.5) Für die Montage <strong>de</strong>r neuen Anzeige- Tastatur gehen Sie in <strong>de</strong>r umgekehrten Reihenfolgevor.Siehe Abb. 204.3 AUSTAUSCH DER SICHERUNGENSollte die Maschine bei <strong>de</strong>r Betätigung <strong>de</strong>r Einschaltknöpfe nicht in Betrieb gehen,müssen die Sicherungen überprüft wer<strong>de</strong>n. Diese Überprüfung geht folgen<strong>de</strong>rmaßenvor sich:1) Schalten Sie die Maschine über <strong>de</strong>n Hauptschalter ab, und ziehen Sie das Kabelaus <strong>de</strong>r Steckdose.2) Nehmen Sie <strong>de</strong>n Sicherungshalter heraus, <strong>de</strong>r sich unter <strong>de</strong>m Hauptschalter befin<strong>de</strong>t.3) Überprüfen Sie (benutzen Sie ein Testgerät), ob eine <strong>de</strong>r Sicherungen durchgebranntist und ersetzen Sie sie durch eine von gleichem Typ und Farbe.4.4 RIEMEN SPANNEN ODER AUSTAUSCHENZur Prüfung <strong>de</strong>r Spannung <strong>de</strong>s Riemens o<strong>de</strong>r für seinen Austausch gehen Sie nach <strong>de</strong>nfolgen<strong>de</strong>n Schritten vor:1) Schalten Sie die Maschine über <strong>de</strong>n Hauptschalter ab, und ziehen Sie das Kabelaus <strong>de</strong>r Steckdose.2) Lösen Sie die 4 Schrauben (5) <strong>de</strong>s “Kopfhalters”, und nehmen Sie ihn heraus. DieSchrauben befin<strong>de</strong>n sich an <strong>de</strong>r rechten und linken Seite sowie im oberen und im hinterenTeil. Um <strong>de</strong>n “Kopfhalter” herausnehmen zu können, ist es notwenig, die “Taste zurBlockierung <strong>de</strong>r Fräse” (E) bis zum Anschlag einzudrücken.3) Lösen Sie die vier Schrauben (6), ohne sie herauszunehmen, welche <strong>de</strong>n Motorhalten.4) Lösen Sie die zwei Kontermuttern (7), ohne sie herauszunehmen.Spannen: Drehen Sie die bei<strong>de</strong>n Spannsschrauben (8), womit <strong>de</strong>r Motor nach hintenverschoben wird. Wenn <strong>de</strong>r Riemen über die nötige Spannung verfügt, ziehenSie bei<strong>de</strong>n Muttern <strong>de</strong>r Kontermutter (7) genauso wie<strong>de</strong>r fest, wie die Schrauben(6), die <strong>de</strong>n Motor halten.Austausch: Lösen Sie die 2 Spannschrauben <strong>de</strong>s Riemens, ohne sie herauszunehmen.Nehmen Sie <strong>de</strong>n verschlissenen Riemen heraus, und ersetzen sie ihn durcheinen neuen. Drehen Sie die bei<strong>de</strong>n Spannsschrauben (8), womit <strong>de</strong>r Motor nachhinten verschoben wird. Wenn <strong>de</strong>r Riemen über die nötige Spannung verfügt, ziehenSie bei<strong>de</strong>n Muttern <strong>de</strong>r Kontermutter (7) genauso wie<strong>de</strong>r fest, wie die Schrauben(6), die <strong>de</strong>n Motor halten.5) Setzen Sie <strong>de</strong>n “Kopfhalter" wie<strong>de</strong>r ein, und schrauben Sie ihn fest.Siehe Abb. 184.7 AUSTAUSCH DER ELEKTRONISCHEN STEUERPLATINEDiese Überprüfung geht folgen<strong>de</strong>rmaßen vor sich:1) Schalten Sie die Maschine über <strong>de</strong>n Hauptschalter ab, und ziehen Sie das Kabelaus <strong>de</strong>r Steckdose.2) Lösen Sie die 4 Schrauben (5) <strong>de</strong>s “Kopfhalters”, und nehmen Sie ihn heraus. DieSchrauben befin<strong>de</strong>n sich an <strong>de</strong>r rechten und linken Seite sowie im oberen und im hinterenTeil. Um <strong>de</strong>n “Kopfhalter” herausnehmen zu können, ist es notwenig, die “Taste zurBlockierung <strong>de</strong>r Fräse” (E) bis zum Anschlag einzudrücken.3) Ziehen sie <strong>de</strong>n Hauptstecker von <strong>de</strong>r Steuerplatine (L) ab.4) Ziehen sie das Flachkabel ab, welches die Anzeige- Tastatur mit <strong>de</strong>r Steuerplatine(L) verbin<strong>de</strong>t.5) Lösen Sie die 3 Schrauben (11), welche die Steuerplatine (L) am “Kopfhalter” befestigenund nehmen Sie sie heraus.6) Für die Montage <strong>de</strong>r neuen elektronischen Steuerplatine, gehen Sie in <strong>de</strong>r umgekehrtenReihenfolge vor.Siehe Abb. 214.8 AUSTAUSCH DER LEISTUNGSKARTE UND DES UN-TERBRECHUNGSSCHALTERSDiese Überprüfung geht folgen<strong>de</strong>rmaßen vor sich:1) Schalten Sie die Maschine über <strong>de</strong>n Hauptschalter ab, und ziehen Sie das Kabelaus <strong>de</strong>r Steckdose.2) Schrauben Sie die 4 Füße (P) <strong>de</strong>r Maschine ab, und nehmen Sie sie ab.3) Lösen Sie die 5 Schrauben (12), die das “untere Schutzblech” (F) befestigen, undnehmen Sie es ab.4) Entfernen Sie alle Kabel <strong>de</strong>r Steckkarte, die ausgetauscht wer<strong>de</strong>n soll, und notierenSie sich die Position je<strong>de</strong>s Kabels.5) Um die Leistungskarte (M) o<strong>de</strong>r <strong>de</strong>n Unterbrechungsschalter (N) zu lösen, reicht esaus, auf die Lasche <strong>de</strong>r 4 Zapfen zu drücken, auf <strong>de</strong>nen Sie sitzen und die Steckkartenach oben heraus zu ziehen.6) Für die Montage <strong>de</strong>r neuen Leistungskarte o<strong>de</strong>r Unterbrechungsschalters gehenSie in <strong>de</strong>r umgekehrten Reihenfolge vor.Siehe Abb. 22<strong>de</strong>utsch4.5 AUSTAUSCH DES MOTORSDiese Überprüfung geht folgen<strong>de</strong>rmaßen vor sich:1) Schalten Sie die Maschine über <strong>de</strong>n Hauptschalter ab, und ziehen Sie das Kabelaus <strong>de</strong>r Steckdose.2) Lösen Sie die 4 Schrauben (5) <strong>de</strong>s “Kopfhalters”, und nehmen Sie ihn heraus. DieSchrauben befin<strong>de</strong>n sich an <strong>de</strong>r rechten und linken Seite sowie im oberen und im hinterenTeil. Um <strong>de</strong>n “Kopfhalter” herausnehmen zu können, ist es notwenig, die “Taste zurBlockierung <strong>de</strong>r Fräse” (E) bis zum Anschlag einzudrücken.3) Lösen Sie die 6 Schrauben (9) <strong>de</strong>s “Motorhalters” (F), und nehmen Sie ihn heraus.4) Nehmen Sie <strong>de</strong>n Riemen (G) heraus.5) Ziehen Sie die Kabel zur Stromversorgung ab, die zum Motor führen.6) Lösen Sie die vier Schrauben (6), welche <strong>de</strong>n Motor halten.7) Nehmen Sie <strong>de</strong>n Motor heraus.8) Mit einem Schlitzschraubenzieher blockieren Sie die Achse <strong>de</strong>s Motors, und drehenmanuell die Riemenscheibe (H), bis Sie sie abnehmen können (es ist ein Linksgewin<strong>de</strong>).9) Lösen Sie die 4 Schrauben (10), die <strong>de</strong>n Blechhalter <strong>de</strong>s Motors halten, und nehmenSie ihn heraus.10) Für die Montage eines neuen Motors gehen Sie in <strong>de</strong>r umgekehrten Reihenfolgevor.Siehe Abb. 195.- SICHERHEITFür Ihre Sicherheit empfehlen wir Ihnen, die folgen<strong>de</strong>n Grundsätze zu beachten:• Versuchen Sie nicht, die Maschine in Betrieb zu nehmen o<strong>de</strong>r sie zu handhaben,bis alle Sicherheitsthemen, Anweisungen für das Aufstellen, die Anleitung <strong>de</strong>s Bedienungspersonalsund die Vorgänge zur Instandhaltung verstan<strong>de</strong>n und ausgeführt wur<strong>de</strong>n.• Trennen Sie die Maschine stets von <strong>de</strong>r Stromversorgung, bevor Sie eine Arbeit zurReinigung o<strong>de</strong>r zur Instandhaltung ausführen.• Halten Sie die Maschine und ihr Umfeld immer sauber.• Arbeiten Sie immer mit trockenen Hän<strong>de</strong>n.• Benutzen Sie immer eine Schutzbrille, auch wenn die Maschine über Schutzvorrichtungenverfügt.• Versichern Sie sich darüber, dass die Maschine korrekt geer<strong>de</strong>t ist.Wir empfehlen, mit <strong>de</strong>r Maschine auf einer Höhe zu arbeiten, die für <strong>de</strong>n Bedienerbequem ist:• Am Besten arbeitet man auf einem Stuhl sitzend. Stellen Sie Höhe <strong>de</strong>s Stuhls soein, damit sich die Augen <strong>de</strong>s Benutzers auf <strong>de</strong>r Höhe <strong>de</strong>s höchstens Teils <strong>de</strong>r Maschinebefin<strong>de</strong>n.• Wenn stehend gearbeitet wer<strong>de</strong>n soll, ist es empfehlenswert, in Abhängigkeit <strong>de</strong>rGröße <strong>de</strong>s Bedieners einen Untersatz unter die Maschine zu stellen, damit sich dieAugen <strong>de</strong>s Benutzers auf <strong>de</strong>r Höhe <strong>de</strong>s höchstens Teils <strong>de</strong>r Maschine befin<strong>de</strong>n.
<strong>de</strong>utsch
danishNøglemaskinecapriBRUGSANVISNING
1.- PRÆSENTATION OG GENERELLE PUNKTER1.1 GENERELLE PUNKTER1.2 TRANSPORT OG FORPAKNING1.3 IDENTIFIKATIONSMÆRKE2. – MASKINENS EGENSKABER2.1 NØGLEFAMILIE2.2 TILBEHØR2.3 REDSKABSBAKKE2.4 STRØMKREDS2.5 TEKNISK DATA2.6 MASKINENS HOVEDELEMENTER2.7 KOMPONENTER OG FUNKTIONELLE DELE2.7.1 Udskiftning af fræser og føler(21)2.7.2 Slæ<strong>de</strong>ns blokering efter tilen<strong>de</strong>bringelse af “Y” aksens løb2.7.3 Kæbe (6)2.7.4 Justering af følerens affjedring (11)2.7.5 Justering af slæ<strong>de</strong>ns læng<strong>de</strong>afstand og <strong>de</strong>ns blokering i akse “X” (5 og 4)2.7.6 Støttestang til rørnøgler2.7.7 Fræserens hastighed (17)2.7.8 Display-tastatur (1)2.7.9 Lodret justering af føleren (15)2.7.10 Justering af skæringsstyrken3.- SKÆRING3.1 NØGLESKÆRINGSFUNKTION3.2 NØGLESKÆRING3.2.1 KA-2, KA-3 og KA-4. nøgler3.2.2 KE-1 nøgle.3.2.3 SEA-1 nøgle.3.2.4 OP-WH.P og OP-WY.P nøgler3.2.5 ME-3.P og ME-4.P nøgler3.2.6 Rørnøgler3.2.7 FIC-2 og FIC-3 nøgler3.2.8 WIN-1D, WIN-2D, WIN-3D og WIN-4D. nøgler3.2.9 JIS-4.P nøgle3.2.10 FO-6.P nøgle3.2.11 MCM-10 nøgle.3.2.12 TE-T60 og TE-T80 nøgler4.- VEDLIGEHOLDELSE4.1 UDSKIFTNING AF KÆBENS GRIBERE4.2 GRIBERNES JUSTERING4.2.1 NORMAL justering4.2.2 FIN justering4.3 UDSKIFTNING AF SIKRINGERNE4.4 UDSKIFTNING OG/ELLER STRAMNING AF DRIVREM4.5 UDSKIFTNING AF MOTOR4.6 UDSKIFTNING AF DISPLAY-TASTATUR4.7 UDSKIFTNING AF ELEKTRONISK KORT4.8 UDSKIFTNING AF EFFEKTKORT OG AFBRYDER5.- SIKKERHED6.- BORTSKAFFELSE AF AFFALD6.1 EMBALLAGE6.2 SKÆRESPÅN6.3 MASKINEN7.- TABEL NØGLE-FRÆSER-FØLER-HÆLDNINGSVINKEL-ADAPTER8.- DRIFTANVISNINGdanish
1.- PRÆSENTATION OG GENERELLE PUNKTER1.1 GENERELLE PUNKTER<strong>CAPRI</strong> nøglemaskinen er udviklet i overensstemmelse med EUs gæl<strong>de</strong>n<strong>de</strong> sikkerhedsregler.Sikkerhed for personalet, <strong>de</strong>r håndterer <strong>de</strong>nne type maskine, opnås med et veludvikletprogram for arbejdssikkerhed, gennemførelse af et vedligehol<strong>de</strong>lsesprogram samt overhol<strong>de</strong>lseaf anbefalningerne til sikkerhed i <strong>de</strong>nne brugsanvisning.Selvom maskinen ikke er vanskelig at installere, anbefales <strong>de</strong>t at læse <strong>de</strong>nne brugsanvisningin<strong>de</strong>n apparatet installeres, justeres eller håndteres.Når maskinen forla<strong>de</strong>r vores fabrik er <strong>de</strong>n klar til brug og skal kun kalibreres til <strong>de</strong>redskaber som skal anven<strong>de</strong>s.1.2 TRANSPORT OG FORPAKNINGMaskinen leveres beskyttet med emballageskum i en kraftig papkasse i flg. størrelse:Bred<strong>de</strong> = 520 mm; Læng<strong>de</strong> = 650 mm; Høj<strong>de</strong> = 575 mmMaskinens vægt incl. forpakning = 30 Kg.Når maskinen er pakket ud bør <strong>de</strong>n un<strong>de</strong>rsøges for evt. beskadigelser fra transporten.Såfremt <strong>de</strong>r forekommer problemer, skal transportfirmaet straks informeres og maskinenmå ikke tages i brug før en repræsentant fra transportfirmaet har inspiceret <strong>de</strong>n.I tilfæl<strong>de</strong> af, at maskinen skal flyttes, anbefales <strong>de</strong>t, at <strong>de</strong>n u<strong>de</strong>lukken<strong>de</strong> løftes ved athol<strong>de</strong> fast i maskinens ne<strong>de</strong>rste <strong>de</strong>l og ikke andre ste<strong>de</strong>r.3. Strømafbry<strong>de</strong>r med 3 positioner.4. Transformer.5. Motor.6. Display-tastatur.7. Elektronisk kort.8. Fræser.9. Føler.10. Kæbe.11. Lysdio<strong>de</strong>r til belysning.12. Styrkeføler.Se figur nr. 22.5 TEKNISK DATAMotor: Enkeltfaset 400 W. ,230 V - 50 Hz (Valgfri: enfaset 400W, 110V – 60Hz)Fræser: HSS stål (Valgfri: Hårdt metal )Hastighed: 6.000 og 11.000 omdr. pr. minutKæber: Tosi<strong>de</strong>t kæbe 0 / 45 ºVandring: I tre akser med præcision styreruller.Effektiv bevægelse: X akse = 71 mm; Y akse = 62 mm; Z akse = 40 mmLampe: Lysdio<strong>de</strong>Dimensioner: Bred<strong>de</strong> = 430 mm, Dyb<strong>de</strong> = 385 mm og Høj<strong>de</strong> = 485 mmVægt: 25 Kgdanish1.3 IDENTIFIKATIONSMÆRKE<strong>CAPRI</strong> nøglemakinen har et i<strong>de</strong>ntifikationsmærkesom angiver serie- eller registreringsnummer,fabrikantens navn og adresse, CE mærkesamt fremstillingsår.2. – MASKINENS EGENSKABER<strong>CAPRI</strong> er en nøglemaskine som er meget robust og præcis med mange spæn<strong>de</strong>mulighe<strong>de</strong>rved hjælp af <strong>de</strong>ns kæbe og u<strong>de</strong>n brug af indlægsemne- eller justeringselementer.Maskinen er forsynet med et mo<strong>de</strong>rne kontrolsystem af effekten som forøger præcisionenun<strong>de</strong>r kopiering.2.1 NØGLEFAMILIENøglemaskinen <strong>CAPRI</strong> kan bla. kopiere flg. type nøgler:- Punkt nøgler- Regata nøgler- Rørnøgler- FIC-2 og FIC-3 nøgler- WIN-1D, WIN-2D, WIN-3D og WIN-4D nøgler- JIS-4.P nøgle- FO-6.P nøgle2.2 TILBEHØRMaskinen leveres med brugs- og vedligehol<strong>de</strong>lsestilbehør. Alle disse elementer kanopbevares i maskinens redskabsbakke.- 2 sikringer (un<strong>de</strong>r redskabsbakken)- Indstiksnøglesæt ( 5, 3 og 2.5)- 1 kort indstiksnøgle (1,5)- 2 pla<strong>de</strong>r til stop ved skæring fra nøglespids- 2 nøgler til justering af kæber- 2 tilpasningsled til rørnøgle CHI-1T- Fræser: F-1 og F-13- Føler: T-1 og T-13.2.3 REDSKABSBAKKEApparatet er forsynet med en redskabsbakke som sid<strong>de</strong>r øverst på maskinen. Bakkenkan trækkes ud og lægges direkte på bor<strong>de</strong>t så man får mere plads på <strong>de</strong>n øverste <strong>de</strong>laf maskinen til at lægge nøgler, tilbehør, osv.2.6 MASKINENS HOVEDELEMENTER1.- Display-tastatur2.- Kæbeslæ<strong>de</strong> (akser X – Y)3.- Slæ<strong>de</strong>rnes håndtag, akser x – y4.- Håndtag til blokering af kæbeslæ<strong>de</strong>n, akse x5.- Håndtag til forskydning af slæ<strong>de</strong>n, akse x6.- Kæbe7.- Håndtag til blokering af kæbernes omdrejning8.- Kæbens håndtag9.- Hol<strong>de</strong>hoved (akse Z)10.- Håndtag til åbning/lukning af hol<strong>de</strong>hoved, akse z11.- Følerens hol<strong>de</strong>hoved12.- Bakke til nøgler, tilbehør, osv.13.- Fræser14.- Føler15.- Justeringsknap til regulering af følerens skæredyb<strong>de</strong>16.- Strømafbry<strong>de</strong>r17.- Motors hastighedsvælger (2 hastighe<strong>de</strong>r)18.- Lysdio<strong>de</strong>r19.- Spånbakke20.- Opbevaringsrum til redskaber21.- Knap til blokering af fræserenSe figur nr. 32.7 KOMPONENTER OG FUNKTIONELLE DELE2.7.1 Udskiftning af fræser og føler (21)For at løsne fræseren bør man trykke på knappen til blokering af fræseren samtidig medat man drejer redskabsbakken rundt.Efter at man har taget fræseren ud indsættes en ny ved at fastspæn<strong>de</strong> <strong>de</strong>n på redskabsbakkenbakkenog sikre sig at <strong>de</strong>n rører bakkens bund.Føleren udskiftes på samme må<strong>de</strong>. Den eneste forskel man bør være opmærksom på erat føleren altid er blokeret internt.2.7.2 Slæ<strong>de</strong>ns blokering efter tilen<strong>de</strong>bringelse af “Y”aksens løbFor at forhindre at slæ<strong>de</strong>n flytter sig i “Y” aksens løb mens nøgler fastspæn<strong>de</strong>s i kæben,kan slæ<strong>de</strong>n blokeres i <strong>de</strong>n retning.Denne blokering kan igangsættes blot ved at flytte slæ<strong>de</strong>n frem til <strong>de</strong>ns stoppunkt iretning mod duplikatoren.Blokeringen afbry<strong>de</strong>s ved at skubbe slæ<strong>de</strong>n frem.2.7.3 Kæbe (6)<strong>CAPRI</strong> nøglemaskinens kæber har et præstationsniveau som er højere end andre maskinerssom fin<strong>de</strong>s på marke<strong>de</strong>t da <strong>de</strong>n har to uafhængige to si<strong>de</strong>t kæber. Kæberne kanogså blokeres i enhver position mellem 45º 0º og -45º.2.4 STRØMKREDSFølgen<strong>de</strong> er hove<strong>de</strong>lementerne i strømkredsen og <strong>de</strong> elektroniske <strong>de</strong>le:1. Stikkontakt.2. Forbin<strong>de</strong>lsespla<strong>de</strong>.2.7.4 Justering af følerens affjedring (11)Føleren kan justeres på to forskellige må<strong>de</strong>r afhængig af arbej<strong>de</strong>t som skal udføres:- Føler med affjedring. En føler med affjedring bruges kun til skæring af punktnøgler.- Blokeret føler. Føleren blokeres når man skal kopiere med fremskudt slæ<strong>de</strong> og
normalt når nøgler af regata typen skal skæres.For at starte eller afbry<strong>de</strong> følerens affjedringsfunktion skal man blot dreje følerens affjedringsknap180º (en halv gang rundt).Når følerens affjedringsfunktion aktiveres, anbringes følerens spids lidt un<strong>de</strong>r <strong>de</strong>ns justeringspositioni forhold til fræseren. Med føleren i <strong>de</strong>nne position kan man forsigtigindsætte <strong>de</strong>n i hullet på originalnøglens hoved in<strong>de</strong>n fræseren begyn<strong>de</strong>r at skære inøgleemnet . På <strong>de</strong>n må<strong>de</strong> undgår man at slæ<strong>de</strong>n vibrerer eller rykker sig.På display-tastaturet fin<strong>de</strong>s en kontrollampe som angiver om føleren affjedringsfunktioner slået til eller om føleren er blokeret. Hvis kontrollampen er tændt bety<strong>de</strong>r<strong>de</strong>t at affjedringsfunktionen er tilsluttet. Hvis kontrollampen <strong>de</strong>rimod er slukket vil <strong>de</strong>tbety<strong>de</strong> at føleren er blokeret.2.7.5 Slæ<strong>de</strong>ns affjedring og blokering i akse “X”(5 og 4)Det anbefales at anven<strong>de</strong> slæ<strong>de</strong>ns affjedringssystem i akse “X” ved si<strong>de</strong>fræsning afregata nøgler.Det anbefales at blokere slæ<strong>de</strong>n i akse “X” til fræsninger eller til udførelsen af punkteri lige linje.2.7.6 Støttestang til rørnøgler<strong>CAPRI</strong> nøglemaskinen er forsynet med en udtagelig støttestang som sid<strong>de</strong>r øverst påmaskinens venstre si<strong>de</strong> og som gør arbej<strong>de</strong>t lettere når man skal skære rørnøgler, regatanøgler, osv., da stangen har et støttepunkt til hån<strong>de</strong>n som man bruger til at flytteslæ<strong>de</strong>rne med.2.7.7 Fræserens hastighed (17)Maskinen er udstyret med en hastighedsvælger som er placeret på apparatets højresi<strong>de</strong> og som anven<strong>de</strong>s til at udvælge fræserens omdrejningshastighed. Generelt kanman sige at omdrejningshastighe<strong>de</strong>n afhænger af matrialet som skal skæres:- Position I: Skæring med en fræser af HSS stål (6.000 omdr. pr. minut )- Position II: Skæring med en fræser af HÅRDT METAL (11.000 omdr. pr. minut )- Position O: Standsning af fræseren.2.7.8 Display-tastatur (1)EFFEKTMÅLER.Måleren viser <strong>de</strong>n optimale effekt un<strong>de</strong>r skæringen.BEMÆRK: Effektmåleren er også forsynet med et lydsignal som kan høres når manhar opnået <strong>de</strong>n optimale effekt un<strong>de</strong>r skæringen. Lydsignalet kan kobles til og fra vedsamtidigt at trykke på MODETASTEN og TÆND/SLUKTASTEN.2.7.9 Lodret justering af føleren (15)Hver gang man skifter fræser-føler, bør man udføre en lodret justering af føleren.For at kunne anven<strong>de</strong> følerens elektroniske justeringssystem skal display-tastaturetvære tændt (når <strong>de</strong>t er tændt lyser en grøn kontrollampe placeret ved si<strong>de</strong>n af TÆND/SLUKTASTEN). Når display-tastaturet er tændt, kan man igangsætte/afbry<strong>de</strong> følerenselektroniske justeringsfunktion ved at trykke på MODETASTEN.Følerens lodrette justering gøres på følgen<strong>de</strong> må<strong>de</strong>:• Fræseren og føleren spæn<strong>de</strong>s på hver sin hol<strong>de</strong>r. Sørg for at <strong>de</strong> sid<strong>de</strong>r godt fast vedat skubbe <strong>de</strong>m op til stoppunktet.• Spænd to ens nøgler på maskinens kæber.• Afbryd følerens affjedringsfunktion (føleren blokeres).• Sænk hol<strong>de</strong>hove<strong>de</strong>t indtil fræseren og føleren støtter mod nøglerne som er spændtpå kæberne. Følgen<strong>de</strong> tre ting kan ske:VENSTRE BLÅ KONTROLLAMPE. Tæn<strong>de</strong>s kun <strong>de</strong>n venstre kontrollampe, bety<strong>de</strong>r <strong>de</strong>tat føleren er i kontakt med nøglen men ikke fræseren. Drej følerens justeringshjul modvenstre til <strong>de</strong> to justeringskontrollamper tæn<strong>de</strong>s.HØJRE BLÅ KONTROLLAMPE. Tæn<strong>de</strong>s kun <strong>de</strong>n højre kontrollampe, bety<strong>de</strong>r <strong>de</strong>t atfræseren er i kontakt med nøglen men ikke føleren. Drej følerens justeringshjul modhøjre til <strong>de</strong> to justeringskontrollamper tæn<strong>de</strong>s.VENSTRE OG HØJRE BLÅ KONTROLLAMPE. Tæn<strong>de</strong>s begge kontrollamper, bety<strong>de</strong>r<strong>de</strong>t at bå<strong>de</strong> fræseren og føleren er i kontakt med hver sin nøgle. Dette er ensbety<strong>de</strong>n<strong>de</strong>med at føleren er justeret.BEMÆRK: Når føleren justeres bør man være opmærksom på hvilken type nøgle <strong>de</strong>rskal skæres. Drejer <strong>de</strong>t sig om en REGATA nøgle, bør hol<strong>de</strong>hove<strong>de</strong>t ikke presses forhårdt ned (så effektmålerens kontrollamper ikke tæn<strong>de</strong>s). Er <strong>de</strong>r tale om en PUNKTnøgle, skal begge justeringssystemets blå kontrollamper være tændte, samtidigt medat effektmåleren viser <strong>de</strong>n optimale effekt til skæringen af punkt nøgler (ved at trykkelet på hol<strong>de</strong>hove<strong>de</strong>ts håndtag).2.7.10 Justering af skæringsstyrkenTÆND/SLUKTASTEN.Trykker man på <strong>de</strong>nne tast, igangsættes maskinen. En grøn kontrollampe ved si<strong>de</strong>n aftasten tæn<strong>de</strong>s. Trykker man på tasten igen, skifter man til ”STAND-BY”. En rød kontrollampeved si<strong>de</strong>n af tasten tæn<strong>de</strong>s.LEDTASTEN.Trykker man på <strong>de</strong>nne tast, tæn<strong>de</strong>s lysdio<strong>de</strong>rne (hvis <strong>de</strong> er slukke<strong>de</strong>) eller <strong>de</strong> slukkes(hvis <strong>de</strong> er tændte). Denne funktion fungerer uafhængig af justeringsfunktionen.AFFJEDRING.Hvis <strong>de</strong>n blå kontrollampe er tændt, bety<strong>de</strong>r <strong>de</strong>t at følerens affjedringssystem erIGANGSAT. Hvis <strong>de</strong>n blå kontrollampe er slukket, bety<strong>de</strong>r <strong>de</strong>t at føleren er BLOKERET(affjedringsfunktionen er slukket).MODETASTEN.Denne funktion anven<strong>de</strong>s til at starte eller slukke følerens lodrette justeringssystem.Kontrollamper til FØLERENS JUSTERING.Venstre kontrollampe tæn<strong>de</strong>s når føleren rører nøglen. Højre kontrollampe tæn<strong>de</strong>s nårfræseren rører nøglen.<strong>CAPRI</strong> nøglemaskinen er udstyret med en revolutionæren<strong>de</strong> kontrolsystem som justererskæringsstyrken. Det drejer sig om et patenteret system som angiver <strong>de</strong>n optimalestyrke som man bør anven<strong>de</strong> på hol<strong>de</strong>hove<strong>de</strong>ts håndtag un<strong>de</strong>r kopieringen af PUNKTnøgler. Systemet har to kontrolanordninger:Visuel indikator. Den optimale skæringsstyrke opnås når lyslinjen når <strong>de</strong>n hvi<strong>de</strong>pil.Lydsignal. Når lyslinjen når <strong>de</strong>n hvi<strong>de</strong> pil vil man kunne høre et fløjt. Dette lydsignalkan slås til eller fra ved at trykke på MODE- og TÆND/SLUKTASTEN samtidigt.Dette system som regulerer nøglekopieringens skæringsstyrke, gør <strong>de</strong>t muligt at skærePUNKTnøgler med stor nøjagtighed. Man vil kunne kopiere nøglens huller med nøjagtig<strong>de</strong>n samme styrke som føleren er blevet justeret til. På <strong>de</strong>n må<strong>de</strong> opnår man en maksimalpræcision når PUNKT nøgler skal kopieres.3.- SKÆRING3.1 NØGLESKÆRINGSFUNKTION• Tænd for maskinen ved at trykke på kontakten som sid<strong>de</strong>r på bagsi<strong>de</strong>n af apparatet.• Tænd for lampen ved at trykke på knappen som sid<strong>de</strong>r på display-tastaturet såarbejdsste<strong>de</strong>t belyses.• Ved hjælp af <strong>de</strong>nne brugsvejlednings medfølgen<strong>de</strong> tabel, vælger man <strong>de</strong>n nødvendigefræser og føler til skæring af en nøgle.• Udskift fræser og føler.• Slæ<strong>de</strong>n blokeres ved “Y” aksens stop.• Indsæt originalnøglen i venstre kæbe og nøgleemnet i højre kæbe. Når nøglernestrammes på kæbesi<strong>de</strong>rne bør man være opmærksom på følgen<strong>de</strong>:- NØGLEBRYST. På nogle nøgler kan nøglebrystet sid<strong>de</strong> øverst (Figur 4.A), ellerlængere ne<strong>de</strong> mod spidsen (Figur 4.B).- ADAPTER. På nogle nøglemo<strong>de</strong>ller kan <strong>de</strong>t være nødvendigt at bruge en adapter.- HÆLDNING. På nogle nøglemo<strong>de</strong>ller kan tæn<strong>de</strong>rne have en bestemt hældnings-danish
vinkel som gør <strong>de</strong>t nødvendigt at dreje kæben.• Føleren dyb<strong>de</strong>justeres.• Følgen<strong>de</strong> funktioner justeres:- FØLER: Igangsæt eller afbryd følerens affjedringssystem alt efter nøglemo<strong>de</strong>llensom skal skæres.- SLÆDE: Alt efter nøglemo<strong>de</strong>llen kan <strong>de</strong>t være en god i<strong>de</strong> at igangsætte slæ<strong>de</strong>nsaffjedringssystem eller blokere slæ<strong>de</strong>n i “X” retningen.- STØTTESTANG: Alt efter nøgletypen kan <strong>de</strong>t være nyttigt at anven<strong>de</strong> støttestangennår <strong>de</strong>r arbej<strong>de</strong>s med rørnøgler.• Igangsæt fræseren ved at vælge en af <strong>de</strong> to omdrejningshastighe<strong>de</strong>r.• Nøgleskæringen påbegyn<strong>de</strong>s. Hvis <strong>de</strong>t drejer sig om en punktnøgle kan man benyttesig af funktionen som justerer skæringsstyrken.3.2 NØGLESKÆRING3.2.1 KA-2, KA-3 og KA-4 nøgler.• Alt efter nøgletypen anven<strong>de</strong>r man forskellige fræsere/følere. Se tabellen.• Nøglen strammes på kæben ved nøglebrystet.• Afhængig af nøgletypen skal kæberne drejes for at opnå <strong>de</strong>n nødvendige vinkel. Setabellen.• Følerens affjedringssystem igangsættes.• For at opnå en højere nøjagtighed i skæringen bør man anven<strong>de</strong> funktionen somjusterer skæringsstyrken.• BEMÆRK: Den skåre<strong>de</strong> <strong>de</strong>l af KA-3 nøglen bør altid være på <strong>de</strong>n ne<strong>de</strong>rste <strong>de</strong>l afkæben.• BEMÆRK: Den skåre<strong>de</strong> <strong>de</strong>l af KA-2 nøglen bør altid være på <strong>de</strong>n øverste <strong>de</strong>l afkæben.Se Figur nr. 53.2.2 KE-1 nøgle.• Anvend fræser-føler: F-1 / P-1.• Nøglen strammes på kæben ved nøglebrystet men ved at indsætte <strong>de</strong>n på bagsi<strong>de</strong>n.• Kæbesi<strong>de</strong>rne bør have en hældningsvinkel på 5º.• Igangsæt følerens affjedringssystem.• For at opnå en højere nøjagtighed i skæringen bør man anven<strong>de</strong> funktionen somjusterer skæringsstyrken.• BEMÆRK: Den skåre<strong>de</strong> <strong>de</strong>l af KE-1 nøglen bør altid være på <strong>de</strong>n øverste <strong>de</strong>l afkæben.• BEMÆRK: Til skæring af nøglebla<strong>de</strong>t bør man anven<strong>de</strong> <strong>de</strong>n <strong>de</strong>r tilhøren<strong>de</strong> adapter.Se Figur nr. 6- Nøglen indsættes i adapteren.- Samtidig med at adapteren spæn<strong>de</strong>s fast på kæben fastspæn<strong>de</strong>s også adapteren.• Føleren blokeres (afbryd affjedringsfunktionen).• BEMÆRK: Efter lodret justering af føleren bør man sænke <strong>de</strong>n en lille smule vedat dreje justeringshjulet 5 hakker frem mod højre. Føleren indsættes i nøglekammensrille og maskinens hol<strong>de</strong>hoved blokeres. Derefter løftes føleren en smule så <strong>de</strong>n ikketrækker nøglen med.• BEMÆRK: Det anbefales at bruge slæ<strong>de</strong>ns affjedringsfunktion.Se Figur nr. 93.2.6 Rørnøgler• Anvend fræser-føler: F-8 / P-8.• Nøglen strammes på kæbens “V” akse.• Følerens affjedringsfunktion igangsættes.• Skæringen er nemmere at udføre hvis man støtter hån<strong>de</strong>n som igangsætter slæ<strong>de</strong>npå støttestangen til rørnøgler.Se Figur nr. 103.2.7 FIC-2 og FIC-3 nøgler• Anvend fræser-føler: F-11 / P-11.• Nøglen strammes på kæben ved at støtte <strong>de</strong>n på bun<strong>de</strong>n og skubbe <strong>de</strong>n mod kæbensforrige si<strong>de</strong>.• Føleren blokeres (afbryd affjedringsfunktionen).• Maskinens hol<strong>de</strong>hoved blokeres i en sådan høj<strong>de</strong> at fræseren passerer kæbenu<strong>de</strong>n at berøre <strong>de</strong>n.• Nøgleemnets to øverste si<strong>de</strong>r skæres.• Drej nøglerne og fjern graterne så man opnår en korrekt placering og stramning afnøglen in<strong>de</strong>n man begyn<strong>de</strong>r skæringen af nøglens resteren<strong>de</strong> to si<strong>de</strong>r.Se Figur nr. 113.2.8 WIN-1D, WIN-2D, WIN-3D og WIN-4D nøgler.• Anvend fræser-føler: F-15 / P-15.• Stram to nøgleemner på kæben og indstil <strong>de</strong>refter føleren.• Stram originalnøglen med tæn<strong>de</strong>rne vendt opad (som vist på figuren).• Føleren blokeres (afbryd affjedringsfunktionen).• Føleren indsættes forsigtigt i et af <strong>de</strong> to punkter og maskinens hol<strong>de</strong>hoved blokeresi <strong>de</strong>n høj<strong>de</strong>.• Skæringen kan påbegyn<strong>de</strong>.Se Figur nr. 12danish3.2.3 SEA-1 nøgle.• Anvend fræser-føler: F-3 / P-3.• Nøglen strammes på kæben ved nøglebrystet.• Føleren blokeres (afbryd affjedringsfunktionen).• BEMÆRK: Efter lodret justering af føleren bør man sænke <strong>de</strong>n en lille smule vedat dreje justeringshjulet 5 hakker frem mod højre. Føleren indsættes i nøglekammensrille og maskinens hoved blokeres. Derefter løftes føleren en smule så <strong>de</strong>n ikke trækkernøglen med.• BEMÆRK: Gå ind på rillens midte u<strong>de</strong>n at røre si<strong>de</strong>rne og an<strong>de</strong>n gang går man indpå højre si<strong>de</strong> og ud igen på venstre si<strong>de</strong> u<strong>de</strong>n at trykke (kun ved at hol<strong>de</strong> let på føleren).• BEMÆRK: Til skæring af nøglebla<strong>de</strong>t bør man anven<strong>de</strong> fræser-føler F-1 / P-1.Nøglen strammes på kæben ved nøglebrystet. Følerens affjedringssystem igangsættesog funktionen som justerer skæringsstyrken anven<strong>de</strong>s.Se Figur. nr. 73.2.4 OP-WH.P og OP-WY.P nøgler• Anvend fræser-føler: F-11 / P-11.• Nøglen strammes på kæben ved nøglebrystet.• Føleren blokeres (afbryd affjedringsfunktionen).• BEMÆRK: Efter lodret justering af føleren bør man sænke <strong>de</strong>n en lille smule vedat dreje justeringshjulet 5 hakker frem mod højre. Føleren indsættes i nøglekammensrille og maskinens hoved blokeres. Derefter løftes føleren en smule så <strong>de</strong>n ikke trækkernøglen med.• BEMÆRK: Det anbefales at anven<strong>de</strong> slæ<strong>de</strong>ns affjedringsfunktion.• BEMÆRK: Det anbefales at udføre en slibning og <strong>de</strong>refter en afslutten<strong>de</strong> gennemganglangs hele nøglens overfla<strong>de</strong>. Dette gøres i nedadgåen<strong>de</strong> retning (fra spidsen ogop til nøglens hoved).3.2.9 JIS-4.P nøgle• Anvend fræser-føler: F-11 / P-11.• Nøglen strammes på kæben ved at anven<strong>de</strong> en adapter AD-MJ.- Adaptateren anbringes på kæben.- Indsæt nøglen i adapteren til <strong>de</strong>n rører <strong>de</strong>n drejen<strong>de</strong> si<strong>de</strong>. I <strong>de</strong>nne position strammesnøglen på <strong>de</strong>ns adapter.• Føleren blokeres (afbryd affjedringsfunktionen).Se Figur nr. 133.2.10 FO-6.P nøgle• Anvend fræser-føler: F-22 / P-22.• Nøglen strammes på kæben ved at anven<strong>de</strong> <strong>de</strong>ns <strong>de</strong>rtil høren<strong>de</strong> adapter.- Placer og stram adapterne på kæben.- Når man anbringer nøglen bør man sørge for at <strong>de</strong>n ligger helt flat så beggeskæringer er ens.• Føleren blokeres (afbryd affjedringsfunktionen).• Indsæt føleren i et af bogstavernes rille. Maskinens hol<strong>de</strong>hoved blokeres og følerenhæves en smule så <strong>de</strong>n ikke stød<strong>de</strong>r imod adapteren.• Skæringen kan påbegyn<strong>de</strong>.Se Figur nr. 14Aflæsning af originalnøglens ko<strong>de</strong>• Originalnøglen har 6 kopieringspositioner og som betegnes med bogstaverne: A, B,C, D, E og F, som anvist på følgen<strong>de</strong> figur• Hver kopieringsposition har 4 forskellige kombinationsmulighe<strong>de</strong>r (angivet mednumre):Se Figur nr.. 83.2.5 ME-3.P og ME-4.P nøgler• Anvend fræser-føler: F-11 / P-11.• Nøglen strammes på kæben ved at anven<strong>de</strong> en adapter AD-MM2.- Adaptateren anbringes på kæben.
NORMAL justeringFIN justering4.2.1 NORMAL justeringDet drejer sig om en hurtig og enkel fremgangsmå<strong>de</strong> hvormed man opnår en acceptabeljustering som muliggør nøglekopieringer med en vis præcesion.Denne justering udføres på følgen<strong>de</strong> må<strong>de</strong>:1) Spænd <strong>de</strong> to justeringsakser fast på hver sin redsabshol<strong>de</strong>r så <strong>de</strong> rører bun<strong>de</strong>nin<strong>de</strong> på <strong>de</strong>nne samtidigt med at aksernes koniske <strong>de</strong>l sid<strong>de</strong>r udvendigt.1 2 3 4• Position nr.1, angiver at <strong>de</strong>r ikke må kopieres. Position nr. 2 angiver at <strong>de</strong>r er enlille skæring på nøglen som hvis <strong>de</strong>n er større hører ind un<strong>de</strong>r position nr. 3. Position nr.4 angiver <strong>de</strong>n største skæring på nøglen.• Derefter tager man nøglen og markerer kombinationerne i hver enkel af <strong>de</strong> 6 kopieringspositionersom <strong>de</strong>t kan ses i følgen<strong>de</strong> eksempel:POSITION A B C D E FKOMBINATION 3 4 1 2 4 2BEMÆRK: Kombinationens nummerserie er nøglens ko<strong>de</strong>.3.2.11 MCM-10. nøgle• Speciel stramning på kæben. Se figuren.Se Figur. nr.152) Den faste venstre griber på kæbens højre si<strong>de</strong> og <strong>de</strong>n faste højre griber på kæbensvenstre si<strong>de</strong> kan ikke justeres da <strong>de</strong> sid<strong>de</strong>r fast ved hjælp af en stift. Man skal <strong>de</strong>rformontere <strong>de</strong>m ved at føre <strong>de</strong>m igennem disse og <strong>de</strong>refter spæn<strong>de</strong> <strong>de</strong>m fast med hver sinskrue.3.2.12 TE-T60 og TE-T80 nøgler• En speciel stramning på kæben er nødvendig. TE-T60 nøglen strammes som angivetpå figuren.• TE-T80 nøglen er speciel da <strong>de</strong>n for at kunne maskinbearbej<strong>de</strong> <strong>de</strong>ns venstre si<strong>de</strong>,bør strammes på kæben ligesom TE-T60 nøglen og for at kunne maskinbearbej<strong>de</strong> <strong>de</strong>nshøjre si<strong>de</strong> skal <strong>de</strong>n strammes på bagsi<strong>de</strong>n af kæben (ligesom med MCM-10 nøglen).Se Figur nr. 164.- VEDLIGEHOLDELSEFølgen<strong>de</strong> krav skal opfyl<strong>de</strong>s ved alle vedligehol<strong>de</strong>lsesmanøvrer:1. Foretag aldrig vedligehol<strong>de</strong>lse mens maskinen er tændt.2. Maskinens stik skal tages ud.3. Anvisningerne i <strong>de</strong>nne brugsanvisning skal overhol<strong>de</strong>s.4. Der må u<strong>de</strong>lukken<strong>de</strong> kun bruges originale reserve<strong>de</strong>le.3) Da <strong>de</strong>r for hvert par gribere er en med en fast position, bør man justere <strong>de</strong>n an<strong>de</strong>ni forhold til <strong>de</strong>n som har <strong>de</strong>n faste position.4) Skruerne til griberen som skal justeres, sættes på u<strong>de</strong>n at skrue <strong>de</strong>m fast så griberenkan bevæges med hån<strong>de</strong>n dog u<strong>de</strong>n at <strong>de</strong>n kan løfte sig fra overfla<strong>de</strong>n som <strong>de</strong>nstøtter sig til.4.1 UDSKIFTNING AF KÆBENS GRIBERE<strong>CAPRI</strong> nøglemaskinens kæbe, er forsynet med tre par gribere (venstre fast griber, højrefast griber og en bevægelig griber). Hvis en af <strong>de</strong>m skulle gå i stykker, kan <strong>de</strong>n udskiftesmed en ny.For at udskifte venstre fastsid<strong>de</strong>n<strong>de</strong> griber (A) eller højre fastsid<strong>de</strong>n<strong>de</strong> griber (B), skalman blot løsne <strong>de</strong> to skruer som hol<strong>de</strong>r <strong>de</strong>m fast og tage <strong>de</strong>n ud ved at trække <strong>de</strong>m op.For at montere en ny griber, gør man <strong>de</strong>t i omvendt rækkefølge.For at udskifte <strong>de</strong>n bevægelige griber (C) gør man følgen<strong>de</strong>:1) Kæbenhåndtagets sorte plastikskærm tages ud ved hjælp af en hobbykniv ellerlign.2) Mens man blokerer kontramøtrikken med en fastnøgle størrelse 14, indsættes enindstiksnøgle størrelse 5 gennem <strong>de</strong>t åbne mellemrum i kæbens håndtag og skruer <strong>de</strong>nløs.3) Kæben justeres så <strong>de</strong>n har en hældningsvinkel på 45º, og med hån<strong>de</strong>n drejesspin<strong>de</strong>len rundt og tages ud gennem en af si<strong>de</strong>rne. Når spin<strong>de</strong>len er taget ud er <strong>de</strong>nbevægelige griber frigjort og kan fjernes.4) En ny bevægelig griber monteres i omvændt rækkefølge.5) Griberen justeres på følgen<strong>de</strong> må<strong>de</strong>:5.1) Følerens justeringsakse indsættes i griberens åbning nr. 1.5.2) Man bør sikre sig at følerens justeringsakse passer ind i gribrens åbning nr. 1.5.3) Løft maskinens hol<strong>de</strong>hoved og gør <strong>de</strong>t samme i griberens åbning nr. 2.5.4) Forrige punkt gentages så mange gange som <strong>de</strong>t måtte være nødvendig indtiljusteringsakserne gli<strong>de</strong>r ind i åbning nr. 1 og nr. 2 u<strong>de</strong>n at forcere.danishBEMÆRK: Når vesntre fastsid<strong>de</strong>n<strong>de</strong> griber eller højre fastsid<strong>de</strong>n<strong>de</strong> griber skal skiftesud, bør man altid justere <strong>de</strong> to nye gribere som <strong>de</strong> gamle er blevet udskiftet med. Hvis<strong>de</strong>n bevægelige griber <strong>de</strong>rimod bliver skiftet ud, er <strong>de</strong>t ikke nødvendigt at justere <strong>de</strong>nnye griber.Se Figur nr. 174.2 GRIBERNES JUSTERINGNår venstre eller højre faste griber udskiftes, skal man altid justere <strong>de</strong> to nye griberesom <strong>de</strong> gamle er blevet udskiftet med. Hvis <strong>de</strong>n bevægelige griber <strong>de</strong>rimod bliver skiftetud, er <strong>de</strong>t ikke nødvendigt at justere <strong>de</strong>n nye griber.Justeringen af griberne kan udføres på to forskellige må<strong>de</strong>r:5.5) Med <strong>de</strong> to justeringsakser i åbningerne nr. 1, blokeres hol<strong>de</strong>hove<strong>de</strong>t og skrueB strammes let.5.6) Med <strong>de</strong> to justeringsakser i åbningerne nr. 2, blokeres hol<strong>de</strong>hove<strong>de</strong>t og skrueA strammes let.5.7) Gentag <strong>de</strong>t beskrevne i forrige punkt og stram skuerne A og B fast.
5.8) Efter endt justering og ved hjælp af en kort indstikningsnøgle 1,5, strammes <strong>de</strong>to skruer som sid<strong>de</strong>r mellem kæbens håndtag og griberen som er blevet justeret.På <strong>de</strong>nne må<strong>de</strong> sikre man sig at fastgørelsen af griberen som er blevet justeret,får en højere konsistens.4.2.2 FIN justeringDenne form for justering kræver en vis færdighed men til gengæld opnår man også enmeget mere nøjagtig justering af griberne.Denne justering udføres på følgen<strong>de</strong> må<strong>de</strong>:1) Den faste venstre griber på kæbens højre si<strong>de</strong> og <strong>de</strong>n faste højre griber på kæbensvenstre si<strong>de</strong> kan ikke justeres da <strong>de</strong> sid<strong>de</strong>r fast ved hjælp af en stift. Man skal <strong>de</strong>rformontere <strong>de</strong>m ved at føre <strong>de</strong>m igennem disse og <strong>de</strong>refter spæn<strong>de</strong> <strong>de</strong>m fast med hver sinskrue.10) Anbring redskabet som er tilpasset med gribrens an<strong>de</strong>n spæn<strong>de</strong>skrue og gentagsamme fremgangsmå<strong>de</strong>.11) Man bør sikre sig at griberne er justere<strong>de</strong> i disse to positioner (overfor spæn<strong>de</strong>skruerne)og genjustere griberens position hvis <strong>de</strong>t skulle være nødvendig ved at spæn<strong>de</strong>passtiften forsigtigt.12) Efter endt justering skal griberens skruer spæn<strong>de</strong>s or<strong>de</strong>ntligt fast.13) Til sidst spæn<strong>de</strong>s griberens to passtifter. På <strong>de</strong>n må<strong>de</strong> sikre man sig at fastgørelsenaf griberen som er blevet justeret, før en højere konsistens.2) Da <strong>de</strong>r for hvert par gribere er en med en fast position, bør man justere <strong>de</strong>n an<strong>de</strong>ni forhold til <strong>de</strong>n som har <strong>de</strong>n faste position.3) Skruerne til griberen som skal justeres, sættes på u<strong>de</strong>n at skrue <strong>de</strong>m fast så griberenkan bevæges med hån<strong>de</strong>n dog u<strong>de</strong>n at <strong>de</strong>n kan løfte sig fra overfla<strong>de</strong>n som <strong>de</strong>nstøtter sig til.4.3 UDSKIFTNING AF SIKRINGERNEHvis maskinen ikke tæn<strong>de</strong>r når man trykker på startknappen, bør man efterse sikringerne.Dette gøres på følgen<strong>de</strong> må<strong>de</strong>:1) Sluk for maskinen og træk stikket ud.2) Tag sikringerne ud som sid<strong>de</strong>r ved si<strong>de</strong>n af hovedkontakten.3) Check (brug evt. en tester) om en af sikringerne er gået og skulle <strong>de</strong>tte være tilfæl<strong>de</strong>tså skift <strong>de</strong>n ud med en ny af samme type og værdi.danish4) Ved hjælp af en kort indstikningsnøgle 1,5 drejer man griberens to reguleringsskuer1 gang rundt (<strong>de</strong> to skruer som sid<strong>de</strong>r mellem kæbens håndtag og griberen somskal justeres).5) Derefter monteres fræser-føler på redskabshol<strong>de</strong>ren men omvendt (med skærespidsernemod hol<strong>de</strong>rens indre). Maskinens hol<strong>de</strong>hoved sænkes og blokeres i en høj<strong>de</strong>så redskaberne er i berøring med gribernes si<strong>de</strong>r.6) Følerens elektroniske justeringssystem igangsættes.7) Støt <strong>de</strong>n en<strong>de</strong> af griberen som er fastspændt (<strong>de</strong>n som har en fast position) modredskabets si<strong>de</strong>. Med hån<strong>de</strong>n skubber man griberen som justeres i retningen af kæbenshåndtag og samtidig med at man fortsætter med at trykke griberen ind i <strong>de</strong>n retning,skubber man <strong>de</strong>ns forreste <strong>de</strong>l ind indtil <strong>de</strong>n også rører si<strong>de</strong>n af <strong>de</strong>ns <strong>de</strong>rtil høren<strong>de</strong>redskab. I <strong>de</strong>nne position,skrues griberens skruer løst på. Kontrollampen til følerenselektroniske justeringssystem lyser når redskaberne er i berøring med med hver singriber.4.4 UDSKIFTNING OG/ELLER STRAMNING AF DRIVREMSkal drivremmen strammes eller udskiftes, bør man gøre følgen<strong>de</strong>:1) Sluk for maskinen og træk stikket ud.2) De 4 skruer (5) som hol<strong>de</strong>r beskyttelsesdækslet fast løsnes og tages ud. Skruerneer placeret på højre, venstre, øverst og på bagsi<strong>de</strong>n af dækslet. For at kunne tage beskyttelsesdæksletud skal man for in<strong>de</strong>n trykke fræsrens blokeringsstang helt ned (E) til<strong>de</strong>ts stoppunkt.3) De 4 skruer (6) som hol<strong>de</strong>r motoren fast løsnes u<strong>de</strong>n dog at tage <strong>de</strong>m helt ud.4) Kontramøtrikkens (7) 2 skruer løsnes en smule.Stramning: Ved at dreje <strong>de</strong> to spæn<strong>de</strong>skruer (8), flytter motoren sig mod <strong>de</strong>n bagerste<strong>de</strong>l af maskinen. Når man har opnået <strong>de</strong>n ønske<strong>de</strong> stramning af drivremmen,spæn<strong>de</strong>s <strong>de</strong> to kontamøtrikker (7) og skruerne (6) som hol<strong>de</strong>r motoren fastpå igen.Udskiftning: Drivremmens 2 spæn<strong>de</strong>skruer (8) løsnes en smule. Den brugte drivremtages ud og udskiftes med en ny. Ved at dreje <strong>de</strong> to spæn<strong>de</strong>skruer (8), flyttermotoren sig mod <strong>de</strong>n bagerste <strong>de</strong>l af maskinen. Når man har opnået <strong>de</strong>n ønske<strong>de</strong>stramning af drivremmen, spæn<strong>de</strong>s <strong>de</strong> to kontramøtrikker (7) og skruerne (6) somhol<strong>de</strong>r motoren fast på igen.5) Hol<strong>de</strong>hove<strong>de</strong>t s beskyttelsesdæksel påmonteres og spæn<strong>de</strong>s på igen.Se Figur nr. 184.5 UDSKIFTNING AF MOTORMotoren udskiftes på følgen<strong>de</strong> må<strong>de</strong>:1) Sluk for maskinen ved at trykke på kontakten og træk stikket ud.2) De 4 skruer (5) som hol<strong>de</strong>r hol<strong>de</strong>hove<strong>de</strong>ts beskyttelsesskærm fast løsnes og tagesud. Skruerne er placeret på højre, venstre, øverst og på bagsi<strong>de</strong>n af dækslet. For at kunnetage beskyttelsesskærmen ud, skal man for in<strong>de</strong>n trykke fræserens blokeringsstang(E) helt ned til <strong>de</strong>ts stoppunkt.3) De 6 skruer (9) som hol<strong>de</strong>r motorens beskyttelsesskærm (F) fast, løsnes og tagesud.4) Remmen (G) tages ud.5) Motorens el-ledninger trækkes ud.6) De 4 skruer (6) som hol<strong>de</strong>r motoren fast skrues af.7) Motoren tages ud.8) Med en skruetrækker blokerer man motorens akse som sid<strong>de</strong>r i <strong>de</strong>ns ne<strong>de</strong>rste <strong>de</strong>log remskiven (H) drejes rundt manuelt og tages ud (drejes mod venstre).9) De 4 skruer (10) som hol<strong>de</strong>r motorens skærm og un<strong>de</strong>rlag fast løsnes og tages ud.10) Monteringen af en ny motor gøres på samme må<strong>de</strong> men i omvendt rækkefølge.8) Den bevægelige griber adskilles fra griberen som justeres ved at dreje på kæbenshåndtag.9) Redskabet placeres på linje med et af kæbens spæn<strong>de</strong>skruer og i <strong>de</strong>nne positionstøttes redskabet mod gribren som er spændt (<strong>de</strong>n faste griber). Mens man forsigtigfasthol<strong>de</strong>r trykket mellem redskabet og griberen som er spændt (<strong>de</strong>n faste griber),spæn<strong>de</strong>s skruerne, som sid<strong>de</strong>r på linje med redskabet og giberens passtift, forsigtigtfast. På et tidspunkt tæn<strong>de</strong>s <strong>de</strong>n an<strong>de</strong>n kontrollampe på følerens elektroniske justeringssystem.Når <strong>de</strong>t sker, bør fastspændingen af passtiften standses.Se Figur nr. 194.6 UDSKIFTNING AF DISPLAY OG TASTATURDette gøres på følgen<strong>de</strong> må<strong>de</strong>:1) Sluk for maskinen og træk stikket ud.2) De 4 skruer (5) som hol<strong>de</strong>r beskyttelsesdækslet fast løsnes og tages ud. Skruerneer placeret på højre, venstre, øverst og på bagsi<strong>de</strong>n af dækslet. For at kunne tage beskyttelsesdæksletud skal man for in<strong>de</strong>n indsætte og trykke fræsrens blokeringsmøgle
(E) helt ned til <strong>de</strong>ns stoppunkt.3) Fladkabelet som forbin<strong>de</strong>r display-tastatur (K) med <strong>de</strong>t elektroniske kort trækkesud.4) Display-tastaturet (K) vrikkes løs fra hol<strong>de</strong>hove<strong>de</strong>ts beskyttelsesskærm og tagesud.5) Monteringen af en ny display-tastatur gøres på samme må<strong>de</strong> men i omvendtrækkefølge.Se Figur nr. 204.7 UDSKIFTNING AF ELEKTRONISK KORTDette gøres på følgen<strong>de</strong> må<strong>de</strong>:1) Sluk for maskinen og træk stikket ud.2) De 4 skruer (5) som hol<strong>de</strong>r hol<strong>de</strong>ve<strong>de</strong>ts beskyttelsesskærm fast løsnes og tagesud. Skruerne er placeret på højre si<strong>de</strong>, venstre si<strong>de</strong>, øverst og på bagsi<strong>de</strong>n af skærmen.For at kunne tage hol<strong>de</strong>hove<strong>de</strong>ts beskyttelsesskærm ud skal man for in<strong>de</strong>n indsætte ogtrykke fræserens blokeringsnøgle (E) helt ned til <strong>de</strong>ns stoppunkt.3) Det elektroniske korts hovedstikforbin<strong>de</strong>lse (L) afbry<strong>de</strong>s.4) Fladkabelet som forbin<strong>de</strong>r display-tastaturet med <strong>de</strong>t elektroniske kort (L) trækkesud.5) De 3 skruer (11) som hol<strong>de</strong>r <strong>de</strong>t elektroniske kort (L) fast til hol<strong>de</strong>hove<strong>de</strong>ts beskyttelsesskærmløsnes og tages ud.6) Montering af et nyt elektronisk kort gøres på samme må<strong>de</strong> men i omvendt rækkefølge.Se Figur nr. 214.8 UDSKIFTNING AF EFFEKTKORT OG AFBRYDERDette gøres på følgen<strong>de</strong> må<strong>de</strong>:1) Sluk for maskinen og træk stikket ud.2) Maskinens 4 støtteben (P) skrues af.3) De 5 skruer (12) som hol<strong>de</strong>r <strong>de</strong>n ne<strong>de</strong>rste beskyttelsesskærm fast løsnes og tagesud.4) De af effektkortets ledninger som man ønsker at få udskiftet trækkes ud og ledningernesplacering noteres ned.5) Effektkortet (M) eller afbry<strong>de</strong>ren (N) tages ud ved at trykke metaltungerne ned på<strong>de</strong> 4 tapper som hol<strong>de</strong>r <strong>de</strong>m fast og trække kortet op.6) Montering af et nyt effektkort eller afbry<strong>de</strong>r gøres på samme må<strong>de</strong> men i omvendtrækkefølge.6.2 SKÆRESPÅN• Skærespån fra kopiering af nøgler, anses for at være speciel affald men ligestillesmed fast affald som f.eks en skuresvamp.• I overenstemmelse med EUs gæl<strong>de</strong>n<strong>de</strong> miljøregler, skal skærespåner <strong>de</strong>poneres ianlæg for behandling og bortskaffelse af affald.6.3 MASKINEN• In<strong>de</strong>n maskinen bortskaffes, skal strømmen slås fra og <strong>de</strong>ns metal- og plastik<strong>de</strong>leadskilles.• Derefter kan maskinen bortskaffes i overenstemmelse med <strong>de</strong> gæl<strong>de</strong>n<strong>de</strong> miljøregleri <strong>de</strong>t land maskinen er blevet brugt.7.- TABEL NØGLE-FRÆSER-FØLER-HÆLD-NINGSVINKEL-ADAPTERMaskinen leveres med følgen<strong>de</strong> tilbehør:Se listen ne<strong>de</strong>nfor8.- DRIFTANVISNINGSe Figur nr. 23Se Figur nr. 225.- SIKKERHEDFor Deres egen sikkerhed anbefales <strong>de</strong>t at overhol<strong>de</strong> følgen<strong>de</strong> sikkerhedsforanstaltninger:• Maskinen må først tæn<strong>de</strong>s og bruges når alle sikkerhedsforanstaltninger, installations-og driftanvisninger samt vedligehol<strong>de</strong>lsesprocedurer er opfyldt og accepteret.• Strømmen skal altid slås fra in<strong>de</strong>n maskinen rengøres og vedligehol<strong>de</strong>s.• Maskinen og områ<strong>de</strong>t, hvor <strong>de</strong>n står, skal altid hol<strong>de</strong>s rent.• Arbejd med tørre hæn<strong>de</strong>r.• Der skal altid arbej<strong>de</strong>s med sikkerhedsbriller, selvom maskinen er udstyret medbeskyttelsesskærme.• Maskinen skal have jordforbin<strong>de</strong>lse.danishDet anbefales at arbej<strong>de</strong> med maskinen i en høj<strong>de</strong> som er behagelig for brugeren:• Det anbefales at anven<strong>de</strong> maskinen i sid<strong>de</strong>n<strong>de</strong> stilling. Stolens høj<strong>de</strong> bør indstillesså brugerens øjne er på høj<strong>de</strong> med maskinens øverste <strong>de</strong>l.• Hvis maskinen bruges i ståen<strong>de</strong> stilling anbefales <strong>de</strong>t at anbringe en klods mellembor<strong>de</strong>t og maskinen så brugerens øjne er på høj<strong>de</strong> med maskinens øverste <strong>de</strong>l.6.- BORTSKAFFELSE AF AFFALDMed affald forstås ethvert produkt eller genstand stammen<strong>de</strong> fra menneskers aktiviteteller Naturens cyklus som efterla<strong>de</strong>s eller som bestemmes til at blive efterladt.6.1 EMBALLAGE• Kassen som <strong>CAPRI</strong> nøglemaskinen leveres i, er af pap og kan genbruges som emballage.• Emballagen anses for at være fast affald og må <strong>de</strong>rfor kun <strong>de</strong>poneres i en containerberegnet til <strong>de</strong>tte formål.• Emballageskummet som beskytter maskinen i papkassen er af polymer som ansesfor at være fast affald og må <strong>de</strong>rfor kun <strong>de</strong>poneres i anlæg for behandling og bortskaffelseaf affald.
portuguesemáquina duplicadoracapriMANUAL DE INSTRUÇÕES
1.- APRESENTAÇÃO E ASPECTOS GERAIS1.1 ASPECTOS GERAIS1.2 TRANSPORTE E EMBALAGEM1.3 ETIQUETA DE IDENTIFICAÇÃO2. - CARACTERÍSTICAS DA MÁQUINA2.1 FAMÍLIAS DE CHAVES2.2 ACESSÓRIOS2.3 ARMAZÉM DE FERRAMENTAS2.4 CIRCUITO ELÉCTRICO2.5 DADOS TÉCNICOS2.6 ELEMENTOS PRINCIPAIS DA MÁQUINA2.7 COMPONENTES E PARTES FUNCIONAIS2.7.1 Substituição da fresa e do apalpador (21)2.7.2 Bloqueio do carro no fim do percurso do eixo “Y”2.7.3 Grampo (6)2.7.4 Mola do apalpador (11)2.7.5 Mola e bloqueio do carro no eixo “ X “ (5 e 4)2.7.6 Alavanca <strong>de</strong> apoio para chaves tubulares2.7.7 Velocida<strong>de</strong> da fresa (17)2.7.8 Visor-teclado (1)2.7.9 Regulação vertical do apalpador (15)2.7.10 Controlo <strong>de</strong> força <strong>de</strong> duplicação3.- CODIFICAÇÃO3.1 PROCESSO DE CODIFICAÇÃO3.2 CODIFICAÇÃO DE CHAVES3.2.1 Chaves KA-2, KA-3 e KA-4.3.2.2 Chave KE-1.3.2.3 Chave SEA-1.3.2.4 Chaves OP-WH.P e OP-WY.P3.2.5 Chaves ME-3.P e ME-4.P3.2.6 Chaves TUBULARES3.2.7 Chaves FIC-2 e FIC-33.2.8 Chaves WIN-1D, WIN-2D, WIN-3D e WIN-4D.3.2.9 Chave JIS-4.P3.2.10 Chave FO-6.P3.2.11 Chave MCM-10.3.2.12 Chave TE-T60 e TE-T804.- MANUTENÇÃO4.1 SUBSTITUIÇÃO DAS GARRAS DO GRAMPO4.2 REGULAÇÃO DAS GARRAS4.2.1 Regulação NORMAL4.2.2 Regulação <strong>de</strong> PRECISÃO4.3 SUBSTITUIÇÃO DOS FUSÍVEIS4.4 TENSÃO E SUBSTITUIÇÃO DA CORREIA4.5 SUBSTITUIÇÃO DO MOTOR4.6 SUBSTITUIÇÃO DO VISOR-TECLADO4.7 SUBSTITUIÇÃO DA PLACA ELECTRÓNICA DE CONTROLO4.8 SUBSTITUIÇÃO DA PLACA DE POTÊNCIA E DO DISJUNTOR5.- SEGURANÇA6.- ELIMINAÇÃO DE RESÍDUOS6.1 EMBALAGEM6.2 APARAS6.3 MÁQUINA7.- TABELA CHAVE-FRESA-APALPADOR-INCLINAÇÃO-ADAPTADOR8.- EXPULSÃOportuguese
1.- APRESENTAÇÃO E ASPECTOS GERAIS1.1 ASPECTOS GERAISA máquina duplicadora <strong>CAPRI</strong> foi <strong>de</strong>senhada tendo em conta as normas <strong>de</strong> segurançavigentes na C.E.E.A segurança do pessoal envolvido na manipulação <strong>de</strong>ste tipo <strong>de</strong> máquinas só se conseguecom um programa bem estruturado em segurança pessoal, como a implementação<strong>de</strong> um programa <strong>de</strong> manutenção e o seguimento dos conselhos recomendados, assimcomo o cumprimento das normas <strong>de</strong> segurança contidas neste manual.Embora a instalação da máquina não apresente nenhuma dificulda<strong>de</strong>, é preferível quenão tente instalar, ajustar ou manipular a mesma sem ler primeiro este manual.A máquina vem da nossa fábrica preparada para a sua utilização e só necessita <strong>de</strong>operações <strong>de</strong> calibragem para as ferramentas que vão ser usadas.1.2 TRANSPORTE E EMBALAGEMA máquina é apresentada numa caixa <strong>de</strong> cartão robusta protegida com espuma <strong>de</strong>embalagem com as seguintes medidas:Largura = 520 mm; Altura = 650 mm; Profundida<strong>de</strong> = 575 mmPeso máquina mais embalagem = 30 kg.Quando <strong>de</strong>sembalar a máquina, inspeccione-a cuidadosamente para verificar se sofreualgum dano durante o transporte.Se encontrar alguma anomalia, avise imediatamente a transportadora e não faça nadacom a máquina até que o agente da transportadora tenha feito a inspecção correspon<strong>de</strong>nte.Para <strong>de</strong>slocar a máquina <strong>de</strong> um local para outro, pegue na máquina pela sua base, enão por outras partes.1.3 ETIQUETA DE IDENTIFICAÇÃOA máquina duplicadora <strong>CAPRI</strong> é fornecidacom uma etiqueta <strong>de</strong> i<strong>de</strong>ntificação, coma especificação do número <strong>de</strong> série oumatrícula da máquina, nome e morada dofabricante, marca CE e ano <strong>de</strong> fabrico.2. - CARACTERÍSTICAS DA MÁQUINAA máquina <strong>CAPRI</strong> é uma duplicadora <strong>de</strong> gran<strong>de</strong> robustez e precisão, que se caracterizapelas múltiplas possibilida<strong>de</strong>s <strong>de</strong> fixação que permite o seu grampo, sem ter <strong>de</strong> utilizaroutras peças nem adaptadores.Incorpora um inovador sistema <strong>de</strong> controlo <strong>de</strong> força, que faz aumentar a precisão <strong>de</strong>duplicação.2.1 FAMÍLIAS DE CHAVESA máquina <strong>CAPRI</strong> duplica entre outras, os seguintes tipos <strong>de</strong> chaves:- Chaves <strong>de</strong> pontos- Chaves tipo regata- Chaves tubulares- Chaves FIC-2 e FIC-3- Chaves WIN-1D, WIN-2D, WIN-3D e WIN-4D- Chaves JIS-4.P- Chaves FO-6.P2.4 CIRCUITO ELÉCTRICOOs principais componentes do circuito eléctrico e electrónico são os seguintes:1. Tomada <strong>de</strong> corrente.2. Placa <strong>de</strong> ligações.3. Interruptor <strong>de</strong> 3 posições.4. Transformador.5. Motor.6. Visor-teclado.7. Placa <strong>de</strong> controlo.8. Fresa.9. Apalpador.10. Grampo.11. Diodos LED <strong>de</strong> iluminação.12. Sensor <strong>de</strong> força.Ver Figura 22.5 DADOS TÉCNICOSMotor: Monofásico 400 W. ,230 V - 50 Hz (Opcional: Monofásico 400W, 110V – 60Hz)Fresa: HSS (Opcional: Metal duro)Velocida<strong>de</strong> fresa: 6.000 e 11.000 r.p.m.Grampos: De duas faces <strong>de</strong> fixação e basculantes 0 / 45 ºDeslocamento: Em três eixos com guias <strong>de</strong> rolos <strong>de</strong> precisão.Percursos ferramentas: Eixo X = 71 mm; eixo Y = 62 mm; eixo Z = 40 mmIluminação: Diodos LedMedidas: Largura = 430 mm, Profundida<strong>de</strong> = 385 mm e Altura = 485 mmPeso: 25 kg2.6 ELEMENTOS PRINCIPAIS DA MÁQUINA1.- Visor-teclado2.- Carro porta grampos (eixos X – Y)3.- Alavanca <strong>de</strong> accionamento dos carros, eixos x – y4.- Puxador <strong>de</strong> bloqueio do carro porta-grampos, eixo x5.- Roda accionamento do sistema <strong>de</strong> mola do carro, eixo x6.- Grampo7.- Alavanca <strong>de</strong> bloqueio da rotação dos grampos8.- Puxador do grampo9.- Cabeça (eixo Z)10.- Alavanca <strong>de</strong> accionamento e bloqueio da cabeça, eixo z11.- Manípulo da mola do apalpador12.- Porta-ferramentas13.- Fresa14.- Apalpador15.- Roda <strong>de</strong> regulação da altura do apalpador16.- Interruptor geral17.- Selector <strong>de</strong> velocida<strong>de</strong> do motor (2 velocida<strong>de</strong>s)18.- LEDs <strong>de</strong> iluminação19.- Protector <strong>de</strong> aparas20.- Armazém <strong>de</strong> ferramentas21.- Botão <strong>de</strong> bloqueio da fresaVer figura 32.7 COMPONENTES E PARTES FUNCIONAISportuguese2.2 ACESSÓRIOSA máquina é fornecida com uma série <strong>de</strong> acessórios para a sua utilização e manutenção.Todos estes acessórios po<strong>de</strong>m ser guardados no armazém <strong>de</strong> ferramentas existentena máquina.- 2 fusíveis (alojados na parte inferior do armazém <strong>de</strong> ferramentas)- Chaves allen <strong>de</strong> 5, <strong>de</strong> 3 e <strong>de</strong> 2.5- 1 chave allen especial <strong>de</strong> braço curto <strong>de</strong> 1,5.- 2 chapas <strong>de</strong> pressão na ponta- 2 eixos para a regulação das garras.- 2 adaptadores para a chave tubular CHI-1T- Fresas: F-1 e F-13- Apalpadores: T-1 e T-13.2.3 ARMAZÉM DE FERRAMENTASA máquina dispõe <strong>de</strong> um armazém <strong>de</strong> ferramentas que está montado na partesuperior da máquina. Oferece a possibilida<strong>de</strong> <strong>de</strong> retirá-lo e apoiá-lo directamentesobre uma mesa (<strong>de</strong>sta forma obtém-se um espaço extra na partesuperior da máquina, aproveitável para <strong>de</strong>positar chaves, acessórios, etc…2.7.1 Substituição da fresa e do apalpador (21)Para soltar a fresa, tem <strong>de</strong> accionar o botão <strong>de</strong> bloqueio da fresa ao mesmo tempo quecom a mão faz rodar o porta-ferramentas.Depois <strong>de</strong> retirar a fresa que vai substituir, introduza a nova fresa e fixe-a ao portaferramentas,certificando-se <strong>de</strong> que a sua extremida<strong>de</strong> faz pressão no interior do portaferramentas.O apalpador é substituído da mesma forma que a fresa. A única diferença a ter emconta é que a rotação do apalpador está sempre bloqueada internamente.2.7.2 Bloqueio do carro no fim do percurso do eixo “Y”Para que o carro não se <strong>de</strong>sloque na direcção “Y”, durante o tempo em que o duplicadorestá a pren<strong>de</strong>r as chaves ao grampo, o carro está equipado com um bloqueio imediatonesta direcção.Para accionar este bloqueio, basta <strong>de</strong>slocar o carro até ao seu amortecedor <strong>de</strong> percursona direcção do duplicador.Para <strong>de</strong>sactivar este bloqueio, basta <strong>de</strong>slocar o carro para a frente, fazendo um pouco<strong>de</strong> força.
máquina.• Para melhorar a visibilida<strong>de</strong> da zona <strong>de</strong> trabalho, active a iluminação accionando ointerruptor localizado no visor-teclado.• Com a ajuda da tabela incluída no presente manual, seleccionar a fresa e o apalpadornecessários para codificar a chave.• Substituir a fresa e o apalpador.• Bloquear momentaneamente o carro no fim do percurso do eixo “Y”.• Pren<strong>de</strong>r a chave original na parte esquerda do grampo, e a chave a codificar naparte direita. Quando pren<strong>de</strong>r as chaves tem <strong>de</strong> ter em conta os seguintes <strong>de</strong>talhes:- PRESSÃO DA CHAVE. Po<strong>de</strong> tratar-se <strong>de</strong> uma chave <strong>de</strong> “pressão-pescoço” (Fig.4.A), ou <strong>de</strong> “pressão na ponta” (Fig. 4.B).- ADAPTADOR. Num mo<strong>de</strong>lo <strong>de</strong> chave muito concreto, po<strong>de</strong> ser necessária a utilização<strong>de</strong> um adaptador.- INCLINAÇÃO. Algumas chaves têm os pontos inclinados, por isso será necessáriorodar o grampo.• Fazer a regulação vertical do apalpador.• Activar os sistemas que simplificam o trabalho <strong>de</strong> duplicação:- APALPADOR: Activar ou <strong>de</strong>sactivar a mola do apalpador, em função do tipo <strong>de</strong>chave a codificar.- CARRO: Em função do mo<strong>de</strong>lo <strong>de</strong> chave, po<strong>de</strong> ser necessário activar a mola docarro, ou o bloqueio do carro na direcção “X”.- APOIO: em função do mo<strong>de</strong>lo <strong>de</strong> chave, po<strong>de</strong> ser necessário utilizar a alavanca<strong>de</strong> apoio para chaves tubulares.• Activar a rotação da fresa, escolhendo previamente uma das duas velocida<strong>de</strong>sdisponíveis.• Proce<strong>de</strong>r à codificação da chave. Se a chave for <strong>de</strong> pontos, utilizar a ajuda dosistema <strong>de</strong> “controlo <strong>de</strong> força <strong>de</strong> duplicação”.3.2 CODIFICAÇÃO DE CHAVES3.2.4 Chaves OP-WH.P e OP-WY.P• Utilizar a fresa-apalpador: F-11 / P-11.• A fixação da chave no grampo é realizada fazendo “pressão na ponta”.• É preciso bloquear o apalpador (<strong>de</strong>sactivar a mola).• NOTA: Depois <strong>de</strong> fazer a regulação vertical do apalpador, tem <strong>de</strong> <strong>de</strong>scer muitoligeiramente o apalpador, rodando a roda <strong>de</strong> regulação 5 pontos para a direita. A seguir,tem <strong>de</strong> introduzir o apalpador no canal do palhetão e bloquear a cabeça da máquina.Depois tem <strong>de</strong> subir ligeiramente o apalpador, para que este não arraste a chave.• NOTA: É recomendável utilizar o sistema da mola do carro.• NOTA: Recomenda-se que faça uma passagem <strong>de</strong> <strong>de</strong>sbaste e logo a seguir outrapassada <strong>de</strong> acabamento seguindo todo o perfil do <strong>de</strong>senho da chave. Faz-se a mecanizaçãono sentido <strong>de</strong>scen<strong>de</strong>nte (<strong>de</strong>s<strong>de</strong> a ponta da chave até à cabeça).Ver Fig. 83.2.5 Chaves ME-3.P e ME-4.P• Utilizar a fresa-apalpador: F-11 / P-11.• A fixação da chave no grampo é feita usando o adaptador AD-MM2.- Posicionar o adaptador sobre o grampo, fazendo “pressão na ponta”.- Introduzir a chave no adaptador.- Ao mesmo tempo que pren<strong>de</strong> o adaptador ao grampo, a chave fica presa aoadaptador.• É preciso bloquear o apalpador (<strong>de</strong>sactivar a mola).• NOTA: Depois <strong>de</strong> fazer a regulação vertical do apalpador, tem <strong>de</strong> <strong>de</strong>scer muitoligeiramente o apalpador, rodando a roda <strong>de</strong> regulação 5 pontos para a direita. A seguir,tem <strong>de</strong> introduzir o apalpador no canal do palhetão e bloquear a cabeça da máquina.Depois tem <strong>de</strong> subir ligeiramente o apalpador, para que este não arraste a chave.• NOTA: É recomendável utilizar o sistema da mola do carro.Ver Fig. 9portuguese3.2.1 Chaves KA-2, KA-3 e KA-4.• Depen<strong>de</strong>ndo do mo<strong>de</strong>lo <strong>de</strong> chave a duplicar, utiliza-se um conjunto fresa-apalpadordiferente. Consultar a tabela.• A fixação da chave no grampo é realizada fazendo “pressão no pescoço”.• Depen<strong>de</strong>ndo do mo<strong>de</strong>lo <strong>de</strong> chave a duplicar, é necessário rodar os grampos segundoo ângulo requerido. Consultar a tabela.• É preciso activar a mola do apalpador.• Para aumentar a precisão da codificação, utilizar o sistema <strong>de</strong> “Controlo <strong>de</strong> força<strong>de</strong> duplicação”.• NOTA: Os pontos entalhados da chave KA-3 <strong>de</strong>vem estar sempre na parte maisbaixa do grampo.• NOTA: Os pontos entalhados da chave KA-2 <strong>de</strong>vem estar sempre na parte maisalta do grampo.Ver Fig. 53.2.2 Chave KE-1.• Utilizar a fresa-apalpador: F-1 / P-1.• A fixação da chave no grampo é realizada fazendo “pressão no pescoço”, masintroduzindo a chave pela parte <strong>de</strong> trás.• É necessário posicionar os grampos com um ângulo <strong>de</strong> inclinação <strong>de</strong> 5º.• É preciso activar a mola do apalpador.• Para aumentar a precisão da codificação, utilizar o sistema <strong>de</strong> “Controlo <strong>de</strong> força<strong>de</strong> duplicação”.• NOTA: Os pontos entalhados da chave KE-1 <strong>de</strong>vem estar sempre na parte mais altado grampo.• NOTA: Para a duplicação dos pontos laterais tem <strong>de</strong> utilizar o adaptador correspon<strong>de</strong>nte.Ver Fig. 63.2.3 Chave SEA-1.• Utilizar a fresa-apalpador: F-3 / P-3.• A fixação da chave no grampo é realizada fazendo “pressão no pescoço”.• É preciso bloquear o apalpador (<strong>de</strong>sactivar a mola).• NOTA: Depois <strong>de</strong> fazer a regulação vertical do apalpador, tem <strong>de</strong> <strong>de</strong>scer muitoligeiramente o apalpador, rodando a roda <strong>de</strong> regulação 5 pontos para a direita. A seguir,tem <strong>de</strong> introduzir o apalpador no canal do palhetão e bloquear a cabeça da máquina.Depois tem <strong>de</strong> subir ligeiramente o apalpador, para que este não arraste a chave.• NOTA: Entrar pelo centro do canal sem tocar nos lados, e na segunda passadaentrar pelo lado direito e sair pelo lado esquerdo, sem fazer qualquer pressão (apoiandoapenas ligeiramente o apalpador).• NOTA: Para a duplicação dos pontos laterais utilizar a fresa-apalpador F-1 / P-1.Fazer “pressão no pescoço”. Activar a mola do apalpador e utilizar o sistema <strong>de</strong> “Controlo<strong>de</strong> força <strong>de</strong> duplicação”.Ver Fig. 73.2.6 Chaves TUBULARES• Utilizar a fresa-apalpador: F-8 / P-8.• Pren<strong>de</strong>r a chave no “V” do grampo.• É preciso activar a mola do apalpador.• A operação <strong>de</strong> entalhe é mais cómoda se apoiar a mão que vai accionar a alavanca<strong>de</strong> accionamento do carro sobre a alavanca <strong>de</strong> apoio para chaves tubulares.Ver fig. 103.2.7 Chaves FIC-2 e FIC-3• Utilizar a fresa-apalpador: F-11 / P-11.• Pren<strong>de</strong>r a chave no grampo, apoiando-a no fundo e empurrando-a para o ladoanterior do grampo.• É preciso bloquear o apalpador (<strong>de</strong>sactivar a mola).• Bloquear a cabeça da máquina a uma altura tal, que a fresa passe sobre o grampomas sem fazer fricção.• Proce<strong>de</strong>r ao entalhe dos dois lados superiores.• Rodar as chaves tendo o cuidado <strong>de</strong> retirar as rebarbas para assegurar o correctoposicionamento e fixação da chave, e proce<strong>de</strong>r ao entalhe dos outros dois lados dachave.Ver Fig. 113.2.8 Chaves WIN-1D, WIN-2D, WIN-3D e WIN-4D.• Utilizar a fresa-apalpador: F-15 / P-15.• Pren<strong>de</strong>r no grampo duas chaves em bruto, e fazer sobre as chaves a regulaçãovertical do apalpador.• Pren<strong>de</strong>r a chave original com o <strong>de</strong>ntado para cima (tal como indica o <strong>de</strong>senho).• É preciso bloquear o apalpador (<strong>de</strong>sactivar a mola).• Introduzir o apalpador exactamente num dos pontos, e bloquear a cabeça da máquinaa essa altura.• Proce<strong>de</strong>r ao entalhe.Ver Fig. 123.2.9 Chave JIS-4.P• Utilizar a fresa-apalpador: F-11 / P-11.• A fixação da chave no grampo é feita usando o adaptador AD-MJ.- Posicionar o adaptador sobre o grampo, fazendo “pressão na ponta”.- Introduzir a chave no adaptador, fazendo “pressão no pescoço” contra a placa queroda. Nesta posição, pren<strong>de</strong>r a chave no seu adaptador.• É preciso bloquear o apalpador (<strong>de</strong>sactivar a mola).Ver Fig. 133.2.10 Chave FO-6.P• Utilizar a fresa-apalpador F-22 / P-22.• A fixação da chave no grampo é feita usando o seu adaptador correspon<strong>de</strong>nte.
- Posicionar e pren<strong>de</strong>r os adaptadores sobre o grampo.- Ao colocar a chave tem <strong>de</strong> ter cuidado para que fique bem plana, para que os doisentalhes fiquem iguais.• É preciso bloquear o apalpador (<strong>de</strong>sactivar a mola).• Introduzir o apalpador no canal <strong>de</strong> uma letra. Bloquear a cabeça da máquina esubir o apalpador ligeiramente para que no bata no adaptador.• Proce<strong>de</strong>r ao entalhe.Ver Fig. 14Leitura do código da chave original• A chave original tem 6 posições <strong>de</strong> duplicação, que estão <strong>de</strong>finidas pelas letras: A, B,C, D, E e F, segundo mostrado na seguinte figura.• Em cada uma das posições que a chave tem, existem 4 combinações diferentes possíveis(<strong>de</strong>finidas através <strong>de</strong> números), que agora indicamos e vamos numerar:1 2 3 43) Posicionar o grampo com um ângulo <strong>de</strong> inclinação <strong>de</strong> 45º, e rodando manualmenteo eixo, retirá-lo por um dos lados. Uma vez retirado o eixo, a garra móvel fica libertadae já a po<strong>de</strong> retirar.4) Para montar a nova garra móvel, agir <strong>de</strong> forma inversa.NOTA IMPORTANTE: Quando substituir a garra fixa esquerda ou a garra fixa direita,tem sempre <strong>de</strong> fazer a regulação do conjunto <strong>de</strong> garras que foi substituído. Por outrolado, se substituir a garra móvel, não é necessário fazer nenhuma operação <strong>de</strong> regulaçãonas garras.Ver Fig. 174.2 REGULAÇÃO DAS GARRASSempre que substituir a garra fixa esquerda ou a garra fixa direita, tem <strong>de</strong> fazer a regulaçãodo conjunto <strong>de</strong> garras que foi substituído. Por outro lado, a substituição da garramóvel não implica nenhuma operação <strong>de</strong> regulação nas garras.Existem duas maneiras diferentes <strong>de</strong> fazer a regulação das garras:Regulação NORMALRegulação <strong>de</strong> PRECISÃO4.2.1 Regulação NORMALTrata-se <strong>de</strong> uma regulação rápida e simples, através da qual se consegue uma regulaçãoaceitável para po<strong>de</strong>r duplicar chaves com alguma precisão.Para fazer esta regulação, executar os seguintes passos:1) Fixar os dois eixos <strong>de</strong> regulação nos seus correspon<strong>de</strong>ntes porta-ferramentas, <strong>de</strong>forma a fazerem pressão no interior do porta-ferramentas e para que a parte cónica doseixos <strong>de</strong> regulação fique no exterior.• A “altura” n.º1 indica que não se <strong>de</strong>ve duplicar. A posição n.º2 indica que existe umpequeno entalhe na chave e que quando é algo maior correspon<strong>de</strong> à altura n.º3. A alturan.º4 é o maior dos entalhes da chave.• A seguir, retire a chave e marque as combinações <strong>de</strong> cada uma das 6 posições, talcomo explicamos a seguir, a título <strong>de</strong> exemplo:POSIÇÃO A B C D E FCOMBINAÇÃO 3 4 1 2 4 2NOTA: A série <strong>de</strong> números da combinação é o código da chave.3.2.11 Chave MCM-10.• Colocação especial no grampo. Ver figura.Ver fig.153.2.12 Chave TE-T60 e TE-T80• Colocação especial no grampo. A chave TE-T60 é presa tal como indicado no <strong>de</strong>senho.• A chave TE-T80 tem a particularida<strong>de</strong> <strong>de</strong> que para mecanizar o lado esquerdo tem<strong>de</strong> ser fixada como a TE-T60 e para mecanizar o lado direito tem <strong>de</strong> fixar a chave pelaparte posterior do grampo (como no caso da MCM-10).2) A garra fixa esquerda do lado direito do grampo, e a garra fixa direita do lado esquerdodo grampo, não têm possibilida<strong>de</strong> <strong>de</strong> regulação já que estão posicionadas compassadores. Por isso, tem <strong>de</strong> as montar guiando-se pelos seus passadores, e a seguirprenda-as com os seus correspon<strong>de</strong>ntes parafusos.Ver Fig. 164.- MANUTENÇÃOQuanto tiver <strong>de</strong> realizar qualquer operação <strong>de</strong> manutenção é necessário cumprir osseguintes requisitos:1. Nunca se <strong>de</strong>ve realizar nenhuma operação com a máquina a funcionar.2. Deve <strong>de</strong>sligar-se o cabo da ligação eléctrica.3. Devem seguir-se rigorosamente as indicações do manual.4. Utilizar peças originais <strong>de</strong> substituição.4.1 SUBSTITUIÇÃO DAS GARRAS DO GRAMPOO grampo da máquina <strong>CAPRI</strong> dispõe <strong>de</strong> três conjuntos <strong>de</strong> garras (garra fixa esquerda,garra fixa direita e garra móvel). Caso as garras fiquem danificadas, po<strong>de</strong>m ser substituídaspor garras novas, <strong>de</strong> forma in<strong>de</strong>pen<strong>de</strong>nte.Para substituir a “garra fixa esquerda” (A) ou a “garra fixa direita” (B), basta <strong>de</strong>senroscaros dois parafusos <strong>de</strong> fixação que a fixam, e retirar puxando-a para cima. Para montaras novas garras, agir <strong>de</strong> forma inversa.Para substituir a “garra móvel” (C) tem <strong>de</strong> executar os seguintes passos:1) Retirar com a ajuda <strong>de</strong> um cutter ou semelhante, a tampa preta <strong>de</strong> plástico quetem a alavanca do grampo.2) Enquanto bloqueia a contra-porca com uma chave fixa <strong>de</strong> 14, introduza uma chaveallen <strong>de</strong> 5 pelo orifício que ficou <strong>de</strong>scoberto na alavanca do grampo, e <strong>de</strong>senroscar.3) Por isso, sabendo que em cada conjunto <strong>de</strong> garras existe uma que tem a sua posiçãofixa, tem <strong>de</strong> regular a outra garra em relação à garra que tem a sua posição fixa.4) Colocar os parafusos da garra a regular, mas sem os apertar. De forma a que agarra possa ser movida com a mão, mas não existindo a possibilida<strong>de</strong> <strong>de</strong> se levantarem relação à superfície on<strong>de</strong> está apoiada.5) Proce<strong>de</strong>r à regulação da garra:5.1) Introduzir o eixo <strong>de</strong> regulação do apalpador no orifício Nº1 da garra.5.2) Fazer coincidir o eixo <strong>de</strong> regulação da fresa, no orifício Nº1 da outra garra.5.3) Levantar a cabeça e fazer a mesma operação, mas no orifício Nº2 das garras.portuguese
5.4) Voltar a repetir o ponto anterior as vezes que forem necessárias, até que oseixos <strong>de</strong> regulação entrem suavemente e sem forçar, tanto no orifício Nº1 comono Nº2.ferramentas estão a tocar nas suas garras correspon<strong>de</strong>ntes porque as luzes do sistemaelectrónico <strong>de</strong> regulação vertical do apalpador vão acen<strong>de</strong>r-se.5.5) Com os dois eixos <strong>de</strong> regulação introduzidos nos orifícios Nº1, bloquear acabeça e fixar ligeiramente o parafuso B.5.6) Com os dois eixos <strong>de</strong> regulação introduzidos nos orifícios Nº2, bloquear acabeça e fixar ligeiramente o parafuso A.5.7) Repetir a operação do ponto anterior, mas fixando <strong>de</strong>finitivamente os parafusosA e B.5.8) Uma vez terminada a regulação, com a ajuda da chave allen <strong>de</strong> 1,5 especial<strong>de</strong> braço corto, apertar os dois parafusos presos situados entre a alavanca dogrampo e a garra que regulou. Desta forma, vai assegurar uma maior consistênciana fixação da garra que regulou.4.2.2 Regulação <strong>de</strong> PRECISÃOTrata-se <strong>de</strong> uma regulação que requer alguma <strong>de</strong>streza, e assim irá conseguir umaregulação muito precisa das garras substituídas.Para fazer esta regulação, executar os seguintes passos:1) A garra fixa esquerda do lado direito do grampo, e a garra fixa direita do lado esquerdodo grampo, não têm possibilida<strong>de</strong> <strong>de</strong> regulação já que estão posicionadas compassadores. Por isso, tem <strong>de</strong> as montar guiando-se pelos seus passadores, e a seguirprenda-as com os seus correspon<strong>de</strong>ntes parafusos.8) A seguir, separar a garra móvel da garra a regular, rodando para isso a alavanca dogrampo.9) Colocar a ferramenta alinhada com um dos parafusos <strong>de</strong> fixação da garra, e nestaposição apoiar a ferramenta contra a garra que está presa (a que tem a sua posiçãofixa). Neste momento, e mantendo sempre uma ligeira pressão entre a ferramenta e agarra que está presa (a que tem a sua posição fixa), ir apertando muito <strong>de</strong>vagar o parafusopreso que está alinhado com a ferramenta e com o parafuso da garra. Chegará aaltura em que se irá acen<strong>de</strong>r a segunda luz do sistema electrónico <strong>de</strong> regulação verticaldo apalpador. Quando chegar esse momento, <strong>de</strong>ixar <strong>de</strong> apertar o parafuso preso.10) Colocar a ferramenta alinhada com o outro parafuso <strong>de</strong> fixação da garra, e voltar arealizar a mesma operação.11) Verificar novamente se as garras ficaram reguladas nessas duas posições (frenteaos parafusos <strong>de</strong> fixação), e se for necessário, retocar ligeiramente a posição da garraapertando muito ligeiramente o correspon<strong>de</strong>nte parafuso preso.12) Já foi realizada a regulação, por isso agora tem <strong>de</strong> apertar com força os dois parafusos<strong>de</strong> fixação da garra.13) Por último, apertar um pouco os dois parafusos presos <strong>de</strong> regulação da garra.Desta forma, vai assegurar uma maior consistência na fixação da garra que regulou.2) Por isso, sabendo que em cada conjunto <strong>de</strong> garras existe uma que tem a sua posiçãofixa, tem <strong>de</strong> regular a outra garra em relação à garra que tem a sua posição fixa.3) Colocar os parafusos da garra a regular, mas sem os apertar. De forma a que agarra possa ser movida com a mão, mas não existindo a possibilida<strong>de</strong> <strong>de</strong> se levantarem relação à superfície on<strong>de</strong> está apoiada.4.3 SUBSTITUIÇÃO DOS FUSÍVEISSe a máquina não começar a trabalhar quando se accionarem os interruptores <strong>de</strong> funcionamento,é necessário verificar os fusíveis. Esta operação é feita da seguinte forma:1) Desligar a máquina com o interruptor geral e <strong>de</strong>sligar o cabo <strong>de</strong> alimentação.2) Retirar o porta-fusível que está por baixo do interruptor geral.3) Comprovar (usando um tester) se algum fusível está fundido, e nesse caso, substituí-lopor outro do mesmo tipo e valor.portuguese4) Com a ajuda da chave allen <strong>de</strong> 1,5 especial <strong>de</strong> braço curto, <strong>de</strong>senroscar cerca <strong>de</strong>1 volta os dois parafusos presos <strong>de</strong> regulação da garra (são os dois parafusos presossituados entre a alavanca do grampo e a garra que vai regular).5) A seguir, montar qualquer conjunto <strong>de</strong> Fresa-Apalpador nos seus correspon<strong>de</strong>ntesporta-ferramentas, mas ao contrário (com as pontas <strong>de</strong> corte voltadas para o interior doporta-ferramentas. Descer a cabeça da máquina, e bloqueá-la a uma altura em que asferramentas possam tocar nos lados das garras.6) Activar o sistema electrónico <strong>de</strong> regulação vertical do apalpador.7) Apoiar a extremida<strong>de</strong> da garra que está presa (a que tem a sua posição fixa), contraa parte lateral da ferramenta. <strong>Manual</strong>mente, <strong>de</strong>slocar a garra a regular na direcçãoda alavanca do grampo, e mantendo a pressão sobre a garra nessa direcção, <strong>de</strong>slocá-lapara a frente até tocar também lateralmente na sua ferramenta correspon<strong>de</strong>nte. Nestaposição, apertar ligeiramente os parafusos <strong>de</strong> fixação da garra. Irá saber quando as4.4 TENSÃO E SUBSTITUIÇÃO DA CORREIAPara confirmar a tensão da correia ou para substituir a mesma, <strong>de</strong>vem executar-se osseguintes passos:1) Desligar a máquina com o interruptor geral e <strong>de</strong>sligar o cabo <strong>de</strong> alimentação.2) Desaparafusar os 4 parafusos (5) que pren<strong>de</strong>m a “protecção da cabeça” e retirá-la.Os parafusos estão no lado direito, no lado esquerdo, na parte superior e na parte traseira.Para po<strong>de</strong>r retirar a “protecção da cabeça”, é necessário introduzir previamentee até ao topo, o “botão <strong>de</strong> bloqueio da fresa” (E).3) Afrouxar sem soltar, os 4 parafusos (6) que pren<strong>de</strong>m o motor.4) Afrouxar mas sem soltar, as 2 porcas <strong>de</strong> contra-porca (7).Tensão: Rodando os dois parafusos <strong>de</strong> tensão (8) produz-se a <strong>de</strong>slocação do motor paraa parte traseira da máquina. Quando verificar que a correia tem a tensão requerida, voltara apertar as duas porcas <strong>de</strong> contra-porca (7) e os parafusos (6) que pren<strong>de</strong>m o motor.Substituição: Afrouxar mas sem soltar, os 2 parafusos <strong>de</strong> tensão da correia (8). Retirara correia danificada e substituí-la por uma nova. Rodando os dois parafusos <strong>de</strong>tensão (8) produz-se a <strong>de</strong>slocação do motor para a parte traseira da máquina.Quando verificar que a correia tem a tensão requerida, voltar a apertar as duas porcas<strong>de</strong> contra-porca (7) e os parafusos (6) que pren<strong>de</strong>m o motor.5) Voltar a colocar e pren<strong>de</strong>r a “protecção da cabeça”.Ver Fig. 18
4.5 SUBSTITUIÇÃO DO MOTOREsta operação é feita da seguinte forma:1) Desligar a máquina com o interruptor geral e <strong>de</strong>sligar o cabo <strong>de</strong> alimentação.2) Desaparafusar os 4 parafusos (5) que pren<strong>de</strong>m a “protecção da cabeça” e retirá-la.Os parafusos estão no lado direito, no lado esquerdo, na parte superior e na parte traseira.Para po<strong>de</strong>r retirar a “protecção da cabeça”, é necessário introduzir previamentee até ao topo, o “botão <strong>de</strong> bloqueio da fresa” (E).3) Desaparafusar os 6 parafusos (9) que pren<strong>de</strong>m a “protecção do motor” (F) e retirála.4) Retirar a correia (G).5) Desligar os cabos <strong>de</strong> alimentação que chegam ao motor.6) Desaparafusar os 4 parafusos (6) que pren<strong>de</strong>m o motor.7) Retirar o motor.8) Ace<strong>de</strong>ndo à parte inferior do motor com uma chave <strong>de</strong> parafusos plana, bloquear oeixo do motor e manualmente rodar a polia (H) até a retirar (a rosca é para a esquerda).9) Desenroscar os 4 parafusos (10) que pren<strong>de</strong>m a chapa-suporte do motor e retirá-la.10) Para montar o novo motor, efectuar as mesmas operações mas <strong>de</strong> forma inversa.Ver Fig. 194.6 SUBSTITUIÇÃO DO VISOR-TECLADOEsta operação é feita da seguinte forma:1) Desligar a máquina com o interruptor geral e <strong>de</strong>sligar o cabo <strong>de</strong> alimentação.2) Desaparafusar os 4 parafusos (5) que pren<strong>de</strong>m a “protecção da cabeça” e retirá-la.Os parafusos estão no lado direito, no lado esquerdo, na parte superior e na parte traseira.Para po<strong>de</strong>r retirar a “protecção da cabeça”, é necessário introduzir previamentee até ao topo, o “botão <strong>de</strong> bloqueio da fresa” (E).3) Desligar o cabo plano que liga o visor-teclado (K) à placa electrónica <strong>de</strong> controlo.4) Retirar o antigo visor-teclado (K) da “Protecção da cabeça”, e retirá-la.5) Para montar o novo visor-teclado, efectuar as mesmas operações mas <strong>de</strong> formainversa.Ver Fig. 204.7 SUBSTITUIÇÃO DA PLACA ELECTRÓNICA DE CON-TROLOEsta operação é feita da seguinte forma:1) Desligar a máquina com o interruptor geral e <strong>de</strong>sligar o cabo <strong>de</strong> alimentação.2) Desaparafusar os 4 parafusos (5) que pren<strong>de</strong>m a “protecção da cabeça” e retirá-la.Os parafusos estão no lado direito, no lado esquerdo, na parte superior e na parte traseira.Para po<strong>de</strong>r retirar a “protecção da cabeça”, é necessário introduzir previamentee até ao topo, o “botão <strong>de</strong> bloqueio da fresa” (E).3) Desligar o conector principal da placa electrónica <strong>de</strong> controlo (L)4) Desligar o cabo plano que liga o visor-teclado à placa electrónica <strong>de</strong> controlo (L).5) Desaparafusar os 3 parafusos (11) que pren<strong>de</strong>m a placa electrónica <strong>de</strong> controlo (L)à “protecção da cabeça” e retirá-la.6) Para montar a nova placa electrónica <strong>de</strong> controlo, efectuar as mesmas operaçõesmas <strong>de</strong> forma inversa.Ver Fig. 214.8 SUBSTITUIÇÃO DA PLACA DE POTÊNCIA E DO DIS-JUNTOREsta operação é feita da seguinte forma:1) Desligar a máquina com o interruptor geral e <strong>de</strong>sligar o cabo <strong>de</strong> alimentação.2) Desaparafusar os 4 pés (P) da máquina e retirá-los.3) Desaparafusar os 5 parafusos (12) que pren<strong>de</strong>m a “Chapa <strong>de</strong> protecção inferior” eretirá-la.4) Desligar todos os cabos da placa que preten<strong>de</strong> substituir, anotando previamente aposição <strong>de</strong> cada cabo.5) Para libertar a placa <strong>de</strong> potência (M) ou o disjuntor (N), basta pressionar as linguetas<strong>de</strong> cada um dos 4 eixos que a sustentam e puxar a placa para cima.6) Para montar a nova placa <strong>de</strong> potência ou o novo disjuntor, efectuar as mesmasoperações mas <strong>de</strong> forma inversa.Ver Fig. 22• Utilize sempre óculos <strong>de</strong> protecção, mesmo que a máquina já tenha protecções.• Certifique-se <strong>de</strong> que a máquina tem uma tomada <strong>de</strong> ligação à terra.Recomendamos que trabalhe com a máquina a uma altura em que o utilizador estejacómodo:• O mais recomendável é trabalhar sentado numa ca<strong>de</strong>ira. Ajuste a altura da ca<strong>de</strong>iraaté que os olhos do utilizador fiquem à altura da parte mais alta da máquina.• Se trabalhar <strong>de</strong> pé, <strong>de</strong>pen<strong>de</strong>ndo da altura do utilizador, é recomendável colocaruma calça<strong>de</strong>ira entre a mesa e a máquina, <strong>de</strong> forma a que os olhos do utilizador fiquemà altura da parte mais alta da máquina.6.- ELIMINAÇÃO DE RESÍDUOSPor resíduo enten<strong>de</strong>-se qualquer substância ou objecto proveniente <strong>de</strong> activida<strong>de</strong>s humanasou <strong>de</strong> ciclos naturais, abandonada ou <strong>de</strong>stinada a ser abandonada.6.1 EMBALAGEM• Como a embalagem em que é fornecida a máquina <strong>CAPRI</strong> é <strong>de</strong> cartão, o mesmopo<strong>de</strong> ser reciclado como embalagem.• Como resíduo equipara-se aos resíduos sólidos urbanos e por isso só se po<strong>de</strong>colocar nos contentores especiais para cartão.• As protecções que protegem a máquina no interior da caixa <strong>de</strong> cartão são <strong>de</strong> materialpolimérico equiparável aos resíduos sólidos urbanos e, por isso, não po<strong>de</strong>m sereliminadas nas instalações normais <strong>de</strong> eliminação <strong>de</strong> resíduos.6.2 APARAS• Os resíduos provenientes da duplicação <strong>de</strong> chaves estão classificados como resíduosespeciais, mas equiparam-se aos resíduos sólidos urbanos, como por exemplo umesfregão metálico.• Estes resíduos <strong>de</strong>vem ser eliminados <strong>de</strong> acordo com as leis vigentes na UE, entregando-osnas instalações especiais <strong>de</strong> eliminação <strong>de</strong> resíduos.6.3 MÁQUINA• Antes <strong>de</strong> fazer a <strong>de</strong>molição da máquina é necessário colocá-la fora <strong>de</strong> serviço,cortando o fornecimento <strong>de</strong> energia eléctrica e separando as peças <strong>de</strong> plástico daspeças metálicas.• Após realizar esta operação po<strong>de</strong>m eliminar-se todos os resíduos em conformida<strong>de</strong>com as leis em vigor no país on<strong>de</strong> a máquina é usada.7.- TABELA CHAVE-FRESA-APALPADOR-IN-CLINAÇÃO-ADAPTADORPara po<strong>de</strong>r trabalhar a<strong>de</strong>quadamente, a máquina é completada com uma série <strong>de</strong> acessórios:Veja a lista abaixo8.- EXPULSÃOVer figura 23portuguese5.- SEGURANÇAPara sua segurança, recomendamos que cumpra as seguintes indicações:• Não tente ligar ou manipular a máquina até que todos os temas <strong>de</strong> segurança,instruções para a instalação, guia do operário e procedimentos <strong>de</strong> manutenção tenhamsido cumpridos e compreendidos.• Desligue sempre o fornecimento eléctrico, antes <strong>de</strong> realizar qualquer trabalho <strong>de</strong>limpeza ou manutenção.• Mantenha a máquina sempre limpa, assim como o seu ambiente.• Trabalhe com as mãos secas.
23 4.A4.B
5 6789 10
1112 13151416 17
181920 2122
REFERENCIAREFERENCEREFERENCEARTIKELNUMMERREFERENCEREFERÊNCIAMARCAMANUFACTURERMARQUEHERSTELLERMÆRKEMARCAFRESACUTTERFRAISEFRÄSERFRÆSERFRESAPALPADORTRACER POINTPALPEURTASTERFØLERAPALPADORINCLINACIONANGLEINCLINAISONNEIGUNGHÆLDNINGS-VINKELINCLINAÇÃOADAPTADORADAPTORADAPTATEURADAPTERADAPTERADAPTADORABC-6 ABC F-5 P-5ABC-7 ABC F-5 P-5ABL-1 ABLOY F-11 P-11 AD-ABLABL-2 ABLOY F-11 P-11 AD-ABLABL-3 ABLOY F-11 P-11 AD-ABLABL-4 ABLOY F-11 P-11 AD-ABLABU-16 ABUS F-1 P-1ABU-34 ABUS F-1 P-1 AD-CIABU-61 ABUS F-1 P-1 AD-CIABU-63 ABUS F-1 P-1 AD-CIABU-66 ABUS F-1 P-1 AD-CIAGA-12 AGA F-13 P-13AGA-25 AGA F-13 P-13AGA-29 AGA F-5 P-5AGA-38 AGA F-1 P-1AGA-39 AGA F-1 P-1AGA-42 AGA F-1 P-1AGA-43 AGA F-1 P-1AGA-44 AGA F-1 P-1AGA-48 AGA F-1 P-1AGA-49 AGA F-1 P-1AGA-50 AGA F-1 P-1AGB-2 AGB F-1 P-1AGB-4 AGB F-1 P-1AGB-5 AGB F-1 P-1AMG-8D AMIG F-5 P-5AMG-9D AMIG F-5 P-5AMG-10 AMIG F-5 P-5AMG-10D AMIG F-5 P-5AP-1D APEX F-13 P-13AP-1D CVC F-5 P-5AP-1D SIB F-14 P-14AP-3D APEX F-13 P-13AP-4D APEX F-13 P-13AP-5D APEX F-19 P-19AX-2.P AXA F-11 P-11AZ- 7 AZBE F-15 P-15AZ- 8D AZBE F-5 P-5AZ- 9 AZBE F-13 P-13AZ-12 AZBE F-13 P-13AZ-14 AZBE F-13 P-13AZ-29 AZBE F-13 P-13AZ-32 AZBE F-13 P-13BAI-8D BASI F-5 P-5BAI-9D BASI F-5 P-5BAG-1 BAGEM F-1 P-1BEY-1D BEY F-13 P-13BEY-2D BEY F-19 P-19BKY-1 BORKEY F-1 P-1BKY-2 BORKEY F-1 P-1BM-1.P BMW F-1 P-1BM-4 BMW F-11 P-11 AD-MJBM-5.P BMW F-11 P-11 AD-MJBM-6.P BMW F-11 P-11BRAS-1 BRAS F-13 P-13BUL-1 BULAT F-1 P-1BRI-16 BRICARD F-1 P-1BRI-25 BRICARD F-1 P-1 AD-CIBRI-26 BRICARD F-1 P-1 AD-CIBRI-27 BRICARD F-1 P-1 AD-CIBRI-28 BRICARD F-1 P-1 AD-CIBRI-29 BRICARD F-1 P-1 AD-CIBRI-30 BRICARD F-1 P-1 AD-CIBRI-31 BRICARD F-1 P-1 AD-CIBRI-33 BRICARD F-1 P-1 AD-CIBUL-1 BULAT F-1 P-1BYP-1D BYP F-19 P-19CAY-2 CAYS F-1 P-1CE-114 CES F-32 P-32CES WSM CES F-32 P-32CHU-10 CHUBB F-1 P-1CI-14 CISA F-1 P-1CI-17 CISA F-1 P-1
CI-21 CISA F-1 P-1 AD-CICI-25 CISA F-1 P-1 AD-CICI-26 CISA F-1 P-1 AD-CICI-30 CISA F-1 P-1 AD-CICI-31 CISA F-1 P-1 AD-CICI-32 CISA F-1 P-1 AD-CICI-33 CISA F-1 P-1 AD-CICI-35 CISA F-1 P-1 AD-CICI-48 CISA F-1 P-1 AD-CICI-56 CISA F-1 P-1 AD-CICI-57 CISA F-1 P-1 AD-CICI-59 CISA F-1 P-1CI-60 CISA F-1 P-1 AD-CICIT-1P CITROEN F_11 P-11COR-37 IFAM F-19 P-19COR-77 CORBIN F-5 P-5CVL-9D CVL F-13 P-13DAF-2 DAF F-13 P-13DAF-3D DAF F-13 P-13DAF-4D DAF F-13 P-13DEK-3 DEKABA F-1 P-1DEK-4 DEKABA F-1 P-1DEK-8 DEKABA F-1 P-1DLC-1 DELCA F-1 P-1DLC-2 DELCA F-1 P-1DLC-3 DELCA F-1 P-1DO-3 DOMUS F-1 P-1DO-4 DOMUS F-1 P-1DOM-17I DOM F-1 P-1DOM-22 DOM F-1 P-1DOM-30 DOM F-1 P-1DOM-31 DOM F-1 P-1DOM-32 DOM F-1 P-1DOM-33 DOM F-1 P-1 AD-STSDOM-34 DOM F-1 P-1 AD-STSDOM-39 DOM F-1 P-1DOM-39DOM F-1 / F-23 P-23(agujero rasgado)(elongated hole)(trou oblong)(Langloch)aflange hul(orificio rasgado)DOM-43 DOM F-1 P-1DOM-56D DOM F-1 P-1DOM-63D DOM F-1 P-1DOM-B1 DOM F-1 P-1DO-3 DOMUS F-1 P-1DO-4 DOMUS F-1 P-1DR-1 DIERRE F-11 P-11ELZ-10 ELZETT F-5 P-5EZ-DS10 EZCURRA F-1 P-1EZ-DS10 EZCURRA F-16 P-16EZ-DS10E EZCURRA F-1 P-1EZ-DS10E EZCURRA F-16 P-16EZ-DS15 EZCURRA F-1 P-1EZ-DS15 EZCURRA F-16 P-16EZ-DS15R EZCURRA F-1 P-1EZ-DS15R EZCURRA F-16 P-16FAV-2 BYP F-5 P-5FAC-19 FAC F-1 P-1FAC-23 FAC F-1 P-1FAY-1D FAYN F-5 P-5FIC-18 FICHET F-18 P-18 FIC18-DAKARFI-16.P TRW-SIPEA F-33 P-33FO-6.P FORD F-22 P-22 AD-FOFO-24P FORD F-11 P-11FTH-7 FTH F-5 P-5FTH-16 FTH F-19 P-19FTH-23 FTH F-5 P-5FTH-24 FTH F-5 P-5FTH-25 FTH F-5 P-5FTH-26D FTH F-5 P-5FTH-29 FTH F-5 P-5FTH-30 FTH F-5 P-5GDA-1.P GERDA F-1 P-1GIOB-3.P LANCIA F-6 P-6HTE-50 HTEC F-5 P-5HOND-17.P HONDA F-11 P-11
HU-2.P HUF F-11 P-11HU-HAA.P AUDI F-11 P-11 AD-AUDIHU-DH.P VOLVO F-11 P-11HU-DN.P VOLVO F-11 P-11IF-2 IFAM F-1 P-1IF-4 IFAM F-1 P-1IF-6 IFAM F-19 P-19IR-1.P IR F-1 P-1INCE-1E INCECA F-18 P-18ªINCE-2E INCECA F-18 P-18ªIS-6D ISEO F-1 P-1IS-10.P ISEO F-1 P-1IS-14D ISEO F-1 P-1ITO-2D ITO F-1 P-1JAR-1E JARDI F-14 P-14 AD-JAR1EJIS-4.P JIS F-11 P-11 AD-JISKA-1 KABA (8) F-1 P-1KA-2 KABA (20) F-5 P-5KA-2 KABA (20) F-43 P-43 45ºKA-3 KAB( emini) F-1 P-1 15ºKA-4 KABA (Cuattro) F-1 P-1 15ºKA-4 KABA Nueva F-1 P-26 45ºKA-5 ** KABA F-5 P-5KA-6 KABA F-1 P-1KA-7 KABA F-1 P-1KA-8 KABA F-1 P-1KA-10 KABA F-1 P-1KA-11 KABA F-1 P-1KAE-1 KALE F-1 P-1KAE-2 KALE F-1 P-1KAE-4 KALE F-1 P-1KAE-10D KALE F-1 P-1KAE-11D KALE F-1 P-1KAE-12D KALE F-13 P-13KE-1 KESO F-1 P-1 5ºKE-2 KESO F-1 P-1KE-3 KESO (2000) F-5 P-5KE-4 KESO(2000) F-1 P-1JAU-1.P TIBBE F-1 P-1JAU-2.P TIBBE F-1 P-1LAP- 4 LAPERCHE F-13 P-13LAP- 8D LAPERCHE F-13 P-13LAP-10D LAPERCHE F-13 P-13LAP-11D LAPERCHE F-13 P-13LAP-13.P LAPERCHE F-13 P-13LAP-17.P LAPERCHE F-13 P-13LAP-20.P LAPERCHE F-13 P-13LAP-21.P LAPERCHE F-13 P-13LAP-22.P LAPERCHE F-13 P-13LAP-23.P LAPERCHE F-13 P-13LIN-13 LINCE F-12B P-12BLIN-13 LINCE F-5 P-5LIN-19D LINCE F-5 P-5LIN-21D LINCE F-1 P-1MAS-15P MASTER F-6 P-6MASL-1 MASTER LOCK F-1 P-1MAZ-12.P1 MAZDA F-1 P-1MCM- 4SS MCM F-1 P-1MCM- 4SS MCM F-B P-BMCM- 4SS MCM F-C P-CMCM-10 MCM F-13 P-13MCM-16 MCM F-1 P-1MCM-21D MCM F-1 P-1MCM-27 MCM F-13 P-13ME-2.P MERCEDES F-11 P-11 AD-MJME-3.P MERCEDES F-11 P-11 AD-MJME-4.P MERCEDES F-11 P-11 AD-MMME-5.P MERCEDES F-11 P-11 AD-MMME-6.P MERCEDES F-11 P-11 AD-MMME-7.P MERCEDES F-11 P-11 AD-MMME-8.P MERCEDES F-11 P-11 AD-MMME-10.P MERCEDES F-11 P-11 AD-MMME-11.P MERCEDES F-11 P-11 AD-MMME-12.P MERCEDES F-11 P-11 AD-MMMLM-4 MLM F-1 P-1MSM-1 MSM F-19 P-19MULT-2.P MULTLOCK F-12A P-12AMULT-2.P MULTLOCK F-12B P-12BMULT-3.P MULTLOCK F-12A P-12A
MULT-3.P MULTLOCK F-12B P-12BMULT-4.P MULTLOCK F-12A P-12AMULT-4.P MULTLOCK F-12B P-12BMULT-5.P MULTLOCK F-12A P-12AMULT-5.P MULTLOCK F-12B P-12BMUL-T10.P MULTLOCK F-12A P-12AMUL-T10.P MULTLOCK F-12B P-12BNE-40.P VOLVO F-11 P-11NE-41.P VOLVO F-11 P-11NE-51P2 PEUGEOT F-11 P-11OJ-Q O<strong>JMA</strong>R F-5 P-5OMC-3 OMEC F-1 P-1OMC-4 OMEC F-1 P-1OP-11C1 OPEL F-11 P-11OP-WH.P OPEL F-11 P-11OP-WHC OPEL F-11 P-11OP-WY.P OPEL F-11 P-11PFA-13D (lateral) PFAFFENHAIN F-34 P-34PFA-14D (lateral) PFAFFENHAIN F-34 P-34PFA-15D (lateral) PFAFFENHAIN F-34 P-34PFA-16D (lateral) PFAFFENHAIN F-34 P-34PEN-2 PENZMASH F-1 P-1PEU-1C1 VALEO/PEUGEOT F-11 P-11PEU-2C1 VALEO/PEUGEOT F-11 P-11PIC-8D PICARD F-1 P-1PTN-1D POTENT F-19 P-19PTN-2D POTENT F-19 P-19ROSE-1 ROSSETTI F-1 P-1SAA-1.P SAAB F-11 P-11SCR-1 SECURITAL F-1 P-1SEA-1 SEA F-3 P-3 CanalSEA-1 SEA F-1 P-1 LateralSEA-2 SEA F-3 P-3 CanalSEA-2 SEA F-1 P-1 LateralSEC-1 SECUREMME F-19 P-19SEC-2 SECUREMME F-19 P-19SEC-3 SECUREMME F-19 P-19SER-3D SERRALLER F-1 P-1SIP-4P4 TRW-SIPEA F-11 P-11SIP4-P3 TRW-SIPEA F-11 P-11SPI-1 SPIDER F-1 P-1SPI-1D SPIDER F-1 P-1STS-35 STS F-1 P-1STS-36 STS F-1 P-1STS-37 STS F-1 P-1STS-38 STS F-1 P-1STS-X5 STS F-5 P-5STS-X6 STS F-5 P-5SUB-2.P SUBARU F-11 P-11T-10 Plus STS-TESA F5 P-5T-10 STS – TESA F-13 P-13T-10 2005 TESA F-1 P-1TE-T11 TESA F-5 P-5T-14 STS F-5 P-5TE-T12PLUS TESA F-5 P-5TE-T60 TESA F-5 P-5TE-T61 TESA F-5 P-5TE-T62 TESA F-5 P-5TE-T80 TESA F-5 P-5TE-T80SC TESA F-5 P-5TE-T82 TESA F-5 P-5TEC-2 TECSESA F-5 P-5TIT-6 TITAN F-1 P-1TOV-2 TOVER F-1 P-1TOV-4 TOVER F-1 P-1TOV-5 (2f25) TOVER F-1 P-1TOV-5 (2f25) TOVER F-6 P-6TOV-6 TOVER F-1 P-1TOV-7 TOVER F-1 P-1TOYO-18.P TOYOTA F-11 P-11TOYO-30.P1 TOYOTA F-11 P-11TRO-1 TARONI F-1 P-1TRO-1D TARONI F-1 P-1TV-3 IX – STS –TESA F-1 P-1TV-5 IX – STS –TESA F-1 P-1TV-8 IX – STS –TESA F-1 P-1TV-9 IX – STS – TESA F-1 P-1TX-1 SH-2 SH-3 F-19 P-19UCEM-5D UCEM F-14 P-14
UCEM-5I UCEM F-14 P-14UCEM-8D.P UCEM F-13 P-13UCEM-13D UCEM F-13 P-13UCEM-17D UCEM F-13 P-13URB-3D URBIS F-1 P-1URB-4D URBIS F-1 P-1VA-11 VACHETTE F-43 P-43 30ºVA-15 VACHETTE F-21 P-21VA-25 VACHETTE F-21 P-21 19ºVA-26 VACHETTE F-21 P-21 19ºVA-27 VACHETTE F-21 P-21 19ºVA-28 VACHETTE F-21 P-21 19ºVA-56 VACHETTE F-21 P-21 19ºVA-58 VACHETTE F-21 P-21 19ºVA-70 VACHETTE F-1 P-1CIT-1.P VALEO F-11 P-11PEU-1.P VALEO F-11 P-11TKY-2 T-KEY F-1 P-1URB-3D URBIS F-1 P-1URB-4D URBIS F-1 P-1VI-14 VIRO F-13 P-13WIL-22 WILKA F-1 P-1WIN-1D WINKHAUS F-15 P-15WIN-1I WINKHAUS F-15 P-15WIN-2D WINKHAUS F-15 P-15WIN-3D WINKHAUS F-15 P-15WIN-4D WINKHAUS F-15 P-15X-5 STS – TESA F-5 P-5 AD-STSX-6 STS – TESA F-5 P-5 AD-STSYA-23 YALE F-11 P-11 AD-JISYA-81 YALE F-1 P-1YAR-1 YARDENI F-13 P-13YAR-2 YARDENI F-13 P-13YAR-3 YARDENI F-13 P-13ZA-10 ZADI F-1 P-1ZA-14P ZADI F-33 P-33Con la mordaza universal (llaves tipo Fichet)With the universal clamp (Fichet type keys)Avec l’étau universel (clés type Fichet)Mit <strong>de</strong>r universellen Spannvorrichtung (Schlüssel vom Typ Fichet)Med universal kæben (nøgler af Fichet typen)Com o grampo universal (chaves tipo Fichet)FIC-2 FICHET F-11 P-11FIC-3 FICHET F-11 P-11FIC-4 FICHET F-11 P-11Con la mordaza universal (llaves tubulares)With the universal clamp (tubular keys)Avec l’étau universel (clés tubulaires)Mit <strong>de</strong>r universellen Spannvorrichtung (röhrenförmige Schlüssel)Med universal kæben (rørnøgler)Com o grampo universal (chaves tubulares)TUBULAR CHICAGO Y OTRAS F-8 P-8( El duplicado <strong>de</strong> este tipo <strong>de</strong> llaves <strong>de</strong>berá realizarse a bajas revoluciones).(This type of key should be cut at low revolutions).(La reproduction <strong>de</strong> ce type <strong>de</strong> clés doit être réalisée à basses révolutions).(Das Kopieren dieses Schlüsseltyps muss mit niedriger Drehzahl ausgeführt wer<strong>de</strong>n).(Kopiering af <strong>de</strong>nne nøgle type bør udføres med et lavt omdrejningstal)(A duplicação <strong>de</strong>ste tipo <strong>de</strong> chaves <strong>de</strong>ve realizar-se a baixas rotações).** Calzar la llave con una galga 0.3 mm. Apretar la llave en la mordaza con ayuda <strong>de</strong> la chapa <strong>de</strong> tope punta.** Pack the key with a 0.3 mm gauge. Tighten the key in the clamp with the help of the tip stop plate.** Chausser la clé avec une jauge <strong>de</strong> 0.3 mm. Serrer la clé dans l’étau à l’ai<strong>de</strong> <strong>de</strong> la plaquette <strong>de</strong> butée en pointe.** Untelegen Sie <strong>de</strong>n Schlüssel mit einer Lehre 0.3 mm. Spannen Sie <strong>de</strong>n Schlüssel in <strong>de</strong>r Spannvorrichtung mit Hilfe <strong>de</strong>s spitzen Anschlagblechs ein.** Nøglen bør fyl<strong>de</strong>s efter med en afstand på 0.3 mm. Spænd nøglen fast på kæben ved hjælp af spidstappen.** Colocar uma bitola <strong>de</strong> 0,3 mm na chave. Apertar a chave no grampo com a ajuda da chapa <strong>de</strong> pressão <strong>de</strong> ponta.
<strong>JMA</strong> HEADQUARTERSALEJANDRO ALTUNA, S.A.Tel +34 943 79 30 00Fax +34 943 79 72 43Bi<strong>de</strong>kurtzeta, 6P.O.Box - Apdo. 7020500 Arrasate - MondragónGipuzkoa – SPAINwww.jma.esventas@jma.es<strong>JMA</strong> ARGENTINA<strong>JMA</strong> ARGENTINA S.A.Tel +54-3461 462 422Fax +54 3461 462 607Av. Central Acero Argentino Oeste 678Parque industrial COMIRSA2900 San Nicolas (Prov. Buenos Aires)www.jma-argentina.cominfo@jma-argentina.com<strong>JMA</strong> FRANCE<strong>JMA</strong> FRANCETel +33 01 39 22 42 10Fax +33 01 39 22 42 11Technoparc13, rue Edouard JeanneretF- 78306 Poissy Ce<strong>de</strong>xwww.jmafrance.frservice.commercial@jmafrance.fr<strong>JMA</strong> INDIA<strong>JMA</strong> KEYS INDIA PVT. LTDTel +91 124 427 5482Fax +91 0124 428 5451H-239 Soshant Shopping Arca<strong>de</strong>Sunshant Lok-1, Block B122002 GurgaonHaryanawww.jmakeys.ininfo@jmakeys.in<strong>JMA</strong> MAROC<strong>JMA</strong> MAROC S.A.R.L.Tel +212 520 150 535Fax +212 520 150 536El OulfaCasablancaMarruecoswww.jma.majma@jma.ma<strong>JMA</strong> MEXICOLLAVES ALTUNA DE MEXICO S.A <strong>de</strong> C.VTel +52-33-3777-1600Fax +52-33-3777-1690Av. Aviación No. 5520Col. San Juan <strong>de</strong> OcotánC.P. 45019 Zapopan, Jaliscowww.jma.com.mxventas@jma.com.mx<strong>JMA</strong> POLSKA<strong>JMA</strong> POLSKA Sp. z.o.o.Tel +48 42 635 12 80Fax +48 42 635 12 8591- 342 Lodz ul. Zbąszynska 3www.jmapolska.plbiuro@jmapolska.pl<strong>JMA</strong> PORTUGALALTUNA PORTUGALCOMERCIO DE CHAVES UNIPESSOAL, LDA.Tel +35 121 994 7470Fax +35 121 994 7471Urbanizaçâo dos Areeiros, Lote 67 C/v2695-733 Sâo Joao da Talhawww.jmaportugal.comgeral@jmaportugal.com<strong>JMA</strong> UKSKS LTDTel +44 144 229 1400Fax +44 144 286 3683Unit 2, Canalsi<strong>de</strong>Northbridge RoadBerkhamstedHerts HP4 1EGwww.skskeys.co.uksales@skskeys.co.uk<strong>JMA</strong> USAALTUNA GROUP USA INC.Tel +1 817.385.0515Fax +1 817.385.48501513 Greenview Drive75050 Grand Prairie, Texaswww.jmausa.cominfo@jmausa.comMember Of Altuna Groupwww.jma.es