Contra Corriente - FIBERPOOL
Contra Corriente - FIBERPOOL
Contra Corriente - FIBERPOOL
- No tags were found...

Create successful ePaper yourself
Turn your PDF publications into a flip-book with our unique Google optimized e-Paper software.
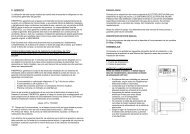
CROSS-CURRENT EQUIPMENT HANDBOOK5-FIXING THE NICHE IN THE LINERIn order to fix the niche in a liner wall you should follow theinstructions given in chapter 2 (place of installation).Fix the seals (nº19 fig 4) to the niche (nº21 fig4) with thescrews (nº19 fig 4), bearing in mind that the liner will liebetween the two seals (nº19 fig 4). Finally, fit the ring (nº17,fig 4) and attach it with the screws (nº16, fig 4).6-FITTING THE NICHE IN THE LINERThe niche is supplied with pipes nº22 and nº23 (Fig 4)already installed. Additionally, one of the hoses (nº24, fig 4)is supplied glued inside pipe nº22. Once the niche hasbeen fixed to the wall, following the instructions given inchapter 2, proceed to install the pneumatic and air lines.Installation of the air line:This line is made up of a hose (nº24), a flexible pipe (nº25),a male screw fitting (nº26) and a foot valve (nº27). All theseparts are supplied fitted, so it is only necessary to glue theend of the hose (nº24) to the pipe (nº23) which is alreadyfitted in the niche. It is important to fix the air line pipe to thewall of the housing so as to ensure that the foot valve is inthe upper part. This is so as to avoid sucking up dirt (seeFig. 8, page 20). Lastly , install the flexible pipe (nº15 fig 4)pressing it inside the nozzle in the interior of the niche.Installations of the pneumatic line:This line is made up a pipe (nº22), a hose (nº24) and aflexible pipe (nº25). As the pipe (nº22) and the hose (nº24)are already installed in the niche, you only need to glue thepipe (nº25). Before gluing the end of the pipe (nº25) to thehose (nº24), fit the transparent pipe (nº2 fig3) thought thehole in the niche. Fix it in position with the clamp (nº20 and20.1, fig 4). Once this is complete, glue the pipe (nº25) tothe hose (nº24).The end of the pipe (nº2, fig 3) will be connected to themicro switch located on one side of the hydro pneumaticcut out included with the cross-current equipment.FIG. 314FIG. 4