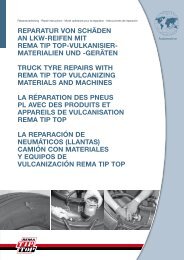
RepaRatuR von Schäden an pkw-Reifen mit Rema tip top ...
RepaRatuR von Schäden an pkw-Reifen mit Rema tip top ...
RepaRatuR von Schäden an pkw-Reifen mit Rema tip top ...
- No tags were found...

You also want an ePaper? Increase the reach of your titles
YUMPU automatically turns print PDFs into web optimized ePapers that Google loves.
Reparatur<strong>an</strong>leitung · Repair instructions · Mode opératoire pour la réparation · Instrucciones de reparaciónReparatur <strong>von</strong> Schäden <strong>an</strong>Pkw-<strong>Reifen</strong> <strong>mit</strong> REMA TIP TOP-Vulk<strong>an</strong>isiermaterialienund -gerätenAutomotivePassenger car tyre repairswith REMA TIP TOP vulc<strong>an</strong>izingmaterials <strong>an</strong>d machinesLa réparation des pneustourisme avec des produitset appareils de vulc<strong>an</strong>isationREMA TIP TOPReparación de neumáticos(ll<strong>an</strong>tas) turismo conmateriales y equipos devulc<strong>an</strong>ización REMA TIP TOP
Inhalt Seite Table of contents page1. Einleitung/Allgemeines 22. Begrifferund um die <strong>Reifen</strong>reparatur 43. Allgemeine Anforderungen<strong>an</strong> die <strong>Reifen</strong>beurteilungund Reparaturdurchführung 44. Reparatur <strong>von</strong> Stichverletzungenim Laufflächenbereich<strong>mit</strong> Minicombi 85. Reparaturim 1-Wege-System<strong>mit</strong> Thermopress-Vulk<strong>an</strong>isiergerätenund Thermopress-Rohpflastern 146. Reparaturim 2-Wege-System<strong>mit</strong> Thermopress Vulk<strong>an</strong>isiergerätenund REMA TIP TOP-Reparaturpflastern 227. Reparatur <strong>von</strong> Stichverletzungenim Laufflächenbereich <strong>mit</strong>REMA TIP TOP-REMASTEM undREMA TIP TOP-Reparaturpflastern 301. Introduction/general information 22. Termsregarding tyre repair 43. General rulesfor tyre inspection<strong>an</strong>d repair 44. Repairs to puncturesin the tread areawith Minicombi 85. Repair withThermopress vulc<strong>an</strong>izing machines<strong>an</strong>d uncured Thermopress patchesaccording to the one way system 146. Repair withThermopress vulc<strong>an</strong>izing machines<strong>an</strong>d REMA TIP TOP repair patchesaccording to the two way system 227. Repair to puncturesin the tread area withREMA TIP TOP REMASTEM <strong>an</strong>dREMA TIP TOP repair patches30
Table des matières page Contenido página1. Informations générales 22. Terminologiede la réparation des pneus 43. Règles généralesde l´inspectionet de la réparation des pneus 44. Réparation des perforations sur la b<strong>an</strong>dede roulement avec des pièces« champignon » Minicombi 85. Réparation par cuisson simult<strong>an</strong>éeavec des appareilsde vulc<strong>an</strong>isation Thermopress etdes emplâtres non vulc<strong>an</strong>isés Thermopress 146. Réparationpar cuisson en deux opérations avecdes appareils de vulc<strong>an</strong>isation Thermopresset des emplâtres REMA TIP TOP 227. Réparation à froiddes perforations sur la b<strong>an</strong>dede roulementavec des bouchons de gomme REMASTEMet des emplâtres REMA TIP TOP 301. Introducción / Generalidades 22. Terminología acercade la reparación de neumáticos 43. Requerimientos generalespara la examinacióny reparación de neumáticos 44. Reparación de pinchazosen la b<strong>an</strong>da de rodamientocon parches Minicombi 85. Reparaciónen el sistema de un solo pasocon vulc<strong>an</strong>izadoras Thermopress y parchesThermopress no vulc<strong>an</strong>izados 146. Reparaciónen el sistema de dos pasoscon vulc<strong>an</strong>izadoras Thermopressy parches RAD REMA TIP TOP 227. Reparaciónde pinchazosen la b<strong>an</strong>da de rodamientocon REMA TIP TOP REMASTEMy parches RAD REMA TIP TOP 30
1. Einleitung/Allgemeines 1. Introduction/general Information• Generelle Inst<strong>an</strong>dsetzungsmöglichkeit des <strong>Reifen</strong>s stetsunter Beachtung einschlägiger Beurteilungskriterien wiez.B. Gesamtzust<strong>an</strong>d des <strong>Reifen</strong>s, länderspezifsche Schadensbegrenzungenetc. fachgerecht überprüfen. Gesamten<strong>Reifen</strong> auf weitere, versteckte Schäden untersuchen.• Für die Reparatur empfehlen wir die Verwendung <strong>von</strong>REMA TIP TOP-Rauwerkzeugen und -Materialien.• Alle Angaben dieser Reparatur<strong>an</strong>leitung beziehen sich ausschließlichauf die Verwendung <strong>von</strong> Original REMA TIP TOP- Produkten.• Für ein gutes Reparaturergebnis ist neben dem Einsatzhochwertiger Reparaturmaterialien und Werkzeugen auchdie Beschaffenheit des entsprechenden Reparaturumfeldesausschlaggebend. Hierzu zählen u.a. folgende Faktoren:- Gute Lichtverhältnisse am Arbeitsplatz- Regelmäßige Reinigung des Arbeitsplatzesund der Geräte (Inst<strong>an</strong>dhaltung)- Vermeidung <strong>von</strong> Zugluft und direkter Sonneneinstrahlungauf die Reparaturstelle wärend der Reparatur- Lagerung aller Produkte gemäß den jeweiligenAnforderungen (s. Verpackung)- Technisch einw<strong>an</strong>dfreie und gewartete Geräteund Hilfs<strong>mit</strong>tel- Gut geschultes Personal• Änderungen <strong>an</strong> Materialien und Arbeitsabläufen, die dertechnischen Weiterentwicklung dienen, bleiben vorbehalten.• Bei der Auswahl des Reparaturmaterials immer gültigeREMA TIP TOP-Schadenstabellen beachten!© 2010 Alle Rechte vorbehalten, auch die der fototechnischenWiedergabe und der Speicherung auf elektronischen Medien.Die gewerbliche Nutzung dieser Anleitung, auch in Auszügen,ist nicht zulässig. REMA TIP TOP GmbH, 85586 Poing /Germ<strong>an</strong>y• Always check in a professional way according to appropriatecriteria, such as the general state of the tyre, nationalrepair li<strong>mit</strong>s etc. whether the tyre c<strong>an</strong> be repaired. Checkthe whole tyre for further hidden damage.• For tyre repairs, we recommend using REMA TIP TOPmaterials <strong>an</strong>d buffing tools. All the information given inthese working instructions refers only to the use of originalREMA TIP TOP products.• A proper repair requires not only the use of high qualityrepair materials <strong>an</strong>d tools but also <strong>an</strong> appropriate workingenvironment: for example:- good illumination of the working place- periodical cle<strong>an</strong>ing of the working place <strong>an</strong>d the tools(mainten<strong>an</strong>ce)- protection of the repair area against draught<strong>an</strong>d direct sunlight during the repair process- storage of all products according to thespecifications on the packs- well serviced, technically correct machines <strong>an</strong>d tools- well trained staff• We reserve the right to ch<strong>an</strong>ge our products <strong>an</strong>d processesin order to carry out technical improvements.• Always observe the valid REMA TIP TOP TIP TOP repaircharts etc., when selecting the appropriate repair materials.© 2010 These instructions are copyright. Their reproduction(including reproduction through various photographic methods<strong>an</strong>d storage by <strong>an</strong>y electronic medium) is subject to theapproval of REMA TIP TOP GmbH, 85586 Poing / Germ<strong>an</strong>y.Any commercial use of these instructions or <strong>an</strong>y part of themis prohibited.Allgemeine Sicherheitshinweise• Die den jeweiligen Materialien und Geräten beiliegendenVerarbeitungs- und Bedienungs<strong>an</strong>leitungen sorgfältig lesenund Sicherheitshinweise stets beachten.• Bei Arbeiten <strong>mit</strong> drehenden Werkzeugen und Geräten einschlägigeSicherheitsmaßnahmen (z.B. Schutzbrille, max.Upm) stets beachten.• Beim Umg<strong>an</strong>g <strong>mit</strong> Lösungen Sicherheitstexte und Symboleauf den Gebinden beachten! Gefährliche Werkzeuge,Lösungen o.ä.. stets für Unbefugte und Kinder unzugänglichaufbewahren!• Fachspezifische Unfallverhütungsvorschriften (UVV) derBerufsgenossenschaften sowie allgemeine Sicherheitshinweisebeachten!General safety instructions• Carefully read the operating <strong>an</strong>d application instructionsenclosed with the corresponding products/machines.Always observe the safety instructions.• When working with rotary tools, always take the necessaryprecautions (e.g. use safety eye goggles; observe maximumR.P.M. etc.).• When using solutions, observe the safety instructions <strong>an</strong>dsymbols on the containers.Always keep d<strong>an</strong>gerous tools, solutions etc. out of thereach of children <strong>an</strong>d unauthorized persons!• Observe general safety instructions <strong>an</strong>d the specific regulationsfor prevention of accidents from the employer´s liabilityinsur<strong>an</strong>ce association.Die in dieser Anleitung aufgeführten Artikelnummernfür Vulk<strong>an</strong>isier-Lösungen und Cemente bezeichnen ausschließlichCkw- und aromatenfreie Produktversionen.The reference numbers of the vulc<strong>an</strong>izing solutions <strong>an</strong>dcements mentioned in these instructions designate onlythe CFC-<strong>an</strong>d aromatic-free versions.
1. Introduction/informations générales 1. Introducción/Generalidades• Toujours <strong>an</strong>alyser de m<strong>an</strong>ière professionnelle les différentespossibilités de réparation du pneu selon des critères telsque l´état général du pneu, les li<strong>mit</strong>es de réparations envigueur d<strong>an</strong>s les différents pays etc. Vérifier si le pneu nepossède pas d´autres dommages cachés.• Pour la réparation, nous recomm<strong>an</strong>dons l´utilisation desoutils de râpage et des produits REMA TIP TOP. Toutesles informations données d<strong>an</strong>s ce mode opératoire seréfèrent uniquement à l´utilisation des produits d´origineREMA TIP TOP.• Une réparation correcte ne nécessite pas seulementl´emploi de produits et d´outils perform<strong>an</strong>ts mais aussi desconditions de travail convenables telles que :- bon éclairage du poste de travail- nettoyage régulier du poste de travail et des outils (entretien)- Lors de la réparation, ne pas exposer la zone à répareraux cour<strong>an</strong>ts d´air et à la lumière directe du soleil.- Pour chaque produit, respecter les préconisations destockage portées sur l´emballage.- outils et appareils techniquement parfaits et bienentretenus- un personnel qualifié• Nous nous réser<strong>von</strong>s le droit de modifier nos produits etnos procédés d<strong>an</strong>s un but d´amélioration technique.• Pour le choix des produits de réparation, respectez toujoursles chartes de réparation REMA TIP TOP etc. en vigueur.© 2010 Tous les droits d´auteur sur le présent mode d´emploisont réservés. Toute reproduction du présent ouvrage (y compriscelle effectuée par des procédés phototechniques) ettoute mémorisation sur des supports d´enregistrement électroniquesne sont permises qu´à l´autorisation de la sociétéREMA TIP TOP GmbH, 85586 Poing / Allemagne. Toute exploitationcommerciale du présent mode d´emploi, pour toutou partie, est interdite.• Siempre comprobar conforme a las reglas, que el neumáticopuede ser reparado consider<strong>an</strong>do criterios, como porejemplo el estado general del neumático, las li<strong>mit</strong>acionesespecíficas vigentes en su país respecto a la dimensión delas roturas, etc. Inspeccionar el neumático entero si existenroturas ocultas.• Para la ejecución de las reparaciones aconsejamosla utilización de herramientas y medios auxiliaresREMA TIP TOP.Todas las indicaciones de este m<strong>an</strong>ual se refierenexclusivamente a la aplicación de productos originalesREMA TIP TOP.• Para lograr un buen resultado de reparación, aparte de laaplicación de materiales y herramientas de alta calidad, esimprescindible condicionar el puesto de trabajo donde serealiza la reparación. Entre otros, los siguientes factoresson de especial import<strong>an</strong>cia:- Buenas condiciones de iluminación enel puesto de trabajo- Limpieza y m<strong>an</strong>tenimiento regulares delpuesto de trabajo y máquinaria- Evitar que haya corrientes de aire y que el neumáticoesté expuesto directamente a rayos solares dur<strong>an</strong>te lareparación- Almacenar los productos adecuadamente cumpliendolos requerimientos imprimidos en los envases- Observar que las máquinas y equipos estén siemprebien revisados y en perfecto estado técnico <strong>an</strong>tes deiniciar cualquier reparación- Personal bien capacitado / formado• Nos reservamos el derecho de introducir modificacionesque contribuyen al desarrollo técnico• ¡Observen siempre las actuales tablas de reparaciónREMA TIP TOP para la correcta selección de los materialesde reparación!© 2010 Reservados todos los derechos, incluyendo los dereproducción fototécnica y almacenamiento en cualquier soporteelectrónico. Queda prohibida la comercialización parcialo íntegra de estas instrucciones. REMA TIP TOP GmbH,85586 Poing / Alem<strong>an</strong>ia.Consignes générales de sécurité• Etudier les modes d´emploi joints aux produits et aux outilset toujours respecter les consignes de sécurité.• Lors de l’utilisation des outils rotatifs, toujours respecter lesconsignes de sécurité correspond<strong>an</strong>tes (comme par exemplelunettes de protection, nombre de tours/min. maximumetc.).• Lors de l´utilisation des solutions, tenir compte des consignesde sécurité et des symboles inscrits sur les conditionnements.Toujours stocker à un endroit inaccessible auxenf<strong>an</strong>ts et aux personnes non autorisées les outils et lessolutions susceptibles de provoquer des accidents.• Respecter la réglementation relative à la sécurité du travailainsi que les consignes générales de sécurité.Les numéros de référence des solutions de vulc<strong>an</strong>isationet des céments mentionnés d<strong>an</strong>s ce mode opératoire nedésignent que les versions s<strong>an</strong>s CFC (hydrocarbures chlorés)ni corps à noyau benzènique.Instrucciones generales de seguridad• ¡Leer detenidamente las instrucciones de aplicación yempleo que acompañ<strong>an</strong> los materiales y máquinas! ¡observarsiempre las instrucciones de seguridad!• ¡Observar en todos los trabajos con herramientas y aparatosrotativos las respectivas medidas de seguridad (porejemplo llevar gafas de protección, respetar las rotacionesmáximas por minuto, etc.)!• ¡Observar siempre las instrucciones de seguridad y símbolosde peligro en los envases de los disolventes! ¡Almacenarfuera del alc<strong>an</strong>ce de niños y/o personas ajenas al serviciolas herramientas, disolventes y otras merc<strong>an</strong>cías que constituyenuna fuente de peligro!• ¡Observar t<strong>an</strong>to las normas es<strong>tip</strong>uladas por las asociacionespara la prevención y el seguro de accidentes de trabajocomo las instrucciones generales de seguridad!Los números de artículos mencionados en este m<strong>an</strong>ualdesign<strong>an</strong> exclusivamente las versiones de solución vulc<strong>an</strong>izadoray cemento exentos de hidrocarburos clorados ycomposiciones aromáticas.
2. Begriffe rund um die<strong>Reifen</strong>reparaturHeiss-/Warmvulk<strong>an</strong>isationVerfahren zum Vulk<strong>an</strong>isieren <strong>von</strong> <strong>mit</strong> Rohgummi verfülltenSchadensstellen und den dort eingebauten Reparaturpflasternunter Zuführung <strong>von</strong> Wärme und Druck.Selbstvulk<strong>an</strong>isationVerfahren zum Vulk<strong>an</strong>isieren <strong>von</strong> eingebautenReparaturpflastern bei Raumtemperatur <strong>von</strong> mind. +18 °C.Schadensk<strong>an</strong>al/Lochk<strong>an</strong>alDurch das Eindringen eines Fremdkörpers in die Karkassebzw. den Gürtel entstehende Öffnung.Kombi-Reparaturkörper (z.B. MINICOMBI)Einteiliger Reparaturkörper, welcher gleichzeitig die Funktiondes Reparaturpflasters und der Schadensk<strong>an</strong>alfüllung erfüllt.Nur für Stichverletzungen im Laufflächenbereich einsetzbar.ReparaturpflasterFlächiges, in seinen Abmessungen und Festigkeiten auf diejeweiligen Schadens- und <strong>Reifen</strong>zuordnungen abgestimmtesReparatur<strong>mit</strong>tel.FestigkeitsträgerTextil- oder Stahlcord, der die Gewebelagen des <strong>Reifen</strong>sbildet und auch bei Reparaturpflastern ab einer bestimmtenGröße Verwendung findet.Trockenzeit/FingerrückenprobeBei der Verarbeitung <strong>von</strong> Vulk<strong>an</strong>isierlösungen und Cementenist sowohl eine Mindesttrockenzeit als auch eine max. zulässigeTrockenzeit zu beachten. Der optimale Zeitpunkt zumAufbringen eines Reparaturpflasters ist erreicht, wenn sichder Einstrich bei leichter Berührung <strong>mit</strong> dem Fingerrückenklebrig <strong>an</strong>fühlt, ohne am Finger haften zu bleiben. DieseFingerrückenprobe wird stets im R<strong>an</strong>dbereich der eingestrichenenFläche durchgeführt.2. Terms regardingtyre repairHot/warm vulc<strong>an</strong>izationMethod of vulc<strong>an</strong>izing rubber fillings <strong>an</strong>d repair patches onrepair areas by me<strong>an</strong>s of heat <strong>an</strong>d pressure.Self vulc<strong>an</strong>izationMethod of vulc<strong>an</strong>izing repair patches on injuries at roomtemperature(= at least + 18 °C)Puncture ch<strong>an</strong>nelHole made by a foreign body penetrating into the tyre casing/beltCombi repair unit (e.g. MINICOMBI)One-piece repair unit which at the same time serves as arepair patch <strong>an</strong>d fills the puncture ch<strong>an</strong>nel. It c<strong>an</strong> be usedonly for punctures to the tread.Repair patchFlat repair unit whose size <strong>an</strong>d strength are adapted to theindividual tyre <strong>an</strong>d injury sizes.ReinforcementTextile or fabric cord which forms the plies of a tyre <strong>an</strong>d is alsoused in repair patches from a specific size on.Drying time/Test with the back of the fingerThe minimum drying time <strong>an</strong>d the maximum permissibledrying time have to be observed during the application ofvulc<strong>an</strong>izing solutions <strong>an</strong>d cements. The right moment for theapplication of a repair patch has come, when the coat feels alittle sticky when touched with the back of the finger but doesnot adhere to the finger or leave a wet residue on the finger;the coat should be dry, but still have tack.This „test with the back of the finger“ is always carried out onthe edge of the coated surface area.3. Allgemeine Anforderungen<strong>an</strong> die <strong>Reifen</strong>beurteilungund Reparaturdurchführung3. General rules for tyre inspection<strong>an</strong>d repair3.1 Vor der Reparatur ist der gesamte <strong>Reifen</strong> hinsichtlichseiner Reparaturwürdigkeit sowie möglicher verdeckterSchäden und Kleinstverletzungen zu untersuchen. Hierbeiist auch der allgemeine Zust<strong>an</strong>d des <strong>Reifen</strong>s außerhalbdes eigentlich zu reparierenden Schadens in dieBeurteilung <strong>mit</strong> einzubeziehen.3.2 Soweit die Position der Schadensstelle bei Kleinstverletzungennicht bek<strong>an</strong>nt ist, <strong>Reifen</strong> durch l<strong>an</strong>gsames,stufenweises Anpumpen auf Betriebsdruck bringen undhierbei gesamten <strong>Reifen</strong> auf sichtbare oder sonstigeerkennbare Defekte überprüfen!3.3 Zur Beurteilung der Reparaturwürdigkeit sowie zurReparatur selbst ist der <strong>Reifen</strong> grundsätzlich <strong>von</strong> derFelge zu demontieren. Nach Abschluss der Schadensstellenbearbeitungist das benötigte Reparaturmaterialunter Einbeziehung <strong>von</strong> Schadensgröße und -Positionsowie des Geschwindigkeitsindexes auszuwählen.3.4 Die Bearbeitung der Schadensstelle hat sach- und fachgerechtunter Verwendung geeigneter Werkzeuge zuerfolgen. Hierbei festgestellte Folgeschäden sind gleichfallsin die Beurteilung der Reparaturwürdigkeit <strong>mit</strong> einzubeziehen.3.5 Die einschlägigen Vorschriften zur Inst<strong>an</strong>dsetzung <strong>von</strong>Luftreifen für Deutschl<strong>an</strong>d, z.B. §36 StVZO, sind zubeachten.3.1 Before starting <strong>an</strong>y repair, check whether it is technicallysafe <strong>an</strong>d economically viable to repair the tyre. Alsocheck the whole tyre for very small injuries <strong>an</strong>d furtherhidden damage. Always examine the tyre taking intoaccount also its general state outside the repair area.3.2 If a small injury is difficult to locate, slowly inflate thetyre step by step to the operating pressure, perm<strong>an</strong>entlychecking the whole tyre for <strong>an</strong>y noticeable defects.3.3 Always demount the tyre from the rim in order to checkwhether repairing it is technically safe <strong>an</strong>d economicallyviable <strong>an</strong>d to carry out the repair. After preparing theinjury, select the appropriate repair materials dependingon the size <strong>an</strong>d position of the injury as well as the speedrating.3.4 The injury area has to be prepared correctly by me<strong>an</strong>s ofthe appropriate tools. Further damage arising from theinjury, which may be found during this operation, alsohas to be included in the evaluation of the repairability ofthe tyre.3.5 Observe the relev<strong>an</strong>t regulations regarding tyre repair (e.g.in GB BS AU 159 f / DK DS 2044)
2. Terminologie de la réparationdes pneus2. Terminologie de la réparationdes pneusVulc<strong>an</strong>isation à chaudProcédé pour vulc<strong>an</strong>iser à l´aide de chaleur et de pression lesblessures bourrées de gomme crue et les emplâtres simult<strong>an</strong>ément.Auto-vulc<strong>an</strong>isationProcédé de vulc<strong>an</strong>isation des emplâtres posés sur des blessuresà une température ambi<strong>an</strong>te égale ou supérieure à+18 °C.C<strong>an</strong>al de perforationOuverture créée par un corps étr<strong>an</strong>ger qui a pénétré d<strong>an</strong>s lacarcasse/la ceinture.Pièce de réparation « champignon »(par exemple MINICOMBI)Pièce de réparation en une seule partie, qui sert à la foisd´emplâtre et de bouchon de gomme. Utilisable uniquementpour les perforations sur la b<strong>an</strong>de de roulement.EmplâtrePièce de réparation plate dont les dimensions et la résist<strong>an</strong>ceméc<strong>an</strong>ique sont adaptées aux types de pneus et de blessures.Plis/nappesEnsemble de cablés textiles ou métalliques compos<strong>an</strong>tl´ossature du pneu et entr<strong>an</strong>t d<strong>an</strong>s la fabrication des emplâtres.Temps de séchage/test du revers du doigtLors de l´application des solutions de vulc<strong>an</strong>isation et descéments, on doit tenir compte du temps de séchage minimumet du temps de séchage maximum. Le meilleur moment pourla pose de l´emplâtre est venu, lorsque en touch<strong>an</strong>t légèrementla couche de solution ou de cément, vous la sentezadhérer un peu au revers du doigt s<strong>an</strong>s qu´elle n´y reste collée.Ce « test du revers du doigt » s´effectue toujours sur le bordde la zone enduite de solution ou de cément.Vulc<strong>an</strong>ización en calienteProcedimiento en el que las roturas rellenadas con gomacruda y los parches aplicados vulc<strong>an</strong>iz<strong>an</strong> por medio de calory presión.Autovulc<strong>an</strong>ización (vulc<strong>an</strong>ización en frío)Procedimiento en el que los parches aplicados vulc<strong>an</strong>iz<strong>an</strong> auna temperatura ambiente de mínimo +18 °C.C<strong>an</strong>al de perforaciónHerida causada por un objeto que ha penetrado la carcasa /cinturones de capa estabilizadoraParche combinado (p.ej. MINICOMBI)Parche de una sola pieza que cumple al mismo tiempo lafunción de un parche de reparación y el relleno del c<strong>an</strong>al deperforación. Sólo aplicable para pinchazos en la b<strong>an</strong>da derodamiento.Parche de reparaciónMedio de reparación pl<strong>an</strong>o, adaptado en su dimensión y flexibilidada los requerimientos de las roturas (profundidad, diámetro,ángulo, etc.) y neumáticos (marca, dimensión, etc.).RefuerzoHilos textiles o alambres de acero que form<strong>an</strong> las capas textilesdel neumático y también hall<strong>an</strong> utilidad en parches deciertos tamaños.Tiempo de secado / prueba a dorso digitalEn la aplicación de líquidos vulc<strong>an</strong>iz<strong>an</strong>tes y cementos hay queconsiderar t<strong>an</strong>to el tiempo mínimo como máximo de secado.El tiempo justo para aplicar el parche se ha conseguidocu<strong>an</strong>do toc<strong>an</strong>do ligeramente con el dorso del dedo (índice)la superficie untada, ésta esté algo pegajosa sin que el dedoquede adherido. Esta prueba a dorso digital se realiza siempreen la orilla de la superficie untada.3. Règles générales de l´inspectionet de la réparation des pneus3. Requerimientos generalespara la examinacióny reparación de neumáticos3.1 Av<strong>an</strong>t la réparation, <strong>an</strong>alyser les possibilités de réparationdu pneu et vérifier que le pneu ne possède pas de petitesblessures et de dommages cachés. Il est égalementnécessaire de tenir compte de l´état général du pneu horsde la zone à réparer.3.2 Si la position d´une petite blessure est difficile à déterminer,gonfler le pneu lentement et graduellement jusqu´à sapression de service. Pend<strong>an</strong>t cette opération, inspecterle pneu pour déterminer toutes les blessures et tous lesendroits défectueux visibles.3.3 Pour <strong>an</strong>alyser les possibilités de réparation et pour effectuerla réparation, il est toujours nécessaire de démonterle pneu de la j<strong>an</strong>te. Après le débridage de la blessure,choisissez le produit de réparation convenable en ten<strong>an</strong>tcompte de la taille et de la position de la blessure ainsique de la catégorie de vitesse du pneu.3.4 Effectuer le débridage de la blessure de m<strong>an</strong>ière professionnelleà l´aide des outils convenables. Les suites de lablessure, que vous constaterez probablement pend<strong>an</strong>tcette opération, doivent également entrer d<strong>an</strong>s l´<strong>an</strong>alysedes possibilités de réparation.3.5 Observer les réglementations nationales relatives à laréparation des pneumatiques (par exemple, pour la RFA :§36 StVZO).3.1 Antes de iniciar la reparación hay que examinar el neumáticopor si puede ser reparado o no y si existen algunasroturas ocultas o muy pequeñas. Aparte de las zonasdañadas, hay que considerar también el estado generaldel neumático.3.2 Mientras la posición de la rotura de dimensiones mínimasno se conozca, hay que inflar el neumático paulatinamentehasta que alc<strong>an</strong>ce la presión de trabajo control<strong>an</strong>do elneumático entero si existen defectos visibles o, de otram<strong>an</strong>era, perceptibles.3.3 Para considerar reparable un neumático y repararlo, elneumático siempre ha de ser desmontado de la ll<strong>an</strong>ta.Finalizada la preparación del neumático para que éstepueda ser reparado (limpieza, raspado, etc.) tiene queser seleccionado el material de reparación requerido bajoconsideración del tamaño de la rotura y su posición, lomismo que el índice de velocidad marcado en el neumático.3.4 La preparación de la rotura tiene que ser llevada a cabosiguiendo las pautas profesionales y us<strong>an</strong>do las herramientasapropiadas. La preparación de la rotura da unaperfecta oportunidad a detectar deterioros secundariosque se deben a la penetración del objeto que la causó.Estos deterioros secundarios también son import<strong>an</strong>tespara juzgar reparable o no el neumático.3.5 ¡Observen las normas nacionales vigentes para la reparaciónde neumáticos (en Alem<strong>an</strong>ia p.ej. §36 StVZO)!
4. Reparatur <strong>von</strong>Stichverletzungenim Laufflächenbereich<strong>mit</strong> REMA TIP TOPMinicombiBeachten Sie bitte auch stets dieaktuelle Verarbeitungs<strong>an</strong>leitung injeder Packung.4.1 Anwendungsbereich Minicombi:Minicombi-Reparaturen dürfen nurim vorgegebenen Laufflächenbereichausgeführt werden.Abb./fig./esq. 4.2aAbb./fig./esq. 4.2b< 90° ± 15° OK > 15°falschwrongincorrectincorrecto4.2 Schadensstelle lokalisieren undStelle <strong>mit</strong> Kreide markieren.<strong>Reifen</strong> demontieren. Fremdkörper,welcher den Schaden verursachthat, entfernen und Verlauf des Schadensk<strong>an</strong>als<strong>mit</strong> Ahle oder Vorstecher(Art.Nr. 836 5613) feststellen.Hinweis: Minicombi-Reparaturkörpernur bei einem Schadensverlauf <strong>von</strong>< 90° ± 15° einsetzen.Reparaturbereich lt. Skizzen (Pkt.4.1) und Zuordnungstabelle beachten!(Abb 4.2 a - c)Abb./fig./esq. 4.2cAbb./fig./esq. 4.3aAbb./fig./esq. 4.3b4.3 Schadensgröße <strong>an</strong>h<strong>an</strong>d des entferntenFremdkörpers sowie derVerletzungen am <strong>Reifen</strong> innen undaußen er<strong>mit</strong>teln und geeignetenRotierfräser auswählen. (Abb 4.3 a)Achtung: Die in den Werkstattsortimentenbeiliegenden HSS-Rotierfräsersind verschleißbedingt nach max.ca. 25 Reparaturen zu ersetzen!Reparaturprofis verwenden alsErsatz REMA TIP TOP-HM-Rotierfräser,welche eine bis zu 10-facheHaltbarkeit gegenüber HSS-Rotierfräsernerreichen. (Abb 4.3 b)
4. Repairs to puncturesin the tread areawith REMA TIP TOPMinicombi4. Repairs to puncturesin the tread areawith REMA TIP TOPMinicombi4. Reparación depinchazos en lab<strong>an</strong>da de rodamientocon parchesMinicombiAlways observe the current applicationinstructions included in everypack.4.1 Minicombi field of application:Minicombi repairs c<strong>an</strong> be carriedout only in the marked tread area.Toujours observer aussi le moded´emploi actuel inclus d<strong>an</strong>s chaqueemballage.4.1 Domaine d´application des pièces« champignon » Minicombi :Les réparations Minicombi nedoivent être effectuées que d<strong>an</strong>sla zone autorisée de la b<strong>an</strong>de deroulement.Les rogamos observen siempre tambiénlas instrucciones actuales deaplicación que acompañ<strong>an</strong> cadaenvase.4.1 Campos de aplicación para los parchesMinicombi:Las reparaciones Minicombi debenllevarse a cabo exclusivamente enla zona marcada de la b<strong>an</strong>da derodamiento.Hartmetall-Rotierfräser (hohe Lebensdauer, einfache und schnelle Schadensbearbeitung) passend für:Carbide mill cutter (long service life, for quick <strong>an</strong>d easy injury preparation) suitable for:Fraise carbure (longue durée de vie, pour un alésage facile et rapide de la perforation) conven<strong>an</strong>t pour :Fresas rotativas de metal duro (vida útil larga, preparación simple y rápida de la zona dañada) aptas para:Minicombi A3, Ø 3 mm: Art.Nr./ref.no./no.réf./no. art. 595 4900Minicombi A4,5 Ø 4,5 mm: Art.Nr./ref.no./no.réf./no. art. 595 5019Minicombi A6 Ø 6 mm: Art.Nr./ref.no./no.réf./no. art. 595 4962Minicombi B8 Ø 8 mm: Art.Nr./ref.no./no.réf./no. art. 595 4948Minicombi B10, Ø 10 mm: Art.Nr./ref.no./no.réf./no. art. 595 50604.2 Locate the damaged spot <strong>an</strong>d markit with a piece of chalk.Demount the tyre. Remove theforeign body which has caused theinjury. Then determine the directionof the puncture ch<strong>an</strong>nel using <strong>an</strong>awl or a probe (ref.no. 836 5613).Note: Use Minicombi repair units only ifthe puncture ch<strong>an</strong>nel has <strong>an</strong> <strong>an</strong>gleof inclination of < 90° ± 15°.As to the repairable area, refer tothe diagrams (section 4.1); alsoobserve the table. (fig. 4.2 a - c)4.3 Determine the injury size by measuringthe foreign body removed <strong>an</strong>dthe size of the injury inside <strong>an</strong>doutside the tyre. Then select theappropriate mill cutter. (Fig. 4.3 a)Attention: Replace the HSS mill cutters(included in the workshop kits)after approx. 25 repairs, becauseof wear.Instead, tyre repair specialists useREMA TIP TOP HM carbide millcutters, which last up to 10 timeslonger th<strong>an</strong> HSS mill cutters. (Fig. 4.3 b)4.2 Localiser la blessure et la repérerà l´aide d´une craie. Démonter lepneu. Enlever le corps étr<strong>an</strong>ger quia causé la blessure et déterminer ladirection du c<strong>an</strong>al de perforation àl´aide d´une alêne ou d´une pointed´inspection (réf. 836 5613).<strong>Rema</strong>rque : N´utiliser les pièces« champignon » Minicombi qu´encas d´une inclinaison de la perforationde < 90° ± 15°.Pour la zone réparable, se référeraux croquis (paragraphe 4.1) ;observer également le tableau deréparation (fig. 4.2 a - c).4.3 Déterminer la taille de la blessureen pren<strong>an</strong>t les mesures du corpsétr<strong>an</strong>ger enlevé et de la blessure àl´intérieur et à l´extérieur du pneu.Ensuite choisir la fraise appropriée. (fig. 4.3 a)Attention : En raison de l´usure, remplacerles fraises acier HSS jointes auxNécessaires d´Atelier après avoireffectué tout au plus 25 réparationsenviron.Au lieu de ce type de fraises, lesspécialistes de la réparation utilisentdes fraises carbure REMA TIP TOPdont la durée d´utilisation est aumaximum 10 fois plus longue quecelle des fraises acier HSS. (fig. 4.3 b)4.2 Localizar el pinchazo y marcarlocon tiza. Desmontar el neumático.Eliminar el objeto que causó larotura y averiguar la dirección de laperforación medi<strong>an</strong>te una lezna oun punzón (no. art. 836 5613).Nota: ¡Utilizar los parches combinadosMinicombi exclusivamente enperforaciones con un ángulo de< 90° ± 15°!¡Respetar la posición de la roturasegún se indica en el esquema (pto.4.1) y la tabla de reparación! (esq. 4.2 a - c)4.3 Determinar las dimensiones de larotura medi<strong>an</strong>te el objeto eliminadoy la perforación en el interior y exteriordel neumático. Seleccionar lafresa correspondiente. (esq. 4.3 a)Atención: Repong<strong>an</strong> después de 25reparaciones las fresas rotativasHSS incluidas en el surtido taller.Estas fresas sufren cierto desgasteque podría influir en la reparaciónsi se exceden las 25 reparacionesindicadas.La mayoría de los profesionales utiliz<strong>an</strong>como repuesto / sustituto lasfresas rotativas de metal duro HMque les ofrecen una duración dehasta 10 veces mayor en comparacióncon las fresas HSS. (esq. 4.3 b)
Abb./fig./esq. 4.44.4 <strong>Reifen</strong>innenseite im Schadensbereich<strong>mit</strong> REMA TIP TOP LiquidBuffer <strong>von</strong> Trenn<strong>mit</strong>tel und Schmutzsäubern. Lochk<strong>an</strong>al <strong>mit</strong> ausgewähltemRotierfräser unter Berücksichtigungdes Schadensverlaufes(siehe Pkt. 4.2) zuerst <strong>von</strong> der<strong>Reifen</strong>innenseite nach außen und<strong>an</strong>schließend <strong>von</strong> außen nachinnen ausfräsen. Vorg<strong>an</strong>g 1 - 2 xwiederholen! Empfohlene Upm. ca.2500. (Abb. 4.4)Hierbei weiterreichende Beschädigungendes Festigkeitsträgers(Rost etc.) vollständig entfernen,ggf. Vorg<strong>an</strong>g <strong>mit</strong> dem nächst größerenRotierfräser wiederholen, dabeistets max. Schadensabmessungenfür Minicombi beachten!Sicherheitshinweis:Schutzbrille benützen!4.5 <strong>Reifen</strong>innenseite in der Größedes Minicombi-Tellers <strong>mit</strong> Kreide<strong>an</strong>zeichnen. <strong>Reifen</strong> <strong>mit</strong> <strong>Reifen</strong>-Schlauch-Sp<strong>an</strong>ner (Art.-Nr. 5952988) sp<strong>an</strong>nen und Innerliner <strong>an</strong>schließendz. B. <strong>mit</strong> Konturscheibe(Art.-Nr. 595 4319) sorgfältig aufrauen.Innerliner nicht durchrauen!Anschließend Raustaub trockenund ohne Zuhilfenahme <strong>von</strong>Lösungs<strong>mit</strong>tel oder Druckluft etc.entfernen. (Abb. 4.5)Sicherheitshinweis:Schutzbrille benützen!Abb./fig./esq. 4.54.6 Aufgeraute Stelle 1 x <strong>mit</strong>REMA TIP TOP Spezial Cement BLeinstreichen. <strong>Reifen</strong> auf 3- oder 9-Uhr-Position drehen und Einstrichca. 10 min trocknen lassen (Fingerrückenprobe). (Abb. 4.6)Sicherheitshinweis:Beim Umg<strong>an</strong>g <strong>mit</strong> LösungenSicherheitstexte und Symbole aufden Gebinden und Verpackungenbeachten! Soweit Minicombi-Reparaturkörper ohne integriertenEinziehstift verwendet werden,während der Trockenzeit Schaft desMinicombi ca. 10-15 mm durch dieÖse der Einführsonde schieben unddarin festklemmen.Abb./fig./esq. 4.610
4.4 Using REMA TIP TOP Liquid Buffer,remove mould release agents <strong>an</strong>ddirt from the repair area inside thetyre. Prepare the puncture ch<strong>an</strong>nelwith the appropriate mill cutterfrom the tyre inside outwards, thenfrom the outside to the inside ofthe tyre, observing the direction ofthe puncture ch<strong>an</strong>nel (see section4.2). Repeat this operation onceor twice. Recommended R.P.M.approx. 2500. (fig. 4.4)Thus completely remove <strong>an</strong>y materialwhich may adversely affect thecasing/belt plies (rust etc.).If necessary, repeat this operationusing the next larger mill cutter,always observing the maximuminjury sizes for the Minicombi repairunits.Safety instruction:Use safety eye goggles!4.4 A l´aide du Rapeur Chimique (LiquidBuffer) REMA TIP TOP, débarrasserla zone à réparer à l´intérieur dupneu de lubrifi<strong>an</strong>ts de moule et desalissures.Aléser la perforation à l´aide dela fraise choisie compte tenu dela direction de la perforation (voirparagraphe 4.2), en av<strong>an</strong>ç<strong>an</strong>td´abord de l´intérieur vers l´extérieurdu pneu, ensuite de l´extérieur versl´intérieur. Répéter cette opérationune ou deux fois. Vitesse de rotationrecomm<strong>an</strong>dée: environ 2500t/mn. (fig. 4.4)Pend<strong>an</strong>t cette opération, enlevercomplètement les détériorationsdes nappes (rouille etc.). Si nécessaire,aléser à nouveau à l´aide dela fraise de la taille immédiatementsupérieure. Toujours observer lesblessures maximum prévues pourle Minicombi.Consigne de sécurité :Utiliser des lunettes de protection.4.4 Quitar con el Liquid Buffer,REMA TIP TOP los restos de lubrific<strong>an</strong>tesde molde y contaminacionesde la zona dañada en el interiordel neumático. Quitar el materialsobr<strong>an</strong>te del c<strong>an</strong>al de la perforaciónfresándolo bajo consideración dela dirección de la rotura desde elinterior del neumático hacia afueray, a continuación, desde afuerahacia adentro. Repetir de una a dosveces. Aconsejamos 2.500 r.p.m. (esq. 4.4)En esta ocasión eliminar por completolas roturas secundarias en elrefuerzo (oxidación, etc.); eventualmenterepetir el proceso con unafresa un tamaño mayor. ¡Siempretener en consideración las dimensionesmáximas reparables conMinicombi!Instrucción de seguridad:¡Utilizar gafas de protección!4.5 Mark <strong>an</strong> area as large as theMinicombi base with a piece ofchalk, on the tyre inside. Spreadthe tyre with a car tyre spreader (ref.no. 595 2988). Then carefully buffthe inner liner using e.g. a domerasp (ref.no. 595 4319).Do not buff through the inner liner!Then remove the buffing dust withoutusing <strong>an</strong>y liquid, solvent orcompressed air etc. (fig. 4.5)Safety instruction:Use safety eye goggles!4.5 A l´aide d´une craie, tracer les contoursde l´embase du Minicombi surl´intérieur du pneu.Ecarter le pneu à l´aide de l´écarteurm<strong>an</strong>uel (réf. 595 2988). Ensuite râpersoigneusement la gomme ét<strong>an</strong>chepar exemple à l´aide d´une râpecloche (réf. 595 4319). Ne pas râpertrop profondément de m<strong>an</strong>ière àpercer la gomme ét<strong>an</strong>che. Ensuiteenlever la poussière de râpage àsec, s<strong>an</strong>s utiliser de solv<strong>an</strong>ts oud´air comprimé etc. (fig. 4.5)Consigne de sécurité :Utiliser des lunettes de protection !4.5 Marcar el contorno de la base delMinicombi con tiza en el interior delneumático. Abrir el neumático conayuda del abridor extensor (No.Art. 595 2988) y raspar concienzudamentela capa butílica (innerliner) con la rueda raspadora (No.Art. 595 4319). No perforar la capabutílica. Eliminar en seco el polvodel raspado, es decir, sin utilizardisolventes ni aire comprimido, etc. (esq. 4.5)Instrucción de seguridad:¡Utilizar gafas de protección!4.6 Apply one coat of REMA TIP TOPSpecial Cement BL to the buffedarea. Turn the tyre so that the repairarea is in the 3 or 9 o´clock position<strong>an</strong>d let the coat dry for approx. 10minutes. (Test with the back of yourfinger.) (fig. 4.6)Safety instruction:When using solutions, observe thesafety instructions <strong>an</strong>d symbols onthe packs <strong>an</strong>d containers.If Minicombi repair units withoutmetal pilots are used, insert theMinicombi stem during the dryingtime, approx. 10-15 mm intothe eyelet opening of the insertingprobe <strong>an</strong>d secure it there.4.6 Appliquer une couche de SpécialCément BL REMA TIP TOP sur lasurface râpée. Tourner le pneu dem<strong>an</strong>ière à mettre la blessure d<strong>an</strong>sla position 3 ou 9 heures.Laisser sécher la couche pend<strong>an</strong>tenviron 10 minutes (test du reversdu doigt). (fig. 4.6)Consigne de sécurité :Lors de l´utilisation des solutions,tenir compte des consignes desécurité et des symboles inscritssur les conditionnements et lesemballages.En cas de l´utilisation des pièces« champignon » Minicombi s<strong>an</strong>stige métallique intégrée, insérer unbout d´environ 10-15 mm de la tigedu Minicombi d<strong>an</strong>s l´oeuillet de latige de guidage et l´y fixer, pend<strong>an</strong>tle temps de séchage.4.6 Untar la zona raspada con unacapa de Special Cement BLREMA TIP TOP. Posicionar la zonadañada a las 3 ó 9 horas y dejarsecar la capa unos 10 minutos.(Prueba a dorso digital). (esq. 4.6)Instrucción de seguridad:¡Trat<strong>an</strong>do con disolventes, observarsiempre las instrucciones de seguridady símbolos de advertencia enlos envases y embalajes!Al utilizar parches Minicombi sinpasador metálico integrado, introducirdur<strong>an</strong>te el tiempo de secadoel vástago del Minicombi de 10 a 15mm en el ojo de la sonda y eng<strong>an</strong>charlo.11
4.7 Nach erfolgter Trockenzeit SpecialCement BL Tube <strong>an</strong> der <strong>Reifen</strong>innenseiteam Lochk<strong>an</strong>al <strong>an</strong>setzenund diesen durch Eindrücken <strong>von</strong>Special Cement BL vollständig gummieren.Abb./fig./esq. 4.7aAchtung:Die bereits gestrichene <strong>Reifen</strong>innenseitesowie den Schaftdes Minicombi nicht benetzen!Anschließend sofort Einziehstift/Einführsonde des Minicombi durchden Lochk<strong>an</strong>al <strong>von</strong> innen nachaußen führen, <strong>mit</strong> Flachz<strong>an</strong>ge fassenund Reparaturkörper soweitwie möglich gerade nach außen ziehen.Minicombi am Schaft nachfassenund Einziehvorg<strong>an</strong>g beenden,sobald der Minicombi-Teller pl<strong>an</strong> <strong>an</strong>der <strong>Reifen</strong>innenseite <strong>an</strong>liegt. (Abb.4.7 a und 4.7 b)Abb./fig./esq. 4.7b4.8 Minicombi-Teller <strong>an</strong>schließend kräftigund lückenlos <strong>mit</strong> schmalemAnroller (Art.-Nr. 595 1044) <strong>von</strong> derMitte nach außen <strong>an</strong>rollen.Tellerr<strong>an</strong>d und evtl. verbliebeneRaufläche <strong>mit</strong> REMA TIP TOPInnerliner Sealer (z.B. Art.-Nr. 5159004) versiegeln. (Abb. 4.8)Abb./fig./esq. 4.84.9 Reparaturstelle abschließend auffehlerfreie Ausführung überprüfen,<strong>Reifen</strong> montieren und auf Betriebsdruckbringen. Erst d<strong>an</strong>n überstehendenSchaft abschneiden, ohnedar<strong>an</strong> zu ziehen.Nach erfolgter Dichtigkeitsprüfungk<strong>an</strong>n der <strong>Reifen</strong> sofort in Betriebgenommen werden. Die Verbindungzwischen Minicombi und <strong>Reifen</strong>erfolgt durch Selbstvulk<strong>an</strong>isationselbsttätig während der Fahrt. (Abb. Nr. 4.9)Abb./fig./esq. 4.912
4.7 At the end of the drying time, turnthe tyre so that the injury is eitherin the 5 or 7 o´clock position; thenplace the tube of Special CementBL at the opening of the puncturech<strong>an</strong>nel inside the tyre <strong>an</strong>d squeezeSpecial Cement BL into the puncturech<strong>an</strong>nel until it is completelyfilled.Attention:Do not moisten the already coatedtyre inside nor the Minicombistem. Immediately push the metalpilot/the inserting probe of theMinicombi through the puncturech<strong>an</strong>nel from the tyre inside outwards,seize it with flat pliers <strong>an</strong>dpull the repair unit outwards as faras possible. Take care to pull therepair unit straight in the direction ofthe puncture ch<strong>an</strong>nel. Take hold ofthe Minicombi stem <strong>an</strong>d pull it untilthe Minicombi base is flush with thetyre inside. (fig. 4.7 a <strong>an</strong>d 4.7 b)4.7 A la fin du temps de séchage, placerun tube de Spécial Cément BL àl´entrée du c<strong>an</strong>al de perforation côtéintérieur du pneu et presser le tubede m<strong>an</strong>ière à remplir complètementle c<strong>an</strong>al de perforation.Attention :Ne pas humecter la tige duMinicombi ni la surface déjà enduiteà l´intérieur du pneu. De l´intérieurdu pneu, introduire aussitôt la tigemétallique/la tige de guidage duMinicombi d<strong>an</strong>s le c<strong>an</strong>al de perforation,saisir celle-ci avec unepince plate et tirer la pièce « champignon» vers l´extérieur aussi loinque possible, d<strong>an</strong>s un mouvementrégulier. Ensuite saisir la tige duMinicombi et la tirer jusqu´à ce quel´embase du Minicombi s´appliqueparfaitement à l´intérieur du pneu. (fig. 4.7 a et 4.7 b)4.7 Tr<strong>an</strong>scurrido el tiempo de secado,introducir el tubo de Special CementBL desde el interior del neumático ala perforación y gomarla completamente.Atención:¡No untar de cemento ni el interiordel neumático ya tratado, ni elvástago del Minicombi! A continuaciónproceder a llevar el pasadormetálico/la sonda del Minicombidesde adentro, a través del c<strong>an</strong>al deperforación, hacia afuera. Agarrarlo/-la con la tenaza de pico pl<strong>an</strong>o ytirar de él, agarrar el vástago y tirardel parche hasta que la base seajuste perfectamente en el interiordel neumático. ¡No estirar demasiadodel pasador / de la sonda, ni delvástago! (esq. 4.7 a/4.7 b)4.8 Then using the thin stitcher (ref.no.595 1044), vigorously stitch on theMinicombi base over its whole surface,from the centre outwards.Seal the edge of the base <strong>an</strong>d <strong>an</strong>ystill exposed, buffed surface areaswith REMA TIP TOP InnerlinerSealer (e.g. ref.no. 515 9004). (fig. 4.8)4.8 Ensuite moleter vigoureusementtoute la surface de l´embase duMinicombi avec la molette fine(réf.595 1044) en av<strong>an</strong>ç<strong>an</strong>t du centrevers l´extérieur.Appliquer du REMA TIP TOPInnerliner Sealer (par exemple réf.515 9004) pour ét<strong>an</strong>chéifier le bordde l´embase du Minicombi et leszones râpées qui se trouvent éventuellementdécouvertes. (fig. 4.8)4.8 A continuación rodillar la base delMinicombi fuertemente y sin dejaraire atrapado con el rodillo fino(No. Art. 595 1044), desde el centrohacia afuera.Untar la orilla del parche y el excesode raspado con el sell<strong>an</strong>te butílico(Innerliner Sealer, p. ej. No. Art. 5159004). (esq. 4.8)4.9 Finally check the repair area fordefects. Mount the tyre <strong>an</strong>d inflateit to the operating pressure.Thencut the protruding stem withoutstretching it.After having been checked for airtightness, the tyre c<strong>an</strong> immediatelybe put back into operation.The vulc<strong>an</strong>ization between the Minicombi<strong>an</strong>d the tyre is automaticallycompleted under normal runningconditions. (fig 4.9)4.9 Finalement, vérifier si la réparationne présente pas de défauts. Monterle pneu et le gonfler à la pression deservice. Ensuite couper le bout dela tige du Minicombi qui dépasse,s<strong>an</strong>s le tirer.Contrôler ét<strong>an</strong>chéité du pneu. Lepneu peut être remis en serviceaussitôt. La vulc<strong>an</strong>isation entre leMinicombi et le pneu se fait automatiquementpend<strong>an</strong>t le roulage. (fig. 4.9)4.9 Comprobar que la reparación sehaya llevado a cabo correctamente.Montar el neumático e inflarlo hastaque alc<strong>an</strong>ce la presión de trabajo.Sólo entonces cortar el vástagosobresaliente, pero sin estirar deél.Después de controlar la impermeabilidadde la zona reparada,el neumático puede ser utilizadoinmediatamente. La unión entre elMinicombi y el neumático se realizapor autovulc<strong>an</strong>ización sobre la marcha. (esq. 4.9)13
5. Reparatur im 1-Weg-System <strong>mit</strong>ThermopressSchnellvulk<strong>an</strong>isiergerätenundThermopress-RohpflasternArbeitsgänge bei der Reparatur <strong>von</strong>Radialreifen, dargestellt <strong>an</strong>h<strong>an</strong>d einerSeitenw<strong>an</strong>dverletzung.5.1 Anwendungsbereich Thermopress-RohpflasterHinweis:Thermopress-Rohpflaster nur inVerbindung <strong>mit</strong> Thermopress- Schnellvulk<strong>an</strong>isiergeräten verarbeiten!5.2 Schadensstelle lokalisieren undStelle <strong>mit</strong> Kreide markieren. <strong>Reifen</strong>demontieren und ggf. Fremdkörper,welcher den Schaden verursachthat, entfernen. <strong>Reifen</strong> <strong>mit</strong>Rep-Boy (Art.-Nr. 517 0777) sp<strong>an</strong>nenund <strong>Reifen</strong>innenseite im Schadensbereich<strong>mit</strong> REMA TIP TOPLiquid Buffer <strong>von</strong> Trenn<strong>mit</strong>tel undSchmutz säubern.Anschließend durch Schadens<strong>mit</strong>teHilfslinien (Fadenkreuz) in radialerund axialer Richtung ziehen. (Abb. 5.2)Abb./fig./esq. 5.2Sicherheitshinweis:Beim Umg<strong>an</strong>g <strong>mit</strong> LösungenSicherheitstexte und Symbole aufden Gebinden und Verpackungenbeachten!5.3 Schadensstelle außen im Gummibereichvorsichtig <strong>mit</strong> Rauring(z.B. Art.-Nr. 595 4340) unter Verwendungeiner schnellaufendenBohrmaschine oder eines Luftschleifers(Art.-Nr. 595 0234) bearbeiten. (Abb. 5.3)Sicherheitshinweis:Schutzbrille benützen!Abb./fig./esq. 5.314
5. Repair withThermopressvulc<strong>an</strong>izing machines<strong>an</strong>d uncuredThermopress patchesaccording to the oneway system5. Réparation parcuisson simult<strong>an</strong>éeavec des appareils devulc<strong>an</strong>isationThermopress et desemplâtres non vulc<strong>an</strong>isésThermopress5. Réparation parcuisson simult<strong>an</strong>éeavec des appareils devulc<strong>an</strong>isationThermopress et desemplâtres non vulc<strong>an</strong>isésThermopressRepair procedure for radial tyres. Theprocedure is shown on a sidewallinjury. The procedure is the same forthe sidewall, shoulder <strong>an</strong>d tread.5.1 Uncured Thermopress patches -field of applicationNote:Apply uncured Thermopress patchesonly with Thermopress vulc<strong>an</strong>izingmachines.Procédé de réparation des pneusradiaux, présenté d<strong>an</strong>s le cadre dela réparation d´une blessure fl<strong>an</strong>c. Leprocédé est le même pour le fl<strong>an</strong>c,l´épaulement et le sommet (b<strong>an</strong>de deroulement).5.1 Domaine d´application des emplâtresnon vulc<strong>an</strong>isés Thermopress<strong>Rema</strong>rque :N´appliquer les emplâtres non vulc<strong>an</strong>isésThermopress qu´à l´aidedes appareils de vulc<strong>an</strong>isationThermopress !Mostramos la reparación en unneumático radial con fisura en elfl<strong>an</strong>co (lateral). El procedimiento esel mismo t<strong>an</strong>to para las reparacionesde b<strong>an</strong>da de rodamiento como dehombro y fl<strong>an</strong>co (lateral).5.1 Campo de aplicación de los parchesThermopress no vulc<strong>an</strong>izadosNota:¡Emplear los parches Thermopressno vulc<strong>an</strong>izados exclusivamentecon las vulc<strong>an</strong>izadoras rápidasThermopress!5.2 Locate the injury <strong>an</strong>d mark it witha piece of chalk. Demount thetyre <strong>an</strong>d, if necessary, remove theforeign body which has caused thedamage.Spread the tyre with the tyre spreaderRep - Boy (ref.no. 517 0777).Using REMA TIP TOP Liquid Buffer,remove mould release agents <strong>an</strong>ddirt from the repair area inside thetyre.Then draw auxiliary lines in the radial<strong>an</strong>d axial directions through thecentre of the damage. (fig. 5.2)Safety instruction:When using solutions, observe thesafety instructions <strong>an</strong>d symbols onthe packs <strong>an</strong>d containers.5.2 Localiser la blessure et la repérer àl´aide d´une craie. Démonter le pneuet éventuellement, enlever le corpsétr<strong>an</strong>ger qui a causé la blessure.Ecarter le pneu à l´aide de l´écarteurRep-Boy (réf. 517 0777). A l´aidedu Rapeur Chimique (Liquid Buffer)REMA TIP TOP, débarrasser la zoneà réparer à l´intérieur du pneu delubrifi<strong>an</strong>ts de moule et de salissures.Ensuite tracer deux lignes pass<strong>an</strong>tpar le centre de la blessure (encroix) d<strong>an</strong>s les sens radial et axial. (fig. 5.2)Consigne de sécurité :Lors de l´utilisation des solutions,tenir compte des consignes desécurité et des symboles inscritssur les conditionnements et lesemballages.5.2 Localizar el pinchazo y marcarlocon tiza. Desmontar el neumático.Eliminar el objeto que causó la rotura.Abrir el neumático con ayuda delRep-Boy (No. Art. 517 0777) y quitarcon el Liquid Buffer REMA TIP TOPlos restos de lubrific<strong>an</strong>tes de moldey contaminaciones de la zona dañadaen el interior del neumático.A continuación trazar líneas auxiliaresa través del centro de la rotura(réticulo) en dirección radial y axial. (esq. 5.2)Instrucción de seguridad:¡Trat<strong>an</strong>do con disolventes, observarsiempre las instrucciones de seguridady símbolos de advertencia enlos envases y embalajes!5.3 Carefully prepare the rubber sectionof the skive on the tyre outside,using a chip rasp (e.g. ref.no. 5954340) on a high-speed drill or <strong>an</strong> airbuffer (ref.no. 595 0234). (fig. 5.3)Safety instruction:Use safety eye goggles.5.3 A l´extérieur du pneu, travaillersoigneusement la gomme de lablessure avec une râpe ronde (parexemple réf. 595 4340) montée surune perceuse ou une meuleusepneumatique basse vitesse (réf.595 0234). (fig. 5.3)Consigne de sécurité :Utiliser des lunettes de protection !5.3 Trabajar cuidadosamente la gomaen el exterior del neumático cercade la rotura con una rueda raspadora(p.ej. No. Art. 595 4340) us<strong>an</strong>douna brocadora de altas revolucioneso una amoladora neumática deraspado (No. Art. 595 0234). (esq. 5.3)Instrucción de seguridad:¡Utilizar gafas de protección!15
5.4 Lockere, beschädigte Cordfäden<strong>mit</strong> Hartmetallfräser (z.B. Art.-Nr.595 4900) oder Schleifstift (Art.-Nr.595 4405) vorsichtig entfernen undbeschleifen.Sicherheitshinweis:Schutzbrille benützen!Anschließend nochmals Gummibereichleicht nachrauen.Schadensgröße messen und geeignetesThermopress-Rohpflastergemäß Schadenstabelle unter Pkt.5.1 auswählen. (Abb. 5.4)Abb./fig./esq. 5.45.5 Reparaturpflaster <strong>mit</strong> Pfeil in Laufrichtung<strong>mit</strong>tig auf die Schadensstellesetzen (Hilfslinien beachten)und Pflasterumriss ca. 5 mmgrößer <strong>an</strong>zeichnen. (Abb. 5.5)Abb./fig./esq. 5.55.6 Innerliner <strong>an</strong>schließend <strong>mit</strong> Konturscheibe(Art.-Nr. 595 4319) oderDrahtrundbürste (Art.-Nr. 595 0722)sorgfältig aufrauen. Innerliner nichtdurchrauen!Anschließend Raustaub innen undaußen trocken und ohne Zuhilfenahme<strong>von</strong> Lösungs<strong>mit</strong>tel oderDruckluft etc. entfernen. (Abb. 5.6)Sicherheitshinweis:Schutzbrille benützen!Abb./fig./esq. 5.65.7 Aufgeraute Flächen innen undaußen 1 x <strong>mit</strong> REMA TIP TOP-Thermopress MTR-Solution (Art.Nr.516 9207) einstreichen. <strong>Reifen</strong> auf3- oder 9-Uhr-Position drehen undEinstrich ca. 10 min trocknen lassen(Fingerrückenprobe). (Abb. 5.7)Sicherheitshinweis:Beim Umg<strong>an</strong>g <strong>mit</strong> LösungenSicherheitstexte und Symbole aufden Gebinden und Verpackungenbeachten!Abb./fig./esq. 5.716
5.4 Carefully remove loose or damagedcords with a carbide cutter (e.g. ref.no. 595 4900) or a pencil stone (ref.no. 595 4405) <strong>an</strong>d grind them.Safety instruction:Use safety eye goggles!Then slightly buff the rubber sectionagain.Measure the size of the injury <strong>an</strong>dselect the appropriate uncuredThermopress patch according tothe repair chart shown in section5.1. (fig. 5.4)5.4 Enlever soigneusement les câblesdécollés et déteriorés avec unefraise carbure (par exemple réf. 5954900) ou une meule crayon (réf. 5954405). Meuler les câbles avec soin.Consigne de sécurité :Utiliser des lunettes de protection!Râper de nouveau légèrement lagomme du cratère.Prendre les mesures de la blessureet choisir l´emplâtre non vulc<strong>an</strong>iséThermopress convenable suiv<strong>an</strong>t letableau de réparation au paragraphe5.1. (fig. 5.4)5.4 Eliminar y raspar cuidadosamentetodas las cuerdas sueltas y deterioradascon la fresa cable de acero(p.ej. No. Art. 595 4900) o muela devástago (No. Art. 595 4405).Instrucción de seguridad:¡Utilizar gafas de protección!A continuación volver a raspar ligeramentela goma.Medir el tamaño de la rotura yseleccionar el parche Thermopressno vulc<strong>an</strong>izado apto para la reparaciónconsider<strong>an</strong>do las indicacionesen nuestra tabla de reparacion, pto.5.1. (esq. 5.4)5.5 Centre the repair patch (with thearrow in the running direction) ontothe repair area, observing the auxiliarylines. Draw the patch outlineapprox.5 mm larger th<strong>an</strong> the patchto be used. (fig. 5.5)5.5 Centrer l´empâtre sur la blessure(la flêche d<strong>an</strong>s le sens de roulement),ten<strong>an</strong>t compte des repères.Tracer les contours de l´emplâtresur le pneu, laiss<strong>an</strong>t une dist<strong>an</strong>ced´environ 5 mm entre les bords del´emplâtre et le tracé. (fig. 5.5)5.5 Centrar el parche en la rotura, conla flecha en sentido de marcha(observar líneas auxiliares), y marcarel contorno del parche a unadist<strong>an</strong>cia de 5 mm en el neumático. (esq. 5.5)5.6 Then carefully buff the inner linerwith a dome rasp (ref.no. 595 4319)or a rotary wire brush (ref.no. 5950722). Do not buff through theinner liner!Then remove the buffing dust onthe tyre inside <strong>an</strong>d outside withoutusing <strong>an</strong>y liquid, solvent or compressedair etc. (fig. 5.6)Safety instruction:Use safety eye goggles!5.6 Ensuite râper soigneusement lagomme ét<strong>an</strong>che avec la râpe cloche(réf. 595 4319) ou la brossemétallique rotative (réf. 595 0722).Ne pas râper la gomme ét<strong>an</strong>chetrop profondément de m<strong>an</strong>ière à lapercer.Puis enlever à sec la poussière derâpage à l´intérieur et à l´extérieurdu pneu s<strong>an</strong>s utiliser de solv<strong>an</strong>tsou de soufflette à air comprimé etc. (fig 5.6)Consigne de sécurité :Utiliser des lunettes de protection !5.6 A continuación raspar concienzudamentela capa butílica (inner liner)con la rueda raspadora (No. Art.595 4319) o con el cepillo metálico(No. Art. 595 0722). No perforar lacapa butílica. Eliminar en seco, enel interior y exterior del neumático,el polvo del raspado, es decir sinutilizar disolventes ni aire comprimido,etc. (esq. 5.6)Instrucción de seguridad:¡Utilizar gafas de protección!5.7 Apply one coat of REMA TIP TOPThermopress MTR-Solution (ref.no.516 9207) to the buffed surfaceareas on the tyre inside <strong>an</strong>d outside.Turn the tyre so that the repairarea is in the 3 or 9 o´clock position<strong>an</strong>d let the coat dry for approx.10minutes. (Test with the back of yourfinger.) (fig. 5.7)Safety instruction:When using solutions, observe thesafety instructions <strong>an</strong>d symbols onthe packs <strong>an</strong>d containers.5.7 Appliquer une couche de SolutionThermopress MTR REMA TIP TOP(réf. 516 9207) sur les surfacesrâpées à l´intérieur et à l´extérieur dupneu. Tourner le pneu de m<strong>an</strong>ière àmettre la blessure d<strong>an</strong>s la position 3ou 9 heures et laisser sécher la couchede solution pend<strong>an</strong>t environ 10minutes. (Test du revers du doigt) (fig. 5.7)Consigne de sécurité :Lors de l´utilisation des solutions,tenir compte des consignes desécurité et des symboles inscritssur les conditionnements et lesemballages.5.7 Untar las superficies raspadas pordentro y fuera del neumático con unacapa de Solución REMA TIP TOPThermopress MTR (No. Art. 5169207). Posicionar la zona a repararen las 3 ó 9 horas y dejar que sequela superficie untada dur<strong>an</strong>te unos10 minutos (prueba a dorso digital). (esq. 5.7)Instrucción de seguridad:¡Trat<strong>an</strong>do con disolventes, observarsiempre las instrucciones de seguridady símbolos de advertencia enlos envases y embalajes!17
5.8 Während der Trockenzeit Streifen<strong>von</strong> REMA TIP TOP ThermopressMTR Rubber (z.B. Art.Nr. 516 1243)zum Verfüllen des Schadenstrichtersauf der Gummi<strong>an</strong>wärmplatte (Art.-Nr. 517 3255) kurzzeitig bei max.75 °C vorwärmen. (Abb. 5.8)Abb./fig./esq. 5.85.9 Schutzfolie des ausgewähltenThermopress-Rohpflasters auf derUnterseite entfernen und dieses <strong>mit</strong>Pfeil in Laufrichtung <strong>mit</strong>tig auf dieeingestrichene Schadensstelle setzen(Hilfslinien beachten). (Abb. 5.9)Pflaster <strong>von</strong> der Mitte nach außen<strong>mit</strong> schmalem Anroller (Art.-Nr. 5951044) <strong>an</strong>rollen. Schutzfolie <strong>an</strong> derOberseite nicht entfernen!Abb./fig./esq. 5.95.10 Schadenstrichter außen nunmehr<strong>mit</strong> Streifen <strong>von</strong> vorgewärmtemThermopress MTR-Rubber blasenfreiauslegen und <strong>an</strong>rollen. Aufausreichende Überhöhung derTrichterfüllung, ca. 2 mm, achten.Schematische Darstellungder gefüllten Schadensstelle siehe (Abb. 5.10)Abschließend Oberfläche derTrichterfüllung <strong>mit</strong> ThermopressMTR Solution einstreichen undsofort <strong>mit</strong> Heizfolie (Art.-Nr. 5171972) abdecken, um ein Anbakkender Heizplattenauflage währendder Vulk<strong>an</strong>isation zu verhindern.Abb./fig./esq. 5.1018
5.8 During the drying time, warmREMA TIP TOP Thermopress MTR-Rubber strips (e.g. ref.no. 516 1243)up on the rubber preheating plate(ref. no. 517 3255) at a maximumtemperature of 75 °C for a shorttime, in order to fill up the skive. (fig 5.8)5.8 Au cours du temps de séchage,préchauffer pend<strong>an</strong>t un courtmoment des b<strong>an</strong>delettes de gommeREMA TIP TOP Thermopress MTR(par exemple réf. 516 1243) destinéesau bourrage du cratère sur laplaque de préchauffage (Réf. 5173255) à une température maximumde 75 °C. (fig. 5.8)5.8 Precalentar dur<strong>an</strong>te el tiempo desecado en la pl<strong>an</strong>cha precalentadora(No. Art. 517 3255) unas tiras degoma REMA TIP TOP ThermopressMTR (p.ej. No. Art. 516 1243) pararellenar el embudo. ¡Temperaturamáxima: 75 °C! (esq. 5.8)5.9 Remove the protective foil from theunderside of the uncured Thermopresspatch selected. Then centrethis patch (with the arrow in therunning direction) onto the coatedrepair area. (Observe the auxiliarylines!) (fig. 5.9)Stitch the patch on from the centreoutwards, using a thin stitcher (ref.no. 595 1044). Do not remove theupper protective foil!5.9 Enlever la feuille de protection dudessous de l´emplâtre non vulc<strong>an</strong>iséThermopress qui a été choisiet centrer celui-ci sur la blessureenduite de solution, la flêche d<strong>an</strong>sle sens de roulement. (Tenir comptedes repères !). (fig. 5.9)Moleter l´emplâtre avec la molette(réf. 595 1044), du centre versl´extérieur. Ne pas enlever la feuillede protection supérieure !5.9 Quitar la lámina de protección dela parte inferior del parche Thermopressno vulc<strong>an</strong>izado seleccionadoy centrarlo con la flecha en sentidode marcha sobre la rotura untadade solución vulc<strong>an</strong>izadora (observarlíneas auxiliares). (esq. 5.9)Rodillar el parche desde el centrohacia afuera con el rodillo delgado(No. Art. 595 1044). Atención: ¡Noeliminar la lámina de protecciónsuperior!5.10 Then fill up the skive on the tyreoutside with strips of pre-heatedThermopress MTR-Rubber avoidingair entrapment <strong>an</strong>d stitchthem on.Ensure a sufficient excess of theskive filling (approx. 2 mm high).The filled skive is shown on the(fig.5.10)Finally coat the surface of theskive filling with ThermopressMTR-Solution <strong>an</strong>d cover it immediatelywith heat resist<strong>an</strong>t foil (ref.no. 517 1972) in order to preventthe heating plate attachments fromsticking, during the vulc<strong>an</strong>izationprocess.5.10 Ensuite à l´extérieur du pneu,bourrer le cratère de b<strong>an</strong>delettespréchauffées de gomme ThermopressMTR et moleter celles-ci dem<strong>an</strong>ière à chasser les bulles d´air.Créer une surépaisseur suffis<strong>an</strong>tedu bouchon de gomme (environ2 mm).Croquis du bouchon de gommevoir : (fig. 5.10)Finalement enduire la surface dubouchon de gomme de SolutionThermopress MTR et la recouvririmmédiatement d´une feuille thermo-résist<strong>an</strong>te(réf. 517 1972) pourempêcher le dessus de la plaquechauff<strong>an</strong>te de coller au pneu pend<strong>an</strong>tla cuisson.5.10 Rellenar el embudo en el exteriordel neumático con las tiras precalentadasde goma REMA TIP TOPThermopress MTR sin atrapar burbujasde aire y rodillarla.Procurar que el relleno sobrepaseel bordillo del embudo en unos2 mm. Ver también: (esq. 5.10) deun embudo rellenado.Finalmente untar la superficie delrelleno del embudo con SoluciónThermopress MTR y tapar con unalámina de celofán termorresistente(No. Art. 517 1972) para evitar queel parche se pegue al segmento decalentamiento dur<strong>an</strong>te la vulc<strong>an</strong>ización.19
5.11 Reparaturstelle <strong>an</strong>schließend ingeeignetem Thermopress-Schnellheizgerätgemäß entsprechenderGerätebedienungs<strong>an</strong>leitung vulk<strong>an</strong>isieren.Nach Abschluß der Vulk<strong>an</strong>isationReparaturstelle nochmals überprüfensowie R<strong>an</strong>d des Reparaturpflastersund evtl. verbliebeneRaufläche <strong>mit</strong> REMA TIP TOPInnerliner Sealer (z.B. Art.-Nr. 5159004) versiegeln.Anschließend <strong>Reifen</strong> montierenund auf Betriebsdruck bringen.Hinweis:Abkühlung der Reparaturstellenicht <strong>mit</strong> Wasser oder ähnlichembeschleunigen!Abb./fig./esq. 5.115.12 Außenseite gegebenenfalls nachvollständiger Abkühlung der Reparaturstelle<strong>mit</strong> Schleifwerkzeug(Art.-Nr. 595 4089) beschleifenbzw. bei Laufflächen-Reparaturen<strong>mit</strong> REMA TIP TOP Rubber-Cutnachprofilieren.Abb./fig./esq. 5.1220
5.11 Then cure the repair area with asuitable Thermopress vulc<strong>an</strong>izingmachine according to the correspondingmachine m<strong>an</strong>ual.After the vulc<strong>an</strong>ization, check therepair area again <strong>an</strong>d seal the edgeof the repair patch <strong>an</strong>d <strong>an</strong>y stillexposed, buffed surface areas withREMA TIP TOP Innerliner Sealer(e.g. ref.no. 515 9004).Then mount the tyre <strong>an</strong>d inflate itto the operating pressure.Note:Do not accelerate the cooling downof the repair area, using water orsimilar subst<strong>an</strong>ces.5.11 Ensuite vulc<strong>an</strong>iser la zone à répareravec l´appareil de vulc<strong>an</strong>isationThermopress convenable conformémentau mode d´emploi correspond<strong>an</strong>t.Après la cuisson, contrôler denouveau la zone réparée et ét<strong>an</strong>chéifierà l´aide d´Innerliner SealerREMA TIP TOP (par exemple réf.515 9004) le bord de l´emplâtre etles zones râpées qui se trouventéventuellement découvertes.Ensuite monter le pneu et le gonflerà la pression de service.<strong>Rema</strong>rque :Ne pas accélérer le refroidissementde la zone réparée à l´aide d´eau oud´autres subst<strong>an</strong>ces similaires.5.11 A continuación vulc<strong>an</strong>izar la reparacióncon una vulc<strong>an</strong>izadora rápidaThermopress adecuada, siguiendolas instrucciones de empleo de lamáquina.Finalizada la vulc<strong>an</strong>ización, comprobarque la reparación se hallevado a cabo correctamente yaplicar una capa de sell<strong>an</strong>te butílico(Innerliner Sealer, p.ej. No. Art.515 9004) a la orilla del parchey el exceso de raspado. Montarel neumático e inflarlo hasta quealc<strong>an</strong>ce la presión de trabajo.Nota:¡No acelerar el enfriamientomedi<strong>an</strong>te agua o sust<strong>an</strong>cias semej<strong>an</strong>tes!5.12 If necessary, finish buff the outsideof the repair area by me<strong>an</strong>s of thebuffing tool (ref.no. 595 4089) afterthe repair area has cooled downcompletely. Tread area repairs areregrooved with REMA TIP TOPRubber-Cut.5.12 Après le refroidissement completde la réparation, procéder éventuellementà la finition extérieurede la réparation à l´aide de l´outilde râpage (réf. 595 4089). En casde réparations sommet, retaillerle profil à l’aide du Rubber-CutREMA TIP TOP.5.12 Pulir el exterior del neumáticodespués del enfriamiento total dela reparación con el esmeriladorES-46 (No. Art. 595 4089) y/o reesculturarcon el REMA TIP TOPRubber-Cut el perfil si se trata dereparaciones en la b<strong>an</strong>da de rodamiento.21
6. Reparatur im 2-Wege-System <strong>mit</strong> Thermopress-Schnell-vulk<strong>an</strong>isiergerätenundREMA TIP TOPRAD-/UP- derPN-ReparaturpflasternArbeitsgänge bei der Reparatur <strong>von</strong>Radialreifen, dargestellt <strong>an</strong>h<strong>an</strong>d einerLaufflächenverletzung.Abb./fig./esq. 6.2a6.1 Anwendungsbereich der jeweiligenReparaturpflaster siehe hierfürjeweils gültige Schadenstabelle!6.2 Schadensstelle lokalisieren undStelle <strong>mit</strong> Kreide markieren. <strong>Reifen</strong>demontieren und ggf. Fremdkörper,welcher den Schaden verursachthat, entfernen. <strong>Reifen</strong> <strong>mit</strong>Rep-Boy (Art.-Nr. 517 0777) sp<strong>an</strong>nenund <strong>Reifen</strong>innenseite im Schadensbereich<strong>mit</strong> REMA TIP TOPLiquid Buffer <strong>von</strong> Trenn<strong>mit</strong>tel undSchmutz säubern.Anschließend durch Schadens<strong>mit</strong>teHilfslinien (Fadenkreuz) in radialerund axialer Richtung ziehen.(Abb. 6.2a und 6.2b)Abb./fig./esq. 6.2bSicherheitshinweis:Beim Umg<strong>an</strong>g <strong>mit</strong> LösungenSicherheitstexte und Symbole aufden Gebinden und Verpackungenbeachten!6.3 Schadensstelle außen im Gummibereichvorsichtig <strong>mit</strong> Stiftaufrauher(z.B. Art.-Nr. 595 4436)unter Verwendung einer schnellaufendenBohrmaschine oder einesLuftschleifers (Art.-Nr. 595 0234)bearbeiten. (Abb. 6.3)Sicherheitshinweis:Schutzbrille benützen!Seitenw<strong>an</strong>d: Seite 14 / 5.3Sidewall : page 14 / 5.3Fl<strong>an</strong>c: page 14 / 5.3Fl<strong>an</strong>co: página 14 / 5.3Abb./fig./esq. 6.322
6. Repair with Thermopressvulc<strong>an</strong>izingmachines <strong>an</strong>dREMA TIP TOPRAD/UP or PN repairpatches according tothe two way systemRepair procedure for radial tyres.The procedure is shown on a treadinjury. The procedure is the same forthe sidewall, shoulder <strong>an</strong>d tread.6.1 As to the fields of application of therepair patches, refer to the relev<strong>an</strong>t<strong>an</strong>d valid repair chart.6.2 Locate the injury <strong>an</strong>d mark it with apiece of chalk. Demount the tyre. Ifnecessary, remove the foreign bodywhich has caused the injury.Spread the tyre with the tyre spreaderRep-Boy (ref.no. 517 0777).Using REMA TIP TOP Liquid Buffer,remove mould release agents <strong>an</strong>ddirt from the repair area inside thetyre.Then draw auxiliary lines throughthe centre of the damage in theradial <strong>an</strong>d axial directions. (fig 6.2 a <strong>an</strong>d b)Safety instruction:When using solutions, observe thesafety instructions <strong>an</strong>d symbols onthe packs <strong>an</strong>d containers.6. Réparation par cuissonen deux opérationsavec des appareils devulc<strong>an</strong>isation Thermopresset des emplâtresREMA TIP TOPRAD, UP ou PN.Procédé de réparation des pneusradiaux, présenté d<strong>an</strong>s le cadre de laréparation d´une blessure sommet.Le procédé est le même pour le fl<strong>an</strong>c,l´épaulement et le sommet (b<strong>an</strong>de deroulement).6.1 Qu<strong>an</strong>t au domaine d´application deces types d´emplâtres, référez-vousà la charte de réparation en vigueurpour ceux-ci.6.2 Localiser la blessure et la repérer àl´aide d´une craie. Démonter le pneuet, éventuellement, enlever le corpsétr<strong>an</strong>ger qui a causé la blessure.Ecarter le pneu à l´aide de l´écarteurRep-Boy (réf. 517 0777).A l´aide du Rapeur Chimique (LiquidBuffer) REMA TIP TOP, débarrasserla zone à réparer à l´intérieur dupneu de lubrifi<strong>an</strong>ts de moule et desalissures.Ensuite tracer deux lignes pass<strong>an</strong>tpar le centre de la blessure (encroix) d<strong>an</strong>s les sens radial et axial. (fig. 6.2 a et b)Consigne de sécurité :Lors de l´utilisation des solutions,tenir compte des consignes desécurité et des symboles inscritssur les conditionnements et lesemballages.6. Reparación en elsistema de dos pasoscon vulc<strong>an</strong>izadorasThermopress yparchesREMA TIP TOPRAD / UP o PNMostramos la reparación en unneumático radial con fisura en lab<strong>an</strong>da de rodamiento. El procedimientoes el mismo t<strong>an</strong>to para lasreparaciones de b<strong>an</strong>da de rodamientocomo de hombro y fl<strong>an</strong>co (lateral).6.1 Campos de aplicación de losrespectivos parches, ver tabla actualde reparación6.2 Localizar el pinchazo y marcarlocon tiza. Desmontar el neumático.Eliminar el objeto que causó la rotura.Abrir el neumático con ayuda delRep-Boy (No. Art. 517 0777) y quitarcon el Liquid Buffer REMA TIP TOPlos restos de lubrific<strong>an</strong>tes de moldey contaminaciones de la zona dañadaen el interior del neumático. Acontinuación trazar líneas auxiliaresa través del centro de la rotura (retículo)en dirección radial y axial. (esq. 6.2 a y b)Instrucción de seguridad:¡Trat<strong>an</strong>do con disolventes, observarsiempre las instrucciones de seguridady símbolos de advertencia enlos envases y embalajes!6.3 Carefully prepare the rubber sectionof the skive on the tyre outside,using a pencil buffer (e.g. ref.no.595 4436) on a high-speed drill or<strong>an</strong> air buffer (ref.no. 595 0234). (fig 6.3)Safety instruction:Use safety eye goggles.6.3 A l´extérieur du pneu, travailler soigneusementla gomme de la blessureavec une râpe crayon (parexemple réf. 595 4436) montée surune perceuse ou une meuleusepneumatique basse vitesse (réf.595 0234). (fig 6.3)Consigne de sécurité :Utiliser des lunettes de protection !6.3 Trabajar cuidadosamente la gomaen el exterior del neumático cercade la rotura con un raspador lápiz(p.ej. No. Art. 595 4436) us<strong>an</strong>do unabrocadora de altas revoluciones ouna amoladora neumática de raspado(No. Art. 595 0234). (esq. 6.3)Instrucción de seguridad:¡Utilizar gafas de protección!23
6.4 Lockere, beschädigte Cordfäden<strong>mit</strong> Hartmetallfräser (z.B. Art.-Nr.595 4900) oder Schleifstift (Art.-Nr.595 4405) vorsichtig entfernen undbeschleifen.Sicherheitshinweis:Schutzbrille benützen!Anschließend nochmals Gummibereichleicht nachrauen. Schadensgrößemessen und geeignetesREMA TIP TOP-Reparaturpflastergemäß jeweils gültiger Schadenstabelleauswählen. (Abb.6.4 a und b)Abb./fig./esq. 6.4aAbb./fig./esq. 6.4b6.5 Aufgeraute Flächen innen undaußen 1 x <strong>mit</strong> Thermopress MTR-Solution (Art.-Nr. 516 9207) einstreichen.<strong>Reifen</strong> auf 3- oder 9-Uhr-Position drehen und Einstrich ca.10 min trocknen lassen (Fingerrückenprobe). (Abb. 6.5)Sicherheitshinweis:Beim Umg<strong>an</strong>g <strong>mit</strong> LösungenSicherheitstexte und Symbole aufden Gebinden und Verpackungenbeachten!Abb./fig./esq. 6.56.6 Während der Trockenzeit Streifen<strong>von</strong> Thermopress MTR-Rubber(z.B. Art.-Nr. 516 1243) zum Verfüllendes Schadenstrichters aufder Gummi<strong>an</strong>wärmplatte (Art.Nr.517 3255) kurzzeitig bei max.75 °C vorwärmen. (Abb. 6.6)Abb./fig./esq. 6.66.7 Schadenstrichter nach Skizze <strong>mit</strong>vorgewärmten Thermopress MTR-Rubber blasenfrei füllen und <strong>mit</strong>schmalem Anroller <strong>an</strong>rollen. (Abb. 6.7)Abb./fig./esq. 6.724
6.4 Carefully, remove loose or damagedcords with a carbide cutter (e.g. ref.no. 595 4900) or a pencil stone (ref.no. 595 4405) <strong>an</strong>d grind them.Safety instruction:Use safety eye goggles!Then slightly buff the rubber sectionagain. Measure the size of theinjury <strong>an</strong>d select the appropriateREMA TIP TOP repair patch accordingto the valid repair chart. (fig. 6.4 a <strong>an</strong>d b)6.4 Enlever soigneusement les câblesdécollés et déteriorés avec unefraise carbure (par exemple réf. 5954900) ou une meule crayon (réf. 5954405). Meuler les câbles avec soin.Consigne de sécurité :Utiliser des lunettes de protection !Râper de nouveau légèrement lagomme du cratère. Prendre lesmesures de la blessure et choisirl´emplâtre REMA TIP TOP convenablesuiv<strong>an</strong>t la charte de réparationen vigueur. (fig. 6.4 a et b)6.4 Eliminar y raspar cuidadosamentetodas las cuerdas sueltas y deterioradascon la fresa cable de acero(p.ej. No. Art. 595 4900) o muela devástago (No. Art. 595 4405).Instrucción de seguridad:¡Utilizar gafas de protección!A continuación volver a raspar ligeramentela goma. Medir el tamañode la rotura y seleccionar el parcheREMA TIP TOP apto para la reparaciónconsider<strong>an</strong>do las indicacionesen nuestra tabla de reparacion. (esq. 6.4 a y b)6.5 Apply one coat of ThermopressMTR-Solution (ref.no. 516 9207) tothe buffed surface areas on the tyreinside <strong>an</strong>d outside. Turn the tyre sothat the repair area is in the 3 or 9o´clock position <strong>an</strong>d let the coat dryfor approx.10 minutes. (Test withthe back of your finger.) (fig. 6.5)Safety instruction:When using solutions, observe thesafety instructions <strong>an</strong>d symbols onthe packs <strong>an</strong>d containers.6.5 Appliquer une couche de SolutionThermopress MTR (réf. 516 9207)sur les surfaces râpées à l´intérieuret à l´extérieur du pneu. Tourner lepneu de m<strong>an</strong>ière à mettre la blessured<strong>an</strong>s la position 3 ou 9 heureset laisser sécher la couche pend<strong>an</strong>tenviron 10 minutes. (Test du reversdu doigt) (fig. 6.5)Consigne de sécurité :Lors de l´utilisation des solutions,tenir compte des consignes desécurité et des symboles inscritssur les conditionnements et lesemballages.6.5 Untar las superficies raspadas pordentro y por fuera del neumáticocon una capa de SOLUCIÓNREMA TIP TOP Thermopress MTR(No. Art. 516 9207). Posicionar lazona a reparar en las 3 ó 9 horasy dejar que seque la superficieuntada dur<strong>an</strong>te unos 10 minutos(prueba a dorso digital). (esq. 6.5)Instrucción de seguridad:¡Trat<strong>an</strong>do con disolventes, observarsiempre las instrucciones de seguridady símbolos de advertencia enlos envases y embalajes!6.6 During the drying time, warmThermopress MTR-Rubber strips(e.g. ref.no. 516 1243) up on therubber preheating plate (ref.no. 5173255) at a maximum temperature of75 °C for a short time, in order to fillup the skive. (fig. 6.6)6.6 Au cours du temps de séchage,préchauffer pend<strong>an</strong>t un courtmoment des b<strong>an</strong>delettes de gommeThermopress MTR (par exempleréf. 516 1243) destinées au bourragedu cratère sur la plaque depréchauffage (Réf. 517 3255) à unetempérature maximum de 75 °C. (fig. 6.6)6.6 Precalentar brevemente dur<strong>an</strong>te eltiempo de secado en la pl<strong>an</strong>chaprecalentadora (No. Art. 517 3255)unas tiras de goma REMA TIP TOPThermopress MTR (p.ej. No. Art.516 1243) para rellenar el embudo.¡Temperatura máxima: 75 °C! (esq. 6.6)6.7 According to the sketch, fill the skiveup with preheated ThermopressMTR-Rubber avoiding air entrapment<strong>an</strong>d stitch the rubber on withthe thin stitcher. (fig. 6.7)6.7 Bourrer le cratère de gommeThermopress MTR préchaufféeconformément au croquis s<strong>an</strong>scréer de bulles d´air et moleter lagomme avec la molette fine. (fig. 6.7)6.7 Rellenar el embudo en el exteriordel neumático con las tiras precalentadasde goma REMA TIP TOPThermopress MTR sin atrapar burbujasde aire y rodillarla. (esq. 6.7)25
6.8 Auf ausreichende Überhöhung derTrichterfüllung, ca. 3 mm, achten!Abschließend Oberfläche derTrichterfüllung innen und außen<strong>mit</strong> Thermopress MTR-Solutioneinstreichen und sofort <strong>mit</strong> Heizfolie(Art.-Nr. 517 1972) abdecken,um ein Anbacken der Heizplattenauflagewährend der Vulk<strong>an</strong>isationzu verhindern. (Abb. 6.8)Abb./fig./esq. 6.86.9 Reparaturstelle <strong>an</strong>schließend ingeeignetem Thermopress-Schnellheizgerätgemäß entsprechenderGerätebedienungs<strong>an</strong>leitung vulk<strong>an</strong>isieren. (Abb. 6.9)Abb./fig./esq. 6.96.10 Nach Ablauf der Heizzeit <strong>Reifen</strong>sofort aus dem Thermopressgerätentnehmen und abkühlen lassen.Anschließend ausgewähltes Reparaturpflaster<strong>mit</strong> Hilfslinien versehen,<strong>mit</strong> Pfeil in Wulstrichtung <strong>mit</strong>tigauf die Schadensstelle setzen(Hilfslinien beachten) und Pflaster-Umriß ca. 5 mm größer <strong>an</strong>zeichnen. (Abb. 6.10)Abb./fig./esq. 6.106.11 Innerliner <strong>an</strong>schließend <strong>mit</strong> Konturscheibe(Art.-Nr. 595 4319) oderDrahtrundbürste (Art.Nr.-5950722)sorgfältig aufrauen.Innerliner nicht durchrauen!Anschließend Raustaub trockenund ohne Zuhilfenahme <strong>von</strong>Lösungs<strong>mit</strong>tel oder Druckluft etc.entfernen. (Abb. 6.11)Sicherheitshinweis:Schutzbrille benützen!Abb./fig./esq. 6.1126
6.8 Ensure a sufficient excess of theskive filling (approx. 3 mm high).Finally coat the surface of the skivefilling with Thermopress MTR-Solution on the tyre inside <strong>an</strong>d outside;then cover it immediately withheat resist<strong>an</strong>t foil (ref.no. 517 1972)in order to prevent the heating plateattachments from sticking, duringthe vulc<strong>an</strong>ization process. (fig. 6.8)6.8 Créer une surépaisseur suffis<strong>an</strong>tedu bouchon de gomme (environ3 mm) ! Finalement enduirede Solution Thermopress MTR lasurface du bouchon de gomme àl´intérieur et à l´extérieur du pneu etla recouvrir immédiatement d´unefeuille thermo-résist<strong>an</strong>te (réf. 5171972) pour empêcher le dessus dela plaque chauff<strong>an</strong>te de coller aupneu pend<strong>an</strong>t la cuisson. (fig. 6.8)6.8 Procurar que el relleno sobrepaseel bordillo del embudo en unos3 mm. Finalmente untar por dentroy por fuera la superficie del rellenodel embudo con Solución ThermopressMTR y tapar en seguida conuna lámina de celofán termorresistente(No. Art. 517 1972) paraevitar que el parche se pegue alsegmento de calentamiento dur<strong>an</strong>tela vulc<strong>an</strong>ización. (esq. 6.8)6.9 Then cure the repair area with asuitable Thermopress vulc<strong>an</strong>izingmachine according to the correspondingmachine m<strong>an</strong>ual.(fig. 6.9)6.9 Ensuite vulc<strong>an</strong>iser la zone à répareravec l´appareil de vulc<strong>an</strong>isationThermopress convenable conformémentau mode d´emploi correspond<strong>an</strong>t.(fig. 6.9)6.9 A continuación vulc<strong>an</strong>izar la reparacióncon una vulc<strong>an</strong>izadora rápidaThermopress adecuada, siguiendolas instrucciones de empleo de lamáquina. (esq. 6.9)6.10 As soon as the curing time haselapsed, remove the tyre from theThermopress vulc<strong>an</strong>izing machine;let the tyre cool down. Thenmark the selected repair patch withauxiliary lines <strong>an</strong>d centre it (withthe arrow towards the beads) ontothe repair area. (Observe the auxiliarylines). Draw the patch outlineapprox.5 mm larger th<strong>an</strong> the patchto be used. (fig. 6.10)6.10 Passé le temps de cuisson, enleverimmédiatement le pneu del´appareil de vulc<strong>an</strong>isation Thermopress.Laisser refroidir le pneu.Ensuite marquer l´emplâtre choiside repères et le centrer sur la blessure(la flêche d<strong>an</strong>s le sens talon àtalon), ten<strong>an</strong>t compte des repères.Tracer les contours de l´emplâtresur le pneu, laiss<strong>an</strong>t une dist<strong>an</strong>ced´environ 5 mm entre les bords del´emplâtre et le tracé. (fig. 6.10)6.10 Tr<strong>an</strong>scurrido el tiempo de vulc<strong>an</strong>ización,sacar el neumático de lavulc<strong>an</strong>izadora Thermopress y dejarque enfríe. A continuación trazarlíneas auxiliares en el parche ycentrarlo en la rotura con la flechaen dirección al talón (observar laslíneas auxiliares). Marcar el contornodel parche a una dist<strong>an</strong>cia de 5mm en el neumático. (esq. 6.10)6.11 Then carefully buff the inner linerusing a dome rasp (ref.no. 5954319) or a rotary wire brush (ref.no.595 0722). Do not buff through theinner liner! Then remove the buffingdust without using <strong>an</strong>y liquid, solventor compressed air etc. (fig. 6.11)Safety instruction:Use safety eye goggles!6.11 Ensuite râper soigneusement lagomme ét<strong>an</strong>che avec la râpe cloche(réf. 595 4319) ou la brossemétallique rotative (réf. 595 0722).Ne pas râper la gomme ét<strong>an</strong>chetrop profondément de m<strong>an</strong>ière àla percer.Puis enlever à sec la poussière derâpage s<strong>an</strong>s utiliser de solv<strong>an</strong>ts oud´air comprimé etc. (fig. 6.11)Consigne de sécurité :Utiliser des lunettes de protection!6.11 Raspar concienzudamente la capabutílica (inner liner) con la ruedaraspadora (No. Art. 595 4319) ocon el cepillo metálico (No. Art.595 0722). No perforar la capabutílica. Eliminar en seco el polvodel raspado, es decir, sin utilizardisolventes ni aire comprimido,etc. (esq. 6.11)Instrucción de seguridad:¡Utilizar gafas de protección!27
6.12 Aufgeraute Flächen 1 x <strong>mit</strong> SpecialCement BL (Art.-Nr. 515 9389)einstreichen. <strong>Reifen</strong> auf 3- oder 9-Uhr-Position drehen und Einstrichca. 10 min trocknen lassen (Fingerrückenprobe). (Abb. 6.12)Sicherheitshinweis:Beim Umg<strong>an</strong>g <strong>mit</strong> LösungenSicherheitstexte und Symbole aufden Gebinden und Verpackungenbeachten!Abb./fig./esq. 6.126.13 Nach dem Ablauf der TrockenzeitSchutzfolie des ausgewähltenReparaturpflasters auf derUnterseite entfernen und dieses <strong>mit</strong>Pfeil in Wulstrichtung <strong>mit</strong>tig auf dieeingestrichene Schadensstelle setzen,ohne den <strong>Reifen</strong> zu spreizen(Hilfslinien beachten). (Abb. 6.13)Pflaster <strong>von</strong> der Mitte nachaußen <strong>mit</strong> schmalem Anroller(Art.-Nr. 595 1044) <strong>an</strong>rollen.Abb./fig./esq. 6.136.14 Reparaturstelle nochmals auf fehlerfreieAusführung überprüfen undPflasterr<strong>an</strong>d sowie evtl. verbliebeneRaufläche <strong>mit</strong> REMA TIP TOPInnerliner Sealer (z.B. Art.-Nr. 5159004) versiegeln.Hinweis zur Selbstvulk<strong>an</strong>isationdes Reparaturpflasters:<strong>Reifen</strong> vor der Montage und Wiederinbetriebnahme24 Std. bei mind.18 °C lagern.Abb./fig./esq. 6.146.15 Nach der Montage des <strong>Reifen</strong>s,soweit nötig, Außenseite gegebenenfalls<strong>mit</strong> Schleifwerkzeug (Art.-Nr. 595 5507) beschleifen. Bei größerenSchadensstellen Laufflächeggf. <strong>mit</strong> REMA TIP TOP Rubber-Cut nachprofilieren. (Abb. 6.15)Abb./fig./esq. 6.1528
6.12 Apply one coat of REMA TIP TOPSpecial Cement BL (ref.no. 5159389) to the buffed surface areas.Turn the tyre so that the repair areais in the 3 or 9 o´clock position<strong>an</strong>d let the coat dry for approx.10 minutes. (Test with the back ofyour finger.) (fig. 6.12)Safety instruction:When using solutions, observe thesafety instructions <strong>an</strong>d symbols onthe packs <strong>an</strong>d containers.6.12 Appliquer une couche de SpécialCément BL (réf. 515 9389) sur lessurfaces râpées.Tourner le pneu dem<strong>an</strong>ière à mettre la blessure d<strong>an</strong>sla position 3 ou 9 heures. Laissersécher la couche pend<strong>an</strong>t environ10 minutes (test du revers dudoigt). (fig. 6.12)Consigne de sécurité :Lors de l´utilisation des solutions,tenir compte des consignes desécurité et des symboles inscritssur les conditionnements et lesemballages.6.12 Untar la zona raspada con unacapa de Special Cement BLREMA TIP TOP (No. Art. 515 9389).Posicionar la zona dañada a las 3ó 9 horas y dejar secar la capaunos 10 minutos. (Prueba a dorsodigital). (esq. 6.12).Instrucción de seguridad:¡Trat<strong>an</strong>do con disolventes, observarsiempre las instrucciones deseguridad y símbolos de advertenciaen los envases y embalajes!6.13 At the end of the drying time,remove the protective foil from theunderside of the selected repairpatch.Then centre this patch (with thearrow towards the beads) onto thecoated repair area, without spreadingthe tyre. (Observe the auxiliarylines!) (fig. 6.13)Stitch the patch on from the centreoutwards, using a thin stitcher(ref.no. 595 1044).6.13 A la fin du temps de séchage,enlever la feuille de protection dudessous de l´emplâtre choisi etcentrer celui-ci (la flêche d<strong>an</strong>s lesens talon à talon) sur la blessureenduite de solution, s<strong>an</strong>s écarter lepneu. (Tenir compte des repères !). (fig. 6.13)Moleter l´emplâtre avec la molette(réf. 595 1044), du centre versl´extérieur.6.13 Tr<strong>an</strong>scurrido el tiempo de secado,quitar la lámina de protecciónde la parte inferior del parcheREMA TIP TOP seleccionado ycentrarlo con la flecha en direcciónal talón (pestaña) en la superficieuntada de la rotura (observar líneasauxiliares) sin abrir el neumático /los talones (pestañas). (esq. 6.13)Rodillar el parche desde el centrohacia afuera con el rodillo delgado(No. Art. 595 1044).6.14 Check the repair area again fordefects <strong>an</strong>d seal the edge ofthe repair patch <strong>an</strong>d <strong>an</strong>y stillexposed, buffed surface areas withREMA TIP TOP Innerliner Sealer(e.g. ref.no. 515 9004).Note regarding self-vulc<strong>an</strong>izationof the repair patch:Store the tyre for 24 hours at 18 °Cplus before mounting <strong>an</strong>d putting itinto operation again.6.14 Vérifier encore une fois si la réparationne présente pas de défauts.Et<strong>an</strong>chéifier à l´aide d´InnerlinerSealer REMA TIP TOP (par exempleréf. 515 9004) le bord de l´emplâtreet les zones râpées qui se trouventéventuellement découvertes.Indications concern<strong>an</strong>tl´auto-vulc<strong>an</strong>isation de l´emplâtre :Stocker le pneu à une températureégale ou supérieure à 18 °C pend<strong>an</strong>t24 heures, av<strong>an</strong>t de le monteret de le remettre en service.6.14 Compruebe que la reparación sehaya realizado correctamente yselle la orilla del parche, y eventualesáreas raspadas rest<strong>an</strong>tes conREMA TIP TOP Innerliner Sealer(p.ej.: N.º de Ref. 515 9004).Observaciones respecto a laautovulc<strong>an</strong>ización del parche:Deje reposar el neumático (cubierta)dur<strong>an</strong>te 24 horas a por lo menos18 °C, <strong>an</strong>tes de montar y reusarlo.6.15 After mounting the tyre, finishbuff the outside of the repair areaby me<strong>an</strong>s of the buffing tool (ref.no. 595 5507), if necessary. Incase of larger repairs, regroove thetread pattern with REMA TIP TOPRubber Cut if necessary. (fig. 6.15)6.15 Après le montage du pneu, procéderéventuellement à la finitionextérieure de la réparation à l´aidede l´outil de râpage (réf. 595 5507).En cas de gr<strong>an</strong>des réparations,retailler éventuellement le profil dela b<strong>an</strong>de de roulement à l’aide duRubber Cut REMA TIP TOP. (fig. 6.15)6.15 Después del montaje, al hacersenecesario, pulir el exterior delneumático con el esmerilador (No.Art. 595 5507). En caso de roturasmayores, reesculturar el perfil dela b<strong>an</strong>da de rodamiento con elREMA TIP TOP Rubber Cut. (esq. 6.15)29
REMASTEMØ 6 mm REMASTEM 6 (510 1935) x x xØ 8 mm REMASTEM 8 (510 1942) x x xØ 10 mm REMASTEM 10 (510 1928) x x xØ 12 mm REMASTEM 12 (510 1959) x xØ 17 mm REMASTEM 17 (510 1973) xØ 22 mm REMASTEM 22 (510 1997) x7. Reparatur im 1-Weg-System <strong>mit</strong>REMA TIP TOPRAD-/UP- oder PN-Reparaturpflasternund REMA TIP TOPREMASTEMREMASTEM,die vorvulk<strong>an</strong>isierte Trichterfüllungfür zylindrische Stichverletzungen imLaufflächenbereich.Anwendungsbereich der jeweiligenReparaturpflaster siehe hierfürjeweils gültige Schadenstabelle!7.1 Schadensstelle lokalisieren und <strong>mit</strong>Kreide markieren. <strong>Reifen</strong> demontieren,Fremdkörper, welcher denSchaden verursacht hat, entfernenund Verlauf des Schadensk<strong>an</strong>als<strong>mit</strong> Ahle oder Vorstecher (Art.Nr.-836 5613) feststellen. (Abb. 7.1 a und b)Reparaturbereich lt. Skizzen (Pkt. 7)und Zuordnungstabelle beachten!Abb./fig./esq. 7.1aAbb./fig./esq. 7.1b7.2 Schadensgröße <strong>an</strong>h<strong>an</strong>d des entferntenFremdkörpers sowie derVerletzungen am <strong>Reifen</strong> innen undaußen er<strong>mit</strong>teln und hierfür geeignetenRotierfräser auswählen. (Abb. 7.2)Abb./fig./esq. 7.2Abb./fig./esq. 7.37.3 <strong>Reifen</strong>innenseite im Schadensbereich<strong>mit</strong> REMA TIP TOP LiquidBuffer <strong>von</strong> Trenn<strong>mit</strong>tel und Schmutzsäubern. Lochk<strong>an</strong>al <strong>mit</strong> ausgewähltemRotierfräser unter Berücksichtigungdes Schadensverlaufes (siehePkt. 4.2) zuerst <strong>von</strong> der <strong>Reifen</strong>innenseitenach außen und<strong>an</strong>schließend <strong>von</strong> außen nach innenausfräsen. Vorg<strong>an</strong>g 1-2 x wiederholen!Empfohlene Upm ca. 2500.Hierbei weiterreichende Beschädigungendes Festigkeitsträgers(Rost etc.) vollständig entfernen,ggf. Vorg<strong>an</strong>g <strong>mit</strong> dem nächst größerenRotierfräser wiederholen, dabeistets max. Schadensabmessungenfür REMASTEM beachten! (Abb 7.3)Sicherheitshinweis:Schutzbrille benützen!30
7. Repair withREMA TIP TOPRAD/UP or PN repairpatches <strong>an</strong>dREMA TIP TOPREMASTEM accordingto the two way system7. Réparation à froid endeux opérations avecdes emplâtresREMA TIP TOP RAD,UP ou PN ainsi que desbouchons de gommeREMASTEM REMA TIP TOP7. Reparación en elsistema de dos pasoscon parchesREMA TIP TOPRAD / UP o PN yREMA TIP TOPREMASTEMREMASTEM,the precured skive filling for cylindricalpunctures in the tread area.As to the fields of application of therepair patches, refer to the relev<strong>an</strong>t<strong>an</strong>d valid repair chart.7.1 Locate the damaged spot <strong>an</strong>d markit with a piece of chalk. Demountthe tyre. Remove the foreign bodywhich has caused the injury. Thendetermine the direction of the puncturech<strong>an</strong>nel using <strong>an</strong> awl or aprobe (ref.no. 836 5613). (fig. 7.1 a <strong>an</strong>d b)As to the repairable area, referto the diagrams (section 7); alsoobserve the table.REMASTEM,bouchon de gomme vulc<strong>an</strong>isé destinéà la réparation des perforationscylindriques sur la b<strong>an</strong>de de roulement.Qu<strong>an</strong>t au domaine d´application deces types d´emplâtres, référez-vousà la charte de réparation en vigueurpour ceux-ci.7.1 Localiser la blessure et la repérerà l´aide d´une craie. Démonter lepneu. Enlever le corps étr<strong>an</strong>ger quia causé la blessure et déterminer ladirection du c<strong>an</strong>al de perforation àl´aide d´une alêne ou d´une pointed´inspection (réf. 836 5613). (fig. 7.1 a et b)Pour la zone réparable, se référeraux croquis (paragraphe7) ; observerégalement le tableau de réparation.REMASTEM,relleno prevulc<strong>an</strong>izado de embudopara pinchazos cilíndricos en lab<strong>an</strong>da de rodamiento.Campos de aplicación de los respectivosparches, ver tablas actuales dereparación.7.1 Localizar el pinchazo y marcarlocon tiza. Desmontar el neumático.Eliminar el objeto que causó larotura y averiguar la dirección de laperforación medi<strong>an</strong>te una lezna oun punzón (no. art. 836 5613). (esq. 7.1 a y b)¡Observar la reparabilidad de lab<strong>an</strong>da de rodamiento, tal y comoindic<strong>an</strong> los esquemas y las tablasde reparación!7.2 Determine the injury size by measuringthe foreign body removed <strong>an</strong>dthe size of the injury inside <strong>an</strong>doutside the tyre. Then select theappropriate mill cutter. (fig. 7.2)7.2 Déterminer la taille de la blessureen pren<strong>an</strong>t les mesures du corpsétr<strong>an</strong>ger enlevé et de la blessure àl´intérieur et à l´extérieur du pneu.Ensuite choisir la fraise appropriée. (fig. 7.2)7.2 Determinar las dimensiones de larotura medi<strong>an</strong>te el objeto eliminadoy la perforación en el interior yexterior del neumático. Seleccionarla fresa correspondiente. (esq. 7.2)Hartmetall-Rotierfräser (hohe Lebensdauer, einfache und schnelle Schadensbearbeitung) passend für:Carbide mill cutter (long service life, for quick <strong>an</strong>d easy injury preparation) suitable for:Fraise carbure (longue durée de vie, pour un alésage facile et rapide de la perforation) conven<strong>an</strong>t pour :Fresas rotativas de metal duro (vida útil larga, preparación simple y rápida de la zona dañada) aptas para:Ø 6 mm 595 4962 REMASTEM 6 / UP 6 (512 6721) / RAD 110 (512 1104)Ø 8 mm 595 4948 REMASTEM 8 / UP 8 (512 6745) / RAD 110 (512 1104)Ø 10 mm 595 5060 REMASTEM 10 / RAD 120 (512 1207)Ø 12 mm 595 5040 REMASTEM 12 / RAD 140 (512 1403)Ø 17 mm 595 5033 REMASTEM 17 / RAD 140 (512 1403)Ø 22 mm 595 5026 REMASTEM 22 / RAD 142 (512 1427)7.3 Using REMA TIP TOP Liquid Buffer,remove mould release agents <strong>an</strong>ddirt from the repair area inside thetyre. Prepare the puncture ch<strong>an</strong>nelwith the appropriate mill cutterfrom the tyre inside outwards, thenfrom the outside to the inside ofthe tyre, observing the direction ofthe puncture ch<strong>an</strong>nel (see section4.2). Repeat this operation onceor twice.Recommended R.P.M. approx.2500. Thus completely remove <strong>an</strong>ymaterial which may adversely affectthe casing/belt plies (rust etc.). Ifnecessary, repeat this operationusing the next larger mill cutter,always observing the maximuminjury sizes for the REMASTEMrepair plugs. (fig. 7.3)Safety instruction:Use safety eye goggles.7.3 A l´aide du Rapeur Chimique (LiquidBuffer) REMA TIP TOP, débarrasserla zone à réparer à l´intérieur dupneu de lubrifi<strong>an</strong>ts de moule et desalissures. Aléser la perforation àl´aide de la fraise choisie comptetenu de la direction de la perforation(voir paragraphe 4.2), en av<strong>an</strong>ç<strong>an</strong>td´abord de l´intérieur vers l´extérieurdu pneu, ensuite de l´extérieur versl´intérieur. Répéter cette opérationune ou deux fois. Vitesse de rotationrecomm<strong>an</strong>dée: environ 2500 t/mn. Pend<strong>an</strong>t cette opération, enlevercomplètement les détériorationsdes nappes (rouille etc.). Si nécessaire,aléser à nouveau à l´aide dela fraise de la taille immédiatementsupérieure. Toujours observer lesblessures maximum prévues pourle REMASTEM. (fig. 7.3)Consigne de sécurité :Utiliser des lunettes de protection.7.3 Quitar con el Liquid BufferREMA TIP TOP (raspador químico)los restos de lubrific<strong>an</strong>tes de moldey contaminaciones de la zona dañadaen el interior del neumático.Quitar el material sobr<strong>an</strong>te del c<strong>an</strong>alde la perforación fres<strong>an</strong>dolo bajoconsideración de la dirección dela rotura y el tamaño de fresa correctodesde el interior del neumáticohacia afuera y, a continuación,desde afuera hacia adentro. Repetirde una a dos veces. Aconsejamosno sobrepasar las 2.500 r.p.m. Enesta ocasión eliminar por completolas roturas secundarias en elrefuerzo (oxidación, etc.); eventualmenterepetir el proceso con elsiguiente tamaño de fresa. ¡Siempretener en consideración las dimensionesmáximas reparables conREMASTEM! (esq. 7.3)Instrucción de seguridad:¡Utilizar gafas de protección!31
7.4 Schadensgröße messen undgeeigneten REMASTEM-Reparaturkörpersowie benötigtes Reparaturpflastergemäß jeweils gültigerZuordnungs-/Schadenstabelleauswählen. Reparaturpflaster <strong>mit</strong>Hilfslinien versehen, <strong>mit</strong> Pfeil inWulstrichtung <strong>mit</strong>tig auf die Schadensstellesetzen (Hilfslinien beachten)und Pflaster-Umriss ca. 5 mmgrößer <strong>an</strong>zeichnen. (Abb. 7.4)REMASTEM-Reparaturkörper <strong>mit</strong>Schaftende ca. 10-15 mm durchdie Öse der Einführsonde schiebenund darin festklemmen.Abb./fig./esq. 7.47.5 Special Cement BL Tube <strong>an</strong> der<strong>Reifen</strong>innenseite am Lochk<strong>an</strong>al <strong>an</strong>setzenund diesen durch Eindrücken<strong>von</strong> Special Cement BL vollständiggummieren.Anschließend Einführsonde durchden Lochk<strong>an</strong>al <strong>von</strong> innen nachaußen führen, <strong>mit</strong> Flachz<strong>an</strong>ge fassenund Reparaturkörper nach außenziehen. REMASTEM am Schaftnachfassen und soweit durchziehen,bis noch ca. 5-10 mm <strong>an</strong> der<strong>Reifen</strong>innenseite überstehen. (Abb. 7.5)Abb./fig./esq. 7.57.6 <strong>Reifen</strong> <strong>mit</strong> Rep-Boy (Art.-Nr. 5170777) sp<strong>an</strong>nen und Innerliner<strong>an</strong>schließend <strong>mit</strong> Konturscheibe(Art.-Nr. 595 4319 oder Drahtrundbürste(Art.-Nr. 595 0722) sorgfältiginnerhalb der Anzeichnungaufrauen. Innerliner nicht durchrauen!Anschließend Raustaub trockenund ohne Zuhilfenahme <strong>von</strong>Lösungs<strong>mit</strong>tel oder Druckluft etc.entfernen. (Abb. 7.6)Sicherheitshinweis:Schutzbrille benützen!Abb./fig./esq. 7.67.7 Aufgeraute Stelle 1 x <strong>mit</strong>REMA TIP TOP Spezial CementBL einstreichen. <strong>Reifen</strong> auf 3-oder 9-Uhr-Position drehen undEinstrich ca. 10 min trocknen lassen(Fingerrückenprobe). (Abb. 7.7)Sicherheitshinweis:Beim Umg<strong>an</strong>g <strong>mit</strong> LösungenSicherheitstexte und Symbole aufden Gebinden und Verpackungenbeachten!Abb./fig./esq. 7.732
7.4 Measure the size of the injury <strong>an</strong>dselect the appropriate REMASTEMrepair plug as well as the requiredrepair patch according to the validrepair chart. Then mark the selectedrepair patch with auxiliary lines<strong>an</strong>d centre it (with the arrow towardsthe beads) onto the repair area.(Observe the auxiliary lines). Drawthe patch outline approx.5 mm largerth<strong>an</strong> the patch to be used. (fig. 7.4)Insert the stem of the REMASTEMrepair plug, approx. 10-15 mm intothe eyelet opening of the insertingprobe <strong>an</strong>d secure it there.7.4 Prendre les mesures de la blessure,puis choisir le bouchon de gommeREMASTEM et l´emplâtre convenablessuiv<strong>an</strong>t la charte de réparation/letableau de réparation envigueur. Ensuite marquer l´emplâtrede repères et le centrer sur la blessure(la flêche d<strong>an</strong>s le sens talon àtalon), ten<strong>an</strong>t compte des repères.Tracer les contours de l´emplâtresur le pneu, laiss<strong>an</strong>t une dist<strong>an</strong>ced´environ 5 mm entre les bords del´emplâtre et le tracé. (fig. 7.4)Insérer un bout d´environ 10-15mm de la tige du REMASTEM d<strong>an</strong>sl´oeuillet de la tige de guidage et l´yfixer.7.4 Medir el tamaño de la rotura yseleccionar la tira REMASTEM y elparche aptos según consta en lastablas de reparación. Trazar líneasauxiliares en el parche y centrarlocon la flecha señal<strong>an</strong>do hacia eltalón (pestaña) en la rotura y dibujara una dist<strong>an</strong>cia de 5 mm el contornodel parche al neumático. (esq. 7.4)Introducir el extremo delREMASTEM (aprox. 10 - 15 mm) através del ojo y eng<strong>an</strong>charlo en lasonda.7.5 Place the tube of Special CementBL at the opening of the puncturech<strong>an</strong>nel inside the tyre <strong>an</strong>d squeezeSpecial Cement BL into the puncturech<strong>an</strong>nel until it is completelyfilled.Then push the inserting probethrough the puncture ch<strong>an</strong>nel fromthe tyre inside outwards, seize itwith flat pliers <strong>an</strong>d pull the repairplug outwards. Take hold of thestem of the REMASTEM repair plug<strong>an</strong>d pull it until approx. 5-10 mm ofthe repair plug protrude from thetyre inside. (fig. 7.5)7.5 Placer un tube de Spécial CémentBL à l´entrée du c<strong>an</strong>al de perforationcôté intérieur du pneu et presserle tube de m<strong>an</strong>ière à remplir complètementle c<strong>an</strong>al de perforation.De l´intérieur du pneu, introduireaussitôt la tige de guidage d<strong>an</strong>s lec<strong>an</strong>al de perforation, saisir celleciavec une pince plate et tirer lebouchon de gomme vers l´extérieur.Ensuite saisir la tige du REMASTEMet la tirer jusqu´à ce qu´un boutd´environ 5-10 mm dépasse ducôté intérieur du pneu. (fig. 7.5)7.5 Introducir el tubo de Special CementBL desde el interior del neumático ala perforación y gomarla completamente.A continuación proceder a llevar lasonda desde adentro a través delc<strong>an</strong>al de perforación hacia afuera,agarrarla con la tenaza de picopl<strong>an</strong>o y tirar del REMASTEM. Tirardel REMASTEM hasta que hayasólo unos 5 - 10 mm en el interiordel neumático. (esq. 7.5)7.6 Spread the tyre with the tyre spreaderRep-Boy (ref.no. 517 0777).Then carefully buff the inner linerwithin the marked area, using adome rasp (ref.no. 595 4319) ora rotary wire brush (ref.no. 5950722).Do not buff through the inner liner!Then remove the buffing dust withoutusing <strong>an</strong>y liquid, solvent orcompressed air etc. (fig. 7.6)Safety instruction:Use safety eye goggles!7.6 Ecarter le pneu à l´aide de l´écarteurRep-Boy (réf. 517 0777).Ensuite râper soigneusement lagomme ét<strong>an</strong>che à l´intérieur dutracé, avec une râpe cloche (réf.595 4319) ou une brosse métalliquerotative (réf. 595 0722). Nepas râper trop profondément dem<strong>an</strong>ière à percer la gomme ét<strong>an</strong>che.Ensuite enlever la poussière derâpage à sec, s<strong>an</strong>s utiliser de solv<strong>an</strong>tsou d´air comprimé etc. (fig. 7.6)Consigne de sécurité :Utiliser des lunettes de protection !7.6 Abrir el neumático con ayuda delRep-Boy (No. Art. 517 0777) yraspar concienzudamente la capabutílica (inner liner) con la ruedaraspadora (No. Art. 595 4319) ocon el cepillo metálico (No. Art. 5950722). No perforar la capa butílica.Eliminar en seco el polvo del raspado,es decir sin utilizar disolventesni aire comprimido, etc. (esq. 7.6)Instrucción de seguridad:¡Utilizar gafas de protección!7.7 Apply one coat of REMA TIP TOPSpecial Cement BL to the buffedarea. Turn the tyre so that the repairarea is in the 3 or 9 o´clock position<strong>an</strong>d let the coat dry for approx.10minutes. (Test with the back of yourfinger.) (fig. 7.7)Safety instruction:When using solutions, observe thesafety instructions <strong>an</strong>d symbols onthe packs <strong>an</strong>d containers.7.7 Appliquer une couche de SpécialCément BL REMA TIP TOP sur lasurface râpée. Tourner le pneu dem<strong>an</strong>ière à mettre la blessure d<strong>an</strong>sla position 3 ou 9 heures.Laisser sécher la couche pend<strong>an</strong>tenviron 10 minutes (test du reversdu doigt). (fig. 7.7)Consigne de sécurité :Lors de l´utilisation des solutions,tenir compte des consignes desécurité et des symboles inscritssur les conditionnements et lesemballages.7.7 Untar la zona raspada con unacapa de Special Cement BL deREMA TIP TOP. Posicionar la zonadañada a las 3 ó 9 horas y dejarsecar la capa unos 10 minutos.(Prueba a dorso digital). (esq. 7.7)Instrucción de seguridad:¡Trat<strong>an</strong>do con disolventes, observarsiempre las instrucciones de seguridady símbolos de advertencia enlos envases y embalajes!33
7.8 Nach Ablauf der Trockenzeit dieSchutzfolie des ausgewählten Reparaturpflastersauf der Unterseiteentfernen und dieses <strong>mit</strong>tig auf dieeingestrichene Schadensstelle setzen,ohne den <strong>Reifen</strong> zu spreizen(Hilfslinien beachten). (Abb. 7.8)Pflaster <strong>von</strong> der Mitte nach außen<strong>mit</strong> schmalem Anroller (Art.-Nr. 5951044) <strong>an</strong>rollen.Abb./fig./esq. 7.87.9 Reparaturstelle nochmals auf fehlerfreieAusführung überprüfen undPflasterr<strong>an</strong>d sowie evtl. verbliebeneRaufläche <strong>mit</strong> REMA TIP TOP InnerlinerSealer (z.B. Art.-Nr. 515 9004)versiegeln. (Abb. 7.9)Hinweis zur Selbstvulk<strong>an</strong>isationdes Reparaturpflasters:<strong>Reifen</strong> vor der Montage undWiederinbetriebnahme 24 Std. beimind. 18 °C lagern.Abb./fig./esq. 7.97.10 <strong>Reifen</strong> montieren, auf Betriebsdruckbringen und erst d<strong>an</strong>n überstehendenSchaft des REMASTEM- Reparaturkörpers abschneiden,ohne dar<strong>an</strong> zu ziehen. (Abb. 7.10)Abb./fig./esq. 7.1034
7.8 At the end of the drying time, removethe protective foil from the undersideof the selected repair patch.Then centre this patch onto thecoated repair area, without spreadingthe tyre. (Observe the auxiliarylines!) (fig 7.8)Stitch the patch on from the centreoutwards, using a thin stitcher (ref.no. 595 1044).7.8 A la fin du temps de séchage, enleverla feuille de protection du dessousde l´emplâtre choisi et centrercelui-ci sur la blessure enduite desolution, s<strong>an</strong>s écarter le pneu. (Tenircompte des repères !). (fig 7.8)Moleter l´emplâtre avec la molette(réf. 595 1044), du centre versl´extérieur.7.8 Tr<strong>an</strong>scurrido el tiempo de secado,quitar la lámina de protecciónde la parte inferior del parcheREMA TIP TOP seleccionado ycentrarlo con la flecha en direcciónal talón (pestaña) en la superficieuntada de la rotura (observar líneasauxiliares) sin abrir el neumático /los talones (pestañas). (esq. 7.8)Rodillar el parche desde el centrohacia afuera con el rodillo delgado(No. Art. 595 1044).7.9 Check the repair area again fordefects <strong>an</strong>d seal the edge ofthe repair patch <strong>an</strong>d <strong>an</strong>y stillexposed, buffed surface areas withREMA TIP TOP Innerliner Sealer(e.g. ref.no. 515 9004). (fig 7.9)Note regarding self-vulc<strong>an</strong>izationof the repair patch:Store the tyre for 24 hours at 18 °Cplus before mounting <strong>an</strong>d putting itinto operation again.7.9 Vérifier encore une fois si la réparationne présente pas de défauts.Et<strong>an</strong>chéifier à l´aide d´InnerlinerSealer REMA TIP TOP (par exempleréf. 515 9004) le bord de l´emplâtreet les zones râpées qui se trouventéventuellement découvertes. (fig 7.9)Indications concern<strong>an</strong>t l´autovulc<strong>an</strong>isationde l´emplâtre :Stocker le pneu à une températureégale ou supérieure à 18 °C pend<strong>an</strong>t24 heures, av<strong>an</strong>t de le monteret de le remettre en service.7.9 Compruebe que la reparación sehaya realizado correctamente yselle la orilla del parche, y eventualesáreas raspadas rest<strong>an</strong>tes conREMA TIP TOP Innerliner Sealer(p.ej.: N.º de Ref. 515 9004).Observaciones respecto a laautovulc<strong>an</strong>ización del parche:Deje reposar el neumático (cubierta)dur<strong>an</strong>te 24 horas a por lo menos18 °C, <strong>an</strong>tes de montar y reusarlo.7.10 Mount the tyre, inflate it to theoperating pressure. Then cut theprotruding stem of the REMASTEMrepair plug without stretching it. (fig 7.10)7.10 Monter le pneu, le gonfler à lapression de service. Ensuite couperle bout du bouchon de gommeREMASTEM qui dépasse, s<strong>an</strong>s letirer. (fig 7.10)7.10 Montar el neumático, inflarlo hastaque alc<strong>an</strong>ce su presión normaly, sólo entonces cortar el restodel REMASTEM sobresaliente sinestirar de él. (esq. 7.10)35
REMA TIP TOP AutomotivePKWWartung& ServiceAnalyseLKWSchulungZweirad<strong>Reifen</strong>reparaturBeratungOTRMontageLogistikVerbrauchsmaterialienWerkzeuge, VentileGewichte &WerkstatteinrichtungAngebotKonzeptionRunderneuerungIndividuelleLösungenPl<strong>an</strong>ungAgrarFahrradREMA TIP TOP GmbHWe m<strong>an</strong>age your workshop.Qualität <strong>mit</strong> System.REMA TIP TOP steht für erstklassige Produkte,Systeme und Serviceleistungen aus einer H<strong>an</strong>d. Mitmodernster Technik, wegweisenden Innovationenund einem weltweiten Service-Netzwerk überzeugenwir unsere Kunden.581 0050 - lll.10 Printed in Germ<strong>an</strong>yIhr lokaler Ansprechpartner:REMA TIP TOP GmbHBusiness Unit AutomotiveGruber Straße 6385586 Poing/Germ<strong>an</strong>yTelefon: +49 8121 707-234Telefax: +49 8121 707-222www.rema-<strong>tip</strong><strong>top</strong>.cominfo@<strong>tip</strong><strong>top</strong>.de