UNA PRO incasso / recessed - Danese Milano
UNA PRO incasso / recessed - Danese Milano
UNA PRO incasso / recessed - Danese Milano

Create successful ePaper yourself
Turn your PDF publications into a flip-book with our unique Google optimized e-Paper software.
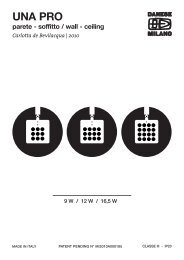
<strong>UNA</strong> <strong>PRO</strong><strong>incasso</strong> / <strong>recessed</strong>Carlotta de Bevilacqua | 20109 W / 12 W / 16,5 WCLASSE I - IP20
ITAvvertenzeLa sicurezza elettrica di questo apparecchio è garantita conl’uso appropriato di queste istruzioni. Pertanto è necessarioconservarle. Prima di ogni operazione sull’apparecchiodisinserire la tensione di rete.SorgenteLED 9 W = 9 LED x 1WLED 12 W = 12 LED x 1WLED 16,5 W = 16 LED x 1,03WLa sorgente è caratterizzata da una elevata vita utile. Nelcaso fosse necessaria la sostituzione del led, rivolgersiesclusivamente al centro assistenza DANESE.Istruzioni di montaggioFig. 1 - Eseguire nel controsoffitto un foro delle dimensioniindicate.Fig. 2 - Far passare i cavi provenienti dalla rete ed avvicinareil corpo <strong>incasso</strong> A al controsoffitto.Fig. 3 - Rasare il corpo <strong>incasso</strong> A.Fig. 4 - Eseguire il collegamento elettrico come indicato infigura. Far passare i cavi con il connettore C attraverso il foroD del corpo <strong>incasso</strong> A.Fig. 5 - Fissare il corpo elettrificato B al corpo <strong>incasso</strong> A,servendosi delle viti fornite in dotazione.Fig. 6 - Avvicinare lo spot F ed eseguire il collegamento trail connettore C ed il connettore E. Fissare lo spot F al corpoelettrificato B tramite i fori G, servendosi delle viti in dotazione.Fig. 7 - Per effettuare l’ispezionabilità del prodotto svitare leviti H del corpo elettrificato.AttenzioneNon forzare la lampada con movimenti impropri che sioppongono alla naturale rotazione dello snodo (Fig. 8).Frequentissimi movimenti del braccio fissato alla base dellalampada possono allentare la frizione. É possibile regolare lafrizione con la chiave in dotazione, per recuperare il normalefunzionamento dello snodo. Prima di agire sulla vite di frizione,svitare il grano interno di blocco allo snodo come indicatonella figura 9a. Dopo aver svitato il grano di blocco, agire sulperno di frizione andando a recuperare la frizione desideratacome nella figura 9b. Raggiunta la frizione desiderata,riavvitare il grano di blocco dello snodo come nella figura 9c.Avvertenze d’usoManeggiare il prodotto con cura:- Movimenti bruschi potrebbero danneggiare la strutturadell’apparecchio.- Il contatto diretto e/o un movimento brusco operato sulla sorgenteluminosa (scheda led) potrebbe causarne danni e/o rottura.Informazioni sulla pulizia- Per la pulizia delle parti metalliche usare esclusivamente unpanno umido.Avvertenze generali per apparecchi di illuminazione di interni.L’apparecchio è idoneo al montaggio diretto su superficinormalmente infiammabili.Tutti i prodotti DANESE che rientrano nell’ambitodi applicazione della direttiva europea bassatensione B.T. 2006/95/CE soddisfano i requisitirichiesti e recano la marcatura “ ”.Attenzione!<strong>Danese</strong> non si assume nessuna responsabilità per i prodottimodificati senza preventiva autorizzazione. <strong>Danese</strong> si riservadi apportare modifiche tecniche e strutturali necessarie almiglioramento del prodotto in qualsiasi momento.ENNoteThis equipment is guaranteed only when used as indicadedin these instructions. Therefore they should be kept for futurereference. Prior to any work on the fixture always switch offthe mains.BulbsLED 9 W = 9 LED x 1WLED 12 W = 12 LED x 1WLED 16,5 W = 16 LED x 1,03WThe fixture is provided with light source having a long life.Anyway, if the LED must be replaced, this operation must becarried out only by our specialized staff.Assembly instructionsFig.1 - Realize a hole of the given dimension in the false ceiling.Fig. 2 - Make the cables coming from the mains go throughand bring near the <strong>recessed</strong> box A and move it close to thehole.Fig. 3 - Render the <strong>recessed</strong> box A to the false ceiling thanksto the holes on the box frame.Fig. 4 - Connect the electrical cables as the image shows.Make the cables with the connector C go through the hole Dof the <strong>recessed</strong> box A.Fig. 5 - Move the electrical body C close to the hole and fixit to <strong>recessed</strong> box A through the holes using the providedscrews H.Fig. 6 - Bring near the spotlight F and realize the link upbetween the connector C and the connector E. Fix thespotlight F to electrical body B through the holes G using theprovided screws.Fig. 7 - For the maintenance unscrew the screws H andextract the <strong>recessed</strong> body lamp.AttentionDo not force the lamp with improper movements, opposingto the natural rotation of the joint (fig. 8). Too many frequentmovements of arm fixed to the basis of the lamp canloosen the friction. The friction can be regulated by meansof the provided key in order to regain the normal use of thejoint. Before acting on the friction screw, unfasten the innerblocking screw of the joint as shown in image 9a. After havingunfastened the blocking screw, act on the friction pivot,recovering the wanted friction, as image 9b. Once the wantedfriction is reached, tighten the blocking screw of the joint, asshown in image 9c.Use warningsHandle the product with care- Sudden movements could damage the device’s structure.- Direct contact and / or a sudden movement operated onthe light source (LED board) may cause damages and / orfailures.Cleaning information- Only use a wet cloth in order to clean the metal fixture.General warnings for indoor light fittings.The appliance is suitable to be mounted directly on normallyinflammable surfaces.All DANESE products falling within the rangeof application of the European low voltagedirective B.T. 2006/95/EC meet the requiredspecifications and bear “ ” labelling.Attention!<strong>Danese</strong> not shoulder any responsabilities should products bemodified without prior authorisation. <strong>Danese</strong> reserves the rightto change, at any time, the technical specification necessaryor structural for improvements of the product.
FRAvisLa securitè de l’appareil n’est garantie que si les instructionssont convenablement suivies. Il est donc necessaires de lesconserver. Déconnecter la tension de réseau avant touteopération sur l’appareil.AmpoulesLED 9 W = 9 LED x 1WLED 12 W = 12 LED x 1WLED 16,5 W = 16 LED x 1,03WLa source lumineuse est caractérisée par une grande vieutile. Si il faut remplacer les LED, nous vous prions de biencontacter le centre de service DANESE.Instructions de montageFig. 1 - Réaliser un trou des dimensions indiquée dans le fauxplafond.Fig. 2 - Faire passer les câbles provenant de le réseauélectrique et approcher le corps encastré A.Fig. 3 - Réaliser le branchement électrique comme indiquéen illustration. Faire passer les câbles avec le connecteur Bpar le trou C du corps encastré A. Fixer le corps encastré Aau faux plafond.Fig. 4 - Approcher le spot D et réaliser la jonction entre leconnecteur B et le connecteur E. Fixer le spot D au corpsencastré A par les trous F en utilisant les vis fournies.Fig. 5 - Pour la manutention dévisser les vis G et extraire lecorp avec l’alimentation.AttentionNe pas forcer la lampe avec des mouvements impropresqui s’opposent à la rotation naturelle de l’articulation (fig.6).Des mouvements trop fréquents du bras fixé à la base de lalampe peuvent détendre la friction. Il est possible de régler lafriction avec la clé fournie dans l’emballage pour récupérerle normal fonctionnement du joint. Avant d’agir sur la vis defriction, dévisser la vis intérieure de blocage de l’articulation,comme indiqué dans la image 7a. Après avoir dévissé lavis de blocage, agir sur le pivot de friction en récupérant lafriction voulue, comme indiqué dans la figure image 7b. Unefois que la friction voulue est atteinte, serrez la vis de blocagede l’articulation, comme indiqué dans la image 7c.Instructions pour l’utilisationManipuler le produit avec soin:- Des mouvements brusques peuvent endommager le corpsde l’appareil.- Un contact direct et / ou un mouvement brusque sur la sourcede lumière (LED bord) pourrait en causer des dommages et /ou la rupture de la source même.Le nettoyage:- Nettoyer les pièces métalliques en utilisant uniquementun chiffon humide.Avertissements généraux pour appareils d’éclairage d’intérieur.L’appareil est indiqué pour être monté directement sur dessurfaces normalement inflammables.Tous les produits DANESE appartenants au champd’application de la directive européenne basse tension B.T.2006/95/CE remplissent les conditions prévues et portent lemarquage “ ”.Attention!<strong>Danese</strong> décline toute responsabilité pour les produits modifiéssans autorisations préalable. <strong>Danese</strong> se réserve la facultéd’apporter, à tout moment, les modifications techniques etstructurales jugées nécessaires pour améliorer le produit.DVorsichtDie Sicherheit der Leuchte wird nur bei sachgerechtemGebrauch gemäß Anweisungen gewährleistet. Bitte bewahrenSie diese sorgfältig auf. Vor jedem Eingriff an dem Gerät dieNetzspannung unterbrechen.GlühlampeLED 9 W = 9 LED x 1WLED 12 W = 12 LED x 1WLED 16,5 W = 16 LED x 1,03WDie Quelle ist durch eine hohe Lebensdauer aus. Wenn esnotwendig ist, die LED zu ersetzen, bitte kontaktieren Sie dasService-Center DANESE.MontageanleitungAbb. 1 - Die Zwischendecke durchlöchern mit denangezeigten Maßen.Abb. 2 - Die Netz-Kabeln durch gehen lassen und denEinbaukörper A an die Zwischendecke heranrücken.Abb. 3 - Die Verbindung wie in Abb. ausführen. Die Kabel mitdem Steckwerbinder B durch das Loch C des EinbaukörpersA gehen lassen.Abb. 4 - Den Lightspot D heranrücken und den SteckwerbinderB mit dem Steckwerbinder E verbinden. Den Lightspot D andem Einbaukörper A fixieren durch die Löcher F und dieBenutzung der ausgestatteten Schrauben.Abb. 5 - Für die Instandhaltung die Schrauben G aufschraubenund den Elektrifizierten Körper ausziehen.AchtungDie Lampe mit unangemessene Bewegungen, die gegenteiligzu natürliche Rotationen des Gelenk sind, nicht anstrengen(Abb.6). Zu viele häufige Bewegungen des an der Basisbefestigtes Armes können die Friktion lockern. Man kanndie Friktion durch den gegebenen Schlüssel regulieren,um die regelmäßige Arbeitsweise wiederzuerlangen.Bevor auf die Friktionsschraube zu handeln, die innereBlockierungsschraube des Gelenkes lösen, wie in dieabb. 7a. Nachdem die Blockierungsschraube lösen, aufden Friktionsstift handeln, um die gewünschte Friktion zuerreichen, wie in die abb. 7b. Als die gewünschte Friktionerreicht ist, die Blockierungsschraube des Gelenkes wiederverschrauben, wie in die abb. 7c.Behandeln Sie das Produkt mit Vorsicht:- Plötzliche Bewegungen können die Struktur des Geräts schaden.- Ein direkter Kontakt und / oder eine plötzliche Bewegung aufder Lichtquelle (LED-Platine) könnten zu einer Beschädigungund / oder Nichtbeachtung bringen.Zur Reinigung:- Die Metallteile nur mit einem feuchten Tuch reinigen.Generelle Hinweise für Beleuchtungsgeräte für Innenräume.Das Gerät ist geeignet, direkt auf normal entflammbarenOberflächen montiert werden.Alle Podukte von DANESE, die unter das Anwendungsgebietder europäischen Richtlinie der Niederspannung B.T. 2006/95/EG fallen, entsprechen den erforderlichen Eigenschaften undtragen das “ ” Kennzeichen.Achtung!<strong>Danese</strong> nimmt keine Verantwortung für ohne Vorgenehmigunggeänderte Produckte an. <strong>Danese</strong> darf in jedem Momenttechnischen und strukturellen Veränderungen, die nötig fürdie Verbesserung des Gegenstandes sind vornehmen.
Fig. 3AFig. 4DCBLN
Fig. 5AB
Fig. 6GCEFCLACK!
Fig. 7BH
Fig. 8358°180°358°358°180°358°
OFFICES / FACTORYVIA ANTONIO CANOVA 3420145 MILANOT. +39.02.349611F. +39.02.34538211info@danesemilano.comSHOWROOMPIAZZA SAN NAZARO IN BROLO 1520122 MILANOT. +39.02.58304150F. +39.02.58433350showroom@danesemilano.com© JANUARY 2011 DANESE S.R.LDANESE S.R.L reserves the right to change,at any time and without prior warrning, thetecnical specification of any product illustratedin this catalogue.For DANESE MILANO points of sale worldwidevisit our website.DANESEMILANO.COM