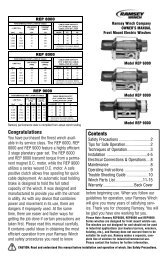
Ramsey Winch Company
Ramsey Winch Company
Ramsey Winch Company
- No tags were found...

Create successful ePaper yourself
Turn your PDF publications into a flip-book with our unique Google optimized e-Paper software.
5. Determine position shifter knob needs to be foryour application. Note: Shifter knob cannot bepositioned too low or it will interfere with the feeton the Gear End Bearing (see Range of Position inFigure 4).6. To position the shifter knob, place locking ring inend bearing with stop post approximately 180°from where shifter knob needs to be positioned.Place cam ring over locking ring in proper positionand confirm that shifter knob will move fromengaged to disengaged position without interference.Mark position of stop post on end bearing.Figure 47. Remove cam ring and locking ring from end bearing. Insert springs (item #38) into end bearing. When youreplace the locking ring (item #34) over the springs, be sure the springs compress down into their recesses,and don’t bend sideways.8. Reassemble Gear Housing as shown in Figure 3. Make sure locking ring is positioned with stop post at markedlocation. The capscrews (item #38) for the retainer should be tightened to 40-45 in-lbs. Do not over-tighten.9. Place Gear Housing over the stacked gears, etc. that you removed in step 3. Gently work the housing over thestack, turning it as needed to mesh the planetary gears with the ring gear in the housing. Once they are all in thehousing, flip the assembly over. Align the Gear Housing Cover and gasket with the holes in the ring gear. Replacethe (6) capscrews that hold the Gear Housing Cover onto the Gear Housing. Tighten securely.10. Move the Shifter to the Disengaged position.11. Turn the Gear Housing over and set it on the workbench with the Gear Housing Cover down. SeeFigure 5.12. Install the drum bushing into the Gear Housing, confirmingthat the slot in the bushing is aligned withthe key in the end bearing. Pick up the rest of thewinch (drum and motor end), and holding the drum,lower the winch onto the gear end. Stab the shaftinto the gear end--you may need to turn the drumslightly to get the shaft to go all the way in.13. Place the tiebars on the motor end and gear end andfasten using (4) screws. Tighten securely.14. Once the winch is reassembled, turn it so that it issitting on its feet. Confirm that the cable willfreespool when the shifter is in the Disengaged position.Connect up the winch temporarily and confirmthat the cable spools when the shifter is in theEngaged position.Figure 58