
You also want an ePaper? Increase the reach of your titles
YUMPU automatically turns print PDFs into web optimized ePapers that Google loves.
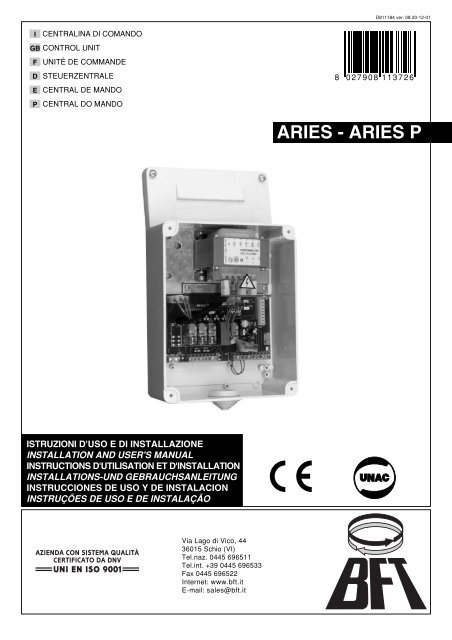
D811184 ver. 08 20-12-01I CENTRALINA DI COMANDOGB CONTROL UNITF UNITÉ DE COMMANDED STEUERZENTRALEE CENTRAL DE MANDOP CENTRAL DO MANDO8 027908 113726<strong>ARIES</strong> - <strong>ARIES</strong> PISTRUZIONI D'USO E DI INSTALLAZIONEINSTALLATION AND USER'S MANUALINSTRUCTIONS D'UTILISATION ET D'INSTALLATIONINSTALLATIONS-UND GEBRAUCHSANLEITUNGINSTRUCCIONES DE USO Y DE INSTALACIONINSTRUÇÕES DE USO E DE INSTALAÇÃOVia Lago di Vico, 4436015 Schio (VI)Tel.naz. 0445 696511Tel.int. +39 0445 696533Fax 0445 696522Internet: www.bft.itE-mail: sales@bft.it
2 - <strong>ARIES</strong>/<strong>ARIES</strong>-P - Ver. 08D811184_08
D811184_08<strong>ARIES</strong>/<strong>ARIES</strong>-P - Ver. 08 - 3
ITALIANOMANUALE D’USONel ringraziarVi per la preferenza accordata a questo prodotto, la ditta è certa che da esso otterrete le prestazioni necessarie al Vostro uso.Leggete attentamente l’opuscolo “AVVERTENZE” ed il “LIBRETTO ISTRUZIONI” che accompagnano questo prodotto in quanto forniscono importantiindicazioni riguardanti la sicurezza, l’installazione, l’uso e la manutenzione. Questo prodotto risponde alle norme riconosciute della tecnica e delledisposizioni relative alla sicurezza. Confermiamo che è conforme alle seguenti direttive europee: 89/336/CEE, 73/23/CEE (e loro modifiche successive).D811184_081) GENERALITÀLa centralina mod. <strong>ARIES</strong> è adatta per cancelli a battente. Può comandare uno o due operatori.La centralina mod. <strong>ARIES</strong> P può inoltre comandare l’apertura di un singolo operatore mantenedo in chiusura l’altro (accesso pedonale).2) FUNZIONISTOP: In tutti i casi: arresta il cancello fino a nuovo start.PHOT: Funzioni settabili con DIP-SWITCH.Attiva in chiusura.Attiva in apertura e chiusura.Chiusura RapidaON Quando sono oltrepassate le fotocellule del cancello, sia in apertura che in chiusura, il cancello parte automaticamente in chiusura anche se èinserito il TCA. Si consiglia di settare il DIP3 in ON (fotocellule attive solo in chiusura).Blocca impulsiON: Durante la fase di apertura non accetta comandi di START.OFF: Durante la fase di apertura accetta comandi di START.FotocelluleON: Fotocellule attive solo in chiusura.OFF: Fotocellule attive in chiusura ed apertura.Tempo di chiusura automatica TCAON: Chiusura automatica inserita (regolabile da 0 a 90s).Preallarme (solo mod. <strong>ARIES</strong> P)ON: Inserito. Il lampeggiante inizia a segnalare 3 secondi prima dell’inizio della manovra.PER L’INSTALLATORE: contrassegnare con un segno di spunta le caselle interessate.START: logica a 4 passiapreferma ed inserisce il TCAchiudeblocca (ferma e non inserisce il TCA)va in aperturaSTART: logica a 2 passiapreSCA: Spia cancello apertoCancello chiusoIn aperturaCancello apertoIn chiusuraDopo stopferma ed inserisce il TCA (se inserito)chiudeapreaprespentaaccesaaccesalampeggianteATTENZIONE: Per mod. <strong>ARIES</strong> (lasciare sempre in OFF).3) MANUTENZIONE E DEMOLIZIONELa manutenzione dell’impianto va fatta eseguire regolarmente da parte di personale qualificato. I materiali costituenti l’apparecchiatura e il suoimballo vanno smaltiti secondo le norme vigenti. Le pile non devono essere disperse nell’ambiente.AVVERTENZEIl buon funzionamento dell’operatore è garantito solo se vengono rispettate i dati riportati in questo manuale. La ditta non risponde dei dannicausati dall’inosservanza delle norme di installazione e delle indicazioni riportate in questo manuale.Le descrizioni e le illustrazioni del presente manuale non sono impegnative. Lasciando inalterate le caratteristiche essenziali del prodotto, laDitta si riserva di apportare in qualunque momento le modifiche che essa ritiene convenienti per migliorare tecnicamente, costruttivamentee commercialmente il prodotto, senza impegnarsi ad aggiornare la presente pubblicazione.4 - <strong>ARIES</strong>/<strong>ARIES</strong>-P - Ver. 08
D811184_08USER’S MANUALENGLISHThank you for buying this product, our company is sure that you will be more than satisfied with the product’s performance. The product is supplied witha “WARNINGS” leaflet and an “INSTRUCTION MANUAL”.These should both be read carefully as they provide important information about safety, installation, operation and maintenance. This product complieswith the recognised technical standards and safety regulations. We declare that this product is in conformity with the following European Directives:89/336/EEC and 73/23/EEC (and subsequent amendments).1) GENERAL OUTLINEThe <strong>ARIES</strong> control unit has been designed for swing gates. It can be used for one or two gate controllers.The control unit mod. <strong>ARIES</strong> P can also be used to perform opening of a single actuator while keeping the other one closed (pedestrian access).2) FUNCTIONSSTOP: In all cases: it stops the gate until a new start command is given.PHOT: Functions can be set with Dip-Switch.Activated during closing.Activated during opening and closing.Rapid closingON: When the position of the gate photocells is exceeded, during both opening and closing, the gate automatically starts to close even if TCA isactivated. We recommend setting DIP3 to ON (photocells only activated during closing).Blocks impulsesON: During opening, START commands are not accepted.OFF: During opening, START commands are accepted.PhotocellsON: Photocells only activated during closing.OFF: Photocells activated during opening and closing.Automatic closing time (TCA)ON: Automatic closing activated (can be adjusted from 0 to 90s)Preallarm (mod. <strong>ARIES</strong> P only)ON: The flashing light turns on abt 3 seconds before the motors start.FOR THE INSTALLER: check the boxes you are interested in.START: four-step logicit opensit stops and activates TCAit closesit stops and does not activate TCAit starts openingSTART: two-step logicit opensSCA: Gate open indicating lightGate closedDuring openingGate openDuring closingAfter stopit stops and activats TCA (if activated)it closesit opensit opensoffononflashingATTENTION: Dip non used in mod. <strong>ARIES</strong> (always in OFF set).3) MAINTENANCE AND DEMOLITIONThe maintenance of the system should only be carried out by qualified personnel regularly. The materials making up the set and its packing mustbe disposed of according to the regulations in force.Batteries must be properly disposed of.WARNINGSCorrect controller operation is only ensured when the data contained in the present manual are observed. The company is not to be heldresponsible for any damage resulting from failure to observe the installation standards and the instructions contained in the presentmanual.The descriptions and illustrations contained in the present manual are not binding. The Company reserves the right to make any alterationsdeemed appropriate for the technical, manufacturing and commercial improvement of the product, while leaving the essential product featuresunchanged, at any time and without undertaking to update the present publication.<strong>ARIES</strong>/<strong>ARIES</strong>-P - Ver. 08 - 5
FRANÇAISMANUEL D’UTILISATIONNous vous remercions pour avoir choisi ce produit: nous sommes sûrs qu’il vous rendra le service nécessaire à vos besoins. Lisez attentivement le livret“AVERTISSEMENTS” et le “MANUEL D’INSTRUCTIONS” qui accompagnent ce produit puisqu’ils fournissent d’importantes indications concernant lasécurité, l’installation, l’emploi et l’entretien.Ce produit est conforme aux règles reconnues de la technique et aux dispositions concernant la sécurité en vigueur. Nous certifionssa conformité avecles directives européennes suivantes: 89/336/CEE, 73/23/CEE (et modifications successives).D811184_081) GÉNERALITÉSLa centrale mod. <strong>ARIES</strong> est indiquée pour des portails à battants. Elle peut commander un ou deux opérateurs.L’unité de commande mod. <strong>ARIES</strong> P peut en outre commander l’ouverture d’un seul opérateur en maintenant l’autre en fermeture (accès piétonnier).2) FONCTIONSSTOP: En tous les cas: arrête le portail jusqu’à un nouveau start.PHOT: Fonctions réglables par interrupteurs DIP.Est active en fermeture.Est active en ouverture et en fermeture.Fermeture rapideON: Lorsque les cellules photoélectriques du portail sont dépassées, tant en ouverture qu’en fermeture, le portail part automatiquement en fermeturemême si le TCA est actif. Il est conseillé de régler le DIP 3 sur ON (cellule-sphotoélectriques actives seulement en fermeture).Bloque les impulsionsON: Pendant la phase d’ouverture, il n’accepte pas des commandes de START.OFF: Pendant la phase d’ouverture, il n’accepte pas des commandes de START.Cellules photoélectriquesON: Cellules photoélectriques actives seulement en fermeture.OFF: Cellules photoélectriques actives en fermeture et en ouverture.Temps de fermeture automatique TCAON: Fermeture automatique active (réglable de 0 à 90s).Préalarme (Seulement mod. <strong>ARIES</strong> P)ON: Activé. Le clignotement commence 3 second avant de le début de la manoeuvre.POUR L’INSTALLATEUR: barrer les cases intéressées.Portail ferméEn ouverturePortail ouvertEn fermetureAprès stopSTART: logique à 4 pasouvrearrête et active le TCAfermebloque (arrête et n’active pas le TCA)va en ouvertureSTART: logique à 2 pasouvrearrête et active le TCA (si enclenché)fermeouvreouvreSCA: Témoin portail ouvertéteintalluméalluméclignotantATTENTION: Pour le mod. <strong>ARIES</strong> (lasser toujour en OFF).3) ENTRETIEN ET DEMOLITIONL’entretien de l’installation doit être effectué régulièrement de la part de personnel qualifié. Les matériaux constituant l’appareillage et sonemballage doivent être mis au rebut conformément aux normes en vigueur. Les piles constituent des déchets spéciaux.AVERTISSEMENTSLe bon fonctionnement de l’actionneur n’est assuré que si les données fournies dans ce manuel sont respectées. Le constructeur ne répondpas pour les dommages provoqués par le non respect des normes d’installation et des indications fournies dans ce manuel.Les descriptions et les figures de ce manuel n’engagent pas le constructeur. En laissant inaltérées les caractéristiques essentielles du produit,la Société se réserve le droit d’apporter à n’importe quel moment les modifications qu’elle juge opportunes pour améliorer le produit du pointde vue technique, commercial et de construction, sans s’engager à mettre à jour cette publication.6 - <strong>ARIES</strong>/<strong>ARIES</strong>-P - Ver. 08
D811184_08BEDIENUNGSANLEITUNGDEUTSCHWir danken für den Kauf dieses Produkts und sind sicher, daß seine Leistungen Sie bei der von Ihnen vorgesehenen Anwendung zufriedenstellen werden.Bitte lesen Sie die Broschüre “WARNHINWEISE” und die “BEDIENUNGSANLEITUNG”, die mit der Maschine geliefert werden, auf-merksam durch, dasie wichtige Hinweise zur Sicherheit, Installierung, Anwendung und Wartung enthalten. Dieses Produkt entspricht den anerkannten technischen Normensowie den Sicherheitsbestimmungen. Wir bestätigen hiermit, daß es sich im Einklang mit folgenden europäischen Richtlinien befindet: 89/336/EWG und73/23/EWG (und ihren nachfolgende Änderungen).1) ALLGEMEINESDie Steuerung modell <strong>ARIES</strong> eignet sich für Drehtore. Sie kann einen oder zwei Antriebe steuern.Die Steuerung Modell <strong>ARIES</strong> P kann außerdem die Öffnung eines einzelnenAntriebes steuern, der andere bleibt dabei verschlossen (Fußgängerzugang).2) FUNKTIONENSTOP: In allen Fällen: hält das Tor an, bis erneut der Startbefehl gegeben wird.PHOT: Die Funktionen sind über DIP-SWITCH einstellbar.Beim Schließvorgang aktiv falls.Beim Öffnungs-und Schließvorgang aktiv falls.Schneller SchließvorgangON: Wenn die Lichtschranken des Tors überschritten wurden, schließt sich das Tor sowohl während des Öffnungs-als auch des Schließvorgangsautomatisch, auch wenn der TCA eingeschaltet ist. Es wird empfohlen, DIP3 auf ON zu stellen (Lichtschranken nur beim Schließvorgang aktiv).OFF: Funktion nicht aktiv.Impulsblockierung in ÖffnungON: Während der Öffnungsphase werden keine weiteren START-Befehle angenommen.OFF: Während der Öffnungsphase werden START-Befehle angenommen.LichtschrankenON: Lichtschranken nur beim Schließvorgang aktiv.OFF: Lichtschranken beim Schließ- und Öffnungsvorgang aktiv.Automatische Schließzeit (TCA)ON: Automatischer Schließvorgang eingeschaltet (einstellbar von 0 bis 90s.).Vorwahrnzeit (nur mod. <strong>ARIES</strong> P)ON: Das Blinklicht schaltet sich ca. 3s vor dem Start der Motoren ein.OFF:Das Blinklicht schaltet sich gemeinsam mit den Motoren ein.FÜR DEN INSTALLATEUR: Kennzeichnen Sie die betreffenden Felder mit einem Häkchen.Tor geschlossenin ÖffnungTor offenIm SchließvorgangNach dem StopSTART: Vier-Schritt-Logiköffnethält an und schaltet TCA einschließthält an (schaltet TCA nicht ein)geht in ÖffnungSTART: Zwei-Schritt-Logiköffnethält an und schaltet TCA ein (wenn vorgewählt)schließtöffnetöffnetSCA: Kontrollampe für offenstehendes TorausananblinkendACHTUNG: Nicht für mod. <strong>ARIES</strong> verwendet (immer auf OFF belassen).3) INSTANDHALTUNG UND VERSCHROTTUNGDie Anlagenwartung ist regelmäßig von Fachleuten vorzunehmen. Die Materialien, aus denen die Apparatur besteht und ihre Verpackung sindvorschriftsmäßig zu entsorgen. Die Batterien dürfen nicht in die Umwelt gelangen.HINWEISEDer einwandfreie Betrieb des Antriebes ist nur dann garantiert, wenn die Angaben aus diesem Handbuch beachtet werden. Der Hersteller haftet nichtfür Schäden, die durch Mißachtung der Installationsanweisungen und der Angaben aus diesem Handbuch entstehen.Die Beschreibungen und bildlichen Darstellungen in diesem Handbuch sind unverbindlich. Der Hersteller behält sich - ohne auch zurAktualisierung dieser Unterlagen verpflichtet zu sein - jederzeit vor, Änderungen vornehmen, wenn er diese für technische oder baulicheVerbesserungen als notwendig erachtet und die wesentlichen Produkteigenschaften unverändert bleiben.<strong>ARIES</strong>/<strong>ARIES</strong>-P - Ver. 08 - 7
ESPAÑOLMANUAL DE USOAl agradecerle la preferencia que ha manifestado por este producto, la empresa está segura de que de él obtendrá los rendimientos necesarios para susexigencias. Lea atentamente el folleto “ADVERTENCIAS” y el “MANUAL DE INSTRUCCIONES” que acompañan a este producto, pues proporcionanimportantes indicaciones acerca de la seguridad, la instalación, el uso y el mantenimiento del mismo.Este producto responde a las normas reconocidas de la técnica y a las disposiciones relativas a la seguridad. Confirmamos que es conforme a lassiguientes directivas europeas: 89/336/CEE, 73/23/CEE (y modificaciones sucesivas).D811184_081) GENERALIDADESLa central mod. <strong>ARIES</strong> es indicada para cancelas de batiente. Puede accionar uno o dos operadores.El cuadro mod. <strong>ARIES</strong> P también puede accionar la apertura de un actuador solo, manteniendo el otro cerrado (acceso peatones).2) FUNCIONESSTOP: En todos los casos: detiene la cancela hasta nuevo start.PHOT: Funciones que pueden establecerse con DIP-SWITCH.Se acciona durante el cierre.Se acciona durante la apertura y cierre.Cierre rápidoON Cuando se sobrepasan las fotocélulas de la cancela, tanto durante la apertura como durante el cierre, la cancela se pone en marchaautomáticamente en cierre aunque si está conectado el TCA. Se aconseja ajustar el DIP3 en ON (fotocélulas en función sólo en cierre).Bloque impulsosON: Durante la fase de apertura no acepta órdenes de START.OFF: Durante la fase de apertura acepta órdenes de START.FotocélulasON: Fotocélulas en función sólo durante cierre.OFF: Fotocélulas en función durante cierre y apertura.Tiempo de cierre automático TCAON: Tiempo de cierre autom. conectado (regulable de 0 a 90s).Prealarma (Solamente para el mod. <strong>ARIES</strong> P)ON: Activado. La luz de destello se enciende aproximadamente 3 segundos antes de que los mores arranquen.PARA EL INSTALADOR: marque con una tilde las casillas correspondientes.Cancela cerradaEn aperturaCancela abiertaEn cierreDespués del stopSTART: lógica de cuatro pasosabrepara y conecta el TCAcierrabloquea (para y no conecta el TCA)se abreSTART: lógica de dos pasosabrepara y conecta el TCA (si está conectado)cierraabreabreSCA: Luz indicadora cancela abiertaapagadaencendidaencendidaintermitenteATENCIÓN: Para mod. <strong>ARIES</strong> (deje siempre en OFF).3) MANTENIMIENTO Y DEMOLICIONEl mantenimiento de la instalación debe ser realizado, con regularidad, por personal cualificado. Los materiales que constituyen el equipo y suembalaje deben eliminarse de conformidad con las normas vigentes.Las pilas deben depositarse en los contenedores expresamente previstos.ADVERTENCIASEl buen funcionamiento del operador resulta garantizado únicamente si se respetan los datos contenidos en este manual de instrucciones.La empresa no responde de los daños causados por el incumplimiento de las normas de instalación y de las indicaciones contenidas eneste manual.Las descripciones y las ilustraciones del presente manual tienen un carácter puramente indicativo. Dejando inalteradas las característicasesenciales del producto, la Empresa se reserva la posibilidad de aportar, en cualquier momento, las modificaciones que considereconvenientes para mejorar técnica, constructiva y comercialmente el producto, sin la obligación de poner al día esta publicación.8 - <strong>ARIES</strong>/<strong>ARIES</strong>-P - Ver. 08
ITALIANONel ringraziarVi per la preferenza accordata a questo prodotto, la ditta ècerta che da esso otterrete le prestazioni necessarie al Vostro uso.Leggete attentamente l’opuscolo “AVVERTENZE” ed il “LIBRETTO ISTRU-ZIONI” che accompagnano questo prodotto in quanto forniscono importantiindicazioni riguardanti la sicurezza, l’installazione, l’uso e la manutenzione.Questo prodotto risponde alle norme riconosciute della tecnica e delledisposizioni relative alla sicurezza. Confermiamo che è conforme alleseguenti direttive europee: 89/336/CEE, 73/23/CEE (e loro modifichesuccessive).1) GENERALITÀLa centralina mod. <strong>ARIES</strong> è adatta per cancelli a battente. Può comandareuno o due operatori.La centralina mod. <strong>ARIES</strong> P può inoltre comandare l’apertura di un singolooperatore mantenedo in chiusura l’altro (accesso pedonale).2) SICUREZZA GENERALEATTENZIONE! Una installazione errata o un uso improprio del prodotto,può creare danni a persone, animali o cose.• Leggete attentamente l’opuscolo ”Avvertenze” ed il ”Libretto istruzioni”che accompagnano questo prodotto, in quanto forniscono importanti indicazioniriguardanti la sicurezza, l’installazione, l’uso e la manutenzione.• Smaltire i materiali di imballo (plastica, cartone, polistirolo, ecc.) secondoquanto previsto dalle norme vigenti. Non lasciare buste di nylon epolistirolo a portata dei bambini.• Conservare le istruzioni per allegarle al fascicolo tecnico e per consultazionifuture.• Questo prodotto è stato progettato e costruito esclusivamente per l’utilizzoindicato in questa documentazione. Usi non indicati in questa documentazionepotrebbero essere fonte di danni al prodotto e fonte dipericolo.• La Ditta declina qualsiasi responsabilità derivante dall’uso improprio odiverso da quello per cui è destinato ed indicato nella presentedocumentazione.• Non installare il prodotto in atmosfera esplosiva.• La Ditta declina qualsiasi responsabilità dall’inosservanza della BuonaTecnica nella costruzione delle chiusure (porte, cancelli, ecc.), nonchédalle deformazioni che potrebbero verificarsi durante l’uso.• L’installazione deve essere in accordo con quanto previsto dalle DirettiveEuropee: 89/336/CEE, 73/23/CEE, 98/37/CEE e loro modifiche successive.• Togliere l’alimentazione elettrica, prima di qualsiasi intervento sull’impianto.Scollegare anche eventuali batterie tampone se presenti.• Prevedere sulla rete di alimentazione dell’automazione, un interruttore oun magnetotermico onnipolare con distanza di apertura dei contattiuguale o superiore a 3mm.• Verificare che a monte della rete di alimentazione, vi sia un interruttoredifferenziale con soglia da 0.03A.• Verificare se l’impianto di terra è realizzato correttamente: collegare tuttele parti metalliche della chiusura (porte, cancelli, ecc.) e tutti i componentidell’impianto provvisti di morsetto di terra.• La Ditta declina ogni responsabilità ai fini della sicurezza e del buonfunzionamento dell’automazione se vengono impiegati componenti di altriproduttori.• Usare esclusivamente parti originali per qualsiasi manutenzione oriparazione.• Non eseguire alcuna modifica ai componenti dell’automazione se nonespressamente autorizzata dalla Ditta.• Istruire l’utilizzatore dell’impianto per quanto riguarda i sistemi di comandoapplicati e l’esecuzione dell’apertura manuale in caso di emergenza.• Non permettere a persone e bambini di sostare nell’area d’azione dell’automazione.• Non lasciare radiocomandi o altri dispositivi di comando alla portata deibambini onde evitare azionamenti involontari dell’automazione.• L’utilizzatore deve evitare qualsiasi tentativo di intervento o riparazionedell’automazione e rivolgersi solo a personale qualificato.• Tutto quello che non è espressamente previsto in queste istruzioni, nonè permesso.MANUALE PER L’INSTALLAZIONE3) DATI TECNICIAlimentazione: ................................................................ 230V ±10% 50HzAssorbimento a vuoto:................................................................ 0.5A maxUscita alim. accessori: ..................................................... 24V~ 6VA maxCorrente max relè: ................................................................................. 8APotenza max. motori: ................................................................ 300 W x 2Limitatore di coppia: .......................................... Autotrasformatore 4 pos.Finecorsa: .......................................................... Tempo di lavoro regolab.Dimensioni quadro: ..................................................................... Vedi fig.1Grado di protezione scatola: ............................................................. IP55Temperatura di utilizzo: ............................................................ -20 +55 °C4) COLLEGAMENTI MORSETTIERA (Fig.2)ATTENZIONE: Tenere i collegamenti in bassa tensione nettamenteseparati dai collegamenti di alimentazione di reteIn fig.3 è riportato il modo di fissaggio e collegamento dei condensatori dimarcia, nel caso questi non siano a bordo del motore.JP51-2 Alimentazione monofase 230V ±10%, 50Hz. (1=L / 2=N).Per il collegamento alla rete utilizzare cavo multipolare di sezione minima3x1.5mm 2 e del tipo previsto dalle normative precedentemente citate (atitolo di esempio se il cavo non è protetto deve essere almeno pari a H07RN-F mentre se protetto deve essere almeno pari a H05 VV-F con sezione3x1.5mm 2 ).JP33-4 (mod. <strong>ARIES</strong>-P). Collegamento lampeggiante 230V 40W max.5-6 (mod. <strong>ARIES</strong>). Collegamento lampeggiante 230V 40W max7-8-9 Collegamento motore M1 - 8 comune, 7-9 marcia.10-11-12 Collegamento motore M2(r) - 11 comune, 10-12 marcia.JP413-14 Pulsante apre-chiude e selettore a chiave (N.O.).13-15 Pulsante di blocco (N.C.). Se non si usa lasciare il ponticello inserito.13-16 Ingresso fotocellula o costa pneumatica (N.C.). Se non si usalasciare il ponticello inserito.17-18 Spia segnalazione cancello aperto 24V 3W max.18-19 Uscita 24V~ 0.25A max (6VA) (per alimentazione fotocellula o altridispositivo).20-21 Ingresso antenna per scheda radioricevente (20 segnale - 21 calza).22 Morsetto comune (equivalente al morsetto 13).23 Morsetto per comando pedonale. Muove l’anta del motore M2 collegatoai morsetti 10-11-12. Il morsetto è presente solo nella centralina mod.<strong>ARIES</strong>-P.JP225-26 Uscita secondo canale radio della scheda ricevente bicanale (morsettinon montati su <strong>ARIES</strong>, montati su <strong>ARIES</strong> P) contatto N.O.JP1 Connettore scheda radioricevente 1-2 canali.5) FUNZIONIDL1: Led power onÉ acceso quando la scheda è alimentata.START: logica a 4 passi: (DIP5 OFF)cancello chiuso: ................................................................................... aprein apertura: ........................................................ ferma ed inserisce il TCAcancello aperto: ............................................................................... chiudein chiusura: ..................................... blocca (ferma e non inserisce il TCA)dopo stop: ............................................................................. va in aperturaSTART: logica a 2 passi: (DIP5 ON)cancello chiuso: ................................................................................... aprein apertura: .................................... ferma ed inserisce il TCA (se inserito)cancello aperto: ............................................................................... chiudein chiusura: .......................................................................................... apredopo stop: ............................................................................................ apreSTOP: In tutti i casi: arresta il cancello fino a nuovo start.PHOT: Funzioni settabili con DIP-SWITCH.Attiva in chiusura se DIP3-ON.Attiva in apertura e chiusura se DIP3-OFF.D811184_0810 - <strong>ARIES</strong>/<strong>ARIES</strong>-P - Ver. 08
D811184_08SCA: Spia cancello apertocon cancello chiuso: ........................................................................ spentacon cancello in apertura: ................................................................ accesacon cancello aperto: ....................................................................... accesacancello in chiusura: ............................................................. lampeggiante6) SELEZIONE DIP-SWITCHDIP1: Chiusura RapidaON Quando sono oltrepassate le fotocellule del cancello, sia in aperturache in chiusura, il cancello parte automaticamente in chiusura anche se èinserito il TCA. Si consiglia di settare il DIP3 in ON (fotocellule attive soloin chiusura).OFF: Funzione disattiva.DIP2: Blocca impulsiON: Durante la fase di apertura non accetta comandi di START.OFF: Durante la fase di apertura accetta comandi di START.DIP3: FotocelluleON: Fotocellule attive solo in chiusura.OFF: Fotocellule attive in chiusura ed apertura.DIP4: Tempo di chiusura automatica TCAON: Chiusura automatica inserita (regolabile da 0 a 90s).OFF: Chiusura automatica esclusa.DIP5: Logica di comandoON: Attiva logica a 2 passi (vedere paragrafo start).OFF Attiva logica a 4 passi (vedere paragrafo start).DIP6: Preallarme (solo mod. <strong>ARIES</strong> P)ON: Inserito. Il lampeggiante inizia a segnalare 3 secondi prima dell’iniziodella manovra.OFF Disinserito. Il lampeggiante inizia a segnalare contemporaneamentealla manovra.ATTENZIONE: Per mod. <strong>ARIES</strong> (lasciare sempre in OFF).MANUALE PER L’INSTALLAZIONEITALIANOLe descrizioni e le illustrazioni del presente manuale non sonoimpegnative. Lasciando inalterate le caratteristiche essenziali delprodotto, la Ditta si riserva di apportare in qualunque momento lemodifiche che essa ritiene convenienti per migliorare tecnicamente,costruttivamente e commercialmente il prodotto, senza impegnarsiad aggiornare la presente pubblicazione.7) REGOLAZIONE TRIMMERTCA Regola il tempo di chiusura automatica, trascorso il quale, la porta sichiude automaticamente (regolabile da 0 a 90s).TW Regola il tempo di lavoro del motore, trascorso il quale, il motore siferma (regolabile da 0 a 40s).TDELAY Regola il tempo di ritardo in chiusura del secondo motore (M2r).8) REGOLAZIONE COPPIA MOTORELa centralina mod. <strong>ARIES</strong> è provvista di una regolazione elettrica di coppiache consente di regolare la forza del motore.La regolazione deve essere tarata per la minima forza necessaria ad effettuarela corsa di apertura e chiusura completa.La regolazione si effettua spostando il collegamento 55 (fig.3) nelle presedel trasformatore come segue:pos. T1 1°COPPIA (MINIMA COPPIA)pos. T2 2°COPPIApos. T3 3°COPPIApos. T4 4°COPPIA (MASSIMA COPPIA)Si possono ottenere 4 valori di coppia motore.Per accedere alle prese di regolazione coppia, togliere l’alimentazione direte e togliere la protezione “P” del trasformatore.ATTENZIONE: Una regolazione di coppia eccessiva, può comprometterela sicurezza antischiacciamento.Al contrario, una regolazione di coppia insufficiente, può non garantire unacorsa di apertura o chiusura corretta.9) MANUTENZIONE E DEMOLIZIONELa manutenzione dell’impianto va fatta eseguire regolarmente daparte di personale qualificato. I materiali costituenti l’apparecchiatura eil suo imballo vanno smaltiti secondo le norme vigenti. Le pile non devonoessere disperse nell’ambiente.AVVERTENZEIl buon funzionamento dell’operatore è garantito solo se vengonorispettate i dati riportati in questo manuale. La ditta non risponde deidanni causati dall’inosservanza delle norme di installazione e delleindicazioni riportate in questo manuale.<strong>ARIES</strong>/<strong>ARIES</strong>-P - Ver. 08 - 11
ENGLISHThank you for buying this product, our company is sure that you will be morethan satisfied with the product’s performance. The product is supplied witha “WARNINGS” leaflet and an “INSTRUCTION MANUAL”.These should both be read carefully as they provide important informationabout safety, installation, operation and maintenance.This product complies with the recognised technical standards and safetyregulations. We declare that this product is in conformity with the followingEuropean Directives: 89/336/EEC and 73/23/EEC (and subsequentamendments).1) GENERAL OUTLINEThe <strong>ARIES</strong> control unit has been designed for swing gates. It can be usedfor one or two gate controllers.The control unit mod. <strong>ARIES</strong> P can also be used to perform opening of asingle actuator while keeping the other one closed (pedestrian access).2) GENERAL SAFETYWARNING! An incorrect installation or improper use of the productcan cause damage to persons, animals or things.• The “Warnings” leaflet and “Instruction booklet” supplied with thisproduct should be read carefully as they provide important informationabout safety, installation, use and maintenance.• Scrap packing materials (plastic, cardboard, polystyrene etc) accordingto the provisions set out by current standards. Keep nylon or polystyrenebags out of children’s reach.• Keep the instructions together with the technical brochure for futurereference.• This product was exclusively designed and manufactured for the usespecified in the present documentation. Any other use not specified inthis documentation could damage the product and be dangerous.• The Company declines all responsibility for any consequences resultingfrom improper use of the product, or use which is different from thatexpected and specified in the present documentation.• Do not install the product in explosive atmosphere.• The Company declines all responsibility for any consequences resultingfrom failure to observe Good Technical Practice when constructingclosing structures (door, gates etc.), as well as from any deformationwhich might occur during use.• The installation must comply with the provisions set out by the followingEuropean Directives: 89/336/EEC, 73/23/EEC, 98/37/ECC andsubsequent amendments.• Disconnect the electrical power supply before carrying out any work onthe installation. Also disconnect any buffer batteries, if fitted.• Fit an omnipolar or magnetothermal switch on the mains power supply,having a contact opening distance equal to or greater than 3mm.• Check that a differential switch with a 0.03A threshold is fitted justbefore the power supply mains.• Check that earthing is carried out correctly: connect all metal parts forclosure (doors, gates etc.) and all system components provided with anearth terminal.• The Company declines all responsibility with respect to the automationsafety and correct operation when other manufacturers’ componentsare used.• Only use original parts for any maintenance or repair operation.• Do not modify the automation components, unless explicitly authorisedby the company.• Instruct the product user about the control systems provided and themanual opening operation in case of emergency.• Do not allow persons or children to remain in the automationoperation area.• Keep radio control or other control devices out of children’s reach, inorder to avoid unintentional automation activation.• The user must avoid any attempt to carry out work or repair on theautomation system, and always request the assistance of qualifiedpersonnel.• Anything which is not expressly provided for in the present instructions,is not allowed.3) TECHNICAL SPECIFICATIONSPower supply:...............................................................230V ±10% 50HzAbsorption on empty:.................................................................0.5A maxOutput power for accessories:..........................................24V~ 6VA maxMax relay current:................................................................................8AMax power of motors:...............................................................300 W x 2Torque limiter:.................................................Self-transformer with 4 posLimit switch:................................................................Adjustable run timeINSTALLATION MANUALPanel dimensions:.........................................................................See fig.1Cabinet protection:............................................................................IP55Working temperature:...............................................................-20 +55°C4) TERMINAL BOARD CONNECTIONS (Fig.2)CAUTION: Keep the low voltage connections completelyseparated from the power supply connections.Fig.3 shows the fixing and connection method of the drive condenserswhenever they are not fitted to the motor.JP51-2 Single-phase power supply 230V ±10%, 50 Hz (1=L/2=N).For connection to the mains use a multiple-pole cable with a minimumcross section of 3x1.5mm 2 of the type indicated in the above-mentionedstandard (by way of example, if the cable is not shielded it must be at leastequivalent to H07 RN-F while, if shielded, it must be at least equivalent toH05 VV-F with a cross section of 3x1.5mm 2 ).JP33-4 (mod.<strong>ARIES</strong>-P) 230V 40W max. blinker connection.5-6 (mod.<strong>ARIES</strong>) 230V 40W max. blinker connection.7-8-9 Motor M1 connection - 8 common, 7-9 start.10-11-12 Motor M2(r) connection - 11 common, 10-12 start.JP413-14 Open-close button and key switch (N.O.).13-15 Stop button (N.C.). If unused, leave bridged.13-16 Photocell or pneumatic edge input (N.C.). If unused, leave bridged.17-18 24V 3W max. gate open warning light.18-19 24V~ 0.25A max. (6VA) output (for supplying photocell or otherdevice).20-21 Antenna input for radio-receiver board (20 signal - 21 braid).22 Common terminal (equivalent to terminal 13).23 Terminal for pedestrian control. It moves the leaf of motor M2 connectedto terminal 10-11-12. This terminal is available only in <strong>ARIES</strong>-P control unit.JP225-26 2nd radio channel output of the double-channel receiver board(terminals not fitted on <strong>ARIES</strong> but fitted on <strong>ARIES</strong>-P) contact N.O.JP1 Radio-receiver board connector 1-2 channels.5) FUNCTIONSDL1: Power-on LedIt is switched on when the board is electrically powered.START: four-step logic: (DIP5 OFF)gate closed:..................................................................................it opensduring opening:............................................... it stops and activates TCAgate open:................................................................................... it closesduring closing:.................................... it stops and does not activate TCAafter stop:.........................................................................it starts openingSTART: two-step logic: (DIP5 ON)gate closed:..................................................................................it opensduring opening:................................it stops and activats TCA (if activated)gate open:....................................................................................it closesduring closing:..............................................................................it opensafter stop:.....................................................................................it opensSTOP: In all cases: it stops the gate until a new start command is given.PHOT: Functions can be set with DIP-SWITCH.Activated during closing if DIP3-ON.Activated during opening and closing if DIP3-OFF.SCA: Gate open indicating light.with gate closed:...................................................................................offwhen gate is opening:...........................................................................onwith gate open:.......................................................................................onwhen gate is closing:.....................................................................flashing6) DIP-SWITCH SELECTIONDIP1 Rapid closingON: When the position of the gate photocells is exceeded, during bothopening and closing, the gate automatically starts to close even if TCA isactivated. We recommend setting DIP3 to ON (photocells only activatedduring closing).OFF: Function not activated.DIP2 Blocks impulsesON: During opening, START commands are not accepted.OFF: During opening, START commands are accepted.DIP3 PhotocellsON: Photocells only activated during closing.OFF: Photocells activated during opening and closing.D811184_0812 - <strong>ARIES</strong>/<strong>ARIES</strong>-P - Ver. 08
D811184_08DIP4 Automatic closing time (TCA)ON: Automatic closing activated (can be adjusted from 0 to 90s).OFF: Automatic closing not activated.DIP5 Control logicON: 2-step logic is activated (see start paragraph).OFF: 4-step logic is activated (see start paragraph).DIP6: Preallarm (mod.<strong>ARIES</strong> P only)ON: The flashing light turns on abt 3 seconds before the motors start.OFF The flashing light turns on simultaneously with the start of the motors.ATTENTION: Dip non used in mod. <strong>ARIES</strong> (always in OFF set).INSTALLATION MANUALENGLISH7) TRIMMER ADJUSTMENTTCA This adjusts the automatic closing time, after which time the gateautomatically closes (can be adjusted from 0 to 90s).TW This adjusts the motor working time, after which time the motor stops(can be adjusted from 0 to 40s).TDELAY This adjusts the closing delay time of the second motor (M2).8) MOTOR TORQUE ADJUSTMENTThe <strong>ARIES</strong> control unit has electric torque adjustment which allows themotor force to be adjusted.The adjustment should be set for the minimum force required to carry outthe opening and closing strokes completely.Adjustment is carried out by moving the connection 55 (fig.3) on the transformersockets as described below:Pos.T1 1st TORQUE (MINIMUM TORQUE)Pos.T2 2nd TORQUEPos.T3 3rd TORQUEPos.T4 4th TORQUE (MAXIMUM TORQUE)4 motor torque values can be obtained.To gain access to the torque adjustment sockets, disconnect the mainssupply and remove the protective case “P” of the transfomer.CAUTION: Excessive torque adjustment may jeopardise the anti-squashsafety function. On the other hand insufficient torque adjustment may notguarantee correct opening or closing strokes.9) MAINTENANCE AND DEMOLITIONThe maintenance of the system should only be carried out by qualifiedpersonnel regularly. The materials making up the set and its packing mustbe disposed of according to the regulations in force.Batteries must be properly disposed of.WARNINGSCorrect controller operation is only ensured when the data containedin the present manual are observed. The company is not to be heldresponsible for any damage resulting from failure to observe theinstallation standards and the instructions contained in thepresent manual.The descriptions and illustrations contained in the present manualare not binding. The Company reserves the right to make any alterationsdeemed appropriate for the technical, manufacturing and commercialimprovement of the product, while leaving the essential productfeatures unchanged, at any time and without undertaking to updatethe present publication.<strong>ARIES</strong>/<strong>ARIES</strong>-P - Ver. 08 - 13
FRANÇAISNous vous remercions pour avoir choisi ce produit: nous sommes sûrs qu’ilvous rendra le service nécessaire à vos besoins. Lisez attentivement lelivret “AVERTISSEMENTS” et le “MANUEL D’INSTRUCTIONS” quiaccompagnent ce produit puisqu’ils fournissent d’importantes indicationsconcernant la sécurité, l’installation, l’emploi et l’entretien.Ce produit est conforme aux règles reconnues de la technique et auxdispositions concernant la sécurité en vigueur. Nous certifionssa conformitéavec les directives européennes suivantes: 89/336/CEE, 73/23/CEE (etmodifications successives).1) GÉNERALITÉSLa centrale mod. <strong>ARIES</strong> est indiquée pour des portails à battants. Elle peutcommander un ou deux opérateurs.L’unité de commande mod. <strong>ARIES</strong> P peut en outre commander l’ouvertured’un seul opérateur en maintenant l’autre en fermeture (accès piétonnier).2) SECURITE GENERALEATTENTION! Une installation erronée ou une utilisation impropre duproduit peuvent provoquer des lésions aux personnes et aux animauxou des dommages aux choses.• Lisez attentivement la brochure “Avertissements” et le “Manueld’instructions” qui accompagnent ce produit, puisqu’ils fournissentd’importantes indications concernant la sécurité, l’installation, l’utilisationet l’entretien.• Eliminer les matériaux d’emballage (plastique, carton, polystyrène etc.)selon les prescriptions des normes en vigueur. Ne pas laisser desenveloppes en nylon et polystyrène à la portée des enfants.• Conserver les instructions et les annexer à la fiche technique pour lesconsulter à tout moment.• Ce produit a été conçu et réalisé exclusivement pour l’utilisation indiquéedans cette documentation. Des utilisations non indiquées dans cettedocumentation pourraient provoquer des dommages au produit etreprésenter une source de danger pour l’utilisateur.• La Société décline toute responsabilité dérivée d’une utilisation impropreou différente de celle à laquelle le produit a été destiné et qui estindiquée dans cette documentation.• Ne pas installer le produit dans une atmosphère explosive.• La Société décline toute responsabilité en cas de non respect des règlesde bonne technique dans la construction des fermetures (portes,portails etc.), ainsi qu’en cas de déformations pouvant se produirependant l’utilisation.• L’installation doit être conforme aux prescriptions des DirectivesEuropéennes: 89/336/CEE, 73/23/CEE, 98/37/CEE et modificationssuccessives.• Couper l’alimentation électrique avant d’effectuer n’importe quelleintervention sur l’installation. Débrancher aussi les éventuelles batteriesde secours, si présentes.• Prévoir sur la ligne d’alimentation de la motorisation un interrupteur ouun magnétothermique omnipolaire avec distance d’ouverture descontacts égale ou supérieure à 3mm.• Vérifier qu’en amont de la ligne d’alimentation il y a un interrupteurdifférentiel avec seuil de 0,03A.• Vérifier si l’installation de terre est effectuée correctement: connectertoutes les parties métalliques de la fermeture (portes, portails etc.) ettous les composants de la motorisation dotés de borne de terre.• La Société décline toute responsabilité en matière de sécurité et de bonfonctionnement de la motorisation si des composants d’autresproducteurs sont utilisés.• Utiliser exclusivement des pièces originales pour n’importe quel entretienou réparation.• Ne pas effectuer des modifications aux composants de la motorisationsi non expressément autorisées par la Société.• Informer l’utilisateur de l’installation sur les systèmes de commandeappliqués et sur l’exécution de l’ouverture manuelle en cas d’urgence.• Ne pas permettre à des personnes et à des enfants de stationner dansla zone d’action de la motorisation.• Ne pas laisser des radio commandes ou d’autres dispositifs de commandeà portée des enfants afin d’éviter des actionnements involontaires de lamotorisation.• L’utilisateur doit éviter toute tentative d’intervention ou de réparation dela motorisation et ne doit s’adresser qu’à du personnel qualifié.• Tout ce qui n’est pas expressément prévu dans ces instructions, estinterdit.MANUEL D’INSTALLATION3) CARACTERISTIQUES TECHNIQUESAlimentation: ............................................................... 230V~ ±10% 50 HzIntensité absorbée à vide: .......................................................... 0,5A maxSortie alim. accessoires: ................................................ 24 Vac 6 VA maxCourant maximum des relais: ............................................................... 8APuissance max. absorbée: ....................................................... 300 W x 2Limiteur de couple: ............................... Autotransformateur à 4 positionsFin de course: ................................................... Temps de travail réglableDimension de la centrale: ........................................................... Voir fig.1Degré de protection de la boîte: ........................................................ IP55Température d’utilisation: ............................................................ -20 +55°4) BRANCHEMENTS DU BORNIER (Fig.2)ATTENTION: Tenir les branchements de basse tension nettementséparés des branchements d’alimentation de ligne.La fig.3 illustre la façon de fixer et de brancher les condensateurs demarche si ceuxci ne se trouvent pas sur le moteur.JP51-2 Alimentation monophasée 230V ± 10% 50Hz (1=L/ 2=N).Pour la connexion au réseau, utiliser un câble multipolaire ayant unesection minimale de 3x1.5mm 2 et du type prévu par les normesprécédemment indiquées (à titre d’exemple, si le câble n’est pas protégéil doit être au moins correspondant à H07 RN-F, tandis que s’il est protégé,il doit être au moins correspondant à H05 VV-F avec section 3x1.5mm 2 ).JP33-4 (mod. <strong>ARIES</strong>-P) Connexion feu clignotant 230V 40W max.5-6 (mod. <strong>ARIES</strong>) Connexion feu clignotant 230V 40W max.7-8-9 Connexion moteur M1 - 8 commun, 7-9 marche.10-11-12 Connexion moteur M2 (r.) - 11 commun, 10-12 marche.JP413-14 Touche ouvre-ferme et sélecteur à clé (N.O.).13-15 Touche de verrouillage (N.F.) Si elle n’est pas utilisée, laisser lecavalier inséré.13-16 Entrée cellule photoélectrique ou barre palpeuse pneumatique(N.F.). Si elle n’est pas utilisée, laisser le cavalier inséré.17-18 Témoin signalisation portail ouvert 24 volts 3W max.18-19 Sortie 24 V~ 0,25 A maxi (6 VA) (pour alimentation cellulesphotoélectriques ou autres dispositifs).20-21 Entrée antenne pour carte radio-réceptrice (20 signal - 21 gaine).22 Borne commune (équivalente à la borne 13).23 Borne pour l’ouverture piétons. Elle commande le vantail du moteur M2connecté aux bornes 10-11-12. Cette borne n’est présente que dans lacentrale mod. <strong>ARIES</strong> P.JP225-26 Sortie deuxième canal radio de la carte réceptrice bicanal (bornesnon montées sur <strong>ARIES</strong>, montées sur <strong>ARIES</strong> P) contact N.O.JP1 Connecteur de la carte radio-réceptrice 1 ou 2 canaux.5) FONCTIONSDL1: LED alimentationElle est allumée quand la carte est alimentéeSTART: logique à 4 pas (DIP 5 OFF)portail fermé: ...................................................................................... ouvreen ouverture: ........................................................ arrête et active le TCAportail ouvert: .................................................................................... fermeen fermeture: ................................ bloque (arrête et n’active pas le TCA)après stop: ....................................................................... va en ouvertureSTART: logique à 2 pas (DIP 5 ON)portail fermé: ...................................................................................... ouvreen ouverture: ................................ arrête et active le TCA (si enclenché)portail ouvert: .................................................................................... fermeen fermeture: .................................................................................... ouvreaprès stop: ......................................................................................... ouvreSTOP: En tous les cas: arrête le portail jusqu’à un nouveau start.PHOT: Fonctions réglables par interrupteurs DIP.Est active en fermeture si DIP 3-ONEst active en ouverture et en fermeture si DIP 3-OFF.D811184_0814 - <strong>ARIES</strong>/<strong>ARIES</strong>-P - Ver. 08
D811184_08SCA: Témoin portail ouvertavec portail fermé: ............................................................................ éteintavec portail en ouverture: ............................................................... alluméavec portail ouvert: ......................................................................... alluméavec portail en fermeture: .......................................................... clignotant6) SÉLECTION DES DIP-SWITCHDIP 1 Fermeture rapideON: Lorsque les cellules photoélectriques du portail sont dépassées, tanten ouverture qu’en fermeture, le portail part automatiquement en fermeturemême si le TCA est actif. Il est conseillé de régler le DIP 3 sur ON (cellulesphotoélectriquesactives seulement en fermeture).OFF: Fonction inactive.DIP 2 Bloque les impulsionsON: Pendant la phase d’ouverture, il n’accepte pas des commandes deSTART.OFF: Pendant la phase d’ouverture, il n’accepte pas des commandes deSTART.DIP 3 Cellules photoélectriquesON: Cellules photoélectriques actives seulement en fermeture.OFF: Cellules photoélectriques actives en fermeture et en ouverture.DIP 4 Temps de fermeture automatique TCAON: Fermeture automatique active (réglable de 0 à 90s).OFF: Fermeture automatique non active.DIP 5 Logique de commandeON: La logique à 2 pas est active (voir paragraphe START).OFF: La logique à 4 pas est active (voir paragraphe START).DIP 6 Préalarme (Seulement mod. <strong>ARIES</strong> P)ON: Activé. Le clignotement commence 3 second avant de le début de lamanoeuvre.OFF: Désactivé. Le clignotement commence en même temp de lamanoeuvre.ATTENTION: Pour le mod. <strong>ARIES</strong> (lasser toujour en OFF).MANUEL D’INSTALLATIONFRANÇAISLes descriptions et les figures de ce manuel n’engagent pas leconstructeur. En laissant inaltérées les caractéristiques essentiellesdu produit, la Société se réserve le droit d’apporter à n’importe quelmoment les modifications qu’elle juge opportunes pour améliorer leproduit du point de vue technique, commercial et de construction,sans s’engager à mettre à jour cette publication.7) RÉGLAGE TRIMMERTCA Règle le temps de fermeture automatique après lequel le portail seferme automatiquement (réglable de 0 à 90s).TW Règle le temps de travail du moteur après lequel le moteur s’arrête(réglable de 0 à 40s).TDELAY Règle le temps de retard en fermeture du deuxième moteur (M2).8) RÉGLAGE DU COUPLE MOTEURLa centrale mod. <strong>ARIES</strong> est dotée d’un réglage électrique de couple quipermet de régler la force du moteur.Le réglage doit être étalonné sur la force minimale nécessaire pour effectuerla course d’ouverture et de fermeture complète.Le réglage se fait en déplaçant la connexion 55 (fig.3) dans les prises dutransformateur comme suit:pos. T1 1° COUPLE COUPLE MINIMUMpos. T2 2° COUPLEpos. T3 3° COUPLEpos. T4 4° COUPLE COUPLE MAXIMUMOn peut obtenir 4 valeurs de couple moteur.Pour accéder aux prises de réglage du couple, couper l’alimentation deligne et enlever le protecteur “P” du transformateur.ATTENTION: Un réglage excessif du couple peut compromettre la sécuritéanti-écrasement. Par contre, un réglage de couple insuffisant peut ne pasassurer une course d’ouverture ou de fermeture correcte.9) ENTRETIEN ET DEMOLITIONL’entretien de l’installation doit être effectué régulièrement de la partde personnel qualifié. Les matériaux constituant l’appareillage et sonemballage doivent être mis au rebut conformément aux normes en vigueur.Les piles constituent des déchets spéciaux.AVERTISSEMENTSLe bon fonctionnement de l’actionneur n’est assuré que si les donnéesfournies dans ce manuel sont respectées. Le constructeur ne répondpas pour les dommages provoqués par le non respect des normesd’installation et des indications fournies dans ce manuel.<strong>ARIES</strong>/<strong>ARIES</strong>-P - Ver. 08 - 15
DEUTSCHWir danken Ihnen, daß Sie sich für diese Anlage entschieden haben. Ganzsicher wird sie mit ihren Leistungen Ihren Ansprüchen vollauf gerechtwerden. Lesen Sie aufmerksam die Broschüre “Hinweisen“ und die“Gebrauchsanweisung“ durch, die dem Produkt beiliegen. Sie enthaltenwichtige Hinweise zur Sicherheit, Installation, Bedienung und Wartung derAnlage. Dieses Produkt genügt den anerkannten technischen Regeln undSicherheitsbestimmungen. Wir bestätigen, daß es mit folgendenEuropäischen Richtlinien übereinstimmt: 89/336/EWG, 73/23/EWG (undihren nachfolgende Änderungen).1) ALLGEMEINESDie Steuerung <strong>ARIES</strong> ist für den Anschluss bis zu zwei Motoren geeignet.Die Steuerung Modell <strong>ARIES</strong> P kann außerdem die Öffnung eineseinzelnenAntriebes steuern, der andere bleibt dabei verschlossen(Fußgängerzugang).2) ALLGEMEINE SICHERHEITSHINWEISEACHTUNG! Die falsche Installation oder der unsachgemäße Gebrauchder Anlage kann Personen-oder Sachschäden nach sich ziehen.• Lesen Sie aufmerksam die Broschüre mit den “Hinweisen” und die“Gebrauchsanweisung”, die dem Produkt beiliegen. Sie enthaltenwichtige Hinweise zur Sicherheit, Montage, Bedienung und Wartungder Anlage.• Verpackungsmaterialien (Plastik, Karton, Polystyrol u. a.) sind nach deneinschlägigen Vorschriften zu entsorgen. Keine Plastik-oder Polystyroltütenin Reichweite von Kindern liegenlassen.• Die Anleitung ist für zukünftige Einsichtnahme als Beilage zur technischenAkte aufzubewahren.• Dieses Produkt wurde ausschließlich für den Gebrauch entwickelt undgebaut, wie er in dieser Dokumentation beschrieben wird.Davon abweichende Verwendungen können Schadens und Gefahrenquellendarstellen.• Der Hersteller lehnt jede Verantwortung für Folgen ab, die durch denunsachgemäßen oder nicht bestimmungsgemäßen, weil in dieser Dokumentationnicht genannten Gebrauch entstehen.• Die Anlage darf nicht in explosionsgefährdeter Atmosphäreinstalliert werden.• Der Hersteller lehnt jede Verantwortung für Folgen ab, die durch nichtfachgerechte Ausführung von Schließvorrichtungen (Türen, Tore usw.),oder durch Verformungen während des Betriebes entstehen.• Die Montage muß im Einklang mit folgenden Europäischen Richtlinienerfolgen: 89/336/EWG, 73/23/EWG, 98/37/EWG und ihren nachfolgendeÄnderungen.• Vor jedem Eingriff an der Anlage die Stromversorgung unterbrechen.Auch vorhandene Pufferbatterien sind abzuklemmen.• Versehen Sie die Versorgungsleitung der Anlage mit einem Schalter oderallpoligen magnetthermischen Schutzschalter mit einem Kontaktabstandvon mindestens 3mm.• Der Versorgungsleitung muß ein Fehlerstromschutzschalter mit einerSchwelle von 0.03A vorgeschaltet sein.• Prüfen Sie. ob der Erdungsanschluß richtig vorgenommen wurde: AlleMetallteile der Schließanlage (Türen, Tore etc.) und alle Anlagenkomponentenmüssen mit einer Erdungsklemme verbunden sein.• Der Hersteller lehnt jede Verantwortung für die Sicherheit und die Funktionstüchtigkeitder Anlage ab, wenn Komponenten anderer Produzentenverwendet werden.• Für Wartungen und Reparaturen ausschließlich Originalteile verwenden.• Keine Umbauten an Anlagenkomponenten vornehmen, wenn sie nichtausdrücklich vom Hersteller genehmigt wurden.• Weisen Sie den Anlagenbetreiber in die vorhandenen Steuerungssystemeund die manuelle Toröffnung im Notfall ein.• Kindern oder Erwachsenen darf nicht gestattet werden, im Aktionsbereichder Anlage zu verweilen.• Keine Fernbedienungen oder andere Steuerungsvorrichtungen in Reichweitevon Kindern liegenlassen. Sie könnten die Anlage versehentlich inGang setzen.• Der Betreiber hat jeden Versuch eines Eingriffes oder der Reparatur zuunterlassen. Nur entsprechend qualifizierte Fachleute sind hierzu befugt.• Alles, was nicht ausdrücklich in dieser Anleitung genannt ist, ist untersagt.MONTAGEANLEITUNG3) TECHNISCHE DATENStromversorgung: ........................................................... 230V ±10% 50HzStromaufnahme im Leerlauf: ......................................................0,5A max.Ausgang Stromversorgung Zubehör: ............................ 24 V~/ 6VA max.Max. Relaisstrom: .................................................................................. 8AMax. Motorleistung: .................................................................. 300 W x 2Drehmomentbegrenzer: ........................................ 4-StufentransformatorBetriebszeit: .................................................................. einstellbar 0s-90sAbmessungen: ....................................................................... Siehe Abb.1Schutzgrad des Gehäuses: ............................................................... IP 55Betriebstemperatur: .................................................................. -20 + 55°C4) ANSCHLUSS AN DIE KLEMMLEISTEACHTUNG: Die Anschlüsse mit Niederspannung klar von denenmit Netzspannung trennenIn Abb. 3 ist die Befestigungs- und Anschlußart der Betriebskondensatoren(JP12/13 Motor 1, JP14/15 Motor 2) angegeben, falls diese sich nicht amMotor befinden.JP 51-2 Stromversorgung 230 V ± 10% 50 Hz. (1= Phase, 2= Nullleiter)Für den Netzanschluß verwenden Sie bitte ein mehrpoliges Kabel mitMindestquerschnitt 3x1.5mm 2 , das den vorstehenden Vorschriften entspricht(ist das Kabel beispielsweise nicht geschützt, muß es zumindest der NormH07RN-F genügen, während geschützte Kabel H05 VV-F mit Mindestschnitt3x1.5mm 2 entsprechen muß).JP33-4 (Modell <strong>ARIES</strong> P) Anschluß Blinkleuchte max. 230 V/40W max.5-6 (Modell <strong>ARIES</strong>) Anschluß Blinkleuchte max. 230 V/40W max7-8-9 Anschluss Motor M1 (Klemme 8 gemeinsam = blau, Klemmen 7-9 Drehrichtung Motor)10-11-12 Anschluss Motor M2 (Klemme 11 gemeinsam = blau, Klemmen10-12 Drehrichtung Motor)ACHTUNG: Die Antriebe müssen so angeschlossen werden, dass nacheiner Stromunterbrechung der nächste Befehl das Öffnen des Toresbewirkt.JP413-14 Taster, Schlüsselschalter, Codeschloss (N.O.)13-15 Stoptaste – Not-Aus (N.C.). Wenn nicht verwendet, Brückebelassen.13-16 Lichtschranke, Sicherheitsleiste (N.C.). Wenn nicht verwendet,Brücke belassen.17-18 Kontrolleuchte Tor offen, max. 24 Vac/3 W max.18-19 Ausgang max. 24 V~ 0.25 A (6VA) für StromversorgungLichtschranke usw.20-21 Eingang Antenne für Funkempfängerkarte (20 Signal, 21Ummantelung)22 Gemeinsame Klemme (gleich Klemme 13)23 Klemme zur Steuerung des Fußgängertores. Bewegt Flügel desMotors M2, angeschlossen an die Klemmen 10-11-12. Nur Platine<strong>ARIES</strong>-P.JP225-26 Ausgang zweiter Funkkanal der zweikanaligen Empfängerkarte(Klemmen nicht bei <strong>ARIES</strong> montiert, sondern nur bei <strong>ARIES</strong> P),Kontakt N.O.JP1Stecker Empfängerkarte 1-2 Kanäle5) FUNKTIONEN LEDDL1: LED Power OnLeuchtet bei Stromversorgung der Platine.START: Logik mit 4 Schritten: (DIP 5 OFF)Tor geschlossen: ....................................................................... Tor öffnetTor öffnet sich: .. Tor hält an–TCA wird aktiviert (DIP-SWITCH TCA ON)Tor offen: ................................................................................ Tor schließtTor schließt sich: ..................................................................... Tor hält anNach Stop: ................................................................................. Tor öffnetBei DIP-SWITCH IBL auf ON haben Befehle während der Öffnungsphasekeinerlei Auswirkung.D811184_0816 - <strong>ARIES</strong>/<strong>ARIES</strong>-P - Ver. 08
D811184_08START: Logik mit 2 Schritten: (DIP 5 ON)Tor geschlossen: ........................................................................ Tor öffnetTor öffnet sich ............................................................................................ :Tor hält an und TCA wird aktiviert (DIP-SWITCH TCA ON)Tor offen ................................................................................ : Tor schließtTor schließt sich ....................................................................... : Tor öffnetNach Stop ................................................................................. : Tor öffnetBei DIP-SWITCH IBL auf ON haben Befehle während der Öffnungsphasekeinerlei Auswirkung.STOP: Tor hält an. Ein folgender Startbefehl bewirkt die Öffnung des Tores.PHOT: Funktionen mit DIP-SWITCH einstellbarAktiv beim Schließen, wenn DIP 3 ONAktiv beim Öffnen und Schließen, wenn DIP 3 OFFSCA: Kontrolleuchte Tor offenBei geschlossenem Tor: ....................................................... leuchtet nichtBei sich öffnendem Tor: ................................................................ leuchtetBei offenem Tor: ............................................................................ leuchtetBei sich schließendem Tor: ............................................................... blinkt6) AUSWAHL DER DIP-SWITCHDIP1: Schnelles SchließenON Wenn die Fotozellen des Tores sowohl beim Öffnen als auch beimSchließen überschritten wurden, schließt sich das Tor automatisch, auchwenn der TCA eingeschaltet ist. Es wird empfohlen, den DIP 3 auf ON zustellen (Fotozellen nur beim Schließen aktiv).OFF: Funktion nicht aktiv.DIP2: Impulsstop IBLON: Während des Öffnens werden keine Startbefehle angenommen.OFF: Während des Öffnens werden Startbefehle angenommen.DIP3: Fotozellen FCHON: Fotozellen nur beim Schließen aktiv. Bei einer Verdunkelung derFotozellen während des Schließens wird die Bewegungsrichtung desTores umgekehrt.OFF: Fotozellen beim Schließen und Öffnen aktiv. Bei einer Verdunkelungder Fotozellen während des Schließens und Öffnens wird das Torangehalten. Nach Entfernen des Hindernisses öffnet sich das Tor immer.DIP4: Automatische Schließzeit TCAON: Automatisches Schließen eingeschaltet (einstellbar von 0 bis 90s)OFF: Automatisches Schließen ausgeschaltetDIP5: Steuerlogik 2P/4PON: 2-Schritt-Logik aktiv (siehe Abschnitt Funktionslogik)OFF: 4-Schritt-Logik aktiv (siehe Abschnitt Funktionslogik)DIP6: Voralarm (nur Modell <strong>ARIES</strong> P) PREALLON: eingeschaltet. Die Blinkleuchte beginnt 3 s vor dem Start der Motorenzu leuchten.OFF: ausgeschaltet. Die Blinkleuchte beginnt gleichzeitig mit der Motorenzu leuchten.ACHTUNG: Bei Modell <strong>ARIES</strong> DIP6 immer in OFF-Stellung belassen.MONTAGEANLEITUNGDEUTSCHACHTUNG: Eine zu hohe Einstellung des Drehmoments kann denQuetschschutz beeinträchtigen.Im Gegensatz dazu kann ein unzureichendes Drehmoment nicht dasrichtige Öffnen oder Schließen gewährleisten.9) INSTANDHALTUNG UND VERSCHROTTUNGDie Anlagenwartung ist regelmäßig von Fachleuten vorzunehmen.Die Materialien, aus denen die Apparatur besteht und ihre Verpackung sindvorschriftsmäßig zu entsorgen. Die Batterien dürfen nicht in die Umweltgelangen.HINWEISEDer einwandfreie Betrieb des Antriebes ist nur dann garantiert, wenn dieAngaben aus diesem Handbuch beachtet werden. Der Hersteller haftetnicht für Schäden, die durch Mißachtung der Installationsanweisungenund der Angaben aus diesem Handbuch entstehen.Die Beschreibungen und bildlichen Darstellungen in diesem Handbuchsind unverbindlich. Der Hersteller behält sich - ohne auch zurAktualisierung dieser Unterlagen verpflichtet zu sein - jederzeit vor,Änderungen vornehmen, wenn er diese für technische oder baulicheVerbesserungen als notwendig erachtet und die wesentlichenProdukteigenschaften unverändert bleiben.7) EINSTELLUNG DER TRIMMERTCA Regelt die automatische Schließzeit, nach deren Ablauf schließt sichdas Tor automatisch (einstellbar von 0 bis 90s)TW Regelt die Betriebszeit des Motors, nach deren Ablauf kommt derMotor zum Stillstand (einstellbar von 0 bis 40s).Die Laufzeit sollte ca. 5 slänger eingestellt sein als der Antrieb für den Torlauf benötigt.TDELAY Regelt die Verzögerung des zweiten Motors beim Schließen(M2).8) EINSTELLUNG DES MOTORDREHMOMENTSDie Steuerung verfügt über eine elektrische Einstellung des Drehmoments,zur Regelung der Motorenleistung.Die Einstellung muß auf die minimale Kraft vorgenommen werden, die zumvollständigen Öffnen und Schließen erforderlich ist.Die Einstellung erfolgt durch Verschiebung des Anschlusses 55 (Abb. 3)des Transformators wie folgt:Pos. T1 1. Drehmoment Minimales DrehmomentPos. T2 2. DrehmomentPos. T3 3. DrehmomentPos. T4 4. Drehmoment Maximales DrehmomentEs können vier Werte für das Drehmoment am Motor erzielt werden.Zum Zugriff auf die Einstellung des Drehmoments, die Stromzufuhrabschalten und die Schutzabdeckung „P“ vom Transformator abnehmen.<strong>ARIES</strong>/<strong>ARIES</strong>-P - Ver. 08 - 17
ESPAÑOLAl agradecerle la preferencia que ha manifestado por este producto, laempresa está segura de que de él obtendrá los rendimientos necesariospara sus exigencias. Lea atentamente el folleto “ADVERTENCIAS” y el“MANUAL DE INSTRUCCIONES” que acompañan a este producto, puesproporcionan importantes indicaciones acerca de la seguridad, la instalación,el uso y el mantenimiento del mismo.Este producto responde a las normas reconocidas de la técnica y a lasdisposiciones relativas a la seguridad. Confirmamos que es conforme a lassiguientes directivas europeas: 89/336/CEE, 73/23/CEE (y modificacionessucesivas).1) GENERALIDADESLa central mod. <strong>ARIES</strong> es indicada para cancelas de batiente. Puedeaccionar uno o dos operadores.El cuadro mod. <strong>ARIES</strong> P también puede accionar la apertura de unactuador solo, manteniendo el otro cerrado (acceso peatones).MANUAL DE INSTALACIÓN3) DATOS TECNICOSAlimentación: .................................................................. 230V ±10% 50HzAbsorción en vacío: .................................................................. 0,5A máx.Salida alim. accesorios: .................................................. 24V~ 6VA máx.Corriente máx. relé: ............................................................................... 8APotencia máx. absorbida: ......................................................... 300 W x 2Limitador de par: ............................................... Autotransformador 4 pos.Final de carrera: ............................................. Tiempo de trabajo regulab.Dimensiones cuadro: ................................................................ Véase fig.1Grado de protección caja: ...................................................................IP55Temperatura de empleo: ........................................................... -20 +55°C4) CONEXIONES TABLERO DE BORNES (Fig.2)ATENCIÓN: Mantener las conexiones de baja tensión claramenteseparadas de las conexiones de alimentación de red.D811184_082) SEGURIDAD GENERALATENCION! Una instalación equivocada o un uso impropio del productopuede crear daños a personas, animales o cosas. Es preciso:• Leer atentamente el folleto “Advertencias” y el “Manual de instrucciones”que acompañan a este producto, pues proporcionan importantesindicaciones referentes a la seguridad, la instalación, el uso y el mantenimientodel mismo.• Eliminar los materiales de embalaje (plástico, cartón, poliestireno, etc.)según lo previsto por las normas vigentes. No dejar bolsas de nylon opoliestireno al alcance de los niños.• Conservar las instrucciones para adjuntarlas al folleto técnico y paraconsultas futuras.• Este producto ha sido proyectado y construido exclusivamente para lautilización indicada en esta documentación. Usos no indicados en estadocumentación podrían causar daños al producto y ser fuente de peligro.• La Empresa declina toda responsabilidad que derive del uso impropio delproducto o de un uso distinto de aquél para el que está destinado y queaparece indicado en la presente documentación.• No instalar el producto en atmósfera explosiva.• La Empresa declina toda responsabilidad que derive de la inobservanciade la Buena Técnica en la construcción de los elementos de cierre(puertas, cancelas, etc.), así como de las deformaciones que se podríanverificar durante su uso.• La instalación debe ser conforme a lo previsto por las siguientes DirectivasEuropeas: 89/336/CEE, 73/23/CEE, 98/37/CEE y modificaciones sucesivas.• Cortar el suministro de corriente antes de efectuar cualquier intervenciónen la instalación. Desconectar también eventuales baterías tampón, silas hay.• Prever, en la red de alimentación del automatismo, un interruptor o unmagnetotérmico omnipolar con una distancia de abertura de los contactosigual o superior a 3mm.• Verificar que, antes de la red de alimentación, haya un interruptordiferencial con un umbral de 0,03A.• Verificar si la toma de tierra ha sido realizada correctamente: conectartodas las partes metálicas de cierre (puertas, cancelas, etc.) y todos loscomponentes de la instalación provistos de borne de tierra.• La Empresa declina toda responsabilidad, a efectos de la seguridad y delbuen funcionamiento del automatismo, si se emplean componentes deotros fabricantes.• Usar exclusivamente partes originales al realizar cualquier operación demantenimiento o reparación.• No modificar ningún componente del automatismo si antes no se ha sidoexpresamente autorizado por la Empresa.• Instruir al usuario del equipo sobre los sistemas de mando aplicados y laejecución de la apertura manual en caso de emergencia.• No permitir que personas adultas o niños estacionen en el campo deacción del automatismo.• No dejar radiomandos u otros dispositivos de mando al alcance de losniños, para evitar el accionamiento involuntario del automatismo.• El usuario debe: evitar cualquier intento de intervención o reparación delautomatismo y dirigirse únicamente a personal cualificado.• Todo lo que no está expresamente previsto en estas instrucciones no estápermitido.En la fig.3 se ilustra el modo de fijación y conexión de los condensadoresde marcha, en el caso de que éstos no se encuentren en el motor.JP51-2 Alimentación monofásica 230V ±10%, 60 Hz. (1=L/2=N).Para la conexión a la red utilizar cable multipolar que tenga una secciónmínima igual a 3x1.5mm2 y del tipo previsto en las antedichas normativas(como ejemplo si el cable no es protegido debe ser por lo menos igual a H07RN-F mientras si protegido debe ser por lo menos igual a H05 VV-F, consección 3x1.5mm).JP33-4 (mod. <strong>ARIES</strong>-P) Conexión luz intermitente 230V 40W máx.5-6 (mod. <strong>ARIES</strong>) Conexión luz intermitente 230V 40W máx.7-8-9 Conexión motor M1 - 8 común, 7-9 marcha.10-11-12 Conexión motor M2 (r) - 11 común, 10-12 marcha.JP413-14 Botón abre-cierra y selector de llave (N.O.).13-15 Botón de bloqueo (N.C.). Si no se usa, deje el puente conectado.13-16 Entrada fotocélula o borde neumático (N.C.). Si no se usa, deje elpuente conectado.17-18 Luz de aviso cancela abierta 24V 3W máx .18-19 Salida 24V~ 0,25A máx. (6VA) (para alimentación fotocélula u otrodispositivo).20-21 Entrada antena para tarjeta radiorreceptora (20 señal - 21 trenza).22 Borne común (equivalente al borne 13).23 Borne para mando peatonal. Mueve la hoja del motor M2 conectado alos bornes 10-11-12. El borne está presente sólo en la central de mandomod. <strong>ARIES</strong> P.JP225-26 Salida segundo canal radio de la tarjeta receptora bicanal (bornes nomontados en <strong>ARIES</strong>, montados en <strong>ARIES</strong> P) contacto (N.O.).JP1 Conector tarjeta radiorreceptora. 1-2 canales.5) FUNCIONESDL1: Power on ledEstá encendido cuando la tarjeta está alimentada.START: lógica de cuatro pasos: (DIP5 OFF)cancela cerrada: .................................................................................. abreen apertura: ............................................................ para y conecta el TCAcancela abierta: ................................................................................. cierraen cierre: ........................................... bloquea (para y no conecta el TCA)después del stop: .......................................................................... se abreSTART: lógica de dos pasos: (DIP5 ON)E cancela cerrada abre en apertura: ........ para y conecta el TCA (si estáconectado)cancela abierta: ................................................................................ cierraen cierre: ............................................................................................. abredespués del stop: ............................................................................... abreSTOP: En todos los casos: detiene la cancela hasta nuevo start.PHOT: Funciones que pueden establecerse con DIP-SWITCH.Se acciona durante el cierre, si DIP3-ONSe acciona durante la apertura y cierre, si DIP3-OFF.18 - <strong>ARIES</strong>/<strong>ARIES</strong>-P - Ver. 08
D811184_08SCA: Luz indicadora cancela abiertacon cancela cerrada: .................................................................... apagadacon cancela en apertura: .......................................................... encendidacon cancela abierta: ................................................................. encendidacon cancela en cierre: ............................................................. intermitente6) SELECCION DIP-SWITCHDIP1 Cierre rápidoON Cuando se sobrepasan las fotocélulas de la cancela, tanto durante laapertura como durante el cierre, la cancela se pone en marchaautomáticamente en cierre aunque si está conectado el TCA. Se aconsejaajustar el DIP3 en ON (fotocélulas en función sólo en cierre).OFF: Función desactivada.DIP2: Bloque impulsosON: Durante la fase de apertura no acepta órdenes de START.OFF: Durante la fase de apertura acepta órdenes de START.DIP3: FotocélulasON: Fotocélulas en función sólo durante cierre.OFF: Fotocélulas en función durante cierre y apertura.DIP4: Tiempo de cierre automático TCAON: Tiempo de cierre autom. conectado (regulable de 0 a 90s).OFF: Tiempo de cierre automático excluido.DIP5: Lógica de mandoON: Activa lógica de 2 pasos (véase párrafo start).OFF: Activa lógica de 4 pasos (véase párrafo start).DIP 6 Prealarma (Solamente para el mod. <strong>ARIES</strong> P)ON: Activado. La luz de destello se enciende aproximadamente 3 segundosantes de que los mores arranquen.OFF: Desactivado. La luz de destello se enciende contemporáneamenteal arraque de los motores.ATENCIÓN: Para mod. <strong>ARIES</strong> (deje siempre en OFF).MANUAL DE INSTALACIÓNESPAÑOLADVERTENCIASEl buen funcionamiento del operador resulta garantizado únicamentesi se respetan los datos contenidos en este manual de instrucciones.La empresa no responde de los daños causados por elincumplimiento de las normas de instalación y de las indicacionescontenidas en este manual.Las descripciones y las ilustraciones del presente manual tienen uncarácter puramente indicativo. Dejando inalteradas las característicasesenciales del producto, la Empresa se reserva la posibilidad deaportar, en cualquier momento, las modificaciones que considereconvenientes para mejorar técnica, constructiva y comercialmente elproducto, sin la obligación de poner al día esta publicación.7) REGULACION TRIMMERTCA Regula el tiempo de cierre automático, transcurrido el cual la puertase cierra automáticamente (regulable de 0 a 90s).TW Regula el tiempo de trabajo del motor, transcurrido el cual el motor separa (regulable de 0 a 40s).TDELAY Regula el tiempo de retardo durante el cierre del segundomotor (M2).8) REGULACION PAR MOTORLa central mod. <strong>ARIES</strong> está equipada con una regulación eléctrica de parque permite regular la fuerza del motor.La regulación se tiene que ajustar a la mínima fuerza necesaria para efectuarla carrera de apertura y cierre completa. La regulación se efectúadesplazando la conexión 55 (fig.3) a las tomas del transformador de lasiguiente manera:pos. T1 1° PAR (PAR MÍNIMO)pos. T2 2° PARpos. T3 3° PARpos. T4 4° PAR (PAR MÁXIMO)Se pueden obtener 4 valores de par motor.Para acceder a las tomas de regulación del par, corte la alimentación yquite la protección “P” del transformador.ATENCIÓN: Una regulación de par excesiva puede comprometer eldispositivo de seguridad antiaplastamiento. Al contrario, una regulaciónde par insuficiente puede no garantizar una carrera de apertura ocierre correcta.9) MANTENIMIENTO Y DEMOLICIONEl mantenimiento de la instalación debe ser realizado, con regularidad,por personal cualificado. Los materiales que constituyen el equipo y suembalaje deben eliminarse de conformidad con las normas vigentes.Las pilas deben depositarse en los contenedores expresamente previstos.<strong>ARIES</strong>/<strong>ARIES</strong>-P - Ver. 08 - 19
D811184_08SCA: Indicador luminoso de portão abertocom portão fechado: .................................................................... apagadocom portão em abertura: ................................................................. acesocom portão aberto: .......................................................................... acesoportão no fecho:...................................................................... intermitente6) SELECÇÃO DIP-SWITCHDIP: Fecho RápidoON Quando são ultrapassadas as fotocélulas do portão, tanto na aberturaque no fecho, o portão parte automaticamente em fecho ainda que estejaligado o TCA. É aconselhável regular o DIP3 em ON (fotocélulas activassomente no fecho).OFF: Função desactivada.DIP2: Bloqueia impulsosON: Durante a fase de abertura não aceita comandos de START.OFF: Durante a fase de abertura aceita comandos de START.DIP3: FotocélulasON: Fotocélulas activas somente no fecho.OFF: Fotocélulas activas no fecho e abertura.DIP4: Tempo de fecho automático TCAON: Fecho automático ligado (regulável de 0 a 90s).OFF : Fecho automático desligado.DIP5: Lógica de comandoON: Activa lógica de 2 fases (ver parágrafo start).OFF Activa lógica de 4 fases (ver parágrafo start).DIP6: Pré-alarme (somente mod. <strong>ARIES</strong> P)ON: Ligado. O lampejante começa a piscar 3 segundos antes do início damanobra.OFF Desligado. O lampejante começa a piscar simultaneamente à manobra.ATENÇÃO: Para mod. <strong>ARIES</strong> (deixar sempre em OFF).MANUAL PARA A INSTALAÇÃOPORTUGUÊSAs descrições e as ilustrações deste manual não constituem umcompromisso. Mantendo inalteradas as características essenciais doproduto, a Empresa reservase o direito de efectuar em qualquermomento as modificações que julgar convenientes para melhorar ascaracterísticas técnicas, de construção e comerciais do produto, semcomprometerse em actualizar esta publicação.7) REGULAÇÃO DO TRIMMERTCA Regula o tempo de fecho automático, após o qual, a porta fecha-seautomaticamente (regulável de 0 a 90s).TW Regula o tempo de trabalho do motor, após o qual o motor pára(regulável de 0 a 40s).TDELAY Regula o tempo de atraso no fecho do segundo motor (M2r).8) REGULAÇÃO DO BINÁRIO DO MOTORA central mod. <strong>ARIES</strong> está equipada de uma regulação eléctrica de binárioque consente de regular a força do motor.A regulação deve ser calibrada para a força mínima necessária a efectuaro percurso completo de abertura e fecho.A regulação efectua-se deslocando a ligação 55 (fig.3) nas tomadas dotransformador como segue:pos. T1 1° BINÁRIO (MÍNIMO BINÁRIO)pos. T2 2° BINÁRIOpos. T3 3° BINÁRIOpos. T4 4° BINÁRIO (MÁXIMO BINÁRIO)É possível obter 4 valores de binário do motor. Para ter acesso às tomadasde regulação do binário, interrompa a alimentação de rede e remova aprotecção “P” do transformador.ATENÇÃO: Uma regulação de binário excessiva, pode comprometer asegurança antiesmagamento. Pelo contrário, uma regulação de binárioinsuficiente, pode não garantir um percurso correcto de abertura ou de fecho.9) MANUTENÇÃO E DEMOLIÇÃOA manutenção da instalação deve ser executada periodicamente porpessoal qualificado. Os materiais que constituem a aparelhagem e a suaembalagem devem ser eliminados de acordo com a legislação vigente. Aspilhas não devem ser abandonadas no ambiente.AVISOSO bom funcionamento do operador é garantido, somente se foremrespeitados os dados contidos neste manual. A empresa não respondepor danos provocados pela inobservância das normas de instalaçãoe das indicações contidas neste manual.<strong>ARIES</strong>/<strong>ARIES</strong>-P - Ver. 08 - 21
195ø5225Fig. 1D811184_0812590183Fig. 2<strong>ARIES</strong><strong>ARIES</strong> PLNJP51230V ± 10%2LNJP51230V ± 10%2JP3JP3MAX 40 W34MAX 40 W56M178JP12MOT1M178JP12MOT1NONCNC910M2(r)1112JP4COMM13START14STOP15PHOT16SCA170V1824Vac19JP13JP14MOT2JP15NONCNC910M2(r)1112JP4COMM13START14STOP15PHOT16SCA170V1824Vac19JP13JP14MOT2JP15ANTEN.COMM202122ANTEN.COMMNO PED.20212223JP2JP2II° CH2526NOII° CH2526NO22 - <strong>ARIES</strong>/<strong>ARIES</strong>-P - Ver. 08
D811184_08Fig. 3COLLEGAMENTO CONDENSATORI IN CENTRALINA - CONNECTIONS TO THE TERMINAL BOARD FOR THE CAPACITORCONNECTION DES CONDENSATEURS DANS LA CENTRALE - KONDENSATOREN VERBINDUNG IN DER STEURUNGCONEXION DEL LOS CONDENSADORES EN LA CENTRAL DE MANDO - LIGA ˝E CONDENSADORES NA CENTRAL DE MANDO4455DL166TDELAYTCATWM1JP4567JP12JP13JP14MOT1JP3 JP1156789101112181716151413JP4192322212025 II¡ CH26M2(r) 1112MOT2JP151JP5T 2,5A 230VT 5A 110VT 0,5A 230VT 1A 110V2JP6JP7JP12JP13JP9JP8JP10T2T3T4L 0VN2211331201255JP14JP15JP21089PONDIP1 2 3 4 5 6M2M1JP14JP15JP13JP12<strong>ARIES</strong>/<strong>ARIES</strong>-P - Ver. 08 - 23
BFT FRANCE BFT S.p.a. ITALIAParc Club des Aygalades35 bd capitaine GEZE13333 MARSEILLE Cedex 14Tel. 0491101860Fax 0491101866BFTDEUTSCHLANDVertretung und LagerJohannisstr. 14,D-90763 FŸrthhttp://www.bft-torantriebe.deTel. 0049 911 773323Fax 0049 911 773324Via Lago di Vico, 4436015 Schio (VI)Tel.naz. 0445 696511Tel.int. +39 0445 696533Fax 0445 696522Internet: www.bft.itE-mail: sales@bft.it