Anglaise - Arabe - Black & Decker
Anglaise - Arabe - Black & Decker
Anglaise - Arabe - Black & Decker

You also want an ePaper? Increase the reach of your titles
YUMPU automatically turns print PDFs into web optimized ePapers that Google loves.
www.blackanddecker.ae<br />
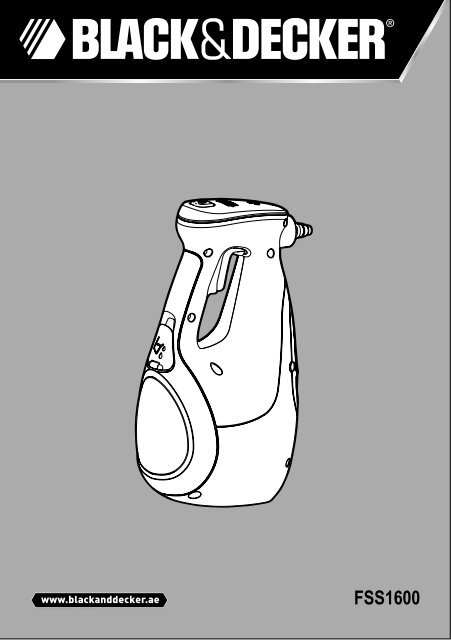
FSS1600
A<br />
B<br />
C<br />
D<br />
2
(Original instructions)<br />
ENGLISH<br />
Intended use<br />
Your <strong>Black</strong> & <strong>Decker</strong> steam cleaner has been designed for<br />
sanitising and cleaning tiles, work tops, kitchen surfaces and<br />
bathroom surfaces. This appliance is intended for indoor<br />
household use only.<br />
Safety instructions<br />
@<br />
@<br />
Warning! Read all safety warnings and all<br />
instructions. Failure to follow the warnings and<br />
instructions listed below may result in electric<br />
shock, fire and/or serious injury.<br />
Warning! When using mains-powered appliances,<br />
basic safety precautions, including the<br />
following, should always be followed to reduce<br />
the risk of fire, electric shock, personal injury and<br />
material damage.<br />
u Read all of this manual carefully before using the appliance.<br />
u The intended use is described in this manual. The use of<br />
any accessory or attachment or the performance of any<br />
operation with this appliance other than those recommended<br />
in this instruction manual may present a risk of<br />
personal injury.<br />
u Retain this manual for future reference.<br />
Using your appliance<br />
u Do not direct steam at people, animals, electrical appliances<br />
or electrical outlets.<br />
u Do not expose to rain.<br />
u Do not immerse the appliance in water.<br />
u Do not leave the appliance unattended.<br />
u Do not leave the appliance connected to an electrical<br />
outlet when not in use.<br />
u Never pull the power lead to disconnect the appliance<br />
from the socket. Keep the appliance lead away from heat,<br />
oil and sharp edges.<br />
u Do not handle steam cleaner with wet hands.<br />
u Do not pull or carry by cord, use cord as a handle, close<br />
door on cord, pull cord around sharp corners or expose<br />
cord to heated surfaces.<br />
u Do not use appliance in an enclosed space filled with<br />
vapour given off by oil-base paint thinner, some mothproofing<br />
substances, flammable dust, or other explosive<br />
or toxic vapours.<br />
u Check the type of floor with the manufacturer.<br />
u Do not use on leather, wax polished furniture or floors,<br />
synthetic fabrics, velvet or other delicate, steam-sensitive<br />
materials.<br />
Warning! Do not use on unsealed wood or<br />
unsealed laminate floors. On surfaces that have<br />
@<br />
been treated with wax or some no wax floors, the<br />
sheen may be removed by the heat and steam<br />
action. It is always recommended to test an<br />
isolated area of the surface to be cleaned before<br />
proceeding. We also recommend that you check<br />
the use and care instructions from the floor<br />
manufacturer.<br />
u Never put descaling, aromatic, alcoholic or detergent<br />
products into the steam cleaner, as this may damage it or<br />
make it unsafe for use.<br />
u If the home circuit breaker activates while using the steam<br />
function, discontinue product use immediately and contact<br />
the customer support centre. (Beware of the risk of electrical<br />
shock.)<br />
u The appliance emits very hot steam to sanitize the area of<br />
use. This means that the steam head, cleaning pads and<br />
carpet attachment get very hot during use.<br />
u Caution! Always wear suitable shoes when using your<br />
steam mop and when changing the accessories on your<br />
steam mop. Do not wear slippers or open toed footwear.<br />
u Steam may escape from the appliance during use.<br />
u Care should be taken when using this appliance. DO NOT<br />
touch any parts which may become hot during use.<br />
u If steam is observed escaping from the body of the hand<br />
held steam cleaner, switch off and disconnect the unit<br />
from the manis supply, allow to cool. Contact your nearest<br />
authorised repair agent. Do not continue to use the appliance..<br />
After use<br />
u Unplug the appliance and allow to cool before cleaning.<br />
u When not in use, the appliance should be stored in a dry<br />
place.<br />
u Children should not have access to stored appliances.<br />
Inspection and repairs<br />
u Unplug the appliance and allow to cool before performing<br />
any maintenance or repairs.<br />
u Before use, check the appliance for damaged or defective<br />
parts. Check for breakage of parts, damage to switches<br />
and any other conditions that may affect its operation.<br />
u Regularly check the power lead for damage.<br />
u Do not use the appliance if any part is damaged or defective.<br />
u Have any damaged or defective parts repaired or replaced<br />
by an authorized repair agent.<br />
u Never attempt to remove or replace any parts other than<br />
those specified in this manual.<br />
3
ENGLISH<br />
(Original instructions)<br />
Safety of others<br />
u This appliance is not intended for use by persons (including<br />
children) with reduced physical, sensory or mental<br />
capabilities, or lack of experience and knowledge, unless<br />
they have been given supervision or instruction concerning<br />
the use of the appliance by a person responsible for<br />
their safety.<br />
u Children should be supervised to ensure that they do not<br />
play with the appliance.<br />
Residual risks.<br />
Additional residual risks may arise when using the tool which<br />
may not be included in the enclosed safety warnings. These<br />
risks can arise from misuse, prolonged use etc.<br />
Even with the application of the relevant safety regulations<br />
and the implementation of safety devices, certain residual<br />
risks can not be avoided. These include:<br />
u Injuries caused by touching any moving parts.<br />
u Injuries caused by touching any hot parts.<br />
u Injuries caused when changing any parts or accessories.<br />
u Injuries caused by prolonged use of the appliance. When<br />
using any appliance for prolonged periods ensure you<br />
take regular breaks.<br />
Features<br />
This appliance includes some or all of the following features.<br />
1. ON/Off switch<br />
2. Lock off button<br />
3. Trigger switch<br />
4. Steam nozzle<br />
5. Water tank<br />
6. Filler cap<br />
Accessories<br />
This appliance includes some of the following accessories<br />
others are available to purchase from the <strong>Black</strong> & <strong>Decker</strong><br />
website.<br />
The performance of your appliance depends on the accessory<br />
used. <strong>Black</strong> & <strong>Decker</strong> accessories are engineered to high<br />
quality standards and designed to enhance the performance<br />
of your appliance. By using these accessories you will get the<br />
very best from your appliance.<br />
Flexible hose and handle<br />
For convienient use of all accessories.<br />
Electrical safety<br />
@<br />
Warning! This product must be earthed.<br />
Always check that the power supply corresponds<br />
to the voltage on the rating plate.<br />
Power plugs must match the outlet. Never modify the plug in<br />
any way. Unmodified plugs and matching outlets will reduce<br />
risk of electric shock.<br />
u If the supply cord is damaged, it must be replaced by<br />
the manufacturer or an authorised <strong>Black</strong> & <strong>Decker</strong><br />
Service Centre in order to avoid a hazard.<br />
Extension cables & Class 1 product<br />
u A 3-core cable must be used as your appliance is<br />
earthed and of Class 1 construction.<br />
u Up to 30m (100 ft) can be used without loss of power.<br />
Labels on the appliance<br />
The following pictograms are shown on the tool:<br />
Variable stem jet nozzle<br />
For higher pressure steam bursts, twist to change<br />
the spray pattern of the steam burst.<br />
Small brush (Blue)<br />
For cleaning bathrooms.<br />
Small brush (Orange)<br />
For cleaning kitchens.<br />
Small brush (Green)<br />
For cleaning toilets.<br />
Warning! To reduce the risk of injury, the user<br />
must read the instruction manual.<br />
Large Squeegee<br />
For cleaning galss doors and windows.<br />
Warning! Do not use the window squeegee on cold<br />
glass. It may cause the glass to break.<br />
Warning! Danger of scalding.<br />
4
(Original instructions)<br />
ENGLISH<br />
Detail tile cleaner<br />
For cleaning grouted areas between tiles.<br />
Large scrub brush cleaner with scraper<br />
For cleaning heavily soiled object such as BBQ's.<br />
Assembly<br />
Warning! Before attempting any of the following operations,<br />
make sure that the appliance is switched off and unplugged<br />
and that the appliance is cold and does not contain any water.<br />
Attaching the hose and accessories (Fig. A & B)<br />
Warning! Inspect the seal (7) on the steam nozzle (4) and<br />
hose (8) before each use. If the seal is missing or damaged<br />
then please contact your nearest authorised repair agent. Do<br />
not use the appliance.<br />
Attaching the hose (Fig. A)<br />
u Press in the clips (9) on either side of the hose (8).<br />
u Press the hose (8) onto the steam nozzle (4) and release<br />
the clips (9).<br />
Important! Ensure that the hose (8) is securely fastened<br />
before using the hand held steeam cleaner. If steam escapes<br />
from the joint then the hose is not correctly fit, allow the unit to<br />
cool then remove and re-fit the hose.<br />
Attaching the variable steam jet nozzle (Fig. B)<br />
u Press in the clips (11) on either side of the variable steam<br />
jet nozzle (12).<br />
u Press the variable steam jet nozzle onto the steam nozzle<br />
(4) or the hose (8) and release the clips (11).<br />
Important! Ensure that the variable steam jet nozzle (12) is<br />
securely fastened before using the hand held steeam cleaner.<br />
If steam escapes from the joint then the variable steam jet<br />
nozzle is not correctly fit, allow the unit to cool then remove<br />
and re-fit the variable steam jet nozzle.<br />
Attaching other accessories (Fig. A)<br />
u Align the lugs on the hose (8) with the recesses on the<br />
accessory.<br />
u Press the accessory (10) onto the hose (8) and twist anticlockwise<br />
untill the accessory clicks into place.<br />
Note! The variable steam jet nozzle may be used without the<br />
hose by fitting them directly to steam nozzle. All other accessories<br />
must be connected to the hose for use.<br />
Removing the hose and accessories(Fig. A & B)<br />
Warning! The Steam nozzle, variable steam jet nozzle, hose<br />
and accessories become hot during use. Allow the unit and all<br />
accessories to cool before removing any accessories.<br />
Removing an accessory (Fig. A)<br />
u Twist the accessory (10) clockwise then pull away from<br />
the hose (8).<br />
Removinging the hose (Fig. A)<br />
u Press in the clips (9) on either side of the hose (8) and pull<br />
away from the steam nozzle (4).<br />
Removing the variable steam jet nozzle (Fig. B)<br />
u Press in the clips (11) on either side of the vaiable steam<br />
jet nozzle (12) and pull away from the steam nozzle (4).<br />
Filling the water tank (Fig. C)<br />
This Steam cleaner incorporates an anti-calc system to help<br />
prolong the life of the system.<br />
Note: Fill the water tank with clean tap water.<br />
Note: In areas of very hard water, the use of de-ionised water<br />
is recommended.<br />
u Switch off the unit and disconnect from the mains supply.<br />
u Open the filler cap (6) by flipping it down.<br />
u Using the jug, fill the water tank (5) with water.<br />
Warning! Your water tank has a 0.35 litre capacity.<br />
u Re-fit the filler cap (6).<br />
Note: Ensure the filler cap is firmly secured.<br />
Use<br />
Important! This unit will kill 99.9% of bacteria & germs when<br />
used in accordance with this manual and with the micro fibre<br />
pad fitted and a continuous run time of 90 seconds.<br />
Switching on and off<br />
u To switch the appliance on, press the ON/OFF button (1).<br />
It takes approximately 15 seconds for the hand held steam<br />
cleaner to heat up.<br />
Note: When the hand held steam cleaner is first turned on<br />
the water reservoir will glow red. Once the hand held steam<br />
cleaner is ready to use the water reservoir will glow blue.<br />
u Lift the lock off switch (2) and pull the trigger switch (3).<br />
After a few seconds steam will be produced.<br />
u To switch the appliance off, release the trigger switch (3)<br />
then press the ON/OFF button (1).<br />
Caution! Always empty the hand held steam cleaner after<br />
use.<br />
Caution! Steam may continue to be produced for a short time<br />
after the trigger switch (3) is released, this is normal. Switch<br />
off and allow the unit to cool before removing any accessories.<br />
5
ENGLISH<br />
(Original instructions)<br />
Hints for optimum use<br />
General<br />
u For optiaml cleaning results never use the hand held<br />
steam cleaner without first attaching an accessory.<br />
u Do not use chemical cleaners with your hand held steam<br />
cleaner. To remove stubborn stains from vinyl or linoleum<br />
floors, you can pre-treat with a mild detergent and some<br />
water before using the steam mop.<br />
Hand held steam cleaning<br />
u Attach the required accessory.<br />
u Connect the hand held steam cleaner to the mains.<br />
u Press the ON/OFF button (1). It takes approximately 15<br />
seconds for the hand held steam cleaner to heat up.<br />
u Lift the lock off (2) and pull the trigger switch (3) to activate<br />
the steam pump. After a few seconds steam will start to<br />
come out of the accessory.<br />
Note: During use you may turn off the steam pump by releasing<br />
the trigger switch, this convenient feature will allow you to<br />
place the hand held steam cleaner down for a short time so<br />
that you may move items of furniture, then continue cleaning<br />
without the need to switch the appliance off.<br />
u When you have finished using the hand held steam<br />
cleaner, release the trigger switch (3), turn it ‘OFF’and disconnect<br />
from the mains supply. Wait until the steam mop<br />
cools down before storing. (approximately five minutes)<br />
Caution! It is important to monitor the water level in the water<br />
tank. To refill the water tank and continue to sanitise/clean,<br />
turn the hand held steam cleaner ‘OFF’. Unplug the unit from<br />
the electrical wall outlet, refill the water tank (5).<br />
After use<br />
u Unplug the hand held steam cleaner from the electrical<br />
wall outlet.<br />
u Allow the hand held steam cleaner to cool completely.<br />
(approximately five minutes)<br />
u Empty the water tank (5).<br />
u Remove the accessories and store in the storage bag<br />
provided.<br />
Maintenance and cleaning<br />
Your <strong>Black</strong> & <strong>Decker</strong> corded appliance has been designed to<br />
operate over a long period of time with a minimum of maintenance.<br />
Continuous satisfactory operation depends upon<br />
proper appliance care and regular cleaning.<br />
Warning! Before performing any maintenance or cleaning on<br />
corded appliances switch off and unplug the appliance.<br />
u Wipe your appliance over using a soft damp cloth.<br />
u For stubborn marks you can use a mild solution of soap<br />
and water to dampen your cloth.<br />
u Inspect the seal (7) on the steam nozzle (4) and hose (8)<br />
before each use. If the seal is missing or damaged then<br />
please contact your nearest authorised repair agent. Do<br />
not use the appliance.<br />
Mains plug replacement (U.K. & Ireland only)<br />
If a new mains plug needs to be fitted:<br />
u Safely dispose of the old plug.<br />
u Connect the brown lead to the live terminal in the new<br />
plug.<br />
u Connect the blue lead to the neutral terminal.<br />
u Connect the green/yellow lead to the earth terminal.<br />
Warning! Follow the fitting instructions supplied with good<br />
quality plugs. Recommended fuse: 13A.<br />
Protecting the environment<br />
Z<br />
Separate collection. This product must not be<br />
disposed of with normal household waste.<br />
Should you find one day that your <strong>Black</strong> & <strong>Decker</strong> product<br />
needs replacement, or if it is of no further use to you, do not<br />
dispose of it with household waste. Make this product available<br />
for separate collection.<br />
z<br />
Separate collection of used products and packaging<br />
allows materials to be recycled and used again.<br />
Re-use of recycled materials helps prevent environmental<br />
pollution and reduces the demand for raw<br />
materials.<br />
Local regulations may provide for separate collection of electrical<br />
products from the household, at municipal waste sites or<br />
by the retailer when you purchase a new product.<br />
<strong>Black</strong> & <strong>Decker</strong> provides a facility for the collection and<br />
recycling of <strong>Black</strong> & <strong>Decker</strong> products once they have reached<br />
the end of their working life. To take advantage of this service<br />
please return your product to any authorised repair agent who<br />
will collect them on our behalf.<br />
You can check the location of your nearest authorised repair<br />
agent by contacting your local <strong>Black</strong> & <strong>Decker</strong> office at<br />
the address indicated in this manual. Alternatively, a list of<br />
authorised <strong>Black</strong> & <strong>Decker</strong> repair agents and full details of our<br />
after-sales service and contacts are available on the Internet<br />
at: www.2helpU.com<br />
6
(Original instructions)<br />
ENGLISH<br />
Technical data<br />
Voltage V ac 230<br />
FSS1600<br />
(Type 1)<br />
Power<br />
Tank capacity<br />
W<br />
ml<br />
1600<br />
350<br />
Weight kg 2.7<br />
Guarantee<br />
<strong>Black</strong> & <strong>Decker</strong> is confident of the quality of its products and<br />
offers an outstanding guarantee. This guarantee statement is<br />
in addition to and in no way prejudices your statutory rights.<br />
The guarantee is valid within the territories of the Member<br />
States of the European Union and the European Free Trade<br />
Area.<br />
If a <strong>Black</strong> & <strong>Decker</strong> product becomes defective due to faulty<br />
materials, workmanship or lack of conformity, within 24<br />
months from the date of purchase, <strong>Black</strong> & <strong>Decker</strong> guarantees<br />
to replace defective parts, repair products subjected to fair<br />
wear and tear or replace such products to ensure minimum<br />
inconvenience to the customer unless:<br />
u The product has been used for trade, professional or hire<br />
purposes;<br />
u The product has been subjected to misuse or neglect;<br />
u The product has sustained damage through foreign<br />
objects, substances or accidents;<br />
u Repairs have been attempted by persons other than<br />
authorised repair agents or <strong>Black</strong> & <strong>Decker</strong> service staff.<br />
To claim on the guarantee, you will need to submit proof of<br />
purchase to the seller or an authorised repair agent. You can<br />
check the location of your nearest authorised repair agent<br />
by contacting your local <strong>Black</strong> & <strong>Decker</strong> office at the address<br />
indicated in this manual. Alternatively, a list of authorised<br />
<strong>Black</strong> & <strong>Decker</strong> repair agents and full details of our aftersales<br />
service and contacts are available on the Internet at:<br />
www.2helpU.com<br />
Please visit our website www.blackanddecker.co.uk to register<br />
your new <strong>Black</strong> & <strong>Decker</strong> product and to be kept up to date<br />
on new products and special offers. Further information on the<br />
<strong>Black</strong> & <strong>Decker</strong> brand and our range of products is available<br />
at www.blackanddecker.co.uk<br />
7
FRANÇAIS<br />
(Traduction des instructions initiales)<br />
Utilisation<br />
Votre nettoyeur <strong>Black</strong> & <strong>Decker</strong> <strong>Black</strong> & <strong>Decker</strong> a été conçu<br />
pour désinfecter et nettoyer les carrelages, les plans de<br />
travail, les surfaces de cuisines et de salles de bain. Il est<br />
destiné à une utilisation à l’intérieur et exclusivement<br />
domestique.<br />
Consignes de sécurité<br />
@<br />
@<br />
Attention ! Lisez avec attention tous les<br />
avertissements et toutes les instructions. Le<br />
non-respect de cette consigne peut entraîner<br />
une électrocution, un incendie et/ou de graves<br />
blessures.<br />
Attention ! De simples précautions sont à<br />
prendre pour l’utilisation d’appareil branché à<br />
l’alimentation principale. Les conseils suivants<br />
-<br />
duire le risque d’incendie, les chocs électriques,<br />
les blessures et les dommages matériels.<br />
Lisez attentivement et entièrement le manuel avant<br />
d’utiliser l’appareil.<br />
Ce manuel décrit la manière d’utiliser cet outil. L’utilisation<br />
dans ce manuel d’instruction peut présenter un risque de<br />
blessures.<br />
Gardez ce manuel pour référence ultérieure.<br />
Utilisation de votre appareil<br />
N’orientez pas la vapeur vers des personnes, des animaux,<br />
des appareils électriques ou des prises.<br />
Ne laissez pas l’appareil sous la pluie.<br />
Ne plongez pas l’appareil dans l’eau.<br />
Ne laissez pas l’appareil sans surveillance.<br />
Ne laissez pas l’appareil branché à une prise s’il ne doit<br />
pas être utilisé.<br />
<br />
chaleur, de zones graisseuses et de bords tranchants.<br />
N'utilisez pas le balai vapeur avec les mains humides.<br />
<br />
N’utilisez pas sur du cuir, des meubles ou des sols cirés,<br />
des tissues synthétiques, des velours ou autres tissues<br />
délicats, des matériaux ne résistant pas à la vapeur.<br />
@<br />
Attention ! N’utilisez pas sur des sols en bois<br />
ou en bois lamellé non vernis. Sur les surfaces<br />
traitées avec de la cire ou sur certains sols non<br />
cirés, la chaleur et les vapeurs peuvent faire disparaître<br />
la brillance. Il est toujours recommandé<br />
de tester sur une zone de la surface à nettoyer<br />
avant de commencer. Nous recommandons<br />
précautions du fabricant du sol.<br />
Ne jamais utiliser de détartrant, de produit parfumé,<br />
d’alcool ou de détergents dans le balai vapeur, ceci<br />
aurait pour effet de l’endommager, voire même d’être<br />
dangereux.<br />
Si le disjoncteur se déclenche pendant l’utilisation du<br />
balai vapeur, arrêtez immédiatement de l’utiliser et<br />
contactez le service client (ne pas oublier qu’il y a risque<br />
d’électrocution).<br />
L’appareil diffuse de la vapeur à très haute température<br />
embouts deviennent extrêmement chauds.<br />
Attention ! Portez toujours des chaussures adaptées<br />
pour utiliser le balai vapeur ainsi que pour changer<br />
d'accessoire. Ne portez pas de chaussons ou de sandalettes.<br />
La vapeur peut s’échapper de l’appareil pendant<br />
l’utilisation.<br />
Toutes les précautions doivent être prises pour utiliser<br />
l’appareil. NE TOUCHEZ AUCUNE PIÈCE qui pourrait<br />
devenir chaude.<br />
Si la vapeur est évacuée du logement du nettoyeur à<br />
vapeur portable, éteignez l'appareil et débranchez-le du<br />
secteur. Laissez-le refroidir. Contactez le réparateur agréé<br />
le plus proche de chez vous. N'utilisez plus l'appareil.<br />
Après l’utilisation<br />
Débranchez l’appareil et laissez-le refroidir avant de le<br />
nettoyer.<br />
Quand il n’est pas utilisé, l’appareil doit être rangé dans<br />
un endroit sec.<br />
Les enfants ne doivent pas avoir accès aux appareils<br />
rangés.<br />
Avant toutes opérations d'entretien ou réparations,<br />
débranchez l’appareil et laissez-le refroidir.<br />
<br />
doit pas être coincé par une porte, glisser sur des coins<br />
anguleux ou approcher de surfaces chaudes.<br />
N’utilisez pas l’appareil dans un espace restreint où se<br />
dégage de la vapeur provenant d'un diluant chimique, cerou<br />
autres vapeurs explosives ou toxiques.<br />
8
(Traduction des instructions initiales)<br />
FRANÇAIS<br />
<br />
<br />
ou si aucune pièce ne manque. Recherchez des pièces<br />
cassées, des boutons endommagés et d'autres anomalies<br />
susceptibles de nuire au bon fonctionnement de l’appareil.<br />
N’utilisez pas l’appareil si une pièce est endommagée ou<br />
défectueuse.<br />
Faites réparer ou remplacer les pièces défectueuses ou<br />
endommagées par un réparateur agréé.<br />
Ne tentez jamais de retirer ou de remplacer des pièces<br />
autres que celles citées dans ce manuel.<br />
Sécurité des personnes<br />
Cet appareil ne doit pas être utilisé par des personnes<br />
Rallonges et produit de Classe 1<br />
Un câble tripolaire doit être utilisé quand l’appareil est<br />
relié à la terre et de Classe 1.<br />
Une longueur de 30 m peut être utilisée sans perte de<br />
puissance.<br />
Étiquettes sur l’appareil<br />
Les pictogrammes ci-dessous se trouvent sur l’appareil :<br />
Attention ! Pour réduire le risque de blessures,<br />
l’utilisateur doit lire le manuel d’instructions.<br />
mentales ou sensorielles. Cette consigne s’applique aussi<br />
aux personnes manquant d'expérience et de connaissance<br />
du matériel, à moins que celles-ci n’aient reçu les<br />
instructions appropriées ou qu’elles ne soient encadrées<br />
par une personne responsable de leur sécurité pour<br />
utiliser l’appareil.<br />
Ne laissez jamais les enfants sans surveillance pour éviter<br />
qu'ils ne jouent avec cet outil.<br />
Risques résiduels.<br />
L'utilisation d'un outil non mentionné dans les consignes de<br />
sécurité données peut entraîner des risques résiduels supplémentaires.<br />
Ces risques peuvent survenir si la machine est<br />
mal utilisée, si l'utilisation est prolongée, etc.<br />
Malgré l'application des normes de sécurité requises et la<br />
présence de dispositifs de sécurité, certains risques résiduels<br />
ne peuvent être évités. Notamment :<br />
Les blessures dues au contact avec une pièce mobile.<br />
Les blessures dues au contact avec des pièces brûlantes.<br />
Les blessures survenues en changeant des pièces ou des<br />
accessoires.<br />
Les blessures dues à l'utilisation prolongée de l'appareil.<br />
Une utilisation prolongée de l’appareil nécessite des<br />
pauses régulières.<br />
Attention ! Risque de brûlures.<br />
Éléments<br />
Cet appareil présente la totalité ou une partie des caractéristiques<br />
suivantes :<br />
1. Bouton marche/arrêt<br />
2. Bouton de déblocage<br />
3. Déclencheur<br />
4. Embout vapeur<br />
5. Réservoir d’eau<br />
6. Bouchon de remplissage<br />
Accessoires<br />
Les accessoires suivants peuvent être achetés sur le site Web<br />
de <strong>Black</strong> & <strong>Decker</strong>.<br />
La qualité du travail réalisé par votre appareil dépend des<br />
accessoires utilisés. Les accessoires <strong>Black</strong> & <strong>Decker</strong> sont<br />
conformes aux normes de qualité supérieure et sont conçus<br />
pour donner le meilleur résultat possible. En utilisant ces accessoires,<br />
votre appareil vous donnera entière satisfaction.<br />
Pour utiliser facilement tous les accessoires.<br />
Sécurité électrique<br />
@<br />
Attention ! Cet appareil doit être relié à la<br />
sur la plaque signalétique de l'outil correspond<br />
bien à la tension présente sur le lieu.<br />
-<br />
Embout variateur<br />
Pour augmenter la puissance du jet de vapeur,<br />
tournez l'embout.<br />
consignes réduit le risque de choc électrique.<br />
Si le câble d'alimentation est endommagé, il doit être<br />
remplacé par le fabricant ou par un centre de réparation<br />
agréé <strong>Black</strong> & <strong>Decker</strong> pour éviter tout risque.<br />
9
FRANÇAIS<br />
(Traduction des instructions initiales)<br />
Petite brosse (bleue)<br />
Pour le nettoyage des salles de bain.<br />
Petite brosse (orange)<br />
Pour le nettoyage des cuisines.<br />
Appuyez sur les clips (11) de chaque côté de l'embout<br />
variateur (12).<br />
Enfoncez l'embout variateur sur l'embout vapeur (4) ou le<br />
tuyau (8) et relâchez les clips (11).<br />
Important ! Assurez-vous que l'embout variateur (12) est cor-<br />
Si la vapeur sort au niveau du joint, l'embout variateur est<br />
l'embout variateur.<br />
Petite brosse (verte)<br />
Pour le nettoyage des toilettes.<br />
Grande raclette<br />
Pour le nettoyage des vitres et des portes en verre.<br />
Attention ! N'utilisez pas la raclette sur le verre<br />
froid. Le verre pourrait se briser.<br />
Nettoyeur de joint de carrelage<br />
Pour le nettoyage des jointures de carrelage.<br />
Grande brosse avec grattoir<br />
Pour le nettoyage des objets très encrassés,<br />
comme les barbecues.<br />
Assemblage<br />
Attention ! Avant d’exécuter ce qui suit, assurez-vous que<br />
l’appareil est éteint, débranché et que l’appareil est froid et ne<br />
contient pas d’eau.<br />
Alignez les goujons du tuyau (8) sur les encoches de<br />
l'accessoire.<br />
Enfoncez l'accessoire (10) sur le tuyau (8) et tournez-le<br />
dans le sens inverse des aiguilles d'une montre pour<br />
l’enclencher.<br />
Remarque ! L'embout variateur peut être utilisé sans le tuyau<br />
en l'installant directement sur l'embout vapeur. Tous les autres<br />
accessoires doivent être raccordés au tuyau pour être utilisés.<br />
Attention ! L'embout vapeur, l'embout variateur, le tuyau et<br />
les accessoires chauffent pendant l'utilisation. Avant de retirer<br />
un accessoire, laissez-le refroidir ainsi que l'appareil.<br />
A)<br />
Tournez l'accessoire (10) dans le sens des aiguilles d'une<br />
montre, puis le tirer du tuyau (8).<br />
Appuyez sur les clips (9) de chaque côté du tuyau (8) pour<br />
l'extraire de l'embout vapeur (4).<br />
B)<br />
Attention !<br />
tuyau (8) avant chaque utilisation. Si le joint est endommagé<br />
ou manquant, contactez le réparateur agréé <strong>Black</strong> & <strong>Decker</strong> le<br />
plus proche. N’utilisez pas l’appareil.<br />
Appuyez sur les clips (9) de chaque côté du tuyau (8).<br />
Enfoncez le tuyau (8) sur l'embout vapeur (4) et relâchez<br />
les clips (9).<br />
Important ! Assurez-vous que le tuyau (8) est correctement<br />
refroidir et installez de nouveau le tuyau.<br />
Appuyez sur les clips (11) de chaque côté de l'embout<br />
variateur (12) pour l'extraire de l'embout vapeur (4).<br />
Ce nettoyeur à vapeur est doté d’un système anti-calcaire qui<br />
permet de prolonger la durée de vie du système.<br />
Remarque : Remplissez le réservoir avec de l’eau du robinet.<br />
Remarque : Dans les zones où l’eau est très calcaire,<br />
l’utilisation d’eau distillée est recommandée.<br />
Éteignez l'appareil et débranchez-le du secteur.<br />
Ouvrez le couvercle de remplissage (6) en le soulevant.<br />
Avec le récipient, remplissez le réservoir d'eau (5) avec de<br />
l’eau.<br />
Attention ! La capacité du réservoir d'eau est de 0.35 L.<br />
Ré-installez le couvercle de remplissage (6).<br />
Remarque : -<br />
sage.<br />
10
(Traduction des instructions initiales)<br />
FRANÇAIS<br />
Utilisation<br />
Important ! Cet appareil détruit 99.9 % des bactéries et<br />
germes. Il doit cependant être utilisé conformément aux<br />
Mise en marche et arrêt<br />
Pour mettre l’appareil en marche, appuyez sur le bouton<br />
marche/arrêt (1). Le nettoyeur à vapeur portable prend<br />
environ 15 secondes pour chauffer.<br />
Remarque : Quand le nettoyeur à vapeur portable est mis en<br />
marche, le réservoir d’eau s’allume en rouge. Quand il est prêt<br />
à être utilisé, le réservoir d’eau s’allume en bleu.<br />
Soulevez le bouton de déblocage (2) et actionnez le<br />
déclencheur (3). La formation de vapeur prend quelques<br />
secondes.<br />
Pour éteindre l’appareil, relâchez le déclencheur (3), puis<br />
appuyez sur le bouton marche/arrêt (1)..<br />
Attention ! Videz toujours le nettoyeur à vapeur portable<br />
après l’utilisation.<br />
Attention ! La formation de vapeur peut continuer pendant<br />
une courte période une fois le déclencheur (3) relâché. Ceci<br />
est un phénomène normal. Avant de retirer un accessoire,<br />
arrêtez l'appareil et laissez-le refroidir.<br />
Conseils pour une utilisation optimale<br />
Généralités<br />
Pour un meilleur résultat, n’utilisez jamais le nettoyeur à<br />
N'utilisez pas de nettoyants chimiques avec le nettoyeur à<br />
vapeur portable. Pour éliminer les taches qui résistent sur<br />
des sols en vinyle ou en lino, vous pouvez prétraiter avec<br />
un mélange détergent doux et eau avant d’utiliser le balai<br />
vapeur.<br />
Nettoyage vapeur avec dispositif portable<br />
Fixez l’accessoire nécessaire.<br />
Branchez le nettoyeur à vapeur portable au secteur.<br />
Appuyez sur le bouton marche/arrêt (1). Le nettoyeur à<br />
vapeur portable prend environ 15 secondes pour chauffer.<br />
Soulevez le bouton de déblocage (2) et actionnez le<br />
déclencheur (3) pour activer la pompe à vapeur. Après<br />
quelques secondes, la vapeur se forme et est évacuée de<br />
l’accessoire.<br />
Remarque : Pendant le nettoyage, vous pouvez arrêter la<br />
pompe à vapeur en relâchant le déclencheur. Vous pourrez<br />
ainsi placer le nettoyeur à vapeur portable sur le support<br />
continuer à nettoyer sans avoir à éteindre l'appareil.<br />
Une fois terminé, relâchez le déclencheur (3), éteignez<br />
l'appareil et débranchez-le du secteur. Attendez le refroidissement<br />
du balai vapeur avant de le ranger. (environ<br />
cinq minutes)<br />
Attention ! Il est important de surveiller le niveau d’eau<br />
dans le réservoir. Pour remplir d’eau et continuer à nettoyer/<br />
désinfecter, éteignez le nettoyeur à vapeur portable (OFF).<br />
Débranchez l’appareil de la prise et remplissez le réservoir<br />
d'eau (5).<br />
Après l’utilisation<br />
Débranchez le nettoyeur à vapeur portable de la prise<br />
murale.<br />
Laissez le nettoyeur à vapeur portable refroidir complètement.<br />
(environ cinq minutes)<br />
Videz le réservoir (5).<br />
Retirez les accessoires et les ranger dans le sac de<br />
rangement fourni.<br />
Nettoyage et entretien<br />
Votre appareil <strong>Black</strong> & <strong>Decker</strong> a été conçu pour fonctionner<br />
pendant longtemps avec un minimum d'entretien. Un fonctionnement<br />
continu satisfaisant dépend d'un nettoyage régulier et<br />
d'un entretien approprié de l'appareil.<br />
Attention ! Avant d’effectuer des réparations ou un nettoyage<br />
de l’appareil, éteignez-le et débranchez-le.<br />
Nettoyez régulièrement l’appareil à l'aide d'un chiffon doux<br />
humide.<br />
Pour les taches résistantes, vous pouvez utiliser un<br />
mélange d’eau et de savon imbibé sur un chiffon.<br />
<br />
avant chaque utilisation. Si le joint est endommagé ou<br />
manquant, contactez le réparateur agréé <strong>Black</strong> & <strong>Decker</strong><br />
le plus proche. N’utilisez pas l’appareil.<br />
Remplacement des prises secteur (RU et Irlande<br />
uniquement)<br />
Si une nouvelle prise secteur doit être installée :<br />
Mettez au rebut la vieille prise.<br />
<br />
<br />
<br />
Attention ! Suivez les instructions de montage fournies avec<br />
les prises de bonne qualité. Fusibles recommandés : 13 A.<br />
Protection de l'environnement<br />
Z<br />
Recyclage. Cet outil ne doit pas être jeté avec les<br />
déchets ménagers.<br />
11
FRANÇAIS<br />
(Traduction des instructions initiales)<br />
Si votre appareil/outil <strong>Black</strong> & <strong>Decker</strong> doit être remplacé ou<br />
si vous ne l'utilisez plus, ne le jetez pas avec les ordures<br />
ménagères. Songez à la protection de l'environnement et<br />
recyclez-le.<br />
z<br />
La collecte séparée des produits et des emballages<br />
usagés permet de recycler et de réutiliser des<br />
matériaux. La réutilisation de matériaux recyclés<br />
évite la pollution de l'environnement et réduit la<br />
demande de matières premières.<br />
Des réglementations locales peuvent stipuler la collecte<br />
séparée des produits électriques et des produits ménagers,<br />
dans des déchetteries municipales ou par le revendeur<br />
lorsque vous achetez un nouveau produit.<br />
<strong>Black</strong> & <strong>Decker</strong> offre une solution permettant de recycler les<br />
retourner votre produit à un réparateur agréé qui se chargera<br />
de le collecter pour nous.<br />
Pour connaître l'adresse du réparateur agréé le plus proche<br />
de chez vous, contactez le bureau <strong>Black</strong> & <strong>Decker</strong> à l'adresse<br />
indiquée dans ce manuel. Vous pourrez aussi trouver une<br />
liste de réparateurs agréés <strong>Black</strong> & <strong>Decker</strong> et de plus amples<br />
détails sur notre service après-vente sur le site Internet à<br />
l'adresse suivante : www.2helpU.com<br />
Caractéristiques techniques<br />
Tension V ac 230<br />
Puissance<br />
Volume du réservoir<br />
W<br />
ml<br />
FSS1600<br />
(Type 1)<br />
1600<br />
350<br />
Garantie<br />
<strong>Black</strong> & <strong>Decker</strong> vous offre une garantie très élargie ainsi que<br />
-<br />
ment supplémentaire et ne peut en aucun cas se substituer à<br />
vos droits légaux. La garantie est valable sur tout le territoire<br />
des États Membres de l'Union Européenne et de la Zone de<br />
Libre Échange Européenne.<br />
Si un produit <strong>Black</strong> & <strong>Decker</strong> s'avère défectueux en raison de<br />
matériaux en mauvaises conditions, d'une erreur humaine, ou<br />
d'un manque de conformité dans les 24 mois suivant la date<br />
d'achat, <strong>Black</strong> & <strong>Decker</strong> garantit le remplacement des pièces<br />
défectueuses, la réparation des produits usés ou cassés ou<br />
remplace ces produits à la convenance du client, sauf dans<br />
les circonstances suivantes :<br />
Le produit a été utilisé dans un but commercial, professionnel,<br />
ou a été loué;<br />
Le produit a été mal utilisé ou utilisé avec négligence;<br />
Le produit a subi des dommages à cause d'objets<br />
étrangers, de substances ou à cause d'accidents;<br />
Des réparations ont été tentées par des techniciens ne<br />
faisant pas partie du service technique de <strong>Black</strong> & <strong>Decker</strong>.<br />
Pour avoir recours à la garantie, il est nécessaire de fournir<br />
une preuve d'achat au vendeur ou à un réparateur agréé.<br />
Pour connaître l'adresse du réparateur agréé le plus proche<br />
de chez vous, contactez le bureau <strong>Black</strong> & <strong>Decker</strong> à l'adresse<br />
indiquée dans ce manuel. Vous pourrez aussi trouver une<br />
liste de réparateurs agréés <strong>Black</strong> & <strong>Decker</strong> et de plus amples<br />
détails sur notre service après-vente sur le site Internet à<br />
l'adresse suivante : www.2helpU.com<br />
Visitez notre site Web www.blackanddecker.fr pour enregistrer<br />
votre nouveau produit <strong>Black</strong> & <strong>Decker</strong> et être informé<br />
des nouveaux produits et des offres spéciales. Pour plus<br />
d'informations concernant la marque <strong>Black</strong> & <strong>Decker</strong> et notre<br />
gamme de produits, consultez notre site www.blackanddecker.<br />
fr<br />
Poids kg 2.7<br />
12
15<br />
14
17<br />
16
19<br />
18
21<br />
20
90592378 REV-0 10/2012