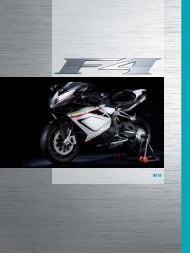
F4 1000 R (2010) Manual mantenimiento (multilenguaje). - MV Agusta
F4 1000 R (2010) Manual mantenimiento (multilenguaje). - MV Agusta
F4 1000 R (2010) Manual mantenimiento (multilenguaje). - MV Agusta

Create successful ePaper yourself
Turn your PDF publications into a flip-book with our unique Google optimized e-Paper software.
<strong>Manual</strong>e di manutenzione<br />
Versione Italiana
INDICE GENERALE<br />
cap. Descrizione argomenti pag.<br />
1 MANUTENZIONE 3<br />
1.1. Simbologia 3<br />
1.2. Tabelle di manutenzione e controllo 4<br />
1.3. Attrezzi e accessori in dotazione 14<br />
1.4. Tabella lubrificanti e liquidi 15<br />
1.5. Smontaggio/montaggio fiancata carenatura 16<br />
1.6. Olio motore - Controllo livello 18<br />
1.6.1. Olio motore - Ripristino livello 19<br />
1.7. Liquido di raffreddamento - Controllo livello 21<br />
1.7.1. Liquido di raffreddamento - Ripristino livello 22<br />
1.8. Pastiglie freni - Controllo usura 24<br />
1.9. Fluido comando freni - Controllo livello 25<br />
1.10. Fluido comando frizione - Controllo livello 27<br />
1.11. Pneumatici - Controllo e sostituzione 28<br />
1.12. Catena - Controllo e lubrificazione 34<br />
1.13. Regime di minimo - Controllo 38<br />
1.14. Sostituzioni - informazioni generali 39<br />
1.14.1. Fusibili - Sostituzione 39<br />
1.14.2. Luce targa - Sostituzione lampadina 44<br />
cap. Descrizione argomenti pag.<br />
1.15. Batteria 47<br />
1.16. Pulizia della motocicletta 49<br />
1.17. Periodo di sosta prolungata 51<br />
2 GUASTI 52<br />
2.1. Inconvenienti al motore 52<br />
2.2. Inconvenienti all’impianto elettrico 57<br />
3 INFORMAZIONI TECNICHE 60<br />
3.1. Descrizione generale della motocicletta 60<br />
3.1.1. Circuito freno anteriore 62<br />
3.1.2. Circuito freno posteriore 63<br />
3.1.3. Circuito frizione 64<br />
3.1.4. Lubrificazione motore 65<br />
3.1.5. Circuito di raffreddamento 66<br />
3.1.6. Circuito di alimentazione 67<br />
3.2. Dati tecnici 68<br />
3.3. Riferimento colori componenti carenatura 76<br />
3.4. Riferimento colori componenti telaio 78<br />
- 2 -
MANUTENZIONE 1<br />
1.1. Simbologia<br />
Le parti di testo di particolare importanza, relative alla sicurezza della persona e all’integrità della motocicletta,<br />
sono evidenziate con i seguenti simboli:<br />
1<br />
IT<br />
Pericolo - Attenzione: la mancata o incompleta osservanza di queste prescrizioni può<br />
comportare pericolo grave per la propria incolumità e per quella di altre persone.<br />
Cautela - Precauzione: la mancata o incompleta osservanza di queste prescrizioni può<br />
comportare un rischio di danni alla motocicletta.<br />
Per indicare le persone autorizzate allo svolgimento delle operazioni di regolazione e/o manutenzione,<br />
esse sono contraddistinte dai seguenti simboli:<br />
Informazioni sulle operazioni consentite al motociclista.<br />
Informazioni sulle operazioni che devono essere svolte solo dal personale autorizzato.<br />
Per evidenziare ulteriori informazioni vengono utilizzati i seguenti simboli:<br />
Il simbolo indica la necessità di utilizzare un attrezzo od un’attrezzatura specifica per<br />
il corretto svolgimento dell’operazione descritta.<br />
§ Il simbolo “ § ” indica il rimando al capitolo identificato dal numero che lo segue.<br />
- 3 -
MANUTENZIONE 1<br />
IT<br />
1<br />
1.2. Tabelle di manutenzione e controllo<br />
Le operazioni di manutenzione e controllo più importanti e la<br />
loro frequenza sono riportate nelle specifiche tabelle. È indispensabile<br />
eseguire tali operazioni per mantenere la motocicletta<br />
efficiente e sicura.<br />
Gli intervalli indicati nella tabella della manutenzione periodica<br />
e di lubrificazione devono venire considerati solo come una<br />
guida generale in condizioni di marcia normali. Potrebbe essere<br />
necessario ridurre tali intervalli in funzione delle condizioni<br />
climatiche, del terreno, della situazione geografica e dell’impiego<br />
individuale.<br />
Alcune operazioni possono essere eseguite dal proprietario<br />
della motocicletta, purchè in possesso delle competenze<br />
necessarie. In caso contrario fare eseguire le operazioni presso<br />
un centro di assistenza autorizzato.<br />
In generale le operazioni di manutenzione vanno eseguite con<br />
motocicletta posizionata su cavalletto posteriore, con motore<br />
spento e con interruttore in posizione “OFF”. Durante il controllo<br />
del livello dei liquidi è invece preferibile tenere la moto in<br />
posizione verticale senza utilizzare il cavalletto posteriore.<br />
Oltre i 36.000 Km (22400 mi), le operazioni devono essere eseguite<br />
con la stessa frequenza indicata nelle specifiche tabelle.<br />
- 4 -
MANUTENZIONE 1<br />
ATTENZIONE<br />
• Una manutenzione impropria, o la mancata esecuzione dei lavori di manutenzione consigliati,<br />
aumenta il rischio di incidenti o di danneggiamenti della moto.<br />
• Utilizzate sempre ricambi originali <strong>MV</strong> <strong>Agusta</strong>. L’utilizzo di ricambi non originali può accelerare<br />
l’usura della moto ed abbreviarne la durata.<br />
• La mancata esecuzione delle operazioni raccomandate o l’utilizzo di ricambi non originali<br />
puo’ comportare la non operativita’ della garanzia.<br />
• La sostituzione e/o il ripristino dei lubrificanti e dei liquidi va eseguita utilizzando esclusivamente<br />
i prodotti indicati nel §1.4.<br />
1<br />
IT<br />
ATTENZIONE<br />
Nel caso di utilizzo in pista si raccomanda di far verificare la moto sia prima che dopo l’uso<br />
da personale specializzato appartenente alla rete dei Centri assistenza <strong>MV</strong> <strong>Agusta</strong>.<br />
L’utilizzo su pista e’ permesso solo occasionalmente e, comunque, non a scopi agonistici,<br />
anche se amatoriali.<br />
L’uso della moto in pista comporta un sensibile incremento dell’usura delle varie componenti,<br />
con conseguente vita utile delle stesse ridotta rispetto ad un normale utilizzo su strada<br />
od autostrada.<br />
- 5 -
MANUTENZIONE 1<br />
IT<br />
1<br />
Tabelle manutenzione programmata<br />
Frequenza Manutenzione Km (mi)<br />
0 <strong>1000</strong> 6000 12000 18000 24000 30000 36000<br />
(600) (3800) (7500) (11200) (14900) (18600) (22400)<br />
Tagliando<br />
Pre-con<br />
segna<br />
A B C D E F G<br />
DESCRIZIONE<br />
Olio motore<br />
Filtro olio motore<br />
OPERAZIONE<br />
Controllo livello<br />
Sostituzione<br />
Sostituzione<br />
(Utilizzare esclusivamente<br />
filtri olio originali <strong>MV</strong> <strong>Agusta</strong>)<br />
Controllo / Ripristino livello<br />
Prima di ogni utilizzo del veicolo<br />
● ● ● ● ● ● ●<br />
Comunque ogni anno<br />
● ● ● ● ● ● ●<br />
Comunque ad ogni sostituzione olio motore<br />
Prima di ogni utilizzo del veicolo<br />
Liquido di raffreddamento<br />
Controllo / Ripristino livello ● ● ● ● ● ● ● ●<br />
Sostituzione<br />
Ogni due anni<br />
Impianto raffreddamento Controllo perdite ● ● ● ● ● ● ● ●<br />
Elettroventole Controllo funzionamento ● ● ● ● ● ● ● ●<br />
Valvole Controllo / Regolazione ● ● ●<br />
Catena distribuzione<br />
Controllo ● ●<br />
Sostituzione<br />
●<br />
- 6 -
MANUTENZIONE 1<br />
Tabelle manutenzione programmata<br />
Frequenza Manutenzione Km (mi)<br />
0 <strong>1000</strong> 6000 12000 18000 24000 30000 36000<br />
(600) (3800) (7500) (11200) (14900) (18600) (22400)<br />
Tagliando<br />
Pre-con<br />
segna<br />
A B C D E F G<br />
1<br />
IT<br />
DESCRIZIONE<br />
OPERAZIONE<br />
Controllo / Sostituzione ● ●<br />
Pattino mobile distribuzione<br />
Sostituzione<br />
Comunque ad ogni sostituzione della catena di distribuzione<br />
●<br />
Tendicatena distribuzione Controllo / Sostituzione ● ● ●<br />
Candele<br />
Controllo / Sostituzione ● ● ●<br />
Sostituzione ● ● ●<br />
Filtro benzina Controllo / Sostituzione ● ● ●<br />
Corpo farfallato Controllo e Regolazione ● ● ● ● ● ● ●<br />
Filtro aria Controllo / Sostituzione ● ● ● ● ● ●<br />
Controllo livello<br />
Prima di ogni utilizzo del veicolo<br />
Fluido freni e frizione<br />
Controllo livello ● ● ● ● ● ● ●<br />
●<br />
Sostituzione<br />
Comunque ogni 2 anni<br />
- 7 -
MANUTENZIONE 1<br />
IT<br />
1<br />
Tabelle manutenzione programmata<br />
Frequenza Manutenzione Km (mi)<br />
0 <strong>1000</strong> 6000 12000 18000 24000 30000 36000<br />
(600) (3800) (7500) (11200) (14900) (18600) (22400)<br />
Tagliando<br />
Pre-con<br />
segna<br />
A B C D E F G<br />
DESCRIZIONE<br />
OPERAZIONE<br />
Controllo funzionalità<br />
Prima di ogni utilizzo del veicolo<br />
Freni / Frizione Controllo funzionalità ● ● ● ● ● ● ● ●<br />
Controllo circuito ● ● ● ● ● ● ● ●<br />
Pastiglie freni<br />
( anteriore + posteriore )<br />
Tubi circuito carburante<br />
Controllo usura Ogni <strong>1000</strong> Km ( 600 mi )<br />
Controllo / Sostituzione ● ● ● ● ● ● ●<br />
Controllo difetti e perdite ● ● ● ● ● ● ●<br />
Sostituzione<br />
Comunque ogni 3 anni<br />
Controllo funzionalità<br />
Prima di ogni utilizzo del veicolo<br />
Comando acceleratore Controllo funzionalità ● ● ● ● ● ● ● ●<br />
Verifica/regolazione gioco ● ● ● ● ● ● ● ●<br />
Comando starter Controllo funzionalità ● ● ● ● ● ● ● ●<br />
Trasmissioni e<br />
comandi flessibili<br />
Controllo / Regolazione ● ● ● ● ● ● ● ●<br />
- 8 -
MANUTENZIONE 1<br />
Tabelle manutenzione programmata<br />
Frequenza Manutenzione Km (mi)<br />
0 <strong>1000</strong> 6000 12000 18000 24000 30000 36000<br />
(600) (3800) (7500) (11200) (14900) (18600) (22400)<br />
Tagliando<br />
Pre-con<br />
segna<br />
A B C D E F G<br />
1<br />
IT<br />
DESCRIZIONE<br />
Catena di trasmissione<br />
OPERAZIONE<br />
Controllo Ogni <strong>1000</strong> Km ( 600 mi )<br />
Lubrificazione<br />
Ogni <strong>1000</strong> Km ( 600 mi ) e dopo ogni guida sotto la pioggia<br />
Controllo / Regolazione ● ● ● ● ● ● ● ●<br />
Lubrificazione ● ● ● ●<br />
Sostituzione ● ● ●<br />
Controllo ● ● ● ●<br />
Pignone / Rosetta di fermo<br />
Sostituzione<br />
● ● ●<br />
Comunque ad ogni sostituzione della catena di trasmissione<br />
Controllo ● ● ● ●<br />
Corona<br />
Sostituzione<br />
● ● ●<br />
Comunque ad ogni sostituzione della catena di trasmissione<br />
Parastrappi corona Controllo / Sostituzione ● ● ●<br />
Ghiera cannotto di sterzo<br />
Controllo / Regolazione ● ● ● ●<br />
- 9 -
MANUTENZIONE 1<br />
IT<br />
1<br />
Tabelle manutenzione programmata<br />
Frequenza Manutenzione Km (mi)<br />
0 <strong>1000</strong> 6000 12000 18000 24000 30000 36000<br />
(600) (3800) (7500) (11200) (14900) (18600) (22400)<br />
Tagliando<br />
Pre-con<br />
segna<br />
A B C D E F G<br />
DESCRIZIONE<br />
Cuscinetti di sterzo<br />
OPERAZIONE<br />
Controllo / Regolazione ● ● ● ●<br />
Lubrificazione<br />
●<br />
Controllo pressione<br />
Ad ogni utilizzo del veicolo e comunque ogni 10 giorni<br />
Pneumatici<br />
Controllo usura Ad ogni utilizzo del veicolo e comunque ogni 500 Km ( 300 mi )<br />
Controllo pressione ● ● ● ● ● ● ● ●<br />
Controllo usura ● ● ● ● ● ● ●<br />
Cerchi ruota<br />
Cuscinetti ruota anteriore<br />
Controllo visivo<br />
Controllo<br />
Sostituzione<br />
● ● ● ● ● ● ●<br />
Comunque ad ogni sostituzione dei pneumatici<br />
● ● ● ● ●<br />
Comunque ad ogni sostituzione dei pneumatici<br />
●<br />
Cavalletto laterale<br />
Controllo funzionalità<br />
Prima di ogni utilizzo del veicolo<br />
Controllo funzionalità ● ● ● ● ● ● ● ●<br />
- 10 -
MANUTENZIONE 1<br />
Tabelle manutenzione programmata<br />
Frequenza Manutenzione Km (mi)<br />
0 <strong>1000</strong> 6000 12000 18000 24000 30000 36000<br />
(600) (3800) (7500) (11200) (14900) (18600) (22400)<br />
Tagliando<br />
Pre-con<br />
segna<br />
A B C D E F G<br />
1<br />
IT<br />
DESCRIZIONE<br />
OPERAZIONE<br />
Interruttore<br />
Controllo funzionalità<br />
Prima di ogni utilizzo del veicolo<br />
cavalletto laterale<br />
Controllo funzionalità ● ● ● ● ● ● ● ●<br />
Mozzo ruota posteriore<br />
Controllo /<br />
lubrificazione<br />
astuccio rullini<br />
● ●<br />
Sostituzione /<br />
lubrificazione<br />
astuccio rullini<br />
●<br />
Cuscinetti forcellone Controllo / lubrificazione ●<br />
Pattini catena forcellone Controllo / sostituzione ● ● ● ● ● ● ●<br />
Pattini catena piastra telaio Controllo / sostituzione ● ● ● ● ● ● ●<br />
Ammortizzatore posteriore Controllo / regolazione ● ● ● ●<br />
Olio forcella anteriore Sostituzione ●<br />
Collegamenti batteria Controllo e pulizia ● ● ● ● ● ● ●<br />
Impianto elettrico Controllo funzionalità ● ● ● ● ● ● ● ●<br />
Strumentazione<br />
Controllo funzionalità<br />
Prima di ogni utilizzo del veicolo<br />
Controllo funzionalità ● ● ● ● ● ● ● ●<br />
- 11 -
MANUTENZIONE 1<br />
IT<br />
1<br />
Tabelle manutenzione programmata<br />
Frequenza Manutenzione Km (mi)<br />
0 <strong>1000</strong> 6000 12000 18000 24000 30000 36000<br />
(600) (3800) (7500) (11200) (14900) (18600) (22400)<br />
Tagliando<br />
Pre-con<br />
segna<br />
A B C D E F G<br />
DESCRIZIONE<br />
Luci / segnali visivi<br />
Avvisatore acustico<br />
OPERAZIONE<br />
Controllo funzionalità /<br />
Prima di ogni utilizzo del veicolo<br />
Sostituzione lampadine<br />
Controllo funzionalità /<br />
Sostituzione lampadine<br />
● ● ● ● ● ● ● ●<br />
Controllo funzionalità<br />
Prima di ogni utilizzo del veicolo<br />
Controllo funzionalità ● ● ● ● ● ● ● ●<br />
Controllo funzionalità<br />
Prima di ogni utilizzo del veicolo<br />
Fanale anteriore Controllo funzionalità ● ● ● ● ● ● ● ●<br />
Regolazione<br />
Ad ogni variazione di assetto del veicolo<br />
Interruttore accensione<br />
Serrature<br />
Controllo funzionalità<br />
Prima di ogni utilizzo del veicolo<br />
Controllo funzionalità ● ● ● ● ● ● ● ●<br />
Controllo funzionalità<br />
Prima di ogni utilizzo del veicolo<br />
Controllo funzionalità ● ● ● ● ● ● ● ●<br />
Serraggio viti e dadi Controllo / serraggio ● ● ● ● ● ● ● ●<br />
- 12 -
MANUTENZIONE 1<br />
Tabelle manutenzione programmata<br />
Frequenza Manutenzione Km (mi)<br />
0 <strong>1000</strong> 6000 12000 18000 24000 30000 36000<br />
(600) (3800) (7500) (11200) (14900) (18600) (22400)<br />
Tagliando<br />
Pre-con<br />
segna<br />
A B C D E F G<br />
1<br />
IT<br />
DESCRIZIONE<br />
OPERAZIONE<br />
Fascette stringitubo Controllo / serraggio ● ● ● ● ● ● ● ●<br />
Lubrificazione generale ● ● ● ● ● ● ● ●<br />
Collaudo generale ● ● ● ● ● ● ● ●<br />
- 13 -
MANUTENZIONE 1<br />
IT<br />
1<br />
1.3. Attrezzi e accessori in dotazione<br />
Nel vano portaoggetti viene fornita una busta che contiene<br />
i seguenti attrezzi:<br />
- 1 barra esagonale (esagono da 10 mm);<br />
- 6 chiavi a maschio esagonale (esagono da 2,5 - 3 -<br />
4 - 5 - 6 - 8 mm);<br />
- 1 chiave per eccentrico ruota posteriore e relativa<br />
prolunga;<br />
- 1 estrattore per minifusibili;<br />
- 3 fusibili (15A).<br />
Vengono inoltre forniti i seguenti accessori:<br />
- 1 chiave per candele (esagono da 16 mm);<br />
- 1 busta portadocumenti.<br />
- 14 -
MANUTENZIONE 1<br />
1.4. Tabella lubrificanti e liquidi<br />
Descrizione Prodotto consigliato Specifiche<br />
Olio lubrificazione motore AGIP RACING 4T 10W/60 (*) SAE 10W/60 - API SJ<br />
Glicole - Etilenico<br />
Liquido di raffreddamento AGIP ECO - PERMANENT diluito con 50%<br />
di acqua distillata<br />
Fluido comando frizione e freni AGIP BRAKE FLUID DOT4 DOT4<br />
Olio lubrificazione catena MOTUL CHAIN LUBE ROAD –<br />
1<br />
IT<br />
* : Per la reperibilità del prodotto consigliato, <strong>MV</strong> <strong>Agusta</strong> consiglia di rivolgersi direttamente ai propri concessionari<br />
autorizzati. L’olio motore AGIP Racing 4T 10W/60 è stato realizzato appositamente per il<br />
motore del motociclo <strong>F4</strong>. Qualora il lubrificante descritto non fosse<br />
reperibile, <strong>MV</strong> <strong>Agusta</strong> consiglia l’utilizzo di olii completamente sintetici<br />
con caratteristiche conformi o superiori alle seguenti normative:<br />
– Conforme API SJ<br />
– Conforme ACEA A3<br />
– Conforme JASO MA<br />
– Gradazione SAE 20 W-50 o 10 W-60<br />
NOTA<br />
Le specifiche sopra indicate devono essere riportate, da sole od<br />
insieme ad altre, sul contenitore dell’olio lubrificante.<br />
Olio motore<br />
SAE 10 W-60<br />
API SJ<br />
ACEA A3<br />
JASO MA<br />
- 15 -
MANUTENZIONE 1<br />
IT<br />
1<br />
1.5. Smontaggio/montaggio fiancata carenatura<br />
Dopo aver tolto gli agganci rapidi rimuovere la fiancata.<br />
- 16 -
MANUTENZIONE 1<br />
Rimontare la fiancata avendo cura di posizionare<br />
il profilo anteriore come indicato in figura A.<br />
Completare il montaggio posizionando correttamente<br />
la linguetta nella parte inferiore della carenatura,<br />
come indicato in figura B.<br />
1<br />
IT<br />
Profilo anteriore<br />
fiancata<br />
A<br />
B<br />
- 17 -
MANUTENZIONE 1<br />
IT<br />
1<br />
1.6. Olio motore - Controllo livello<br />
Eseguire il controllo a freddo, a motore spento. Se effettuato<br />
a caldo, il motore deve essere spento da almeno<br />
dieci minuti.<br />
Questo controllo va effettuato disponendo la motocicletta<br />
su un piano orizzontale ed in posizione di marcia<br />
(posizione verticale).<br />
Il livello deve essere compreso tra i riferimenti MAX e<br />
MIN riportati nel carter.<br />
Nel caso in cui il livello dell’olio si trovi sotto il riferimento<br />
MIN, effettuare un rabbocco (vedere 1.6.1).<br />
Pericolo - Attenzione: Non avviare il motore<br />
se l’olio è sotto il riferimento MIN.<br />
Max<br />
Min<br />
- 18 -
MANUTENZIONE 1<br />
1.6.1. Olio motore - Ripristino livello<br />
Svitare il tappo olio utilizzando la barra esagonale<br />
da 10 mm in dotazione montata su una apposita<br />
chiave (vedi figura). Versare una quantità di olio<br />
del tipo consigliato fino a raggiungere un adeguato<br />
livello; in ogni caso non superare mai il riferimento<br />
MAX. Infine riavvitare il tappo e rimontare<br />
la fiancata.<br />
ATTENZIONE<br />
Prima di eseguire il rimontaggio del<br />
tappo olio, lubrificare l’O-Ring presente<br />
sul tappo utilizzando del grasso AGIP<br />
Grease 30.<br />
Eseguire infine il serraggio del tappo<br />
olio al valore di 35 Nm, utilizzando una<br />
chiave dinamometrica.<br />
Tappo olio<br />
CAUTELA<br />
Per prevenire slittamenti della frizione<br />
ed evitare il danneggiamento del motore,<br />
non miscelare additivi chimici all’olio,<br />
né utilizzare olii di tipo differente da<br />
quello riportato nel § 1.4. Accertarsi che<br />
non penetrino corpi estranei nel carter<br />
durante il rabbocco.<br />
1<br />
IT<br />
- 19 -
MANUTENZIONE 1<br />
IT<br />
1<br />
ATTENZIONE<br />
L’olio motore, nuovo o esausto, può essere<br />
pericoloso. L’ingestione di olio motore,<br />
nuovo o esausto, può essere nociva per<br />
le persone e per gli animali domestici. In<br />
caso di ingestione di olio motore, chiamare<br />
immediatamente un medico e non<br />
provocare il vomito onde evitare aspirazione<br />
del prodotto nei polmoni. Si è constatato<br />
che il contatto continuo con l’olio<br />
motore provoca il cancro della pelle su<br />
cavie. Brevi contatti con l’olio motore<br />
possono irritare la pelle.<br />
• Tenere l’olio motore, nuovo o esausto,<br />
lontano dalla portata dei bambini e<br />
degli animali domestici.<br />
• Indossare indumenti con le maniche<br />
lunghe e guanti impermeabili all’acqua<br />
ogni volta che si effettua il rabbocco<br />
dell’olio motore.<br />
• Lavarsi con acqua e sapone, se l’olio<br />
motore entra in contatto con la pelle.<br />
• Riciclare o smaltire correttamente l’olio<br />
motore esausto.<br />
- 20 -
MANUTENZIONE 1<br />
1.7. Liquido di raffreddamento - Controllo livello<br />
Eseguire il controllo a freddo, a motore spento.<br />
Questo controllo va effettuato disponendo la motocicletta<br />
su un piano orizzontale ed in posizione di marcia<br />
(posizione verticale).<br />
1<br />
IT<br />
Il livello deve essere compreso tra il riferimento MIN e<br />
MAX, come mostrato in figura.<br />
Nel caso in cui il livello del liquido refrigerante si trovi<br />
sotto il riferimento MIN, effettuare un rabbocco (vedere<br />
§ 1.7.1).<br />
ATTENZIONE<br />
Non utilizzare il motociclo se il livello del<br />
liquido di raffreddamento si trova al di sotto<br />
del riferimento MIN.<br />
MAX<br />
MIN<br />
- 21 -
MANUTENZIONE 1<br />
IT<br />
1<br />
1.7.1. Liquido di raffreddamento - Ripristino<br />
livello<br />
Svitare il tappo ed effettuare il rabbocco<br />
utilizzando il fluido di raffreddamento<br />
consigliato nel § 1.4.<br />
ATTENZIONE: Il rabbocco del<br />
liquido di raffreddamento va<br />
effettuato sempre a motore freddo.<br />
Non tentare mai di togliere il<br />
tappo del serbatoio del liquido<br />
di raffreddamento quando il<br />
motore è caldo per evitare il<br />
rischio di ustioni. Il circuito è in<br />
pressione!<br />
Dopo il ripristino del livello, rimontare<br />
accuratamente le parti precedentemente<br />
smontate.<br />
- 22 -
MANUTENZIONE 1<br />
ATTENZIONE<br />
In determinate condizioni il glicole etilenico<br />
contenuto nel liquido di raffreddamento<br />
è infiammabile e la sua fiamma è<br />
invisibile. Evitare di portare a contatto il<br />
liquido di raffreddamento con parti<br />
calde, in quanto la conseguente combustione<br />
del glicole etilenico potrebbe<br />
esporre al rischio di ustioni.<br />
ATTENZIONE<br />
Il liquido refrigerante del motore è nocivo<br />
se ingerito o se entra in contatto con<br />
gli occhi o con la pelle. Tenere il liquido<br />
refrigerante del motore lontano dalla<br />
portata dei bambini e degli animali<br />
domestici. In caso di ingestione di liquido<br />
refrigerante, chiamare immediatamente<br />
un medico e non provocare il<br />
vomito onde evitare aspirazione del prodotto<br />
nei polmoni. In caso di contatto<br />
del liquido refrigerante del motore con<br />
gli occhi o con la pelle, sciacquare<br />
immediatamente con acqua.<br />
- 23 -<br />
CAUTELA<br />
Per il ripristino e/o la sostituzione del<br />
liquido di raffreddamento utilizzare<br />
esclusivamente il prodotto specificato<br />
in tabella §1.4. Non miscelare né diluire<br />
il liquido di raffreddamento con additivi<br />
o fluidi differenti. Nel caso in cui il prodotto<br />
indicato al § 1.4. non fosse reperibile,<br />
utilizzare un prodotto avente<br />
analoghe caratteristiche tecniche.<br />
CAUTELA<br />
Gli spruzzi di refrigerante possono danneggiare<br />
le superfici verniciate.<br />
Stare attenti a non versare il fluido quando<br />
si riempie l’impianto di raffreddamento.<br />
Asciugare immediatamente con un<br />
panno pulito l’eventuale refrigerante del<br />
motore versato.<br />
1<br />
IT
MANUTENZIONE 1<br />
IT<br />
1<br />
Pinza freno anteriore<br />
Pinza freno posteriore<br />
Disco<br />
Pastiglie<br />
Limite di usura 1 mm<br />
1.8. Pastiglie freni - Controllo usura<br />
Controllare periodicamente l’altezza dello strato del materiale<br />
di attrito delle pastiglie, avendo cura di non scendere<br />
mai al di sotto del limite di usura minimo di 1 mm.<br />
Pericolo - Attenzione: Utilizzando la moto con<br />
le pastiglie dei freni usurate, la potenza di frenata<br />
diminuisce ed aumenta il rischio di incidenti.<br />
Se lo spessore residuo è vicino al limite<br />
di usura, rivolgersi ad un centro di assistenza<br />
autorizzato per effettuare la sostituzione<br />
delle pastiglie. Sottoporre le nuove pastiglie<br />
ad opportuno rodaggio.<br />
- 24 -
MANUTENZIONE 1<br />
Serbatoio freno posteriore<br />
Serbatoio freno anteriore<br />
1<br />
IT<br />
Max<br />
Min<br />
Max<br />
Min<br />
1.9. Fluido comando freni - Controllo livello<br />
ATTENZIONE<br />
Il mancato controllo ed una manutenzione<br />
carente dei freni aumentano il rischio di<br />
incidenti. Prima di ogni uscita con la moto,<br />
controllare il sistema frenante secondo le<br />
istruzioni riportate nel Quick <strong>Manual</strong>.<br />
L’usura delle pastiglie dei freni provoca un normale<br />
calo del livello del fluido. In ogni caso il livello<br />
deve essere compreso tra i riferimenti MAX e<br />
MIN. Se tale livello scende al di sotto del riferimento<br />
MIN, occorre rivolgersi ad un centro assistenza<br />
autorizzato per un controllo generale dell’impianto<br />
frenante.<br />
- 25 -
MANUTENZIONE 1<br />
IT<br />
1<br />
ATTENZIONE<br />
Non utilizzare la motocicletta se il livello è<br />
al di sotto al riferimento MIN; in tale condizione<br />
l’impianto frenante potrebbe non<br />
funzionare correttamente, con conseguente<br />
rischio di perdita di controllo del veicolo<br />
ed incidenti. Se il livello del liquido si trova<br />
al di sotto del riferimento MIN, rivolgersi ad<br />
un concessionario <strong>MV</strong> <strong>Agusta</strong> per effettuare<br />
un controllo dell’impianto frenante.<br />
ATTENZIONE<br />
Fare effettuare il rabbocco del liquido<br />
dei freni esclusivamente da personale<br />
autorizzato. Il liquido dei freni è nocivo o<br />
mortale, se ingerito, ed è nocivo se viene<br />
a contatto della pelle e degli occhi.<br />
Tenete il liquido dei freni fuori dalla portata<br />
dei bambini e degli animali domestici.<br />
In caso di ingestione del liquido dei<br />
freni, chiamare immediatamente un<br />
medico e non provocare il vomito onde<br />
evitare aspirazione del prodotto nei polmoni.<br />
In caso di contatto del liquido dei<br />
freni con gli occhi o con la pelle, sciacquare<br />
immediatamente con acqua.<br />
- 26 -<br />
ATTENZIONE<br />
Fare effettuare il rabbocco del liquido<br />
freni utilizzando solamente il tipo di fluido<br />
consigliato nel §1.4. del presente<br />
manuale. Eventuali miscelazioni tra fluidi<br />
di tipo differente possono causare<br />
una reazione chimica pericolosa e la<br />
diminuzione dell’efficienza di frenata,<br />
con conseguente aumento del rischio di<br />
incidenti.<br />
ATTENZIONE<br />
Una quantità insufficiente di liquido freni<br />
può permettere la penetrazione di aria<br />
nell’impianto dei freni, compromettendo<br />
l’efficienza della frenata con conseguente<br />
aumento del rischio di incidenti. La<br />
presenza di aria nell’impianto idraulico<br />
potrebbe essere evidenziata nel caso in<br />
cui, premendo la leva del freno, si avvertisse<br />
una sensazione di eccessiva cedevolezza.<br />
In caso di presenza di aria nell’impianto<br />
idraulico, farne effettuare lo<br />
spurgo da un concessionario <strong>MV</strong> <strong>Agusta</strong><br />
prima di utilizzare il mezzo.
MANUTENZIONE 1<br />
1.10. Fluido comando frizione - Controllo livello<br />
Il livello deve essere compreso tra i riferimenti MAX e<br />
MIN. Se tale livello scende al di sotto del riferimento<br />
MIN, occorre rivolgersi ad un centro assistenza autorizzato<br />
per un controllo generale dell’impianto comando<br />
frizione.<br />
1<br />
IT<br />
ATTENZIONE<br />
Non utilizzare la motocicletta se il livello è al<br />
di sotto del riferimento MIN; in tale condizione<br />
l’impianto di comando frizione potrebbe non<br />
funzionare correttamente, con conseguente<br />
rischio di perdita di controllo del veicolo ed<br />
incidenti. Se il livello del liquido si trova al di<br />
sotto del riferimento MIN, rivolgersi ad un<br />
concessionario <strong>MV</strong> <strong>Agusta</strong> per effettuare un<br />
controllo dell’impianto frizione.<br />
Max<br />
Min<br />
ATTENZIONE<br />
Fare effettuare il rabbocco del liquido comando<br />
frizione utilizzando solamente il tipo di fluido<br />
consigliato nel §1.4. del presente manuale.<br />
- 27 -
MANUTENZIONE 1<br />
IT<br />
1<br />
1.11. Pneumatici - Controllo e sostituzione<br />
ATTENZIONE<br />
Prima dell’uso verificare sempre<br />
la pressione dei pneumatici ed il<br />
loro stato di usura.<br />
Il controllo della pressione dei pneumatici<br />
è un fattore fondamentale per assicurare<br />
la sicurezza di guida. I pneumatici<br />
non sufficientemente gonfi peggiorano la<br />
maneggevolezza della moto e si usurano<br />
rapidamente; al contrario pressioni di<br />
gonfiaggio troppo elevate determinano<br />
una minore superficie di contatto con il<br />
suolo e possono ridurre l’aderenza del<br />
veicolo.<br />
Prima di ogni utilizzo della moto è perciò<br />
indispensabile eseguire il controllo della<br />
pressione con pneumatici a temperatura<br />
ambiente, cioè con la motocicletta parcheggiata<br />
da almeno tre ore.<br />
ATTENZIONE<br />
L’errato gonfiaggio dei pneumatici comporta seri<br />
pericoli nell’utilizzo della moto. Una pressione<br />
insufficiente può causare lo slittamento del pneumatico<br />
sul cerchione od il suo distacco, con conseguente<br />
afflosciamento del pneumatico e perdita<br />
di controllo del veicolo.<br />
- 28 -
MANUTENZIONE 1<br />
Effettuando il controllo subito dopo avere utilizzato<br />
la motocicletta, si otterrebbero infatti dei valori<br />
più alti rispetto a quelli effettivi e ciò potrebbe portare<br />
ad un’errata regolazione della pressione dei<br />
pneumatici. Il controllo della pressione va eseguito<br />
rispettando i valori riportati al § 3.2. e/o nell’etichetta<br />
situata sul cupolino. Nel caso di lunghe<br />
percorrenze continuative aumentare il valore<br />
della pressione nominale di 0,2 bar. Nel caso di<br />
utilizzo della motocicletta a velocità superiori a<br />
300 km/h aumentare la pressione dei pneumatici<br />
secondo il valore riportato al § 3.2.<br />
Inoltre, prima dell’uso è estremamente importante<br />
controllare lo stato di usura dei pneumatici; i<br />
pneumatici usurati tendono infatti a subire forature<br />
con maggiore facilità, ed influiscono negativamente<br />
sulla stabilità e la maneggevolezza della<br />
moto. Nel corso del controllo assicurarsi che lo<br />
spessore del battistrada non sia al di sotto dei<br />
valori prescritti dal codice della strada e che non<br />
compaiano crepe sul fondo della scolpitura.<br />
Inoltre non devono essere presenti chiodi o frammenti<br />
di vetro sul pneumatico, né fessurazioni sul<br />
fianco dello stesso. Se queste condizioni non fossero<br />
verificate, fare sostituire immediatamente il<br />
pneumatico da un concessionario <strong>MV</strong> <strong>Agusta</strong>.<br />
ATTENZIONE<br />
I limiti di profondità del battistrada possono<br />
variare da nazione a nazione.<br />
Rispettare sempre le disposizioni di<br />
legge della nazione d’impiego.<br />
ATTENZIONE<br />
• Fare sostituire i pneumatici eccessivamente<br />
consumati da un concessionario<br />
<strong>MV</strong> <strong>Agusta</strong>. Oltre ad essere illegale,<br />
l’utilizzo del motociclo con pneumatici<br />
eccessivamente usurati riduce la stabilità<br />
di marcia e può provocare la perdita<br />
del controllo del mezzo.<br />
• Se un pneumatico è forato o danneggiato<br />
va sostituito, non riparato. Un<br />
1<br />
IT<br />
- 29 -
MANUTENZIONE 1<br />
IT<br />
1<br />
pneumatico riparato garantisce prestazioni<br />
limitate e livelli di sicurezza inferiori<br />
rispetto ad un pneumatico nuovo.<br />
Se si esegue una riparazione temporanea<br />
o di emergenza ad un pneumatico,<br />
guidare lentamente e con cautela fino al<br />
più vicino concessionario <strong>MV</strong> <strong>Agusta</strong> e<br />
far sostituire il pneumatico. Dopo la riparazione<br />
di un pneumatico non eccedere<br />
mai la velocità di 60 km/h. La riparazione<br />
non può essere effettuata se il pneumatico<br />
è forato sul fianco, o se il foro sul<br />
battistrada è più grande di 6 mm.<br />
• Per la riparazione temporanea di un<br />
pneumatico forato, <strong>MV</strong> <strong>Agusta</strong> sconsiglia<br />
l’utilizzo di sigillanti liquidi. Questi<br />
sigillanti possono influire negativamente<br />
sul materiale degli strati del pneumatico<br />
e nascondere i danni secondari causati<br />
da eventuale penetrazione di oggetti.<br />
• Sostituire i pneumatici utilizzando<br />
esclusivamente quelli prescritti al §3.2.<br />
Evitare inoltre di utilizzare simultaneamente<br />
pneumatici di tipo o marca differenti<br />
tra loro per le coperture anteriori e<br />
posteriori. L’utilizzo di pneumatici impropri<br />
può influire negativamente sulla<br />
manovrabilità e la stabilità della motocicletta,<br />
aumentando il rischio di incidenti.<br />
• I cerchi della motocicletta sono stati<br />
progettati per l’utilizzo di pneumatici<br />
tubeless. Non installare pneumatici del<br />
tipo con camera d’aria su cerchi per<br />
pneumatici tubeless. I talloni potrebbero<br />
non assestarsi correttamente ed i pneumatici,<br />
slittando sui cerchi, potrebbero<br />
afflosciarsi causando la perdita di controllo<br />
del veicolo.<br />
- 30 -
MANUTENZIONE 1<br />
• Non installare una camera d’aria in un<br />
pneumatico tubeless. Il surriscaldamento<br />
del pneumatico potrebbe far scoppiare<br />
la camera d’aria, provocando l’afflosciamento<br />
del pneumatico e la perdita di<br />
controllo del veicolo.<br />
• Fare installare i pneumatici in conformità<br />
alla direzione di rotazione indicata<br />
dalle frecce sui fianchi di ciascun pneumatico.<br />
• I pneumatici nuovi devono essere sottoposti<br />
ad un periodo di rodaggio prima<br />
di raggiungere la completa efficienza; in<br />
questa fase è infatti possibile che i pneumatici<br />
abbiano una aderenza relativamente<br />
scarsa su determinate superfici<br />
stradali. Consigliamo quindi di guidare a<br />
velocità moderata ed usare estrema cautela<br />
nella guida per circa 100 km dopo<br />
l’installazione di un pneumatico nuovo.<br />
1<br />
IT<br />
- 31 -
MANUTENZIONE 1<br />
IT<br />
1<br />
❏ Smontaggio della ruota posteriore<br />
Cautela-Precauzione: Nel caso in<br />
cui si rendesse necessario far<br />
effettuare la sostituzione del<br />
pneumatico posteriore presso un<br />
gommista, assicurarsi che nello<br />
smontaggio e nel rimontaggio<br />
della ruota vengano utilizzati i<br />
seguenti utensili:<br />
• Chiave a bussola poligonale<br />
da 55 mm<br />
• Chiave dinamometrica<br />
Se le suddette operazioni venissero<br />
effettuate con utensili differenti,<br />
i componenti della ruota posteriore<br />
potrebbero essere gravemente<br />
danneggiati. Consigliamo<br />
quindi di non fare effettuare la<br />
sostituzione del pneumatico presso<br />
un’officina non adeguatamente<br />
attrezzata; in ogni caso è preferibile<br />
rivolgersi ad un concessionario<br />
<strong>MV</strong> <strong>Agusta</strong>.<br />
Dado poligonale<br />
Perno ruota con filettatura<br />
M50x1.5 a passo sinistro<br />
Chiave a bussola poligonale da 55 mm<br />
Chiave dinamometrica<br />
- 32 -
MANUTENZIONE 1<br />
❏ Controllo delle ruote<br />
Prima di utilizzare il mezzo, controllare sempre<br />
che il cerchio della ruota non presenti cricche, piegature<br />
o deformazioni.<br />
ATTENZIONE<br />
Se si riscontrano danneggiamenti, fare<br />
sostituire la ruota da un concessionario<br />
<strong>MV</strong> <strong>Agusta</strong>. Non tentare di eseguire riparazioni<br />
delle ruote, neppure di lieve<br />
entità.<br />
In caso di sostituzione del pneumatico o<br />
della ruota, occorre fare eseguire l’equilibratura<br />
della ruota presso un concessionario<br />
<strong>MV</strong> <strong>Agusta</strong>. Lo sbilanciamento<br />
della ruota può compromettere le prestazioni<br />
e la manovrabilità del mezzo e<br />
ridurre la durata dei pneumatici.<br />
ATTENZIONE<br />
Per eseguire l’equilibratura della ruote,<br />
ricorrere esclusivamente a contrappesi<br />
omologati. È sconsigliato l’utilizzo di<br />
bilancianti liquidi o di bilancianti liquidi/sigillanti.<br />
ATTENZIONE<br />
Non tentare di far rimuovere un pneumatico<br />
tubeless senza la speciale attrezzatura<br />
necessaria e le protezioni per il<br />
cerchio. In caso contrario, si rischia di<br />
danneggiare o deformare la superficie<br />
di tenuta del cerchio stesso, con conseguente<br />
rischio di afflosciamento del<br />
pneumatico e perdita di controllo del<br />
veicolo.<br />
1<br />
IT<br />
- 33 -
MANUTENZIONE 1<br />
IT<br />
1<br />
1.12. Catena - Controllo e lubrificazione<br />
Per effettuare le seguenti operazioni posizionare la<br />
motocicletta sul cavalletto posteriore, su un piano orizzontale<br />
e con il cambio in folle.<br />
❏ Controllo della regolazione<br />
ATTENZIONE: Prima di controllare la regolazione<br />
della catena, rivolgersi ad un centro<br />
assistenza autorizzato <strong>MV</strong> <strong>Agusta</strong> per verificare<br />
che il veicolo presenti la quota corretta<br />
dell’assetto statico della sospensione posteriore.<br />
Accertarsi inoltre che la catena sia adeguatamente<br />
lubrificata.<br />
L’asse del ramo inferiore della catena deve trovarsi ad una<br />
distanza di 50 mm dal paracatena inferiore. Effettuare il<br />
controllo su più punti della catena ruotando manualmente<br />
la ruota posteriore. Il gioco deve restare pressoché<br />
costante mentre la ruota gira; se la catena presenta forti<br />
oscillazioni del gioco, ciò significa che alcune maglie sono<br />
schiacciate, grippate o allungate. Se la distanza della<br />
catena dal paracatena inferiore è maggiore di 50 mm,<br />
occorre far effettuare la regolazione della catena.<br />
- 34 -<br />
50 mm
MANUTENZIONE 1<br />
ATTENZIONE: L’uso della motocicletta<br />
con la catena in cattive condizioni o mal<br />
regolata può dar luogo ad incidenti.<br />
Prima di ogni uscita con la moto, effettuare<br />
il controllo della catena in conformità<br />
al presente capitolo. Nel caso in cui<br />
si rendesse necessaria la regolazione<br />
della tensione della catena, rivolgersi ad<br />
un centro assistenza autorizzato <strong>MV</strong><br />
<strong>Agusta</strong>.<br />
ATTENZIONE: Se la catena presenta<br />
maglie schiacciate, grippate o allungate,<br />
farne effettuare la sostituzione presso<br />
un centro assistenza autorizzato <strong>MV</strong><br />
<strong>Agusta</strong>.<br />
ATTENZIONE: Se si rilevano danni o<br />
usura eccessiva della catena o dei relativi<br />
ingranaggi, occorre rivolgersi ad un<br />
concessionario <strong>MV</strong> <strong>Agusta</strong> per la loro<br />
sostituzione. Ogni volta che si sostituisce<br />
la catena, anche i relativi ingranaggi<br />
devono essere rinnovati.<br />
- 35 -<br />
ATTENZIONE<br />
Può essere pericoloso utilizzare una<br />
catena del tipo a falsamaglia. Una<br />
maglia principale non completamente<br />
rivettata, o del tipo a falsamaglia, può<br />
aprirsi e provocare incidenti o seri danni<br />
al motore. Non utilizzare mai catene con<br />
falsamaglia.<br />
ATTENZIONE<br />
Ogni volta che si renda necessario operare<br />
sulle viti del mozzo ruota posteriore,<br />
occorre rivolgersi ad un concessionario<br />
<strong>MV</strong> <strong>Agusta</strong>. Per il serraggio delle<br />
viti, rispettare il valore della coppia di<br />
serraggio indicata nella targhetta presente<br />
sul forcellone. Il superamento del<br />
valore indicato può causare il precoce<br />
deterioramento del mozzo ruota posteriore,<br />
compromettendo l’affidabilità del<br />
veicolo e la sicurezza del conducente.<br />
1<br />
IT
MANUTENZIONE 1<br />
IT<br />
1<br />
❏ Lubrificazione<br />
La catena deve essere correttamente lubrificata<br />
per garantire la massima efficienza.<br />
Pulizia preliminare: prima di effettuare la lubrificazione<br />
è necessario disciogliere i depositi di<br />
sporco sulla catena utilizzando kerosene; tali<br />
depositi devono essere successivamente rimossi<br />
con un panno pulito e/o un getto d’aria.<br />
Cautela - Precauzione: la catena è del<br />
tipo con anelli di tenuta (O-RING); per<br />
prevenirne il danneggiamento, non<br />
effettuare la pulizia della catena tramite<br />
getti di vapore o acqua ad alta pressione,<br />
né utilizzando benzina o solventi<br />
detergenti in commercio. La pulizia<br />
della catena va effettuata utilizzando<br />
esclusivamente kerosene.<br />
ATTENZIONE<br />
Il kerosene può essere pericoloso. Il<br />
kerosene è infiammabile. Il contatto con<br />
il kerosene può essere nocivo per i bambini<br />
e gli animali domestici.<br />
Tenere le fiamme libere e gli oggetti ad<br />
elevata temperatura lontani dal kerosene.<br />
Tenere i bambini e gli animali domestici<br />
lontani dal kerosene. Effettuare<br />
correttamente lo smaltimento del kerosene<br />
usato.<br />
- 36 -
MANUTENZIONE 1<br />
Lubrificazione: applicare un leggero ed uniforme<br />
strato di lubrificante sull’intero sviluppo della<br />
catena avendo cura di non raggiungere le parti<br />
circostanti, in particolare i pneumatici. Dirigere il<br />
getto dello spray sulla maglia interna, affinché<br />
possa lubrificare la superficie degli O-Ring e<br />
penetrare all’interno del rullo catena.<br />
Cautela - Precauzione: utilizzare solo il<br />
lubrificante riportato nel §1.4., allo scopo<br />
di proteggere efficacemente la catena di<br />
trasmissione ed evitare la formazione di<br />
schizzi durante la marcia del veicolo.<br />
ATTENZIONE: La lubrificazione della<br />
catena va effettuata secondo gli intervalli<br />
specificati nelle Tabelle Manutenzione<br />
Programmata del presente manuale (vedi<br />
§ 1.2.). È necessario effettuare questa<br />
operazione anche dopo ogni guida sotto<br />
la pioggia e dopo ogni lavaggio della<br />
motocicletta. L’uso della motocicletta<br />
con la catena in cattive condizioni o non<br />
lubrificata può dar luogo ad incidenti.<br />
1<br />
IT<br />
- 37 -
MANUTENZIONE 1<br />
IT<br />
1<br />
1.13. Regime di minimo - Controllo<br />
Eseguire il controllo con il motore alla temperatura di<br />
esercizio e verificare che il dispositivo “CHOKE” non sia<br />
inserito.<br />
Il regime di minimo deve essere compreso tra 1150 e<br />
1250 rpm.<br />
Se occorre effettuare la regolazione, rivolgersi ai centri<br />
assistenza autorizzati.<br />
- 38 -
MANUTENZIONE 1<br />
1.14. Sostituzioni - informazioni generali<br />
La sostituzione dei fusibili e delle lampadine (ad<br />
esclusione di quelle di posizione anteriore), può<br />
essere eseguita dal motociclista, seguendo correttamente<br />
le indicazioni fornite.<br />
Fusibile di ricarica batteria<br />
Fusibili servizi<br />
1.14.1. Fusibili - Sostituzione<br />
Il fusibile di ricarica batteria si trova sul teleruttore<br />
di avviamento della motocicletta. Per raggiungerlo<br />
occorre smontare la sella pilota.<br />
1<br />
IT<br />
Faro anteriore - Sostituzione lampadina<br />
Luce targa - Sostituzione lampadina<br />
Teleruttore di<br />
avviamento<br />
- 39 -
MANUTENZIONE 1<br />
IT<br />
1<br />
CAUTELA<br />
Girare l’interruttore di accensione sulla<br />
posizione “OFF” prima di controllare o<br />
sostituire i fusibili, allo scopo di evitare<br />
cortocircuiti accidentali con conseguente<br />
rischio di danneggiare altri componenti<br />
elettrici.<br />
Fusibile di ricarica (40 A)<br />
Fusibile di scorta (40 A)<br />
Per eseguire la sostituzione del fusibile occorre<br />
scambiare di posto fra il fusibile di ricarica ed il<br />
fusibile di scorta.<br />
ATTENZIONE<br />
Non utilizzare mai un fusibile con una<br />
taratura diversa da quella prescritta, allo<br />
scopo di evitare il danneggiamento dell’impianto<br />
elettrico della motocicletta<br />
con conseguente pericolo d’incendio.<br />
- 40 -
MANUTENZIONE 1<br />
I fusibili dei servizi si trovano sul lato sinistro;<br />
per raggiungerli occorre smontare la fiancata dalla<br />
carenatura (vedi §1.5.).<br />
Disimpegnare le due linguette e ruotare il<br />
coperchio verso l’alto.<br />
1<br />
IT<br />
CAUTELA<br />
Girare l’interruttore di accensione sulla<br />
posizione “OFF” prima di controllare o<br />
sostituire i fusibili, allo scopo di evitare<br />
cortocircuiti accidentali con conseguente<br />
rischio di danneggiare altri componenti<br />
elettrici.<br />
- 41 -
MANUTENZIONE 1<br />
IT<br />
1<br />
Sostituire il fusibile bruciato e rimontare il<br />
coperchio.<br />
- 42 -
MANUTENZIONE 1<br />
Per identificare la posizione e la funzione dei<br />
fusibili, consultare le informazioni riportate nello<br />
schema elettrico allegato; le lettere di riferimento<br />
indicate in figura corrispondono a quelle riportate<br />
nello schema.<br />
Tenere presente che nella busta porta attrezzi<br />
sono disponibili tre fusibili di scorta.<br />
ATTENZIONE<br />
Non utilizzare mai un fusibile con una<br />
taratura diversa da quella prescritta, allo<br />
scopo di evitare il danneggiamento dell’impianto<br />
elettrico della motocicletta<br />
con conseguente pericolo d’incendio.<br />
F1 F2 F3 <strong>F4</strong> F5 F6 F7<br />
15A<br />
15A<br />
15A<br />
15A<br />
15A<br />
15A<br />
15A<br />
1<br />
IT<br />
- 43 -
MANUTENZIONE 1<br />
IT<br />
1<br />
1.14.2. Luce targa - Sostituzione lampadina<br />
Rimuovere le viti di fissaggio del coperchio inferiore<br />
del portatarga.<br />
- 44 -
MANUTENZIONE 1<br />
Rimuovere il coperchio inferiore.<br />
1<br />
IT<br />
Estrarre il portalampada sfilandolo dalla propria<br />
sede.<br />
- 45 -
MANUTENZIONE 1<br />
IT<br />
1<br />
Estrarre la lampadina.<br />
Inserire la lampadina nuova.<br />
Reinserire il portalampada.<br />
Rimontare il coperchio inferiore del portatarga.<br />
Cautela: Prima di eseguire il rimontaggio, prestare<br />
attenzione alla corretta disposizione dei<br />
cavi delle luci posteriori per evitarne il danneggiamento<br />
(vedi figura).<br />
- 46 -
MANUTENZIONE 1<br />
1.15. Batteria<br />
Questo motociclo è equipaggiato con una batteria<br />
sigillata, installata sotto il codone. Tale elemento è<br />
esente da manutenzione, quindi non occorre controllare<br />
il liquido né aggiungere acqua distillata.<br />
Se la batteria sembra scarica (causando problemi<br />
elettrici o un avviamento difficoltoso), farla caricare<br />
al più presto possibile presso un concessionario<br />
<strong>MV</strong> <strong>Agusta</strong>. Tenere presente che la batteria<br />
tende a scaricarsi più rapidamente se il motociclo<br />
è equipaggiato con accessori elettrici optional.<br />
ATTENZIONE<br />
Se il corpo esterno della batteria è danneggiato<br />
possono verificarsi fuoriuscite<br />
di acido solforico, una sostanza velenosa<br />
ed estremamente corrosiva. Evitare<br />
qualsiasi contatto con la pelle, gli occhi<br />
e gli abiti e proteggere sempre gli occhi<br />
quando si lavora vicino alla batteria.<br />
In caso di contatto, prestare i PRIMI<br />
SOCCORSI come segue.<br />
• CONTATTO ESTERNO: Sciacquare<br />
con molta acqua.<br />
• CONTATTO INTERNO: Bere grandi<br />
quantità di acqua o latte e chiamare<br />
immediatamente un medico.<br />
• OCCHI: Sciacquare con acqua per 15<br />
minuti e ricorrere immediatamente ad<br />
un medico.<br />
La fuoriuscita di acido solforico comporta<br />
inoltre la formazione di idrogeno,<br />
il quale può provocare un’esplosione in<br />
presenza di una scintilla o di una fiamma.<br />
Per effettuare la sostituzione della batteria<br />
è necessario rivolgersi ad un centro<br />
assistenza autorizzato <strong>MV</strong> <strong>Agusta</strong>.<br />
1<br />
IT<br />
- 47 -
MANUTENZIONE 1<br />
IT<br />
1<br />
Inattività prolungata<br />
Se la motocicletta è destinata a non essere utilizzata<br />
per un periodo prolungato (un mese o più), è<br />
consigliabile scollegare i cavi della batteria o farla<br />
rimuovere da un meccanico qualificato. In caso di<br />
lunga inattività si raccomanda di far ricaricare la<br />
batteria presso un concessionario <strong>MV</strong> <strong>Agusta</strong><br />
ogni 4-5 mesi, al fine di garantirne la durata nel<br />
tempo.<br />
PERICOLO: L’inversione dei cavi della<br />
batteria può danneggiare l’impianto di<br />
carica e la batteria. Il cavo rosso va collegato<br />
al morsetto positivo (+) della batteria,<br />
mentre i cavi neri vanno collegati<br />
al morsetto negativo (-). Per lo smontaggio<br />
della batteria scollegare PER PRIMO<br />
il morsetto del polo negativo, quindi<br />
quello del polo positivo. Per il rimontaggio<br />
procedere in modo inverso.<br />
- 48 -
MANUTENZIONE 1<br />
1.16. Pulizia della motocicletta<br />
La pulizia periodica e accurata è<br />
importante per mantenere nel tempo<br />
il valore della motocicletta, proteggere<br />
la finitura delle sue superfici e controllare<br />
che non vi siano danni, usura<br />
e perdita di fluidi corrosivi.<br />
Cautela - Precauzione: prima<br />
di effettuare il lavaggio otturare<br />
i tubi di scarico e proteggere<br />
le parti elettriche.<br />
ATTENZIONE: Se la motocicletta<br />
è ancora calda per un<br />
uso recente, attendere che il<br />
motore e l’impianto di scarico<br />
si siano raffreddati.<br />
NOTA: I detersivi inquinano<br />
l’ambiente. Pertanto la pulizia<br />
del veicolo va effettuata<br />
in zone attrezzate per la raccolta<br />
e la depurazione dei<br />
liquidi di lavaggio.<br />
Cautela - Precauzione: non utilizzare macchine di<br />
lavaggio con getti di acqua ad alta pressione o di<br />
vapore, in quanto possono provocare infiltrazioni di<br />
acqua e deterioramento dei componenti della motocicletta.<br />
- 49 -<br />
1<br />
IT
MANUTENZIONE 1<br />
IT<br />
1<br />
Lavare con acqua, spugna e usare un detergente<br />
non aggressivo. Asciugare con un panno morbido.<br />
Nelle zone meno accessibili usare un getto d’aria.<br />
Cautela - Precauzione:<br />
• Accertarsi di non utilizzare panni o<br />
spugne che siano stati a contatto con<br />
prodotti di pulizia forti o abrasivi, solventi<br />
o benzina.<br />
• Per evitare danni irreversibili ai componenti<br />
della carrozzeria non usare<br />
detergenti alcalini o di elevata acidità,<br />
benzina, liquido per freni o altri solventi.<br />
Pulire la carrozzeria esclusivamente con<br />
un panno morbido, acqua tiepida e un<br />
detergente neutro.<br />
• In caso di dubbio sulla composizione<br />
chimica del detergente, testare l’effetto<br />
del prodotto su una piccola area prima<br />
di procedere con l’uso esteso.<br />
Periodicamente, trattare le parti verniciate con<br />
prodotti specifici. Se si percorrono strade trattate<br />
con prodotti corrosivi (sale) eseguire il lavaggio<br />
appena possibile, utilizzando acqua fredda; l’acqua<br />
calda favorisce l’azione corrosiva.<br />
ATTENZIONE: Accertarsi che non ci sia<br />
olio o cera sui freni o sui pneumatici. Se<br />
necessario, pulire i dischi dei freni con<br />
un detergente per dischi freno e lavare i<br />
pneumatici con acqua calda ed un<br />
detergente neutro.<br />
ATTENZIONE: Se i freni sono bagnati,<br />
possono provocare una riduzione della<br />
potenza di frenata ed incidenti. Dopo il<br />
lavaggio avviare il motore per qualche<br />
minuto ponendosi in marcia ad andatura<br />
ridotta, ed eseguire alcune frenate con<br />
cautela per asciugare le pastiglie e i<br />
dischi dei freni.<br />
ATTENZIONE: La catena di trasmissione<br />
deve essere lubrificata subito dopo il<br />
lavaggio e l’asciugamento della motocicletta<br />
secondo le istruzioni riportate nel<br />
§1.12. del presente manuale.<br />
- 50 -
MANUTENZIONE 1<br />
1.17. Periodo di sosta prolungata<br />
Se si prevede di tenere la motocicletta ferma per un lungo<br />
periodo, è bene eseguire le operazioni di seguito elencate.<br />
Vuotare il serbatoio carburante.<br />
Togliere la batteria e conservarla opportunamente.<br />
Togliere i cappucci delle candele e le candele. Versare un cucchiaino di olio motore in ciascun foro<br />
delle candele, dopodiché reinstallare le candele e i relativi cappucci e far ruotare a vuoto il motore<br />
per alcune volte.<br />
Lubrificare tutti i cavi di comando ed i punti di rotazione di tutte le leve e dei pedali.<br />
Pulire la motocicletta e trattare con prodotti specifici le parti verniciate (§1.16.).<br />
Allo scopo di garantire l’integrità e le prestazioni dei pneumatici, parcheggiare la moto in un<br />
ambiente fresco, asciutto e buio, con una temperatura relativamente costante e inferiore a 25°C.<br />
Evitare il contatto diretto dei pneumatici con tubazioni o radiatori di riscaldamento, ed il contatto<br />
prolungato con olio o benzina. Evitare di collocare i pneumatici nelle vicinanze di motori elettrici o<br />
attrezzature passibili di generare scintille o scariche elettriche. Durante il periodo di sosta, mantenere<br />
la moto sollevata sul cavalletto posteriore.<br />
Ricoprire la motocicletta con un apposito telo.<br />
Al primo utilizzo della motocicletta ricordarsi di eseguire una<br />
verifica generale e far eseguire la manutenzione (§1.2.) se<br />
necessario.<br />
1<br />
IT<br />
- 51 -
GUASTI 2<br />
2.1. Inconvenienti al motore: IL MOTORE NON SI AVVIA<br />
IT<br />
2<br />
L’interruttore di<br />
stop motore<br />
è premuto?<br />
SI<br />
Portare l’interruttore<br />
di stop motore<br />
in posizione di riposo<br />
Adesso il motore<br />
si avvia?<br />
SI<br />
Inconveniente risolto<br />
NO<br />
NO<br />
Marcia inserita<br />
e cavalletto laterale<br />
abbassato<br />
SI<br />
Disinserire la marcia<br />
oppure alzare il cavalletto<br />
e tirare la leva frizione<br />
Adesso il motore<br />
si avvia?<br />
SI<br />
Inconveniente risolto<br />
NO<br />
NO<br />
La procedura di avviamento<br />
è stata eseguita<br />
correttamente?<br />
NO<br />
Eseguire correttamente<br />
la procedura di<br />
avviamento<br />
Adesso il motore<br />
si avvia?<br />
SI<br />
Inconveniente risolto<br />
SI<br />
NO<br />
Il serbatoio<br />
carburante è<br />
vuoto?<br />
SI<br />
Effettuare il rifornimento<br />
carburante<br />
Adesso il motore<br />
si avvia?<br />
SI<br />
Inconveniente risolto<br />
NO<br />
continua nella pagina successiva<br />
NO<br />
- 52 -
GUASTI 2<br />
continua dalla pagina precedente<br />
I fusibili <strong>F4</strong> e F6<br />
sono integri?<br />
NO<br />
Sostituire i fusibili <strong>F4</strong> e F6<br />
(§1.14.1.)<br />
Adesso il motore<br />
si avvia?<br />
SI<br />
Inconveniente risolto<br />
2<br />
IT<br />
SI<br />
NO<br />
La batteria<br />
è carica?<br />
NO<br />
Fare effettuare la ricarica<br />
della batteria presso<br />
un centro assistenza<br />
autorizzato <strong>MV</strong> <strong>Agusta</strong><br />
Adesso il motore<br />
si avvia?<br />
SI<br />
Inconveniente risolto<br />
SI<br />
NO<br />
Il codice della<br />
chiave è stato<br />
riconosciuto?<br />
NO<br />
Inserire il codice riportato<br />
sulla <strong>MV</strong> Code Card presso<br />
un centro assistenza<br />
autorizzato <strong>MV</strong> <strong>Agusta</strong><br />
Adesso il motore<br />
si avvia?<br />
SI<br />
Inconveniente risolto<br />
SI<br />
Rivolgersi ai centri<br />
assistenza autorizzati<br />
<strong>MV</strong> <strong>Agusta</strong><br />
NO<br />
- 53 -
GUASTI 2<br />
IL MOTORE SI SPEGNE DURANTE LA MARCIA<br />
IT<br />
2<br />
Il cruscotto<br />
è acceso ?<br />
NO<br />
Rivolgersi ai centri<br />
assistenza autorizzati<br />
<strong>MV</strong> <strong>Agusta</strong><br />
SI<br />
Il serbatoio<br />
carburante è<br />
vuoto?<br />
NO<br />
Effettuare il rifornimento<br />
carburante<br />
Adesso il motore<br />
rimane acceso?<br />
SI<br />
Inconveniente risolto<br />
NO<br />
NO<br />
I fusibili <strong>F4</strong> e F6<br />
sono integri?<br />
NO<br />
Sostituire i fusibili <strong>F4</strong> e F6<br />
(§1.14.1.)<br />
Adesso il motore<br />
rimane acceso?<br />
SI<br />
Inconveniente risolto<br />
SI<br />
NO<br />
Rivolgersi ai centri<br />
assistenza autorizzati<br />
<strong>MV</strong> <strong>Agusta</strong><br />
- 54 -
GUASTI 2<br />
IL MOTORE SI SURRISCALDA<br />
Il livello del liquido<br />
di raffreddamento<br />
è corretto?<br />
(§1.7.)<br />
NO<br />
Rivolgersi ai centri<br />
assistenza autorizzati<br />
<strong>MV</strong> <strong>Agusta</strong><br />
2<br />
IT<br />
SI<br />
Il fusibile F5<br />
è integro?<br />
NO<br />
Sostituire il fusibile F5<br />
(§1.14.1.)<br />
Adesso il motore<br />
è alla temperatura<br />
di esercizio?<br />
SI<br />
Inconveniente risolto<br />
SI<br />
NO<br />
Rivolgersi ai centri<br />
assistenza autorizzati<br />
<strong>MV</strong> <strong>Agusta</strong><br />
- 55 -
GUASTI 2<br />
LA PRESSIONE DELL’OLIO È INSUFFICIENTE (Accensione spia pressione olio con motore in moto)<br />
IT<br />
2<br />
Il livello dell’olio<br />
motore è corretto?<br />
(§1.6.)<br />
NO<br />
Fare ripristinare il livello<br />
dell’olio motore presso<br />
un centro assistenza<br />
autorizzato <strong>MV</strong> <strong>Agusta</strong><br />
Adesso la pressione<br />
dell’olio è al<br />
valore ottimale?<br />
SI<br />
Inconveniente risolto<br />
SI<br />
NO<br />
Rivolgersi ai centri<br />
assistenza autorizzati<br />
<strong>MV</strong> <strong>Agusta</strong><br />
- 56 -
GUASTI 2<br />
2.2. Inconvenienti all’impianto elettrico: LE LUCI NON FUNZIONANO<br />
I fusibili delle luci<br />
sono integri?<br />
NO<br />
Sostituire il/i fusibile/i<br />
(§1.14.1.)<br />
Adesso le luci<br />
funzionano?<br />
SI<br />
Inconveniente risolto<br />
2<br />
IT<br />
SI<br />
NO<br />
Le lampadine<br />
sono efficienti?<br />
NO<br />
Sostituire la/e<br />
lampadina/e (§1.14.)<br />
Adesso le luci<br />
funzionano?<br />
SI<br />
Inconveniente risolto<br />
SI<br />
NO<br />
Rivolgersi ai centri<br />
assistenza autorizzati<br />
<strong>MV</strong> <strong>Agusta</strong><br />
- 57 -
GUASTI 2<br />
L’AVVISATORE ACUSTICO NON FUNZIONA<br />
IT<br />
2<br />
Il fusibile F1<br />
è integro?<br />
NO<br />
Sostituire il fusibile F1<br />
(§1.14.1.)<br />
Adesso l’avvisatore<br />
acustico<br />
funziona?<br />
SI<br />
Inconveniente risolto<br />
SI<br />
NO<br />
Rivolgersi ai centri<br />
assistenza autorizzati<br />
<strong>MV</strong> <strong>Agusta</strong><br />
IL CONTACHILOMETRI NON FUNZIONA<br />
Il fusibile F1<br />
è integro?<br />
NO<br />
Sostituire il fusibile F1<br />
(§1.14.1.)<br />
Adesso il contachilometri<br />
funziona?<br />
SI<br />
Inconveniente risolto<br />
SI<br />
NO<br />
Rivolgersi ai centri<br />
assistenza autorizzati<br />
<strong>MV</strong> <strong>Agusta</strong><br />
- 58 -
GUASTI 2<br />
LE SPIE DEL CRUSCOTTO NON FUNZIONANO<br />
Il fusibile F1<br />
è integro?<br />
NO<br />
Sostituire il fusibile F1<br />
(§1.14.1.)<br />
Adesso le spie<br />
del cruscotto<br />
funzionano ?<br />
SI<br />
Inconveniente risolto<br />
2<br />
IT<br />
SI<br />
NO<br />
Rivolgersi ai centri<br />
assistenza autorizzati<br />
<strong>MV</strong> <strong>Agusta</strong><br />
L’ALTERNATORE NON CARICA LA BATTERIA (Accensione spia carica batteria con motore in moto)<br />
Il fusibile di<br />
ricarica batteria<br />
è integro?<br />
NO<br />
Sostituire il fusibile di<br />
ricarica batteria<br />
(§1.14.1.)<br />
Adesso<br />
l’alternatore carica<br />
la batteria ?<br />
SI<br />
Inconveniente risolto<br />
SI<br />
NO<br />
Rivolgersi ai centri<br />
assistenza autorizzati<br />
<strong>MV</strong> <strong>Agusta</strong><br />
- 59 -
INFORMAZIONI TECNICHE 3<br />
3.1. Descrizione generale della motocicletta<br />
(N) Cruscotto<br />
(B) Accensione-Alimentazione<br />
IT<br />
3<br />
(G) Sospensione anteriore<br />
(I) Batteria<br />
(O) Impianto di scarico<br />
(E) Raffreddamento<br />
(L) Freno anteriore<br />
(F) Telaio<br />
(A) Motore<br />
(C) Cambio<br />
(H) Sospensione posteriore<br />
(M) Freno posteriore<br />
(D) Trasmissione finale<br />
- 60 -
INFORMAZIONI TECNICHE 3<br />
A - Motore: quattro tempi, quattro cilindri in linea.<br />
Distribuzione a doppio albero a camme in testa<br />
con valvole radiali. Lubrificazione a carter<br />
umido.<br />
B - Accensione - Alimentazione: sistema integrato<br />
d’accensione - iniezione. Accensione<br />
elettronica a scarica induttiva. Iniezione elettronica<br />
“Multipoint”.<br />
C - Cambio: del tipo estraibile, a sei rapporti con<br />
ingranaggi sempre in presa.<br />
D - Trasmissione finale: composta da pignone,<br />
corona e catena.<br />
E - Raffreddamento: a liquido e olio con radiatori<br />
separati.<br />
F - Telaio: a traliccio, in tubolare d’acciaio, con<br />
piastre laterali in alluminio.<br />
G - Sospensione anteriore: forcella oleodinamica<br />
a steli rovesciati, dotata di sistema esterno<br />
di regolazione.<br />
H - Sospensione posteriore: ad azione progressiva<br />
con monobraccio oscillante e monoammortizzatore<br />
dotato di sistema esterno di regolazione.<br />
I<br />
- Batteria: sigillata ed esente da manutenzione.<br />
L - Freno anteriore: doppio disco semi-flottante<br />
con pinze a quattro pistoncini.<br />
M - Freno posteriore: disco singolo con pinza a<br />
quattro pistoncini.<br />
N - Cruscotto: dotato di spie segnalatrici e strumentazione<br />
digitale.<br />
O - Impianto di scarico: dotato di convertitore<br />
catalitico per la riduzione delle emissioni<br />
inquinanti.<br />
3<br />
IT<br />
- 61 -
INFORMAZIONI TECNICHE 3<br />
3.1.1 Circuito freno anteriore<br />
2<br />
1<br />
IT<br />
3<br />
3<br />
5<br />
4<br />
4<br />
5<br />
1 Gruppo pompa freno<br />
2 Leva freno<br />
3 Tubazione freno<br />
4 Pinza freno<br />
5 Dischi freno<br />
- 62 -
INFORMAZIONI TECNICHE 3<br />
3.1.2. Circuito freno posteriore<br />
4<br />
3<br />
IT<br />
6<br />
3<br />
5<br />
1 2<br />
1 Leva freno<br />
2 Pompa freno<br />
3 Tubazione freno<br />
4 Serbatoio liquido freno<br />
5 Pinza freno<br />
6 Disco freno<br />
- 63 -
INFORMAZIONI TECNICHE 3<br />
3.1.3. Circuito frizione<br />
IT<br />
3<br />
1<br />
2<br />
3 4<br />
1 Leva frizione<br />
2 Gruppo pompa frizione<br />
3 Tubazione frizione<br />
4 Gruppo cilindretto frizione<br />
- 64 -
INFORMAZIONI TECNICHE 3<br />
3.1.4. Lubrificazione motore<br />
3<br />
IT<br />
3<br />
1 2<br />
1 Coppa olio<br />
2 Filtro olio<br />
3 Tubazione mandata olio alla testa<br />
- 65 -
INFORMAZIONI TECNICHE 3<br />
3.1.5. Circuito di raffreddamento<br />
1<br />
2<br />
IT<br />
3<br />
3 4<br />
1 Vaso espansione<br />
2 Radiatore superiore<br />
3 Radiatore inferiore<br />
4 Pompa liquido<br />
- 66 -
INFORMAZIONI TECNICHE 3<br />
3.1.6. Circuito di alimentazione<br />
1<br />
3<br />
IT<br />
2<br />
3<br />
1 Corpi farfallati<br />
2 Pompa carburante<br />
3 Tubazione carburante<br />
- 67 -
INFORMAZIONI TECNICHE 3<br />
2100<br />
750<br />
IT<br />
3<br />
830<br />
115<br />
3.2. Dati tecnici<br />
1430<br />
Descrizione <strong>F4</strong> <strong>1000</strong><br />
CARATTERISTICHE<br />
Interasse (mm) (*) 1430<br />
Lunghezza totale (mm) (*) 2100<br />
Larghezza max. (mm) 750<br />
Altezza sella (mm) (*) 830<br />
Altezza min. da terra (mm) (*) 115<br />
Avancorsa (mm) (*) 100,4<br />
* : I dati dichiarati non sono vincolanti. Essi sono suscettibili di variazioni in funzione delle condizioni di assetto del veicolo.<br />
- 68 -
INFORMAZIONI TECNICHE 3<br />
Dati tecnici<br />
Descrizione <strong>F4</strong> <strong>1000</strong><br />
Peso a secco (Kg) 192<br />
Capacità serbatoio carburante (lt) (*) 17<br />
Riserva carburante (lt) (*) 4<br />
Q.tà olio nel basamento (lt) 3,5<br />
MOTORE<br />
Tipo<br />
Quattro cilindri, 4 tempi, 16 valvole<br />
Alesaggio (mm) 76<br />
Corsa (mm) 55<br />
Cilindrata totale (cm 3 ) 998<br />
Rapporto di compressione 13,1 : 1<br />
Avviamento<br />
Elettrico<br />
Raffreddamento<br />
A liquido e olio con radiatori separati<br />
Carter motore e coperchi<br />
Pressofusi<br />
Testa e cilindri<br />
Fusi in conchiglia<br />
Valvole<br />
Bimetalliche / monometalliche<br />
DISTRIBUZIONE<br />
Tipo<br />
Doppio albero a camme in testa; valvole radiali<br />
3<br />
IT<br />
* : I dati dichiarati non sono vincolanti. Essi sono suscettibili di variazioni in funzione della temperatura esterna, della temperatura<br />
del motore e del punto di evaporazione della benzina utilizzata.<br />
- 69 -
INFORMAZIONI TECNICHE 3<br />
Dati tecnici<br />
IT<br />
3<br />
Descrizione <strong>F4</strong> <strong>1000</strong><br />
LUBRIFICAZIONE<br />
Tipo<br />
A carter umido<br />
ACCENSIONE - ALIMENTAZIONE<br />
Tipo<br />
Sistema integrato di accensione-iniezione Magneti Marelli IAW 7BM<br />
con corpo farfallato Mikuni; accensione elettronica a scarica induttiva;<br />
iniezione elettronica “Multipoint” sequenziale fasata; cornetti aspirazione<br />
ad altezza variabile con sistema Torque Shift System (TSS)<br />
Candele<br />
NGK CR9 EB<br />
Distanza elettrodi (mm) 0,7 ÷ 0,8<br />
FRIZIONE<br />
Tipo<br />
Multidisco in bagno d’olio con dispositivo antisaltellamento meccanico<br />
TRASMISSIONE PRIMARIA<br />
Numero denti ingranaggio albero motore Z = 50<br />
Numero denti ingranaggio frizione Z = 79<br />
Rapporto di trasmissione 1,58<br />
TRASMISSIONE SECONDARIA<br />
Numero denti pignone Z = 15<br />
Numero denti corona Z = 41<br />
Rapporto di trasmissione 2,73<br />
CAMBIO VELOCITÀ<br />
Tipo<br />
Estraibile a sei velocità con ingranaggi sempre in presa<br />
- 70 -
INFORMAZIONI TECNICHE 3<br />
Dati tecnici<br />
Descrizione <strong>F4</strong> <strong>1000</strong><br />
Rapporti cambio (rapporti totali)<br />
Prima 2.92 (12.60)<br />
Seconda 2.12 (9.14)<br />
Terza 1.78 (7.68)<br />
Quarta 1.50 (6.47)<br />
Quinta 1.32 (5.69)<br />
Sesta 1.21 (5.22)<br />
TELAIO<br />
Tipo<br />
Tubolare a traliccio in acciaio CrMo (saldato in TIG)<br />
Piastre fulcro forcellone<br />
Lega di alluminio<br />
SOSPENSIONE ANTERIORE<br />
Tipo<br />
Forcella oleodinamica a steli rovesciati con sistema di regolazione esterno<br />
e separato del freno in estensione, in compressione e del precarico molla<br />
Ø steli (mm) 50<br />
Corsa sull’asse gambe 120<br />
SOSPENSIONE POSTERIORE<br />
Tipo<br />
Progressiva, monoammortizzatore regolabile in estensione,<br />
in compressione (Alta velocità/Bassa velocità) e nel precarico molla<br />
Forcellone oscillante monobraccio<br />
Lega di alluminio<br />
Corsa ruota (mm) 120<br />
3<br />
IT<br />
- 71 -
INFORMAZIONI TECNICHE 3<br />
Dati tecnici<br />
IT<br />
3<br />
Descrizione <strong>F4</strong> <strong>1000</strong><br />
FRENO ANTERIORE<br />
Tipo<br />
A doppio disco flottante con fascia frenante in acciaio<br />
Ø disco (mm) 320<br />
Flangia disco<br />
Alluminio<br />
Pinze (diametro pistoncini mm) Radiale monoblocco a 4 pistoncini (Ø 34)<br />
FRENO POSTERIORE<br />
Tipo<br />
A disco in acciaio<br />
Ø disco (mm) 210<br />
Pinza (diametro pistoncini mm) A 4 pistoncini (Ø 25,4)<br />
CERCHIO ANTERIORE<br />
Materiale<br />
Forgiato in lega di alluminio<br />
Dimensione 3,50” x 17”<br />
CERCHIO POSTERIORE<br />
Materiale<br />
Forgiato in lega di alluminio<br />
Dimensione 6,00” x 17”<br />
PNEUMATICI<br />
Anteriore 120/70-ZR 17 (58 W)<br />
Posteriore 190/55-ZR 17 (75 W)<br />
- 72 -
INFORMAZIONI TECNICHE 3<br />
Dati tecnici<br />
Descrizione <strong>F4</strong> <strong>1000</strong><br />
Marca e tipo<br />
PIRELLI - Diablo Supercorsa SP<br />
DUNLOP - Sportmax Qualifier RR<br />
Pressione di gonfiaggio (*) Per velocità inferiori a 300 km/h Per velocità superiori a 300 km/h<br />
Anteriore PIRELLI: 2.3 bar (33 psi) 2.5 bar (36 psi)<br />
DUNLOP: 2.3 bar (33 psi) 2.5 bar (36 psi)<br />
Posteriore PIRELLI: 2.3 bar (33 psi) 2.9 bar (42 psi)<br />
DUNLOP: 2.3 bar (33 psi) 2.9 bar (42 psi)<br />
IMPIANTO ELETTRICO<br />
Tensione impianto<br />
12V<br />
Luce faro anteriore<br />
OSRAM Xenarc D1S 35W<br />
Luce di posizione posteriore<br />
12V 5W<br />
Batteria<br />
12V - 8,6Ah<br />
Alternatore<br />
350 W a 5000 giri/min.<br />
CARROZZERIA<br />
Carenatura<br />
Materiale termoplastico<br />
Cupolino<br />
Materiale termoplastico<br />
Codone<br />
Materiale termoplastico<br />
Serbatoio<br />
Materiale termoplastico<br />
* : Nell’eventualità di utilizzo di pneumatici di marche differenti da quelle consigliate, riferirsi al valore della pressione di gonfiaggio<br />
marcato dal costruttore sul fianco del pneumatico.<br />
3<br />
IT<br />
- 73 -
INFORMAZIONI TECNICHE 3<br />
Dati tecnici<br />
IT<br />
3<br />
Descrizione <strong>F4</strong> <strong>1000</strong><br />
Condotti aspirazione<br />
Materiale termoplastico<br />
Air-box<br />
Materiale termoplastico<br />
Fianchetti air-box<br />
Materiale termoplastico<br />
Parafango anteriore<br />
Materiale termoplastico<br />
Protezioni catena<br />
Materiale termoplastico<br />
Protezione tubo scarico<br />
Alluminio<br />
Paratia paracalore<br />
Materiale termoplastico<br />
Portatarga<br />
Materiale termoplastico<br />
- 74 -
INFORMAZIONI TECNICHE 3<br />
3<br />
IT<br />
- 75 -
INFORMAZIONI TECNICHE 3<br />
5<br />
6<br />
3 4<br />
2<br />
11<br />
IT<br />
3<br />
7<br />
1<br />
12<br />
9<br />
10<br />
8<br />
- 76 -
INFORMAZIONI TECNICHE 3<br />
3.3. Riferimento colori componenti carenatura<br />
Le parti verniciate della carenatura presentano i seguenti colori di riferimento, in relazione al rispettivo<br />
codice colore della motocicletta:<br />
1. - Cupolino;<br />
2. - Specchietto retrovisore sinistro;<br />
3. - Specchietto retrovisore destro;<br />
4. - Airbox;<br />
5. - Serbatoio benzina;<br />
6. - Fianchetto posteriore sinistro;<br />
7. - Fianchetto posteriore destro:<br />
Codice colore A:<br />
Rosso Pastello<br />
(Cod. Palinal 926R750)<br />
Codice colore B:<br />
Nero Lucido<br />
(Cod. Palinal 929R486H)<br />
Codice colore C:<br />
Grigio Titanium<br />
(Cod. Palinal L821)<br />
8. - Fiancata carena sinistra;<br />
9. - Fiancata carena destra;<br />
10. - Sottocarena;<br />
11. - Fianchetto serbatoio sinistro;<br />
12. - Fianchetto serbatoio destro:<br />
Codice colore A:<br />
Argento Metallizzato<br />
(Cod. Palinal 928XV025)<br />
Codice colore B:<br />
Nero Opaco<br />
(Cod. Palinal 929XR486 + Palinal Matt 3)<br />
Codice colore C:<br />
Grigio Admiral<br />
(Cod. Palinal L820)<br />
3<br />
IT<br />
- 77 -
INFORMAZIONI TECNICHE 3<br />
1<br />
2<br />
IT<br />
3<br />
3<br />
4<br />
- 78 -
INFORMAZIONI TECNICHE 3<br />
3.4. Riferimento colori componenti telaio<br />
Le parti verniciate del telaio della motocicletta presentano i seguenti colori di riferimento:<br />
1. - Telaio:<br />
Codici colore A-B:<br />
Grigio Antracite Metallizzato<br />
(Cod. Palinal 926XH893)<br />
Codice colore C:<br />
Rosso Ciclistica<br />
(Cod. Palinal 211XH987)<br />
3. - Motore:<br />
Nero Opaco<br />
(Cod. Pulverit 3500/0085)<br />
3<br />
IT<br />
2. - Supporto fanale:<br />
Grigio Antracite Metallizzato<br />
(Cod. Palinal 926XH893)<br />
4. - Coperchio testa motore:<br />
Rosso Ciclistica<br />
(Cod. Palinal 211XH987)<br />
- 79 -
NOTE<br />
IT<br />
3<br />
Nota informativa<br />
<strong>MV</strong> <strong>Agusta</strong> S.p.A. è impegnata in una politica di continuo miglioramento dei propri prodotti; per questa ragione<br />
potrebbe essere possibile riscontrare leggere differenze tra quanto riportato nel presente documento ed<br />
il veicolo da Voi acquistato. I modelli <strong>MV</strong> <strong>Agusta</strong> vengono esportati in numerosi Paesi, nei quali valgono<br />
norme differenti in relazione al Codice della Strada ed alle procedure di omologazione. Contando sulla<br />
Vostra comprensione, <strong>MV</strong> <strong>Agusta</strong> S.p.A. ritiene quindi necessario riservarsi il diritto di apportare modifiche<br />
ai propri prodotti ed alla propria documentazione tecnica in qualsiasi momento e senza fornirne preavviso.<br />
Vi consigliamo di visitare periodicamente il sito Internet www.mvagusta.it per ottenere informazioni ed<br />
aggiornamenti sui prodotti <strong>MV</strong> <strong>Agusta</strong> e sulla relativa documentazione.<br />
Rispettiamo e difendiamo l’ambiente<br />
Tutto ciò che facciamo ha ripercussioni sull’intero pianeta e sulle sue risorse.<br />
<strong>MV</strong> <strong>Agusta</strong>, a tutela degli interessi della comunità, sensibilizza i Clienti e gli operatori dell’assistenza tecnica<br />
ad adottare modalità d’uso del mezzo e di smaltimento di sue parti, nel pieno rispetto delle normative<br />
vigenti in termini di inquinamento ambientale, smaltimento e riciclaggio dei rifiuti.<br />
© 2009<br />
È vietata la riproduzione anche parziale di questo documento senza il consenso scritto della <strong>MV</strong> <strong>Agusta</strong> S.p.A.<br />
Part. n° 8000B4299<br />
Edizione n° 1 - Dicembre 2009<br />
- 80 -
Maintenance manual<br />
English Version
CONTENTS<br />
chap. Subjects covered page<br />
1 MAINTENANCE 3<br />
1.1. Symbols 3<br />
1.2. Tables of scheduled maintenance and checks 4<br />
1.3. Tools and accessories supplied 14<br />
1.4. Table of lubricants and fluids 15<br />
1.5. Removing/fitting the side fairing 16<br />
1.6. Checking the engine oil level 18<br />
1.6.1. Topping up the engine oil level 19<br />
1.7. Checking the coolant level 21<br />
1.7.1. Topping up the coolant level 22<br />
1.8. Checking the wear of the brake pads 24<br />
1.9. Checking the brake fluid level 25<br />
1.10. Checking the clutch fluid level 27<br />
1.11. Checking and replacing the tyres 28<br />
1.12. Checking and lubricating the drive chain 34<br />
1.13. Checking the idle speed 38<br />
1.14. Replacing parts - General information 39<br />
1.14.1. Replacing the fuses 39<br />
1.14.2. Replacing the license plate light bulb 44<br />
chap. Subjects covered page<br />
1.15. Battery 47<br />
1.16. Cleaning the motorcycle 49<br />
1.17. Prolonged inactivity 51<br />
2 TROUBLESHOOTING FLOW CHART 52<br />
2.1. Engine problems 52<br />
2.2. Electrical equipment problems 57<br />
3 TECHNICAL INFORMATION 60<br />
3.1. Motorcycle overview 60<br />
3.1.1. Front brake circuit 62<br />
3.1.2. Rear brake circuit 63<br />
3.1.3. Clutch circuit 64<br />
3.1.4. Engine lubrication 65<br />
3.1.5. Coolant circuit 66<br />
3.1.6. Fuel system 67<br />
3.2. Specifications 68<br />
3.3. Bodywork parts reference colours 76<br />
3.5. Frame parts reference colours 78<br />
- 2 -
MAINTENANCE 1<br />
1.1. Symbols<br />
Sections of text that are particularly important in terms of personal safety or possible damage to the<br />
motorcycle are marked with the following symbols:<br />
1<br />
GB<br />
Danger - Failure to observe these prescriptions, even in part, may pose a serious hazard<br />
to the driver’s and other people’s safety.<br />
Caution - Failure to observe these prescriptions, even in part, may result in damage to the<br />
motorcycle.<br />
The following symbols give an indication of who is supposed to perform the different adjustments and/or<br />
maintenance operations:<br />
Information on operations that can be carried out by the user.<br />
Information on operations that must be carried out only by authorized personnel.<br />
The following symbols are used to provide further information:<br />
The “ ” symbol points out the requirement to use a tool or a special equipment in<br />
order to correctly perform the described operation.<br />
§ The “ § ” symbol refers the reader to the chapter identified by the number that follows.<br />
- 3 -
MAINTENANCE 1<br />
GB<br />
1<br />
1.2. Tables of scheduled maintenance and checks<br />
The main periodic checks and maintenance operations are<br />
shown in the following tables. These operations are necessary<br />
to keep the motorcycle safe and in perfect running order.<br />
The intervals indicated in the periodic maintenance and lubrication<br />
tables must be intended as a general guide under normal<br />
riding conditions. It could be necessary to reduce these<br />
intervals according to the climate, the ground conditions, the<br />
geographic position and the conditions of use.<br />
Some of the operations can be carried out by the user, providing<br />
he or she possesses the requisite skills. If unskilled, have<br />
the operations performed by an authorized service centre.<br />
As a rule maintenance operations must be performed while<br />
the motorcycle is on the rear stand after switching off the<br />
engine and setting the start switch to OFF. On the contrary,<br />
while checking the fluid levels it is advisable to keep the motorcycle<br />
in an upright position without using the rear stand.<br />
After the first 36,000 km (22,400 mi) the operations must be<br />
performed at the same intervals shown in the tables.<br />
- 4 -
MAINTENANCE 1<br />
WARNING<br />
• Impropriety or lack of recommended maintenance operations can lead to an increase of<br />
the risk of accidents and damage to the motorcycle.<br />
• Always use genuine <strong>MV</strong> <strong>Agusta</strong> spare parts. Using non-genuine spare parts can accelerate<br />
the wear of your motorcycle and shorten its life.<br />
• Failure to perform the recommended operations, as well as using non-genuine spare<br />
parts, could cause the warranty not to be operating.<br />
• To replace or top up the lubricants and fluids of your motorcycle, use only the products<br />
given at paragraph 1.4.<br />
1<br />
GB<br />
WARNING<br />
If you use the motorcycle on race track, we recommend to have the bike checked before<br />
and after using it by skilled personnel belonging to the <strong>MV</strong> <strong>Agusta</strong> Service Centers network.<br />
Using the motorcycle on road track is allowed only occasionally and, however, not for competitive<br />
purpose, even during amateur events.<br />
Using the motorcycle on road track could cause a considerable increase of the wear of its<br />
components, which would bring to a reduction of their life duration with reference to a normal<br />
use on road or highway route.<br />
- 5 -
MAINTENANCE 1<br />
GB<br />
1<br />
Tables of scheduled maintenance<br />
km (mi) covered<br />
0 <strong>1000</strong> 6000 12000 18000 24000 30000 36000<br />
(600) (3800) (7500) (11200) (14900) (18600) (22400)<br />
Service coupon<br />
Predelivery<br />
A B C D E F G<br />
DESCRIPTION<br />
Engine oil<br />
Engine oil filter<br />
OPERATION<br />
Check level<br />
Renew<br />
Replace<br />
( Use only <strong>MV</strong> <strong>Agusta</strong><br />
genuine spare parts )<br />
Check / Restore level<br />
Every time vehicle is used<br />
● ● ● ● ● ● ●<br />
At least once a year<br />
● ● ● ● ● ● ●<br />
Every time engine oil is changed<br />
Every time vehicle is used<br />
Coolant Check / Restore level ● ● ● ● ● ● ● ●<br />
Renew<br />
At least every two years<br />
Cooling system Check for leakage ● ● ● ● ● ● ● ●<br />
Electric fans Check operation ● ● ● ● ● ● ● ●<br />
Valves Check / Adjust ● ● ●<br />
Timing chain<br />
Check ● ●<br />
Replace<br />
●<br />
- 6 -
MAINTENANCE 1<br />
Tables of scheduled maintenance<br />
km (mi) covered<br />
0 <strong>1000</strong> 6000 12000 18000 24000 30000 36000<br />
(600) (3800) (7500) (11200) (14900) (18600) (22400)<br />
Service coupon<br />
Predelivery<br />
A B C D E F G<br />
1<br />
GB<br />
DESCRIPTION<br />
Timing movable shoe<br />
OPERATION<br />
Check / Replace ● ●<br />
Replace<br />
Every time timing chain is replaced<br />
●<br />
Timing chain stretcher Check / Replace ● ● ●<br />
Spark plugs<br />
Check / Replace ● ● ●<br />
Replace ● ● ●<br />
Fuel filter Check / Replace ● ● ●<br />
Throttle body Check and Adjust ● ● ● ● ● ● ●<br />
Air filter Check / Replace ● ● ● ● ● ●<br />
Check level<br />
Every time vehicle is used<br />
Brakes / Clutch fluid<br />
Check level ● ● ● ● ● ● ●<br />
●<br />
Renew<br />
At least every two years<br />
- 7 -
MAINTENANCE 1<br />
GB<br />
1<br />
Tables of scheduled maintenance<br />
km (mi) covered<br />
0 <strong>1000</strong> 6000 12000 18000 24000 30000 36000<br />
(600) (3800) (7500) (11200) (14900) (18600) (22400)<br />
Service coupon<br />
Predelivery<br />
A B C D E F G<br />
DESCRIPTION<br />
OPERATION<br />
Check operation<br />
Every time vehicle is used<br />
Brakes / Clutch Check operation ● ● ● ● ● ● ● ●<br />
Check lines for leakage ● ● ● ● ● ● ● ●<br />
Brake pads<br />
( front and rear )<br />
Fuel lines and connections<br />
Check wear Every <strong>1000</strong> Km ( 600 mi )<br />
Check / Replace ● ● ● ● ● ● ●<br />
Check for leakage ● ● ● ● ● ● ●<br />
Replace<br />
At least every 3 years<br />
Check operation<br />
Every time vehicle is used<br />
Throttle control Check operation ● ● ● ● ● ● ● ●<br />
Check / Adjust play ● ● ● ● ● ● ● ●<br />
Choke control Check operation ● ● ● ● ● ● ● ●<br />
Flexible controls<br />
and transmissions<br />
Check / Adjust ● ● ● ● ● ● ● ●<br />
- 8 -
MAINTENANCE 1<br />
Tables of scheduled maintenance<br />
km (mi) covered<br />
0 <strong>1000</strong> 6000 12000 18000 24000 30000 36000<br />
(600) (3800) (7500) (11200) (14900) (18600) (22400)<br />
Service coupon<br />
Predelivery<br />
A B C D E F G<br />
1<br />
GB<br />
DESCRIPTION<br />
OPERATION<br />
Check Every <strong>1000</strong> Km ( 600 mi )<br />
Lubricate<br />
Every <strong>1000</strong> Km ( 600 mi ) and after riding under the rain<br />
Drive chain Check / Adjust ● ● ● ● ● ● ● ●<br />
Lubricate ● ● ● ●<br />
Replace ● ● ●<br />
Check ● ● ● ●<br />
Front sprocket / Tab washer<br />
Replace<br />
● ● ●<br />
Every time drive chain is replaced<br />
Check ● ● ● ●<br />
Rear sprocket<br />
Replace<br />
● ● ●<br />
Every time drive chain is replaced<br />
Rear sprocket spring drive Check / Replace ● ● ●<br />
Steering head tube ring Check / Adjust ● ● ● ●<br />
- 9 -
MAINTENANCE 1<br />
GB<br />
1<br />
Tables of scheduled maintenance<br />
km (mi) covered<br />
0 <strong>1000</strong> 6000 12000 18000 24000 30000 36000<br />
(600) (3800) (7500) (11200) (14900) (18600) (22400)<br />
Service coupon<br />
Predelivery<br />
A B C D E F G<br />
DESCRIPTION<br />
Steering bearings<br />
OPERATION<br />
Check / Adjust ● ● ● ●<br />
Lubricate<br />
●<br />
Check pressure<br />
Every time vehicle is used; at least every 10 days<br />
Tyres<br />
Check wear Every time vehicle is used; at least every 500 Km ( 300 mi )<br />
Check pressure ● ● ● ● ● ● ● ●<br />
Check wear ● ● ● ● ● ● ●<br />
Wheel rims<br />
Front wheel bearings<br />
Inspect visually<br />
Check<br />
Replace<br />
● ● ● ● ● ● ●<br />
Every time tyre is replaced<br />
● ● ● ● ●<br />
Every time tyre is replaced<br />
●<br />
Sidestand<br />
Check operation<br />
Every time vehicle is used<br />
Check operation ● ● ● ● ● ● ● ●<br />
- 10 -
MAINTENANCE 1<br />
Tables of scheduled maintenance<br />
km (mi) covered<br />
0 <strong>1000</strong> 6000 12000 18000 24000 30000 36000<br />
(600) (3800) (7500) (11200) (14900) (18600) (22400)<br />
Service coupon<br />
Predelivery<br />
A B C D E F G<br />
1<br />
GB<br />
DESCRIPTION<br />
OPERATION<br />
Check operation<br />
Every time vehicle is used<br />
Side stand switch<br />
Check operation ● ● ● ● ● ● ● ●<br />
Rear wheel hub<br />
Check /<br />
Lubricate<br />
needle bearing<br />
● ●<br />
Replace /<br />
Lubricate<br />
needle bearing<br />
●<br />
Swingarm bearings Check / Lubricate ●<br />
Drive chain pads on swingarm Check / Replace ● ● ● ● ● ● ●<br />
Drive chain pads on frame plate Check / Replace ● ● ● ● ● ● ●<br />
Rear shock absorber Check / Adjust ● ● ● ●<br />
Front fork oil Renew ●<br />
Battery connections Check and clean ● ● ● ● ● ● ●<br />
Electrical equipment Check operation ● ● ● ● ● ● ● ●<br />
Instrument panel<br />
Check operation<br />
Every time vehicle is used<br />
Check operation ● ● ● ● ● ● ● ●<br />
- 11 -
MAINTENANCE 1<br />
GB<br />
1<br />
Tables of scheduled maintenance<br />
km (mi) covered<br />
0 <strong>1000</strong> 6000 12000 18000 24000 30000 36000<br />
(600) (3800) (7500) (11200) (14900) (18600) (22400)<br />
Service coupon<br />
Predelivery<br />
A B C D E F G<br />
DESCRIPTION<br />
Lights / Visual signals<br />
Horn<br />
OPERATION<br />
Check operation /<br />
Every time vehicle is used<br />
Replace bulbs<br />
Check operation /<br />
Replace bulbs<br />
● ● ● ● ● ● ● ●<br />
Check operation<br />
Every time vehicle is used<br />
Check operation ● ● ● ● ● ● ● ●<br />
Check operation<br />
Every time vehicle is used<br />
Headlight Check operation ● ● ● ● ● ● ● ●<br />
Adjust<br />
Every time geometry is changed<br />
Ignition switch<br />
Locks<br />
Check operation<br />
Every time vehicle is used<br />
Check operation ● ● ● ● ● ● ● ●<br />
Check operation<br />
Every time vehicle is used<br />
Check operation ● ● ● ● ● ● ● ●<br />
Screws and nuts Check / Tighten ● ● ● ● ● ● ● ●<br />
- 12 -
MAINTENANCE 1<br />
Tables of scheduled maintenance<br />
km (mi) covered<br />
0 <strong>1000</strong> 6000 12000 18000 24000 30000 36000<br />
(600) (3800) (7500) (11200) (14900) (18600) (22400)<br />
Service coupon<br />
Predelivery<br />
A B C D E F G<br />
1<br />
GB<br />
DESCRIPTION<br />
OPERATION<br />
Hose clamps Check / Tighten ● ● ● ● ● ● ● ●<br />
General lubrication ● ● ● ● ● ● ● ●<br />
General test ● ● ● ● ● ● ● ●<br />
- 13 -
MAINTENANCE 1<br />
GB<br />
1<br />
1.3. Tools and accessories supplied<br />
A bag in the glove compartment contains the following<br />
tools:<br />
- 1 hexagonal bar (10 mm hexagon);<br />
- 6 Allen keys (2,5 - 3 - 4 - 5 - 6 - 8 mm hexagons);<br />
- 1 spanner for rear wheel eccentric with extension;<br />
- 1 fuse puller;<br />
- 3 fuses (15A).<br />
The following accessories are also supplied:<br />
- 1 spark plug wrench (16 mm hexagon);<br />
- 1 document holder.<br />
- 14 -
MAINTENANCE 1<br />
1.4. Table of lubricants and fluids<br />
Description Recommended product Specifications<br />
Engine lubrication oil AGIP RACING 4T 10W/60 (*) SAE 10W/60 - API SJ<br />
Ethylene glycol diluted<br />
Coolant AGIP ECO - PERMANENT with 50 percent<br />
distilled water<br />
Brake and clutch fluid AGIP BRAKE FLUID DOT4 DOT4<br />
Drive chain lubrication oil MOTUL CHAIN LUBE ROAD –<br />
1<br />
GB<br />
* : <strong>MV</strong> <strong>Agusta</strong> suggests to refer directly to its authorized dealers in order to purchase the recommended<br />
product. The AGIP Racing 4T 10W/60 engine oil has been expressly produced for the <strong>F4</strong> motorcycle<br />
engine. If the above described lubricant is not available, <strong>MV</strong> <strong>Agusta</strong><br />
suggests to use a fully synthetic engine oil having characteristics<br />
equal or better than the ones prescribed in the following standards:<br />
– Consistent with: API SJ<br />
– Consistent with: ACEA A3<br />
– Consistent with: JASO MA<br />
– SAE Rating: SAE 20 W-50 o 10 W-60<br />
NOTE<br />
The above standard denominations must be written, alone or<br />
together, on the engine oil container label.<br />
Engine oil<br />
SAE 10 W-60<br />
API SJ<br />
ACEA A3<br />
JASO MA<br />
- 15 -
MAINTENANCE 1<br />
GB<br />
1<br />
1.5. Removing/fitting the side fairing<br />
Pull off the quick fastenings and then remove the side<br />
fairing.<br />
- 16 -
MAINTENANCE 1<br />
Fit the side fairing, taking care to position the front<br />
profile as shown in figure A.<br />
Fasten the panel by positioning the tab in the<br />
lower part of the fairing as shown in figure B.<br />
1<br />
GB<br />
Side fairing front<br />
profile<br />
A<br />
B<br />
- 17 -
MAINTENANCE 1<br />
GB<br />
1<br />
1.6. Checking the engine oil level<br />
Check the oil level while the engine is not running, and<br />
has been allowed to cool down for at least ten minutes<br />
after a ride.<br />
The check must be performed after placing the motorcycle<br />
in an upright position on a horizontal surface.<br />
The level must be between the MAX and MIN marks on<br />
the crankcase.<br />
If the oil level is below the MIN mark, top up as<br />
described in § 1.6.1.<br />
WARNING<br />
Do not start the engine if the oil level is below<br />
the MIN mark.<br />
Max<br />
Min<br />
- 18 -
MAINTENANCE 1<br />
1.6.1. Topping up the engine oil level<br />
Remove the oil filler plug by using the 10 mm<br />
hexagonal bar supplied, assembled on a proper<br />
key (see figure). Pour an appropriate amount of<br />
engine oil of the recommended type. Never exceed<br />
the MAX level mark. At the end of the operation,<br />
place back the oil filler plug and reassemble the<br />
right-hand side fairing.<br />
WARNING<br />
Before reassembling the oil filler plug,<br />
grease its O-Ring by using AGIP Grease<br />
30.<br />
At last, perform the tightening of the oil<br />
filler plug at the tightening torque of 35<br />
Nm, by using a dynamometric key.<br />
Oil filler plug<br />
CAUTION<br />
To avoid clutch sliding and damage to<br />
the engine, never add chemical additives<br />
to the engine oil, nor use an engine<br />
oil different from the one specified in the<br />
table at § 1.4. Make sure that no foreign<br />
body gets in the crankcase while topping<br />
up the engine oil.<br />
1<br />
GB<br />
- 19 -
MAINTENANCE 1<br />
GB<br />
1<br />
WARNING<br />
New or exhaust engine oil can be dangerous.<br />
Engine oil is highly toxic for<br />
people and domestic animals. Avoid<br />
ingestion and contact. It has been<br />
proved that prolonged contact with<br />
engine oil can cause skin cancer on<br />
guinea pigs. Even a brief contact with<br />
engine oil can cause skin irritation.<br />
• If the engine oil comes in touch with<br />
your skin, wash it away with soap and<br />
water.<br />
• Keep new or exhaust engine oil out of<br />
reach of children and domestic animals.<br />
• In the event of an engine oil ingestion,<br />
immediately call a doctor and do not<br />
cause vomiting, in order to avoid inhalation<br />
of engine oil in lungs.<br />
• While topping up the engine oil, wear<br />
a long-sleeved shirt and a pair of waterproof<br />
gloves to protect your skin.<br />
• Correctly recycle or dispose of the<br />
exhaust engine oil, in order to avoid<br />
environmental pollution.<br />
- 20 -
MAINTENANCE 1<br />
1.7. Checking the coolant level<br />
Check the coolant level while the engine is off and cold.<br />
The check must be performed after placing the motorcycle<br />
in an upright position on a horizontal surface.<br />
1<br />
GB<br />
Ensure that the coolant level is between the MIN and<br />
MAX mark, as shown in the figure.<br />
If the coolant level is below the MIN mark, top up the<br />
coolant as described at paragraph 1.7.1.<br />
WARNING<br />
Do not start the engine if the coolant level is<br />
below the MIN mark.<br />
MAX<br />
MIN<br />
- 21 -
MAINTENANCE 1<br />
GB<br />
1<br />
1.7.1. Topping up the coolant level<br />
Remove the coolant filler cap and top up<br />
with the recommended coolant (see<br />
§1.4).<br />
WARNING<br />
Perform the topping up of the<br />
coolant when the engine is off<br />
and cold. Never attempt to<br />
remove the coolant filler cap<br />
when the engine is hot, in order<br />
to avoid the risk of burns. The<br />
cooling system is under pressure!<br />
After topping up, carefully replace the<br />
previously removed parts.<br />
- 22 -
MAINTENANCE 1<br />
WARNING<br />
Under certain conditions, ethylene glycol<br />
contained in the coolant can become<br />
flammable. When it is lighted, it produces<br />
an invisible flame.<br />
Avoid spilling coolant on hot parts of<br />
the motorcycle, because the subsequent<br />
combustion of ethylene glycol<br />
could cause serious burns.<br />
WARNING<br />
Coolant is a highly toxic fluid. Avoid<br />
contact and ingestion. Keep coolant out<br />
of reach of children and domestic animals.<br />
In the event of a coolant ingestion,<br />
immediately call a doctor and do not<br />
cause vomiting, in order to avoid inhalation<br />
of coolant in lungs. If the coolant<br />
comes in touch with your skin or eyes,<br />
immediately wash it away with water.<br />
CAUTION<br />
To top up the coolant level and/or renew<br />
the coolant, use only the product specified<br />
in the table in section 1.4. Do not<br />
mix nor dilute the coolant with additives<br />
or different fluids. If the coolant specified<br />
in section 1.4. is not available, use a<br />
coolant having technical characteristics<br />
consistent with the prescribed product.<br />
CAUTION<br />
Coolant can damage painted and plastic<br />
parts. When you top up the coolant<br />
level, be careful not to spill coolant on<br />
any part of the motorcycle. If you do<br />
spill coolant on your motorcycle, immediately<br />
wipe it away using a clean cloth.<br />
1<br />
GB<br />
- 23 -
MAINTENANCE 1<br />
GB<br />
1<br />
Front brake caliper<br />
Rear brake caliper<br />
Disc<br />
Pads<br />
Wear limit 1 mm<br />
1.8. Checking the wear of the brake pads<br />
Periodically check the width of the friction material layer of the<br />
pads, making sure it never falls below the wear limit (1 mm).<br />
WARNING: If the brake pads are excessively<br />
worn out, the effectiveness of the braking<br />
system decreases, increasing the risk of accidents.<br />
If the pads have worn to near the wear<br />
limit, have both pads replaced by an authorized<br />
service centre. Ensure that the new pads<br />
are suitably broken in.<br />
- 24 -
MAINTENANCE 1<br />
Rear brake fluid reservoir<br />
Front brake fluid reservoir<br />
1<br />
GB<br />
Max<br />
Min<br />
Max<br />
Min<br />
1.9. Checking the brake fluid level<br />
WARNING<br />
Lack of maintenance of the braking system<br />
can increase the risk of accidents.<br />
Before riding, always check the braking<br />
system according to the instructions<br />
provided in the Quick <strong>Manual</strong>.<br />
The level of the brake fluid decreases as the<br />
brake pads wear down. Ensure that the fluid level<br />
is always between the MAX and MIN marks. If the<br />
level falls below the MIN mark, contact an authorized<br />
service centre and have the brake system<br />
overhauled.<br />
- 25 -
MAINTENANCE 1<br />
GB<br />
1<br />
WARNING<br />
Never use your motorcycle if the fluid<br />
level is below the MIN mark. The brakes<br />
may fail to properly operate, which<br />
could lead to an accident. If the brake<br />
fluid level is below the MIN mark, you<br />
must have the braking system overhauled<br />
by an authorized <strong>MV</strong> <strong>Agusta</strong><br />
dealer.<br />
WARNING<br />
Have the topping up of the brake fluid<br />
performed only by skilled personnel.<br />
Brake fluid is highly toxic. Avoid contact<br />
and ingestion. Keep brake fluid out of<br />
reach of children and domestic animals.<br />
In the event of a brake fluid ingestion,<br />
immediately call a doctor and do not<br />
cause vomiting, in order to avoid inhalation<br />
of brake fluid in lungs. If the brake<br />
fluid comes in touch with your skin or<br />
eyes, immediately wash with water.<br />
WARNING<br />
Use only the brake fluid specified at<br />
paragraph 1.4. of this manual. Mixing different<br />
brake fluids can cause a dangerous<br />
chemical reaction, as well as the<br />
decrease of the braking efficiency, with<br />
subsequent increase of the risk of accidents.<br />
WARNING<br />
An insufficient amount of brake fluid may<br />
allow the introduction of air in the braking<br />
system. This could compromise the effectiveness<br />
of the braking system, with subsequent<br />
increase of the risk of accidents.<br />
Presence of air in the braking system can<br />
be identified in the moment you feel a<br />
characteristic “spongy effect” while<br />
pushing the brake lever. In this case, have<br />
a braking system bleeding performed by<br />
an authorized <strong>MV</strong> <strong>Agusta</strong> dealer before<br />
riding your motorcycle again.<br />
- 26 -
MAINTENANCE 1<br />
1.10. Checking the clutch fluid level<br />
The fluid level must be between the MAX and MIN<br />
marks.<br />
If the level falls below the MIN mark, contact an authorized<br />
service centre and have the clutch control system<br />
repaired.<br />
1<br />
GB<br />
WARNING<br />
Never use your motorcycle if the fluid level is<br />
below the MIN mark. The clutch may fail to<br />
properly operate, which could lead to an accident.<br />
If the clutch fluid level is below the MIN<br />
mark, have the clutch system overhauled by<br />
an authorized <strong>MV</strong> <strong>Agusta</strong> dealer.<br />
WARNING<br />
Use only the clutch fluid specified in the paragraph<br />
1.4. of this manual.<br />
Max<br />
Min<br />
- 27 -
MAINTENANCE 1<br />
GB<br />
1<br />
1.11. Checking and replacing the tyres<br />
WARNING<br />
Before using the motorcycle,<br />
always check the pressure and<br />
wear of the tyres.<br />
Checking the inflating pressure of the<br />
tyres is an essential requirement to ensure<br />
driving safety. Insufficiently inflated<br />
tyres can reduce the handling of the<br />
motorcycle and wear themselves out<br />
very quickly. On the other hand, an<br />
excessively high inflating pressure reduces<br />
the wideness of the surface in contact<br />
with the ground, and it can compromise<br />
the grip of the vehicle.<br />
Before riding your motorcycle, it is therefore<br />
necessary to measure the tyre<br />
pressure at room temperature. The vehicle<br />
must be parked since three hours at<br />
least.<br />
WARNING<br />
An incorrect inflating pressure can lead to dangerous<br />
situations during riding. An insufficiently<br />
inflated tyre can cause the sliding of the tyre on<br />
the wheel rim or its detachment; this may lead to<br />
the deflation of the tyre with subsequent loss of<br />
control of the vehicle.<br />
- 28 -
MAINTENANCE 1<br />
In fact, by checking the pressure soon afterwards<br />
using the motorcycle, you would obtain a higher<br />
value than the actual one. This could cause an<br />
incorrect adjustment of the tyre pressure.<br />
Refer to the pressures given in § 3.2. and/or on<br />
the label applied to the steering head tube. In the<br />
event of long travels, you can increase the face<br />
value of the tyre pressure of 0.2 bar. In the event<br />
of use of the motorcycle at a speed higher than<br />
300 km/h, increase the tyre pressure with reference<br />
to the values given in § 3.2.<br />
Moreover, it is extremely important to check the<br />
wear of the tyres before riding. In fact, a worn out<br />
tyre can be punctured more easily than a new<br />
one, and it can adversely affect handling and stability<br />
of the motorcycle.<br />
Check that the depth of the tyre tread is not below<br />
the values prescribed by the Highway Code.<br />
Verify the absence of crevices at the bottom of the<br />
tread design and fissures on the tyre sidewall.<br />
Moreover, verify the absence of nails and glass<br />
splinters in the tyre. If these conditions are not<br />
verified, have the tyre replaced by an authorized<br />
<strong>MV</strong> <strong>Agusta</strong> dealer.<br />
WARNING<br />
The limits of the tyre tread depth may<br />
vary from country to country. Always<br />
refer to the values prescribed by the law<br />
provisions of the nation in which you<br />
use your motorcycle.<br />
WARNING<br />
• If the tyres of your motorcycle are<br />
excessively worn out, have it replaced<br />
by your <strong>MV</strong> <strong>Agusta</strong> dealer. Besides<br />
being illegal, riding a motorcycle with<br />
excessively worn out tyres can reduce<br />
its stability and lead to the loss of control<br />
of the vehicle.<br />
• If a tyre is punctured it must be<br />
replaced, not repaired. A repaired tyre<br />
provides a restricted performance and<br />
lower safety levels than a new one. If<br />
1<br />
GB<br />
- 29 -
MAINTENANCE 1<br />
GB<br />
1<br />
you make a provisional or emergency<br />
repair to a tyre, you must ride at very<br />
low speed until you reach the nearest<br />
<strong>MV</strong> <strong>Agusta</strong> dealer and have the tyre<br />
replaced. With a provisionally repaired<br />
tyre, never exceed 60 km/h. Tyre repairing<br />
must never be performed if the tyre<br />
is punctured on its sidewall, or if the<br />
diameter of the puncture on the tread is<br />
greater than 6 mm.<br />
• <strong>MV</strong> <strong>Agusta</strong> recommends not to use<br />
sealing fluids to repair a punctured tyre.<br />
These products can adversely affect the<br />
material of the tyre layers, as well as<br />
hide the minor damages caused by<br />
objects penetrated in the tyre.<br />
• When it is necessary to replace the<br />
tyres, use only the type specified in<br />
paragraph 3.2. Moreover, avoid using<br />
tyres of a different brand or type on the<br />
front and on the rear wheel at the same<br />
time. Using tyres different from those<br />
specified can adversely affect the handling<br />
and stability of the motorcycle,<br />
increasing the risk of accidents.<br />
• The wheel rims of your motorcycle<br />
have been designed for use with tubeless<br />
tyres only. Do not assemble an air<br />
tube tyre on rims designed for tubeless<br />
tyres. Otherwise, the tyre bead could<br />
not properly settle down on the wheel<br />
rim, leading to the deflation of the tyre<br />
and the loss of control of the vehicle.<br />
- 30 -
MAINTENANCE 1<br />
• Do not assemble an air tube on a<br />
tubeless tyre. The overheating of the<br />
tyre could cause the explosion of the air<br />
tube, leading to the deflation of the tyre<br />
and the loss of control of the vehicle.<br />
• Have the tyres replaced according to<br />
their direction of spin, which is highlighted<br />
by a small arrow on the tyre sidewall.<br />
• New tyres should be run in for a short<br />
period before demanding their full<br />
performance. In fact, during this period<br />
the tyres could have a reduced grip on<br />
some kind of roads. We suggest to ride<br />
at reduced speed and exercise extreme<br />
caution during the first 100 km after the<br />
replacement of a tyre.<br />
1<br />
GB<br />
- 31 -
MAINTENANCE 1<br />
GB<br />
1<br />
❏ Rear wheel disassembling<br />
CAUTION<br />
If you have the rear wheel tyre<br />
replaced by a tyre-dealer, make<br />
sure that the following tools are<br />
used in the rear wheel disassembling<br />
and reassembling:<br />
• 55 mm polygonal socket wrench<br />
• Torque wrench<br />
If the above mentioned operations<br />
are performed with tools other than<br />
those indicated, the rear wheel<br />
parts can be seriously damaged.<br />
Therefore, we strongly recommend<br />
not to have the tyres replaced by<br />
an improperly equipped workshop.<br />
Always have the tyres replaced by<br />
an authorized <strong>MV</strong> <strong>Agusta</strong> dealer.<br />
Polygonal nut<br />
Wheel pin with M50x1.5 mm<br />
left-hand pitch tread<br />
55 mm polygonal socket wrench<br />
Torque wrench<br />
- 32 -
MAINTENANCE 1<br />
❏ Checking the wheel rims<br />
Before riding, always verify the absence of<br />
cracks, bending or buckling on the wheel rims.<br />
WARNING<br />
If you find that the wheel rim is damaged,<br />
have it replaced by an authorized<br />
<strong>MV</strong> <strong>Agusta</strong> dealer. Never attempt to<br />
repair the wheel rim, even in case of<br />
slight damage.<br />
Every time you replace a tyre or a rim,<br />
you must have a wheel balancing performed<br />
by an authorized <strong>MV</strong> <strong>Agusta</strong><br />
dealer. Wheel unbalance can adversely<br />
affect performance and handling of the<br />
motorcycle, as well as shorten the life of<br />
the tyres.<br />
WARNING<br />
When you have a wheel balancing performed,<br />
make sure to assemble only<br />
approved counterweights on the wheel<br />
rim. <strong>MV</strong> <strong>Agusta</strong> recommends not to use<br />
balancing or balancing/sealing fluids.<br />
WARNING<br />
Do not attempt to have a tubeless tyre<br />
removed without using the proper tools<br />
and protections for the wheel rim.<br />
Otherwise, you could damage the sealing<br />
surface of the rim, leading to the<br />
deflation of the tyre and the loss of control<br />
of the vehicle.<br />
1<br />
GB<br />
- 33 -
MAINTENANCE 1<br />
GB<br />
1<br />
1.12. Checking and lubricating the drive chain<br />
To perform this operation, you must put the motorcycle<br />
on the rear stand, upright on a horizontal surface and<br />
with the gear in neutral.<br />
❏ Checking the chain adjustment<br />
WARNING: Before checking the chain adjustment,<br />
contact a <strong>MV</strong> <strong>Agusta</strong> authorized centre<br />
to verify that the value of the static setup of<br />
the rear suspension is correct. Also make<br />
sure that the chain is properly lubricated.<br />
50 mm<br />
The axis of the chain lower portion must be 50 mm from<br />
the lower chain guard. <strong>Manual</strong>ly turn the rear wheel and<br />
carry out the check at several points along the chain. The<br />
distance between the chain and the lower chain guard<br />
must remain almost constant as the wheel turns. If, on<br />
the other hand, the play on the chain varies considerably,<br />
it means that some chain links are flattened, seized or<br />
elongated. If the distance is greater than 50 mm, have<br />
the chain adjusted by your local <strong>MV</strong> <strong>Agusta</strong> dealer.<br />
- 34 -
MAINTENANCE 1<br />
WARNING<br />
Riding your motorcycle when the drive<br />
chain is in poor condition or improperly<br />
adjusted can lead to accidents. Before<br />
riding, always check the chain adjustment<br />
according to the procedures<br />
shown in this paragraph. If necessary,<br />
have the chain adjusted by your <strong>MV</strong><br />
<strong>Agusta</strong> dealer.<br />
WARNING<br />
If any chain link is flattened, seized or<br />
elongated, have the chain replaced by a<br />
<strong>MV</strong> <strong>Agusta</strong> authorized service centre.<br />
WARNING<br />
If you notice damage or excessive wear<br />
of the chain and the corresponding<br />
sprockets, have them replaced by an<br />
authorized <strong>MV</strong> <strong>Agusta</strong> dealer. Every time<br />
the chain is replaced, you must always<br />
replace the front and rear sprockets too.<br />
WARNING<br />
Using a chain with a fake link can be<br />
dangerous. An uncompletely riveted or<br />
fake link can accidentally split open and<br />
cause accidents, as well as damage to<br />
the engine. Never use a chain with a<br />
fake link.<br />
WARNING<br />
Every time it is requested to operate the<br />
rear wheel hub screws, contact an<br />
authorized <strong>MV</strong> <strong>Agusta</strong> dealer. In order to<br />
tighten the screws, apply a tightening<br />
torque equal to the value shown in the<br />
label placed on the swingarm. Applying<br />
a torque higher than the indicated value<br />
can cause the fast decay of the rear<br />
wheel hub, compromising the reliability<br />
of the vehicle and the safety of the pilot.<br />
1<br />
GB<br />
- 35 -
MAINTENANCE 1<br />
GB<br />
1<br />
❏ Lubrication<br />
To ensure proper operation, the drive chain needs<br />
to be properly lubricated.<br />
Preliminary cleaning - Before lubrication, the<br />
dirt accumulated on the chain must be dissolved<br />
using kerosene. The dirt must then be removed<br />
with a clean rag and/or an air jet.<br />
CAUTION<br />
The chain is of the O-ring type. To prevent<br />
it from damaging, never clean the<br />
chain with a steam or high pressure<br />
water jet, nor using gasoline or other<br />
solvents. The chain must be cleaned<br />
using kerosene only.<br />
WARNING<br />
Kerosene is highly toxic and flammable.<br />
Avoid contact and inhalation. Keep<br />
kerosene away from sparks and flames.<br />
Keep kerosene out of reach of children<br />
and domestic animals. Correctly dispose<br />
of exhaust kerosene, in order to<br />
avoid environmental pollution.<br />
- 36 -
MAINTENANCE 1<br />
Lubrication - Apply a slight and uniform film of<br />
lubricant over the whole of the drive chain, taking<br />
care not to smear the surrounding parts, and in<br />
particular the tyres. Direct the lubricant jet on the<br />
internal links, in order to lubricate the surface of<br />
the O-Rings and penetrate inside the chain roller.<br />
1<br />
GB<br />
CAUTION<br />
Only use the lubricant specified in the<br />
paragraph 1.4. of this manual, in order<br />
to protect the drive chain and avoid oil<br />
spurts when the vehicle is in motion.<br />
WARNING<br />
Chain lubrication must be performed<br />
according to the intervals specified in<br />
the tables of scheduled maintenance<br />
(see § 1.2.). It is also necessary to perform<br />
this operation after riding under the<br />
rain and after cleaning the motorcycle.<br />
Riding your motorcycle when the drive<br />
chain is in poor condition or improperly<br />
adjusted can lead to accidents.<br />
- 37 -
MAINTENANCE 1<br />
GB<br />
1<br />
1.13. Checking the idle speed<br />
Check the idle speed when the engine has reached the<br />
operating temperature. Ensure that the choke control<br />
has not been activated.<br />
The idle speed should range from 1,150 to 1,250 rpm.<br />
If a tune-up is necessary, contact an authorized service<br />
centre.<br />
- 38 -
MAINTENANCE 1<br />
1.14. Replacing parts - General information<br />
The replacement of the fuses and the light bulbs<br />
(excepting the front parking light bulbs) can be<br />
carried out by the owner according to the indications<br />
provided below.<br />
Battery recharge fuse<br />
Service fuses<br />
1.14.1. Replacing the fuses<br />
The battery recharge fuse is located on the<br />
solenoid starter of the motorcycle. To expose it,<br />
remove the rider’s saddle.<br />
1<br />
GB<br />
Headlight - Replacement<br />
License plate light bulb - Replacement<br />
Solenoid<br />
starter<br />
- 39 -
MAINTENANCE 1<br />
GB<br />
1<br />
CAUTION<br />
Turn the ignition key on the “OFF” position<br />
before checking or replacing the<br />
fuses, in order to avoid a short circuit<br />
with subsequent damage to other electric<br />
parts of the motorcycle.<br />
Recharge fuse (40 A)<br />
Spare fuse (40 A)<br />
To replace the fuse, you must swap the recharge<br />
fuse with the spare fuse.<br />
WARNING<br />
Never replace a fuse with a rating other<br />
than that precribed, in order to avoid<br />
damage to the electrical equipment of<br />
the motorcycle which could lead to a fire.<br />
- 40 -
MAINTENANCE 1<br />
The service fuses are located on the left side.<br />
To expose them, remove the side fairing (see<br />
§1.5.).<br />
Release the two clamps and lift the fuse box<br />
cover.<br />
1<br />
GB<br />
CAUTION<br />
Turn the ignition key on the “OFF” position<br />
before checking or replacing the<br />
fuses, in order to avoid a short circuit<br />
with subsequent damage to other electric<br />
parts of the motorcycle.<br />
- 41 -
MAINTENANCE 1<br />
GB<br />
1<br />
Replace the blown fuse and refit the cover.<br />
- 42 -
MAINTENANCE 1<br />
To identify the position and function of the<br />
fuses, refer to the information shown in the<br />
enclosed electrical diagram. The reference letters<br />
in the figure correspond to those shown in the diagram.<br />
Remember that the tool bag contains three spare<br />
fuses.<br />
WARNING<br />
Never replace a fuse with a rating other<br />
than that precribed, in order to avoid<br />
damage to the electrical equipment of<br />
the motorcycle which could lead to a fire.<br />
F1 F2 F3 <strong>F4</strong> F5 F6 F7<br />
15A<br />
15A<br />
15A<br />
15A<br />
15A<br />
15A<br />
15A<br />
1<br />
GB<br />
- 43 -
MAINTENANCE 1<br />
GB<br />
1<br />
1.14.2. Replacing the license plate light bulb<br />
Remove the fixing screws of the lower cover of the<br />
license plate holder.<br />
- 44 -
MAINTENANCE 1<br />
Remove the lower cover.<br />
1<br />
GB<br />
Extract the bulb socket sliding it from its seat.<br />
- 45 -
MAINTENANCE 1<br />
GB<br />
1<br />
Extract the bulb.<br />
Insert the new bulb.<br />
Reposition the bulb socket.<br />
Reassemble the lower cover of the license plate holder.<br />
Caution: Before reassembling pay special<br />
attention to positioning the tail light harness<br />
correctly, in order to avoid any damage (see<br />
figure).<br />
- 46 -
MAINTENANCE 1<br />
1.15. Battery<br />
The battery is of the maintenance-free type and is<br />
installed under the tail section. This battery does<br />
not require checking of the fluid level or adding of<br />
distilled water.<br />
If the battery seems to be run-down (causing electrical<br />
problems or a difficult starting), have it<br />
recharged by an authorized <strong>MV</strong> <strong>Agusta</strong> dealer as<br />
soon as possible. Remember that the battery runs<br />
down more quickly if your motorcycle is equipped<br />
with additive electrical accessories.<br />
WARNING<br />
If the battery casing is damaged, there<br />
may be a leakage of sulphuric acid, a<br />
HIGHLY TOXIC AND CORROSIVE substance.<br />
Avoid any contact with your<br />
eyes, skin and clothes. Always wear<br />
protective glasses when you have to<br />
work near the battery.<br />
In the event of a contact with sulphuric<br />
acid, give the FIRST AID as described<br />
below:<br />
• CONTACT WITH EYES: Wash away<br />
with water for about 15 minutes, and<br />
immediately call a doctor.<br />
• CONTACT WITH SKIN: Wash away<br />
with a great amount of water.<br />
• INGESTION: Drink great amounts of<br />
water or milk, and immediately call a<br />
doctor.<br />
Furthermore, leakage of sulphuric acid<br />
can result in the formation of hydrogen<br />
gas which, if ignited by a spark or a<br />
flame, would cause an explosion.<br />
Always have the battery replaced by<br />
your local <strong>MV</strong> <strong>Agusta</strong> dealer.<br />
1<br />
GB<br />
- 47 -
MAINTENANCE 1<br />
GB<br />
1<br />
Prolonged inactivity<br />
If the motorcycle is to remain unused for a long<br />
time (a month or longer), it is advisable to disconnect<br />
the battery cables or have the battery<br />
removed by skilled personnel. In case of prolonged<br />
inactivity, to avoid shortening the life of the<br />
battery, it is essential to have it recharged by your<br />
<strong>MV</strong> <strong>Agusta</strong> dealer every 4-5 months.<br />
WARNING: The inversion of the battery<br />
wires can damage the battery and the<br />
recharging system. The red wire must<br />
be connected to the positive terminal<br />
(+), while the black wires must be connected<br />
to the negative terminal (-).<br />
When removing the battery, disconnect<br />
the negative terminal FIRST and then<br />
the positive terminal. When reinstalling<br />
the battery, use the reverse procedure.<br />
- 48 -
MAINTENANCE 1<br />
1.16. Cleaning the motorcycle<br />
Periodic careful cleaning is a key factor<br />
in preserving the value of the<br />
motorcycle, protecting its surface finish<br />
and checking for damages, wear<br />
and leakage of corrosive fluids.<br />
1<br />
GB<br />
CAUTION: Before washing<br />
the vehicle, stop up the<br />
exhaust pipes and protect<br />
the electrical parts.<br />
WARNING: Do not wash your<br />
motorcycle soon afterwards riding.<br />
Attend a few minutes to<br />
allow the engine and the exhaust<br />
pipes to thoroughly cool.<br />
INFORMATION: Spilling detergent<br />
can cause environmental<br />
pollution. Therefore, you<br />
should clean your motorcycle<br />
in an area equipped for collection<br />
and disposal of washing<br />
fluids.<br />
CAUTION: Never use washing systems involving<br />
steam or high pressure water jets. These systems<br />
could cause water infiltration and damage the internal<br />
parts of your motorcycle.<br />
- 49 -
MAINTENANCE 1<br />
GB<br />
1<br />
Wash the motorcycle with water, a mild detergent<br />
and a sponge. Wipe the vehicle with a soft cloth.<br />
Use an air jet to dry difficult-to-reach areas.<br />
CAUTION<br />
• Avoid using clothes or sponges that<br />
have been in contact with strong or<br />
abrasive detergents, solvents or gasoline.<br />
• To avoid irreparable damage to the<br />
fairing, never use alkaline or strongly<br />
acid detergents, petrol, brake fluid or<br />
other solvents. Clean the fairing only<br />
with a soft cloth, warm water and a neutral<br />
detergent.<br />
• If you have doubts about the chemical<br />
composition of the detergent, test its<br />
effect by applying it on a little area of the<br />
fairing before using it on the whole bike.<br />
Periodically treat the paintwork with high quality<br />
wax. After riding on roads treated with corrosive<br />
substances (salt), wash the vehicle as soon as<br />
possible with cold water. Do not use hot water as<br />
it enhances the corrosive action.<br />
WARNING: Avoid smearing brakes or<br />
tyres with oil or wax. If necessary, clean<br />
the brake discs with a brake disc detergent<br />
or with acetone, and wash the tyres<br />
with warm water and a neutral detergent.<br />
WARNING: The presence of water on the<br />
brakes can lead to a decrease of the<br />
braking effectiveness with subsequent<br />
risk of accidents. After completing the<br />
washing, run the engine for a few minutes<br />
and start off at reduced speed.<br />
Carefully apply the brakes a few times so<br />
as to dry the brake pads and discs.<br />
WARNING: The drive chain must be correctly<br />
lubricated after washing the<br />
motorcycle, following the instructions<br />
provided at § 1.12. of this manual.<br />
- 50 -
MAINTENANCE 1<br />
1.17. Prolonged inactivity<br />
If the motorcycle is to remain unused for a long time, it is<br />
advisable to carry out the following operations:<br />
Empty the fuel tank.<br />
Remove the battery and store it in a suitable place.<br />
Remove the spark plug caps and the spark plugs. Pour a teaspoonful of engine oil in every spark<br />
plug hole, then place back the spark plugs and the corresponding caps. Make the engine run idle<br />
for a few times.<br />
1<br />
GB<br />
Lubricate all control cables and the joints of all pedals and levers.<br />
Clean the motorcycle and treat the paintwork with high quality wax (§ 1.16).<br />
In order to ensure integrity and performance of the tyres, park your motorcycle in a fresh, dry and<br />
dark place, with a temperature relatively constant and lower than 25° C. Avoid direct contact of the<br />
tyres with heating pipes or radiators, and prolonged contact with oil or gasoline. Avoid parking with<br />
the tyres near to electrical motors or devices capable to produce sparks or electric discharge.<br />
During the period of inactivity, place your motorcycle on the rear stand.<br />
Cover the vehicle with an adequate canvas cover.<br />
When the motorcycle is first put back into service, remember<br />
to carry out a comprehensive check and, if necessary, to have<br />
the vehicle serviced (§1.2.).<br />
- 51 -
TROUBLESHOOTING FLOW CHART 2<br />
2.1. Engine problems: ENGINE DOES NOT START<br />
GB<br />
2<br />
Engine stop switch<br />
depressed<br />
YES<br />
Return the engine stop<br />
switch in rest position<br />
Engine starts<br />
YES<br />
Problem solved<br />
NO<br />
NO<br />
Gears engaged and<br />
side stand down<br />
YES<br />
Disengage gears or<br />
lift stand and pull<br />
clutch lever<br />
Engine starts<br />
YES<br />
Problem solved<br />
NO<br />
NO<br />
Starting procedure<br />
correctly performed<br />
NO<br />
Correctly perform<br />
starting procedure<br />
Engine starts<br />
YES<br />
Problem solved<br />
YES<br />
NO<br />
YES<br />
Fuel tank empty Refuel Engine starts<br />
YES<br />
Problem solved<br />
NO<br />
continued on next page<br />
NO<br />
- 52 -
TROUBLESHOOTING FLOW CHART 2<br />
continued from previous page<br />
Fuses <strong>F4</strong> and F6<br />
are OK<br />
NO<br />
Replace fuses <strong>F4</strong> and F6<br />
(§1.14.1.)<br />
Engine starts<br />
YES<br />
Problem solved<br />
2<br />
GB<br />
YES<br />
NO<br />
The battery is<br />
charged<br />
NO<br />
Have the battery recharged<br />
by a <strong>MV</strong> <strong>Agusta</strong><br />
authorized service centre<br />
Engine starts<br />
YES<br />
Problem solved<br />
YES<br />
NO<br />
The key code has<br />
been recognized<br />
NO<br />
Insert the code printed<br />
on the <strong>MV</strong> Code Card<br />
by a <strong>MV</strong> <strong>Agusta</strong><br />
authorized service centre<br />
Engine starts<br />
YES<br />
Problem solved<br />
YES<br />
NO<br />
Contact a <strong>MV</strong> <strong>Agusta</strong><br />
authorized service centre<br />
- 53 -
TROUBLESHOOTING FLOW CHART 2<br />
ENGINE SHUTS OFF DURING RIDING<br />
GB<br />
2<br />
The dashboard<br />
is on<br />
NO<br />
Contact a <strong>MV</strong> <strong>Agusta</strong><br />
authorized service centre<br />
YES<br />
Fuel tank empty<br />
NO<br />
Refuel<br />
Engine is running<br />
YES<br />
Problem solved<br />
NO<br />
NO<br />
Fuses <strong>F4</strong> and F6<br />
are OK<br />
NO<br />
Replace fuses <strong>F4</strong> and F6<br />
(§1.14.1.)<br />
Engine is running<br />
YES<br />
Problem solved<br />
YES<br />
NO<br />
Contact a <strong>MV</strong> <strong>Agusta</strong><br />
authorized service centre<br />
- 54 -
TROUBLESHOOTING FLOW CHART 2<br />
ENGINE OVERHEATS<br />
Coolant level is<br />
correct (§1.7.)<br />
NO<br />
Contact a <strong>MV</strong> <strong>Agusta</strong><br />
authorized service centre<br />
2<br />
GB<br />
YES<br />
Fuse F5<br />
is OK<br />
NO<br />
Replace fuse F5<br />
(§1.14.1.)<br />
Engine cools<br />
down to operating<br />
temperature<br />
YES<br />
Problem solved<br />
YES<br />
NO<br />
Contact a <strong>MV</strong> <strong>Agusta</strong><br />
authorized service centre<br />
- 55 -
TROUBLESHOOTING FLOW CHART 2<br />
OIL PRESSURE IS TOO LOW (Engine oil pressure warning light is on with the engine running)<br />
GB<br />
2<br />
Oil level is correct<br />
(§1.6.)<br />
NO<br />
Have the oil level restored<br />
by a <strong>MV</strong> <strong>Agusta</strong><br />
authorized service centre<br />
Oil pressure is<br />
optimal<br />
YES<br />
Problem solved<br />
YES<br />
NO<br />
Contact a <strong>MV</strong> <strong>Agusta</strong><br />
authorized service centre<br />
- 56 -
TROUBLESHOOTING FLOW CHART 2<br />
2.2. Electrical equipment problems: LIGHTS DO NOT WORK<br />
The fuses of the<br />
lighting are OK<br />
NO<br />
Replace fuse(s)<br />
(§1.14.1.)<br />
Lights work<br />
YES<br />
Problem solved<br />
2<br />
GB<br />
YES<br />
NO<br />
Bulbs are OK<br />
NO<br />
Replace bulb(s)<br />
(§1.14.)<br />
Lights work<br />
YES<br />
Problem solved<br />
YES<br />
NO<br />
Contact a <strong>MV</strong> <strong>Agusta</strong><br />
authorized service centre<br />
- 57 -
TROUBLESHOOTING FLOW CHART 2<br />
HORN DOES NOT WORK<br />
GB<br />
2<br />
Fuse F1<br />
is OK<br />
NO<br />
Replace fuse F1<br />
(§1.14.1.)<br />
Horn works<br />
YES<br />
Problem solved<br />
YES<br />
NO<br />
Contact a <strong>MV</strong> <strong>Agusta</strong><br />
authorized service centre<br />
SPEEDOMETER DOES NOT WORK<br />
Fuse F1<br />
is OK<br />
NO<br />
Replace fuse F1<br />
(§1.14.1.)<br />
Speedometer<br />
works<br />
YES<br />
Problem solved<br />
YES<br />
NO<br />
Contact a <strong>MV</strong> <strong>Agusta</strong><br />
authorized service centre<br />
- 58 -
TROUBLESHOOTING FLOW CHART 2<br />
DASHBOARD WARNING LIGHTS DO NOT WORK<br />
Fuse F1<br />
is OK<br />
NO<br />
Replace fuse F1<br />
(§1.14.1.)<br />
Warning lights<br />
work<br />
YES<br />
Problem solved<br />
2<br />
GB<br />
YES<br />
NO<br />
Contact a <strong>MV</strong> <strong>Agusta</strong><br />
authorized service centre<br />
ALTERNATOR DOES NOT CHARGE BATTERY (Battery charge indicator is on with the engine running)<br />
Battery recharge<br />
fuse is OK<br />
NO<br />
Replace battery<br />
recharge fuse<br />
(§1.14.1.)<br />
Alternator<br />
charges battery<br />
YES<br />
Problem solved<br />
YES<br />
NO<br />
Contact a <strong>MV</strong> <strong>Agusta</strong><br />
authorized service centre<br />
- 59 -
TECHNICAL INFORMATION 3<br />
3.1. Motorcycle overview<br />
(N) Instrument panel<br />
(B) Ignition - Power supply<br />
GB<br />
3<br />
(G) Front suspension<br />
(I) Battery<br />
(O) Exhaust system<br />
(E) Cooling system<br />
(L) Front brake<br />
(F) Frame<br />
(A) Engine<br />
(C) Gearbox<br />
(H) Rear suspension<br />
(M) Rear brake<br />
(D) Final drive<br />
- 60 -
TECHNICAL INFORMATION 3<br />
A - Engine: four-stroke, inline four-cylinder.<br />
Double-overhead camshaft valve train with<br />
radial valves. Wet sump lubrication.<br />
B - Ignition - Power supply: integrated ignitioninjection<br />
system. Inductive-discharge electronic<br />
ignition. “Multipoint” electronic injection.<br />
C - Gearbox: removable, six-speed, with constant-mesh<br />
gears.<br />
D - Final drive: consisting of drive sprocket, rear<br />
sprocket and chain.<br />
E - Cooling system: with separate liquid and oil<br />
radiators.<br />
F - Frame: tubular steel trellis with aluminium<br />
side plates.<br />
G - Front suspension: upside-down hydraulic<br />
fork with external adjusting system.<br />
H - Rear suspension: progressive, with singlesided<br />
swingarm and single shock absorber<br />
with external adjusting system.<br />
I<br />
- Battery: sealed and maintenance-free.<br />
L - Front brake: dual semi-floating disc with<br />
four-piston calipers.<br />
M - Rear brake: single disc with four-piston caliper.<br />
N - Instrument panel: with warning lights and<br />
digital instruments.<br />
O - Exhaust system: equipped with catalytic<br />
converter for exhaust emission reduction.<br />
3<br />
GB<br />
- 61 -
TECHNICAL INFORMATION 3<br />
3.1.1 Front brake circuit<br />
2<br />
1<br />
GB<br />
3<br />
3<br />
5<br />
4<br />
4<br />
5<br />
1 Brake master cylinder<br />
2 Brake lever<br />
3 Brake line<br />
4 Brake caliper<br />
5 Brake discs<br />
- 62 -
TECHNICAL INFORMATION 3<br />
3.1.2. Rear brake circuit<br />
4<br />
3<br />
GB<br />
6<br />
3<br />
5<br />
1 2<br />
1 Brake lever<br />
2 Brake master cylinder<br />
3 Brake line<br />
4 Brake fluid reservoir<br />
5 Brake caliper<br />
6 Brake disc<br />
- 63 -
TECHNICAL INFORMATION 3<br />
3.1.3. Clutch circuit<br />
GB<br />
3<br />
1<br />
2<br />
3 4<br />
1 Clutch lever<br />
2 Clutch master cylinder<br />
3 Clutch line<br />
4 Clutch cylinder assembly<br />
- 64 -
TECHNICAL INFORMATION 3<br />
3.1.4. Engine lubrication<br />
3<br />
GB<br />
3<br />
1 2<br />
1 Oil sump<br />
2 Oil filter<br />
3 Cylinder head oil feed pipe<br />
- 65 -
TECHNICAL INFORMATION 3<br />
3.1.5. Coolant circuit<br />
1<br />
2<br />
GB<br />
3<br />
3 4<br />
1 Expansion tank<br />
2 Upper radiator<br />
3 Lower radiator<br />
4 Coolant pump<br />
- 66 -
TECHNICAL INFORMATION 3<br />
3.1.6. Fuel system<br />
1<br />
3<br />
GB<br />
2<br />
3<br />
1 Throttle bodies<br />
2 Fuel pump<br />
3 Fuel line<br />
- 67 -
TECHNICAL INFORMATION 3<br />
2100<br />
750<br />
GB<br />
3<br />
830<br />
115<br />
3.2. Specifications<br />
1430<br />
Description <strong>F4</strong> <strong>1000</strong><br />
SPECIFICATIONS<br />
Wheelbase (mm) (*) 1430<br />
Overall length (mm) (*) 2100<br />
Max. width (mm) 750<br />
Seat height (mm) (*) 830<br />
Min. ground clearance (mm) (*) 115<br />
Trail (mm) (*) 100,4<br />
* : The indicated values must not be intended as binding informations. They can change according to the vehicle setup.<br />
- 68 -
TECHNICAL INFORMATION 3<br />
Specifications<br />
Description <strong>F4</strong> <strong>1000</strong><br />
Dry weight (Kg) 192<br />
Fuel tank capacity (lt) (*) 17<br />
Reserve fuel (lt) (*) 4<br />
Oil in crankcase (lt) 3,5<br />
ENGINE<br />
Type<br />
Four-cylinder, four-stroke, 16 valves<br />
Bore (mm) 76<br />
Stroke (mm) 55<br />
Total displacement (cm 3 ) 998<br />
Compression ratio 13,1 : 1<br />
Starting<br />
Electric starter<br />
Cooling system<br />
Cooling with separate liquid and oil radiators<br />
Crankcase and covers<br />
Die-cast<br />
Head and cylinders<br />
Chill-cast<br />
Valves<br />
Bimetal / single-metal<br />
VALVE TRAIN<br />
Type<br />
Double-overhead camshaft, radial valves<br />
3<br />
GB<br />
* : The indicated data must not be intended as binding informations. They can change according to the environmental temperature,<br />
the engine temperature and the evaporation point of the gasoline.<br />
- 69 -
TECHNICAL INFORMATION 3<br />
Specifications<br />
GB<br />
3<br />
Description <strong>F4</strong> <strong>1000</strong><br />
LUBRICATION<br />
Type<br />
Wet sump<br />
IGNITION - POWER SUPPLY<br />
Type<br />
“Magneti-Marelli” IAW 7BM integrated ignition-injection system<br />
with Mikuni throttle body; inductive discharge electronic ignition;<br />
“Multipoint” phased sequential electronic injection;<br />
variable lenght intake funnel with Torque Shift System (TSS)<br />
Spark plugs<br />
NGK CR9 EB<br />
Spark gap (mm) 0,7 ÷ 0,8<br />
CLUTCH<br />
Type<br />
Multiple-disc in oil bath with mechanical anti-surging device<br />
PRIMARY DRIVE<br />
Number of teeth on crankshaft gear Z = 50<br />
Number of teeth on clutch gear Z = 79<br />
Transmission ratio 1,58<br />
SECONDARY DRIVE<br />
Number of teeth on front sprocket Z = 15<br />
Number of teeth on rear sprocket Z = 41<br />
Transmission ratio 2,73<br />
TRANSMISSION<br />
Type<br />
Removable, six-speed gearbox with constant-mesh gears<br />
- 70 -
TECHNICAL INFORMATION 3<br />
Specifications<br />
Description <strong>F4</strong> <strong>1000</strong><br />
Gear ratio (overall ratios)<br />
First gear 2.92 (12.60)<br />
Second gear 2.12 (9.14)<br />
Third gear 1.78 (7.68)<br />
Fourth gear 1.50 (6.47)<br />
Fifth gear 1.32 (5.69)<br />
Sixth gear 1.21 (5.22)<br />
FRAME<br />
Type<br />
CrMo steel tubular trellis (TIG welded)<br />
Swingarm pivot plates<br />
Aluminium alloy<br />
FRONT SUSPENSION<br />
Type<br />
“Upside down” telescopic hydraulic fork with external and separated<br />
adjustment of rebound and compression damping and of spring preload<br />
Rod diameter (mm) 50<br />
Travel on leg axis (mm) 120<br />
REAR SUSPENSION<br />
Type<br />
Progressive, single shock absorber with rebound-compression<br />
(high speed/low speed) damping and spring preload adjustment<br />
Swingarm<br />
Aluminium alloy<br />
Wheel travel (mm) 120<br />
3<br />
GB<br />
- 71 -
TECHNICAL INFORMATION 3<br />
Specifications<br />
GB<br />
3<br />
Description <strong>F4</strong> <strong>1000</strong><br />
FRONT BRAKE<br />
Type<br />
Double steel floating disc<br />
Disc diameter (mm) 320<br />
Disc flange<br />
Aluminium<br />
Calipers, piston diameters (mm) Radial-type, single-piece with 4 pistons (Ø 34)<br />
REAR BRAKE<br />
Type<br />
Single steel disc<br />
Disc diameter (mm) 210<br />
Caliper, piston diameter (mm) 4-piston (Ø 25.4)<br />
FRONT RIM<br />
Material<br />
Forged aluminium alloy<br />
Dimensions 3,50” x 17”<br />
REAR RIM<br />
Material<br />
Forged aluminium alloy<br />
Dimensions 6,00” x 17”<br />
TYRES<br />
Front 120/70-ZR 17 (58 W)<br />
Rear 190/55-ZR 17 (75 W)<br />
- 72 -
TECHNICAL INFORMATION 3<br />
Specifications<br />
Description <strong>F4</strong> <strong>1000</strong><br />
Brand and type<br />
PIRELLI - Diablo Supercorsa SP<br />
DUNLOP - Sportmax Qualifier RR<br />
Inflating pressure (*) At a speed lower than 300 km/h At a speed higher than 300 km/h<br />
Front PIRELLI: 2.3 bar (33 psi) 2.5 bar (36 psi)<br />
DUNLOP: 2.3 bar (33 psi) 2.5 bar (36 psi)<br />
Rear PIRELLI: 2.3 bar (33 psi) 2.9 bar (42 psi)<br />
DUNLOP: 2.3 bar (33 psi) 2.9 bar (42 psi)<br />
ELECTRICAL EQUIPMENT<br />
Equipment voltage<br />
12V<br />
Headlight bulb<br />
OSRAM Xenarc D1S 35W<br />
Tail light bulb<br />
12V 5W<br />
Battery<br />
12V - 8,6 Ah<br />
Alternator<br />
350 W at 5000 rpm<br />
BODYWORK<br />
Fairing<br />
Thermoplastic material<br />
Front fairing<br />
Thermoplastic material<br />
Tail section<br />
Thermoplastic material<br />
Fuel tank<br />
Thermoplastic material<br />
* : If you use tyres of a brand different from the ones recommended, refer to the inflating pressure values marked by the manufacturer<br />
on the tyre sidewall.<br />
3<br />
GB<br />
- 73 -
TECHNICAL INFORMATION 3<br />
Specifications<br />
GB<br />
3<br />
Description <strong>F4</strong> <strong>1000</strong><br />
Air scoops<br />
Thermoplastic material<br />
Air box<br />
Thermoplastic material<br />
Air box side panels<br />
Thermoplastic material<br />
Front mudguard<br />
Thermoplastic material<br />
Chain guards<br />
Thermoplastic material<br />
Exhaust pipe guard<br />
Aluminium<br />
Heat shield<br />
Thermoplastic material<br />
License-plate holder<br />
Thermoplastic material<br />
- 74 -
TECHNICAL INFORMATION 3<br />
3<br />
GB<br />
- 75 -
TECHNICAL INFORMATION 3<br />
5<br />
6<br />
3 4<br />
2<br />
11<br />
GB<br />
3<br />
7<br />
1<br />
12<br />
9<br />
10<br />
8<br />
- 76 -
TECHNICAL INFORMATION 3<br />
3.3. Bodywork parts reference colours<br />
Bodywork parts are painted with the following reference colours, according to the corresponding<br />
motorcycle colour combination:<br />
1. - Front fairing;<br />
2. - Left-hand rearview mirror;<br />
3. - Right-hand rearview mirror;<br />
4. - Air box;<br />
5. - Fuel tank;<br />
6. - Rear left side panel;<br />
7. - Rear right side panel:<br />
Colour code A:<br />
Crayon red<br />
(Code Palinal 926R750)<br />
Colour code B:<br />
Shiny black<br />
(Code Palinal 929R486H)<br />
Colour code C:<br />
Titanium grey<br />
(Code Palinal L821)<br />
8. - Left-hand side fairing;<br />
9. - Right-hand side fairing;<br />
10. - Undercowl;<br />
11. - Fuel tank left-hand side fairing;<br />
12. - Fuel tank right-hand side fairing:<br />
Colour code A:<br />
Metalized silver<br />
(Code Palinal 928XV025)<br />
Colour code B:<br />
Matt Black<br />
(Code Palinal 929XR486 + Palinal Matt 3)<br />
Colour code C:<br />
Admiral grey<br />
(Code Palinal L820)<br />
3<br />
GB<br />
- 77 -
TECHNICAL INFORMATION 3<br />
1<br />
2<br />
GB<br />
3<br />
3<br />
4<br />
- 78 -
TECHNICAL INFORMATION 3<br />
3.4. Frame parts reference colours<br />
Frame parts are painted with the following reference colours:<br />
1. - Frame:<br />
Colour code A-B:<br />
Metal Antracite grey<br />
(Code Palinal 926XH893)<br />
Colour code C:<br />
Frame red<br />
(Code Palinal 211XH987)<br />
3. - Engine:<br />
Matt black<br />
(Code Pulverit 3500/0085)<br />
3<br />
GB<br />
2. - Headlight holder:<br />
Metal Antracite grey<br />
(Code Palinal 926XH893)<br />
4. - Engine head cover:<br />
Frame red<br />
(Code Palinal 211XH987)<br />
- 79 -
NOTES<br />
GB<br />
3<br />
Information<br />
<strong>MV</strong> <strong>Agusta</strong> S.p.A. is committed to a policy of constant improvement; therefore, you may find slight differences<br />
between the information provided in this document and the vehicle you purchased. <strong>MV</strong> <strong>Agusta</strong> motorcycles<br />
are exported in several countries, in which different rules and regulations (concerning both the<br />
Highway Code and the homologation procedures) are in force. Relying on your understanding, <strong>MV</strong> <strong>Agusta</strong><br />
S.p.A. deems it necessary to reserve the right to change its products and the related documentation at any<br />
time and without notice.<br />
We suggest to often visit the Internet site www.mvagusta.it in order to obtain informations and updates<br />
about the <strong>MV</strong> <strong>Agusta</strong> products and the related documentation.<br />
Respect and defend natural environment<br />
Everything we do affects the whole planet as well as its resources.<br />
<strong>MV</strong> <strong>Agusta</strong>, in order to protect the interests of the community, awakens the Customers and the Technical<br />
Assistance operators to use the vehicle and dispose of its replaced parts respecting the laws in force concerning<br />
environmental pollution and waste disposal and recycling.<br />
© 2009<br />
This document may not, in whole or in part, be reproduced without prior consent, in writing, from <strong>MV</strong> <strong>Agusta</strong> S.p.A.<br />
Part No. 8000B4299<br />
Edition No. 1 - December 2009<br />
- 80 -
Manuel d’entretien<br />
Version Française
TABLE DES MATIÈRES<br />
Chap. Sujets abordés page<br />
1 ENTRETIEN 3<br />
1.1. Symboles 3<br />
1.2. Tableau d’entretien et contrôle 4<br />
1.3. Outils et accessoires équipant la moto 14<br />
1.4. Tableau des lubrifiants et liquides 15<br />
1.5. Démontage/montage du flanc de carénage 16<br />
1.6. Huile moteur - Contrôle du niveau 18<br />
1.6.1. Huile moteur - Appoint 19<br />
1.7. Liquide de refroidissement - Contrôle 21<br />
1.7.1. Liquide de refroidissement - Appoint 22<br />
1.8. Plaquettes de freins - Contrôle usure 24<br />
1.9. Liquide de freins - Contrôle du niveau 25<br />
1.10. Liquide d’embrayage - Contrôle du niveau 27<br />
1.11. Pneumatiques - Contrôle et remplacement 28<br />
1.12. Chaîne - Contrôle et lubrification 34<br />
1.13. Régime du ralenti - Contrôle 38<br />
1.14. Remplacements - Informations générales 39<br />
1.14.1. Fusibles - remplacement 39<br />
1.14.2. Eclaireur de plaque - Remplacement ampoule 44<br />
Chap. Sujets abordés page<br />
1.15. Batterie 47<br />
1.16. Nettoyage de la moto 49<br />
1.17. Période d’arrêt prolongé 51<br />
2 PANNES 52<br />
2.1. Problèmes au moteur 52<br />
2.2. Problèmes de nature électrique 57<br />
3 INFORMATIONS TECHNIQUES 60<br />
3.1. Description générale de la moto 60<br />
3.1.1. Circuit de frein avant 62<br />
3.1.2. Circuit de frein arrière 63<br />
3.1.3. Circuit d’embrayage 64<br />
3.1.4. Graissage moteur 65<br />
3.1.5. Circuit de refroidissement 66<br />
3.1.6. Circuit d’alimentation 67<br />
3.2. Données techniques 68<br />
3.3. Références couleurs des composants du<br />
carénage 76<br />
3.4. Références couleurs des composants du<br />
cadre 78<br />
- 2 -
ENTRETIEN 1<br />
1.1. Symboles<br />
Les parties du texte particulièrement importantes qui concernent la sécurité de la personne et l’intégrité<br />
de la moto, sont mises en évidences par les pictogrammes suivants:<br />
1<br />
FR<br />
Danger - Attention: le non respect partiel ou total de ces prescriptions peut être source de<br />
danger pour soi-même et pour autrui.<br />
Prudence - Précautions: le non respect partiel ou total de ces prescriptions peut être<br />
cause de dommages pour la moto.<br />
Pour indiquer les personnes autorisées à exécuter les opérations de réglage et/ou d’entretien, celles-ci<br />
sont mises en évidences par les pictogrammes suivants:<br />
Informations sur les opérations permises au motard.<br />
Informations sur les opérations qui doivent être effectuées uniquement par le personnel<br />
autorisé.<br />
Pour mettre en évidence les informations supplémentaires, les symboles suivants sont utilisés:<br />
Le symbole indique la nécessité d’utiliser un outil ou un appareil spécial pour l’exécution<br />
correcte de l’opération décrite.<br />
§ Le symbole “§” renvoie au chapitre correspondant au numéro qui l’accompagne.<br />
- 3 -
ENTRETIEN 1<br />
FR<br />
1<br />
1.2. Tableau d’entretien et contrôle<br />
Les opérations d’entretien et contrôle les plus importantes et<br />
leur fréquence, sont indiquées dans les tableaux correspondants.<br />
Il est indispensable d’effectuer ces opérations pour garder<br />
la moto efficace et sûre.<br />
Les intervalles indiqués dans le tableau d’entretien périodique<br />
et de lubrification doivent être considérés uniquement comme<br />
un guide général en conditions d’utilisation normales. Il pourrait<br />
être nécessaire de réduire ces intervalles en fonction des<br />
conditions climatiques, du terrain, de la situation géographique<br />
et de l’utilisation individuelle.<br />
Certaines opérations peuvent être effectuées par le propriétaire<br />
de la moto, à condition qu’il soit en possession des compétences<br />
nécessaires. Dans le cas contraire, faire effectuer les<br />
opérations par un centre de réparation agréé.<br />
En général, les opérations d’entretien s’effectuent avec la<br />
moto montée sur la béquille arrière, avec le moteur coupé et<br />
le coupe-circuit sur “OFF”. Pendant le contrôle du niveau de<br />
liquide, il est préférable de tenir la moto en position verticale<br />
sans utiliser la béquille arrière.<br />
Au delà de 36.000 km (22.400 mi), les opérations s’effectuent à la<br />
fréquence indiquée dans le tableaux.<br />
- 4 -
ENTRETIEN 1<br />
ATTENTION<br />
• Un entretien inadéquat ou la non exécution des travaux d’entretien conseillés, augmente le<br />
risque d’accident ou de détérioration de la moto.<br />
• Utiliser toujours des pièces détachées d’origine <strong>MV</strong> <strong>Agusta</strong>. L’utilisation de pièces non<br />
d’origine peut accélérer l’usure de la moto et écourter sa durée de vie.<br />
• La non exécution des opérations recommandées ou l’utilisation de pièces détachées non<br />
d’origine a pu rendre la garantie inadmissible.<br />
• Le remplacement et/ou le rétablissement des lubrifiants et des liquides s’effectue en utilisant<br />
exclusivement les produits indiqués au §1.4.<br />
1<br />
FR<br />
ATTENTION<br />
En cas d’utilisation sur piste, il est recommandé de faire contrôler la moto avant et après<br />
l’emploi par un personnel qualifié faisant partie du réseau des Centres d’Assistance <strong>MV</strong><br />
<strong>Agusta</strong>.<br />
L’utilisation sur piste n’est admise que de manière occasionnelle et en aucun cas à des fins<br />
de compétition, même à un niveau d’amateur.<br />
L’utilisation de la moto sur piste entraîne une usure notable des pièces, et par là une réduction<br />
de la durée de vie du véhicule par rapport à une utilisation normale sur route ou autoroute.<br />
- 5 -
ENTRETIEN 1<br />
FR<br />
1<br />
Tableau d’entretien programmé<br />
Fréquence d’entretien Km (mi)<br />
0 <strong>1000</strong> 6000 12000 18000 24000 30000 36000<br />
(600) (3800) (7500) (11200) (14900) (18600) (22400)<br />
Révision<br />
Préparation<br />
à la route<br />
A B C D E F G<br />
DESCRIPTION<br />
Huile moteur<br />
Filtre à huile moteur<br />
OPÉRATION<br />
Contrôle niveau<br />
Vidange<br />
Vidange<br />
(utiliser exclusivement des<br />
filtres à huile d’origine <strong>MV</strong><br />
<strong>Agusta</strong>)<br />
Contrôle/Appoint<br />
Avant chaque utilisation du véhicule<br />
● ● ● ● ● ● ●<br />
Au minimum, tous les ans<br />
● ● ● ● ● ● ●<br />
A chaque vidangee<br />
Avant chaque utilisation du véhicule<br />
Liquide de refroidissement Contrôle des fuites ● ● ● ● ● ● ● ●<br />
Vidange<br />
Tous les 2 ans<br />
Circuit de refroidissement Contrôle des fuites ● ● ● ● ● ● ● ●<br />
Electroventilateurs Contrôle fonctionnement ● ● ● ● ● ● ● ●<br />
Soupapes Contrôle/Réglage ● ● ●<br />
Chaîne de distribution<br />
Contrôle ● ●<br />
Remplacement<br />
●<br />
- 6 -
ENTRETIEN 1<br />
Tableau d’entretien programmé<br />
Fréquence d’entretien Km (mi)<br />
0 <strong>1000</strong> 6000 12000 18000 24000 30000 36000<br />
(600) (3800) (7500) (11200) (14900) (18600) (22400)<br />
Révision<br />
Préparation<br />
à la route<br />
A B C D E F G<br />
1<br />
FR<br />
DESCRIPTION<br />
OPÉRATION<br />
Contrôle/Remplacement ● ●<br />
Patin mobile distribution<br />
Remplacement<br />
●<br />
Dans tous les cas à chaque remplacement de la chaîne de distribution<br />
Tendeur de chaîne distribution Contrôle/Remplacement ● ● ●<br />
Bougies<br />
Contrôle/Remplacement ● ● ●<br />
Remplacement ● ● ●<br />
Filtre à essence Contrôle/Remplacement ● ● ●<br />
Papillon Contrôle et réglage ● ● ● ● ● ● ●<br />
Filtre à air Contrôle/Remplacement ● ● ● ● ● ●<br />
Contrôle du niveau<br />
Avant chaque utilisation du véhicule<br />
Liquide des freins Contrôle du niveau ● ● ● ● ● ● ●<br />
et d’embrayage<br />
Remplacement<br />
●<br />
Minimum tous les 2 ans<br />
- 7 -
ENTRETIEN 1<br />
FR<br />
1<br />
Tableau d’entretien programmé<br />
Fréquence d’entretien Km (mi)<br />
0 <strong>1000</strong> 6000 12000 18000 24000 30000 36000<br />
(600) (3800) (7500) (11200) (14900) (18600) (22400)<br />
Révision<br />
Préparation<br />
à la route<br />
A B C D E F G<br />
DESCRIPTION<br />
OPÉRATION<br />
Contrôle fonctionnalité<br />
Avant chaque utilisation du véhicule<br />
Freins/embrayage Contrôle fonctionnalité ● ● ● ● ● ● ● ●<br />
Contrôle circuit ● ● ● ● ● ● ● ●<br />
Plaquettes des freins<br />
( avant + arrière )<br />
Contrôle usure<br />
Tous les <strong>1000</strong> km (600 mi)<br />
Contrôle/Remplacement ● ● ● ● ● ● ●<br />
Canalisations circuit du Contrôle défauts et fuites ● ● ● ● ● ● ●<br />
carburant Remplacement Minimum tous les 3 ans<br />
Contrôle fonctionnalité<br />
Avant chaque utilisation du véhicule<br />
Commande d’accélérateur Contrôle fonctionnalité ● ● ● ● ● ● ● ●<br />
Vérification/Réglage du jeu ● ● ● ● ● ● ● ●<br />
Commande starter Contrôle fonctionnalité ● ● ● ● ● ● ● ●<br />
Transmissions et<br />
commandes souples<br />
Contrôle / Réglage ● ● ● ● ● ● ● ●<br />
- 8 -
ENTRETIEN 1<br />
Tableau d’entretien programmé<br />
Fréquence d’entretien Km (mi)<br />
0 <strong>1000</strong> 6000 12000 18000 24000 30000 36000<br />
(600) (3800) (7500) (11200) (14900) (18600) (22400)<br />
Révision<br />
Préparation<br />
à la route<br />
A B C D E F G<br />
1<br />
FR<br />
DESCRIPTION<br />
OPÉRATION<br />
Contrôle<br />
Tous les <strong>1000</strong> km (600 mi)<br />
Chaîne de transmission<br />
Graissage<br />
Tous les <strong>1000</strong> km (600 mi) et après conduite sous la pluie<br />
Contrôle/Réglage ● ● ● ● ● ● ● ●<br />
Graissage ● ● ● ●<br />
Remplacement ● ● ●<br />
Contrôle ● ● ● ●<br />
Pignon / Rondelle d’arrêt<br />
Remplacement<br />
● ● ●<br />
Dans tous les cas à chaque remplacement de la chaîne de transmission<br />
Contrôle ● ● ● ●<br />
Couronne<br />
Remplacement<br />
● ● ●<br />
Dans tous les cas à chaque remplacement de la chaîne de transmission<br />
Flecteur couronne Contrôle/Remplacement ● ● ●<br />
Ecrou de direction Contrôle/Réglage ● ● ● ●<br />
- 9 -
ENTRETIEN 1<br />
FR<br />
1<br />
Tableau d’entretien programmé<br />
Fréquence d’entretien Km (mi)<br />
0 <strong>1000</strong> 6000 12000 18000 24000 30000 36000<br />
(600) (3800) (7500) (11200) (14900) (18600) (22400)<br />
Révision<br />
Préparation<br />
à la route<br />
A B C D E F G<br />
DESCRIPTION<br />
OPÉRATION<br />
Roulements de direction Contrôle / Réglage ● ● ● ●<br />
Lubrification<br />
●<br />
Contrôle pression<br />
A chaque utilisation du véhicule dans tous les cas tous les 10 jours<br />
Pneumatiques<br />
Contrôle usure A chaque utilisation du véhicule dans tous les cas tous les 500 km (300 mi)<br />
Contrôle pression ● ● ● ● ● ● ● ●<br />
Contrôle usure ● ● ● ● ● ● ●<br />
Jantes<br />
Roulements roue AV<br />
Contrôle visuel<br />
Contrôle<br />
Remplacement<br />
● ● ● ● ● ● ●<br />
Dans tous les cas à chaque remplacement des pneus<br />
● ● ● ● ●<br />
Dans tous les cas à chaque remplacement des pneus<br />
●<br />
Béquille latérale<br />
Contrôle fonctionnalité<br />
Avant chaque utilisation du véhicule<br />
Contrôle fonctionnalité ● ● ● ● ● ● ● ●<br />
- 10 -
ENTRETIEN 1<br />
Tableau d’entretien programmé<br />
Fréquence d’entretien Km (mi)<br />
0 <strong>1000</strong> 6000 12000 18000 24000 30000 36000<br />
(600) (3800) (7500) (11200) (14900) (18600) (22400)<br />
Révision<br />
Préparation<br />
à la route<br />
A B C D E F G<br />
1<br />
FR<br />
DESCRIPTION<br />
OPÉRATION<br />
Contrôle fonctionnalité<br />
Avant chaque utilisation du véhicule<br />
Contacteur béquille<br />
Contrôle fonctionnalité ● ● ● ● ● ● ● ●<br />
Moyeu AR<br />
Contrôle /<br />
lubrification des<br />
douilles à aiguilles<br />
● ●<br />
Remplacement/<br />
lubrification des<br />
douilles à aiguilles<br />
●<br />
Roulements du bras de suspension Contrôle / Lubrification ●<br />
Patin chaîne bras de suspension Contrôle / Remplacement ● ● ● ● ● ● ●<br />
Patin chaîne plateau cadre Contrôle / Remplacement ● ● ● ● ● ● ●<br />
Amortisseur arrière Contrôle / Réglage ● ● ● ●<br />
Huile fourche avant Remplacement ●<br />
Cosses de batterie Contrôle et propreté ● ● ● ● ● ● ●<br />
Installation électrique Contrôle fonctionnalité ● ● ● ● ● ● ● ●<br />
Appareillage de bord<br />
Contrôle fonctionnalité<br />
Avant chaque utilisation du véhicule<br />
Contrôle fonctionnalité ● ● ● ● ● ● ● ●<br />
- 11 -
ENTRETIEN 1<br />
FR<br />
1<br />
Tableau d’entretien programmé<br />
Fréquence d’entretien Km (mi)<br />
0 <strong>1000</strong> 6000 12000 18000 24000 30000 36000<br />
(600) (3800) (7500) (11200) (14900) (18600) (22400)<br />
Révision<br />
Préparation<br />
à la route<br />
A B C D E F G<br />
DESCRIPTION<br />
Eclairage/signaux visuels<br />
Avertisseur sonore<br />
OPÉRATION<br />
Contrôle fonctionnalité /<br />
Avant chaque utilisation du véhicule<br />
Remplacement ampoule<br />
Contrôle fonctionnalité /<br />
Remplacement ampoule<br />
● ● ● ● ● ● ● ●<br />
Contrôle fonctionnalité<br />
Avant chaque utilisation du véhicule<br />
Contrôle fonctionnalité ● ● ● ● ● ● ● ●<br />
Contrôle fonctionnalité<br />
Avant chaque utilisation du véhicule<br />
Phare avant Contrôle fonctionnalité ● ● ● ● ● ● ● ●<br />
Réglage<br />
A chaque variation de l’assiette du véhicule<br />
Coupe-circuit<br />
Serrures<br />
Contrôle fonctionnalité<br />
Avant chaque utilisation du véhicule<br />
Contrôle fonctionnalité ● ● ● ● ● ● ● ●<br />
Contrôle fonctionnalité<br />
Avant chaque utilisation du véhicule<br />
Contrôle fonctionnalité ● ● ● ● ● ● ● ●<br />
Serrage des vis et écrous Contrôle/Serrage ● ● ● ● ● ● ● ●<br />
- 12 -
ENTRETIEN 1<br />
Tableau d’entretien programmé<br />
Fréquence d’entretien Km (mi)<br />
0 <strong>1000</strong> 6000 12000 18000 24000 30000 36000<br />
(600) (3800) (7500) (11200) (14900) (18600) (22400)<br />
Révision<br />
Préparation<br />
à la route<br />
A B C D E F G<br />
1<br />
FR<br />
DESCRIPTION<br />
OPÉRATION<br />
Colliers serre-tube Contrôle/Serrage ● ● ● ● ● ● ● ●<br />
Lubrification générale ● ● ● ● ● ● ● ●<br />
Essai sur route ● ● ● ● ● ● ● ●<br />
- 13 -
ENTRETIEN 1<br />
FR<br />
1<br />
1.3. Outils et accessoires équipant la moto<br />
Une trousse à outils se trouve dans la boîte à gants, elle<br />
contient les outils suivants:<br />
- 1 barre hexagonale (hexagone de 10 mm);<br />
- 6 clés maîtresses hexagonales (hexagone de 2,5 - 3<br />
- 4 - 5 - 6 - 8 mm);<br />
- 1 clé pour excentrique roue arrière et sa rallonge;<br />
- 1 extracteur pour fusibles;<br />
- 3 fusibles (15A).<br />
Les accessoires suivants sont également fournis:<br />
- 1 clé à bougie (hexagonale 16 mm);<br />
- 1 pochette pour les papiers.<br />
- 14 -
ENTRETIEN 1<br />
1.4. Tableau des lubrifiants et liquides<br />
Description Produit préconisé Caractéristiques<br />
Huile moteur AGIP RACING 4T 10W/60 (*) SAE 10W/60 - API SJ<br />
Glycol-éthylène<br />
Liquide de refroidissement AGIP ECO - PERMANENT dilué à 50% avec<br />
eau distillée<br />
Liquide d’embrayage et freins AGIP BRAKE FLUID DOT4 DOT4<br />
Huile de graissage de la chaîne MOTUL CHAIN LUBE ROAD –<br />
1<br />
FR<br />
* : Pour la disponibilité du produit conseillé, <strong>MV</strong> <strong>Agusta</strong> conseille de s’adresser directement aux propres<br />
concessionnaires autorisés. L’huile moteur AGIP Racing 4T 1W/60 a été réalisée spécialement pour<br />
le moteur de la motocyclette <strong>F4</strong>. Au cas où le lubrifiant décrit ne<br />
serait pas possible à trouver, <strong>MV</strong> <strong>Agusta</strong> conseille d’utiliser des huiles<br />
complètement synthétiques avec des caractéristiques conformes<br />
ou supérieures au normes suivantes:<br />
– Conforme API SJ<br />
– Conforme ACEA A3<br />
– Conforme JASO MA<br />
– Gradation SAE 20 W-50 ou 10 W-60<br />
NOTE<br />
Les caractéristiques indiquées ci-dessus doivent être indiquées<br />
seules ou avec d’autres sur l’emballage de l’huile.<br />
- 15 -<br />
Huile moteur<br />
SAE 10 W-60<br />
API SJ<br />
ACEA A3<br />
JASO MA
ENTRETIEN 1<br />
FR<br />
1<br />
1.5. Démontage/montage du flanc de carénage<br />
Après avoir retiré les fixations instantanée, déposer le<br />
flanc de carénage.<br />
- 16 -
ENTRETIEN 1<br />
Remonter le flanc de carénage en en positionnant<br />
correctement le profil avant comme l’indique la<br />
figure A.<br />
Compléter le montage en positionnant correctement<br />
la languette dans la partie inférieure du<br />
carénage, comme l’indique la figure B.<br />
1<br />
FR<br />
Profil avant<br />
carénage<br />
A<br />
B<br />
- 17 -
ENTRETIEN 1<br />
FR<br />
1<br />
1.6. Huile moteur - Contrôle du niveau<br />
Le contrôle se fait à froid, à moteur coupé. Si le contrôle<br />
a lieu à chaud, il faut que le moteur soit coupé depuis<br />
au moins dix minutes.<br />
Ce contrôle s’effectue en mettant la moto sur un plan<br />
horizontal et en position de marche (position verticale).<br />
Le niveau doit être compris entre les repères MAX et<br />
MIN inscrits sur le carter.<br />
Dans le cas où le niveau d’huile se trouve en dessous<br />
du repère MIN, effectuer un appoint (voir §1.6.1).<br />
Danger - Attention: ne pas démarrer si l’huile<br />
est sous le repère du MIN.<br />
Max<br />
Min<br />
- 18 -
ENTRETIEN 1<br />
1.6.1. Huile moteur - Appoint<br />
Dévisser le bouchon d’huile en employant la barre<br />
hexagonale de 10 mm fournie, monté sur une clef<br />
appropriée (voir la figure). Verser une quantité<br />
d’huile du type conseillé jusqu’à arriver à un<br />
niveau adéquat: dans tous les cas, ne pas dépasser<br />
le repère MAX. Enfin, revisser le bouchon et<br />
remonter le flanc.<br />
ATTENTION<br />
Avant de rassembler le bouchon d'huile,<br />
graissez sa bague en employant AGIP<br />
Grease 30.<br />
Enfin, effectuez le serrage de le bouchon<br />
d'huile au couple de serrage de 35<br />
Nm, en employant une clef dynamométrique.<br />
Bouchon d’huile<br />
RAPPEL<br />
Pour prévenir le patinage de l’embrayage<br />
et éviter d’endommager le moteur, ne<br />
pas mélanger d’additifs chimiques à<br />
l’huile ni utiliser d’huiles autres que<br />
celles indiquées au § 1.4. Veiller à ce<br />
qu’aucun corps étranger ne pénètre<br />
dans le carter pendant le remplissage.<br />
1<br />
FR<br />
- 19 -
ENTRETIEN 1<br />
FR<br />
1<br />
ATTENTION<br />
L’huile moteur, neuve ou usagée, peut<br />
être dangereuse. L’ingestion d’huile<br />
moteur neuve ou usagée peut être nocive<br />
pour les personnes et les animaux<br />
domestiques. En cas d’ingestion d’huile<br />
moteur, appeler immédiatement un<br />
médecin et ne pas provoquer le vomissement<br />
pour éviter l’aspiration du produit<br />
dans les poumons. Il a été constaté<br />
que le contact continu avec l’huile<br />
moteur provoque<br />
le cancer de la peau sur des cobayes.<br />
De brefs contacts avec l’huile moteur<br />
peuvent irriter la peau.<br />
• Conserver l’huile moteur, neuve ou<br />
usée, loin de la portée des enfants et<br />
des animaux domestiques.<br />
• Porter des vêtements à manches<br />
longues et des gants imperméables à<br />
l’eau toutes les fois que l’on effectue un<br />
ajout d’huile moteur.<br />
• Se laver à l’eau et au savon si l’huile<br />
moteur entre en contact avec la peau.<br />
• Recycler ou évacuer correctement<br />
l’huile moteur usagée.<br />
- 20 -
ENTRETIEN 1<br />
1.7. Liquide de refroidissement - Contrôle du<br />
niveau<br />
1<br />
FR<br />
Le contrôle se fait à froid, à moteur coupé.<br />
Ce contrôle s’effectue en disposant la motocyclette sur<br />
un plan horizontal et en position de marche (position<br />
verticale).<br />
Le niveau doit être compris entre le repères MIN et MAX<br />
comme représenté sur la figure.<br />
Dans le cas où le niveau de liquide de refroidissement<br />
se trouve sous le repère MIN, ajouter un complément<br />
(voir § 1.7.1).<br />
ATTENTION<br />
Ne pas utiliser la moto si le niveau du liquide<br />
de refroidissement se trouve en dessous du<br />
repère MIN.<br />
MAX<br />
MIN<br />
- 21 -
ENTRETIEN 1<br />
FR<br />
1<br />
1.7.1. Liquide de refroidissement -<br />
Appoint<br />
Dévisser le bouchon et ajouter le liquide<br />
de refroidissement conseillé au § 1.4.<br />
ATTENTION: L’ajout de liquide de<br />
refroidissement s’effectue toujours<br />
à moteur froid. Ne jamais<br />
tenter de retirer le bouchon du<br />
réservoir de liquide refroidissement<br />
lorsque le moteur est chaud<br />
pour éviter les risques de brûlure.<br />
Le circuit est sous pression.<br />
Une fois que le niveau est corrigé, remonter<br />
soigneusement les parties démontées<br />
précédemment.<br />
- 22 -
ENTRETIEN 1<br />
ATTENTION<br />
Dans certaines conditions, le glycoléthylène<br />
contenu dans le liquide de<br />
refroidissement est inflammable et sa<br />
flamme est invisible. Eviter de mettre le<br />
liquide de refroidissement au contact<br />
des parties chaudes car la combustion<br />
du glycol-éthylène peut exposer à des<br />
risques de brûlures.<br />
ATTENTION<br />
Le liquide de refroidissement du moteur<br />
est nocif en cas d’ingestion ou s’il entre<br />
en contact avec les yeux ou la peau.<br />
Conserver le liquide de refroidissement<br />
loin de la portée des enfants et des animaux<br />
domestiques. En cas d’ingestion<br />
de liquide de refroidissement, appeler<br />
immédiatement un médecin et ne pas<br />
provoquer le vomissement pour éviter<br />
l’aspiration de produit dans les poumons.<br />
En cas de contact du liquide de<br />
refroidissement avec les yeux ou la<br />
peau, rincer immédiatement à l’eau.<br />
- 23 -<br />
RAPPEL<br />
Pour le rétablissement et/ou le vidange<br />
du liquide de refroidissement, utiliser<br />
exclusivement le produit spécifié au<br />
tableau § 1.4. Ne mélangez pas ou ne<br />
diluez pas le liquide réfrigérant avec des<br />
additifs ou des fluides différents. Au cas<br />
où le produit spécifié au tableau § 1.4 ne<br />
serait pas possible à trouver, utiliser un<br />
liquide réfrigérant avec des caractéristiques<br />
techniques conformes au produit<br />
prescrit.<br />
RAPPEL<br />
Les giclées de liquide de refroidissement<br />
peuvent endommager les peintures.<br />
Attention à ne pas renverser de<br />
liquide lorsque vous remplissez le circuit<br />
de refroidissement. Sécher immédiatement<br />
avec un chiffon propre le<br />
liquide de refroidissement éventuellement<br />
renversé.<br />
1<br />
FR
ENTRETIEN 1<br />
FR<br />
1<br />
Etrier de frein avant<br />
Etrier de frein arrière<br />
Disque<br />
Plaquettes<br />
Usure limite 1 mm<br />
1.8. Plaquettes de freins - Contrôle de l’usure<br />
Contrôler périodiquement la largeur de la couche du<br />
matériel de frottement des plaquettes, en veillant à ne<br />
pas la laisser descendre en dessous de la limite d’usure<br />
(1 mm).<br />
Danger – Attention: En cas d’utilisation de la<br />
moto avec les plaquettes de frein usées, la<br />
puissance de freinage diminue et le risque<br />
d’accident augmente. Si l’épaisseur restante<br />
est proche de la limite d’usure, s’adresser à<br />
un centre d’assistance agréé pour effectuer le<br />
remplacement des plaquettes. Soumettre les<br />
plaquettes à un rodage.<br />
- 24 -
ENTRETIEN 1<br />
Réservoir de frein AR.<br />
Réservoir de frein AV.<br />
1<br />
FR<br />
Max<br />
Min<br />
Max<br />
Min<br />
1.9. Liquide de freins - Contrôle du niveau<br />
ATTENTION<br />
Les contrôles non effectués et l’entretien<br />
négligé des freins augmentent les<br />
risques d’accident. Avant toute sortie<br />
avec la moto, contrôler le circuit de freinage<br />
en suivant les instructions<br />
données au <strong>Manual</strong> Rapide.<br />
L’usure des plaquettes de freins provoque une<br />
baisse de niveau du liquide. Dans tous les cas, le<br />
niveau doit être compris entre les repères MAX et<br />
MIN. Si ce niveau descend en dessous du repère<br />
MIN, il faut s’adresser à un centre de réparation<br />
agréé pour un contrôle général du circuit de freinage.<br />
- 25 -
ENTRETIEN 1<br />
FR<br />
1<br />
ATTENTION<br />
Ne pas utiliser la moto si le niveau se trouve<br />
en dessous du repère MIN. Dans ces<br />
conditions, le circuit de freinage pourrait<br />
ne pas fonctionner correctement avec<br />
comme conséquence un risque de perte<br />
de contrôle du véhicule et des accidents.<br />
Si le niveau de liquide se trouve en dessous<br />
du repère MIN, s’adresser à un<br />
Concessionnaire <strong>MV</strong> <strong>Agusta</strong> pour faire<br />
réviser le circuit de freinage.<br />
ATTENTION<br />
Faire rectifier le niveau du liquide de frein<br />
exclusivement par le personnel autorisé.<br />
Le liquide de frein est nocif ou mortel en<br />
cas d’ingestion et nocif s’il entre en<br />
contact avec les yeux ou la peau.<br />
Conserver le liquide de frein loin de la portée<br />
des enfants et des animaux domestiques.<br />
En cas d’ingestion de liquide de<br />
frein, appeler immédiatement un médecin<br />
et ne pas provoquer le vomissement pour<br />
éviter l’aspiration de produit dans les poumons.<br />
En cas de contact du liquide de<br />
frein avec les yeux ou la peau, rincer<br />
immédiatement à l’eau.<br />
ATTENTION<br />
Faire rectifier le niveau de liquide en utilisant<br />
uniquement le type de liquide<br />
conseillé au §1.4. de ce manuel. Les<br />
mélanges éventuels entre fluides de type<br />
différents peuvent provoquer une réaction<br />
chimique dangereuse et la diminution<br />
d’efficacité du freinage avec une<br />
augmentation du risque d’accident.<br />
ATTENTION<br />
Une quantité insuffisante de liquide de<br />
freins peut permettre l’entrée d’air dans<br />
le circuit et compromettre ainsi l’efficacité<br />
du freinage et augmenter les risques<br />
d’accidents. La présence d’air dans le<br />
circuit se traduit par une excessive souplesse<br />
du levier de frein. En présence<br />
d’air dans le circuit, faire purger celui-ci<br />
par un concessionnaire <strong>MV</strong> <strong>Agusta</strong><br />
avant d’utiliser la moto.<br />
- 26 -
ENTRETIEN 1<br />
1.10. Liquide d’embrayage - Contrôle du niveau<br />
Le niveau doit être compris entre les repère MAX et<br />
MIN. Si ce niveau descend en dessous du repère MIN,<br />
il faut s’adresser à un centre de réparation agréé pour<br />
un contrôle général du circuit de commande de l’embrayage.<br />
1<br />
FR<br />
ATTENTION<br />
Ne pas utiliser la moto si le niveau est en dessous<br />
du repère MIN. Dans ces conditions le circuit<br />
de commande d’embrayage pourrait ne<br />
pas fonctionner correctement et créer un<br />
risque de perte de contrôle du véhicule et des<br />
accidents. Si le niveau de liquide se trouve en<br />
dessous du repère MIN, s’adresser à un<br />
Concessionnaire <strong>MV</strong> <strong>Agusta</strong> pour pour faire<br />
réviser le circuit d’embrayage.<br />
Max<br />
Min<br />
ATTENTION<br />
Faire rectifier le niveau du liquide de commande<br />
d’embrayage en utilisant uniquement<br />
le type de fluide conseillé au §1.4 de ce livret.<br />
- 27 -
ENTRETIEN 1<br />
FR<br />
1<br />
1.11. Pneumatiques - Contrôle et remplacement<br />
ATTENTION<br />
Avant l’utilisation, toujours vérifier<br />
la pression des pneumatiques<br />
et leur état d’usure.<br />
Le contrôle de la pression des pneumatiques<br />
est un facteur fondamental pour<br />
assurer la sécurité de conduite. Les<br />
pneumatiques insuffisamment gonflés<br />
aggravent la maniabilité de la moto et<br />
s’usent rapidement. Au contraire, des<br />
pneus surgonflés ont une plus petite<br />
superficie de contact au sol et peuvent<br />
réduire l’adhérence du véhicule.<br />
Avant toute utilisation de la moto, il est<br />
donc indispensable de contrôler la pression<br />
des pneumatique à température<br />
ambiante, c’est à dire avec la moto à l’arrêt<br />
depuis au moins trois heures.<br />
ATTENTION<br />
Un gonflage erroné des pneumatiques entraîne<br />
une série de danger lors de l’utilisation de la<br />
moto. Une pression insuffisante peut faire déjanter<br />
le pneu avec pour conséquence un dégonflage<br />
et une perte de contrôle du véhicule.<br />
- 28 -
ENTRETIEN 1<br />
Les résultats obtenus d’un contrôle juste après<br />
l’utilisation de la moto donnerait en effet des<br />
valeurs plus hautes par rapport à celles réelles et<br />
donc un réglage erroné de la pression. Le contrôle<br />
de la pression s’effectue en respectant les<br />
valeurs données au §3.2 et/ou sur l’étiquette qui<br />
se trouve sur la bulle. En cas de long trajets continus,<br />
augmenter la valeur de pression nominale de<br />
0,2 bar. En cas de l'utilisation de la moto à une<br />
vitesse plus haute que 300 km/h, augmenter la<br />
pression des pneus selon les valeurs données<br />
dans le § 3.2.<br />
De plus, avant utilisation, il est extrêmement<br />
important de contrôler l’usure des pneumatiques.<br />
En effet, des pneus usés ont tendance à subir des<br />
crevaisons plus facilement et influent négativement<br />
sur la stabilité et la maniabilité de la moto.<br />
Au cours du contrôle, s’assurer que l’épaisseur de<br />
la bande de roulement ne se trouve pas en dessous<br />
des valeurs prescrites par le code de la<br />
route et qu’il n’y a pas de fentes sur le fond de<br />
l’empreinte. En outre, il ne doit pas y avoir de<br />
clous ou de fragments de verre sur le pneumatique,<br />
ni de fissures sur son flanc. Dans le cas<br />
contraire, faire remplacer immédiatement le pneumatique<br />
chez un Concessionnaire <strong>MV</strong> <strong>Agusta</strong>.<br />
ATTENTION<br />
Les limites de profondeur de la bande<br />
de roulement du pneu peuvent varier<br />
d’un pays à l’autre. Toujours respecter<br />
les dispositions légales du pays d’utilisation.<br />
ATTENTION<br />
• Faire remplacer les pneus excessivement<br />
usés par un concessionnaire <strong>MV</strong><br />
<strong>Agusta</strong>. L’usage de la moto avec des<br />
pneus usés, en plus d’être illégale,<br />
réduit la stabilité et peut provoquer la<br />
perte de contrôle de la moto.<br />
• Si un pneu crève ou subit quelque<br />
dommage, il faut le remplacer et non<br />
pas le réparer. Un pneu réparé donne<br />
1<br />
FR<br />
- 29 -
ENTRETIEN 1<br />
FR<br />
1<br />
des résultats limités et des niveaux de<br />
sécurité inférieurs par rapport à un pneu<br />
neuf. En cas de réparation temporaire<br />
ou d’urgence d’un pneumatique,<br />
conduire lentement et avec précaution<br />
jusqu’au plus proche concessionnaire<br />
<strong>MV</strong> <strong>Agusta</strong> pour faire remplacer le pneu.<br />
Après la réparation d’un pneu, ne pas<br />
dépasser la vitesse de 60 km/h. La réparation<br />
ne peut pas être effectuée si le<br />
pneu est crevé sur le flanc ou si le trou<br />
sur la bande de roulement est supérieur<br />
à 6 mm.<br />
• Pour la réparation temporaire d’un<br />
pneu crevé, <strong>MV</strong> <strong>Agusta</strong> déconseille l’utilisation<br />
de produits de réparation liquides.<br />
Ces produits peuvent influer négativement<br />
sur le matériau formant la stratification<br />
des pneus et cacher les dommages<br />
secondaires provoqués par d’éventuels<br />
objets de pénétration.<br />
• Remplacer les pneus en utilisant<br />
exclusivement ceux prescrits au §2.2.<br />
Eviter également d’utiliser simultanément<br />
des pneus de type ou de marques<br />
différentes à l’avant et à l’arrière.<br />
L’utilisation de pneus impropres peut<br />
influer négativement sur la maniabilité<br />
et la stabilité de la moto, augmentant<br />
ainsi les risques d’accidents.<br />
• Les jantes de la moto ont été conçues<br />
pour l’utilisation de pneus tubeless. Ne<br />
pas monter de pneus avec chambre à air<br />
sur les jantes pour pneus tubeless. Les<br />
talons pourraient ne pas se mettre en<br />
place correctement et les pneus s’affaisser<br />
en glissant sur les jantes provoquant<br />
une perte de contrôle du véhicule.<br />
- 30 -
ENTRETIEN 1<br />
• Ne pas monter de chambre à air dans<br />
un pneu tubeless. La surchauffe du<br />
pneu pourrait faire éclater la chambre à<br />
air et provoquer l’affaissement du pneu<br />
et la perte de contrôle du véhicule.<br />
• Faire monter les pneus conformément<br />
au sens de rotation indiqué par les<br />
flèches sur leurs flancs.<br />
• Les pneus neufs doivent être soumis<br />
à une période de rodage avant d’être<br />
parfaitement efficaces. Durant cette<br />
période, il est possible que les pneus<br />
aient une adhérence limitée sur certaines<br />
surfaces. Nous conseillons donc<br />
de conduire à vitesse modérée et de<br />
prendre un maximum de précautions<br />
pendant au moins 100 km après le montage<br />
d’un pneu neuf.<br />
1<br />
FR<br />
- 31 -
ENTRETIEN 1<br />
FR<br />
1<br />
❏ Démontage de la roue arrière<br />
Rappel - Précautions: Au cas où<br />
il serait nécessaire de faire remplacer<br />
le pneumatique arrière<br />
dans un centre spécialisé. Veiller<br />
à ce que les outils suivants<br />
soient utilisés pour le démontage<br />
et le remontage de la roue:<br />
• Clé à douille polygonale de 55<br />
mm<br />
• Clé dynamométrique<br />
Si les opérations sont exécutées<br />
avec d’autres outils, les composants<br />
de la roue arrière pourraient<br />
se retrouver gravement<br />
endommagés. Nous conseillons<br />
donc de ne pas faire remplacer<br />
les pneus par un atelier qui ne<br />
possède pas les équipements<br />
adéquats. Dans tous les cas, il<br />
est préférable de s’adresser à un<br />
Concessionnaire <strong>MV</strong> <strong>Agusta</strong>.<br />
Ecrou polygonal<br />
Axe roue avec filetage<br />
M50x1,5 pas de vis à gauche<br />
Clé à douille polygonale de 55 mm<br />
Clé dynamométrique<br />
- 32 -
ENTRETIEN 1<br />
❏ Contrôle des roues<br />
Avant d’utiliser la moto, toujours contrôler que la<br />
jante ne présente pas de criques, torsions ou<br />
voiles.<br />
ATTENTION<br />
En présence de détériorations, faire<br />
remplacer la roue par un concessionnaire<br />
<strong>MV</strong> <strong>Agusta</strong>. Ne pas tenter d’effectuer<br />
de réparations des roues même si ce<br />
sont des réparations minimes.<br />
En cas de remplacement du pneumatique<br />
ou de la roue, il faut faire effectuer<br />
l’équilibrage de la roue chez un concessionnaire<br />
<strong>MV</strong> <strong>Agusta</strong>. Le déséquilibre de<br />
la roue peut compromettre les performances<br />
et la maniabilité de la moto et<br />
réduire la durée des pneumatiques.<br />
ATTENTION<br />
Pour effectuer l’équilibrage des roues, il<br />
faut avoir recours exclusivement à des<br />
contrepoids homologués. Il est déconseillé<br />
d’utiliser des équilibrants liquides<br />
ou des équilibrants liquides/collants.<br />
ATTENTION<br />
Ne pas tenter de faire démonter un pneu<br />
tubeless sans l’outillage spécial nécessaire<br />
et les protections pour la jante.<br />
Dans le cas contraire, on risque d’endommager<br />
ou de déformer le bourrelet<br />
d’étanchéité de la jante, avec comme<br />
conséquence un risque d’affaissement<br />
du pneu et une perte de contrôle du<br />
véhicule.<br />
1<br />
FR<br />
- 33 -
ENTRETIEN 1<br />
FR<br />
1<br />
1.12. Chaîne - Contrôle et lubrification<br />
Pour effectuer les opérations suivantes, positionner la<br />
moto sur la béquille arrière, sur un plan horizontal et<br />
avec le sélecteur au point mort.<br />
❏ Contrôle du réglage<br />
ATTENTION: Avant de vérifier l'ajustement de<br />
la chaîne, s’adresser à un centre d’assistance<br />
autorisé <strong>MV</strong> <strong>Agusta</strong> pour vérifier que la valeur<br />
de l'assiette statique de la suspension arrière<br />
est correcte. S'assurer en outre que la chaîne<br />
est correctement lubrifiée.<br />
50 mm<br />
L’axe du brin inférieur de la chaîne doit se trouver à 50<br />
mm du pare-chaîne inférieur. Le contrôle de cette distance<br />
s’effectue en plusieurs points de la chaîne, en tournant<br />
manuellement la roue arrière. Le jeu doit rester pratiquement<br />
constant pendant que la roue tourne. Si la chaîne<br />
présente des fortes variations du jeu, cela signifie que<br />
certains maillons sont écrasés, grippés ou allongées. Si<br />
la distance de la chaîne au pare-chaîne inférieur est<br />
supérieure à 50 mm, il est nécessaire de régler la chaîne.<br />
- 34 -
ENTRETIEN 1<br />
ATTENTION<br />
L’utilisation de la motocyclette avec la<br />
chaîne en mauvaise état ou mal réglée<br />
peut donner lieu à des accidents. Avant<br />
chaque utilisation de la moto, effectuer<br />
le contrôle de la chaîne en conformité<br />
au présent chapitre. Dans le cas où le<br />
réglage de la tension de la chaîne s’impose,<br />
s’adresser à un centre d’assistance<br />
autorisé <strong>MV</strong> <strong>Agusta</strong>.<br />
ATTENTION<br />
Si la chaîne présente des maillons écrasés,<br />
grippés ou allongées, il faut effectuer<br />
le remplacement de la chaîne par un<br />
centre d’assistance autorisé <strong>MV</strong> <strong>Agusta</strong>.<br />
ATTENTION<br />
En cas de détérioration ou d’usure<br />
excessive de la chaîne et des pignons, il<br />
faut s’adresser à un concessionnaire<br />
<strong>MV</strong> <strong>Agusta</strong> pour le remplacement.<br />
Toutes les fois que la chaîne est remplacée,<br />
même les pignons doivent être<br />
renouvelés.<br />
- 35 -<br />
ATTENTION<br />
Il peut être dangereux d’utiliser une<br />
chaîne de type à faux maillon. Un<br />
maillon principal incomplètement riveté<br />
ou de type ouvrant de jonction, peut<br />
s’ouvrir et provoquer des accidents ou<br />
de sérieux dommages au moteur. Ne<br />
pas utiliser de chaînes avec un maillon<br />
ouvrant.<br />
ATTENTION<br />
Chaque fois qu'est requise d'actionner<br />
les vis du moyeu du roue arrière,<br />
contactez un concessionnaire autorisé<br />
<strong>MV</strong> <strong>Agusta</strong>. Afin de serrer les vis, appliquez<br />
un couple de serrage égal à la<br />
valeur montrée dans l'étiquette placée<br />
sur le monobras. L'application d'un<br />
couple plus haut que la valeur indiquée<br />
peut causer l'affaiblissement rapide du<br />
moyeu du roue arrière, compromettant<br />
la fiabilité du véhicule et la sûreté du<br />
pilote.<br />
1<br />
FR
ENTRETIEN 1<br />
FR<br />
1<br />
❏ Lubrification<br />
La chaîne doit être correctement lubrifiée pour<br />
garantir le maximum d’efficacité.<br />
Nettoyage préalable: avant d’effectuer la lubrification,<br />
il est nécessaire de dissoudre les dépôts<br />
de saleté sur la chaîne en utilisant du mazout.<br />
Ces dépôts doivent ensuite être retirés avec un<br />
chiffon propre et/ou un jet d’air.<br />
Rappel - Précaution: la chaîne est du<br />
type à joints toriques. Pour éviter la<br />
détérioration, ne pas effectuer le nettoyage<br />
de la chaîne avec des jets de<br />
vapeur ou d’eau sous haute pression, ni<br />
utiliser d’essence ou de solvants détergents<br />
dans le commerce. Le nettoyage<br />
de la chaîne s’effectue uniquement avec<br />
du mazout.<br />
ATTENTION<br />
Le mazout peut être dangereux. Il est<br />
inflammable. Le contact avec le mazout<br />
peut être nocif pour les enfants et les<br />
animaux domestiques.<br />
Tenir les flammes libres et les objets à<br />
haute température loin du mazout.<br />
Garder les enfants et les animaux<br />
domestiques loin du mazout. Effectuer<br />
correctement le traitement du mazout<br />
usagé.<br />
- 36 -
ENTRETIEN 1<br />
Lubrification: appliquer une couche de lubrifiant<br />
légère et uniforme sur tout le développement<br />
de la chaîne en ayant soin de ne pas toucher les<br />
parties environnantes, en particulier les pneumatiques.<br />
Diriger le jet du lubrifiant sur les maillons<br />
internes, afin de lubrifier la surface des bagues et<br />
pénétrer à l'intérieur du rouleau à chaînes.<br />
Rappel - Précaution: utiliser uniquement<br />
le lubrifiant spécifié au tableau § 1.4.,<br />
afin de protéger la chaîne de transmission<br />
et éviter l'huile injecte quand le<br />
véhicule est en mouvement.<br />
ATTENTION: La lubrification de la chaîne<br />
s’effectue selon les intervalles spécifiées<br />
dans le tableau d’Entretien Programmé<br />
de ce manuel (voir § 1.2.). Il est nécessaire<br />
d’effectuer cette opération même après<br />
la conduite sous la pluie et après chaque<br />
lavage de la motocyclette. L’utilisation de<br />
la motocyclette avec la chaîne en mauvaises<br />
conditions ou non lubrifiée peut<br />
donner lieu à des accidents.<br />
1<br />
FR<br />
- 37 -
ENTRETIEN 1<br />
FR<br />
1<br />
1.13. Régime du ralenti - Contrôle<br />
Le contrôle s’effectue avec le moteur à température de<br />
marche en veillant à que le dispositif “CHOKE” ne soit<br />
pas actionné.<br />
Le régime du ralenti doit être compris entre 1150 et<br />
1250 tr/mn.<br />
Pour ce réglage, il faut s’adresser aux centres de réparation<br />
agréés.<br />
- 38 -
ENTRETIEN 1<br />
1.14. Remplacements - Informations générales<br />
Le remplacement des fusibles et des ampoules (à<br />
l’exception du feu de position avant) peut être réalisé<br />
par le motard en suivant à la lettre les indications<br />
données:<br />
1.14.1. Fusibles - Remplacement<br />
Le fusible de charge de la batterie se trouve<br />
sur le telerupteur de démarreur de la moto. Pour<br />
y accéder, il faut démonter la selle du pilote.<br />
1<br />
FR<br />
Fusible de charge batterie<br />
Fusible services<br />
Projecteur - Remplacement ampoule<br />
Eclaireur de plaque - Remplacement ampoule<br />
Telerupteur<br />
de démarreur<br />
- 39 -
ENTRETIEN 1<br />
FR<br />
1<br />
PRÉCAUTION<br />
Tourner la clé de contact sur la position<br />
“OFF” avant de contrôler ou de remplacer<br />
les fusibles, dans le but d’éviter les<br />
courts-circuits accidentels avec risques<br />
d’endommager les autres composants<br />
électriques.<br />
Fusible de charge (40 A)<br />
Fusible de rechange (40 A)<br />
Pour remplacer le fusible, il faut invertir la position<br />
du fusible de charge avec le fusible de<br />
rechange.<br />
ATTENTION<br />
Ne pas utiliser un fusible avec une capacité<br />
différente de celle indiquée, dans le<br />
but d’éviter la détérioration de l’installation<br />
électrique de la motocyclette avec<br />
danger d’incendie.<br />
- 40 -
ENTRETIEN 1<br />
Les fusibles des services se trouvent sur le<br />
côté gauche. Pour y accéder, il faut démonter le<br />
flanc de carénage (voir § 1.5.).<br />
Libérer les deux brides et soulever le couvercle.<br />
1<br />
FR<br />
PRÉCAUTION<br />
Tourner la clé de contact sur la position<br />
“OFF” avant de contrôler ou de remplacer<br />
les fusibles, dans le but d’éviter les<br />
courts-circuits accidentels avec risques<br />
d’endommager les autres composants<br />
électriques.<br />
- 41 -
ENTRETIEN 1<br />
FR<br />
1<br />
Remplacer le fusible grillé et remonter le couvercle.<br />
- 42 -
ENTRETIEN 1<br />
Pour déterminer la position et le fonction du<br />
fusible, consulter les informations données sur le<br />
schéma électrique fourni. Les lettres de références<br />
indiquées sur la figure correspondent à<br />
celles du schéma.<br />
Il faut se rappeler que la trousse à outils contient<br />
trois fusibles de rechange.<br />
ATTENTION<br />
Ne pas utiliser un fusible avec une capacité<br />
différente de celle indiquée, dans le<br />
but d’éviter la détérioration de l’installation<br />
électrique de la motocyclette avec<br />
danger d’incendie.<br />
F1 F2 F3 <strong>F4</strong> F5 F6 F7<br />
15A<br />
15A<br />
15A<br />
15A<br />
15A<br />
15A<br />
15A<br />
1<br />
FR<br />
- 43 -
ENTRETIEN 1<br />
FR<br />
1<br />
1.14.2. Eclaireur de plaque - Remplacement ampoule<br />
Enlever les vis de fixation du couvercle infériueur du<br />
porte-balai.<br />
- 44 -
ENTRETIEN 1<br />
Enlever le couvercle inférieur.<br />
1<br />
FR<br />
Extraire le porte-ampoule en le désenfilant de sa<br />
siège.<br />
- 45 -
ENTRETIEN 1<br />
FR<br />
1<br />
Extrarire l’ampoule.<br />
Introduire l’ampoule neuve.<br />
Remettre en place le porte-ampoule.<br />
Remounter le couvercle inférieur du porte-balai.<br />
Prudence: Avant d’effectuer le remontage il<br />
faut faire attention à la correcte disposition du<br />
faisceau des câbles des feux arrière, afin d’éviter<br />
de l’endommager.<br />
- 46 -
ENTRETIEN 1<br />
1.15. Batterie<br />
Cette motocyclette est équipée d’une batterie<br />
cachetée montée sous l’élément de carénage<br />
arrière. Elle est exempte d’entretien , il n’est donc<br />
pas nécessaire de contrôler le niveau de liquide ni<br />
d’ajouter de l’eau distillée.<br />
Si la batterie semble déchargée (causant des problèmes<br />
électriques ou des démarrages difficiles),<br />
faites la charger le plus tôt possible auprès d’un<br />
concessionnaire <strong>MV</strong> <strong>Agusta</strong>. Il faut se rappeler<br />
que la batterie a tendance à se décharger plus<br />
rapidement si la motocyclette est équipée des<br />
accessoires électriques en option.<br />
ATTENTION<br />
Si le corps extérieur de la batterie est<br />
endommagé, il peut se produire des<br />
écoulements d’acide sulfurique, une<br />
substance toxique et hautement corrosive.<br />
Eviter tout contact avec la peau,<br />
les yeux et les vêtements. Toujours se<br />
protéger les yeux lorsqu’on travaille à<br />
proximité de la batterie.<br />
En cas de contact, donner les PRE-<br />
MIERS SECOURS suivants:<br />
• CONTACT EXTERNE: Rincer à l’eau<br />
abondante.<br />
• CONTACT INTERNE: Boire de grandes<br />
quantités d’eau ou de lait et appeler<br />
immédiatement un médecin.<br />
• YEUX: Rincer à l’eau pendant 15 mn et<br />
appeler immédiatement un médecin.<br />
L’écoulement d’acide sulfurique comporte<br />
également la formation d’hydrogène<br />
qui peut provoquer une explosion en<br />
présence d’une étincelle ou d’une flamme.<br />
Pour effectuer le remplacement de<br />
la batterie, il est nécessaire de s’adresser<br />
à un centre d’assistance autorisé<br />
<strong>MV</strong> <strong>Agusta</strong>.<br />
1<br />
FR<br />
- 47 -
ENTRETIEN 1<br />
FR<br />
1<br />
Inactivité prolongée<br />
Si la moto est destinée à ne pas être utilisée pendant<br />
une période prolongée (un mois ou plus), il<br />
est conseillé de débrancher les cosses de batterie<br />
ou de faire déposer celle-ci par un mécanicien<br />
qualifié. En cas de longue inactivité, il est recomandé<br />
de faire recharger la batterie par un<br />
concessionnaire <strong>MV</strong> <strong>Agusta</strong> tous les 4-5 mois,<br />
afin de garantir sa durée dans le temps.<br />
DANGER<br />
L’inversion des câbles de la batterie<br />
peut endommager le circuit de charge et<br />
la batterie. Le câble rouge se branche<br />
sur la borne du positif (+) et les câbles<br />
noirs sur celle du négatif (-). Pour la<br />
dépose de la batterie, débrancher EN<br />
PREMIER la cosse du pôle négatif puis<br />
celle du positif. Pour le montage, procéder<br />
de manière inverse.<br />
- 48 -
ENTRETIEN 1<br />
1.16. Nettoyage de la moto<br />
Le nettoyage périodique et méticuleux<br />
est important pour préserver la valeur<br />
de la moto dans le temps, en protégeant<br />
la finition de toutes les superficies<br />
et en contrôlant qu’il n’y a pas d’usure<br />
ou de fuites de fluides corrosifs.<br />
Rappel - Précaution: avant d’effectuer<br />
le lavage, obturer les<br />
tuyaux d’échappement et protéger<br />
les composants électriques.<br />
ATTENTION: Si la moto est<br />
encore chaude à cause d’une<br />
utilisation récente, attendre<br />
que le moteur et le circuit<br />
d’échappement aient refroidi.<br />
NOTE: Les détergents sont<br />
polluants pour l'environnement.<br />
Le nettoyage du véhicule<br />
doit donc être effectué<br />
dans des zones équipées<br />
pour la récolte et l'épuration<br />
des liquides de lavage.<br />
Rappel - Précaution: ne pas utiliser de machines de<br />
lavage à jet d’eau sous haute pression ou à vapeur,<br />
car elles peuvent provoquer des infiltrations d’eau et<br />
la détérioration des composant de la moto.<br />
1<br />
FR<br />
- 49 -
ENTRETIEN 1<br />
FR<br />
1<br />
Laver à l’eau, à l’éponge et utiliser un détergent<br />
non agressif. Sécher avec un chiffon doux. Dans<br />
les zones moins accessibles, utiliser un jet d’air<br />
comprimé.<br />
Rappel - Précautions:<br />
• Veiller à ne pas utiliser de chiffons ou<br />
d’éponges ayant été en contact avec<br />
des produits de nettoyage forts ou abrasifs,<br />
des solvants ou de l’essence.<br />
• Pour éviter des dégâts irréversibles<br />
au carénage, ne pas utiliser de détergents<br />
alcalins ou avec une forte acidité,<br />
essence, liquide pour freins ou autres<br />
solvants. Nettoyer le carénage uniquement<br />
avec un chiffon doux, de l’eau<br />
tiède et un détergent neutre.<br />
• Si vous avez des doutes sur la composition<br />
chimique du détergent, examinent<br />
son effet en l'appliquant sur un secteur du<br />
carénage avant de l'employer sur la moto.<br />
Périodiquement, traiter les peintures avec un produit<br />
spécial. En cas de trajets sur routes traitées<br />
avec des produits corrosifs (sel), effectuer le lavage<br />
dès que possible en utilisant de l’eau froide:<br />
l’eau chaude favorise l’action corrosive.<br />
ATTENTION: Veiller à ce qu’il n’y ait pas<br />
d’huile ou de cire sur les freins ou sur<br />
les pneus. Si nécessaire, nettoyer les<br />
disques des freins avec un détergent<br />
pour disques de frein ou avec de l’acétone<br />
et laver les pneus à l’eau chaude et<br />
avec un détergent neutre.<br />
ATTENTION: Si les freins sont mouillés,<br />
la puissance de freinage peut s’en trouver<br />
diminuée. Après le lavage, démarrer<br />
le moteur quelques minutes, se mettre<br />
en route à vitesse réduite et effectuer<br />
quelques freinages avec précaution<br />
pour sécher les plaquettes et les<br />
disques des freins.<br />
ATTENTION: La chaîne de transmission<br />
doit être lubrifiée juste après le lavage et<br />
le séchage de la moto selon les instructions<br />
données au §1.12 de ce manuel.<br />
- 50 -
ENTRETIEN 1<br />
1.17. Période d’arrêt prolongé<br />
Si l’on prévoir de laisser la moto à l’arrêt pendant une longue<br />
période, il est préférable d’effectuer les opérations ci-dessous.<br />
Vidanger le réservoir à carburant.<br />
Retirer la batterie et la conserver correctement.<br />
Retirer les capuchons des bougies et les bougies. Verser une cuillère à café d’huile moteur dans<br />
chacun des orifices de bougie puis remonter les bougies et leur capuchon et faire tourner le<br />
moteur à vide de quelques tours.<br />
Lubrifier tous les câbles de commande et les axes de rotation de tous les leviers et pédales.<br />
Nettoyer la moto et traiter les parties peintes avec des produits spéciaux (§1.16.).<br />
Afin de garantir l’intégrité et la qualité des pneus, garer la moto dans une endroit frais, sec et sombre<br />
avec une température relativement constante et inférieure à 25°C.<br />
Eviter le contact direct des pneus avec les canalisations ou les radiateurs de chauffage ainsi que<br />
le contact prolongé avec huile et essence. Eviter de ranger les pneus à proximité de moteurs électriques<br />
ou appareillages en mesure de générer des étincelles ou des décharges électriques.<br />
Pendant la période de stationnement, maintenir la moto soulevée sur la béquille arrière.<br />
Couvrir la moto avec une bâche appropriée.<br />
Lors de la première utilisation de la moto, faire un contrôle<br />
général et faire effectuer l’entretien (§1.2.) si nécessaire.<br />
1<br />
FR<br />
- 51 -
PANNES 2<br />
2.1. Problèmes au moteur: LE MOTEUR NE DÉMARRE PAS<br />
FR<br />
2<br />
Le coupe-circuit<br />
est actionné?<br />
OUI<br />
Renvoyer le coupe-circuit<br />
en position de repos<br />
Le moteur<br />
démarre?<br />
OUI<br />
Problème résolu<br />
NON<br />
NON<br />
Vitesse enclenchée<br />
et béquille latérale<br />
baissée<br />
OUI<br />
Mettre au point mort<br />
ou remonter la béquille<br />
et tirer le levier d’embrayage<br />
Le moteur<br />
démarre?<br />
OUI<br />
Problème résolu<br />
NON<br />
NON<br />
La procédure<br />
de démarrage n’a<br />
pas été faite<br />
correctement?<br />
NON<br />
Effectuer la procédure<br />
de démarrage<br />
correctement<br />
Le moteur<br />
démarre?<br />
OUI<br />
Problème résolu<br />
OUI<br />
NON<br />
Le réservoir à<br />
carburant est<br />
vide?<br />
OUI<br />
Approvisionner en<br />
carburant<br />
Le moteur<br />
démarre?<br />
OUI<br />
Problème résolu<br />
NON<br />
NON<br />
Suite page suivante<br />
- 52 -
PANNES 2<br />
Suite de la page précédente<br />
Les fusibles <strong>F4</strong> et<br />
F6 sont-ils<br />
en bon état?<br />
NON<br />
Remplacer les<br />
fusibles <strong>F4</strong> et F6<br />
(§1.14.1.)<br />
Le moteur<br />
démarre?<br />
OUI<br />
Problème résolu<br />
2<br />
FR<br />
OUI<br />
NON<br />
La batterie est<br />
chargée?<br />
NON<br />
Faire recharger la<br />
batterie par un centre<br />
de réparation agréé<br />
<strong>MV</strong> <strong>Agusta</strong><br />
Le moteur<br />
démarre?<br />
OUI<br />
Problème résolu<br />
OUI<br />
NON<br />
Le code de la clé<br />
a été reconnu?<br />
NON<br />
Inserer le code imprimé<br />
sur la <strong>MV</strong> Code Card<br />
par un centre de réparation<br />
agreé <strong>MV</strong> <strong>Agusta</strong><br />
Le moteur<br />
démarre?<br />
OUI<br />
Problème résolu<br />
OUI<br />
NON<br />
S’adresser aux centres<br />
de réparations agréés<br />
<strong>MV</strong> <strong>Agusta</strong><br />
- 53 -
PANNES 2<br />
LE MOTEUR A COUPÉ TOUT EN COURANT<br />
FR<br />
2<br />
Le tableau<br />
de bord est<br />
allumé?<br />
NON<br />
S’adresser aux centres<br />
de réparations agréés<br />
<strong>MV</strong> <strong>Agusta</strong><br />
OUI<br />
Le réservoir à<br />
carburant est<br />
vide?<br />
NON<br />
Approvisionner en<br />
carburant<br />
Le moteur tourne<br />
OUI<br />
Problème résolu<br />
NON<br />
NON<br />
Les fusibles <strong>F4</strong> et<br />
F6 sont-ils<br />
en bon état?<br />
NON<br />
Remplacer les<br />
fusibles <strong>F4</strong> et F6<br />
(§1.14.1.)<br />
Le moteur tourne<br />
OUI<br />
Problème résolu<br />
OUI<br />
NON<br />
S’adresser aux centres<br />
de réparations agréés<br />
<strong>MV</strong> <strong>Agusta</strong><br />
- 54 -
PANNES 2<br />
LE MOTEUR SURCHAUFFE<br />
Le niveau<br />
de liquide de refroidissement<br />
est correct?<br />
(§1.7.)<br />
OUI<br />
NON<br />
S’adresser aux centres<br />
de réparations agréés<br />
<strong>MV</strong> <strong>Agusta</strong><br />
2<br />
FR<br />
Le fusible F5<br />
est-il en bon<br />
état?<br />
NON<br />
Remplacer le fusible F5<br />
(§1.14.1.)<br />
Le moteur est à<br />
la température de<br />
fonctionnement?<br />
OUI<br />
Problème résolu<br />
OUI<br />
NON<br />
S’adresser aux centres<br />
de réparations agréés<br />
<strong>MV</strong> <strong>Agusta</strong><br />
- 55 -
PANNES 2<br />
LAPRESSION D’HUILE EST INSUFFISANTE (Le voyant de pression d’huile moteur est allumé avec le moteur courant)<br />
FR<br />
2<br />
Le niveau d’huile<br />
est-il correct?<br />
(§1.6.)<br />
NON<br />
Faire reconstituer le<br />
niveau d'huile par un<br />
centre de réparation<br />
agréé <strong>MV</strong> <strong>Agusta</strong><br />
La pression de<br />
l’huile est maintenant<br />
à la valeur<br />
correcte?<br />
OUI<br />
Problème résolu<br />
OUI<br />
NON<br />
S’adresser aux centres<br />
de réparations agréés<br />
<strong>MV</strong> <strong>Agusta</strong><br />
- 56 -
PANNES 2<br />
2.2. Problèmes de nature électrique: LES FEUX NE FONCTIONNENT PAS<br />
Les fusibles<br />
des feux sont-ils<br />
en bon état?<br />
NON<br />
Remplacer le/les<br />
fusible(s) (§1.14.1.)<br />
Les feux<br />
fonctionnent?<br />
OUI<br />
Problème résolu<br />
2<br />
FR<br />
OUI<br />
NON<br />
Les ampoules<br />
sont-elles en<br />
état?<br />
NON<br />
Remplacer la/les<br />
ampoule(s) (§1.14.)<br />
Les feux<br />
fonctionnent?<br />
OUI<br />
Problème résolu<br />
OUI<br />
NON<br />
S’adresser aux centres<br />
de réparations agréés<br />
<strong>MV</strong> <strong>Agusta</strong><br />
- 57 -
PANNES 2<br />
L’AVERTISSEUR SONORE NE FONCTIONNE PAS<br />
FR<br />
2<br />
Le fusible F1<br />
est-il en bon<br />
état?<br />
NON<br />
Remplacer le fusible F1<br />
(§1.14.1.)<br />
L’avertisseur<br />
sonore<br />
fonctionne?<br />
OUI<br />
Problème résolu<br />
OUI<br />
NON<br />
S’adresser aux centres<br />
de réparations agréés<br />
<strong>MV</strong> <strong>Agusta</strong><br />
LE COMPTEUR KILOMETRIQUE NE FONCTIONNE PAS<br />
Le fusible F1<br />
est-il en bon<br />
état?<br />
NON<br />
Remplacer le fusible F1<br />
(§1.14.1.)<br />
Le compteur<br />
kilométrique<br />
fonctionne?<br />
OUI<br />
Problème résolu<br />
OUI<br />
NON<br />
S’adresser aux centres<br />
de réparations agréés<br />
<strong>MV</strong> <strong>Agusta</strong><br />
- 58 -
PANNES 2<br />
LES VOYANTS DU TABLEAU DE BORD NE FONCTIONNENT PAS<br />
Le fusible F1<br />
est-il en bon<br />
état?<br />
NON<br />
Remplacer le fusible F1<br />
(§1.14.1.)<br />
Les voyants<br />
fonctionnent?<br />
OUI<br />
Problème résolu<br />
2<br />
FR<br />
OUI<br />
NON<br />
S’adresser aux centres<br />
de réparations agréés<br />
<strong>MV</strong> <strong>Agusta</strong><br />
L’ALTERNATEUR NE CHARGE PAS LA BATTERIE (Le voyant limiteur de tours est allumé avec le moteur courant)<br />
Le fusible<br />
de charge de la<br />
batterie est-il en<br />
bon état?<br />
NON<br />
Remplacer le fusible de<br />
charge de la batterie<br />
(§1.14.1.)<br />
L'alternateur<br />
charge la<br />
batterie?<br />
OUI<br />
Problème résolu<br />
OUI<br />
NON<br />
S’adresser aux centres<br />
de réparations agréés<br />
<strong>MV</strong> <strong>Agusta</strong><br />
- 59 -
INFORMATIONS TECHNIQUES 3<br />
3.1. Description générale de la moto<br />
(N) Tableau de bord<br />
(B) Allumage - alimentation<br />
FR<br />
3<br />
(G) Suspension avant<br />
(I) Batterie<br />
(O) Èchappement<br />
(E) Refroidissement<br />
(L) Frein avant<br />
(F) Cadre<br />
(A) Moteur<br />
(C) Boîte de vitesses<br />
(H) Suspension arrière<br />
(M) Frein arrière<br />
(D) Transmission finale<br />
- 60 -
INFORMATIONS TECHNIQUES 3<br />
A - Moteur: quatre temps, quatre cylindres en<br />
ligne. Distribution par double arbre à cames<br />
en tête avec soupapes radiales. Graissage à<br />
carter humide.<br />
B - Allumage - alimentation: Système intégré<br />
d’allumage - injection. Allumage électronique<br />
à décharge inductive. Injection électronique<br />
“Multipoint”.<br />
C - Boîte de vitesses: du type extractible, à six<br />
rapports avec pignons en prise constante.<br />
D - Transmission finale: composée de pignon,<br />
couronne et chaîne.<br />
E - Refroidissement: à liquide et huile avec<br />
radiateurs séparés.<br />
F - Cadre: à treillis, en tube d’acier, avec plaques<br />
latérales en aluminium.<br />
G - Suspension avant: fourche oléodynamique<br />
à tubes inversés, équipée d’un système extérieur<br />
de réglage.<br />
H - Suspension arrière: à action progressive<br />
avec monobras oscillant et monoamortisseur<br />
équipé d’un système extérieur de réglage.<br />
I<br />
- Batterie: scellée et sans entretien.<br />
L - Frein avant: double disque semi-flottant avec<br />
étriers à quatre pistons.<br />
M - Frein arrière: un seul disque avec étrier à<br />
quatre pistons.<br />
N - Tableau de bord: équipé de voyants lumineux<br />
et d’appareillage digital.<br />
O - Èchappement: équipé de convertisseur<br />
catalytique pour la réduction des émissions<br />
d'échappement.<br />
3<br />
FR<br />
- 61 -
INFORMATIONS TECHNIQUES 3<br />
3.1.1 Circuit de frein avant<br />
2<br />
1<br />
FR<br />
3<br />
3<br />
5<br />
4<br />
4<br />
5<br />
1 Groupe maître-cylindre<br />
2 Levier de frein<br />
3 Canalisation de frein<br />
4 Etrier de frein<br />
5 Disques de frein<br />
- 62 -
INFORMATIONS TECHNIQUES 3<br />
3.1.2. Circuit de frein arrière<br />
4<br />
3<br />
FR<br />
6<br />
3<br />
5<br />
1 2<br />
1 Levier de frein<br />
2 Maître-cylindre<br />
3 Canalisation<br />
4 Réservoir de liquide<br />
de frein<br />
5 Etrier de frein<br />
6 Disque de frein<br />
- 63 -
INFORMATIONS TECHNIQUES 3<br />
3.1.3. Circuit d’embrayage<br />
FR<br />
3<br />
1<br />
2<br />
3 4<br />
1 Levier d’embrayage<br />
2 Groupe maître-cylindre<br />
d’embrayage<br />
3 Canalisation<br />
4 Groupe cylindre de<br />
débrayage<br />
- 64 -
INFORMATIONS TECHNIQUES 3<br />
3.1.4. Graissage du moteur<br />
3<br />
FR<br />
3<br />
1 2<br />
1 Carter d’huile<br />
2 Filtre à huile<br />
3 Canalisation de<br />
refoulement de l’huile<br />
à la culasse<br />
- 65 -
INFORMATIONS TECHNIQUES 3<br />
3.1.5. Circuit de refroidissement<br />
1<br />
2<br />
FR<br />
3<br />
3 4<br />
1 Vase d’expansion<br />
2 Radiateur supérieur<br />
3 Radiateur inférieur<br />
4 Pompe de liquide<br />
- 66 -
INFORMATIONS TECHNIQUES 3<br />
3.1.6. Circuit d’alimentation<br />
1<br />
3<br />
FR<br />
2<br />
3<br />
1 Corps de papillon<br />
2 Pompe à carburant<br />
3 Canalisation de<br />
carburant<br />
- 67 -
INFORMATIONS TECHNIQUES 3<br />
2100<br />
750<br />
FR<br />
3<br />
830<br />
115<br />
3.2. Données techniques<br />
1430<br />
Description <strong>F4</strong> <strong>1000</strong><br />
CARACTÉRISTIQUES<br />
Empattement (mm) (*) 1430<br />
Longueur hors tout (mm) (*) 2100<br />
Largeur hors tout (mm) 750<br />
Hauteur de selle (mm) (*) 830<br />
Garde au sol (mm) (*) 115<br />
Chasse (mm) (*) 100,4<br />
* : Les valeurs déclarées sont sans engagement. Elles sont susceptibles de variations en fonction des conditions d’assiette du véhicule.<br />
- 68 -
INFORMATIONS TECHNIQUES 3<br />
Données techniques<br />
Description <strong>F4</strong> <strong>1000</strong><br />
Poids à vide (Kg) 192<br />
Contenance du réservoir carburant (lt) (*) 17<br />
Réserve de carburant (lt) (*) 4<br />
Qté d’huile dans l’embase (lt) 3,5<br />
MOTEUR<br />
Type<br />
Quatre cylindres 4 temps, 16 soupapes<br />
Alésage (mm) 76<br />
Course (mm) 55<br />
Cylindrée totale (cm 3 ) 998<br />
Rapport de compression 13,1 : 1<br />
Démarreur<br />
Electrique<br />
Refroidissement<br />
À liquide et huile avec radiateurs séparés<br />
Carter moteur et couvercles<br />
Moulés sous pression<br />
Culasse et cylindres<br />
Moulés en coquille<br />
Soupapes<br />
Bimétalliques / monométalliques<br />
DISTRIBUTION<br />
Type<br />
Double arbre à cames en tête, soupapes radiales<br />
3<br />
FR<br />
* : Les valeurs déclarées sont sans engagement. Elles sont susceptibles de variations en fonction de la température extérieure,<br />
de la température du moteur et du point d’évaporation de l’essence utilisée.<br />
- 69 -
INFORMATIONS TECHNIQUES 3<br />
Données techniques<br />
FR<br />
3<br />
Description <strong>F4</strong> <strong>1000</strong><br />
GRAISSAGE<br />
Type<br />
A carter humide<br />
ALLUMAGE – ALIMENTATION<br />
Type<br />
Système intégré de d'allumage-injection Magneti Marelli IAW 7BM<br />
avec corps de papillon Mikuni; allumage électronique à décharge inductive;<br />
injection électronique “Multipoint” séquentielle a phase complète; cornets<br />
d’aspiration à hauteur varaible avec système Torque Shift System (TSS)<br />
Bougies<br />
NGK CR9 EB<br />
Ecartement des électrodes (mm) 0,7 ÷ 0,8<br />
EMBRAYAGE<br />
Type<br />
Multidisque en bain d’huile avec dispositif mécanique d'anti-houblon<br />
TRANSMISSION PRIMAIRE<br />
Nombre de dents du pignon de vilebrequin Z = 50<br />
Nombre de dents du pignon d’embrayage Z = 79<br />
Rapport de transmission 1,58<br />
TRANSMISSION SECONDAIRE<br />
Nombre de dente du pignon Z = 15<br />
Nombre de dents de la couronne Z = 41<br />
Rapport de transmission 2,73<br />
BOITE DE VITESSES<br />
Type<br />
Extractible à six vitesses avec pignons en prise constante<br />
- 70 -
INFORMATIONS TECHNIQUES 3<br />
Données techniques<br />
Descrizione <strong>F4</strong> <strong>1000</strong><br />
Rapports boite de vitesses (rapports totaux)<br />
Première 2.92 (12.60)<br />
Seconde 2.12 (9.14)<br />
Troisième 1.78 (7.68)<br />
Quatrième 1.50 (6.47)<br />
Cinquième 1.32 (5.69)<br />
Sixième 1.21 (5.22)<br />
CADRE<br />
Type<br />
Tube à tresse en acier CrMo (soudé en TIG)<br />
Plaque d’ancrage du bras oscillant<br />
Alliage de aluminium<br />
SUSPENSION AVANT<br />
Type<br />
Fourche oléodynamique à tubes inversés avec système de réglage extérieur<br />
et séparé du freinage en détente, compression et de la précharge du ressort<br />
Ø des tubes (mm) 50<br />
Débattement 120<br />
SUSPENSION ARRIÈRE<br />
Type<br />
Progressive, monoamortisseur réglable en détente, en compression<br />
(Vitesse élevée/Vitesse basse) et en précharge du ressort<br />
Bras oscillant<br />
Alliage de aluminium<br />
Débattement (mm) 120<br />
3<br />
FR<br />
- 71 -
INFORMATIONS TECHNIQUES 3<br />
Données techniques<br />
FR<br />
3<br />
Description <strong>F4</strong> <strong>1000</strong><br />
FREIN AVANT<br />
Type<br />
A double disque flottant avec bande freinante en acier<br />
Ø disque (mm) 320<br />
Plateau de frein<br />
Aluminum<br />
Etriers (diamètre des pistons mm) Radiaux mono-pièce a 4 pistons (Ø 34)<br />
FREIN ARRIÈRE<br />
Type<br />
A disque en acier<br />
Ø disque (mm) 210<br />
Etrier (diamètre des pistons mm) A 4 pistons (Ø 25.4)<br />
JANTE AVANT<br />
Matériau<br />
Forgée en alliage d’aluminium<br />
Dimension 3,50” x 17”<br />
JANTE ARRIÈRE<br />
Matériau<br />
Forgée en alliage d’aluminium<br />
Dimension 6,00” x 17”<br />
PNEUMATIQUES<br />
Avant 120/70-ZR 17 (58 W)<br />
Arrière 190/55-ZR 17 (75 W)<br />
- 72 -
INFORMATIONS TECHNIQUES 3<br />
Données techniques<br />
Descrizione <strong>F4</strong> <strong>1000</strong><br />
Marque et type<br />
PIRELLI - Diablo Supercorsa SP<br />
DUNLOP - Sportmax Qualifier RR<br />
Pression de gonflage (*) À une vitesse plus basse que 300 km/h À une vitesse plus haute que 300 km/h<br />
Avant PIRELLI: 2.3 bar (33 psi) 2.5 bar (36 psi)<br />
DUNLOP: 2.3 bar (33 psi) 2.5 bar (36 psi)<br />
Arrière PIRELLI: 2.3 bar (33 psi) 2.9 bar (42 psi)<br />
DUNLOP: 2.3 bar (33 psi) 2.9 bar (42 psi)<br />
ÉQUIPEMENT ÉLECTRIQUE<br />
Tension du circuit<br />
12V<br />
Feu projecteur<br />
OSRAM Xenarc D1S 35W<br />
Feu de position arrière<br />
12V 5W<br />
Batterie<br />
12V - 8,6Ah<br />
Alternateur<br />
350 W à 5000 tr/mn.<br />
CARROSSERIE<br />
Carénage<br />
Matière thermoplastique<br />
Bulle<br />
Matière thermoplastique<br />
Element de queue<br />
Matière thermoplastique<br />
Réservoir<br />
Matière thermoplastique<br />
* : Dans le cas de pneus d’une autre marque que celle préconisée, se référer à la valeur de pression de gonflage marquée par<br />
le constructeur sur le flanc du pneumatique.<br />
3<br />
FR<br />
- 73 -
INFORMATIONS TECHNIQUES 3<br />
Données techniques<br />
FR<br />
3<br />
Description <strong>F4</strong> <strong>1000</strong><br />
Conduits d’admission<br />
Matière thermoplastique<br />
Airbox<br />
Matière thermoplastique<br />
Flancs airbox<br />
Matière thermoplastique<br />
Garde-boue avant<br />
Matière thermoplastique<br />
Protection chaîne<br />
Matière thermoplastique<br />
Protection tuyau d’échappement<br />
Aluminium<br />
Plaque isolante<br />
Matière thermoplastique<br />
Support de plaque d’immatriculation<br />
Matière thermoplastique<br />
- 74 -
INFORMATIONS TECHNIQUES 3<br />
3<br />
FR<br />
- 75 -
INFORMATIONS TECHNIQUES 3<br />
5<br />
6<br />
3 4<br />
2<br />
11<br />
FR<br />
3<br />
7<br />
1<br />
12<br />
9<br />
10<br />
8<br />
- 76 -
INFORMATIONS TECHNIQUES 3<br />
3.3. Références couleurs des composants du carénage<br />
Les parties peintes du carénage présentent les couleurs de référence suivantes, en relation avec le code<br />
couleur respectif de la moto:<br />
1. - Bulle de carénage;<br />
2. - Rétroviseur gauche;<br />
3. - Rétroviseur droit;<br />
4. - Airbox;<br />
5. - Réservoir d’essence;<br />
6. - Flanc arrière gauche;<br />
7. - Flanc arrière droit:<br />
Code couleur A:<br />
Rouge pastel<br />
(Réf. Palinal 926R750)<br />
Code couleur B:<br />
Noir brillant<br />
(Réf. Palinal 929R486H)<br />
Code couleur C:<br />
Gris Titanium<br />
(Réf. Palinal L821)<br />
8. - Flanc de carénage gauche;<br />
9. - Flanc de carénage droit;<br />
10. - Bas de carénage;<br />
11. - Flanc réservoir gauche;<br />
12. - Flanc réservoir droit:<br />
Code couleur A:<br />
Argent métallisée<br />
(Réf. Palinal 928XV025)<br />
Code couleur B:<br />
Noir mat<br />
(Réf. Palinal 929XR486 + Palinal Matt 3)<br />
Code couleur C:<br />
Gris Admiral<br />
(Réf. Palinal L820)<br />
3<br />
FR<br />
- 77 -
INFORMATIONS TECHNIQUES 3<br />
1<br />
2<br />
FR<br />
3<br />
3<br />
4<br />
- 78 -
INFORMATIONS TECHNIQUES 3<br />
3.4. Références couleurs des composants du cadre<br />
Les parties peintes du cadre de la moto présentent les couleurs de référence suivantes:<br />
1. - Cadre:<br />
Code couleur A-B:<br />
Gris Anthracite métallisée<br />
(Réf. Palinal 926XH893)<br />
Code couleur C:<br />
Rouge cadre<br />
(Réf. Palinal 211XH987)<br />
3. - Moteur:<br />
Noir mat<br />
(Réf. Pulverit 3500/0085)<br />
3<br />
FR<br />
2. - Support projecteur:<br />
Gris Anthracite métallisée<br />
(Réf. Palinal 926XH893)<br />
4. - Couvercle culasse moteur:<br />
Rouge cadre<br />
(Réf. Palinal 211XH987)<br />
- 79 -
NOTES<br />
FR<br />
3<br />
Note d’information<br />
<strong>MV</strong> <strong>Agusta</strong> S.p.A. poursuit une politique de continuelle amélioration de ses produits. Pour cette raison, de<br />
légères différences pourraient éventuellement se présenter entre les informations de ce livret et le véhicule<br />
que vous avez acheté. Les modèles <strong>MV</strong> <strong>Agusta</strong> s’exportent dans de nombreux pays où des normes différentes<br />
sont en vigueur en ce qui concerne le Code de la Route et les procédures d’homologation. En espérant<br />
pouvoir compter sur votre compréhension, il est indispensable à <strong>MV</strong> <strong>Agusta</strong> S.p.A. de se réserver le<br />
droit d’apporter des modifications à ses produits et à la documentation technique à tout moment sans fournir<br />
de préavis.<br />
Nous suggérons de visiter souvent le site Internet www.mvagusta.it afin d'obtenir des informations et des<br />
mises à jour sur les produits <strong>MV</strong> <strong>Agusta</strong> et la documentation relative.<br />
Respectons et défendons l’environnement<br />
Toutes nos actions ont des répercussions sur la planète entière et sur ses ressources.<br />
<strong>MV</strong> <strong>Agusta</strong>, au profit des intérêts de tous, sensibilise les Clients et les opérateurs du service après-vente<br />
pour leur faire adopter des modalités d’utilisation du véhicule et de traitement de ses parties dans le respect<br />
des normes en vigueur en terme de pollution, traitement et recyclage des déchets.<br />
© 2009<br />
Toute reproduction même partielle de ce document est formellement interdite sans autorisation écrite de <strong>MV</strong> <strong>Agusta</strong> S.p.A.<br />
Dét. n° 8000B4299<br />
Edition n° 1 - Décembre 2009<br />
- 80 -
Wartungsanleitung<br />
Deutsche Version
ALLGEMEINES INHALTSVERZEICHNIS<br />
Kap. Inhalt Seite<br />
1 WARTUNG 3<br />
1.1. Zeichenerklärung 3<br />
1.2. Tabelle Wartungs- und Kontrollarbeiten 4<br />
1.3. Mitgeliefertes Bordwerkzeug und Zubehör 14<br />
1.4. Schmiermitteltabelle 15<br />
1.5. Ausbau/ Einbau Seitenteil 16<br />
1.6. Motoröl - Ölstandkontrolle 18<br />
1.6.1. Nachfüllen von Motoröl 19<br />
1.7. Kühlflüssigkeit - Kontrolle Kühlflüssigkeitsstand 21<br />
1.7.1. Kühlflüssigkeit - Nachfüllen von<br />
Kühlflüssigkeit 22<br />
1.8. Bremsbeläge-Kontrolle Abnutzung/Verschleiß 24<br />
1.9. Bremsflüssigkeit - Kontrolle<br />
Bremsflüssigkeitsstand 25<br />
1.10. Flüssigkeit Kupplungsbetätigung -<br />
Kontrolle Flüssigkeitsstand 27<br />
1.11. Reifen - Kontrolle und Wechsel 28<br />
1.12. Kette - Kontrolle und Schmieren 34<br />
1.13. Leerlaufdrehzahl - Kontrolle 38<br />
1.14. Auswechseln - Allgemeine Informationen 39<br />
Kap. Inhalt Seite<br />
1.14.1. Sicherungen - Auswechseln 39<br />
1.14.2. Nummernschildbeleuchtung -<br />
Auswechseln der Birne 44<br />
1.15. Batterie 47<br />
1.16. Fahrzeugpflege 49<br />
1.17. Längeres Stillegen 51<br />
2 STÖRUNGEN 52<br />
2.1. Störungen am Motor 52<br />
2.2. Störungen an der elektrischen Anlage 57<br />
3 TECHNISCHE INFORMATIONEN 60<br />
3.1. Allgemeine Beschreibung des Motorrads 60<br />
3.1.1. Bremskreislauf Vorderradbremse 62<br />
3.1.2. Bremskreislauf Hinterradbremse 63<br />
3.1.3. Kupplungskreislauf 64<br />
3.1.4. Motorschmierung 65<br />
3.1.5. Kühlkreislauf 66<br />
3.1.6. Benzin-Versorgungskreislauf 67<br />
3.2. Technische Daten 68<br />
3.3. Farbkennziffern für Karosseriebauteile 76<br />
3.4. Farbkennziffern für Rahmenbauteile 78<br />
- 2 -
WARTUNG 1<br />
1.1. Zeichenerklärung<br />
Besonders wichtige Textstellen die sich auf die Sicherheit der Personen oder des Fahrzeugs beziehen,<br />
sind mit folgenden Symbolen gekennzeichnet:<br />
1<br />
DE<br />
Gefahr - Achtung: Die mangelnde oder unvollständige Beachtung dieser Vorschriften stellt<br />
eine schwere Unfallgefahr für den Arbeiter oder Dritte dar.<br />
Vorsicht - Vorsichtsmaßnahme: Die Nichteinhaltung der Anweisungen kann schwere und<br />
dauerhafte Schäden am Fahrzeug verursachen.<br />
Folgende Symbole werden benutzt, um anzuzeigen, wer die angegebenen Wartungs- und<br />
Einstellungsarbeiten ausführen darf:<br />
Informationen zu Arbeiten, die vom Motorradfahrer ausgeführt werden dürfen.<br />
Informationen zu arbeiten, die ausschließlich von ausgebildetem Fachpersonal ausgeführt<br />
werden dürfen.<br />
Um weitere Informationen hervorzuheben, werden folgende Symbole verwendet:<br />
Das Symbol zeigt an, dass für die richtige Durchführung der angegebenen Arbeit ein<br />
Spezialwerkzeug oder Sonderausrüstung benötigt werden.<br />
§ Das Zeichen “§” gefolgt von einen Ziffer verweist auf das entsprechende Kapitel.<br />
- 3 -
WARTUNG 1<br />
DE<br />
1<br />
1.2. Tabelle Wartungs- und Kontrollarbeiten<br />
Die wichtigsten Wartungs- und Kontrollarbeiten sowie deren zeitlicher<br />
Abstand sind in den entsprechenden Tabellen aufgeführt.<br />
Um das Motorrad funktionsfähig und sicher zu halten, müssen<br />
die angegebenen unbedingt Arbeiten ausgeführt werden.<br />
Die angegebenen Zeitabstände für die Wartungsarbeiten<br />
haben allgemeinen Charakter und gelten für einen Einsatz des<br />
Fahrzeugs unter normalen Bedingungen. Abhängig von<br />
Wetterbedingungen, Straßenzustand, geografischen<br />
Voraussetzungen und persönlichem Einsatz des Fahrzeugs<br />
müssen die angegebenen Zeitabstände unter Umständen<br />
verkürzt werden.<br />
Einige dieser Arbeiten können vom Fahrzeughalter selbst<br />
ausgeführt werden, sofern er über die entsprechenden<br />
Fähigkeiten und Kenntnisse verfügt. Andernfalls müssen diese<br />
Arbeiten vom Kundendienst vorgenommen werden.<br />
Für die Wartungsarbeiten muß das Motorrad auf den hinteren<br />
Ständer gestellt, der Motor abgeschaltet und der<br />
Zündschlüssel auf “OFF” gestellt werden. Zur Kontrolle der<br />
Flüssigkeitsstände sollte das Fahrzeug ohne auf den hinteren<br />
Ständer zu stellen senkrecht gehalten werden.<br />
Nach 36.000 km (22.400 mile) müssen die Arbeiten in den gleichen<br />
Abständen wie in der Tabelle angegeben ausgeführt werden.<br />
- 4 -
WARTUNG 1<br />
ACHTUNG<br />
• Eine falsche Wartung oder die Nichtausführung der empfohlenen Wartungsarbeiten erhöht<br />
das Unfallrisiko und die Gefahr einer Beschädigung des Motorrads.<br />
• Ausschließlich Original <strong>MV</strong> <strong>Agusta</strong> Ersatzteile verwenden. Der Einsatz nicht originaler<br />
Ersatzteile kann zu vorzeitigen Verschleiß führen und verkürzt die Lebenszeit des Motorrads.<br />
• Bei Nichtausführung der empfohlenen Wartungsarbeiten aus dem Wartungsprogramm<br />
oder bei Verwendung nicht originaler Ersatzteile konnte die Garantie veranlassen, unzulässig<br />
zu sein.<br />
• Der Wechsel bzw. das Auffüllen von Schmiermitteln oder anderen Flüssigkeiten darf nur<br />
mit den in § 1.4. angegebenen Produkten erfolgen.<br />
1<br />
DE<br />
ACHTUNG<br />
Vor und nach dem Befahren einer Rennstrecke sollten Sie Ihr Motorrad unbedingt von<br />
einem Fachmann in einer <strong>MV</strong> <strong>Agusta</strong>-Vertragswerkstatt überprüfen lassen.<br />
Das Fahren auf Rennstrecken sollte jedoch eine Ausnahme darstellen und niemals im<br />
Rahmen eines Profi- oder Amateur-Wettkampfes stattfinden.<br />
Der Einsatz auf einer Rennstrecke bedeutet für das Motorrad eine wesentlich stärkere<br />
Abnutzung der diversen Komponenten und verkürzt demnach auch deren Lebensdauer im<br />
Vergleich zur normalen Benutzung auf Straßen und Autobahnen.<br />
- 5 -
WARTUNG 1<br />
DE<br />
1<br />
Tabelle programmierte Wartungsarbeiten<br />
Häufigkeit der Wartungsarbeiten km (mi)<br />
0 <strong>1000</strong> 6000 12000 18000 24000 30000 36000<br />
(600) (3800) (7500) (11200) (14900) (18600) (22400)<br />
Coupon<br />
Vor Auslieferung<br />
A B C D E F G<br />
BESCHREIBUNG<br />
Motoröl<br />
Motorölfilter<br />
ARBEIT<br />
Ölstandkontrolle<br />
Ölwechsel<br />
Wechsel<br />
(Ausschließlich Original <strong>MV</strong><br />
<strong>Agusta</strong> Motorölfilter<br />
verwenden)<br />
Kontrolle / Auffüllen<br />
Vor jedem Fahrtantritt<br />
● ● ● ● ● ● ●<br />
Mindestens einmal jährlich<br />
● ● ● ● ● ● ●<br />
Bei jedem Ölwechsel<br />
Vor jedem Fahrtantritt<br />
Kühlflüssigkeit<br />
Kontrolle / Auffüllen ● ● ● ● ● ● ● ●<br />
Wechsel<br />
Alle zwei Jahre<br />
Kühlanlage Kontrolle Lecks ● ● ● ● ● ● ● ●<br />
Gebläsen Funktionskontrolle ● ● ● ● ● ● ● ●<br />
Ventile Kontrolle/Einstellung ● ● ●<br />
Kette Ventilsteuerung<br />
Kontrolle ● ●<br />
Austausch<br />
●<br />
- 6 -
WARTUNG 1<br />
Tabelle programmierte Wartungsarbeiten<br />
Häufigkeit der Wartungsarbeiten km (mi)<br />
0 <strong>1000</strong> 6000 12000 18000 24000 30000 36000<br />
(600) (3800) (7500) (11200) (14900) (18600) (22400)<br />
Coupon<br />
Vor Auslieferung<br />
A B C D E F G<br />
1<br />
DE<br />
BESCHREIBUNG<br />
Bewegliche Führung<br />
der Ventilsteuerkette<br />
ARBEIT<br />
Kontrolle / Austausch ● ●<br />
Wechsel<br />
Bei jedem Austausch der Ventilsteuerkette<br />
●<br />
Kettenspanner Ventilsteuerung Kontrolle / Austausch ● ● ●<br />
Zündkerzen<br />
Kontrolle / Austausch ● ● ●<br />
Wechsel ● ● ●<br />
Benzinfilter Kontrolle / Austausch ● ● ●<br />
Vergaser Kontrolle und Einstellung ● ● ● ● ● ● ●<br />
Luftfilter Kontrolle / Austausch ● ● ● ● ● ●<br />
Kontrolle Flüssigkeitsstand<br />
Vor jedem Fahrtantritt<br />
Bremsflüssigkeit und Kontrolle Flüssigkeitsstand ● ● ● ● ● ● ●<br />
Kupplung<br />
●<br />
Wechsel<br />
Mindestens alle zwei Jahre<br />
- 7 -
WARTUNG 1<br />
DE<br />
1<br />
Tabelle programmierte Wartungsarbeiten<br />
Häufigkeit der Wartungsarbeiten km (mi)<br />
0 <strong>1000</strong> 6000 12000 18000 24000 30000 36000<br />
(600) (3800) (7500) (11200) (14900) (18600) (22400)<br />
Coupon<br />
Vor Auslieferung<br />
A B C D E F G<br />
BESCHREIBUNG<br />
ARBEIT<br />
Funktionskontrolle<br />
Vor jedem Fahrtantritt<br />
Bremsen/ Kupplung Funktionskontrolle ● ● ● ● ● ● ● ●<br />
Kontrolle Bremskreislauf ● ● ● ● ● ● ● ●<br />
Bremsbeläge<br />
( vorne und hinten )<br />
Abnutzungskontrolle<br />
Alle 1.000 km (600 mile)<br />
Kontrolle / Austausch ● ● ● ● ● ● ●<br />
Benzinleitungen<br />
Austausch<br />
Funktionskontrolle<br />
● ● ● ● ● ● ●<br />
Alle 3 Jahre<br />
Vor jedem Fahrtantritt<br />
Gasgriff Funktionskontrolle ● ● ● ● ● ● ● ●<br />
Prüfen/ Spiel einstellen ● ● ● ● ● ● ● ●<br />
Chokehebel Funktionskontrolle ● ● ● ● ● ● ● ●<br />
Bowdenzüge Kontrolle / Einstellung ● ● ● ● ● ● ● ●<br />
- 8 -
WARTUNG 1<br />
Tabelle programmierte Wartungsarbeiten<br />
Häufigkeit der Wartungsarbeiten km (mi)<br />
0 <strong>1000</strong> 6000 12000 18000 24000 30000 36000<br />
(600) (3800) (7500) (11200) (14900) (18600) (22400)<br />
Coupon Vor Auslieferung<br />
A B C D E F G<br />
1<br />
DE<br />
BESCHREIBUNG<br />
ARBEIT<br />
Kontrolle<br />
Schmieren<br />
Alle 1.000 km (600 mile)<br />
Alle 1.000 km (600 mile) und nach Fahrten bei Regen<br />
Antriebskette Kontrolle / Einstellung ● ● ● ● ● ● ● ●<br />
Schmieren ● ● ● ●<br />
Austausch ● ● ●<br />
Kontrolle ● ● ● ●<br />
Ritzel/ Sprengring<br />
Austausch<br />
● ● ●<br />
Bei jedem Wechsel der Antriebskette<br />
Kontrolle ● ● ● ●<br />
Zahnkranz<br />
Austausch<br />
● ● ●<br />
Bei jedem Wechsel der Antriebskette<br />
Zahnkranz-Reißschutz Kontrolle / Austausch ● ● ●<br />
Gewindering am Lenkrohr<br />
Kontrolle / Einstellung ● ● ● ●<br />
- 9 -
WARTUNG 1<br />
DE<br />
1<br />
Tabelle programmierte Wartungsarbeiten<br />
Häufigkeit der Wartungsarbeiten km (mi)<br />
0 <strong>1000</strong> 6000 12000 18000 24000 30000 36000<br />
(600) (3800) (7500) (11200) (14900) (18600) (22400)<br />
Coupon<br />
Vor Auslieferung<br />
A B C D E F G<br />
BESCHREIBUNG<br />
Lenklager<br />
ARBEIT<br />
Kontrolle / Einstellung ● ● ● ●<br />
Schmieren<br />
●<br />
Kontrolle Reifendruck<br />
Vor Fahrtantritt, mindestens alle 10 Tage<br />
Reifen<br />
Kontrolle Abnutzung<br />
Vor Fahrtantritt, mindestens alle 500 km (300 mi)<br />
Kontrolle Reifendruck ● ● ● ● ● ● ● ●<br />
Kontrolle Abnutzung ● ● ● ● ● ● ●<br />
Radfelgen<br />
Vorderradlager<br />
Sichtkontrolle<br />
Kontrolle<br />
Austausch<br />
● ● ● ● ● ● ●<br />
Bei jedem Reifenwechsel<br />
● ● ● ● ●<br />
Bei jedem Reifenwechsel<br />
●<br />
Seitenständer<br />
Funktionskontrolle<br />
Vor jedem Fahrtantritt<br />
Funktionskontrolle ● ● ● ● ● ● ● ●<br />
- 10 -
WARTUNG 1<br />
Tabelle programmierte Wartungsarbeiten<br />
Häufigkeit der Wartungsarbeiten km (mi)<br />
0 <strong>1000</strong> 6000 12000 18000 24000 30000 36000<br />
(600) (3800) (7500) (11200) (14900) (18600) (22400)<br />
Coupon<br />
Vor Auslieferung<br />
A B C D E F G<br />
1<br />
DE<br />
BESCHREIBUNG<br />
ARBEIT<br />
Funktionskontrolle<br />
Vor jedem Fahrtantritt<br />
Seitenständerschalter<br />
Funktionskontrolle ● ● ● ● ● ● ● ●<br />
Hintere Radnabe<br />
Kontrolle /<br />
Schmieren der<br />
Rollenbehälter<br />
● ●<br />
Austausch/<br />
Schmieren der<br />
Rollenbehälter<br />
●<br />
Gabellager Kontrolle/ Schmieren ●<br />
Kettenführung an der Schwinge Kontrolle / Austausch ● ● ● ● ● ● ●<br />
Kettenführung am Rahmenblech Kontrolle / Austausch ● ● ● ● ● ● ●<br />
Hinterer Stoßdämpfer Kontrolle / Einstellung ● ● ● ●<br />
Vorderrad-Gabelöl Austausch ●<br />
Batterieanschlüsse Kontrolle und Reinigung ● ● ● ● ● ● ●<br />
Elektrische Anlage Funktionskontrolle ● ● ● ● ● ● ● ●<br />
Instrumente<br />
Funktionskontrolle<br />
Vor jedem Fahrtantritt<br />
Funktionskontrolle ● ● ● ● ● ● ● ●<br />
- 11 -
WARTUNG 1<br />
DE<br />
1<br />
Tabelle programmierte Wartungsarbeiten<br />
Häufigkeit der Wartungsarbeiten km (mi)<br />
0 <strong>1000</strong> 6000 12000 18000 24000 30000 36000<br />
(600) (3800) (7500) (11200) (14900) (18600) (22400)<br />
Coupon<br />
Vor Auslieferung<br />
A B C D E F G<br />
BESCHREIBUNG<br />
Beleuchtung/Blinker<br />
Hupe<br />
ARBEIT<br />
Funktionskontrolle /<br />
Vor jedem Fahrtantritt<br />
Auswechseln der Birne<br />
Funktionskontrolle /<br />
Auswechseln der Birne<br />
● ● ● ● ● ● ● ●<br />
Funktionskontrolle<br />
Vor jedem Fahrtantritt<br />
Funktionskontrolle ● ● ● ● ● ● ● ●<br />
Funktionskontrolle<br />
Vor jedem Fahrtantritt<br />
Scheinwerfer Funktionskontrolle ● ● ● ● ● ● ● ●<br />
Einstellung<br />
Bei jeder Änderung an der Fahrzeigtrimmung<br />
Zündschloß<br />
Schlösser<br />
Festziehen von Schrauben<br />
und Muttern<br />
Funktionskontrolle<br />
Vor jedem Fahrtantritt<br />
Funktionskontrolle ● ● ● ● ● ● ● ●<br />
Funktionskontrolle<br />
Vor jedem Fahrtantritt<br />
Funktionskontrolle ● ● ● ● ● ● ● ●<br />
Kontrolle/ Festziehen ● ● ● ● ● ● ● ●<br />
- 12 -
WARTUNG 1<br />
Tabelle programmierte Wartungsarbeiten<br />
Häufigkeit der Wartungsarbeiten km (mi)<br />
0 <strong>1000</strong> 6000 12000 18000 24000 30000 36000<br />
(600) (3800) (7500) (11200) (14900) (18600) (22400)<br />
Coupon<br />
Vor Auslieferung<br />
A B C D E F G<br />
1<br />
DE<br />
BESCHREIBUNG<br />
ARBEIT<br />
Schlauchschellen Kontrolle/ Festziehen ● ● ● ● ● ● ● ●<br />
Allgemeines Schmieren ● ● ● ● ● ● ● ●<br />
Abnahme Motorrad ● ● ● ● ● ● ● ●<br />
- 13 -
WARTUNG 1<br />
DE<br />
1<br />
1.3. Mitgeliefertes Bordwerkzeug und Zubehör<br />
Im Staufach befindet sich eine Werkzeugtasche mit folgendem<br />
Inhalt:<br />
- 1 Sechskantstab (Sechskant 10 mm);<br />
- 6 Inbusschlüssel (Sechskant 2,5-3-4-5-6-8 mm);<br />
- 1 Exzenterschlüssel für Hinterrad mit Verlängerung;<br />
- 1 Sicherungsabzieher;<br />
- 3 Sicherungen (15A).<br />
Weiterhin wird folgendes Zubehör mitgeliefert:<br />
- 1 Zündkerzenschlüssel (Sechskant 16 mm);<br />
- 1 Dokumentenmappe.<br />
- 14 -
WARTUNG 1<br />
1.4. Schmiermitteltabelle<br />
BeschreibungEmpfohlenes Produkt<br />
Technische Angaben<br />
Motoröl AGIP RACING 4T 10W/60 (*) SAE 10W/60 - API SJ<br />
Glykolethylen mit<br />
Kühlflüssigkeit AGIP ECO - PERMANENT 50% destilliertem<br />
Wasser verdünnt<br />
Brems- und Kupplungsflüssigkeit AGIP BRAKE FLUID DOT4 DOT4<br />
Kettenöl MOTUL CHAIN LUBE ROAD –<br />
1<br />
DE<br />
* : Damit Sie die empfohlenen Produkte finden und kaufen können, empfiehlt Ihnen <strong>MV</strong> <strong>Agusta</strong> sich<br />
direkt an die autorisierten Vertragshändler zu wenden. Das Motoröl AGIP Racing 4T 10W/60 wurde<br />
speziell für den Motor des Motorrads <strong>F4</strong> entwickelt. Steht das<br />
empfohlene Schmiermittel nicht zu Verfügung, rät <strong>MV</strong> <strong>Agusta</strong> zum<br />
Gebrauch vollständig synthetischer Öle, die die gleichen oder bessere<br />
Eigenschaften als folgende Normen haben:<br />
– Konform API SJ<br />
– Konform ACEA A3<br />
– Konform JASO MA<br />
– Grad SAE 20 W-50 o 10 W-60<br />
ANMERKUNG<br />
Die o. a. Spezifizierungen müssen entweder allein oder zusammen<br />
mit anderen auf dem Behälter des Motoröl aufgedruckt sein.<br />
- 15 -<br />
Motoröl<br />
SAE 10 W-60<br />
API SJ<br />
ACEA A3<br />
JASO MA
WARTUNG 1<br />
DE<br />
1<br />
1.5. Ausbau/Einbau Seitenteil<br />
Nach Entfernung der Schnellverschlüsse das Seitenteil<br />
abnehmen.<br />
- 16 -
WARTUNG 1<br />
Bei Anbau des Seitenteils auf die richtige<br />
Anbringung des Profils achten (siehe Fig. A).<br />
Am Ende des Einbaus die Sperrzunge richtig in<br />
das untere Karosserieteil einfügen (siehe Fig. B).<br />
1<br />
DE<br />
Profil vorderes<br />
Seitenteil<br />
A<br />
B<br />
- 17 -
WARTUNG 1<br />
DE<br />
1<br />
1.6. Motoröl - Ölstandkontrolle<br />
Die Ölstandkontrolle muß bei kaltem und abgestelltem<br />
Motor vorgenommen werden. Bei warmem Motor muß<br />
der Motor seit mindestens zehn Minuten abgestellt sein.<br />
Bei der Ölstandkontrolle muss das Fahrzeug auf einem<br />
ebenen Untergrund in Fahrtrichtung (senkrecht) stehen.<br />
Der Ölstand muß zwischen den Zeichen MAX und MIN<br />
am Gehäuse liegen.<br />
Liegt der Ölstand unterhalb der Markierung "MIN", muss<br />
Öl nachgefüllt werden (siehe § 1.6.1).<br />
Gefahr - Achtung: Niemals den Motor starten,<br />
wenn der Ölstand unter Minimum ist.<br />
Max<br />
Min<br />
- 18 -
WARTUNG 1<br />
1.6.1. Nachfüllen von Motoröl<br />
Den Ölverschluss aufschrauben, indem Sie den<br />
10mm-Sechskantstab verwenden, zusammengebaut<br />
auf einem korrekten Schlüssel (sehe<br />
Abbildung). Soviel Motoröl nachfüllen, dass der<br />
Ölstand auf geeignete Weise aufgefüllt wird. Die<br />
Markierung "MAX" darf beim Auffüllen auf keinen<br />
Fall überschritten werden. Den Ölverschluss wieder<br />
schließen und das Seitenteil wieder anbauen.<br />
ACHTUNG<br />
Bevor Sie den Ölverschluss wieder<br />
zusammenbauen, fetten Sie seinen O-<br />
Ring, indem Sie AGIP Grease 30 verwenden.<br />
Schließlich führen Sie das Festziehen des<br />
Ölverschlusses an die Anzugsmoment<br />
von 35 Nm durch, indem Sie einen<br />
Momentenschlüssel verwenden.<br />
- 19 -<br />
Öldeckel<br />
VORSICHT<br />
Um ein Rutschen der Kupplung und<br />
eine Beschädigung des Motors zu vermeiden,<br />
niemals chemische Ölzusätze<br />
oder ein anderes als das in § 1.4. angegebene<br />
Öl verwenden. Sicherstellen,<br />
dass beim Nachfüllen keine<br />
Fremdkörper in das Motorgehäuse<br />
gelangen.<br />
1<br />
DE
WARTUNG 1<br />
DE<br />
1<br />
ACHTUNG<br />
Frischöl und Altöl können gefährlich sein.<br />
Die Einnahme von Frischöl und Altöl ist<br />
für Personen und Haustiere gefährlich.<br />
Bei Einnahme von Motoröl sofort einen<br />
Arzt benachrichtigen und kein Erbrechen<br />
auslösen, um ein Einatmen des<br />
Produktes in die Lungen zu vermeiden.<br />
Ein ständiger Kontakt mit Motoröl kann<br />
Hautkrebs verursachen. Ein kurzer<br />
Kontakt mit Motoröl kann Hautreizungen<br />
verursachen.<br />
• Frischöl und Altöl von Kindern und<br />
Haustieren fernhalten.<br />
• Beim Nachfüllen von Motoröl<br />
langärmlige Kleidung und wasserundurchlässige<br />
Schutzhandschuhe anziehen.<br />
• Bei Hautkontakt mit Motoröl die<br />
betroffenen Stellen mit reichlich Wasser<br />
und Seife waschen.<br />
• Das Altöl muss entsprechend der<br />
gesetzlichen Vorschriften entsorgt oder<br />
recycelt werden.<br />
- 20 -
WARTUNG 1<br />
1.7. Kühlflüssigkeit - Kontrolle Kühlflüssigkeitsstand<br />
1<br />
DE<br />
Die Kontrolle des Kühlflüssigkeitsstands muß bei kaltem<br />
und abgestelltem Motor vorgenommen werden. Bei<br />
der Kontrolle des Kühlflüssigkeitsstands muss das<br />
Fahrzeug auf einem ebenen Untergrund in<br />
Fahrtrichtung (senkrecht) stehen.<br />
Der Kühlflüssigkeitsstand muß zwischen der MIN und<br />
MAX Markierung liegen, wie in der Abbildung gezeigt.<br />
Liegt der Kühlflüssigkeitsstand unterhalb der<br />
Markierung “MIN”, muss Kühlflüssigkeit nachgefüllt werden<br />
(siehe § 1.7.1).<br />
ACHTUNG<br />
Das Motorrad auf keinen Fall nutzen, wenn<br />
der Kühlflüssigkeitsstand unter der<br />
Markierung MIN liegt.<br />
MAX<br />
MIN<br />
- 21 -
WARTUNG 1<br />
DE<br />
1<br />
1.7.1. Kühlflüssigkeit - Nachfüllen von<br />
Kühlflüssigkeit<br />
Den Deckel abschrauben und die in § 1.4<br />
angegebene Kühlflüssigkeit einfüllen.<br />
ACHTUNG: Die Kühlflüssigkeit<br />
darf nur bei kaltem Motor nachgefüllt<br />
werden. Um<br />
Verbrühungsgefahr zu vermeiden,<br />
niemals den Deckel aufschrauben,<br />
solange der Motor noch<br />
warm ist. Der Kühlkreislauf steht<br />
unter Druck!<br />
Nach dem Auffüllen die vorher abgebauten<br />
Teile sorgfältig wieder anbauen.<br />
- 22 -
WARTUNG 1<br />
ACHTUNG<br />
Unter bestimmten Voraussetzungen kann<br />
sich die Kühlflüssigkeit entzünden und<br />
mit unsichtbarer Flamme brennen.<br />
Darauf achten, dass keine Kühlflüssigkeit<br />
auf heiße Motorteile gelangt. Bei<br />
Entzünden der Kühlflüssigkeit besteht<br />
Verbrennungsgefahr.<br />
ACHTUNG<br />
Kühlflüssigkeit ist giftig. Der Kontakt<br />
mit der Kühlflüssigkeit kann<br />
Hautverätzungen und Hautreizungen<br />
verursachen. Kühlflüssigkeit von<br />
Kindern und Haustieren fernhalten. Bei<br />
ungewollter Einnahme von<br />
Kühlflüssigkeit kein Erbrechen hervorrufen,<br />
um ein Einatmen des Produktes<br />
in die Lungen zu vermeiden. Bei Kontakt<br />
mit Augen oder Haut sofort mit reichlich<br />
Wasser abspülen und umgehend einen<br />
Arzt aufsuchen.<br />
- 23 -<br />
VORSICHT<br />
Zum Auffüllen des Kühlflüssigkeitsstands<br />
und/oder Wechsel des<br />
Kühlflüssigkeit ausschließlich das in<br />
der Tabelle § 1.4 angegebene Produkt<br />
verwenden. Mischen Sie noch verdünnen<br />
Sie das Kühlmittel nicht mit<br />
Zusätzen oder unterschiedlichen<br />
Flüssigkeiten. Wenn das Kühlmittel spezifiziert<br />
in der Tabelle § 1.4 ist nicht<br />
vorhanden, benutzt ein Kühlmittel mit<br />
den technischen Eigenschaften, die mit<br />
dem vorgeschriebenen Produkt gleichbleibend<br />
sind.<br />
VORSICHT<br />
Kühlflüssigkeitsspritzer können lackierte<br />
Oberflächen beschädigen. Beim<br />
Auffüllen des Kühlkreislaufes darauf<br />
achten, dass keine Kühlflüssigkeit verspritzt<br />
wird. Eventuell verspritze<br />
Kühlflüssigkeit sofort mit einem sauberen<br />
Tuch aufwischen.<br />
1<br />
DE
WARTUNG 1<br />
DE<br />
1<br />
Vordere Bremszange<br />
Hintere Bremszange<br />
1.8. Bremsbeläge - Kontrolle Abnutzung / Verschleiß<br />
Bremsscheibe Die Tiefe der Schicht des Friktionsmaterials der<br />
Bremsbeläge muss regelmäßig überprüft werden. Die<br />
Tiefe der Schicht des Friktionsmaterials der Bremsbeläge<br />
darf nie weniger als 1 mm betragen.<br />
Bremsbeläge<br />
Gefahr – Achtung: Wird das Motorrad mit abgenutzten<br />
Bremsbelägen gefahren, lässt die Bremswirkung nach,<br />
die Unfallgefahr wird größer. Ist die Bremsbelagstärke<br />
bis nahe der Abnutzungsgrenze verschlissen, wenden<br />
Sie zum Austausch der Bremsbeläge sich an einen autorisierten<br />
Kundendienst. Nach dem Auswechseln der<br />
Abnutzungsgrenzwert 1 mm<br />
Bremsbeläge auf eine entsprechende Einfahrzeit achten.<br />
- 24 -
WARTUNG 1<br />
Bremsflüssigkeitsbehälter<br />
Hinterradbremse<br />
Bremsflüssigkeitsbehälter<br />
Vorderradbremse<br />
1<br />
DE<br />
Max<br />
Min<br />
Max<br />
Min<br />
1.9. Bremsflüssigkeit - Kontrolle Bremsflüssigkeitsstand<br />
ACHTUNG<br />
Bei fehlender Kontrolle oder unzureichender<br />
Wartung erhöht sich die<br />
Unfallgefahr. Vor jedem Fahrtantritt die<br />
Bremsanlage wie in der Quick <strong>Manual</strong><br />
beschrieben überprüfen.<br />
Ein leichtes Abfallen des Bremsflüssigkeitsstandes<br />
ist durch die Abnutzung der Bremsbeläge bedingt<br />
und daher normal. Der Bremsflüssigkeitsstand muss<br />
auf alle Fälle zwischen den Markierungen MIN und<br />
MAX liegen. Ist der Bremsflüssigkeitsstand unter<br />
das Zeichen MIN gefallen, wenden Sie sich an einen<br />
Kundendienst, um die Bremsanlage überprüfen zu<br />
lassen.<br />
- 25 -
WARTUNG 1<br />
DE<br />
1<br />
- 26 -<br />
ACHTUNG<br />
Das Motorrad nicht benutzen, wenn der<br />
Bremsflüssigkeitsstand unter die<br />
Markierung MIN abgefallen ist. Unter diesen<br />
Umständen kann es passieren, dass<br />
die Bremsanlage nicht richtig funktioniert.<br />
Es besteht erhöhte Unfallgefahr. Sie<br />
können die Kontrolle über das Fahrzeug<br />
verlieren. Ist der Bremsflüssigkeitsstand<br />
unter die Markierung MIN abgefallen,<br />
wenden Sie sich zum Überholen der<br />
Bremsanlage an einen <strong>MV</strong> <strong>Agusta</strong><br />
Vertragshändler.<br />
ACHTUNG<br />
Das Nachfüllen von Bremsflüssigkeit darf<br />
nur von autorisiertem Fachpersonal vorgenommen<br />
werden. Die Bremsflüssigkeit<br />
ist giftig und kann bei Einnahme tödlich<br />
sein. Der Kontakt mit der<br />
Bremsflüssigkeit kann Hautverätzungen<br />
und Hautreizungen verursachen.<br />
Bremsflüssigkeit von Kindern und<br />
Haustieren fernhalten. Bei ungewollter<br />
Einnahme von Bremsflüssigkeit kein<br />
Erbrechen hervorrufen, um ein Einatmen<br />
des Produktes in die Lungen zu vermeiden.<br />
Bei Kontakt mit Augen oder Haut<br />
sofort mit reichlich Wasser abspülen und<br />
umgehend einen Arzt aufsuchen.<br />
ACHTUNG<br />
Zum Auffüllen des Bremsflüssigkeitsstands<br />
ausschließlich die in der Tabelle<br />
§ 1.4 angegebene Bremsflüssigkeit verwenden.<br />
Ein eventuelles Mischen unterschiedlicher<br />
Bremsflüssigkeiten kann<br />
gefährliche chemische Reaktionen verursachen<br />
und die Bremswirkung verringern,<br />
dadurch erhöht sich die<br />
Unfallgefahr.<br />
ACHTUNG<br />
Bei einem zu niedrigen<br />
Bremsflüssigkeitsstand kann Luft in die<br />
Bremsanlage eindringen, die<br />
Bremswirkung lässt nach und die<br />
Unfallgefahr wird größer. Luft in der<br />
Bremsanlage kann dadurch bemerkt<br />
werden, dass die Betätigung des<br />
Bremshebels "schwammiger" erscheint.<br />
Bei Luft in der Bremsanlage muss die<br />
Bremsanlage vor einem neuen Einsatz<br />
des Fahrzeugs bei einem <strong>MV</strong> <strong>Agusta</strong><br />
Vertragshändler entlüftet werden.
WARTUNG 1<br />
1.10. Flüssigkeit Kupplungsbetätigung - Kontrolle<br />
Flüssigkeitsstand<br />
Der Flüssigkeitsstand für die Kupplung muß zwischen<br />
den Zeichen MAX und MIN liegen. Ist der<br />
Flüssigkeitsstand für die Kupplung unter das Zeichen<br />
MIN gefallen, wenden Sie sich an einen Kundendienst,<br />
um die Kupplungsanlage überprüfen zu lassen.<br />
ACHTUNG<br />
Das Motorrad niemals benutzen, wenn der<br />
Flüssigkeitsstand für die Kupplung unter die<br />
Markierung MIN abgefallen ist. Die Kupplung<br />
könnte nicht richtig funktionieren. Es besteht<br />
erhöhte Unfallgefahr. Sie können die<br />
Kontrolle über das Fahrzeug verlieren. Ist der<br />
Flüssigkeitsstand für die Kupplung unter die<br />
Markierung MIN abgefallen, wenden Sie sich<br />
zum Überholen der Kupplungsanlage an einen<br />
<strong>MV</strong> <strong>Agusta</strong> Vertragshändler.<br />
ACHTUNG<br />
Zum Auffüllen des Flüssigkeitsstands für die<br />
Kupplung ausschließlich die in der Tabelle § 1.4<br />
angegebene Kupplungsflüssigkeit verwenden.<br />
- 27 -<br />
Max<br />
Min<br />
1<br />
DE
WARTUNG 1<br />
DE<br />
1<br />
1.11. Reifen – Kontrolle und Wechsel<br />
ACHTUNG<br />
Vor Fahrtantritt stets den Reifendruck<br />
und Abnutzungszustand der Reifen<br />
überprüfen.<br />
Die Kontrolle des Reifendrucks ist von<br />
grundlegender Bedeutung für die<br />
Fahrsicherheit. Bei einem zu niedrigen<br />
Reifendruck kann das Fahrzeug schwerer<br />
gelenkt werden und die Reifen verschleißen<br />
schneller. Bei einem zu hohen<br />
Reifendruck verringert sich die<br />
Auflagefläche des Reifens und damit die<br />
Straßenhaftung.<br />
Vor jedem Fahrtantritt muss daher stets<br />
der Reifendruck bei Raumtemperatur<br />
geprüft werden. D. h. das Motorrad muss<br />
seit mindestens drei Stunden geparkt<br />
sein.<br />
ACHTUNG<br />
Ein falscher Reifendruck bedeutet große Gefahr<br />
beim Fahren. Bei zu niedrigem Reifendruck kann<br />
der Reifen auf der Felge rutschen und sich von<br />
ihr ablösen. D. h. der Reifen wird völlig platt und<br />
Sie können die Kontrolle über das Fahrzeug verlieren.<br />
- 28 -
WARTUNG 1<br />
Fahrt gemessen, erhalten Sie höhere als die tatsächlichen<br />
Druckwerte. Dadurch könnte der<br />
Reifendruck falsch eingestellt werden. Beim<br />
Einstellen des Reifendrucks müssen die in § 3.2<br />
angegebenen Werte eingehalten werden. Vor längeren<br />
Fahrten kann der Nominaldruck um 0,2 Bar<br />
erhöht werden. Für Gebrauch des Motorrades mit<br />
einer Geschwindigkeit höhere als 300 km/h, müssen<br />
Sie den Reifendruck entsprechend den<br />
Werten erhöhen, die in § 3.2. gegeben werden.<br />
Sehr wichtig ist die Kontrolle des Reifenzustands<br />
vor Fahrtantritt. Stark abgenutzte Reifen sind<br />
anfälliger gegen Löcher und verschlechtern die<br />
Lenkbarkeit und die Stabilität des Motorrads. Bei<br />
der Überprüfung des Reifenzustands muss die<br />
Profiltiefe kontrolliert werden. Die Profiltiefe darf<br />
nicht geringer als die durch die<br />
Straßenverkehrsordnung angegebenen Werte<br />
sein. Am Boden der Profile dürfen keine Risse zu<br />
sehen sein. Die Reifendecke muss frei von<br />
Nägeln und Glassplittern sein. Die Reifenwände<br />
dürfen keine Risse aufweisen. Sind diese<br />
Voraussetzungen nicht gegeben, muss der<br />
Reifen umgehend bei einem <strong>MV</strong> <strong>Agusta</strong><br />
Vertragshändler gewechselt werden.<br />
ACHTUNG<br />
Die vorgeschriebene Profiltiefe kann<br />
von Land zu Land unterschiedlich sein.<br />
Es müssen stets die vom jeweiligen<br />
Land gesetzlich vorgeschriebenen<br />
Werte eingehalten werden.<br />
ACHTUNG<br />
• Stark verschlissene Reifen von einem<br />
<strong>MV</strong> <strong>Agusta</strong> Vertragshändler wechseln<br />
lassen. Das Fahren des Motorrads mit<br />
stark abgenutzten Reifen ist illegal, die<br />
Fahrstabilität verringert sich. Sie können<br />
die Kontrolle über das Fahrzeug<br />
verlieren.<br />
• Bei Schäden oder einem Loch im<br />
Reifen muss der Reifen gewechselt und<br />
nicht repariert werden. Ein reparierter<br />
Reifen bietet im Vergleich zu einem<br />
1<br />
DE<br />
- 29 -
WARTUNG 1<br />
DE<br />
1<br />
neuen Reifen nur eingeschränkte<br />
Leistungen und ein geringeres<br />
Sicherheitsniveau.<br />
Wird der Reifen provisorisch oder<br />
notdürftig repariert, muss bis zum nächstgelegenen<br />
<strong>MV</strong> <strong>Agusta</strong> Vertragshändler<br />
langsam und sehr vorsichtig gefahren<br />
werden. Lassen Sie dort den Reifen<br />
sofort wechseln. Nach einer<br />
Reifenreparatur nie schneller als 60<br />
km/h fahren. Der Reifen kann nicht repariert<br />
werden, wenn die Reifenwand<br />
beschädigt oder das Loch auf der<br />
Lauffläche größer als 6 mm ist.<br />
• Bei der provisorischen Reparatur eines<br />
Lochs im Reifen rät <strong>MV</strong> <strong>Agusta</strong> vom<br />
Gebrauch flüssiger Abdichtungsmittel ab.<br />
Diese Abdichtungsmittel können negative<br />
auf die einzelnen Schichten des Reifens<br />
einwirken und Nebenschäden, die durch<br />
eventuelle eingedrungene Gegenstände<br />
verursacht wurden, verstecken.<br />
• Zum Reifenwechsel nur die in § 3.2<br />
angegebenen Reifen verwenden.<br />
Unbedingt den Einsatz unterschiedlicher<br />
Reifenmarken und Profile an<br />
Vorder- und Hinterrad vermeiden. Der<br />
Einsatz ungeeigneter Reifen beeinträchtigt<br />
die Lenkbarkeit und Stabilität des<br />
Motorrads. Es besteht erhöhte<br />
Unfallgefahr.<br />
• Die Felgen wurden für schlauchlose<br />
Reifen (Tubeless) entwickelt. Niemals<br />
Schlauchreifen an Felgen für schlauchlose<br />
Reifen abringen. Felgenränder und<br />
Reifenwulst können sich dann nicht<br />
richtig setzen. Die Reifen rutschen auf<br />
den Felgen und können den Druck verlieren.<br />
Sie können die Kontrolle über<br />
das Fahrzeug verlieren.<br />
- 30 -
WARTUNG 1<br />
• Niemals Luftschläuche in einen schlauchlosen<br />
Reifen einbauen. Die<br />
Überhitzung des Reifens kann zum<br />
Platzen des Luftschlauchs führen. Die<br />
Reifen verlieren den Druck und Sie können<br />
die Kontrolle über das Fahrzeug<br />
verlieren.<br />
• Beim Aufziehen der Reifen muss auf<br />
die durch Pfeile auf der Reifenwand<br />
angezeigte Laufrichtung geachtet werden.<br />
• Neue Reifen benötigen eine<br />
Einlaufzeit, um ihre komplette Effizienz<br />
zu erreichen. Während der Einlaufzeit ist<br />
die Reifenhaftung bei bestimmten<br />
Straßenbelägen geringer. Wir empfehlen<br />
Ihnen daher während der ersten 100 km<br />
Fahrt mit einem neuen Reifen langsamer<br />
zu fahren.<br />
1<br />
DE<br />
- 31 -
WARTUNG 1<br />
DE<br />
1<br />
❏ Ausbau des Hinterrads<br />
Vorsicht – Vorsichtsmassnahme:<br />
Muss der Reifen bei einem<br />
Reifenhändler gewechselt werden,<br />
sicherstellen, dass für den<br />
Aus- und Einbau folgende<br />
Werkzeuge verwendet werden:<br />
• 55 mm Steckschlüssel<br />
• Drehmomentschlüssel<br />
Werden andere Werkzeuge<br />
benutzt, können Radbauteile<br />
schwer beschädigt werden. Wir<br />
raten davon ab Reifenwechsel in<br />
schlecht ausgerüsteten<br />
Werkstätten vornehmen zu lassen.<br />
Es ist auf alle Fälle ratsamer<br />
sich für einen Reifenwechsel an<br />
einen <strong>MV</strong> <strong>Agusta</strong> Vertragshändler<br />
zu wenden.<br />
Sechskantmutter<br />
Radachse mit Gewinde<br />
M50x1,5 Linksgewinde<br />
55 mm Steckschlüssel<br />
Drehmomentschlüssel<br />
- 32 -
WARTUNG 1<br />
❏ Radkontrolle<br />
Vor Fahrtantritt stets die Radfelge auf Risse,<br />
Verbiegungen und Verformungen überprüfen.<br />
ACHTUNG<br />
Werden Schäden festgestellt, muss das<br />
Rad von einem <strong>MV</strong> <strong>Agusta</strong><br />
Vertragshändler gewechselt werden.<br />
Niemals versuchen auch nur kleine<br />
Schäden an den Rädern selbst zu beheben.<br />
Bei einem Reifenwechsel oder<br />
Austausch der Felge muss das Rad bei<br />
einem <strong>MV</strong> <strong>Agusta</strong> Vertragshändler<br />
ausgewuchtet werden. Ein nicht richtig<br />
ausgewuchtetes Rad schränkt die<br />
Fahrzeugleistung und die Labensdauer<br />
der Reifen ein.<br />
ACHTUNG<br />
Beim Auswuchten der Räder ausschließlich<br />
zugelassene Ausgleichsgewichte<br />
verwenden. Keine flüssigen<br />
Ausgleichs- oder Dichtungsmittel<br />
verwenden.<br />
ACHTUNG<br />
Niemals versuchen einen schlauchlosen<br />
Reifen ohne das entsprechende<br />
Spezialwerkzeug<br />
und<br />
Schutzvorrichtungen für die Felgen<br />
abzubauen. Andernfalls besteht die<br />
Gefahr, dass die Dichtungsfläche an der<br />
Felge beschädigt wird. Dadurch verliert<br />
der Reifen Luft und Sie die Kontrolle<br />
über das Fahrzeug.<br />
1<br />
DE<br />
- 33 -
WARTUNG 1<br />
DE<br />
1<br />
1.12. Kette - Kontrolle und Schmieren<br />
Für diese Arbeit muss das Motorrad auf ebenem<br />
Untergrund auf den hinteren Ständer gestellt und der<br />
Leerlauf eingelegt werden.<br />
❏ Kontrolle der Kettenspannung<br />
ACHTUNG: Vor der überprüfung der<br />
Kettenspannung, wenden Sie sich an den <strong>MV</strong><br />
<strong>Agusta</strong> Kundendienst, um zu überprüfen,<br />
daß der Wert der statischen Einstellung der<br />
hinteren Federung korrekt ist. Auch überprüfen,<br />
ob die Kette richtig geschmiert wird.<br />
Der untere Teil der Kette muss einem Abstand von 50<br />
mm vom unteren Kettenschutz haben. Die Kontrolle an<br />
mehreren Stellen an der Kette ausführen. Dazu muss<br />
das Hinterrad von Hand gedreht werden. Der Abstand<br />
muss während der Raddrehung gleich bleiben.<br />
Bestehen starke Unterschiede beim Spiel an der Kette,<br />
bedeutet dies, dass einige Kettenglieder gequetscht,<br />
verklemmt oder gedehnt sind. Ist der Abstand der Kette<br />
zum Kettenschutz kleiner oder größer als 50 mm, muss<br />
die Kettenspannung eingestellt werden.<br />
- 34 -<br />
50 mm
WARTUNG 1<br />
ACHTUNG<br />
Beim Fahren des Motorrads mit einer<br />
verschlissenen oder schlecht eingestellten<br />
Kette erhöht sich die Unfallgefahr.<br />
Vor jedem Fahrtantritt prüfen, ob die<br />
Kettenspannung den Angaben in diesem<br />
Kapitel entspricht. Zum Einstellen<br />
der Kettenspannung wenden Sie sich<br />
bitte an einen <strong>MV</strong> <strong>Agusta</strong><br />
Vertragshändler.<br />
ACHTUNG<br />
Bei gequetschten, verklemmten oder<br />
gedehnten Kettengliedern, muss die<br />
Kette durch eine <strong>MV</strong> <strong>Agusta</strong><br />
Vertragshändler ersetzt werden.<br />
ACHTUNG<br />
Bei Schäden oder starker Abnutzung<br />
der Kette oder der entsprechenden<br />
Zahnräder muss die Kette durch einen<br />
<strong>MV</strong> <strong>Agusta</strong> Vertragshändler ausgetauscht<br />
werden. Bei jedem Kettenwechsel<br />
müssen auch die entsprechenden<br />
Zahnräder ausgetauscht werden.<br />
- 35 -<br />
ACHTUNG<br />
Der Einbau einer Kette mit<br />
Kettenschloss ist gefährlich. Ein nicht<br />
richtig vernietetes Kettenglied oder<br />
Kettenschloss kann sich öffnen und<br />
Unfälle oder schwere Motorschäden<br />
verursachen. Niemals Ketten mit<br />
Kettenschlössern verwenden.<br />
ACHTUNG<br />
Jedesmal wenn es verlangt wird, um die<br />
Hinterradnabeschrauben laufen zu lassen,<br />
wenden Sie an einen autorisierten<br />
<strong>MV</strong> <strong>Agusta</strong> Kundendienst. Wenn Sie die<br />
Schrauben festziehen, wenden Sie ein<br />
Drehmoment an, die dem Wert gleich<br />
ist, der im Aufkleber auf dem Schwinge<br />
gezeigt wird. Die Anwendung einer<br />
Drehkraft stark als der angezeigte Wert<br />
kann den schnellen Zerfall der hintere<br />
Radnabe verursachen und die<br />
Zuverlässigkeit des Fahrzeugs und die<br />
Sicherheit des Piloten gefährden.<br />
1<br />
DE
WARTUNG 1<br />
DE<br />
1<br />
❏ Schmieren<br />
Damit die Kette richtig funktioniert, muss sie richtig<br />
geschmiert werden.<br />
Vorbereitende Reinigung: vorm Schmieren der<br />
Kette müssen alle Schmutzablagerungen an der<br />
Kette mit Kerosin aufgelöst werden. Diese<br />
Schmutzreste können anschließend mit einem<br />
sauberen Tuch bzw. einem Pressluftstrahl entfernt<br />
werden.<br />
Vorsicht – Vorsichtsmassnahme: Die<br />
Kette ist eine Kette mit Dichtringen (O-<br />
Ringen). Um Schäden an der Kette zu vermeiden,<br />
darf diese nie mit Hochdruck-<br />
Dampf- oder Wasserstrahl gereinigt werden.<br />
Es dürfen auch kein Benzin oder<br />
handelsübliche Reinigungsmittel verwendet<br />
werden. Die Kette darf nur mit Kerosin<br />
gereinigt werden.<br />
ACHTUNG<br />
Kerosin kann gefährlich sein. Kerosin ist<br />
entzündlich. Der Kontakt mit Kerosin<br />
kann für Kinder und Haustiere schädlich<br />
sein. Offene Flammen und heiße<br />
Gegenstände vom Kerosin fernhalten.<br />
Kinder und Haustier vom Kerosin<br />
fernhalten. Benutztes Kerosin muss entsprechend<br />
der gesetzlichen Vorschriften<br />
entsorgt werden.<br />
- 36 -
WARTUNG 1<br />
Schmieren: einen leichten und gleichmäßigen<br />
Film des angegebenen Schmiermittels auf der<br />
gesamten Kette auftragen. Sorgfältig darauf achten,<br />
dass die umliegenden Fahrzeugteile, wie z. B. die<br />
Reifen, nicht verschmutzt werden. Den Strahl des<br />
Schmiermittels auf den internen Verbindungen<br />
verweisen, zwecks die Oberfläche der O-Ringe schmieren<br />
und innerhalb der Kettenrolle eindringen.<br />
Vorsicht – Vorsichtsmassnahme:<br />
Ausschließlich das in der Tabelle § 1.4.<br />
angegebene Schmiermittel verwenden, um<br />
die Antriebskette zu schützen und zu vermeiden<br />
die Ölspritzern , wenn das Fahrzeug<br />
in Bewegung ist.<br />
ACHTUNG: Das Schmieren der Kette<br />
muss in den in der Tabelle des<br />
Wartungsprogramms (§ 1.2.) angegebenen<br />
Abständen erfolgen. Die Kette muss<br />
auch nach Fahrten bei Regen oder nach<br />
einer Fahrzeugreinigung geschmiert<br />
werden. Bei Fahrten mit nicht oder mit<br />
nicht ausreichend geschmierter Kette<br />
besteht Unfallgefahr.<br />
1<br />
DE<br />
- 37 -
WARTUNG 1<br />
DE<br />
1<br />
1.13. Leerlaufdrehzahl - Kontrolle<br />
Die Kontrolle der Leerlaufdrehzahl muß mit Motor bei<br />
Betriebstemperatur ausgeführt werden. Überprüfen,<br />
dass der “CHOKE” ausgeschaltet ist.<br />
Die Leerlaufdrehzahl muß zwischen 1150 und 1250<br />
U/min liegen.<br />
Wenden Sie sich zum Einstellen der Leerlaufdrehzahl<br />
an einen Kundendienst.<br />
- 38 -
WARTUNG 1<br />
1.14. Auswechseln - Allgemeine Informationen<br />
Das Auswechseln der Sicherungen und der<br />
Glühbirnen (mit Ausnahme des vorderen<br />
Standlichts) kann vom Fahrer selbst ausgeführt<br />
werden. Dazu genau die Anweisungen einhalten.<br />
Sicherung Batterieladung<br />
Sicherungen Stromverbraucher<br />
1.14.1. Sicherungen - Auswechseln<br />
Die Sicherung für die Batterieladung befindet<br />
sich auf der Anlasser Fernrelais auf der<br />
Fahrzeuge. Um an die Sicherung gelangen zu<br />
können, muß das Fahrersitz abgebaut werden.<br />
1<br />
DE<br />
Scheinwerfer - Auswechseln der Birne<br />
Nummernschildbeleuchtung - Auswechseln<br />
der Birne<br />
Anlasser<br />
Fernrelais<br />
- 39 -
WARTUNG 1<br />
DE<br />
1<br />
VORSICHT<br />
Vor der Kontrolle oder Wechseln der<br />
Sicherungen muss der Zündschlüssel<br />
auf “OFF” gedreht werden, um<br />
Kurzschluss und die dadurch bedingte<br />
Beschädigung elektrischer Bauteile zu<br />
vermeiden.<br />
Sicherung für die<br />
Batterieladung (40 A)<br />
Ersatzsicherung (40 A)<br />
Um die Sicherung zu ersetzen, wechseln Sie<br />
die Sicherung fur die Batterieladung mit der<br />
Ersatzsicherung.<br />
ACHTUNG<br />
Niemals eine andere Sicherung als mit<br />
der vorgeschriebenen Leistung verwenden,<br />
um Schäden an der Elektroanlage<br />
des Fahrzeugs und Brandgefahr zu vermeiden.<br />
- 40 -
WARTUNG 1<br />
Die Sicherungen der Stromverbraucher befinden<br />
sich auf der linken Seite. Um an die<br />
Sicherungen gelangen zu können muß das<br />
Seitenteil der Karosserie abgebaut werden (siehe<br />
§1.5).<br />
Geben Sie die zwei Klemmplatten frei und<br />
heben Sie den Deckel.<br />
1<br />
DE<br />
VORSICHT<br />
Vor der Kontrolle oder Wechseln der<br />
Sicherungen muss der Zündschlüssel<br />
auf “OFF” gedreht werden, um<br />
Kurzschluss und die dadurch bedingte<br />
Beschädigung elektrischer Bauteile zu<br />
vermeiden.<br />
- 41 -
WARTUNG 1<br />
DE<br />
1<br />
Die durchgebrannte Sicherung auswechseln<br />
und den Deckel wieder aufsetzen.<br />
- 42 -
WARTUNG 1<br />
Die Sicherungsfunktion und -position im beiliegenden<br />
elektrischen Schaltplan angegeben. Die<br />
Markierungsbuchstaben in der Abbildung entsprechen<br />
den Angaben im Schaltplan.<br />
Nicht vergessen, dass sich in der Werkzeugtasche<br />
drei Ersatzsicherungen befinden.<br />
F1 F2 F3 <strong>F4</strong> F5 F6 F7<br />
1<br />
DE<br />
ACHTUNG<br />
Niemals eine andere Sicherung als mit<br />
der vorgeschriebenen Leistung verwenden,<br />
um Schäden an der Elektroanlage<br />
des Fahrzeugs und Brandgefahr zu vermeiden.<br />
15A<br />
15A<br />
15A<br />
15A<br />
15A<br />
15A<br />
15A<br />
- 43 -
WARTUNG 1<br />
DE<br />
1<br />
1.14.2. Nummernschildbeleuchtung - Auswechseln<br />
der Birne<br />
Die Befestigungschrauben der unteren Deckel der<br />
Nummernschildträger entfernen.<br />
- 44 -
WARTUNG 1<br />
Den unteren Deckel entfernen.<br />
1<br />
DE<br />
Die Lampenhalterung aus ihrem Sitz ziehen.<br />
- 45 -
WARTUNG 1<br />
DE<br />
1<br />
Die Lampe herausnehmen.<br />
Eine neue Lampe einführen.<br />
Die Lampenhalterung anschließen.<br />
Die unteren Deckel der Nummernschildträger montieren.<br />
Vorsicht: Um Beschädigungen zu vermeiden,<br />
vorm Wiedereinbau auf die richtige<br />
Anordnung der Rücklicht-Kabel achten (siehe<br />
Abbildung).<br />
- 46 -
WARTUNG 1<br />
1.15. Batterie<br />
Dieses Motorrad ist mit einer versiegelten (wartungsfreien)<br />
Batterie ausgestattet, die unter dem<br />
Heckteil angebracht ist. Die Batterie ist wartungsfrei,<br />
d. h. der Batterieflüssigkeitsstand braucht<br />
nicht überprüft bzw. nachgefüllt werden.<br />
Bei schwachen bzw. entladener Batterie (elektrische<br />
Probleme, Startschwierigkeiten), muss sie<br />
so bald wie möglich bei einem <strong>MV</strong> <strong>Agusta</strong><br />
Vertragshändler aufgeladen werden. Beachten<br />
Sie, dass die Batterie sich schneller entlädt, wenn<br />
elektrisches Sonder-Zubehör installiert wurde.<br />
ACHTUNG<br />
Ist das Batteriegehäuse beschädigt,<br />
kann Schwefelsäure austreten.<br />
Schwefelsäure ist giftig und stark<br />
ätzend. Jeglichen Kontakt mit Haut,<br />
Augen und Kleidung vermeiden. Bei<br />
Arbeiten an oder in der Nähe der<br />
Batterie stets eine Schutzbrille tragen.<br />
Bei Kontakt mit Schwefelsäure muss<br />
wie folgt ERSTE HILFE geleistet werden:<br />
• ÄUßERLICHER KONTAKT: mit reichlich<br />
fließendem Wasser abspülen.<br />
• INNERLICHER KONTAKT: Grosse<br />
Mengen Wasser oder Milch trinken und<br />
sofort einen Arzt benachrichtigen.<br />
• AUGEN: Mindestens 15 Minuten mit<br />
Wasser spülen und sofort einen Arzt<br />
aufsuchen.<br />
Bei Austreten von Schwefelsäure bildet<br />
sich Wasserstoffgas, das bei offenen<br />
Flammen oder Funkenbildung explodieren<br />
kann.<br />
Zum Wechseln der Batterie wenden Sie<br />
sich bitte an einen autorisierten <strong>MV</strong><br />
<strong>Agusta</strong> Kundendienst.<br />
1<br />
DE<br />
- 47 -
WARTUNG 1<br />
DE<br />
1<br />
Längeres Stilllegen<br />
Soll das Fahrzeug für einen längeren Zeitraum<br />
(einen Monat oder mehr) nicht benutzt werden,<br />
sollten die Batteriekabel von der Batterie abgenommen<br />
werden bzw. die Batterie von einem<br />
Fachmann ausgebaut werden. Zur Erhaltung der<br />
Batterie-Lebensdauer sollte die Batterie bei längerem<br />
Stilllegen alle 4 – 5 Monate bei einem <strong>MV</strong><br />
<strong>Agusta</strong> Vertragshändler nachgeladen werden.<br />
GEFAHR: Ein Vertauschen der<br />
Polanschlüsse kann die Ladeanlage und<br />
die Batterie beschädigen. Das rote Kabel<br />
müssen an den Pluspol (+) der Batterie<br />
und die schwarzen Kabel an den Minuspol<br />
(-) angeschlossen werden. Beim Ausbau<br />
der Batterie muss ALS ERSTES die<br />
Polklemme vom Minuspol der Batterie<br />
und anschließend vom Pluspol abgenommen<br />
werden. Beim Wiedereinbau in<br />
umgekehrter Reihenfolge vorgehen.<br />
- 48 -
WARTUNG 1<br />
1.16. Fahrzeugpflege<br />
Eine regelmäßige Pflege ist wichtig,<br />
damit Ihr Motorrad über lange Zeit<br />
seinen Wert behält. Lack- und andere<br />
Oberflächen müssen gepflegt und<br />
geschützt werden. Stets auf eventuelle<br />
Schäden, Abnutzung und Austreten<br />
ätzender Flüssigkeiten achten.<br />
1<br />
DE<br />
Vorsicht – Vorsichtsmassnahme:<br />
Vorm Waschen müssen<br />
die Auspuffenden verstopft<br />
und die elektrischen<br />
Teile geschützt werden.<br />
ACHTUNG:<br />
Ist das Motorrad noch von<br />
der letzten Fahrt warm, muss<br />
abgewartet werden, bis sich<br />
der Motor und die<br />
Auspuffanlage abgekühlt<br />
haben.<br />
Vorsicht – Vorsichtsmassnahme: Keine Hochdruck-<br />
Wasserstrahl oder Dampfreinigungsgeräte verwenden,<br />
da andernfalls Wasser in Motorradbauteile eindringen<br />
und diese beschädigen kann.<br />
ANMERKUNG: Die Reinigungsmittel verunreinigen<br />
die Umwelt. Aus diesem Grund sollte die<br />
Fahrzeugreinigung in Bereichen, die mit Sammlungsund<br />
Klärungsanlagen der Reinigungswasser ausgestattet<br />
sind, vorgenommen werden.<br />
- 49 -
WARTUNG 1<br />
DE<br />
1<br />
Mit Wasser, Schwamm und einem milden<br />
Reinigungsmittel säubern. Mit einem weichen<br />
Tuch abtrocknen. An schwer zugänglichen Stellen<br />
einen Druckluftstrahl verwenden.<br />
Vorsicht – Vorsichtsmassnahme:<br />
• Sicherstellen, dass keine Tücher oder<br />
Schwämme benutzt werden, die vorher für<br />
scharfe Reinigungs- und Scheuermittel bzw. für<br />
Lösungsmittel oder Benzin verwendet wurden.<br />
• Um nicht-reparierbare Schäden an der<br />
Karosseriebauteile zu vermeiden, laugenoder<br />
säurehaltigen Reinigungsmittel,<br />
Benzin, Bremsflüssigkeit oder andere<br />
Lösungsmittel verwenden nicht. Das<br />
Karosserie-bauteile ausschließlich mit<br />
einem weichen Tuch, lauwarmem Wasser<br />
und einem milden Reinigungsmittel säubern.<br />
• Wenn du Zweifel über den chemischen<br />
Aufbau von hast Reinigungsmittel, prüfen seinen<br />
Effekt, indem es ihn auf einem wenig<br />
Bereich der Karosserie anwendet, bevor es sie<br />
auf dem vollständigen Motorrad verwendet.<br />
Die lackierten Teile müssen in regelmäßigen<br />
Abständen mit Spezialprodukten behandelt werden.<br />
Bei Fahrten auf Straßen, auf denen Streusalz<br />
ausgebracht wurde, muss das Motorrad so bald<br />
wie möglich gereinigt werden. Dann ausschließlich<br />
mit kaltem Wasser waschen. Warmes Wasser<br />
verstärkt die Korrosionswirkung.<br />
ACHTUNG: Sicherstellen, dass kein Öl<br />
oder Wachs auf die Bremsen oder Reifen<br />
gelangt. Gegebenenfalls die Bremsscheiben<br />
mit einem Reinigungsmittel für<br />
Bremsscheiben oder Aceton reinigen und<br />
die Reifen mit heißem Wasser und einem<br />
milden Reinigungsmittel waschen.<br />
ACHTUNG: Bei nassen Bremsen verringert<br />
sich die Bremsleistung und erhöht sich die<br />
Unfallgefahr. Nach dem Waschen des<br />
Fahrzeugs den Motor starten und langsam<br />
einige Minuten fahren. Einige Male vorsichtig<br />
bremsen, so dass die Bremsscheiben<br />
und Bremsbeläge trocknen können.<br />
ACHTUNG: Die Antriebskette muss<br />
sofort nach der Reinigung und Trocknen<br />
des Fahrzeugs geschmiert werden. Das<br />
Schmieren der Kette muss entsprechend<br />
der Angaben in § 1.12 der vorliegenden<br />
Bedienungs- und Wartungsanleitung<br />
vorgenommen werden.<br />
- 50 -
WARTUNG 1<br />
1.17. Längeres Stillegen<br />
Soll das Fahrzeug über längere Zeit stillgelegt werden, müssen<br />
folgende Vorkehrungen getroffen werden:<br />
Den Benzintank entleeren.<br />
Die Batterie ausbauen und in geeigneter Weise aufbewahren.<br />
Die Kerzenstecker abziehen und die Zündkerzen ausbauen. Einen Teelöffel Motoröl in jede<br />
Kerzenbohrung einfüllen, anschließend die Kerzen wieder einbauen und die Kerzenstecker aufsetzen<br />
und den Motor einige Umdrehungen ausführen lassen.<br />
Alle Bowden- und Seilzüge sowie die Drehpunkte der Hebel und Pedale schmieren.<br />
Das Motorrad reinigen und die lackierten Teile mit Spezialprodukten behandeln (§1.16.).<br />
Um die Integrität und Leistung der Reifen zu garantieren, sollte das Fahrzeug an einem kühlen, trockenen<br />
und dunklem Raum mit gleichbleibender Temperatur unter 25°C abgestellt werden. Die Reifen<br />
dürfen keinen direkten Kontakt mit Heizkörpern oder Heizungsleitungen und keinen längeren Kontakt<br />
mit Öl oder Benzin haben. Die Reifen sollten nicht in der Nähe von Elektromotoren oder Geräten aufbewahrt<br />
werden, bei denen elektrische Funkenbildung oder elektrische Entladungen entstehen.<br />
Während der Stillstandzeit muss das Motorrad auf den hinteren Ständer gestellt werden.<br />
Das Motorrad mit einer zweckmäßigen Schutzplane abdecken.<br />
Einsatz nach dem Stillegen muß eine allgemeine<br />
Fahrzeugkontrolle vorgenommen und gegebenenfalls die entsprechenden<br />
Wartungsarbeiten (§1.2.) ausgeführt werden.<br />
1<br />
DE<br />
- 51 -
STÖRUNGEN 2<br />
2.1. Störungen am Motor: DER MOTOR SPRINGT NICHT AN<br />
DE<br />
2<br />
Der<br />
Starterschalter ist<br />
gedrückt?<br />
JA<br />
Der Starterschalter<br />
in Ruhestellung holen.<br />
Jetzt springt der<br />
Motor an?<br />
JA<br />
Der Fehler ist behoben.<br />
NEIN<br />
NEIN<br />
Gang eingelegt,<br />
Seitenständer<br />
ausgeklappt.<br />
NEIN<br />
JA<br />
Leerlauf einlegen oder<br />
den Ständer hochklappen<br />
und den Kupplungshebel<br />
betätigen.<br />
Jetzt springt der<br />
Motor an?<br />
NEIN<br />
JA<br />
Der Fehler ist behoben.<br />
Der Startvorgang<br />
wurde richtig<br />
ausgeführt?<br />
NEIN<br />
Den Startvorgang<br />
richtig ausführen.<br />
Jetzt springt der<br />
Motor an?<br />
JA<br />
Der Fehler ist behoben.<br />
JA<br />
Der Benzintank<br />
ist leer?<br />
JA<br />
Tanken<br />
Jetzt springt der<br />
Motor an?<br />
JA<br />
Der Fehler ist behoben.<br />
NEIN<br />
Weiter auf der nächsten Seite<br />
NEIN<br />
- 52 -
STÖRUNGEN 2<br />
Fortsetzung von der vorherigen Seite<br />
Sind die<br />
Sicherungen <strong>F4</strong> und F6<br />
in Ordnung?<br />
NEIN<br />
Die Sicherungen <strong>F4</strong> und<br />
F6 auswechseln(§1.14.1.)<br />
Jetzt springt der<br />
Motor an?<br />
JA<br />
Der Fehler ist behoben.<br />
2<br />
DE<br />
JA<br />
NEIN<br />
Die Batterie wird<br />
aufgeladen?<br />
NEIN<br />
Die Batterie durch eine<br />
<strong>MV</strong> <strong>Agusta</strong> Kundendienst<br />
neuladen lassen<br />
Jetzt springt der<br />
Motor an?<br />
JA<br />
Der Fehler ist behoben.<br />
JA<br />
NEIN<br />
Den Code des<br />
Schlüssels wurde<br />
erkannt?<br />
NEIN<br />
Den auf der <strong>MV</strong> Code Card<br />
angegebenen Code eine<br />
<strong>MV</strong> <strong>Agusta</strong> Kundendienst<br />
eingeben lassen<br />
Jetzt springt der<br />
Motor an?<br />
JA<br />
Der Fehler ist behoben.<br />
JA<br />
NEIN<br />
Wenden Sie sich an den<br />
<strong>MV</strong> <strong>Agusta</strong> Kundendienst<br />
- 53 -
STÖRUNGEN 2<br />
DER MOTOR STELLT BEIM LAUFEN AB<br />
DE<br />
2<br />
Der Armaturenbrett<br />
ist eingeschaltet?<br />
JA<br />
NEIN<br />
Wenden Sie sich an den<br />
<strong>MV</strong> <strong>Agusta</strong> Kundendienst<br />
Der Benzintank<br />
ist leer?<br />
NEIN<br />
Tanken<br />
Jetzt springt der<br />
Motor an?<br />
JA<br />
Der Fehler ist behoben.<br />
NEIN<br />
NEIN<br />
Sind die<br />
Sicherungen <strong>F4</strong> und<br />
F6 in Ordnung?<br />
NEIN<br />
Die Sicherungen <strong>F4</strong> und<br />
F6 auswechseln(§1.14.1.)<br />
Jetzt springt der<br />
Motor an?<br />
JA<br />
Der Fehler ist behoben.<br />
JA<br />
NEIN<br />
Wenden Sie sich an den<br />
<strong>MV</strong> <strong>Agusta</strong> Kundendienst<br />
- 54 -
STÖRUNGEN 2<br />
DER MOTOR WIRD ZU HEISS (Temperatur der Kühlflüssigkeit = 112°÷140° C)<br />
Ist ausreichend<br />
Kühlflüssigkeit<br />
vorhanden?<br />
(§1.7.)<br />
JA<br />
NEIN<br />
Wenden Sie sich an den<br />
<strong>MV</strong> <strong>Agusta</strong> Kundendienst<br />
2<br />
DE<br />
Die Sicherung F5<br />
ist in Ordnung?<br />
NEIN<br />
Die Sicherung F5<br />
auswechseln<br />
(§1.14.1.)<br />
Hat der Motor<br />
jetzt die richtige<br />
Betriebstemperatur?<br />
JA<br />
Der Fehler ist behoben.<br />
JA<br />
NEIN<br />
Wenden Sie sich an den<br />
<strong>MV</strong> <strong>Agusta</strong> Kundendienst<br />
- 55 -
STÖRUNGEN 2<br />
DER ÖLDRUCK IST ZU NIEDRIG (Das Motoröldruck-Kontrollampe<br />
ist eingeschaltet, während der Motor läuft)<br />
DE<br />
2<br />
Ist ausreichend<br />
Motoröl<br />
vorhanden?<br />
(§1.6.)<br />
NEIN<br />
Den Motorölstand durch<br />
eine <strong>MV</strong> <strong>Agusta</strong><br />
Kundendienst nachfüllen<br />
lassen<br />
Ist der Öldruck<br />
jetzt richtig?<br />
JA<br />
Der Fehler ist behoben.<br />
JA<br />
NEIN<br />
Wenden Sie sich an den<br />
<strong>MV</strong> <strong>Agusta</strong> Kundendienst<br />
- 56 -
STÖRUNGEN 2<br />
2.2. Störungen an der elektrischen Anlage: DIE BELEUCHTUNG FUNKTIONIERT NICHT<br />
Die Sicherungen<br />
vom Beleuchtung<br />
sind in Ordnung?<br />
NEIN<br />
Die Sicherung(en)<br />
auswechseln (§1.14.1.)<br />
Jetzt funktioniert<br />
die Beleuchtung?<br />
JA<br />
Der Fehler ist behoben.<br />
2<br />
DE<br />
JA<br />
NEIN<br />
Die Glühbirnen<br />
sind in Ordnung?<br />
NEIN<br />
Die Glühbirne(n)<br />
auswechseln (§1.14.)<br />
Jetzt funktioniert<br />
die Beleuchtung?<br />
JA<br />
Der Fehler ist behoben.<br />
JA<br />
NEIN<br />
Wenden Sie sich an den<br />
<strong>MV</strong> <strong>Agusta</strong> Kundendienst<br />
- 57 -
STÖRUNGEN 2<br />
DIE HUPE FUNKTIONIERT NICHT<br />
DE<br />
2<br />
Die Sicherung F1<br />
ist in Ordnung?<br />
NEIN<br />
Die Sicherung F1<br />
auswechseln (§1.14.1.)<br />
Funktioniert die<br />
Hupe jetzt?<br />
JA<br />
Der Fehler ist behoben.<br />
JA<br />
NEIN<br />
Wenden Sie sich an den<br />
<strong>MV</strong> <strong>Agusta</strong> Kundendienst<br />
DER KILOMETERZÄHLER FUNKTIONIERT NICHT<br />
Die Sicherung F1<br />
ist in Ordnung?<br />
NEIN<br />
Die Sicherung F1<br />
auswechseln (§1.14.1.)<br />
Funktioniert der<br />
Kilometerzähler<br />
jetzt?<br />
JA<br />
Der Fehler ist behoben.<br />
JA<br />
NEIN<br />
Wenden Sie sich an den<br />
<strong>MV</strong> <strong>Agusta</strong> Kundendienst<br />
- 58 -
STÖRUNGEN 2<br />
DIE KONTROLLEUCHTEN DES ARMATURENBRETTES FUNKTIONIER NICHT<br />
Die Sicherung F1<br />
ist in Ordnung?<br />
NEIN<br />
Die Sicherung F1<br />
auswechseln (§1.14.1.)<br />
Funktionier<br />
die Kontrolleuchten<br />
jetzt?<br />
JA<br />
Der Fehler ist behoben.<br />
2<br />
DE<br />
JA<br />
NEIN<br />
Wenden Sie sich an den<br />
<strong>MV</strong> <strong>Agusta</strong> Kundendienst<br />
DIE LICHTMASCHINE LÄDT DIE BATTERIE NICHT AUF<br />
(Das Batterielade-Kontrollampe ist eingeschaltet, während der Motor läuft)<br />
Die Sicherung<br />
für die Batterieladung<br />
ist in Ordnung?<br />
NEIN<br />
Die Sicherung für die<br />
Batterieladung auswechseln<br />
(§1.14.1.)<br />
Jetzt lädt der<br />
Lichtmaschine die<br />
Batterie auf?<br />
JA<br />
Der Fehler ist behoben.<br />
JA<br />
NEIN<br />
Wenden Sie sich an den<br />
<strong>MV</strong> <strong>Agusta</strong> Kundendienst<br />
- 59 -
TECHNISCHE INFORMATIONEN 3<br />
3.1. Allgemeine Beschreibung des Motorrads<br />
(N) Armaturenbrett<br />
(B) Zündung - Versorgung<br />
DE<br />
3<br />
(G) Vordere Federung<br />
(I) Batterie<br />
(O) Auspuffsystem<br />
(E) Kühlung<br />
(L) Vorderradbremse<br />
(F) Rahmen<br />
(A) Motor<br />
(C) Getriebe<br />
(H) Hintere Federung<br />
(M) Hinterradbremse<br />
(D) Endantrieb<br />
- 60 -
TECHNISCHE INFORMATIONEN 3<br />
A - Motor: Viertaktmotor, 4-Zylinder in Reihe,<br />
Ventilsteuerung mit doppelter obenliegender<br />
Nockenwelle mit Radialventilen. Sumpf-schmierung.<br />
B - Zündung - Versorgung: Integriertes Zünd-<br />
Einspritzsystem. Elektronische Zündung mit<br />
induktiver Entladung. Elektronische<br />
Einspritzung “Multipoint”.<br />
C - Getriebe: Ausziehbar, Sechsganggetriebe<br />
mit ständig greifenden Zahnrädern.<br />
D - Endantrieb: Bestehend aus Ritzel, Zahnkranz<br />
und Kette.<br />
E - Kühlung: mit unterschiedlichen Öl- und<br />
Wasser-Wärmetauscher.<br />
F - Rahmen: Gitterförmig, Stahlrohrrahmen mit<br />
Seitenplatten aus Aluminium.<br />
G - Vordere Federung: Hydraulische Gabel mit<br />
umgekehrten Gabelschäften. Mit Einstellungssystem.<br />
H - Hintere Federung: Schwingarm mit progressiver<br />
Wirkung und Einzelstoßdämpfer mit<br />
Einstellungssystem.<br />
I<br />
- Batterie: versiegelt und wartungsfrei.<br />
L - Vorderradbremse: Doppelte Bremsscheibe<br />
mit halb-schwimmend gelagerten Bremssätteln<br />
mit vier Bremskolben.<br />
M - Hinterradbremse: Einzelscheibe mit Bremszange<br />
mit vier Bremskolben.<br />
N - Armaturenbrett: Ausgestattet mit<br />
Kontrolleuchten und digitalen Instrumenten.<br />
O - Auspuffsystem: Ausgestattet mit katalytischem<br />
Konverter für Abgasverkleinerung.<br />
3<br />
DE<br />
- 61 -
TECHNISCHE INFORMATIONEN 3<br />
3.1.1 Bremskreislauf Vorderradbremse<br />
2<br />
1<br />
DE<br />
3<br />
3<br />
5<br />
4<br />
4<br />
5<br />
1 Hauptbremszylinder<br />
2 Bremshebel<br />
3 Bremsleitung<br />
4 Bremssattel<br />
5 Bremsscheiben<br />
- 62 -
TECHNISCHE INFORMATIONEN 3<br />
3.1.2. Bremskreislauf Hinterradbremse<br />
4<br />
3<br />
DE<br />
6<br />
3<br />
5<br />
1 2<br />
1 Bremshebel<br />
2 Hauptbremszylinder<br />
3 Bremsleitung<br />
4 Bremsflüssigkeitsbehälter<br />
5 Bremssattel<br />
6 Bremsscheibe<br />
- 63 -
TECHNISCHE INFORMATIONEN 3<br />
3.1.3. Kupplungskreislauf<br />
DE<br />
3<br />
1<br />
2<br />
3 4<br />
1 Kupplungshebel<br />
2 Baugruppe<br />
Kupplungs-Hauptzylinder<br />
3 Kupplungsleitung<br />
4 Baugruppe kleiner<br />
Kupplungszylinder<br />
- 64 -
TECHNISCHE INFORMATIONEN 3<br />
3.1.4. Motorschmierung<br />
3<br />
DE<br />
3<br />
1 2<br />
1 Ölwanne<br />
2 Ölfilter<br />
3 Ölzuleitung zum Zylinderkopf<br />
- 65 -
TECHNISCHE INFORMATIONEN 3<br />
3.1.5. Kühlkreislauf<br />
1<br />
2<br />
DE<br />
3<br />
3 4<br />
1 Ausdehnungsgefäß<br />
2 Oberer Kühler<br />
3 Unterer Kühler<br />
4 Kühlmittelpumpe<br />
- 66 -
TECHNISCHE INFORMATIONEN 3<br />
3.1.6. Benzin-Versorgungskreislauf<br />
1<br />
3<br />
DE<br />
2<br />
3<br />
1 Drosselkörper<br />
2 Benzinpumpe<br />
3 Benzinleitung<br />
- 67 -
TECHNISCHE INFORMATIONEN 3<br />
2100<br />
750<br />
DE<br />
3<br />
830<br />
115<br />
3.2. Technische Daten<br />
1430<br />
Bezeichnung <strong>F4</strong> <strong>1000</strong><br />
TECHNISCHE ANGABEN<br />
Radabstand (mm) (*) 1430<br />
Gesamtlänge (mm) (*) 2100<br />
Gesamtbreite (mm) 750<br />
Sitzbankhöh (mm) (*) 830<br />
Bodenfreiheit (mm) (*) 115<br />
Vorlauf (mm) (*) 100,4<br />
* : Die angegebenen Werte sind nicht verbindlich. Die angegebenen Werte können sich je nach Zustand und Trimmung des Fahrzeugs ändern.<br />
- 68 -
TECHNISCHE INFORMATIONEN 3<br />
Technische Daten<br />
Bezeichnung <strong>F4</strong> <strong>1000</strong><br />
Leergewicht (Kg) 192<br />
Tankinhalt Benzintank(lt) (*) 17<br />
Benzinreserve (lt) (*) 4<br />
Ölmenge im Motorgehäuse (lt) 3,5<br />
MOTOR<br />
Typ<br />
Vierzylinder-Viertaktmotor, 16 Ventile<br />
Bohrung (mm) 76<br />
Hub (mm) 55<br />
Hubraum (cm 3 ) 998<br />
Verdichtungsverhältnis 13,1 : 1<br />
Starten/Anlassen<br />
Elektrisch<br />
Kühlung<br />
Mit unterschiedlichen Öl- und Wasser-Wärmetauscher<br />
Motorgehäuse und Deckel<br />
Druckguß<br />
Zylinderkopf und Zylinder<br />
Kokillenguß<br />
Ventile<br />
Bimetallisch / Monometallisch<br />
VENTILSTEUERUNG<br />
Typ<br />
Doppelte obenliegende Nockenwelle, Radialventile<br />
3<br />
DE<br />
* : Die angegebenen Werte sind nicht verbindlich. Die angegebenen Werte können sich je nach Außentemperatur,<br />
Motortemperatur und Verdampfungspunkt des verwendeten Benzins ändern.<br />
- 69 -
TECHNISCHE INFORMATIONEN 3<br />
Technische Daten<br />
DE<br />
3<br />
Bezeichnung <strong>F4</strong> <strong>1000</strong><br />
SCHMIERUNG<br />
Typ<br />
Sumpfschmierung<br />
ZÜNDUNG - VERSORGUNG<br />
Typ<br />
Integriertes Zünd-Einspritzsystem Magneti Marelli IAW 7BM<br />
mit Mikuni-Drosselkörper; Elektronische Zündung mit induktiver Entladung;<br />
Elektronische, sequentiell getaktete Multipoint-Einspritzung;<br />
Saugrohr-Längenverstellung mit Torque Shift System (TSS).<br />
Zündkerzen<br />
NGK CR9 EB<br />
Elektrodenabstand (mm) 0,7 ÷ 0,8<br />
KUPPLUNG<br />
Typ<br />
Mehrscheiben-Ölbadkupplung mit mechanische Anti-hopfenvorrichtung<br />
HAUPTANTRIEB<br />
Zahnzahl Zahnrad Kurbelwelle Z = 50<br />
Zahnzahl Zahnrad Kupplung Z = 79<br />
Übersetzungsverhältnis 1,58<br />
ENDANTRIEB<br />
Zahnzahl Ritzel Z = 15<br />
Zahnzahl Zahnkranz Z = 41<br />
Übersetzungsverhältnis 2,73<br />
GETRIEBE<br />
Typ<br />
Ausziehbar, Sechsganggetriebe mit ständig greifenden Zahnräder<br />
- 70 -
TECHNISCHE INFORMATIONEN 3<br />
Technische Daten<br />
Bezeichnung <strong>F4</strong> <strong>1000</strong><br />
Untersetzung Gänge (Gesamtverhältnis)<br />
Erster 2.92 (12.60)<br />
Zweiter 2.12 (9.14)<br />
Dritter 1.78 (7.68)<br />
Vierter 1.50 (6.47)<br />
Fünfter 1.32 (5.69)<br />
Sechster 1.21 (5.22)<br />
RAHMEN<br />
Typ<br />
Gitterförmiger 25 CrMo-Stahlrohrrahmen (TIG-verschweißt)<br />
Auflageblech Schwingendrehpunkt<br />
Aluminiumlegierung<br />
VORDERE FEDERUNG<br />
Typ<br />
Hydraulische Gabel mit umgekehrten Gabelschäften. Mit Einstellungssystem<br />
für Ausdehnungs- und Kompressionsbremse sowie Federvorspannung<br />
Ø Schaft (mm) 50<br />
Hubhöhe an Gabelbeinachse 120<br />
HINTERE FEDERUNG<br />
Typ<br />
Progressiv, Einzelstoßdämpfer mit Einstellvorrichtung für Ausdehnungs- und<br />
Kompressionsbremse (hohe Gänge / niedrige Gänge) sowie Federvorspannung<br />
Einarmschwinge<br />
Aluminiumlegierung<br />
Radhub (mm) 120<br />
3<br />
DE<br />
- 71 -
TECHNISCHE INFORMATIONEN 3<br />
Technische Daten<br />
DE<br />
3<br />
Bezeichnung <strong>F4</strong> <strong>1000</strong><br />
VORDERRADBREMSE<br />
Typ<br />
Doppelte Bremsscheibe mit halb-schwimmend gelagerten Bremssätteln<br />
Ø Bremsscheibe (mm) 320<br />
Bremsscheibenflansch<br />
Aluminium<br />
Bremszange (Durchmesser Bremskolben mm) Radialbremskolben, mono-Stück, mit vier Bremskolben (Ø 34)<br />
HINTERRADBREMSE<br />
Typ<br />
Stahlscheiben<br />
Ø Bremsscheibe (mm) 210<br />
Bremszange (Durchmesser Bremskolben mm) Vier Bremskolben (Ø 25,4)<br />
VORDERRADFELGE<br />
Material<br />
Schmiede Aluminiumlegierung<br />
Ausmaß 3,50” x 17”<br />
HINTERRADFELGE<br />
Material<br />
Schmiede Aluminiumlegierung<br />
Ausmaß 6,00” x 17”<br />
REIFEN<br />
Vorne 120/70-ZR 17 (58 W)<br />
Hinten 190/55-ZR 17 (75 W)<br />
- 72 -
TECHNISCHE INFORMATIONEN 3<br />
Technische Daten<br />
Bezeichnung <strong>F4</strong> <strong>1000</strong><br />
Merke und Typ<br />
PIRELLI - Diablo Supercorsa SP<br />
DUNLOP - Sportmax Qualifier RR<br />
Reifendruck (*) Geschwindigkeit niedrigere als 300 km/h Geschwindigkeit niedrigere als 300 km/h<br />
Vorne PIRELLI: 2.3 bar (33 psi) 2.5 bar (36 psi)<br />
DUNLOP: 2.3 bar (33 psi) 2.5 bar (36 psi)<br />
Hinten PIRELLI: 2.3 bar (33 psi) 2.9 bar (42 psi)<br />
DUNLOP: 2.3 bar (33 psi) 2.9 bar (42 psi)<br />
ELEKTRISCHE ANLAGE<br />
Spannung<br />
12V<br />
Fahrlicht<br />
OSRAM Xenarc D1S 35W<br />
Standlicht hinten<br />
12V 5W<br />
Batterie<br />
12V - 8,6Ah<br />
Lichtmaschine<br />
350 W bei 5000 U/min.<br />
KAROSSERIE<br />
Karosserie<br />
Thermoplastisches Material<br />
Sportscheibe<br />
Thermoplastisches Material<br />
Heck<br />
Thermoplastisches Material<br />
Tank<br />
Thermoplastisches Material<br />
* : Beim Einsatz anderer Marken als der empfohlenen Reifenmarken muss der vom Reifenhersteller auf der Reifenwand aufgeprägte<br />
Reifendruck eingehalten werden.<br />
- 73 -<br />
3<br />
DE
TECHNISCHE INFORMATIONEN 3<br />
Technische Daten<br />
DE<br />
3<br />
Bezeichnung <strong>F4</strong> <strong>1000</strong><br />
Ansaugstutzen<br />
Thermoplastisches Material<br />
Airbox<br />
Thermoplastisches Material<br />
Seitenteile Airbox<br />
Thermoplastisches Material<br />
Vorderer Kotflügel<br />
Thermoplastisches Material<br />
Kettenschutz<br />
Thermoplastisches Material<br />
Abdeckung Auspuffrohr<br />
Aluminium<br />
Hitzeschutz<br />
Thermoplastisches Material<br />
Nummernschildhalter<br />
Thermoplastisches Material<br />
- 74 -
TECHNISCHE INFORMATIONEN 3<br />
3<br />
DE<br />
- 75 -
TECHNISCHE INFORMATIONEN 3<br />
5<br />
6<br />
3 4<br />
2<br />
11<br />
DE<br />
3<br />
7<br />
1<br />
12<br />
9<br />
10<br />
8<br />
- 76 -
TECHNISCHE INFORMATIONEN 3<br />
3.3. Farbkennziffern für Karosseriebauteile<br />
Die lackierten Karosseriebauteile haben folgende Farbkennzeichnung in Bezug auf die jeweilige<br />
Farbkennziffer des Motorrads:<br />
1. - Sportscheibe;<br />
2. - Linker Rückspiegel;<br />
3. - Rechter Rückspiegel;<br />
4. - Airbox;<br />
5. - Benzintank;<br />
6. - Hinteres linkes Seitenteil;<br />
7. - Hinteres rechtes Seitenteil:<br />
Farbkennziffer A:<br />
Pastellrot<br />
(Kennziffer Palinal 926R750)<br />
Farbkennziffer B:<br />
Schwarz Glänzend<br />
(Kennziffer Palinal 929R486H)<br />
Farbkennziffer C:<br />
Grau Titanium<br />
(Kennziffer Palinal L821)<br />
8. - Linkes Karosserie-Seitenteil;<br />
9. - Rechtes Karosserie-Seitenteil;<br />
10. - Karosserie-Unterteil;<br />
11. - Linkes Tank-Seitenteil;<br />
12. - Rechtes Tank-Seitenteil:<br />
Farbkennziffer A:<br />
Silber metallisiert<br />
(Kennziffer Palinal 928XV025)<br />
Farbkennziffer B:<br />
Matt Schwarz<br />
(Kennziffer Palinal 929XR486 + Palinal Matt 3)<br />
Farbkennziffer C:<br />
Grau Admiral<br />
(Kennziffer Palinal L820)<br />
3<br />
DE<br />
- 77 -
TECHNISCHE INFORMATIONEN 3<br />
1<br />
2<br />
DE<br />
3<br />
3<br />
4<br />
- 78 -
TECHNISCHE INFORMATIONEN 3<br />
3.4. Rahmen- und Radfahrteile Farbkennziffer<br />
Die lackierten Rahmen- u. Radfahrteile haben folgende Farbkennzeichnung:<br />
1. - Rahmen:<br />
Farbkennziffer A-B:<br />
Anthrazitgrau metallisiert<br />
(Kennziffer Palinal 926XH893)<br />
Farbkennziffer C:<br />
Rahmen Rot<br />
(Kennziffer Palinal 211XH987)<br />
3. - Motor:<br />
Matt Schwarz<br />
(Kennziffer Pulverit 3500/0085)<br />
3<br />
DE<br />
2. - Scheinwerferhalterung:<br />
Anthrazitgrau metallisiert<br />
(Kennziffer Palinal 926XH893)<br />
4. - Zylinderkopfabdeckung:<br />
Rahmen Rot<br />
(Kennziffer Palinal 211XH987)<br />
- 79 -
ANMERKUNGEN<br />
DE<br />
3<br />
Informationshinweis<br />
<strong>MV</strong> <strong>Agusta</strong> S.p.A. verfolgt eine Politik ständiger Verbesserung ihrer Produkte. Aus diesem Grund kann es<br />
vorkommen, dass kleine Abweichungen zwischen dem vorliegenden Dokument und dem von Ihnen erworbenen<br />
Fahrzeug bestehen. Die Modelle <strong>MV</strong> <strong>Agusta</strong> werden in zahlreiche Länder exportiert, in denen unterschiedliche<br />
Straßenverkehrsordnungen und Zulassungsverfahren bestehen. In der Hoffnung auf Ihr<br />
Verständnis behält sich <strong>MV</strong> <strong>Agusta</strong> S.p.A. deshalb das Recht vor, jederzeit und ohne Vorankündigung,<br />
Änderungen an ihren Produkten und den technischen Dokumentationen vorzunehmen.<br />
Wir schlagen vor, um den Internetplatz www.mvagusta.it häufig zu besichtigen, um Informationen und<br />
Updates über die <strong>MV</strong> <strong>Agusta</strong>-Produkte und die in Verbindung stehenden Unterlagen zu erhalten.<br />
Die Umwelt schützen und respektieren<br />
Alles was wir tun hat Auswirkungen auf den gesamten Planeten und seine Ressourcen.<br />
Zum Schutz der Gemeinschaft weist <strong>MV</strong> <strong>Agusta</strong> die Kunden und die Angestellten im Kundendienst darauf<br />
hin, wie das Motorrad umweltschonend genutzt und Motorradbauteile und Flüssigkeiten entsprechend der<br />
geltenden Umweltschutzgesetze entsorgt bzw. dem Recycling zugeführt werden können.<br />
© 2009<br />
Die vollständige oder teilweise Vervielfältigung dieses Dokuments ist ohne vorherige schriftliche Genehmigung der <strong>MV</strong> <strong>Agusta</strong><br />
S.p.A. verboten.<br />
Teilnr. n° 8000B4299<br />
Ausgabe n° 1 - Dezember 2009<br />
- 80 -
<strong>Manual</strong> de <strong>mantenimiento</strong><br />
Versión en Español
ÍNDICE GENERAL<br />
Cap. Descripción temas pág.<br />
1 MANTENIMIENTO 3<br />
1.1. Símbolos 3<br />
1.2. Tablas de <strong>mantenimiento</strong> y control 4<br />
1.3. Utillaje y accesorios del equipamiento base 14<br />
1.4. Tabla de lubrificantes y líquidos 15<br />
1.5. Desmontaje/montaje lateral del chasis 16<br />
1.6. Aceite motor - Control nivel 18<br />
1.6.1. Aceite motor - Reposición nivel 19<br />
1.7. Líquido de refrigeración - Control nivel 21<br />
1.7.1. Líquido de refrigeración - Reposición nivel 22<br />
1.8. Pastillas frenos - Control desgaste 24<br />
1.9. Fluido mando frenos - Control nivel 25<br />
1.10. Fluido mando embrague - Control nivel 27<br />
1.11. Neumáticos - Control y cambio 28<br />
1.12. Cadena - Control y lubrificación 34<br />
1.13. Ralentí - Control 38<br />
1.14. Sustituciones - Información general 39<br />
1.14.1. Fusibles - Sustitución 39<br />
1.14.2. Luz matrícula - Sustitución bombilla 44<br />
Cap. Descripción temas pág.<br />
1.15. Batería 47<br />
1.16. Limpieza de la motocicleta 49<br />
1.17. Periodo de larga inactividad 51<br />
2 AVERÍAS 52<br />
2.1. Inconvenientes en el motor 52<br />
2.2. Inconvenientes en la instalación eléctrica 57<br />
3 INFORMACIÓN TÉCNICA 60<br />
3.1. Descripción general de la motocicleta 60<br />
3.1.1. Circuito freno delantero 62<br />
3.1.2. Circuito freno trasero 63<br />
3.1.3. Circuito embrague 64<br />
3.1.4. Lubricación motor 65<br />
3.1.5. Circuito de refrigeración 66<br />
3.1.6. Circuito de alimentación 67<br />
3.2. Datos técnicos 68<br />
3.3. Referencias colores componentes del<br />
carenado 76<br />
3.4. Referencias colores componentes<br />
del bastidor 78<br />
- 2 -
MANTENIMIENTO 1<br />
1.1. Símbolos<br />
Las partes del texto de particular importancia, correspondientes a la seguridad de la persona y a la integridad<br />
de la motocicleta, están evidenciadas con los siguientes símbolos:<br />
1<br />
ES<br />
Peligro - Atención: la falta o el incompleto cumplimiento de estas prescripciones puede<br />
comportar un grave peligro para su incolumidad o para la de otras personas.<br />
Prudencia - Precaución: la falta o el incompleto cumplimiento de estas prescripciones<br />
puede comportar un riesgo de daños a la motocicleta.<br />
Para indicar las personas autorizadas al desarrollo de las operaciones de ajustes y/o manutención, las<br />
mismas se encuentran marcadas con los símbolos siguientes:<br />
Información de las operaciones permitidas al motociclista.<br />
Información de las operaciones que deben ser llevadas a cabo sólo por personal autorizado.<br />
Para poner en evidencia ulteriores informaciones se utilizan los siguientes símbolos:<br />
El símbolo indica que es necesario utilizar una herramienta o utillaje específico para<br />
realizar correctamente la operación descrita.<br />
§ El símbolo “§” indica que nos remitimos al capítulo indicado por el número que lo sigue.<br />
- 3 -
MANTENIMIENTO 1<br />
ES<br />
1<br />
1.2. Tablas de <strong>mantenimiento</strong> y control<br />
Las operaciones de <strong>mantenimiento</strong> y control más importantes<br />
y su frecuencia están indicadas en las tablas específicas. Es<br />
indispensable efectuar éstas operaciones para, mantener la<br />
motocicleta eficiente y segura.<br />
Los intervalos indicados en la tabla de la manutención periódica<br />
y de lubricación se deben considerar solo como una guía<br />
general en normales condiciones de marcha. Podría ser necesario<br />
reducir tales intervalos en función a las condiciones climáticas,<br />
del terreno, de la situación geográfica y del uso individual.<br />
Algunas operaciones las puede efectuar el propietario de la<br />
motocicleta siempre que posea los conocimientos necesarios.<br />
En caso contrario haga efectuar las operaciones en un centro<br />
de asistencia autorizado.<br />
En general las operaciones de <strong>mantenimiento</strong> se efectúan con<br />
la motocicleta colocada sobre el caballete trasero, con motor<br />
apagado y con interruptor en posición “OFF”. Durante la verificación<br />
de los niveles de los líquidos en cambio es preferible<br />
tener la moto en posición vertical sin utilizar el caballete trasero.<br />
Superados los 36.000 km (22400 mi), las operaciones se deben<br />
efectuar con la frecuencia indicada en las correspondientes tablas.<br />
- 4 -
MANTENIMIENTO 1<br />
PELIGRO<br />
• Una manutención no correcta o la falta de realización de trabajos de manutención aconsejados,<br />
aumenta el riesgo de accidentes o de daños a la moto.<br />
• Utilizar siempre recambios originales <strong>MV</strong> <strong>Agusta</strong>. El uso de recambios no originales puede<br />
acelerar el desgaste de la moto y reducir la durabilidad.<br />
• La falta de realización de las operaciones recomendadas o la utilización de recambios no<br />
originales podía hacer la garantía ser inválida.<br />
• El cambio y/o el restablecimiento del nivel de los lubricantes se debe realizar exclusivamente<br />
con los productos indicados en el §1.4.<br />
1<br />
ES<br />
ATENCIÓN<br />
En caso de utilizar la motocicleta en pistas, se recomienda hacerla controlar por personal<br />
especializado perteneciente a la red de Centros de Asistencia <strong>MV</strong> <strong>Agusta</strong> antes y después<br />
del uso.<br />
La conducción en pista sólo está permitida en casos ocasionales y, de todas formas, sin<br />
fines agonísticos, aunque sea en calidad de aficionados.<br />
El uso de la moto en pista comporta un significativo aumento del consumo de varios componentes,<br />
con una menor duración de los mismos respecto del uso normal en carreteras<br />
y autopistas.<br />
- 5 -
MANTENIMIENTO 1<br />
ES<br />
1<br />
Tabla de <strong>mantenimiento</strong> programado<br />
Frecuencia Manutención Km (mi)<br />
0 <strong>1000</strong> 6000 12000 18000 24000 30000 36000<br />
(600) (3800) (7500) (11200) (14900) (18600) (22400)<br />
Cupón<br />
Preentrega<br />
A B C D E F G<br />
DESCRIPCIÓN<br />
Aceite motor<br />
Filtro aceite motor<br />
OPERACIÓN<br />
Control nivel<br />
Sustitución<br />
Sustitución<br />
(Utilizar exclusivamente filtros<br />
de aceite originales <strong>MV</strong><br />
<strong>Agusta</strong>)<br />
Control/Restablecimiento nivel<br />
Antes de usar el vehículo<br />
● ● ● ● ● ● ●<br />
Cada año<br />
● ● ● ● ● ● ●<br />
A cada sustitución del aceite motor<br />
Antes de usar el vehículo<br />
Líquido de refrigeración<br />
Control/Restablecimiento nivel ● ● ● ● ● ● ● ●<br />
Sustitución<br />
Cada dos años<br />
Instalación de refrigeración Control pérdidas ● ● ● ● ● ● ● ●<br />
Electroventilador Control funcionamiento ● ● ● ● ● ● ● ●<br />
Válvulas Control / Regulación ● ● ●<br />
Cadena distribución<br />
Control ● ●<br />
Sustitución<br />
●<br />
- 6 -
MANTENIMIENTO 1<br />
Tabla de <strong>mantenimiento</strong> programado<br />
Frecuencia Manutención Km (mi)<br />
0 <strong>1000</strong> 6000 12000 18000 24000 30000 36000<br />
(600) (3800) (7500) (11200) (14900) (18600) (22400)<br />
Cupón<br />
Preentrega<br />
A B C D E F G<br />
1<br />
ES<br />
DESCRIPCIÓN<br />
OPERACIÓN<br />
Control / Sustitución ● ●<br />
Patín móvil distribución<br />
Sustitución<br />
●<br />
De cualquier manera a cada cambio de cadena de la distribución<br />
Tensor cadena distribución Control / Sustitución ● ● ●<br />
Bujías<br />
Control / Sustitución ● ● ●<br />
Sustitución ● ● ●<br />
Filtro gasolina Control / Sustitución ● ● ●<br />
Cuerpo mariposa Comprobación y Ajuste ● ● ● ● ● ● ●<br />
Filtro aire Control / Sustitución ● ● ● ● ● ●<br />
Control nivel<br />
Antes de usar el vehículo<br />
Fluido frenos y embrague<br />
Control nivel ● ● ● ● ● ● ●<br />
●<br />
Sustitución<br />
Cada dos años<br />
- 7 -
MANTENIMIENTO 1<br />
ES<br />
1<br />
Tabla de <strong>mantenimiento</strong> programado<br />
Frecuencia Manutención Km (mi)<br />
0 <strong>1000</strong> 6000 12000 18000 24000 30000 36000<br />
(600) (3800) (7500) (11200) (14900) (18600) (22400)<br />
Cupón<br />
Preentrega<br />
A B C D E F G<br />
DESCRIPCIÓN<br />
OPERACIÓN<br />
Control funcionalidad<br />
Antes de usar el vehículo<br />
Frenos/Embrague Control funcionalidad ● ● ● ● ● ● ● ●<br />
Control circuito ● ● ● ● ● ● ● ●<br />
Pastillas frenos<br />
(delantero + trasero)<br />
Tubería circuito carburante<br />
Control desgaste<br />
Cada <strong>1000</strong> km (600 mi)<br />
Control / Sustitución ● ● ● ● ● ● ●<br />
Control defectos y pérdidas ● ● ● ● ● ● ●<br />
Sustitución<br />
De cualquier manera cada 3 años<br />
Control funcionalidad<br />
Antes de usar el vehículo<br />
Mando acelerador Control funcionalidad ● ● ● ● ● ● ● ●<br />
Comprobación/ajuste juego ● ● ● ● ● ● ● ●<br />
Mando estarter Control funcionalidad ● ● ● ● ● ● ● ●<br />
Transmisiones y<br />
mandos flexibles<br />
Control / Regulación ● ● ● ● ● ● ● ●<br />
- 8 -
MANTENIMIENTO 1<br />
Tabla de <strong>mantenimiento</strong> programado<br />
Frecuencia Manutención Km (mi)<br />
0 <strong>1000</strong> 6000 12000 18000 24000 30000 36000<br />
(600) (3800) (7500) (11200) (14900) (18600) (22400)<br />
Cupón<br />
Preentrega<br />
A B C D E F G<br />
1<br />
ES<br />
DESCRIPCIÓN<br />
OPERACIÓN<br />
Control<br />
Cada <strong>1000</strong> Km (600 mi)<br />
Cadena de transmisión<br />
Lubrificación<br />
Cada <strong>1000</strong> km (600 mi) y después de conducción con lluvia<br />
Control / Regulación ● ● ● ● ● ● ● ●<br />
Lubrificación ● ● ● ●<br />
Sustitución ● ● ●<br />
Control ● ● ● ●<br />
Piñón / Arandela de fijación<br />
Sustitución<br />
● ● ●<br />
De cualquier manera a cada cambio de la cadena de transmisión<br />
Control ● ● ● ●<br />
Corona<br />
Sustitución<br />
● ● ●<br />
De cualquier manera a cada cambio de la cadena de transmisión<br />
Acoplamiento flexible corona Control / Sustitución ● ● ●<br />
Tuerca tubo dirección<br />
Control / Regulación ● ● ● ●<br />
- 9 -
MANTENIMIENTO 1<br />
ES<br />
1<br />
Tabla de <strong>mantenimiento</strong> programado<br />
Frecuencia Manutención Km (mi)<br />
0 <strong>1000</strong> 6000 12000 18000 24000 30000 36000<br />
(600) (3800) (7500) (11200) (14900) (18600) (22400)<br />
Cupón<br />
Preentrega<br />
A B C D E F G<br />
DESCRIPCIÓN<br />
Cojinetes de la dirección<br />
OPERACIÓN<br />
Control / Regulación ● ● ● ●<br />
Lubricación<br />
●<br />
Control presión<br />
Cada vez que se utiliza el vehículo y de todas maneras cada 10 días<br />
Neumáticos<br />
Control desgaste<br />
Cada vez que se utiliza el vehículo y de todas maneras cada 500 Km (300 mi)<br />
Control presión ● ● ● ● ● ● ● ●<br />
Control desgaste ● ● ● ● ● ● ●<br />
Llantas rueda<br />
Cojinetes rueda delantera<br />
Control visivo<br />
Control<br />
Sustitución<br />
● ● ● ● ● ● ●<br />
De cualquier manera a cada cambio de neumáticos<br />
● ● ● ● ●<br />
De cualquier manera a cada cambio de neumáticos<br />
●<br />
Caballete lateral<br />
Control funcionalidad<br />
Antes de usar el vehículo<br />
Control funcionalidad ● ● ● ● ● ● ● ●<br />
- 10 -
MANTENIMIENTO 1<br />
Tabla de <strong>mantenimiento</strong> programado<br />
Frecuencia Manutención Km (mi)<br />
0 <strong>1000</strong> 6000 12000 18000 24000 30000 36000<br />
(600) (3800) (7500) (11200) (14900) (18600) (22400)<br />
Cupón<br />
Preentrega<br />
A B C D E F G<br />
1<br />
ES<br />
DESCRIPCIÓN<br />
OPERACIÓN<br />
Interruptor<br />
Control funcionalidad<br />
Antes de usar el vehículo<br />
caballete lateral<br />
Control funcionalidad ● ● ● ● ● ● ● ●<br />
Buje rueda trasera<br />
Control /<br />
Lubricación cojinetes<br />
de rodillo<br />
● ●<br />
Sustitución/<br />
Lubricación cojinetes<br />
de rodillo<br />
●<br />
Cojinetes horquilla Control / Lubrificación ●<br />
Patines cadena horquilla Control / Sustitución ● ● ● ● ● ● ●<br />
Patines cadena placa bastidor Control / Sustitución ● ● ● ● ● ● ●<br />
Amortiguador trasero Control / Regulación ● ● ● ●<br />
Aceite horquilla delantera Sustitución ●<br />
Conexiones batería Control y limpieza ● ● ● ● ● ● ●<br />
Instalación eléctrica Control funcionalidad ● ● ● ● ● ● ● ●<br />
Instrumentos<br />
Control funcionalidad<br />
Antes de usar el vehículo<br />
Control funcionalidad ● ● ● ● ● ● ● ●<br />
- 11 -
MANTENIMIENTO 1<br />
ES<br />
1<br />
Tabla de <strong>mantenimiento</strong> programado<br />
Frecuencia Manutención Km (mi)<br />
0 <strong>1000</strong> 6000 12000 18000 24000 30000 36000<br />
(600) (3800) (7500) (11200) (14900) (18600) (22400)<br />
Cupón<br />
Preentrega<br />
A B C D E F G<br />
DESCRIPCIÓN<br />
Luces / Señales visivas<br />
Claxon<br />
OPERACIÓN<br />
Control funcionalidad /<br />
Antes de usar el vehículo<br />
Sustitución bombilla<br />
Control funcionalidad /<br />
Sustitución bombilla<br />
● ● ● ● ● ● ● ●<br />
Control funcionalidad<br />
Antes de usar el vehículo<br />
Control funcionalidad ● ● ● ● ● ● ● ●<br />
Control funcionalidad<br />
Antes de usar el vehículo<br />
Faro delantero Control funcionalidad ● ● ● ● ● ● ● ●<br />
Regulación<br />
Cada vez que hay una modificación del equilibrado<br />
Interruptor encendido<br />
Cerraduras<br />
Control funcionalidad<br />
Antes de usar el vehículo<br />
Control funcionalidad ● ● ● ● ● ● ● ●<br />
Control funcionalidad<br />
Antes de usar el vehículo<br />
Control funcionalidad ● ● ● ● ● ● ● ●<br />
Apriete tornillos y tuercas Verificación / apriete ● ● ● ● ● ● ● ●<br />
- 12 -
MANTENIMIENTO 1<br />
Tabla de <strong>mantenimiento</strong> programado<br />
Frecuencia Manutención Km (mi)<br />
0 <strong>1000</strong> 6000 12000 18000 24000 30000 36000<br />
(600) (3800) (7500) (11200) (14900) (18600) (22400)<br />
Cupón<br />
Preentrega<br />
A B C D E F G<br />
1<br />
ES<br />
DESCRIPCIÓN<br />
OPERACIÓN<br />
Abrazaderas Verificación / apriete ● ● ● ● ● ● ● ●<br />
Lubrificación general ● ● ● ● ● ● ● ●<br />
Prueba motocicleta ● ● ● ● ● ● ● ●<br />
- 13 -
MANTENIMIENTO 1<br />
ES<br />
1<br />
1.3. Utillaje y accesorios del equipamiento base<br />
Se suministra, en el hueco portaobjetos, una bolsa que<br />
contiene las siguientes herramientas:<br />
- n. 1 barra hexagonal (hexágono de 10 mm);<br />
- n. 6 llaves macho hexagonal (hexágono de 2,5 - 3 -<br />
4 - 5 - 6 - 8 mm);<br />
- n. 1 llave para excéntrico rueda trasera y correspondiente<br />
prolongación;<br />
- n. 1 extractor para fusibles;<br />
- n. 3 fusibles (15A).<br />
Se proporcionan además los siguientes accesorios:<br />
- n. 1 llave para bujías (hexágono de 16 mm);<br />
- n. 1 portadocumentos.<br />
- 14 -
MANTENIMIENTO 1<br />
1.4. Tabla lubrificantes y líquidos<br />
Descripción Producto aconsejado Características<br />
Aceite lubrificación motor AGIP RACING 4T 10W/60 (*) SAE 10W/60 - API SJ<br />
Glicol - Etilénico<br />
Líquido de refrigeración AGIP ECO - PERMANENT diluido con 50%<br />
de agua destilada<br />
Fluido mando embrague y frenos AGIP BRAKE FLUID DOT4 DOT4<br />
Aceite lubrificación cadena MOTUL CHAIN LUBE ROAD –<br />
1<br />
ES<br />
* : Para encontrar fácilmente los productos recomendados, <strong>MV</strong> <strong>Agusta</strong> aconseja dirigirse directamente<br />
a los propios concesionarios autorizados. El aceite para motor AGIP Racing 4T 10W/60 ha sido realizado<br />
especialmente para el motor de la motocicleta <strong>F4</strong>. En el caso<br />
que el lubricante descrito no se consiga, <strong>MV</strong> <strong>Agusta</strong> aconseja utilizar<br />
aceites completamente sintéticos con características conformes o<br />
superiores a las siguientes normas:<br />
– Conforme API SJ<br />
– Conforme ACEA A3<br />
– Conforme JASO MA<br />
– Gradazione SAE 20 W-50 o 10 W-60<br />
NOTA<br />
Las especificaciones indicadas deben estar presentes, por sí<br />
solas o junto a otras, en el envase del aceite lubricante.<br />
- 15 -<br />
Aceite para<br />
motor<br />
SAE 10 W-60<br />
API SJ<br />
ACEA A3<br />
JASO MA
MANTENIMIENTO 1<br />
ES<br />
1<br />
1.5. Desmontaje/montaje lateral del chasis<br />
Después de haber quitado los enganches rápidos saque<br />
el lateral.<br />
- 16 -
MANTENIMIENTO 1<br />
Vuelva a montar el lateral teniendo cuidado de<br />
colocar el perfil delantero como se indica en la<br />
figura A.<br />
Complete el montaje colocando correctamente la<br />
lengüeta en la parte inferior del carenado, como<br />
se indica en la figura B.<br />
1<br />
ES<br />
Perfil delantero<br />
lateral<br />
A<br />
B<br />
- 17 -
MANTENIMIENTO 1<br />
ES<br />
1<br />
1.6. Aceite motor - Control nivel<br />
Efectúe el control en frío, con motor apagado. Si se<br />
efectúa en caliente, apague el motor y espere por lo<br />
menos 10 minutos.<br />
Este control se debe realizar colocando la motocicleta<br />
en un plano horizontal y en posición de la marcha (posición<br />
vertical).<br />
El nivel tiene que estar comprendido entre las referencias<br />
MAX y MIN indicadas en el cárter.<br />
En el caso que el nivel del aceite se encuentre por<br />
debajo de la referencia MIN, añadir (ver § 1.6.1).<br />
Peligro - Atención: no arranque el motor si el<br />
aceite está por debajo de la referencia de MIN.<br />
Max<br />
Min<br />
- 18 -
MANTENIMIENTO 1<br />
1.6.1. Aceite motor - Reposición nivel<br />
Destornillar la tapa usando la barra hexagonal de<br />
10 mm suministrada, montada en una llave apropiada<br />
(véase figura). Hechar una cantidad de<br />
aceite del tipo recomendado hasta alcanzar un<br />
adecuado nivel; de todas maneras no superar<br />
nunca la marca MAX. En fin enroscar nuevamente<br />
la tapa y montar el lateral.<br />
PELIGRO<br />
Antes de volver a montar el tapón del<br />
aceite, engrase su anillo usando AGIP<br />
Grease 30.<br />
En el último, apriete el tapón del aceite<br />
en el par de apriete de 35 Nm, usando<br />
una llave dinamométrica.<br />
Tapón aceite<br />
PRUDENCIA - PRECAUCION<br />
Para evitar deslizamientos del embrague<br />
y consiguiente daño del motor, no<br />
mezclar aditivos químicos al aceite, ni<br />
utilizar aceites distintos del tipo indicado<br />
en el § 1.4. Asegurarse que no se<br />
introduzcan cuerpos extraños en el cárter<br />
durante el llenado.<br />
1<br />
ES<br />
- 19 -
MANTENIMIENTO 1<br />
ES<br />
1<br />
PELIGRO<br />
El aceite nuevo o exhausto puede ser<br />
peligroso. La ingestión del aceite del<br />
motor, nuevo o exhausto puede ser<br />
nocivo para las personas y para los animales<br />
domésticos. En caso de ingestión<br />
del aceite del motor, llamar inmediatamente<br />
un médico y no provocar vómito<br />
para evitar la aspiración del producto en<br />
los pulmones. Ha sido constatado que<br />
el contacto continuado con el aceite<br />
produce cáncer en la piel en ratones<br />
para experimentación. Breves contactos<br />
con el aceite del motor pueden producir<br />
irritación de la piel.<br />
• Tener el aceite del motor, nuevo o<br />
exhausto lejos del alcance de los niños<br />
y de animales domésticos.<br />
• Ponerse ropa con mangas largas y<br />
guantes impermeables al agua cada vez<br />
que se efectúa el llenado del aceite del<br />
motor.<br />
• Lavarse con agua y jabón, si el aceite<br />
del motor entra en contacto con la piel.<br />
• Reciclar o eliminar correctamente el<br />
aceite motor exhausto.<br />
- 20 -
MANTENIMIENTO 1<br />
1.7. Líquido de refrigeración - Control nivel<br />
Efectúe el control en frío, con el motor apagado.<br />
Este control se debe efectuar colocando la motocicleta<br />
en un plano horizontal y en posición de marcha (posición<br />
vertical).<br />
1<br />
ES<br />
El nivel tiene que estar comprendido entre la referencia<br />
de MIN y MAX.<br />
En el caso que el nivel del líquido refrigerante se<br />
encuentre por debajo de la marca MIN, añadir (ver §<br />
1.7.1).<br />
PELIGRO<br />
No utilizar la motocicleta si el nivel del líquido<br />
refrigerante se encuentra por debajo de la<br />
marca MIN.<br />
MAX<br />
MIN<br />
- 21 -
MANTENIMIENTO 1<br />
ES<br />
1<br />
1.7.1. Líquido de refrigeración - Reposición<br />
nivel<br />
Desenroscar la tapa y llenar con líquido<br />
refrigerante aconsejado en el § 1.4.<br />
PELIGRO: El deposito se debe<br />
llenar con el motor frío. No<br />
intentar nunca quitar la tapa del<br />
depósito del líquido refrigerante<br />
cuando el motor está caliente<br />
para evitar quemaduras. El circuito<br />
se encuentra bajo presión.<br />
Después de la reposición del nivel, vuelva<br />
a montar cuidadosamente las piezas<br />
anteriormente desmontadas.<br />
- 22 -
MANTENIMIENTO 1<br />
PELIGRO<br />
En determinadas condiciones el glicol<br />
etílico contenido en el líquido refrigerante<br />
es inflamable y la llama es invisible.<br />
Evitar que el líquido refrigerante<br />
vaya a contacto con partes calientes,<br />
puesto que con la combustión del glicol<br />
etílico podría haber peligro de quemaduras.<br />
PELIGRO<br />
El líquido refrigerante del motor es nocivo<br />
si es ingerido o a contacto con los<br />
ojos y la piel. Tener el líquido refrigerante<br />
del motor lejos del alcance de los<br />
niños y de los animales domésticos. En<br />
caso de ingestión del líquido refrigerante<br />
llamar inmediatamente un médico y<br />
no provocar vómito para evitar aspiraciones<br />
del producto en los pulmones.<br />
En caso de contacto del líquido refrigerante<br />
del motor con los ojos o la piel,<br />
lavar inmediatamente con agua.<br />
- 23 -<br />
PRUDENCIA - PRECAUCION<br />
Para restablecer el nivel del líquido refrigerante<br />
y/o substituir el líquido refrigerante,<br />
usar exclusivamente el producto<br />
específico de la tabla § 1.4. No mezcle ni<br />
no diluya el líquido refrigerante con aditivos<br />
o diversos líquidos. Si el líquido<br />
refrigerante especificado en la tabla §<br />
1.4. no está disponible, utilice un líquido<br />
refrigerante con características técnicas<br />
conformes al producto prescrito.<br />
PRUDENCIA - PRECAUCION<br />
Las salpicaduras del líquido refrigerante<br />
pueden dañar las superficies pintadas.<br />
Tener cuidado en no derramar el líquido<br />
cuando llenamos el circuito de refrigeración.<br />
Secar inmediatamente con un<br />
trapo limpio el líquido derramado.<br />
1<br />
ES
MANTENIMIENTO 1<br />
ES<br />
1<br />
Pinza freno delantero<br />
Pinza freno trasero<br />
Disco<br />
Pastillas<br />
Límite de desgaste 1 mm<br />
1.8. Pastillas frenos - Control desgaste<br />
Verificar periódicamente el espesor de la capa del<br />
material de la fricción de las pastillas, teniendo cuidado<br />
en no superar el límite de desgaste (1 mm).<br />
- 24 -<br />
Peligro - Atencion: Si se utiliza la moto con<br />
las pastillas de frenos desgastadas, la fuerza<br />
de la frenada disminuye y aumenta el riesgo<br />
de accidentes. Si el espesor residuo está<br />
cerca del límite de desgaste, dirigirse a un<br />
centro de asistencia autorizado para cambiar<br />
las pastillas. Someter las pastillas nuevas a<br />
un oportuno rodaje.
MANTENIMIENTO 1<br />
Depósito freno trasero<br />
Depósito freno delantero<br />
1<br />
ES<br />
Max<br />
Min<br />
Max<br />
Min<br />
1.9. Fluido mando frenos - Control nivel<br />
PELIGRO<br />
La falta de control y una manutención<br />
incorrecta de los frenos aumenta el riesgo<br />
de accidentes. Antes de salir con la<br />
moto, controlar el sistema de frenos<br />
según las instrucciones indicadas en el<br />
Quick <strong>Manual</strong>.<br />
El desgaste de las pastillas de los frenos provoca<br />
una normal disminución del nivel del fluido. De<br />
cualquier manera el nivel debe estar comprendido<br />
entre las marcas MAX y MIN. Si tal nivel desciende<br />
por debajo de la referencia MIN, es necesario<br />
dirigirse a un centro de asistencia autorizado para<br />
un control general de la instalación de frenado.<br />
- 25 -
MANTENIMIENTO 1<br />
ES<br />
1<br />
PELIGRO<br />
No usar la motocicleta si el nivel se<br />
encuentra por debajo de la marca MIN; en<br />
tales condiciones el circuito de frenos<br />
podría funcionar no correctamente provocando<br />
la perdida del control del vehículo y<br />
accidentes. Si el nivel del líquido se<br />
encuentra por debajo de la marca MIN,<br />
dirigirse a un concesionario <strong>MV</strong> <strong>Agusta</strong><br />
para efectuar la comprobación del sistema<br />
de frenos.<br />
PELIGRO<br />
Hacer añadir líquido de frenos exclusivamente<br />
por personas autorizadas. El<br />
líquido de frenos es nocivo o mortal si<br />
es ingerido, y es nocivo a contacto con<br />
la piel y los ojos. Tener el líquido lejos<br />
del alcance de los niños y de animales<br />
domésticos. En el caso de ingestión del<br />
líquido de frenos llamar inmediatamente<br />
un médico y no provocar vómito para<br />
evitar aspiraciones en los pulmones. En<br />
el caso de contacto del líquido con los<br />
ojos o con la piel, lavarse inmediatamente<br />
con agua.<br />
- 26 -<br />
PELIGRO<br />
Hacer añadir líquido de frenos utilizando<br />
exclusivamente el tipo de líquido recomendado<br />
en el § 1.4. de éste manual.<br />
Eventuales mezclas con tipos diferentes<br />
pueden provocar una reacción química<br />
peligrosa y la disminución de la eficiencia<br />
de la frenada, con consiguiente<br />
aumento del riesgo de accidentes.<br />
PELIGRO<br />
Una cantidad insuficiente del líquido de<br />
frenos puede permitir la entrada de aire<br />
en el circuito de frenos, perjudicando la<br />
eficiencia de la frenada con consiguiente<br />
aumento del riesgo de accidentes. La<br />
presencia de aire en el circuito hidráulico<br />
se podría notar en el caso que apretando<br />
la palanca del freno, se advirtiera<br />
poca resistencia. En el caso que haya<br />
aire en el circuito hidráulico, realizar el<br />
expurgo en un concesionario <strong>MV</strong> <strong>Agusta</strong><br />
antes de utilizar el vehículo.
MANTENIMIENTO 1<br />
1.10. Fluido mando embrague - Control nivel<br />
El nivel tiene que estar comprendido entre las referencias<br />
MAX y MIN. Si tal nivel desciende por debajo de la<br />
referencia MIN, es necesario dirigirse a un centro de<br />
asistencia autorizado para un control general de la instalación<br />
mando embrague.<br />
1<br />
ES<br />
PELIGRO<br />
No utilizar la motocicleta si el nivel se encuentra<br />
por debajo de la marca MIN; en éstas condiciones<br />
el circuito de mando del embrague<br />
podría no funcionar correctamente, con el<br />
consiguiente riesgo de pérdida del control del<br />
vehículo y accidentes. Si el líquido se encuentra<br />
por debajo de la marca MIN, dirigirse a un<br />
concesionario <strong>MV</strong> <strong>Agusta</strong> para efectuar la<br />
comprobación del sistema de embrague.<br />
Max<br />
Min<br />
PELIGRO<br />
Realizar el llenado del líquido mando embrague<br />
utilizando solamente el tipo de líquido<br />
recomendado en el § 1.4. de éste manual.<br />
- 27 -
MANTENIMIENTO 1<br />
ES<br />
1<br />
1.11. Neumáticos - Control y cambio<br />
ATENCIÓN<br />
Antes de usar el vehículo verificar<br />
siempre la presión de los<br />
neumáticos y las condiciones<br />
de desgaste.<br />
El control de la presión de los neumáticos<br />
en un factor fundamental para garantizar<br />
seguridad en la conducción. Los<br />
neumáticos no inflados suficientemente<br />
empeoran la manejabilidad de la moto y<br />
se desgastan rápidamente; de lo contrario,<br />
presiones muy altas determinan<br />
menor superficie de contacto con el<br />
suelo y pueden reducir la adherencia del<br />
vehículo.<br />
Antes de usar la moto es por lo tanto<br />
indispensable efectuar el control de la<br />
presión con los neumáticos a temperatura<br />
ambiente, es decir con la moto estacionada<br />
por tres horas.<br />
PELIGRO<br />
Un errado inflado de los neumáticos produce<br />
serios peligros durante el uso de la moto. Una<br />
presión insuficiente puede provocar el deslizamiento<br />
del neumático en la llanta o el desprendimiento<br />
con consiguiente aflojamiento del neumático<br />
y pérdida de control del vehículo.<br />
- 28 -
MANTENIMIENTO 1<br />
Efectuar controles inmediatamente después de<br />
haber usado la moto, se obtendrían valores mas<br />
altos respecto a los efectivos y esto llevaría a una<br />
errada regulación de la presión de los neumáticos.<br />
El control de la presión de los neumáticos se<br />
debe realizar respetando los valores indicados en<br />
el § 3.2. y/o en la pegatina colocada en el parabrisas.<br />
En el caso de largos recorridos aumentar<br />
el valor de la presión nominal de 0,2 bar. Al usar<br />
la motocicleta en una velocidad más alta de 300<br />
km/h, aumentar la presión de los neumáticos<br />
según los valores dados en el § 3.2.<br />
Además antes del uso es extremamente importante<br />
verificar las condiciones de desgaste de los<br />
neumáticos; los neumáticos desgastados están<br />
sometidos a pinchazos con mayor facilidad e<br />
influyen negativamente con la estabilidad y la<br />
manejabilidad de la moto. Durante la verificación<br />
asegurarse que la banda de rodadura no se<br />
encuentre por debajo del límite prescrito por el<br />
código del transito y que no tengan grietas.<br />
Además no deben tener clavos o fragmentos de<br />
vidrio, y los laterales no deben estar fisurados.<br />
Presentando alguna de éstas condiciones hacer<br />
cambiar inmediatamente el neumático por un<br />
concesionario <strong>MV</strong> <strong>Agusta</strong>.<br />
PELIGRO<br />
El límite de la profundidad puede variar<br />
de un país a otro. Respetar siempre las<br />
disposiciones de la ley del país donde<br />
se utiliza el vehículo.<br />
PELIGRO<br />
• Hacer cambiar los neumáticos excesivamente<br />
desgastados, por un concesionario<br />
<strong>MV</strong> <strong>Agusta</strong>. Además de ser ilegal,<br />
la utilización de la motocicleta con neumáticos<br />
excesivamente desgastados,<br />
reduce la estabilidad de la marcha y<br />
puede provocar la pérdida de control<br />
del vehículo.<br />
1<br />
ES<br />
- 29 -
MANTENIMIENTO 1<br />
ES<br />
1<br />
• Si un neumático está pinchado o<br />
dañado no debe ser reparado, debe ser<br />
sustituido. Un neumático reparado<br />
garantiza prestaciones limitadas y nivel<br />
de seguridad inferior respecto a un neumático<br />
nuevo. Si se realiza una reparación<br />
provisoria o de emergencia a un<br />
neumático, conducir lentamente y con<br />
cautela hasta el mas cercano concesionario<br />
<strong>MV</strong> <strong>Agusta</strong> y cambiar el neumático.<br />
Después de la reparación de un neumático<br />
no alcanzar nunca la velocidad<br />
de 60 Km/h. La reparación no se puede<br />
realizar si el neumático está pinchado<br />
lateralmente, o si el agujero en la banda<br />
de rodado es mayor de 6 mm.<br />
• Para la reparación de un neumático<br />
pinchado, <strong>MV</strong> <strong>Agusta</strong> recomienda no<br />
utilizar pegamentos líquidos. Estos<br />
pegamentos pueden influir negativamente<br />
en el material de las capas del<br />
neumático y no evidenciar daños<br />
- 30 -<br />
secundarios provocados por eventuales<br />
objetos de penetración.<br />
• Sustituir los neumáticos utilizando<br />
exclusivamente los prescritos en el § 3.2.<br />
Evitar además utilizar al mismo tiempo<br />
neumáticos del tipo y marca distintos<br />
entre ellos en la rueda delantera y trasera.<br />
Utilizar neumáticos no correctos<br />
puede influir negativamente en la manejabilidad<br />
y la estabilidad de la motocicleta,<br />
aumentando el riesgo de accidentes.<br />
• Las llantas de la motocicleta han sido<br />
proyectadas para la utilización de neumáticos<br />
tubeless. No instalar neumáticos<br />
del tipo con cámara de aire en llantas<br />
para neumáticos tubeless. Los talones<br />
del neumático podrían no ajustarse<br />
correctamente y salir de las llantas, provocando<br />
el desinflado de los mismos con<br />
pérdida de control del vehículo.
MANTENIMIENTO 1<br />
• No instalar una cámara de aire en un<br />
neumático tubeless. El recalentamiento<br />
del neumático podría provocar la explosión<br />
de la cámara de aire provocando el<br />
desinflado del mismo con pérdida de<br />
control del vehículo.<br />
• Montar un neumático de acuerdo a la<br />
dirección de rotación indicado por la flecha<br />
ubicada en los laterales de cada<br />
neumático.<br />
• Los neumáticos nuevos deben ser<br />
sometidos a un periodo de rodaje antes<br />
de alcanzar la completa eficiencia;<br />
durante ésta fase es por lo tanto posible<br />
que los neumáticos tengan una adherencia<br />
relativamente escasa en determinadas<br />
superficies. Recomendamos por<br />
lo tanto conducir a una velocidad moderada<br />
y usar extrema cautela en la conducción<br />
por unos 100 km después del<br />
montaje del neumático nuevo.<br />
1<br />
ES<br />
- 31 -
MANTENIMIENTO 1<br />
ES<br />
1<br />
❏ Desmontaje de la rueda trasera<br />
Prudencia - Precaución: En el<br />
caso fuera necesario cambiar el<br />
neumático trasero en un taller,<br />
cerciorares que en el desmontaje<br />
y el montaje de la rueda sean<br />
utilizados el siguiente útillaje:<br />
• Llave tubular poligonal de 55 mm<br />
• Llave dinamométrica<br />
Si dichas operaciones se realizaran<br />
con herramientas distintas,<br />
los componentes de la<br />
rueda trasera podrían dañarse<br />
seriamente. Aconsejamos por lo<br />
tanto no sustituir el neumático<br />
en un taller sin utillaje adecuado;<br />
de cualquier manera es preferible<br />
dirigirse a un concesionario<br />
<strong>MV</strong> <strong>Agusta</strong>.<br />
Tuerca poligonal<br />
Perno rueda con rosca<br />
M50x1,5 izquierda<br />
Llave tubular poligonal de 55mm<br />
Llave dinamométrica<br />
- 32 -
MANTENIMIENTO 1<br />
❏ Control de las ruedas<br />
Antes de utilizar el vehículo controlar siempre que<br />
la llanta de la rueda no tenga grietas, pliegues o<br />
deformaciones.<br />
PELIGRO<br />
Si se encontraran daños, cambiar la<br />
rueda en un concesionario <strong>MV</strong> <strong>Agusta</strong>.<br />
No intentar efectuar reparaciones en la<br />
rueda aunque sean pequeñas.<br />
En el caso de cambio de neumáticos o<br />
de la rueda, es necesario efectuar el<br />
balanceo de la rueda en un concesionario<br />
<strong>MV</strong> <strong>Agusta</strong>. El desequilibrio de la<br />
rueda puede perjudicar el rendimiento y<br />
la manejabilidad del vehículo y reducir<br />
la durabilidad de los neumáticos.<br />
PELIGRO<br />
Para efectuar el balanceo de la rueda<br />
utilizar exclusivamente contrapesos<br />
homologados. No es recomendable utilizar<br />
balanceadores líquidos o balanceadores<br />
líquidos/sellantes.<br />
PELIGRO<br />
No intentar quitar un neumático tubeless<br />
sin el utillaje específico necesario y<br />
las protecciones para la llanta. De lo<br />
contrario, podría dañarse o deformarse<br />
la superficie de sellado de la misma llanta,<br />
provocando el desinflado del neumático<br />
con pérdida de control del vehículo.<br />
1<br />
ES<br />
- 33 -
MANTENIMIENTO 1<br />
ES<br />
1<br />
1.12. Cadena - Control y lubricación<br />
Para efectuar las siguientes operaciones colocar la<br />
motocicleta sobre el caballete trasero, en un plano horizontal<br />
y con el cambio en neutro.<br />
❏ Control de la regulación<br />
PELIGRO: Antes de comprobar el ajuste de<br />
cadena, dirigirse a un centro autorizado <strong>MV</strong><br />
<strong>Agusta</strong> para verificar que el valor del equilibrado<br />
estático de la suspensión posterior<br />
está correcto. También cerciorarse de que la<br />
cadena esté lubricada correctamente.<br />
50 mm<br />
El eje de la parte inferior de la cadena debe estar a una<br />
distancia de 50 mm del cubrecadena inferior. El control<br />
de dicha distancia se debe efectuar en distintos puntos<br />
de la cadena girando manualmente la rueda trasera. El<br />
juego debe quedar prácticamente constante mientras<br />
gira la rueda; si la cadena presenta fuertes variaciones<br />
del juego, esto indica que algunas eslabones están<br />
aplastados, bloqueados o alargados. Si la distancia<br />
entre la cadena y el cubre cadena inferior es mayor de<br />
50 mm, es necesario efectuar el ajuste de la cadena.<br />
- 34 -
MANTENIMIENTO 1<br />
PELIGRO: Usar la motocicleta con la<br />
cadena en malas condiciones o mal<br />
regulada puede ser causa de accidentes.<br />
Antes de salir con la moto, efectuar<br />
el control de la cadena de acuerdo al<br />
presente capítulo. En el caso fuera<br />
necesaria la regulación de la tensión de<br />
la cadena, dirigirse a un centro asistencia<br />
autorizado <strong>MV</strong> <strong>Agusta</strong>.<br />
PELIGRO: Si la cadena tiene eslabones<br />
aplastados, bloqueados o alargados,<br />
hacer la sustitución de la cadena por un<br />
centro asistencia autorizado <strong>MV</strong> <strong>Agusta</strong>.<br />
PELIGRO: Si se detectan daños o desgaste<br />
excesivo de la cadena o de sus<br />
engranajes, es necesario dirigirse a un<br />
concesionario <strong>MV</strong> <strong>Agusta</strong> para la sustitución.<br />
Cada vez que se cambia una<br />
cadena, también los engranajes correspondientes<br />
deben ser sustituidos.<br />
PELIGRO<br />
Puede ser peligroso utilizar una cadena<br />
del tipo con falso eslabón. Un eslabón<br />
principal no remachada completamente<br />
o del tipo falso eslabón, puede abrirse y<br />
provocar accidentes o graves daños al<br />
motor. No utilizar nunca cadenas con<br />
falso eslabón.<br />
PELIGRO<br />
Cada vez que se solicita de funcionar<br />
los tornillos del cubo de la rueda posterior,<br />
dirigirse a un centro autorizado <strong>MV</strong><br />
<strong>Agusta</strong>. Para apretar los tornillos, aplique<br />
un par de apriete igual al valor mostrado<br />
en la etiqueta puesta sobre el<br />
monobrazo. El uso de un par de apriete<br />
mayor que el valor indicado puede causar<br />
el decaimiento rápido del cubo de la<br />
rueda posterior, comprometiendo la<br />
confiabilidad del vehículo y la seguridad<br />
del piloto.<br />
1<br />
ES<br />
- 35 -
MANTENIMIENTO 1<br />
ES<br />
1<br />
❏ Lubricación<br />
La cadena debe estar correctamente lubricada<br />
para garantizar la máxima eficiencia.<br />
Limpieza preliminar: antes de efectuar la lubricación<br />
es necesario disolver los depósitos de<br />
suciedad en la cadena utilizando kerosene; estos<br />
depósitos deben ser sucesivamente eliminados<br />
con un trapo limpio y/o un chorro de aire.<br />
Prudencia - Precaución: la cadena es<br />
del tipo con retenedores (O-RING); para<br />
evitar daños, no efectuar la limpieza de<br />
la cadena con chorros de vapor o agua<br />
con alta presión, ni utilizar gasolina o<br />
disolventes detergentes en comercio.<br />
La limpieza de la cadena se debe realizar<br />
exclusivamente con kerosene.<br />
PELIGRO<br />
El kerosene puede ser peligroso. El<br />
kerosene es inflamable. El contacto con<br />
el kerosene puede ser nocivo para los<br />
niños y los animales domésticos.<br />
Tener las llamas libres y objetos con<br />
temperatura elevada lejos del kerosene.<br />
Tener los niños y los animales domésticos<br />
lejos del kerosene. Eliminar de<br />
manera correcta el kerosene usado.<br />
- 36 -
MANTENIMIENTO 1<br />
Lubricación: aplicar una capa ligera y uniforme<br />
en toda la cadena teniendo cuidado en no echar<br />
en las zonas circunstantes, especialmente en los<br />
neumáticos. Dirigir el aerosol del lubricante en los<br />
eslabones internos, para lubricar la superficie de<br />
los anillos de sellado y penetrar dentro del rodillo<br />
de cadena.<br />
Prudencia - Precaución: utilizar solamente<br />
el lubricante específico de la<br />
tabla § 1.4., para proteger la cadena de<br />
transmisión y evitar chorros de aceite<br />
cuando el vehículo está en movimiento.<br />
PELIGRO: La lubricación de la cadena<br />
se debe realizar según los intervalos<br />
indicados en la Tabla de Manutención<br />
Programada de éste manual (ver § 1.2.).<br />
Es necesario efectuar ésta operación<br />
también después de haber conducido<br />
con lluvia o después de cada lavado de<br />
la motocicleta. Usar la motocicleta con<br />
la cadena en malas condiciones o no<br />
lubricadas puede generar accidentes.<br />
1<br />
ES<br />
- 37 -
MANTENIMIENTO 1<br />
ES<br />
1<br />
1.13. Ralentí - Control<br />
Efectúe el control con el motor a la temperatura de ejercicio<br />
y verifique que el dispositivo “CHOKE” no esté<br />
conectado.<br />
El ralentí debe estar comprendido entre 1150 y 1250<br />
rpm.<br />
Si fuera necesario efectuar el ajuste, diríjase a los centros<br />
de asistencia autorizados.<br />
- 38 -
MANTENIMIENTO 1<br />
1.14. Sustituciones - Información general<br />
La sustitución de los fusibles y de las bombillas<br />
(excluidas las de posición delanteras), pueden<br />
ser efectuadas por el motociclista, siguiendo correctamente<br />
las indicaciones proporcionadas.<br />
Fusible de recarga batería<br />
1.14.1. Fusibles - Sustitución<br />
El fusible de recarga batería se encuentra<br />
sobre el telerruptor de arranque de la motocicleta.<br />
Para llegarlo es necesario desmontar el sillín<br />
del piloto.<br />
1<br />
ES<br />
Fusibles servicios<br />
Faro delantero - Sustitución bombilla<br />
Luz matrícula - Sustitución bombilla<br />
Telerruptor<br />
de arranque<br />
- 39 -
MANTENIMIENTO 1<br />
ES<br />
1<br />
PRUDENCIA - PRECAUCION<br />
Poner el interruptor en “OFF” antes de<br />
controlar o sustituir los fusibles, para<br />
evitar cortocircuitos accidentales con el<br />
consiguiente riesgo de dañar otros<br />
componentes.<br />
Fusible de recarga<br />
batería (40 A)<br />
Fusible de<br />
repuesto (40 A)<br />
Para substituir el fusible es necesario intercambiar<br />
de posición el fusible de recarga batería<br />
con el fusible de repuesto.<br />
PELIGRO<br />
No utilizar nunca fusibles con valores<br />
distintos de los indicados, para evitar el<br />
daño a la instalación eléctrica de la<br />
motocicleta con peligro de incendio.<br />
- 40 -
MANTENIMIENTO 1<br />
Los fusibles de los servicios se encuentran en<br />
el lado izquierdo; para llegar a los mismos es<br />
necesario desmontar el costado del carenado<br />
(véase §1.5.).<br />
Lance las dos abrazaderas y levante la tapa.<br />
1<br />
ES<br />
PRUDENCIA - PRECAUCION<br />
Poner el interruptor en “OFF” antes de<br />
controlar o sustituir los fusibles, para<br />
evitar cortocircuitos accidentales con el<br />
consiguiente riesgo de dañar otros<br />
componentes.<br />
- 41 -
MANTENIMIENTO 1<br />
ES<br />
1<br />
Sustituya el fusible quemado y vuelva a montar<br />
la tapa.<br />
- 42 -
MANTENIMIENTO 1<br />
Para identificar la posición y la función de los<br />
fusibles, consulte la información indicada en el<br />
esquema eléctrico adjunto; las letras de referencia<br />
indicadas en la figura corresponden a las indicadas<br />
en el esquema.<br />
Tenga presente que en la bolsa porta herramientas<br />
hay tres fusibles de repuesto.<br />
PELIGRO<br />
No utilizar nunca fusibles con valores<br />
distintos de los indicados, para evitar el<br />
daño a la instalación eléctrica de la<br />
motocicleta con peligro de incendio.<br />
F1 F2 F3 <strong>F4</strong> F5 F6 F7<br />
15A<br />
15A<br />
15A<br />
15A<br />
15A<br />
15A<br />
15A<br />
1<br />
ES<br />
- 43 -
MANTENIMIENTO 1<br />
ES<br />
1<br />
1.14.2. Luz matrícula - Sustitución bombilla<br />
Quitar los tornillos de fijación de la tapa inferior del<br />
porta-matricula.<br />
- 44 -
MANTENIMIENTO 1<br />
Extraer la tapa inferior.<br />
1<br />
ES<br />
Extraer el portalámpara desenhebrando de su alojamiento.<br />
- 45 -
MANTENIMIENTO 1<br />
ES<br />
1<br />
Extraer la bombilla.<br />
Introducir la bombilla nueva.<br />
Reinsertar el portalámpara.<br />
Montar nuevamente la tapa inferior del porta-matricula.<br />
Prudencia: Ante de efectuar el remontaje se<br />
debe prestar atención a la correcta disposición<br />
de los cables de las luces traseras para<br />
evitar que se dañan (véase figura).<br />
- 46 -
MANTENIMIENTO 1<br />
1.15. Batería<br />
Esta motocicleta está equipada con una batería<br />
hermética instalada debajo de la cola. La batería<br />
no precisa <strong>mantenimiento</strong>, por lo tanto no es<br />
necesario ni verificar el líquido ni añadir agua<br />
destilada.<br />
Si la batería parece estar descargada (provocando<br />
problemas eléctricos o dificultad de arranque),<br />
hacerla cargar lo antes posible en un concesionario<br />
<strong>MV</strong> <strong>Agusta</strong>. Tener presente que la batería<br />
se descarga mas rápido si la motocicleta posee<br />
accesorios eléctricos opcionales.<br />
PELIGRO<br />
Si la parte externa de la batería está<br />
dañada puede verificarse salida de<br />
ácido sulfúrico, substancia venenosa y<br />
extremamente corrosiva. Evitar contactos<br />
con la piel, los ojos y la ropa y proteger<br />
siempre los ojos cuando trabajamos<br />
cerca de la batería.<br />
En caso de contacto, prestar los PRIME-<br />
ROS AUXILIOS de la siguiente manera.<br />
• CONTACTO EXTERNO: Enjuagar con<br />
mucha agua.<br />
• CONTACTO INTERNO: Tomar mucha<br />
agua o leche y llamar inmediatamente<br />
un médico.<br />
• OJOS: Lavar con agua por 15 minutos<br />
y dirigirse inmediatamente a un médico.<br />
La salida del ácido sulfúrico provoca la<br />
formación de hidrógeno, el cual puede<br />
provocar una explosión en presencia de<br />
chispas o llamas.<br />
Para efectuar la sustitución de la batería<br />
es necesario dirigirse a un centro autorizado<br />
<strong>MV</strong> <strong>Agusta</strong>.<br />
1<br />
ES<br />
- 47 -
MANTENIMIENTO 1<br />
ES<br />
1<br />
Larga inactividad<br />
Si la motocicleta no será utilizada por largo tiempo<br />
(un mes o más), se recomienda desconectar los<br />
cables de la batería o desmontarla por un mecánico<br />
calificado. En caso de larga inactividad se recomienda<br />
hacer cargar la batería por un concesionario<br />
<strong>MV</strong> <strong>Agusta</strong> cada 4-5 meses, para garantizar la<br />
durabilidad.<br />
PELIGRO: Invertir los cables de la batería<br />
puede dañar el circuito de recarga y la<br />
misma batería. El cable rojo se debe<br />
conectar al borne positivo (+) de la batería<br />
y los cables negros se deben conectar<br />
al borne negativo (-). En el desmontaje de<br />
la batería desconectar ANTES el borne<br />
del polo negativo, y luego el del polo<br />
positivo. Para el montaje proceder de<br />
manera contraria al desmontaje.<br />
- 48 -
MANTENIMIENTO 1<br />
1.16. Limpieza de la motocicleta<br />
La limpieza periódica y cuidadosa es<br />
importante para mantener en el tiempo<br />
el valor de la motocicleta, proteger<br />
el acabado de la superficie y controlar<br />
que no haya daños, desgastes o<br />
pérdida de líquido corrosivo.<br />
Prudencia - Precaución: antes<br />
de efectuar el lavado tapar los<br />
tubos de escape y proteger<br />
las partes eléctricas.<br />
PELIGRO: Si la motocicleta<br />
está aún caliente, esperar que<br />
el motor y el escape estén fríos.<br />
NOTA: Los detergentes contaminan<br />
el medioambiente. Por<br />
lo tanto la limpieza del vehículo<br />
debe ser realizada en una<br />
area equipada para la recolección<br />
y la depuración del líquido<br />
utilizado para el lavado.<br />
Prudencia - precaución: No utilizar máquinas de lavado<br />
con chorros de agua de alta presión o de vapor,<br />
puesto que pueden provocar infiltraciones de agua y<br />
dañar componentes de la motocicleta.<br />
1<br />
ES<br />
- 49 -
MANTENIMIENTO 1<br />
ES<br />
1<br />
Lavar con agua y esponja y no usar detergentes<br />
agresivos. Secar con un trapo suave. En las<br />
zonas menos accesibles usar un chorro de aire.<br />
Prudencia - Precaución:<br />
• Asegurarse que los trapos usados no<br />
hayan estado en contacto con productos<br />
de limpieza fuertes o abrasivos,<br />
disolventes o gasolina.<br />
• Para evitar daños irreversibles al carenado<br />
no usar detergentes alcalinos o con<br />
mucha acidez, gasolina, líquido de frenos<br />
u otros disolventes. Limpiar el carenado<br />
exclusivamente con un trapo<br />
suave, agua tibia y un detergente neutro.<br />
• Si tienes dudas sobre la composición<br />
química del detergente, prueba su efecto<br />
aplicándolo en una poca área del<br />
carenado antes de usarlo en la motocicleta<br />
entera.<br />
Periódicamente, tratar las partes pintadas con<br />
productos específicos. Si recorremos calles tratadas<br />
con productos corrosivos (sal) efectuar el<br />
lavado apenas posible, utilizando agua fría; el<br />
agua caliente favorece la acción corrosiva.<br />
PELIGRO: Asegurarse que no haya<br />
aceite o cera en los frenos o en los neumáticos.<br />
Si fuera necesario limpiar los<br />
discos de los frenos con un detergente<br />
para discos de frenos o acetona y lavar<br />
los neumáticos con agua caliente y<br />
detergente neutro.<br />
PELIGRO: Si los frenos están mojados<br />
pueden provocar una reducción de la<br />
potencia de la frenada y accidentes.<br />
Después del lavado poner en marcha el<br />
motor por algunos minutos y saliendo<br />
despacio. Efectuar algunas frenadas<br />
con cuidado para secar las pastillas y<br />
los discos de frenos.<br />
PELIGRO: La cadena de la transmisión<br />
se debe lubricar después del lavado y el<br />
secado de la motocicleta de acuerdo a<br />
las instrucciones indicadas en el § 1.12.<br />
de éste manual.<br />
- 50 -
MANTENIMIENTO 1<br />
1.17. Periodo de larga inactividad<br />
Si tiene previsto tener la motocicleta parada durante mucho<br />
tiempo, es conveniente efectuar las siguientes operaciones:<br />
Vacíe el depósito combustible.<br />
Quite la batería y consérvela convenientemente.<br />
Quitar los capuchones de las bujías y las bujías. Echar una cucharada de aceite motor en cada<br />
orificio de las bujías, luego volver a instalar las bujías y los correspondientes capuchones y dejar<br />
girar algunas veces el motor.<br />
Lubricar todos los cables de mando y los puntos de rotación de todas las levas y pedales.<br />
Limpie la motocicleta y trate con productos específicos las partes pintadas (§1.16.).<br />
Con el objeto de garantizar la integridad y las prestaciones de los neumáticos, estacionar la moto<br />
en un ambiente fresco, seco u obscuro con una temperatura casi constante e inferior a 25 °C.<br />
Evitar el contacto directo de los neumáticos con tubos o caloríferos de la calefacción, y el contacto<br />
prolongado con aceite y gasolina. Evitar colocar los neumáticos en las cercanías de motores<br />
eléctricos o herramientas donde se puedan desprender chispas o descargas eléctricas.<br />
Durante el tiempo de parada, tener la moto sobre el caballete trasero.<br />
Tape la motocicleta con un telón adecuado.<br />
Cuando vuelva a utilizar la motocicleta recuerde que debe<br />
efectuar la verificación general y, si fuera necesario, haga<br />
efectuar el <strong>mantenimiento</strong> (§1.2.).<br />
1<br />
ES<br />
- 51 -
AVERÍAS 2<br />
2.1. Inconvenientes en el motor: EL MOTOR NO ARRANCA<br />
ES<br />
2<br />
¿El interruptor de<br />
stop motor está<br />
apretado?<br />
SI<br />
Traer el interruptor de<br />
stop motor a la posición<br />
de reclinación<br />
¿Ahora arranca<br />
el motor?<br />
SI<br />
Inconveniente solucionado<br />
NO<br />
NO<br />
Marcha<br />
engranada y<br />
caballete lateral<br />
bajado<br />
SI<br />
Desengrane la marcha o<br />
bien suba el caballete y<br />
estire la palanca embrague<br />
¿Ahora arranca<br />
el motor?<br />
SI<br />
Inconveniente solucionado<br />
NO<br />
NO<br />
¿El procedimiento<br />
de arranque ha sido<br />
efectuado correctamente?<br />
NO<br />
Efectúe correctamente<br />
el procedimiento de<br />
arranque<br />
¿Ahora arranca<br />
el motor?<br />
SI<br />
Inconveniente solucionado<br />
SI<br />
NO<br />
¿El depósito<br />
combustible está<br />
vacío?<br />
SI<br />
Efectúe el reabastecimiento<br />
combustible<br />
¿Ahora arranca<br />
el motor?<br />
SI<br />
Inconveniente solucionado<br />
NO<br />
sigue en la página siguiente<br />
NO<br />
- 52 -
AVERÍAS 2<br />
sigue de la página anterior<br />
¿Los fusibles<br />
<strong>F4</strong> y F6<br />
están intactos?<br />
NO<br />
Sustituir los fusibles<br />
<strong>F4</strong> y F6 (§1.14.1.)<br />
¿Ahora arranca<br />
el motor?<br />
SI<br />
Inconveniente solucionado<br />
2<br />
ES<br />
SI<br />
NO<br />
¿La batería está<br />
cargada?<br />
NO<br />
Hacer la batería<br />
recargar por un centro<br />
de asistencia autorizado<br />
<strong>MV</strong> <strong>Agusta</strong><br />
¿Ahora arranca<br />
el motor?<br />
SI<br />
Inconveniente solucionado<br />
SI<br />
NO<br />
¿El codigo llave<br />
se ha<br />
reconocido?<br />
NO<br />
Introduzca el codigo que<br />
aparece en la <strong>MV</strong> Code Card<br />
por un centro de asistencia<br />
autorizado <strong>MV</strong> <strong>Agusta</strong><br />
¿Ahora arranca<br />
el motor?<br />
SI<br />
Inconveniente solucionado<br />
SI<br />
Diríjase a los centros de<br />
asistencia autorizados<br />
<strong>MV</strong> <strong>Agusta</strong><br />
NO<br />
- 53 -
AVERÍAS 2<br />
EL MOTOR SE APAGA MIENTRAS QUE ESTÁ FUNCIONANDO<br />
ES<br />
2<br />
¿La instrumentación<br />
está encendida?<br />
NO<br />
Diríjase a los centros de<br />
asistencia autorizados<br />
<strong>MV</strong> <strong>Agusta</strong><br />
SI<br />
¿El depósito<br />
combustible está<br />
vacío?<br />
NO<br />
Efectúe el reabastecimiento<br />
combustible<br />
¿Ahora el motor<br />
está funcionando?<br />
SI<br />
Inconveniente solucionado<br />
NO<br />
NO<br />
¿Los fusibles <strong>F4</strong><br />
y F6 están intactos?<br />
NO<br />
Sustituir los fusibles<br />
<strong>F4</strong> y F6 (§1.14.1.)<br />
¿Ahora el motor<br />
está funcionando?<br />
SI<br />
Inconveniente solucionado<br />
SI<br />
NO<br />
Diríjase a los centros de<br />
asistencia autorizados<br />
<strong>MV</strong> <strong>Agusta</strong><br />
- 54 -
AVERÍAS 2<br />
EL MOTOR SE RECALIENTA<br />
¿El nivel del líquido<br />
de refrigeración<br />
es correcto?<br />
(§1.7.)<br />
NO<br />
Diríjase a los centros de<br />
asistencia autorizados<br />
<strong>MV</strong> <strong>Agusta</strong><br />
2<br />
ES<br />
SI<br />
¿El fusible F5<br />
está intacto?<br />
NO<br />
Sustituya el fusible<br />
F5 (§1.14.1.)<br />
¿El motor está<br />
ahora a la temperatura<br />
de ejercicio?<br />
SI<br />
Inconveniente solucionado<br />
SI<br />
NO<br />
Diríjase a los centros de<br />
asistencia autorizados<br />
<strong>MV</strong> <strong>Agusta</strong><br />
- 55 -
AVERÍAS 2<br />
LA PRESIÓN DEL ACEITE ES INSUFICIENTE (El testigo de la presión del aceite<br />
está encendido mientras que el motor está funcionando)<br />
ES<br />
2<br />
¿El nivel del aceite<br />
es correcto?<br />
(§1.6.)<br />
NO<br />
Hacer el nivel de aceite<br />
rellenar por un centro de<br />
asistencia autorizado<br />
<strong>MV</strong> <strong>Agusta</strong><br />
¿La presión del<br />
aceite tiene<br />
ahora un valor<br />
óptimo?<br />
SI<br />
Inconveniente solucionado<br />
SI<br />
NO<br />
Diríjase a los centros de<br />
asistencia autorizados<br />
<strong>MV</strong> <strong>Agusta</strong><br />
- 56 -
AVERÍAS 2<br />
2.2. Inconvenientes en la instalación eléctrica: LAS LUCES NO FUNCIONAN<br />
¿Los fusibles de<br />
las luces<br />
están intactos?<br />
NO<br />
Sustituya el/los fusible/s<br />
(§1.14.1.)<br />
¿Funcionan<br />
ahora las luces?<br />
SI<br />
Inconveniente solucionado<br />
2<br />
ES<br />
SI<br />
NO<br />
¿Las bombillas<br />
son eficaces?<br />
NO<br />
Sustituya la/s bombilla/s<br />
(§1.14.)<br />
¿Funcionan<br />
ahora las luces?<br />
SI<br />
Inconveniente solucionado<br />
SI<br />
NO<br />
Diríjase a los centros de<br />
asistencia autorizados<br />
<strong>MV</strong> <strong>Agusta</strong><br />
- 57 -
AVERÍAS 2<br />
EL CLAXON NO FUNCIONA<br />
ES<br />
2<br />
¿El fusible F1<br />
está intacto?<br />
NO<br />
Sustituya el fusible F1<br />
(§1.14.1.)<br />
¿Funciona ahora<br />
el claxon?<br />
SI<br />
Inconveniente solucionado<br />
SI<br />
NO<br />
Diríjase a los centros de<br />
asistencia autorizados<br />
<strong>MV</strong> <strong>Agusta</strong><br />
EL CUENTAKILÓMETROS NO FUNCIONA<br />
¿El fusible F1<br />
está intacto?<br />
NO<br />
Sustituya el fusible F1<br />
(§1.14.1.)<br />
¿Funciona ahora<br />
el cuentakilómetros?<br />
SI<br />
Inconveniente solucionado<br />
SI<br />
NO<br />
Diríjase a los centros de<br />
asistencia autorizados<br />
<strong>MV</strong> <strong>Agusta</strong><br />
- 58 -
AVERÍAS 2<br />
LOS TESTIGOS DE LA INSTRUMENTACIÓN NO FUNCIONAN<br />
¿El fusible F1<br />
está intacto?<br />
NO<br />
Sustituya el fusible F1<br />
(§1.14.1.)<br />
¿Funcionan<br />
ahora los testigos?<br />
SI<br />
Inconveniente solucionado<br />
2<br />
ES<br />
SI<br />
NO<br />
Diríjase a los centros de<br />
asistencia autorizados<br />
<strong>MV</strong> <strong>Agusta</strong><br />
EL ALTERNADOR NO CARGA LA BATERÍA (El testigo carga batería<br />
está encendido mientras que el motor está funcionando)<br />
¿El fusible de<br />
recarga batería<br />
está intacto?<br />
NO<br />
Sustituya el fusible de<br />
recarga batería<br />
(§1.14.1.)<br />
¿Ahora el<br />
alternador carga la<br />
batería?<br />
SI<br />
Inconveniente solucionado<br />
SI<br />
NO<br />
Diríjase a los centros de<br />
asistencia autorizados<br />
<strong>MV</strong> <strong>Agusta</strong><br />
- 59 -
INFORMACIÓN TÉCNICA 3<br />
3.1. Descripción general de la motocicleta<br />
(N) Cuadro mandos<br />
(B) Encendido - Alimentación<br />
ES<br />
3<br />
(G) Suspensión delantera<br />
(I) Batería<br />
(O) Escape<br />
(E) Refrigeración<br />
(L) Freno delantero<br />
(F) Chasis<br />
(A) Motor<br />
(C) Cambio<br />
(H) Suspensión trasera<br />
(M) Freno trasero<br />
(D) Transmisión final<br />
- 60 -
INFORMACIÓN TÉCNICA 3<br />
A - Motor: cuatro tiempos, cuatro cilindros en<br />
línea. Distribución mediante doble árbol de<br />
levas en cabeza con válvulas radiales.<br />
Lubrificación por cárter húmedo.<br />
B - Encendido - alimentación: sistema integrado<br />
de encendido - inyección. Encendido electrónico<br />
por descarga inductiva. Inyección<br />
electrónica “Multipoint”.<br />
C - Cambio: del tipo extraíble, de 6 velocidades<br />
con engranajes siempre en toma.<br />
D - Transmisión final: compuesta por piñón,<br />
corona y cadena.<br />
E - Refrigeración: con radiadores separados del<br />
agua y del aceite.<br />
F - Chasis: entramado, en tubular de acero, con<br />
placas laterales en aluminio.<br />
G - Suspensión delantera: horquilla oleodinámica<br />
con vástagos vueltos, equipada con sistema<br />
exterior de regulación.<br />
H - Suspensión trasera: de acción progresiva<br />
con monobrazo oscilante y monoamortiguador<br />
equipado con sistema exterior de regulación.<br />
I<br />
- Batería: sellada y sin <strong>mantenimiento</strong>.<br />
L - Freno delantero: doble disco semi-flotante<br />
con pinzas de cuatro pistones.<br />
M - Freno trasero: disco único con pinza de cuatro<br />
pistones.<br />
N - Cuadro mandos: equipado con testigos indicadores<br />
e instrumentos digitales.<br />
O - Escape: equipado con convertidor catalítico<br />
para la reducción del gas de escape.<br />
3<br />
ES<br />
- 61 -
INFORMACIÓN TÉCNICA 3<br />
3.1.1 Circuito freno delantero<br />
2<br />
1<br />
ES<br />
3<br />
3<br />
5<br />
4<br />
4<br />
5<br />
1 Grupo bomba freno<br />
2 Palanca freno<br />
3 Tubería freno<br />
4 Pinza freno<br />
5 Discos freno<br />
- 62 -
INFORMACIÓN TÉCNICA 3<br />
3.1.2. Circuito freno trasero<br />
4<br />
3<br />
ES<br />
6<br />
3<br />
5<br />
1 2<br />
1 Palanca freno<br />
2 Bomba freno<br />
3 Tubería freno<br />
4 Depósito líquido freno<br />
5 Pinza freno<br />
6 Disco freno<br />
- 63 -
INFORMACIÓN TÉCNICA 3<br />
3.1.3. Circuito embrague<br />
ES<br />
3<br />
1<br />
2<br />
3 4<br />
1 Palanca embrague<br />
2 Grupo bomba embrague<br />
3 Tubería embrague<br />
4 Grupo cilindro embrague<br />
- 64 -
INFORMACIÓN TÉCNICA 3<br />
3.1.4. Lubricación motor<br />
3<br />
ES<br />
3<br />
1 2<br />
1 Cárter motor<br />
2 Filtro aceite<br />
3 Tubería envío aceite en la culata<br />
- 65 -
INFORMACIÓN TÉCNICA 3<br />
3.1.5. Circuito de refrigeración<br />
1<br />
2<br />
ES<br />
3<br />
3 4<br />
1 Depósito de expansión<br />
2 Radiador superior<br />
3 Radiador inferior<br />
4 Bomba líquido<br />
- 66 -
INFORMACIÓN TÉCNICA 3<br />
3.1.6. Circuito de alimentación<br />
1<br />
3<br />
ES<br />
2<br />
3<br />
1 Cuerpo mariposa<br />
2 Bomba carburante<br />
3 Tubería carburante<br />
- 67 -
INFORMACIÓN TÉCNICA 3<br />
2100<br />
750<br />
ES<br />
3<br />
830<br />
115<br />
3.2. Datos técnicos<br />
1430<br />
Descripción <strong>F4</strong> <strong>1000</strong><br />
CARACTERÍSTICAS<br />
Distancia entre ejes (mm) (*) 1430<br />
Longitud total (mm) (*) 2100<br />
Ancho máx. (mm) 750<br />
Altura asiento (mm) (*) 830<br />
Altura mín. desde el suelo (mm) (*) 115<br />
Avance carrera (mm) (*) 100,4<br />
* : Los datos no son vinculantes. Los mismos son susceptibles a cambios en función de las variaciones aportadas al vehículo.<br />
- 68 -
INFORMACIÓN TÉCNICA 3<br />
Datos técnicos<br />
Descripción <strong>F4</strong> <strong>1000</strong><br />
Peso en seco (Kg) 192<br />
Capacidad depósito combustible (lt) (*) 17<br />
Reserva combustible (lt) (*) 4<br />
Cant. aceite en la bancada (lt) 3,5<br />
MOTOR<br />
Tipo<br />
Cuatro cilindros 4 tiempos, 16 válvulas<br />
Alisado (mm) 76<br />
Carrera (mm) 55<br />
Cilindrada total (cm 3 ) 998<br />
Relación de compresión 13,1 : 1<br />
Arranque<br />
Eléctrico<br />
Refrigeración<br />
Con radiadores separados del agua y del aceite<br />
Cárter motor y tapas<br />
Fundido a presión<br />
Culata y cilindros<br />
Fundidos en coquilla<br />
Válvulas<br />
Bimetálicas / monometálicas<br />
DISTRIBUCIÓN<br />
Tipo<br />
Doble árbol de levas en cabeza; válvulas radiales<br />
3<br />
ES<br />
* : Los datos no son vinculantes. Los mismos son susceptibles a cambios en función de la temperatura externa, de la temperatura<br />
del motor y del punto de evaporación de la gasolina utilizada.<br />
- 69 -
INFORMACIÓN TÉCNICA 3<br />
Datos técnicos<br />
ES<br />
3<br />
Descripción <strong>F4</strong> <strong>1000</strong><br />
LUBRIFICACIÓN<br />
Tipo<br />
Por cárter húmedo<br />
ENCENDIDO - ALIMENTACIÓN<br />
Tipo<br />
Sistema integrado de encendido-inyección Magneti Marelli IAW 7BM<br />
con cuerpo mariposa Mikuni; encendido electrónico con descarga inductiva;<br />
inyección electrónica “Multipoint” sequencial en fase; conos de aspiración<br />
de altura variable con sistema Torque Shift System (TSS)<br />
Bujías<br />
NGK CR9 EB<br />
Distancia electrodos (mm) 0,7 ÷ 0,8<br />
EMBRAGUE<br />
Tipo<br />
Multidisco en baño de aceite con dispositivo mecánico anti-salto<br />
TRANSMISIÓN PRIMARIA<br />
Número dientes engranaje cigüeñal Z = 50<br />
Número dientes engranaje embrague Z = 79<br />
Relación de transmisión 1,58<br />
TRANSMISIÓN SECUNDARIA<br />
Número dientes piñón Z = 15<br />
Número dientes corona Z = 41<br />
Relación de transmisión 2,73<br />
CAMBIO VELOCIDAD<br />
Tipo<br />
Extraíble de seis velocidades con engranajes siempre en toma<br />
- 70 -
INFORMACIÓN TÉCNICA 3<br />
Datos técnicos<br />
Descripción <strong>F4</strong> <strong>1000</strong><br />
Relaciones cambio (relaciones totales)<br />
Primera 2.92 (12.60)<br />
Segunda 2.12 (9.14)<br />
Tercera 1.78 (7.68)<br />
Cuarta 1.50 (6.47)<br />
Quinta 1.32 (5.69)<br />
Sexta 1.21 (5.22)<br />
CHASIS<br />
Tipo<br />
Tubular con castillete de refuerzo de acero 25 CrMo (soldado en TIG)<br />
Placas fulcro horquilla<br />
Aleación de aluminio<br />
SUSPENSIÓN DELANTERA<br />
Tipo<br />
Horquilla oleodinámica con vástagos vueltos equipada con sistema de regulación<br />
exterior y separado del freno en extensión, en compresión y de la precarga muelle<br />
Ø vástagos (mm) 50<br />
Carrera sobre el eje patas 120<br />
SUSPENSIÓN TRASERA<br />
Tipo<br />
Progresiva, mono-amortiguador regulable en extensión, en compresión (Alta<br />
velocidad / Baja velocidad) y en la precarga del muelle<br />
Basculante monobrazo<br />
Aleación de aluminio<br />
Carrera rueda (mm) 120<br />
3<br />
ES<br />
- 71 -
INFORMACIÓN TÉCNICA 3<br />
Datos técnicos<br />
ES<br />
3<br />
Descripción <strong>F4</strong> <strong>1000</strong><br />
FRENO DELANTERO<br />
Tipo<br />
De doble disco flotante con faja de frenado en acero<br />
Ø disco (mm) 320<br />
Brida disco<br />
Aluminio<br />
Pinzas (diámetro pistones mm) Radiales, mono-pieza, de 4 pistones (Ø 34)<br />
FRENO TRASERO<br />
Tipo<br />
De disco en acero<br />
Ø disco (mm) 210<br />
Pinzas (diámetro pistones mm) De 4 pistones (Ø 25.4)<br />
LLANTA DELANTERA<br />
Material<br />
Forjado en aleación de aluminio<br />
Dimensiones 3,50” x 17”<br />
LLANTA TRASERA<br />
Material<br />
Forjado en aleación de aluminio<br />
Dimensiones 6,00” x 17”<br />
NEUMÁTICOS<br />
Delantero 120/70-ZR 17 (58 W)<br />
Trasero 190/55-ZR 17 (75 W)<br />
- 72 -
INFORMACIÓN TÉCNICA 3<br />
Datos técnicos<br />
Descripción <strong>F4</strong> <strong>1000</strong><br />
Marca y tipo<br />
PIRELLI - Diablo Supercorsa SP<br />
DUNLOP - Sportmax Qualifier RR<br />
Presión de hinchado (*) A velocidad más baja de 300 km/h A velocidad más alta de 300 km/h<br />
Delantero PIRELLI: 2.3 bar (33 psi) 2.5 bar (36 psi)<br />
DUNLOP: 2.3 bar (33 psi) 2.5 bar (36 psi)<br />
Trasero PIRELLI: 2.3 bar (33 psi) 2.9 bar (42 psi)<br />
DUNLOP: 2.3 bar (33 psi) 2.9 bar (42 psi)<br />
INSTALACIÓN ELÉCTRICA<br />
Tensión instalación<br />
12V<br />
Luz faro delantero<br />
OSRAM Xenarc D1S 35W<br />
Luz de posición delantera<br />
12V 5W<br />
Batería<br />
12V - 8,6Ah<br />
Alternador<br />
350 W a 5000 rpm<br />
CARROCERÍA<br />
Carenado<br />
Material termoplástico<br />
Cúpula<br />
Material termoplástico<br />
Colín<br />
Material termoplástico<br />
Depósito<br />
Material termoplástico<br />
* : En la eventualidad que se utilice neumáticos diferentes de los recomendados, tener en cuenta el valor de presión de inflado<br />
marcado por el constructor en el lateral del neumático.<br />
3<br />
ES<br />
- 73 -
INFORMACIÓN TÉCNICA 3<br />
Datos técnicos<br />
ES<br />
3<br />
Descripción <strong>F4</strong> <strong>1000</strong><br />
Conductos aspiración<br />
Material termoplástico<br />
Air-box<br />
Material termoplástico<br />
Costados air-box<br />
Material termoplástico<br />
Guardabarro delantero<br />
Material termoplástico<br />
Protección cadena<br />
Material termoplástico<br />
Protección tubo de escape<br />
Aluminio<br />
Protección paracalor<br />
Material termoplástico<br />
Portamatrícula<br />
Material termoplástico<br />
- 74 -
INFORMACIÓN TÉCNICA 3<br />
3<br />
ES<br />
- 75 -
INFORMACIÓN TÉCNICA 3<br />
5<br />
6<br />
3 4<br />
2<br />
11<br />
ES<br />
3<br />
7<br />
1<br />
12<br />
9<br />
10<br />
8<br />
- 76 -
INFORMACIÓN TÉCNICA 3<br />
3.3. Referencias colores componentes del carenado<br />
Las partes pintadas del carenado tienen las siguientes referencias de colores , en relación al correspondiente<br />
código del color de la motocicleta:<br />
1. - Parabrisas;<br />
2. - Espejo retrovisor izquierdo;<br />
3. - Espejo retrovisor derecho;<br />
4. - Air box;<br />
5. - Deposito carburante;<br />
6. - Lateral trasero izquierdo;<br />
7. - Lateral trasero derecho:<br />
Código color A:<br />
Rojo pastel<br />
(Cod. Palinal 926R750)<br />
Código color B:<br />
Negro brillante<br />
(Cod. Palinal 929R486H)<br />
Código color C:<br />
Gris Titanium<br />
(Cod. Palinal L821)<br />
8. - Lateral carenado izquierdo;<br />
9. - Lateral carenado derecho;<br />
10. - Parte inferior del carenado;<br />
11. - Lateral deposito izquierdo;<br />
12. - Lateral deposito derecho:<br />
Código color A:<br />
Plata metalizada<br />
(Cod. Palinal 928XV025)<br />
Código color B:<br />
Negro mate<br />
(Cod. Palinal 929XR486 + Palinal Matt 3)<br />
Código color C:<br />
Gris Admiral<br />
(Cod. Palinal L820)<br />
3<br />
ES<br />
- 77 -
INFORMACIÓN TÉCNICA 3<br />
1<br />
2<br />
ES<br />
3<br />
3<br />
4<br />
- 78 -
INFORMACIÓN TÉCNICA 3<br />
3.4. Referencias colores componentes del bastidor<br />
Las partes pintadas del bastidor de la motocicleta tienen las siguientes referencias de colores:<br />
1. - Bastidor:<br />
Código color A-B:<br />
Gris antracita metalizado<br />
(Cod. Palinal 926XH893)<br />
Código color C:<br />
Rojo bastidor<br />
(Cod. Palinal 211XH987)<br />
3. - Motor:<br />
Negro mate<br />
(Cod. Pulverit 3500/0085)<br />
3<br />
ES<br />
2. - Soporte faro:<br />
Gris antracita metalizado<br />
(Cod. Palinal 926XH893)<br />
4. - Tapa culata motor:<br />
Rojo bastidor<br />
(Cod. Palinal 211XH987)<br />
- 79 -
NOTAS<br />
ES<br />
3<br />
Nota informativa<br />
<strong>MV</strong> <strong>Agusta</strong> S.p.A. está comprometida en una política de continuo mejoramiento de sus productos; por este<br />
motivo es posible encontrar ligeras diferencias entre el contenido de éste documento y el vehículo adquirido<br />
por Ustedes. Los modelos <strong>MV</strong> <strong>Agusta</strong> son exportados en muchos Países, en los cuales el Código del<br />
Transito y a los procedimientos de homologación son distintos a los nuestros.<br />
Confiamos en Vuestra comprensión. <strong>MV</strong> <strong>Agusta</strong> S.p.A. considera por lo tanto necesario reservarse el derecho<br />
de aportar modificaciones a sus productos y a la documentación técnica en cualquier momento y sin<br />
ningún aviso previo.<br />
Sugerimos para visitar a menudo el sitio Internet www.mvagusta.it para obtener informaciones y actualizaciones<br />
sobre los productos <strong>MV</strong> <strong>Agusta</strong> y la documentación relacionada.<br />
Respetemos y defendamos el medioambiente<br />
Todo lo que hacemos tiene repercusiones para todo el planeta y en sus recursos.<br />
<strong>MV</strong> <strong>Agusta</strong>, a tutela de los intereses de la comunidad, sensibiliza los Clientes y los operadores de la asistencia<br />
técnica a adoptar una utilización del vehículo y de eliminación de sus partes, respetando plenamente<br />
las normativas vigentes en términos de contaminación del medio ambiente, eliminación y reciclaje<br />
de los deshechos.<br />
© 2009<br />
Está prohibida la reproducción aunque sea parcial de éste documento sin el consentimiento escrito por <strong>MV</strong> <strong>Agusta</strong> S.p.A.<br />
Part. n° 8000B4299<br />
Edición n° 1 - Diciembre 2009<br />
- 80 -