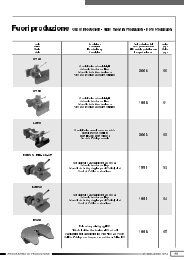
Gancio di traino GA25 Drawbar coupling GA25 Crochet d ... - Orlandi
Gancio di traino GA25 Drawbar coupling GA25 Crochet d ... - Orlandi
Gancio di traino GA25 Drawbar coupling GA25 Crochet d ... - Orlandi

Create successful ePaper yourself
Turn your PDF publications into a flip-book with our unique Google optimized e-Paper software.
N<br />
O<br />
T<br />
E<br />
1)<br />
2)<br />
DRAWBAR COUPLING <strong>GA25</strong><br />
INSTALLATION, OPERATING AND MAINTENANCE INSTRUCTIONS<br />
2 INSTALLATION<br />
This chapter refers to the figures on pages 08-09/24 .<br />
Read the following instructions carefully before any operation:<br />
Installation has to be carried out by skilled personnel<br />
Put on heavy working shoes and working gloves.<br />
2.1 INSTALLATION OF THE TRAILER COUPLING<br />
PAG.<br />
08/24<br />
CHAP. 2<br />
REV. A<br />
Position the holes of the flange of the <strong>coupling</strong> fitting to the existing holes on<br />
the drawbeam of the vehicle, considering the prescriptions of the installation<br />
manual of the drawbeam.<br />
Fix the drawbar <strong>coupling</strong> on the drawbeam with 4 flanged screws and 4 selflocking<br />
nuts, following the prescription of the following chart:<br />
hole pattern of the <strong>coupling</strong> bolt size bolt strength torque (M)<br />
120x55<br />
130x30<br />
M 14<br />
M 12<br />
8.8<br />
8.8<br />
120 Nm<br />
100 Nm<br />
ATTENTION: use only self-locking nuts. For the installation of the drawbar<br />
<strong>coupling</strong> as shown in the illustration use screws with length of 40 mm.