4-in-1 Vibration Wheel - Saitek
4-in-1 Vibration Wheel - Saitek
4-in-1 Vibration Wheel - Saitek

You also want an ePaper? Increase the reach of your titles
YUMPU automatically turns print PDFs into web optimized ePapers that Google loves.
PW21_manual_f<strong>in</strong>al.qxd 15/08/2008 15:21 Page 1<br />
<strong>Saitek</strong>®<br />
4-<strong>in</strong>-1 <strong>Vibration</strong> <strong>Wheel</strong><br />
USER MANUAL<br />
BEDIENUNGSANLEITUNG<br />
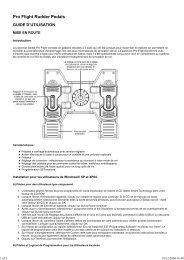
GUIDE D’UTILISATION<br />
MANUALE D’USO<br />
MANUAL DEL USUARIO
PW21_manual_f<strong>in</strong>al.qxd 15/08/2008 15:21 Page 2<br />
SAITEK 4-IN-1 VIBRATION WHEEL<br />
Features<br />
• Compatible with PC, PS2/PS3 and Xbox<br />
• Button sett<strong>in</strong>gs programmable when us<strong>in</strong>g PC and PS2<br />
• Detachable lap rest for complete comfort and control when play<strong>in</strong>g from your sofa<br />
• Removable clamp locks the wheel <strong>in</strong> place when sat at a desk<br />
• On-the-fly sensitivity adjustment helps you adapt to different driv<strong>in</strong>g games<br />
• Use the <strong>in</strong>cluded pedals or wheel paddles to accelerate and brake, depend<strong>in</strong>g on your play<strong>in</strong>g<br />
environment<br />
Sett<strong>in</strong>g up your controller<br />
1 Attach the ma<strong>in</strong> wheel unit to the desk clamp or lap support.<br />
3 If us<strong>in</strong>g the desk clamp, position the wheel unit on the edge of your desktop, and turn the<br />
clamp grip clockwise until the unit is securely attached to the desk. Do not overtighten!<br />
4 Plug the PS/2 cable from the pedal unit <strong>in</strong>to the socket <strong>in</strong> the wheel unit, mak<strong>in</strong>g sure the<br />
connector clicks firmly <strong>in</strong>to place.<br />
5 Place the pedal unit on the floor <strong>in</strong> your preferred driv<strong>in</strong>g position.<br />
System Compatibility<br />
PC runn<strong>in</strong>g W<strong>in</strong>dows XP/Vista (32-bit only), PS2/PS3 and Xbox<br />
Software <strong>in</strong>stallation for PC<br />
1. With your computer switched on, close down any programs that are currently runn<strong>in</strong>g and<br />
<strong>in</strong>sert the Installation CD <strong>in</strong>to your CD-ROM drive.<br />
2. When the Introduction Screen appears, click Install Software to cont<strong>in</strong>ue. If the CD does not<br />
run automatically, select Start from the W<strong>in</strong>dows® Taskbar, then Run and type D:\Setup.exe<br />
and click OK - where D:\ is letter of your CD-ROM drive. For Vista users, the screen will ask<br />
Do you want to run this file? Press Run. A screen will now appear say<strong>in</strong>g A program needs<br />
your permission to cont<strong>in</strong>ue. Press Cont<strong>in</strong>ue.<br />
3. When the Welcome screen appears, click Next to cont<strong>in</strong>ue.<br />
4. After read<strong>in</strong>g the Disclaimer, select the I accept the terms of the Disclaimer option and click<br />
Next to cont<strong>in</strong>ue.<br />
5. Plug the USB cable <strong>in</strong>to one of your computer's USB ports and click on Next.<br />
6. At the Registration screen, select Check this box to register now and follow the on-screen<br />
<strong>in</strong>structions, or you can choose to select this option later.<br />
7. Click on F<strong>in</strong>ish to complete the <strong>in</strong>stallation.<br />
Installation for users of PS2 and Xbox<br />
Plug the wheel’s PS2 or Xbox controller cable <strong>in</strong>to one of your console’s free controller sockets.<br />
Installation for users of PC or PS3<br />
Plug the wheel’s USB cable <strong>in</strong>to one of your PC or PS3’s free USB ports.<br />
Mode switch<strong>in</strong>g<br />
The 4-<strong>in</strong>-1 <strong>Vibration</strong> <strong>Wheel</strong> supports both Digital and Analog modes on PS2. Press the Mode<br />
button to switch modes.<br />
<strong>Vibration</strong> Force Feedback<br />
The 4-<strong>in</strong>-1 <strong>Vibration</strong> <strong>Wheel</strong> offers vibration force feedback with PS2. Press the Select and Up<br />
buttons to switch the force feedback on or off.<br />
Auto calibration<br />
To calibrate the wheel, press the Mapp<strong>in</strong>g button for two seconds and the red LED will bl<strong>in</strong>k quickly<br />
to show the wheel is calibrat<strong>in</strong>g.<br />
Sensitivity adjustment<br />
The 4-<strong>in</strong>-1 <strong>Vibration</strong> wheel has six sensitivity sett<strong>in</strong>gs. Normal sett<strong>in</strong>g is three.<br />
To adjust sensitivity press the Select and Right buttons. Each time you press the two buttons, the<br />
stick sensitivity will <strong>in</strong>crease by one <strong>in</strong>crement until it reaches six and then start from one aga<strong>in</strong>.<br />
So, if you want to reduce sensitivity from normal sett<strong>in</strong>g (three) to one, press the Select and Right<br />
buttons four times: 4, 5, 6, 1.<br />
Button programm<strong>in</strong>g<br />
1 Press and hold the Select button for 3 seconds to enter programm<strong>in</strong>g mode - the red LED will<br />
bl<strong>in</strong>k quickly. Press the button that you want to change and the red LED will stop bl<strong>in</strong>k<strong>in</strong>g. Now<br />
press the desired function - the LED will bl<strong>in</strong>k quickly after programm<strong>in</strong>g is completed (PS2<br />
only)<br />
2 The 1, 2, 3, 4, 5, 6, 7, 8, RY and RY buttons all can be programmed when us<strong>in</strong>g a PC. Gas<br />
Pedal, Brake Pedal, L-hand, R-hand, L1, L2, R1, R2, SL, ST, , O, X and can all be<br />
programmed when us<strong>in</strong>g a PS2.<br />
Exit<strong>in</strong>g program mode:<br />
The wheel will automatically exit programm<strong>in</strong>g mode after 6 seconds or press the Select button to<br />
leave programm<strong>in</strong>g immediately.<br />
Resett<strong>in</strong>g button programm<strong>in</strong>g<br />
Press and hold the Mode button for 2 seconds to reset all button programm<strong>in</strong>g.
CIRCLE<br />
PW21_manual_f<strong>in</strong>al.qxd 15/08/2008 15:21 Page 4<br />
Button assignment for PC and PS2/PS3<br />
Button and axis designation<br />
PC Mode PS2 Mode PS3 Mode Xbox Mode Digital/Analog<br />
1 3 X X A A<br />
2 4 X A<br />
3 1 Y A<br />
4 2 O O B A<br />
1<br />
4<br />
TRIANGLE /1<br />
SQUARE /4<br />
6<br />
L 1/7<br />
L 2/6<br />
5<br />
7<br />
12<br />
<strong>Saitek</strong><br />
SELECT/9<br />
START/10<br />
MOD E<br />
8<br />
9<br />
10<br />
R1/8 /2<br />
R2/5<br />
11<br />
CRO S<br />
/3<br />
2<br />
3<br />
5 7 L1 L1 White A<br />
6 8 R1 R1 Black A<br />
7 6 L2 L2 Left trigger A<br />
8 5 R2 R2 Right trigger A<br />
9 9 SL SL Back D<br />
10 10 ST ST Start D<br />
11 Mode Mode Mode Mode D<br />
12 D_Pad D_Pad D_Pad D_Pad A<br />
X Axis X Axis X Axis X Axis X Axis A<br />
Left hand lever 2 L2 L2 A A<br />
Right hand lever 1 R2 R2 X A<br />
Gas Pedal RY X X Right trigger A<br />
Brake Pedal RY Left trigger A<br />
LED Red Red Red Red LED<br />
Example 1<br />
Step Action Result<br />
1 Press and hold Select for 3 seconds LED bl<strong>in</strong>ks quickly<br />
2 Press O LED stops bl<strong>in</strong>k<strong>in</strong>g<br />
3 Press Gas Pedal LED bl<strong>in</strong>ks quickly<br />
O is now Gas Pedal and Gas Pedal is Gas Pedal
PW21_manual_f<strong>in</strong>al.qxd 15/08/2008 15:21 Page 6<br />
Example 2<br />
Step Action Result<br />
1 Press and hold Select for 3 seconds LED bl<strong>in</strong>ks quickly<br />
2 Press L1 LED stops bl<strong>in</strong>k<strong>in</strong>g<br />
3 Press X LED bl<strong>in</strong>ks quickly<br />
L1 is now X and X is X<br />
Technical Support<br />
Nearly all the products that are returned to us as faulty are not faulty at all - they have just not<br />
been <strong>in</strong>stalled properly. If you experience any difficulty with this product, please first visit our<br />
website www.saitek.com. The technical support area will provide you with all the <strong>in</strong>formation you<br />
need to get the most out of your product and should solve any problems you might have.<br />
If you do not have access to the <strong>in</strong>ternet, or if the website cannot answer your question, please<br />
contact your local <strong>Saitek</strong> Technical Support Team. We aim to offer quick, comprehensive and<br />
thorough technical support to all our users so, before you call, please make sure you have all the<br />
relevant <strong>in</strong>formation at hand.<br />
To f<strong>in</strong>d your local <strong>Saitek</strong> Technical Support Center, please see the separate Technical Support<br />
Center sheet that came packaged with this product.<br />
Information for Customers <strong>in</strong> the United States<br />
FCC Compliance and Advisory Statement<br />
Warn<strong>in</strong>g: Changes or modifications to this unit not expressly approved by the party responsible for<br />
compliance could void the user's authority to operate the equipment.<br />
This device complies with Part 15 of the FCC Rules. Operation is subject to the follow<strong>in</strong>g two<br />
conditions:<br />
1 This device may not cause harmful <strong>in</strong>terference, and;<br />
2 This device must accept any <strong>in</strong>terference received, <strong>in</strong>clud<strong>in</strong>g <strong>in</strong>terference that may cause<br />
undesired operation.<br />
NOTE: This equipment has been tested and found to comply with the limits for a Class B digital<br />
device, pursuant to Part 15 of the FCC Rules. These limits are designed to provide reasonable<br />
protection aga<strong>in</strong>st harmful <strong>in</strong>terference <strong>in</strong> a residential <strong>in</strong>stallation. This equipment generates, uses<br />
and can radiate radio frequency energy and, if not <strong>in</strong>stalled and used <strong>in</strong> accordance with the<br />
<strong>in</strong>structions, may cause harmful <strong>in</strong>terference to radio communications. However, there is no<br />
guarantee that <strong>in</strong>terference will not occur <strong>in</strong> a particular <strong>in</strong>stallation. If this equipment does cause<br />
harmful <strong>in</strong>terference to radio or television reception, which can be determ<strong>in</strong>ed by turn<strong>in</strong>g the<br />
equipment off and on, the user is encouraged to try to correct the <strong>in</strong>terference by one or more of<br />
the follow<strong>in</strong>g measures:<br />
• Reorient or relocate the receiv<strong>in</strong>g antenna;<br />
• Increase the separation between the equipment and receiver;<br />
• Connect the equipment <strong>in</strong>to an outlet on a circuit different from that to which the receiver is<br />
connected;<br />
• Consult the dealer or an experienced radio/TV technician for help.<br />
Mad Catz, Inc, 7480 Mission Valley Rd, Suite 101, San Diego, CA 92108-4406<br />
Canada ICES-003<br />
Operation is subject to the follow<strong>in</strong>g two conditions:<br />
1 This device may not cause <strong>in</strong>terference, and;<br />
2 This device must accept any <strong>in</strong>terference, <strong>in</strong>clud<strong>in</strong>g <strong>in</strong>terference that may cause undesired<br />
operation of the device.<br />
This Class B digital apparatus complies with Canadian ICES-003.<br />
Cet appareil numérique de la classe B est conforme à la norme NMB-003 du Canada.<br />
Conditions of Warranty<br />
1 Warranty period is 2 years from date of purchase with proof of purchase submitted.<br />
2 Operat<strong>in</strong>g <strong>in</strong>structions must be followed.<br />
3 Specifically excludes any damages associated with leakage of batteries.<br />
Note: Batteries can leak when left unused <strong>in</strong> a product for a period of time, so it is advisable to<br />
<strong>in</strong>spect batteries regularly.<br />
4 Product must not have been damaged as a result of defacement, misuse, abuse, neglect,<br />
accident, destruction or alteration of the serial number, improper electrical voltages or currents,<br />
repair, alteration or ma<strong>in</strong>tenance by any person or party other than our own service facility or<br />
an authorized service center, use or <strong>in</strong>stallation of non-<strong>Saitek</strong> replacement parts <strong>in</strong> the product<br />
or the modification of this product <strong>in</strong> any way, or the <strong>in</strong>corporation of this product <strong>in</strong>to any other<br />
products, or damage to the product caused by accident, fire, floods, lightn<strong>in</strong>g, or acts of God,<br />
or any use violative of <strong>in</strong>structions furnished by <strong>Saitek</strong> plc.<br />
5 Obligations of <strong>Saitek</strong> shall be limited to repair or replacement with the same or similar unit, at<br />
our option. To obta<strong>in</strong> repairs under this warranty, present the product and proof of purchase<br />
(eg, bill or <strong>in</strong>voice) to the authorized <strong>Saitek</strong> Technical Support Center (listed on the separate<br />
sheet packaged with this product) transportation charges prepaid. Any requirements that<br />
conflict with any state or Federal laws, rules and/or obligations shall not be enforceable <strong>in</strong> that<br />
particular territory and <strong>Saitek</strong> will adhere to those laws, rules, and/or obligations.<br />
6 When return<strong>in</strong>g the product for repair, please pack it very carefully, preferably us<strong>in</strong>g the<br />
orig<strong>in</strong>al packag<strong>in</strong>g materials. Please also <strong>in</strong>clude an explanatory note.
PW21_manual_f<strong>in</strong>al.qxd 15/08/2008 15:21 Page 8<br />
7 IMPORTANT: To save yourself unnecessary cost and <strong>in</strong>convenience, please check carefully<br />
that you have read and followed the <strong>in</strong>structions <strong>in</strong> this manual.<br />
This warranty is <strong>in</strong> lieu of all other expressed warranties, obligations or liabilities. ANY<br />
IMPLIED WARRANTIES, OBLIGATIONS, OR LIABILITIES, INCLUDING BUT NOT LIMITED<br />
TO THE IMPLIED WARRANTIES OF MERCHANTABILITY AND FITNESS FOR A<br />
PARTICULAR PURPOSE, SHALL BE LIMITED IN DURATION TO THE DURATION OF THIS<br />
WRITTEN LIMITED WARRANTY. Some states do not allow limitations on how long an implied<br />
warranty lasts, so the above limitations may not apply to you. IN NO EVENT SHALL WE BE<br />
LIABLE FOR ANY SPECIAL OR CONSEQUENTIAL DAMAGES FOR BREACH OF THIS OR<br />
ANY OTHER WARRANTY, EXPRESS OR IMPLIED, WHATSOEVER. Some states do not<br />
allow the exclusion or limitation of special, <strong>in</strong>cidental or consequential damages, so the above<br />
limitation may not apply to you. This warranty gives you specific legal rights, and you may also<br />
have other rights which vary from state to state.<br />
This symbol on the product or <strong>in</strong> the <strong>in</strong>structions means that your electrical and<br />
electronic equipment should be disposed at the end of its life separately from<br />
your household waste. There are separate collection systems for recycl<strong>in</strong>g <strong>in</strong><br />
the EU.<br />
For more <strong>in</strong>formation, please contact the local authority or your retailer where<br />
you purchased the product.<br />
SAITEK 4-IN-1 VIBRATION WHEEL<br />
Ausstattungsmerkmale<br />
• Kompatibel mit PC, PS2/PS3 und Xbox<br />
• Programmierbare Tastene<strong>in</strong>stellung für PC und PS2<br />
• Abnehmbare Be<strong>in</strong>auflage bietet vollkommenen Komfort und Kontrolle bei Spielen auf dem<br />
Sofa<br />
• Abnehmbare Klemme zur Befestigung des Lenkrads am Computertisch<br />
• Unverzügliche Empf<strong>in</strong>dlichkeitsanpassung hilft Ihnen bei der Umstellung auf verschiedene<br />
Fahrspiele<br />
• Verwenden Sie die mitgelieferten Pedale oder Lenkradsteuerungen zum Beschleunigen und<br />
Bremsen - je nach Ihrer Spielumgebung.<br />
Verb<strong>in</strong>den des Controllers<br />
1 Verb<strong>in</strong>den Sie das Hauptgerät mit der Tischklemme oder der Be<strong>in</strong>auflage.<br />
3 Bei Verwendung der Tischklemme stellen Sie das Rad auf die Tischkante und drehen Sie den<br />
Klemmengriff im Uhrzeigers<strong>in</strong>n, bis das Gerät sicher auf dem Tisch befestigt ist. Drehen Sie<br />
nicht zu fest!<br />
4 Verb<strong>in</strong>den Sie das PS/2-Kabel der Pedale<strong>in</strong>heit mit dem Anschluss der Rade<strong>in</strong>heit.<br />
Vergewissern Sie sich, dass der Anschluss fest e<strong>in</strong>rastet.<br />
5 Legen Sie die Pedale<strong>in</strong>heit <strong>in</strong> Ihrer gewünschten Fahrposition auf den Boden.<br />
Systemkompatibilität<br />
PC mit W<strong>in</strong>dows XP/Vista (nur 32-Bit), PS2/PS3 und Xbox<br />
Software<strong>in</strong>stallation für PC<br />
1. Schalten Sie den Computer e<strong>in</strong>, schließen Sie alle laufenden Programme und legen Sie die<br />
Installations-CD <strong>in</strong> Ihr CD-ROM-Laufwerk.<br />
2. Wenn der E<strong>in</strong>führungsbildschirm ersche<strong>in</strong>t, klicken Sie auf "Software <strong>in</strong>stallieren", um<br />
fortzufahren. Falls die CD nicht automatisch anläuft, wählen Sie die Start-Schaltfläche von<br />
W<strong>in</strong>dows® und dann "Ausführen", tippen "D:\Setup.exe" e<strong>in</strong> und klicken auf OK. Dabei steht<br />
"D:\" für den Buchstaben Ihres CD-ROM-Laufwerks. Vista-Anwender werden gefragt: "Möchten<br />
Sie diese Datei ausführen?" Klicken Sie auf "Ausführen". Jetzt ersche<strong>in</strong>t die Meldung "Zur<br />
Fortsetzung des Programms ist Ihre Zustimmung erforderlich". Klicken Sie auf "Weiter".<br />
3. Wenn der Willkommensbildschirm ersche<strong>in</strong>t, klicken Sie auf "Weiter", um fortzufahren.<br />
4. Nach dem Lesen des Rechtsverzichts wählen Sie die Option "Ich akzeptiere die Bed<strong>in</strong>gungen"<br />
und klicken auf "Weiter", um fortzufahren.<br />
5. Schließen Sie das USB-Kabel an e<strong>in</strong>en der freien USB-Anschlüsse Ihres Computers an und<br />
klicken Sie auf "Weiter".
CIRCLE<br />
PW21_manual_f<strong>in</strong>al.qxd 15/08/2008 15:21 Page 10<br />
6. Auf dem Registrierungsbildschirm wählen Sie "Klicken Sie hier, um sich jetzt zu registrieren"<br />
und folgen Sie den Anweisungen auf dem Bildschirm; Sie können sich jedoch auch dafür<br />
entscheiden, diese Option später zu wählen.<br />
7. Klicken Sie auf "Fertigstellen", um die Installation vollständig durchzuführen.<br />
Installation für Benutzer von PS2 und Xbox<br />
Verb<strong>in</strong>den Sie das PS2- oder Xbox-Steuerkabel des Rades mit e<strong>in</strong>em freien Steuer-Anschluss auf<br />
Ihrer Konsole.<br />
Installation für Benutzer von PC oder PS3<br />
Verb<strong>in</strong>den Sie das USB-Kabel des Rades mit e<strong>in</strong>em freien USB-Anschluss auf Ihrem PC oder<br />
PS3.<br />
Moduswechsel<br />
Das 4-<strong>in</strong>-1 <strong>Vibration</strong> Rad unterstützt sowohl Digital- als auch Analogmodus der PS2. Zum<br />
Umschalten drücken Sie die Taste Mode (Modus).<br />
<strong>Vibration</strong> Force Feedback<br />
Das 4-<strong>in</strong>-1 <strong>Vibration</strong> <strong>Wheel</strong> bietet mit der PS2 <strong>Vibration</strong> Force Feedback. Drücken Sie zum E<strong>in</strong>oder<br />
Ausschalten der Funktion Force Feedback die Tasten Select (Auswahl) und Up (Aufwärts).<br />
Automatische Kalibrierung<br />
Zur Kalibrierung des Rades halten Sie die Taste Mapp<strong>in</strong>g (Zuordnung) 2 Sekunden lang gedrückt.<br />
Die rote LED bl<strong>in</strong>kt rasch um anzuzeigen, dass das Rad kalibriert wird.<br />
Empf<strong>in</strong>dlichkeitsanpassung<br />
Das 4-<strong>in</strong>-1 <strong>Vibration</strong> <strong>Wheel</strong> verfügt über sechs Empf<strong>in</strong>dlichkeitse<strong>in</strong>stellungen. Die Grunde<strong>in</strong>stellung<br />
ist drei.<br />
Zur Anpassung der Empf<strong>in</strong>dlichkeit drücken Sie die Tasten Select (Auswahl) und Right (Rechts).<br />
Mit jedem Mal Drücken beider Tasten erhöht sich die Stick-Empf<strong>in</strong>dlichkeit um jeweils e<strong>in</strong>e Stufe<br />
bis zur Stufe sechs, danach geht sie wieder auf Stufe 1 zurück. Zur Reduktion der Empf<strong>in</strong>dlichkeit<br />
der Grunde<strong>in</strong>stellung (drei) auf e<strong>in</strong>s drücken Sie viermal die Tasten Select (Auswahl) und Right<br />
(Rechts): 4, 5, 6, 1.<br />
Tastenprogrammierung<br />
1 Halten Sie die Taste Select (Auswahl) 3 Sekunden lang gedrückt, um den<br />
Programmierungsmodus zu aktivieren - dies rote LED bl<strong>in</strong>kt schnell. Drücken Sie die zu<br />
ändernde Taste, und die rote LED hört auf zu bl<strong>in</strong>ken. Drücken Sie nun die gewünschte<br />
Funktion - nach Abschluss der Programmierung (nur PS2) bl<strong>in</strong>kt die LED schnell.<br />
2 Die Tasten 1, 2, 3, 4, 5, 6, 7, 8, RY und RY können allesamt über den PC programmiert<br />
werden. Gaspedal, Bremspedal, L<strong>in</strong>ks, Rechts, L1, L2, R1, R2, SL, ST, , O, X und <br />
können allesamt über die PS2 programmiert werden.<br />
Programmierungsmodus verlassen<br />
Das Rad verlässt nach 6 Sekunden automatisch den Programmierungsmodus. Sie können zum<br />
Verlassen des Programmierungsmodus auch die Taste Select (Auswahl) drücken.<br />
Tastenprogrammierung zurücksetzen<br />
Halten Sie die Taste Mode (Modus) 2 Sekunden lang gedrückt, um die Tastenprogrammierung<br />
zurückzusetzen.<br />
Tastenzuweisung für PC und PS2/PS3<br />
1<br />
4<br />
TRIANGLE /1<br />
SQUARE /4<br />
6<br />
L 1/7<br />
L 2/6<br />
5<br />
7<br />
<strong>Saitek</strong><br />
SELECT/9<br />
START/10<br />
MOD E<br />
12<br />
8<br />
9<br />
10<br />
R1/8 /2<br />
R2/5<br />
11<br />
CRO S<br />
/3
PW21_manual_f<strong>in</strong>al.qxd 15/08/2008 15:21 Page 12<br />
Tasten- und Achsenzuweisung<br />
PC Modus PS2 Modus PS3 Modus Xbox Modus Digital/Analog<br />
1 3 X X A A<br />
2 4 X A<br />
3 1 Y A<br />
4 2 O O B A<br />
5 7 L1 L1 Weiß A<br />
6 8 R1 R1 Schwarz A<br />
7 6 L2 L2 L<strong>in</strong>ker Abzug A<br />
8 5 R2 R2 Rechter Abzug A<br />
9 9 SL SL Zurück D<br />
10 10 ST ST Start D<br />
11 Modus Modus Modus Modus D<br />
12 D_Pad D_Pad D_Pad D_Pad A<br />
X-Achse X-Achse X-Achse X-Achse X-Achse A<br />
L<strong>in</strong>ker Abzug 2 L2 L2 A A<br />
Rechter Abzug 1 R2 R2 X A<br />
Gaspedal RY X X Right trigger A<br />
Bremspedal RY Left trigger A<br />
LED Rot Rot Rot Rot LED<br />
Beispiel 1<br />
Schritt Vorgang Resultat<br />
1 Halten Sie Select (Auswahl) 3 LED bl<strong>in</strong>kt schnell<br />
Sekunden lang gedrückt<br />
2 Drücken Sie O LED hört auf zu bl<strong>in</strong>ken<br />
3 Drücken Sie das Gaspedal LED bl<strong>in</strong>kt schnell<br />
O ist nun das Gaspedal und Gaspedal ist das Gaspedal<br />
Beispiel 2<br />
Schritt Vorgang Resultat<br />
1 Halten Sie Select (Auswahl) 3 LED bl<strong>in</strong>kt schnell<br />
Sekunden lang gedrückt<br />
2 Drücken Sie L1 LED hört auf zu bl<strong>in</strong>ken<br />
3 Drücken Sie X LED bl<strong>in</strong>kt schnell<br />
L1 ist nun X und X ist X<br />
Technischer Support<br />
Probleme - ke<strong>in</strong>e Angst, wir lassen Sie nicht im Stich!<br />
Wussten Sie, dass fast alle Produkte, die als fehlerhaft an uns zurückgeschickt werden, überhaupt<br />
nicht defekt s<strong>in</strong>d? Sie wurden e<strong>in</strong>fach nicht richtig <strong>in</strong>stalliert!<br />
Sollten Sie Probleme mit diesem Produkt haben, besuchen Sie bitte zuerst unsere Website<br />
www.saitek.de. Unsere Website, speziell der Bereich Technischer Support, wurde erstellt, damit<br />
Sie von Ihrem <strong>Saitek</strong>-Produkt die bestmögliche Leistung erhalten.<br />
Sollten Sie trotzdem noch Probleme haben oder ke<strong>in</strong> Internetanschluss haben, dann stehen Ihnen<br />
unsere Produktspezialisten im <strong>Saitek</strong> Technical Support Team zur Verfügung, die Sie telefonisch<br />
um Rat und Hilfe bitten können.<br />
Wir möchten, dass Sie viel Freude an Ihrem Gerät haben. Bitte rufen Sie uns an, falls Sie<br />
Probleme oder Fragen haben. Bitte stellen Sie auch sicher, dass Sie alle relevanten Informationen<br />
zu Hand haben, bevor Sie anrufen.<br />
Rufnummern und Adressen f<strong>in</strong>den Sie auf der mit dem Produkt gelieferten Liste der Zentren für<br />
Technischen Support.<br />
Garantiebed<strong>in</strong>gungen<br />
1 Die Garantiezeit beträgt 2 Jahre ab dem nachgewiesenen Kaufdatum.<br />
2 Die Bedienungsanleitung ist zu beachten.<br />
3 Schäden im Zusammenhang mit dem Auslaufen von Batterien s<strong>in</strong>d spezifisch aus dem<br />
Garantieumfang ausgenommen.<br />
H<strong>in</strong>weis: Batterien können auslaufen, wenn sie über e<strong>in</strong>en längeren Zeitraum ungenutzt <strong>in</strong><br />
e<strong>in</strong>em Gerät verbleiben. Es ist daher ratsam, die Batterien regelmäßig zu überprüfen.<br />
4 Die Garantie ist ausgeschlossen bei<br />
Verunstaltung des Geräts, unsachgemäßer oder missbräuchlicher Benutzung, mangelnder<br />
Sorgfalt, Unfall, Beseitigung oder Änderung der Seriennummer; Anschluss an e<strong>in</strong>e falsche
PW21_manual_f<strong>in</strong>al.qxd 15/08/2008 15:21 Page 14<br />
Spannung oder Stromart; Reparatur, Umbau oder Wartung des Geräts durch fremde Personen<br />
außerhalb unserer Servicee<strong>in</strong>richtung oder e<strong>in</strong>es autorisierten Servicecenters; Verwendung<br />
oder E<strong>in</strong>bau von nicht von <strong>Saitek</strong> stammenden Ersatzteilen <strong>in</strong> das Gerät oder sonstigen<br />
Veränderungen: E<strong>in</strong>bau <strong>in</strong> andere Geräte; Beschädigung des Geräts durch höhere Gewalt<br />
(z.B. Unfall, Brand, Hochwasser oder Blitzschlag) oder e<strong>in</strong>e den Anweisungen von <strong>Saitek</strong><br />
zuwider laufende Benutzung des Geräts.<br />
5 Die Garantiepflicht beschränkt sich darauf, dass <strong>Saitek</strong> das Gerät nach eigener Wahl<br />
entweder repariert oder durch e<strong>in</strong> gleiches oder ähnliches Gerät ersetzt. Zur Inanspruchnahme<br />
der Garantie s<strong>in</strong>d dem autorisierten <strong>Saitek</strong> Technical Support Center (Anschrift liegt dem Gerät<br />
<strong>in</strong> der Verpackung bei) Gerät und Kaufbeleg (z.B. Kassenzettel oder Rechnung) frachtfrei zu<br />
übersenden.<br />
6 Bei E<strong>in</strong>sendung des Geräts zur Reparatur ist e<strong>in</strong>e angemessene Verpackung (vorzugsweise<br />
die Orig<strong>in</strong>alverpackung) zu wählen und e<strong>in</strong>e Schilderung des Problems beizufügen.<br />
7 WICHTIGER HINWEIS: Achten Sie zur Vermeidung unnötiger Kosten und<br />
Unannehmlichkeiten darauf, die Anweisungen <strong>in</strong> dieser Bedienungsanleitung sorgfältig<br />
durchzulesen und zu beachten.<br />
Dieses Produkt darf am Ende se<strong>in</strong>er Lebensdauer nicht über den normalen<br />
Haushaltsabfall entsorgt werden, sondern muss an e<strong>in</strong>em Sammelpunkt für das<br />
Recycl<strong>in</strong>g von elektrischen und elektronischen Geräten abgegeben werden.<br />
Das Symbol auf dem Produkt, der Gebrauchsanleitung oder der Verpackung<br />
weist darauf h<strong>in</strong>.<br />
SAITEK 4-IN-1 VIBRATION WHEEL<br />
Fonctions<br />
• Compatible avec les PC, PS2/PS3 et Xbox<br />
• Boutons de réglages programmables sur PC et PS2<br />
• Appuis détachables pour un confort et un contrôle total quand vous jouez dans votre canapé<br />
• La p<strong>in</strong>ce de fixation détachable ma<strong>in</strong>tient le volant en place quand vous êtes assis à votre<br />
bureau<br />
• Sensibilité ajustable à la volée vous permettant de vous adapter aux différents jeux de course<br />
• Utilisez les pédales ou les palettes du volant pour accélérer et fre<strong>in</strong>er, en fonction de votre<br />
environnement de jeu.<br />
Régler votre contrôleur<br />
1 Attachez le volant sur la p<strong>in</strong>ce de bureau ou le support<br />
3 Si vous utilisez la p<strong>in</strong>ce de bureau, positionnez le volant sur votre bureau, et tournez l'attache<br />
dans le sens des aiguilles d'une montre jusqu'à ce que l'appareil soit solidement attaché au<br />
bureau. Ne serrez pas trop fort !<br />
4 Branchez le câble PS/2 du pédalier dans la prise située sur le volant, en vérifiant que le<br />
connecteur est fermement fixé.<br />
5 Placez le pédalier sur le sol dans votre position de conduite préférée.<br />
Compatibilité système<br />
PC fonctionnant sous W<strong>in</strong>dows XP/Vista (32-bit uniquement), PS2/PS3 et Xbox<br />
Installation du logiciel pour PC<br />
1. Votre ord<strong>in</strong>ateur allumé, fermez tous les programmes en cours et <strong>in</strong>sérez le CD d'<strong>in</strong>stallation<br />
dans votre lecteur CD-ROM.<br />
2. Quand l'écran d'<strong>in</strong>troduction apparaît, cliquez sur Installer le Logiciel pour cont<strong>in</strong>uer. Si le CD<br />
ne tourne pas automatiquement, cliquez sur Démarrer dans la barre des tâches W<strong>in</strong>dows®, et<br />
tapez D:\Setup.exe puis cliquez sur OK (la lettre D correspond généralement à votre lecteur<br />
Cd-rom). Sous Vista, la question Voulez-vous exécuter ce fichier ? s'affiche à l'écran. Appuyez<br />
sur Exécuter. Un écran apparaît alors disant qu'un programme a beso<strong>in</strong> de votre permission<br />
pour cont<strong>in</strong>uer. Cliquez sur Cont<strong>in</strong>uer.<br />
3. Quand l'écran de Bienvenue apparaît, cliquez sur Suivant pour cont<strong>in</strong>uer.<br />
4. Après avoir lu la Clause de responsabilité, sélectionnez J'accepte les termes de la clause et<br />
cliquez sur Suivant pour cont<strong>in</strong>uer.<br />
5. Brancher le câble USB sur l'un des ports USB de votre ord<strong>in</strong>ateur et cliquez sur Suivant.<br />
6. À l'écran d'enregistrement, sélectionnez Cocher la case pour enregistrer ma<strong>in</strong>tenant ou vous<br />
pouvez choisir de sélectionner cette option plus tard.
PW21_manual_f<strong>in</strong>al.qxd 15/08/2008 15:21 Page 16<br />
7. Cliquez sur Term<strong>in</strong>er pour achever l'<strong>in</strong>stallation.<br />
Installation pour les utilisateurs PS2 et Xbox<br />
Branchez le câble PS2 ou Xbox du volant dans une des prises libres de votre console.<br />
Installation pour les utilisateurs PC et PS3<br />
Branchez le câble USB du volant dans une des prises USB libres de votre PC ou de votre PS3.<br />
Sélection de mode<br />
Le 4-<strong>in</strong>-1 <strong>Vibration</strong> <strong>Wheel</strong> supporte les modes Digital et Analogique sur PS2. Pressez le bouton<br />
Mode pour changer de mode.<br />
Retour de force à vibration<br />
Le 4-<strong>in</strong>-1 <strong>Vibration</strong> <strong>Wheel</strong> offre un retour de force à vibration sur PS2. Pressez les boutons Select<br />
et Haut pour activer ou désactiver le retour de force.<br />
Calibration automatique<br />
Pour calibrer le volant, pressez le bouton Mapp<strong>in</strong>g pendant deux secondes et la diode rouge<br />
clignotera rapidement pour <strong>in</strong>diquer que le volant est en tra<strong>in</strong> de se calibrer.<br />
Réglage de la sensibilité<br />
Le 4-<strong>in</strong>-1 <strong>Vibration</strong> wheel possède six réglages de sensibilité. Le réglage normal est trois. Pour<br />
ajuster la sensibilité pressez les boutons Select et Droit. Chaque fois que vous pressez ces deux<br />
boutons, la sensibilité s'<strong>in</strong>crémentera de un jusqu'à atte<strong>in</strong>dre le six et elle repartira sur un. Donc, si<br />
vous voulez réduire la sensibilité à partir du réglage normal (trois) vers un, pressez les boutons<br />
Select et Droit quatre fois : 4, 5, 6, 1.<br />
Programmation des boutons<br />
1 Ma<strong>in</strong>tenez enfoncé le bouton pendant 3 secondes pour entrer en mode programmation - la<br />
diode rouge clignotera rapidement. Pressez les boutons que vous voulez changer et la diode<br />
rouge arrêtera de clignoter. Pressez ma<strong>in</strong>tenant la fonction désirée - la diode clignotera<br />
rapidement lorsque la programmation sera term<strong>in</strong>ée (PS2 uniquement)<br />
2 Les boutons 1, 2, 3, 4, 5, 6, 7, 8, RY et RY peuvent être programmés quand vous utilisez un<br />
PC. La pédale des gaz, la pédale de fre<strong>in</strong>, la poignée-L, la poignée-R, L1, L2, R1, R2, SL, ST,<br />
, O, X et peuvent être programmés quand vous utilisez une PS2.<br />
Sortir du mode programmation :<br />
Le volant sortira automatiquement du mode programmation après 6 secondes ou pressez le bouton<br />
Select pour sortir immédiatement du mode programmation.<br />
Ré<strong>in</strong>itialiser la programmation des boutons<br />
Ma<strong>in</strong>tenez enfoncé le bouton Mode pendant 2 secondes pour ré<strong>in</strong>itialiser la programmation de tous<br />
les boutons.<br />
Désignation des boutons et des axes<br />
Mode PC Mode PS2 Mode PS3 Mode Xbox Digital/Analogique<br />
1 3 X X A A<br />
2 4 X A<br />
3 1 Y A<br />
4 2 O O B A<br />
5 7 L1 L1 Blanc A<br />
6 8 R1 R1 Noir A<br />
7 6 L2 L2 Gâchette gauche A<br />
8 5 R2 R2 Gâchette droite A<br />
9 9 SL SL Retour D<br />
10 10 ST ST Démarrer D<br />
11 Modus Modus Modus Modus D<br />
12 Croix dir. Croix dir. Croix dir. Croix dir. A<br />
Axe X Axe X Axe X Axe X Axe X A<br />
Levier ma<strong>in</strong> gauche 2 L2 L2 A A<br />
Levier ma<strong>in</strong> droite 1 R2 R2 X A<br />
Pédale des gaz RY X X Right trigger A<br />
Pédale de fre<strong>in</strong> RY Left trigger A<br />
Diode Rouge Rouge Rouge Rouge Diode<br />
Exemple 1<br />
Etape Action Résultat<br />
1 Ma<strong>in</strong>tenez enfoncé Select pendant La diode clignote<br />
3 secondes rapidement<br />
2 Pressez O La diode arrête de clignoter<br />
3 Pressez la pédale des gaz La diode clignote<br />
rapidement<br />
O est ma<strong>in</strong>tenant la pédale des gaz et la pédale des gaz est la pédale des gaz
CIRCLE<br />
PW21_manual_f<strong>in</strong>al.qxd 15/08/2008 15:21 Page 18<br />
Assignation des boutons pour PC et PS2/PS3<br />
Exemple 2<br />
Etape Action Résultat<br />
1 Ma<strong>in</strong>tenez enfoncé Select pendant La diode clignote<br />
3 secondes rapidement<br />
2 Pressez L1 La diode arrête de clignoter<br />
3 Pressez X La diode clignote<br />
rapidement<br />
L1 est à présent X et X est X<br />
1<br />
4<br />
TRIANGLE /1<br />
SQUARE /4<br />
6<br />
L 1/7<br />
L 2/6<br />
5<br />
7<br />
12<br />
<strong>Saitek</strong><br />
SELECT/9<br />
START/10<br />
MOD E<br />
8<br />
9<br />
10<br />
R1/8 /2<br />
R2/5<br />
11<br />
CRO S<br />
/3<br />
Support Technique<br />
Je ne peux pas démarrer. Ne vous <strong>in</strong>quiétez pas, nous sommes là pour vous aider !<br />
La plupart des produits qui nous sont retournés comme étant défectueux ne le sont pas du tout en<br />
réalité : ils n'ont tout simplement pas été <strong>in</strong>stallés correctement.<br />
Si vous rencontrez la mo<strong>in</strong>dre difficulté avec ce produit, merci de vous rendre tout d'abord sur<br />
notre site web www.saitek.com. La section " Support Technique " vous fournira toute l'<strong>in</strong>formation<br />
dont vous avez beso<strong>in</strong> pour tirer le meilleur parti de votre produit, et devrait vous aider à résoudre<br />
tous les problèmes que vous pourriez éventuellement rencontrer.<br />
Si vous n'avez pas accès à Internet, ou si vous ne trouvez pas de réponse à votre question sur<br />
notre site web, merci de bien vouloir contacter l'équipe locale du Support Technique <strong>Saitek</strong>. Notre<br />
objectif consiste à offrir un support technique complet et approfondi à tous nos utilisateurs, donc,<br />
avant de nous appeler, merci de bien vouloir vérifier que vous avez toute l'<strong>in</strong>formation requise à<br />
portée de ma<strong>in</strong>.<br />
Pour trouver votre équipe locale du Support Technique <strong>Saitek</strong>, merci de vous référer à la feuille<br />
" Centre de Support Technique " qui vous a été fournie dans l'emballage de ce produit.<br />
Conditions de garantie<br />
1 La période de garantie est de deux ans à compter de la date d'achat, avec soumission d'une<br />
preuve d'achat.<br />
2 Les <strong>in</strong>structions de fonctionnement doivent être correctement suivies.<br />
3 Sont exclus spécifiquement tous les dommages dus à une fuite des piles.<br />
NB : Les piles risquent de fuir si elles sont laissées trop longtemps à l'<strong>in</strong>térieur d'un appareil. Il<br />
est donc recommandé d'<strong>in</strong>specter les piles de façon régulière.<br />
4 Le produit ne doit pas avoir été endommagé par une dégradation, une utilisation non<br />
conforme, une négligence, un accident, une destruction ou une altération du numéro de série,<br />
l'utilisation de voltages ou courants électriques <strong>in</strong>adaptés, la réparation, la modification ou la
PW21_manual_f<strong>in</strong>al.qxd 15/08/2008 15:21 Page 20<br />
ma<strong>in</strong>tenance par toute personne ou tiers autre que notre propre Service Après Vente ou un<br />
centre de réparation agréé, l'utilisation ou l'<strong>in</strong>stallation de pièces de remplacement qui ne<br />
soient pas des pièces <strong>Saitek</strong>, ou la modification du produit de quelque manière que ce soit, ou<br />
l'<strong>in</strong>troduction de ce produit dans n'importe quel autre produit, ou des dommages causés au<br />
produit par un accident, le feu, des <strong>in</strong>ondations, la foudre, les catastrophes naturelles, ou toute<br />
utilisation allant à l'encontre des <strong>in</strong>structions fournies par <strong>Saitek</strong> PLC.<br />
5 Les obligations de <strong>Saitek</strong> sont limitées à la réparation ou au remplacement par un produit<br />
identique ou similaire, à notre convenance. Af<strong>in</strong> d'obtenir la réparation d'un produit sous cette<br />
garantie, veuillez présenter le produit et sa preuve d'achat (c'est à dire le ticket de caisse ou<br />
une facture) au Centre de Support Technique <strong>Saitek</strong> agréé (la liste vous est fournie sur une<br />
feuille séparée se trouvant également dans l'emballage du produit), en ayant au préalable<br />
payé les frais d'envoi. Toute condition en contradiction avec des lois, règles et/ou obligations<br />
fédérales ou étatiques ne pourra pas être appliquée dans ce territoire spécifique et <strong>Saitek</strong><br />
adhèrera à ces lois, règles et/ou obligations.<br />
6 Lors du renvoi du produit en vue d'une réparation, veillez s'il vous plaît à l'emballer<br />
soigneusement, en utilisant de préférence l'emballage d'orig<strong>in</strong>e. Merci également de bien<br />
vouloir <strong>in</strong>clure une note explicative.<br />
IMPORTANT : af<strong>in</strong> de vous permettre d'éviter des coûts et des désagréments <strong>in</strong>utiles, merci<br />
de vérifier soigneusement que vous avez lu et suivi les <strong>in</strong>structions figurant dans ce manuel.<br />
Cette garantie agit en lieu et place de toutes les autres garanties, obligations et<br />
responsabilités. TOUTES GARANTIES, OBLIGATIONS OU RESPONSABILITES IMPLICITES,<br />
INCLUANT SANS RESTRICTION LES GARANTIES ET CONDITIONS IMPLICITES DE<br />
QUALITE OU D'ADAPTABILITE A UN USAGE SPECIFIQUE, SONT LIMITEES, EN DUREE,<br />
A LA DUREE DE CETTE GARANTIE LIMITEE ECRITE. Certa<strong>in</strong>s Etats n'autorisent pas de<br />
restrictions de durée de la garantie, auquel cas les restrictions décrites ci-dessus ne vous sont<br />
pas applicables. EN AUCUN CAS NOUS NE POURRONS ETRE TENUS POUR<br />
RESPONSABLES POUR DES DEGATS SPECIFIQUES OU RESULTANT D'UNE<br />
INFRACTION A CETTE GARANTIE OU A TOUTE AUTRE GARANTIE, EXPRESSE OU<br />
IMPLICITE, QUELLE QU'ELLE SOIT. Certa<strong>in</strong>s Etats n'autorisent pas l'exclusion ou la<br />
restriction des dégâts accidentels, <strong>in</strong>directs, spéciaux ou <strong>in</strong>duits, auquel cas la restriction cidessus<br />
ne vous est pas applicable. Cette garantie vous accorde des droits légaux spécifiques,<br />
et vous pouvez également bénéficier d'autres droits variant d'un Etat à l'autre.<br />
Ce symbole sur le produit ou dans le manuel signifie que votre équipement<br />
électrique et électronique doit être, en f<strong>in</strong> de vie, jeté séparement de vos<br />
déchets ménagés. Il existe en France des systèmes de collecte différents pour<br />
les déchets recyclables. Pour plus d'<strong>in</strong>formation, veuillez contacter les autorités<br />
locales ou le revendeur chez qui vous avez acheté le produit.<br />
VOLANTE CON VIBRAZIONE 4-IN-1 SAITEK<br />
Caratteristiche<br />
• Compatibile con PC, PS2/PS3 e Xbox<br />
• Impostazione dei bottoni programmabile usando PC e PS2<br />
• Sostegno per il grembo staccabile per un completo comfort e controllo quando giocate sul<br />
divano<br />
• Il morsetto rimovibile fissa <strong>in</strong> posizione il volante quando siete seduti alla scrivania<br />
• La regolazione d<strong>in</strong>amica della sensibilità vi aiuta ad adattarvi a diversi giochi di guida<br />
• Usate i pedali <strong>in</strong>clusi o i comandi del volante per accelerare e frenare, <strong>in</strong> funzione della<br />
posizione di gioco<br />
Installazione<br />
1 Agganciate l'unità pr<strong>in</strong>cipale del volante al morsetto per la scrivania o al sostegno per il<br />
grembo.<br />
3 Se usate il sostegno per la scrivania, posizionate il volante sul bordo del piano della scrivania<br />
e girate <strong>in</strong> senso orario la vite del morsetto f<strong>in</strong>o a quando l'unità è fissata alla scrivania <strong>in</strong><br />
modo sicuro. Non str<strong>in</strong>gete troppo!<br />
4 Inserite il cavo PS/2 dei pedali nella presa del volante, assicurandovi che il connettore sia<br />
saldamente collegato.<br />
5 Posizionate i pedali sul pavimento nella vostra posizione di guida preferita.<br />
Compatibilità con i sistemi<br />
PC con W<strong>in</strong>dows XP/Vista (solo 32 bit), PS2/PS3 e Xbox<br />
Installazione del software per PC<br />
1. Dopo avere acceso il computer, chiudete tutti i programmi <strong>in</strong> esecuzione e <strong>in</strong>serite il CD di<br />
<strong>in</strong>stallazione nel vostro drive CD-ROM.<br />
2. Quando appare la schermata <strong>in</strong>troduttiva, fate click su Install Software per cont<strong>in</strong>uare. Se il<br />
CD non parte automaticamente, selezionate "Start" dalla barra delle applicazioni di W<strong>in</strong>dows®,<br />
poi "Esegui", digitate D:\Setup.exe e fate clic su OK (dove D:\ è la lettera che <strong>in</strong>dica il vostro<br />
drive CD-ROM). Per gli utenti Vista, la schermata chiederà "Do you want to run this file?"<br />
Premete Run. Apparirà ora una f<strong>in</strong>estra con il messaggio "A program needs your permission to<br />
cont<strong>in</strong>ue". Premete Cont<strong>in</strong>ue.<br />
3. Quando appare lo schermo di benvenuto, fate click su Next per cont<strong>in</strong>uare.<br />
4. Dopo avere letto il Disclaimer, selezionate l'opzione "I accept the terms of the Disclaimer" e<br />
fate click su Next per cont<strong>in</strong>uare.<br />
5. Inserite il cavo USB <strong>in</strong> una porta USB del vostro computer e fate click su Next.
PW21_manual_f<strong>in</strong>al.qxd 15/08/2008 15:21 Page 22<br />
6. Nella schermata di registrazione, selezionate "Check this box to register now" e seguite le<br />
istruzioni sullo schermo, oppure scegliete di selezionare questa opzione <strong>in</strong> seguito.<br />
7. Fate click su F<strong>in</strong>ish per completare l'<strong>in</strong>stallazione.<br />
Installazione per PS2 e Xbox<br />
Inserite il cavo del controller per PS2 o Xbox del volante <strong>in</strong> una presa libera della vostra console.<br />
Installazione per PC o PS3<br />
Inserite il cavo USB del volante <strong>in</strong> una porta USB libera del vostro PC o della vostra PS3.<br />
Cambio di modo<br />
Il volante con vibrazione 4-<strong>in</strong>-1 supporta le modalità digitale e analogica su PS2. Premete il bottone<br />
"Mode" per cambiare modalità.<br />
Feedback con forza e vibrazione<br />
Il volante con vibrazione 4-<strong>in</strong>-1 offre un feedback di forza e di vibrazione con PS2. Premete i<br />
bottoni "Select" e "Up" per <strong>in</strong>serire o dis<strong>in</strong>serire la forza di feedback.<br />
Calibrazione automatica<br />
Per calibrare il volante, premete il bottone "Mapp<strong>in</strong>g" per due secondi e il LED rosso <strong>in</strong>izierà a<br />
lampeggiare rapidamente per mostrare che il volante si sta calibrando.<br />
Regolazione della sensibilità<br />
Il volante con vibrazione 4-<strong>in</strong>-1 ha sei livelli di sensibilità. Il livello normale è il tre.<br />
Per regolare la sensibilità premete i bottoni "Select" e "Right". Ogni volta che premete i due bottoni,<br />
la sensibilità aumenta di un livello f<strong>in</strong>o a quando raggiunge il sei, e poi ricom<strong>in</strong>cia da uno. Così, se<br />
volete ridurre la sensibilità dall'impostazione normale (tre) a uno, premete i bottoni "Select" e<br />
"Right" quattro volte: 4, 5, 6, 1.<br />
Programmazione dei bottoni<br />
1 Mantenete premuto il bottone "Select" per 3 secondi per entrare nel modo di programmazione<br />
- il LED rosso lampeggerà rapidamente. Premete il bottone che volete modificare e il LED<br />
rosso smetterà di lampeggiare. Ora premete la funzione desiderata - il LED lampeggerà<br />
rapidamente dopo il completamento della programmazione (solo PS2)<br />
2 Tutti i bottoni 1, 2, 3, 4, 5, 6, 7, 8, RY e RY possono essere programmati quando si usa un<br />
PC. Il pedale dell'acceleratore, il pedale del freno, leva s<strong>in</strong>istra, leva destra, L1, L2, R1, R2,<br />
SL, ST, , O, X e possono essere programmati quando si usa PS2.<br />
Uscita dal modo di programmazione:<br />
Il volante esce automaticamente dal modo di programmazione dopo 6 secondi o premendo il<br />
bottone "Select" per abbandonare immediatamente la programmazione.<br />
Reset della programmazione dei bottoni<br />
Mantenete premuto il bottone "Mode" per 2 secondi per annullare la programmazione di tutti i<br />
bottoni.<br />
Designazione di bottoni e assi<br />
Modo PC Modo PS2 Modo PS3 Modo Xbox Digitale/Analogico<br />
1 3 X X A A<br />
2 4 X A<br />
3 1 Y A<br />
4 2 O O B A<br />
5 7 L1 L1 bianco A<br />
6 8 R1 R1 nero A<br />
7 6 L2 L2 Grilletto s<strong>in</strong>istro A<br />
8 5 R2 R2 Grilletto destro A<br />
9 9 SL SL Back D<br />
10 10 ST ST Start D<br />
11 Modo Modo Modo Modo D<br />
12 D_Pad D_Pad D_Pad D_Pad A<br />
Asse X Asse X Asse X Asse X Asse X A<br />
Leva s<strong>in</strong>istra 2 L2 L2 A A<br />
Leva destra 1 R2 R2 X A<br />
Pedale Gas RY X X Right trigger A<br />
Pedale freno RY Left trigger A<br />
LED Rosso Rosso Rosso Rosso LED
CIRCLE<br />
PW21_manual_f<strong>in</strong>al.qxd 15/08/2008 15:21 Page 24<br />
Assegnazione dei bottoni per PC e PS2/PS3<br />
1<br />
4<br />
TRIANGLE /1<br />
SQUARE /4<br />
6<br />
L 1/7<br />
L 2/6<br />
5<br />
7<br />
<strong>Saitek</strong><br />
R1/8 /2<br />
Esempio 1<br />
Passo Azione Risultato<br />
1 Premere "Select" per 3 secondi il LED lampeggia rapidamente<br />
2 Premere O il LED smette di lampeggiare<br />
3 Premere il pedale del gas il LED lampeggia rapidamente<br />
O è ora il pedale del gas e il pedale del gas è il pedale del gas il<br />
SELECT/9<br />
START/10<br />
MOD E<br />
12<br />
8<br />
9<br />
10<br />
R2/5<br />
11<br />
CRO S<br />
/3<br />
Esempio 2<br />
Passo Azione Risultato<br />
1 Premere "Select" per 3 secondi il LED lampeggia rapidamente<br />
2 Premere L1 il LED smette di lampeggiare<br />
3 Premere X il LED lampeggia rapidamente<br />
L1 è ora X e X è X<br />
Assistenza tecnica<br />
Avvio impossibile? Non preoccupatevi, siamo qui per aiutarti!<br />
Quasi tutti i prodotti che ci vengono resi come difettosi non sono affatto difettosi - non sono stati<br />
semplicemente <strong>in</strong>stallati correttamente.<br />
Se avete delle difficoltà con questo prodotto, visitate prima di tutto il nostro sito Web<br />
www.saitek.com. L'area dell'assistenza tecnica vi fornirà tutte le <strong>in</strong>formazioni che vi occorrono per<br />
ottenere il meglio dal vostro prodotto e per risolvere qualsiasi problema da voi riscontrato.<br />
Se non avete accesso all'Internet o il sito Web non è <strong>in</strong> grado di rispondere alla vostra domanda,<br />
rivolgetevi al vostro Team Assistenza Tecnica <strong>Saitek</strong> locale. Offriamo l'assistenza tecnica rapida,<br />
vasta e completa a tutti i nostri utenti. Prima di chiamarci accertatevi di avere tutte le <strong>in</strong>formazioni<br />
pert<strong>in</strong>enti a portata di mano.<br />
Troverete nel foglio separato fornito con questo prodotto i dati relativi al vostro Centro di<br />
Assistenza Tecnica locale.<br />
Condizioni della garanzia<br />
1 Il periodo di garanzia è di 2 anni dalla data d'acquisto con presentazione della prova<br />
d'acquisto.<br />
2 Seguire le istruzioni per il funzionamento.<br />
3 Esclude espressamente qualsiasi danno associato alla perdita delle batterie.<br />
NB: le batterie possono perdere se sono lasciate <strong>in</strong>utilizzate <strong>in</strong> un prodotto per un periodo di<br />
tempo prolungato, e per questo è consigliabile controllarle regolarmente.<br />
4 Il prodotto non deve essere stato danneggiato a causa di deturpazione, uso errato, abuso,<br />
negligenza, <strong>in</strong>cidente, distruzione o alterazione del numero di serie, <strong>in</strong>corrette tensioni o<br />
correnti elettriche, riparazione, modificazione o manutenzione effettuata da qualsiasi persona o<br />
parte eccetto dal nostro servizio di manutenzione o un centro di manutenzione autorizzato,<br />
utilizzo o <strong>in</strong>stallazione di parti di ricambio non <strong>Saitek</strong> nel prodotto o la modifica di questo<br />
prodotto <strong>in</strong> qualsiasi modo, o l'<strong>in</strong>corporazione di questo prodotto <strong>in</strong> qualsiasi altro prodotto, o<br />
danni al prodotto provocato da <strong>in</strong>cidente, <strong>in</strong>cendio, <strong>in</strong>ondazione, fulm<strong>in</strong>i o forza maggiore, o
PW21_manual_f<strong>in</strong>al.qxd 15/08/2008 15:21 Page 26<br />
qualsiasi uso che contravviene alle istruzioni fornite da <strong>Saitek</strong> plc.<br />
5 Gli obblighi di <strong>Saitek</strong> saranno limitati alla riparazione o sostituzione con la stessa unità o con<br />
un'unità simile, a scelta di <strong>Saitek</strong>. Per ottenere le riparazioni ai sensi della presente garanzia,<br />
presentare il prodotto e la prova d'acquisto (ad es. la ricevuta o la fattura) al Centro Assistenza<br />
Tecnica <strong>Saitek</strong> (elencato nel foglio separato contenuto nella confezione di questo prodotto),<br />
con le spese di trasporto prepagate. Qualsiasi requisito che è <strong>in</strong> conflitto con qualsiasi legge,<br />
regolamento e/o obbligo statale o federale non sarà applicabile <strong>in</strong> quel territorio particolare e<br />
<strong>Saitek</strong> aderirà a quelle leggi, regole e/o obblighi.<br />
6 Quando il prodotto viene reso per la riparazione, imballarlo molto attentamente,<br />
preferibilmente utilizzando i materiali d'imballaggio <strong>in</strong>iziali. Includere <strong>in</strong>oltre una nota<br />
esplicativa.<br />
7 IMPORTANTE: per risparmiare costi e <strong>in</strong>convenienti <strong>in</strong>utili, controllare attentamente di aver<br />
letto e seguito le istruzioni <strong>in</strong> questo manuale.<br />
8 Questa garanzia sostituisce tutte le altre garanzie, gli obblighi o le responsabilità esplicite. LA<br />
DURATA DI QUALSIASI GARANZIA, OBBLIGO, O RESPONSABILITÀ IMPLICITI,<br />
COMPRESI MA NON LIMITATI ALLE GARANZIE IMPLICITE DI RESPONSABILITÀ E<br />
IDONEITÀ PER UNO SCOPO PARTICOLARE, SARÀ LIMITATA ALLA DURATA DELLA<br />
PRESENTE GARANZIA LIMITATA SCRITTA. Alcuni Stati non consentono limitazioni sulla<br />
durata di una garanzia implicita, perciò le suddette limitazioni possono non essere pert<strong>in</strong>enti<br />
nel vostro caso. NON SAREMO MAI RESPONSABILI PER QUALSIASI DANNO SPECIALE O<br />
CONSEGUENTE PER VIOLAZIONE DI QUESTA O DI QUALSIASI ALTRA GARANZIA,<br />
ESPLICITA O IMPLICITA, DI QUALSIASI TIPO. Alcuni Stati non consentono l'esclusione o la<br />
limitazione di danni speciali, <strong>in</strong>cidentali o conseguenti, per cui la suddetta limitazione può non<br />
applicarsi nel vostro caso. La presente garanzia vi conferisce diritti legali speciali, e potete<br />
avere anche altri diritti che variano da uno Stato all'altro.<br />
Questo simbolo riportato sul prodotto o nelle istruzioni <strong>in</strong>dica che, al term<strong>in</strong>e<br />
della loro vita, le apparecchiature elettriche ed elettroniche devono essere<br />
smaltite separatamente dai rifiuti domestici. Nell'Unione Europea sono<br />
disponibili sistemi per la raccolta separata e il riciclaggio dei rifiuti.<br />
Per richiedere ulteriori <strong>in</strong>formazioni contattare le autorità locali o il rivenditore dove è stato<br />
effettuato l'acquisto del prodotto.<br />
VOLANTE DE VIBRACIÓN 4-EN-1 SAITEK<br />
Características<br />
• Compatible con PC, PS2/PS3 y Xbox<br />
• Configuraciones de botones programables si se usa PC y PS2<br />
• Soporte de regazo desmontable para un confort y control completos cuando juega desde el<br />
sofá<br />
• Abrazadera desmontable que fija el volante en su sitio si está sentado junto a su escritorio<br />
• El ajuste de sensibilidad sobre la marcha le ayuda a adaptarse a diferentes juegos de<br />
conducir<br />
• Utilice los pedales <strong>in</strong>cluidos o paletas de volante para acelerar y frenar, dependiendo de su<br />
entorno de juego<br />
Instalación del controlador<br />
1 Ajuste la unidad de volante pr<strong>in</strong>cipal a la abrazadera o al soporte de regazo.<br />
3 Si utiliza la abrazadera, coloque la unidad de volante al borde de su escritorio, y gire el control<br />
de la abrazadera en el sentido de las agujas del reloj hasta que la unidad esté acoplada de un<br />
modo seguro a su escritorio. ¡No apriete demasiado!<br />
4 Conecte el cable PS/2 de la unidad de pedal al enchufe de la unidad de volante,<br />
asegurándose que el conector se engancha firmemente en su lugar.<br />
5 Coloque la unidad de pedal en el suelo en su posición de conducir preferida.<br />
Compatibilidad del sistema<br />
PC con W<strong>in</strong>dows XP/Vista (sólo 32-bits), PS2/PS3 y Xbox<br />
Instalación de software para PC<br />
1. Con su ordenador encendido, cierre todos los programas que estén en ese momento en<br />
funcionamiento e <strong>in</strong>troduzca el CD de Instalación en su unidad de CD-ROM.<br />
2. Cuando aparezca la Pantalla de Introducción, haga clic en Instalar Software para cont<strong>in</strong>uar. Si<br />
el CD no comienza automáticamente, seleccione Iniciar (Start) desde la Barra de Tareas de<br />
W<strong>in</strong>dows®, después Activar (Run) y escriba D:\Setup.exe y haga clic en OK - (si D:\ es la<br />
letra que corresponda a su unidad de CD-ROM).Para usuarios de Vista, la pantalla le<br />
preguntará ¿Quiere activar este archivo? (Do you want to run this file?) Pulse en Activar<br />
(Run). A cont<strong>in</strong>uación aparecerá una pantalla diciendo Un programa necesita su autorización<br />
para cont<strong>in</strong>uar. Pulse Cont<strong>in</strong>uar.<br />
3. Cuando aparece la pantalla de Bienvenida (Welcome), haga clic en Siguiente (Next) para<br />
cont<strong>in</strong>uar.<br />
4. Después de leer el Descargo de Responsabilidad, seleccione Acepto los térm<strong>in</strong>os de la<br />
opción Descargo de Responsabilidad (I accept….) y haga clic en Siguiente (Next) para<br />
cont<strong>in</strong>uar.
PW21_manual_f<strong>in</strong>al.qxd 15/08/2008 15:21 Page 28<br />
5. Enchufe el cable USB en uno de los puertos USB de su ordenador y haga clic en Siguiente<br />
(Next).<br />
6. En la pantalla de Registro, seleccione Marque esta casilla (Check this box) para registrarse en<br />
ese momento y siga las <strong>in</strong>strucciones en la pantalla, o puede elegir el seleccionar esta opción<br />
más tarde.<br />
7. Haga clic en Term<strong>in</strong>ar (F<strong>in</strong>ish) para completar la <strong>in</strong>stalación.<br />
Instalación para usuarios de PS2 y Xbox<br />
Conecte el cable del controlador Xbox o PS2 del volante en uno de los enchufes de controlador<br />
libres de su consola.<br />
Instalación para usuarios de PC o PS3<br />
Enchufe el cable USB del volante en uno de los puertos USB libres de su PS3 o PC.<br />
Cambio de modo<br />
El Volante de Vibración 4-en-1 permite modos Análogos y Digitales en PS2. Presione el botón<br />
Modo (Mode) para cambiar los modos.<br />
Reacciones de fuerza de vibración<br />
El Volante de Vibración 4-en-1 presenta reacciones de fuerza de vibración con PS2. Presione los<br />
botones Seleccionar (Select) y Arriba (Up) para encender y apagar las reacciones de fuerza.<br />
Auto calibrado<br />
Para calibrar el volante, presione el botón de Del<strong>in</strong>eación (Mapp<strong>in</strong>g) durante dos segundos y el<br />
LED (diodo emisor de luz) rojo destellará rápidamente para mostrar que el volante se está<br />
calibrando.<br />
Ajuste de sensibilidad<br />
El Volante de Vibración 4-en-1 tiene seis configuraciones de sensibilidad. La configuración normal<br />
es tres.<br />
Para ajustar la sensibilidad presione los botones Seleccionar (Select) y Derecha (Right). Cada vez<br />
que presione los dos botones, la sensibilidad del stick aumentará un <strong>in</strong>cremento hasta que<br />
alcance seis y después volverá a empezar desde uno. Por tanto, si quiere reducir la sensibilidad<br />
de la configuración normal (tres) a uno, presione los botones Seleccionar (Select) y Derecha<br />
(Right) cuatro veces: 4, 5, 6, 1.<br />
Programación de botones<br />
1 Presione y mantenga presionado el botón Seleccionar (Select) durante 3 segundos para<br />
entrar en el modo de programación: el LED (diodo emisor de luz) rojo destellará rápidamente.<br />
Presione el botón que quiera cambiar y el LED rojo dejará de destellar. Ahora presione la<br />
función deseada- el LED destellará rápidamente después de completar la programación (sólo<br />
PS2)<br />
2 Todos los botones 1, 2, 3, 4, 5, 6, 7, 8, RY y RY se pueden programar si utiliza un PC.<br />
Pueden programarse el Pedal de Gas, Pedal de freno, Mano Izquierda, Mano Derecha, L1,<br />
L2, R1, R2, SL, ST, , O, X y con PS2.<br />
Modo de programa de salida:<br />
El volante saldrá del modo de programación automáticamente después de 6 segundos o presione<br />
el botón Seleccionar (Select) para salir de la programación <strong>in</strong>mediatamente.<br />
Reconfiguración de la programación de botones<br />
Presione y mantenga presionado el botón Modo (Mode) durante 2 segundos para reconfigurar<br />
toda la programación de botones.<br />
Designazione di bottoni e assi<br />
Modo PC Modo PS2 Modo PS3 Modo Xbox Digital/Análogo<br />
1 3 X X A A<br />
2 4 X A<br />
3 1 Y A<br />
4 2 O O B A<br />
5 7 L1 L1 Blanco A<br />
6 8 R1 R1 Negro A<br />
7 6 L2 L2 Disparador izquierdo A<br />
8 5 R2 R2 Disparador derecho A<br />
9 9 SL SL Atrás D<br />
10 10 ST ST Inicio D<br />
11 Modo Modo Modo Modo D<br />
12 Alfombrilla_D Alfombrilla_D Alfombrila_D Alfombrilla_D A<br />
Axis X Axis X Axis X X Axis Axis X A<br />
Palanca izquierda 2 L2 L2 A A<br />
Palanca derecha 1 R2 R2 X A<br />
Pedal de gas RY X X Right trigger A<br />
Pedal de freno RY Left trigger A<br />
LED Rojo Rojo Rojo Rojo LED
CIRCLE<br />
PW21_manual_f<strong>in</strong>al.qxd 15/08/2008 15:21 Page 30<br />
Asignación de botones para PC y PS2/PS3<br />
1<br />
4<br />
TRIANGLE /1<br />
SQUARE /4<br />
6<br />
L 1/7<br />
L 2/6<br />
5<br />
7<br />
<strong>Saitek</strong><br />
R1/8 /2<br />
Ejemplo 1<br />
Paso Acción Resultado<br />
1 Presione y mantenga presionado LED destella rápidamente<br />
Seleccionar (Select) durante 3 segundos<br />
2 Presione O LED deja de destellar<br />
3 Presione Pedal de Gas LED destella rápidamente<br />
O es ahora Pedal de Gas y Pedal de Gas es Pedal de Gas<br />
SELECT/9<br />
START/10<br />
MOD E<br />
12<br />
8<br />
9<br />
10<br />
R2/5<br />
11<br />
CRO S<br />
/3<br />
Ejemplo 2<br />
Paso Acción Resultado<br />
1 Presione y mantenga presionado LED destella rápidamente<br />
Seleccionar (Select) durante 3 segundos<br />
2 Presione L1 LED deja de destellar<br />
3 Presione X LED destella rápidamente<br />
L1 es ahora X y X es X<br />
Asistencia técnica<br />
¿No puede empezar?: No se preocupe, ¡aquí estamos para ayudarle!<br />
Casi la totalidad de los productos que nos devuelven como averiados no tienen n<strong>in</strong>gún fallo: es<br />
simplemente que no se han <strong>in</strong>stalado correctamente.<br />
Si experimenta alguna dificultad con este producto, rogamos que visite primeramente nuestro sitio<br />
web: www.saitek.com.<br />
El área de asistencia técnica le proporcionará toda la <strong>in</strong>formación que necesita para obtener el<br />
mayor rendimiento de su producto y debería resolver cualesquiera problemas que pudiese tener.<br />
Si no dispone de acceso a Internet o si no encuentra en el sitio web respuesta a su pregunta,<br />
rogamos que se ponga en contacto con el equipo de asistencia técnica de <strong>Saitek</strong>. Nuestro objetivo<br />
es ofrecer asistencia técnica rápida y completa a todos nuestros usuarios, así que le rogamos que<br />
antes de llamar tenga a mano toda la <strong>in</strong>formación relevante.<br />
Para hallar el Centro de asistencia técnica de <strong>Saitek</strong> de su localidad, rogamos que consulte la hoja<br />
de Centros de asistencia técnica <strong>in</strong>cluida en el paquete de este producto.<br />
Condiciones de la garantía<br />
1 El período de garantía es de 2 años desde la fecha de compra con presentación de<br />
comprobante.<br />
2 Se deben seguir las <strong>in</strong>strucciones de funcionamiento.<br />
3 Se excluye específicamente cualquier daño asociado con pérdidas de pilas.<br />
Nota: Las pilas pueden perder cuando se dejan en un producto s<strong>in</strong> usar durante cierto tiempo,<br />
por lo que se recomienda <strong>in</strong>speccionar las pilas regularmente.<br />
4 El producto no se deberá haber dañado como resultado de modificación, uso <strong>in</strong>debido, abuso,<br />
negligencia, accidente, destrucción o alteración del número de serie, tensiones o corrientes<br />
eléctricas <strong>in</strong>adecuadas, reparación, modificación o mantenimiento por parte de cualquier<br />
persona que no sea de nuestras <strong>in</strong>stalaciones de servicio o de un centro de servicio<br />
autorizado, uso o <strong>in</strong>stalación de piezas de repuesto que no sean de <strong>Saitek</strong> en el producto o
PW21_manual_f<strong>in</strong>al.qxd 15/08/2008 15:21 Page 32<br />
modificación de este producto de cualquier manera o la <strong>in</strong>corporación de este producto en<br />
cualesquiera otros productos o daños causados por accidente, <strong>in</strong>cendio, <strong>in</strong>undación, rayos o<br />
fuerza mayor o por cualquier uso que viole las <strong>in</strong>strucciones sum<strong>in</strong>istradas por <strong>Saitek</strong> plc.<br />
5 Las obligaciones de <strong>Saitek</strong> se limitarán a reparar o sustituir la unidad por otra igual o similar,<br />
según optemos. Para obtener reparaciones de acuerdo a esta garantía, deberá presentar el<br />
producto y comprobante de compra (p. ej., una factura o un albarán) al Centro de asistencia<br />
técnica de <strong>Saitek</strong> autorizado (listado en una hoja separada empaquetada con este producto) y<br />
pagando los gastos de transporte. Cualesquiera requisitos que entren en conflicto con<br />
cualesquiera leyes, normas y/u obligaciones estatales o federales no serán aplicables en<br />
dicho territorio en particular y <strong>Saitek</strong> se atendrá a dichas leyes, normas y/u obligaciones.<br />
6 Cuando se devuelva el producto para reparar, rogamos que se empaquete con mucho<br />
cuidado, preferentemente utilizando los materiales de envasado orig<strong>in</strong>ales. Se ruega adjuntar<br />
una nota explicativa.<br />
7 IMPORTANTE: Para ahorrarse costes e <strong>in</strong>convenientes <strong>in</strong>necesarios, rogamos que<br />
compruebe cuidadosamente que ha leído y seguido las <strong>in</strong>strucciones de este manual.<br />
8 Esta garantía sustituye a cualesquiera otras garantías, obligaciones o responsabilidades<br />
explícitas. CUALESQUIERA GARANTÍAS, OBLIGACIONES O RESPONSABILIDADES<br />
IMPLÍCITAS, INCLUYENDO, SIN LIMITARSE A LO MISMO, LAS GARANTÍAS IMPLÍCITAS<br />
DE COMERCIABILIDAD Y APTITUD PARA UN FIN PARTICULAR, SE LIMITARÁN EN<br />
CUANTO A DURACIÓN AL PERÍODO DE ESTA GARANTÍA LIMITADA ESCRITA. Algunos<br />
estados no permiten limitaciones en cuanto al tiempo de duración de una garantía implícita,<br />
así que las limitaciones anteriores podrían no ser aplicables para usted. EN NINGÚN CASO<br />
SEREMOS RESPONSABLES DE NINGÚN DAÑO ESPECIAL O INDIRECTO POR<br />
INCUMPLIENTO DE ESTA O CUALESQUEIRA OTRAS GARANTÍAS, EXPLÍCITAS O<br />
IMPLÍCITAS Y DE LA NATURALEZA QUE FUESEN. Algunos estados no permiten la<br />
exclusión o limitación de daños especiales, <strong>in</strong>cidentales o <strong>in</strong>directos, así que la limitación<br />
anterior podría no aplicarse a usted. Esta garantía le da derechos legales específicos y<br />
también podría tener otros derechos, que varían entre estados.<br />
Este símbolo en el producto o en las <strong>in</strong>strucciones significa que no debería tirar<br />
a la basura doméstica el equipo eléctrico o electrónico al f<strong>in</strong>al de su vida útil.<br />
En los países de la UE existen sistemas de recogida separados para reciclaje.<br />
Para más <strong>in</strong>formación, rogamos que se ponga en contacto con la autoridad<br />
local o con el vendedor al que compró el producto.<br />
HR<br />
NL<br />
CZ<br />
Systeem compatibiliteit<br />
PC met W<strong>in</strong>dows XP/Vista<br />
Vista<br />
Vista/<br />
Het aansluiten van het apparaat<br />
Met uw PC <strong>in</strong> geschakeld, sluit de USB connector aan op de PC. Volg de <strong>in</strong>stallatiestappen<br />
van het apparaat om zo de <strong>in</strong>stallatie te voltooien van het nieuwe USB apparaat op het<br />
systeem.<br />
Vista
PW21_manual_f<strong>in</strong>al.qxd 15/08/2008 15:21 Page 34<br />
GR<br />
/Vista<br />
SE Mask<strong>in</strong>varukrav<br />
DK PC med w<strong>in</strong>dows XP/Vista<br />
NO Anslutn<strong>in</strong>g / Installation<br />
Starta d<strong>in</strong> dator, koppla <strong>in</strong> enheten till d<strong>in</strong> dators USB port. Följ anvisn<strong>in</strong>garna för att slutföra<br />
<strong>in</strong>stallationen av den nya USB-enheten.<br />
HU<br />
Rendszerkövetelmények<br />
PC W<strong>in</strong>dows XP/Vista<br />
RU<br />
/Vista<br />
Csatalakoztatás a számítógéphez<br />
Csatlakoztassa <strong>Saitek</strong> egerét számítógépe USB portján keresztül.<br />
Kövesse a telepítési varázsló utasításait a sikeres <strong>in</strong>stallálás érdekében.<br />
PL<br />
Vista<br />
TK<br />
Vista<br />
PT<br />
Compatibilidade com sistema<br />
PC W<strong>in</strong>dows XP/Vista<br />
Como conectar o aparelho<br />
Ligue o computador, <strong>in</strong>serte o plugue USB do aparelho com uma das entradas USB do<br />
computador. Siga as <strong>in</strong>truções <strong>in</strong>dicadas para completar a <strong>in</strong>stalação do novo aparelho no<br />
sistema do computador.
PW21_manual_f<strong>in</strong>al.qxd 15/08/2008 15:21 Page 36<br />
<strong>Saitek</strong>®<br />
4-<strong>in</strong>-1 <strong>Vibration</strong> <strong>Wheel</strong><br />
www.saitek.com<br />
© 2007 <strong>Saitek</strong> Ltd. Made and pr<strong>in</strong>ted <strong>in</strong> Ch<strong>in</strong>a.<br />
All trademarks are the property of their respective owners.<br />
V.1.0 15/08/08<br />
PW21