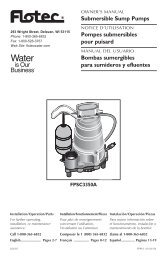
Submersible Sump Pumps Pompes submersibles pour ... - Flotec
Submersible Sump Pumps Pompes submersibles pour ... - Flotec
Submersible Sump Pumps Pompes submersibles pour ... - Flotec

Create successful ePaper yourself
Turn your PDF publications into a flip-book with our unique Google optimized e-Paper software.
Installation 3<br />
10" Minimum with<br />
IntelliShield Switch<br />
3A. Unsnap the switch from the switch bracket and<br />
remove it from the pump (see Figure 11, Page 5).<br />
10" Min. with<br />
IntelliShield<br />
Switch<br />
<strong>Sump</strong> Pit<br />
Hard Surface –<br />
No Sand, Clay,<br />
Gravel<br />
Figure 1<br />
1A. Minimum sump size: 10" (254mm) diameter by<br />
10" (254mm) depth.<br />
1B. Construct the sump pit of tile, concrete, steel, or<br />
plastic; it must meet code requirements.<br />
1C. No clay, earth, sand, or gravel in the sump (they<br />
will clog the pump). Keep the pump inlet screen<br />
clear.<br />
Figure 3<br />
3B. Slide the lid down over the discharge pipe.<br />
3C. Remove the cord grommet from the sump lid<br />
and pass the switch down through the grommet<br />
hole in the lid.<br />
Figure 2<br />
1/8" hole<br />
2A. Install the discharge plumbing and check valve,<br />
using 1 Teflon tape - NOT pipe joint compound.<br />
2B. Tighten the pipe into the pump (hand tight plus<br />
1-1/2 turns).<br />
2C. Install a check valve in the vertical pipe to prevent<br />
flow backwards through the pump when it shuts<br />
off. To prevent airlocking the pump, drill a 1/8"<br />
(3.2 mm) hole in the discharge pipe just above<br />
where it screws into the pump discharge. Antiairlock<br />
hole must aim away from switch. Install<br />
the check valve above this hole, but keep it as<br />
close to the pump as possible. Be sure the hole is<br />
below the waterline and below the check valve.<br />
2D.To reduce noise and vibration, cut the discharge<br />
pipe near the pump and fasten a short length of<br />
rubber hose (1-7/8" (48 mm) I.D., e.g. radiator<br />
hose) into it with hose clamps.<br />
Figure 4<br />
3D. Pull the pump power cord up through the<br />
grommet hole.<br />
3E. Press the power cord and switch cord into the<br />
slots in the grommet and replace the grommet in<br />
the sump lid. Snap the switch into the bracket.<br />
Figure 5<br />
1<br />
E.I. DuPont de Demours and Company Corporation, Delaware<br />
For parts or assistance, call <strong>Flotec</strong> Customer Service at 1-800-365-6832