You also want an ePaper? Increase the reach of your titles
YUMPU automatically turns print PDFs into web optimized ePapers that Google loves.
Advanced <strong>Contact</strong> Technology<br />
(ill.13 + 14)<br />
ME1.../ME2...<br />
Beim Stifteinsatz ME1... und ME2...<br />
sind alle PE-Stiftkontake zur Standardkontakteb<strong>en</strong>e<br />
voreil<strong>en</strong>d.<br />
ME3.../ME4...<br />
Beim Stifteinsatz ME3.../ME4... sind<br />
nur die PE-Stiftkontakte bis Kontakt-Ø<br />
2 mm voreil<strong>en</strong>d. Stiftkontakte ab Ø 3<br />
mm müss<strong>en</strong> steckseitig gleich weit<br />
aus <strong>de</strong>m Stiftträger steh<strong>en</strong>, kein voreil<strong>en</strong><strong>de</strong>r<br />
Stiftkontakt. Bei Buchs<strong>en</strong> ab<br />
Ø 3 mm eilt die PE-Buchse im<br />
Buchs<strong>en</strong>träger vor. Kontaktträger (z.B.<br />
Hybridträger) mit Schirmkontakt (S) ist<br />
<strong>de</strong>r Schirmkontakt zu <strong>de</strong>n Steuerkontakt<strong>en</strong><br />
voreil<strong>en</strong>d, zum PE jedoch<br />
nacheil<strong>en</strong>d.<br />
Die Details hierzu fin<strong>de</strong>n Sie auf <strong>de</strong>n<br />
(ill.15)<br />
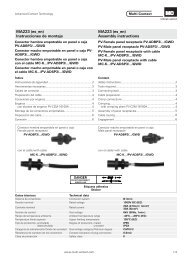
Zu weit eingedrückte Buchs<strong>en</strong><br />
wer<strong>de</strong>n mit <strong>de</strong>m Buchs<strong>en</strong>ausbauwerkzeug<br />
(S.3/8) bis zu ihrer Einrastlage<br />
zurückgedrückt.<br />
Bei Belegungsfehlern und<br />
Reparatur<strong>en</strong> wer<strong>de</strong>n die Kontakte mit<br />
<strong>de</strong>n <strong>en</strong>tsprech<strong>en</strong><strong>de</strong>n Ausbauwerkzeug<strong>en</strong><br />
(siehe S.3/8) aus <strong>de</strong>n<br />
Kontaktträgern gedrückt und neu<br />
eingesetzt.<br />
8/8<br />
Industriealkohol<br />
Industrial alcohol<br />
(ill.12)<br />
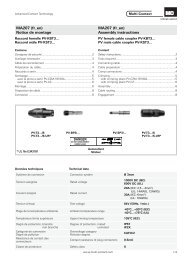
Werkzeug beim Eindrück<strong>en</strong> und<br />
Herauszieh<strong>en</strong> parallel zur Achse<br />
Überprüfung auf einwand<strong>fr</strong>eie<br />
Konfektionierung<br />
Control of correct assembly<br />
ill.13 ill.14<br />
<strong>MA202</strong> (<strong>de</strong>_<strong>en</strong>_<strong>fr</strong>)<br />
ill.12<br />
(ill.12)<br />
Be sure to keep tool straight wh<strong>en</strong><br />
installing or removing contacts.<br />
(ill.13 + 14)<br />
ME1.../ME2...<br />
all types of PE pins are in advanced<br />
position (mating first, braking last)<br />
compared to the other contacts.<br />
ME3.../ME4...<br />
In male inserts ME3... and ME4...only<br />
PE pin contacts up to Ø 2 mm are in<br />
advanced position. PE contacts of<br />
Ø 3 mm and above are on the same<br />
level as the other pins (no leading<br />
contact). Regarding female inserts, for<br />
sockets of Ø 3 mm or larger, the PE<br />
socket is in advanced positon.<br />
In contact carriers (e.g. hybrid carriers)<br />
with a shield contact (S) the shield<br />
contact is in advanced position<br />
compared to the control contacts, but<br />
lagging behind the PE contact.<br />
You will find the relevant <strong>de</strong>tails on<br />
the product drawings.<br />
(ill.15)<br />
Sockets pressed in too far can be<br />
turned back to their proper seating<br />
position with the socket extraction tool<br />
(p.3/8).<br />
By repairs or installation errors, remove<br />
the contacts <strong>fr</strong>om the contact<br />
carrier with the respective extraction<br />
tool (see page 3/8) and th<strong>en</strong> reinstall<br />
(ill.12)<br />
Lors du montage ou du démontage<br />
<strong>de</strong>s contacts, veiller à manipuler les<br />
Contrôle du montage<br />
(ill.13 + 14)<br />
ME1.../ME2...<br />
Sur les inserts mâles ME1... et<br />
ME2..., tous les contacts <strong>de</strong> terre<br />
(PE) sont <strong>en</strong> position avancée par<br />
rapport aux autres broches.<br />
ME3.../ME4...<br />
Sur les inserts mâles ME3... et<br />
ME4..., seuls les contacts <strong>de</strong> terre<br />
jusqu'au Ø 2 mm sont avancés. Les<br />
contacts mâles à partir du Ø 3 mm<br />
doiv<strong>en</strong>t être au même niveau que les<br />
autres (pas <strong>de</strong> broche avancée).<br />
Pour les douilles à partir du Ø 3 mm,<br />
la douille <strong>de</strong> terre PE est <strong>en</strong> position<br />
avancée dans l’isolant. Sur les<br />
supports isolants (p. ex. support<br />
hybri<strong>de</strong>) avec contact <strong>de</strong> blindage (S),<br />
la douille <strong>de</strong> blindage est avancée par<br />
rapport aux autres contacts, mais <strong>en</strong><br />
arrière par rapport à la douille <strong>de</strong><br />
terre. Vous trouverez les détails à ce<br />
sujet sur les plans <strong>de</strong>s produits.<br />
ill.15<br />
(ill.15)<br />
Les douilles montées trop <strong>en</strong> avant<br />
peuv<strong>en</strong>t être ram<strong>en</strong>ées dans leur<br />
position nominale à l'ai<strong>de</strong> <strong>de</strong> l'outil <strong>de</strong><br />
démontage (pour douille), (p.3/8).<br />
Lors d'une réparation, les contacts<br />
seront extraits du support isolant avec<br />
l'outil <strong>de</strong> démontage approprié (voir<br />
page 3/8).<br />
Än<strong>de</strong>rung<strong>en</strong> vorbehalt<strong>en</strong>/Subject to alterations/Modifications sous réserve<br />
Copyright by <strong>Multi</strong>-<strong>Contact</strong> AG, Switzerland / Docking line / 08.2011 / In<strong>de</strong>x l<br />
www.multi-contact.com