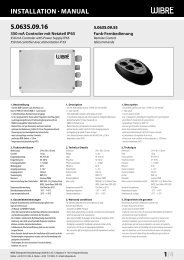
InstallatIon · Manual 4.0072 1/4 - Wibre
InstallatIon · Manual 4.0072 1/4 - Wibre
InstallatIon · Manual 4.0072 1/4 - Wibre

You also want an ePaper? Increase the reach of your titles
YUMPU automatically turns print PDFs into web optimized ePapers that Google loves.
Installation · <strong>Manual</strong><br />
Object<br />
Object<br />
ø 5,5<br />
40<br />
40<br />
3.3<br />
3.4<br />
Zahnscheiben<br />
serrated washers<br />
roues dentées<br />
Unterlegscheibe<br />
washer<br />
rondelle<br />
Hutmutter<br />
cap nut<br />
écrous-chapeaux<br />
3.1 3.2<br />
3.5<br />
3. Installation/Montage<br />
Zur Installation sind die nationalen Sicherheitsvorschriften zu<br />
beachten. Es wird keine Haftung für unsachgemäßen Einsatz oder<br />
Montage übernommen. Bei nachträglichen Änderungen an den<br />
Leuchten wird keine Haftung übernommen.<br />
POW-LED Leuchten müssen immer in Reihenschaltung an entsprechenden<br />
Konstantstromnetzteilen (siehe Betriebsgeräte) betrieben<br />
werden.<br />
Die Leuchtengehäuse sind nicht zu demontieren, da zum Schutz die<br />
Kabel und POW LED Platine vergossen ist.<br />
Montage des Scheinwerfers ist im Aussen- und Unterwasserbereich<br />
auf verschiedenstem Monatgegrund möglich. Aufbaumonatge<br />
direkt auf Beton, Pflaster, Platten, Holzdielen und in Verbindung mit<br />
Erdspiess 9.0072.20.00 in Erdreich, Kies, Rasenflächen oder Beete<br />
möglich.<br />
Da bei Projekten die Aufbausituationen variieren ist keine allgemein<br />
gültige Montageanleitung möglich. Die Piktogramme verdeutlichen<br />
typische Montagebeispiele.<br />
3.1. Aufbaumontage des Scheinwerfers auf festem Untergrund<br />
3.2. Aufbaumontage des Scheinwerfers in Verbindung mit Erdspieß<br />
in losem Untergrund.<br />
3. Installation/mounting<br />
When installing, observe the national safety regulations. We are not liable<br />
for any improper use or installation. No liability will be accepted in case of<br />
subsequent modification to the lights.<br />
POW LED lights must always be operated in series with appropriate<br />
constant-current power sources (see operating devices).<br />
The light housings must not be removed, since the cable and POW LED<br />
printed circuit board are sealed for protection.<br />
The spotlight can be mountedin outdoor and underwater areas on a broad<br />
range of surfaces. Surface mounting straight onto concrete, paving, slabs,<br />
wooden floor boards and in conjunction with earth spike 9.0072.20.00 in<br />
soil, gravel, lawns or garden beds.<br />
Since the mounting conditions vary from project to project, no general<br />
installation instructions can be provided. The icons symbolise typical<br />
installation examples.<br />
3.1. Surface mounting of the spotlight on a solid surface<br />
3.2. Surface mounting of the spotlight in conjunction with an earth spike<br />
on a soft surface<br />
3. Installation/Montage<br />
Respecter les prescriptions nationales applicables en matière de sécurité.<br />
Nous déclinons toute responsabilité pour l’utilisation ou le montage non<br />
conforme. De même, nous réfutons toute responsabilité pour les modifications<br />
réalisées sur les luminaires.<br />
Pour leur exploitation, les projecteurs à POW-LED doivent toujours être reliés<br />
en série au bloc d‘alimentation en courant continu correspondant (voir blocs<br />
d‘alimentation).<br />
Ne pas démonter les boîtiers de projecteur, étant donné que les câbles et la<br />
platine POW LED sont scellés.<br />
Le montage extérieur et subaquatique du projecteur peut être réalisé sur<br />
différents supports. Montage du projecteur directement sur le béton, les<br />
pavés, les plaques, les lames de bois et en association avec un piquet de terre<br />
9.0072.20.00 dans la terre, le gravier, les espaces verts ou les plates-bandes.<br />
Étant donné que dans les différents projets, les situations d’intégration<br />
varient, nous ne pouvons établir une notice de montage générale. Les<br />
pictogrammes expliquent les exemples de montage type.<br />
3.1. Montage en saillie du projecteur sur un support consolidé<br />
3.2. Montage en saillie du projecteur en association avec un piquet de mise<br />
à la terre sur un support non consolidé<br />
Montage<br />
Bei Aufbaumontage des Scheinwerfers auf festem Untergrund wie<br />
z.B. Beton, Steinplatten, Holz und Fassade die seitliche Hutmuttern<br />
öffnen, Unterlegscheibe und Zahnscheibe entfernen und den<br />
Schweinwerfer aus dem Bügel nehmen. Den Bügel zum Objekt<br />
ausrichten und auf Untergrund mit den beiliegenden Edelstahlschrauben<br />
befestigen 3.3.<br />
Bei Aufbaumontage des Scheinwerfers in Verbindung mit Erdspieß<br />
in losem Untergrund wie z.B. Erde, Kies die seitlichen Hutmuttern<br />
öffnen, Unterlegscheibe und Zahnscheibe entfernen und den<br />
Schweinwerfer aus dem Bügel nehmen. Den Erdspieß zum Objekt<br />
ausrichten, im Untergrund fixieren und den Bügeln mit den beiliegenden<br />
Edelstahlschrauben am Erdspieß befestigen 3.4.<br />
Achtung: Nur werkseitig angeschlossenes Kabel verwenden.<br />
Gewünschte Kabellänge bei Bestellung angeben oder entsprechende<br />
Verbinder mit Vergußmasse zur Kabelverlängerung verwenden<br />
(WIBRE Art.-Nr. 9.9011.02.02; 9.9011.02.03).<br />
Bei erhöhter mechanischer Beanspruchung sollte das Kabel zusätzlich<br />
in einem Schutzrohr zur Leuchte verlegt werden.<br />
Einzelanschlussader entsprechend den Vorschriften an den Netzteilen<br />
elektrisch anschließen. 3.6.<br />
Die maximale Anzahl der Leuchten sind dem <strong>Manual</strong> des Netzteiles<br />
zu entnehmen. 3.7.<br />
2/4<br />
Installation<br />
To surface mount the spotlight on a solid surface, such as concrete,<br />
flagstones, wood and facade, open the side cap nuts, remove washer and<br />
serrated washer and take the spotlight out of the bracket. Line up the<br />
bracket with the object and fasten to the surface using the stainless steel<br />
screws supplied 3.3.<br />
To surface mount the spotlight in conjunction with an earth spike on a soft<br />
surface, such as earth or gravel, open the side cap nuts, remove washer and<br />
serrated washer and take the spotlight out of the bracket. Line up the earth<br />
spike with the object, fix into the surface and fasten the bracket to the<br />
earth spike using the stainless steel screws supplied 3.4.<br />
Attention: Use only cable connected at the factory. Specify the<br />
required cable length when ordering or use an appropriate connector and<br />
sealing compound to extend the cable (WIBRE Art. no. 9.9011.02.02;<br />
9.9011.02.03).<br />
In case of increased mechanical load, the cable should also be laid in a<br />
protective tube leading to the light.<br />
Connect individual wires to the power supply according to the<br />
regulations. 3.6.<br />
The maximum number of lights is stated in the power supply manual. 3.7.<br />
Montage<br />
Lors du montage en saillie du projecteur sur un support consolidé, par ex. le<br />
béton, les plaques de pierre, le bois et les façades, ouvrir les écrous-chapeaux<br />
latéraux, retirer la rondelle et la roue dentée et retirer le projecteur de son<br />
étrier. Orienter l‘étrier vers l‘objet et fixer sur le support à l‘aide des vis en acier<br />
inoxydable 3.3. fournies.<br />
Lors du montage en saillie du projecteur en association avec un piquet<br />
de terre sur un support non consolidé, par ex. la terre, le gravier, ouvrir les<br />
écrous-chapeaux latéraux, retirer la rondelle et la roue dentée et retirer le<br />
projecteur de son étrier. Orienter le piquet de terre vers l‘objet et fixer sur le<br />
support et l‘étrier à l‘aide des vis en acier inoxydable fournies sur le piquet<br />
de terre 3.4.<br />
Attention: utiliser uniquement les câbles raccordés en usine. Indiquer<br />
la longueur de câble souhaitée lors de la commande ou utiliser des<br />
connecteurs adaptés avec une masse de scellement pour rallonger le câble<br />
(n° réf. WIBRE 9.9011.02.02; 9.9011.02.03).<br />
En cas de sollicitation mécanique élevée, le câble vers le luminaire doit être<br />
posé dans une gaine de protection.<br />
Raccorder les différents conducteurs aux blocs d‘alimentation conformément<br />
aux prescriptions. 3.6.<br />
Le nombre maximal de projecteurs est indiqué dans le manuel du bloc<br />
d‘alimentation. 3.7.<br />
WIBRE Elektrogeräte Edmund Breuninger GmbH & Co. KG · Liebigstrasse 9 · 74211 Leingarten/Germany<br />
Telefon: +49 (0) 7131 9053-0 · Telefax: +49 (0) 7131 9053-19 · E-Mail: info@wibre.de