
You also want an ePaper? Increase the reach of your titles
YUMPU automatically turns print PDFs into web optimized ePapers that Google loves.
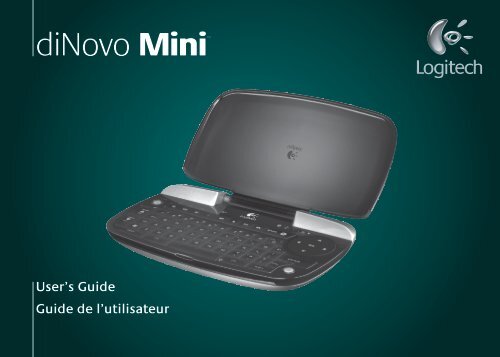
diNovo <strong>Mini</strong><br />
User’s Guide<br />
Guide de l’utilisateur
Contents / Table des matières<br />
Welcome 3<br />
Product package 4<br />
Your diNovo <strong>Mini</strong> 5<br />
diNovo <strong>Mini</strong> at a glance (top) 6<br />
diNovo <strong>Mini</strong> at a glance (base) 7<br />
Installation 10<br />
Configuration 11<br />
Using diNovo <strong>Mini</strong> 12<br />
Tips and troubleshooting 17<br />
Service and support 18<br />
Compliance and FCC statement 20<br />
Logitech hardware product<br />
limited warranty 21<br />
Bienvenue 23<br />
Coffret du produit 24<br />
Votre diNovo <strong>Mini</strong> 25<br />
Aperçu du clavier diNovo <strong>Mini</strong> (haut) 26<br />
Aperçu du clavier diNovo <strong>Mini</strong> (bas) 27<br />
Installation 28<br />
Configuration 31<br />
Utilisation du clavier diNovo <strong>Mini</strong> 32<br />
Astuces et dépannage 37<br />
Services et assistance 38<br />
Conformité et déclaration FCC 40<br />
Garantie limitée du matériel Logitech 41<br />
English
English<br />
Thank you for purchasing the Logitech ®<br />
diNovo <strong>Mini</strong> .<br />
Welcome<br />
This document provides a comprehensive guide<br />
to using your new diNovo <strong>Mini</strong>.<br />
If you need more information about this product,<br />
visit www.logitech.com
Product package<br />
diNovo <strong>Mini</strong><br />
USB mini-receiver<br />
CD-ROM with SetPoint software<br />
Power supply<br />
Rechargeable lithium-ion battery<br />
diNovo<br />
Cleaning cloth<br />
English
The Logitech ® diNovo <strong>Mini</strong> puts you in total<br />
control of your PC entertainment with a palmsized<br />
keyboard plus media remote and ClickPad .<br />
Sit back and enjoy movies and music, share<br />
photos, and surf the Web—from anywhere in the<br />
room. Bluetooth ® wireless technology delivers<br />
reliable operation from up to 30 feet (10 meters)<br />
under most conditions.<br />
The diNovo <strong>Mini</strong> gives you all the advantages<br />
of a full-size keyboard. Type search text, URLs,<br />
and IM messages. Automatic backlighting allows<br />
effortless text entry, even in low light.<br />
English<br />
Your diNovo <strong>Mini</strong><br />
Convenient media controls make the diNovo <strong>Mini</strong><br />
the perfect remote control for PC entertainment.<br />
The dual-purpose ClickPad gives you more ways<br />
to enjoy your digital life. Use it as a touch pad<br />
to point, scroll, and click, or as a directional pad<br />
to navigate your favorite media (perfect for<br />
Windows Media ® Center).<br />
Advanced lithium-ion batteries recharge faster<br />
and last longer—up to one month between<br />
charges.<br />
Compact and stylish, the diNovo <strong>Mini</strong> helps keep<br />
your home free of clutter.
diNovo <strong>Mini</strong> at a glance (top)<br />
Battery<br />
indicator light<br />
Blinking green while<br />
charging, solid green<br />
when fully charged,<br />
red when battery is low<br />
Left-click<br />
Convenient for<br />
left thumb<br />
Illuminated keypad<br />
Fully functional keyboard<br />
Protective cover<br />
Close to place diNovo <strong>Mini</strong> in standby<br />
Bluetooth ® light<br />
Solid green<br />
when connected,<br />
red when not connected<br />
Mode slider<br />
ClickPad<br />
Behaves as D-pad<br />
or touch pad<br />
English
English<br />
Battery<br />
compartment<br />
Power port (on side)<br />
Back cover<br />
diNovo <strong>Mini</strong> at a glance (base)<br />
Connect button<br />
Press to discover Bluetooth ® devices<br />
Platform switch<br />
Preset for PC; move right<br />
to use diNovo <strong>Mini</strong> with<br />
PLAYSTATION ® 3<br />
<strong>Mini</strong>-receiver<br />
compartment
Installation<br />
Insert battery<br />
1�Open<br />
the back cover of the diNovo <strong>Mini</strong><br />
by sliding the tab up.<br />
�Insert<br />
the lithium-ion battery as shown in<br />
the illustration.<br />
�Replace<br />
the back cover.<br />
Note: If you are going to use your diNovo <strong>Mini</strong><br />
with a PLAYSTATION ® 3, move the platform switch<br />
to the right to enable the device for use with<br />
the console. (See page 7.)<br />
English
Connect power<br />
1�Plug<br />
the AC cable into the power port on<br />
the side of the diNovo <strong>Mini</strong>.<br />
�Plug<br />
the AC adapter into a wall socket to<br />
start charging the lithium-ion battery. A full<br />
charge is about four hours for up to one<br />
month of use. A ten-minute charge provides<br />
about one day of use.<br />
Connect mini-receiver<br />
•<br />
Plug the mini-receiver into a USB port on<br />
your computer.<br />
Note: The mini-receiver is not required for a<br />
PLAYSTATION ® 3 or PC with built-in Bluetooth ®<br />
wireless technology. Follow the host device<br />
instructions for discovering Bluetooth ® devices.<br />
When prompted, press the red connect button<br />
on the base of the diNovo <strong>Mini</strong> to make it<br />
discoverable. However, for best results we<br />
recommend that you use the USB mini-receiver.<br />
English<br />
Installation
Installation<br />
Install the SetPoint software<br />
Insert the provided CD-ROM and follow<br />
the instructions for installing the device drivers<br />
and setup software.<br />
Check for updates to SetPoint<br />
at www.logitech.com/downloads<br />
10 English
Depending on your monitor resolution and<br />
computing environment, you may want to adjust<br />
pointer speed and reassign hot keys.<br />
Follow these steps to configure your diNovo <strong>Mini</strong><br />
(PC only):<br />
Start SetPoint<br />
Double-click the SetPoint shortcut on your<br />
desktop.<br />
Adjust pointer speed<br />
1�Click<br />
the My Mouse tab, and then click<br />
the Mouse Movement subtab on the left of<br />
the SetPoint window.<br />
�Choose<br />
diNovo <strong>Mini</strong> from the Select Mouse<br />
pull-down menu.<br />
�Drag<br />
the slider to adjust pointer speed.<br />
English<br />
1<br />
Change hot key settings<br />
1�Click<br />
the My Keyboard Tab.<br />
Configuration<br />
�Select<br />
a key from the Hot Key column.<br />
�From<br />
the Select Task column select an option<br />
or choose an application for assignment.<br />
�Click<br />
OK to apply the new settings.<br />
11
Using diNovo <strong>Mini</strong><br />
Changing modes<br />
The diNovo <strong>Mini</strong> offers two operating modes,<br />
a media remote mode for navigating the<br />
Windows Media Center and a cursor mode<br />
for familiar keyboard and touch pad functions.<br />
Switch between modes by moving the mode<br />
slider at the top of the keypad. Move the slider<br />
to the left to place the diNovo <strong>Mini</strong> in media<br />
remote mode. Move the slider to the right for<br />
cursor mode.<br />
diNovo <strong>Mini</strong> in media remote<br />
mode<br />
Controls lit in green.<br />
Best for Windows Media Center.<br />
diNovo <strong>Mini</strong> in cursor mode<br />
Controls lit in orange.<br />
Best for browsing the Web<br />
and using PC applications.<br />
1 English
English<br />
OK<br />
Select an item. (Use your<br />
left thumb for faster<br />
selection.) Press while<br />
holding down FN key to<br />
get contextual menu.<br />
Next/Previous<br />
• Page Up and Page Down<br />
for navigating media.<br />
• Channel Up and Channel<br />
Down while watching TV.<br />
• Press while holding down<br />
FN key to zoom in or out.<br />
Volume and mute controls<br />
Controls in media remote mode<br />
Keypad<br />
Press a letter key to<br />
select names that<br />
begin with that letter.<br />
Media transport hot keys<br />
FN key<br />
Hold down to enable<br />
functions labeled in blue.<br />
Press to turn on backlighting.<br />
Using diNovo <strong>Mini</strong><br />
Back<br />
ClickPad<br />
Operates as a D-pad. Use four<br />
direction arrows for navigation.<br />
Press OK (center) to select an<br />
item in Media Center.<br />
Launch Windows<br />
Media Center<br />
1
Using diNovo <strong>Mini</strong><br />
OK/Enter<br />
Left-click.<br />
Press while holding<br />
down FN key to get<br />
contextual menu<br />
(right-click).<br />
Page Up/Page Down<br />
Scrolls through web pages.<br />
Press while holding down<br />
FN key to zoom in or out<br />
on documents and images.<br />
Windows key<br />
Controls in cursor mode<br />
Application and sleep hot keys<br />
Press while holding down FN key to launch Web<br />
browser/media player or put computer to sleep<br />
Delete<br />
Press while holding<br />
down FN key<br />
Backspace<br />
ClickPad<br />
Operates as a track pad.<br />
Press to perform<br />
left-click.<br />
FN key<br />
CTRL key Enter key<br />
Hold down to enable<br />
functions labeled in blue.<br />
Press to turn on backlighting.<br />
Press while holding down FN<br />
key to enter CTRL+ALT+DEL<br />
key combination.<br />
1 English
Illumination<br />
Backlighting makes your diNovo <strong>Mini</strong> easy to<br />
use—even in a darkened room. The keyboard and<br />
ClickPad illuminate when you use them, and dim<br />
to conserve power when they are not being used.<br />
Color-coding identifies the current mode and<br />
provides quick access to controls.<br />
The keyboard and ClickPad automatically illuminate<br />
when you:<br />
•<br />
•<br />
•<br />
English<br />
Open the cover<br />
Touch the ClickPad<br />
Press any key<br />
Using diNovo <strong>Mini</strong><br />
Backlighting fades out when you either close<br />
the cover of your diNovo <strong>Mini</strong> or stop using the keys<br />
and ClickPad for about five seconds.<br />
Note: The diNovo <strong>Mini</strong> uses an ambient light sensor<br />
to measure current light levels. If the available light<br />
is sufficient for viewing the keyboard and controls,<br />
the diNovo <strong>Mini</strong> suppresses backlighting to conserve<br />
power.<br />
1
Using diNovo <strong>Mini</strong><br />
ClickPad backlighting<br />
In media remote mode, the ClickPad direction<br />
arrows and OK in the center of the pad are<br />
backlighted in green, indicating that the pad is<br />
functioning as a D-pad for navigating media.<br />
In cursor mode, the perimeter of the ClickPad<br />
is backlighted in orange to indicate that it is<br />
functioning as a touch pad for moving the cursor.<br />
Keyboard backlighting<br />
Keyboard keys are always backlighted in orange.<br />
ClickPad in media<br />
remote mode<br />
ClickPad in<br />
cursor mode<br />
1 English
If a problem should occur, you can usually solve it quickly in one of<br />
the following ways:<br />
•<br />
•<br />
•<br />
•<br />
Plug the USB mini-receiver into a different<br />
USB port (page 9).<br />
The battery LED should be lit when you lift the<br />
cover (page 6). Check whether the lithium-ion<br />
battery is correctly inserted (page 8).<br />
Restart the diNovo <strong>Mini</strong> by removing and<br />
reinserting the lithium-ion battery (page 8).<br />
Recharge the keyboard (page 9).<br />
English<br />
•<br />
•<br />
•<br />
Tips and troubleshooting<br />
Press the red connect button to the<br />
right of the mini-receiver compartment<br />
(page 7).<br />
Check the position of the platform switch<br />
and confirm that is properly set for a PC<br />
or PLAYSTATION ® 3 (page 7).<br />
Restart your computer or console.<br />
1
Service and support<br />
General support<br />
For service and discussion forums,<br />
visit www.logitech.com/support<br />
Software downloads<br />
Visit www.logitech.com/downloads<br />
Using SetPoint <br />
Go to Start, Programs, Logitech, Mouse<br />
and Keyboard, Help Center. In Contents, expand<br />
the section “Using the SetPoint software.”<br />
Registering your diNovo <strong>Mini</strong><br />
Visit www.logitech.com/register<br />
1 English
Technical support<br />
English<br />
Location Hotline Technical Help<br />
België / Belgique Dutch: +32-(0)2 200 64 44; French: +32-(0)2 200 64 40<br />
����� ��������� +420 239 000 335<br />
Danmark +45-38 32 31 20<br />
Deutschland +49-(0)69-51 709 427<br />
España +34 -91-275 45 88<br />
France +33-(0)1-57 32 32 71<br />
Ireland +312-(0) 200 8433<br />
Italia +39-02-91 48 30 31<br />
������������ +36-177-74 853<br />
Nederland +31-(0)-20-200 84 33<br />
Norge +47-(0)24 159 579<br />
Österreich +43-(0)1 206 091 026<br />
������ +48-22-854 11 51<br />
Portugal +351-21-415 90 16<br />
Russija +7(495) 641 34 60<br />
Schweiz / Suisse D +41-(0)22 761 40 12; F +41-(0)22 761 40 16;<br />
Svizzera I +41-(0)22 761 40 20; E +41 (0)22 761 40 25<br />
South Africa 0800 981 089<br />
Suomi +358-(0)9 725 191 08<br />
Sverige +46-(0)8-501 632 83<br />
������� Check website<br />
United Arab Emirates 800 441-4294<br />
United Kingdom +44-(0)203-024-81 59<br />
European., Mid. East., English: +41-(0)22 761 40 25<br />
& African Hq. Romanel Fax: +41-(0)21 863 54 02<br />
s/Morges, Switzerland<br />
Eastern Europe English: 41-(0)22 761 40 25<br />
WWW<br />
Service and support<br />
www.logitech.com/support<br />
Location Hotline Technical Help<br />
United States ���������������<br />
Argentina 0800 555 3284<br />
Brasil 0800 891 4173<br />
Canada +1 416 207 2782<br />
Chile 1230 020 5484<br />
Latin America +55 11 3444 6761<br />
Mexico 001 800 578 9619<br />
1
Compliance and FCC statement<br />
Important ergonomic information. Long periods of<br />
repetitive motion using an improperly set-up workspace,<br />
incorrect body position, and poor work habits may be<br />
associated with physical discomfort and injury to nerves,<br />
tendons, and muscles. If you feel pain, numbness,<br />
weakness, swelling, burning, cramping, or stiffness in<br />
your hands, wrists, arms, shoulders, neck, or back, see<br />
a qualified health professional. For more information,<br />
please read the Comfort Guidelines located on the<br />
Logitech ® web site at http://www.logitech.com/comfort,<br />
or on the Logitech ® Software CD.<br />
Power supply warning. The power supply for this<br />
product is for indoor use only. Use the power supply that<br />
comes with your product; do not use any other power<br />
supply. Do not use a damaged power supply or attempt<br />
to repair one that is damaged. Do not immerse the<br />
power supply in water or subject it to physical abuse.<br />
Inspect the power supply regularly for damage to its<br />
cable, plug, and body.<br />
Battery warning. Your product uses a rechargeable<br />
lithium-ion battery. Use this battery and no other. Exercise<br />
care when handling the battery. Do not open or mutilate<br />
it. When a battery is misused, it may leak or explode<br />
causing burns and personal injury. Conducting materials<br />
can also short out a battery causing it to overheat and<br />
leak. Do not put the battery in a fire, expose it to heat<br />
above 130 F (54 C), or immerse it in water. If the battery<br />
leaks or it will not recharge, use caution and discard<br />
the battery immediately according to your local laws.<br />
Battery charge may vary depending on usage. When not<br />
using your product for long periods of time, remove the<br />
battery and store it in a cool, dry place at normal room<br />
temperature.<br />
UL testing. Your product is UL tested (and CE certified)<br />
and should only be used with other UL listed devices.<br />
Compliance on the Web. For additional compliance<br />
information, go to http://www.logitech.com/compliance.<br />
0 English
FCC statement. FCC Compliance and Advisory Statement:<br />
This hardware device complies with Part 15 of the FCC<br />
Rules. Operation is subject to the following two conditions:<br />
1) this device may not cause harmful interference,<br />
and 2) this device must accept any interference received,<br />
including interference that may cause undesired operation.<br />
This equipment has been tested and found to comply<br />
with the limits for a Class B digital device, pursuant to<br />
Part 15 of the FCC Rules. These limits are designed to<br />
provide reasonable protection against harmful interference<br />
in a residential installation. This equipment generates,<br />
uses, and can radiate radio frequency energy and, if not<br />
installed or used in accordance with the instructions,<br />
may cause harmful interference to radio communications.<br />
However, there is no guarantee that interference will not<br />
occur in a particular installation. If this equipment does<br />
cause harmful interference to radio or television reception,<br />
which can be determined by turning the equipment<br />
off and on, the user is encouraged to try to correct the<br />
interference by one or more of the following measures:<br />
1) reorient or relocate the receiving antenna; 2) increase<br />
the separation between the equipment and the receiver;<br />
3) connect the equipment to an outlet on a circuit<br />
different from that to which the receiver is connected;<br />
English<br />
Compliance and FCC statement<br />
4) consult the dealer or an experienced radio/TV<br />
technician for help. Any changes or modifications<br />
not expressly approved by the party responsible for<br />
compliance could void the user’s authority to operate<br />
the equipment. Where shielded interface cables have<br />
been provided with the product or specified additional<br />
components or accessories elsewhere defined to be used<br />
with the installation of the product, they must be used in<br />
order to ensure compliance with FCC regulations.<br />
Canadian Doc Statement: This digital device does<br />
not exceed the Class B limits for radio noise emissions<br />
from digital apparatus specified in the interferencecausing<br />
equipment standard entitled “Digital Apparatus,”<br />
ICES-003 of the Department of Communications.<br />
This device complies with RSS-210 of Industry and<br />
Science Canada. Operation is subject to the following<br />
two conditions: 1) this device may not cause interference,<br />
and 2) this device must accept any interference,<br />
including interference that may cause undesired<br />
operation of the device.<br />
1
Logitech Hardware Product Limited Warranty<br />
Logitech warrants that your Logitech hardware product shall be free from defects in<br />
material and workmanship for three (3) years, beginning from the date of purchase.<br />
Except where prohibited by applicable law, this warranty is nontransferable and<br />
is limited to the original purchaser. This warranty gives you specific legal rights,<br />
and you may also have other rights that vary under local laws.<br />
Remedies<br />
Logitech’s entire liability and your exclusive remedy for any breach of warranty shall<br />
be, at Logitech’s option, (1) to repair or replace the hardware, or (2) to refund the<br />
price paid, provided that the hardware is returned to the point of purchase or such<br />
other place as Logitech may direct with a copy of the sales receipt or dated itemized<br />
receipt. Shipping and handling charges may apply except where prohibited by<br />
applicable law. Logitech may, at its option, use new or refurbished or used parts in<br />
good working condition to repair or replace any hardware product. Any replacement<br />
hardware product will be warranted for the remainder of the original warranty<br />
period or thirty (30) days, whichever is longer or for any additional period of time<br />
that may be applicable in your jurisdiction.<br />
This warranty does not cover problems or damage resulting from (1) accident,<br />
abuse, misapplication, or any unauthorized repair, modification or disassembly;<br />
(2) improper operation or maintenance, usage not in accordance with product<br />
instructions or connection to improper voltage supply; or (3) use of consumables,<br />
such as replacement batteries, not supplied by Logitech except where such<br />
restriction is prohibited by applicable law.<br />
How to Obtain Warranty Support<br />
Before submitting a warranty claim, we recommend you visit the support section<br />
at www.logitech.com for technical assistance. Valid warranty claims are generally<br />
processed through the point of purchase during the first thirty (30) days after<br />
purchase; however, this period of time may vary depending on where you purchased<br />
your product – please check with Logitech or the retailer where you purchased your<br />
product for details. Warranty claims that cannot be processed through the point<br />
of purchase and any other product related questions should be addressed directly<br />
to Logitech. The addresses and customer service contact information for Logitech<br />
can be found in the documentation accompanying your product and on the web<br />
at www.logitech.com/contactus.<br />
Limitation of Liability<br />
LOGITECH SHALL NOT BE LIABLE FOR ANY SPECIAL, INDIRECT, INCIDENTAL<br />
OR CONSEQUENTIAL DAMAGES WHATSOEVER, INCLUDING BUT NOT LIMITED<br />
TO LOSS OF PROFITS, REVENUE OR DATA (WHETHER DIRECT OR INDIRECT)<br />
OR COMMERCIAL LOSS FOR BREACH OF ANY EXPRESS OR IMPLIED WARRANTY ON<br />
YOUR PRODUCT EVEN IF LOGITECH HAS BEEN ADVISED OF THE POSSIBILITY OF SUCH<br />
DAMAGES. Some jurisdictions do not allow the exclusion or limitation of special,<br />
indirect, incidental or consequential damages, so the above limitation or exclusion<br />
may not apply to you.<br />
Duration of Implied Warranties<br />
EXCEPT TO THE EXTENT PROHIBITED BY APPLICABLE LAW, ANY IMPLIED WARRANTY<br />
OR CONDITION OF MERCHANTABILITY OR FITNESS FOR A PARTICULAR PURPOSE ON<br />
THIS HARDWARE PRODUCT IS LIMITED IN DURATION TO THE DURATION OF THE<br />
APPLICABLE LIMITED WARRANTY PERIOD FOR YOUR PRODUCT. Some jurisdictions<br />
do not allow limitations on how long an implied warranty lasts, so the above<br />
limitation may not apply to you.<br />
National Statutory Rights<br />
Consumers have legal rights under applicable national legislation governing<br />
the sale of consumer goods. Such rights are not affected by the warranties in<br />
this Limited Warranty.<br />
No Other Warranties<br />
No Logitech dealer, agent, or employee is authorized to make any modification,<br />
extension, or addition to this warranty.<br />
Logitech Address<br />
Logitech, Inc., 6505 Kaiser Drive, Fremont, California 94555, U.S.A.<br />
Logitech Europe S.A., Z.I. Moulin du Choc D, 1122 Romanel/Morges, Switzerland<br />
© 2007 Logitech. All rights reserved. Logitech, the Logitech logo, and other<br />
Logitech marks are owned by Logitech and may be registered. All other trademarks<br />
are the property of their respective owners. Logitech assumes no responsibility<br />
for any errors that may appear in any manual or on this website. Information<br />
contained herein is subject to change without notice.<br />
English
Français<br />
Vous venez d’acheter la clavier Logitech ®<br />
diNovo <strong>Mini</strong> et nous vous en félicitons.<br />
Bienvenue<br />
Ce document fournit des explications détaillées<br />
sur l’utilisation du nouveau clavier diNovo <strong>Mini</strong>.<br />
Pour plus d’informations sur ce produit,<br />
rendez-vous sur www.logitech.com.
Coffret du produit<br />
diNovo <strong>Mini</strong><br />
<strong>Mini</strong>-récepteur USB<br />
CD-ROM comprenant le logiciel SetPoint <br />
Boîtier d’alimentation<br />
Batterie au lithium-ion rechargeable<br />
diNovo<br />
Chiffon nettoyant<br />
Français
La solution Logitech ® diNovo <strong>Mini</strong> vous offre<br />
un contrôle total de votre système multimédia<br />
grâce à un clavier adapté à la taille de vos mains<br />
et muni d’une télécommande multimédia ainsi<br />
que d’un ClickPad .<br />
Détendez-vous en musique ou devant un film,<br />
partagez vos photos et surfez sur le Web où que<br />
vous soyez dans la pièce. La technologie sans fil<br />
Bluetooth ® assure un fonctionnement fiable dans<br />
un rayon de 10 mètres maximum, quelles que soient<br />
les conditions.<br />
Le clavier diNovo <strong>Mini</strong> vous offre tous les avantages<br />
d’un clavier pleine taille. Il vous permet de saisir<br />
des textes de recherche, des adresses URL et<br />
des messages instantanés. Le rétroéclairage<br />
automatique des touches facilite la saisie de texte,<br />
même dans des conditions d’éclairage faible.<br />
Français<br />
Votre diNovo <strong>Mini</strong><br />
Grâce à ses commandes multimédia pratiques,<br />
le clavier diNovo <strong>Mini</strong> constitue un outil idéal pour<br />
vos loisirs informatiques.<br />
Le ClickPad à double usage vous permet<br />
d’apprécier votre univers numérique comme<br />
jamais auparavant. Vous pouvez l’utiliser comme<br />
touch pad pour pointer, défiler et cliquer<br />
ou comme pavé directionnel pour parcourir<br />
vos documents multimédia favoris (idéal pour<br />
Windows Media ® Center).<br />
Les piles au lithium-ion se rechargent plus<br />
rapidement et ont une autonomie prolongée<br />
d’un mois maximum entre chaque charge.<br />
Compact et élégant, le clavier diNovo <strong>Mini</strong><br />
vous permet de réduire l’encombrement de<br />
votre espace de travail.
Aperçu du clavier diNovo <strong>Mini</strong> (haut)<br />
Témoin lumineux de charge des piles<br />
Clignote en vert pendant la charge, s’allume en vert<br />
lorsque le clavier est entièrement chargé<br />
et passe au rouge lorsque le niveau de charge<br />
de la batterie est faible.<br />
Clic gauche<br />
Pratique pour le pouce gauche.<br />
Touches lumineuses<br />
Clavier entièrement fonctionnel<br />
Etui de protection<br />
Fermez-le pour mettre le clavier en veille.<br />
Témoin lumineux Bluetooth ®<br />
S’allume en vert lorsque le clavier<br />
est connecté et passe au rouge dans<br />
le cas contraire.<br />
Curseur de mode<br />
ClickPad<br />
Se comporte comme un pavé<br />
directionnel ou un touch pad.<br />
Français
Logement des piles<br />
Français<br />
Prise d’alimentation<br />
latérale<br />
Couvercle arrière<br />
Aperçu du clavier diNovo <strong>Mini</strong> (bas)<br />
Bouton de connexion<br />
Appuyez sur ce bouton pour passer<br />
en mode de détection Bluetooth.<br />
Commutateur de plate-forme<br />
Prédéfini pour une utilisation sur ordinateur,<br />
ce commutateur vous permet d’utiliser<br />
votre clavier diNovo <strong>Mini</strong> avec PLAYSTATION ® 3<br />
lorsque vous le déplacer vers la droite.<br />
Compartiment de mini-récepteur
Installation<br />
Insertion de la batterie<br />
1�Ouvrez<br />
le couvercle arrière du clavier diNovo <strong>Mini</strong><br />
en faisant glisser l’onglet vers le haut.<br />
�Insérez<br />
la batterie au lithium-ion comme indiqué<br />
sur l’illustration.<br />
�Replacez<br />
le couvercle une fois l’opération<br />
terminée.<br />
Remarque: si vous comptez utiliser votre<br />
clavier diNovo <strong>Mini</strong> avec une PLAYSTATION ® 3,<br />
déplacez le commutateur de plate-forme vers<br />
la droite pour activer la prise en charge de la console<br />
(voir en page 27).<br />
Français
Mise sous tension<br />
1�Branchez<br />
le câble d’alimentation dans la prise<br />
d’alimentation latérale du clavier diNovo <strong>Mini</strong>.<br />
�Branchez<br />
l’adaptateur secteur dans une prise<br />
murale afin de lancer le chargement de la batterie<br />
au lithium-ion.Chaque cycle de charge dure un<br />
peu moins de quatre heures pour une autonomie<br />
d’un mois maximum. 10 minutes de charge<br />
correspondent à environ une journée d’utilisation.<br />
Connexion du mini-récepteur<br />
•<br />
Branchez le mini-récepteur dans un port USB<br />
de votre ordinateur.<br />
Remarque: aucun mini-récepteur n’est requis si<br />
vous utilisez une console PLAYSTATION ® 3 ou un<br />
ordinateur équipé de la technologie sans fil Bluetooth ® .<br />
Suivez les instructions du dispositif hôte pour détecter<br />
les dispositifs Bluetooth ® . Lorsque vous y êtes invité,<br />
appuyez sur le bouton de connexion qui se trouve<br />
en dessous du clavier diNovo <strong>Mini</strong> pour que ce dernier<br />
puisse être détecté. Pour de meilleurs résultats, il est<br />
toutefois recommandé d’utiliser le mini-récepteur USB.<br />
Français<br />
Installation
Installation<br />
Installation du logiciel SetPoint<br />
Insérez le CD-ROM qui vous a été fourni et suivez<br />
les instructions qui s’affichent à l’écran pour installer<br />
les pilotes et le logiciel d’installation du clavier.<br />
Vérifiez si des mises à jour sont disponibles<br />
pour le logiciel SetPoint<br />
à l’adresse www.logitech.com/downloads<br />
0 Français
Selon la résolution de votre écran et la configuration<br />
de votre environnement informatique, il est possible<br />
que vous souhaitiez régler la vitesse du pointeur<br />
et redéfinir les raccourcis clavier.<br />
Suivez les étapes ci-dessous pour configurer<br />
votre clavier diNovo <strong>Mini</strong> (PC uniquement):<br />
Démarrage de SetPoint<br />
Cliquez deux fois sur l’icône SetPoint sur le Bureau.<br />
Réglage de la vitesse du pointeur<br />
1�Cliquez<br />
sur l’onglet Ma souris, puis sur le sousonglet<br />
des mouvements de souris qui se trouve<br />
à gauche de la fenêtre de SetPoint.<br />
�Choisissez<br />
diNovo <strong>Mini</strong> dans le menu déroulant<br />
Sélection de la souris.<br />
�Faites<br />
glisser le curseur pour régler la vitesse<br />
du pointeur.<br />
Français<br />
2<br />
3<br />
Configuration<br />
Modification des paramètres des touches<br />
de raccourci<br />
1�Cliquez<br />
sur l’onglet Mon clavier.<br />
1<br />
�Sélectionnez<br />
une touche dans la colonne<br />
de sélection de la touche de raccourci.<br />
�Dans<br />
la colonne de sélection de la tâche,<br />
sélectionnez une option ou choisissez<br />
une application à assigner.<br />
�Cliquez<br />
sur OK pour appliquer les nouveaux<br />
paramètres.<br />
1
Utilisation du clavier diNovo <strong>Mini</strong><br />
Changement de mode<br />
Le clavier diNovo <strong>Mini</strong> offre deux modes de<br />
fonctionnement: le mode Télécommande<br />
multimédia vous permet de naviguer dans<br />
Windows Media Center tandis que le mode<br />
Curseur vous donne accès aux fonctions les plus<br />
communes du clavier et du touch pad.<br />
Le commutateur de mode situé au-dessus<br />
du clavier vous permet de passer rapidement<br />
d’un mode à l’autre. Déplacez le commutateur<br />
vers la gauche pour placer le clavier diNovo <strong>Mini</strong><br />
en mode Télécommande multimédia ou vers<br />
la droite pour le placer en mode Curseur.<br />
Clavier diNovo <strong>Mini</strong> en mode<br />
Télécommande multimédia<br />
Les commandes sont rétroéclairées<br />
en vert. Idéal pour Windows<br />
Media Center.<br />
Clavier diNovo <strong>Mini</strong> en mode<br />
Curseur<br />
Les commandes sont rétroéclairées<br />
en orange. Idéal pour la navigation<br />
Web et l’utilisation d’applications<br />
sur votre ordinateur.<br />
Français
Français<br />
Utilisation du clavier diNovo <strong>Mini</strong><br />
Commandes en mode Télécommande multimédia<br />
Commandes de volume et de sourdine<br />
OK<br />
Sélection d’un élément<br />
(utilisez votre pouce<br />
gauche pour une sélection<br />
plus rapide). Appuyez sur cette<br />
touche tout en maintenant<br />
la touche Fn enfoncée pour<br />
afficher le menu contextuel.<br />
Suivant/Précédent<br />
• Page précédente et Page suivante,<br />
pour naviguer dans vos documents<br />
multimédia.<br />
• Chaîne suivante et Chaîne précédente,<br />
pour regarder la télévision.<br />
• Maintenez la touche Fn enfoncée<br />
pour effectuer un zoom avant ou<br />
un zoom arrière.<br />
Pavé<br />
Appuyez sur une touche<br />
pour sélectionner les noms<br />
qui commencent par<br />
la lettre spécifiée.<br />
Touches de raccourcis multimédia<br />
Retour<br />
ClickPad<br />
Fonctionne comme un pavé directionnel.<br />
Utilisez les quatre flèches directionnelles<br />
pour la navigation et appuyez sur OK<br />
(au centre) pour sélectionner un élément<br />
dans Media Center.<br />
Windows Media Center<br />
Touche Fn<br />
Maintenez cette touche enfoncée pour activer<br />
les fonctions indiquées en bleu ou appuyez<br />
dessus pour activer le rétroéclairage.
Utilisation du clavier diNovo <strong>Mini</strong><br />
OK/Entrée<br />
Clic gauche. Appuyez sur<br />
cette touche tout en maintenant<br />
la touche Fn enfoncée pour<br />
afficher le menu contextuel<br />
(équivalent à un clic droit).<br />
Commandes en mode Curseur<br />
Touches de raccourci relatives aux applications et à la mise en veille<br />
Appuyez sur ces touches tout en maintenant la touche Fn enfoncée pour lancer<br />
votre navigateur Web/lecteur multimédia ou mettre votre ordinateur en veille.<br />
Page précédente/Page suivante<br />
Fait défiler vos pages Web. Appuyez sur<br />
cette touche tout en maintenant la touche<br />
Fn enfoncée pour effectuer un zoom avant<br />
ou arrière sur vos documents et images.<br />
Touche Windows<br />
Touche Fn.<br />
Maintenez cette touche<br />
enfoncée pour activer les<br />
fonctions désignées en bleu<br />
ou appuyez dessus pour<br />
activer le rétroéclairage.<br />
Suppr<br />
Appuyez sur cette touche tout<br />
en maintenant la touche Fn<br />
enfoncée.<br />
Retour arrière<br />
ClickPad<br />
Fonctionne comme un pavé tactile.<br />
Appuyez dessus pour effectuer<br />
un clic gauche.<br />
Touche Ctrl Touche Entrée<br />
Appuyez sur cette touche tout en<br />
maintenant la touche Fn enfoncée pour saisir<br />
la combinaison Ctrl+Alt+Del.<br />
Français
Rétroéclairage<br />
Le rétroéclairage facilite l’utilisation du clavier<br />
diNovo <strong>Mini</strong>, même dans une pièce sombre.<br />
Par mesure d’économie d’énergie, le clavier<br />
et le ClickPad s’allument lorsque vous les utilisez et<br />
s’éteignent dans le cas contraire.<br />
La couleur du rétroéclairage vous permet d’identifier<br />
le mode en cours d’utilisation et d’accéder plus<br />
facilement aux commandes appropriées.<br />
Le clavier et le ClickPad s’allument<br />
automatiquement lorsque vous effectuez l’une<br />
des actions suivantes:<br />
•<br />
•<br />
•<br />
ouverture du couvercle;<br />
entrée en contact avec le ClickPad;<br />
pression d’une touche.<br />
Français<br />
Utilisation du clavier diNovo <strong>Mini</strong><br />
Le rétroéclairage s’éteint progressivement lorsque<br />
vous refermez le couvercle du diNovo <strong>Mini</strong> ou<br />
cessez d’utiliser les touches et le ClickPad pendant<br />
plus de cinq secondes.<br />
Remarque: le clavier diNovo <strong>Mini</strong> utilise un capteur de<br />
lumière ambiante pour mesurer le niveau d’éclairage.<br />
Si l’éclairage est suffisant pour visualiser les touches et<br />
les commandes du clavier, le rétroéclairage est désactivé<br />
par mesure d’économie d’énergie.
Utilisation du clavier diNovo <strong>Mini</strong><br />
Rétroéclairage du ClickPad<br />
Lorsque le mode Télécommande multimédia<br />
est activé, les flèches directionnelles du ClickPad<br />
et la mention OK au centre du pavé sont<br />
rétroéclairées en vert pour indiquer que le pavé<br />
fonctionne comme un pavé directionnel de<br />
navigation multimédia.<br />
Lorsque le mode Curseur est activé, le périmètre<br />
du ClickPad est rétroéclairé en orange pour indiquer<br />
que le pavé fonctionne comme un touch pad pour<br />
le déplacement du curseur.<br />
Rétroéclairage du clavier<br />
Les touches du clavier sont toujours rétroéclairées<br />
en orange.<br />
ClickPad en mode<br />
Télécommande<br />
multimédia<br />
ClickPad en mode<br />
Curseur<br />
Français
Si vous rencontrez un problème, vous pouvez généralement le résoudre rapidement<br />
de l’une des manières suivantes:<br />
•<br />
•<br />
•<br />
•<br />
Branchez le mini-récepteur USB dans un port<br />
différent (page 29).<br />
Le témoin de la batterie doit s’allumer<br />
lorsque vous soulevez le couvercle (page 26).<br />
Vérifiez que la batterie au lithium-ion est<br />
correctement placée (page 28).<br />
Redémarrez le clavier diNovo <strong>Mini</strong> en retirant<br />
la batterie au lithium-ion, puis en la réinsérant<br />
(page 28).<br />
Rechargez le clavier (page 29).<br />
Français<br />
•<br />
•<br />
•<br />
Astuces et dépannage<br />
Appuyez sur le bouton de connexion rouge situé<br />
à droite du compartiment du mini-récepteur<br />
(page 27), puis appuyez sur le bouton de<br />
connexion rouge situé en dessous du minirécepteur<br />
USB.<br />
Localisez le commutateur de plate-forme<br />
et vérifiez qu’il se trouve en position correcte<br />
pour votre ordinateur ou votre PLAYSTATION ® 3<br />
(page 27).<br />
Redémarrez votre ordinateur ou votre console.
Services et assistance<br />
Support et assistance<br />
Pour faire appel à nos services et consulter<br />
nos forums de discussion,<br />
rendez-vous sur www.logitech.com/support<br />
Téléchargement de logiciels<br />
Visitez le site Web www.logitech.com/downloads<br />
Utilisation de SetPoint<br />
Accédez au menu Démarrer > Programmes<br />
> Logitech > Souris et Clavier > Centre d’aide.<br />
Dans la table des matières, développez la section<br />
intitulée Utilisation du logiciel SetPoint.<br />
Enregistrement du clavier diNovo <strong>Mini</strong><br />
Visitez le site Web www.logitech.com/register<br />
Français
Support technique<br />
Français<br />
Location Hotline Technical Help<br />
België / Belgique Dutch: +32-(0)2 200 64 44; French: +32-(0)2 200 64 40<br />
����� ��������� +420 239 000 335<br />
Danmark +45-38 32 31 20<br />
Deutschland +49-(0)69-51 709 427<br />
España +34 -91-275 45 88<br />
France +33-(0)1-57 32 32 71<br />
Ireland +312-(0) 200 8433<br />
Italia +39-02-91 48 30 31<br />
������������ +36-177-74 853<br />
Nederland +31-(0)-20-200 84 33<br />
Norge +47-(0)24 159 579<br />
Österreich +43-(0)1 206 091 026<br />
������ +48-22-854 11 51<br />
Portugal +351-21-415 90 16<br />
Russija +7(495) 641 34 60<br />
Schweiz / Suisse D +41-(0)22 761 40 12; F +41-(0)22 761 40 16;<br />
Svizzera I +41-(0)22 761 40 20; E +41 (0)22 761 40 25<br />
South Africa 0800 981 089<br />
Suomi +358-(0)9 725 191 08<br />
Sverige +46-(0)8-501 632 83<br />
������� Check website<br />
United Arab Emirates 800 441-4294<br />
United Kingdom +44-(0)203-024-81 59<br />
European., Mid. East., English: +41-(0)22 761 40 25<br />
& African Hq. Romanel Fax: +41-(0)21 863 54 02<br />
s/Morges, Switzerland<br />
Eastern Europe English: 41-(0)22 761 40 25<br />
WWW<br />
Services et assistance<br />
www.logitech.com/support<br />
Location Hotline Technical Help<br />
United States ���������������<br />
Argentina 0800 555 3284<br />
Brasil 0800 891 4173<br />
Canada +1 416 207 2782<br />
Chile 1230 020 5484<br />
Latin America +55 11 3444 6761<br />
Mexico 001 800 578 9619
Conformité et déclaration FCC<br />
Informations importantes relatives au confort. Des tâches répétitives<br />
effectuées pendant de longues périodes et un espace de travail mal<br />
agencé peuvent entraîner de l’inconfort, voire des blessures au niveau<br />
des nerfs, des tendons et des muscles. Si vous ressentez des douleurs,<br />
des engourdissements, des gonflements, des crampes, des raideurs<br />
ou des sensations de brûlure, au niveau des mains, des poignets, des bras,<br />
des épaules, du cou ou du dos, consultez votre médecin. Pour plus d’infor-<br />
mations, veuillez consulter le guide Logitech et votre confort sur le site<br />
Web de Logitech ® à l’adresse suivante: http://www.logitech.com/comfort,<br />
ou sur le CD du logiciel Logitech ® .<br />
Avertissement relatif au boîtier d’alimentation. Le boîtier<br />
d’alimentation livré avec ce produit est exclusivement destiné à un usage<br />
en intérieur. Utilisez uniquement le boîtier d’alimentation fourni avec<br />
le produit. Si le boîtier d’alimentation est endommagé, ne l’utilisez<br />
pas et ne tentez en aucun cas de le réparer. Ne plongez pas le boîtier<br />
d’alimentation dans l’eau et ne le soumettez à aucune utilisation abusive.<br />
Vérifiez régulièrement l’état du câble, de la prise et des parois du boîtier<br />
d’alimentation.<br />
Avertissement relatif à la batterie. Votre produit utilise une batterie<br />
rechargeable au lithium-ion. Utilisez cette batterie et aucune autre.<br />
Manipulez la batterie avec précaution. N’essayez pas de l’ouvrir ni de<br />
l’altérer. En cas de mauvaise utilisation, la batterie risque d’exploser ou de<br />
couler, entraînant des dommages matériels et corporels. Les matériaux<br />
conducteurs peuvent provoquer des courts-circuits, faisant ainsi surchauffer<br />
la batterie au risque de la faire couler. Ne jetez pas la batterie au feu et<br />
ne l’exposez pas à une température supérieure à 54° C. Ne la plongez<br />
pas dans l’eau. Si la batterie coule ou cesse de se recharger, prenez les<br />
précautions d’usage nécessaires et débarrassez-vous en immédiatement en<br />
vous référant aux instructions du fabricant, ainsi qu’aux règlements locaux.<br />
L’autonomie de la batterie dépend de son utilisation. Lorsque vous n’utilisez<br />
pas votre produit pendant des périodes prolongées, retirez la batterie et<br />
conservez-la dans un endroit sec, à température ambiante.<br />
Certification UL Votre produit est certifié UL (et conforme aux normes CE)<br />
et doit être utilisé uniquement avec des appareils certifiés UL.<br />
Conformité sur le Web Pour plus d’informations sur la conformité,<br />
rendez-vous sur le site http://www.logitech.com/compliance.<br />
Déclaration FCC Ce dispositif a été testé et déclaré conforme à la section<br />
15 du règlement de la FCC. L’utilisation de ce dispositif est soumise aux<br />
deux conditions suivantes: 1) le dispositif concerné ne doit pas causer<br />
d’interférences dangereuses et 2) il doit accepter toute interférence reçue,<br />
y compris les interférences risquant d’engendrer un fonctionnement<br />
indésirable. Cet équipement a été testé et déclaré conforme aux limitations<br />
prévues dans le cadre de la catégorie B des appareils numériques selon<br />
la définition de la section 15 du règlement de la FCC. Ces limitations<br />
ont été conçues pour fournir une protection raisonnable contre tout<br />
brouillage nuisible au sein d’une installation résidentielle. Cet équipement<br />
génère, utilise et diffuse des ondes radio et, s’il n’est pas installé ni utilisé<br />
en conformité avec les instructions dont il fait l’objet, peut causer des<br />
interférences gênantes avec les communications radio. Nous ne saurions<br />
toutefois garantir l’absence d’interférences dans une installation particulière.<br />
Si cet équipement produit des interférences graves lors de réceptions<br />
radio ou télévisées, ce qui peut être détecté en allumant et en éteignant<br />
l’équipement, vous êtes invité à les supprimer de plusieurs manières:<br />
1) réorienter ou déplacer l’antenne de réception; 2) augmenter la distance<br />
séparant l’équipement et le récepteur; 3) connecter l’équipement à un circuit<br />
différent de celui auquel le récepteur est connecté; 4) contacter votre<br />
revendeur ou un technicien radio/TV qualifié. Toutes modifications ou tous<br />
changements effectués sans l’accord exprès de la partie responsable de<br />
la compatibilité pourraient annuler le droit de l’utilisateur à utiliser son<br />
équipement. Si des câbles d’interface blindés ont été fournis avec le<br />
produit ou si des composants ou des accessoires complémentaires sont<br />
recommandés, ils doivent être utilisés lors de l’installation du produit afin<br />
d’assurer la conformité avec le règlement FCC.<br />
Déclaration pour les documents canadiens: cet appareil numérique<br />
est conforme aux limitations concernant l’émission d’interférences radio<br />
par des appareils numériques de catégorie B, telles que stipulées dans le<br />
cadre de la norme Appareils numériques ICES-003 édictée par le ministère<br />
des Communications. Ce dispositif est conforme à la norme RSS-210 du<br />
partenariat Industrie et Sciences Canada. L’utilisation de l’appareil est soumise<br />
aux deux conditions suivantes: 1) le dispositif concerné ne doit pas causer<br />
d’interférences et 2) il doit accepter toute interférence reçue, y compris<br />
les interférences risquant d’engendrer un fonctionnement indésirable.<br />
0 Français
Garantie limitée du matériel Logitech<br />
Logitech garantit que votre produit Logitech exempt de tout défaut de matériel et de<br />
construction pour 3 ans, à partir de sa date d’achat. Hormis lorsque les lois en vigueur<br />
l’interdisent, cette garantie n’est pas transférable et elle est limitée à l’acheteur initial.<br />
Cette garantie vous octroie un certain nombre de droits et vous bénéficiez également d’autres<br />
droits qui varient selon les lois locales en vigueur.<br />
Recours<br />
En cas de rupture de garantie, la seule obligation de Logitech et votre seul recours consistent,<br />
à la discrétion de Logitech, (1) à réparer ou remplacer le matériel, ou (2) à rembourser le<br />
montant payé, sous réserve qu’il soit renvoyé au point de vente ou à tout autre lieu indiqué<br />
par Logitech, accompagné d’un justificatif d’achat ou d’un reçu détaillé et daté. Des frais de<br />
port et de traitement peuvent être demandés, sauf si cela est contraire aux lois applicables.<br />
Logitech se réserve le droit d’utiliser des pièces neuves, remises à neuf ou déjà utilisées mais<br />
en état de marche pour réparer ou remplacer le produit. Tout matériel de remplacement sera<br />
garanti pour le reste de la période de garantie initiale ou pour trente (30) jours, selon la période<br />
la plus longue, ou pour toute durée supplémentaire éventuellement requise par la loi dans<br />
votre juridiction.<br />
Cette garantie ne couvre pas les problèmes ou les préjudices résultant (1) d’un accident,<br />
d’un abus, d’une mauvaise utilisation, d’une modification ou d’un désassemblage;<br />
(2) d’une utilisation ou d’un entretien incorrect, d’une utilisation non conforme aux instructions<br />
fournies avec le produit ou d’un branchement à une alimentation dont la tension est inadaptée<br />
; ou (3) de l’utilisation de consommables (piles de remplacement, par exemple) non fournis<br />
par Logitech, hormis là où une telle restriction est interdite par les lois en vigueur.<br />
Comment bénéficier de la garantie<br />
Avant de soumettre une réclamation relative à la garantie, nous vous recommandons<br />
de consulter la rubrique de support technique de notre site Web, disponible à l’adresse<br />
www.logitech.com, afin d’obtenir de l’aide. Les réclamations fondées, et qui sont liées<br />
à la garantie, sont en général traitées par l’intermédiaire du point de vente dans les trente<br />
(30) jours suivant l’achat. Cette durée peut toutefois varier en fonction du lieu d’achat.<br />
Veuillez vous renseigner auprès de Logitech ou de la boutique qui vous a vendu le produit<br />
pour plus de détails. Les réclamations qui ne peuvent être traitées par l’intermédiaire<br />
du point de vente, et les autres questions liées au produit, doivent être adressées directement<br />
à Logitech. Les adresses et les coordonnées du service client de Logitech sont mentionnées<br />
dans la documentation qui accompagne votre produit, et sur Internet à l’adresse<br />
www.logitech.com/contactus.<br />
Français<br />
Limite de responsabilité<br />
LOGITECH NE PEUT ÊTRE TENU RESPONSABLE DE TOUT PRÉJUDICE SPÉCIAL, INDIRECT,<br />
CONSÉCUTIF OU ACCIDENTEL, Y COMPRIS, MAIS SANS RESTRICTION, DE TOUT MANQUE<br />
À GAGNER, DE TOUTE PERTE DE RECETTES OU DE DONNÉES (DIRECTE OU INDIRECTE)<br />
OU DE TOUT PRÉJUDICE COMMERCIAL POUR RUPTURE DE TOUTE GARANTIE EXPLICITE OU<br />
IMPLICITE CONCERNANT VOTRE PRODUIT, MÊME SI LOGITECH A ÉTÉ INFORMÉ DE L’ÉVENTUALITÉ<br />
DE CES PRÉJUDICES. Certaines juridictions n’autorisant pas l’exclusion ou la limitation<br />
des préjudices spéciaux, indirects, consécutifs ou accidentels, les limitations ou les exclusions<br />
susmentionnées peuvent ne pas s’appliquer à votre cas.<br />
Durée des garanties implicites<br />
HORMIS LORSQUE CELA EST INTERDIT PAR LES LOIS EN VIGUEUR, TOUTE GARANTIE IMPLICITE OU<br />
CONDITION DE QUALITÉ MARCHANDE OU D’ADAPTATION À UN USAGE PARTICULIER EST LIMITÉE<br />
EN TEMPS, POUR UNE DURÉE CORRESPONDANT À LA DURÉE DE LA PÉRIODE DE GARANTIE<br />
LIMITÉE APPLICABLE À VOTRE PRODUIT. Certaines juridictions ne reconnaissant pas les limitations<br />
de durée des garanties implicites, les limitations susmentionnées peuvent ne pas s’appliquer<br />
à votre cas.<br />
Droits nationaux prévus par la loi<br />
Les consommateurs bénéficient de droits reconnus par la loi en vertu de la législation nationale<br />
applicable régissant la vente de biens de consommation. Ces droits ne sont pas affectés par<br />
les garanties mentionnées dans cette garantie limitée.<br />
Aucune autre garantie<br />
Aucun distributeur, représentant ou employé de Logitech n’est autorisé à modifier ou étendre<br />
la présente garantie, ni à y ajouter des éléments..<br />
Adresse de Logitech<br />
Logitech, Inc., 6505 Kaiser Drive, Fremont, Californie 94555, États-Unis<br />
Logitech Europe S.A., Z.I. Moulin du Choc D, 1122 Romanel/Morges, Suisse<br />
© 2007 Logitech. Tous droits réservés. Logitech, le logo Logitech et les autres marques Logitech<br />
sont la propriété de Logitech et peuvent être des marques déposées. Toutes les autres marques<br />
sont la propriété de leurs détenteurs respectifs. Logitech n’assume aucune obligation quant<br />
aux éventuelles erreurs susceptibles d’apparaître dans ses manuels ou sur son site Internet.<br />
Les informations contenues dans le présent document sont susceptibles d’être modifiées<br />
sans préavis.<br />
1
www.logitech.com<br />
© 2007 Logitech. All rights reserved. Logitech, the Logitech logo, and other Logitech marks are owned by Logitech and may be registered.<br />
All other trademarks are the property of their respective owners. Logitech assumes no responsibility for any errors that may appear in this manual.<br />
Information contained herein is subject to change without notice.<br />
© 2007 Logitech. Tous droits réservés. Logitech, le logo Logitech et les autres marques Logitech sont la propriété exclusive de Logitech et sont<br />
susceptibles d’être des marques déposées. Toutes les autres marques sont la propriété exclusive de leurs détenteurs respectifs. Logitech décline<br />
toute responsabilité en cas d’erreurs dans ce manuel. Les informations énoncées dans le présent document peuvent faire l’objet de modifications<br />
sans avis préalable.<br />
“PLAYSTATION” is a registered trademark of Sony Computer Entertainment Inc.<br />
“PLAYSTATION” est une marque déposée de Sony Computer Entertainment Inc.<br />
The Bluetooth word mark and logos are owned by the Bluetooth SIG, Inc., and any such use of such marks by logitech is under license.<br />
La marque et le logo Bluetooth sont la propriété de Bluetooth SIG, Inc et sont utilisés par Logitech sous licence.<br />
0-000 0 .00