SPLIT-SYSTEM - Rhoss
SPLIT-SYSTEM - Rhoss
SPLIT-SYSTEM - Rhoss

Create successful ePaper yourself
Turn your PDF publications into a flip-book with our unique Google optimized e-Paper software.
<strong>SPLIT</strong>-<strong>SYSTEM</strong><br />
ISTRUZIONI PER L’USO<br />
INSTRUCTIONS FOR USE<br />
MODE D’EMPLOI<br />
GEBRAUCHSANWEISUNG<br />
INSTRUCCIONES DE USO<br />
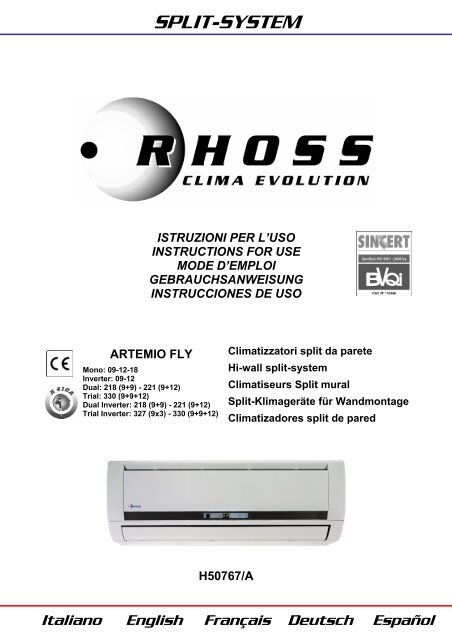
ARTEMIO FLY<br />
Mono: 09-12-18<br />
Inverter: 09-12<br />
Dual: 218 (9+9) - 221 (9+12)<br />
Trial: 330 (9+9+12)<br />
Dual Inverter: 218 (9+9) - 221 (9+12)<br />
Trial Inverter: 327 (9x3) - 330 (9+9+12)<br />
Climatizzatori split da parete<br />
Hi-wall split-system<br />
Climatiseurs Split mural<br />
Split-Klimageräte für Wandmontage<br />
Climatizadores split de pared<br />
H50767/A<br />
Italiano English Français Deutsch Español
RHOSS 2<br />
SEZIONE I: UTENTE
E’ vietata la riproduzione la memorizzazione e la trasmissione anche parziale della presente<br />
pubblicazione, in qualsiasi forma, senza la preventiva autorizzazione scritta della RHOSS S.p.A.<br />
I centri di assistenza tecnica della RHOSS S.p.A. sono disponibili a risolvere qualunque dubbio<br />
inerente all’utilizzo dei suoi prodotti ove la manualistica fornita risulti non soddisfacente. La<br />
RHOSS S.p.A. si ritiene libera di variare senza preavviso le caratteristiche dei propri prodotti.<br />
RHOSS S.p.A. attuando una politica di costante sviluppo e miglioramento dei propri prodotti, si<br />
riserva il diritto di modificare specifiche, equipaggiamenti ed istruzioni relative all’uso e alla<br />
manutenzione in qualsiasi momento e senza alcun preavviso.<br />
Italiano<br />
Reproduction, data storage and transmission, even partial, of this publication, in any form,<br />
without the prior written authorisation of RHOSS S.p.A., is prohibited. RHOSS S.p.A. technical<br />
service centres can be contacted for all queries regarding the use of its products, should the<br />
information in the manuals prove to be insufficient. RHOSS S.p.A. reserves the right to alter<br />
features of its products without notice. RHOSS S.p.A. follows a policy of continuous product<br />
development and improvement and reserves the right to modify specifications, equipment and<br />
instructions regarding use and maintenance at any time, without notice.<br />
English<br />
La reproduction, la mémorisation et la transmission quand bien même partielles de la présente publication<br />
sont interdites, sous quelque forme que ce soit, sans l'autorisation préalable de RHOSS S.p.A. Les<br />
centres d'assistance technique de RHOSS S.p.A. sont à la disposition de l'utilisateur pour<br />
fournir toute information supplémentaire sur ses produits dans le cas où les notices fournies<br />
s'avèreraient insuffisantes. RHOSS S.p.A. conserve la faculté de modifier sans préavis les<br />
caractéristiques de ses produits. Mettant en œuvre des activités de développement et de<br />
constante amélioration de ses produits, RHOSS S.p.A. se réserve la faculté de modifier à tout<br />
moment et sans préavis aucun, spécifications, équipements et instructions d'utilisation et<br />
d'entretien.<br />
Français<br />
Die auch teilweise Vervielfältigung, Abspeicherung und Weitergabe der vorliegenden<br />
Veröffentlichung in jeder Form ist ohne vorherige schriftliche Genehmigung seitens des<br />
Herstellers RHOSS S.p.A. untersagt. Die technischen Kundendienststellen RHOSS S.p.A.<br />
helfen bei Zweifeln über die Anwendung der betriebseigenen Produkte gern weiter, sollte die<br />
beigestellte Dokumentation in dieser Hinsicht nicht ausreichend sein. RHOSS S.p.A. behält sich<br />
das Recht vor, ohne Vorankündigung die Eigenschaften der Geräte zu ändern. RHOSS S.p.A.<br />
behält sich weiterhin das Recht vor, im Zuge seiner Geschäftspolitik ständiger Entwicklung und<br />
Verbesserung der eigenen Produkte jeder Zeit und ohne Vorankündigung die Beschreibung, die<br />
Ausrüstung und die Gebrauchs- und Wartungsanweisungen zu ändern.<br />
Deutsch<br />
Se prohíbe la reproducción, memorización y transmisión incluso parcial de esta publicación, de<br />
cualquier manera, sin la autorización previa por escrito de RHOSS S.p.A. Los servicios técnicos<br />
de RHOSS S.p.A. están disponibles para solucionar cualquier duda acerca del uso de los<br />
productos, si el manual no fuese suficiente. RHOSS S.p.A. se reserva el derecho de aportar<br />
modificaciones a los productos sin previo aviso. RHOSS S.p.A., siguiendo una política de<br />
constante desarrollo y mejora de sus productos, se reserva el derecho de modificar<br />
especificaciones, equipamientos e instrucciones referentes al uso y el mantenimiento en<br />
cualquier momento y sin previo aviso.<br />
Español
Dichiarazione di conformità<br />
La società RHOSS S.p.A.<br />
con sede a Pordenone, Viale Trieste 15, dichiara, sotto la propria<br />
esclusiva responsabilità, che i prodotti della serie<br />
ARTEMIO FLY<br />
sono conformi ai requisiti essenziali di sicurezza di cui alla Direttiva<br />
Macchine 89/392/CEE come modificata da 91/368, 93/44, 93/68/CEE e<br />
attuate in Italia dal DPR 459 del 24 Luglio 1996.<br />
E’ pertanto altresì conforme alla Direttiva Europea 98/37/CEE che abroga<br />
e sostituisce la Direttiva 89/392 e i suoi emendamenti, che le raggruppa in<br />
un testo unico e mantiene invariate le disposizioni ai fini della marcatura<br />
CE ed i requisiti essenziali di sicurezza.<br />
------------<br />
La macchina è inoltre conforme alle seguenti direttive:<br />
- 73/23/CEE (Bassa Tensione) come modificata da 93/68/CEE<br />
- 89/336/CEE (Compatibilità Elettromagnetica) come modificata da 93/68/CEE<br />
Statement of conformity<br />
RHOSS S.p.A.<br />
located in Viale Trieste 15, Pordenone, Italy, hereby states on its own<br />
exclusive responsibility that the products in the<br />
ARTEMIO FLY<br />
product range comply with the fundamental safety requirements of<br />
Machine Directive 89/392/CEE as modified by 91/368, 93/44, 93/68/CEE<br />
and put into effect in Italy by Presidential Decree DPR459 dated 24 July<br />
1996.<br />
The aforesaid products also comply with European Directive 98/37/CEE<br />
which rescinds and replaces Directive 89/392 and amendments thereto,<br />
which groups together and maintains unaltered the provisions required by<br />
the CE mark and fundamental safety requirements.<br />
------------<br />
The machine also complies with the following directives:<br />
- 73/23/CEE (Low Voltage) as modified by 93/68/CEE<br />
- 89/336/CEE (Electromagnetic Compatibility) as modified by 93/68/CEE<br />
Déclaration de conformité<br />
La société RHOSS S.p.A.<br />
dont le siège se trouve à Pordenone, Viale Trieste 15, déclare, sous sa<br />
responsabilité exclusive, que les produits de la série<br />
ARTEMIO FLY<br />
sont conformes aux critères essentiels de sécurité requis par la Directive<br />
Machines 89/392/CEE et à ses modifications 91/368, 93/44 et 93/68/CEE,<br />
adoptées en Italie par le D.P.R. 459 du 24 juillet 1996.<br />
Ils sont donc également conformes à la Directive Européenne 98/37/CEE<br />
qui abroge et remplace la Directive 89/392 et ses amendements, et les<br />
regroupe dans un texte unique en laissant inchangées les dispositions<br />
relatives au marquage CE et aux critères essentiels de sécurité requis.<br />
------------<br />
En outre, la machine est conforme aux directives suivantes:<br />
- 73/23/CEE (Basse tension) modifiée par la 93/68/CEE<br />
- 89/336/CEE (Compatibilité électromagnétique) modifiée par la 93/68/CEE<br />
Konformitätserklärung<br />
Der Hersteller RHOSS S.p.A.<br />
mit Geschäftssitz in Pordenone, Viale Trieste 15, erklärt eigenverantwortlich,<br />
dass die Geräte der Baureihe<br />
ARTEMIO FLY<br />
den wesentlichen Sicherheitsanforderungen gemäß der Maschinenrichtlinie<br />
89/392/EWG und den nachträglichen Änderungsrichtlinien 91/368/EWG,<br />
93/44/EWG und 93/68/EWG entsprechen.<br />
Die Baureihe erfüllt also darüber hinaus die Richtlinie 98/37/EWG, welche die<br />
Maschinenrichtlinie 89/392/EWG mitsamt ihren Änderungsrichtlinien ersetzt<br />
und unter Wahrung der Vorschriften hinsichtlich der CE Kennzeichnung sowie<br />
der wesentlichen Sicherheitsanforderungen in einem übergeordneten<br />
Regelwerk zusammenstellt.<br />
------------<br />
Die Geräte entsprechen außerdem folgenden Richtlinien:<br />
- 73/23/EWG (Niederspannung) und der Änderungsrichtlinie 93/68/EWG<br />
- 89/336/CEE (Elektromagnetische Verträglichkeit) und der Änderungsrichtlinie 93/68/EWG<br />
Declaración de conformidad<br />
La empresa RHOSS S.p.A.<br />
con sede en Pordenone, Viale Trieste 15, declara bajo su única<br />
responsabilidad que los productos de la serie<br />
ARTEMIO FLY<br />
cumplen con los requisitos básicos de seguridad de conformidad con la<br />
Directiva de maquinaria 89/392/CEE modificada en 91/368, 93/44,<br />
93/68/CEE y aplicadas en Italia por el DPR459 del 24 de julio de 1996.<br />
Por tanto, también cumplen con la Directiva europea 98/37/CEE, que<br />
deroga y sustituye a la Directiva 89/392 y sus enmiendas, agrupándolas<br />
en un texto único sin modificar las disposiciones relativas a la marca CE y<br />
los requisitos esenciales de seguridad.<br />
------------<br />
La máquina también cumple las disposiciones de las siguientes directivas:<br />
-73/23/CEE (Baja tensión), en su modificación de 93/68/CEE<br />
-89/336/CEE (Compatibilidad electromagnética), en su modificación de 93/68/CEE<br />
/68/CEE<br />
Codroipo , lì 15/12/2005<br />
Il direttore generale / General manager / Directeur général / Generaldirektor / Director general<br />
Pierluigi Ceccolin<br />
4
INDICE<br />
I<br />
Italiano pag. 4<br />
English page 20<br />
Français page 35<br />
Deutsch Seite 50<br />
Español pág. 65<br />
INDICE<br />
SEZIONE I: UTENTE................................................................................6<br />
I.1 Informazioni generali ..................................................................................................6<br />
I.1.1 Condizioni di utilizzo previste ........................................................................................6<br />
I.1.2 Limiti di funzionamento .................................................................................................6<br />
I.1.3 Informazioni sulla sicurezza ..........................................................................................6<br />
I.2 Ricambi ........................................................................................................................6<br />
I.3 Assistenza ...................................................................................................................6<br />
I.4 Descrizione unità ........................................................................................................6<br />
I.4.1 Unità interna..................................................................................................................7<br />
I.4.2 Unità esterna.................................................................................................................7<br />
I.4.3 Telecomando ................................................................................................................7<br />
I.5 Descrizione telecomando e sue funzioni ..................................................................8<br />
I.5.1 Nomi e funzioni degli indicatori sul display....................................................................9<br />
I.6 Uso del telecomando ..................................................................................................9<br />
I.6.1 Impostazione dell’orologio...........................................................................................10<br />
I.6.2 Accensione spegnimento dell’unità.............................................................................10<br />
I.6.3 Impostazione del modo di funzionamento...................................................................10<br />
I.6.4 Funzione economic running ........................................................................................10<br />
I.6.5 Impostazione della temperatura desiderata ................................................................10<br />
I.6.6 Impostazione del deflettore .........................................................................................11<br />
I.6.7 Impostazione della ventilazione ..................................................................................11<br />
I.6.8 Impostazione deI Timer...............................................................................................11<br />
I.6.9 Blocco della tastiera ....................................................................................................11<br />
I.6.10 Reset del telecomando ...............................................................................................11<br />
I.7 Descrizione DEGLI INDICATORI ..............................................................................11<br />
I.8 Messa fuori servizio..................................................................................................11<br />
I.9 Riavvio dopo lunga inattività ...................................................................................11<br />
SIMBOLO<br />
SIMBOLOGIA UTILIZZATA<br />
SIGNIFICATO<br />
PERICOLO GENERICO!<br />
L’indicazione PERICOLO GENERICO è usata per<br />
informare l’operatore ed il personale addetto alla<br />
manutenzione di rischi che possono comportare la<br />
morte, danni fisici, malattie in qualsivoglia forma<br />
immediata o latente.<br />
PERICOLO COMPONENTI IN TENSIONE!<br />
L’indicazione PERICOLO COMPONENTI IN<br />
TENSIONE è usata per informare l’operatore ed il<br />
personale addetto alla manutenzione circa i rischi<br />
dovuti alla presenza di tensione.<br />
PERICOLO SUPERFICI TAGLIENTI!<br />
L’indicazione PERICOLO SUPERFICI TAGLIENTI è<br />
usata per informare l’operatore ed il personale<br />
addetto alla manutenzione della presenza di<br />
superfici potenzialmente pericolose.<br />
PERICOLO SUPERFICI CALDE!<br />
L’indicazione PERICOLO SUPERFICI CALDE è<br />
usata per informare l’operatore ed il personale<br />
addetto alla manutenzione della presenza di<br />
superfici calde potenzialmente pericolose.<br />
PERICOLO ORGANI IN MOVIMENTO!<br />
L’indicazione PERICOLO ORGANI IN MOVIMENTO è<br />
usata per informare l’operatore ed il personale<br />
addetto alla manutenzione circa i rischi dovuti alla<br />
presenza di organi in movimento.<br />
AVVERTENZE IMPORTANTI!<br />
L’indicazione AVVERTENZE IMPORTANTI è usata<br />
per richiamare l’attenzione su azioni o pericoli che<br />
potrebbero creare danni all’unità o ai suoi<br />
equipaggiamenti.<br />
SALVAGUARDIA AMBIENTALE!<br />
L’indicazione SALVAGUARDIA AMBIENTALE<br />
fornisce istruzioni per l’utilizzo della macchina nel<br />
rispetto dell’ambiente.<br />
I.10 GUIDA RAPIDA AL FUNZIONAMENTO....................................................................12<br />
I.10.1 Funzionamento automatico.........................................................................................12<br />
I.10.2 Funzione raffrescamento ............................................................................................12<br />
I.10.3 Funzione deumidificazione..........................................................................................12<br />
I.10.4 Funzione riscaldamento ..............................................................................................12<br />
I.10.5 Funzione ventilazione .................................................................................................12<br />
I.11 Manutenzione ordinaria a cura dell’utente..............................................................13<br />
I.11.1 Pulizia dell’unità interna ..............................................................................................13<br />
I.11.2 Pulizia dell’unità esterna .............................................................................................13<br />
I.11.3 Pulizia del filtro dell’aria...............................................................................................13<br />
I.11.4 Pulizia del telecomando ..............................................................................................13<br />
I.12 Avvertenze e suggerimenti.......................................................................................13<br />
I.13 Anomalie di funzionamento .....................................................................................14<br />
I.14 Indicazioni per lo smantellamento dell’unità e smaltimento sostanze dannose .14<br />
II<br />
SEZIONE II: INSTALLAZIONE E MANUTENZIONE..............................15<br />
II.1.1 Trasporto e movimentazione.......................................................................................15<br />
II.1.2 Immagazzinamento.....................................................................................................15<br />
II.1.3 Spazi di rispetto...........................................................................................................15<br />
II.2<br />
Installazione...............................................................................................................16<br />
II.2.1 Riduzione della rumorosità e delle vibrazioni ..............................................................16<br />
II.2.2 Dislivello massimo tra le unità.....................................................................................16<br />
II.2.3 Installazione dell’unità interna .....................................................................................16<br />
II.2.4 Installazione dell’unità esterna ....................................................................................16<br />
II.2.5 Collegamenti frigoriferi ................................................................................................16<br />
II.2.6 Collegamenti elettrici...................................................................................................16<br />
II.3<br />
Istruzioni per l’avviamento.......................................................................................16<br />
II.3.1 Controlli preliminari all’avviamento..............................................................................16<br />
II.4 Manutenzione straordinaria .....................................................................................16<br />
II.4.1 Controllo carica fluido frigorigeno................................................................................16<br />
II.4.2 Verifica assenza fughe fluido frigorigeno ....................................................................16<br />
II.4.3 Verifica stato di pulizia dello scambiatore ...................................................................16<br />
II.4.4 Verifica stato di pulizia dello scarico condensa ...........................................................16<br />
II.4.5 Verifica del circuito elettrico.........................................................................................16<br />
II.4.6 Indicazioni per la sostituzione di componenti ..............................................................16<br />
UNI EN 292<br />
UNI EN 294<br />
UNI EN 563<br />
UNI EN 1050<br />
UNI 10893<br />
EN 13133<br />
EN 12797<br />
EN 378-1<br />
PrEN 378-2<br />
CEI EN 60335-2-40<br />
UNI EN ISO 3744<br />
EN 50081-1:1992<br />
EN 61000<br />
RIFERIMENTI NORMATIVI<br />
Sicurezza del macchinario. Concetti fondamentali,<br />
principi generali di progettazione.<br />
Sicurezza del macchinario. Distanze di sicurezza per<br />
impedire il raggiungimento di zone pericolose con gli arti<br />
superiori.<br />
Sicurezza del macchinario. Temperature delle superfici<br />
di contatto. Dati ergonomici per stabilire i valori limiti di<br />
temperatura per superfici calde.<br />
Sicurezza del macchinario. Principi per la valutazione<br />
del rischio.<br />
Documentazione tecnica di prodotto. Istruzioni per l’uso<br />
Brazing. Brazer approval.<br />
Brazing. Destructive tests of brazed joints.<br />
Refrigeration systems and heat pumps – safety and<br />
environmental requirements. Basic requirements,<br />
definitions, classification and selection criteria.<br />
Refrigeration systems and heat pumps – safety and<br />
environmental requirements. Design, construction,<br />
testing, installing, marking and documentation.<br />
Sicurezza degli apparecchi elettrici d’uso domestico e<br />
similare. Parte 2: Norme particolari per le pompe di<br />
calore elettriche, per i condizionatori d’aria e per i<br />
deumidificatori.<br />
Determinazione dei livelli di potenza sonora delle<br />
sorgenti di rumore mediante pressione sonora. Metodo<br />
tecnico progettuale in un campo essenzialmente libero<br />
su un piano riflettente.<br />
Electromagnetic compatibility - Generic emission<br />
standard Part 1: Residential, commercial and light<br />
industry<br />
Electromagnetic compatibility (EMC)<br />
ALLEGATI<br />
A1<br />
A2<br />
Caratteristiche tecniche………………………………………………………………..80<br />
Schemi di collegamento elettrico...........................................................................84<br />
5
SEZIONE I: UTENTE<br />
I<br />
SEZIONE I: UTENTE<br />
I.1 INFORMAZIONI GENERALI<br />
Questo manuale d’uso fa parte della dotazione di questo<br />
condizionatore.<br />
L'utilizzo e la manutenzione in sicurezza della macchina, oggetto di<br />
questo Manuale di Istruzioni per l’uso, è indispensabile per evitare rischi<br />
agli operatori, sia nelle fasi operative, sia nella manutenzione e<br />
riparazione; pertanto è indispensabile che il presente documento venga<br />
letto attentamente, osservato in tutte le sue parti e conservato con cura.<br />
IMPORTANTE!<br />
RHOSS S.p.a. declina ogni responsabilità per<br />
qualsiasi danno dovuto ad un utilizzo improprio del<br />
condizionatore o causato in seguito ad una lettura<br />
incompleta o superficiale delle informazioni e delle<br />
indicazioni contenute in questo manuale.<br />
I.1.1<br />
CONDIZIONI DI UTILIZZO PREVISTE<br />
PERICOLO!<br />
Usi diversi da quello previsto dal costruttore sono<br />
espressamente vietati.<br />
Il climatizzatore split da parete è destinato al trattamento dell’aria<br />
(climatizzazione estiva e invernale) all’interno di ambienti ad uso<br />
domestico o similare. L’unità é destinata all’installazione in ambienti con<br />
atmosfera NON ESPLOSIVA.<br />
Non usare il condizionatore per impieghi specializzati come la<br />
climatizzazione di apparecchiature elettriche o elettroniche, la<br />
conservazione di alimenti, mobili d’antiquariato, allevamenti di animali,<br />
colture biologiche, pellicce, ecc...<br />
Questo condizionatore é dotato di ventilatori che ruotano ad alto<br />
numero di giri. Non inserire mai le mani o oggetti di qualsiasi tipo nelle<br />
feritoie di uscita dell’aria sia della unità interna che dell’unità esterna:<br />
ciò potrebbe causare seri incidenti con lesioni personali e danni al<br />
ventilatore.<br />
Fare attenzione a mantenere l’ambiente ad una temperatura<br />
confortevole, soprattutto in presenza di bambini, persone anziane o<br />
portatrici di handicap.<br />
L’utilizzo del condizionatore con valori di temperatura e umidità diversi<br />
da quelli consentiti può essere causa di malfunzionamenti e<br />
gocciolature di condensa dell’unità interna.<br />
In caso di temporali é opportuno togliere l’alimentazione elettrica tramite<br />
un interruttore generale IG (non fornito in dotazione), al fine di<br />
salvaguardare il condizionatore da eventuali danni dovuti a<br />
sovratensioni provocate da scariche di fulmini.<br />
I.1.2<br />
LIMITI DI FUNZIONAMENTO<br />
IMPORTANTE!<br />
Il corretto funzionamento dell’unità è subordinato<br />
alla scrupolosa osservanza delle istruzioni d’uso, al<br />
rispetto degli spazi tecnici nell’installazione e dei<br />
limiti di impiego riportati nel presente manuale.<br />
Interno Esterno<br />
Raffrescamento limite superiore °C 30 43<br />
limite inferiore °C 17 18<br />
Riscaldamento limite superiore °C 30 24<br />
limite inferiore °C 17 -5<br />
I.1.3<br />
INFORMAZIONI SULLA SICUREZZA<br />
L’unità è dotata di dispositivi di sicurezza per prevenire rischi di danni<br />
alle persone e per garantirne il corretto funzionamento.<br />
Manomissioni o alterazioni non autorizzate da RHOSS S.p.a.<br />
possono determinare situazioni di potenziale pericolo per le persone e<br />
danni all’unità.<br />
I.2 RICAMBI<br />
IMPORTANTE!<br />
Utilizzare solo ed esclusivamente ricambi e<br />
accessori originali. RHOSS S.p.a. declina ogni<br />
responsabilità per danni causati da manomissioni o<br />
interventi eseguiti da personale non autorizzato o<br />
per disfunzioni dovute all’uso di ricambi o<br />
accessori non originali.<br />
Per la manutenzione utilizzare solo ricambi originali RHOSS S.p.A.<br />
RHOSS S.p.A. si ritiene sollevata da qualsiasi responsabilità nei<br />
seguenti casi:<br />
• installazione non corretta o non eseguita secondo le procedure;<br />
• inosservanza parziale o totale delle istruzioni;<br />
• errori di alimentazione elettrica/idraulica;<br />
• uso improprio della unità;<br />
• carenze nella manutenzione;<br />
• modifiche ed interventi non autorizzati;<br />
• utilizzo di ricambi non originali o non adatti.<br />
I.3 ASSISTENZA<br />
Prima di effettuare interventi di riparazione è consigliabile rivolgersi a<br />
RHOSS S.p.A., soprattutto nel caso fosse necessario intervenire per<br />
manutenzione straordinaria.<br />
I.4 DESCRIZIONE UNITÀ<br />
I condizionatori autonomi a sezioni separate in versione pompa di<br />
calore sono costituiti da unità interne (n°1 per il modello MONO, n°2 per<br />
il modello DUAL, n°3 per il modello TRIAL) per installazione a parete e<br />
da un’unità esterna da collegarsi mediante linee frigorifere ed elettriche.<br />
L’unità interna ha una carica di gas protettivo per evitare l’ingresso di<br />
umidità. L’unità esterna contiene l’intera carica di refrigerante,<br />
sufficiente anche per la linea frigorifera fino ad una lunghezza massima<br />
di 5 m.<br />
Per lunghezze superiori bisognerà effettuare un rabbocco di gas<br />
refrigerante. Le unità sono caratterizzate da un funzionamento molto<br />
silenzioso e da elevate prestazioni in termini di efficienza ed affidabilità.<br />
Il funzionamento delle unità é controllato da una scheda elettronica a<br />
microprocessore che consente di scegliere tra i seguenti programmi:<br />
• automatico AUTO<br />
• raffreddamento COOL<br />
• deumidificazione DRY<br />
• riscaldamento HEAT<br />
• ventilazione FAN<br />
Tutte le scelte dei programmi di funzionamento sono selezionabili<br />
tramite un telecomando a raggi infrarossi con display a cristalli liquidi.<br />
Quando il telecomando non é disponibile, in emergenza il<br />
condizionatore può essere comandato da un interruttore posto sull’unità<br />
interna.<br />
Mod. INVERTER<br />
Interno Esterno<br />
Raffrescamento limite superiore °C 30 43<br />
limite inferiore °C 17 18<br />
Riscaldamento limite superiore °C 30 24<br />
limite inferiore °C 17 -15<br />
6
Unità interna<br />
uscita aria<br />
Unità esterna<br />
entrata aria<br />
uscita aria<br />
entrata aria<br />
entrata aria<br />
I.4.1<br />
UNITÀ INTERNA<br />
SEZIONE I: UTENTE<br />
L’unità interna, da installare solo a parete, é caratterizzata da<br />
un’estetica gradevole, che ne permette l’inserimento in qualsiasi<br />
tipologia d’arredamento. È dotata di una batteria di scambio termico, di<br />
un ventilatore tangenziale molto silenzioso che garantisce un eccellente<br />
comfort acustico anche alla massima portata d’aria, di un filtro aria<br />
rigenerabile e facilmente estraibile per la pulizia, di un deflettore<br />
orizzontale motorizzato e di alette verticali per ottimizzare la<br />
distribuzione dell’aria in uscita.<br />
Frontalmente, in posizione ben visibile, ci sono i led di segnalazione<br />
dello stato di funzionamento e il ricevitore dei segnali provenienti dal<br />
telecomando.<br />
A corredo dell’unità viene fornita:<br />
• la piastra di fissaggio;<br />
• il telecomando;<br />
• il supporto per il fissaggio a muro del telecomando.<br />
I.4.2<br />
UNITÀ ESTERNA<br />
L’unità esterna, da installare a parete, è costituita da una struttura in<br />
lamiera di acciaio zincata e verniciata. All’interno è installato il<br />
compressore di tipo ermetico assieme ad un ventilatore elicoidale<br />
bilanciato staticamente e dinamicamente per garantire la massima<br />
silenziosità di funzionamento.<br />
Completano l’unità la batteria di scambio termico ad ampia superficie,<br />
l’organo di laminazione, la valvola d’inversione ciclo per le versioni a<br />
pompa di calore, gli attacchi a cartella con rubinetto, i condensatori<br />
elettrici per compressore e ventilatore e la morsettiera per i<br />
collegamenti elettrici con l’unità interna.<br />
I.4.3<br />
TELECOMANDO<br />
Il telecomando permette di impostare e visualizzare tutti i parametri di<br />
funzionamento del condizionatore, facilitando così tutte le operazioni di<br />
programmazione.<br />
Il telecomando é alimentato con 2 batterie R03 size AAA da 1,5 V.<br />
Legenda<br />
Unità Interna<br />
1) Struttura portante<br />
2) Pannello frontale<br />
3) Filtro aria<br />
4) Griglia di uscita aria<br />
5) Deflettori verticali<br />
6) Ricevitore di segnale infrarosso<br />
7) Segnalazione indicatori<br />
8) Pulsante per il funzionamento manuale<br />
9) Telecomando<br />
Unità Esterna<br />
10) Tubazioni di collegamento<br />
11) Collegamento elettrico<br />
12) Rubinetti frigoriferi<br />
13) Griglia di uscita aria<br />
IMPORTANTE!<br />
E’ consigliabile testare il funzionamento del<br />
telecomando per determinare la sua zona di<br />
ricezione.<br />
7
I.5 DESCRIZIONE TELECOMANDO E SUE<br />
FUNZIONI N° TASTO FUNZIONE DESCRIZIONE<br />
Fig. 1<br />
1 /<br />
2 /<br />
3<br />
4<br />
5<br />
6<br />
7<br />
8<br />
9<br />
10<br />
11<br />
Emettitore di<br />
segnali<br />
Display a<br />
cristalli liquidi<br />
Accensione/<br />
Spegnimento<br />
Selezione del<br />
programma di<br />
funzionamen<br />
to<br />
Impostazione<br />
della<br />
temperatura<br />
Impostazione<br />
velocità del<br />
ventilatore<br />
Impostazione<br />
posizione<br />
deflettore<br />
Selezione<br />
deflettore<br />
motorizzato<br />
Funzionamento<br />
economico<br />
(escluso<br />
INVERTER)<br />
Impostazione<br />
accensione/<br />
spegnimento<br />
con timer<br />
Impostazione<br />
orari<br />
12 Conferma<br />
13<br />
14<br />
15<br />
16<br />
Regolazione<br />
orologio<br />
Blocco<br />
telecomando<br />
Reset<br />
telecomando<br />
Cancellazione<br />
timer<br />
SEZIONE I: UTENTE<br />
Trasmette i segnali infrarossi al<br />
ricevitore dell’unità interna<br />
Indica gli stati e i modi di<br />
funzionamento del<br />
condizionatore<br />
Permette di accendere e<br />
spegnere il condizionatore.<br />
Premere il tasto per avviare il<br />
condizionatore. Premere<br />
nuovamente il tasto per<br />
arrestare il condizionatore<br />
Permette di selezionare il tipo di<br />
funzionamento desiderato<br />
(AUTO, COOL, DRY, HEAT,<br />
FAN)<br />
Questi tasti permettono di<br />
impostare la temperatura<br />
ambiente desiderata.<br />
la temperatura richiesta viene<br />
alzata fino a 30 °C<br />
la temperatura richiesta viene<br />
abbassata fino a 17 °C<br />
Ad ogni pressione corrisponde<br />
una variazione di 1°C<br />
Premere questo tasto per<br />
selezionare la velocità del<br />
ventilatore. Quando si seleziona<br />
AUTO la velocità del ventilatore<br />
viene regolata automaticamente<br />
a seconda della temperatura<br />
dell’ambiente. È possibile<br />
selezionare anche manualmente<br />
la velocità del ventilatore<br />
scegliendo tra 3 regolazioni:<br />
LOW = MINIMA; MED = MEDIA;<br />
HIGH = MASSIMA<br />
Permette di selezionare l’angolo<br />
di inclinazione del deflettore<br />
Questo tasto permette al<br />
deflettore di oscillare in maniera<br />
costante<br />
Seleziona il controllo automatico<br />
della temperatura e della<br />
velocità del ventilatore in modo<br />
da non provocare sensazioni di<br />
freddo eccessivo<br />
(funzionamento in<br />
raffrescamento) o caldo<br />
eccessivo (funzionamento in<br />
riscaldamento)<br />
Premere questi tasti per<br />
predisporre lo<br />
spegnimento/accensione<br />
dell’unità con timer<br />
Permette di impostare l’orario<br />
dell’orologio e dei timer<br />
Premere questo tasto per<br />
confermare gli orari scelti<br />
Premendo questo tasto per più<br />
secondi permette la regolazione<br />
dell’orologio<br />
Permette di bloccare ogni<br />
funzionalità del telecomando<br />
Premere questo pulsante per<br />
resettare le impostazioni del<br />
telecomando<br />
Premere questo tasto per<br />
annullare il funzionamento con<br />
timer<br />
8
I.5.1<br />
NOMI E FUNZIONI DEGLI INDICATORI SUL<br />
DISPLAY<br />
I.6 USO DEL TELECOMANDO<br />
SEZIONE I: UTENTE<br />
Il telecomando utilizza due batterie alcaline da 1,5 V del tipo RO3 size<br />
AAA (fornite in dotazione).<br />
Per inserire le batterie, sfilare completamente il coperchio del<br />
telecomando facendolo slittare verso la parte inferiore. Inserire le<br />
batterie nell’apposito alloggiamento rispettando le polarità indicate.<br />
Riposizionare il coperchio e selezionare le funzioni desiderate. Stessa<br />
operazione deve essere fatta quando vengono sostituite le batterie con<br />
altre nuove. La durata media delle batterie é di circa un anno.<br />
1) Indicatore di trasmissione<br />
Appare ogni volta che si trasmette un segnale all’unità interna.<br />
2) Visualizzazione del programma di funzionamento (MODE)<br />
Indica il tipo di funzionamento prescelto.<br />
3) Visualizzazione ON/OFF<br />
Indica che l’unità è in funzione.<br />
4) Visualizzazione della temperatura (TEMP)<br />
Indica la temperatura impostata (da 17 °C a 30 °C). Quando si sceglie il<br />
programma di funzionamento FAN non viene visualizzata nessuna<br />
temperatura.<br />
5) Visualizzazione dell’orologio<br />
È sempre attiva, indica l’ora attuale.<br />
6) Visualizzazione del timer (TIMER ON)<br />
Se si preme il tasto TIMER ON viene visualizzato l’orario di accensione<br />
con timer.<br />
7) Visualizzazione del timer (TIMER OFF)<br />
Se si preme il tasto TIMER OFF viene visualizzato l’orario di<br />
spegnimento con timer.<br />
8) Visualizzazione di blocco<br />
Indica che il telecomando è bloccato.<br />
9) Visualizzazione ECONO<br />
Indica che la funzione ECONOMIC RUNNING è attiva.<br />
10) Visualizzazione della velocità del ventilatore (FAN)<br />
Indica la velocità del ventilatore selezionata. Può essere visualizzato<br />
AUTO o uno dei tre livelli di velocità: MINIMA (low), MEDIA (med),<br />
MASSIMA (high).<br />
Il telecomando rimane sempre con il display acceso.<br />
Rimuovere le batterie dal telecomando se si prevede di non utilizzarlo<br />
per lunghi periodi.<br />
Il display del telecomando visualizza sempre l’orario indipendentemente<br />
dal fatto che il condizionatore sia acceso o spento.<br />
Rivolgere il telecomando verso il ricevitore del condizionatore mentre si<br />
effettuano le impostazioni (eccetto durante l’impostazione dell’orologio).<br />
Se i segnali vengono ricevuti correttamente il condizionatore emetterà<br />
un segnale acustico “beep”.<br />
Il telecomando é in grado di trasmettere fino ad una distanza di circa 8<br />
metri dal ricevitore.<br />
Evitare l’esposizione del telecomando ad umidità eccessive, alla luce<br />
solare diretta o ad altre fonti di calore, agli urti. Proteggere il<br />
telecomando da spruzzi d’acqua o di altri fluidi.<br />
Se il ricevitore a raggi infrarossi dell’unità interna viene esposto a luce<br />
solare diretta o a luce intensa di una lampada fluorescente con<br />
accensione elettronica, il condizionatore può presentare anomalie di<br />
funzionamento o non funzionare.<br />
L’utilizzo di altri telecomandi nelle vicinanze o nello stesso ambiente in<br />
cui é installata l’unità interna può influenzare il regolare funzionamento<br />
del condizionatore: evitare di rivolgere il trasmettitore di tali telecomandi<br />
verso il ricevitore del condizionatore.<br />
9
SEZIONE I: UTENTE<br />
I.6.1<br />
IMPOSTAZIONE DELL’OROLOGIO<br />
Quando si inseriscono le batterie nel telecomando, l’indicatore orario<br />
visualizza 0:00 lampeggiante.<br />
Nota: durante l’impostazione dell’orologio non rivolgere il telecomando<br />
verso il condizionatore.<br />
Si consiglia di regolare l’orologio sul telecomando prima di avviare il<br />
condizionatore; per la regolazione operare nel seguente modo (rif. Fig.<br />
1):<br />
premere il tasto TIME ADJUST fino<br />
al raggiungimento dell’ora<br />
desiderata<br />
premere OK per confermare la<br />
selezione (non dirigere il<br />
telecomando verso l’unità)<br />
Per regolare nuovamente l’orario o effettuare una nuova<br />
programmazione nel seguente modo (rif. Fig. 1):<br />
premere il tasto CLOCK per più di<br />
tre secondi<br />
Con la scelta del programma automatico AUTO il condizionatore può<br />
operare in RAFFRESCAMENTO, in VENTILAZIONE ed in<br />
RISCALDAMENTO in base alla differenza di temperatura esistente tra<br />
la temperatura ambiente e la temperatura selezionata sul telecomando.<br />
Il ventilatore, qualsiasi sia la differenza tra temperatura ambiente e<br />
temperatura selezionata, è sempre in funzione.<br />
Quando viene scelto il programma di raffrescamento COOL, il<br />
condizionatore funziona con set di temperatura libero, abbassando la<br />
temperatura in ambiente.<br />
Quando viene scelto il programma di deumidificazione DRY, il<br />
condizionatore funziona a intervalli di 4-6 minuti, con set di temperatura<br />
libero, abbassando così progressivamente la temperatura e l’umidità in<br />
ambiente. Nel programma di deumidificazione DRY il tasto FAN SPEED<br />
non è utilizzabile.<br />
Quando il condizionatore funziona in riscaldamento HEAT, il<br />
condizionatore funziona con set di temperatura libero, alzando la<br />
temperatura in ambiente. Con condizioni dell’aria esterna di bassa<br />
temperatura e alta percentuale di umidità relativa, sullo scambiatore<br />
esterno si forma della brina che deve essere eliminata; la scheda a<br />
microprocessore, in base a un ciclo definito, provvede a questa<br />
operazione bloccando la fase di riscaldamento per tempi che variano da<br />
6 a 10 minuti. Questa operazione é segnalata dal led PRE-DEF.<br />
Quando viene scelto il programma di ventilazione FAN, il<br />
condizionatore funziona senza set di temperatura, ventilando l’aria<br />
dell’ambiente.<br />
I.6.4<br />
FUNZIONE ECONOMIC RUNNING<br />
premere il tasto TIME ADJUST fino<br />
al raggiungimento dell’ora<br />
desiderata<br />
premere OK per confermare la<br />
selezione (non dirigere il<br />
telecomando verso l’unità)<br />
Ad unità accesa, premendo questo tasto nelle<br />
modalità AUTO, COOL, HEAT, il condizionatore<br />
provvede a variare nelle due ore successive la<br />
temperatura impostata, in funzionamento COOL<br />
+2°C, in funzionamento HEAT -2°C, per poi<br />
mantenerla per tutto il tempo di funzionamento,<br />
ottenendo un maggior confort ed un risparmio<br />
energetico.<br />
I.6.2<br />
ACCENSIONE SPEGNIMENTO DELL’UNITÀ<br />
I.6.4.1<br />
FUNZIONAMENTO DI EMERGENZA<br />
Premendo il tasto ON/OFF è possibile accendere o<br />
spegnere l’unità<br />
Nel passaggio da ON a OFF viene interrotto qualsiasi modo di<br />
funzionamento, cancellate le temporizzazioni in corso, memorizzati il<br />
modo di funzionamento dell’apparecchio e del ventilatore, la posizione<br />
del deflettore ed il valore di temperatura impostato.<br />
Nel passaggio da OFF a ON la macchina ripristina automaticamente<br />
tutte le modalità di funzionamento memorizzate prima dello<br />
spegnimento.<br />
Ad unità accesa sul display compare l’indicazione di<br />
unità accesa.<br />
La presenza di questo simbolo sul display indica che il<br />
telecomando sta comunicando con l’unità.<br />
Ogni volta che il compressore nell’unità esterna si ferma, devono<br />
trascorrere almeno 3 minuti prima della nuova partenza. Questo<br />
periodo di tempo serve a salvaguardare il compressore e non può<br />
essere modificato.<br />
I.6.3<br />
IMPOSTAZIONE DEL MODO DI<br />
FUNZIONAMENTO<br />
Premendo più volte il tasto Mode è possibile cambiare il<br />
modo di funzionamento dell’unità. Sul display compare<br />
l’indicazione del modo di funzionamento selezionato.<br />
AUTO: funzionamento completamente automatico<br />
COOL: funzione raffrescamento<br />
DRY: funzione deumidificazione<br />
HEAT: funzione riscaldamento<br />
FAN: funzionamento solo ventilazione<br />
Pulsante di emergenza<br />
Il funzionamento di emergenza può essere utilizzato quando il<br />
telecomando non é disponibile o ha le batterie scariche. Agendo sul<br />
pulsante di funzionamento in emergenza, situato sull’unità interna, il<br />
condizionatore potrà funzionare ugualmente.<br />
Se il pulsante di funzionamento di emergenza viene premuto una prima<br />
volta il condizionatore funziona in modalità AUTO.<br />
Se viene premuto una seconda volta il condizionatore funzionerà in<br />
raffrescamento secondo questo programma:<br />
• temperatura impostata 24 °C;<br />
• velocità del ventilatore AUTOMATICA.<br />
Premendo il pulsante di emergenza una terza volta il condizionatore si<br />
ferma.<br />
I.6.5<br />
IMPOSTAZIONE DELLA TEMPERATURA<br />
DESIDERATA<br />
Premendo questi tasti nelle modalità AUTO, COOL,<br />
DRY, HEAT è possibile aumentare o diminuire il<br />
valore della temperatura desiderata da 17°C a 30°C.<br />
Il display visualizza il valore della temperatura<br />
selezionato.<br />
10
SEZIONE I: UTENTE<br />
I.6.6<br />
IMPOSTAZIONE DEL DEFLETTORE<br />
Per ottenere una distribuzione ottimale dell’aria regolare la posizione<br />
del deflettore motorizzato e delle alette verticali avendo cura che il<br />
flusso d’aria non investa direttamente le persone.<br />
Le alette verticali devono essere orientate manualmente prima di metter<br />
in funzione il condizionatore, mentre per il deflettore motorizzato agire<br />
nel modo seguente:<br />
Premendo più volte il tasto AIR DIRECTION è<br />
possibile modificare la posizione del deflettore.<br />
Premendo il tasto SWING è possibile attivare<br />
l’oscillazione continua del deflettore.<br />
ATTENZIONE:<br />
Per poter trasmettere automaticamente le impostazioni del timer<br />
all’orario prefissato, posizionare il telecomando nei pressi dell’unità<br />
interna. La funzione TIMER non è ripetitiva e deve essere impostata<br />
ogni qualvolta sia utilizzata.<br />
Quando viene selezionata la funzione Timer ON-OFF, l'accensione<br />
dell'unità potrà avvenire con un leggero ritardo rispetto all'orario timer<br />
programmato, ciò è da ritenersi del tutto normale e rientra nel corretto<br />
funzionamento dell'unità.<br />
I.6.9<br />
BLOCCO DELLA TASTIERA<br />
Premendo con un oggetto appuntito il tasto<br />
BLOCCO è possibile inibire completamente<br />
la tastiera del telecomando evitando usi<br />
indesiderati dello stesso (bambini, ecc.). Il<br />
display visualizzerà il simbolo riportato a<br />
fianco. Per togliere il blocco premere<br />
nuovamente con un oggetto appuntito il<br />
tasto BLOCCO.<br />
I.6.10<br />
RESET DEL TELECOMANDO<br />
Premendo con un oggetto appuntito il tasto<br />
RESET è possibile riportare il telecomando allo<br />
stato originario di fabbrica.<br />
PERICOLO!<br />
Muovere manualmente il deflettore motorizzato<br />
quando il condizionatore è acceso potrebbe<br />
causare dei problemi di funzionamento o<br />
danneggiare il sistema di regolazione.<br />
I.7 DESCRIZIONE DEGLI INDICATORI<br />
Gli indicatori presenti sulla parte centrale dell’unità servono ad indicare<br />
lo status di funzionamento della macchina.<br />
I.6.7<br />
IMPOSTAZIONE DELLA VENTILAZIONE<br />
Premendo più volte il tasto FAN SPEED è possibile<br />
impostare la velocità del ventilatore tra le tre<br />
disponibili oppure attivare la funzione AUTO.<br />
Sul display compare il modo di funzionamento.<br />
Indicatori<br />
Significato<br />
indica che l’unità è in funzione, lampeggia dopo<br />
l’interruzione momentanea dell’alimentazione<br />
elettrica<br />
indica che l’unità sta funzionando in modalità<br />
ECONOMIC RUNNING<br />
AUTO: funzionamento completamente automatico<br />
LOW: funzionamento velocità minima<br />
MED: funzionamento velocità media<br />
HIGH: funzionamento velocità massima<br />
indica che è inserito il timer<br />
I.6.8<br />
IMPOSTAZIONE DEI TIMER<br />
Premendo questi tasti è possibile programmare<br />
l’orario di accensione e/o l’orario di spegnimento<br />
dell’unità.<br />
Il display visualizza le indicazioni TIMER ON e/o<br />
TIMER OFF con parte dell’orario lampeggiante.<br />
indica che l’unità è in fase di sbrinamento o nella<br />
fase Anti Cold Air<br />
indica che l’unità è in funzione in modalità AUTO<br />
Orario di accensione<br />
indica la temperatura impostata<br />
TIME ADJUST<br />
Orario di spegnimento<br />
Premendo questo tasto è possibile modificare<br />
l’orario di accensione o di spegnimento. Ad ogni<br />
pressione del tasto l’orario aumenta o diminuisce di<br />
dieci minuti.<br />
Raggiunto l’orario di accensione o spegnimento<br />
desiderato, l’impostazione deve essere confermata<br />
premendo il tasto OK.<br />
Il tasto CANCEL permette di disattivare le funzioni di<br />
TIMER ON e/o TIMER OFF<br />
Una volta impostati gli orari di accensione e<br />
spegnimento, il display visualizzerà l’ora<br />
corrente e le scritte TIMER ON e/o TIMER<br />
OFF con i relativi orari.<br />
I.8 MESSA FUORI SERVIZIO<br />
PERICOLO!<br />
Agire sempre sull’interruttore automatico generale<br />
(IG) posto a protezione di tutto l’impianto. Verificare<br />
che nessuno alimenti accidentalmente la macchina,<br />
bloccare l’interruttore automatico generale (IG) in<br />
posizione di zero.<br />
Durante i lunghi periodi di fermo macchina bisogna isolare<br />
elettricamente l’unità aprendo l’interruttore automatico generale IG<br />
dell’impianto, posto dall’installatore.<br />
I.9 RIAVVIO DOPO LUNGA INATTIVITÀ<br />
Prima del riavvio:<br />
• Pulire o sostituire il filtro dell’aria.<br />
• Pulire lo scambiatore.<br />
• Pulire o liberare da possibili ostruzioni lo scarico della vaschetta<br />
raccolta condensa.<br />
Si raccomanda di far funzionare l’unità alla massima velocità per alcune<br />
ore.<br />
11
SEZIONE I: UTENTE<br />
I.10 GUIDA RAPIDA AL FUNZIONAMENTO<br />
I.10.1<br />
FUNZIONAMENTO AUTOMATICO<br />
Con la scelta del programma automatico AUTO il condizionatore può<br />
operare in RAFFRESCAMENTO, in VENTILAZIONE ed in<br />
RISCALDAMENTO in base alla differenza di temperatura esistente tra<br />
la temperatura ambiente e la temperatura selezionata sul telecomando.<br />
L’unità funzionerà in modo: Se:<br />
raffrescamento TA-TS > 2 °C<br />
ventilazione -1 °C ≤ TA-TS ≤ 2 °C<br />
riscaldamento TA-TS < -1 °C<br />
TA = temperatura ambiente TS = temperatura selezionata<br />
Il ventilatore, qualsiasi sia la differenza tra temperatura ambiente e<br />
temperatura selezionata, è sempre in funzione.<br />
I.10.2<br />
FUNZIONE RAFFRESCAMENTO<br />
Per impostare il funzionamento in raffrescamento COOL procedere<br />
come segue:<br />
• selezionare il programma raffrescamento, agendo sul tasto MODE<br />
(1), finché non appare sul display la scritta COOL;<br />
• regolare la temperatura desiderata premendo i tasti TEMP (2) il<br />
display indica valori da 17 °C a 30 °C;<br />
• regolare la velocità di ventilazione agendo sul tasto FAN SPEED (3),<br />
scegliendo tra AUTO e le altre velocità HIGH-MED-LOW;<br />
• rivolgere il telecomando verso il ricevitore dell’unità, e premere il<br />
tasto di accensione ON/OFF (4);<br />
• regolare il flusso dell’aria secondo le esigenze utilizzando il tasto<br />
SWING (5) o AIR DIRECTION (6);<br />
Fatte le regolazioni, queste verranno riproposte quando si riaccenderà il<br />
condizionatore.<br />
Ogni segnale trasmesso dal telecomando se ricevuto viene<br />
confermato da un suono “beep”.<br />
L’indicatore presente sull’unità interna si illumina, indicando<br />
il funzionamento dell’unità.<br />
Ogni volta che il compressore nell’unità esterna si ferma, devono<br />
trascorrere almeno 3 minuti prima della nuova partenza. Questo<br />
periodo di tempo serve a salvaguardare il compressore e non può<br />
essere modificato.<br />
I.10.3<br />
FUNZIONE DEUMIDIFICAZIONE<br />
Per impostare il funzionamento in deumidificazione DRY procedere<br />
come segue:<br />
• selezionare il programma deumidificazione, agendo sul tasto MODE<br />
(1), finché non appare sul display la scritta DRY;<br />
• regolare la temperatura desiderata premendo i tasti TEMP (2) il<br />
display indica valori da 17 °C a 30 °C;<br />
• rivolgere il telecomando verso il ricevitore dell’unità, e premere il<br />
tasto di accensione ON/OFF (4);<br />
• regolare il flusso dell’aria secondo le esigenze utilizzando il tasto<br />
SWING (5) o AIR DIRECTION (6);<br />
Fatte le regolazioni, queste verranno riproposte quando si riaccenderà il<br />
condizionatore.<br />
Ogni segnale trasmesso dal telecomando, se ricevuto, viene<br />
confermato da un suono “beep”.<br />
Quando viene scelto il programma di deumidificazione DRY, il<br />
condizionatore funziona a intervalli di 4-6 minuti, con set di temperatura<br />
libero, abbassando così progressivamente la temperatura e l’umidità in<br />
ambiente.<br />
Nel programma di deumidificazione DRY il tasto FAN SPEED non è<br />
utilizzabile.<br />
Ogni volta che il compressore nell’unità esterna si ferma, devono<br />
trascorrere almeno 3 minuti prima della nuova partenza. Questo<br />
periodo di tempo serve a salvaguardare il compressore e non può<br />
essere modificato.<br />
I.10.4<br />
FUNZIONE RISCALDAMENTO<br />
Per impostare il funzionamento in riscaldamento HEAT procedere come<br />
segue:<br />
• selezionare il programma riscaldamento, agendo sul tasto MODE<br />
(1), finché non appare sul display la scritta HEAT;<br />
• regolare la temperatura desiderata premendo i tasti TEMP (2): il<br />
display indica valori da 17°C a 30°C;<br />
• regolare la velocità di ventilazione agendo sul tasto FAN SPEED (3),<br />
scegliendo tra AUTO e le altre velocità HIGH-MED-LOW;<br />
• rivolgere il telecomando verso il ricevitore dell’unità, e premere il<br />
tasto di accensione ON/OFF (4);<br />
• regolare il flusso dell’aria secondo le esigenze utilizzando il tasto<br />
SWING (5) o AIR DIRECTION (6);<br />
Fatte le regolazioni, queste verranno riproposte quando si riaccenderà il<br />
condizionatore.<br />
Ogni segnale trasmesso dal telecomando, se ricevuto, viene<br />
confermato da un suono “beep”.<br />
L’indicatore presente sull’unità interna si illumina, indicando<br />
il funzionamento dell’unità.<br />
Quando il condizionatore funziona in riscaldamento HEAT, con<br />
condizioni dell’aria esterna di bassa temperatura e alta percentuale di<br />
umidità relativa, sullo scambiatore esterno si forma della brina che deve<br />
essere eliminata; la scheda a microprocessore, in base a un ciclo<br />
definito, provvede a questa operazione bloccando la fase di<br />
riscaldamento per tempi che variano da 6 a 10 minuti.<br />
L’indicatore presente sull’unità interna si illumina,<br />
segnalando questa operazione.<br />
Ogni volta che il compressore nell’unità esterna si ferma, devono<br />
trascorrere almeno 3 minuti prima della nuova partenza. Questo<br />
periodo di tempo serve a salvaguardare il compressore e non può<br />
essere modificato.<br />
I.10.5<br />
FUNZIONE VENTILAZIONE<br />
Per impostare il funzionamento in ventilazione FAN procedere come<br />
segue:<br />
• selezionare il programma ventilazione, agendo sul tasto MODE (1),<br />
finché non appare sul display la scritta FAN;<br />
• regolare la velocità di ventilazione agendo sul tasto FAN SPEED (3),<br />
scegliendo tra AUTO e le altre velocità HIGH-MED-LOW;<br />
• rivolgere il telecomando verso il ricevitore dell’unità, e premere il<br />
tasto di accensione ON/OFF (4);<br />
• regolare il flusso dell’aria secondo le esigenze utilizzando il tasto<br />
SWING (5) o AIR DIRECTION (6);<br />
Fatte le regolazioni, queste verranno riproposte quando si riaccenderà il<br />
condizionatore.<br />
Ogni segnale trasmesso dal telecomando, se ricevuto, viene<br />
confermato da un suono “beep”.<br />
L’indicatore presente sull’unità interna si illumina, indicando<br />
il funzionamento dell’unità.<br />
12
SEZIONE I: UTENTE<br />
I.11 MANUTENZIONE ORDINARIA A CURA<br />
DELL’UTENTE<br />
PERICOLO!<br />
Agire sempre sull’interruttore automatico generale<br />
(IG) posto a protezione di tutto l’impianto prima di<br />
qualunque operazione manutentiva anche se a<br />
carattere puramente ispettivo. Verificare che<br />
nessuno alimenti accidentalmente la macchina,<br />
bloccare l’interruttore automatico generale (IG) in<br />
posizione di zero.<br />
I.11.1<br />
PULIZIA DELL’UNITÀ INTERNA<br />
Per pulire l’unità usare un panno morbido e asciutto. Può essere usato<br />
un panno inumidito con acqua fredda se l’unità è molto sporca (fare<br />
attenzione a non utilizzare panni eccessivamente bagnati).<br />
Non spruzzare acqua sulle superfici del condizionatore.<br />
Non usare prodotti chimici, solventi o liquidi simili per pulire le superfici<br />
del condizionatore.<br />
Non spruzzare insetticidi o deodoranti spray direttamente sul<br />
condizionatore.<br />
I.11.2<br />
PULIZIA DELL’UNITÀ ESTERNA<br />
Normalmente l’unità esterna non necessita di particolari operazioni di<br />
pulizia; solo se é installata in zone polverose o in presenza di agenti<br />
inquinanti, lo scambiatore esterno deve essere pulito periodicamente:<br />
ad ogni modo é opportuno che l’operazione sia svolta da personale<br />
qualificato.<br />
A inizio stagione, prima di avviare il condizionatore, controllare che<br />
nessun impedimento ostacoli il flusso dell’aria sull’unità esterna sia in<br />
aspirazione che in mandata.<br />
A fine stagione, se il condizionatore deve rimanere fermo per lunghi<br />
periodi dopo aver funzionato in raffrescamento é consigliabile prima di<br />
spegnerlo definitivamente, farlo funzionare per alcune ore solo in<br />
ventilazione FAN in modo da fare evaporare l’eventuale condensa<br />
rimasta nell’unità interna.<br />
I.11.3<br />
PULIZIA DEL FILTRO DELL’ARIA<br />
I.11.4<br />
PULIZIA DEL TELECOMANDO<br />
Per la pulizia del telecomando usare solo un panno morbido e asciutto.<br />
I.12 AVVERTENZE E SUGGERIMENTI<br />
L’unità non deve funzionare continuamente nella modalità<br />
raffrescamento in ambienti con umidità relativa elevata (superiore<br />
all’80%). In queste condizioni sulla bocca della mandata dell’aria<br />
potrebbe formarsi della condensa che potrebbe danneggiare oggetti<br />
sottostanti, la pavimentazione e la parete sulla quale è fissata l’unità.<br />
Evitare sempre di ostruire il flusso dell’aria o di usare l’unità come piano<br />
d’appoggio.<br />
PERICOLO!<br />
Prestare attenzione durante lo smontaggio del filtro,<br />
le alette dello scambiatore di calore possono<br />
tagliare.<br />
IMPORTANTE!<br />
Far funzionare l’unità sempre con i filtri installati.<br />
Per garantire una corretta aspirazione dell’aria il filtro deve essere pulito<br />
almeno un volta al mese, o più frequentemente se la macchina è in<br />
funzione in ambienti molto polverosi. Una pulizia frequente, andrà a<br />
vantaggio dell’efficienza di funzionamento.<br />
Per estrarre il filtro dell’aria sollevare il pannello di aspirazione, tirare la<br />
linguetta centrale del filtro verso il basso e sfilare. Pulire il filtro con un<br />
aspirapolvere ed eventualmente lavarlo con acqua fredda, avendo<br />
l’avvertenza di farlo asciugare all’ombra. Quando il filtro é pulito e<br />
asciutto rimontarlo procedendo al contrario. Se il filtro è danneggiato<br />
deve essere sostituito con un filtro originale RHOSS.<br />
L’utilizzo di acqua o di bombolette spray in prossimità dell’unità può<br />
causare scosse elettriche e malfunzionamenti.<br />
13
SEZIONE I: UTENTE<br />
Il telecomando non trasmette il segnale all’unità se tra esso e l’unità<br />
vengono interposti una parete o altri oggetti.<br />
Non appoggiare alcun oggetto sull’unità esterna.<br />
I.13 ANOMALIE DI FUNZIONAMENTO<br />
Anomalia<br />
Il condizionatore NON FUNZIONA (non si accende)<br />
Il condizionatore funziona ma NON RAFFRESCA in modo adeguato<br />
Potrebbero manifestarsi condizioni che però non hanno influenza sul<br />
funzionamento regolare del condizionatore, quali ad esempio:<br />
• potrebbe udirsi per qualche istante un fruscio dopo l’avviamento o<br />
l’arresto del condizionatore: ciò é dovuto al riequilibrio delle pressioni<br />
del gas all’interno del circuito frigorifero;<br />
• potrebbero sentirsi temporanei scricchiolii se il condizionatore<br />
funziona con basse temperature in ambiente: sono dovute alle<br />
dilatazioni del pannello per la variazione della temperatura;<br />
• si potrebbero diffondere odori sgradevoli dovuti all’accumulo di<br />
sostanze presenti nell’aria (fumo di sigarette, vapori di cottura dei cibi,<br />
ecc..), specialmente se non si provvede ad aerare periodicamente gli<br />
ambienti;<br />
• se il condizionatore funziona in modo continuativo in raffrescamento<br />
all’interno di un ambiente con elevata umidità relativa (superiore<br />
all’80%), si può avere formazione di condensa sul deflettore e sulle<br />
alette dell’unità interna, e tale condensa potrebbe gocciolare sul<br />
pavimento o sugli oggetti sottostanti;<br />
• nel funzionamento in riscaldamento (solo per i modelli a pompa di<br />
calore), dall’unità esterna può uscire del vapore durante la fase di<br />
sbrinamento.<br />
Intervento consigliato<br />
verificare che sia presente la tensione elettrica (accendere una lampada)<br />
verificare che l’interruttore generale della linea di alimentazione del<br />
condizionatore sia inserito (se l’interruttore generale è munito di fusibili,<br />
essi siano tutti integri)<br />
verificare che il telecomando funzioni<br />
verificare che non sia inserito il timer<br />
verificare che sia stato impostato il funzionamento raffrescamento<br />
verificare che la temperatura sia stata impostata sul telecomando<br />
verificare che la velocità del ventilatore non sia troppo bassa<br />
verificare che non ci siano impedimenti all’ingresso o all’emissione dell’aria<br />
sull’unità interna ed esterna<br />
verificare che il filtro dell’aria sia pulito<br />
verificare che non ci siano porte o finestre aperte<br />
verificare che non ci siano fonti di calore anomale (ferro da stiro, presenza<br />
di molte persone, ecc..)<br />
I.14 INDICAZIONI PER LO SMANTELLAMENTO<br />
DELL’UNITÀ E SMALTIMENTO SOSTANZE<br />
DANNOSE<br />
SALVAGUARDIA AMBIENTALE!<br />
RHOSS S.p.A. da sempre è sensibile alla<br />
salvaguardia dell’ambiente.<br />
E’ importante che le indicazioni seguenti vengano<br />
scrupolosamente seguite da chi effettuerà lo<br />
smantellamento dell’unità.<br />
Lo smantellamento dell’unità va eseguito solo da parte di ditta<br />
autorizzata al ritiro di prodotti/macchine in obsolescenza. La macchina<br />
nel suo complesso è costituita da materiali trattabili come MPS (materia<br />
prima secondaria), con l’obbligo di rispettare le prescrizioni seguenti:<br />
• deve essere rimosso l’olio contenuto nel compressore, esso deve<br />
essere recuperato e consegnato a un ente autorizzato al ritiro dell’olio<br />
esausto;<br />
• il fluido frigorigeno non può essere scaricato nell’atmosfera. Il suo<br />
recupero, per mezzo di apparecchiature omologate, deve prevedere<br />
l’utilizzo di bombole adatte e la consegna a un centro di raccolta<br />
autorizzato;<br />
• il filtro deidratatore e la componentistica elettronica (condensatori<br />
elettrolitici) sono da considerarsi rifiuti speciali, come tali vanno<br />
consegnati ad un ente autorizzato alla loro raccolta;<br />
il materiale di isolamento dei tubi, in gomma poliuretanica espansa,<br />
deve essere rimosso e trattato come rifiuto assimilabile agli urbani.<br />
14
SEZIONE II: INSTALLAZIONE E MANUTENZIONE<br />
II<br />
II.1.1<br />
SEZIONE II: INSTALLAZIONE E<br />
MANUTENZIONE<br />
TRASPORTO E MOVIMENTAZIONE<br />
PERICOLO!<br />
La movimentazione deve essere eseguita con la<br />
massima attenzione e a cura di personale<br />
qualificato ed addestrato a tale operazioni. Una<br />
scorretta movimentazione può essere causa di<br />
danni alle persone ed all’unità.<br />
Nella movimentazione dei condizionatori avere cura di evitare colpi o<br />
cadute che potrebbero danneggiarli.<br />
Le unità vengono spedite con imballo standard costituito da gusci di<br />
polistirolo espanso e cartone. Non calpestare l’imballo. Non lasciare gli<br />
imballi sciolti durante il trasporto.<br />
II.1.3<br />
SPAZI DI RISPETTO<br />
Le unità devono essere fissate rispettando gli spazi tecnici di<br />
posizionamento riportati di seguito.<br />
II.1.3.1 Unità interna<br />
Il sollevamento e la movimentazione<br />
devono essere eseguiti da almeno<br />
2 persone.<br />
La macchina imballata è movimentabile/sollevabile per mezzo di<br />
apposite feritoie presenti sull’imballo. La movimentazione dell’unità<br />
deve essere eseguita con cura onde evitare danni alla struttura esterna<br />
e alle parti meccaniche ed elettriche interne. Per il sollevamento<br />
dell’unità non imballata sono presenti apposite maniglie. Non<br />
capovolgere mai l’imballo.<br />
SALVAGUARDIA AMBIENTALE!<br />
Smaltire i materiali dell’imballo in conformità alla<br />
legislazione nazionale o locale vigente nel Vostro<br />
paese.<br />
PERICOLO!<br />
Non lasciare gli imballi a portata di bambini.<br />
Installare l’unità in modo tale che il flusso d’aria non arrivi direttamente<br />
sulle persone.<br />
II.1.2<br />
IMMAGAZZINAMENTO<br />
I condizionatori devono essere immagazzinati in ambienti che<br />
impediscano l’esposizione alle intemperie, con gli imballi chiusi.<br />
Porre attenzione alla loro sovrapponibilità, controllando sull’imballo la<br />
posizione della freccia per conoscere il numero di macchine impilabili.<br />
15
SEZIONE II: INSTALLAZIONE E MANUTENZIONE<br />
Installare l’unità lontano da fonti di calore e da qualsiasi elemento che<br />
possa compromettere il regolare flusso d’aria.<br />
L’unità esterna non dovrebbe mai essere collocata in aree confinanti<br />
con locali normalmente abitati (uffici, soggiorni, camere da letto, ecc.).<br />
Si dovrà prestare particolare attenzione ad installazioni in prossimità di<br />
locali frequentati da persone malate o portatrici di handicap.<br />
L’utilizzo dei kit supporti antivibranti per l’unità esterna garantisce un<br />
adeguato smorzamento delle vibrazioni trasmesse all’edificio dall’unità.<br />
Particolari accorgimenti devono essere presi nel caso in cui l’unità<br />
esterna venga installata in luoghi ad elevato rischio sismico o in<br />
particolari situazioni. E’ necessario in questi casi avvalersi della<br />
consulenza di tecnici specializzati.<br />
II.2.2<br />
DISLIVELLO MASSIMO TRA LE UNITÀ<br />
Il dislivello massimo consentito fra unità interna ed esterna é di 5 m.<br />
Quando il dislivello tra l’unità interna ed esterna supera i 3 m e l’unità<br />
esterna é posta più in alto di quella interna, si consiglia di prevedere un<br />
sifone sulla linea del gas per facilitare il ritorno al compressore dell’olio<br />
lubrificante (Fig. 2).<br />
L’unità non deve funzionare continuamente nella modalità<br />
raffrescamento in ambienti con umidità relativa elevata (superiore<br />
all’80%). In queste condizioni sulla bocca della mandata dell’aria<br />
potrebbe formarsi della condensa che potrebbe danneggiare oggetti<br />
sottostanti, la pavimentazione e la parete sulla quale è fissata l’unità.<br />
II.1.3.2 Unità esterna<br />
L’unità esterna va installata alzata da terra, in modo tale da non essere<br />
accessibile facilmente, su opportune staffe idonee a sostenere il peso<br />
dell’unità e dei tubi di collegamento.<br />
Rispettare gli spazi tecnici di seguito raffigurati.<br />
II.2<br />
INSTALLAZIONE<br />
PERICOLO!<br />
L’installazione deve essere eseguita<br />
esclusivamente da tecnici esperti abilitati ad<br />
operare su prodotti per il condizionamento e la<br />
refrigerazione.<br />
Un’installazione non corretta può determinare un<br />
cattivo funzionamento dell’unità con conseguenti<br />
sensibili cali di rendimento.<br />
È fatto obbligo al personale di seguire le normative<br />
locali o nazionali vigenti all’atto della messa in<br />
opera della macchina.<br />
Vengono qui riportate le indicazioni per una corretta installazione dei<br />
condizionatori.<br />
Si lascia comunque all’esperienza dell’installatore il perfezionamento di<br />
tutte le operazioni a seconda delle esigenze specifiche.<br />
II.2.1<br />
RIDUZIONE DELLA RUMOROSITÀ E DELLE<br />
VIBRAZIONI<br />
Una corretta installazione prevede degli accorgimenti volti a ridurre il<br />
disagio acustico derivante dal normale funzionamento dell’unita<br />
esterna.<br />
Prima di installare l’unità informarsi presso le autorità locali circa<br />
l’esistenza di specifiche limitazioni in termini di rumore ambientale<br />
consentito.<br />
II.2.3<br />
INSTALLAZIONE DELL’UNITÀ INTERNA<br />
L’unità interna può essere installata solo a parete.<br />
Si rispettino gli spazi tecnici minimi indicati.<br />
Prima di installare l’unità occorrono delle verifiche preliminari che<br />
consistono nell’accertare che:<br />
• la parete dove posizionare il condizionatore sia solida e<br />
sufficientemente piana in modo da avere un buon appoggio;<br />
• si possano rispettare gli spazi tecnici minimi per l’installazione;<br />
• l’unità non venga coperta da tendaggi o altri oggetti che disturbino il<br />
passaggio dell’aria in aspirazione o in espulsione;<br />
• l’unità, di conseguenza il ricevitore (a segnale infrarosso), non sia<br />
esposto alla luce solare diretta o di lampade elettroniche, che<br />
potrebbero influenzare il buon funzionamento;<br />
• l’unità non sia installata ad un’altezza dal pavimento superiore a 2,7<br />
metri per evitare effetti di stratificazione dell’aria durante il<br />
funzionamento.<br />
Per il montaggio procedere come segue:<br />
• fissare la dima di carta a corredo sulla parete scelta;<br />
• utilizzando un trapano munito di punta piccola segnare i seguenti<br />
centri: foro per il passaggio delle tubazioni e dei cavi elettrici; fori per i<br />
tasselli ad espansione per il fissaggio della piastra di supporto (minimo<br />
n° 4, se necessario utilizzarne altri);<br />
• eseguire il foro per il passaggio delle tubazioni e dei cavi elettrici<br />
(Fig. 3);<br />
Lato interno<br />
parete<br />
Lato interno<br />
parete<br />
Lato esterno<br />
parete<br />
Lato esterno<br />
parete<br />
Fig. 2<br />
Fig. 3<br />
• eseguire i fori per i tasselli ad espansione;<br />
• togliere la piastra di supporto agganciata all’unità;<br />
• fissare la piastra di supporto al muro con i tasselli e assicurarsi che<br />
sia perfettamente orizzontale;<br />
• svitare le viti che tengono l’involucro dell’unità;<br />
16
SEZIONE II: INSTALLAZIONE E MANUTENZIONE<br />
• piegare i tubi di rame sul retro dell’unità secondo le esigenze (Fig.<br />
4);<br />
IMPORTANTE!<br />
I tubi di rame devono essere piegati con la massima<br />
cautela in modo da evitare possibili fessurazioni.<br />
Utilizzare le staffe<br />
di supporto.<br />
Fig. 7<br />
Sinistra<br />
Destra<br />
• eseguire i collegamenti frigoriferi, elettrici e dello scarico condensa<br />
come specificato ai paragrafi “Collegamenti frigoriferi” e “Collegamenti<br />
elettrici”;<br />
• prima di rimontare l’involucro verificare il funzionamento dello<br />
scarico condensa.<br />
II.2.4<br />
Verso il basso<br />
destra<br />
Destra<br />
posteriore<br />
Centro<br />
posteriore<br />
Sinistra<br />
posteriore<br />
Verso il basso<br />
sinistra<br />
INSTALLAZIONE DELL’UNITÀ ESTERNA<br />
L’unità esterna deve essere installata all’aperto, rispettando gli spazi<br />
tecnici minimi per consentire il passaggio dell’aria e l’esecuzione di<br />
eventuali interventi di manutenzione.<br />
Fig. 4<br />
Agganciare l’unità alla piastra di supporto,<br />
avendo cura di far scorrere nel foro del<br />
muro le linee frigorifere, i cavi elettrici e il<br />
tubo di scarico condensa.<br />
Fig. 5<br />
Nei modelli a pompa di calore, durante la fase di sbrinamento del<br />
funzionamento in riscaldamento, viene prodotta acqua, rendendo<br />
necessario raccoglierla e convogliarla allo scarico.<br />
II.2.5<br />
COLLEGAMENTI FRIGORIFERI<br />
IMPORTANTE!<br />
L’esecuzione delle connessioni frigorifere deve<br />
essere eseguita da personale specializzato e nel<br />
rispetto delle leggi e dei regolamenti vigenti nel<br />
luogo di installazione.<br />
Un allacciamento non conforme solleva RHOSS<br />
S.p.A. da responsabilità per danni alle cose ed alle<br />
persone.<br />
Per la realizzazione delle linee frigorifere devono essere utilizzati tubi di<br />
rame per impianti frigoriferi, rispettando le indicazioni delle lunghezze e<br />
dei diametri consigliati nelle pagine degli allegati. Assicurarsi inoltre che<br />
all’interno delle tubazioni non vi siano impurità e presenza di umidità,<br />
elementi estremamente dannosi per il circuito frigorifero. Le linee<br />
frigorifere devono inoltre essere isolate singolarmente con rivestimento<br />
in materiale espanso a cellule chiuse.<br />
Per il passaggio dei tubi attraverso i muri é sufficiente un foro da 65<br />
mm.<br />
Per la preparazione dei tubi procedere come segue.<br />
Tagliare i tubi di collegamento alla distanza prestabilita, prevedendo un<br />
certo margine di sicurezza e tenendo conto degli accorgimenti indicati<br />
in Fig. 8.<br />
Corretto<br />
Non corretto<br />
Garantire la corretta<br />
messa a livello dell’unità.<br />
Fig. 6<br />
Fig. 8<br />
Eliminare le sbavature venutesi a creare con il taglio mantenendo<br />
l’imboccatura del tubo verso il basso durante la suddetta operazione.<br />
Rivestire le linee frigorifere con l’opportuno<br />
isolamento e quindi inserire i bocchettoni<br />
preventivamente tolti dagli attacchi delle<br />
unità.<br />
Fig. 9<br />
La consistenza della parete deve essere adeguata al peso dell’unità e<br />
non permettere la trasmissione di rumori o vibrazioni.<br />
Bisogna porre particolare attenzione nella scelta dell’area, affinché il<br />
flusso dell’aria non rechi disturbo ai vicini.<br />
17
SEZIONE II: INSTALLAZIONE E MANUTENZIONE<br />
Per una corretta esecuzione della flangiatura utilizzare una flangiatubi<br />
di tipo universale seguendo le indicazioni riportate in Fig. 10, rimuovere<br />
successivamente le eventuali sbavature formatesi.<br />
Fig. 10<br />
1) Presa a spillo<br />
2) Cappuccio della<br />
presa a spillo<br />
3) Nottolino<br />
4) Cappuccio del<br />
rubinetto<br />
5) Cappuccio del<br />
rubinetto<br />
A<br />
B (mm)<br />
inch mm max min.<br />
1/4” 6,35 8,25 8,01<br />
3/8” 9,52 12,36 11,97<br />
1/2” 12,70 15,82 15,42<br />
5/8 15,90 18,95 18,58<br />
Assicurarsi che il tubo risulti svasato uniformemente e non presenti i<br />
difetti illustrati in Fig. 11.<br />
Corretto<br />
Non corretto<br />
Fig. 11<br />
Connettere le linee frigorifere agli attacchi delle unità facendo<br />
combaciare perfettamente le due estremità. Avvitare a mano il<br />
bocchettone e quindi serrarlo mediante la chiave dinamometrica<br />
rispettando i valori di coppia riportati in tabella.<br />
Dado Forza di avvitamento<br />
inch 1/4” Nm 15<br />
inch 3/8” Nm 16<br />
inch 1/2” Nm 40<br />
inch 5/8” Nm 48<br />
Collegare il tubo di scarico condensa all’unità interna.<br />
Si consiglia di non realizzare curve sui tubi con raggio inferiore a 100<br />
mm per non schiacciare la sezione dei tubi stessi.<br />
II.2.5.1<br />
SALVAGUARDIA AMBIENTALE!<br />
Prima di avviare l’unità verificare con opportuno<br />
strumento che le perdite di gas non siano superiori<br />
a 5 g/anno.<br />
Carica di refrigerante<br />
Le unità sono fornite con una carica di refrigerante che prevede una<br />
lunghezza delle linee pari a 5 m. Per lunghezze superiori è necessario<br />
incrementare la quantità di refrigerante. Per i valori fare riferimento alla<br />
tabella presente negli allegati.<br />
II.2.5.2<br />
Creazione dello scarico condensa<br />
Fig. 13<br />
Per evitare che odori sgradevoli possano salire attraverso il tubo di<br />
scarico condensa, si consiglia di realizzare sempre un sifone nella parte<br />
terminale del tubo sul lato esterno.<br />
Il sistema di scarico della condensa deve prevedere un’adeguata<br />
pendenza per favorire la fuoriuscita dell’acqua (Fig. 14).<br />
1. Chiave<br />
2. Chiave dinamometrica<br />
Fig. 14<br />
Fig. 12<br />
Nel collegamento delle unità tenere fermi gli attacchi con un’ulteriore<br />
chiave (Fig. 12); questo per evitare che il tubo subisca una torsione.<br />
Togliere il cappuccio dalla presa a spillo del rubinetto. (Fig. 13)<br />
Collegare la pompa per vuoto sulla presa a spillo del rubinetto.<br />
Non aprire i rubinetti, il vuoto deve essere fatto solo sull’unità interna e<br />
sulla linea frigorifera.<br />
Effettuare il vuoto fino a raggiungere una pressione di circa 1,3 KPa (10<br />
mmHg).<br />
Eseguita questa operazione e dopo aver scollegato la pompa per vuoto,<br />
aprire completamente i rubinetti, togliendo i cappucci (Fig. 13) e agendo<br />
con una chiave maschio esagonale da 5 mm (fornita a corredo) sul<br />
nottolino (Fig. 13).<br />
Rimettere tutti i cappucci sui rubinetti e serrarli.<br />
IMPORTANTE!<br />
L’esecuzione non conforme dello scarico condensa<br />
provoca una perdita d’acqua dall’unita interna, con<br />
conseguenti danni a persone e/o cose limitrofe.<br />
Un allacciamento non conforme solleva RHOSS<br />
S.p.A. da responsabilità per danni alle cose ed alle<br />
persone.<br />
18
SEZIONE II: INSTALLAZIONE E MANUTENZIONE<br />
II.2.6<br />
COLLEGAMENTI ELETTRICI<br />
IMPORTANTE!<br />
L’esecuzione delle connessioni elettriche deve<br />
essere eseguita da personale specializzato e nel<br />
rispetto delle leggi e dei regolamenti vigenti nel<br />
luogo di installazione.<br />
Un allacciamento elettrico non conforme solleva<br />
RHOSS S.p.A. da responsabilità per danni alle<br />
cose ed alle persone.<br />
PERICOLO!<br />
Installare sempre in zona protetta ed in vicinanza<br />
della macchina un interruttore automatico generale<br />
(IG) con curva caratteristica ritardata, di adeguata<br />
portata e potere d’interruzione e con distanza<br />
minima di apertura dei contatti di 3 mm.<br />
L’interruttore automatico generale (IG) deve essere<br />
posto a monte dell’intero impianto in modo da poter<br />
interrompere l’alimentazione elettrica dell’unità<br />
principale e di tutti gli accessori ad essa collegati<br />
costituenti l’intero impianto.<br />
Il collegamento a terra dell’unità è obbligatorio per<br />
legge e salvaguarda la sicurezza dell’utente con la<br />
macchina in funzione.<br />
Eseguire la sguainatura solo in prossimità dei morsetti. Utilizzare<br />
capicorda adatti per i morsetti in uso.<br />
Dopo aver inserito il capicorda nel morsetto, serrare le viti con un<br />
cacciavite senza premere con eccessiva forza: ad operazione conclusa<br />
tirare leggermente i cavi per verificarne il corretto serraggio.<br />
Utilizzare il pressacavo presente all’interno del vano scheda elettronica<br />
per bloccare i cavi.<br />
II.2.6.1<br />
Collegamento alimentazione<br />
Controllare che la tensione e la frequenza dell’impianto elettrico<br />
corrispondano a 230V (±10%) monofase a 50 Hz; che la potenza<br />
installata disponibile sia sufficiente al funzionamento e che i cavi della<br />
linea d’alimentazione siano di sezione adeguata alla corrente massima<br />
richiesta.<br />
Assicurarsi che l’impianto elettrico di alimentazione sia conforme alle<br />
vigenti norme nazionali per la sicurezza.<br />
Per il collegamento dell’unità alla rete elettrica utilizzare cavo flessibile<br />
bipolare + terra, sezione 1,5 mm² con guaina in policloroprene non più<br />
leggero di H05RN-F. Il conduttore di terra deve essere più lungo degli<br />
altri conduttori in modo che esso sia l’ultimo a tendersi in caso di<br />
allentamento del dispositivi di fissaggio del cavo.<br />
I cavi di collegamento elettrico devono essere fatti passare all’interno di<br />
condotte aventi un sufficiente grado di protezione, a sua volta devono<br />
essere ancorati solidamente al pavimento o alle pareti.<br />
Particolare attenzione deve essere prestata all’eventuale presenza di<br />
spigoli vivi, sbavature, superfici ruvide in genere o filetti al fine di<br />
garantire che non si danneggi l’isolamento del conduttore.<br />
Per effettuare i collegamenti, togliere l’involucro dell’unità interna ed il<br />
portellino laterale (lato attacchi frigoriferi) dell’unità esterna, inserire i<br />
cavi elettrici nei morsetti seguendo gli schemi elettrici applicati sui<br />
condizionatori stessi.<br />
Nel caso in cui l’unità venga fissata su una parete metallica, deve<br />
essere prevista la messa a terra secondo le norme vigenti nel paese<br />
d’installazione.<br />
Gli allacciamenti devono essere eseguiti rispettando gli schemi elettrici<br />
riportati negli allegati.<br />
Normalmente la lunghezza della linea elettrica é maggiore di circa 2 m<br />
rispetto alla lunghezza della linea frigorifera.<br />
Ogni unità interna è dotata di cavo di alimentazione con spina.<br />
II.3<br />
II.3.1<br />
ISTRUZIONI PER L’AVVIAMENTO<br />
IMPORTANTE!<br />
La messa in funzione o primo avviamento della<br />
macchina (dove previsto) deve essere eseguito<br />
esclusivamente da personale abilitato ad operare<br />
su questa tipologia di prodotti.<br />
PERICOLO!<br />
Prima della messa in funzione assicurarsi che<br />
l’installazione ed i collegamenti elettrici siano stati<br />
eseguiti conformemente a quanto riportato nel<br />
presente manuale. Assicurarsi inoltre che non vi<br />
siano persone non autorizzate nei pressi della<br />
macchina durante le suddette operazioni.<br />
CONTROLLI PRELIMINARI ALL’AVVIAMENTO<br />
Prima dell’avviamento dell’unità assicurarsi che:<br />
1. l’unità sia posizionata in modo corretto;<br />
2. le tubazioni di mandata, ritorno e scarico condensa dell’impianto<br />
siano collegate correttamente;<br />
3. lo scambiatore sia pulito;<br />
4. i collegamenti elettrici siano corretti;<br />
5. le viti che fissano i conduttori siano ben serrate;<br />
6. la tensione di alimentazione sia quella richiesta;<br />
Si raccomanda di far funzionare l’unità alla massima velocità per alcune<br />
ore.<br />
II.4<br />
II.4.1<br />
MANUTENZIONE STRAORDINARIA<br />
PERICOLO!<br />
Gli interventi manutentivi vanno eseguiti da tecnici<br />
esperti, abilitati a operare su prodotti per il<br />
condizionamento e la refrigerazione.<br />
Utilizzare idonei guanti di lavoro.<br />
PERICOLO!<br />
Agire sempre sull’interruttore automatico generale<br />
(IG) posto a protezione di tutto l’impianto prima di<br />
qualunque operazione manutentiva anche se a<br />
carattere puramente ispettivo. Verificare che<br />
nessuno alimenti accidentalmente la macchina,<br />
bloccare l’interruttore automatico generale (IG) in<br />
posizione di zero.<br />
PERICOLO<br />
Prestare attenzione alle superfici calde presenti<br />
all’interno della macchina.<br />
E’ vietato introdurre oggetti appuntiti attraverso le<br />
griglie di aspirazione mandata aria.<br />
CONTROLLO CARICA FLUIDO FRIGORIGENO<br />
Dopo avere inserito un manometro sulla presa di pressione sul lato di<br />
mandata e uno sulla presa di pressione sul lato di aspirazione, avviare<br />
l’unità e controllare le relative pressioni una volta che risultino<br />
stabilizzate.<br />
II.4.2<br />
VERIFICA ASSENZA FUGHE FLUIDO<br />
FRIGORIGENO<br />
Con apposito cercafughe o con acqua saponata, controllare il circuito<br />
frigorifero e verificare che non siano superiori a 5 g/anno.<br />
II.4.3<br />
VERIFICA STATO DI PULIZIA DELLO<br />
SCAMBIATORE<br />
A unità spenta osservare lo scambiatore e, a seconda del caso:<br />
• asportare dalla superficie alettata qualsiasi corpo estraneo che<br />
possa ostruire il passaggio dell’aria;<br />
• eliminare la polvere depositata mediante un getto d’aria compressa;<br />
• effettuare un blando lavaggio con acqua, unito a un leggero<br />
spazzolamento;<br />
• effettuare l’asciugatura con aria compressa.<br />
II.4.4<br />
VERIFICA STATO DI PULIZIA DELLO<br />
SCARICO CONDENSA<br />
A unità spenta verificare lo stato di pulizia dello scarico condensa.<br />
II.4.5<br />
VERIFICA DEL CIRCUITO ELETTRICO<br />
Sono raccomandate le seguenti operazioni:<br />
• verifica assorbimento elettrico unità mediante pinza amperometrica<br />
e confronto del valore con quelli riportati nell’allegato A1;<br />
• ispezione e verifica serraggio contatti elettrici e relativi morsetti.<br />
II.4.6<br />
INDICAZIONI PER LA SOSTITUZIONE DI<br />
COMPONENTI<br />
Nel caso di riparazione di una unità è bene scaricare il fluido frigorigeno<br />
da entrambi i lati di alta e bassa pressione. Questo perché nel caso di<br />
rimozione di carica di fluido frigorigeno dall’unità solamente dal lato di<br />
alta pressione, può succedere che il compressore chiuda il circuito<br />
impedendo l’equalizzazione delle pressioni nello stesso. In tal modo la<br />
parte di bassa pressione dell’involucro e la linea di aspirazione possono<br />
rimanere pressurizzate. In questo caso, se si applica una torcia di<br />
brasatura su un componente a bassa pressione dell’unità, la miscela<br />
pressurizzata di fluido frigorigeno e olio uscendo dal circuito può<br />
incendiarsi al contatto con la fiamma della torcia. Per prevenire questo<br />
rischio è importante controllare l’effettivo scarico della pressione sui<br />
rami di alta e bassa pressione prima di dissaldare.<br />
L’eventuale integrazione sulle unità di fluido frigorigeno R410A deve<br />
essere fatta spillando sempre dalla fase liquida della bombola per non<br />
alterarne la composizione.<br />
19
CONTENTS<br />
CONTENTS<br />
KEY TO SYMBOLS<br />
I<br />
SECTION I: USER..................................................................................21<br />
I.1 General information ..................................................................................................21<br />
I.1.1 Standard use conditions..............................................................................................21<br />
I.1.2 Operating limits ...........................................................................................................21<br />
I.1.3 Safety information .......................................................................................................21<br />
I.2 Spare parts ................................................................................................................21<br />
I.3 Assistance .................................................................................................................21<br />
I.4 Description of the unit ..............................................................................................21<br />
I.4.1 Internal unit .................................................................................................................22<br />
I.4.2 External unit ................................................................................................................22<br />
I.4.3 Remote control............................................................................................................22<br />
I.5 Description of remote control and its functions ....................................................23<br />
I.5.1 Names and functions of the indicators on the display .................................................24<br />
I.6 Use of the remote control.........................................................................................24<br />
I.6.1 Setting the clock..........................................................................................................25<br />
I.6.2 Switching the unit on and off .......................................................................................25<br />
I.6.3 Setting the operating mode .........................................................................................25<br />
I.6.4 Economic running function..........................................................................................25<br />
I.6.5 Setting the desired temperature..................................................................................25<br />
I.6.6 Setting the deflector ....................................................................................................26<br />
I.6.7 Fan settings.................................................................................................................26<br />
I.6.8 Setting the timer..........................................................................................................26<br />
I.6.9 Keypad lock.................................................................................................................26<br />
I.6.10 Resetting the remote control .......................................................................................26<br />
I.7 description OF INDICATORS....................................................................................26<br />
I.8 Periods out of use.....................................................................................................26<br />
I.9 Start-up after prolonged shutdown .........................................................................26<br />
I.10 Quick operating guide ..............................................................................................27<br />
I.10.1 Automatic function.......................................................................................................27<br />
I.10.2 Cooling function ..........................................................................................................27<br />
I.10.3 Drying function ............................................................................................................27<br />
I.10.4 Heating function ..........................................................................................................27<br />
I.10.5 Fan function ................................................................................................................27<br />
I.11 Ordinary maintenance to be performed by user ....................................................28<br />
I.11.1 Cleaning the internal unit ............................................................................................28<br />
I.11.2 Cleaning the external unit ...........................................................................................28<br />
I.11.3 Cleaning the air filter ...................................................................................................28<br />
I.11.4 Cleaning the remote control ........................................................................................28<br />
I.12 Warning and suggestions ........................................................................................28<br />
I.13 Operating anomalies.................................................................................................29<br />
I.14 Instructions for disposal of the unit and hazardous substances .........................29<br />
II<br />
SECTION II: INSTALLATION AND MAINTENANCE.............................30<br />
II.1.1 Transport and handling ...............................................................................................30<br />
II.1.2 Storage .......................................................................................................................30<br />
II.1.3 Clearance distances....................................................................................................30<br />
II.2 Installation .................................................................................................................31<br />
II.2.1 Noise and vibration reduction......................................................................................31<br />
II.2.2 Maximum difference in height between the units ........................................................31<br />
II.2.3 Internal unit installation ...............................................................................................31<br />
II.2.4 External unit installation ..............................................................................................32<br />
II.2.5 Refrigerant connections ..............................................................................................32<br />
II.2.6 Electrical connections .................................................................................................34<br />
II.3<br />
Start-up instructions.................................................................................................34<br />
II.3.1 Controls before start-up ..............................................................................................34<br />
II.4<br />
Extraordinary maintenance......................................................................................34<br />
II.4.1 Refrigerant fluid charge control ...................................................................................34<br />
II.4.2 Checking for absence of refrigerant fluid leaks ...........................................................34<br />
II.4.3 Checking heat exchanger cleanliness.........................................................................34<br />
II.4.4 Checking condensation drain cleanliness ...................................................................34<br />
II.4.5 Checking the electric circuit.........................................................................................34<br />
II.4.6 Component replacement instructions..........................................................................34<br />
SYMBOL<br />
UNI EN 292<br />
UNI EN 294<br />
UNI EN 563<br />
UNI EN 1050<br />
UNI 10893<br />
EN 13133<br />
EN 12797<br />
EN 378-1<br />
PrEN 378-2<br />
CEI EN 60335-2-40<br />
UNI EN ISO 3744<br />
EN 50081-1:1992<br />
EN 61000<br />
MEANING<br />
GENERIC DANGER!<br />
The GENERIC DANGER sign warns the operator<br />
and maintenance personnel about risks that may<br />
cause death, physical injury, or immediate or latent<br />
illnesses of any kind.<br />
DANGER: LIVE COMPONENTS!<br />
The DANGER: LIVE COMPONENTS sign warns the<br />
operator and maintenance personnel about risks<br />
due to the presence of live voltage.<br />
DANGER: SHARP EDGES!<br />
The DANGER: SHARP EDGES sign warns the<br />
operator and maintenance personnel about the<br />
presence of potentially dangerous sharp edges.<br />
DANGER: HOT SURFACES!<br />
The DANGER: HOT SURFACES sign warns the<br />
operator and maintenance personnel about the<br />
presence of potentially dangerous hot surfaces.<br />
DANGER: MOVING PARTS!<br />
The DANGER: MOVING PARTS sign warns the<br />
operator and maintenance personnel about risks<br />
due to the presence of moving parts.<br />
IMPORTANT WARNING!<br />
The IMPORTANT WARNING sign indicates actions<br />
or hazards that could damage the unit or its<br />
equipment.<br />
SAFEGUARD THE ENVIRONMENT!<br />
The ENVIRONMENTAL SAFEGUARD sign provides<br />
instructions on how to use the machine in an<br />
environmentally friendly manner.<br />
NORMATIVE REFERENCES<br />
Sicurezza del macchinario. Concetti fondamentali,<br />
principi generali di progettazione.<br />
Sicurezza del macchinario. Distanze di sicurezza per<br />
impedire il raggiungimento di zone pericolose con gli arti<br />
superiori.<br />
Sicurezza del macchinario. Temperature delle superfici<br />
di contatto. Dati ergonomici per stabilire i valori limiti di<br />
temperatura per superfici calde.<br />
Sicurezza del macchinario. Principi per la valutazione<br />
del rischio.<br />
Documentazione tecnica di prodotto. Istruzioni per l’uso<br />
Brazing. Brazer approval.<br />
Brazing. Destructive tests of brazed joints.<br />
Refrigeration systems and heat pumps – safety and<br />
environmental requirements. Basic requirements,<br />
definitions, classification and selection criteria.<br />
Refrigeration systems and heat pumps – safety and<br />
environmental requirements. Design, construction,<br />
testing, installing, marking and documentation.<br />
Sicurezza degli apparecchi elettrici d’uso domestico e<br />
similare. Parte 2: Norme particolari per le pompe di<br />
calore elettriche, per i condizionatori d’aria e per i<br />
deumidificatori.<br />
Determinazione dei livelli di potenza sonora delle<br />
sorgenti di rumore mediante pressione sonora. Metodo<br />
tecnico progettuale in un campo essenzialmente libero<br />
su un piano riflettente.<br />
Electromagnetic compatibility - Generic emission<br />
standard Part 1: Residential, commercial and light<br />
industry<br />
Electromagnetic compatibility (EMC)<br />
ENCLOSED DOCUMENTS<br />
A1<br />
A2<br />
Technical features ……………………………………………………………………..85<br />
Wiring diagrams …………………..........................................................................89<br />
20
SECTION I: USER<br />
I<br />
SECTION I: USER<br />
I.1 GENERAL INFORMATION<br />
This user manual comes as standard with this air conditioning unit.<br />
Safe use and maintenance of this machine, which is the purpose of this<br />
User Instructions Manual, are indispensable to avoid risks to the<br />
operators, both during operation as well as during repair and<br />
maintenance work. Therefore it is indispensable for this document to be<br />
carefully read, adhered to in its entirety and conserved with care.<br />
IMPORTANT!<br />
RHOSS S.p.a. declines all responsibility for any<br />
damage deriving from improper use of the air<br />
conditioning unit or caused following failure to read<br />
the information and instructions provided in this<br />
manual in full.<br />
I.1.1<br />
STANDARD USE CONDITIONS<br />
DANGER!<br />
Uses other than that for which the machine has<br />
been designed by the manufacturer are expressly<br />
prohibited.<br />
The split wall-mounted air conditioning unit is intended for the treatment<br />
of air (summer and winter air conditioning) inside buildings used for<br />
domestic or similar purposes. The unit is designed for installation in<br />
rooms with a NON EXPLOSIVE atmosphere.<br />
Do not use the air conditioning unit for specialist uses such as cooling<br />
electrical or electronic equipment, preserving food, antique furniture,<br />
animal farms, organic agriculture, furs, etc…<br />
This air conditioning unit is fitted with high speed fans. Never insert your<br />
hands or objects of any kind inside the air output slots in either the<br />
internal unit or the external unit: this could cause serious accidents<br />
involving personal injury and damage to the fan.<br />
Always keep the environment at a comfortable temperature, especially<br />
in the presence of children, the elderly or the disabled.<br />
Use of the air conditioning unit at temperatures and levels of humidity<br />
other than those permitted may cause malfunctions and condensation<br />
drips inside the internal unit.<br />
We recommend disconnecting the unit from the power supply during<br />
storms using a mains switch (not included), in order to protect the air<br />
conditioning unit from damage due to over voltage caused by lightning<br />
strikes.<br />
I.1.2<br />
OPERATING LIMITS<br />
IMPORTANT!<br />
The unit will function correctly only if the<br />
instructions for use are scrupulously followed, if<br />
the specified clearances are complied with during<br />
installation and if the operating restrictions<br />
indicated in this manual are strictly adhered to.<br />
Internal External<br />
Cooling upper limit °C 30 43<br />
lower limit °C 17 18<br />
Heating upper limit °C 30 24<br />
lower limit °C 17 -5<br />
I.1.3<br />
SAFETY INFORMATION<br />
The unit is fitted with safety devices in order to prevent the risk of<br />
personal injury and guarantee correct operation.<br />
Tampering or alterations not authorized by RHOSS S.p.a. may pose<br />
a potential risk to persons and damage to the unit.<br />
I.2 SPARE PARTS<br />
IMPORTANT!<br />
Use only original spare parts and accessories.<br />
RHOSS S.p.a. shall not be held liable for damage<br />
caused by tampering or work carried out by<br />
unauthorised personnel or malfunctions caused by<br />
the use of non-original spare parts or accessories.<br />
Only use original RHOSS S.p.A. spare parts during maintenance.<br />
RHOSS S.p.A. will not be held responsible in the following cases:<br />
• incorrect installation;<br />
• partial or total failure to observe the instructions;<br />
• electrical/hydraulic supply problems;<br />
• incorrect use of the unit;<br />
• lack of maintenance;<br />
• unauthorized modifications and operations;<br />
• use of non original or unsuitable spare parts.<br />
I.3 ASSISTANCE<br />
Before carrying out repair work on the unit, we recommend contacting<br />
RHOSS S.p.A.,, especially in the event that extraordinary maintenance<br />
operations are necessary.<br />
I.4 DESCRIPTION OF THE UNIT<br />
Autonomous air conditioning units with separate sections in the heat<br />
pump version consist of internal units (No. 1 for the MONO model, No.<br />
2 for the DUAL model, No. 3 for the TRIAL model) for wall-mounted<br />
installation and an external unit to be connected via refrigerant and<br />
electric lines.<br />
The internal unit has a protective gas charge in order to prevent the<br />
entry of damp. The external unit contains the entire refrigerant charge,<br />
which is also sufficient for the refrigerant line up to a maximum length of<br />
5 m.<br />
In the event of a longer line, you will need to top up the refrigerant gas.<br />
The units are characterized by very silent running and high<br />
performances in terms of efficiency and reliability.<br />
The operation of the units is controlled by an electronic microprocessor<br />
board which makes it possible to choose from the following<br />
programmes:<br />
• automatic AUTO<br />
• cooling COOL<br />
• drying DRY<br />
• heating HEAT<br />
• ventilation FAN<br />
All the operating programme options can be selected using an infrared<br />
remote control with liquid crystal display.<br />
When the remote control is not available, the air conditioning unit can<br />
be controlled by a switch on the internal unit in emergencies.<br />
Mod. INVERTER<br />
Internal External<br />
Cooling upper limit °C 30 43<br />
lower limit °C 17 18<br />
Heating upper limit °C 30 24<br />
lower limit °C 17 -15<br />
21
Internal Unit<br />
air outlet<br />
External Unit<br />
air inlet<br />
air outlet<br />
air inlet<br />
air inlet<br />
I.4.1<br />
INTERNAL UNIT<br />
SECTION I: USER<br />
The internal unit, for wall mounted installation only, is characterized by<br />
its attractive appearance, which means it blends in well with any<br />
furnishing style. It is fitted with a heat exchange coil, a very silent<br />
tangential fan that guarantees excellent acoustic comfort at even the<br />
maximum air flow, an air filter that can be removed for cleaning, a<br />
horizontal motor-driven deflector and vertical fins in order to optimize<br />
output air distribution.<br />
The operating status signal LEDs and the remote control signal receiver<br />
are located in a clearly visible frontal position.<br />
The unit comes with:<br />
• a fixture plate;<br />
• a remote control;<br />
• a wall-mounted remote control holder.<br />
I.4.2<br />
EXTERNAL UNIT<br />
The external unit, for wall-mounted installation, consists of a zinc-plated<br />
and coated steel sheet structure. It houses a hermetic type compressor<br />
together with a statically and dynamically balanced axial fan in order to<br />
guarantee maximum operating silence.<br />
The unit is completed by the large surface heat exchange coil, the<br />
lamination body, the cycle reversing valve for the heat pump versions,<br />
the folder connections with tap, the electric condensers for compressor<br />
and fan and the terminal board for electrical connections with the<br />
internal unit.<br />
I.4.3<br />
REMOTE CONTROL<br />
The remote control makes it possible to set and display all the air<br />
conditioning unit operating parameters, thus facilitating all the<br />
programming operations.<br />
The remote control is powered by 2 R03 size AAA 1.5 V batteries.<br />
IMPORTANT!<br />
It is advisable to test the remote control operation<br />
in order to establish its reception zone.<br />
Key<br />
Internal Unit<br />
1) Load bearing structure<br />
2) Front panel<br />
3) Air filter<br />
4) Air output grille<br />
5) Vertical deflectors<br />
6) Infrared signal receiver<br />
7) Indicator signal<br />
8) Manual operation button<br />
9) Remote control<br />
External Unit<br />
10) Connection pipes<br />
11) Electrical connections<br />
12) Refrigerant taps<br />
13) Air output grille<br />
22
I.5 DESCRIPTION OF REMOTE CONTROL AND ITS<br />
FUNCTIONS No. KEY FUNCTION DESCRIPTION<br />
1 / Signal emitter<br />
2 /<br />
Liquid crystal<br />
display<br />
3 On/Off<br />
4<br />
5<br />
6<br />
7<br />
8<br />
9<br />
10<br />
Operating<br />
programme<br />
selection<br />
Temperature<br />
setting<br />
Fan speed<br />
setting<br />
Deflector<br />
position<br />
setting<br />
Motor-driven<br />
deflector<br />
selection<br />
Economic<br />
operation<br />
(INVERTER<br />
excluded)<br />
On/off setting<br />
with timer<br />
11 Time setting<br />
12 Confirm<br />
13<br />
14<br />
15<br />
16<br />
Clock<br />
regulation<br />
Remote<br />
control lock<br />
Reset the<br />
remote control<br />
Timer<br />
cancellation<br />
SECTION I: USER<br />
Transmits the infrared signals to<br />
the receiver in the internal unit<br />
Indicates the air conditioning unit<br />
status and operating modes<br />
Makes it possible to switch the<br />
air conditioning unit on and off.<br />
Press the key to start the unit.<br />
Press the key again to switch it<br />
off.<br />
Makes it possible to select the<br />
desire operating mode (AUTO,<br />
COOL, DRY, HEAT, FAN)<br />
These keys make it possible to<br />
set the desired ambient<br />
temperature.<br />
the desired temperature is<br />
raised up to 30°C<br />
the desired temperature is<br />
lowered down to 17°C<br />
Every time the key is pressed<br />
corresponds to a variation of 1°C<br />
Press this key to select the fan<br />
speed. When you select AUTO,<br />
the fan speed is automatically<br />
regulated on the basis of the<br />
ambient temperature. It is also<br />
possible to manually select the<br />
fan speed by choosing between<br />
the 3 options: LOW, MEDIUM or<br />
HIGH<br />
Makes it possible to select the<br />
deflector angle<br />
This key makes enables the<br />
deflector to oscillate in a<br />
constant fashion<br />
Selects automatic temperature<br />
and fan speed control in order<br />
not to cause feelings of<br />
excessive cold (cooling function)<br />
or excessive heat (heating<br />
function)<br />
Press these keys to set the timer<br />
for switching the unit on/off<br />
Makes it possible to set the<br />
clock time and the timers<br />
Press this key to confirm the<br />
selected times<br />
Pressing this key for several<br />
seconds makes it possible to<br />
regulate the clock<br />
Makes it possible to lock the<br />
remote control functions<br />
Press this button in order to<br />
reset the remote control settings<br />
Press this key to cancel the<br />
timer function<br />
Fig. 1<br />
23
I.5.1<br />
NAMES AND FUNCTIONS OF THE<br />
INDICATORS ON THE DISPLAY<br />
I.6 USE OF THE REMOTE CONTROL<br />
SECTION I: USER<br />
The remote control uses two alkaline 1.5 V, R03 type AAA batteries<br />
(provided).<br />
To insert the batteries, slide the remote control cover right off in a<br />
downwards direction. Insert the batteries in the specific seat, respecting<br />
the polarities indicated. Replace the cover and select the desired<br />
functions. The same operation must be carried out when replacing the<br />
batteries with new ones. On average the batteries last for around a<br />
year.<br />
1) Transmission indicator<br />
Appears every time a signal is transmitted to the internal unit.<br />
2) Operating programme (MODE) display<br />
Indicates the selected operating mode.<br />
3) ON/OFF display<br />
Indicates that the unit is operating.<br />
4) Temperature display (TEMP)<br />
Indicates the set temperature (from 17°C to 30°C). No temperature is<br />
displayed when the FAN operating mode is selected.<br />
5) Clock display<br />
This display is always active and indicates the current time.<br />
6) Timer display (TIMER ON)<br />
If you press the TIMER ON key, the on time with timer is displayed.<br />
6) Timer display (TIMER OFF)<br />
If you press the TIMER OFF key, the off time with timer is displayed.<br />
8) Lock display<br />
Indicates that the remote control is locked.<br />
9) ECONO display<br />
Indicates that the ECONOMIC RUNNING function is active.<br />
10) Fan speed display (FAN)<br />
Indicates the selected fan speed. May display AUTO or one of the three<br />
speed levels: LOW, MEDIUM and HIGH.<br />
The remote control display is always on.<br />
Remove the batteries from the remote control if it is going to be out of<br />
use for a long period of time.<br />
The remote control display always displays the time, whether the air<br />
conditioning unit is off or on.<br />
Point the remote control at the air conditioning unit receiver when<br />
making settings (except when setting the clock).<br />
If the signals are received correctly, the air conditioning unit will emit an<br />
acoustic “beep” signal.<br />
The remote control is able to transmit up to a distance of around 8<br />
metres from the receiver.<br />
Avoid exposing the remote control to excessive humidity, direct sunlight<br />
or other heat sources, and knocks. Protect the remote control from<br />
splashes of water or other fluids.<br />
If the internal unit’s infrared receiver is exposed to direct sunlight or<br />
intense fluorescent light with electronic ignition, the unit may present<br />
operating anomalies or stop working altogether.<br />
The use of other remote controls in the vicinity or in the same room in<br />
which the internal unit is installed may prevent the air conditioning unit<br />
from operating correctly. Avoid pointing other remote controls towards<br />
the air conditioning unit receiver.<br />
24
SECTION I: USER<br />
I.6.1<br />
SETTING THE CLOCK<br />
When the batteries are inserted in the remote control, the clock<br />
indicator flashes and displays 0:00.<br />
NOTE: do not point the remote control towards the air conditioning unit<br />
when setting the clock.<br />
We recommend regulating the clock on the remote control before<br />
starting up the air conditioning unit. Proceed as follows in order to<br />
regulate it (ref. Fig. 1):<br />
press the TIME ADJUST key until<br />
reaching the desired time<br />
press OK in order to confirm the<br />
selection (do not point the remote<br />
control at the unit)<br />
In order to regulate the clock again or programme again, proceed as<br />
follows (ref. Fig. 1):<br />
press the CLOCK key for more than<br />
three seconds<br />
With the selection of the automatic programme AUTO, the air<br />
conditioning unit can operating in COOLING mode, VENTILATION<br />
mode and in HEATING mode on the basis of the temperature difference<br />
between the ambient temperature and the temperature selected on the<br />
remote control.<br />
The fan is in constant operation, whatever the difference between the<br />
ambient temperature and the selected temperature.<br />
When the cooling programme COOL is selected, the air conditioning<br />
unit operates with free temperature settings, lowering the ambient<br />
temperature.<br />
When the drying programme DRY is selected, the air conditioning unit<br />
operates at 4-6 minute intervals, with free temperature settings, thus<br />
progressively lowering the temperature and humidity in the<br />
environment. In the drying programme DRY, the FAN SPEED key<br />
cannot be used.<br />
When the unit is running in heating mode HEAT, the air conditioning<br />
unit operates with free temperature settings, raising the ambient<br />
temperature. With low temperature and high relative humidity external<br />
air conditions, some frost may form on the external heat exchanger that<br />
must be eliminated; the microprocessor board provides for this<br />
operation on the basis of a defined cycle, blocking the heating phase for<br />
periods varying from 6 to 10 minutes. This operation is signalled by the<br />
PRE-DEF LED.<br />
When the ventilation programme FAN is selected, the air conditioning<br />
unit operates without temperature settings, ventilating the ambient air.<br />
press the TIME ADJUST key until<br />
reaching the desired time<br />
press OK in order to confirm the<br />
selection (do not point the remote<br />
control at the unit)<br />
I.6.4<br />
I.6.4.1<br />
ECONOMIC RUNNING FUNCTION<br />
By pressing this key in the AUTO, COOL and HEAT<br />
modes when the unit is running, the air conditioning<br />
unit varies the set temperature over the following<br />
two hours, in COOL mode +2°C, in HEAT mode –<br />
2°C, and then maintains it throughout the operating<br />
time, obtaining greater comfort and energy saving.<br />
EMERGENCY FUNCTION<br />
I.6.2<br />
SWITCHING THE UNIT ON AND OFF<br />
The unit may be switched on or off by pressing the<br />
ON/OFF key.<br />
In going from ON to OFF, any operating mode is interrupted, timer<br />
delays in progress are cancelled, and the operating mode of the<br />
appliance and the fan, the position of the deflector and the preset<br />
temperature are memorised.<br />
In going from OFF to ON, the machine automatically restores the<br />
operating modes memorised before shutdown.<br />
When the unit is on, the unit on indication appears on<br />
the display.<br />
The presence of this symbol on the display indicates<br />
that the remote control is communicating with the unit.<br />
Every time the external unit compressor stops, at least 3 seconds must<br />
pass before it is started up again. This period of time is necessary to<br />
safeguard the compressor and may not be modified.<br />
I.6.3<br />
SETTING THE OPERATING MODE<br />
By pressing the Mode key several times, it is possible to<br />
change the operating mode of the unit. The operating<br />
mode selected appears on the display.<br />
AUTO: Completely automatic operation<br />
COOL: cooling mode<br />
DRY: drying mode<br />
HEAT: heating mode<br />
FAN: Ventilation only mode<br />
The emergency function can be used when the remote control is not<br />
available or the batteries are flat. By pressing the emergency operation<br />
button, located on the internal unit, the air conditioning unit can run as<br />
usual.<br />
If the emergency operating button is pressed once, the unit runs in<br />
AUTO mode.<br />
If it is pressed a second time, the unit will run in cooling mode on the<br />
basis of this programme:<br />
• set temperature 24°C<br />
• AUTOMATIC fan speed<br />
By pressing the emergency button a third time, the air conditioning unit<br />
will come to a stop.<br />
I.6.5<br />
Emergency button<br />
SETTING THE DESIRED TEMPERATURE<br />
By pressing these keys in the AUTO, COOL, DRY<br />
and HEAT mode, it is possible to increase or reduce<br />
the desired temperature value from 17°C to 30°C.<br />
The display shows the value of the temperature<br />
selected.<br />
25
SECTION I: USER<br />
I.6.6<br />
SETTING THE DEFLECTOR<br />
In order to obtain optimal air distribution, regulate the position of the<br />
motor-driven deflector and the vertical fins, making sure that the air flow<br />
is not directly pointed at persons.<br />
The vertical fins must be manually oriented before starting the air<br />
conditioning unit, while you should proceed as follows for the motordriven<br />
deflector:<br />
The deflector position can be modified by pressing<br />
the AIR DIRECTION key several times.<br />
Press the SWING key to activate continuous<br />
deflector oscillation.<br />
ATTENTION:<br />
In order to transmit the timer settings automatically at the set time,<br />
position the remote control near the internal unit. The TIMER function is<br />
not repetitive and must be set every time it is used.<br />
When the Timer ON-OFF is selected , there can be a small delay for the<br />
start up of the unit with respect to the hour programmed in the timer.<br />
This is to be considered completely normal operation of the unit.<br />
I.6.9<br />
KEYPAD LOCK<br />
By pressing the LOCK key with a sharp<br />
object, it is possible to completely inhibit the<br />
remote control keypad, preventing<br />
undesired use (by children etc.). The<br />
display will show the symbol alongside. To<br />
remove the lock, press the LOCK key again<br />
with a sharp object.<br />
I.6.10<br />
RESETTING THE REMOTE CONTROL<br />
By pressing the RESET key with a sharp object, it<br />
is possible to take the remote control back to its<br />
original factory settings.<br />
I.7 DESCRIPTION OF INDICATORS<br />
The indicators on the right-hand side of the unit are for indicating the<br />
operational status of the machine.<br />
I.6.7<br />
DANGER!<br />
Moving the motor-driven deflector manually when<br />
the air conditioning unit is one could cause<br />
operating problems or damage the regulation<br />
system.<br />
FAN SETTINGS<br />
By pressing the FAN SPEED key several times, it is<br />
possible to set the speed of the fan between the<br />
three available, or activate the AUTO function.<br />
The display shows the operating mode.<br />
Indicators<br />
Meaning<br />
indicates that the unit is running, flashes after<br />
temporary interruption of the power supply<br />
indicates that the unit is running in ECONOMIC<br />
RUNNING mode<br />
indicates that the timer has been activated<br />
AUTO: Completely automatic operation<br />
LOW: minimum speed operation<br />
MED: medium speed operation<br />
HIGH: maximum speed operation<br />
indicates that the unit is in defrost or Anti Cold Air<br />
phase<br />
I.6.8<br />
SETTING THE TIMER<br />
By pressing these keys, it is possible to programme<br />
the start-up and/or the shutdown time of the unit.<br />
The display shows the TIMER ON and/or TIMER<br />
OFF indications, with part of the clock flashing.<br />
indicates that the unit is running in AUTO mode<br />
indicates the set temperature<br />
TIME ADJUST<br />
Start-up time<br />
Shutdown time<br />
By pressing this key, it is possible to programme the<br />
start-up or the shutdown time. With every press of<br />
the key, the time moves forwards or backwards by<br />
ten minutes.<br />
When the desired start-up or shutdown time is<br />
reached, the setting must be confirmed by pressing<br />
the OK key.<br />
The CANCEL key makes it possible to deactivate<br />
the TIMER ON and/or TIMER OFF functions.<br />
Once the start-up and shutdown times have<br />
been set, the display shows the current time<br />
and the messages TIMER ON and/or TIMER<br />
OFF with the relative times.<br />
I.8 PERIODS OUT OF USE<br />
DANGER!<br />
Always turn off the automatic main switch (IG) for<br />
the protection of the entire system. Make sure that<br />
no one accidentally supplies power to the machine<br />
– lock the automatic main switch in the off position.<br />
If the machine is going to be out of use for long periods of time, it is<br />
necessary to disconnect the unit from the mains by opening the main<br />
switch, fitted by the installer.<br />
I.9 START-UP AFTER PROLONGED SHUTDOWN<br />
Before starting up the unit again:<br />
• Clean or change the air filter.<br />
• Clean the heat-exchanger.<br />
• Clean the condensation collector tray drain tube or make sure it is<br />
clear.<br />
It is advisable to run the unit at maximum speed for several hours.<br />
26
SECTION I: USER<br />
I.10 QUICK OPERATING GUIDE<br />
I.10.1<br />
AUTOMATIC FUNCTION<br />
With the selection of the automatic programme AUTO, the air<br />
conditioning unit can operating in COOLING mode, VENTILATION<br />
mode and in HEATING mode on the basis of the temperature difference<br />
between the ambient temperature and the temperature selected on the<br />
remote control.<br />
The unit will operate in the If:<br />
following mode:<br />
cooling TA-TS > 2 °C<br />
ventilation -1 °C ≤ TA-TS ≤ 2 °C<br />
heating TA-TS < -1 °C<br />
TA = ambient temperature TS = selected temperature<br />
The fan is in constant operation, whatever the difference between the<br />
ambient temperature and the selected temperature.<br />
I.10.2<br />
COOLING FUNCTION<br />
To put the unit in cooling mode COOL, proceed as follows:<br />
• select the cooling programme by pressing the MODE key (1), until<br />
the word COOL appears on the display;<br />
• regulate the desired temperature by pressing the TEMP keys (2).<br />
The display shows values from 17°C to 30°C;<br />
• regulate the ventilation speed by pressing the FAN SPEED key (3),<br />
selecting between AUTO and the other HIGH-MED-LOW speeds;<br />
• point the remote control at the unit receiver and press the start-up<br />
key ON/OFF (4);<br />
• regulate the air flow as per requirements, using the SWING (5) or<br />
AIR DIRECTION (6) key;<br />
Once these regulations have been made, they will be re-proposed when<br />
the air conditioning unit is switched back on.<br />
Every signal transmitted by the remote control is confirmed by a<br />
beep if it is successfully received.<br />
The indicator on the indoor unit lights up, indicating that the<br />
unit is in operation.<br />
Every time the external unit compressor stops, at least 3 seconds must<br />
pass before it is started up again. This period of time is necessary to<br />
safeguard the compressor and may not be modified.<br />
I.10.3<br />
DRYING FUNCTION<br />
To put the unit in drying mode DRY, proceed as follows:<br />
• select the drying programme by pressing the MODE key (1), until the<br />
word DRY appears on the display;<br />
• regulate the desired temperature by pressing the TEMP keys (2).<br />
The display shows values from 17°C to 30°C;<br />
• point the remote control at the unit receiver and press the start-up<br />
key ON/OFF (4);<br />
• regulate the air flow as per requirements, using the SWING (5) or<br />
AIR DIRECTION (6) key;<br />
Once these regulations have been made, they will be re-proposed when<br />
the air conditioning unit is switched back on.<br />
Every signal transmitted by the remote control is confirmed by a<br />
beep if it is successfully received.<br />
When the drying programme DRY is selected, the air conditioning unit<br />
operates at 4-6 minute intervals, with free temperature settings, thus<br />
progressively lowering the temperature and humidity in the<br />
environment.<br />
In the drying programme DRY, the FAN SPEED key cannot be used.<br />
Every time the external unit compressor stops, at least 3 seconds must<br />
pass before it is started up again. This period of time is necessary to<br />
safeguard the compressor and may not be modified.<br />
I.10.4<br />
HEATING FUNCTION<br />
To put the unit in heating mode HEAT, proceed as follows:<br />
• select the heating programme by pressing the MODE key (1), until<br />
the word HEAT appears on the display;<br />
• regulate the desired temperature by pressing the TEMP keys (2).<br />
The display shows values from 17°C to 30°C;<br />
• regulate the ventilation speed by pressing the FAN SPEED key (3),<br />
selecting between AUTO and the other HIGH-MED-LOW speeds;<br />
• point the remote control at the unit receiver and press the start-up<br />
key ON/OFF (4);<br />
• regulate the air flow as per requirements, using the SWING (5) or<br />
AIR DIRECTION (6) key;<br />
Once these regulations have been made, they will be re-proposed when<br />
the air conditioning unit is switched back on.<br />
Every signal transmitted by the remote control is confirmed by a<br />
beep if it is successfully received.<br />
The indicator on the indoor unit lights up, indicating that the<br />
unit is in operation.<br />
When the air conditioning unit is in HEAT mode, with low temperature<br />
and high relative humidity external air conditions, some frost may form<br />
on the external heat exchanger that must be eliminated; the<br />
microprocessor board provides for this operation on the basis of a<br />
defined cycle, blocking the heating phase for periods varying from 6 to<br />
10 minutes.<br />
The indicator on the indoor unit lights up, indicating this<br />
operation.<br />
Every time the external unit compressor stops, at least 3 seconds must<br />
pass before it is started up again. This period of time is necessary to<br />
safeguard the compressor and may not be modified.<br />
I.10.5<br />
FAN FUNCTION<br />
To put the unit in fan mode FAN, proceed as follows:<br />
• select the fan programme by pressing the MODE key (1), until the<br />
word FAN appears on the display;<br />
• regulate the ventilation speed by pressing the FAN SPEED key (3),<br />
selecting between AUTO and the other HIGH-MED-LOW speeds;<br />
• point the remote control at the unit receiver and press the start-up<br />
key ON/OFF (4);<br />
• regulate the air flow as per requirements, using the SWING (5) or<br />
AIR DIRECTION (6) key;<br />
Once these regulations have been made, they will be re-proposed when<br />
the air conditioning unit is switched back on.<br />
Every signal transmitted by the remote control is confirmed by a<br />
beep if it is successfully received.<br />
The indicator on the indoor unit lights up, indicating that the<br />
unit is in operation.<br />
27
SECTION I: USER<br />
I.11 ORDINARY MAINTENANCE TO BE<br />
PERFORMED BY USER<br />
DANGER!<br />
Always turn off the automatic main switch (IG) for<br />
the protection of the entire system before doing any<br />
maintenance work, even if it is only an inspection.<br />
Make sure that no one accidentally supplies power<br />
to the machine – lock the automatic main switch in<br />
the off position.<br />
I.11.1<br />
CLEANING THE INTERNAL UNIT<br />
Use a soft, dry cloth to clean the unit. A cloth dampened with a little cold<br />
water can be used if the unit is very dirty (make sure you do not use<br />
very wet cloths).<br />
Do not spray water on the air conditioning unit surfaces.<br />
Do not use chemical products, solvents or similar liquids for cleaning<br />
the surfaces of the air conditioning unit.<br />
Do not spray insecticides or spray deodorants directly onto the air<br />
conditioning unit.<br />
I.11.2<br />
CLEANING THE EXTERNAL UNIT<br />
The external unit does not normally require any particular cleaning<br />
operations. If it is installed in dusty or polluted zones, the external heat<br />
exchanger should be cleaned from time to time. In any case, this<br />
operation should be performed by qualified personnel.<br />
At the start of the season, before starting up the unit, check that there<br />
are no blockages in the external unit inlet and outlet air flow.<br />
At the end of season, if the unit is to be out of use for long periods of<br />
time after operating in cooling mode, we recommend running it for a few<br />
hours in fan mode FAN before switching it off definitively, in order to<br />
make any condensation in the internal unit evaporate.<br />
I.11.3<br />
CLEANING THE AIR FILTER<br />
I.11.4<br />
CLEANING THE REMOTE CONTROL<br />
Use a soft, dry cloth only when cleaning the remote control.<br />
I.12 WARNING AND SUGGESTIONS<br />
The unit must not operate continuously in cooling mode in rooms with a<br />
high relative humidity (above 80%). In these conditions condensation<br />
could form on the mouth of the air outlet which could damage objects<br />
below it, or the floor, or the wall to which the unit is attached.<br />
Always avoid obstructing the flow of air, or using the unit as a surface to<br />
lean on.<br />
DANGER!<br />
Take care when dismantling the filter: the heat<br />
exchanger fins can cut.<br />
IMPORTANT!<br />
Always have the filters installed when running the<br />
unit.<br />
To ensure correct air intake, the air filter must be cleaned at least once<br />
a month, or more frequently if the unit is being used in very dusty<br />
environments. Regular cleaning will make the unit run more efficiently.<br />
In order to extract the air filter, raise the suction panel, pull the central<br />
unit flap downwards and slip it out. Clean the filter with a vacuum<br />
cleaner and wash it with cold water if necessary, drying it in the shade.<br />
When the filter is clean and dry, replace it by proceeding in reverse<br />
order. If the filter is damaged, it must be replaced with an original<br />
RHOSS filter.<br />
The use of water or aerosol sprays in proximity to the unit can cause<br />
electric shocks and malfunctions.<br />
28
SECTION I: USER<br />
The remote control will not transmit the signal to the unit if a wall or any<br />
other object is in the way.<br />
Do not place any objects on top of the external unit.<br />
I.13 OPERATING ANOMALIES<br />
Symptom<br />
Recommended action<br />
The unit DOES NOT WORK (does not switch on)<br />
check whether the power supply is present (switch on a light)<br />
check that the air conditioning unit mains switch is on<br />
(if the switch is fitted with fuses, make sure that they are all intact)<br />
check whether the remote control works<br />
check whether the timer is inserted<br />
The unit works but does NOT COOL sufficiently<br />
Conditions that do not effect the normal operation of the air conditioning<br />
unit could occur, for example:<br />
• a rustling noise could be heard after the start-up or shutdown of the<br />
unit: this is due to the balancing of the gas pressure inside the<br />
refrigerant circuit;<br />
• temporary creaks could be heard if the air conditioning unit operates<br />
in low ambient temperature: this is due to the dilation of the panel<br />
caused by the temperature variation;<br />
• unpleasant smells could be smelt due to the accumulation of<br />
substances present in the air (cigarette smoke, cooking smells, etc.),<br />
especially if the rooms are not aired from time to time;<br />
• if the air conditioning unit operates continuously in cooling mode in<br />
an environment with a high level of relative humidity (over 80%),<br />
condensation could form on the deflector and on the fins of the internal<br />
unit, and this condensation could drip onto the floor and objects<br />
beneath;<br />
• in the heating mode (for heat pump models only), steam could come<br />
out of the external unit during the defrosting phase.<br />
check whether the cooling function is on<br />
check whether the temperature has been set on the remote control<br />
check whether the fan speed is too low<br />
check that there are no blockages in the internal and external unit air inlet<br />
or outlet<br />
check that the air filter is clean<br />
check that there are no doors or windows open<br />
check that there are no anomalous heat sources (iron, lots of people, etc.)<br />
I.14 INSTRUCTIONS FOR DISPOSAL OF THE UNIT<br />
AND HAZARDOUS SUBSTANCES<br />
SAFEGUARD THE ENVIRONMENT!<br />
RHOSS S.p.A. cares about protecting the<br />
environment.<br />
When the unit is dismantled it is important to<br />
adhere scrupulously to the following procedures.<br />
The unit should only be dismantled by a firm authorized for the disposal<br />
of scrap machinery/products. The unit as a whole is composed of<br />
materials considered as secondary raw materials and the following<br />
conditions must be observed:<br />
• the compressor oil must be removed, recovered and delivered to a<br />
body authorized to collect waste oil;<br />
• coolant gas must not be discharged into the atmosphere. It should<br />
instead be recovered by means of homologated devices, stored in<br />
suitable cylinders and delivered to a company authorised for the<br />
collection;<br />
• the filter-drier and electronic components (electrolytic condensers)<br />
are considered special waste, and must be delivered to a body<br />
authorized to collect such items;<br />
The expanded polyurethane pipe insulation must be removed and<br />
processed as urban-type waste.<br />
29
SECTION II: INSTALLATION AND MAINTENANCE<br />
II<br />
SECTION II: INSTALLATION AND<br />
MAINTENANCE<br />
II.1.3.1<br />
Internal Unit<br />
II.1.1<br />
TRANSPORT AND HANDLING<br />
DANGER!<br />
The unit must be handled carefully by qualified<br />
personnel trained to perform these operations.<br />
Incorrect handling could cause damage the unit and<br />
persons.<br />
When handling air conditioning units, avoid knocks or falls that could<br />
damage them.<br />
Units are shipped with standard packaging consisting of expanded<br />
polystyrene shells and cardboard. Do not tread on the packaging. Do<br />
not leave the packages loose during transport.<br />
The unit should be lifted and moved<br />
by at least 2 people.<br />
The packed machine can be handled/lifted by means of the slots in the<br />
cardboard box. Movement of the unit should be performed with care, in<br />
order to avoid damage to the external structure and to the internal<br />
mechanical and electrical components. Handles are provided for lifting<br />
the unpacked unit. Never over turn the pack.<br />
SAFEGUARD THE ENVIRONMENT!<br />
Dispose of the packaging materials in compliance<br />
with the national or local legislation in force in your<br />
country.<br />
DANGER!<br />
Do not leave the packaging within reach of children.<br />
II.1.2<br />
STORAGE<br />
Air conditioning units should be stored in rooms that prevent exposure<br />
to bad weather, with the packs closed.<br />
Install the unit so that the air flow does not arrive directly onto persons.<br />
Be careful when placing packs on top of one another, checking the<br />
position of the arrow on the pack in order to know the number of<br />
stackable machines.<br />
II.1.3<br />
CLEARANCE DISTANCES<br />
Install the unit far from heat sources and any element that could<br />
prejudice the normal air flow.<br />
The units must be positioned in compliance with the recommended<br />
clearance distances.<br />
30
II.2.2<br />
SECTION II: INSTALLATION AND MAINTENANCE<br />
MAXIMUM DIFFERENCE IN HEIGHT<br />
BETWEEN THE UNITS<br />
The maximum permitted difference in height between the internal and<br />
external unit is +/- 5 m.<br />
When the difference in height between the internal and external unit<br />
exceeds 3 m and the external unit is positioned higher than the internal<br />
one, we recommend installing a siphon on the gas line in order to<br />
facilitate the return of the lubricant oil to the compressor (Fig. 2).<br />
The unit must not operate continuously in cooling mode in rooms with a<br />
high relative humidity (above 80%). In these conditions condensation<br />
could form on the mouth of the air outlet which could damage objects<br />
below it, or the floor, or the wall to which the unit is attached.<br />
II.1.3.2<br />
External Unit<br />
The external unit should be installed above ground, so that it is not<br />
easily accessible, on suitable brackets for supporting the weight of the<br />
unit and the connection pipes.<br />
Respect the technical spaces illustrated below.<br />
II.2<br />
INSTALLATION<br />
DANGER!<br />
Installation must only be carried out by skilled<br />
technicians, qualified to work on air conditioning<br />
and refrigerant systems.<br />
Incorrect installation could cause the unit to run<br />
badly, with consequent deterioration in<br />
performance.<br />
The unit must be installed according to national or<br />
local rules in force at the time of installation.<br />
Instructions for correct air conditioning unit installation are provided<br />
here.<br />
The completion of the operations on the basis of specific requirements<br />
is left to the experience of the installer.<br />
II.2.1<br />
NOISE AND VIBRATION REDUCTION<br />
Proper installation calls for measures aimed at reducing noise<br />
disturbances caused by the normal operation of the external unit.<br />
Before installing the unit, check with local authorities about the<br />
existence of specific limitations concerning permitted environmental<br />
noise.<br />
The external unit must never be located in areas where there are<br />
spaces which are normally inhabited (offices, living rooms, bedrooms<br />
etc).<br />
Particular attention should be paid to installations near rooms used by<br />
sick or disabled people.<br />
The use of antivibration mountings for the unit guarantees adequate<br />
absorption of vibrations transmitted to the building by the unit.<br />
Special measures must be taken if the unit is installed in an area with a<br />
high risk of earthquakes or in other particular situations. In these cases<br />
it is necessary to obtain the advice of specialized technicians.<br />
II.2.3<br />
INTERNAL UNIT INSTALLATION<br />
The internal unit must be wall-mounted.<br />
Respect the minimum clearance distances indicated.<br />
Before installing the unit, make some preliminary checks in order to<br />
ascertain that:<br />
• the wall where the unit is to be installed is solid and sufficiently level<br />
in order to provide a good support;<br />
• the minimum technical clearance distances can be respected for<br />
installation;<br />
• the unit will not be covered by curtains or other objects that disturb<br />
the ingoing and outgoing passage of air;<br />
• the unit, and consequently the receiver (infrared signal), will not be<br />
exposed to direct sunlight or electronic lights, which could prevent it<br />
from operating correctly;<br />
• the unit is not installed at a height above ground of more than 2.7<br />
metres in order to prevent air stratification effects during operation.<br />
Proceed as follows to install the unit:<br />
• fix the paper template provided to the wall selected;<br />
• using a drill with a small tip, mark the following centres: hole for the<br />
passage of the pipes and electric wires, hole for the expansion plugs for<br />
the fixture of the support plate (minimum No. 4, use others if<br />
necessary);<br />
• make the hole for the pipe and electric wire passage (Fig. 3);<br />
Internal wall<br />
side<br />
Internal wall<br />
side<br />
External<br />
wall side<br />
External<br />
wall side<br />
• make the holes for the expansion plugs;<br />
• remove the support plate fixed to the unit;<br />
• secure the support plate to the wall using the plugs and make sure<br />
that it is perfectly horizontal;<br />
• unscrew the screws that hold the unit casing in place;<br />
• bend the copper pipes on the back of the unit on the basis of<br />
requirements (Fig. 4);<br />
IMPORTANT!<br />
The copper pipes must be bent very carefully in<br />
order to avoid cracks occurring.<br />
Fig. 2<br />
Fig. 3<br />
31
SECTION II: INSTALLATION AND MAINTENANCE<br />
Left<br />
Back<br />
centre<br />
Back<br />
left<br />
Towards the<br />
bottom left<br />
Use the support<br />
brackets.<br />
Fig. 7<br />
Right<br />
Back<br />
right<br />
• make the refrigerant, electric and condensation drain connections as<br />
specified in the “Refrigerant connections” and “Electric connections”<br />
paragraphs;<br />
• before removing the casing, check that the condensation drain is<br />
working properly.<br />
II.2.4<br />
Towards the<br />
bottom right<br />
EXTERNAL UNIT INSTALLATION<br />
Fig. 4<br />
Secure the unit to the support plate,<br />
making sure that the refrigerant lines, the<br />
electric cables and the condensation drain<br />
pipe run through the hole in the wall.<br />
Fig. 5<br />
The external unit must be installed outdoors, respecting the minimum<br />
technical clearance distances in order to allow the passage of air and<br />
the execution of any necessary maintenance operations.<br />
Water is produced in heat pump models, during the heating mode<br />
defrosting phase. This water needs to be collected and channelled to<br />
the drain.<br />
II.2.5<br />
REFRIGERANT CONNECTIONS<br />
IMPORTANT!<br />
The refrigerant connections must be made by<br />
specialist personnel in compliance with laws and<br />
regulations in force in the country of installation.<br />
RHOSS S.p.A. shall not be held liable for damage<br />
to persons or property caused by incorrect<br />
connections.<br />
Copper pipes for cooling systems must be used for refrigerant lines,<br />
respecting the lengths and diameters recommended in the enclosed<br />
documents. Make sure there are no impurities or moisture inside the<br />
pipes as this is extremely harmful for the refrigerant circuit. The<br />
refrigerant lines must each be insulated individually with lagging of<br />
closed-cell expanded material.<br />
A 65 mm hole is sufficient for the passage of the pipes through the<br />
walls.<br />
Proceed as follows to prepare the pipes.<br />
Cut the connection pipes at the set distance, leaving a certain safety<br />
margin and bearing in mind the tips indicated in Fig. 8.<br />
Right<br />
Wrong<br />
Make sure that the unit is<br />
level.<br />
Fig. 6<br />
Eliminate any cutting burr while keeping the pipe opening facing<br />
downwards to prevent the ingress of debris.<br />
Fig. 8<br />
The consistency of the wall must be sufficient for the weight of the unit<br />
and must not permit the transmission of noise or vibrations.<br />
Particular care must be taken when selecting the area, so that the air<br />
flow does not disturb the neighbours.<br />
Cover the refrigerant lines with suitable<br />
insulation and then insert the nozzles which<br />
had previously been removed from the unit<br />
connections.<br />
Fig. 9<br />
32
SECTION II: INSTALLATION AND MAINTENANCE<br />
For correctly executed pipe flaring use a universal mandrel and follow<br />
the indication shown in fig. 10, then remove any burrs that have formed.<br />
1) Needle inlet<br />
2) Needle inlet<br />
hood<br />
3) Pin<br />
4) Valve hood<br />
5) Valve hood<br />
Fig. 10<br />
A<br />
B (mm)<br />
inch mm max min.<br />
1/4” 6,35 8,25 8,01<br />
3/8” 9,52 12,36 11,97<br />
1/2” 12,70 15,82 15,42<br />
5/8 15,90 18,95 18,58<br />
Make sure the pipe is evenly flared and has none of the defects shown<br />
in Fig. 11.<br />
Right<br />
Wrong<br />
Fig. 11<br />
Connect the refrigerating lines to the unit connections, making sure the<br />
end of the pipe mates perfectly with the fitting. Tighten the pipe union by<br />
hand and then lock it with the torque wrench, respecting the torque<br />
values indicated in the table.<br />
Nut Tightening force<br />
inch 1/4” Nm 15<br />
inch 3/8” Nm 16<br />
inch 1/2” Nm 40<br />
inch 5/8” Nm 48<br />
Connect the condensation drain pipe to the internal unit.<br />
We recommend not creating bends in the pipes with an angle of below<br />
100 mm in order not to crush the section of the pipes themselves.<br />
II.2.5.1<br />
SAFEGUARD THE ENVIRONMENT!<br />
Before the starting up the unit, use a suitable tool to<br />
check that the gas leaks do not exceed 5 days/year.<br />
Refrigerant charge<br />
The units are supplied with a charge of refrigerant calculated for a pipe<br />
length of 5 m. For longer pipe-runs, it is necessary to increase the<br />
quantity of refrigerant For the values, please refer to the table in the<br />
enclosed documents.<br />
II.2.5.2<br />
Fig. 13<br />
Setting up the condensate drainage system<br />
In order to prevent unpleasant odours from passing up through the<br />
condensate drain pipe, we recommend always installing a siphon on the<br />
end of the pipe on the external side.<br />
The condensation drainage system must be set up with an adequate<br />
fall, to ensure that the water escapes properly (Fig. 14).<br />
1. Key<br />
2. Dynamometric key<br />
Fig. 14<br />
Fig. 12<br />
When connecting up the unit, hold the unit connections with a spanner<br />
(Fig. 12), to eliminate the risk of twisting the pipe.<br />
Remove the hood from the needle valve. (Fig. 13)<br />
Connect the vacuum pump to the needle valve.<br />
Do not open the valves, the vacuum must be created inside the internal<br />
unit and on the refrigerant line only.<br />
Apply the vacuum until reaching a pressure of around 1.3 Kpa (10<br />
mmHg).<br />
After having carried out this operation and after having disconnected<br />
the vacuum pump, open the valves completely, remove the hoods (Fig.<br />
13) and work with a hexagonal 5 mm male spanner (provided) on the<br />
pin.<br />
Replace the hoods on the valves and tighten them.<br />
IMPORTANT!<br />
Non conforming installation of the condensation<br />
drain will lead to a loss of water from the internal<br />
unit, with consequent damage to persons and/or<br />
nearby objects.<br />
RHOSS S.p.A. shall not be held liable for damage<br />
to persons or property caused by incorrect<br />
connections.<br />
33
SECTION II: INSTALLATION AND MAINTENANCE<br />
II.2.6<br />
ELECTRICAL CONNECTIONS<br />
IMPORTANT!<br />
The electrical connections must be made by<br />
specialist personnel in compliance with laws and<br />
regulations in force in the country of installation.<br />
RHOSS shall not be held liable for damage to<br />
persons or property caused by incorrect electrical<br />
connection.<br />
DANGER!<br />
Always install an automatic main switch (IG) in a<br />
protected area near the appliance with a<br />
characteristic delayed curve, with sufficient<br />
capacity and breaking power. There should be a<br />
minimum distance of 3 mm between the contacts.<br />
The automatic main switch (IG) must be placed up<br />
the line from the entire system in order to cut off<br />
the electrical power supply to the main unit and to<br />
all the accessories connected to it which make up<br />
the entire system.<br />
Earth connection is compulsory by law to ensure<br />
user safety while the machine is in use.<br />
Strip off the sheathing only in the immediate area of the terminals. Use<br />
suitable cable-ends for the terminals involved.<br />
After inserting the cable-end into the terminal, tighten the screws with a<br />
screwdriver without applying excessive force: at the end of the<br />
operation, pull gently on the cables to check that they are properly tight.<br />
Use the cable clamp inside the electronic board compartment to lock<br />
the cables.<br />
II.2.6.1<br />
Connecting the power supply<br />
Check that the voltage and the frequency of the electrical supply<br />
correspond to 230V (±10%) single phase at 50 Hz; that the available<br />
power is sufficient for the running the equipment; and that the supply<br />
cables are of adequate section for the maximum current which will be<br />
required.<br />
Make sure that the electrical supply system complies with current<br />
national safety regulations.<br />
When connecting the unit to the electricity network, use flexible bipolar<br />
wiring + earth, 1.5 mm² section with polychloroprene sheath of no<br />
lighter than H05RN-F. The earth conductor must be longer than the<br />
other conductors in order to ensure that in the event of the cable<br />
clamping device becoming slack, it will be the last to come under strain.<br />
The electrical connection wires must be made to pass through conduits<br />
with a sufficient level of protection, which must be firmly secured to the<br />
floor or the walls.<br />
Special attention must be given to any sharp edges, burrs, rough<br />
surfaces in general or threads so as to guarantee that the conductor<br />
insulation is not damaged.<br />
When making connections, removing the internal unit casing and the<br />
external unit side door (refrigerant connections side), insert the electric<br />
wires into the terminals in keeping with the wiring diagrams applied on<br />
the<br />
air conditioning units themselves.<br />
In the event that the unit is mounted on a metal surface, earth<br />
connections must be made in compliance with local regulations.<br />
The connections must be made in compliance with the wiring diagrams<br />
in the enclosed documents.<br />
The electrical line is normally around 2 m longer than the refrigerant<br />
line.<br />
Each internal unit is fitted with a power supply cable with plug.<br />
II.3<br />
START-UP INSTRUCTIONS<br />
IMPORTANT!<br />
Machine commissioning or the first start up (where<br />
required) must be carried out by skilled personnel<br />
qualified to work on this type of product.<br />
DANGER!<br />
Before starting up, make sure that the installation<br />
and electrical connections have been carried out in<br />
accordance with the instructions in this manual.<br />
Also make sure that there are no unauthorised<br />
persons in the vicinity of the machine during the<br />
above operations.<br />
4. the electrical connections are correct;<br />
5. the screws holding the cables are well tightened;<br />
6. the supply voltage is as required;<br />
It is advisable to run the unit at maximum speed for several hours.<br />
II.4<br />
II.4.1<br />
EXTRAORDINARY MAINTENANCE<br />
DANGER!<br />
Maintenance work must only be carried out by<br />
qualified technicians authorised to work on airconditioning<br />
and refrigerant systems.<br />
Use suitable work gloves.<br />
DANGER!<br />
Always turn off the automatic main switch (IG) for<br />
the protection of the entire system before doing any<br />
maintenance work, even if it is only an inspection.<br />
Make sure that no one accidentally supplies power<br />
to the machine – lock the automatic main switch in<br />
the off position.<br />
DANGER!<br />
Beware of the hot surfaces inside the machine.<br />
Do not introduce pointed objects through the air<br />
delivery intake grilles.<br />
REFRIGERANT FLUID CHARGE CONTROL<br />
Fit a pressure gauge on the test point on the outlet side and another on<br />
the test point on the suction side. Start up the unit and check both<br />
pressure readings once the pressure has stabilised.<br />
II.4.2<br />
CHECKING FOR ABSENCE OF<br />
REFRIGERANT FLUID LEAKS<br />
Use a specific leak detector or soapy water to check the refrigerant<br />
circuit and make sure that leaks do not exceed 5 g/year.<br />
II.4.3<br />
CHECKING HEAT EXCHANGER<br />
CLEANLINESS<br />
Switch off the unit, check the heat exchanger and, depending on its<br />
condition, proceed as follows:<br />
• remove any foreign bodies from the finned surface which may<br />
obstruct air flow;<br />
• clean off the dust with a jet of compressed air;<br />
• wash and brush, gently, with water;<br />
• dry with a jet of compressed air;<br />
II.4.4<br />
CHECKING CONDENSATION DRAIN<br />
CLEANLINESS<br />
With the unit switched off, check the cleanliness of the condensation<br />
drain tube.<br />
II.4.5<br />
CHECKING THE ELECTRIC CIRCUIT<br />
The following checks are recommended on the electrical circuit:<br />
• check the unit power absorption using a clip-on meter and compare<br />
the reading with the values shown in Appendix A1;<br />
• inspect and, if necessary, tighten the electrical contacts and<br />
terminals.<br />
II.4.6<br />
COMPONENT REPLACEMENT<br />
INSTRUCTIONS<br />
Before replacing components, discharge coolant from both the high and<br />
low-pressure sides. If the coolant is discharged from the high-pressure<br />
side only, the compressor may close the circuit thereby preventing<br />
pressure equalisation. In this way, the low-pressure side of the casing<br />
and the suction line may remain pressurised. If that happens, if you<br />
apply a brazing torch to one of the low-pressure components of the<br />
system, the pressurised mixture of refrigerant and oil could blow out of<br />
the circuit and ignite on contact with the brazing torch. To avoid this<br />
hazard, make sure both the high and low pressure sides of the circuit<br />
have been correctly depressurised before applying brazing torches.<br />
Any topping up of the system on units with R410A refrigerant must be<br />
carried out in the liquid phase, piping it from a cylinder so as not to alter<br />
its composition.<br />
II.3.1<br />
CONTROLS BEFORE START-UP<br />
Before starting up the unit, make sure that:<br />
1. the unit is positioned correctly;<br />
2. the system flow, return and condensation drainage pipes are<br />
correctly connected;<br />
3. the exchanger is clean;<br />
34
INDEX<br />
INDEX<br />
SYMBOLES UTILISÉS<br />
I SECTION I: UTILISATEUR ....................................................................36<br />
I.1 Informations générales.............................................................................................36<br />
I.1.1 Conditions de fonctionnement prévues .......................................................................36<br />
I.1.2 Limites de fonctionnement ..........................................................................................36<br />
I.1.3 Informations sur la sécurité .........................................................................................36<br />
I.2 Pièces détachées ......................................................................................................36<br />
I.3 Assistance .................................................................................................................36<br />
I.4 Description unité.......................................................................................................36<br />
I.4.1 Unité interne................................................................................................................37<br />
I.4.2 Unité externe...............................................................................................................37<br />
I.4.3 Télécommande ...........................................................................................................37<br />
I.5 Description et fonctions télécommande .................................................................38<br />
I.5.1 Noms et fonctions des indicateurs sur écran...............................................................39<br />
I.6 Fonctionnement de la télécommande .....................................................................39<br />
I.6.1 Réglage de l’horloge ...................................................................................................40<br />
I.6.2 Mise en marche et arrêt de l’unité...............................................................................40<br />
I.6.3 Sélection du mode de fonctionnement ........................................................................40<br />
I.6.4 Fonction economic running .........................................................................................40<br />
I.6.5 Réglage de la température désirée.............................................................................40<br />
I.6.6 Réglage du déflecteur .................................................................................................41<br />
I.6.7 Réglage de la ventilation.............................................................................................41<br />
I.6.8 Réglage du timer.........................................................................................................41<br />
I.6.9 Verrouillage du clavier.................................................................................................41<br />
I.6.10 Réinitialisation de la télécommande............................................................................41<br />
I.7 Description DES INDICATEURS...............................................................................41<br />
I.8 Mise hors service ......................................................................................................41<br />
I.9 Remise en marche après une longue période d'arrêt ............................................41<br />
I.10 Guide rapide du fonctionnement .............................................................................42<br />
I.10.1 Fonctionnement automatique......................................................................................42<br />
I.10.2 Fonction rafraîchissement...........................................................................................42<br />
I.10.3 Fonction déshumidification..........................................................................................42<br />
I.10.4 Fonction chauffage......................................................................................................42<br />
I.10.5 Fonction ventilation .....................................................................................................42<br />
I.11 Entretien courant incombant a l’utilisateur ............................................................43<br />
I.11.1 Nettoyage de l’unité interne.........................................................................................43<br />
I.11.2 Nettoyage de l’unité externe........................................................................................43<br />
I.11.3 Nettoyage du filtre à air ...............................................................................................43<br />
I.11.4 Nettoyage de la télécommande...................................................................................43<br />
I.12 Recommandations et conseils.................................................................................43<br />
I.13 Anomalies de fonctionnement.................................................................................44<br />
I.14 Recommandations pour la mise au rebut de l'unité et l'élimination des<br />
substances toxiques.................................................................................................44<br />
II SECTION II : INSTALLATION, ENTRETIEN ET MAINTENANCE ........45<br />
II.1.1 Transport et deplacement ...........................................................................................45<br />
II.1.2 Stockage .....................................................................................................................45<br />
II.1.3 Dégagements..............................................................................................................45<br />
II.2 Installation .................................................................................................................46<br />
II.2.1 Réduction du bruit et des vibrations ............................................................................46<br />
II.2.2 Dénivellation maximum entre les unités......................................................................46<br />
II.2.3 Installation de l’unité interne........................................................................................46<br />
II.2.4 Installation de l’unité externe.......................................................................................47<br />
II.2.5 Raccordements circuits frigorifiques ...........................................................................47<br />
II.2.6 Branchements électriques...........................................................................................49<br />
II.3<br />
Instructions pour la mise en marche.......................................................................49<br />
II.3.1 Contrôles préliminaires avant la mise en marche........................................................49<br />
II.4<br />
Entretien extraordinaire............................................................................................49<br />
II.4.1 Contrôler la charge du fluide frigorigène .....................................................................49<br />
II.4.2 Vérification de l'absence de fuites de fluide frigorigène..............................................49<br />
II.4.3 Vérification de proprete de l’échangeur.......................................................................49<br />
II.4.4 Contrôle de la propreté de l'échangeur. ......................................................................49<br />
II.4.5 Contrôle du circuit électrique.......................................................................................49<br />
II.4.6 Indications pour le remplacement de composants ......................................................49<br />
ANNEXES<br />
A1<br />
A2<br />
Caractéristiques techniques…………………………………………………………..91<br />
Schémas de branchement électrique...................................................................95<br />
SYMBOLE<br />
UNI EN 292<br />
UNI EN 294<br />
UNI EN 563<br />
UNI EN 1050<br />
UNI 10893<br />
EN 13133<br />
EN 12797<br />
EN 378-1<br />
PrEN 378-2<br />
CEI EN 60335-2-40<br />
UNI EN ISO 3744<br />
EN 50081-1:1992<br />
EN 61000<br />
SIGNIFICATION<br />
DANGER!<br />
L'indication DANGER sans autre précision est<br />
utilisée pour informer l'opérateur et le personnel<br />
assurant l'entretien de la présence de dangers<br />
exposant à des risques de mort, de blessures ou de<br />
lésions aussi bien immédiates que latentes.<br />
DANGER COMPOSANTS SOUS TENSION!<br />
L'indication COMPOSANTS SOUS TENSION est<br />
utilisée pour informer l'opérateur et le personnel<br />
assurant l'entretien des risques auxquels expose la<br />
présence de tension.<br />
DANGER SURFACES COUPANTES!<br />
L'indication DANGER SURFACES COUPANTES est<br />
utilisée pour informer l'opérateur et le personnel<br />
assurant l'entretien de la présence de surfaces<br />
potentiellement dangereuses.<br />
DANGER SURFACES CHAUDES!<br />
L'indication DANGER SURFACES CHAUDES est<br />
utilisée pour informer l'opérateur et le personnel<br />
assurant l'entretien de la présence de surfaces<br />
chaudes potentiellement dangereuses.<br />
DANGER ORGANES EN MOUVEMENT !<br />
L'indication DANGER ORGANES EN MOUVEMENT<br />
est utilisée pour informer l'opérateur et le personnel<br />
chargé de l'entretien, de la présence de risques dus<br />
à des organes en mouvement.<br />
RECOMMANDATIONS IMPORTANTES!<br />
L'indication RECOMMANDATIONS IMPORTANTES<br />
est utilisée pour prévenir les risques de dommages<br />
de l'unité et autres équipements.<br />
PROTECTION DE L'ENVIRONNEMENT!<br />
L'indication PROTECTION DE L'ENVIRONNEMENT<br />
accompagne les instructions à respecter pour<br />
assurer une utilisation de l'appareil dans le respect<br />
de l'environnement.<br />
NORMES DE RÉFÉRENCE<br />
Sicurezza del macchinario. Concetti fondamentali,<br />
principi generali di progettazione.<br />
Sicurezza del macchinario. Distanze di sicurezza per<br />
impedire il raggiungimento di zone pericolose con gli arti<br />
superiori.<br />
Sicurezza del macchinario. Temperature delle superfici<br />
di contatto. Dati ergonomici per stabilire i valori limiti di<br />
temperatura per superfici calde.<br />
Sicurezza del macchinario. Principi per la valutazione<br />
del rischio.<br />
Documentazione tecnica di prodotto. Istruzioni per l’uso<br />
Brazing. Brazer approval.<br />
Brazing. Destructive tests of brazed joints.<br />
Refrigeration systems and heat pumps – safety and<br />
environmental requirements. Basic requirements,<br />
definitions, classification and selection criteria.<br />
Refrigeration systems and heat pumps – safety and<br />
environmental requirements. Design, construction,<br />
testing, installing, marking and documentation.<br />
Sicurezza degli apparecchi elettrici d’uso domestico e<br />
similare. Parte 2: Norme particolari per le pompe di<br />
calore elettriche, per i condizionatori d’aria e per i<br />
deumidificatori.<br />
Determinazione dei livelli di potenza sonora delle<br />
sorgenti di rumore mediante pressione sonora. Metodo<br />
tecnico progettuale in un campo essenzialmente libero<br />
su un piano riflettente.<br />
Electromagnetic compatibility - Generic emission<br />
standard Part 1: Residential, commercial and light<br />
industry<br />
Electromagnetic compatibility (EMC)<br />
35
SECTION I: UTILISATEUR<br />
I<br />
SECTION I: UTILISATEUR<br />
I.1 INFORMATIONS GENERALES<br />
Le présent manuel d'utilisation fait partie intégrante du climatiseur.<br />
L'utilisation et l'entretien du groupe objet du présent manuel d'utilisation<br />
doivent impérativement intervenir dans des conditions de sécurité de<br />
telle sorte que l'opérateur ne soit exposé à aucun risque (durant le<br />
fonctionnement, les opérations d'entretien et les réparations); il est par<br />
conséquent indispensable de lire attentivement le présent document,<br />
d'en respecter toutes les instructions et autres recommandations ainsi<br />
que de le conserver soigneusement.<br />
IMPORTANT!<br />
RHOSS S.p.a. décline toute responsabilité en cas<br />
de dommage dû à une utilisation impropre du<br />
climatiseur ou à une lecture incomplète ou<br />
superficielle des informations et des indications<br />
figurant dans le manuel.<br />
I.1.1<br />
CONDITIONS DE FONCTIONNEMENT<br />
PREVUES<br />
DANGER!<br />
Toute utilisation autre que celle prévue par le<br />
constructeur est rigoureusement interdite.<br />
Le climatiseur splkit mural est destiné au traitement de l’air<br />
(climatisation été et hiver) à l’intérieur de locaux à usage domestique ou<br />
analogue. L’unité est prévue pour être installée dans un milieu à<br />
atmosphère NON EXPLOSIVE.<br />
Ne pas utiliser le climatiseur pour des applications spéciales telles que<br />
la climatisation d'appareillages électriques ou électroniques, la<br />
conservation d'aliments, de meubles d'antiquaires, l'élevage d'animaux,<br />
les cultures biologiques, pour la conservation de fourrures, etc.<br />
Ce climatiseur est équipé de ventilateurs à haute vitesse de rotation. Ne<br />
jamais introduire les mains ni des objets de quelque nature que ce soit<br />
dans les fentes de sortie d'air, aussi bien sur l'unité interne que sur<br />
l'unité externe: une telle opération expose à des risques de graves<br />
blessures ainsi qu'à des risques de dommage pour le ventilateur.<br />
Veiller à ce que la température reste agréable, en particulier en<br />
présence d'enfants, de personnes âgées ou de porteurs de handicap.<br />
L’utilisation du climatiseur à des valeurs de température et d'humidité<br />
autres que celles prévus peut entraîner un mauvais fonctionnement et<br />
des égouttements de condensation au niveau de l'unité interne.<br />
En cas d'orage, il est recommandé de couper l'alimentation électrique<br />
par l'intermédiaire d'un interrupteur général IG (non fourni) afin de<br />
mettre à l'abri le climatiseur des risques de dommages provoqués par<br />
les surtensions dues à la foudre.<br />
I.1.2<br />
LIMITES DE FONCTIONNEMENT<br />
IMPORTANT!<br />
Le bon fonctionnement de l'unité dépend de la<br />
stricte observation du mode d'emploi, des<br />
distances de sécurité de l'installation et des limites<br />
d'utilisation prescrites dans le présent manuel.<br />
Interne Externe<br />
Rafraîchissement limite supérieure ° C 30 43<br />
limite inférieure ° C 17 18<br />
Chauffage limite supérieure ° C 30 24<br />
limite inférieure ° C 17 -5<br />
Mod. INVERTER<br />
Interne Externe<br />
Rafraîchissement limite supérieure ° C 30 43<br />
limite inférieure ° C 17 18<br />
Chauffage limite supérieure ° C 30 24<br />
limite inférieure ° C 17 -15<br />
I.1.3<br />
INFORMATIONS SUR LA SECURITE<br />
L’unité est équipée de dispositifs de sécurité pour prévenir les risques<br />
de dommages physiques et pour garantir le bon fonctionnement.<br />
Modifications ou altérations non autorisées par RHOSS S.p.a.<br />
peuvent induire des situations de danger potentiel pour les personnes<br />
et peuvent exposer l'unité à des risques de dommage.<br />
I.2 PIÈCES DÉTACHÉES<br />
IMPORTANT!<br />
N'utiliser que des pièces détachées et des<br />
accessoires d'origine. RHOSS S.p.A. décline toute<br />
responsabilité en cas de dommages causés par des<br />
interventions non prévues et/ou des interventions<br />
effectuées par un personnel non autorisé à cet<br />
effet, ainsi qu'en cas de mauvais fonctionnement<br />
causé par l'utilisation de pièces détachées et/ou<br />
d'accessoires non d'origine.<br />
Pour les opérations d'entretien, veiller à faire exclusivement usage de<br />
pièces détachées d'origine RHOSS S.p.A.<br />
RHOSS S.p.A. décline toute responsabilité dans les cas suivants:<br />
• mauvais installation ou installation ne respectant pas les procédures<br />
prévues;<br />
• non-respect partiel ou total des instructions;<br />
• erreurs d'alimentation électrique/hydraulique;<br />
• utilisation impropre de l'unité;<br />
• entretien insuffisant;<br />
• modifications ert interventions non autorisées;<br />
• utilisation de pièces détachées non d'origine ou non adaptées.<br />
I.3 ASSISTANCE<br />
Avant de procéder à quelque intervention de réparation que ce soit, il<br />
est recommandé de prendre contact avec RHOSS S.p.A., en particulier<br />
pour les interventions d'entretien exceptionnel.<br />
I.4 DESCRIPTION UNITE<br />
Les climatiseurs autonomes à sections indépendantes en version<br />
pompe à chaleur sont constitués d'une unité interne (1 sur le modèle<br />
MONO, 2 sur le modèle DUAL, 3 sur le modèle TRIAL) prévue pour une<br />
installation murale et d'une unité externe à raccorder par l'intermédiaire<br />
des lignes frigorifiques et des lignes électriques.<br />
L’unité interne est remplie d'une charge de gaz de protection pour<br />
prévenir l'introduction d'humidité. L’unité externe contient toute la<br />
charge de réfrigérant, suffisante pour une ligne frigorifique d'une<br />
longueur maximum de 5 m.<br />
Pour des longueurs supérieures il est nécessaire de procéder à un<br />
rajout de gaz réfrigérant. Les unités sont gage de fonctionnement très<br />
silencieux, gage de fiabilité et de hautes performances.<br />
Le fonctionnement des unités est contrôlé par une carte électronique à<br />
microprocesseur qui permet de sélectionner un des programmes<br />
suivants:<br />
• automatique AUTO<br />
• rafraîchissement COOL<br />
• déshumidification DRY<br />
• chauffage HEAT<br />
• ventilation FAN<br />
Les programmes de fonctionnement peuvent être sélectionnés par<br />
l'intermédiaire d'une télécommande à infrarouges équipée d'un écran à<br />
cristaux liquides.<br />
Lorsque la télécommande n'est pas utilisable, en cas d'urgence, le<br />
climatiseur peut être commandé par un interrupteur situé sur l'unité<br />
interne.<br />
36
Unité interne<br />
sortie air<br />
Unité externe<br />
entrée air<br />
sortie air<br />
entrée air<br />
entrée air<br />
I.4.1<br />
UNITE INTERNE<br />
SECTION I: UTILISATEUR<br />
L’unité interne, prévue exclusivement pour une installation murale, est<br />
caractérisée par une esthétique élégante qui permet de l'intégrer à tout<br />
type d'ameublement. Elle est équipée d'une batterie d'échange<br />
thermique, d'un ventilateur tangentiel très silencieux qui garantit un<br />
excellent confort acoustique y compris au débit d'air maximum, d'un<br />
filtre à air régénérable et facilement extractible pour procéder à son<br />
nettoyage, d'un déflecteur horizontal motorisé et d'ailettes verticales<br />
pour optimiser la distribution d'air en sortie.<br />
Sur la partie frontale, en position bien visible, sont présentes des diodes<br />
qui indiquent l'état de fonctionnement et le récepteur des signaux<br />
provenant de la télécommande.<br />
Avec l'unité sont fournis:<br />
• la plaque de fixation;<br />
• la télécommande;<br />
• le support de fixation murale de la télécommande.<br />
I.4.2<br />
UNITE EXTERNE<br />
L’unité externe, prévue pour une installation murale, est constituée d'un<br />
structure en tôle d'acier zinguée et peinte. A l'intérieur de l'unité sont<br />
installés le compresseur de type hermétique et un ventilateur hélicoïdal<br />
à équilibrage statique et dynamique pour garantir un fonctionnement<br />
extrêmement silencieux.<br />
L'unité est complétée par la batterie d'échange thermique à grande<br />
surface, le capillaire de détente, la vanne d'inversion de cycle pour les<br />
versions à pompe à chaleur, les raccords à godet avec robinet, les<br />
condensateurs électriques pour le compresseur et le ventilateur, et le<br />
bornier pour les branchements électriques à l'unité interne.<br />
I.4.3<br />
TELECOMMANDE<br />
La télécommande permet de programmer et de visualiser tous les<br />
paramètres de fonctionnement du climatiseur, facilitant ainsi toutes les<br />
opérations de programmation.<br />
La télécommande est alimentée à l'aide de 2 piles R03 type AAA de 1,5<br />
V.<br />
Légendes:<br />
Unité interne<br />
1) Structure portante<br />
2) Panneau frontal<br />
3) Filtre à air<br />
4) Grille de sortie air<br />
5) Déflecteurs verticaux<br />
6) Récepteur de signal infrarouge<br />
7) Signalisations des indicateurs<br />
8) Bouton de fonctionnement manuel<br />
9) Télécommande<br />
Unité externe<br />
10) Tuyaux de raccordement<br />
11) Raccordement électrique<br />
12) Robinets frigorifiques<br />
13) Grille de sortie air<br />
IMPORTANT!<br />
Il est recommandé de tester le fonctionnement de la<br />
télécommande pour établir la zone de réception.<br />
37
I.5 DESCRIPTION ET FONCTIONS<br />
TELECOMMANDE N TOUCHE FONCTION DESCRIPTION<br />
1 /<br />
2 /<br />
3<br />
4<br />
5<br />
6<br />
7<br />
8<br />
9<br />
10<br />
11<br />
Émetteur de<br />
signaux<br />
Écran à<br />
cristaux<br />
liquides<br />
Allumage/<br />
Arrêt<br />
12 Valider<br />
13<br />
14<br />
15<br />
16<br />
Sélection du<br />
programme de<br />
fonctionnement<br />
Programmation<br />
de la<br />
température<br />
Programmation<br />
vitesse du<br />
ventilateur<br />
Programmation<br />
position<br />
déflecteur<br />
Sélection<br />
déflecteur<br />
motorisé<br />
Fonctionnement<br />
économique<br />
(sauf<br />
INVERTER)<br />
Programmation<br />
allumage/ arrêt<br />
avec timers<br />
Programmation<br />
heures<br />
Réglage<br />
horloge<br />
Verrouillage<br />
télécommande<br />
Reset<br />
télécommande<br />
Désactivation<br />
timers<br />
SECTION I: UTILISATEUR<br />
Transmet les signaux<br />
infrarouges au récepteur de<br />
l'unité interne<br />
Indique les états et les modes<br />
de fonctionnement du<br />
climatiseur<br />
Permet d'allumer et d'éteindre le<br />
climatiseur. Appuyer sur la<br />
touche pour mettre en marche le<br />
climatiseur. Appuyer à nouveau<br />
sur la touche pour arrêter le<br />
climatiseur<br />
Permet de sélectionner le type<br />
de fonctionnement voulu (AUTO,<br />
COOL, DRY, HEAT ou FAN)<br />
Ces touches permettent de<br />
programmer la température<br />
ambiante voulue.<br />
la température requise est<br />
augmentée jusqu'à 30°C<br />
la température requise est<br />
abaissée jusqu'à 17°C<br />
A chaque pression correspond<br />
une variation de 1°C<br />
Appuyer sur cette touche pour<br />
sélectionner la vitesse du<br />
ventilateur. Quand est<br />
sélectionné AUTO la vitesse du<br />
ventilateur est réglée<br />
automatiquement en fonction de<br />
la température ambiante. Il est<br />
également possible de<br />
sélectionner manuellement la<br />
vitesse du ventilateur; 3<br />
réglages sont disponibles: LOW<br />
= MINIMUM; MED =<br />
MOYENNE; HIGH = MAXIMUM<br />
Permet de sélectionner l’angle<br />
d'inclinaison du déflecteur<br />
Cette touche permet au<br />
déflecteur d'osciller de manière<br />
constante<br />
Sélectionner le contrôle<br />
automatique de la température<br />
et de la vitesse du ventilateur de<br />
façon à n'induire aucune<br />
sensation de froid excessif<br />
(fonctionnement en<br />
rafraîchissement) ni de chaleur<br />
excessive (fonctionnement en<br />
chauffage)<br />
Appuyer sur ces touches pour<br />
programmer l'arrêt/allumage de<br />
l'unité par l'intermédiaire des<br />
timers<br />
Permet de programmer l'heure<br />
de l'horloge et des timers<br />
Appuyer sur cette touche pour<br />
valider les heures sélectionnées<br />
En maintenant cette touche<br />
enfoncée pendant quelques<br />
secondes, il est possible de<br />
régler l'horloge<br />
Permet de verrouiller toutes les<br />
fonctions de la télécommande<br />
Appuyer sur ce bouton pour<br />
réinitialiser les programmations<br />
de la télécommande<br />
Appuyer sur cette touche pour<br />
désactiver le fonctionnement par<br />
l'intermédiaire des timers<br />
38
I.5.1<br />
NOMS ET FONCTIONS DES INDICATEURS<br />
SUR ECRAN<br />
SECTION I: UTILISATEUR<br />
I.6 FONCTIONNEMENT DE LA TELECOMMANDE<br />
La télécommande est alimentée par deux piles alcalines de 1,5 V de<br />
type RO3 format AAA (fournies avec la télécommande).<br />
Pour mettre en place les piles, retirer entièrement le couvercle de la<br />
télécommande en le faisant glisser vers le bas. Mettre en place les piles<br />
dans le logement prévu à cet effet en veillant à respecter les polarités<br />
indiquées. Remettre en place le couvercle et sélectionner les fonctions<br />
voulues. Par la suite, pour remplacer les piles usées par des neuves,<br />
procéder de la même manière. La durée de vie moyenne des piles est<br />
d'un an.<br />
1) Indicateur de transmission<br />
S'affiche à chaque transmission d'un signal à l'unité interne.<br />
2) Visualisation du programme de fonctionnement (MODE)<br />
Indique le type de fonctionnement sélectionné.<br />
3) Visualisation ON/OFF<br />
Indique que l'unité est en marche.<br />
4) Visualisation de la température (TEMP)<br />
Indique la température programmée (de 17°C à 30°C). Quand est<br />
sélectionné le programme de fonctionnement FAN, aucune température<br />
n'est affichée.<br />
5) Visualisation de l'horloge<br />
Toujours active, indique l'heure actuelle.<br />
6) Visualisation du timer (TIMER ON)<br />
En appuyant sur la touche TIMER ON, s'affiche l'heure d'allumage avec<br />
timer.<br />
7) Visualisation du timer (TIMER OFF)<br />
En appuyant sur la touche TIMER OFF s'affiche l'heure d'arrêt avec<br />
timer.<br />
8) Visualisation du verrouillage<br />
Indique que la télécommande est verrouillée.<br />
9) Visualisation ECONO<br />
Indique que la fonction ECONOMIC RUNNING est active.<br />
10) Visualisation de la vitesse du ventilateur (FAN)<br />
Indique la vitesse du ventilateur sélectionnée. Peut être visualisé AUTO<br />
ou l'un des trois niveaux de vitesse: MINIMUM (low), MOYENNE (med)<br />
ou MAXIMUM (high).<br />
L'écran de la télécommande reste toujours allumé.<br />
Dans le cas où il serait prévu de ne pas utiliser la télécommande<br />
pendant une longue période, veiller à retirer les piles.<br />
L'écran de la télécommande visualise constamment l'heure que le<br />
climatiseur soit allumé ou éteint.<br />
Diriger la télécommande vers le récepteur du climatiseur durant les<br />
opérations de programmation (cette procédure n'est pas nécessaire<br />
pendant la programmation de l'heure).<br />
Si les signaux sont correctement reçus, le climatiseur émet un signal<br />
sonore (“bip”).<br />
La télécommande est en mesure de transmettre les signaux à une<br />
distance maximum d'environ 8 mètres du récepteur.<br />
Veiller à ce que la télécommande soit à l'abri de l'humidité excessive,<br />
de la lumière directe du soleil et autres sources de chaleur ainsi qu'à<br />
l'abri des chocs. Mettre la télécommande à l'abri des éclaboussures<br />
d'eau et autres liquides.<br />
Dans le cas où récepteur à rayons infrarouges de l'unité interne serait<br />
exposé à la lumière dirdcte du soleil ou à la lumière intense d'une<br />
lampe fluorescente à allumage électronique, le climatiseur peut<br />
présenter des anomalies de fonctionnement voire ne pas fonctionner du<br />
tout.<br />
L’utilisation d'autres télécommandes à proximité ou dans la pièce où<br />
l'unité interne est installée peut empêcher le bon fonctionnement du<br />
climatiseur: éviter d'orienter l'émetteur d'autres télécommandes vers le<br />
récepteur du climatiseur.<br />
39
SECTION I: UTILISATEUR<br />
I.6.1<br />
REGLAGE DE L’HORLOGE<br />
Après la mise en place des piles dans la télécommande, l'indicateur<br />
affiche l'indication 0:00 clignotante.<br />
Note: durant la programmation de l'horloge ne pas orienter la<br />
télécommande vers le climatiseur.<br />
Il est recommandé de régler l'horloge de la télécommande avant de<br />
mettre en marche le climatiseur; pour le réglage procéder comme suit<br />
(réf. Fig. 1):<br />
maintenir enfoncée la touche TIME<br />
ADJUST jusqu'à ce que soit<br />
obtenue l'heure voulue<br />
appuyer sur OK pour valider la<br />
sélection (ne pas orienter la<br />
télécommande vers l’unité)<br />
Pour régler à nouveau l'heure ou pour effectuer une nouvelle<br />
programmation, procéder comme suit (réf. Fig. 1):<br />
maintenir enfoncée la touche<br />
CLOCK pendant plus de trois<br />
secondes<br />
En sélectionnant le programme automatique AUTO, le climatiseur peut<br />
fonctionner en mode RAFRAÎCHISSEMENT, VENTILATION et en<br />
mode CHAUFFAGE en fonction de l'écart entre la température<br />
ambiante et la température sélectionnée sur la télécommande.<br />
Le ventilateur, quel que soit l'écart entre température ambiante et<br />
température programmée, est toujours en marche.<br />
Quand est sélectionné le programme de rafraîchissement COOL, le<br />
climatiseur fonctionne sur la base températures librement programmées<br />
et abaisse la température ambiante.<br />
Quand est sélectionné le programme de déshumidification DRY, le<br />
climatiseur fonctionne à intervalles de 4 à 6 minutes, sur la base de<br />
valeurs librement programmées, et abaisse progressivement la<br />
température et le degré d'humidité ambiants. Quand est sélectionné le<br />
programme de déshumidification DRY, la touche FAN SPEED n'est pas<br />
utilisable.<br />
Quand le climatiseur fonctionne en mode chauffage HEAT, le<br />
climatiseur fonctionne sur la base de valeurs de température librement<br />
programmées et augmente la température ambiante. Dans le cas où la<br />
température de l'air externe serait basse et son degré d'humidité élevé,<br />
sur l'échangeur externe se forme une rosée qui doit être éliminée; la<br />
carte à microprocesseur, sur la base d'un cycle défini, effectue cette<br />
opération en bloquant la phase de chauffage pendant des durées qui<br />
varient de 6 à 10 minutes. Cette opération est signalée par le voyant<br />
PRE-DEF.<br />
Quand est sélectionné le programme de ventilation FAN, le climatiseur<br />
fonctionne sans réglage de température et brasse l'air ambiant.<br />
maintenir enfoncée la touche TIME<br />
ADJUST jusqu'à ce que soit<br />
obtenue l'heure voulue<br />
appuyer sur OK pour valider la<br />
sélection (ne pas orienter la<br />
télécommande vers l’unité)<br />
I.6.4<br />
FONCTION ECONOMIC RUNNING<br />
Lorsque l'unité est allumée, en appuyant sur cette<br />
touche dans les modalités AUTO, COOL et HEAT,<br />
le climatiseur varie la température programmée au<br />
cours de deux qui suivent, en fonctionnement COOL<br />
+2°C, en fonctionnement HEAT -2°C, et la maintient<br />
ensuite stable pendant toute la durée de<br />
fonctionnement de façon à obtenir un plus grand<br />
confort et à garantir des économies d'énergie.<br />
I.6.2<br />
MISE EN MARCHE ET ARRET DE L’UNITE<br />
I.6.4.1<br />
FONCTIONNEMENT DE SECOURS<br />
La touche ON/OFF permet de mettre en marche ou<br />
éteindre l’unité<br />
Le passage de ON à OFF interrompt tous les modes de fonctionnement<br />
et annule les temporisations en cours tandis que le mode de<br />
fonctionnement de l’appareil et du ventilateur, la position du déflecteur<br />
et la valeur de température programmée sont mémorisés.<br />
En passant de OFF à ON, le groupe rétablit automatiquement tous les<br />
modes de fonctionnement mémorisés avant l’extinction.<br />
Lorsque l'unité est allumée, l'écran affiche l'indication<br />
correspondante.<br />
Ce symbole sur l’écran indique que la télécommande<br />
est en liaison avec l’unité.<br />
Après chaque arrêt du compresseur de l'unité externe, doivent s'écouler<br />
au moins 3 minutes avant sa remise en marche. Cette durée assure la<br />
protection du compresseur et ne peut être modifiée.<br />
I.6.3<br />
SELECTION DU MODE DE<br />
FONCTIONNEMENT<br />
En appuyant plusieurs fois sur la touche Mode, il est<br />
possible de modifier le mode de fonctionnement de<br />
l’unité. L’écran affiche l’indication du mode de<br />
fonctionnement sélectionné.<br />
AUTO fonctionnement entièrement automatique<br />
COOL: fonction rafraîchissement<br />
DRY: fonction déshumidification<br />
HEAT: fonction chauffage<br />
FAN fonctionnement de la seule ventilation<br />
Le fonctionnement de secours peut être utilisé lorsque la<br />
télécommande n'est pas disponible ou bien lorsque ses piles sont<br />
déchargées. En appuyant sur le bouton de fonctionnement de secours,<br />
situé sur l'unité interne, le climatiseur peut fonctionner normalement.<br />
Si le bouton de fonctionnement de secours est enfoncé une première<br />
fois, le climatiseur fonctionne en modalité AUTO.<br />
S'il est enfoncé une deuxième fois, le climatiseur se met à fonctionner<br />
en mode rafraîchissement sur la base du programme suivant:<br />
• température programmée 24°C<br />
• vitesse du ventilateur AUTOMATIQUE<br />
En appuyant sur le bouton de fonctionnement de secours une troisième<br />
fois le climatiseur s'arrête.<br />
I.6.5<br />
Bouton de secours<br />
REGLAGE DE LA TEMPERATURE DESIREE<br />
En appuyant sur ces touches dans les modalités<br />
AUTO, COOL, DRY et HEAT, il est possible<br />
d'augmenter ou d'abaisser la température voulue de<br />
17°C à 30°C. L'écran visualise la température<br />
sélectionnée.<br />
40
SECTION I: UTILISATEUR<br />
I.6.6<br />
REGLAGE DU DEFLECTEUR<br />
Pour obtenir une distribution optimale de l'air, il est nécessaire de régler<br />
la position du déflecteur motorisé et des ailettes verticales, en veillant à<br />
ce que le flux d'air ne soit pas dirigé directement vers les personnes.<br />
Les ailettes verticales doivent être orientées manuellement avant de<br />
mettre en marche le climatiseur; pour régler le déflecteur motorisé<br />
procéder comme suit:<br />
En appuyant à plusieurs reprises sur la touche AIR<br />
DIRECTION, il est possible de modifier la position du<br />
déflecteur.<br />
En appuyant sur la touche SWING, il est possible<br />
d'activer l'oscillation continue du déflecteur.<br />
ATTENTION<br />
Pour pouvoir transmettre automatiquement les programmations<br />
horaires du timer, placer la télécommande à proximité de l'unité interne.<br />
La fonction TIMER n'est pas répétitive et doit être programmé à chaque<br />
utilisation.<br />
Sélectionnant la fonction Timer ON-OFF, le démarrage de l'unité<br />
pourra avenir un peut en rétard respect l'horaire programmé sur le<br />
timer, le tout est normal dans le correct fonctionnement de l'unité.<br />
I.6.9<br />
VERROUILLAGE DU CLAVIER<br />
En appuyant à l'aide d'un objet pointu sur la<br />
touche BLOCCO, il est possible de<br />
verrouiller le clavier de la télécommande<br />
pour prévenir toute utilisation indésirable<br />
(en présence d'enfants par exemple).<br />
L'écran visualise ensuite le symbole cicontre.<br />
Pour éliminer le verrouillage, il suffit<br />
d'appuyer à nouveau à l'aide d'un objet<br />
pointu sur la touche BLOCCO.<br />
I.6.10<br />
REINITIALISATION DE LA TELECOMMANDE<br />
En appuyant à l'aide d'un objet pointu sur la touche<br />
RESET, il est possible de rétablir la<br />
programmation par défaut de la télécommande.<br />
I.7 DESCRIPTION DES INDICATEURS<br />
Les indicateurs situés sur la partie centrale de l’unité servent à indiquer<br />
l’état de fonctionnement de l'appareil.<br />
I.6.7<br />
DANGER!<br />
Manœuvrer manuellement le déflecteur motorisé<br />
alors que le climatiseur est allumé peut entraîner un<br />
mauvais fonctionnement voire endommager le<br />
système de réglage.<br />
REGLAGE DE LA VENTILATION<br />
En appuyant à plusieurs reprises sur la touche FAN<br />
SPEED, il est possible de programmer la vitesse du<br />
ventilateur en sélectionnant une des trois vitesses<br />
disponibles ou bien d'activer la fonction AUTO.<br />
Sur l'écran, s'affiche le mode de fonctionnement.<br />
Indicateurs<br />
Signification<br />
indique que l'unité est en marche, clignote à l'issue d'une<br />
coupure momentanée de l'alimentation électrique<br />
indique que l'unité fonctionne en modalité<br />
ECONOMIC RUNNING<br />
AUTO fonctionnement entièrement automatique<br />
LOW: fonctionnement vitesse minimum<br />
MED: fonctionnement vitesse moyenne<br />
HIGH: fonctionnement vitesse maximum<br />
indique que le timer est activé<br />
indique que l'unité est en phase de dégivrage ou<br />
en phase Anti Cold Air<br />
I.6.8<br />
REGLAGE DU TIMER<br />
En appuyant sur ces touches, il est possible de<br />
programmer l’heure de mise en marche et/ou l’heure<br />
d’extinction de l’unité.<br />
L'écran visualise les indications TIMER ON et/ou<br />
TIMER OFF en faisant clignoter l'heure.<br />
indique que l'unité est en marche en en modalité<br />
AUTO<br />
indique la température programmée<br />
TIME ADJUST<br />
Heure de mise en marche<br />
Heure d’extinction<br />
En appuyant sur cette touche, il est possible de<br />
modifier l’heure de mise en marche ou d’extinction.<br />
À chaque pression sur la touche, l'heure est<br />
avancée ou reculée de dix minutes.<br />
Après avoir sélectionné l’heure de mise en marche<br />
ou d’extinction désirée, la programmation doit être<br />
validée en appuyant sur la touche OK.<br />
La touche CANCEL permet de désactiver les<br />
fonctions TIMER ON et/ou TIMER OFF<br />
Après avoir programmé les heures de mise en<br />
marche et d’extinction, l’écran affichera<br />
l’heure actuelle et les indications TIMER ON<br />
et/ou TIMER OFF, ainsi que les heures<br />
correspondantes.<br />
I.8 MISE HORS SERVICE<br />
DANGER!<br />
Veiller à toujours utiliser l'interrupteur automatique<br />
général (IG) assurant la protection de toute<br />
l'installation. S'assurer que personne ne puisse<br />
mettre involontairement l'appareil sous tension; à<br />
cet effet, bloquer l'interrupteur général (IG) sur la<br />
position off.<br />
Pendant les longues périodes d'arrêt, l'utilisateur doit isoler l'appareil de<br />
l'alimentation électrique en plaçant l'interrupteur automatique général IG<br />
sur la position off (son installation incombe à l'installateur).<br />
I.9 REMISE EN MARCHE APRES UNE LONGUE<br />
PERIODE D'ARRET<br />
Avant la remise en marche:<br />
• Nettoyer ou changer le filtre à air.<br />
• Nettoyer l'échangeur.<br />
• Nettoyer et/ou débarrasser des éventuelles obstructions le bac à<br />
condensat.<br />
Il est recommandé de faire fonctionner l'unité à la vitesse maximum<br />
pendant quelques heures.<br />
41
SECTION I: UTILISATEUR<br />
I.10 GUIDE RAPIDE DU FONCTIONNEMENT<br />
I.10.1<br />
FONCTIONNEMENT AUTOMATIQUE<br />
En sélectionnant le programme automatique AUTO le climatiseur peut<br />
fonctionner en mode RAFRAICHISSEMENT, en mode VENTILATION<br />
et en mode CHAUFFAGE en fonction de l'écart entre la température<br />
ambiante et la température sélectionnée sur la télécommande.<br />
L’unité fonctionne en mode: Si:<br />
rafraîchissement TA-TS > 2 °C<br />
ventilation -1 °C ≤TA-TS ≤2 °C<br />
chauffage TA-TS < -1 °C<br />
TA = température ambiente TS = température sélectionnée<br />
Le ventilateur, quel que soit l'écart entre température ambiante et<br />
température sélectionnée, est constamment en marche.<br />
I.10.2<br />
FONCTION RAFRAICHISSEMENT<br />
Pour programmer le fonctionnement en mode rafraîchissement COOL<br />
procéder comme suit:<br />
• sélectionner le programme rafraîchissement, en appuyant sur la<br />
touche MODE (1), jusqu'à ce que l'écran affiche l'indication COOL;<br />
• régler la température voulue en appuyant sur les touches TEMP (2);<br />
l'écran indique des valeurs comprises entre 17°C et 30°C;<br />
• régler la vitesse de ventilation en appuyant sur la touche FAN<br />
SPEED (3), en sélectionnant AUTO ou une des trois vitesses<br />
disponibles HIGH-MED-LOW;<br />
• orienter la télécommande vers le récepteur de l'unité et appuyer sur<br />
la touche d'allumage ON/OFF (4);<br />
• régler le flux d'air en fonction des besoins en utilisant la touche<br />
SWING (5) ou AIR DIRECTION (6);<br />
Une fois les réglages effectués, ceux-ci seront reproposés lors de<br />
l'allumage du climatiseur.<br />
Chaque signal transmis par télécommande est confirmé par un bip<br />
sonore s'il est correctement reçu.<br />
L'indicateur situé sur l'unité interne s'allume, signalant ainsi<br />
que l'unité est en train de fonctionner.<br />
Après chaque arrêt du compresseur de l'unité externe, doivent s'écouler<br />
au moins 3 minutes avant sa remise en marche. Cette durée assure la<br />
protection du compresseur et ne peut être modifiée.<br />
I.10.3<br />
FONCTION DESHUMIDIFICATION<br />
Pour programmer le fonctionnement en mode déshumidifcation DRY<br />
procéder comme suit:<br />
• sélectionner le programme déshumidification, en appuyant sur la<br />
touche MODE (1), jusqu'à ce que l'écran affiche l'indication DRY;<br />
• régler la température voulue en appuyant sur les touches TEMP (2)<br />
l'écran indique des valeurs comprises entre 17°C et 30°C;<br />
• orienter la télécommande vers le récepteur de l'unité, et appuyer sur<br />
la touche d'allumage ON/OFF (4);<br />
• régler le flux d'air en fonction des besoins en utilisant la touche<br />
SWING (5) ou AIR DIRECTION (6);<br />
Une fois les réglages effectués, ceux-ci seront reproposés lors de<br />
l'allumage du climatiseur.<br />
Chaque signal transmis par télécommande est confirmé par un bip<br />
s'il correctement reçu.<br />
Quand est sélectionné le programme de déshumidification DRY, le<br />
climatiseur fonctionne à intervalles de 4 à 6 minutes, sur la base de<br />
valeurs librement programmées, et abaisse progressivement la<br />
température et le degré d'humidité ambiants.<br />
Quand est sélectionné le programme de déshumidifcation DRY, la<br />
touche FAN SPEED n'est pas utilisable.<br />
Après chaque arrêt du compresseur de l'unité externe, doivent s'écouler<br />
au moins 3 minutes avant sa remise en marche. Cette durée assure la<br />
protection du compresseur et ne peut être modifiée.<br />
I.10.4<br />
FONCTION CHAUFFAGE<br />
Pour programmer le fonctionnement en mode chauffage HEAT<br />
procéder comme suit:<br />
• sélectionner le programme chauffage, en appuyant sur la touche<br />
MODE (1), jusqu'à ce que l'écran affiche l'indication HEAT;<br />
• régler la température voulue en appuyant sur les touches TEMP (2):<br />
l'écran indique des valeurs comprises entre 17°C et 30°C;<br />
• régler la vitesse de ventilation en appuyant sur la touche FAN<br />
SPEED (3), et sélectionner AUTO ou l'une des vitesses disponivles,<br />
HIGH-MED-LOW;<br />
• orienter la télécommande vers le récepteur de l'unité, et appuyer sur<br />
la touche d'allumage ON/OFF (4);<br />
• régler le flux d'air en fonction des besoins en utilisant la touche<br />
SWING (5) ou AIR DIRECTION (6);<br />
Une fois les réglages effectués, ceux-ci seront reproposés lors de<br />
l'allumage du climatiseur.<br />
Chaque signal transmis par télécommande est confirmé par un bip<br />
s'il correctement reçu.<br />
L'indicateur situé sur l'unité interne s'allume, signalant ainsi<br />
que l'unité est en train de fonctionner.<br />
Dans le cas où la température de l'air externe serait basse et son degré<br />
d'humidité élevé, sur l'échangeur externe se forme une rosée qui doit<br />
être éliminée; la carte à microprocesseur, sur la base d'un cycle défini,<br />
effectue cette opération en bloquant la phase de chauffage pendant des<br />
durées qui varient de 6 à 10 minutes.<br />
L'indicateur situé sur l'unité interne s'allume, signalant cet<br />
fonction.<br />
Après chaque arrêt du compresseur de l'unité externe, doivent s'écouler<br />
au moins 3 minutes avant sa remise en marche. Cette durée assure la<br />
protection du compresseur et ne peut être modifiée.<br />
I.10.5<br />
FONCTION VENTILATION<br />
Pour programmer le fonctionnement en mode ventilation FAN procéder<br />
comme suit:<br />
• sélectionner le programme ventilation, en appuyant sur la touche<br />
MODE (1), jusqu'à ce que l'écran affiche l'indication FAN;<br />
• régler la vitesse de ventilation en appuyant sur la touche FAN<br />
SPEED (3), et sélectionner AUTO ou l'une des vitesses disponibles,<br />
HIGH-MED-LOW;<br />
• orienter la télécommande vers le récepteur de l'unité, et appuyer sur<br />
la touche d'allumage ON/OFF (4);<br />
• régler le flux d'air en fonction des besoins en utilisant la touche<br />
SWING (5) ou AIR DIRECTION (6);<br />
Une fois les réglages effectués, ceux-ci seront reproposés lors de<br />
l'allumage du climatiseur.<br />
Chaque signal transmis par télécommande est confirmé par un bip<br />
s'il correctement reçu.<br />
L'indicateur situé sur l'unité interne s'allume, signalant ainsi<br />
que l'unité est en train de fonctionner.<br />
42
SECTION I: UTILISATEUR<br />
I.11 ENTRETIEN COURANT INCOMBANT A<br />
L’UTILISATEUR<br />
I.11.1<br />
DANGER!<br />
Veiller à toujours placer l'interrupteur automatique<br />
général (IG) assurant la protection de l'installation<br />
sur la position off avant de procéder à toute<br />
opération d'entretien y compris s'il s'agit d'un<br />
simple contrôle. S'assurer que personne ne puisse<br />
mettre involontairement l'appareil sous tension ;<br />
pour ce faire, bloquer l'interrupteur général sur la<br />
position O.<br />
NETTOYAGE DE L’UNITE INTERNE<br />
Pour nettoyer l’unité, faire usage d'un chiffon doux et sec. Dans le cas<br />
où l'unité serait très sale, il est possible d'utiliser un chiffon humidifié à<br />
l'aide d'eau froide (veiller à ne pas utiliser un chiffon excessivement<br />
mouillé).<br />
Ne pas vaporiser d'eau sur les surfaces du climatiseur.<br />
Ne pas faire usage de produits chimiques, de solvants ni autres liquides<br />
semblables pour nettoyer les surfaces du climatiseur.<br />
Ne pas vaporiser d'insecticides ni de sprays désodorisants directement<br />
sur le climatiseur.<br />
I.11.2<br />
NETTOYAGE DE L’UNITE EXTERNE<br />
En règle générale, l’unité externe ne nécessite aucune opération de<br />
nettoyage particulière; en cas d'installation sur une zone poussiéreuse<br />
ou en présence d'agents polluants, il est toutefois nécessaire de<br />
nettoyer régulièrement l'échangeur; il est recommandé de confier cette<br />
opération à un personnel qualifié.<br />
A chaque début de saison, avant de mettre en marche le climatiseur,<br />
s'assurer de l'absence d'obstacles susceptibles d'entraver le flux d'air<br />
passant au niveau de l'unité externe, aussi bien en aspiration qu'en<br />
soufflage.<br />
En fin de saison, dans le cas où le climatiseur devrait rester longuement<br />
à l'arrêt après avoir fonctionné en mode rafraîchissement, il est<br />
recommandé, avant de l'éteindre définitivement, de le faire fonctionner<br />
pendant quelques heures en mode ventilation FAN de façon à éliminer<br />
l'éventuelle condensation encore présente dans l'unité interne.<br />
I.11.3<br />
NETTOYAGE DU FILTRE A AIR<br />
I.11.4<br />
NETTOYAGE DE LA TELECOMMANDE<br />
Pour la nettoyage de la télécommande, faire usage d'un chiffon doux et<br />
sec.<br />
I.12 RECOMMANDATIONS ET CONSEILS<br />
L’unité ne doit pas fonctionner de manière continue en mode<br />
rafraîchissement dans des locaux à forte humidité relative (supérieure à<br />
80%). Dans ces conditions, de la condensation pourrait se former sur<br />
l’orifice de refoulement d’air et endommager les objets y placés<br />
dessous, le plancher ou le mur sur lequel est fixée l’unité.<br />
Veiller à ce que le flux d'air ne soit pas entravé et ne pas utiliser l'unité<br />
comme plan d'appui.<br />
DANGER!<br />
Faire attention lors du le démontage du filtre, les<br />
ailettes de l’échangeur de chaleur sont coupantes.<br />
IMPORTANT!<br />
Faire fonctionner les unités uniquement après avoir<br />
installé les filtres.<br />
Pour garantir une bonne aspiration d'air, le filtre doit être nettoyé au<br />
moins une fois par mois voire plus fréquemment si l'appareil est utilisé<br />
dans un milieu très poussiéreux. Un nettoyage fréquent est gage de<br />
fonctionnement plus efficace.<br />
Pour extraire le filtre à air, soulever le panneau d'apsiration, tirer la<br />
languette centrale du filtre vers le bas et extraire le filtre. Nettoyer le<br />
filtre à l'aide d'un aspirateur et au besoin le laver à l'aide d'eau froide en<br />
veillant ensuite à le faire sécher à l'ombre. Une fois que le filtre est<br />
propre et sec, procéder à son remontage en effectuant les opérations<br />
décrites ci-dessus en sens inverse. Dans le cas où il serait<br />
endommagé, le filtre doit être remplacé par un filtre neuf d'origine<br />
(RHOSS).<br />
L'utilisation d'eau ou de bombes spray à proximité de l'unité peut<br />
provoquer des décharges électriques et/ou entraîner un mauvais<br />
fonctionnement<br />
43
SECTION I: UTILISATEUR<br />
La télécommande ne transmet pas le signal à l’unité si celui-ci est<br />
entravé par une cloison ou d’autres objets.<br />
Ne poser asucun objet sur l'unité externe.<br />
I.13 ANOMALIES DE FONCTIONNEMENT<br />
Anomalie<br />
Le climatiseur NE FONCTIONNE PAS (il ne s'allume pas).<br />
Le climatiseur fonctionne mais NE RAFRAÎCHIT PAS suffisamment.<br />
Il est possible que se manifestent certaines conditions qui en aucun cas<br />
ni'ndiquent un mauvais fonctionnement du climatiseur, ainsi:<br />
• il est possible que soit perceptible un sifflement après la mise en<br />
marche ou l'arrêt du climatiseur: ce sifflement est dû au rééquilibrage<br />
des pressions de gaz à l'intérieur du circuit frigorifique;<br />
• il est possible que soient perceptibles des craquements temporaires<br />
lorsque le climatiseur foctionne à basse température ambiante: ces<br />
craquements sont dues aux dilatations du panneau provoquées par la<br />
variation de tempréature;<br />
• il est possible que se diffusent des odeurs désagréables dues à<br />
l'accumulation de certaines substances dans l'air (fumée de cigarette,<br />
vapeurs de cuisson, etc.), en particulier lorsque les pièces ne sont pas<br />
régulièrement aérées;<br />
• si le climatiseur fonctionne constamment en mode rafraîchissement<br />
à l'intérieur d'un espace à haut degré d'humidité relative (supérieur à<br />
80%), il est possible que de la condensation se forme sur le déflecteur<br />
et sur les ailettes de l'unité interne, cette condensation pouvant<br />
s'égoutter au sol ou sur les objets situés au-dessous;<br />
• durant le fonctionnement en mode chauffage (uniquement sur les<br />
modèles équipés de pompe à chaleur), il est possible que de la vapeur<br />
s'échappe de l'unité externe durant la phase de dégivrage.<br />
Intervention conseillée:<br />
s'assurer de la présence de tension électrique (allumer une lampe)<br />
s'assurer que l’interrupteur général de la ligne d'alimentation du<br />
climatiseur est sur la position on (si l’interrupteur général est muni de<br />
fusibles, ceux-ci doivent être intacts)<br />
s'assurer que la télécommande fonctionne<br />
s'assurer que le timer n'est pas activé<br />
s'assurer qu'est bien sélectionné le fonctionnement en mode<br />
rafraîchissement<br />
s'assurer que la température a bien été programmée sur la télécommande<br />
s'assurer que la vitesse du ventilateur n'est pas excessivement basse<br />
s'assurer de l'absence d'obstacles à hauteur des points d'entrée et de<br />
sortie d'air sur les unités interne et externe<br />
s'assurer que le filtre à air est propre<br />
s'assurer que portes et fenêtres sont fermées<br />
s'assurer de l'absence de sources de chaleur anormales (fer à repasser,<br />
présence d'un grand nombre de personnes, etc.)<br />
I.14 RECOMMANDATIONS POUR LA MISE AU<br />
REBUT DE L'UNITE ET L'ELIMINATION DES<br />
SUBSTANCES TOXIQUES<br />
PROTECTION DE L'ENVIRONNEMENT!<br />
RHOSS SPA est depuis toujours très sensible au<br />
thème de la protection de l'environnement.<br />
Le ou les responsables de la mise au rebut de<br />
l'unité doivent veiller au respect scrupuleux des<br />
indications qui suivent.<br />
La mise au rebut de l'unité doit être effectuée par une entreprise agréée,<br />
spécialisée dans le retrait des machines et des produits destinés à la<br />
démolition. L'unité est constituée dans son ensemble de matières<br />
pouvant être recyclées, telles que les MPS (matières premières<br />
secondaires), et est soumise aux prescriptions suivantes :<br />
• l’huile de vidange du compresseur doit être récupérée et remise à un<br />
centre agréé, spécialisé dans le retrait des huiles usées ;<br />
• le fluide frigorigène ne doit pas être libéré dans l’atmosphère. Sa<br />
récupération, au moyen d’appareils homologués, doit prévoir l’utilisation<br />
de bouteilles appropriées et la remise à un centre de collecte agréé ;<br />
• le filtre déshydrateur et les composants électroniques<br />
(condensateurs électrolytiques) doivent être considérés comme des<br />
déchets spéciaux et, en tant que tels, doivent être collectés par des<br />
opérateurs agréés;<br />
l’isolant en élastomère de polyuréthanne expansé des tuyaux doit être<br />
éliminé et traité comme des déchets assimilables aux ordures<br />
ménagères.<br />
44
SECTION II : INSTALLATION, ENTRETIEN ET MAINTENANCE<br />
II<br />
SECTION II : INSTALLATION,<br />
ENTRETIEN ET MAINTENANCE<br />
II.1.3.1<br />
Unité interne<br />
II.1.1<br />
TRANSPORT ET DEPLACEMENT<br />
DANGER!<br />
Les déplacements doivent être confiés à un<br />
personnel qualifié à cet effet et effectués avec la<br />
plus grande prudence. Un déplacement effectué de<br />
manière impropre expose à des risques de<br />
blessures et à des risques de dommages matériels.<br />
Lors du déplacement des climatiseurs, veiller à éviter les chocs et les<br />
chutes susceptibles de les endommager.<br />
Les unités sont expédiées dans un emballage standard constitués<br />
d'enveloppes de polystyrène expansé et de carton. Ne pas marcher sur<br />
l'emballage. Ne pas laisser les emballages ouverts durant le transport.<br />
Le levage et le déplacement doivent<br />
être effectués par au moins 2<br />
personnes.<br />
L'appareil emballé doit être déplacé et soulevé en utilisant les points de<br />
prise prévus à cet effet sur l'emballage. Les opérations de déplacement<br />
de l'unité doivent être effectuées en prenant soin de ne pas<br />
endommager la structure externe et les parties mécaniques et<br />
électriques internes. Pour soulever l'unité non emballée, utiliser les<br />
poignées prévues à cet effet. Ne jamais retourner l'emballage.<br />
PROTECTION DE L'ENVIRONNEMENT!<br />
Éliminer les matériaux d'emballage en respectant<br />
les dispositions légales, locales et nationales en<br />
vigueur dans le pays où l'unité est installée.<br />
DANGER!<br />
Ne pas laisser les emballages à la portée des<br />
enfants.<br />
Installer l’unité de telle sorte que le flux d'air ne soit pas directement<br />
orienté vers les personnes.<br />
II.1.2<br />
STOCKAGE<br />
Les climatiseurs doivent être stockés à l'abri des intempéries dans des<br />
emballages fermés.<br />
Installer l’unité loin des sources de chaleur et à bonne distance de tout<br />
élément susceptible d'entraver le flux d'air.<br />
Avant de superposer des emballages, contrôler la position de la flèche<br />
pour connaître le nombre d'appreils superposables.<br />
II.1.3<br />
DEGAGEMENTS<br />
Les unités doivent être fixées en veillant au respect des dégagements<br />
techniques indiqués ci-après.<br />
45
SECTION II : INSTALLATION, ENTRETIEN ET MAINTENANCE<br />
Des précautions particulières doivent être prises dans le cas où l'unité<br />
externe serait installée à un endroit à forte activité sismique. Dans ce<br />
cas, il est nécessaire de faire appel à des techniciens spécialisés.<br />
II.2.2<br />
DENIVELLATION MAXIMUM ENTRE LES<br />
UNITES<br />
La dénivellation maximum entre unité interne et unité externe est de +/- 5 m.<br />
Lorsque la dénivellation entre l’unité interne et l'unité externe est supérieure à<br />
3 m et que l’unité externe se trouve à une hauteur supérieure à celle de l'unité<br />
interne, il est recommandé de prévoir l'installation d'un siphon sur la ligne de<br />
gaz pour faciliter le retour de l'huile de lubrification au compresseur (Fig. 2).<br />
L’unité ne doit pas fonctionner de manière continue en mode<br />
rafraîchissement dans des locaux à forte humidité relative (supérieure à<br />
80%). Dans ces conditions, de la condensation pourrait se former sur<br />
l’orifice de refoulement d’air et endommager les objets y placés<br />
dessous, le plancher ou le mur sur lequel est fixée l’unité.<br />
II.1.3.2 Unité externe<br />
L’unité externe doit être installée à une hauteur par rapport au sol telle<br />
qu'elle ne soit pas facilement accessible, sur les supports permettant<br />
d'en soutenir le poids ainsi que celui des tuyaux de raccordement.<br />
Veiller au respect des dégagements techniques indiqués ci-après.<br />
II.2<br />
INSTALLATION<br />
DANGER!<br />
L'installation doit être effectuée exclusivement par<br />
des techniciens experts agréés, autorisés à<br />
intervenir sur des appareils de conditionnement et<br />
de réfrigération.<br />
Une installation incorrecte peut entraîner un<br />
mauvais fonctionnement de l'unité et par<br />
conséquent de légères baisses de rendement.<br />
Les installateurs doivent impérativement respecter<br />
la réglementation locale ou nationale en vigueur au<br />
moment de l'installation de l'appareil.<br />
Ci-après figurent les indications nécessaires à la bonne installation des<br />
climatiseurs.<br />
La bonne installation repose néanmoins sur l'expérience de l'installateur<br />
en fonction des exigences spécifiques.<br />
II.2.1<br />
REDUCTION DU BRUIT ET DES VIBRATIONS<br />
Une bonne installation prévoit un certain nombre de précautions<br />
permettant de réduire les nuisances acoustiques produites par le<br />
fonctionnement normal de l'unité.<br />
Avant d'installer l'unité, s'informer auprès des autorités locales quant à<br />
l'existence de limitations en matières de nuisances sonores.<br />
Dans la mesure du possible, l'unité externe ne doit jamais être installée<br />
à proximité d'espaces habités (bureaux, séjours, chambres à coucher,<br />
etc.).<br />
Il convient de prendre les précautions nécessaires en cas d'installation<br />
à proximité d'espaces au sein desquels vivent des malades ou des<br />
personnes handicapées.<br />
L’utilisation des kits anti-vibratiles sur l'unité externe garantit un bon<br />
amortissement des vibrations transmises par l'unité à l'édifice.<br />
46<br />
II.2.3<br />
INSTALLATION DE L’UNITE INTERNE<br />
L’unité interne est exclusivement prévue pour une installation murale.<br />
Veiller au respect des espaces de dégagement technique minimum indiqués.<br />
Avant d'installer l'unité, il est nécessaire de procéder à un certain<br />
nombre de contrôles préliminaires pour s'assurer:<br />
• que le mur sur lequel doit être positionné le climatiseur est solide et<br />
sufffisamment plat pour constituer un bon appui;<br />
• que les espaces techniques de dégagement minimum nécessaires<br />
à l'installation peuvent être respectés;<br />
• que l'unité ne risque pas d'être couverte par des tentures ou autres objets<br />
susceptibles d'entraver le passage de l'air en aspiration et en soufflage;<br />
• que l'unité et le récepteur (à signal infrarouge) ne risquent pas d'être<br />
exposés à la lumière directe du soleil ni à des ampoules électroniques<br />
susceptibles de compromettre le bon fonctionnement;<br />
• que l'unité ne doit pas être installée à une hauteur supérieure à 2,7<br />
mètres par rapport au sol pour prévenir les effets de stratification de l'air<br />
durant le fonctionnement.<br />
Pour le montage, procéder comme suit:<br />
• fixer le gabarit en papier sur le mur prévu;<br />
• à l'aide d'une perceuse et d'un foret de petit diamètre marquer les<br />
points suivants: trou de passage des tuyaux et des câbles électriques;<br />
trous pour les cheveilles à expansion destinées à la fixation de la<br />
plaque de soutien (4 minimum, plus au besoin);<br />
• effectuer le trou de passage des tuyaux et des câbles électriques<br />
(Fig. 3);<br />
Côté interne<br />
mur<br />
Côté interne<br />
mur<br />
Côté<br />
externe mur<br />
Côté<br />
externe mur<br />
Fig. 2<br />
Fig. 3<br />
• réaliser les trous destinés aux chevilles à expansion;<br />
• retirer la plaque de soutien fixée à l'unité;<br />
• fixer la plaque de soutien au mur à l'aide des chevilles et veiller à ce<br />
qu'elle soit en position parfaitement horizontale;<br />
• dévisser les vis de fixation de l'habillage de l'unité;<br />
• plier les tuyaux en cuivre à l'arrière de l'unité en fonction des besoins<br />
(Fig. 4);<br />
IMPORTANT!<br />
Les tuyaux en cuivre doivent être pliés avec grande<br />
précaution pour prévenir les risques de fissure.
SECTION II : INSTALLATION, ENTRETIEN ET MAINTENANCE<br />
Gauche<br />
Utiliser les brides<br />
de soutien.<br />
Gauche<br />
postérieur<br />
Fig. 7<br />
Vers le bas à<br />
Centre gauche<br />
postérieur<br />
Droite<br />
Vers le bas à<br />
droite<br />
Droite<br />
postérieur<br />
• effectuer les raccordements frigorifiques, électriques et le<br />
raccordement de l'évacuation de condensation comme indiqué dans les<br />
chapitres “Raccordements frigorifiques” et “Branchements électriques”;<br />
• avant de remonter l'habillage s'assurer de la bonne évacuation de la<br />
condensation.<br />
II.2.4<br />
INSTALLATION DE L’UNITE EXTERNE<br />
Fig. 4<br />
Fixer l’unité à la plaque de soutien, en<br />
veillant à faire passer dans le trou du mur<br />
les lignes frigorifiques, les câbles<br />
électriques et le tuyau d'évacuation de la<br />
condensation.<br />
Fig. 5<br />
L’unité externe doit être installée à l'extérieur en veillant à respect les<br />
espaces techniques minimum nécessaires au passage de l'air et aux<br />
éventuelles interventions d'entretien.<br />
Sur les modèles équipés de pompe à chaleur, durant la phase de<br />
dégivrage du mode chauffage, est produite une quantité d'eau qu'il est<br />
nécessaire de collecter et d'évacuer.<br />
II.2.5<br />
RACCORDEMENTS CIRCUITS<br />
FRIGORIFIQUES<br />
IMPORTANT!<br />
Les raccordements frigorifiques doivent être<br />
confiés à un personnel qualifié et effectués dans le<br />
respect des dispositions légales et des règlements<br />
en vigueur sur le lieu d'installation.<br />
Un raccordement électrique non conforme dégage<br />
la société RHOSS SPA de toute responsabilité en<br />
cas de dommages corporels et matériels.<br />
Pour la réalisation des lignes frigorifiques doivent être utilisés des<br />
tuyaux de cuivre pour circuits frigorifiques en veillant au respect des<br />
longueurs et des diamètres recommandés dans les annexes. S’assurer<br />
en outre de l’absence à l’intérieur des tuyaux d’impuretés, d’humidité,<br />
d’éléments susceptibles d'endommager gravement le circuit frigorifique.<br />
Les lignes frigorifiques doivent être isolées individuellement à l'aide d'un<br />
revêtement en matériau expansé à cellules fermées.<br />
Pour le passage des tuyaux à travers les murs un trou de 65 mm de<br />
diamètre est suffisant.<br />
Pour la prépration des tuyaux procéder comme suit.<br />
Couper les tuyaux de raccordement à la distance préétablie en<br />
prévoyant une certaine marge de sécurité et en tenant compte des<br />
indications de la Fig. 8.<br />
Correct<br />
Incorrect<br />
Garantir la bonne mise à<br />
niveau de l'unité.<br />
Fig. 6<br />
La consistence du mur doit être adaptée au poids de l'unité et doit<br />
empêcher la transmission du bruit et des vibrations.<br />
Il est nécessaire d'accorder une attention toute particulière aux choix de<br />
la position d'installation de telle sorte que le flux d'air ne constitue pas<br />
une nuisance pour le voisinage.<br />
Fig. 8<br />
Procéder à l’ébavurage des tubes en maintenant l'ouverture vers le bas<br />
pendant cette opération.<br />
Couvrir les lignes frigorifiques d'un isolant<br />
puis mettre en place les manchons<br />
préalablement retirés des raccords de<br />
l'unité.<br />
Fig. 9<br />
47
SECTION II : INSTALLATION, ENTRETIEN ET MAINTENANCE<br />
Pour réaliser correctement le bridage il est nécessaire de faire usage<br />
d'un bride-tube de type universel en suivant les indications de la Fig. 10<br />
(veiller à retirer ensuite les éventuelles ébarbures).<br />
Fig. 10<br />
1) Prise à pointeau<br />
2) Capuchon de la<br />
prise à pointeau<br />
3) Cliquet<br />
4) Capuchon du<br />
robinet<br />
5) Capuchon du<br />
robinet<br />
A<br />
B (mm)<br />
inch mm max. min.<br />
1/4” 6,35 8,25 8,01<br />
3/8” 9,52 12,36 11,97<br />
1/2” 12,70 15,82 15,42<br />
5/8 15,90 18,95 18,58<br />
S'assurer que le tube est fraisé uniformément et ne présente aucun des<br />
défauts montrés à la Fig. 11.<br />
Correct<br />
Incorrect<br />
Fig. 11<br />
Connecter les circuits frigorifiques aux raccordements des unités en<br />
faisant parfaitement coïncider les deux extrémités. Visser à la main<br />
l'embout et serrer ensuite avec une clé dynamométrique en respectant<br />
les couples de serrage indiqués dans le tableau ci-dessous.<br />
Écrou Couple de serrage<br />
inch 1/4” Nm 15<br />
inch 3/8” Nm 16<br />
inch 1/2” Nm 40<br />
inch 5/8” Nm 48<br />
Raccorder le tuyau d'évacuation de la condensation à l'unité interne.<br />
Il est recommandé de ne pas réaliser de courbes sur les tuyaux de<br />
rayon inférieur à 100 mm pour ne pas écraser la section des tuyaux.<br />
II.2.5.1<br />
PROTECTION DE L'ENVIRONNEMENT!<br />
Avant de mettre en marche l'unité, s'assurer à l'aide<br />
d'un instrument approprié que les fuites de gaz ne<br />
sont pas supérieures à 5 g/an.<br />
Charge de réfrigérant<br />
Les unités sont fournies avec une charge de réfrigérant pour une<br />
longueur des lignes de 5 m. Pour des longueurs supérieurs, il est<br />
nécessaire d'augmenter la quantité de réfrigérant. Pour les valeurs,<br />
faire référence au tableau des annexes.<br />
II.2.5.2<br />
Évacuation de la condensation<br />
Fig. 13<br />
Pour éviter que des odeurs désagréables ne puissent remonter par le<br />
tuyau d'évacuation de la condensation, il est recommandé de réaliser<br />
un siphon sur la partie terminale du tuyau côté externe.<br />
Le système d'évacuation de la condensation doit se trouver à la bonne<br />
inclinaison pour permettre l'écoulement de l'eau (Fig. 14).<br />
1. Clé<br />
2. Clé dynamométrique<br />
Fig. 14<br />
Fig. 12<br />
Pour éviter la torsion du tuyau lors du raccordement des unités tenir les<br />
raccords à l'aide d'une clé supplémentaire (Fig. 12).<br />
Couper le capuchon de la prise à pointeau du robinet. Fig. 13<br />
Raccorder la pompe de vide à la prise à pointeau du robinet.<br />
Ne pas ouvrir les robinets, le vide doit être créé uniquement sur l'unité<br />
interne et sur la ligne frigorifique.<br />
Réaliser le vide jusqu'à ce que soit atteinte une pression d'environ 1,3<br />
KPa (10 mmHg).<br />
Une fois cette opération effectuée et après avoir débranché la pompe<br />
de vide, ouvrir les robinets en retirant les capuchons (Fig. 13) et en<br />
intervenant à l'aide d'une clé mâle hexagonale de 5 mm (fournie) sur le<br />
cliquet (Fig. 13).<br />
Remettre en place tous les capuchons sur les robinets et les serrer.<br />
IMPORTANT!<br />
La réalisation non conforme de l'évacuation de la<br />
condensation provoque une fuite d'eau à hauteur<br />
de l'unité interne pouvant entraîner des dommages<br />
matériels et physiques.<br />
Un raccordement non conforme décharge la société<br />
RHOSS SPA de toute responsabilité en cas de<br />
dommages corporels et matériels.<br />
48
SECTION II : INSTALLATION, ENTRETIEN ET MAINTENANCE<br />
II.2.6<br />
BRANCHEMENTS ÉLECTRIQUES<br />
IMPORTANT!<br />
Les branchements électriques doivent être confiés<br />
à un personnel qualifié et effectués dans le respect<br />
des dispositions légales et des normes en vigueur<br />
sur le lieu d'installation. Un raccordement<br />
électrique non conforme décharge la société<br />
RHOSS SPA de toute responsabilité en cas de<br />
dommages corporels et matériels.<br />
DANGER!<br />
Dans un endroit protégé et à proximité de l'unité,<br />
Installer un interrupteur général automatique (IG) à<br />
courbe de retardement, de portée et de pouvoir de<br />
coupure appropriés et ayant un écart d'ouverture entre<br />
les contacts de 3 mm minimum. L’interrupteur<br />
automatique général (IG) doit se trouver en amont du<br />
circuit de façon à pouvoir couper l'alimentation<br />
électrique de l'unité principale et de tous les<br />
accessoires raccordés à l'installation (pour plus<br />
d'informations, faire référence aux schémas<br />
électriques fournis). La mise à la terre de l'unité est<br />
obligatoire selon la loi et garantit la sécurité de<br />
l'utilisateur pendant le fonctionnement de la machine.<br />
Dénuder les conducteurs uniquement à la proximité des bornes. Utiliser<br />
des cosses adaptées aux bornes utilisées.<br />
Après avoir inséré la cosse dans la borne, serrer les vis avec un<br />
tournevis sans force excessive: une fois l’opération terminée, tirer<br />
légèrementsur les câbles pour vérifier qu’ils soient serrés correctement.<br />
Utiliser le serre-câble présent à l’intérieur du logement de la carte<br />
électronique pour bloquer les câbles.<br />
II.2.6.1<br />
Branchement au réseau électrique<br />
S'assurer que tension et fréquence du secteur d'alimentation électrique<br />
sont de 230V (±10%) monophasé à 50 Hz; contrôler que la puissance<br />
disponible est suffisante pour faire fonctionner l'appareil et que la<br />
section des câbles de la ligne d'alimentation est compatible avec le<br />
courant maximum requis. S'assurer que le circuit d'alimentation<br />
électrique est conforme aux normes nationales de sécurité en vigueur.<br />
Le câble d'alimentation doit être de type flexible avec gaine en<br />
polychloroprène et d'un poids non inférieur à celui du type H05RN-F. La<br />
longueur du conducteur de terre doit être supérieure à celle des autres<br />
conducteurs de telle sorte qu'il soit le dernier à se décrocher en cas de<br />
desserrement du dispositif de fixation du câble.<br />
Les câbles de branchement électrique doivent passer à l'intérieur de<br />
conduits à degré de protection suffisant et doivent être ancrés<br />
solidement au sol et au mur. Il est nécessaire d'accorder l'importance<br />
nécessaire à la présence d'angles vifs, d'ébarbures, de surfaces<br />
rugueuses ou autres filetages de façon à ne pas risquer d'endommager<br />
l'isolation du conducteur. Pour effectuer les branchements, retirer<br />
l'habillage de l'unité interne et le volet latéral (côté raccords<br />
frigorifiques) de l'unité externe, et brancher les câbles électriques aux<br />
bornes en suivant les schémas électriques apposés sur les<br />
climatiseurs. En cas de fixation de l'unité à une paroi métallique, elle<br />
doit être reliée à la terre conformément aux normes en vigueur dans le<br />
pays d'installation. Les branchements doivent être effectués dans le<br />
respect des schémas électriques figurant dans les annexes.<br />
En règle générale, la longueur de la ligne électrique est supérieure de 2<br />
m par rapport à la ligne frigorifique.<br />
Chaque unité interne est dotée d'un câble d'alimentation avec fiche.<br />
II.3<br />
II.3.1<br />
INSTRUCTIONS POUR LA MISE EN MARCHE<br />
IMPORTANT!<br />
La mise en service ou la première mise en marche<br />
de l'appareil doit être confiée exclusivement à un<br />
personnel qualifié et habilité pour intervenir sur ce<br />
type d'appareil.<br />
DANGER!<br />
Avant de procéder à la mise en service s'assurer que<br />
l'installation et les branchements électriques ont été<br />
effectués conformément aux indications reportées<br />
dans la présente notice. Vérifier qu'aucune personne<br />
non autorisée ne se trouve à proximité de l'appareil<br />
pendant les opérations susmentionnées.<br />
CONTROLES PRELIMINAIRES AVANT LA<br />
MISE EN MARCHE<br />
Avant la mise en marche s'assurer:<br />
1. que l'unité est correctement positionnée;<br />
2. que le tuyaux de refoulement et de retour du circuit hydraulique sont<br />
raccordés;<br />
3. que l’échangeur est propre;<br />
4. que les branchements électriques sont conformes;<br />
5. que les vis de fixation des conducteurs sont bien serrées;<br />
6. que la tension d'alimentation est conforme à celle requise;<br />
Il est recommandé de faire fonctionner l'unité à la vitesse maximum<br />
pendant quelques heures.<br />
II.4<br />
II.4.1<br />
ENTRETIEN EXTRAORDINAIRE<br />
DANGER!<br />
Les interventions d’entretien doivent être effectuées par<br />
des techniciens qualifiés et habilités à intervenir sur<br />
des appareils de conditionnement et de réfrigération.<br />
Veiller à faire usage de gants de travail appropriés.<br />
DANGER!<br />
Veiller à toujours placer l'interrupteur automatique<br />
général (IG) assurant la protection de l'installation sur la<br />
position off avant de procéder à toute opération<br />
d'entretien y compris s'il s'agit d'un simple contrôle.<br />
S'assurer que personne ne puisse mettre<br />
involontairement l'appareil sous tension ; pour ce faire,<br />
bloquer l'interrupteur général (IG) sur la position off.<br />
DANGER<br />
Attention aux surfaces chaudes présentes à<br />
l'intérieur de l'appareil. Il est rigoureusement<br />
interdit d'introduire des objets pointus à travers les<br />
grilles d'aspiration et de refoulement d'air.<br />
CONTROLER LA CHARGE DU FLUIDE<br />
FRIGORIGENE<br />
Après avoir monté un manomètre sur la prise de pression côté<br />
refoulement et un autre manomètre sur la prise de pression côté<br />
aspiration, mettre en marche l’unité et contrôler les pressions<br />
respectives après stabilisation.<br />
II.4.2<br />
VERIFICATION DE L'ABSENCE DE FUITES<br />
DE FLUIDE FRIGORIGENE<br />
A l'aide d'un dispositif de détection de fuites ou d'eau savonneuse,<br />
contrôler le circuirt frigorifique et s'assurer qu'elles ne sont pas<br />
supérieures à 5 g/an.<br />
II.4.3<br />
VERIFICATION DE PROPRETE DE<br />
L’ECHANGEUR<br />
Avec l’unité hors tension, observer l’échangeur et selon les cas:<br />
• débarrasser la surface à ailettes de tout corps étranger susceptible<br />
d'empêcher le passage de l’air ;<br />
• éliminer les dépôts de poussière avec un jet d’air comprimé;<br />
• effectuer un léger lavage à l’eau suivi d’un léger brossage ;<br />
• sécher le tout à l’air comprimé.<br />
II.4.4<br />
CONTROLE DE LA PROPRETE DE<br />
L'ECHANGEUR.<br />
Avec l’unité hors tension contrôler la propreté de l'évacuation de<br />
condensation.<br />
II.4.5<br />
CONTROLE DU CIRCUIT ELECTRIQUE<br />
Il est recommandé d’effectuer les opérations suivantes :<br />
• contrôler la consommation électrique de l’unité au moyen d’une pince<br />
ampèremètre et la comparer avec celle reportée dans l’annexe A1;<br />
• contrôler le serrage des contacts électriques et des bornes<br />
correspondantes.<br />
II.4.6<br />
INDICATIONS POUR LE REMPLACEMENT DE<br />
COMPOSANTS<br />
En cas de réparation d'une unité, il convient de laisser s'écouler le<br />
fluide réfrigérant des deux côtés de haute et basse pression. En effet<br />
en cas de retrait de la charge de fluide réfrigérant uniquement du côté<br />
haute pression, il est possible que le compresseur ferme le circuit,<br />
empêchant ainsi l'équilibrage des pressions internes. De la sorte, la<br />
partie basse pression de l'enveloppe et la ligne d'aspiration peuvent<br />
rester sous pression. Dans ce cas, si l'on applique une torche de<br />
brasage sur un composant à basse pression, le mélange pressurisé de<br />
fluide frigorigène et d'huile sortant du circuit pourrait s'enflammer au<br />
contact de la flamme de la torche. Pour prévenir ce risque, il est<br />
important de contrôler la détente effective de la pression sur les<br />
branches haute et basse pression avant de dessouder.<br />
L'éventuel ajout dans l'unité de fluide réfrigérant R410A doit s'effectuer<br />
en phase liquide de distribution de la bonbonne pour ne pas altérer la<br />
composition.<br />
49
INHALTSVERZEICHNIS<br />
INHALTSVERZEICHNIS<br />
VERWENDETE SYMBOLE<br />
I<br />
ABSCHNITT I: BENUTZER....................................................................51<br />
I.1 Allgemeine informationen ........................................................................................51<br />
I.1.1 Zulässiger Maschinengebrauch ..................................................................................51<br />
I.1.2 Einsatzgrenzen ...........................................................................................................51<br />
I.1.3 Hinweise zur Sicherheit...............................................................................................51<br />
I.2 Ersatzteile ..................................................................................................................51<br />
I.3 Kundendienst ............................................................................................................51<br />
I.4 Beschreibung der Einheit.........................................................................................51<br />
I.4.1 Inneneinheit.................................................................................................................52<br />
I.4.2 Ausseneinheit..............................................................................................................52<br />
I.4.3 Fernbedienung............................................................................................................52<br />
I.5 Beschreibung der Fernbedienung und ihrer Funktionen ......................................53<br />
I.5.1 Namen und Funktionen der display-Anzeigen.............................................................54<br />
I.6 Benutzung der Fernbedienung ................................................................................54<br />
I.6.1 Uhreinstellung .............................................................................................................55<br />
I.6.2 Einschaltung/Ausschaltung der Einheit .......................................................................55<br />
I.6.3 Einstellen der Betriebsart ............................................................................................55<br />
I.6.4 Funktion Economic Running .......................................................................................55<br />
I.6.5 Einstellen der gewünschten Temperatur.....................................................................55<br />
I.6.6 Einstellen der Lüftungsklappe .....................................................................................56<br />
I.6.7 Einstellen der Belüftung ..............................................................................................56<br />
I.6.8 Einstellen der Timer ....................................................................................................56<br />
I.6.9 Tastatursperre.............................................................................................................56<br />
I.6.10 Rücksetzung der Fernbedienung ................................................................................56<br />
I.7 ANZEIGENBESCHREIBUNG.....................................................................................56<br />
I.8 Ausserbetriebsetzen.................................................................................................56<br />
I.9 Wiederinbetriebnahme nach längerer Stillstandzeit ..............................................56<br />
I.10 Schnelle Einführung in den Betrieb ........................................................................57<br />
I.10.1 Automatischer Betrieb.................................................................................................57<br />
I.10.2 Betriebsart Kühlung.....................................................................................................57<br />
I.10.3 Betriebsart Luftentfeuchtung .......................................................................................57<br />
I.10.4 Betriebsart Heizen.......................................................................................................57<br />
I.10.5 Funktion Belüftung ......................................................................................................57<br />
I.11 Normale Wartung durch den Benutzer....................................................................58<br />
I.11.1 Reinigen der Inneneinheit ...........................................................................................58<br />
I.11.2 Reinigen der Ausseneinheit ........................................................................................58<br />
I.11.3 Reinigen des Luftfilters................................................................................................58<br />
I.11.4 Reinigung der Fernbedienung.....................................................................................58<br />
I.12 Warnungen und Hinweise ........................................................................................58<br />
I.13 Betriebsstörungen ....................................................................................................59<br />
I.14 Hinweise zur Verschrottung und Schadstoffentsorgung der Einheit...................59<br />
II<br />
ABSCHNITT II: INSTALLATION UND WARTUNG................................60<br />
II.1.1 Transport und Handling...............................................................................................60<br />
II.1.2 Einlagerung.................................................................................................................60<br />
II.1.3 Einzuhaltende Abstände .............................................................................................60<br />
II.2 Installation .................................................................................................................61<br />
II.2.1 Lärmreduzierung und Schwingungsdämpfung............................................................61<br />
II.2.2 Maximaler Höhenunterschied zwischen den Einheiten. ..............................................61<br />
II.2.3 Installation der Inneneinheit ........................................................................................61<br />
II.2.4 Installation der Ausseneinheit .....................................................................................62<br />
II.2.5 Anschluss der Kältemittelleitungen .............................................................................62<br />
II.2.6 Elektrische Anschlüsse ...............................................................................................64<br />
II.3 Erste Inbetriebnahme ...............................................................................................64<br />
II.3.1 Kontrollen vor der Inbetriebnahme..............................................................................64<br />
II.4<br />
Ausserplanmässige Wartung...................................................................................64<br />
II.4.1 Kontrolle der Kältemittelfüllung....................................................................................64<br />
II.4.2 Überprüfung auf Gaslecks ..........................................................................................64<br />
II.4.3 Überprüfung des Wärmeaustauschers auf Verschmutzung........................................64<br />
II.4.4 Überprüfung des Kondensatablaufs auf Sauberkeit....................................................64<br />
II.4.5 Überprüfung des elektrischen Schaltkreises ...............................................................64<br />
II.4.6 Hinweise zum Austausch von Bauteilen .....................................................................64<br />
ANLAGEN<br />
SYMBOL<br />
UNI EN 292<br />
UNI EN 294<br />
UNI EN 563<br />
UNI EN 1050<br />
UNI 10893<br />
EN 13133<br />
EN 12797<br />
EN 378-1<br />
PrEN 378-2<br />
CEI EN 60335-2-40<br />
UNI EN ISO 3744<br />
EN 50081-1:1992<br />
EN 61000<br />
BEDEUTUNG<br />
ALLGEMEINE GEFAHR!<br />
Die Warnung ALLGEMEINE GEFAHR weist die<br />
Bedienung und das Wartungspersonal auf Gefahren<br />
hin, die zum Tode, zu Verletzungen und zu<br />
dauernden oder latenten Krankheiten führen<br />
können.<br />
GEFAHR BAUTEILE UNTER SPANNUNG!<br />
Die Warnung GEFAHR BAUTEILE UNTER<br />
SPANNUNG weist die Bedienung und das<br />
Wartungspersonal auf Gefährdung durch unter<br />
Spannung stehende Maschinenteile hin.<br />
GEFAHR SCHARFE OBERFLÄCHEN!<br />
Die Warnung GEFAHR SCHARFE OBERFLÄCHEN<br />
weist die Bedienung und das Wartungspersonal auf<br />
Risiken durch potentiell gefährliche Oberflächen<br />
hin.<br />
GEFAHR HEISSE OBERFLÄCHEN!<br />
Die Warnung HEISSE OBERFLÄCHEN weist die<br />
Bedienung und das Wartungspersonal auf<br />
Gefährdung durch potentiell heiße Oberflächen hin.<br />
GEFAHR MASCHINENTEILE IN BEWEGUNG!<br />
Die Warnung MASCHINENTEILE IN BEWEGUNG<br />
weist die Bedienung und das Wartungspersonal auf<br />
Gefahren hin, die durch sich bewegende<br />
Maschinenorgane entstehen können.<br />
WICHTIGER WARNHINWEIS!<br />
Die Angabe WICHTIGER WARNHINWEIS lenkt die<br />
Aufmerksamkeit der Bedienung und des Personals<br />
auf Eingriffe oder Gefahren hin, die zu Schäden an<br />
der Maschine oder ihrer Ausrüstung führen können.<br />
UMWELTSCHUTZ!<br />
Der Hinweis UMWELTSCHUTZ liefert Anleitungen<br />
für den umweltfreundlichen Gebrauch der<br />
Maschine.<br />
NORMENBEZUG<br />
Sicurezza del macchinario. Concetti fondamentali,<br />
principi generali di progettazione.<br />
Sicurezza del macchinario. Distanze di sicurezza per<br />
impedire il raggiungimento di zone pericolose con gli arti<br />
superiori.<br />
Sicurezza del macchinario. Temperature delle superfici<br />
di contatto. Dati ergonomici per stabilire i valori limiti di<br />
temperatura per superfici calde.<br />
Sicurezza del macchinario. Principi per la valutazione<br />
del rischio.<br />
Documentazione tecnica di prodotto. Istruzioni per l’uso<br />
Brazing. Brazer approval.<br />
Brazing. Destructive tests of brazed joints.<br />
Refrigeration systems and heat pumps – safety and<br />
environmental requirements. Basic requirements,<br />
definitions, classification and selection criteria.<br />
Refrigeration systems and heat pumps – safety and<br />
environmental requirements. Design, construction,<br />
testing, installing, marking and documentation.<br />
Sicurezza degli apparecchi elettrici d’uso domestico e<br />
similare. Parte 2: Norme particolari per le pompe di<br />
calore elettriche, per i condizionatori d’aria e per i<br />
deumidificatori.<br />
Determinazione dei livelli di potenza sonora delle<br />
sorgenti di rumore mediante pressione sonora. Metodo<br />
tecnico progettuale in un campo essenzialmente libero<br />
su un piano riflettente.<br />
Electromagnetic compatibility - Generic emission<br />
standard Part 1: Residential, commercial and light<br />
industry<br />
Electromagnetic compatibility (EMC)<br />
A1<br />
A2<br />
Technische Merkmale………………………………………………………………...97<br />
Elektrische Schaltpläne.......................................................................................101<br />
50
ABSCHNITT I: BENUTZER<br />
I<br />
ABSCHNITT I: BENUTZER<br />
I.1 ALLGEMEINE INFORMATIONEN<br />
Dieses Handbuch gehört zur Ausstattung dieses Klimagerätes.<br />
Der sichere Gebrauch und die Wartung der Maschine, Inhalt dieses<br />
Handbuches der Gebrauchsanweisungen, ist unentbehrlich zum<br />
Vermeiden von Gefahrensituationen für die Bediener während des<br />
Betriebes, der Wartung und Reparatur; daher müssen die vorliegenden<br />
Unterlagen aufmerksam gelesen, beachtet und sorgfältig aufbewahrt<br />
werden.<br />
WICHTIG!<br />
RHOSS S.p.a. übernimmt keinerlei Haftung für<br />
Schäden, die auf einen ungeeigneten Gebrauch des<br />
Klimagerätes oder ein unvollständiges oder<br />
flüchtiges Durchlesen der Informationen und<br />
Anweisungen in diesem Handbuch zurückzuführen<br />
sind.<br />
I.1.1<br />
ZULÄSSIGER MASCHINENGEBRAUCH<br />
GEFAHR!<br />
Andere Verwendungen als die vom Hersteller<br />
vorgesehenen, sind verboten.<br />
Das Split-Klimagerät zur Wandmontage ist zur Aufbereitung der Luft<br />
(Sommer- und Winterklimatisierung) in Innenräumen des Wohnbereichs<br />
oder ähnlichen Räumen bestimmt. Die Einheit ist zur Installation in<br />
Räumen mit NICHT EXPLOSIONSGEFÄHRDETER Atmosphäre<br />
bestimmt.<br />
Das Klimagerät darf nicht für die besondere Klimatisierung elektrischer<br />
und elektronischer Geräte, Konservierung von Lebensmitteln, antiker<br />
Möbel, Tierzuchten, biologischer Kulturen, Pelzen usw. verwendet<br />
werden.<br />
Dieses Klimagerät ist mit Ventilatoren, die mit hoher Drehzahl arbeiten,<br />
ausgerüstet. Niemals die Hände oder Gegenstände, gleich welcher Art,<br />
in die Schlitze des Luftaustritts der Innen- oder Ausseneinheit stecken:<br />
das könnte zu ernsten Unfällen mit schweren Verletzungen und<br />
Schäden am Ventilator führen.<br />
Auf das Beibehalten einer angenehmen Raumtemperatur achten, vor<br />
allem in Anwesenheit von Kindern, älteren Personen oder Behinderten:<br />
Der Gebrauch des Klimagerätes mit Temperaturen und Feuchtigkeit,<br />
die von den zulässigen abweichen, kann zum mangelhaften Betrieb und<br />
zum Kondensattröpfeln der Inneneinheit führen.<br />
Bei Gewittern sollte die Stromversorgung über einen Hauptschalter IG<br />
(gehört nicht zur Ausstattung) abgetrennt werden, um eventuelle<br />
Schäden, verursacht durch Überspannung bei Blitzeinschlag, am<br />
Klimagerät zu vermeiden.<br />
I.1.2<br />
EINSATZGRENZEN<br />
WICHTIG!<br />
Die einwandfreie Arbeitsweise der Einheit hängt<br />
von der gewissenhaften Beachtung der<br />
Gebrauchsanweisungen im vorliegenden<br />
Handbuch, der Einhaltung der für die Aufstellung<br />
vorgesehenen Freibereiche und des zulässigen<br />
Einsatzbereichs ab.<br />
Innen Aussen<br />
Kältebetrieb Obere Grenze °C 30 43<br />
Untere Grenze °C 17 18<br />
Heizbetrieb Obere Grenze °C 30 24<br />
Untere Grenze °C 17 -5<br />
I.1.3<br />
HINWEISE ZUR SICHERHEIT<br />
Die Einheit ist mit einer Sicherheitvorkehrung ausgerüstet, um<br />
Verletzungen an Personen zu vermeiden und den korrekten Betrieb zu<br />
garantieren.<br />
Handanlegung oder Änderungen, die nicht von RHOSS S.p.a.<br />
genehmigt worden sind, können potentiell gefährliche Situationen für<br />
Personen und Schäden an der Einheit hervorrufen:<br />
I.2 ERSATZTEILE<br />
WICHTIG!<br />
Ausschließlich Originalersatzteile und<br />
Originalzubehör benutzen. RHOSS SpA übernimmt<br />
keineHaftung für Schäden durch Umbau bzw. Eingriffe<br />
seitens nicht autorisiertem Personals oder für<br />
Betriebsstörungen durch Einbau von nicht<br />
Originalersatz- und Zubehörteilen.<br />
Für die Wartung nur Originalersatzteile von RHOSS S.p.A. verwenden.<br />
RHOSS S.p.A. ist in folgenden Fällen jeder Verantwortung enthoben:<br />
• nicht korrekte Installation oder nicht der Vorgangsweise<br />
entsprechend ausgeführt; komplette oder teilweise Nichtbeachtung der<br />
Anweisungen;<br />
• Fehler in der elektrischen/hydraulischen Versorgung;<br />
• ungeeignete Verwendung der Einheit;<br />
• unregelmässige Wartung;<br />
• nicht zulässige Änderungen oder Eingriffe;<br />
• Verwendung ungeeigneter oder nicht originaler Ersatzteile.<br />
I.3 KUNDENDIENST<br />
Vor einer Reparatur empfiehlt es sich, RHOSS S.p.A. zu kontaktieren,<br />
im Besonderen, falls es sich um eine aussergewöhnliche Wartung<br />
handeln sollte.<br />
I.4 BESCHREIBUNG DER EINHEIT<br />
Autonome Klimageräte mit getrennten Bereichen in der Ausführung<br />
Wärmepumpe bestehen aus Inneneinheiten (1 Stck. für das Modell<br />
MONO, 2 Stck. für das Modell DUAL, 3 Stck. für das Modell TRIAL) zur<br />
Wandmontage und einer Ausseneinheit, die durch Kältemittel- und<br />
Elektroleitungen angeschlossen wird.<br />
Die Inneneinheit hat eine Gasschutzfüllung, zur Vermeidung des<br />
Eindringens von Feuchtigkeit. Die Ausseneinheit umfasst die komplette<br />
Kältemittelfüllung, die auch für eine Kältemittelleitung bis zu einer<br />
maximalen Länge von 5 m ausreicht.<br />
Für darüber hinaus gehende Längen muss Kältemittel nachgefüllt<br />
werden. Die Einheiten zeichnen sich durch einen sehr geräuscharmen<br />
Betrieb und hohe Leistungen bezüglich der Wirksamkeit und<br />
Zuverlässigkeit aus.<br />
Der Betrieb der Einheiten wird durch einen Mikroprozessor gesteuert,<br />
der das Wählen folgender Programme ermöglicht:<br />
• automatisch AUTO<br />
• Kühlbetrieb COOL<br />
• Entfeuchtung DRY<br />
• Heizbetrieb HEAT<br />
• Lüftung FAN<br />
Alle Betriebsprogramme können über eine Infrarot-Fernbedienung mit<br />
Display aus Flüssigkristallen gewählt werden.<br />
Falls die Fernbedienung nicht verfügbar ist, kann das Klimagerät im<br />
Notfall durch einen Schalter auf der Inneneinheit gesteuert werden.<br />
Mod. INVERTER<br />
Innen Aussen<br />
Kältebetrieb Obere Grenze °C 30 43<br />
Untere Grenze °C 17 18<br />
Heizbetrieb Obere Grenze °C 30 24<br />
Untere Grenze °C 17 -15<br />
51
Inneneinheit<br />
Luftaustritt<br />
Außeneinheit<br />
Lufteintritt<br />
Luftaustritt<br />
Lufteintritt<br />
Lufteintritt<br />
I.4.1<br />
INNENEINHEIT<br />
ABSCHNITT I: BENUTZER<br />
Die Inneneinheit, nur zur Wandmontage ist von gefälliger Ästhetik und<br />
passt sich jedem Einrichtungsstil an. Zur Ausrüstung gehören ein<br />
Wärmetauscherregister, ein sehr geräuscharmer Tangentialventilator,<br />
der auch bei Höchstleistung akustisch äusserst angenehm arbeitet, ein<br />
regenerierbarer Luftfilter, der für die Reinigung leicht zu entfernen ist<br />
und eine motorisierte, waagrechte Lüftungsklappe mit senkrechten<br />
Lamellen zur optimalen Luftverteilung am Austritt.<br />
Auf der Vorderseite befinden sich, gut sichtbar, die LED-Anzeigen des<br />
Betriebszustandes und der Signal-Empfänger der Fernbedienung.<br />
Zur Ausstattung der Einheit gehören:<br />
• die Befestigungsplatte;<br />
• die Fernbedienung;<br />
• die Halterung der Fernbedienung zur Wandmontage<br />
I.4.2<br />
AUSSENEINHEIT<br />
Die Ausseneinheit zur Wandmontage besteht aus einer verzinkten und<br />
lackierten Stahlblechstruktur. Im Innern ist ein hermetischer Verdichter<br />
und ein statisch und dynamisch ausbalancierter Axialventilator<br />
untergebracht, so wird eine maximale Geräuscharmut des Betriebes<br />
garantiert.<br />
Die Einheit wird vervollständigt durch das Wärmetauscherregister mit<br />
grosser Oberfläche, das Umwälzorgan, das Zyklus-Umschaltventil für<br />
die Modelle mit Wärmepumpe, die Bördelanschlüsse mit Hahn, die<br />
elektrischen Kondensatoren für Verdichter und Ventilator und die<br />
Klemmleiste für die elektrischen Anschlüsse der Inneneinheit.<br />
I.4.3<br />
FERNBEDIENUNG<br />
Die Fernbedienung ermöglicht die Einstellung und Sichtanzeige aller<br />
Betriebsparameter des Klimagerätes und erleichtert dadurch alle<br />
Programmierungen.<br />
Die Fernbedienung wird durch 2 Batterien R03 size AAA von 1,5 V<br />
gespeist.<br />
WICHTIG!<br />
Die Funktion der Fernbedienung sollte getestet<br />
werden, um seine Reichweite zu bestimmen.<br />
Zeichenerklärung<br />
Inneneinheit<br />
1) Tragrahmen<br />
2) Frontpaneel<br />
3) Luftfilter<br />
4) Gitter Luftaustritt<br />
5) Senkrechte Lüftungsklappen<br />
6) Empfänger des Infrarotsignals<br />
7) Mitteilungen der Anzeigen<br />
8) Schalter für Handbetrieb<br />
9) Fernbedienung<br />
Außeneinheit<br />
10) Anschlussrohre<br />
11) Elektrischer Anschluss<br />
12) Kältemittelhähne<br />
13) Gitter Luftaustritt<br />
52
I.5 BESCHREIBUNG DER FERNBEDIENUNG UND<br />
IHRER FUNKTIONEN N TASTE FUNKTION BESCHREIBUNG<br />
Abb. 1<br />
1 / Signalsender<br />
2 /<br />
3<br />
4<br />
5<br />
6<br />
7<br />
8<br />
9<br />
10<br />
11<br />
Flüssigkristall-<br />
Display<br />
Einschaltung/<br />
Ausschaltung<br />
Wahl des<br />
Betriebsprogra<br />
mmes<br />
Temperaturein<br />
stellung<br />
Einstellung der<br />
Ventilatorgesc<br />
hwindigkeit<br />
Einstellung der<br />
Position<br />
Lüftungsklappe<br />
Wahl<br />
motorisierte<br />
Lüftungsklappe<br />
Wirtschaftlicher<br />
Betrieb<br />
(ausgenommen<br />
INVERTER)<br />
Einstellung<br />
Einschaltung/<br />
Ausschaltung<br />
des Timers<br />
Eingabe der<br />
Schaltzeiten<br />
12 Bestätigen<br />
13<br />
14<br />
15<br />
16<br />
Einstellung der<br />
Uhr<br />
Sperre<br />
Fernbedienung<br />
Rücksetzung<br />
Fernbedienung<br />
Löschung<br />
Timer<br />
ABSCHNITT I: BENUTZER<br />
Überträgt die Infrarotsignale an<br />
den Empfänger der Inneneinheit<br />
Zeigt den Zustand und die<br />
Betriebsart des Klimagerätes<br />
Schaltet das Klimagerät ein und<br />
aus Start des Klimagerätes<br />
durch Drücken der Taste. Start<br />
des Klimagerätes durch Drücken<br />
der Taste.<br />
Wählen der gewünschten<br />
Betriebsart (AUTO, COOL, DRY,<br />
HEAT, FAN)<br />
Mit diesen Tasten wird die<br />
gewünschte Raumtemperatur<br />
eingestellt.<br />
die verlangte Temperatur wird<br />
bis 30 °C erhöht<br />
die verlangte Temperatur wird<br />
bis 17 °C gesenkt<br />
Jeder Druck entspricht der<br />
Änderung um 1°C.<br />
Diese Taste zum Wählen der<br />
Ventilatordrehzahl drücken.<br />
Wenn AUTO gewählt wird, stellt<br />
sich die Drehzahl des Ventilators<br />
automatisch auf die<br />
Raumtemperatur ein. Die<br />
Drehzahl des Ventilators kann<br />
auch manuell eingestellt werden,<br />
es stehen 3 Einstellungen zur<br />
Verfügung. LOW = MINIMAL;<br />
MED = MITTEL; HIGH =<br />
MAXIMAL<br />
Ermöglicht die Einstellung des<br />
Neigungswinkels der<br />
Lüftungsklappe<br />
Durch diese Taste schwingt die<br />
Lüftungsklappe kontinuierlich<br />
Wahl der automatischen<br />
Temperatursteuerung und der<br />
Ventilatordrehzahl ohne eine zu<br />
grosse Kühlung (im Kältebetrieb)<br />
oder ein Zuviel an Wärme<br />
(Heizbetrieb) entstehen zu<br />
lassen.<br />
Mit diesen Tasten wird die<br />
Einschaltung/Ausschaltung über<br />
den Timer voreingestellt.<br />
Ermöglicht die Einstellung der<br />
Uhr und der Timer<br />
Mit dieser Taste werden die<br />
gewählten Schaltzeiten bestätigt<br />
Das Drücken dieser Taste für<br />
einige Sekunden stellt die Uhr<br />
ein<br />
Ermöglicht die Sperre aller<br />
Funktionen der Fernbedienung<br />
Mit dieser Taste werden die<br />
Einstellungen der<br />
Fernbedienung rückgesetzt<br />
Mit dieser Taste wird der Betrieb<br />
des Timers gelöscht<br />
53
I.5.1<br />
NAMEN UND FUNKTIONEN DER DISPLAY-<br />
ANZEIGEN<br />
I.6 BENUTZUNG DER FERNBEDIENUNG<br />
ABSCHNITT I: BENUTZER<br />
Für die Fernbedienung werden zwei Alkalibatterien mit 1,5 V Typ RO3<br />
size AAA (beiliegend) benutzt.<br />
Zum Einsetzen der Batterien, den Deckel der Fernbedienung<br />
abnehmen, indem man ihn nach unten schiebt. Die Batterien, unter<br />
Beachtung der Polarität in ihren Sitz einfügen. Den Deckel wieder<br />
einsetzen und die gewünschten Funktionen wählen. Der Vorgang ist<br />
der gleiche beim Auswechseln der Batterien. Die durchschnittliche<br />
Dauer der Batterien beträgt ungefähr ein Jahr.<br />
1) Übertragungsanzeige<br />
Erscheint jedesmal beim Senden eines Signals an die Inneneinheit.<br />
2) Anzeige des Betriebsprogramms (MODE)<br />
Zeigt die vorgewählte Betriebsart.<br />
3) Anzeige ON/OFF<br />
Zeigt, dass die Einheit in Betrieb ist.<br />
4) Temperaturanzeige (TEMP)<br />
Anzeige der eingestellten Temperatur (von 17 °C bis 30 °C). Bei Wahl<br />
des Betriebsprogramms FAN wird keine Temperatur angezeigt.<br />
5) Uhrzeitanzeige<br />
Ist immer aktiviert, zeigt die aktuelle Uhrzeit.<br />
6) Timeranzeige (TIMER ON)<br />
Das Drücken der Taste TIMER ON zeigt die Uhrzeit der Einschaltung<br />
über den Timer.<br />
7) Timeranzeige (TIMER OFF)<br />
Das Drücken der Taste TIMER OFF zeigt die Uhrzeit der Ausschaltung<br />
über den Timer.<br />
8) Sperranzeige<br />
Zeigt an, dass die Fernbedienung blockiert ist.<br />
9) Anzeige ECONO<br />
Zeigt die Aktivierung der Funktion ECONOMIC RUNNING.<br />
10) Anzeige der Ventilatordrehzahl (FAN)<br />
Zeigt die gewählte Drehzahlgeschwindigkeit des Ventilators. Angezeigt<br />
werden kann AUTO oder eine der drei Geschwindigkeitsstufen:<br />
MINDEST (low), MITTEL (med), MAXIMAL (high).<br />
Die Fernbedienung hat das Display ständig eingeschaltet.<br />
Bei längerer Nichtbenutzung der Fernbedienung, die Batterien<br />
herausnehmen.<br />
Das Display der Fernbedienung zeigt immer die Uhrzeit an, unabhängig<br />
davon, ob das Klimagerät ein- oder ausgeschaltet ist<br />
Während der Einstellungen die Fernbedienung in Richtung des<br />
Empfängers des Klimagerätes halten (ausgenommen während der<br />
Einstellung der Uhrzeit).<br />
Bei korrektem Empfang der Signale gibt das Klimagerät ein hörbares<br />
“Beep”- Signal aus.<br />
Die Ferndienung kann bis zu einer Entfernung von ca: 8 m vom<br />
Empfänger übertragen.<br />
Die Fernbedienung keiner übermässigen Feuchtigkeit, direkter<br />
Sonneneinstrahlung oder anderen Wärmequellen oder Schlägen<br />
aussetzen. Die Fernbedienung vor Wasserspritzern oder anderen<br />
Flüssigkeiten schützen.Falls der Infrarot-Empfänger der Einheit direkter<br />
Sonneneinstrahlung oder intensivem Licht einer Leuchtstofflampe mit<br />
elektronischer Einschaltung ausgesetzt wird, kann dies zu Störungen<br />
oder nicht Funktionieren des Klimagerätes führen.<br />
Die Verwendung anderer Fernbedienungen in der Nähe oder im selben<br />
Raum, in dem die Inneneinheit installiert ist, kann den regulären Betrieb<br />
des Klimagerätes beeinflussen. Den Sender der anderen<br />
Fernbedienungen nicht in Richtung des Empfängers des Klimagerätes<br />
halten.<br />
54
ABSCHNITT I: BENUTZER<br />
I.6.1<br />
UHREINSTELLUNG<br />
Beim Einlegen der Batterien in die Fernbedienung, blinkt die<br />
Uhrzeitangabe mit 0.00.<br />
Hinweis: während der Uhrzeiteinstellung die Fernbedienung nicht in<br />
Richtung des Klimagerätes halten.<br />
Die Uhrzeit der Fernbedienung sollte vor dem Start des Klimagerätes<br />
eingestellt werden, für die Einstellung wie folgt vorgehen (bez. Abb. 1):<br />
Die Taste TIME ADJUST bis zum<br />
Erreichen der gewünschten Uhrzeit<br />
drücken<br />
OK zum Bestätigen der Einstellung<br />
drücken (die Fernbedienung nicht in<br />
Richtung der Einheit halten)<br />
Um die Uhrzeit erneut einzustellen oder um eine neue Programmierung<br />
vorzunehmen, wie folgt vorgehen (bez. Abb: 1).<br />
Die Taste Clock für über drei<br />
Sekunden drücken<br />
Die Taste TIME ADJUST bis zum<br />
Erreichen der gewünschten Uhrzeit<br />
drücken<br />
OK zum Bestätigen der Einstellung<br />
drücken (die Fernbedienung nicht in<br />
Richtung der Einheit halten)<br />
Mit der automatischen Programmwahl AUTO kann das Klimagerät in<br />
KÜHLUNG, BELÜFTUNG und im HEIZBETRIEB je nach dem<br />
vorhandenem Temperaturunterschied zwischen Raumtemperatur und<br />
der auf der Fernbedienung gewählten Temperatur arbeiten..<br />
Der Ventilator ist, unabhängig vom Temperaturunterschied zwischen<br />
Raum- und eingestellter Temperatur, immer in Betrieb.<br />
Bei der Programmwahl Kühlung COOL arbeitet das Klimagerät ohne<br />
Temperatursollwert, die Raumtemperatur wird gesenkt.<br />
Bei der Programmwahl Entfeuchtung DRY arbeitet das Klimagerät in<br />
Zeitabständen von 4-6 Minuten ohne Temperatursollwert, die<br />
Temperatur und die Raumfeuchtigkeit werden schrittweise gesenkt. Für<br />
das Programm Entfeuchtung DRY kann die Taste FAN SPEED nicht<br />
benutzt werden.<br />
Arbeitet das Klimagerät im Heizbetrieb HEAT, erhöht sich die<br />
Raumtemperatur ohne Temperatursollwert. Bei niedrigen Temperaturen<br />
der Aussenluft und hoher Luftfeuchtigkeit bildet sich auf dem externen<br />
Wärmetauscher Raureif, der beseitigt werden muss. Der<br />
Mikroprozessor aktiviert, je nach eingestelltem Zyklus, eine Sperre der<br />
Heizungsphase, die von 6 bis 10 Minuten dauern kann. Dieser Vorgang<br />
wird durch die LED-Anzeige PRE-DEF angezeigt.<br />
Bei der Programmwahl der Belüftung FAN arbeitet das Klimagerät ohne<br />
Temperatursollwert und ventiliert die Raumluft.<br />
I.6.4<br />
I.6.4.1<br />
FUNKTION ECONOMIC RUNNING<br />
Durch Drücken dieser Taste, bei eingeschalteter<br />
Einheit, in den Betriebsarten AUTO, COOL und<br />
HEAT, variiert das Klimagerät in den nächsten zwei<br />
Stunden die eingestellte Temperatur im Betrieb<br />
COOL um +2°C und im Betrieb HEAT um -2°C, und<br />
behält diese für die gesamte Betriebsdauer bei,<br />
dadurch wird ein grösserer Komfort und eine<br />
Energieeinsparung erzielt .<br />
NOTBETRIEB<br />
I.6.2<br />
EINSCHALTUNG/AUSSCHALTUNG DER<br />
EINHEIT<br />
DieTaste ON/OFF drücken, um das Gerät ein- oder<br />
auszuschalten<br />
Nach dem Umschalten von ON auf OFF wird jede Betriebsart<br />
unterbrochen, die laufenden Zeitschaltungen gelöscht, die Betriebsart<br />
des Gerätes und des Ventilators, die Stellung der Lüftungsklappe und<br />
der eingestellte Temperaturwert gespeichert.<br />
Beim Umschalten von OFF auf ON stellt die Einheit automatisch alle<br />
vor dem Abschalten gespeicherten Betriebsbedingungen wieder her.<br />
Bei eingeschalteter Einheit erscheint auf dem Display<br />
die Betriebsanzeige.<br />
Das auf dem Display eingeblendete Symbol zeigt an,<br />
dass die Fernbedienung mit der Einheit kommuniziert.<br />
Bei jedem Anhalten des Verdichters in der Ausseneinheit, müssen 3<br />
Minuten bis zum Neustart verstreichen. Diese Zeit dient zum Schutz<br />
des Verdichters und kann nicht geändert werden.<br />
I.6.3<br />
EINSTELLEN DER BETRIEBSART<br />
Durch mehrmaliges Drücken der Taste Mode, kann die<br />
Betriebsart der Einheit gewechselt werden. Das Display<br />
blendet die Anzeige der gewählten Betriebsart ein.<br />
AUTO: Vollautomatische Betriebsart<br />
COOL: Kühlbetrieb<br />
DRY : Betriebsart Luftentfeuchtung<br />
HEAT: Heizbetrieb<br />
FAN: Betriebsart nur Belüften<br />
Der Notbetrieb wird eingesetzt, falls die Fernbedienung nicht verfügbar<br />
ist oder die Batterien leer sind. Durch Betätigen des<br />
Betriebsnotschalters auf der Inneneinheit funktioniert das Klimagerät<br />
gleichfalls.<br />
Wird der Betriebsnotschalter einmal gedrückt, arbeitet das Klimagerät<br />
im Betrieb AUTO.<br />
Wird er ein zweites Mal gedrückt, arbeitet das Klimagerät in Kühlung<br />
mit folgendem Programm:<br />
• eingestellte Temperatur 24 °C<br />
• AUTOMATISCHE Ventilatordrehzahl<br />
Wird der Schalter ein drittes Mal gedrückt, hält das Klimagerät an.<br />
I.6.5<br />
Notschalter<br />
EINSTELLEN DER GEWÜNSCHTEN<br />
TEMPERATUR<br />
Werden diese Tasten in den Betriebsarten AUTO,<br />
COOL, DRY und HEAT gedrückt, kann der<br />
gewünschte Temperaturwert zwischen 17°C und<br />
30°C erhöht oder gesenkt werden. Das Display zeigt<br />
den gewählten Temperaturwert.<br />
55
ABSCHNITT I: BENUTZER<br />
I.6.6<br />
EINSTELLEN DER LÜFTUNGSKLAPPE<br />
Für eine optimale Luftverteilung wird die Position der motorisierten<br />
Lüftungsklappe und der senkrechten Lamellen reguliert, darauf achten,<br />
dass der Luftstrom nicht direkt die Personen trifft.<br />
Die senkrechten Lamellen müssen von Hand, vor dem Start des<br />
Klimagerätes, eingestellt werden, für die motorisierte Lüftungsklappe<br />
hingegen, wie folgt vorgehen:<br />
Durch mehrmaliges Drücken der Taste AIR<br />
DIRECTION kann die Position der Lüftungsklappe<br />
geändert werden.<br />
Durch Drücken der Taste SWING kann die ständige<br />
Schwingung der Lüftungsklappe aktiviert werden.<br />
ACHTUNG:<br />
Um automatisch die Timereinstellungen zur festgelegten Zeit zu<br />
übertragen, wird die Fernbedienung in der Nähe der Inneneinheit<br />
abgelegt. Die Funktion TIMER wiederholt sich nicht, sondern muss<br />
jedes Mal neu eingestellt werden.<br />
Wenn die Funktion Timer ON-OFF eingestellt ist, kann die<br />
Einschaltung des Geraets etwas verzoegert werden. Das ist nicht als<br />
ein Mangel des Geraets zu betrachten, sondern als das normale<br />
Betrieb.<br />
I.6.9<br />
TASTATURSPERRE<br />
Mit einem spitzen Gegenstand die Taste<br />
BLOCCO drücken, damit wird die Tastatur<br />
der Fernbedienung gegen unerwünschten<br />
Gebrauch (durch Kinder usw.) gesperrt. Auf<br />
dem Display erscheint nebenstehendes<br />
Symbol. Zur Aufhebung der Sperre erneut<br />
mit einem spitzen Gegenstand die Taste<br />
BLOCCO drücken.<br />
I.6.10<br />
RÜCKSETZUNG DER FERNBEDIENUNG<br />
Mit einem spitzen Gegenstand die Taste RESET<br />
drücken, dadurch wird die Fernbedienung in ihren<br />
ursprünglichen Werkszustand versetzt.<br />
I.7 ANZEIGENBESCHREIBUNG<br />
Die in der Mitte der Einheit befindlichen Anzeigen dienen zur Angabe<br />
des Betriebszustandes der Maschine.<br />
I.6.7<br />
GEFAHR!<br />
Das manuelle Bewegen der motorisierten<br />
Lüftungsklappe bei laufendem Klimagerät kann zu<br />
Betriebsstörungen führen oder das<br />
Einstellungssystem beschädigen.<br />
EINSTELLEN DER BELÜFTUNG<br />
Durch mehrmaliges Drücken der Taste FAN SPEED<br />
kann eine der drei vorhandenen<br />
Ventilatorgeschwindigkeiten oder die Funktion<br />
AUTO eingestellt werden.<br />
Auf dem Display erscheint die Betriebsart.<br />
Anzeigen<br />
Bedeutung<br />
zeigt, dass die Einheit in Betrieb ist, blinkt nach<br />
einer kurzen Unterbrechung der Stromversorgung<br />
zeigt, dass die Einheit im Betrieb ECONOMIC<br />
RUNNING arbeitet<br />
AUTO: Vollautomatische Betriebsart<br />
LOW: Mindestdrehzahl<br />
MITTL. mittlere Drehzahl<br />
HIGH: maximale Drehzahl<br />
anzeige, dass der Timer aktiviert ist<br />
Anzeige, dass die Einheit sich in der Abtauphase<br />
oder in der Phase Anti Cold Air befindet<br />
I.6.8<br />
EINSTELLEN DER TIMER<br />
Diese Tasten drücken, um die Ein- und<br />
Ausschaltzeiten des Gerätes zu programmieren.<br />
Das Display zeigt TIMER ON und/oder TIMER OFF<br />
mit einem Teil der blinkenden Uhrzeit.<br />
zeigt, das die Einheit im Betrieb AUTO arbeitet.<br />
zeigt die eingestellte Temperatur<br />
TIME ADJUST<br />
Einschaltzeit<br />
Ausschaltzeit<br />
Mit dieser Taste kann die Ein- oder Ausschaltzeit<br />
geändert werden. Jeder Tastendruck erhöht oder<br />
vermindert die Zeit um zehn Minuten.<br />
Nach Erreichen der gewünschten Ein- oder<br />
Ausschaltzeit muss die Einstellung mit der Taste OK<br />
bestätigt werden.<br />
Mit der Taste CANCEL werden die Funktionen<br />
TIMER ON und/oder TIMER OFF abgestellt<br />
Nach Einstellung der Ein- und Ausschaltzeiten<br />
zeigt das Display die aktuelle Uhrzeit und die<br />
Meldungen TIMER ON und/oder TIMER OFF<br />
mit den entsprechenden Zeiten.<br />
I.8 AUSSERBETRIEBSETZEN<br />
GEFAHR!<br />
Immer den automatischen Hauptschalter (IG), der<br />
die gesamte Anlage schützt, betätigen. Sich<br />
vergewissern, dass niemand zufällig die Maschine<br />
einschalten kann; den automatischen Hauptschalter<br />
(IG) in der Position null blockieren.<br />
Vor längeren Stillstandzeiten der Maschine durch Öffnen des<br />
automatischen Hauptschalters IG der Anlage (durch den Installateur<br />
eingebaut) die Einheit vom Stromnetz trennen.<br />
I.9 WIEDERINBETRIEBNAHME NACH LÄNGERER<br />
STILLSTANDZEIT<br />
Vor dem Einschalten:<br />
• Die Luftfilter reinigen oder auswechseln.<br />
• Den Wärmetauscher reinigen.<br />
• Den Ablauf der Kondensatwanne reinigen oder eventuelle<br />
Ablagerungen entfernen.<br />
Das Gerät mit Höchstdrehzahl für einige Stunden laufen lassen.<br />
56
ABSCHNITT I: BENUTZER<br />
I.10 SCHNELLE EINFÜHRUNG IN DEN BETRIEB<br />
I.10.1<br />
AUTOMATISCHER BETRIEB<br />
Mit der automatischen Programmwahl AUTO kann das Klimagerät in<br />
KÜHLUNG, BELÜFTUNG und im HEIZBETRIEB, je nach dem<br />
vorhandenem Temperaturunterschied zwischen Raumtemperatur und<br />
der auf der Fernbedienung gewählten Temperatur arbeiten.<br />
Die Einheit arbeitet im Bei:<br />
Betrieb:<br />
Kühlung TA-TS > 2 °C<br />
Belüftung -1 °C ≤TA-TS ≤2 °C<br />
Heizung TA-TS < -1 °C<br />
TA = Raumtemperatur TS = gewählte Temperatur<br />
Der Ventilator ist, unabhängig vom Temperaturunterschied zwischen<br />
Raum- und eingestellter Temperatur, immer in Betrieb.<br />
I.10.2<br />
BETRIEBSART KÜHLUNG<br />
Um den Betrieb Kühlung COOL einzustellen, wie folgt vorgehen:<br />
• das Programm Kühlung wird durch Drücken der Taste MODE (1) bis<br />
die Schrift COOL erscheint, gewählt;<br />
• die gewünschte Temperatur wird durch Drücken der Taste TEMP (2)<br />
eingestellt, das Display zeigt die Werte von 17 °C bis 30 °C;<br />
• mit der Taste FAN SPEED (3) die Drehzahl der Belüftung regulieren,<br />
gewählt werden kann zwischen AUTO und drei anderen<br />
Geschwindigkeiten HIGH-MED-LOW;<br />
• die Fernbedienung in Richtung des Empfängers der Einheit halten<br />
und die Einschalttaste ON/OFF (4) drücken;<br />
• den Luftstrom nach Bedarf mit der Taste SWING (5) oder AIR<br />
DIRECTION (6) einstellen;<br />
Nach Beendigung der Einstellungen, werden diese beim erneuten<br />
Einschalten des Klimagerätes wieder eingeblendet.<br />
Jedes von der Fernbedienung ausgehende Signal wird bei<br />
Empfang mit einem hörbaren “Beep”-Signal bestätigt.<br />
Die Anzeige auf der Inneneinheit wird beleuchtet und zeigt<br />
den Betrieb der Einheit an.<br />
Bei jedem Anhalten des Verdichters in der Ausseneinheit, müssen 3<br />
Minuten bis zum Neustart verstreichen. Diese Zeit dient zum Schutz<br />
des Verdichters und kann nicht geändert werden.<br />
I.10.3<br />
BETRIEBSART LUFTENTFEUCHTUNG<br />
Um den Betrieb Entfeuchtung DRY einzustellen, wie folgt vorgehen:<br />
• das Programm Entfeuchtung wird durch Drücken der Taste MODE<br />
(1) bis die Schrift DRY erscheint, gewählt;<br />
• die gewünschte Temperatur wird durch Drücken der Tasten TEMP<br />
(2) eingestellt, das Display zeigt die Werte von 17 °C bis 30 °C;<br />
• die Fernbedienung in Richtung des Empfängers der Einheit halten<br />
und die Einschalttaste ON/OFF (4) drücken;<br />
• den Luftstrom nach Bedarf mit der Taste SWING (5) oder AIR<br />
DIRECTION (6) einstellen;<br />
Nach Beendigung der Einstellungen, werden diese beim erneuten<br />
Einschalten des Klimagerätes wieder eingeblendet.<br />
Jedes von der Fernbedienung ausgehende Signal wird bei<br />
Empfang mit einem hörbaren “Beep”-Signal bestätigt.<br />
Bei der Programmwahl Entfeuchtung DRY arbeitet das Klimagerät in<br />
Zeitabständen von 4-6 Minuten ohne Temperatursollwert, die<br />
Temperatur und die Raumfeuchtigkeit werden schrittweise gesenkt.<br />
Für das Programm Entfeuchtung DRY kann die Taste FAN SPEED<br />
nicht benutzt werden.<br />
Bei jedem Anhalten des Verdichters in der Ausseneinheit, müssen 3<br />
Minuten bis zum Neustart verstreichen. Diese Zeit dient zum Schutz<br />
des Verdichters und kann nicht geändert werden.<br />
I.10.4<br />
BETRIEBSART HEIZEN<br />
Um den Betrieb HEIZEN HEAT einzustellen, wie folgt vorgehen:<br />
• das Programm Heizen wird durch Drücken der Taste MODE (1) bis<br />
die Schrift HEAT erscheint, gewählt;<br />
• die gewünschte Temperatur wird über die Tasten TEMP (2)<br />
eingestellt: das Display zeigt die Werte von 17°C bis 30°C;<br />
• mit der Taste FAN SPEED (3) die Drehzahl der Belüftung regulieren,<br />
gewählt werden kann zwischen AUTO und den drei anderen<br />
Geschwindigkeiten HIGH-MED-LOW;<br />
• die Fernbedienung in Richtung des Empfängers der Einheit halten<br />
und die Einschalttaste ON/OFF (4) drücken;<br />
• den Luftstrom nach Bedarf mit der Taste SWING (5) oder AIR<br />
DIRECTION (6) einstellen;<br />
Nach Beendigung der Einstellungen, werden diese beim erneuten<br />
Einschalten des Klimagerätes wieder eingeblendet.<br />
Jedes von der Fernbedienung ausgehende Signal wird bei<br />
Empfang mit einem hörbaren “Beep”-Signal bestätigt.<br />
Die Anzeige auf der Inneneinheit wird beleuchtet und zeigt<br />
den Betrieb der Einheit an.<br />
Wenn das Klimagerät im Heizbetrieb HEAT arbeitet, bildet sich bei<br />
niedrigen Temperaturen der Aussenluft und hoher Luftfeuchtigkeit auf<br />
dem externen Wärmetauscher Raureif, der beseitigt werden muss. Der<br />
Mikroprozessor aktiviert, je nach eingestelltem Zyklus, eine Sperre der<br />
Heizungsphase, die von 6 bis 10 Minuten dauern kann.<br />
Die Anzeige auf der Inneneinheit wird beleuchtet und zeigt<br />
der Heizungsphase.<br />
Bei jedem Anhalten des Verdichters in der Ausseneinheit, müssen 3<br />
Minuten bis zum Neustart verstreichen. Diese Zeit dient zum Schutz<br />
des Verdichters und kann nicht geändert werden.<br />
I.10.5<br />
FUNKTION BELÜFTUNG<br />
Um den Betrieb Belüftung FAN einzustellen, wie folgt vorgehen:<br />
• das Programm Belüftung wird durch Drücken der Taste MODE (1)<br />
bis die Schrift FAN erscheint, gewählt;<br />
• mit der Taste FAN SPEED (3) die Drehzahl der Belüftung regulieren,<br />
gewählt werden kann zwischen AUTO und drei anderen<br />
Geschwindigkeiten HIGH-MED-LOW;<br />
• die Fernbedienung in Richtung des Empfängers der Einheit halten<br />
und die Einschalttaste ON/OFF (4) drücken;<br />
• den Luftstrom nach Bedarf mit der Taste SWING (5) oder AIR<br />
DIRECTION (6) einstellen;<br />
Nach Beendigung der Einstellungen, werden diese beim erneuten<br />
Einschalten des Klimagerätes wieder eingeblendet.<br />
Jedes von der Fernbedienung ausgehende Signal wird bei<br />
Empfang mit einem hörbaren “Beep”-Signal bestätigt.<br />
Die Anzeige auf der Inneneinheit wird beleuchtet und zeigt<br />
den Betrieb der Einheit an.<br />
57
ABSCHNITT I: BENUTZER<br />
I.11 NORMALE WARTUNG DURCH DEN BENUTZER<br />
GEFAHR!<br />
Vor jedem Wartungseingriff, auch wenn er nur der<br />
Inspektion dient, ist der automatische<br />
Hauptschutzschalter (IG), der die gesamte Anlage<br />
schützt, zu betätigen. Sich vergewissern, dass<br />
niemand zufällig die Maschine einschalten kann;<br />
den automatischen Hauptschalter (IG) in der<br />
Position null blockieren.<br />
I.11.1<br />
REINIGEN DER INNENEINHEIT<br />
Zum Reinigen der Einheit ein weiches und trockenes Tuch verwenden.<br />
Wenn die Einheit stark verschmutzt ist, kann ein mit kaltem Wasser<br />
angefeuchtetes Tuch benutzt werden (keine zu nassen Tücher<br />
verwenden).<br />
Kein Wasser auf die Oberfläche des Klimagerätes spritzen.<br />
Keine chemischen Produkte, Lösungsmittel oder ähnliche Flüssigkeiten<br />
zum Reinigen der Oberfläche des Klimagerätes benutzen.<br />
Keine Insektenschutzmittel oder Deo-Sprays direkt auf das Klimagerät<br />
spritzen.<br />
I.11.2<br />
REINIGEN DER AUSSENEINHEIT<br />
Normalerweise bedarf die Ausseneinheit keiner besonderen Reinigung;<br />
nur wenn sie sich in einem sehr staubigem Bereich befindet oder bei<br />
vorhandenen Schadstoffen muss der Wärmetauscher regelmässig<br />
gereinigt werden. auf jeden Fall ist es angezeigt, das der Vorgang<br />
durch Fachpersonal durchgeführt wird.<br />
Am Beginn der Saison, bevor das Klimagerät in Betrieb genommen<br />
wird, kontrollieren, ob kein Hindernis den Luftstrom in der Ausseneinheit<br />
sowohl in der Ansaugung als auch am Austritt, behindert,<br />
Am Saisonende, falls das Klimagerät, nachdem es im Kühlbetrieb<br />
gearbeitet hat, für längere Zeit stillstehen sollte, empfiehlt sich vor der<br />
endgültigen Abschaltung, es für einige Stunden nur mit der Belüftung<br />
FAN laufen zu lassen, um eine eventuelle Kondensatbildung in der<br />
Inneneinheit verdunsten zu lassen.<br />
I.11.3<br />
REINIGEN DES LUFTFILTERS<br />
I.11.4<br />
REINIGUNG DER FERNBEDIENUNG<br />
Für die Reinigung der Fernbedienung nur ein weiches und trockenes<br />
Tuch verwenden.<br />
I.12 WARNUNGEN UND HINWEISE<br />
In Räumen mit relativ hoher Luftfeuchtigkeit (über 80%) darf das Gerät<br />
nicht kontinuierlich im Kühlbetrieb laufen. In diesem Fall kann sich am<br />
Luftaustritt Kondenswasser bilden, das darunter liegende Gegenstände,<br />
den Fußboden und die Wand, an der das Gerät befestigt ist,<br />
beschädigen kann.<br />
Nie den Luftstrom des Gerätes behindern oder es als Abstellfläche<br />
benutzen.<br />
GEFAHR!<br />
Achten Sie beim Filterausbau auf die Lamellen des<br />
Wärmetauschers, die sehr scharf sind.<br />
WICHTIG!<br />
Setzen Sie das Gerät nur mit eingebauten Filtern in<br />
Betrieb.<br />
Zur Aufrechterhaltung einer korrekten Luftansaugung sollte der Luftfilter<br />
mindestens einmal pro Monat gereinigt werden oder öfters, wenn die<br />
Maschine in stark staubhaltiger Umgebung installiert ist. Eine häufige<br />
Reinigung ist zum Vorteil der Leistungsfähigkeit des Betriebes.<br />
Zur Herausnahme des Luftfilters das Paneel der Ansaugung<br />
hochheben, die mittlere Lasche des Filters nach unten ziehen und ihn<br />
herausnehmen. Den Filter mit einem Staubsauger reinigen und<br />
eventuell mit kaltem Wasser auswaschen, anschliessend im Schatten<br />
trocknen lassen. Wenn der Filter sauber und trocken ist, ihn in<br />
umgekehrter Reihenfolge wieder einsetzen. Ein beschädigter Filter<br />
muss durch einen neuen RHOSS -Originalfilter ersetzt werden.<br />
Bei Verwendung von Wasser oder Spraydosen in Gerätenähe besteht<br />
die Gefahr von Stromschlägen oder Gerätestörungen.<br />
58
ABSCHNITT I: BENUTZER<br />
Falls sich zwischen Fernbedienung und Einheit eine Wand oder andere<br />
Hindernisse befinden, kann das Signal nicht übertragen werden.<br />
Keine Gegenstände auf der Ausseneinheit abstellen.<br />
I.13 BETRIEBSSTÖRUNGEN<br />
Störung<br />
Das Klimagerät FUNKTIONIERT NICHT (schaltet sich nicht ein)<br />
Das Klimagerät funktioniert, aber KÜHLT NICHT ausreichend<br />
Es könnten sich auch Konditionen, die keinen Einfluss auf den<br />
regulären Betrieb des Klimagerätes haben, bemerkbar machen,<br />
beispielsweise:<br />
• nach dem Start oder Stopp des Klimagerätes könnte für einige<br />
Momente ein Reibungsgeräusch hörbar sein: das ist auf den<br />
Druckausgleich des Gases im Kältekreislauf zurückzuführen;<br />
• es könnte gleichzeitig ein Knistern hörbar sein, wenn das Klimagerät<br />
bei niedrigen Raumtemperaturen arbeitet. was auf die Ausdehnungen<br />
des Paneels durch die Temperaturänderung zurückzuführen ist.<br />
• Es könnten unangenehme Gerüche durch in der Luft vorhandene<br />
Substanzen (Zigarettenrauch, Kochdünste, usw.) entstehen, vor allem<br />
dann, wenn kein regelmässiges Lüften der Räume vorgenommen wird;<br />
• falls das Klimagerät in einem Ambiente mit relativ hoher<br />
Luftfeuchtigkeit (über 80%) kontinuierlich in Kühlung arbeitet, kann es<br />
zur Kondensbildung auf der Lüftungsklappe und auf den Lamellen der<br />
Inneneinheit kommen, diese Kondens kann auf den Fussboden oder<br />
auf andere Gegenstände tropfen;<br />
• im Heizbetrieb (nur bei Modellen mit Wärmepumpe) kann an der<br />
Ausseneinheit während der Abtauphase Dampf austreten.<br />
Abhilfe<br />
prüfen, ob Spannung vorhanden ist ( eine Lampe einschalten)<br />
prüfen, ob der Hauptschalter der Versorgungsleitung des<br />
Klimagerätes inseriert ist (wenn der Hauptschalter mit Sicherungen<br />
ausgerüstet ist, müssen alle intakt sein)<br />
prüfen, ob die Fernbedienung funktioniert<br />
prüfen, ob der Timer nicht eingestellt ist<br />
prüfen, ob der Betrieb Kühlung eingestellt ist<br />
prüfen, ob die Temperatur auf der Fernbedienung eingestellt worden ist<br />
prüfen, ob die Drehzahl des Ventilators nicht zu niedrig ist<br />
prüfen, ob Hindernisse am Lufteintritt oder Luftaustritt der Innen- und<br />
Ausseneinheit vorhanden sind<br />
prüfen, ob der Luftfilter sauber ist<br />
prüfen, ob Türen oder Fenster offen stehen<br />
prüfen, ob keine ungewöhnlichen Wärmequellen vorhanden sind<br />
(Bügeleisen, zahlreiche Personen, usw.)<br />
I.14 HINWEISE ZUR VERSCHROTTUNG UND<br />
SCHADSTOFFENTSORGUNG DER EINHEIT<br />
UMWELTSCHUTZ!<br />
RHOSS S.p.A. ist seit jeher auf Umweltschutz<br />
bedacht.<br />
Es ist wichtig, dass die Verantwortlichen für die<br />
Entsorgung der Einheit gewissenhaft die folgenden<br />
Anweisungen befolgen.<br />
Die Maschine darf nur von einem zur Annahme und Entsorgung<br />
derartiger Produkte/Geräte autorisierten Betrieb verschrottet werden. Die<br />
Maschine besteht vorrangig aus wieder verwertbaren Rohstoffen. Bei<br />
der Entsorgung sind folgende Vorschriften zu beachten:<br />
• das imVerdichter enthaltene Öl muss abgelassen und einer Altöl-<br />
Annahmestelle übergeben werden ;<br />
• das Kältemittel darf nicht in die Atmosphäre abgelassen werden, es<br />
muss mit entsprechend zugelassenen Geräten aus der Anlage<br />
abgesaugt, in geeignete Flaschen abgefüllt und einer autorisierten<br />
Stelle übergeben werden;<br />
• der Filtertrockner und die elektronischen Bauteile<br />
(Elektrolytkondensatore) sind Sondermüll und müssen an einer<br />
entsprechend autorisierten Annahmestelle abgegeben werden;die<br />
PUR-Schaumisolierung der Rohrleitungen und die aufgeschäumte<br />
Schalldämmung der Verkleidungsplatten entfernen und als Hausmüll<br />
entsorgen.<br />
59
ABSCHNITT II: INSTALLATION UND WARTUNG<br />
II<br />
ABSCHNITT II: INSTALLATION UND<br />
WARTUNG<br />
II.1.3.1<br />
Inneneinheit<br />
II.1.1<br />
TRANSPORT UND HANDLING<br />
GEFAHR!<br />
Das Handling muss mit äusserster Vorsicht und<br />
durch Fachpersonal, das für diese Vorgänge<br />
ausgebildet worden ist, durchgeführt werden. Ein<br />
unsachgemässes Handling kann zu Schäden an<br />
Personen und an der Einheit führen.<br />
Beim Handling der Klimageräte Stösse oder Stürze, die sie<br />
beschädigen könnten, vermeiden<br />
Die Einheiten werden in Standardverpackung aus Polysterschaumstoff<br />
und Karton geliefert. Die Verpackung nicht eindrücken. Während des<br />
Transportes die Verpackungen nicht offen lassen.<br />
Das Anheben und das Handling<br />
muss durch mindestens 2 Personen<br />
Ausgeführt werden.<br />
Die verpackte Maschine darf nur an den Schlitzen der Verpackungen<br />
gegriffen und angehoben werden. Die Einheit immer sehr vorsichtig<br />
handhaben, um Beschädigungen der Verkleidung sowie der innen<br />
liegenden mechanischen und elektrischen Komponenten zu vermeiden.<br />
Zum Heben der unverpackten Maschine sind entsprechende Griffe<br />
angebracht. Niemals die Verpackung auf den Kopf stellen.<br />
UMWELTSCHUTZ!<br />
Entsorgen Sie das Verpackungsmaterial<br />
entsprechend den gültigen nationalen oder lokalen<br />
Umweltschutzgesetzen Ihres Landes.<br />
GEFAHR!<br />
Lassen Sie das Verpackungsmaterial nicht in<br />
Reichweite von Kindern.<br />
Die Einheit so installieren, dass der Luftstrom nicht direkt die Personen<br />
trifft.<br />
II.1.2<br />
EINLAGERUNG<br />
Die Klimageräte müssen mit geschlossener Verpackung in Räumen, die<br />
keinen Witterungseinflüssen ausgesetzt sind, untergebracht werden.<br />
Die Einheit nicht in der Nähe von Wärmequellen und anderen<br />
Gegenständen, die den Luftstrom behindern könnten, installieren.<br />
Beim Übereinanderstapeln den Pfeil auf der Verpackung beachten, um<br />
die Anzahl der stapelbaren Maschinen nicht zu überschreiten.<br />
II.1.3<br />
EINZUHALTENDE ABSTÄNDE<br />
Bei Befestigung der Einheiten müssen unbedingt die nachstehend<br />
aufgeführten technischen Freiräume eingehalten werden.<br />
60
ABSCHNITT II: INSTALLATION UND WARTUNG<br />
Lagen installiert wird. In solchen Fällen, sollte man spezialisierte<br />
Techniker zu Rate ziehen.<br />
II.2.2<br />
MAXIMALER HÖHENUNTERSCHIED<br />
ZWISCHEN DEN EINHEITEN.<br />
Der maximal zulässige Höhenunterschied zwischen Außen- und<br />
Inneneinheit beträgt +/- 5 m. Falls der Höhenunterschied zwischen<br />
Außen- und Inneneinheit größer als 3 m ist und falls die Außeneinheit in<br />
einer höheren Position als die Inneneinheit angebracht wird, ist der<br />
Einbau eines Siphons in der Gasleitung angebracht, um den Rücklauf<br />
des Schmieröls zum Verdichter zu erleichtern (Abb. 2).<br />
In Räumen mit relativ hoher Luftfeuchtigkeit (über 80%) darf das Gerät nicht<br />
kontinuierlich im Kühlbetrieb laufen. In diesem Fall kann sich am Luftaustritt<br />
Kondenswasser bilden, das darunter liegende Gegenstände, den<br />
Fußboden und die Wand, an der das Gerät befestigt ist, beschädigen kann.<br />
II.1.3.2<br />
Außeneinheit<br />
Die Ausseneinheit muss so weit vom Boden entfernt installiert werden,<br />
dass sie nicht leicht zu erreichen ist.<br />
Die nachstehend gezeigten Freiräume einhalten.<br />
II.2<br />
INSTALLATION<br />
GEFAHR!<br />
Die Installation muss ausschließlich von einem<br />
Fachmann ausgeführt werden, der nachweislich zu<br />
Arbeiten an Kälte- und Klimaanlagen befähigt ist.<br />
Eine falsche Installation kann Ursache für einen<br />
schlechten Betrieb der Einheit mit entsprechendem<br />
Leistungsabfall sein. Der Installateur ist verpflichtet,<br />
alle zum Zeitpunkt der Aufstellung gültigen lokalen<br />
und nationalen Bestimmungen einzuhalten.<br />
II.2.3<br />
INSTALLATION DER INNENEINHEIT<br />
Die Inneneinheit darf nur an der Wand montiert werden.<br />
Dabei sind die technischen Mindestfreiräume unbedingt einzuhalten.<br />
Vor der Installation des Gerätes sind folgende Kontrollen vorzunehmen;<br />
zu prüfen sind:<br />
• - ob die Wand, an der das Klimagerät montiert werden soll, robust<br />
genug ist und ausreichenden Halt gewährleistet;<br />
• - ob die für die Installation erforderlichen Freiräume eingehalten<br />
werden können;<br />
• - dass weder Vorhänge noch andere Gegenstände den Luftstrom<br />
zum Gerät oder die austretende Luft behindern;<br />
• das die Einheit und demnach der IR-Empfänger nicht direktem<br />
Sonnenlicht oder elektronischen Röhren ausgesetzt sind, die den<br />
störungsfreien Gerätebetrieb beeinträchtigen könnten;<br />
• dass die Einheit nicht höher als 2,7 m über dem Fussboden<br />
installiert wird, um während des Betriebes die Bildung von Luftschichten<br />
zu vermeiden.<br />
Bei der Montage, wie folgt, vorgehen.<br />
• - die mitgelieferte Papierschablone an der vorgesehenen Wand<br />
befestigen.<br />
• - mit einem Bohrer mit kleiner Bohrspitze die folgenden Punkte<br />
anbohren: Bohrung für die Durchführung der Rohre und Elektrokabel;<br />
Bohrungen für die Spreizdübel zur Befestigung der Stützplatte<br />
(mindestens 4, ggf. zusätzliche Dübel verwenden).<br />
• - die Bohrung für die Durchführung der Rohre und elektrischen<br />
Leitungen ausführen (Abb. 3);<br />
Innenseite<br />
Wand<br />
Aussenseite<br />
Wand<br />
Abb. 2<br />
Die folgenden Anleitungen dienen zur korrekten Aufstellung der<br />
Klimageräte. Die fachgerechte Ausführung der einzelnen Arbeiten<br />
entsprechend den spezifischen Anforderungen der Anlage bleibt jedoch<br />
der Erfahrung des Installateurs überlassen.<br />
II.2.1<br />
LÄRMREDUZIERUNG UND<br />
SCHWINGUNGSDÄMPFUNG<br />
Eine korrekte Installation sieht auch Massnahmen der Lärmreduzierung<br />
des normalen Betriebs der Ausseneinheit vor.<br />
Vor der Installation der Einheit sind bei den örtlichen Behörden<br />
Auskünfte über eventuell vorhandene, umweltbezogene<br />
Lärmeinschränkungen einzuholen. Die Ausseneinheit sollte niemals in<br />
der Nähe von Wohnbereichen (Büros, Wohn-, Schlafzimmer usw.)<br />
montiert werden. Besondere Aufmerksamkeit ist der Installation in der<br />
Nähe von Krankenzimmern oder Räumen, in denen sich Behinderte<br />
aufhalten, zu widmen. Die Verwendung des Bausatzes<br />
Schwingungsdämpfer für die Ausseneinheit, garantiert eine erhebliches<br />
Herabsetzen, der von der Einheit an das Gebäude übertragenen<br />
Schwingungen. Besondere Massnahmen müssen getroffen werden,<br />
falls die Einheit in einer erdbebengefährdeten Zone oder in besonderen<br />
Innenseite<br />
Wand<br />
Aussenseite<br />
Wand<br />
• - die Bohrungen für die Spreizdübel ausführen.<br />
• - die an der Einheit eingehängte Stützplatte abnehmen.<br />
• - die Stützplatte mit den Dübeln an der Wand befestigen und sich<br />
vergewissern, dass dieselbe perfekt waagerecht ist.<br />
• - die Schrauben des Gehäuses der Einheit lösen.<br />
• - die Kupferrohre auf der Geräterückseite nach Bedarf biegen.<br />
Abb. 3<br />
WICHTIG!<br />
Die Kupferrohre müssen äusserst vorsichtig<br />
gebogen werden, um mögliche Risse zu vermeiden.<br />
61
ABSCHNITT II: INSTALLATION UND WARTUNG<br />
Links<br />
Die Haltebügel<br />
verwenden.<br />
Zentral<br />
hinten<br />
Links<br />
hinten<br />
Nach unten<br />
links<br />
Abb. 7<br />
Rechts<br />
Rechts<br />
hinten<br />
• die Anschlüsse der Kältemittelleitungen und des Kondensatablaufs<br />
wie auch den elektrischen Anschluss entsprechend den Abschnitten<br />
“Anschluss der Kältemittelleitungen” und “Elektrischer Anschluss”<br />
vornehmen.<br />
• - vor dem Aufsetzen des Gehäuses die Funktionstüchtigkeit des<br />
Kondensatablaufs kontrollieren.<br />
II.2.4<br />
Nach unten<br />
rechts<br />
INSTALLATION DER AUSSENEINHEIT<br />
Abb. 4<br />
Die Einheit an der Stützplatte einhängen,<br />
darauf achten, dass die<br />
Kältemittelleitungen, die Elektrokabel und<br />
das Rohr des Kondensatablauf durch die<br />
Wandbohrung geführt werden.<br />
Abb 5<br />
- Die Außeneinheit darf nur im Freien aufgestellt werden, unter<br />
Einhaltung der technischen Mindestfreiräume, die für den Luftstrom und<br />
die Ausführung eventueller Wartungsarbeiten erforderlich sind.<br />
Die Modelle mit Wärmepumpe produzieren während des Abtauens<br />
beim Heizbetrieb Wasser, das aufgefangen und über den Ablauf<br />
abgeleitet werden muss.<br />
II.2.5<br />
ANSCHLUSS DER KÄLTEMITTELLEITUNGEN<br />
WICHTIG!<br />
Die Ausführung der Kältemittelanschlüsse muss<br />
durch Fachpersonal erfolgen, dabei sind die<br />
gültigen Gesetze und Vorschriften des<br />
Installationsartes zu beachten.<br />
Ein den Vorschriften nicht konformer<br />
Stromanschluss enthebt die Firma RHOSS S.p.a<br />
jeglicher Haftpflicht für Verletzungen und<br />
Sachschäden.<br />
Für die Verlegung der Kältemittelleitungen sind Kupferrohre für<br />
Kälteanlagen zu verwenden, deren Länge und deren Durchmesser den<br />
Angaben auf den Seiten mit den “Technischen Daten” entsprechen<br />
sollten. Es ist ferner sicherzustellen, dass die Rohre innen schmutzfrei<br />
und trocken sind, da Fremdkörper und Feuchtigkeit den Kältekreislauf<br />
beschädigen können. Die Kältemittelleitungen müssen einzeln mit einer<br />
Ummantelung aus geschlossenzelligem Schaumstoffmaterial isoliert<br />
sein.<br />
- Für die Mauerdurchführung der Rohre ist eine Bohrung von 65 mm<br />
ausreichend.<br />
Die Rohrverlegung auf folgende Weise vorbereiten:<br />
Die Anschlussrohre auf die vorgesehene Länge abschneiden. Dabei<br />
einen gewissen Sicherheitsspielraum und außerdem die Hinweise in<br />
Abb. 8 berücksichtigen.<br />
Richtig<br />
Falsch<br />
Die korrekte Nivellierung<br />
der Einheit muss<br />
garantiert sein.<br />
Abb. 6<br />
- Die Beschaffenheit der Wand muss für das Gerätegewicht geeignet<br />
sein und darf weder Lärm noch Vibrationen übertragen.<br />
- Bei der Auswahl des Aufstellungsortes ist sorgfältig darauf zu achten,<br />
dass der Luftstrom nicht die Nachbarn stört.<br />
Abb. 8<br />
Die beim Schnitt entstandenen Grate entfernen; bei dieser Arbeit die<br />
Rohröffnungen nach unten halten.<br />
Die Kältemittelleitungen mit geeignetem<br />
Material isolieren, dann die vorher von den<br />
Anschlüssen der Einheit entfernten Stutzen<br />
einsetzen.<br />
Abb. 9<br />
62
ABSCHNITT II: INSTALLATION UND WARTUNG<br />
Für eine fachgerechte Anflanschen ein Universal-Rohrflanschgerät<br />
verwenden, die Hinweise in Abb. 10 beachten und anschließend alle<br />
Grate entfernen.<br />
Abb. 10<br />
1) Nadelventil<br />
2) Schutzhaube<br />
des Nadelventils<br />
3) Stellschraube<br />
4) Schutzhaube<br />
des Hahnes<br />
5) Schutzhaube<br />
des Hahnes<br />
A<br />
B (mm)<br />
Zoll mm max. min.<br />
1/4” 6,35 8,25 8,01<br />
3/8” 9,52 12,36 11,97<br />
1/2” 12,70 15,82 15,42<br />
5/8 15,90 18,95 18,58<br />
Sicherstellen, dass das Rohr gleichmäßig aufgeweitet ist und keinen<br />
der in Abb. 11 gezeigten Fehler aufweist.<br />
Richtig<br />
Falsch<br />
Abb. 11<br />
Die Kältemittelleitungen an die Anschlüsse der Einheit anschließen;<br />
dabei müssen beide Enden sauber aufeinander liegen. Den Stutzen<br />
von Hand einschrauben und dann mit einem Drehmomentschlüssel mit<br />
dem untenstehend genannten Anziehmoment festziehen.<br />
Mutter Anziehmoment<br />
Zoll 1/4” Nm 15<br />
Zoll 3/8” Nm 16<br />
Zoll 1/2” Nm 40<br />
Zoll 5/8” Nm 48<br />
Den Kondensatschlauch an die Inneneinheit anschließen.<br />
Vermeiden Sie dabei, die Rohre mit Kurven zu verlegen, die einen<br />
Radius von weniger als 100 mm aufweisen, da sonst der<br />
Rohrquerschnitt eingequetscht werden kann.<br />
II.2.5.1<br />
UMWELTSCHUTZ!<br />
Vor Inbetriebnahme der Einheit mit einem<br />
geeigneten Instrument prüfen, ob die Gasverluste 5<br />
gr./Jahr nicht überschreiten.<br />
Kältemittelfüllung<br />
Die Einheiten werden mit einer Kältemittelfüllung für eine Leitungslänge<br />
von 5 m geliefert. Bei längeren Leitungen muss die Kältemittelmenge<br />
erhöht werden. Die Werte beziehen sich auf die Tabelle in den Anlagen.<br />
II.2.5.2<br />
Installation des Kondensatablaufs<br />
Abb. 13<br />
Zur Vermeidung von unangenehmen Gerüchen, die im<br />
Kondensatablauf entstehen können, ist es angebracht, am Ende des<br />
Kondensatschlauchs auf der Außenseite einen Siphon zu installieren.<br />
Der Kondensatablauf muss eine geeignete Neigung aufweisen, um den<br />
Wasserabfluss zu erleichtern (Abb. 14).<br />
1. Schlüssel<br />
2. Drehmomentschlüssel<br />
Abb. 14<br />
Abb. 12<br />
Die Anschlussstücke beim Anschrauben an die Geräte mit einem<br />
zweiten Schlüssel kontern (Abb. 12), um das Rohr nicht zu verdrehen.<br />
Die Schutzhaube vom Nadelventil des Hahns abnehmen. Abb. 13:<br />
Die Vakuumpumpe an das Nadelventil des Hahns anschließen.<br />
Nicht die Hähne öffnen; das Vakuum nur auf der Inneneinheit und in der<br />
Kältemittelleitung herstellen.<br />
Das Vakuum bis zum Erreichen eines Drucks von ca. 1,3 KPa (10<br />
mmHg) erzeugen.<br />
Nach Beendigung dieses Schritts die Vakuumpumpe abnehmen, die<br />
Schutzkappen entfernen und die Hähne vollständig öffnen (siehe Abb.<br />
13); dazu mithilfe eines 5 mm – Sechskantschlüssels die Stellschraube<br />
betätigen (Abb. 13)<br />
Die Schutzkappen wieder auf alle Hähne aufsetzen und festziehen.<br />
WICHTIG!<br />
Eine nicht konforme Ausführung des<br />
Kondensatablaufs, verursacht einen Wasserverlust<br />
der Inneneinheit und Schäden an, in der Nähe<br />
befindlichen Personen und/oder Gegenständen.<br />
Ein den Vorschriften nicht konformer<br />
Stromanschluss enthebt die Firma RHOSS S.p.a<br />
jeglicher Haftpflicht für Verletzungen und<br />
Sachschäden.<br />
63
ABSCHNITT II: INSTALLATION UND WARTUNG<br />
II.2.6<br />
ELEKTRISCHE ANSCHLÜSSE<br />
WICHTIG!<br />
Die Ausführung der elektrischen Anschlüsse muss<br />
durch Fachpersonal erfolgen, dabei sind die<br />
gültigen Gesetze und Vorschriften des<br />
Installationsartes zu beachten.<br />
Ein den Vorschriften nicht konformer<br />
Stromanschluss enthebt die Firma RHOSS S.p.a<br />
jeglicher Haftpflicht für Verletzungen und<br />
Sachschäden.<br />
GEFAHR!<br />
In Maschinennähe und an geschützter Stelle immer<br />
einen automatischen Leistungsschutzschalter (IG)<br />
mit verzögerter Kennlinie, ausreichender<br />
Belastungsfähigkeit und Ausschaltleistung und mit<br />
Mindestkontaktöffnung von 3 mm installieren.<br />
Der automatische Hauptschutzschalter (IG) muss<br />
vor der gesamten Anlage zur Unterbrechung der<br />
Stromversorgung der Haupteinheit und aller<br />
angeschlossenen Zubehörteile installiert werden.<br />
Der Anschluss der Maschine an eine<br />
Erdungsanlage ist gesetzlich vorgeschrieben und<br />
dient zum Schutz des Benutzers während des<br />
Maschinenbetriebes.<br />
Die Kabel nur in Nähe der Klemmen abisolieren. Benutzen Sie immer<br />
für die Klemmen passende Kabelschuhe.<br />
Nach Einführung des Kabelschuhs in die Klemme die Schraube<br />
sachgemäß, ohne übermäßigen Kraftaufwand anziehen: danach leicht<br />
am Kabel ziehen, um den festen Sitz zu kontrollieren.<br />
Benutzen Sie die Kabellasche im Fach der Platine zur<br />
Kabelbefestigung.<br />
II.2.6.1<br />
Netzanschluss<br />
Kontrollieren, ob die Netzspannung und -frequenz 230V (± 10%), 1 Ph,<br />
50Hz beträgt, die verfügbare, installierte Leistung für den Gerätebetrieb<br />
ausreichend ist und die Netzkabel den für die maximale<br />
Stromaufnahme erforderlichen Querschnitt aufweisen.<br />
Sich vergewissern, dass die elektrische Anlage den gültigen<br />
Sicherheitsbestimmungen des Aufstellungslandes entspricht.<br />
Ein flexibles zweipoliges Netzkabel mit Erdung, einem Querschnitt von<br />
1,5 mm 2 und mit einer PCP-Schutzhülle, die nicht leichter als H05RN-F<br />
sein darf, benutzen. Der Erdleiter muss länger sein als alle anderen<br />
Leiter, so dass er bei einer Lockerung der Kabelbefestigung als letzter<br />
gespannt wird. Die elektrischen Anschlusskabel müssen einen<br />
ausreichenden Schutzgrad haben und durch das Innere der<br />
Leitungskanälegeführt werden, sie sind am Fussboden oder an der<br />
Wand solide zu befestigen. Besonders auf eventuell vorhandene<br />
scharfe Kanten, Gratbildungen, raue Oberflächen im Allgemeinen oder<br />
Gewinde achten , um zu vermeiden, dass die Leitungsisolierung<br />
beschädigt wird.<br />
- Für den elektrischen Anschluss das Gehäuse der Inneneinheit und die<br />
Seitenklappe (auf der Seite der Anschlüsse der Kältemittelleitungen)<br />
der Inneneinheit abnehmen; die Elektrokabel in die Klemmen einführen<br />
und sich dabei an die auf den Klimageräten angebrachten Schaltpläne<br />
halten. Falls das Gerät an einer Metallwand befestigt wird, muss es<br />
entsprechend den gültigen Bestimmungen des Aufstellungslandes<br />
geerdet werden.<br />
Die Anschlüsse müssen unter Beachtung der in der Anlage beigefügten<br />
Schaltpläne ausgeführt werden.<br />
Normalerweise ist das Stromkabel 2 m länger als die<br />
Kältemittelleitungen.<br />
Jede Inneneinheit verfügt über ein Netzkabel mit Stecker.<br />
II.3<br />
II.3.1<br />
ERSTE INBETRIEBNAHME<br />
WICHTIG!<br />
Die erste Inbetriebnahme oder das erste Anfahren der<br />
Maschine (falls vorgesehen) muss ausschließlich<br />
durch Fachkräfte erfolgen, die nachweislich zu<br />
Arbeiten an solchen Geräten befähigt ist.<br />
GEFAHR!<br />
Sich vergewissern, dass vor der Inbetriebnahme, die<br />
Installation und die elektrischen Anschlüsse<br />
entsprechend den Anweisungen des vorliegenden<br />
Handbuchs ausgeführt sind. Ausserdem dafür sorgen<br />
, dass sich keine unbefugten Personen während<br />
dieser Arbeiten in Maschinennähe aufhalten.<br />
KONTROLLEN VOR DER INBETRIEBNAHME<br />
Vor der Inbetriebnahme der Einheit sicherstellen, dass:<br />
1. die Einheit vorschriftsmäßig aufgestellt ist;<br />
2. die Druck-, Rücklauf- und Kondensatablaufleitungen der Anlage<br />
vorschriftsmäßig angeschlossen sind;<br />
3. der Wärmetauscher sauber ist;<br />
4. die elektrischen Anschlüsse vorschriftsmäßig ausgeführt sind;<br />
5. die Schrauben der Leiter fest angezogen sind;<br />
6. die Netzspannung der vorgeschriebenen Spannung entspricht;<br />
Die Einheit mit Höchstdrehzahl für einige Stunden laufen lassen.<br />
II.4<br />
II.4.1<br />
AUSSERPLANMÄSSIGE WARTUNG<br />
GEFAHR!<br />
Alle Wartungsarbeiten müssen von Fachkräften<br />
ausgeführt werden, die nachweislich zu Arbeiten an<br />
Kälte- und Klimaanlagen befähigt sind.<br />
Immer geeignete Schutzhandschuhe tragen.<br />
GEFAHR!<br />
Vor jedem Wartungseingriff, auch wenn er nur der<br />
Inspektion dient, ist der automatische<br />
Hauptschutzschalter (IG), der die gesamte Anlage<br />
schützt, zu betätigen. Sich vergewissern, dass<br />
niemand zufällig die Maschine einschalten kann;<br />
den automatischen Hauptschalter (IG) in der<br />
Position null blockieren.<br />
GEFAHR<br />
Auf die heißen Oberflächen im Maschineninneren<br />
achten.<br />
Es ist untersagt, spitze Gegenstände durch das<br />
Ansaug- und Luftauslassgitter einzuführen.<br />
KONTROLLE DER KÄLTEMITTELFÜLLUNG<br />
Je ein Manometer an den Prüfanschluss von Druck- und Saugleitung<br />
anschließen. Die Einheit einschalten und den jeweiligen Druck messen,<br />
sobald er sich stabilisiert hat.<br />
II.4.2<br />
ÜBERPRÜFUNG AUF GASLECKS<br />
Mit einem geeigneten Lecksuchgerät oder mit Seifenwasser den<br />
Kältekreiskauf prüfen, die Verluste dürfen 5gr./Jahr nicht übersteigen.<br />
II.4.3<br />
ÜBERPRÜFUNG DES<br />
WÄRMEAUSTAUSCHERS AUF<br />
VERSCHMUTZUNG<br />
An der abgeschalteten Maschine den Wärmeaustauscher untersuchen<br />
und je nach Ergebnis:<br />
• alle Fremdpartikel, die den Luftstrom behindern, von den Lamellen<br />
entfernen.<br />
• mit einem Druckluftstrahl den Staub entfernen;<br />
• vorsichtig mit Wasser unter leichtem Abbürsten die<br />
Schmutzablagerungen abwaschen;<br />
• anschließend mit Druckluft trocknen.<br />
II.4.4<br />
ÜBERPRÜFUNG DES KONDENSATABLAUFS<br />
AUF SAUBERKEIT.<br />
Den Kondensatablauf bei abgeschaltetem Gerät auf Sauberkeit prüfen.<br />
II.4.5<br />
ÜBERPRÜFUNG DES ELEKTRISCHEN<br />
SCHALTKREISES<br />
Es werden folgende Kontrollen empfohlen:<br />
• Überprüfung der Stromaufnahme mit einer Stromzange und<br />
Vergleich mit den Vorgabewerten in Anlage A1;<br />
• Sichtkontrolle und Überprüfung des festen Sitzes der elektrischen<br />
Kontakte und zugehörigen Klemmen.<br />
II.4.6<br />
HINWEISE ZUM AUSTAUSCH VON<br />
BAUTEILEN<br />
Vor einem Reparatureingriff an der Maschine sollte das Kältemittel<br />
sowohl an der Hochdruck- als auch an der Niederdruckseite<br />
abgelassen werden. Falls die Kältemittelfüllung nur aus der<br />
Hochdruckseite der Anlage entfernt wird, kann es vorkommen, dass der<br />
Verdichter den Kreislauf absperrt und einen Druckausgleich verhindert.<br />
In diesem Fall würde der Niederdruck-Abschnitt von Gehäuse und<br />
Saugleitung weiterhin unter Druck stehen. Falls man nun eine<br />
Hartlötlampe an ein Bauteil des ND-Abschnitts ansetzt, kann sich das<br />
unter Druck austretende Kältemittel-Öl-Gemisch bei Berührung mit der<br />
Flamme entzünden. Um dieser Gefahr vorzubeugen, ist es unerlässlich,<br />
dass vor dem Entlöten die tatsächliche Druckentlastung beider<br />
Bereiche kontrolliert wird.<br />
Ein eventuelles Auffüllen der Einheit mit Kältemittel R410A muss in<br />
flüssiger Form direkt aus der Flasche erfolgen, um die<br />
Zusammensetzung des Mittels nicht zu verändern.<br />
64
ÍNDICE<br />
ÍNDICE<br />
SIMBOLOGÍA UTILIZADA<br />
I<br />
SECCIÓN I: USUARIO...........................................................................66<br />
I.1 Informaciones generales..........................................................................................66<br />
I.1.1 Condiciones de uso previstas .....................................................................................66<br />
I.1.2 Límites de funcionamiento ..........................................................................................66<br />
I.1.3 Información sobre la seguridad...................................................................................66<br />
I.2 Recambios.................................................................................................................66<br />
I.3 Asistencia ..................................................................................................................66<br />
I.4 Descripción de la unidad..........................................................................................66<br />
I.4.1 Unidad interior.............................................................................................................67<br />
I.4.2 Unidad exterior............................................................................................................67<br />
I.4.3 Mando a distancia.......................................................................................................67<br />
I.5 Descripción del mando a distancia y sus funciones .............................................68<br />
I.5.1 Nombres y funciones de los indicadores en el display................................................69<br />
I.6 Uso del mando a distancia.......................................................................................69<br />
I.6.1 Programación del reloj ................................................................................................70<br />
I.6.2 Encendido y apagado de la unidad.............................................................................70<br />
I.6.3 Programación del modo de funcionamiento................................................................70<br />
I.6.4 Función economic running ..........................................................................................70<br />
I.6.5 Programación de la temperatura deseada ..................................................................70<br />
I.6.6 Programación del deflector .........................................................................................71<br />
I.6.7 Programación de la ventilación ...................................................................................71<br />
I.6.8 Programación de los timer ..........................................................................................71<br />
I.6.9 Bloqueo del teclado.....................................................................................................71<br />
I.6.10 Restablecimiento del mando a distancia.....................................................................71<br />
I.7 DESCRIPTION DE LOS INDICADORES ...................................................................71<br />
I.8 Puesta fuera de servicio...........................................................................................71<br />
I.9 Reactivación después de prolongada inactividad .................................................71<br />
I.10 Guía rápida para el funcionamiento ........................................................................72<br />
I.10.1 Funcionamiento automático ........................................................................................72<br />
I.10.2 Función refrigeración ..................................................................................................72<br />
I.10.3 Función de deshumidificación.....................................................................................72<br />
I.10.4 Función calefacción ....................................................................................................72<br />
I.10.5 Función ventilación .....................................................................................................72<br />
I.11 Mantenimiento rutinario a cargo del usuario..........................................................73<br />
I.11.1 Limpieza de la unidad interior .....................................................................................73<br />
I.11.2 Limpieza de la unidad exterior ....................................................................................73<br />
I.11.3 Limpieza del filtro del aire ...........................................................................................73<br />
I.11.4 Limpieza del mando a distancia..................................................................................73<br />
I.12 Advertencias y sugerencias.....................................................................................73<br />
I.13 Anomalías de funcionamiento .................................................................................74<br />
I.14 Instrucciones para el desguace de la unidad y la eliminación de sustancias<br />
dañinas ......................................................................................................................74<br />
II<br />
SECCIÓN II: INSTALACIÓN Y MANTENIMIENTO................................75<br />
II.1.1 Transporte y desplazamiento......................................................................................75<br />
II.1.2 Almacenamiento .........................................................................................................75<br />
II.1.3 Espacios técnicos necesarios .....................................................................................75<br />
II.2 Instalación .................................................................................................................76<br />
II.2.1 Reducción de los ruidos y de las vibraciones..............................................................76<br />
II.2.2 Desnivel máximo entre las unidades...........................................................................76<br />
II.2.3 Instalación de la unidad interior...................................................................................76<br />
II.2.4 Instalación de la unidad exterior..................................................................................77<br />
II.2.5 Conexiones frigoríficas................................................................................................77<br />
II.2.6 Conexiones eléctricas .................................................................................................79<br />
II.3<br />
Instrucciones para el arranque................................................................................79<br />
II.3.1 Controles previos a la puesta en marcha....................................................................79<br />
II.4<br />
Mantenimiento extraordinario..................................................................................79<br />
II.4.1 Control de carga del fluido refrigerante .......................................................................79<br />
II.4.2 Control de ausencia de fugas de fluido refrigerante....................................................79<br />
II.4.3 Control estado de limpieza del intercambiador ...........................................................79<br />
II.4.4 Control correcta limpieza de la desagüe de condensados..........................................79<br />
II.4.5 Comprobación del circuito eléctrico ............................................................................79<br />
II.4.6 Indicaciones para la sustitución de componentes.......................................................79<br />
ANNEXOS<br />
A1<br />
A2<br />
Características técnicas…………………………………………………………...….103<br />
Esquemas de conexión eléctrica.........................................................................107<br />
SÍMBOLO<br />
UNI EN 292<br />
UNI EN 294<br />
UNI EN 563<br />
UNI EN 1050<br />
UNI 10893<br />
EN 13133<br />
EN 12797<br />
EN 378-1<br />
PrEN 378-2<br />
CEI EN 60335-2-40<br />
UNI EN ISO 3744<br />
EN 50081-1:1992<br />
EN 61000<br />
SIGNIFICADO<br />
PELIGRO GENÉRICO<br />
La indicación de PELIGRO GENÉRICO se utiliza<br />
para informar al operador y al personal encargado<br />
del mantenimiento acerca de los riesgos que<br />
pueden conllevar la muerte, daños físicos,<br />
enfermedades bajo cualquier forma inmediata o<br />
latente.<br />
PELIGRO COMPONENTES EN TENSIÓN<br />
La indicación de PELIGRO COMPONENTES EN<br />
TENSIÓN se utiliza para informar al operador y al<br />
personal encargado del mantenimiento acerca de<br />
los riesgos debidos a la presencia de tensión.<br />
PELIGRO SUPERFICIES CORTANTES<br />
La indicación de PELIGRO SUPERFICIES<br />
CORTANTES se utiliza para informar al operador y<br />
al personal encargado del mantenimiento acerca de<br />
la presencia de superficies potencialmente<br />
peligrosas.<br />
PELIGRO SUPERFICIES CALIENTES<br />
La indicación de PELIGRO SUPERFICIES<br />
CALIENTES se utiliza para informar al operador y al<br />
personal encargado del mantenimiento acerca de la<br />
presencia de superficies calientes potencialmente<br />
peligrosas.<br />
PELIGRO ÓRGANOS EN MOVIMIENTO<br />
La indicación de PELIGRO ÓRGANOS EN<br />
MOVIMIENTO se utiliza para informar al operador y<br />
al personal encargado del mantenimiento acerca de<br />
los riesgos debidos a la presencia de órganos en<br />
movimiento.<br />
ADVERTENCIAS IMPORTANTES<br />
La indicación ADVERTENCIAS IMPORTANTES se<br />
utiliza para llamar la atención sobre acciones o<br />
peligros que pueden causar daños a la unidad o a<br />
sus equipamientos.<br />
PROTECCIÓN MEDIO AMBIENTE<br />
La indicación PROTECCIÓN MEDIO AMBIENTE<br />
proporciona información para utilizar la máquina<br />
respetando el medio ambiente.<br />
REFERENCIAS NORMATIVAS<br />
Sicurezza del macchinario. Concetti fondamentali,<br />
principi generali di progettazione.<br />
Sicurezza del macchinario. Distanze di sicurezza per<br />
impedire il raggiungimento di zone pericolose con gli arti<br />
superiori.<br />
Sicurezza del macchinario. Temperature delle superfici<br />
di contatto. Dati ergonomici per stabilire i valori limiti di<br />
temperatura per superfici calde.<br />
Sicurezza del macchinario. Principi per la valutazione<br />
del rischio.<br />
Documentazione tecnica di prodotto. Istruzioni per l’uso<br />
Brazing. Brazer approval.<br />
Brazing. Destructive tests of brazed joints.<br />
Refrigeration systems and heat pumps – safety and<br />
environmental requirements. Basic requirements,<br />
definitions, classification and selection criteria.<br />
Refrigeration systems and heat pumps – safety and<br />
environmental requirements. Design, construction,<br />
testing, installing, marking and documentation.<br />
Sicurezza degli apparecchi elettrici d’uso domestico e<br />
similare. Parte 2: Norme particolari per le pompe di<br />
calore elettriche, per i condizionatori d’aria e per i<br />
deumidificatori.<br />
Determinazione dei livelli di potenza sonora delle<br />
sorgenti di rumore mediante pressione sonora. Metodo<br />
tecnico progettuale in un campo essenzialmente libero<br />
su un piano riflettente.<br />
Electromagnetic compatibility - Generic emission<br />
standard Part 1: Residential, commercial and light<br />
industry<br />
Electromagnetic compatibility (EMC)<br />
65
SECCIÓN I: USUARIO<br />
I<br />
SECCIÓN I: USUARIO<br />
I.1 INFORMACIONES GENERALES<br />
Este manual de uso forma parte de la dotación de este climatizador.<br />
La utilización y el mantenimiento en condiciones de seguridad de la<br />
máquina objeto de este manual de instrucciones para el uso es<br />
indispensable para evitar riesgos a los operadores, tanto en las fases<br />
operativas, como durante el mantenimiento y la reparación; por lo tanto,<br />
es indispensable que este documento se lea atentamente, sea<br />
respetado en todas sus partes y se conserve con cuidado.<br />
IMPORTANTE<br />
RHOSS S.p.a. declina cualquier responsabilidad<br />
por cualquier daño debido a una utilización<br />
impropia del climatizador o causado como<br />
consecuencia de una lectura incompleta o<br />
superficial de las informaciones y de las<br />
indicaciones que contiene este manual.<br />
I.1.1<br />
CONDICIONES DE USO PREVISTAS<br />
PELIGRO<br />
Se prohíben expresamente usos diferentes del<br />
previsto por el fabricante.<br />
El climatizador split de pared está destinado al tratamiento del aire<br />
(climatización en verano y en invierno) en ambientes de uso doméstico<br />
o similar. La unidad está destinada a instalación en ambientes con<br />
atmósfera NO EXPLOSIVA.<br />
No usar el climatizador para empleos especializados, como la<br />
climatización de aparatos eléctricos o electrónicos, la conservación de<br />
alimentos, muebles de anticuario, cría de animales, cultivos biológicos,<br />
etc...<br />
Este climatizador está dotado de ventiladores que giran a un elevado<br />
número de revoluciones. No introducir nunca las manos u objetos de<br />
cualquier tipo en las ranuras de salida del aire, tanto en la unidad<br />
interior como en la exterior. esto podría causar accidentes con lesiones<br />
personales y daños al ventilador.<br />
Poner atención en mantener el ambiente a una temperatura<br />
confortable, sobre todo en presencia de niños, personas ancianas o<br />
personas con minusvalías.<br />
La utilización del climatizador con valores de temperatura y humedad<br />
diferentes a los permitidos puede provocar un mal funcionamiento y<br />
goteos de condensados de la unidad interior.<br />
En caso de temporal, es conveniente quitar la alimentación eléctrica<br />
con un interruptor general IG (no suministrado), para proteger el<br />
climatizador de posibles daños debidos a subidas de tensión<br />
provocadas por descargas de relámpagos.<br />
I.1.2<br />
LÍMITES DE FUNCIONAMIENTO<br />
IMPORTANTE<br />
El correcto funcionamiento de la unidad queda<br />
subordinado a la escrupulosa aplicación de las<br />
instrucciones de uso, al mantenimiento de los<br />
espacios técnicos en la instalación y de los límites<br />
de empleo indicados en este manual.<br />
Interior Exterior<br />
Refrigeración límite superior °C 30 43<br />
límite inferior °C 17 18<br />
Calefacción límite superior °C 30 24<br />
límite inferior °C 17 -5<br />
Mod. INVERTER<br />
Interior Exterior<br />
Refrigeración límite superior °C 30 43<br />
límite inferior °C 17 18<br />
Calefacción límite superior °C 30 24<br />
límite inferior °C 17 -15<br />
I.1.3<br />
INFORMACIÓN SOBRE LA SEGURIDAD<br />
La unidad está dotada de dispositivos de seguridad para prevenir<br />
riesgos de daños a las personas y garantizar un correcto<br />
funcionamiento.<br />
Las modificaciones o alteraciones no autorizadas por RHOSS S.p.a.<br />
pueden determinar situaciones de potencial peligro para las personas y<br />
daños a la unidad.<br />
I.2 RECAMBIOS<br />
IMPORTANTE<br />
Utilizar única y exclusivamente repuestos y<br />
accesorios originales. RHOSS S.p.A. rehúsa<br />
cualquier responsabilidad por daños causados por<br />
modificaciones o intervenciones realizadas por<br />
personal no autorizado o por funcionamientos<br />
anómalos debidos al uso de repuestos o<br />
accesorios no originales.<br />
Para el mantenimiento utilizar sólo recambios originales RHOSS<br />
S.p.A.<br />
RHOSS S.p.A. se considera exenta de cualquier responsabilidad en<br />
los siguientes casos:<br />
• instalación no correcta o no efectuada según los procedimientos<br />
indicados;<br />
• falta de respeto total o parcial de las instrucciones;<br />
• errores de alimentación eléctrica/hidráulica;<br />
• uso impropio de la unidad;<br />
• falta de mantenimiento;<br />
• modificaciones e intervenciones no autorizadas;<br />
• utilización de recambios no originales o no adecuados.<br />
I.3 ASISTENCIA<br />
Antes de efectuar intervenciones de reparación se aconseja dirigirse a<br />
RHOSS S.p.A., sobre todo en caso que sea necesario intervenir para<br />
mantenimiento extraordinario.<br />
I.4 DESCRIPCIÓN DE LA UNIDAD<br />
Los climatizadores autónomos de secciones separadas en versión<br />
bomba de calor están formados por unidades interiores (1 para el<br />
modelo MONO, 2 para el modelo DUAL, 3 para el modelo TRIAL) para<br />
instalación en pared y por una unidad exterior a conectar mediante<br />
líneas frigoríficas y eléctricas.<br />
La unidad interior tiene una carga de gas protectivo para evitar la<br />
entrada de humedad. La unidad exterior contiene toda la carga de<br />
refrigerante, suficiente también para la línea frigorífica hasta una<br />
longitud máxima de 5 m.<br />
Para longitudes superiores es necesario efectuar un llenado de gas<br />
refrigerante. Las unidades se caracterizan por un funcionamiento muy<br />
silencioso y por elevadas prestaciones en términos de eficiencia y<br />
fiabilidad.<br />
El funcionamiento de las unidades está controlado por una tarjeta<br />
electrónica microprocesada que permite elegir entre los siguientes<br />
programas:<br />
• automático AUTO<br />
• refrigeración COOL<br />
• deshumidificación DRY<br />
• calefacción HEAT<br />
• ventilación FAN<br />
Todas las elecciones de los programas de funcionamiento se pueden<br />
seleccionar a través de un mando a distancia por infrarrojos con display<br />
de cristales líquidos.<br />
Cuando el mando a distancia no está disponible, en emergencia el<br />
climatizador puede controlarse con un interruptor colocado en la unidad<br />
interior.<br />
66
Unidad interior<br />
salida de aire<br />
Unidad exterior<br />
entrada de<br />
salida de aire<br />
entrada de<br />
entrada de<br />
I.4.1<br />
UNIDAD INTERIOR<br />
SECCIÓN I: USUARIO<br />
La unidad interior, a instalar sólo en pared, se caracteriza por una<br />
agradable estética, que permite introducirla en cualquier tipo de<br />
decoración. Está dotada de una batería de intercambio térmico, un<br />
ventilador tangencial muy silencioso que garantiza un excelente confort<br />
acústico incluso con el máximo caudal de aire, un filtro de aire<br />
regenerable y fácilmente extraíble para su limpieza, un deflector<br />
horizontal motorizado y aletas verticales para optimizar la distribución<br />
del aire en salida.<br />
En el frontal, en una posición bien visible, hay los led de señalación del<br />
estado de funcionamiento y el receptor de las señales proveniente del<br />
mando a distancia.<br />
Con la unidad se suministran:<br />
• la placa de fijación;<br />
• el mando a distancia;<br />
• el soporte para la fijación en la pared del mando a distancia.<br />
I.4.2<br />
UNIDAD EXTERIOR<br />
La unidad exterior, a instalar en la pared, está formada por una<br />
estructura de chapa de acero galvanizada y pintada. En el interior se ha<br />
instalado un compresor de tipo hermético junto con un ventilador axial<br />
equilibrado estática y dinámicamente para garantizar la máxima<br />
silenciosidad de funcionamiento.<br />
Completan la unidad la batería de intercambio térmico con una amplia<br />
superficie, el órgano de laminación, la válvula de inversión de ciclo para<br />
las versiones en bomba de calor, las conexiones avellanadas con grifo,<br />
los condensadores eléctricos para compresor y ventilador y el tablero<br />
de bornes para las conexiones eléctricas con la unidad interior.<br />
I.4.3<br />
MANDO A DISTANCIA<br />
El mando a distancia permite fijar y visualizar todos los parámetros de<br />
funcionamiento del climatizador, facilitando de esta manera todas las<br />
operaciones de programación.<br />
El mando a distancia se alimenta con 2 pilas R03 tamaño AAA de 1,5<br />
V.<br />
Leyenda<br />
Unidad interior<br />
1) Estructura portante<br />
2) Panel frontal<br />
3) Filtro de aire<br />
4) Rejilla de salida de aire<br />
5) Deflectores verticales<br />
6) Receptor de la señal de infrarrojos<br />
7) Señalación indicadores<br />
8) Pulsador para el funcionamiento manual<br />
9) Mando a distancia<br />
Unidad exterior<br />
10) Tubería de conexión<br />
11) Conexión eléctrica<br />
12) Grifos frigoríficos<br />
13) Rejilla de salida de aire<br />
IMPORTANTE<br />
Se aconseja probar el funcionamiento del mando a<br />
distancia para determinar la zona de recepción.<br />
67
I.5 DESCRIPCIÓN DEL MANDO A DISTANCIA Y<br />
SUS FUNCIONES N° TECLA FUNCIÓN DESCRIPCIÓN<br />
Fig. 1<br />
1 /<br />
2 /<br />
3<br />
4<br />
5<br />
6<br />
7<br />
8<br />
9<br />
10<br />
11<br />
Emisor de<br />
señales<br />
Display de<br />
cristales<br />
líquidos<br />
Encendido/<br />
apagado<br />
Selección del<br />
programa de<br />
funcionamiento<br />
Programación<br />
de la<br />
temperatura<br />
Programación<br />
de la<br />
velocidad del<br />
ventilador<br />
Programación<br />
de la posición<br />
del deflector<br />
Selector de<br />
deflector<br />
motorizado<br />
Funcionamiento<br />
económico<br />
(excluido<br />
INVERTER)<br />
Programación<br />
de<br />
encendido/apa<br />
gado con timer<br />
Programación<br />
horarios<br />
12 Confirmación<br />
13<br />
14<br />
15<br />
16<br />
Regulación del<br />
reloj<br />
Bloqueo del<br />
mando a<br />
distancia<br />
Restablecimie<br />
nto del mando<br />
a distancia<br />
Cancelación<br />
del timer<br />
SECCIÓN I: USUARIO<br />
Transmite las señales infrarrojas<br />
al receptor de la unidad interior<br />
Indica los estados y los modos<br />
de funcionamiento del<br />
climatizador<br />
Permite encender y apagar el<br />
climatizador. Apretar la tecla<br />
para poner en marcha el<br />
climatizador. Apretar de nuevo<br />
la tecla para parar el<br />
climatizador.<br />
Permite seleccionar el tipo de<br />
funcionamiento deseado<br />
(AUTO, COOL, DRY, HEAT,<br />
FAN)<br />
Estas teclas permiten programar<br />
la temperatura ambiente<br />
deseada.<br />
la temperatura deseada se<br />
suba hasta 30ºC<br />
la temperatura deseada se<br />
baja hasta 17ºC<br />
Cada presión corresponde a una<br />
variación de 1ºC<br />
Apretar esta tecla para<br />
seleccionar la velocidad del<br />
ventilador. Cuando se<br />
selecciona AUTO la velocidad<br />
del ventilador se regula<br />
automáticamente dependiendo<br />
de la temperatura del ambiente.<br />
Se puede seleccionar incluso<br />
manualmente la velocidad del<br />
ventilador eligiendo entre tres<br />
regulaciones: LOW = MÍNIMA;<br />
MED = MEDIA; HIGH =<br />
MÁXIMA<br />
Permite seleccionar el ángulo de<br />
inclinación del deflector<br />
Esta tecla permite que el<br />
deflector oscile de manera<br />
constante<br />
Selecciona el control automático<br />
de la temperatura y de la<br />
velocidad el ventilador de<br />
manera que no provoca<br />
sensaciones de frío excesivo<br />
(funcionamiento en<br />
refrigeración) o de calor<br />
excesivo (funcionamiento en<br />
calefacción)<br />
Apretar estas teclas para<br />
preparar el encendido/apagado<br />
de la unidad con timer<br />
Permite programar el horario del<br />
reloj y de los timer<br />
Apretar esta tecla para confirmar<br />
los horarios elegidos<br />
Apretando esta tecla durante<br />
varios segundos se permite la<br />
regulación del reloj<br />
Permite bloquear las funciones<br />
del mando a distancia<br />
Apretar este pulsador para<br />
restablecer las programaciones<br />
del mando a distancia<br />
Apretar esta tecla para anular el<br />
funcionamiento con timer<br />
68
I.5.1<br />
NOMBRES Y FUNCIONES DE LOS<br />
INDICADORES EN EL DISPLAY<br />
I.6 USO DEL MANDO A DISTANCIA<br />
SECCIÓN I: USUARIO<br />
El mando a distancia utiliza dos pilas alcalinas de 1,5 V del tipo RO3<br />
tamaño AAA (incluidas en el suministro).<br />
Para introducir las pilas, sacar completamente la tapa del mando a<br />
distancia haciendo deslizar la parte inferior. Introducir las pilas en el<br />
relativo alojamiento respetando las polaridades indicadas. Volver a<br />
colocar la tapa y seleccionar las funciones deseada. Debe hacerse la<br />
misma operación cuando se cambien la pilas con otras nuevas. La<br />
duración media de las pilas es de aproximadamente un año.<br />
1) Indicador de transmisión<br />
Aparece cada vez que se transmite una señal a la unidad interior.<br />
2) Visualización del programa de funcionamiento (MODE)<br />
Indica el tipo de funcionamiento elegido.<br />
3) Visualización ON/OFF<br />
Indica que la unidad está en funcionamiento.<br />
4) Visualización de la temperatura (TEMP)<br />
Indica la temperatura programada (de 17 °C a 30 °C). Cuando e elige el<br />
programa de funcionamiento FAN no se muestra ninguna temperatura.<br />
5) Visualización del reloj<br />
Siempre está activa, indica la hora actual.<br />
6) Visualización del timer (TIMER ON)<br />
Si se pulsa la tecla TIMER ON se muestra el horario de encendido con<br />
timer.<br />
7) Visualización del timer (TIMER OFF)<br />
Si se pulsa la tecla TIMER OFF se muestra el horario de apagado con<br />
timer.<br />
8) Visualización del bloqueo<br />
Indica que el mando a distancia está bloqueado<br />
9) Visualización ECONO<br />
Indica que la función ECONOMIC RUNNING está activa.<br />
10) Visualización de la velocidad del ventilador (FAN)<br />
Indica la velocidad el ventilador seleccionada. Puede visualizarse<br />
AUTO o uno de los tres niveles de velocidad: MÍNIMA (low), MEDIA<br />
(med), MÁXIMA (high).<br />
El mando a distancia está siempre con el display encendido.<br />
Quitar las pilas del mando a distancia si se prevé no utilizarlo durante<br />
largos periodos.<br />
El display del mando a distancia muestre siempre el horario<br />
independientemente del hecho que el climatizador esté encendido o<br />
apagado.<br />
Dirigir el mando a distancia hacia el receptor del climatizador mientras<br />
se efectúan las programaciones (excepto durante la programación del<br />
reloj).<br />
Si las señales se reciben correctamente el climatizador emitirá una<br />
señal acústica “beep”.<br />
El mando a distancia puede transmitir hasta una distancia de unos 8<br />
metros del receptor.<br />
Evitar la exposición del mando a distancia a humedad excesiva, a la luz<br />
solar directa o a otras fuentes de calor, a los golpes. Proteger el mando<br />
a distancia de salpicaduras de agua o de otros fluidos.<br />
Si el receptor de rayos infrarrojos de la unidad interior se expone a la<br />
luz solar directa o a luz solar intensa de una lámpara fluorescente con<br />
encendido electrónico, el climatizador puede presentar anomalías de<br />
funcionamiento o no funcionar.<br />
La utilización de otros mandos a distancia cerca o en el mismo<br />
ambiente en el que está instalada la unidad puede influir el<br />
funcionamiento regular del climatizador. evitar dirigir el transmisor de<br />
dichos mandos a distancia hacia el receptor del climatizador.<br />
69
SECCIÓN I: USUARIO<br />
I.6.1<br />
PROGRAMACIÓN DEL RELOJ<br />
Cuando se introducen las pilas en el mando a distancia, el indicador<br />
horario muestra 0:00 parpadeante.<br />
Nota: durante la programación del reloj no dirigir el mando a distancia<br />
hacia el climatizador.<br />
Se aconseja regular el reloj en el mando a distancia antes de poner en<br />
marcha el climatizador; para la regulación operar de la siguiente<br />
manera (ref. Fig.1):<br />
apretar la tecla TIME ADJUST hasta<br />
alcanzar la hora deseada<br />
pulsar OK para confirmar la<br />
selección (no dirigir el mando a<br />
distancia hacia la unidad)<br />
Para regular nuevamente el horario o efectuar una nueva<br />
programación de la siguiente manera (ref. Fig. 1):<br />
apretar la tecla CLOCK durante más<br />
de tres segundos<br />
Con la elección del programa automático AUTO el climatizador puede<br />
operar en REFRIGERACIÓN, en VENTILACIÓN y en CALEFACCIÓN<br />
en base a la diferencia de temperatura ambiente y la temperatura<br />
seleccionada en el mando a distancia.<br />
El ventilador, cualquiera que sea la diferencia entre la temperatura<br />
ambiente y la temperatura seleccionada, siempre está en<br />
funcionamiento.<br />
Cuando se elige el programa de refrigeración COOL, el climatizador<br />
funciona con punto de consigna de temperatura libre, bajando la<br />
temperatura en el ambiente.<br />
Cuando se elige el programa de deshumidificación DRY, el climatizador<br />
funciona a intervalos de 4-6 minutos, con punto de consigna de<br />
temperatura libre, bajando de esta manera progresivamente la<br />
temperatura y la humedad en el ambiente. En el programa de<br />
deshumidificación DRY la tecla FAN SPEED no se utiliza.<br />
Cuando el climatizador funciona en calefacción HEAT, el climatizador<br />
funciona con punto de consigna libre, subiendo la temperatura en el<br />
ambiente. Con condiciones de aire exterior de baja temperatura y alto<br />
porcentaje de humedad relativa, en el intercambiador exterior se forma<br />
escarcha que debe eliminarse; la tarjeta microprocesada, en base a un<br />
ciclo definido, efectúa esta operación bloqueando la fase de calefacción<br />
durante intervalos de tiempo que varía de 6 a minutos. Esta operación<br />
se indica con el led PRE-DEF.<br />
Cuando se elige el programa de ventilación FAN, el climatizador<br />
funciona sin punto de consigna de temperatura, ventilando el aire del<br />
ambiente.<br />
apretar la tecla TIME ADJUST hasta<br />
alcanzar la hora deseada<br />
pulsar OK para confirmar la<br />
selección (no dirigir el mando a<br />
distancia hacia la unidad)<br />
I.6.4<br />
FUNCIÓN ECONOMIC RUNNING<br />
Con la unidad encendida, apretando esta tecla en<br />
los modos AUTO, COOL, HEAT, el climatizador<br />
varía en las dos horas sucesivas la temperatura<br />
fijada, en funcionamiento COOL +2°C, en<br />
funcionamiento HEAT -2°C, para después<br />
mantenerla durante todo el tiempo de<br />
funcionamiento, obteniendo un mayor confort y un<br />
ahorro energético.<br />
I.6.2<br />
ENCENDIDO Y APAGADO DE LA UNIDAD<br />
I.6.4.1<br />
FUNCIONAMIENTO DE EMERGENCIA<br />
Pulsando la tecla ON/OFF se puede encender o apagar<br />
la unidad.<br />
En el paso de ON a OFF se interrumpe cualquier modo de<br />
funcionamiento, se cancelan las temporizaciones en curso, se<br />
memoriza el modo de funcionamiento del aparato y del ventilador, la<br />
posición del deflector y el valor de temperatura fijado.<br />
En el paso de OFF a ON se restablece automáticamente todos los<br />
modos de funcionamiento memorizados antes del apagado.<br />
Con la unidad encendido en el display aparece la<br />
indicación de unidad encendida.<br />
La presencia de este símbolo en el display indica que<br />
el mando a distancia se está comunicando con la<br />
unidad.<br />
Cada vez que el compresor de la unidad exterior se para, deben<br />
transcurrir al menos 3 minutos antes de un nuevo inicio. Este periodo<br />
de tiempo sirve para proteger el compresor y no puede modificarse.<br />
I.6.3<br />
PROGRAMACIÓN DEL MODO DE<br />
FUNCIONAMIENTO.<br />
Pulsando varias veces la tecla Mode se puede cambiar<br />
el modo de funcionamiento de la unidad. En el display<br />
aparece la indicación del modo de funcionamiento<br />
seleccionado.<br />
AUTO: funcionamiento completamente automático<br />
COOL: función refrigeración<br />
DRY: función deshumidificación<br />
HEAT: función calefacción<br />
FAN : funcionamiento sólo ventilación<br />
Pulsador de emergencia<br />
El funcionamiento de emergencia puede utilizarse cuando el mando a<br />
distancia no está disponible o tiene las pilas descargadas. Usando el<br />
pulsador de emergencia, situado en la unidad interior, el climatizador<br />
podrá funcionar igualmente.<br />
Si el pulsador de funcionamiento de emergencia se pulsa una primera<br />
vez, el climatizador funciona en modo AUTO.<br />
Si se pulsa una segunda vez el climatizador funcionará en refrigeración<br />
según este programa.<br />
• temperatura programada 24 °C<br />
• velocidad del ventilador AUTOMÁTICA<br />
Apretando el pulsador de emergencia una tercera vez el climatizador se<br />
para.<br />
I.6.5<br />
PROGRAMACIÓN DE LA TEMPERATURA<br />
DESEADA<br />
Apretando estas teclas en los modos AUTO, COOL,<br />
DRY, HEAT se puede aumentar o disminuir el valor<br />
de la temperatura deseada de 17°C a 30°C. El<br />
display mostrará el valor de la temperatura<br />
seleccionado.<br />
70
SECCIÓN I: USUARIO<br />
I.6.6<br />
PROGRAMACIÓN DEL DEFLECTOR<br />
Para obtener una distribución óptima del aire regular la posición del<br />
deflector motorizado y de las aletas verticales teniendo cuidado de que<br />
el flujo del aire no se dirija directamente a las personas.<br />
Las aletas verticales deben estar orientadas manualmente antes de<br />
poner en funcionamiento el climatizador, mientras que para el deflector<br />
motorizado se deben efectuar estas operaciones:<br />
Apretando varias veces la tecla AIR DIRECTION se<br />
puede modificar la posición del deflector.<br />
Apretando la tecla SWING se puede activar la<br />
oscilación continua del deflector.<br />
ATENCIÓN:<br />
Para poder transmitir automáticamente las programaciones del timer en<br />
el horario fijado, colocar el mando a distancia cerca de la unidad<br />
interior. La función TIMER no es repetitiva y debe fijarse cada vez que<br />
sea utilizada.<br />
Cuando se selecciona la función Timer ON-OFF, el encendido de la<br />
unidad podrá venir con un ligero retardo respecto el horario del reloj<br />
programado, es decir, este comportamiento es del todo normal y<br />
coincide con el correcto funcionamiento de la unidad.<br />
I.6.9<br />
BLOQUEO DEL TECLADO<br />
Apretando con un objeto puntiagudo la<br />
tecla BLOQUEO se puede inhibir<br />
completamente el teclado del mando a<br />
distancia, evitando usos no deseados del<br />
mismo (niños, etc.). El display mostrará el<br />
símbolo mostrado al lado. Para quitar el<br />
bloqueo apretar de nuevo con un objeto<br />
puntiagudo la tecla BLOQUEO.<br />
I.6.10<br />
RESTABLECIMIENTO DEL MANDO A<br />
DISTANCIA<br />
Apretando con un objeto puntiagudo la tecla<br />
RESET se puede poner el mando a distancia en el<br />
estado original de fábrica.<br />
PELIGRO<br />
Mover manualmente el deflector motorizado cuando<br />
el climatizador está encendido podría causar<br />
problemas de funcionamiento o dañar el sistema de<br />
regulación.<br />
I.7 DESCRIPTION DE LOS INDICADORES<br />
Los indicadores presentes en la parte derecha de la unidad sirven para<br />
indicar el estado de funcionamiento de la máquina.<br />
I.6.7<br />
PROGRAMACIÓN DE LA VENTILACIÓN<br />
Apretando varias veces la tecla FAN SPEED se<br />
puede programar la velocidad del ventilador entre<br />
las tres disponibles o activar la función AUTO.<br />
En el display aparece el modo de funcionamiento.<br />
Indicatores<br />
Significado<br />
Indica que la unidad está en funcionamiento,<br />
parpadea después de la interrupción momentánea<br />
de la alimentación eléctrica<br />
indica que la unidad está funcionando en modo<br />
ECONOMIC RUNNING<br />
AUTO: funcionamiento completamente automático<br />
LOW: funcionamiento velocidad mínima<br />
MED: funcionamiento velocidad media<br />
HIGH: funcionamiento velocidad máxima<br />
indica que está conectado el timer<br />
I.6.8<br />
PROGRAMACIÓN DE LOS TIMER<br />
Pulsando estas teclas se puede programar el<br />
horario de encendido y/o el horario de apagado de<br />
la unidad.<br />
El display muestra las indicaciones TIMER ON y/o<br />
TIMER OFF con parte del reloj parpadeante.<br />
indica que la unidad está en fase de desescarche<br />
o en la fase Anti Cold Air<br />
indica que la unidad está en funcionamiento en<br />
modo AUTO<br />
Horario de encendido<br />
indica la temperatura programada<br />
TIME ADJUST<br />
Horario de apagado<br />
Pulsando esta tecla se puede modificar el horario de<br />
encendido o apagado. Cada vez que se pulsa la<br />
tecla el horario aumenta o disminuye diez minutos.<br />
Una vez alcanzado el horario de encendido o<br />
apagado deseado, la programación debe<br />
confirmarse pulsando la tecla OK.<br />
La tecla CANCEL permite desactivar las funciones<br />
de TIMER ON y/o TIMER OFF<br />
Una vez programados los horarios de<br />
encendido y apagado, el display mostrará la<br />
hora corriente y los mensajes TIMER ON y/o<br />
TIMER OFF con los relativos horarios.<br />
I.8 PUESTA FUERA DE SERVICIO<br />
PELIGRO<br />
Usar siempre el interruptor automático general (IG)<br />
colocado para la protección de todo el equipo.<br />
Comprobar que nadie alimente accidentalmente la<br />
máquina, bloquear el interruptor automático<br />
general (IG) en posición de cero<br />
Durante los periodos prolongados de inactividad de la máquina es<br />
necesario aislar la unidad eléctricamente, abriendo el interruptor<br />
general IG de la instalación, colocado por el instalador.<br />
I.9 REACTIVACIÓN DESPUÉS DE PROLONGADA<br />
INACTIVIDAD<br />
Antes de volver a poner en marcha:<br />
• Limpiar o sustituir el filtro del aire.<br />
• Limpiar el intercambiador.<br />
• Limpiar o liberar de posibles obstrucciones el desagüe de la bandeja<br />
de recogida de condensados.<br />
Se recomienda que haga funcionar la unidad a la máxima velocidad<br />
durante un par de horas.<br />
71
SECCIÓN I: USUARIO<br />
I.10 GUÍA RÁPIDA PARA EL FUNCIONAMIENTO<br />
I.10.1<br />
FUNCIONAMIENTO AUTOMÁTICO<br />
Con la elección del programa automático AUTO el climatizador puede<br />
operar en REFRIGERACIÓN, en VENTILACIÓN y en CALEFACCIÓN<br />
en base a la diferencia de temperatura ambiente y la temperatura<br />
seleccionada en el mando a distancia.<br />
La unidad funcionará en Si:<br />
modo:<br />
refrigeración TA-TS > 2 °C<br />
ventilación -1 °C ≤TA-TS ≤2 °C<br />
calefacción TA-TS < -1 °C<br />
TA = temperatura ambiente TS = temperatura seleccionada<br />
El ventilador, cualquiera que sea la diferencia entre la temperatura<br />
ambiente y la temperatura seleccionada, siempre está en<br />
funcionamiento.<br />
I.10.2<br />
FUNCIÓN REFRIGERACIÓN<br />
Para programar el funcionamiento en refrigeración COOL seguir los<br />
siguientes pasos:<br />
• seleccionar el programa refrigeración, usando la tecla MODE (1),<br />
hasta que en el display aparezca el mensaje COOL;<br />
• regular la temperatura deseada usando las teclas TEMP (2) el<br />
display indica valores de 17 °C a 30 °C;<br />
• regular la velocidad de ventilación usando la tecla FAN SPEED (3),<br />
eligiendo entre AUTO y las otras velocidades HIGH-MED-LOW;<br />
• dirigir en mando a distancia hacia el receptor de la unidad, y pulsar<br />
la tecla de encendido ON/OFF (4);<br />
• regular el flujo de aire según las necesidades utilizando la tecla<br />
SWING (5) o AIR DIRECTION (6);<br />
Una vez hechas las regulaciones, éstas se volverán a proponer cuando<br />
se vuelva a encender el climatizador.<br />
Cada señal transmitida por el mando a distancia, si se recibe, es<br />
confirmada con un sonido “beep”.<br />
El indicador presente en la unidad interna se ilumina,<br />
indicando el funcionamiento de la unidad.<br />
Cada vez que el compresor de la unidad exterior se para, deben<br />
transcurrir al menos 3 minutos antes de un nuevo inicio. Este periodo<br />
de tiempo sirve para proteger el compresor y no puede modificarse.<br />
I.10.3<br />
FUNCIÓN DE DESHUMIDIFICACIÓN<br />
Para programar el funcionamiento en deshumidificación DRY seguir los<br />
siguientes pasos:<br />
• seleccionar el programa deshumidificación, usando la tecla MODE<br />
(1), hasta que en el display aparezca el mensaje DRY;<br />
• regular la temperatura deseada usando las teclas TEMP (2) el<br />
display indica valores de 17 °C a 30 °C;<br />
• dirigir en mando a distancia hacia el receptor de la unidad, y pulsar<br />
la tecla de encendido ON/OFF (4);<br />
• regular el flujo de aire según las necesidades utilizando la tecla<br />
SWING (5) o AIR DIRECTION (6);<br />
Una vez hechas las regulaciones, éstas se volverán a proponer cuando<br />
se vuelva a encender el climatizador.<br />
Cada señal transmitida por el mando a distancia, si se recibe, es<br />
confirmada con un sonido “beep”.<br />
Cuando se elige el programa de deshumidificación DRY, el climatizador<br />
funciona a intervalos de 4-6 minutos, con punto de consigna de<br />
temperatura libre, bajando de esta manera progresivamente la<br />
temperatura y la humedad en el ambiente.<br />
En el programa de deshumidificación DRY la tecla FAN SPEED no se<br />
utiliza.<br />
Cada vez que el compresor de la unidad exterior se para, deben<br />
transcurrir al menos 3 minutos antes de un nuevo inicio. Este periodo<br />
de tiempo sirve para proteger el compresor y no puede modificarse.<br />
I.10.4<br />
FUNCIÓN CALEFACCIÓN<br />
Para programar el funcionamiento en calefacción HEAT seguir los<br />
siguientes pasos:<br />
• seleccionar el programa calefacción, usando la tecla MODE (1),<br />
hasta que en el display aparezca el mensaje HEAT;<br />
• regular la temperatura deseada apretando las teclas TEMP (2): el<br />
display indica valores de 17°C a 30°C;<br />
• regular la velocidad de ventilación usando la tecla FAN SPEED (3),<br />
eligiendo entre AUTO y las otras velocidades HIGH-MED-LOW;<br />
• dirigir en mando a distancia hacia el receptor de la unidad, y pulsar<br />
la tecla de encendido ON/OFF (4);<br />
• regular el flujo de aire según las necesidades utilizando la tecla<br />
SWING (5) o AIR DIRECTION (6);<br />
Una vez hechas las regulaciones, éstas se volverán a proponer cuando<br />
se vuelva a encender el climatizador.<br />
Cada señal transmitida por el mando a distancia, si se recibe, es<br />
confirmada con un sonido “beep”.<br />
El indicador presente en la unidad interna se ilumina,<br />
indicando el funcionamiento de la unidad.<br />
Cuando el climatizador funciona en calefacción HEAT, con condiciones<br />
de aire exterior de baja temperatura y alto porcentaje de humedad<br />
relativa, en el intercambiador exterior se forma escarcha que debe<br />
eliminarse; la tarjeta microprocesada, en base a un ciclo definido,<br />
efectúa esta operación bloqueando la fase de calefacción durante<br />
intervalos de tiempo que varía de 6 a minutos.<br />
El indicador presente en la unidad interna se ilumina,<br />
indicando esta operación.<br />
Cada vez que el compresor de la unidad exterior se para, deben<br />
transcurrir al menos 3 minutos antes de un nuevo inicio. Este periodo<br />
de tiempo sirve para proteger el compresor y no puede modificarse.<br />
I.10.5<br />
FUNCIÓN VENTILACIÓN<br />
Para programar el funcionamiento en ventilación FAN seguir los<br />
siguientes pasos:<br />
• seleccionar el programa ventilación, usando la tecla MODE (1),<br />
hasta que en el display aparezca el mensaje FAN;<br />
• regular la velocidad de ventilación usando la tecla FAN SPEED (3),<br />
eligiendo entre AUTO y las otras velocidades HIGH-MED-LOW;<br />
• dirigir en mando a distancia hacia el receptor de la unidad, y pulsar<br />
la tecla de encendido ON/OFF (4);<br />
• regular el flujo de aire según las necesidades utilizando la tecla<br />
SWING (5) o AIR DIRECTION (6);<br />
Una vez hechas las regulaciones, éstas se volverán a proponer cuando<br />
se vuelva a encender el climatizador.<br />
Cada señal transmitida por el mando a distancia, si se recibe, es<br />
confirmada con un sonido “beep”.<br />
El indicador presente en la unidad interna se ilumina,<br />
indicando el funcionamiento de la unidad.<br />
72
SECCIÓN I: USUARIO<br />
I.11 MANTENIMIENTO RUTINARIO A CARGO DEL<br />
USUARIO<br />
PELIGRO<br />
Usar siempre el interruptor automático general (IG)<br />
colocado como protección de la instalación antes<br />
de efectuar cualquier operación de mantenimiento<br />
aunque ésta sea sólo de revisión. Comprobar que<br />
nadie alimente accidentalmente la máquina,<br />
bloquear el interruptor automático general (IG) en<br />
posición de cero<br />
I.11.1<br />
LIMPIEZA DE LA UNIDAD INTERIOR<br />
Para limpiar la unidad usar un paño suave y seco. Puede usarse un<br />
paño humedecido con agua fría si la unidad está muy sucia (poner<br />
atención en no utilizar paños muy mojados).<br />
No salpicar agua en las superficies del climatizador.<br />
No usar productos químicos, solventes o líquidos similares para limpiar<br />
las superficies del climatizador.<br />
No salpicar con insecticida o desodorantes en spray directamente en el<br />
climatizador.<br />
I.11.2<br />
LIMPIEZA DE LA UNIDAD EXTERIOR<br />
Normalmente la unidad exterior no requiere especiales operaciones de<br />
limpieza; sólo si está instalada en zona con mucho polvo o en<br />
presencia de agentes contaminantes, el intercambiador exterior debe<br />
limpiarse periódicamente. en cualquier caso es conveniente que la<br />
operación sea realizada por personal cualificado.<br />
Al principio de cada estación, antes de poner en marcha el<br />
climatizador, controlar que nada impida el flujo del aire en la unidad<br />
exterior tanto en aspiración como en impulsión.<br />
Al final de la estación, si el climatizador debe estar parado durante<br />
largos periodos de tiempo después de haber funcionado en<br />
refrigeración se aconseja antes de apagarlo definitivamente hacerlo<br />
funcionar durante unas horas sólo en ventilación FAN para hacer que<br />
se evapore los posibles condensados que hayan quedado en la unidad<br />
interior.<br />
I.11.3<br />
LIMPIEZA DEL FILTRO DEL AIRE<br />
I.11.4<br />
LIMPIEZA DEL MANDO A DISTANCIA<br />
Para la limpieza del mando a distancia usar sólo un paño suave y<br />
seco.<br />
I.12 ADVERTENCIAS Y SUGERENCIAS<br />
La unidad no debe funcionar continuamente en el modo refrigeración<br />
en ambientes con humedad relativa elevada (superior al 80%). En<br />
estas condiciones en la boca de impulsión del aire podría formarse<br />
condensación que podría dañar los objetos situados debajo, el suelo y<br />
la pared en la que está fijada la unidad.<br />
Evite que se obstruya el flujo del aire o usar la unidad como plano de<br />
apoyo.<br />
PELIGRO<br />
Prestar atención durante el desmontaje del filtro,<br />
las aletas del intercambiador de calor pueden<br />
cortar.<br />
IMPORTANTE<br />
Hacer funcionar siempre la unidad con los filtros<br />
instalados.<br />
Para garantizar una correcta aspiración del aire, el filtro debe limpiarse<br />
al menos una vez al mes, o con más frecuencia si la máquina funciona<br />
en ambientes con mucho polvo. Una limpieza frecuencia supone una<br />
mejor eficiencia en el funcionamiento.<br />
Para sacar el filtro del aire subir el panel de aspiración, tirar la lengüeta<br />
central del filtro hacia abajo y sacar. Limpiar el filtro con un aspirador y<br />
eventualmente lavarlo con agua fría, teniendo cuidado de hacer que se<br />
seque a la sombra. Cuando el filtro esté limpio y seco volver a montarlo<br />
haciendo las mismas operaciones en sentido contrario. Si el filtro está<br />
dañado, debe sustituirse con un filtro original RHOSS.<br />
El uso de agua o de bombonas de spray cerca de la unidad puede<br />
causar descargas eléctricas y un mal funcionamiento.<br />
73
SECCIÓN I: USUARIO<br />
El mando a distancia no transmite la señal a la unidad si entre éste y la<br />
unidad se interpone una pared u otros objetos.<br />
No apoyar ningún objeto en la unidad exterior.<br />
I.13 ANOMALÍAS DE FUNCIONAMIENTO<br />
Anomalía<br />
El climatizador NO FUNCIONA (no se enciende)<br />
El climatizador funciona pero no ENFRÍA de manera adecuada<br />
Puede producirse situaciones que no tienen ninguna influencia en<br />
el funcionamiento regular del climatizador, como por ejemplo:<br />
• puede oírse un zumbido después de la puesta en marcha o del paro<br />
del climatizador: esto se debe al reequilibrio de las presiones del gas<br />
en el interior del circuito frigorífico;<br />
• pueden oírse crujidos temporales si el climatizador funciona con<br />
bajas temperaturas en el ambiente: se debe a las dilataciones del panel<br />
por la variación de la temperatura;<br />
• se puede difundir olores desagradables debidos a la acumulación de<br />
sustancias presentes en el aire (humo de cigarrillos, vapores de<br />
cocción de la comida, etc...) especialmente si no se airea<br />
periódicamente el ambiente;<br />
• si el climatizador funciona de manera continuada en refrigeración en<br />
el interior de un ambiente con elevada humedad relativa (superior al<br />
80%), se puede producir la formación de condensados en el deflector y<br />
en las aletas de la unidad interior, y dichos condensados pueden gotear<br />
en el suelo o en los objetos situados debajo;<br />
• en el funcionamiento en calefacción (sólo para los modelos bomba d<br />
calor), de la unidad exterior puede salir vapor durante la fase de<br />
desescarche.<br />
Actuación aconsejada<br />
comprobar que haya tensión eléctrica (encender una lámpara)<br />
comprobar que el interruptor general de la línea de alimentación del<br />
climatizador esté conectado (si el interruptor general está dotado de<br />
fusibles, controlar que éstos estén íntegros)<br />
comprobar que el mando a distancia funcione<br />
comprobar que no esté conectado el timer<br />
comprobar que se haya fijado el funcionamiento refrigeración<br />
comprobar que se haya fijado la temperatura en el mando a distancia<br />
comprobar que la velocidad del ventilador no sea demasiado baja<br />
comprobar que no haya impedimentos en la entrada o en la emisión del<br />
aire en la unidad interior y exterior<br />
comprobar que el filtro del aire esté limpio<br />
comprobar que no haya puertas o ventanas abiertas<br />
comprobar que no haya fuentes de calor anómalas (planchas, presencias<br />
de muchas personas, etc...)<br />
I.14 INSTRUCCIONES PARA EL DESGUACE DE LA<br />
UNIDAD Y LA ELIMINACIÓN DE SUSTANCIAS<br />
DAÑINAS<br />
PROTECCIÓN MEDIO AMBIENTE<br />
RHOSS S.p.A. desde siempre se preocupa de<br />
proteger el medio ambiente.<br />
Es importante que quien efectúa la eliminación de<br />
la unidad se ajuste meticulosamente a las<br />
indicaciones siguientes<br />
El desguace de la unidad debe ser efectuado sólo por una empresa<br />
autorizada para el retiro de productos o máquinas obsoletas. En su<br />
conjunto, la máquina está construida con materiales tratables como<br />
MPS (materia prima secundaria), con la obligación de respetar las<br />
siguientes instrucciones:<br />
• se debe quitar el aceite contenido en el compresor, éste debe ser<br />
recuperado y entregado a un centro autorizado para retirar el aceite<br />
usado;<br />
• el fluido refrigerante no se puede descargar a la atmósfera. Su<br />
recuperación, mediante equipos homologados, debe prever la<br />
utilización de bombonas adecuadas y la entrega a un centro autorizado<br />
para su recogida;<br />
• el filtro deshidratador y los componentes electrónicos<br />
(condensadores electrolíticos) se deben considerar como desechos<br />
especiales y como tales deben ser entregados a un centro autorizado<br />
para su recogida;<br />
el material de aislamiento de los tubos de goma poliuretánica<br />
expandida debe ser quitado y tratado como desecho equivalente a las<br />
basuras urbanas.<br />
74
SECCIÓN II: INSTALACIÓN Y MANTENIMIENTO<br />
II<br />
SECCIÓN II: INSTALACIÓN Y<br />
MANTENIMIENTO<br />
II.1.3.1<br />
Unidad interior<br />
II.1.1<br />
TRANSPORTE Y DESPLAZAMIENTO<br />
PELIGRO<br />
El desplazamiento debe ser efectuado con la<br />
máxima atención y a cargo de personal cualificado<br />
y preparado para efectuar dichas operaciones. Un<br />
desplazamiento incorrecto puede ser causa de<br />
daños a las personas y a la unidad.<br />
En el desplazamiento de los climatizadores tener cuidado de evitar<br />
golpes o caídas que podrían dañarlos.<br />
Las unidades se envían con un embalaje estándar formado por trozos<br />
de poliestirol expandido y cartón. No pisar el embalaje. No dejar los<br />
embalajes sueltos durante el transporte.<br />
La elevación y desplazamiento<br />
deben ser efectuados por al menos 2<br />
personas.<br />
La máquina embalada puede ser desplazada/elevada utilizando las<br />
ranuras presentes en el embalaje. El desplazamiento de la unidad debe<br />
efectuarse con especial atención para evitar daños a la estructura<br />
exterior y a las partes internas mecánicas y eléctricas. La elevación de<br />
la unidad no embalada se efectúa utilizando las respectivas asas. No<br />
girar nunca el embalaje.<br />
PROTECCIÓN MEDIO AMBIENTE<br />
Eliminar los materiales del embalaje conforme a la<br />
legislación nacional o local vigente en el país de<br />
utilización.<br />
PELIGRO<br />
No dejar los embalajes al alcance de los niños.<br />
Instalar la unidad de manera que el flujo de aire no llegue directamente<br />
a las personas.<br />
II.1.2<br />
ALMACENAMIENTO<br />
Los climatizadores deben almacenarse en ambientes que impidan la<br />
exposición a la intemperie, con los embalajes cerrados.<br />
Instalar la unidad lejos de fuentes de calor y de cualquier elemento que<br />
pueda poner en peligro el flujo de aire regular.<br />
Poner atención al sobreponerlas, controlando en el embalaje la<br />
posición de la flecha para conocer el número de máquinas que se<br />
pueden apilar.<br />
II.1.3<br />
ESPACIOS TÉCNICOS NECESARIOS<br />
Las unidades deben fijarse respetando los espacios técnicos de<br />
colocación indicados a continuación.<br />
75
SECCIÓN II: INSTALACIÓN Y MANTENIMIENTO<br />
Deben tomarse medidas especiales si la unidad exterior se instala en<br />
lugares con un elevado riesgo sísmico o en situaciones especiales. En<br />
estos casos es necesario consultar con técnicos especializados.<br />
II.2.2<br />
DESNIVEL MÁXIMO ENTRE LAS UNIDADES<br />
El desnivel máximo permitido entre las unidades interna y externa es<br />
de +/- 5m.<br />
Cuando el desnivel entre la unidad interna y la externa supera los 3<br />
metros y la unidad externa se ha colocado en un lugar más alto que la<br />
interna, se aconseja que coloque un sifón en la línea del gas para<br />
facilitar el retorno al compresor del aceite lubricante (Fig. 2).<br />
La unidad no debe funcionar continuamente en el modo refrigeración<br />
en ambientes con humedad relativa elevada (superior al 80%). En<br />
estas condiciones en la boca de impulsión del aire podría formarse<br />
condensación que podría dañar los objetos situados debajo, el suelo y<br />
la pared en la que está fijada la unidad.<br />
II.1.3.2 Unidad exterior<br />
La unidad exterior se instala levantada del suelo, de manera que no se<br />
pueda acceder a ella fácilmente, en bridas adecuadas para sostener el<br />
peso de la unidad y de los tubos de conexión.<br />
Respetar los espacios técnicos que a continuación se muestran.<br />
II.2<br />
INSTALACIÓN<br />
PELIGRO<br />
La instalación debe ser efectuada única y<br />
exclusivamente por técnicos expertos y habilitados<br />
para operar con productos para la climatización y la<br />
refrigeración.<br />
Una instalación no correcta puede causar un<br />
funcionamiento anómalo de la unidad y comportar<br />
fuertes reducciones de rendimiento.<br />
Es obligatorio para el personal aplicar las<br />
normativas locales y nacionales vigentes en el<br />
momento de la puesta en marcha de la máquina.<br />
A continuación se incluyen las indicaciones para efectuar una correcta<br />
instalación de los climatizadores.<br />
En cualquier caso, se confía en la experiencia del instalador para<br />
perfeccionar las operaciones según las necesidades específicas.<br />
II.2.1<br />
REDUCCIÓN DE LOS RUIDOS Y DE LAS<br />
VIBRACIONES<br />
Una correcta instalación prevé medidas para reducir las molestias<br />
acústicas derivadas del funcionamiento normal de la unidad exterior.<br />
Antes de instalar la unidad informarse en las autoridades locales sobre<br />
la existencia de limitaciones específicas en términos de ruido ambiental<br />
permitido. La unidad exterior no debería colocarse nunca en áreas<br />
situadas al lado de locales que normalmente están habitados (oficinas,<br />
comedores, habitaciones, etc...). Se deberá prestar especial atención a<br />
instalaciones en proximidad de locales frecuentados por personas<br />
enfermas o personas con minusvalías.<br />
La utilización de los kit de soporte antivibrantes para la unidad exterior<br />
garantiza una adecuada amortiguación de las vibraciones transmitidas<br />
al edificio por la unidad.<br />
76<br />
II.2.3<br />
INSTALACIÓN DE LA UNIDAD INTERIOR<br />
La unidad interna puede instalarse sólo en la pared.<br />
Respeten los espacios técnicos mínimos indicados.<br />
Antes de instalar la unidad es necesario efectuar algunas<br />
comprobaciones preliminares que consisten en asegurarse de que:<br />
• la pared donde debe colocarse el climatizador sea sólida y<br />
suficientemente plana para tener un buen punto de apoyo;<br />
• se puedan respetar los espacios técnicos mínimos para la<br />
instalación;<br />
• la unidad no se cubra con cortinas u otros objetos que molesten el<br />
paso del aire en aspiración o en expulsión;<br />
• la unidad, y en consecuencia el receptor (de señales por infrarrojos)<br />
no esté expuesta a la luz del sol directa o a lámparas electrónicas, que<br />
podrían poner en peligro el buen funcionamiento;<br />
• la unidad no esté instalada a una altura del suelo superior a 2,7<br />
metros para evitar efectos de estratificación del aire durante el<br />
funcionamiento.<br />
Para el montaje siga los siguientes pasos:<br />
• fijar la plantilla de papel que se adjunta en la pared elegida.<br />
• utilizando un taladro con una broca pequeña, marque los siguientes<br />
centros: agujero para el paso de las tuberías y los cables eléctricos;<br />
agujeros para los tornillos de expansión para la fijación de la placa de<br />
soporte (mínimo 4, si es necesario haga más).<br />
• haga el agujero para el paso de las tuberías y de los cables<br />
eléctricos (Fig. 3);<br />
Lado interno<br />
pared<br />
Lado interno<br />
pared<br />
Lado externo<br />
pared<br />
Lado externo<br />
pared<br />
Fig. 2<br />
Fig. 3<br />
• haga los agujeros para los tornillos de expansión;<br />
• quitar la placa de soporte enganchada a la unidad;<br />
• fijar la placa de soporte a la pared con los tornillos de expansión y<br />
asegúrese de que sea perfectamente horizontal;<br />
• destornillar los tornillos que sujetan el envoltorio de la unidad;<br />
• plegar los tubos de cobre en la parte posterior de la unidad según<br />
las necesidades específicas (Fig.4);<br />
IMPORTANTE<br />
Los tubos de cobre deben plegarse con la máxima<br />
cautela de manera de evitar posibles fisuras.
SECCIÓN II: INSTALACIÓN Y MANTENIMIENTO<br />
Izquierda<br />
Utilizar las bridas<br />
de soporte.<br />
Centro<br />
posterior<br />
Izquierda<br />
posterior<br />
Hacia abajo<br />
izquierda<br />
Fig. 7<br />
Derecha<br />
Derecha<br />
posterior<br />
• efectuar las conexiones frigoríficas, eléctricas y del desagüe de<br />
condensados tal y como se especifica en los párrafos “Conexiones<br />
frigoríficas” y “Conexiones eléctricas”;<br />
• antes de volver a montar el envoltorio compruebe el funcionamiento<br />
del desagüe de condensados.<br />
II.2.4<br />
Hacia abajo<br />
derecha<br />
INSTALACIÓN DE LA UNIDAD EXTERIOR<br />
Fig. 4<br />
Enganche la unidad a la placa de soporte<br />
teniendo cuidado de hacer que se<br />
deslicen el agujero de la pared las líneas<br />
frigoríficas, los cables eléctricos y el tubo<br />
de descarga del líquido de condensación.<br />
Fig 5<br />
La unidad exterior debe instalarse al aire libre, respetando los espacios<br />
técnicos mínimos para permitir el paso del aire y la ejecución de<br />
posibles intervenciones de mantenimiento.<br />
En los modelos con bomba de calor, durante la fase de desescarche<br />
del funcionamiento en calefacción, se produce agua, haciendo<br />
necesaria su recogida y la eliminación hacia el desagüe.<br />
II.2.5<br />
CONEXIONES FRIGORÍFICAS<br />
IMPORTANTE<br />
La ejecución de las conexiones frigoríficas debe ser<br />
efectuada por personal especializado y respetando<br />
las leyes y regulaciones vigentes en el lugar de<br />
instalación.<br />
Una conexión incorrecta exime a la empresa<br />
RHOSS S.p.A. de toda responsabilidad por daños a<br />
las personas y a las cosas.<br />
Para realizar las líneas frigoríficas, deben utilizarse tubos de cobre para<br />
instalaciones frigoríficas, respetando las indicaciones relativas a las<br />
longitudes y los diámetros aconsejados en las páginas de los anexos.<br />
Asegurarse también que en el interior de las tuberías no haya<br />
impurezas ni humedad, que son extremadamente dañinas para el<br />
circuito frigorífico. Además, las líneas frigoríficas deben ser aisladas<br />
separadamente con revestimiento de material expandido de células<br />
cerradas.<br />
Para el paso de los tubos a través de las paredes, basta un agujero de<br />
65 mm.<br />
Para la preparación de los tubos siga los siguientes pasos:<br />
Cortar los tubos de conexión a la distancia preestablecida, dejando un<br />
cierto margen de seguridad y considerando las indicaciones ilustradas<br />
en la Fig. 8.<br />
Correcto<br />
No correcto<br />
Garantizar la correcta<br />
nivelación de la unidad.<br />
Fig. 6<br />
La consistencia del suelo o de la pared debe ser adecuada para el<br />
peso de la unidad y no permitir la transmisión de ruidos o vibraciones.<br />
Es necesario poner especial atención en elegir dónde se coloca la<br />
unidad, para que el flujo del aire no cause molestias a los vecinos.<br />
Fig. 8<br />
Eliminar las rebabas producto del corte manteniendo la embocadura<br />
del tubo hacia abajo al efectuar esta operación.<br />
Revestir las líneas frigoríficas con<br />
adecuado aislamiento y colocar las bocas<br />
previamente retiradas de las conexiones de<br />
las unidades.<br />
Fig. 9<br />
77
SECCIÓN II: INSTALACIÓN Y MANTENIMIENTO<br />
Para una correcta ejecución del embridado utilizar una embridadora de<br />
tubos de tipo universal, siguiendo las indicaciones ilustradas en la Fig.<br />
10, quitando a continuación las rebabas que se formen.<br />
Fig. 10<br />
1) Toma de aguja<br />
2) Capuchón de la<br />
toma de aguja<br />
3) Cabezal de<br />
roscar<br />
4) Capuchón del<br />
grifo<br />
5) Capuchón del<br />
grifo<br />
A<br />
B (mm)<br />
inch mm máx mín<br />
1/4” 6,35 8,25 8,01<br />
3/8” 9,52 12,36 11,97<br />
1/2” 12,70 15,82 15,42<br />
5/8 15,90 18,95 18,58<br />
Controlar que el tubo quede avellanado de modo uniforme, sin<br />
presentar los defectos ilustrados en la Fig 11.<br />
Correcto<br />
No correcto<br />
Fig. 11<br />
Conectar las líneas frigoríficas a las conexiones de las unidades<br />
haciendo coincidir perfectamente ambos extremos. Atornillar a mano la<br />
boca y cerrarla mediante la llave dinamométrica, respetando los valores<br />
de par que a continuación se indican:<br />
Tuerca Fuerza de apriete<br />
inch 1/4” Nm 15<br />
inch 3/8” Nm 16<br />
inch 1/2” Nm 40<br />
inch 5/8” Nm 48<br />
Conectar el tubo de desagüe de condensados a la unidad interior.<br />
Se aconseja no realizar curvas en los tubos con un radio inferior a los<br />
100 mm para no aplastar la sección de los mismos tubos.<br />
II.2.5.1<br />
PROTECCIÓN MEDIO AMBIENTE<br />
Antes de poner en marcha la unidad comprobar con<br />
un instrumento adecuado que las pérdidas de gas<br />
no sean superiores a 5g/año.<br />
Carga de refrigerante<br />
Las unidades se suministran con una carga de refrigerante que prevé<br />
una longitud de las líneas igual a 5 m. Para longitudes superiores es<br />
necesario aumentar la cantidad de refrigerante. Para los valores, ver<br />
como referencia la tabla presente en los anexos.<br />
II.2.5.2<br />
Creación del desagüe de condensados<br />
Fig. 13<br />
Para evitar que suban olores desagradables a través del tubo de<br />
desagüe de condensados, se aconseja que ponga siempre un sifón en<br />
la parte terminal del tubo en el lado exterior.<br />
El sistema de desagüe de condensados debe prever una pendiente<br />
adecuada para favorecer la salida de agua (Fig. 14).<br />
1. Llave<br />
2. Llave dinamométrica<br />
Fig. 14<br />
Fig. 12<br />
Al efectuar la conexión de las unidades se deben mantener fijas las<br />
conexiones con otra llave (Fig. 12) para evitar que el tubo sufra una<br />
torsión.<br />
Quitar el capuchón de la toma de aguja del grifo. (Fig. 13)<br />
Conectar la bomba para vacío en la toma de aguja del grifo.<br />
No abrir los grifos, el vacío debe hacerse sólo en la unidad interior y en<br />
la línea frigorífica.<br />
Hacer el vacío hasta alcanzar una presión de aproximadamente 1,3<br />
KPa (10 mmHg).<br />
Una vez efectuada esta operación y después de haber desconectado la<br />
bomba para vacío, abrir completamente los grifos, quitando los<br />
capuchones (Fig.13) y usando una llave macho hexagonal de 5 mm<br />
(suministrada con la unidad) en el cabezal de roscar (Fig. 13).<br />
Volver a poner todos los capuchones en los grifos y ajústelos.<br />
IMPORTANTE<br />
Una ejecución no conforme del desagüe de<br />
condensados provoca una pérdida de agua de la<br />
unidad interior, con los consiguientes daños a<br />
personas y/ cosas limítrofes.<br />
Una conexión incorrecta exime a la empresa<br />
RHOSS S.p.A. de toda responsabilidad por daños a<br />
las personas y a las cosas.<br />
78
II.2.6<br />
CONEXIONES ELÉCTRICAS<br />
IMPORTANTE<br />
La ejecución de las conexiones eléctricas debe ser<br />
efectuada por personal especializado y respetando<br />
las leyes y regulaciones vigentes en el lugar de<br />
instalación.<br />
Una conexión eléctrica incorrecta exime a la<br />
empresa RHOSS S.p.A. de toda responsabilidad<br />
por daños a las personas y a las cosas.<br />
PELIGRO<br />
Instalar siempre, en zona protegida y cerca de la<br />
máquina, un interruptor automático general (IG) con<br />
curva característica retrasada, de capacidad y poder<br />
de interrupción adecuados, con una distancia mínima<br />
de apertura de los contactos de 3 mm.<br />
El interruptor automático general (IG) debe<br />
colocarse antes de toda la instalación para poder<br />
interrumpir la alimentación eléctrica de la unidad<br />
principal y de todos los accesorios a ésta<br />
conectados que formen parte de toda la instalación.<br />
La conexión a tierra de la unidad es obligatoria por<br />
ley y garantiza la seguridad del usuario durante el<br />
funcionamiento de la máquina.<br />
Quitar la vaina sólo cerca de los bornes. Utilizar terminales de cables<br />
adecuados para los bornes que se están usando.<br />
Después de haber introducido los terminales de cables en el borne,<br />
ajustar los tornillos con un destornillador sin apretar demasiado: una<br />
vez concluida la operación tirar ligeramente los cables para comprobar<br />
su correcto ajuste.<br />
Utilizar el sujeta-cable presente en el interior del espacio de la tarjeta<br />
electrónica para bloquear los cables.<br />
II.2.6.1<br />
Conexión de la alimentación<br />
Controle que la tensión y la frecuencia de la instalación eléctrica sean<br />
230V (±10%) monofásica a 50 Hz; que la potencia instalada disponible<br />
sea suficiente para el funcionamiento de la máquina y que los cables<br />
de la línea de alimentación sean de una sección adecuada para la<br />
corriente máxima necesaria. Asegurarse de que la instalación eléctrica<br />
de alimentación esté en conformidad con las normas nacionales<br />
vigentes para la seguridad. Para la conexión de la unidad a la red<br />
eléctrica utilizar flexible bipolar + tierra , tamaño 1,5 mm 2 con vaina en<br />
policloropreno no más ligero que H05RN-F. El conductor de tierra tiene<br />
que ser más largo que los otros conductores para que éste sea el<br />
último en salir si se afloja el dispositivo de fijación del cable. Los cables<br />
de conexión eléctrica deben hacerse pasar por el interior de conductos<br />
que tengan un grado de protección suficiente, a su vez deben sujetarse<br />
sólidamente al suelo o a las paredes. Debe prestarse especial atención<br />
a la posible presencia de esquinas, rebabas, superficies rugosas en<br />
general o roscas para garantizar que no se dañe el aislamiento del<br />
conductor. Para efectuar las conexiones, quite el envoltorio de la<br />
unidad interna y la puerta lateral (lado de las conexiones frigoríficas) de<br />
la unidad externa, introduzca los cables eléctricos en los bornes<br />
siguiendo los esquemas aplicados en los mismos climatizadores. En el<br />
caso que la unidad se fije en una pared metálica, debe preverse la<br />
toma a tierra según las normas vigentes en el país de instalación. Las<br />
conexiones deben efectuarse respetando los esquemas eléctricos<br />
incluidos en los anexos. Normalmente la longitud de la línea eléctrica<br />
es unos 2 metros mayor que la longitud de la línea frigorífica. Cada<br />
unidad interna está dotada de un cable de alimentación con enchufe.<br />
II.3<br />
II.3.1<br />
INSTRUCCIONES PARA EL ARRANQUE<br />
IMPORTANTE<br />
La puesta en marcha o el primer arranque de la<br />
máquina (cuando previsto) debe ser efectuada<br />
exclusivamente por personal habilitado para actuar<br />
sobre esta clase de productos.<br />
PELIGRO<br />
Antes de la puesta en servicio hay que comprobar<br />
que la instalación y las conexiones eléctricas hayan<br />
sido efectuadas conforme a lo indicado en este<br />
manual. Compruébese asimismo que no haya<br />
personas no autorizadas cerca de la máquina<br />
durante dichas operaciones.<br />
CONTROLES PREVIOS A LA PUESTA EN<br />
MARCHA<br />
Antes de poner en marcha la unidad asegurarse de que:<br />
1. la unidad esté colocada correctamente;<br />
2. las tuberías de impulsión, retorno y desagüe de condensados de la<br />
instalación estén correctamente conectadas;<br />
79<br />
SECCIÓN II: INSTALACIÓN Y MANTENIMIENTO<br />
3. el intercambiador esté limpio;<br />
4. las conexiones eléctricas sean correctas;<br />
5. los tornillos que fijan los conductores estén bien ajustados;<br />
6. la tensión de alimentación sea la necesaria;<br />
Se recomienda que haga funcionar la unidad a la máxima<br />
velocidad durante un par de horas.<br />
II.4<br />
II.4.1<br />
MANTENIMIENTO EXTRAORDINARIO<br />
PELIGRO<br />
Las operaciones de mantenimiento deben ser<br />
efectuadas por técnicos expertos, habilitados para<br />
actuar sobre productos para la climatización y la<br />
refrigeración.<br />
Utilizar guantes de trabajo adecuados.<br />
PELIGRO<br />
Usar siempre el interruptor automático general (IG)<br />
colocado como protección de la instalación antes<br />
de efectuar cualquier operación de mantenimiento<br />
aunque ésta sea sólo de revisión. Comprobar que<br />
nadie alimente accidentalmente la máquina,<br />
bloquear el interruptor automático general (IG) en<br />
posición de cero<br />
PELIGRO<br />
Prestar atención a las superficies calientes<br />
presentes dentro de la máquina.<br />
Se prohíbe introducir objetos puntiagudos por las<br />
rejillas de aspiración e impulsión del aire.<br />
CONTROL DE CARGA DEL FLUIDO<br />
REFRIGERANTE<br />
Después de haber colocado un manómetro en la toma de presión en el<br />
lado de impulsión y otro en la toma de presión en el lado de aspiración,<br />
activar la unidad y controlar las respectivas presiones una vez que se<br />
hayan estabilizado.<br />
II.4.2<br />
CONTROL DE AUSENCIA DE FUGAS DE<br />
FLUIDO REFRIGERANTE<br />
Con un buscador de fugas o con agua jabonosa, controlar el circuito<br />
frigorífico y comprobar que no sean superiores a 5g/año.<br />
II.4.3<br />
CONTROL ESTADO DE LIMPIEZA DEL<br />
INTERCAMBIADOR<br />
Con la unidad apagada observar el intercambiador y, según el caso:<br />
• quitar de la superficie de aletas cualquier cuerpo extraño que pueda<br />
obstruir el paso del aire;<br />
• eliminar el polvo depositado con un chorro de aire comprimido;<br />
• efectuar un lavado ligero con agua y cepillar suavemente;<br />
• efectuar el secado con aire comprimido.<br />
II.4.4<br />
CONTROL CORRECTA LIMPIEZA DE LA<br />
DESAGÜE DE CONDENSADOS<br />
Con la unidad apagada, comprobar el estado de limpieza del desagüe<br />
de condensados.<br />
II.4.5<br />
COMPROBACIÓN DEL CIRCUITO ELÉCTRICO<br />
Se recomienda efectuar las siguientes operaciones:<br />
• controlar la potencia eléctrica absorbida por la unidad mediante<br />
pinza amperimétrica y comparar el valor con aquéllos indicados en el<br />
anexo A1;<br />
• inspeccionar y verificar el adecuado apriete de los contactos<br />
eléctricos y sus respectivos bornes.<br />
II.4.6<br />
INDICACIONES PARA LA SUSTITUCIÓN DE<br />
COMPONENTES<br />
En el caso de reparación de una unidad se deberá descargar el fluido<br />
refrigerante de ambos lados de alta y baja presión. Ello debido a que<br />
en caso de retirarse de la unidad la carga de fluido refrigerante sólo del<br />
lado de alta presión puede suceder que el compresor cierre el circuito<br />
impidiendo la igualación de las presiones en el mismo. De esta manera<br />
la parte de baja presión de la carcasa y la línea de aspiración pueden<br />
permanecer presurizadas. En este caso, si se aplica un soplete en un<br />
componente de baja presión de la unidad, la mezcla presurizada de<br />
fluido refrigerante y aceite, al salir del circuito puede incendiarse al<br />
entrar en contacto con la llama del soplete. Para prevenir y evitar este<br />
riesgo es importante controlar la descarga efectiva de la presión en los<br />
conductos de alta y baja presión antes de deshacer soldaduras.<br />
En caso de realizarse, la integración en la unidad de fluido refrigerante<br />
R410A debe realizarse en fase líquida mientras sale lentamente de la<br />
bombona para no alterar su composición.
ALLEGATI<br />
A1<br />
CARATTERISTICHE TECNICHE<br />
<strong>SPLIT</strong> MONO - INVERTER<br />
<strong>SPLIT</strong> MONO 09 12 18 09 INVERTER 12 INVERTER<br />
Dati tecnici<br />
Potenzialità frigorifera (*) kW 2,64 3,52 5,30 (min./nom./max.) 0,94/2,64/3,22 1,32/3,52/4,40<br />
Potenza assorbita totale (*) kW 0,82 1,08 1,72 (min./nom./max.) 0,27/0,80/1,118 0,48/1,06/1,59<br />
Corrente assorbita A 3,6 4,9 7,8 1,5/4,0/6,0 2,7/5,3/7,9<br />
Potenzialità termica (**) kW 3,22 4,40 5,57 (min./nom./max.) 1,03/3,08/4,10 1,47/4,10/5,57<br />
Potenza assorbita totale (**) kW 0,89 1,18 1,63 (min./nom./max.) 0,27/0,82/1,85 0,26/1,11/2,05<br />
Corrente assorbita A 3,9 5,3 7,4 1,5/4,1/9,1 2,7/5,4/10,8<br />
E.E.R. / C.O.P. 3,22/3,62 3,26/3,73 3,10/3,42 3,30/3,76 3,32/3,69<br />
Alimentazione elettrica V ph Hz 230-1-50 230-1-50 230-1-50 230-1-50 230-1-50<br />
Unità interna<br />
Portata aria velocità massima m 3 /h 500 680 850 570 700<br />
Deumidificazione l/h 1,0 1,2 1,6 1,0 1,2<br />
Massima dB(A) 36 39 44 37 38<br />
Pressione sonora (***) Media dB(A) 34 33 41 34 35<br />
Minima dB(A) 32 28 38 30 31<br />
Altezza mm 250 280 293 250 280<br />
Dimensioni Larghezza mm 750 815 920 750 815<br />
Profondità mm 205 215 224 205 215<br />
Peso kg 8,0 10,0 13,5 8,5 10,0<br />
Unità esterna<br />
Tipo compressore ROTATIVO ROTATIVO ROTATIVO ROT. INVERTER ROT. INVERTER<br />
Corrente di spunto A 22,0 30,0 42,5 3,3 4,8<br />
Pressione sonora (****) dB(A) 50 52 56 55 55<br />
Altezza mm 540 590 695 590 590<br />
Dimensioni Larghezza mm 780 760 845 760 760<br />
Profondità mm 250 285 335 285 285<br />
Peso kg 37,0 41,5 52,0 42 42<br />
Collegamento<br />
Tipo di attacchi cartella cartella cartella cartella cartella<br />
Attacco linea liquido mm 6,35 (1/4") 6,35 (1/4") 6,35 (1/4") 6,35 (1/4") 6,35 (1/4")<br />
Attacco linea gas mm 9,52 (3/8") 12,7 (1/2") 12,7 (1/2") 9,52 (3/8") 12,7 (1/2")<br />
Scarico condensa Ø mm 15 15 15 15 15<br />
Carica refrigerante R410A kg 0,92 1,18 1,77 1,09 1,17<br />
Lungh. max equivalente linee frigorif. m 15 15 15 15 15<br />
Lunghezza max con carica standard m 5 5 5 5 5<br />
Carica agg. oltre max lungh. standard g/m 30 30 30 30 30<br />
Dislivello massimo linee frigorifere m 7,5 7,5 7,5 7,5 7,5<br />
(*) Alle seguenti condizioni: temperatura esterna 35°C B.S., 24°C B.U; temperatura ambiente 27°C B.S., 19°C B.U.<br />
(47% U.R.); velocità massima.<br />
(**) Alle seguenti condizioni: temperatura esterna 7°C B.S., 6°C B.U.; temperatura ambiente 20°C B.S., 15°C B.U,<br />
velocità massima.<br />
(***) Livello di pressione sonora in dB(A) riferito ad una misura alla distanza di 1 m dal punto di uscita dell’aria, a bocca<br />
libera.<br />
(****) Livello di pressione sonora in dB(A) riferito ad una misura alla distanza di 1 m dal punto di uscita dell’aria, con<br />
fattore di direzionalità pari a 2, a bocca libera.<br />
80
ALLEGATI<br />
<strong>SPLIT</strong> MULTI (DUAL-TRIAL)<br />
<strong>SPLIT</strong> 09+09 DUAL 09+12 DUAL 09+09+12 TRIAL<br />
Dati tecnici I II I II I II III<br />
Potenzialità frigorifera (*) kW 2,60 2,60 2,60 2,90 2,60 2,60 2,90<br />
Potenza assorbita totale (*) kW 0,94 0,94 0,94 1,11 1,90 1,10<br />
Corrente assorbita A 4,1 4,1 4,1 5,0 8,3 5,0<br />
Potenzialità termica (**) kW 2,80 2,80 2,90 3,50 2,80 2,80 2,90<br />
Potenza assorbita totale (**) kW 0,98 0,98 0,98 1,30 1,92 1,10<br />
Corrente assorbita A 4,3 4,3 4,3 5,8 8,3 5,0<br />
E.E.R. / C.O.P. 2,77/2,86 2,68/2,81 2,70/2,81<br />
Alimentazione elettrica V ph Hz 230-1-50 230-1-50 230-1-50<br />
Unità interna I II I II I II III<br />
Portata aria velocità massima m 3 /h 500 500 500 580 500 500 680<br />
Deumidificazione l/h 1,0 1,0 1,0 1,2 1.00 1.00 1.20<br />
Massima dB(A) 36 36 36 39 36 36 39<br />
Pressione sonora (***) Media dB(A) 34 34 34 33 34 34 33<br />
Minima dB(A) 32 32 32 28 32 32 28<br />
Altezza mm 250 250 250 280 250 250 280<br />
Dimensioni Larghezza mm 750 750 750 815 750 750 815<br />
Profondità mm 205 205 205 215 205 205 215<br />
Peso kg 8,5 8,5 8,5 10 8.5 8.5 10<br />
Unità esterna<br />
Tipo compressore ROTATIVO ROTATIVO ROTATIVO<br />
Corrente di spunto A 21,7 21,7 21,7 29,5 31.8 29.5<br />
Pressione sonora (****) dB(A) 56 56 58<br />
Altezza mm 655 655 830<br />
Dimensioni Larghezza mm 895 895 860<br />
Profondità mm 345 345 330<br />
Peso kg 75 76 81<br />
Collegamento<br />
Tipo di attacchi cartella cartella cartella<br />
Attacco linea liquido mm 6,35 (1/4") 6,35 (1/4") 6,35 (1/4")<br />
Attacco linea gas mm 9,52 (3/8") 9,52 (3/8") 12,7 (1/2") 9,52(3/8") 9,52(3/8") 12,7 (1/2")<br />
Scarico condensa Ø mm 15 15 15 15 15 15 15<br />
Carica refrigerante R410A kg 0,98 0,98 0,900 1,10 1,55 1,150<br />
Lungh. max equivalente linee frigorifere m 20 20 20 20 20 20 20<br />
Lunghezza max con carica standard m 5 5 5 5 5 5 5<br />
Carica agg. oltre max lungh. standard g/m 15 15 15 15 15 15 15<br />
Dislivello massimo linee frigorifere m 10 10 10 10 10 10 10<br />
(*) Alle seguenti condizioni: temperatura esterna 35°C B.S., 24°C B.U; temperatura ambiente 27°C B.S., 19°C B.U.<br />
(47% U.R.); velocità massima.<br />
(**) Alle seguenti condizioni: temperatura esterna 7°C B.S., 6°C B.U.; temperatura ambiente 20°C B.S., 15°C B.U,<br />
velocità massima.<br />
(***) Livello di pressione sonora in dB(A) riferito ad una misura alla distanza di 1 m dal punto di uscita dell’aria, a bocca<br />
libera.<br />
(****) Livello di pressione sonora in dB(A) riferito ad una misura alla distanza di 1 m dal punto di uscita dell’aria, con<br />
fattore di direzionalità pari a 2, a bocca libera.<br />
81
ALLEGATI<br />
<strong>SPLIT</strong> MULTI (DUAL) INVERTER<br />
<strong>SPLIT</strong> 09+09 DUAL INVERTER 09+12 DUAL INVERTER<br />
Dati tecnici I II I II<br />
Potenzialità frigorifera (*) kW 5,28 5,86<br />
Potenza assorbita totale (*) kW 2,06 2,32<br />
Corrente assorbita A 9,0 10,2<br />
Potenzialità termica (**) kW 5,86 6,15<br />
Potenza assorbita totale (**) kW 2,16 2,25<br />
Corrente assorbita A 9,50 9,88<br />
E.E.R. / C.O.P. 2,56/2,71 2,52/2,73<br />
Alimentazione elettrica V ph Hz 230-1-50 230-1-50<br />
Unità interna I II I II<br />
Portata aria velocità massima m 3 /h 500 500 500 680<br />
Deumidificazione l/h 1,0 1,0 1,0 1,2<br />
Massima dB(A) 36 36 36 39<br />
Pressione sonora (***) Media dB(A) 34 34 34 33<br />
Minima dB(A) 32 32 32 28<br />
Altezza mm 250 250 250 280<br />
Dimensioni Larghezza mm 750 750 750 815<br />
Profondità mm 205 205 205 215<br />
Peso kg 8,5 8,5 8,5 10<br />
Unità esterna<br />
Tipo compressore ROTATIVO INV. ROTATIVO INV.<br />
Corrente di spunto A 20 20<br />
Pressione sonora (****) dB(A) 60 60<br />
Altezza mm 695 695<br />
Dimensioni Larghezza mm 845 845<br />
Profondità mm 335 335<br />
Peso kg 71 71<br />
Collegamento<br />
Tipo di attacchi cartella cartella cartella cartella<br />
Attacco linea liquido mm 6,35 (1/4") 6,35 (1/4") 6,35 (1/4") 6,35 (1/4")<br />
Attacco linea gas mm 9,52 (3/8") 9,52 (3/8") 9,52 (3/8") 12,7 (1/2")<br />
Scarico condensa Ø mm 15 15 15 15<br />
Carica refrigerante R410A kg 2,10 2,10<br />
Lungh. max equivalente linee frigorifere m 20 20 20 20<br />
Lunghezza max con carica standard m 5 5 5 5<br />
Carica agg. oltre max lungh. standard g/m 15 15 15 15<br />
Dislivello massimo linee frigorifere m 10 10 10 10<br />
(*) Alle seguenti condizioni: temperatura esterna 35°C B.S., 24°C B.U; temperatura ambiente 27°C B.S., 19°C B.U.<br />
(47% U.R.); velocità massima.<br />
(**) Alle seguenti condizioni: temperatura esterna 7°C B.S., 6°C B.U.; temperatura ambiente 20°C B.S., 15°C B.U,<br />
velocità massima.<br />
(***) Livello di pressione sonora in dB(A) riferito ad una misura alla distanza di 1 m dal punto di uscita dell’aria, a bocca<br />
libera.<br />
(****) Livello di pressione sonora in dB(A) riferito ad una misura alla distanza di 1 m dal punto di uscita dell’aria, con<br />
fattore di direzionalità pari a 2, a bocca libera.<br />
82
ALLEGATI<br />
<strong>SPLIT</strong> MULTI (TRIAL) INVERTER<br />
<strong>SPLIT</strong> 09+09+09 TRIAL INVERTER 09+09+12 TRIAL INVERTER<br />
Dati tecnici I II III I II III<br />
Potenzialità frigorifera (*) kW 7,03 7,62<br />
Potenza assorbita totale (*) kW 2,78 2,91<br />
Corrente assorbita A 12,2 12,7<br />
Potenzialità termica (**) kW 7,91 8,21<br />
Potenza assorbita totale (**) kW 2,88 3,03<br />
Corrente assorbita A 12,6 13,3<br />
E.E.R. / C.O.P. 2,53/2,75 2,62/2,71<br />
Alimentazione elettrica V ph Hz 230-1-50 230-1-50<br />
Unità interna I II III I II III<br />
Portata aria velocità massima m 3 /h 500 500 500 500 500 680<br />
Deumidificazione l/h 1,0 1,0 1,0 1,0 1,0 1,2<br />
Massima dB(A) 36 36 36 36 36 39<br />
Pressione sonora (***) Media dB(A) 34 34 34 34 34 33<br />
Minima dB(A) 32 32 32 32 32 28<br />
Altezza mm 250 250 250 250 250 280<br />
Dimensioni Larghezza mm 750 750 750 750 750 815<br />
Profondità mm 205 205 205 205 205 215<br />
Peso kg 8,5 8,5 8,5 8,5 8,5 10<br />
Unità esterna<br />
Tipo compressore ROTATIVO INV. ROTATIVO INV.<br />
Corrente di spunto A 20 20<br />
Pressione sonora (****) dB(A) 60 60<br />
Altezza mm 695 695<br />
Dimensioni Larghezza mm 845 845<br />
Profondità mm 335 335<br />
Peso kg 72 72<br />
Collegamento<br />
Tipo di attacchi cartella cartella<br />
Attacco linea liquido mm 6,35 (1/4") 6,35 (1/4")<br />
Attacco linea gas mm 9,52 (3/8") 9,52 (3/8") 9,52 (3/8") 12,7 (1/2")<br />
Scarico condensa Ø mm 15 15 15 15<br />
Carica refrigerante R410A kg 2,25 2,25<br />
Lungh. max equivalente linee frigorifere m 20 20 20 20<br />
Lunghezza max con carica standard m 5 5 5 5<br />
Carica agg. oltre max lungh. standard g/m 15 15 15 15<br />
Dislivello massimo linee frigorifere m 10 10 10 10<br />
(*) Alle seguenti condizioni: temperatura esterna 35°C B.S., 24°C B.U; temperatura ambiente 27°C B.S., 19°C B.U.<br />
(47% U.R.); velocità massima.<br />
(**) Alle seguenti condizioni: temperatura esterna 7°C B.S., 6°C B.U.; temperatura ambiente 20°C B.S., 15°C B.U,<br />
velocità massima.<br />
(***) Livello di pressione sonora in dB(A) riferito ad una misura alla distanza di 1 m dal punto di uscita dell’aria, a bocca<br />
libera.<br />
(****) Livello di pressione sonora in dB(A) riferito ad una misura alla distanza di 1 m dal punto di uscita dell’aria, con<br />
fattore di direzionalità pari a 2, a bocca libera.<br />
83
ALLEGATI<br />
A2<br />
<strong>SPLIT</strong> MONO<br />
Mod. 09 - 12 – 18<br />
SCHEMI DI COLLEGAMENTO ELETTRICO<br />
<strong>SPLIT</strong> INVERTER<br />
Mod. 09-12 INVERTER<br />
<strong>SPLIT</strong> DUAL<br />
Mod. 09+09 - 09+12<br />
<strong>SPLIT</strong> DUAL INVERTER<br />
Mod. 09+09 - 09+12<br />
84
ALLEGATI<br />
A2<br />
<strong>SPLIT</strong> TRIAL<br />
Mod. 09+09+12<br />
SCHEMI DI COLLEGAMENTO ELETTRICO<br />
<strong>SPLIT</strong> TRIAL INVERTER<br />
Mod. 09+09+09 Mod. 09+09+12<br />
85
ENCLOSED DOCUMENTS<br />
A1<br />
TECHNICAL FEATURES<br />
<strong>SPLIT</strong> MONO - INVERTER<br />
<strong>SPLIT</strong> MONO 09 12 18 09 INVERTER 12 INVERTER<br />
Technical data<br />
Cooling capacity (*) kW 2,64 3,52 5,30 (min./nom./max.) 0,94/2,64/3,22 1,32/3,52/4,40<br />
Total absorbed power (*) kW 0,82 1,08 1,72 (min./nom./max.) 0,27/0,80/1,118 0,48/1,06/1,59<br />
Absorbed current A 3,6 4,9 7,8 1,5/4,0/6,0 2,7/5,3/7,9<br />
Heating capacity (**) kW 3,22 4,40 5,57 (min./nom./max.) 1,03/3,08/4,10 1,47/4,10/5,57<br />
Total absorbed power (**) kW 0,89 1,18 1,63 (min./nom./max.) 0,27/0,82/1,85 0,26/1,11/2,05<br />
Absorbed current A 3,9 5,3 7,4 1,5/4,1/9,1 2,7/5,4/10,8<br />
E.E.R. / C.O.P. 3,22/3,62 3,26/3,73 3,10/3,42 3,30/3,76 3,32/3,69<br />
Electrical power supply V ph Hz 230-1-50 230-1-50 230-1-50 230-1-50 230-1-50<br />
Internal Unit<br />
Maximum air flow speed m3/h 500 680 850 570 700<br />
Drying l/h 1,0 1,2 1,6 1,0 1,2<br />
Maximum dB(A) 36 39 44 37 38<br />
Sound pressure (***) Medium dB(A) 34 33 41 34 35<br />
Minimum dB(A) 32 28 38 30 31<br />
Height mm 250 280 293 250 280<br />
Dimensions Width mm 750 815 920 750 815<br />
Depth mm 205 215 224 205 215<br />
Weight kg 8,0 10,0 13,5 8,5 10,0<br />
External Unit<br />
Compressor type ROTARY ROTARY ROTARY ROT. INVERTER ROT. INVERTER<br />
Starting current A 22,0 30,0 42,5 3,3 4,8<br />
Sound pressure (****) dB(A) 50 52 56 55 55<br />
Height mm 540 590 695 590 590<br />
Dimensions Width mm 780 760 845 760 760<br />
Depth mm 250 285 335 285 285<br />
Weight kg 37,0 41,5 52,0 42 42<br />
Connection<br />
Connection type flare flare flare flare flare<br />
Liquid line connection mm 6,35 (1/4") 6,35 (1/4") 6,35 (1/4") 6,35 (1/4") 6,35 (1/4")<br />
Gas line connection mm 9,52 (3/8") 12,7 (1/2") 12,7 (1/2") 9,52 (3/8") 12,7 (1/2")<br />
Condensation drain Ø mm 15 15 15 15 15<br />
R 410A refrigerant charge kg 0,92 1,18 1,77 1,09 1,17<br />
Refrigerant line max. length m 15 15 15 15 15<br />
Max. length with standard charge m 5 5 5 5 5<br />
Add. charge over max. standard length g/m 30 30 30 30 30<br />
Max. refrigerant line diff. In height m 7,5 7,5 7,5 7,5 7,5<br />
(*) At the following conditions: outdoor temperature 35°C D.B., 24°C W.B; ambient temperature 27°C B.D.;19°C W.B.<br />
(47% U.R.); max speed.<br />
(**) In the following conditions: outdoor temperature 7°C D.B., 6°C W.B; ambient temperature 20°C D.B., 15°C W.B;<br />
maximum speed.<br />
(***) Sound pressure level in dB(A) is referred to measures at a distance of 1 m from the air outlet, free discharge.<br />
(****) Sound pressure level in dB(A) is referred to measures at a distance of 1 m from the air outlet, with a direction<br />
factor of 2, free discharge.<br />
86
ENCLOSED DOCUMENTS<br />
<strong>SPLIT</strong> MULTI (DUAL-TRIAL)<br />
<strong>SPLIT</strong> MONO 09+09 DUAL 09+12 DUAL 09+09+12 TRIAL<br />
Technical data I II I II I II III<br />
Cooling capacity (*) kW 2,60 2,60 2,60 2,90 2,60 2,60 2,90<br />
Total absorbed power (*) kW 0,94 0,94 0,94 1,11 1,90 1,10<br />
Absorbed current A 4,1 4,1 4,1 5,0 8,3 5,0<br />
Heating capacity (**) kW 2,80 2,80 2,90 3,50 2,80 2,80 2,90<br />
Total absorbed power (**) kW 0,98 0,98 0,98 1,30 1,92 1,10<br />
Absorbed current A 4,3 4,3 4,3 5,8 8,3 5,0<br />
E.E.R. / C.O.P. 2,77/2,86 2,68/2,81 2,70/2,81<br />
Electrical power supply V ph Hz 230-1-50 230-1-50<br />
Internal Unit I II I II I II III<br />
Maximum air flow speed m3/h 500 500 500 580 500 500 680<br />
Drying l/h 1,0 1,0 1,0 1,2 1.00 1.00 1.20<br />
Maximum dB(A) 36 36 36 39 36 36 39<br />
Sound pressure (***) Medium dB(A) 34 34 34 33 34 34 33<br />
Minimum dB(A) 32 32 32 28 32 32 28<br />
Height mm 250 250 250 280 250 250 280<br />
Dimensions Width mm 750 750 750 815 750 750 815<br />
Depth mm 205 205 205 215 205 205 215<br />
Weight kg 8,5 8,5 8,5 10 8.5 8.5 10<br />
External Unit<br />
Compressor type ROTARY ROTARY ROTARY<br />
Starting current A 21,7 21,7 21,7 29,5 31.8 29.5<br />
Sound pressure (****) dB(A) 56 56 58<br />
Height mm 655 655 830<br />
Dimensions Width mm 895 895 860<br />
Depth mm 345 345 330<br />
Weight kg 75 76 81<br />
Connection<br />
Connection type flare flare flare<br />
Liquid line connection mm 6,35 (1/4") 6,35 (1/4") 6,35 (1/4")<br />
Gas line connection mm 9,52 (3/8") 9,52 (3/8") 12,7 (1/2") 9,52(3/8") 9,52(3/8") 12,7 (1/2")<br />
Condensation drain Ø mm 15 15 15 15 15 15 15<br />
R 410A refrigerant charge kg 0,98 0,98 0,900 1,10 1,55 1,150<br />
Refrigerant line max. length m 20 20 20 20 20 20 20<br />
Max. length with standard charge m 5 5 5 5 5 5 5<br />
Add. charge over max. standard length g/m 15 15 15 15 15 15 15<br />
Max. refrigerant line diff. In height m 10 10 10 10 10 10 10<br />
(*) At the following conditions: outdoor temperature 35°C D.B., 24°C W.B; ambient temperature 27°C B.D.;19°C W.B.<br />
(47% U.R.); max speed.<br />
(**) In the following conditions: outdoor temperature 7°C D.B., 6°C W.B; ambient temperature 20°C D.B., 15°C W.B;<br />
maximum speed.<br />
(***) Sound pressure level in dB(A) is referred to measures at a distance of 1 m from the air outlet, free discharge.<br />
(****) Sound pressure level in dB(A) is referred to measures at a distance of 1 m from the air outlet, with a direction<br />
factor of 2, free discharge.<br />
87
ENCLOSED DOCUMENTS<br />
<strong>SPLIT</strong> MULTI (DUAL) INVERTER<br />
<strong>SPLIT</strong> 09+09 DUAL INVERTER 09+12 DUAL INVERTER<br />
Technical data I II I II<br />
Cooling capacity (*) kW 5,28 5,86<br />
Total absorbed power (*) kW 2,06 2,32<br />
Absorbed current A 9,0 10,2<br />
Heating capacity (**) kW 5,86 6,15<br />
Total absorbed power (**) kW 2,16 2,25<br />
Absorbed current A 9,50 9,88<br />
E.E.R. / C.O.P. 2,56/2,71 2,52/2,73<br />
Electrical power supply V ph Hz 230-1-50 230-1-50<br />
Internal Unit I II I II<br />
Maximum air flow speed m3/h 500 500 500 680<br />
Drying l/h 1,0 1,0 1,0 1,2<br />
Maximum dB(A) 36 36 36 39<br />
Sound pressure (***) Medium dB(A) 34 34 34 33<br />
Minimum dB(A) 32 32 32 28<br />
Height mm 250 250 250 280<br />
Dimensions Width mm 750 750 750 815<br />
Depth mm 205 205 205 215<br />
Weight kg 8,5 8,5 8,5 10<br />
External Unit<br />
Compressor type ROTARY INV. ROTARY INV.<br />
Starting current A 20 20<br />
Sound pressure (****) dB(A) 60 60<br />
Height mm 695 695<br />
Dimensions Width mm 845 845<br />
Depth mm 335 335<br />
Weight kg 71 71<br />
Connection<br />
Connection type flare flare flare flare<br />
Liquid line connection mm 6,35 (1/4") 6,35 (1/4") 6,35 (1/4") 6,35 (1/4")<br />
Gas line connection mm 9,52 (3/8") 9,52 (3/8") 9,52 (3/8") 12,7 (1/2")<br />
Condensation drain Ø mm 15 15 15 15<br />
R 410A refrigerant charge kg 2,10 2,10<br />
Refrigerant line max. length m 20 20 20 20<br />
Max. length with standard charge m 5 5 5 5<br />
Add. charge over max. standard length g/m 15 15 15 15<br />
Max. refrigerant line diff. In height m 10 10 10 10<br />
(*) At the following conditions: outdoor temperature 35°C D.B., 24°C W.B; ambient temperature 27°C B.D.;19°C W.B.<br />
(47% U.R.); max speed.<br />
(**) In the following conditions: outdoor temperature 7°C D.B., 6°C W.B; ambient temperature 20°C D.B., 15°C W.B;<br />
maximum speed.<br />
(***) Sound pressure level in dB(A) is referred to measures at a distance of 1 m from the air outlet, free discharge.<br />
(****) Sound pressure level in dB(A) is referred to measures at a distance of 1 m from the air outlet, with a direction<br />
factor of 2, free discharge.<br />
88
ENCLOSED DOCUMENTS<br />
<strong>SPLIT</strong> MULTI (TRIAL) INVERTER<br />
<strong>SPLIT</strong> MONO 09+09+09 TRIAL INVERTER 09+09+12 TRIAL INVERTER<br />
Technical data I II III I II III<br />
Cooling capacity (*) kW 7,03 7,62<br />
Total absorbed power (*) kW 2,78 2,91<br />
Absorbed current A 12,2 12,7<br />
Heating capacity (**) kW 7,91 8,21<br />
Total absorbed power (**) kW 2,88 3,03<br />
Absorbed current A 12,6 13,3<br />
E.E.R. / C.O.P. 2,53/2,75 2,62/2,71<br />
Electrical power supply V ph Hz 230-1-50 230-1-50<br />
Internal Unit I II III I II III<br />
Maximum air flow speed m3/h 500 500 500 500 500 680<br />
Drying l/h 1,0 1,0 1,0 1,0 1,0 1,2<br />
Maximum dB(A) 36 36 36 36 36 39<br />
Sound pressure (***) Medium dB(A) 34 34 34 34 34 33<br />
Minimum dB(A) 32 32 32 32 32 28<br />
Height mm 250 250 250 250 250 280<br />
Dimensions Width mm 750 750 750 750 750 815<br />
Depth mm 205 205 205 205 205 215<br />
Weight kg 8,5 8,5 8,5 8,5 8,5 10<br />
External Unit<br />
Compressor type ROTARY INV. ROTARY INV.<br />
Starting current A 20 20<br />
Sound pressure (****) dB(A) 60 60<br />
Height mm 695 695<br />
Dimensions Width mm 845 845<br />
Depth mm 335 335<br />
Weight kg 72 72<br />
Connection<br />
Connection type flare flare<br />
Liquid line connection mm 6,35 (1/4") 6,35 (1/4")<br />
Gas line connection mm 9,52 (3/8") 9,52 (3/8") 9,52 (3/8") 12,7 (1/2")<br />
Condensation drain Ø mm 15 15 15 15<br />
R 410A refrigerant charge kg 2,25 2,25<br />
Refrigerant line max. length m 20 20 20 20<br />
Max. length with standard charge m 5 5 5 5<br />
Add. charge over max. standard length g/m 15 15 15 15<br />
Max. refrigerant line diff. In height m 10 10 10 10<br />
(*) At the following conditions: outdoor temperature 35°C D.B., 24°C W.B; ambient temperature 27°C B.D.;19°C W.B.<br />
(47% U.R.); max speed.<br />
(**) In the following conditions: outdoor temperature 7°C D.B., 6°C W.B; ambient temperature 20°C D.B., 15°C W.B;<br />
maximum speed.<br />
(***) Sound pressure level in dB(A) is referred to measures at a distance of 1 m from the air outlet, free discharge.<br />
(****) Sound pressure level in dB(A) is referred to measures at a distance of 1 m from the air outlet, with a direction<br />
factor of 2, free discharge.<br />
89
ENCLOSED DOCUMENTS<br />
A2<br />
<strong>SPLIT</strong> MONO<br />
Mod. 09 - 12 – 18<br />
ELECTRICAL WIRING DIAGRAMS<br />
<strong>SPLIT</strong> DUAL<br />
Mod. 09+09 - 09+12<br />
<strong>SPLIT</strong> DUAL INVERTER<br />
Mod. 09+09 - 09+12<br />
90
ENCLOSED DOCUMENTS<br />
A2<br />
<strong>SPLIT</strong> TRIAL<br />
Mod. 09+09+12<br />
SCHEMI DI COLLEGAMENTO ELETTRICO<br />
<strong>SPLIT</strong> TRIAL INVERTER<br />
Mod. 09+09+09 Mod. 09+09+12<br />
91
ANNEXES<br />
A1<br />
CARACTERISTIQUES TECHNIQUES<br />
<strong>SPLIT</strong> MONO - INVERTER<br />
<strong>SPLIT</strong> 09 12 18 09 INVERTER 12 INVERTER<br />
Données techniques<br />
Puissance frigorifique (*) kW 2,64 3,52 5,30 (min./nom./max.) 0,94/2,64/3,22 1,32/3,52/4,40<br />
Puissance totale absorbée (*) kW 0,82 1,08 1,72 (min./nom./max.) 0,27/0,80/1,118 0,48/1,06/1,59<br />
Courant absorbé A 3,6 4,9 7,8 1,5/4,0/6,0 2,7/5,3/7,9<br />
Puissance thermique (**) kW 3,22 4,40 5,57 (min./nom./max.) 1,03/3,08/4,10 1,47/4,10/5,57<br />
Puissance totale absorbée (**) kW 0,89 1,18 1,63 (min./nom./max.) 0,27/0,82/1,85 0,26/1,11/2,05<br />
Courant absorbé A 3,9 5,3 7,4 1,5/4,1/9,1 2,7/5,4/10,8<br />
E.E.R. / C.O.P. 3,22/3,62 3,26/3,73 3,10/3,42 3,30/3,76 3,32/3,69<br />
Alimentation électrique V ph Hz 230-1-50 230-1-50 230-1-50 230-1-50 230-1-50<br />
Unité interne<br />
Débit air vitesse maximum m 3 /h 500 680 850 570 700<br />
Déshumidification l/h 1,0 1,2 1,6 1,0 1,2<br />
Maximum dB(A) 36 39 44 37 38<br />
Pression sonore (***) Moyenne dB(A) 34 33 41 34 35<br />
Minimum dB(A) 32 28 38 30 31<br />
Hauteur mm 250 280 293 250 280<br />
Dimensions Largeur mm 750 815 920 750 815<br />
Profondeur mm 205 215 224 205 215<br />
Poids kg 8,0 10,0 13,5 8,5 10,0<br />
Unité externe<br />
Type compresseur ROTATIF ROTATIF ROTATIF ROT. INVERTER ROT. INVERTER<br />
Courant de démarrage A 22,0 30,0 42,5 3,3 4,8<br />
Pression sonore (****) dB(A) 50 52 56 55 55<br />
Hauteur mm 540 590 695 590 590<br />
Dimensions Largeur mm 780 760 845 760 760<br />
Profondeur mm 250 285 335 285 285<br />
Poids kg 37,0 41,5 52,0 42 42<br />
Raccordement<br />
Type de raccords godet godet godet godet godet<br />
Raccord ligne liquide mm 6,35 (1/4") 6,35 (1/4") 6,35 (1/4") 6,35 (1/4") 6,35 (1/4")<br />
Raccord ligne gaz mm 9,52 (3/8") 12,7 (1/2") 12,7 (1/2") 9,52 (3/8") 12,7 (1/2")<br />
Évacuation condensation Ø mm 15 15 15 15 15<br />
Charge réfrigérant R410A kg 0,92 1,18 1,77 1,09 1,17<br />
Long. max équivalente lignes frigorif. m 15 15 15 15 15<br />
Longueur max. avec charge standard m 5 5 5 5 5<br />
Charge supp. au-delà long. max. g/m 30 30 30 30 30<br />
standard<br />
Dénivellation max. lignes frigorifiques m 7,5 7,5 7,5 7,5 7,5<br />
(*) Aux conditions suivantes: température externe 35°C B.S., 24°C B.U; température ambiant 24°C B.S., 19°C B.H.<br />
(47% U.R); vitesse maxi.<br />
(**) Dans les conditions suivantes: température externe 7°C B.S., 6°C B.U; température ambiante 20°C B.S., 15°C<br />
B.U, vitesse maximum.<br />
(***)Niveau de pression sonore en dB(A) référé à une mesure à la distance de 1 m du point de sortie de l’air, à bouche<br />
libre.<br />
(****)Niveau de pression sonore en dB(A) référé à une mesure à la distance de 1 m du point de sortie de l’air, avec<br />
facteur de direction égal à 2; à bouche libre.<br />
92
ANNEXES<br />
<strong>SPLIT</strong> MULTI (DUAL-TRIAL)<br />
<strong>SPLIT</strong> MULTI 09+09 DUAL 09+12 DUAL 09+09+12 TRIAL<br />
Données techniques I II I II I II III<br />
Puissance frigorifique (*) kW 2,60 2,60 2,60 2,90 2,60 2,60 2,90<br />
Puissance totale absorbée (*) kW 0,94 0,94 0,94 1,11 1,90 1,10<br />
Courant absorbé A 4,1 4,1 4,1 5,0 8,3 5,0<br />
Puissance thermique (**) kW 2,80 2,80 2,90 3,50 2,80 2,80 2,90<br />
Puissance totale absorbée (**) kW 0,98 0,98 1,30 1,92 1,10<br />
Courant absorbé A 4,3 4,3 4,3 5,8 8,3 5,0<br />
E.E.R. / C.O.P. 2,77/2,86 2,68/2,81 2,70/2,81<br />
Alimentation électrique V ph Hz 230-1-50 230-1-50 230-1-50<br />
Unité interne I II I II I II III<br />
Débit air vitesse maximum m 3 /h 500 500 500 580 500 500 680<br />
Déshumidification l/h 1,0 1,0 1,0 1,2 1.00 1.00 1.20<br />
Maximum dB(A) 36 36 36 39 36 36 39<br />
Pression sonore (***) Moyenne dB(A) 34 34 34 33 34 34 33<br />
Minimum dB(A) 32 32 32 28 32 32 28<br />
Hauteur mm 250 250 250 280 250 250 280<br />
Dimensions Largeur mm 750 750 750 815 750 750 815<br />
Profondeur mm 205 205 205 215 205 205 215<br />
Poids kg 8,5 8,5 8,5 10 8.5 8.5 10<br />
Unité externe<br />
Type compresseur ROTATIF ROTATIF ROTATIF<br />
Courant de démarrage A 21,7 21,7 21,7 29,5 31.8 29.5<br />
Pression sonore (****) dB(A) 56 56 58<br />
Hauteur mm 655 655 830<br />
Dimensions Largeur mm 895 895 860<br />
Profondeur mm 345 345 330<br />
Poids kg 75 76 81<br />
Raccordement<br />
Type de raccords godet godet godet<br />
Raccord ligne liquide mm 6,35 (1/4") 6,35 (1/4") 6,35 (1/4")<br />
Raccord ligne gaz mm 9,52 (3/8") 9,52 (3/8") 12,7 (1/2") 9,52(3/8") 9,52(3/8") 12,7 (1/2")<br />
Évacuation condensation Ø mm 15 15 15 15 15 15 15<br />
Charge réfrigérant R410A kg 0,98 0,98 0,900 1,10 1,55 1,150<br />
Long. max équivalente lignes frigorif. m 20 20 20 20 20 20 20<br />
Longueur max. avec charge standard m 5 5 5 5 5 5 5<br />
Charge supp. au-delà long. max.<br />
g/m 15 15 15 15 15 15 15<br />
standard<br />
Dénivellation max. lignes frigorifiques m 10 10 10 10 10 10 10<br />
(*) Aux conditions suivantes: température externe 35°C B.S., 24°C B.U; température ambiant 24°C B.S., 19°C B.H.<br />
(47% U.R); vitesse maxi.<br />
(**) Dans les conditions suivantes: température externe 7°C B.S., 6°C B.U; température ambiante 20°C B.S., 15°C<br />
B.U, vitesse maximum.<br />
(***)Niveau de pression sonore en dB(A) référé à une mesure à la distance de 1 m du point de sortie de l’air, à bouche<br />
libre.<br />
(****)Niveau de pression sonore en dB(A) référé à une mesure à la distance de 1 m du point de sortie de l’air, avec<br />
facteur de direction égal à 2; à bouche libre.<br />
93
ANNEXES<br />
<strong>SPLIT</strong> MULTI (DUAL) INVERTER<br />
<strong>SPLIT</strong> MULTI 09+09 DUAL 09+12 DUAL INVERTER<br />
Données techniques I II I II<br />
Puissance frigorifique (*) kW 5,28 5,86<br />
Puissance totale absorbée (*) kW 2,06 2,32<br />
Courant absorbé A 9,0 10,2<br />
Puissance thermique (**) kW 5,86 6,15<br />
Puissance totale absorbée (**) kW 2,16 2,25<br />
Courant absorbé A 9,50 9,88<br />
E.E.R. / C.O.P. 2,56/2,71 2,52/2,73<br />
Alimentation électrique V ph Hz 230-1-50 230-1-50<br />
Unité interne I II I II<br />
Débit air vitesse maximum m 3 /h 500 500 500 680<br />
Déshumidification l/h 1,0 1,0 1,0 1,2<br />
Maximum dB(A) 36 36 36 39<br />
Pression sonore (***) Moyenne dB(A) 34 34 34 33<br />
Minimum dB(A) 32 32 32 28<br />
Hauteur mm 250 250 250 280<br />
Dimensions Largeur mm 750 750 750 815<br />
Profondeur mm 205 205 205 215<br />
Poids kg 8,5 8,5 8,5 10<br />
Unité externe<br />
Type compresseur ROTATIF INV. ROTATIF INV.<br />
Courant de démarrage A 20 20<br />
Pression sonore (****) dB(A) 60 60<br />
Hauteur mm 695 695<br />
Dimensions Largeur mm 845 845<br />
Profondeur mm 335 335<br />
Poids kg 71 71<br />
Raccordement<br />
Type de raccords godet godet godet godet<br />
Raccord ligne liquide mm 6,35 (1/4") 6,35 (1/4") 6,35 (1/4") 6,35 (1/4")<br />
Raccord ligne gaz mm 9,52 (3/8") 9,52 (3/8") 9,52 (3/8") 12,7 (1/2")<br />
Évacuation condensation Ø mm 15 15 15 15<br />
Charge réfrigérant R410A kg 2,10 2,10<br />
Long. max équivalente lignes frigorif. m 20 20 20 20<br />
Longueur max. avec charge standard m 5 5 5 5<br />
Charge supp. au-delà long. max. standard g/m 15 15 15 15<br />
Dénivellation max. lignes frigorifiques m 10 10 10 10<br />
(*) Aux conditions suivantes: température externe 35°C B.S., 24°C B.U; température ambiant 24°C B.S., 19°C B.H.<br />
(47% U.R); vitesse maxi.<br />
(**) Dans les conditions suivantes: température externe 7°C B.S., 6°C B.U; température ambiante 20°C B.S., 15°C<br />
B.U, vitesse maximum.<br />
(***)Niveau de pression sonore en dB(A) référé à une mesure à la distance de 1 m du point de sortie de l’air, à bouche<br />
libre.<br />
(****)Niveau de pression sonore en dB(A) référé à une mesure à la distance de 1 m du point de sortie de l’air, avec<br />
facteur de direction égal à 2; à bouche libre.<br />
94
ANNEXES<br />
<strong>SPLIT</strong> MULTI (TRIAL) INVERTER<br />
<strong>SPLIT</strong> MULTI 09+09+09 TRIAL INVERTER 09+09+12 TRIAL INVERTER<br />
Données techniques I II III I II III<br />
Puissance frigorifique (*) kW 7,03 7,62<br />
Puissance totale absorbée (*) kW 2,78 2,91<br />
Courant absorbé A 12,2 12,7<br />
Puissance thermique (**) kW 7,91 8,21<br />
Puissance totale absorbée (**) kW 2,88 3,03<br />
Courant absorbé A 12,6 13,3<br />
E.E.R. / C.O.P. 2,53/2,75 2,62/2,71<br />
Alimentation électrique V ph Hz 230-1-50 230-1-50<br />
Unité interne I II III I II III<br />
Débit air vitesse maximum m 3 /h 500 500 500 500 500 680<br />
Déshumidification l/h 1,0 1,0 1,0 1,0 1,0 1,2<br />
Maximum dB(A) 36 36 36 36 36 39<br />
Pression sonore (***) Moyenne dB(A) 34 34 34 34 34 33<br />
Minimum dB(A) 32 32 32 32 32 28<br />
Hauteur mm 250 250 250 250 250 280<br />
Dimensions Largeur mm 750 750 750 750 750 815<br />
Profondeur mm 205 205 205 205 205 215<br />
Poids kg 8,5 8,5 8,5 8,5 8,5 10<br />
Unité externe<br />
Type compresseur ROTATIF INV.. ROTATIF INV.<br />
Courant de démarrage A 20 20<br />
Pression sonore (****) dB(A) 60 60<br />
Hauteur mm 695 695<br />
Dimensions Largeur mm 845 845<br />
Profondeur mm 335 335<br />
Poids kg 72 72<br />
Raccordement<br />
Type de raccords godet godet<br />
Raccord ligne liquide mm 6,35 (1/4") 6,35 (1/4")<br />
Raccord ligne gaz mm 9,52 (3/8") 9,52 (3/8") 9,52 (3/8") 12,7 (1/2")<br />
Évacuation condensation Ø mm 15 15 15 15<br />
Charge réfrigérant R410A kg 2,25 2,25<br />
Long. max équivalente lignes frigorif. m 20 20 20 20<br />
Longueur max. avec charge standard m 5 5 5 5<br />
Charge supp. au-delà long. max. standard g/m 15 15 15 15<br />
Dénivellation max. lignes frigorifiques m 10 10 10 10<br />
(*) Aux conditions suivantes: température externe 35°C B.S., 24°C B.U; température ambiant 24°C B.S., 19°C B.H.<br />
(47% U.R); vitesse maxi.<br />
(**) Dans les conditions suivantes: température externe 7°C B.S., 6°C B.U; température ambiante 20°C B.S., 15°C<br />
B.U, vitesse maximum.<br />
(***)Niveau de pression sonore en dB(A) référé à une mesure à la distance de 1 m du point de sortie de l’air, à bouche<br />
libre.<br />
(****)Niveau de pression sonore en dB(A) référé à une mesure à la distance de 1 m du point de sortie de l’air, avec<br />
facteur de direction égal à 2; à bouche libre.<br />
95
ANNEXES<br />
A2<br />
<strong>SPLIT</strong> MONO<br />
Mod. 09 - 12 – 18<br />
SCHEMAS DE BRANCHEMENT ELECTRIQUE<br />
<strong>SPLIT</strong> DUAL<br />
Mod. 09+09 - 09+12<br />
<strong>SPLIT</strong> DUAL INVERTER<br />
Mod. 09+09 - 09+12<br />
96
ANNEXES<br />
A2<br />
<strong>SPLIT</strong> TRIAL<br />
Mod. 09+09+12<br />
SCHEMAS DE BRANCHEMENT ELECTRIQUE<br />
<strong>SPLIT</strong> TRIAL INVERTER<br />
Mod. 09+09+09 Mod. 09+09+12<br />
97
ANLAGEN<br />
A1<br />
TECHNISCHE MERKMALE<br />
<strong>SPLIT</strong> MONO - INVERTER<br />
<strong>SPLIT</strong> MONO 09 12 18 09 INVERTER 12 INVERTER<br />
Technische Daten<br />
Kälteleistung (*) kW 2,64 3,52 5,30 (min./nom./max.) 0,94/2,64/3,22 1,32/3,52/4,40<br />
Gesamte Leistungsaufnahme (*) kW 0,82 0,82 1,72 (min./nom./max.) 0,27/0,80/1,118 0,48/1,06/1,59<br />
Stromaufnahme A 3,6 4,9 7,8 1,5/4,0/6,0 2,7/5,3/7,9<br />
Wärmeleistung (**) kW 3,22 4,40 5,57 (min./nom./max.) 1,03/3,08/4,10 1,47/4,10/5,57<br />
Gesamte Leistungsaufnahme (**) kW 0,89 0,89 1,63 (min./nom./max.) 0,27/0,82/1,85 0,26/1,10/2,05<br />
Stromaufnahme A 3,9 5,3 7,4 1,5/4,1/9,1 2,7/5,4/10,8<br />
EER. /Leistungsziffer<br />
3,22/3,62 3,26/3,73 3,10/3,42 3,30/3,76 3,32/3,69<br />
(COP)<br />
Betriebsspannung V-Ph-Hz 230-1-50 230-1-50 230-1-50 230-1-50 230-1-50<br />
Inneneinheit<br />
Luftmenge bei Höchstdrehzahl m 3 /h 500 680 850 570 700<br />
Luftentfeuchtung l/h 1,0 1,2 1,6 1,0 1,2<br />
Maximal dB(A) 36 39 44 37 38<br />
Schaltdruckpegel (***) Mittlerer dB(A) 34 33 41 34 35<br />
Mindest dB(A) 32 28 38 30 31<br />
Höhe mm 250 280 293 250 280<br />
Abmessungen Breite mm 750 815 920 750 815<br />
Tiefe mm 205 215 224 205 215<br />
Gewicht kg 8,0 10,0 13,5 8,5 10,0<br />
Außeneinheit<br />
Verdichtertyp ROTARY ROTARY ROTARY ROT. INVERTER ROT. INVERTER<br />
Anlaufstrom A 22,0 30,0 42,5 3,3 4,8<br />
Schaltdruckpegel (****) dB(A) 50 52 56 55 55<br />
Höhe mm 540 590 695 590 590<br />
Abmessungen Breite mm 780 760 845 760 760<br />
Tiefe mm 250 285 335 285 285<br />
Gewicht kg 37,0 41,5 52,0 42 42<br />
Anschluss<br />
Art der Anschlüsse flare flare flare flare flare<br />
Anschluss<br />
mm 6,35 (1/4") 6,35 (1/4") 6,35 (1/4") 6,35 (1/4") 6,35 (1/4")<br />
Flüssigkeitsleitung<br />
Anschluss Gasleitung mm 9,52 (3/8") 12,7 (1/2") 12,7 (1/2") 9,52 (3/8") 12,7 (1/2")<br />
Kondensatablauf Ø mm 15 15 15 15 15<br />
Kältemittelfüllung R410A kg 0,92 1,18 1,77 1,09 1,17<br />
Max. Länge Kältemittelleitungen m 15 15 15 15 15<br />
Höchstlänge bei Standardfüllung m 5 5 5 5 5<br />
Zusätzliche Befüllung bei Überschreiten g/m 30 30 30 30 30<br />
der Standardlänge<br />
Max. Höhenunterschied der<br />
m<br />
Kältemittelleitungen<br />
7,5 7,5 7,5 7,5 7,5<br />
(*) Bei den folgenden Betriebsbedingungen: Aussentemperatur 35°C D.B., 24°C W.B; Raumtemperatur 27°C TK,<br />
19°C FK (47% R.F.); max. Geschwindigkeit.<br />
(**) Betriebsbedingungen: Aussentemperatur 7°C D.B., 6°C W.B; Raumtemperatur 20°C TK, 15°C FK,<br />
Höchstdrehzahl.<br />
(***)Schalldruckpegel in dB(A), 1 m Abstand aus dem Luftausblas, freie Zuluft.<br />
(****)Schalldruckpegel in dB(A), 1 m Abstand aus dem Luftausblas, Richtungsfaktor 2; freie Zuluft.<br />
98
ANLAGEN<br />
<strong>SPLIT</strong> MULTI (DUAL-TRIAL)<br />
<strong>SPLIT</strong> 09+09 DUAL 09+12 DUAL 09+09+12 TRIAL<br />
Technische Daten I II I II I II III<br />
Kälteleistung (*) kW 2,60 2,60 2,60 2,90 2,60 2,60 2,90<br />
Gesamte Leistungsaufnahme (*) kW 0,94 0,94 0,94 1,11 1,90 1,10<br />
Stromaufnahme A 4,1 4,1 4,1 5,0 8,3 5,0<br />
Wärmeleistung (**) kW 2,80 2,80 2,90 3,50 2,80 2,80 2,90<br />
Gesamte Leistungsaufnahme (**) kW 0,98 0,98 0,98 1,30 1,92 1,10<br />
Stromaufnahme A 4,3 4,3 4,3 5,8 8,3 5,0<br />
EER. /Leistungsziffer (COP) 2,77/2,86 2,68/2,81 2,70/2,81<br />
Betriebsspannung V-Ph-Hz 230-1-50 230-1-50 230-1-50<br />
Inneneinheit I II I II I II III<br />
Luftmenge bei Höchstdrehzahl m 3 /h 500 500 500 580 500 500 680<br />
Luftentfeuchtung l/h 1,0 1,0 1,0 1,2 1.00 1.00 1.20<br />
Maximal dB(A) 36 36 36 39 36 36 39<br />
Schaltdruckpegel (***) Mittlerer dB(A) 34 34 34 33 34 34 33<br />
Mindest dB(A) 32 32 32 28 32 32 28<br />
Höhe mm 250 250 250 280 250 250 280<br />
Abmessungen Breite mm 750 750 750 815 750 750 815<br />
Tiefe mm 205 205 205 215 205 205 215<br />
Gewicht kg 8,5 8,5 8,5 10 8.5 8.5 10<br />
Außeneinheit<br />
Verdichtertyp ROTARY ROTARY ROTARY<br />
Anlaufstrom A 21,7 21,7 21,7 29,5 31.8 29.5<br />
Schaltdruckpegel (****) dB(A) 56 56 58<br />
Höhe mm 655 655 830<br />
Abmessungen Breite mm 895 895 860<br />
Tiefe mm 345 345 330<br />
Gewicht kg 75 76 81<br />
Anschluss<br />
Art der Anschlüsse flare flare flare<br />
Anschluss Flüssigkeitsleitung mm 6,35 (1/4") 6,35 (1/4") 6,35 (1/4")<br />
Anschluss Gasleitung mm 9,52 (3/8") 9,52 (3/8") 12,7 (1/2") 9,52(3/8") 9,52(3/8") 12,7 (1/2")<br />
Kondensatablauf Ø mm 15 15 15 15 15 15 15<br />
Kältemittelfüllung R410A kg 0,98 0,98 0,900 1,10 1,55 1,150<br />
Max. Länge Kältemittelleitungen m 20 20 20 20 20 20 20<br />
Höchstlänge bei Standardfüllung m 5 5 5 5 5 5 5<br />
Zusätzliche Befüllung bei Überschreiten<br />
g/m 15 15 15 15 15 15 15<br />
der Standardlänge<br />
Max. Höhenunterschied der<br />
Kältemittelleitungen<br />
m 10 10 10 10 10 10 10<br />
(*) Bei den folgenden Betriebsbedingungen: Aussentemperatur 35°C D.B., 24°C W.B; Raumtemperatur 27°C TK,<br />
19°C FK (47% R.F.); max. Geschwindigkeit.<br />
(**) Betriebsbedingungen: Aussentemperatur 7°C D.B., 6°C W.B; Raumtemperatur 20°C TK, 15°C FK,<br />
Höchstdrehzahl.<br />
(***)Schalldruckpegel in dB(A), 1 m Abstand aus dem Luftausblas, freie Zuluft.<br />
(****)Schalldruckpegel in dB(A), 1 m Abstand aus dem Luftausblas, Richtungsfaktor 2; freie Zuluft.<br />
99
ANLAGEN<br />
<strong>SPLIT</strong> MULTI (DUAL) INVERTER<br />
<strong>SPLIT</strong> 09+09 DUAL INVERTER 09+12 DUAL INVERTER<br />
Technische Daten I II I II<br />
Kälteleistung (*) kW 5,28 5,86<br />
Gesamte Leistungsaufnahme (*) kW 2,06 2,32<br />
Stromaufnahme A 9,0 10,2<br />
Wärmeleistung (**) kW 5,86 6,15<br />
Gesamte Leistungsaufnahme (**) kW 2,16 2,25<br />
Stromaufnahme A 9,50 9,88<br />
EER. /Leistungsziffer (COP) 2,56/2,71 2,52/2,73<br />
Betriebsspannung V-Ph-Hz 230-1-50 230-1-50<br />
Inneneinheit I II I II<br />
Luftmenge bei Höchstdrehzahl m 3 /h 500 500 500 680<br />
Luftentfeuchtung l/h 1,0 1,0 1,0 1,2<br />
Maximal dB(A) 36 36 36 39<br />
Schaltdruckpegel (***) Mittlerer dB(A) 34 34 34 33<br />
Mindest dB(A) 32 32 32 28<br />
Höhe mm 250 250 250 280<br />
Abmessungen Breite mm 750 750 750 815<br />
Tiefe mm 205 205 205 215<br />
Gewicht kg 8,5 8,5 8,5 10<br />
Außeneinheit<br />
Verdichtertyp ROTARY INV. ROTARY INV.<br />
Anlaufstrom A 20 20<br />
Schaltdruckpegel (****) dB(A) 60 60<br />
Höhe mm 695 695<br />
Abmessungen Breite mm 845 845<br />
Tiefe mm 335 335<br />
Gewicht kg 71 71<br />
Anschluss<br />
Art der Anschlüsse flare flare flare flare<br />
Anschluss Flüssigkeitsleitung mm 6,35 (1/4") 6,35 (1/4") 6,35 (1/4") 6,35 (1/4")<br />
Anschluss Gasleitung mm 9,52 (3/8") 9,52 (3/8") 9,52 (3/8") 12,7 (1/2")<br />
Kondensatablauf Ø mm 15 15 15 15<br />
Kältemittelfüllung R410A kg 2,10 2,10<br />
Max. Länge Kältemittelleitungen m 20 20 20 20<br />
Höchstlänge bei Standardfüllung m 5 5 5 5<br />
Zusätzliche Befüllung bei Überschreiten der<br />
g/m<br />
Standardlänge<br />
15 15 15 15<br />
Max. Höhenunterschied der Kältemittelleitungen m 10 10 10 10<br />
(*) Bei den folgenden Betriebsbedingungen: Aussentemperatur 35°C D.B., 24°C W.B; Raumtemperatur 27°C TK,<br />
19°C FK (47% R.F.); max. Geschwindigkeit.<br />
(**) Betriebsbedingungen: Aussentemperatur 7°C D.B., 6°C W.B; Raumtemperatur 20°C TK, 15°C FK,<br />
Höchstdrehzahl.<br />
(***)Schalldruckpegel in dB(A), 1 m Abstand aus dem Luftausblas, freie Zuluft.<br />
(****)Schalldruckpegel in dB(A), 1 m Abstand aus dem Luftausblas, Richtungsfaktor 2; freie Zuluft.<br />
100
ANLAGEN<br />
<strong>SPLIT</strong> MULTI (TRIAL) INVERTER<br />
<strong>SPLIT</strong> 09+09+09 TRIAL INVERTER 09+09+12 TRIAL INVERTER<br />
Technische Daten I II III I II III<br />
Kälteleistung (*) kW 7,03 7,62<br />
Gesamte Leistungsaufnahme (*) kW 2,78 2,91<br />
Stromaufnahme A 12,2 12,7<br />
Wärmeleistung (**) kW 7,91 8,21<br />
Gesamte Leistungsaufnahme (**) kW 2,88 3,03<br />
Stromaufnahme A 12,6 13,3<br />
EER. /Leistungsziffer (COP) 2,53/2,75 2,62/2,71<br />
Betriebsspannung V-Ph-Hz 230-1-50 230-1-50<br />
Inneneinheit I II III I II III<br />
Luftmenge bei Höchstdrehzahl m 3 /h 500 500 500 500 500 680<br />
Luftentfeuchtung l/h 1,0 1,0 1,0 1,0 1,0 1,2<br />
Maximal dB(A) 36 36 36 36 36 39<br />
Schaltdruckpegel (***) Mittlerer dB(A) 34 34 34 34 34 33<br />
Mindest dB(A) 32 32 32 32 32 28<br />
Höhe mm 250 250 250 250 250 280<br />
Abmessungen Breite mm 750 750 750 750 750 815<br />
Tiefe mm 205 205 205 205 205 215<br />
Gewicht kg 8,5 8,5 8,5 8,5 8,5 10<br />
Außeneinheit<br />
Verdichtertyp ROTARY INV. ROTARY INV.<br />
Anlaufstrom A 20 20<br />
Schaltdruckpegel (****) dB(A) 60 60<br />
Höhe mm 695 695<br />
Abmessungen Breite mm 845 845<br />
Tiefe mm 335 335<br />
Gewicht kg 72 72<br />
Anschluss<br />
Art der Anschlüsse flare flare<br />
Anschluss Flüssigkeitsleitung mm 6,35 (1/4") 6,35 (1/4")<br />
Anschluss Gasleitung mm 9,52 (3/8") 9,52 (3/8") 9,52 (3/8") 12,7 (1/2")<br />
Kondensatablauf Ø mm 15 15 15 15<br />
Kältemittelfüllung R410A kg 2,25 2,25<br />
Max. Länge Kältemittelleitungen m 20 20 20 20<br />
Höchstlänge bei Standardfüllung m 5 5 5 5<br />
Zusätzliche Befüllung bei Überschreiten der<br />
g/m<br />
Standardlänge<br />
15 15 15 15<br />
Max. Höhenunterschied der Kältemittelleitungen m 10 10 10 10<br />
(*) Bei den folgenden Betriebsbedingungen: Aussentemperatur 35°C D.B., 24°C W.B; Raumtemperatur 27°C TK,<br />
19°C FK (47% R.F.); max. Geschwindigkeit.<br />
(**) Betriebsbedingungen: Aussentemperatur 7°C D.B., 6°C W.B; Raumtemperatur 20°C TK, 15°C FK,<br />
Höchstdrehzahl.<br />
(***)Schalldruckpegel in dB(A), 1 m Abstand aus dem Luftausblas, freie Zuluft.<br />
(****)Schalldruckpegel in dB(A), 1 m Abstand aus dem Luftausblas, Richtungsfaktor 2; freie Zuluft.<br />
101
ANLAGEN<br />
A2<br />
<strong>SPLIT</strong> MONO<br />
Mod. 09 - 12 – 18<br />
ELEKTRISCHE VERDRAHTUNGSPLÄNE<br />
<strong>SPLIT</strong> DUAL<br />
Mod. 09+09 - 09+12<br />
<strong>SPLIT</strong> DUAL INVERTER<br />
Mod. 09+09 - 09+12<br />
102
ANLAGEN<br />
A2<br />
<strong>SPLIT</strong> TRIAL<br />
Mod. 09+09+12<br />
ELEKTRISCHE VERDRAHTUNGSPLÄNE<br />
<strong>SPLIT</strong> TRIAL INVERTER<br />
Mod. 09+09+09 Mod. 09+09+12<br />
103
ANNEXOS<br />
A1<br />
CARACTERÍSTICAS TÉCNICAS<br />
<strong>SPLIT</strong> MONO - INVERTER<br />
<strong>SPLIT</strong> MONO 09 12 18 09 INVERTER 12 INVERTER<br />
Datos técnicos<br />
Potencia frigorífica (*) kW 2,64 3,52 5,30 (min./nom./max.) 0,94/2,64/3,22 1,32/3,52/4,40<br />
Potencia absorbida total (*) kW 0,82 1,08 1,72 (min./nom./max.) 0,27/0,80/1,118 0,48/1,06/1,59<br />
Absorción de corriente A 3,6 4,9 7,8 1,5/4,0/6,0 2,7/5,3/7,9<br />
Potencia térmica (**) kW 3,22 4,40 5,57 (min./nom./max.) 1,03/3,08/4,10 1,47/4,10/5,57<br />
Potencia absorbida total (**) kW 0,89 1,18 1,63 (min./nom./max.) 0,27/0,82/1,85 0,26/1,10/2,05<br />
Absorción de corriente A 3,9 5,3 7,4 1,5/4,1/9,1 2,7/5,4/10,8<br />
E.E.R. / C.O.P. 3,22/3,62 3,26/3,73 3,10/3,42 3,30/3,76 3,32/3,69<br />
Alimentación eléctrica V ph Hz 230-1-50 230-1-50 230-1-50 230-1-50 230-1-50<br />
Unidad interior<br />
Caudal aire velocidad máxima m 3 /h 500 680 850 570 700<br />
Deshumidificación l/h 1,0 1,2 1,6 1,0 1,2<br />
Máxima dB(A) 36 39 44 37 38<br />
Presión sonora (***) Media dB(A) 34 33 41 34 35<br />
Mínima dB(A) 32 28 38 30 31<br />
Altura mm 250 280 293 250 280<br />
Dimensiones Ancho mm 750 815 920 750 815<br />
Profundidad mm 205 215 224 205 215<br />
Peso kg 8,0 10,0 13,5 8,5 10,0<br />
Unidad exterior<br />
Tipo de compresor ROTATIVO ROTATIVO ROTATIVO ROT. INVERTER ROT. INVERTER<br />
Corriente de arranque A 22,0 30,0 42,5 3,3 4,8<br />
Presión sonora (****) dB(A) 50 52 56 55 55<br />
Altura mm 540 590 695 590 590<br />
Dimensiones Ancho mm 780 760 845 760 760<br />
Profundidad mm 250 285 335 285 285<br />
Peso kg 37,0 41,5 52,0 42 42<br />
Conexión<br />
Tipo de conexiones<br />
conexión<br />
avellanada<br />
conexión<br />
avellanada<br />
conexión<br />
avellanada<br />
conexión<br />
avellanada<br />
conexión<br />
avellanada<br />
Conexión línea líquido mm 6,35 (1/4") 6,35 (1/4") 6,35 (1/4") 6,35 (1/4") 6,35 (1/4")<br />
Conexión línea gas mm 9,52 (3/8") 12,7 (1/2") 12,7 (1/2") 9,52 (3/8") 12,7 (1/2")<br />
Desagüe condensados Ø mm 15 15 15 15 15<br />
Carga refrigerante R410A kg 0,92 1,18 1,77 1,09 1,17<br />
Long. máx. equivalente líneas m 15 15 15 15 15<br />
frigoríficas<br />
Longitud máxima con carga estándar m 5 5 5 5 5<br />
Carga añadida más allá de la long. est. g/m 30 30 30 30 30<br />
Desnivel máximo de las líneas m<br />
frigoríficas<br />
7,5 7,5 7,5 7,5 7,5<br />
(*) A la siguentes condiciones: temperatura exterior 35°C B.S., 24°C B.H; temperatura ambiente 27°C B.S., 19°C B.H.<br />
(47% H.C); velocidad maxima.<br />
(**) En las siguientes condiciones: temperatura exterior 7°C B.S., 6°C B.H; temperatura ambiente 20°C B.S., 15°C<br />
B.U, velocidad máxima.<br />
(***)Nivel de preción sonora en dB(A), medido a una distancia de 1 m desde el punto de salida del aire, a boca libre.<br />
(****)Nivel de preción sonora en dB(A), medido a una distancia de 1 m desde el punto de salida del aire, con coefficiente<br />
de dirección igual a 2, a boca libre.<br />
104
ANNEXOS<br />
<strong>SPLIT</strong> MULTI (DUAL-TRIAL)<br />
<strong>SPLIT</strong> 09+09 DUAL 09+12 DUAL 09+09+12 TRIAL<br />
Datos técnicos I II I II I II III<br />
Potencia frigorífica (*) kW 2,60 2,60 2,60 2,90 2,60 2,60 2,90<br />
Potencia absorbida total (*) kW 0,94 0,94 0,94 1,11 1,90 1,10<br />
Absorción de corriente A 4,1 4,1 4,1 5,0 8,3 5,0<br />
Potencia térmica (**) kW 2,80 2,80 2,90 3,50 2,80 2,80 2,90<br />
Potencia absorbida total (**) kW 0,98 0,98 0,98 1,30 1,92 1,10<br />
Absorción de corriente A 4,3 4,3 4,3 5,8 8,3 5,0<br />
E.E.R. / C.O.P. 2,77/2,86 2,68/2,81 2,70/2,81<br />
Alimentación eléctrica V ph Hz 230-1-50 230-1-50 230-1-50<br />
Unidad interior I II I II I II III<br />
Caudal aire velocidad máxima m 3 /h 500 500 500 580 500 500 680<br />
Deshumidificación l/h 1,0 1,0 1,0 1,2 1.00 1.00 1.20<br />
Máxima dB(A) 36 36 36 39 36 36 39<br />
Presión sonora (***) Media dB(A) 34 34 34 33 34 34 33<br />
Mínima dB(A) 32 32 32 28 32 32 28<br />
Altura mm 250 250 250 280 250 250 280<br />
Dimensiones Ancho mm 750 750 750 815 750 750 815<br />
Profundidad mm 205 205 205 215 205 205 215<br />
Peso kg 8,5 8,5 8,5 10 8.5 8.5 10<br />
Unidad exterior<br />
Tipo de compresor ROTATIVO ROTATIVO ROTATIVO<br />
Corriente de arranque A 21,7 21,7 21,7 29,5 31.8 29.5<br />
Presión sonora (****) dB(A) 56 56 58<br />
Altura mm 655 655 830<br />
Dimensiones Ancho mm 895 895 860<br />
Profundidad mm 345 345 330<br />
Peso kg 75 76 81<br />
Conexión<br />
Tipo de conexiones conexión avellanada conexión avellanada conexión avellanada<br />
Conexión línea líquido mm 6,35 (1/4") 6,35 (1/4") 6,35 (1/4")<br />
Conexión línea gas mm 9,52 (3/8") 9,52 (3/8") 12,7 (1/2") 9,52(3/8") 9,52(3/8") 12,7 (1/2")<br />
Desagüe condensados Ø mm 15 15 15 15 15 15 15<br />
Carga refrigerante R410A kg 0,98 0,98 0,900 1,10 1,55 1,150<br />
Long. máx. equivalente líneas<br />
m 20 20 20 20 20 20 20<br />
frigoríficas<br />
Longitud máxima con carga estándar m 5 5 5 5 5 5 5<br />
Carga añadida más allá de la long. est. g/m 15 15 15 15 15 15 15<br />
Desnivel máximo de las líneas frigoríficas m 10 10 10 10 10 10 10<br />
(*) A la siguentes condiciones: temperatura exterior 35°C B.S., 24°C B.H; temperatura ambiente 27°C B.S., 19°C B.H.<br />
(47% H.C); velocidad maxima.<br />
(**) En las siguientes condiciones: temperatura exterior 7°C B.S., 6°C B.H; temperatura ambiente 20°C B.S., 15°C<br />
B.U, velocidad máxima.<br />
(***)Nivel de preción sonora en dB(A), medido a una distancia de 1 m desde el punto de salida del aire, a boca libre.<br />
(****)Nivel de preción sonora en dB(A), medido a una distancia de 1 m desde el punto de salida del aire, con coefficiente<br />
de dirección igual a 2, a boca libre.<br />
105
ANNEXOS<br />
<strong>SPLIT</strong> MULTI (DUAL) INVERTER<br />
<strong>SPLIT</strong> 09+09 DUAL INVERTER 09+12 DUAL INVERTER<br />
Datos técnicos I II I II<br />
Potencia frigorífica (*) kW 5,28 5,86<br />
Potencia absorbida total (*) kW 2,06 2,32<br />
Absorción de corriente A 9,0 10,2<br />
Potencia térmica (**) kW 5,86 6,15<br />
Potencia absorbida total (**) kW 2,16 2,25<br />
Absorción de corriente A 9,50 9,88<br />
E.E.R. / C.O.P. 2,56/2,71 2,52/2,73<br />
Alimentación eléctrica V ph Hz 230-1-50 230-1-50<br />
Unidad interior I II I II<br />
Caudal aire velocidad máxima m 3 /h 500 500 500 680<br />
Deshumidificación l/h 1,0 1,0 1,0 1,2<br />
Máxima dB(A) 36 36 36 39<br />
Presión sonora (***) Media dB(A) 34 34 34 33<br />
Mínima dB(A) 32 32 32 28<br />
Altura mm 250 250 250 280<br />
Dimensiones Ancho mm 750 750 750 815<br />
Profundidad mm 205 205 205 215<br />
Peso kg 8,5 8,5 8,5 10<br />
Unidad exterior<br />
Tipo de compresor ROTATIVO INV. ROTATIVO INV.<br />
Corriente de arranque A 20 20<br />
Presión sonora (****) dB(A) 60 60<br />
Altura mm 695 695<br />
Dimensiones Ancho mm 845 845<br />
Profundidad mm 335 335<br />
Peso kg 71 71<br />
Conexión<br />
Tipo de conexiones cartella cartella cartella cartella<br />
Conexión línea líquido mm 6,35 (1/4") 6,35 (1/4") 6,35 (1/4") 6,35 (1/4")<br />
Conexión línea gas mm 9,52 (3/8") 9,52 (3/8") 9,52 (3/8") 12,7 (1/2")<br />
Desagüe condensados Ø mm 15 15 15 15<br />
Carga refrigerante R410A kg 2,10 2,10<br />
Long. máx. equivalente líneas frigoríficas m 20 20 20 20<br />
Longitud máxima con carga estándar m 5 5 5 5<br />
Carga añadida más allá de la long. est. g/m 15 15 15 15<br />
Desnivel máximo de las líneas frigoríficas m 10 10 10 10<br />
(*) A la siguentes condiciones: temperatura exterior 35°C B.S., 24°C B.H; temperatura ambiente 27°C B.S., 19°C B.H.<br />
(47% H.C); velocidad maxima.<br />
(**) En las siguientes condiciones: temperatura exterior 7°C B.S., 6°C B.H; temperatura ambiente 20°C B.S., 15°C<br />
B.U, velocidad máxima.<br />
(***)Nivel de preción sonora en dB(A), medido a una distancia de 1 m desde el punto de salida del aire, a boca libre.<br />
(****)Nivel de preción sonora en dB(A), medido a una distancia de 1 m desde el punto de salida del aire, con coefficiente<br />
de dirección igual a 2, a boca libre.<br />
106
ANNEXOS<br />
<strong>SPLIT</strong> MULTI (TRIAL) INVERTER<br />
<strong>SPLIT</strong> 09+09+09 TRIAL INVERTER 09+09+12 TRIAL INVERTER<br />
Datos técnicos I II III I II III<br />
Potencia frigorífica (*) kW 7,03 7,62<br />
Potencia absorbida total (*) kW 2,78 2,91<br />
Absorción de corriente A 12,2 12,7<br />
Potencia térmica (**) kW 7,91 8,21<br />
Potencia absorbida total (**) kW 2,88 3,03<br />
Absorción de corriente A 12,6 13,3<br />
E.E.R. / C.O.P. 2,53/2,75 2,62/2,71<br />
Alimentación eléctrica V ph Hz 230-1-50 230-1-50<br />
Unidad interior I II III I II III<br />
Caudal aire velocidad máxima m 3 /h 500 500 500 500 500 680<br />
Deshumidificación l/h 1,0 1,0 1,0 1,0 1,0 1,2<br />
Máxima dB(A) 36 36 36 36 36 39<br />
Presión sonora (***) Media dB(A) 34 34 34 34 34 33<br />
Mínima dB(A) 32 32 32 32 32 28<br />
Altura mm 250 250 250 250 250 280<br />
Dimensiones Ancho mm 750 750 750 750 750 815<br />
Profundidad mm 205 205 205 205 205 215<br />
Peso kg 8,5 8,5 8,5 8,5 8,5 10<br />
Unidad exterior<br />
Tipo de compresor ROTATIVO INV. ROTATIVO INV.<br />
Corriente de arranque A 20 20<br />
Presión sonora (****) dB(A) 60 60<br />
Altura mm 695 695<br />
Dimensiones Ancho mm 845 845<br />
Profundidad mm 335 335<br />
Peso kg 72 72<br />
Conexión<br />
Tipo de conexiones cartella cartella<br />
Conexión línea líquido mm 6,35 (1/4") 6,35 (1/4")<br />
Conexión línea gas mm 9,52 (3/8") 9,52 (3/8") 9,52 (3/8") 12,7 (1/2")<br />
Desagüe condensados Ø mm 15 15 15 15<br />
Carga refrigerante R410A kg 2,25 2,25<br />
Long. máx. equivalente líneas frigoríficas m 20 20 20 20<br />
Longitud máxima con carga estándar m 5 5 5 5<br />
Carga añadida más allá de la long. est. g/m 15 15 15 15<br />
Desnivel máximo de las líneas frigoríficas m 10 10 10 10<br />
(*) A la siguentes condiciones: temperatura exterior 35°C B.S., 24°C B.H; temperatura ambiente 27°C B.S., 19°C B.H.<br />
(47% H.C); velocidad maxima.<br />
(**) En las siguientes condiciones: temperatura exterior 7°C B.S., 6°C B.H; temperatura ambiente 20°C B.S., 15°C<br />
B.U, velocidad máxima.<br />
(***)Nivel de preción sonora en dB(A), medido a una distancia de 1 m desde el punto de salida del aire, a boca libre.<br />
(****)Nivel de preción sonora en dB(A), medido a una distancia de 1 m desde el punto de salida del aire, con coefficiente<br />
de dirección igual a 2, a boca libre.<br />
107
ANNEXOS<br />
A2<br />
<strong>SPLIT</strong> MONO<br />
Mod. 09 - 12 – 18<br />
ESQUEMAS DE CONEXIÓN ELÉCTRICA<br />
<strong>SPLIT</strong> DUAL<br />
Mod. 09+09 - 09+12<br />
<strong>SPLIT</strong> DUAL INVERTER<br />
Mod. 09+09+09 Mod. 09+09 - 09+12<br />
107
ANNEXOS<br />
A2<br />
<strong>SPLIT</strong> TRIAL<br />
Mod. 09+09+12<br />
ESQUEMAS DE CONEXIÓN ELÉCTRICA<br />
<strong>SPLIT</strong> TRIAL INVERTER<br />
Mod. 09+09+09 Mod. 09+09+12<br />
108
NOTE<br />
NOTE<br />
………………………………………………………………………………………<br />
………………………………………………………………………………………<br />
………………………………………………………………………………………<br />
………………………………………………………………………………………<br />
………………………………………………………………………………………<br />
………………………………………………………………………………………<br />
………………………………………………………………………………………<br />
………………………………………………………………………………………<br />
………………………………………………………………………………………<br />
………………………………………………………………………………………<br />
………………………………………………………………………………………<br />
………………………………………………………………………………………<br />
………………………………………………………………………………………<br />
………………………………………………………………………………………<br />
………………………………………………………………………………………<br />
………………………………………………………………………………………<br />
………………………………………………………………………………………<br />
………………………………………………………………………………………<br />
……………………………………………………………………………………….<br />
109
3<br />
ARTEMIO FLY<br />
RHOSS S.p.A.<br />
Via Oltre Ferrovia - 33033 Codroipo (UD) Italia- tel. 0432.911611 - fax 0432.911600 - rhoss@rhoss.it www.rhoss.it - www.rhoss.com<br />
H50767/A 12.05 PS/DM