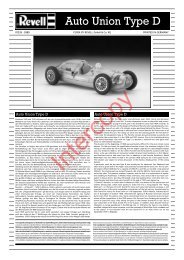
Instrucciones de uso: Prueba de funcionamiento del ... - Revell
Instrucciones de uso: Prueba de funcionamiento del ... - Revell
Instrucciones de uso: Prueba de funcionamiento del ... - Revell

You also want an ePaper? Increase the reach of your titles
YUMPU automatically turns print PDFs into web optimized ePapers that Google loves.
A H G<br />
B C D<br />
NL E<br />
A Passtuk voor het A Pieza <strong>de</strong> adaptación<br />
D<br />
GB F<br />
aansluiten van <strong>de</strong><br />
<strong>Revell</strong>-slang<br />
para compresor<br />
para la conexión<br />
A Kompressoran- A Compressor A Adaptateur <strong>de</strong><br />
38230 op <strong>de</strong><br />
compressor<br />
<strong>de</strong>l tubo flexible<br />
38230 <strong>de</strong> <strong>Revell</strong><br />
passungsstück adapter for the compresseur pour<br />
für <strong>de</strong>n Anschluss connector of le raccor<strong>de</strong>ment B Waterafschei<strong>de</strong>r B Separador <strong>de</strong> agua<br />
<strong>de</strong>s <strong>Revell</strong><br />
<strong>Revell</strong> hose<br />
du tuyau flexible<br />
Schlauches 38230 38230<br />
<strong>Revell</strong> 38230. C Opening voor het C Tubuladura <strong>de</strong><br />
B Wasserabschei<strong>de</strong>r B Water separator B Purgeur <strong>de</strong><br />
aftappen van<br />
con<strong>de</strong>nswater<br />
salida <strong>de</strong>l agua <strong>de</strong><br />
con<strong>de</strong>nsación<br />
con<strong>de</strong>nsation<br />
C Kon<strong>de</strong>nswasser- C Con<strong>de</strong>nsation C Tubulure d’éva- D Drukregelaar D Regulador <strong>de</strong><br />
ablassstutzen drain valve<br />
cuation <strong>de</strong> l’eau<br />
presión<br />
D Druckregler<br />
<strong>de</strong> con<strong>de</strong>nsation<br />
D Pressure regulator D Régulateur <strong>de</strong><br />
E Persluchtdrukmeter<br />
E Manómetro <strong>de</strong>l<br />
E Druckluftmanometer<br />
E Compressed air<br />
manometer<br />
pression<br />
E Manomètre à air<br />
comprimé<br />
F Schakelaar<br />
Aan / Uit<br />
aire comprimido<br />
F Interruptor <strong>de</strong><br />
conexión/<br />
F An-/Aus-Schalter F On/Off switch F Bouton G Afschakelautmaat <strong>de</strong>sconexión<br />
Marche/Arrêt<br />
G Dispositivo automá<br />
G Abschaltautomatik G Automatic switch- G Arrêt automatique H<br />
Draaggreep<br />
tico <strong>de</strong> <strong>de</strong>sconexión<br />
off system<br />
H Tragegriff H Carrying handle H Poignée <strong>de</strong><br />
transport<br />
H Asa <strong>de</strong> transporte<br />
E<br />
F<br />
Typ: D Ölfreier Kolbenkompressor (220 - 240 V / 50 Hz / 135 W)<br />
Maximaldruck: ca. 5,5 bar<br />
Luft-/Liter Leistung: ca. 23 l/min<br />
Geräuschentwicklung: ca. 55 db<br />
Extras: Manometer, Druckregler, Wasserabschei<strong>de</strong>r, Abschaltautomatik, Tragegriff<br />
Anschlüsse: Serienmäßig mit Anschluss (1/4 Zoll) für die Schläuche 38230<br />
(mit Kompressoranpassungsstück) und 38250<br />
Das Kompressoranpassungsstück ist enthalten,<br />
die Schläuche sind nicht im Set enthalten<br />
Der 'standard class' Kompressor ist ein ölfreier Kolbenkompressor. Er arbeitet optimal mit<br />
unserer 'standard class' Spritzpistole zusammen. Er ist i<strong>de</strong>al für ambitionierte Einsteiger in das<br />
Airbrush-Hobby.<br />
Bedienungsanleitung:<br />
1. Packen Sie <strong>de</strong>n Kompressor und <strong>de</strong>n Wasserabschei<strong>de</strong>r (B) vorsichtig aus. Entfernen Sie die<br />
Transportmaterialien und prüfen Sie alles auf äußere Beschädigungen.<br />
2. Montieren Sie <strong>de</strong>n Wasserabschei<strong>de</strong>r (B) an <strong>de</strong>n Kompressor (siehe Abbildung).<br />
3. Schließen Sie <strong>de</strong>n Luftschlauch <strong>de</strong>r Spritzpistole an <strong>de</strong>n Wasserabschei<strong>de</strong>r (B) an:<br />
Bei Verwendung <strong>de</strong>s Luftschlauchs 38230 können Sie diesen direkt an das Kompressoranpassungsstück<br />
(A) am Wasserabschei<strong>de</strong>r (B) anschließen.<br />
Bei Verwendung <strong>de</strong>s Luftschlauchs 38250 müssen Sie das Kompressoranpassungsstück (A) vom<br />
Wasserabschei<strong>de</strong>r (B) abschrauben und <strong>de</strong>n Schlauch direkt auf das 1/4-Zoll-Gewin<strong>de</strong> schrauben.<br />
4. Verbin<strong>de</strong>n Sie das an<strong>de</strong>re En<strong>de</strong> <strong>de</strong>s Luftschlauchs mit Ihrer Spritzpistole.<br />
5. Der Kompressor ist nun fertig montiert und bereit für <strong>de</strong>n Funktionstest.<br />
Testen <strong>de</strong>s Kompressors:<br />
6. Stecken Sie <strong>de</strong>n Netzstecker <strong>de</strong>s Kompressors in eine Steckdose.<br />
7. Schalten Sie <strong>de</strong>n Kompressor ein (F). Der Kompressor läuft an und schaltet automatisch ab, wenn<br />
das System luftdicht ist. Wenn sich <strong>de</strong>r Kompressor nach ca. 10 Sekun<strong>de</strong>n jedoch nicht automatisch<br />
abschaltet o<strong>de</strong>r wenn sich <strong>de</strong>r Kompressor im Ruhezustand dauernd ein- und ausschaltet, <strong>de</strong>utet<br />
dies auf eine Undichtigkeit hin. Prüfen Sie alle Anschlüsse und Schlauchverbindungen und achten<br />
Sie auf das Geräusch entweichen<strong>de</strong>r Luft. Dichten Sie gegebenenfalls undichte Gewin<strong>de</strong> mit<br />
Teflonband ab und ziehen Sie alle Schlauchverbindungen fest.<br />
8. Nach<strong>de</strong>m sich <strong>de</strong>r Kompressor automatisch abgeschaltet hat, geben Sie <strong>de</strong>n Luftstrom frei, in<strong>de</strong>m<br />
Sie <strong>de</strong>n Auslöser Ihrer Spritzpistole betätigen. Sobald <strong>de</strong>r Luftstrom freigegeben ist, läuft <strong>de</strong>r<br />
Kompressor wie<strong>de</strong>r an. Der Kompressor läuft so lange, wie Sie die Spritzpistole verwen<strong>de</strong>n und<br />
schaltet sich bei Nichtbenutzung <strong>de</strong>r Spritzpistole automatisch ab.<br />
Wartung und Leerung <strong>de</strong>s Wasserabschei<strong>de</strong>rs:<br />
9. Nach Benutzung <strong>de</strong>s Kompressors kann sich Feuchtigkeit im Wasserabschei<strong>de</strong>r (B) ansammeln.<br />
10. Schalten Sie <strong>de</strong>n Kompressor aus (F).<br />
11. Um <strong>de</strong>n Wasserabschei<strong>de</strong>r (B) zu entleeren, drehen Sie zunächst <strong>de</strong>n Druckregler (D) entgegen <strong>de</strong>m<br />
Uhrzeigersinn heraus und nehmen Sie die austreten<strong>de</strong> Feuchtigkeit mit einem Tuch auf. Schalten Sie<br />
<strong>de</strong>n Kompressor anschließend wie<strong>de</strong>r ein (F).<br />
12. Die Feuchtigkeit wird aus <strong>de</strong>r Unterseite <strong>de</strong>s Reglers herausgedrückt, bis keine Feuchtigkeit mehr<br />
aus <strong>de</strong>m Kon<strong>de</strong>nswasserablassstutzen (C) austritt.<br />
13. Wenn <strong>de</strong>r Wasserabschei<strong>de</strong>r (B) entleert ist, drehen Sie <strong>de</strong>n Druckregler (D) im Uhrzeigersinn<br />
wie<strong>de</strong>r hinein.<br />
Druckluftmanometer und Einstellung <strong>de</strong>s Arbeitsdrucks:<br />
14. Das Druckluftmanometer (E) zeigt <strong>de</strong>n Arbeitsdruck beim Airbrushen an.<br />
Die Abschaltautomatik (G) schaltet <strong>de</strong>n Kompressor bei Erreichen von ca. 4 bar ab und bei Absenkung<br />
auf ca. 3 bar wie<strong>de</strong>r ein.<br />
15. Im Betrieb zeigt das Druckluftmanometer normalerweise zwischen 2,5 und 3,5 bar an, abhängig<br />
von <strong>de</strong>m jeweiligen Spritzpistolen-Mo<strong>de</strong>ll. Dies wird als zur Verfügung stehen<strong>de</strong>r "Arbeitsdruck"<br />
bezeichnet.<br />
16. Wir empfehlen beim Arbeiten mit <strong>de</strong>n <strong>Revell</strong> Spritzpistolen einen Arbeitsdruck von ca. 1,8 - 2,1 bar.<br />
17. Verringerung <strong>de</strong>s Arbeitsdrucks: Geben Sie <strong>de</strong>n Luftstrom frei, in<strong>de</strong>m Sie <strong>de</strong>n Auslöser an <strong>de</strong>r<br />
Spritzpistole betätigen. Drehen Sie gleichzeitig <strong>de</strong>n Druckregler (D) entgegen <strong>de</strong>m Uhrzeigersinn, bis<br />
das Druckluftmanometer (E) <strong>de</strong>n gewünschten Arbeitsdruck anzeigt.<br />
18. Hinweis: Wenn Sie mit verringertem Arbeitsdruck arbeiten, tritt aus <strong>de</strong>m Druckregler (D) permanent<br />
Luft aus. Auf diese Weise wird die automatische Abschaltfunktion (G) außer Betrieb gesetzt.<br />
Wenn Sie <strong>de</strong>n Druckregler (D) schließen, wird die automatische Abschaltfunktion (G) wie<strong>de</strong>r eingeschaltet.<br />
Allgemeine Hinweise:<br />
19. Der Kompressor kann bei längerem Gebrauch sehr heiß wer<strong>de</strong>n; seine<br />
Handhabung erfor<strong>de</strong>rt dann beson<strong>de</strong>re Sorgfalt.<br />
20. Die ununterbrochene Laufzeit <strong>de</strong>s Kompressors soll 60 Minuten nicht überschreiten.<br />
Der Motor ist vor Überhitzung geschützt und schaltet <strong>de</strong>n Kompressor bei Überhitzung<br />
automatisch ab. Wenn dies geschieht, schalten Sie <strong>de</strong>n Kompressor bitte aus.<br />
Schalten Sie ihn erst wie<strong>de</strong>r ein, wenn er abgekühlt ist.<br />
21. Arbeiten Sie immer in gut belüfteten Bereichen und vermei<strong>de</strong>n Sie <strong>de</strong>n Einsatz<br />
<strong>de</strong>s Kompressors in feuchter Umgebung o<strong>de</strong>r in Wassernähe.<br />
22. Setzen Sie <strong>de</strong>n Kompressor nicht <strong>de</strong>m unmittelbaren Farbnebel aus.<br />
23. Versprühen Sie bitte niemals brennbare Substanzen.<br />
24. Garantie: Auf dieses Gerät gewährt die Firma <strong>Revell</strong> eine Garantie von einem Jahr ab Kaufdatum.<br />
Bitte wen<strong>de</strong>n Sie sich im Garantiefall unter Vorlage <strong>de</strong>s Kassenbons an Ihren Händler.<br />
25. Garantieanspruch: Bitte führen Sie keine Selbstreparaturen durch. An<strong>de</strong>rnfalls entfällt <strong>de</strong>r<br />
Garantieanspruch.<br />
Hinweise zum Umweltschutz:<br />
Dieses Produkt darf am En<strong>de</strong> seiner Lebensdauer nicht über <strong>de</strong>n normalen Haushaltsabfall<br />
entsorgt wer<strong>de</strong>n, son<strong>de</strong>rn muss an einem Sammelpunkt für das Recycling von<br />
elektrischen und elektronischen Geräten abgegeben wer<strong>de</strong>n. Das Symbol auf <strong>de</strong>m<br />
Produkt, <strong>de</strong>r Gebrauchsanleitung o<strong>de</strong>r <strong>de</strong>r Verpackung weist darauf hin. Die Werkstoffe<br />
sind gemäß Ihrer Kennzeichnung wie<strong>de</strong>rverwertbar.<br />
Mit <strong>de</strong>r Wie<strong>de</strong>rverwendung, <strong>de</strong>r stofflichen Verwertung o<strong>de</strong>r an<strong>de</strong>ren Formen <strong>de</strong>r Verwertung<br />
von Altgeräten leisten Sie einen wichtigen Beitrag zum Schutze unserer Umwelt.<br />
Bitte erfragen Sie bei <strong>de</strong>r Gemein<strong>de</strong>verwaltung die zuständige Entsorgungsstelle.<br />
Type: GB Oil-free piston compressor (220 - 240 V / 50 Hz / 135 W)<br />
Maximum pressure: approx. 5.5 bar<br />
Output in litres of air: approx. 23 l/min<br />
Noise level: approx. 55 db<br />
Extras: Manometer, pressure regulator, water separator, automatic switch-off system,<br />
carrying handle.<br />
Connectors: Fitted as standard with the connector (1/4 inch) for hoses 38230 (with<br />
compressor adapter) and 38250. The compressor adapter is inclu<strong>de</strong>d, but the<br />
hoses are not inclu<strong>de</strong>d in the set.<br />
The 'standard class' compressor is an oil-free piston compressor. It works best with our<br />
'standard class' spray-gun. It is i<strong>de</strong>al for ambitious beginners.<br />
Instructions for use:<br />
1. Carefully unpack the compressor and water separator (B). Remove the transport material and check<br />
everything for external damage.<br />
2. Attach the water separator (B) to the compressor (see illustration).<br />
3. Connect the air hose of the spray-gun to the water separator (B): If using air hose 38230, you can<br />
connect this directly to the compressor adapter (A) on the water separator (B). If using air hose<br />
38250, you must unscrew the compressor adapter (A) from the water separator (B) and screw the<br />
hose directly onto the 1/4 inch thread.<br />
4. Connect the other end of the air hose to your spray-gun.<br />
5. The compressor is now assembled and ready for the function test.<br />
Testing the compressor:<br />
6. Plug the mains plug of the compressor into a power point.<br />
7. Switch on the compressor (F). The compressor starts up and automatically switches off, if the<br />
system is airtight. If the compressor does not automatically switch off after approx. 10 seconds, or<br />
if the compressor switches on and off constantly while in a resting state, this indicates a leak. Check<br />
all connectors and hose connections and listen out for the sound of escaping air. Seal all leaky<br />
threads with Teflon tape and pull all hose connections tight.<br />
8. After the compressor has automatically switched off, release the air flow by pressing the trigger on<br />
your spray-gun. As soon as the air flow has been released, the compressor starts up again. The<br />
compressor continues to run for as long as you use the spray-gun, and if the spray-gun is not used<br />
for a certain period of time, it automatically switches off.<br />
Servicing and emptying the water separator:<br />
9. After using the compressor, moisture can collect in the water separator (B).<br />
10. Switch off the compressor (F).<br />
11. To empty the water separator (B), unscrew the pressure regulator (D) anticlockwise and use a cloth<br />
to absorb the moisture that comes out. Then switch the compressor (F) on again.<br />
12. The moisture will be pressed out from un<strong>de</strong>rneath the regulator until no more moisture comes out<br />
of the con<strong>de</strong>nsation drain valve (C).<br />
13. When the water separator (B) is empty, screw the press regulator (D) back on<br />
clockwise.<br />
Compressed air manometer and setting the operating pressure:<br />
14. The compressed air manometer (E) displays the operating pressure during airbrushing. The<br />
automatic switch-off system (G) switches off the compressor when the pressure reaches approx.<br />
4 bar and switches it back on again when the pressure drops to approx. 3 bar.<br />
15. While running, the compressed air manometer normally displays pressure at between 2.5 and 3.5<br />
bar, <strong>de</strong>pending on the mo<strong>de</strong>l of spray-gun. This is <strong>de</strong>scribed as the available “operating pressure”.<br />
16. When working with <strong>Revell</strong> spray-guns, we recommend an operating pressure of approx. 1.8 – 2.1 bar.<br />
17. Reducing the operating pressure: Release the air flow by pressing the trigger on your spray-gun.<br />
At the same time, unscrew the pressure regulator (D) anticlockwise until the compressed air<br />
manometer (E) displays the <strong>de</strong>sired operating pressure.<br />
18. Tip: If you are working with reduced operating pressure, air constantly escapes from the pressure<br />
regulator. In this way, the automatic switch-off system (G) is put out of action. If you close the<br />
pressure regulator (D), the automatic switch-off system (G) switches back on.<br />
General notes:<br />
19. If used for a long period of time, the compressor can become very hot; in such cases, special care<br />
must be taken when handling the compressor.<br />
20. The uninterrupted operating time of the compressor must not exceed 60 minutes. The motor is<br />
protected from overheating. In the event of overheating, it automatically turns off the compressor.<br />
If this happens, please switch off the compressor. Do not switch it back on until it has cooled down.<br />
21. Always work in well ventilated areas and avoid using the compressor in a humid environment or<br />
near water.<br />
22. Do not expose the compressor to the direct spray.<br />
23. Never spray it with flammable substances.<br />
24. Guarantee: <strong>Revell</strong>’s guarantee on this piece of equipment is valid for one year from the purchase<br />
date. Should you need to invoke the guarantee, please take the compressor and your receipt to your<br />
local <strong>de</strong>aler.<br />
25. Right to claim un<strong>de</strong>r the guarantee: Please do not carry out any repairs yourself. If you do, your right<br />
to claim un<strong>de</strong>r the guarantee shall cease to apply.<br />
Notes on environmental protection:<br />
At the end of its useful life, this product must not be disposed of with normal household<br />
waste. It must be han<strong>de</strong>d over at a collection point for the recycling of electric and<br />
electronic equipment. This is indicated by the symbol on the product, instructions for<br />
use or packaging. The materials are recyclable as labelled. You make an important<br />
contribution to the protection of our environment through the recycling, material<br />
recycling or other forms of recycling of old equipment.<br />
Please contact your local authority for <strong>de</strong>tails on your local disposal centre.<br />
Type : F Compresseur à piston sans huile (220 - 240 V / 50 Hz / 135 W)<br />
Pression maxi : env. 5,5 bars<br />
Débit d’air : 23 l/min env.<br />
Niveau sonore : 55 db env.<br />
Options : manomètre, régulateur <strong>de</strong> pression, purgeur <strong>de</strong> con<strong>de</strong>nsation, dispositif d’arrêt<br />
automatique, poignée <strong>de</strong> transport.<br />
Raccor<strong>de</strong>ments : <strong>de</strong> série avec raccord (1/4’’) pour les tuyaux flexibles 38230 (avec adaptateur<br />
<strong>de</strong> compresseur) et 38250. L’adaptateur <strong>de</strong> compresseur est fourni, les tuyaux<br />
flexibles ne sont pas fournis.<br />
Le « standard class » est un compresseur à piston sans huile. Il fonctionne parfaitement bien<br />
en association avec notre aérographe « standard class ». C’est un appareil idéal pour les débutants<br />
ambitieux en aérographie.<br />
Notice d’utilisation<br />
1. Sortez le compresseur et le purgeur (B) avec précaution <strong>de</strong> l’emballage. Retirez les matériaux <strong>de</strong><br />
transport et vérifiez que les pièces ne présentent aucun dommage apparent.<br />
2. Installez le purgeur (B) sur le compresseur (voir illustration).<br />
3. Raccor<strong>de</strong>r le tuyau à air <strong>de</strong> l’aérographe au purgeur <strong>de</strong> con<strong>de</strong>nsation (B) : - si vous utilisez le<br />
tuyau 38230, vous pouvez le raccor<strong>de</strong>r directement à l’adaptateur (A) se trouvant sur le purgeur<br />
<strong>de</strong> con<strong>de</strong>nsation (B) ; - si vous utilisez le tuyau 38250, vous <strong>de</strong>vez dévisser l’adaptateur <strong>de</strong><br />
compresseur (A) <strong>de</strong> purgeur (B) et visser le tuyau directement sur le filetage 1/4".<br />
4. Raccor<strong>de</strong>z l’autre bout du tuyau à air à votre aérographe.<br />
5. Le compresseur est maintenant complètement monté et prêt pour le test <strong>de</strong> fonctionnement.<br />
Test <strong>de</strong> fonctionnement du compresseur<br />
6. Branchez la prise mâle du compresseur sur une prise <strong>de</strong> courant.<br />
7. Mettez le compresseur en marche (F). Le compresseur démarre et s’arrête automatiquement si le<br />
système est étanche à l’air. Si toutefois le compresseur ne s’arrête pas automatiquement au bout <strong>de</strong><br />
10 secon<strong>de</strong>s environ ou si le compresseur en position <strong>de</strong> repos n’arrête pas <strong>de</strong> se mettre en route et<br />
<strong>de</strong> s’arrêter, ceci voudra dire qu’il y a une fuite. Contrôlez tous les raccor<strong>de</strong>ments et les raccords <strong>de</strong><br />
tuyaux et vérifiez si on peut entendre un bruit d’air qui s’échappe. Calfeutrez les filetages présentant<br />
éventuellement <strong>de</strong>s défauts d’étanchéité avec une ban<strong>de</strong> <strong>de</strong> téflon et serrez à fond tous les raccords<br />
<strong>de</strong> tuyaux.<br />
8. Lorsque le compresseur s’est arrêté automatiquement, libérez le flux d’air en actionnant la gâchette<br />
<strong>de</strong> votre aérographe. Dès que le flux d’air est libéré, le compresseur se remet en marche. Il fonctionne<br />
tant que vous utilisez votre aérographe et s’arrête automatiquement lorsque vous ne l’utilisez pas.<br />
Entretien et vidage du purgeur <strong>de</strong> con<strong>de</strong>nsation.<br />
9. Après une utilisation du compresseur, l’humidité peut s’accumuler dans le purgeur (B).<br />
10. Arrêtez le compresseur (F).<br />
11. Pour vi<strong>de</strong>r le purgeur (B), dévissez d’abord le régulateur <strong>de</strong> pression (D) dans le sens contraire <strong>de</strong>s<br />
aiguilles d’une montre et épongez l’humidité qui s’échappe avec un chiffon. Remettez ensuite le<br />
compresseur en marche (F).<br />
12. L’humidité est sortie par pression au niveau inférieur du régulateur jusqu’à ce qu’aucune humidité<br />
ne sorte plus <strong>de</strong> la tubulure d’évacuation <strong>de</strong> l’eau <strong>de</strong> con<strong>de</strong>nsation (C).<br />
13. Lorsque le purgeur (B) est vi<strong>de</strong>, revissez le régulateur <strong>de</strong> pression (D) en le tournant dans le sens<br />
<strong>de</strong>s aiguilles d’une montre.