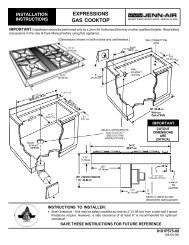
INSTALLATION INSTRUCTIONS 30" (76.2 CM) GAS ... - Jenn-Air
INSTALLATION INSTRUCTIONS 30" (76.2 CM) GAS ... - Jenn-Air
INSTALLATION INSTRUCTIONS 30" (76.2 CM) GAS ... - Jenn-Air

Create successful ePaper yourself
Turn your PDF publications into a flip-book with our unique Google optimized e-Paper software.
6. Read the Use and Care Guide or User Instructions.<br />
7. Turn on surface burners and oven. See the Use and Care Guide<br />
or User Instructions for specific instruction on range operation.<br />
If range does not operate, check the following:<br />
■ Household fuse is intact and tight, or circuit breaker has not<br />
tripped.<br />
■ Range is plugged into a grounded 3 prong outlet.<br />
■ Electrical supply is connected.<br />
■ See “Troubleshooting” in the Use and Care Guide or User<br />
Instructions.<br />
8. When the range has been on for 5 minutes, check for heat. If<br />
the range is cold, turn off the range and check that the gas<br />
supply line shutoff valve is open.<br />
■ If the gas supply line shutoff valve is closed, open it, then<br />
repeat the 5-minute test as outlined above.<br />
■<br />
If the gas supply line shutoff valve is open, press the<br />
CANCEL button on the oven control panel and contact a<br />
qualified technician.<br />
9. Use the Flow Tester Card provided with your range to check<br />
the airflow (see card for step-by-step instructions).<br />
If there is not sufficient airflow, review the “Venting<br />
Requirements” and “Venting Methods” sections.<br />
If you need Assistance or Service:<br />
Please reference the “Assistance or Service” section of the Use<br />
and Care Guide or the cover of the User Instructions, or contact<br />
the dealer from whom you purchased your range.<br />
Gas conversions from Natural gas to LP gas or from LP gas to<br />
Natural gas must be done by a qualified installer.<br />
WARNING<br />
<strong>GAS</strong> CONVERSIONS<br />
LP Gas Conversion<br />
WARNING<br />
Explosion Hazard<br />
Use a new CSA International approved gas supply line.<br />
Install a shut-off valve.<br />
Securely tighten all gas connections.<br />
If connected to LP, have a qualified person make sure<br />
gas pressure does not exceed 14" (36 cm) water<br />
column.<br />
Examples of a qualified person include:<br />
licensed heating personnel,<br />
authorized gas company personnel, and<br />
authorized service personnel.<br />
Failure to do so can result in death, explosion, or fire.<br />
Tip Over Hazard<br />
A child or adult can tip the range and be killed.<br />
Install anti-tip bracket to floor or wall per installation<br />
instructions.<br />
Slide range back so rear range foot is engaged in the<br />
slot of the anti-tip bracket.<br />
Re-engage anti-tip bracket if range is moved.<br />
Do not operate range without anti-tip bracket installed<br />
and engaged.<br />
Failure to follow these instructions can result in death<br />
or serious burns to children and adults.<br />
1. Turn manual shutoff valve to the closed position.<br />
A<br />
A. To range<br />
B. Shutoff valve (closed position)<br />
C. Gas supply line<br />
2. Unplug range or disconnect power.<br />
B<br />
C<br />
20