

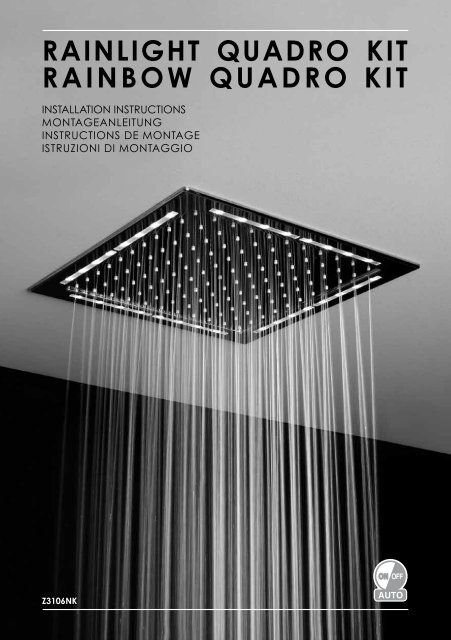
raINlIght quaDro kIt raINbow quaDro kIt - Nikles
raINlIght quaDro kIt raINbow quaDro kIt - Nikles
raINlIght quaDro kIt raINbow quaDro kIt - Nikles

You also want an ePaper? Increase the reach of your titles
YUMPU automatically turns print PDFs into web optimized ePapers that Google loves.
aINlIght <strong>quaDro</strong> <strong>kIt</strong><br />
<strong>raINbow</strong> <strong>quaDro</strong> <strong>kIt</strong><br />
INSTALLATION INSTRUCTIONS<br />
mONTAgEANLEITUNg<br />
INSTRUCTIONS DE mONTAgE<br />
ISTRUzIONI DI mONTAggIO<br />
Z3106Nk
1<br />
locatE thE fEEDEr out from thE showEr IN thE sEcurIty ZoNE<br />
position transformer in safe distance to shower cubicle<br />
PosItIoNIErEN DEs NEtZgErätEs IN DEr sIchErhEItsZoNE aussErhalb DEr<br />
DuschE<br />
Trafo von der Duschkabine in einem Sicherheitsabstand von x-metern unterbringen<br />
gemäss der lokalen gesetzgebung<br />
PosItIoNNEr lE boItIEr D’alImENtatIoN EN DEhors DE la DouchE DaNs<br />
uNE ZoNE DE sEcurItE.<br />
Positionner le transformateur à une distance de sécurité de la cabine de douche<br />
PosIZIoNarE l’alImENtatorE al DI fuorI DElla DoccIa<br />
NElla ZoNa DI sIcurEZZa<br />
Posizionare il trasformatore a distanza di sicurezza rispetto al box doccia<br />
16 17
2<br />
1 RAINLIghT-RAINBOW SQUARE 300 / EINBAURAhmEN RAINLIghT-RAINBOW<br />
QUADRAT 300 / COUVERTURE DE PROTECTION RAINLIghT-RAINBOW CARRE 300 /<br />
COPERTURA DI PROTEzIONE RAINLIghT-RAINBOW QUADRATA 300<br />
2 BOLTS / BOLzEN / BOULONS / BULLONI<br />
3 ANKERS / VERANKERUNgEN / ANCRAgES / ANCORAggI<br />
4 NUTS / mUTTER / ECROUS / DADI<br />
5 LED 3.4V / LED 3.4V / LED 3.4V / LED 3.4V<br />
6 RAINLIghT-RAINBOW hEAD ShOWER QUADRO 300mm / KOPfBRAUSE RAINLIghT-RAINBOW<br />
QUADRO 300mm / DOUChETTE RAINLIghT-RAINBOW QUADRO 300 mm / SOffIONE<br />
RAINLIghT-RAINBOW QUADRO 300mm<br />
7 fLEXIBLE hOSE / SChLAUCh / TUYAU fLEXIBLE / TUBO fLESSIBILE<br />
8 LUggED ELBOW WATER CONNECTION / WINKELSTÜCK WASSERANSChLUSS mIT<br />
SChNAPPVORRIChTUNg / BRANChEmENT EAU COUDE ARTICULE / CURVA COLLEgAmENTO<br />
ACQUA<br />
9 PRESSURE CONTROL DEVICE / DRUCKKONTROLLgERÄT / DISPOSITIf DE CONTROLE DE LA<br />
PRESSION / DISPOSITIVO DI CONTROLLO DELLA PRESSIONE<br />
10 ELECTRONIC PCB / ELEKTRONISChER PCB / CIRCUIT ImPRImE ELECTRONIQUE / SChEDA<br />
ELETTRONICA<br />
11 WIRE / KABEL / CABLE / CAVO<br />
12 CONNECTION IPX5 / IPX5 ANSChLUSS / CONNECXION IPX5 / CONNESSIONE IPX5<br />
13 TRANSfORmER/fEEDER 100/240V 50/60 hz - OUTPUT: 5VDC ETC / TRAfO/NETzgERÄT 100/240V<br />
50/60 hz - OUTPUT: 5VDC ETC / TRANSfORmATEUR/ALImENTATION 100/240V 50/60 hz -<br />
OUTPUT: 5VDC ETC / TRASfORmATORE/ALImENTATORE 100/240V 50/60 hz - OUTPUT: 5VDC ETC<br />
14 CONNECTION IPX5 / IPX5 ANSChLUSS / CONNEXION IPX5 / CONNESSIONE IPX5<br />
15 CONNECTION IPX5 / IPX5 ANSChLUSS / CONNEXION IPX5 / CONNESSIONE IPX5<br />
16 NIPPLES 1/2” gAS / NIPPEL 1/2” / EmBOUT 1/2” / RACCORDO 1/2” gAS<br />
17 NIPPLES 1/2” gAS / NIPPEL 1/2” - 1/2” NPT / EmBOUT 1/2” / RACCORDO 1/2”<br />
gAS - 1/2” NPT
3<br />
gENEral rEquIrEmENt / allgEmEINE aNforDEruNgEN /<br />
coNDItIoNs D’INstallatIoN rEquIsEs / rEquIsItI gENEralI<br />
DUCT fOR ELECTRIC CABLE / KABELKANAL<br />
/ CANIVEAU POUR CABLE ELECTRIQUE /<br />
CANALINA PER CAVO ELETTRICO<br />
oPtIoNal - Switch power supply<br />
(not included in the <strong>Nikles</strong> KIT)<br />
wahlwEIsE - STROmSChALTER<br />
(im <strong>Nikles</strong> KIT nicht inbegriffen)<br />
facultatIf - INTERRUPTEUR<br />
(non compris dans le kit <strong>Nikles</strong>)<br />
facoltatIvo - INTERRUTTORE<br />
ALImENTAzIONE<br />
(non compreso nel KIT <strong>Nikles</strong>)<br />
fEEDER LOCATION OUT fROm ThE<br />
ShOWER IN ThE SECURITY zONE /<br />
POSITION DES NETzgERÄTES IN DER<br />
SIChERhEITSzONE AUSSERhALB DER<br />
DUSChE / POSITION DU BOITIER<br />
D’ALImENTATION DANS LA zONE DE<br />
SECURITE EN DEhORS DE LA DOU-<br />
ChE / POSIzIONE ALImENTATORE<br />
AL DI fUORI DELLA DOCCIA NELLA<br />
zONA DI SICUREzzA<br />
WATER CONNECTION / WASSERANSChLUSS<br />
/ BRANChEmENT EAU / CONNESSIONE<br />
ACQUA<br />
Max 17 mm<br />
Max 43/64"<br />
Min 200 mm<br />
Min 8"<br />
thE INstallEr must INsurE that thE cEIlINg Is caPablE<br />
of bEarINg thE wEIght of 5 kg INcluDINg watEr coNtENt<br />
/ DEr moNtEur muss sIchErstEllEN, Dass DIE DEckE DEr<br />
DuschkabINE EINEm gEwIcht voN 5 kg EINschl. DEm<br />
wassErINhalt staNDhält / l’INstallatEur DoIt s’assurEr<br />
quE lE PlafoND Est a mEmE DE suPPortEr uN PoIDs DE 5 kg<br />
avEc lE coNtENu D’Eau / l’INstallatorE DEvE assIcurarsI<br />
chE Il soffItto sIa IN graDo DI soPPortarE uN PEso DI 5<br />
kg comPrEso Il coNtENuto D’acqua
4<br />
CUT A 350 X 350 mm SQUARE IN PLASTER CEILINg BY USINg TEmPLATE / mIT hILfE DER<br />
SChABLONE AUS DER gIPSKARTONDECKE EIN 350 X 350 mm gROSSES QUADRAT<br />
AUSSChNEIDEN / DECOUPER UN CARRE DE 350 X 350 mm DANS LE PLAfOND EN PLACO<br />
PLATRE EN SE SERVANT DU gABARIT / RITAgLIARE UN QUADRATO DA 350 X 350 mm NEL<br />
SOffITTO DI CARTONgESSO USANDO LA DImA<br />
TEmPLATE<br />
SChABLONE<br />
gABARIT<br />
DImA
Nipples ½” gas<br />
Nippel ½”<br />
Embout ½”<br />
raccordo ½” gas<br />
½” gas / ½” gaZ<br />
Nipples ½ gas - ½” NPt<br />
Nippel ½ - ½” NPt<br />
Embout ½ - ½” NPt<br />
raccordo ½ gas ½” NPt<br />
6<br />
½” gas / ½” gaZ<br />
½” gas / ½” gaZ<br />
PtfE tape<br />
PtfE-band<br />
ruban PtfE<br />
Nastro PtfE<br />
½” NPt<br />
½” NPt
9<br />
PRESSURE SWITCh CONNECTION / ANSChLUSS DES DRUCKSChALTERS<br />
/ BRANChEmENT INTERRUPTEUR DE PRESSION / COLLEgAmENTO INTERRUTTORE DI PRESSIONE<br />
PCB CONNECTION<br />
ANSChLUSS PCB<br />
RACCORDEmENT AU CIRCUIT ImPRImE<br />
COLLEgAmENTO CON SChEDA<br />
ELETTRONICA<br />
LED CONNECTION<br />
ANSChLUSS LED<br />
RACCORDEmENT LED<br />
COLLEgAmENTO CON IL LED
11<br />
<strong>kIt</strong> <strong>raINlIght</strong>/<strong>raINbow</strong> <strong>quaDro</strong> 300 ElEctrIc systEm - tEchNIcal Data<br />
1 ELECTRIC CONNECTION 100/240V - 50/60 hz<br />
2 PROTECTION CLASS II<br />
3 N. 32 LED LOW VOLTAgE 3.4V=<br />
4 fEEDER 100/240V 50/60hz - OUTPUT 5VDC ± 0.5V / SELV<br />
(locate the feeder in the security zone following CEI standard 64/8)<br />
5 INDEX PROTECTION IPX5<br />
6 mARKINg APPROVAL CE<br />
warNINgs:<br />
1: Always make absolutely sure power is off for your safety when performing<br />
installation<br />
2: Always follow local and regional electric codes and adhere to applicable<br />
procedures and safety guideline<br />
3: The manufacturer is not liable for any modifications to electric fixtures or<br />
devices. These instructions are provided as a reference. Installation instructions<br />
do not replace applicable electrical safety procedures, codes, methods<br />
and materials. If unsure about electrical installation please consult a<br />
licensed electrician or an electrical contractor in your area<br />
4: Please read specification before use, according to specification<br />
requirements to operate the product and retain the specification<br />
5: The producer doesn’t answer for damages to things and/or persons, in<br />
case of wrong installation or changes to the original product, from the user<br />
The electric fittings,must be performed from technical qualified, in conformity to the<br />
national and international current laws in object
12<br />
<strong>kIt</strong> <strong>raINlIght</strong>/<strong>raINbow</strong> <strong>quaDro</strong> 300 ElEktrIschE aNlagE – tEchNIschE DatEN<br />
1 ELEKTRISChER ANSChLUSS 100/240V - 50/60 hz<br />
2 SChUTzKLASSE II<br />
3 32 ST. LED mIT NIEDERVOLTSPANNUNg 3.4 V=<br />
4 NETzgERÄT 100/240V 50/60hz – OUTPUT: 5V DC ± 0.5V / SELV (NETzgERÄT<br />
gEm. DEN EWg BESTImmUNgEN 64/8 IN DER SIChERhEITSzONE POSITIONIEREN)<br />
5 INDEX SChUTzVORRIChTUNg IPX5<br />
6 CE - KENNzEIChNUNg<br />
warNhINwEIsE:<br />
1 zu Ihrer eigenen Sicherheit stets sicherstellen, dass der Strom während des<br />
Einbaus abgestellt ist.<br />
2 Die örtlichen und regionalen Vorschriften im Bereich Elektrizität stets befolgen,<br />
wobei anwendbare Verfahren und Sicherheitsrichtlinien zu beachten sind.<br />
3 Der Produzent ist für etwaige Abänderungen an den elektrischen geräten bzw.<br />
Vorrichtungen nicht haftbar. Diese Anleitungen werden lediglich als Bezugsquelle<br />
geliefert. Die montageanleitungen ersetzen daher nicht die im Bereich<br />
Elektrizität zur Anwendung kommenden Sicherheitsverfahren, Normen,<br />
methoden und materialien. Sollten beim Einbau der elektrischen Anlage zweifel<br />
aufkommen, dann wenden Sie sich bitte an einen für Ihr gebiet zugelassenen<br />
Elektriker oder Vertragshändler.<br />
4 Vor gebrauch des Produkts die Spezifikationen sorgfältig durchlesen, damit<br />
diese den Anforderungen entsprechend angewandt werden; die<br />
Spezifikationen aufbewahren.<br />
5 Der Produzent haftet nicht für Schäden an Sachen bzw. Personen, die<br />
durch unsachgemäße Installation oder durch vom Benutzer durchgeführte<br />
Abänderungen am Originalprodukt entstehen.<br />
Die elektrischen Anschlüsse sind gemäss den derzeit geltenden inländischen und<br />
internationalen fachvorschriften von einer fachperson auszuführen.
13<br />
<strong>kIt</strong> <strong>raINlIght</strong>/<strong>raINbow</strong> <strong>quaDro</strong> 300 INstallatIoN ElEctrIquE – DoNNEEs tEchNIquEs<br />
1 CONNEXION ELECTRIQUE 100/240V - 50/60 hz<br />
2 PROTECTION CLASSE II<br />
3 N° 32 DEL A BAS VOLTAgE 3.4V=<br />
4 ALImENTATION 100/240V 50/60hz – OUTPUT: 5V DC ± 0.5V / SELV(POSITIONNER<br />
L’INTERUPTEUR DANS LA zONE DE SECURITE EN CONfORmITE AVEC LE STANDARD<br />
CEI 64/8)<br />
5 INDICE DE PROTECTION IPX5<br />
6 mARQUE D’APPROBATION CE<br />
avErtIssEmENts:<br />
1 Pour la sécurité, toujours s’assurer que l’alimentation est débranchée<br />
avant de procéder à l’installation.<br />
2 Toujours se conformer aux réglementations électriques locales et régiona-<br />
les et respecter les procédures applicables, ainsi que la ligne de conduite<br />
en matière de sécurité.<br />
3 Le fabricant décline toute responsabilité pour les modifications qui auraient<br />
éventuellement été apportées aux appareils ou aux dispositifs électriques.<br />
Ces instructions sont fournies à titre de référence. Les instructions de montage<br />
ne peuvent en aucun cas remplacer les procédures de sécurité électriques<br />
applicables, les normes, les méthodes et le matériel. En cas de doute quant à<br />
l’installation électrique, il est vivement recommandé de s’adresser à un<br />
électricien agréé ou à une société de service électrique de la zone.<br />
4 Avant d’utiliser le produit, il est indispensable de lire attentivement la notice<br />
fournie pour son usage, conforme aux conditions requises, et de conserver<br />
soigneusement les dites instructions.<br />
5 Le fabricant décline toute responsabilité pour les dommages aux biens et/ou<br />
aux personnes, en cas d’installation erronée ou de modifications apportées au<br />
produit original de la part de l’usager.<br />
Les branchements électriques doivent être effectués par un technicien qualifié,<br />
dans le plein respect des lois nationales et internationales en vigueur en la matière.
14<br />
<strong>kIt</strong> <strong>raINlIght</strong>/<strong>raINbow</strong> <strong>quaDro</strong> 300 ImPIaNto ElEttrIco – DatI tEcNIcI<br />
1 CONNESSIONE ELETTRICA 100/240V - 50/60 hz<br />
2 PROTEzIONE CLASSE II<br />
3 N. 32 LED A BASSO VOLTAggIO 3.4V=<br />
4 ALImENTATORE 100/240V 50/60hz – OUTPUT: 5V DC ± 0.5V / SELV (POSIzIONATE<br />
L’ALImENTATORE NELLA zONA DI SICUREzzA IN CONfORmITà ALLO STANDARD<br />
CEI 64/8)<br />
5 INDICE PROTEzIONE IPX5<br />
6 mARChIO DI APPROVAzIONE CE<br />
avvErtENZE:<br />
1 Accertatevi sempre che l’alimentazione sia scollegata per la vostra sicurezza<br />
mentre effettuate l’installazione<br />
2 Seguite sempre le normative elettriche locali e regionali e rispettate le<br />
procedure applicabili e le linee guida sulla sicurezza<br />
3 Il produttore non è responsabile per eventuali modifiche alle apprecchiature o<br />
ai dispositivi elettrici. Queste istruzioni vengono fornite a titolo di riferimento.<br />
Le istruzioni di montaggio non sostituiscono le procedure di sicurezza elettriche<br />
applicabili, le norme, i metodi e i materiali. Se non siete sicuri in merito<br />
all’impianto elettrico, siete pregati di consultare un elettricista autorizzato o un<br />
appaltatore elettrico della vostra zona.<br />
4 Prima di utilizzare il prodotto si prega di leggere attentamente le specifiche per<br />
un suo uso conforme ai requisiti e conservare le specifiche.<br />
5 Il produttore non risponde per danni a cose e/o persone, in caso di installazine<br />
errata o di modifiche apportate al prodotto originale da parte dell’utilizzatore.<br />
I collegamenti elettrici devono essere effettuati da un tecnico qualificato in conformità<br />
con le leggi nazionali e internazionali vigenti in materia.
<strong>kIt</strong> <strong>raINlIght</strong> <strong>quaDro</strong> 300 - <strong>kIt</strong> <strong>raINbow</strong> <strong>quaDro</strong> 300<br />
INDEX<br />
PARTS INCLUDED PAg. 1-2<br />
INSTALLATION STEPS PAg. 3-10<br />
TEChNICAL DATA PAg. 11<br />
INDEX<br />
LIEfERUmfANg SEITE. 1-2<br />
ARBEITSSChRITTE mONTAgE SEITEN. 3-10<br />
TEChNISChE DATEN SEITE. 12<br />
INDEX<br />
LISTE DES PIECES INCLUSES PAgE. 1-2<br />
PhASES DE mONTAgE PAgES. 3-10<br />
DONNEES TEChNIQUES PAgE. 13<br />
INDIcE<br />
ELENCO PEzzI INCLUSI PAgE. 1-2<br />
fASI DI mONTAggIO PAgES. 3-10<br />
DATI TECNICI PAgE. 14