HP Photosmart Plus series - B209 - Hewlett Packard
HP Photosmart Plus series - B209 - Hewlett Packard HP Photosmart Plus series - B209 - Hewlett Packard
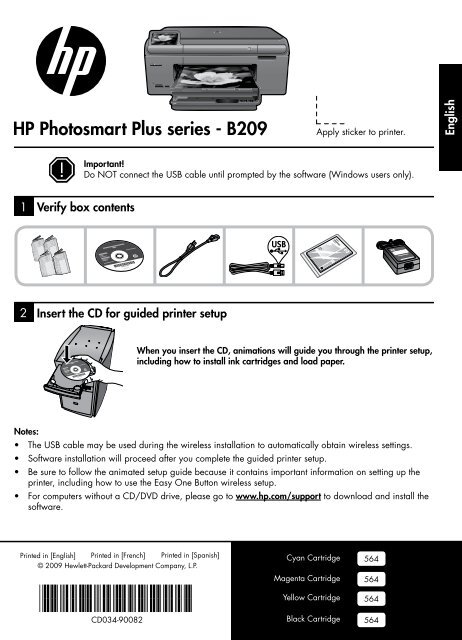
HP Photosmart Plus series - B209 1 2 Notes: • • • • Printed in [English] Printed in [French] Printed in [Spanish] © 2009 Hewlett-Packard Development Company, L.P. *CD034-90082* *CD034-90082* CD034-90082 Cyan Cartridge Magenta Cartridge Yellow Cartridge Black Cartridge Apply sticker to printer. Important! Do NOT connect the USB cable until prompted by the software (Windows users only). Verify box contents Insert the CD for guided printer setup When you insert the CD, animations will guide you through the printer setup, including how to install ink cartridges and load paper. The USB cable may be used during the wireless installation to automatically obtain wireless settings. Software installation will proceed after you complete the guided printer setup. Be sure to follow the animated setup guide because it contains important information on setting up the printer, including how to use the Easy One Button wireless setup. For computers without a CD/DVD drive, please go to www.hp.com/support to download and install the software. 564 564 564 564 English
- Page 2 and 3: English Get to know the HP Photosma
- Page 4 and 5: English Get the most out of your HP
- Page 6 and 7: English Troubleshooting Network Tro
- Page 8 and 9: HP printer limited warranty stateme
- Page 10 and 11: Français Apprenez à connaître l
- Page 12 and 13: Français Tirez le meilleur parti d
- Page 14 and 15: Français Dépannage Dépannage du
- Page 16 and 17: Déclaration de garantie limitée d
- Page 18 and 19: Español Conozca HP Photosmart 1 Es
- Page 20 and 21: Español Aproveche al máximo HP Ph
- Page 22 and 23: Español Resolución de problemas S
- Page 24: Declaración de garantía limitada
<strong>HP</strong> <strong>Photosmart</strong> <strong>Plus</strong> <strong>series</strong> - <strong>B209</strong><br />
1<br />
2<br />
Notes:<br />
•<br />
•<br />
•<br />
•<br />
Printed in [English] Printed in [French] Printed in [Spanish]<br />
© 2009 <strong>Hewlett</strong>-<strong>Packard</strong> Development Company, L.P.<br />
*CD034-90082*<br />
*CD034-90082*<br />
CD034-90082<br />
Cyan Cartridge<br />
Magenta Cartridge<br />
Yellow Cartridge<br />
Black Cartridge<br />
Apply sticker to printer.<br />
Important!<br />
Do NOT connect the USB cable until prompted by the software (Windows users only).<br />
Verify box contents<br />
Insert the CD for guided printer setup<br />
When you insert the CD, animations will guide you through the printer setup,<br />
including how to install ink cartridges and load paper.<br />
The USB cable may be used during the wireless installation to automatically obtain wireless settings.<br />
Software installation will proceed after you complete the guided printer setup.<br />
Be sure to follow the animated setup guide because it contains important information on setting up the<br />
printer, including how to use the Easy One Button wireless setup.<br />
For computers without a CD/DVD drive, please go to www.hp.com/support to download and install the<br />
software.<br />
564<br />
564<br />
564<br />
564<br />
English
English<br />
Get to know the <strong>HP</strong> <strong>Photosmart</strong><br />
1 Scan:<br />
7<br />
Opens the Scan To menu where you can<br />
select a destination for your scan.<br />
2 Copy:<br />
8<br />
Opens the Copy menu where you can select<br />
a copy type or change the copy settings.<br />
3 Directional keys:<br />
Allow you to navigate through photos and<br />
menu options. Touch the right arrow to<br />
access the secondary Home screen.<br />
9<br />
4 Photo:<br />
10<br />
Opens the Photo menu where you can view,<br />
edit, print, and save photos.<br />
5 Help:<br />
11<br />
Opens the Help Menu on the display where<br />
you can select a topic to learn more about<br />
it. From the Home screen, touching Help lists<br />
the topics for which help is available.<br />
6 Home:<br />
12<br />
Returns to the Home screen (the default<br />
screen when you turn on the product).<br />
2<br />
Quick Forms:<br />
Prints a variety of blank forms, such as<br />
school paper, music paper, mazes, and<br />
checklists.<br />
Setup:<br />
Opens the Setup menu where you can<br />
change product settings and perform<br />
maintenance functions.<br />
Back:<br />
Returns to the previous screen on the<br />
display.<br />
Ink:<br />
Opens the Estimated Ink Levels screen.<br />
Wireless:<br />
Opens the Wireless Summary screen where<br />
you can find the host name, IP address, and<br />
the SSID for the <strong>HP</strong> <strong>Photosmart</strong>.<br />
Cancel:<br />
Stops the current operation.
Get the most out of your <strong>HP</strong> <strong>Photosmart</strong><br />
Connect to additional computers on a network<br />
You can connect the <strong>HP</strong> <strong>Photosmart</strong> to more than one computer on a small network of computers.<br />
If the <strong>HP</strong> <strong>Photosmart</strong> is already connected to a computer on a network, for each additional computer you must<br />
install the <strong>HP</strong> <strong>Photosmart</strong> Software. During installation of a wireless connection, the software will automatically<br />
discover the product on the network. Once you have set up the <strong>HP</strong> <strong>Photosmart</strong> on the network you will not<br />
need to configure it again when you add additional computers.<br />
Change the <strong>HP</strong> <strong>Photosmart</strong> from a USB connection to a<br />
network connection<br />
If you first install the <strong>HP</strong> <strong>Photosmart</strong> with a USB connection, you can later change to a wireless network<br />
connection. If you already understand how to connect to a network, you can use the general directions below.<br />
To change a USB connection to an integrated wireless WLAN 802.11 connection<br />
1.<br />
2.<br />
3.<br />
Print your photos without connecting to<br />
a computer— just insert your memory<br />
card or USB drive into a slot on the <strong>HP</strong><br />
<strong>Photosmart</strong> and start printing.<br />
Use the Edit features of the <strong>HP</strong><br />
<strong>Photosmart</strong> to make subtle adjustments,<br />
give your photos an antique look, or add<br />
fun frames.<br />
Print photos from your Bluetooth devices<br />
such as PDAs, camera phones, and<br />
computers using the built-in Bluetooth<br />
technology.<br />
Make color or black-and-white copies.<br />
Unplug the USB connection from the back of the product.<br />
Insert the product CD in the computer CD-ROM drive.<br />
Select Add a Device, and then follow the onscreen instructions for a wireless network installation.<br />
3<br />
Connect the <strong>HP</strong> <strong>Photosmart</strong> to as many<br />
as five computers over a wireless<br />
network.<br />
Print a variety of projects such as games,<br />
checklists, music paper, albums, and<br />
panorama photos.<br />
Scan originals to a memory card or a<br />
connected computer.<br />
English
English<br />
Get the most out of your <strong>HP</strong> <strong>Photosmart</strong><br />
Find more information<br />
All other product information can be found in the electronic Help and Readme. Electronic Help includes<br />
instructions on product features and troubleshooting. It also provides product specifications, legal notices,<br />
environmental, regulatory, and support information. The Readme file contains <strong>HP</strong> support contact information,<br />
operating system requirements, and the most recent updates to your product information.<br />
To access the Electronic Help<br />
•<br />
•<br />
•<br />
If the <strong>HP</strong> <strong>Photosmart</strong> does not turn on:<br />
1.<br />
2.<br />
3.<br />
4.<br />
Windows: Click Start > All Programs > <strong>HP</strong> > <strong>Photosmart</strong> <strong>Plus</strong> <strong>B209</strong> <strong>series</strong> > Help.<br />
Mac OS X v10.4: Click Help > Mac Help, Library > <strong>HP</strong> Product Help.<br />
Mac OS X v10.5: Click Help > Mac Help. In the Help Viewer, select <strong>HP</strong> Product Help.<br />
Windows 7<br />
Windows 7 support information is available online: www.hp.com/go/windows7.<br />
Power specifications:<br />
Power adapter: 0957-2269<br />
Input voltage: 100 to 240 Vac<br />
Input frequency: 50-60 Hz<br />
Power Delivery Capability: 20W Average<br />
Note: Use only with the power adapter supplied<br />
by <strong>HP</strong>.<br />
Troubleshooting<br />
Setup Troubleshooting<br />
Check the power cord.<br />
•<br />
•<br />
•<br />
•<br />
Make sure the power cord is firmly connected to both the product and the power adapter.<br />
If you are using a power strip, make sure the power strip is turned on. Or, try plugging the product<br />
directly into a power outlet.<br />
Test the power outlet to make sure it is working. Plug in an appliance that you know works, and see if<br />
the appliance has power. If not, then there might be a problem with the power outlet.<br />
If you plugged the product into a switched outlet, make sure the outlet is switched on. If it is switched on<br />
but still does not work, then there might be a problem with the power outlet.<br />
Unplug the power cord from the back of the product. Plug the power cord back in, and then press the On<br />
button to turn on the product.<br />
The product might not respond if you press the On button too quickly. Press the On button once. It might<br />
take a few minutes for the product to turn on. If you press the On button again during this time, you might<br />
turn the product off.<br />
If you have completed all of the steps provided in the previous solutions and are still having a problem,<br />
contact <strong>HP</strong> support for service. Go to: www.hp.com/support.<br />
4<br />
Ink usage<br />
Note: Ink from the cartridges is used in the printing<br />
process in a number of different ways, including<br />
in the initialization process, which prepares the<br />
device and cartridges for printing, and in printhead<br />
servicing, which keeps print nozzles clear and ink<br />
flowing smoothly. In addition, some residual ink<br />
is left in the cartridge after it is used. For more<br />
information see www.hp.com/go/inkusage.
Troubleshooting<br />
Windows<br />
If you are unable to print make sure the product<br />
is set as your default printing device:<br />
•<br />
Windows Vista: On the Windows taskbar,<br />
click Start, click Control Panel, and then click<br />
Printers.<br />
• Windows XP: On the Windows taskbar,<br />
click Start, click Control Panel, and then click<br />
Printers and Faxes.<br />
Make sure that your product has a check mark in<br />
the circle next to it. If your product is not selected<br />
as the default printer, right-click the printer icon<br />
and choose “Set as default printer” from the<br />
menu.<br />
If you are still unable to print, or the Windows<br />
software installation fails:<br />
1.<br />
2.<br />
3.<br />
4.<br />
5.<br />
Remove the CD from the computer’s CD-ROM<br />
drive, and then disconnect the USB cable<br />
from the computer.<br />
Restart the computer.<br />
Temporarily disable any software firewall<br />
and close any anti-virus software. Restart<br />
these programs after the product software is<br />
installed.<br />
Insert the product software CD in the<br />
computer’s CD-ROM drive, then follow the<br />
onscreen instructions to install the product<br />
software. Do not connect the USB cable until<br />
you are told to do so.<br />
After the installation finishes, restart the<br />
computer.<br />
5<br />
Mac<br />
If you are unable to print, uninstall and reinstall<br />
the software:<br />
Note: The uninstaller removes all of the <strong>HP</strong><br />
software components that are specific to<br />
the device. The uninstaller does not remove<br />
components that are shared by other products<br />
or programs.<br />
To uninstall the software:<br />
1.<br />
2.<br />
3.<br />
Disconnect the <strong>HP</strong> <strong>Photosmart</strong> from your<br />
computer.<br />
Open the Applications: <strong>Hewlett</strong>-<strong>Packard</strong><br />
folder.<br />
Double-click <strong>HP</strong> Uninstaller. Follow the<br />
onscreen instructions.<br />
To install the software:<br />
1.<br />
2.<br />
3.<br />
To install the software, insert the <strong>HP</strong> software<br />
CD into your computer’s CD drive.<br />
On the desktop, open the CD and then<br />
double-click <strong>HP</strong> Installer.<br />
Follow the onscreen instructions.<br />
English
English<br />
Troubleshooting<br />
Network Troubleshooting<br />
Use this section to solve problems you might encounter when setting up a network connection.<br />
The product cannot be found during software installation<br />
If the <strong>HP</strong> software is unable to find your product on the network during software installation, try the following<br />
troubleshooting steps. If you have a wireless connection, start with step 1 and proceed through step 4 as<br />
necessary.<br />
Wireless connections<br />
Step 1: Determine if the product is connected to the network by running the Wireless Network Test and<br />
following any instructions provided.<br />
To run the Wireless Network Test<br />
1.<br />
2.<br />
3.<br />
4.<br />
Step 2: If you determined in Step 1 that the product is not connected to a network and this is the first time<br />
you are installing the product, you will need to follow the onscreen instructions during software installation to<br />
connect the product to the network.<br />
To connect the product to a network<br />
1.<br />
2.<br />
3.<br />
Here is how to resolve some common issues that can keep the product from joining your network:<br />
•<br />
•<br />
•<br />
On the Home screen, touch the right arrow to view more options.<br />
Touch Setup.<br />
Touch Network.<br />
Touch Wireless Network Test.<br />
Insert the product Software CD in the computer CD-ROM drive.<br />
Follow the instructions on the screen. When you are prompted, connect the product to the computer<br />
using the USB setup cable included in the box. The product will attempt to connect to the network. If the<br />
connection fails, follow the prompts to correct the problem, and then try again.<br />
When the setup is finished, you will be prompted to disconnect the USB cable and test the wireless<br />
network connection. Once the product connects successfully to the network, install the software on each<br />
computer that will use the product over the network.<br />
You may have picked the wrong network or typed in your network name (SSID) incorrectly. Check these<br />
settings to ensure they are correct.<br />
You may have typed in your WEP key or your WPA encryption key incorrectly (if you are using<br />
encryption).<br />
Note: If the network name or the WEP/WPA keys are not found automatically during installation, and if<br />
you don’t know them, you can download an application from www.hp.com/go/networksetup that may<br />
help you locate them. This application works for only Windows Internet Explorer and is only available in<br />
English.<br />
You may have a router problem. Try restarting both the product and the router by turning the power for<br />
each of them off, and then on again.<br />
6
Troubleshooting<br />
Step 3: Check for and resolve the following possible conditions:<br />
•<br />
Step 4: Use the advanced search feature.<br />
1. Print a network configuration report using the following instructions:<br />
2.<br />
3.<br />
a.<br />
b.<br />
c.<br />
d.<br />
e.<br />
On the Home screen, touch the right arrow to view more options.<br />
Touch Setup.<br />
Touch Network.<br />
Touch View Network Settings.<br />
Touch Print Network Configuration Page.<br />
Identify the IP address of the <strong>HP</strong> <strong>Photosmart</strong> from the network configuration report.<br />
Use the advanced search option available during software installation, then click on Search by IP address<br />
and enter the product’s IP address.<br />
Other network problems after software installation<br />
If the <strong>HP</strong> <strong>Photosmart</strong> has been successfully installed, and you are experiencing problems such as not being<br />
able to print, try the following:<br />
•<br />
•<br />
Your computer may not be connected to your network. Make sure that the computer is connected to the<br />
same network to which the <strong>HP</strong> <strong>Photosmart</strong> is connected. If you are connected wirelessly, for example, it is<br />
possible that your computer is connected to a neighbor’s network by mistake.<br />
• Your computer may be connected to a Virtual Private Network (VPN). Temporarily disable the VPN before<br />
proceeding with the installation. Being connected to a VPN is like being on a different network; you will<br />
need to disconnect the VPN to access the product over the home network.<br />
• Security software may be blocking communication. Security software (firewall, anti-virus, anti-spyware) English<br />
installed on your computer may be blocking communication between the product and the computer. An<br />
<strong>HP</strong> diagnostic runs automatically during installation and can provide messaging about what may be<br />
blocked by the firewall. Try temporarily disconnecting your firewall, anti-virus, or anti-spyware applications<br />
to see if you can successfully finish the installation. You can re-enable your firewall application after<br />
installation is complete. Make sure the following files are included in the exceptions list of the firewall:<br />
•<br />
•<br />
•<br />
•<br />
•<br />
•<br />
C:\Program Files\Hp\Digital Imaging\bin\hpqtra08.exe.<br />
C:\Program Files\Hp\Digital Imaging\bin\hpiscnapp.exe.<br />
C:\Program Files\Hp\Digital Imaging\bin\hpqdstcp.exe.<br />
C:\Program Files\Hp\Digital Imaging\bin\hpqkygrp.exe.<br />
C:\Program Files\Hp\Digital Imaging\bin\hpqste08.exe.<br />
C:\Windows\System32\hpzinw12.exe.<br />
• C:\Windows\System32\hpzipm12.exe.<br />
Tip: Configure your firewall software to allow communication over UDP port 427.<br />
Turn off the router, product, and computer, and then turn them back on in this order: router first, then the<br />
product, and finally the computer. Sometimes, cycling the power will recover a network communication<br />
issue.<br />
If the previous step does not solve the problem and you have successfully installed the <strong>HP</strong> <strong>Photosmart</strong><br />
Software on your computer, run the Network Diagnostic tool.<br />
To run the Network Diagnostic tool<br />
> In the Solution Center, click Settings, click Other Settings, and then click Network Toolbox. On the<br />
Utilities tab, click Run Network Diagnostics.<br />
7
<strong>HP</strong> printer limited warranty statement<br />
<strong>HP</strong> product Duration of limited warranty<br />
Software Media 90 days<br />
Printer 1 year<br />
Print or Ink cartridges Until the <strong>HP</strong> ink is depleted or the “end of warranty” date printed<br />
on the cartridge has been reached, whichever occurs first. This<br />
warranty does not cover <strong>HP</strong> ink products that have been refilled,<br />
remanufactured, refurbished, misused, or tampered with.<br />
Printheads (only applies to products with customer 1 year<br />
replaceable printheads)<br />
Accessories 1 year unless otherwise stated<br />
A. Extent of limited warranty<br />
1. <strong>Hewlett</strong>-<strong>Packard</strong> (<strong>HP</strong>) warrants to the end-user customer that the <strong>HP</strong> products specified above will be free from defects<br />
in materials and workmanship for the duration specified above, which duration begins on the date of purchase by the<br />
customer.<br />
2. For software products, <strong>HP</strong>’s limited warranty applies only to a failure to execute programming instructions. <strong>HP</strong> does not<br />
warrant that the operation of any product will be interrupted or error free.<br />
3. <strong>HP</strong>'s limited warranty covers only those defects that arise as a result of normal use of the product, and does not cover<br />
any other problems, including those that arise as a result of:<br />
a. Improper maintenance or modification;<br />
b. Software, media, parts, or supplies not provided or supported by <strong>HP</strong>;<br />
c. Operation outside the product's specifications;<br />
d. Unauthorized modification or misuse.<br />
4. For <strong>HP</strong> printer products, the use of a non-<strong>HP</strong> cartridge or a refilled cartridge does not affect either the warranty to the<br />
customer or any <strong>HP</strong> support contract with the customer. However, if printer failure or damage is attributable to the use of<br />
a non-<strong>HP</strong> or refilled cartridge or an expired ink cartridge, <strong>HP</strong> will charge its standard time and materials charges to<br />
service the printer for the particular failure or damage.<br />
5. If <strong>HP</strong> receives, during the applicable warranty period, notice of a defect in any product which is covered by <strong>HP</strong>'s<br />
warranty, <strong>HP</strong> shall either repair or replace the product, at <strong>HP</strong>'s option.<br />
6. If <strong>HP</strong> is unable to repair or replace, as applicable, a defective product which is covered by <strong>HP</strong>'s warranty, <strong>HP</strong> shall,<br />
within a reasonable time after being notified of the defect, refund the purchase price for the product.<br />
7. <strong>HP</strong> shall have no obligation to repair, replace, or refund until the customer returns the defective product to <strong>HP</strong>.<br />
8. Any replacement product may be either new or like-new, provided that it has functionality at least equal to that of the<br />
product being replaced.<br />
9. <strong>HP</strong> products may contain remanufactured parts, components, or materials equivalent to new in performance.<br />
10. <strong>HP</strong>'s Limited Warranty Statement is valid in any country where the covered <strong>HP</strong> product is distributed by <strong>HP</strong>. Contracts<br />
for additional warranty services, such as on-site service, may be available from any authorized <strong>HP</strong> service facility in<br />
countries where the product is distributed by <strong>HP</strong> or by an authorized importer.<br />
B. Limitations of warranty<br />
TO THE EXTENT ALLOWED BY LOCAL LAW, NEITHER <strong>HP</strong> NOR ITS THIRD PARTY SUPPLIERS MAKES ANY<br />
OTHER WARRANTY OR CONDITION OF ANY KIND, WHETHER EXPRESS OR IMPLIED WARRANTIES OR<br />
CONDITIONS OF MERCHANTABILITY, SATISFACTORY QUALITY, AND FITNESS FOR A PARTICULAR PURPOSE.<br />
C. Limitations of liability<br />
1. To the extent allowed by local law, the remedies provided in this Warranty Statement are the customer's sole and<br />
exclusive remedies.<br />
2. TO THE EXTENT ALLOWED BY LOCAL LAW, EXCEPT FOR THE OBLIGATIONS SPECIFICALLY SET FORTH IN<br />
THIS WARRANTY STATEMENT, IN NO EVENT SHALL <strong>HP</strong> OR ITS THIRD PARTY SUPPLIERS BE LIABLE FOR<br />
DIRECT, INDIRECT, SPECIAL, INCIDENTAL, OR CONSEQUENTIAL DAMAGES, WHETHER BASED ON<br />
CONTRACT, TORT, OR ANY OTHER LEGAL THEORY AND WHETHER ADVISED OF THE POSSIBILITY OF<br />
SUCH DAMAGES.<br />
D. Local law<br />
1. This Warranty Statement gives the customer specific legal rights. The customer may also have other rights which vary<br />
from state to state in the United States, from province to province in Canada, and from country to country elsewhere in<br />
the world.<br />
2. To the extent that this Warranty Statement is inconsistent with local law, this Warranty Statement shall be deemed<br />
modified to be consistent with such local law. Under such local law, certain disclaimers and limitations of this Warranty<br />
Statement may not apply to the customer. For example, some states in the United States, as well as some governments<br />
outside the United States (including provinces in Canada), may:<br />
a. Preclude the disclaimers and limitations in this Warranty Statement from limiting the statutory rights of a consumer<br />
(e.g., the United Kingdom);<br />
b. Otherwise restrict the ability of a manufacturer to enforce such disclaimers or limitations; or<br />
c. Grant the customer additional warranty rights, specify the duration of implied warranties which the manufacturer<br />
cannot disclaim, or allow limitations on the duration of implied warranties.<br />
3. THE TERMS IN THIS WARRANTY STATEMENT, EXCEPT TO THE EXTENT LAWFULLY PERMITTED, DO NOT<br />
EXCLUDE, RESTRICT, OR MODIFY, AND ARE IN ADDITION TO, THE MANDATORY STATUTORY RIGHTS<br />
APPLICABLE TO THE SALE OF THE <strong>HP</strong> PRODUCTS TO SUCH CUSTOMERS.<br />
<strong>HP</strong> Limited Warranty<br />
Dear Customer,<br />
You will find below the name and address of the <strong>HP</strong> entity responsible for the performance of the <strong>HP</strong> Limited Warranty in your<br />
country.<br />
You may have additional statutory rights against the seller based on your purchase agreement. Those rights are not<br />
in any way affected by this <strong>HP</strong> Limited Warranty.<br />
Ireland: <strong>Hewlett</strong>-<strong>Packard</strong> Ireland Limited, 63-74 Sir John Rogerson's Quay, Dublin 2<br />
United Kingdom: <strong>Hewlett</strong>-<strong>Packard</strong> Ltd, Cain Road, Bracknell, GB-Berks RG12 1HN<br />
Malta: <strong>Hewlett</strong> <strong>Packard</strong> International Trade BV, Branch 48, Sqaq Nru 2, Triq ix-Xatt, Pieta MSD08, Malta<br />
South Africa: <strong>Hewlett</strong>-<strong>Packard</strong> South Africa Ltd, 12 Autumn Street, Rivonia, Sandton, 2128, Republic of South Africa<br />
8
<strong>HP</strong> <strong>Photosmart</strong> <strong>Plus</strong> série <strong>B209</strong><br />
1<br />
2<br />
Remarque :<br />
•<br />
•<br />
•<br />
•<br />
Cartouche cyan<br />
Cartouche magenta<br />
Cartouche jaune<br />
Cartouche d’encre noire<br />
Placez l’autocollant de la<br />
page de couverture sur votre<br />
imprimante.<br />
Important !<br />
NE CONNECTEZ PAS le câble USB tant que vous n’y êtes pas invité par le logiciel<br />
d’installation (Utilisateurs de windows uniquement).<br />
Vérifiez le contenu du carton<br />
Insérez le CD de configuration guidée de l'imprimante<br />
Lorsque vous insérez le CD, des animations vous guident tout au long de la<br />
configuration de l'imprimante, notamment en ce qui concerne l'installation<br />
des cartouches d'encre et le chargement du papier.<br />
Le câble USB peut être utilisé durant l'installation sans fil afin d'obtenir automatiquement les paramètres<br />
de liaison sans fil.<br />
Une fois que la configuration guidée de l'imprimante est terminée, l'installation du logiciel se poursuit.<br />
Assurez-vous de suivre les instructions animées du guide de configuration, car il contient des informations<br />
importantes sur la configuration de l’imprimante, et notamment de la liaison sans fil à l’aide d’un bouton<br />
unique.<br />
Sur les ordinateurs non équipés d’un lecteur de CD/DVD, visitez le site www.hp.com/support pour<br />
télécharger et installer le logiciel.<br />
564<br />
564<br />
564<br />
564<br />
Français
Français<br />
Apprenez à connaître l’appareil <strong>HP</strong> <strong>Photosmart</strong><br />
1 Numériser :<br />
7<br />
Ouvre le menu Numériser vers, dans lequel<br />
vous pouvez sélectionner une destination<br />
pour votre numérisation.<br />
2 Copie :<br />
8<br />
Ouvre le menu Copie, dans lequel vous<br />
pouvez sélectionner un type de copie ou<br />
modifier les paramètres de copie.<br />
3 Touches de direction :<br />
9<br />
Vous permettent de naviguer parmi les<br />
photos et les options de menu. Touchez le<br />
bouton dirigé vers la droite pour accéder à<br />
l’écran d’accueil secondaire.<br />
4 Photo :<br />
10<br />
Ouvrez le menu Photo, qui vous permet<br />
d’afficher, d’éditer, d’imprimer et de<br />
sauvegarder des photos.<br />
5 Aide :<br />
11<br />
Ouvre le menu Aide dans lequel vous<br />
pouvez sélectionner une rubrique et<br />
obtenir des informations supplémentaires.<br />
Une pression sur Aide à partir de l’écran<br />
d’accueil indique la liste des rubriques pour<br />
lesquelles une aide est disponible.<br />
6 Position init. :<br />
12<br />
Permet de revenir à l’écran d’accueil (écran<br />
par défaut lorsque vous activez le produit).<br />
10<br />
Formulaires rapides :<br />
Imprime divers formulaires vierges tels que<br />
du papier d’écolier, du papier à musique,<br />
des quadrillages ou des listes de contrôle.<br />
Configurer :<br />
Ouvre le menu Configuration, à partir<br />
duquel vous pouvez modifier les paramètres<br />
du produit et exécuter des fonctions de<br />
maintenance.<br />
Retour :<br />
Revient à l’écran précédent.<br />
Encre :<br />
Ouvrez l’écran Niveaux d’encre estimés.<br />
Sans fil :<br />
Ouvre l’écran Résumé sans fil, qui contient<br />
le nom d’hôte, l’adresse IP et le nom de<br />
réseau (SSID) de l’appareil <strong>HP</strong> <strong>Photosmart</strong>.<br />
Annuler :<br />
Interrompt l’opération en cours.
Tirez le meilleur parti de votre appareil <strong>HP</strong> <strong>Photosmart</strong><br />
Connexion à d’autres ordinateurs sur un réseau<br />
Vous pouvez connecter l’appareil <strong>HP</strong> <strong>Photosmart</strong> à plusieurs ordinateurs sur un petit réseau.<br />
Si l’appareil <strong>HP</strong> <strong>Photosmart</strong> est déjà connecté à un ordinateur en réseau, vous devrez installer le logiciel <strong>HP</strong><br />
<strong>Photosmart</strong> pour chaque ordinateur supplémentaire. Au cours de l’installation d’une connexion sans fil, le<br />
logiciel détecte automatiquement le produit sur le réseau. Une fois l’appareil <strong>HP</strong> <strong>Photosmart</strong> configuré sur le<br />
réseau, il n’est pas nécessaire de réitérer cette opération lors de l’ajout d’autres ordinateurs.<br />
Faire passer l’appareil <strong>HP</strong> <strong>Photosmart</strong> d’une connexion<br />
USB à une connexion réseau<br />
Si vous commencez par installer l’appareil <strong>HP</strong> <strong>Photosmart</strong> avec une connexion USB, vous pourrez passer<br />
ultérieurement à une connexion réseau sans fil. Si vous savez déjà vous connecter à un réseau, suivez les<br />
instructions générales ci-dessous.<br />
Pour modifier une connexion USB en connexion WLAN 802.11 sans fil intégrée<br />
1.<br />
2.<br />
3.<br />
Imprimez vos photos sans vous connecter<br />
à un ordinateur : il vous suffit d’insérer<br />
une carte mémoire ou une unité USB<br />
dans le logement adéquat sur l’appareil<br />
<strong>HP</strong> <strong>Photosmart</strong> et de lancer l’impression.<br />
Utilisez les fonctions d’édition de<br />
l’appareil <strong>HP</strong> <strong>Photosmart</strong> pour effectuer<br />
quelques réglages subtils, donner à vos<br />
photos un aspect ancien ou leur ajouter<br />
des cadres amusants.<br />
Imprimez des photos à partir de<br />
périphériques Bluetooth tels que les<br />
assistants personnels, téléphones équipés<br />
d’un appareils photo ou ordinateurs<br />
équipés de la technologie Bluetooth<br />
intégrée.<br />
Réalisez des copies en couleur ou en<br />
noir et blanc.<br />
Débranchez la connexion USB de l’arrière du produit.<br />
Insérez le CD-ROM du produit dans le lecteur de CD-ROM.<br />
Sélectionnez Ajouter un périphérique et suivez les instructions à l’écran pour une installation réseau sans<br />
fil.<br />
11<br />
Connectez l’appareil <strong>HP</strong> <strong>Photosmart</strong> à<br />
cinq ordinateurs maximum sur un réseau<br />
sans fil.<br />
Imprimez une grande diversité de projets<br />
tels que des jeux, des listes de contrôle,<br />
du papier à musique, des albums ou des<br />
photos panoramiques.<br />
Numérisez des originaux sur une carte<br />
mémoire ou un ordinateur connecté.<br />
Français
Français<br />
Tirez le meilleur parti de votre appareil <strong>HP</strong> <strong>Photosmart</strong><br />
Sources d’informations supplémentaires<br />
Toutes les autres informations relatives au produit figurent dans l’aide en ligne et le fichier Lisez-moi. L’aide en ligne<br />
contient des instructions relatives aux fonctionnalités et au dépannage du produit. Elle décrit également les caractéristiques<br />
du produit, des notices légales, ainsi que des informations d’ordre environnemental, réglementaire et d’assistance. Le<br />
fichier Lisez-moi contient des informations permettant de contacter l’assistance <strong>HP</strong> et décrit la configuration requise pour le<br />
système d’exploitation, ainsi que les mises à jour les plus récentes des informations sur votre produit.<br />
Pour accéder à l’aide en ligne<br />
•<br />
•<br />
•<br />
Windows : Cliquez sur Démarrer > Tous les programmes > <strong>HP</strong> > <strong>Photosmart</strong> <strong>Plus</strong> série <strong>B209</strong> > Aide.<br />
Mac OS X v10.4 : Cliquez sur Aide > Aide sur le Mac, Bibliothèque > Aide sur le produit <strong>HP</strong>.<br />
Mac OS X v10.5 : Cliquez sur Aide > Aide sur le Mac. Dans l’Afficheur d’aide, sélectionnez Aide sur le produit <strong>HP</strong>.<br />
Windows 7<br />
Des informations d’assistance sur Windows 7 sont accessibles en ligne : www.hp.com/go/windows7.<br />
Spécifications relatives à<br />
l’alimentation :<br />
Adaptateur de tension : 0957-2269<br />
Tension d’entrée : 100 à 240 VCA<br />
Fréquence d’entrée : 50 à 60 Hz<br />
Capacité énergétique : 20 W (moyenne)<br />
Remarque : Utilisez uniquement l’adaptateur<br />
secteur fourni par <strong>HP</strong>.<br />
Dépannage<br />
Dépannage de la configuration<br />
Si vous ne parvenez pas à mettre l’appareil <strong>HP</strong> <strong>Photosmart</strong> sous tension :<br />
1. Vérifiez le cordon d’alimentation.<br />
• Assurez-vous que le cordon d’alimentation est correctement branché au produit et à l’adaptateur secteur.<br />
• Si vous utilisez une prise multiple, assurez-vous que l’interrupteur dont elle est équipée est en position<br />
de marche. Vous pouvez aussi brancher directement le produit à une prise secteur.<br />
• Testez la prise de courant pour vérifier qu’elle fonctionne correctement. Branchez un appareil en état<br />
de marche et vérifiez que l’appareil est alimenté. Si ce n’est pas le cas, un problème est peut-être<br />
survenu au niveau de la prise d’alimentation.<br />
• Si vous avez branché le produit sur une prise à interrupteur, assurez-vous que ce dernier est en position de marche.<br />
S’il est sous tension mais ne fonctionne toujours pas, il est possible que la prise de courant ait un problème.<br />
2. Débranchez le cordon d’alimentation à l’arrière du produit. Rebranchez le cordon d’alimentation, puis<br />
appuyez sur le bouton Marche/arrêt pour mettre le produit sous tension.<br />
3. Il se peut que le produit ne réponde pas si vous appuyez trop rapidement sur le bouton Marche/arrêt.<br />
Appuyez une fois sur le bouton Marche/arrêt. Il faut parfois quelques minutes pour mettre le produit sous<br />
tension. Si vous appuyez à nouveau sur le bouton Marche/arrêt pendant cette période, vous risquez de<br />
mettre le produit hors tension.<br />
4. Si vous avez procédé à toutes les étapes mentionnées dans les solutions précédentes et que le problème<br />
n’est toujours pas résolu, contactez le support <strong>HP</strong> pour obtenir une assistance. Consultez le site :<br />
www.hp.com/support.<br />
12<br />
Utilisation de l’encre<br />
Remarque : L’encre contenue dans les cartouches est<br />
utilisée de différentes manières au cours du processus<br />
d’impression, y compris lors de l’initialisation, qui prépare<br />
le périphérique et les cartouches en vue de l’impression,<br />
ou encore lors de l’entretien des têtes d’impression, qui<br />
permet de nettoyer les buses et assurer que l’encre s’écoule<br />
en douceur. En outre, une certaine quantité d’encre<br />
demeure dans la cartouche après utilisation. Pour plus<br />
d’informations, visitez le site www.hp.com/go/inkusage.
Dépannage<br />
Windows<br />
Si vous ne parvenez pas à imprimer, assurezvous<br />
que le produit est défini en tant que<br />
périphérique d’impression par défaut :<br />
• Windows Vista : Dans la barre des tâches de<br />
Windows, cliquez sur Démarrer, sélectionnez<br />
Panneau de configuration, puis Imprimantes.<br />
• Windows XP : Dans la barre des tâches<br />
de Windows, cliquez sur Démarrer,<br />
sélectionnez Panneau de configuration, puis<br />
Imprimantes et fax.<br />
Assurez-vous que le cercle jouxtant le nom de<br />
votre produit comporte une marque de sélection.<br />
Si votre produit n’est pas sélectionné en tant<br />
qu’imprimante par défaut, cliquez avec le bouton<br />
droit sur l’icône de l’imprimante et sélectionnez<br />
“Définir comme imprimante par défaut” dans le<br />
menu.<br />
Si vous ne parvenez toujours pas à imprimer,<br />
ou que l’installation du logiciel sous Windows<br />
échoue :<br />
1. Retirez le CD de l’unité de CD-ROM de votre<br />
ordinateur, puis débranchez le câble USB de<br />
l’ordinateur.<br />
2. Redémarrez l’ordinateur.<br />
3. Désactivez temporairement le logiciel de<br />
pare-feu ainsi que l’antivirus, s’il est présent.<br />
Redémarrez ces programmes une fois<br />
que l’installation du logiciel du produit est<br />
terminée.<br />
4. Insérez le CD du logiciel dans le lecteur<br />
de CD-ROM, puis suivez les instructions à<br />
l’écran pour installer le logiciel du produit.<br />
Ne branchez le câble USB que lorsque vous<br />
y êtes invité.<br />
5. Une fois l’installation terminée, redémarrez<br />
l’ordinateur.<br />
13<br />
Mac<br />
Si vous ne parvenez toujours pas à effectuer<br />
d’impression, désinstallez, puis réinstallez le<br />
logiciel :<br />
Remarque : Tous les composants logiciels <strong>HP</strong><br />
propres au périphérique sont supprimés par le<br />
programme de désinstallation. Le programme<br />
de désinstallation ne supprime pas les<br />
composants partagés par d’autres produits ou<br />
d’autres programmes.<br />
Pour désinstaller le logiciel :<br />
1.<br />
2.<br />
3.<br />
Déconnectez l’appareil <strong>HP</strong> <strong>Photosmart</strong> de<br />
votre ordinateur.<br />
Ouvrez le dossier Applications : <strong>Hewlett</strong>-<br />
<strong>Packard</strong>.<br />
Cliquez deux fois sur Programme de<br />
désinstallation <strong>HP</strong>. Suivez les instructions à<br />
l’écran.<br />
Pour installer le logiciel :<br />
1.<br />
2.<br />
3.<br />
Pour installer le logiciel, insérez le CD du<br />
logiciel <strong>HP</strong> dans l’unité de CD-ROM de votre<br />
ordinateur.<br />
Sur le bureau, ouvrez le CD, puis doublecliquez<br />
sur Programme d’installation <strong>HP</strong>.<br />
Suivez les instructions à l’écran.<br />
Français
Français<br />
Dépannage<br />
Dépannage du réseau<br />
Cette section concerne la résolution des problèmes que vous êtes susceptible de rencontrer lors de la<br />
configuration d’une connexion réseau.<br />
Le produit n’est pas détecté durant l’installation du logiciel<br />
Si le logiciel <strong>HP</strong> ne parvient pas à détecter votre produit lors de l’installation du logiciel, essayez d’appliquer<br />
la procédure de dépannage suivante. Si vous disposez d’une connexion sans fil, commencez par l’étape 1 et<br />
poursuivez jusqu’à l’étape 4 si nécessaire.<br />
Connexions sans fil<br />
Étape 1 : Déterminez si le produit est relié au réseau en exécutant le test de réseau sans fil et suivez les<br />
instructions éventuelles.<br />
Pour exécuter le test de réseau sans fil<br />
1.<br />
2.<br />
3.<br />
4.<br />
Étape 2 : Si vous avez déterminé à l’étape 1 que le produit n’était pas relié au réseau et si c’est la première<br />
fois que vous installez le produit, vous devez suivre les instructions à l’écran durant l’installation du logiciel<br />
pour connecter le produit au réseau.<br />
Pour connecter le produit à un réseau<br />
1.<br />
2.<br />
3.<br />
Voici comment résoudre certains problèmes courants qui sont susceptibles d’empêcher le produit de se<br />
connecter à votre réseau :<br />
•<br />
•<br />
•<br />
Sur l’écran d’accueil, touchez la flèche dirigée vers la droite pour afficher plus d’options.<br />
Touchez l’option Configuration.<br />
Touchez l’option Réseau.<br />
Touchez l’option Test réseau sans fil.<br />
Insérez le CD-ROM du logiciel du produit dans le lecteur de l’ordinateur.<br />
Suivez les instructions qui s’affichent à l’écran. Lorsque vous y êtes invité, connectez le produit à<br />
l’ordinateur à l’aide du câble USB fourni dans le boîtier. Le produit tente alors de se connecter au réseau.<br />
Si la connexion échoue, suivez les instructions des invites pour corriger le problème, puis réessayez.<br />
Une fois la configuration terminée, vous serez invité à déconnecter le câble USB de l’appareil afin de<br />
tester la connexion sans fil. Une fois que le produit est connecté au réseau, installez le logiciel sur chaque<br />
ordinateur qui l’utilisera sur le réseau.<br />
Vous ne vous êtes peut-être pas connecté au bon réseau, ou avez saisi un nom de réseau (SSID) incorrect.<br />
Vérifiez que ces paramètres sont corrects.<br />
Vous avez peut-être entré une clé WEP ou une clé de chiffrement WPA incorrecte (dans le cas où vous<br />
utilisez le chiffrement).<br />
Remarque : Si le nom de réseau ou les clés WEP/WPA ne sont pas automatiquement détectés au cours<br />
de l’installation et que vous ne les connaissez pas, vous pouvez télécharger sur le site www.hp.com/go/<br />
networksetup une application pouvant vous aider à localiser ces données. Cette application fonctionne<br />
uniquement sous Windows Internet Explorer et est disponible en anglais seulement.<br />
Un incident s’est peut-être produit au niveau du routeur. Essayez de redémarrer le produit et le routeur<br />
après les avoir successivement mis hors tension, puis de nouveau sous tension.<br />
14
Dépannage<br />
Étape 3 : Déterminez si les erreurs suivantes se sont produites et, le cas échéant, tentez de les résoudre :<br />
• Votre ordinateur n’est peut-être pas connecté à votre réseau. Assurez-vous que l’ordinateur est connecté<br />
au même réseau que l’appareil <strong>HP</strong> <strong>Photosmart</strong>. Si vous vous connectez via une liaison sans fil, par<br />
exemple, il se peut que votre ordinateur se soit connecté par erreur à un réseau avoisinant.<br />
• Votre ordinateur est peut-être connecté à un réseau privé virtuel (VPN). Désactivez temporairement le<br />
VPN avant de poursuivre l’installation. La connexion à un réseau privé virtuel revient à se connecter à un<br />
autre réseau. Vous devez vous être déconnecté du réseau VPN pour pouvoir accéder au produit via votre<br />
réseau domestique.<br />
• Les communications sont peut-être bloquées par un logiciel de sécurité. Un logiciel de sécurité (parefeu,<br />
anti-virus, anti-logiciel espion) installé sur votre ordinateur bloque peut-être les communications<br />
entre le produit et l’ordinateur. Un programme de diagnostic <strong>HP</strong>, qui s’exécute automatiquement durant<br />
l’installation, peut vous indiquer les composants bloqués par le logiciel pare-feu. Essayez de déconnecter<br />
temporairement vos applications de pare-feu, anti-virus, ou anti-logiciel espion afin de déterminer si<br />
l’installation arrive à son terme. Vous pouvez réactiver votre pare-feu une fois l’installation terminée.<br />
Assurez-vous que les fichiers suivants sont inclus dans la liste des exceptions du pare-feu :<br />
• C:\Program Files\Hp\Digital Imaging\bin\hpqtra08.exe.<br />
• C:\Program Files\Hp\Digital Imaging\bin\hpiscnapp.exe.<br />
• C:\Program Files\Hp\Digital Imaging\bin\hpqdstcp.exe.<br />
• C:\Program Files\Hp\Digital Imaging\bin\hpqkygrp.exe.<br />
• C:\Program Files\Hp\Digital Imaging\bin\hpqste08.exe.<br />
• C:\Windows\System32\hpzinw12.exe.<br />
• C:\Windows\System32\hpzipm12.exe.<br />
Conseil : Configurez votre pare-feu de sorte qu’il autorise les communications sur le port UDP 427.<br />
Étape 4 : Utilisez la fonction de recherche avancée.<br />
1. Imprimez un rapport de configuration du réseau en suivant les instructions ci-après :<br />
2.<br />
3.<br />
a.<br />
b.<br />
c.<br />
d.<br />
e.<br />
Sur l’écran d’accueil, touchez la flèche dirigée vers la droite pour afficher plus d’options.<br />
Touchez l’option Configuration.<br />
Touchez l’option Réseau.<br />
Touchez l’option Afficher les paramètres réseau.<br />
Touchez l’option Imprimer une page de configuration réseau.<br />
Identifiez l’adresse IP de l’appareil <strong>HP</strong> <strong>Photosmart</strong> dans le rapport de configuration du réseau.<br />
Utilisez la fonction de recherche avancée disponible durant l’installation du logiciel, puis cliquez sur<br />
Recherche par adresse IP et entrez l’adresse IP du produit.<br />
Autres problèmes de réseau faisant suite à l’installation du logiciel<br />
Si l’installation de l’appareil <strong>HP</strong> <strong>Photosmart</strong> a réussi, mais que vous rencontrez des problèmes tels que<br />
l’impossibilité d’imprimer, essayez d’appliquer la procédure suivante :<br />
•<br />
•<br />
Mettez le routeur, le produit et l’ordinateur hors tension, puis mettez-les de nouveau sous tension en respectant<br />
l’ordre suivant : mettez le routeur sous tension en premier, suivi du produit et de l’ordinateur. Parfois, le cycle<br />
de mise hors tension permet d’effectuer une reprise après une erreur de communication réseau.<br />
Si l’étape précédente ne permet pas de résoudre le problème et que le logiciel <strong>HP</strong> <strong>Photosmart</strong> est installé<br />
sur l’ordinateur, exécutez l’outil de diagnostic réseau.<br />
Pour exécuter l’outil de diagnostic réseau<br />
> Dans le Centre de solutions, cliquez sur Paramètres, sur Autres paramètres, puis sur Boîte à outils du<br />
réseau. Sur l’onglet Utilitaires, cliquez sur Exécuter l’outil de diagnostic réseau.<br />
15<br />
Français
Déclaration de garantie limitée de l’imprimante <strong>HP</strong><br />
Produit <strong>HP</strong> Durée de la garantie limitée<br />
Supports logiciels 90 jours<br />
Imprimante 1 an<br />
Cartouches d'encre Jusqu'à épuisement de l'encre <strong>HP</strong> ou jusqu'à expiration de la<br />
date de garantie imprimée sur la cartouche (selon le cas qui se<br />
produira en premier). Cette garantie ne couvre pas les produits<br />
utilisant de l'encre <strong>HP</strong> qui ont été reconditionnés, mal utilisés ou<br />
altérés.<br />
Têtes d'impression (ne s'applique qu'aux produits avec 1 an<br />
des têtes d'impression pouvant être remplacées par le client)<br />
Accessoires 1 an, sauf indication contraire<br />
A. Extension de garantie limitée<br />
1. <strong>Hewlett</strong>-<strong>Packard</strong> (<strong>HP</strong>) garantit au client utilisateur final que les produhits <strong>HP</strong> décrits précédemment sont exempts de défauts de matériaux<br />
et malfaçons pendant la durée indiquée ci-dessus, à compter de la date d'achat par le client.<br />
2. Pour les logiciels, la garantie limitée <strong>HP</strong> est valable uniquement en cas d'impossibilité d'exécuter les instructions de programmation. <strong>HP</strong> ne<br />
garantit pas que le fonctionnement du logiciel ne connaîtra pas d'interruptions ni d'erreurs.<br />
3. La garantie limitée <strong>HP</strong> ne couvre que les défauts qui apparaissent dans le cadre de l'utilisation normale du produit et ne couvre aucun<br />
autre problème, y compris ceux qui surviennent du fait :<br />
a. d'une mauvaise maintenance ou d'une modification ;<br />
b. de logiciels, de supports, de pièces ou de consommables non fournis ou non pris en charge par <strong>HP</strong> ;<br />
c. du fonctionnement du produit hors de ses caractéristiques ; ou<br />
d. d'une modification non autorisée ou d'une mauvaise utilisation.<br />
4. Pour les imprimantes <strong>HP</strong>, l'utilisation d'une cartouche d'un autre fournisseur ou d'une cartouche rechargée n'entraîne pas la résiliation de la<br />
garantie ni d'un contrat de support <strong>HP</strong>. Toutefois, si la panne ou les dégâts peuvent être attribués à l'utilisation d'une cartouche d'un autre<br />
fournisseur, d'une cartouche rechargée ou d'une cartouche périmée, <strong>HP</strong> facturera les montants correspondant au temps et au matériel<br />
nécessaires à la réparation de l'imprimante.<br />
5. Si, pendant la période de garantie applicable, <strong>HP</strong> est informé d'une défaillance concernant un produit couvert par la garantie <strong>HP</strong>, <strong>HP</strong><br />
choisira de réparer ou de remplacer le produit défectueux.<br />
6. Si <strong>HP</strong> est dans l'incapacité de réparer ou de remplacer, selon le cas, un produit défectueux couvert par la garantie <strong>HP</strong>, <strong>HP</strong> devra, dans un<br />
délai raisonnable après avoir été informé du défaut, rembourser le prix d'achat du produit.<br />
7. <strong>HP</strong> ne sera tenu à aucune obligation de réparation, de remplacement ou de remboursement tant que le client n'aura pas retourné le<br />
produit défectueux à <strong>HP</strong>.<br />
8. Tout produit de remplacement peut être neuf ou comme neuf, pourvu que ses fonctionnalités soient au moins équivalentes à celles du<br />
produit remplacé.<br />
9. Les produits <strong>HP</strong> peuvent contenir des pièces, des composants ou des matériels reconditionnés équivalents à des neufs en termes de<br />
performances.<br />
10. La garantie limitée <strong>HP</strong> est valable dans tout pays dans lequel le produit <strong>HP</strong> couvert est distribué par <strong>HP</strong>. Des contrats apportant des<br />
services de garantie supplémentaires, tels que la réparation sur site, sont disponibles auprès des services de maintenance agréés par <strong>HP</strong><br />
dans les pays dans lequel le produit est distribué par <strong>HP</strong> ou par un importateur agréé.<br />
B. Restrictions de garantie<br />
DANS LA MESURE OÙ LES LOIS LOCALES L'AUTORISENT, <strong>HP</strong> OU SES FOURNISSEURS TIERS NE FONT AUCUNE AUTRE<br />
GARANTIE OU CONDITION, EXPRESSE OU IMPLICITE, EN CE QUI CONCERNE LES PRODUITS <strong>HP</strong> ET NIENT TOUTE GARANTIE<br />
IMPLICITE DE COMMERCIALISATION, DE QUALITÉ SATISFAISANTE OU D'ADAPTATION À UN BUT PARTICULIER.<br />
C. Restrictions de responsabilité<br />
1. Dans la mesure où les lois locales l'autorisent, les recours énoncés dans cette déclaration de garantie constituent les recours exclusifs du<br />
client.<br />
2. DANS LA MESURE OÙ LES LOIS LOCALES L'AUTORISENT, EXCEPTION FAITE DES OBLIGATIONS SPÉCIFIQUEMENT ÉNONCÉES<br />
DANS LA PRÉSENTE DÉCLARATION DE GARANTIE, <strong>HP</strong> OU SES FOURNISSEURS TIERS NE POURRONT ÊTRE TENUS POUR<br />
RESPONSABLES DE DOMMAGES DIRECTS, INDIRECTS, SPÉCIAUX OU ACCIDENTELS, QU'ILS SOIENT BASÉS SUR UN<br />
CONTRAT, UN PRÉJUDICE OU TOUTE AUTRE THÉORIE LÉGALE, QUE CES DOMMAGES SOIENT RÉPUTÉS POSSIBLES OU NON.<br />
D. Lois locales<br />
1. Cette déclaration de garantie donne au client des droits juridiques spécifiques. Le client peut également posséder d'autres droits selon les<br />
états des Etats-Unis, les provinces du Canada, et les autres pays ou régions du monde.<br />
2. Si cette déclaration de garantie est incompatible avec les lois locales, elle sera considérée comme étant modifiée pour être conforme à la<br />
loi locale. Selon ces lois locales, certaines renonciations et limitations de cette déclaration de garantie peuvent ne pas s'appliquer au client.<br />
Par exemple, certains états des Etats-Unis, ainsi que certains gouvernements hors des Etats-Unis (y compris certaines provinces du<br />
Canada), peuvent :<br />
a. exclure les renonciations et limitations de cette déclaration de garantie des droits statutaires d'un client (par exemple au Royaume-Uni) ;<br />
b. restreindre d'une autre manière la possibilité pour un fabricant d'imposer ces renonciations et limitations ; ou<br />
c. accorder au client des droits de garantie supplémentaires, spécifier la durée des garanties implicites que le fabricant ne peut nier, ou<br />
ne pas autoriser les limitations portant sur la durée des garanties implicites.<br />
3. EXCEPTÉ DANS LA MESURE AUTORISÉE PAR LA LÉGISLATION, LES TERMES DE LA PRÉSENTE DÉCLARATION DE GARANTIE<br />
N'EXCLUENT, NE LIMITENT NI NE MODIFIENT LES DROITS STATUTAIRES OBLIGATOIRES APPLICABLES À LA VENTE DES<br />
PRODUITS <strong>HP</strong> AUXDITS CLIENTS, MAIS VIENNENT S'Y AJOUTER.<br />
Garantie du fabricant <strong>HP</strong><br />
Cher client,<br />
Vous trouverez, ci-après, les coordonnées de l’entité <strong>HP</strong> responsable de l'exécution de la garantie fabricant relative à votre matériel <strong>HP</strong> dans votre pays.<br />
En vertu de votre contrat d’achat, il se peut que vous disposiez de droits légaux supplémentaires à l’encontre de votre vendeur. Ceux-ci ne sont aucunement affectés par la présente<br />
garantie du fabricant <strong>HP</strong>.<br />
En particulier, si vous êtes un consommateur domicilié en France (départements et territoires d’outre-mer (DOM-TOM) inclus dans la limite des textes qui leur sont applicables), le<br />
vendeur reste tenu à votre égard des défauts de conformité du bien au contrat et des vices rédhibitoires hhdans les conditions prévues aux articles 1641 à 1649 du Code civil.<br />
Code de la consommation :<br />
"Art. L. 211-4. - Le vendeur est tenu de livrer un bien conforme au contrat et répond des défauts de conformité existant lors de la délivrance.<br />
Il répond également des défauts de conformité résultant de l'emballage, des instructions de montage ou de l'installation lorsque celle-ci a été mise à sa charge par le contrat ou a été réalisée<br />
sous sa responsabilité."<br />
"Art. L. 211-5. - Pour être conforme au contrat, le bien doit :<br />
1° Etre propre à l'usage habituellement attendu d'un bien semblable et, le cas échéant correspondre à la description donnée par le vendeur et posséder les qualités que celui-ci a présentées<br />
à l'acheteur sous forme d'échantillon ou de modèle ;<br />
- présenter les qualités qu'un acheteur peut légitimement attendre eu égard aux déclarations publiques faites par le vendeur, par le producteur ou par son représentant, notamment dans<br />
la publicité ou l'étiquetage ;<br />
2° Ou présenter les caractéristiques définies d'un commun accord par les parties ou être propre à tout usage spécial recherché par l'acheteur, porté à la connaissance du vendeur et que<br />
ce dernier a accepté."<br />
"Art. L.211-12. – L’action résultant du défaut de conformité se prescrit par deux ans à compter de la délivrance du bien."<br />
Code civil :<br />
"Code civil Article 1641 : Le vendeur est tenu de la garantie à raison des défauts cachés de la chose vendue qui la rendent impropre à l’usage auquel on la destine, ou qui diminuent tellement<br />
cet usage, que l’acheteur ne l’aurait pas acquise, ou n’en aurait donné qu’un moindre prix, s’il les avait connus.<br />
"Code civil Article 1648 : L’action résultant des vices rédhibitoires doit être intentée par l’acquéreur dans un délai de deux ans à compter de la découverte du vice."<br />
France : <strong>Hewlett</strong>-<strong>Packard</strong> France, SAS, 80, rue Camille Desmoulins, 92788 Issy les Moulineaux Cedex 9<br />
Belgique : <strong>Hewlett</strong>-<strong>Packard</strong> Belgium BVBA/SPRL, 1, rue de l'Aéronef, B-1140 Brussels<br />
Luxembourg : <strong>Hewlett</strong>-<strong>Packard</strong> Luxembourg SCA, 7a, rue Robert Stümper, L-2557 Luxembourg-Gasperich<br />
16
<strong>HP</strong> <strong>Photosmart</strong> <strong>Plus</strong> <strong>series</strong> - <strong>B209</strong><br />
1<br />
2<br />
Nota:<br />
•<br />
•<br />
•<br />
•<br />
¡Importante!<br />
NO conecte el cable USB hasta que el software se lo indique (Sólo usuarios de Windows).<br />
Compruebe el contenido de la caja<br />
Inserte el CD para ver la configuración guiada de la impresora<br />
Al insertar el CD, las animaciones le guiarán por el proceso de configuración<br />
de la impresora, incluida la colocación de los cartuchos y la carga de papel.<br />
Puede utilizar el cable USB durante la instalación inalámbrica para obtener automáticamente los<br />
parámetros de la configuración.<br />
El software se instala después de completar la configuración guiada de la impresora.<br />
Siga atentamente las indicaciones de las animaciones, ya que contienen información importante sobre<br />
la configuración de la impresora, incluida la forma de utilizar el botón Easy One de la configuración<br />
inalámbrica.<br />
Si no dispone de una unidad de CD/DVD, visite www.hp.com/support para descargar e instalar el<br />
software.<br />
Cartucho cian<br />
Cartucho magenta<br />
Cartucho amarillo<br />
Cartucho negro<br />
Pegue la etiqueta de la<br />
página de cubierta en la<br />
impresora.<br />
564<br />
564<br />
564<br />
564<br />
Español
Español<br />
Conozca <strong>HP</strong> <strong>Photosmart</strong><br />
1 Escanear:<br />
7<br />
Abre el menú Escanear para seleccionar el<br />
destino de su escaneo.<br />
2 Copiar:<br />
8<br />
Abre el menú Copiar, donde puede<br />
seleccionar un tipo de copia o cambiar los<br />
ajustes de copia.<br />
3 Teclas de dirección:<br />
9<br />
Permite desplazarse a través de las<br />
opciones de menú y de las fotografías.<br />
Toque el botón de flecha derecha para<br />
acceder a la pantalla secundaria de Inicio.<br />
4 Foto:<br />
10<br />
Abre el menú Foto, donde puede ver, editar,<br />
imprimir y guardar fotografías.<br />
5 Ayuda:<br />
11<br />
Abre el menú Ayuda en la pantalla, donde<br />
puede seleccionar un tema para conocer<br />
más respecto del mismo. Al tocar Ayuda<br />
en la pantalla, aparece una lista de temas<br />
para los que hay ayuda disponible.<br />
6 Posición inicial:<br />
12<br />
Vuelve a la pantalla Inicio (la pantalla predeterminada<br />
al encender el producto).<br />
18<br />
Formatos rápidos:<br />
Imprime diferentes tipos de formularios, como<br />
documentos del colegio, pentagramas en<br />
blanco, laberintos y listas de comprobación.<br />
Configurar:<br />
Abre el menú Configuración, donde puede<br />
cambiar los parámetros del producto y<br />
realizar funciones de mantenimiento.<br />
Posterior:<br />
Vuelve a la pantalla anterior.<br />
Tinta:<br />
Abre la pantalla Niveles de tinta estimados.<br />
Conexión inalámbrica:<br />
Abre la pantalla Resumen de la conexión<br />
inalámbrica, donde puede encontrar el<br />
nombre del host, la dirección IP y el SSID<br />
de <strong>HP</strong> <strong>Photosmart</strong>.<br />
Cancelar:<br />
Detiene la operación actual.
Aproveche al máximo <strong>HP</strong> <strong>Photosmart</strong><br />
Conexión de equipos adicionales a una red<br />
Puede conectar <strong>HP</strong> <strong>Photosmart</strong> a varios ordenadores de una red pequeña.<br />
Si <strong>HP</strong> <strong>Photosmart</strong> ya está conectado a un ordenador de una red, deberá instalar el software <strong>HP</strong> <strong>Photosmart</strong><br />
en cada equipo nuevo. Durante la instalación de una conexión inalámbrica, el software detectará<br />
automáticamente el producto en la red. Después de configurar el <strong>HP</strong> <strong>Photosmart</strong> en la red, no necesita volver<br />
a configurarlo al añadir otros ordenadores.<br />
Cambio de la conexión USB del <strong>HP</strong> <strong>Photosmart</strong> a una<br />
conexión de red.<br />
Si instala <strong>HP</strong> <strong>Photosmart</strong> primero con una conexión USB, podrá cambiar más adelante a una conexión de<br />
red Ethernet. Si ya sabe cómo conectarse a una red, puede utilizar las indicaciones generales que se indican<br />
a continuación.<br />
Para cambiar una conexión USB por una conexión inalámbrica integrada WLAN 802.11<br />
1.<br />
2.<br />
3.<br />
Imprima fotos sin conexión al ordenador:<br />
sólo tiene que insertar la tarjeta de<br />
memoria en una ranura o unidad USB<br />
de <strong>HP</strong> <strong>Photosmart</strong> y empezar a imprimir.<br />
Utilice las funciones de edición de <strong>HP</strong><br />
<strong>Photosmart</strong> para ajustar los subtítulos,<br />
dar apariencia antigua a las fotos o<br />
añadir divertidos marcos.<br />
Imprima sus fotos desde dispositivos<br />
Bluetooth, como PDA, móviles con<br />
cámara y ordenadores, con la<br />
tecnología integrada Bluetooth.<br />
Haga copias en color y en blanco y<br />
negro.<br />
Desconecte la conexión USB de la parte posterior del producto.<br />
Inserte el CD del producto en la unidad de CD-ROM del equipo.<br />
Seleccione Agregar un dispositivo y siga las instrucciones en pantalla para la instalación de una red<br />
inalámbrica.<br />
19<br />
Conecte <strong>HP</strong> <strong>Photosmart</strong> hasta a cinco<br />
ordenadores en una red inalámbrica.<br />
Imprima una serie de proyectos,<br />
como juegos, listas de comprobación,<br />
pentagramas, álbumes y fotos<br />
panorámicas.<br />
Escanee originales a la tarjeta de memoria<br />
o un ordenador conectado.<br />
Español
Español<br />
Aproveche al máximo <strong>HP</strong> <strong>Photosmart</strong><br />
Cómo buscar más información<br />
Puede encontrar cualquier otra información del producto en los archivos electrónicos Ayuda y Léame. La<br />
ayuda electrónica incluye instrucciones para el uso de funciones del producto y la solución de problemas.<br />
También ofrece las especificaciones del producto, avisos legales e información medioambiental, regulatoria<br />
y de asistencia técnica. El archivo Léame contiene los requisitos de información de contacto con el servicio<br />
técnico de <strong>HP</strong>, del sistema operativo y las actualizaciones más recientes de la información del producto.<br />
Para acceder a la Ayuda electrónica<br />
•<br />
•<br />
•<br />
Si no se enciende <strong>HP</strong> <strong>Photosmart</strong>:<br />
1.<br />
2.<br />
3.<br />
4.<br />
Windows: Haga clic en Inicio > Todos los programas > <strong>HP</strong> > <strong>Photosmart</strong> <strong>Plus</strong> <strong>B209</strong> <strong>series</strong> > Ayuda.<br />
Mac OS X v10.4: Haga clic en Ayuda > Ayuda de Mac, Biblioteca > Ayuda del producto <strong>HP</strong>.<br />
Mac OS X v10.5: Haga clic en Ayuda > Ayuda de Mac. En el Visor de ayuda, seleccione Ayuda del producto <strong>HP</strong>.<br />
Windows 7<br />
Para más información y asistencia sobre Windows 7, visite: www.hp.com/go/windows7.<br />
Especificaciones de alimentación:<br />
Adaptador de alimentación: 0957-2269<br />
Tensión de entrada: De 100 a 240 VCA<br />
Frecuencia de entrada: 50-60 Hz<br />
Suministro de alimentación: 20W promedio<br />
Nota: Utilícese sólo con el adaptador de<br />
alimentación suministrado por <strong>HP</strong>.<br />
Resolución de problemas<br />
Solución de problemas de instalación<br />
Verifique el cable de alimentación.<br />
•<br />
•<br />
•<br />
•<br />
Asegúrese de que el cable de alimentación está firmemente conectado al producto y al adaptador de<br />
alimentación.<br />
Si está utilizando una regleta, asegúrese de que ésta está encendida. O bien inténtelo enchufando el<br />
producto directamente en la toma de corriente.<br />
Verifique si la toma de corriente funciona. Enchufe algún electrodoméstico que sepa que funcione para<br />
comprobar que la alimentación llega al electrodoméstico. Si la alimentación no llega, es posible que<br />
haya algún problema con la toma de corriente.<br />
Si ha enchufado el producto a una toma de corriente con interruptor, asegúrese de que la toma está<br />
encendida. Si el interruptor está encendido pero sigue sin funcionar, es posible que haya algún<br />
problema con la toma de corriente.<br />
Desenchufe el cable de alimentación de la parte posterior de la impresora. Enchufe de nuevo el cable de<br />
alimentación y pulse el botón Encender para encender el producto.<br />
Es posible que el producto no responda si pulsa el botón Encender demasiado rápido. Pulse el botón<br />
Encender una sola vez. La activación del producto puede tardar unos minutos. Si pulsa el botón Encender<br />
otra vez durante el proceso, es posible que apague el producto.<br />
Si ha realizados todos los pasos de las soluciones anteriores y sigue sin resolver el problema, contacte<br />
con el servicio de asistencia de <strong>HP</strong>. Vaya a: www.hp.com/support.<br />
20<br />
Uso de la tinta<br />
Nota: La tinta de los cartuchos se utiliza en el proceso<br />
de impresión de diferentes maneras, incluso en el<br />
proceso de inicialización, que prepara el dispositivo<br />
y los cartuchos para imprimir, y en el mantenimiento<br />
de los cabezales de impresión, que mantiene limpias<br />
las boquillas de impresión y hace que la tinta fluya<br />
sin problemas. Asimismo, parte de la tinta residual se<br />
queda en el cartucho después de utilizarlo. Para obtener<br />
más información, consulte www.hp.com/go/inkusage.
Resolución de problemas<br />
Windows<br />
Si no consigue imprimir, compruebe que el<br />
producto se ha establecido como dispositivo<br />
predeterminado:<br />
•<br />
•<br />
Windows Vista: En la barra de tareas de<br />
Windows, haga clic en Inicio, elija Panel<br />
de control y, a continuación, haga clic en<br />
Impresoras.<br />
Windows XP: En la barra de tareas de<br />
Windows, haga clic en Inicio, elija Panel<br />
de control y, a continuación, haga clic en<br />
Impresoras y Faxes.<br />
Compruebe que junto al producto hay una<br />
marca de verificación dentro de un círculo<br />
negro. Si el producto no está seleccionado como<br />
predeterminado, haga clic con el botón derecho<br />
en el icono de la impresora y elija “Establecer<br />
como impresora predeterminada” en el menú.<br />
Si sigue sin poder imprimir o el software<br />
Windows genera un error:<br />
1.<br />
2.<br />
3.<br />
4.<br />
5.<br />
Extraiga el CD de la unidad de CD-ROM<br />
del equipo y, a continuación, desconecte el<br />
cable USB del ordenador.<br />
Reinicie el ordenador.<br />
Desactive temporalmente los cortafuegos<br />
y cierre el software antivirus. Reinicie estos<br />
programas después de instalar el software<br />
del producto.<br />
Inserte el CD del software del producto<br />
en la unidad de CD-ROM del equipo<br />
y, a continuación, siga las instrucciones<br />
en pantalla para instalar el software del<br />
producto. No conecte el cable USB hasta<br />
que se le indique.<br />
Una vez haya acabado la instalación,<br />
reinicie el equipo.<br />
21<br />
Mac<br />
Si sigue sin poder imprimir, desinstale y vuelva<br />
a instalar el software:<br />
Nota: El programa de desinstalación elimina los<br />
componentes del software <strong>HP</strong> específicos del<br />
dispositivo. El programa de desinstalación no<br />
elimina los componentes compartidos por otros<br />
productos o programas.<br />
Para desinstalar el software:<br />
1.<br />
2.<br />
3.<br />
Desconecte el <strong>HP</strong> <strong>Photosmart</strong> del ordenador.<br />
Abra la carpeta Aplicaciones: Carpeta<br />
<strong>Hewlett</strong>-<strong>Packard</strong>.<br />
Haga doble clic en Programa de<br />
desinstalación de <strong>HP</strong>. Siga las instrucciones<br />
de la pantalla.<br />
Para instalar el software:<br />
1.<br />
2.<br />
3.<br />
Para volver a instalar el software, inserte el<br />
CD del software en la unidad de CD del<br />
equipo.<br />
En el escritorio, abra el CD y haga doble<br />
clic en <strong>HP</strong> Installer.<br />
Siga las instrucciones de la pantalla.<br />
Español
Español<br />
Resolución de problemas<br />
Solución de problemas de red<br />
Utilice esta sección para resolver los problemas que se puede encontrar al configurar una conexión de red.<br />
No se ha podido detectar el producto durante la instalación del software<br />
Si el software <strong>HP</strong> no consigue detectar el producto en la red durante la instalación, consulte los pasos de<br />
resolución de problemas siguientes. Si dispone de una conexión inalámbrica, empiece por el paso 1 y<br />
continúe hasta el paso 4, según proceda.<br />
Conexiones inalámbricas<br />
Paso 1: Determine si el producto está conectado a la red ejecutando el programa de prueba de la red<br />
inalámbrica y siga las instrucciones.<br />
Para ejecutar la prueba de la red inalámbrica<br />
1.<br />
2.<br />
3.<br />
4.<br />
Paso 2: Si en el Paso 1 ha averiguado que el producto no está conectado a una red y esta es la primera<br />
vez que lo instala, siga las instrucciones que aparecen en pantalla durante la instalación del software para<br />
conectar el producto a la red.<br />
Para conectar el producto a la red<br />
1.<br />
2.<br />
3.<br />
A continuación se indica cómo resolver algunos problemas habituales que pueden impedir la conexión del<br />
producto a la red:<br />
•<br />
•<br />
•<br />
En la pantalla Inicio, toque la flecha derecha para ver más opciones.<br />
Toque Configuración.<br />
Toque Redes.<br />
Toque Comprobación de la red inalámbrica.<br />
Inserte el CD de software de en la unidad de CD-ROM del equipo.<br />
Siga las instrucciones que aparecen en la pantalla. Cuando se le pida, conecte el producto al equipo<br />
mediante el cable de configuración USB incluido en la caja. El producto intentará conectarse a la red. Si<br />
no se establece la conexión, siga las indicaciones para corregir el problema e inténtelo de nuevo.<br />
Cuando haya finalizado la configuración, se el pedirá desconectar el cable USB y comprobar la<br />
conexión de red inalámbrica. Una vez que se haya conectado el producto a la red correctamente, instale<br />
el software en cada equipo que utilizará el producto a través de la red.<br />
Quizá ha seleccionado una red incorrecta o ha escrito el nombre de la red (SSID) incorrectamente.<br />
Compruebe estos parámetros y asegúrese de que son correctos.<br />
Quizá ha escrito mal la clave WEP o la clave de encriptación WPA (si utiliza encriptación).<br />
Nota: Si el nombre de red o las claves WEP/WPA no se detectan automáticamente durante la<br />
instalación, y no los conoce, puede descargar una aplicación en www.hp.com/go/networksetup que<br />
puede ayudarle a detectarlos. Esta aplicación sólo funciona en Windows Internet Explorer y está en<br />
inglés.<br />
Puede tratarse de un problema del router. Reinicie el producto y el router apagando la alimentación y<br />
vuelva a encenderlos.<br />
22
Resolución de problemas<br />
Paso 3: Compruebe y solucione las siguientes condiciones posibles:<br />
•<br />
•<br />
•<br />
Paso 4: Utilice la función de búsqueda avanzada.<br />
1. Imprima un informe de configuración de la red mediante las siguientes instrucciones:<br />
2.<br />
3.<br />
a.<br />
b.<br />
c.<br />
d.<br />
e.<br />
En la pantalla Inicio, toque la flecha derecha para ver más opciones.<br />
Toque Configuración.<br />
Toque Redes.<br />
Toque Visualización de los ajustes de red<br />
Toque Imprima una página de configuración de la red.<br />
Averigüe la dirección IP de <strong>HP</strong> <strong>Photosmart</strong> en el informe de configuración de red.<br />
Utilice la opción de búsqueda avanzada disponible durante la instalación del software, haga clic en<br />
Buscar por dirección IP y escriba la dirección IP del producto.<br />
Otros problemas de red tras la instalación del software<br />
Si <strong>HP</strong> <strong>Photosmart</strong> se ha instalado correctamente, pero sigue experimentando problemas, como no poder<br />
imprimir, pruebe lo siguiente:<br />
•<br />
•<br />
Es posible que el ordenador no esté conectado a la red. Asegúrese de que el equipo que utiliza está<br />
conectado a la misma red que <strong>HP</strong> <strong>Photosmart</strong>. Si la red es inalámbrica, por ejemplo, es posible que el<br />
ordenador esté conectado a una red vecina por error.<br />
El ordenador puede estar conectado a una red privada virtual (VPN). Desactive temporalmente el VPN<br />
antes de continuar con la instalación. La conexión a una VPN es una conexión a una red distinta; debe<br />
desconectar la VPN para acceder al producto a través de la red doméstica.<br />
Algún software de seguridad puede estar bloqueando la comunicación. El software de seguridad (servidor<br />
de seguridad, antivirus, anti software espía) instalado en su ordenador puede estar bloqueando la<br />
comunicación entre el producto y el ordenador. Un diagnóstico de <strong>HP</strong> ejecutado durante la instalación<br />
puede mostrar mensajes sobre los posibles bloqueos del servidor de seguridad. Desconecte temporalmente<br />
el servidor de seguridad, antivirus anti software espía para tratar de completar la instalación. Podrá<br />
reactivar la aplicación del servidor de seguridad cuando haya finalizado la instalación. Asegúrese de que<br />
los archivos siguientes están incluidos en la lista de excepciones del servidor de seguridad:<br />
•<br />
•<br />
•<br />
•<br />
•<br />
•<br />
C:\Archivos de programa\Hp\Digital Imaging\bin\hpqtra08.exe.<br />
C:\Archivos de programa\Hp\Digital Imaging\bin\hpiscnapp.exe.<br />
C:\Archivos de programa\Hp\Digital Imaging\bin\hpqdstcp.exe.<br />
C:\Archivos de programa\Hp\Digital Imaging\bin\hpqkygrp.exe.<br />
C:\Archivos de programa\Hp\Digital Imaging\bin\hpqste08.exe.<br />
C:\Windows\System32\hpzinw12.exe.<br />
• C:\Windows\System32\hpzipm12.exe.<br />
Consejo: Configure el software del servidor de seguridad para que permita la comunicación en el puerto 427<br />
sobre UDP.<br />
Apague el direccionador, el producto y el equipo y vuelva a encenderlos por este orden: primero el<br />
direccionador, a continuación el producto y finalmente el equipo. Algunas veces, apagar y encender la<br />
alimentación solucionará un problema de comunicación de red.<br />
Si los pasos anteriores no resuelven el problema y ha instalado correctamente el software de <strong>HP</strong><br />
<strong>Photosmart</strong> en su equipo, ejecute la herramienta de diagnósticos de red.<br />
Para ejecutar la herramienta de diagnósticos de red<br />
> En el Centro de soluciones, haga clic en Ajustes, haga clic en Otros ajustes y, a continuación, haga<br />
clic en Cajas de herramientas de red. En la ficha Utilidades, haga clic en Ejecutar diagnósticos de red.<br />
23<br />
Español
Declaración de garantía limitada de la impresora <strong>HP</strong><br />
Producto <strong>HP</strong> Duración de la garantía limitada<br />
Medio de almacenamiento del software 90 días<br />
Impresora 1 año<br />
Cartuchos de tinta o impresión La garantía es válida hasta que se agote la tinta <strong>HP</strong> o hasta que<br />
se alcance la fecha de “fin de garantía” indicada en el cartucho,<br />
cualquiera de los hechos que se produzca en primer lugar. Esta<br />
garantía no cubrirá los productos de tinta <strong>HP</strong> que se hayan<br />
rellenado o manipulado, se hayan vuelto a limpiar, se hayan<br />
utilizado incorrectamente o se haya alterado su composición.<br />
Cabezales de impresión (sólo se aplica a productos con 1 año<br />
cabezales de impresión que el cliente puede sustituir)<br />
Accesorios 1 año, a no ser que se especifique otro dato<br />
A. Alcance de la garantía limitada<br />
1. <strong>Hewlett</strong>-<strong>Packard</strong> (<strong>HP</strong>) garantiza al usuario final que el producto de <strong>HP</strong> especificado no tendrá defectos de materiales ni mano de obra por<br />
el periodo anteriormente indicado, cuya duración empieza el día de la compra por parte del cliente.<br />
2. Para los productos de software, la garantía limitada de <strong>HP</strong> se aplica únicamente a la incapacidad del programa para ejecutar las<br />
instrucciones. <strong>HP</strong> no garantiza que el funcionamiento de los productos se interrumpa o no contenga errores.<br />
3. La garantía limitada de <strong>HP</strong> abarca sólo los defectos que se originen como consecuencia del uso normal del producto, y no cubre otros<br />
problemas, incluyendo los originados como consecuencia de:<br />
a. Mantenimiento o modificación indebidos;<br />
b. Software, soportes de impresión, piezas o consumibles que <strong>HP</strong> no proporcione o no admita;<br />
c. Uso que no se ajuste a las especificaciones del producto;<br />
d. Modificación o uso incorrecto no autorizados.<br />
4. Para los productos de impresoras de <strong>HP</strong>, el uso de un cartucho que no sea de <strong>HP</strong> o de un cartucho recargado no afecta ni a la garantía<br />
del cliente ni a cualquier otro contrato de asistencia de <strong>HP</strong> con el cliente. No obstante, si el error o el desperfecto en la impresora se<br />
atribuye al uso de un cartucho que no sea de <strong>HP</strong>, un cartucho recargado o un cartucho de tinta caducado, <strong>HP</strong> cobrará aparte el tiempo y<br />
los materiales de servicio para dicho error o desperfecto.<br />
5. Si durante la vigencia de la garantía aplicable, <strong>HP</strong> recibe un aviso de que cualquier producto presenta un defecto cubierto por la garantía,<br />
<strong>HP</strong> reparará o sustituirá el producto defectuoso como considere conveniente.<br />
6. Si <strong>HP</strong> no logra reparar o sustituir, según corresponda, un producto defectuoso que esté cubierto por la garantía, <strong>HP</strong> reembolsará al cliente<br />
el precio de compra del producto, dentro de un plazo razonable tras recibir la notificación del defecto.<br />
7. <strong>HP</strong> no tendrá obligación alguna de reparar, sustituir o reembolsar el precio del producto defectuoso hasta que el cliente lo haya devuelto a <strong>HP</strong>.<br />
8. Los productos de sustitución pueden ser nuevos o seminuevos, siempre que sus prestaciones sean iguales o mayores que las del<br />
producto sustituido.<br />
9. Los productos <strong>HP</strong> podrían incluir piezas, componentes o materiales refabricados equivalentes a los nuevos en cuanto al rendimiento.<br />
10. La Declaración de garantía limitada de <strong>HP</strong> es válida en cualquier país en que los productos <strong>HP</strong> cubiertos sean distribuidos por <strong>HP</strong>. Es<br />
posible que existan contratos disponibles para servicios de garantía adicionales, como el servicio in situ, en cualquier suministrador de<br />
servicios autorizado por <strong>HP</strong>, en aquellos países donde <strong>HP</strong> o un importador autorizado distribuyan el producto.<br />
B. Limitaciones de la garantía<br />
HASTA DONDE LO PERMITAN LAS LEYES LOCALES, NI <strong>HP</strong> NI SUS TERCEROS PROVEEDORES OTORGAN NINGUNA OTRA<br />
GARANTÍA O CONDICIÓN DE NINGÚN TIPO, YA SEAN GARANTÍAS O CONDICIONES DE COMERCIABILIDAD EXPRESAS O<br />
IMPLÍCITAS, CALIDAD SATISFACTORIA E IDONEIDAD PARA UN FIN DETERMINADO.<br />
C. Limitaciones de responsabilidad<br />
1. Hasta donde lo permitan las leyes locales, los recursos indicados en esta Declaración de garantía son los únicos y exclusivos recursos de<br />
los que dispone el cliente.<br />
2. HASTA EL PUNTO PERMITIDO POR LA LEY LOCAL, EXCEPTO PARA LAS OBLIGACIONES EXPUESTAS ESPECÍFICAMENTE EN<br />
ESTA DECLARACIÓN DE GARANTÍA, EN NINGÚN CASO <strong>HP</strong> O SUS PROVEEDORES SERÁN RESPONSABLES DE LOS DAÑOS<br />
DIRECTOS, INDIRECTOS, ESPECIALES, INCIDENTALES O CONSECUENCIALES, YA ESTÉ BASADO EN CONTRATO,<br />
RESPONSABILIDAD EXTRACONTRACTUAL O CUALQUIER OTRA TEORÍA LEGAL, Y AUNQUE SE HAYA AVISADO DE LA<br />
POSIBILIDAD DE TALES DAÑOS.<br />
D. Legislación local<br />
1. Esta Declaración de garantía confiere derechos legales específicos al cliente. El cliente podría también gozar de otros derechos que<br />
varían según el estado (en Estados Unidos), la provincia (en Canadá), o la entidad gubernamental en cualquier otro país del mundo.<br />
2. Hasta donde se establezca que esta Declaración de garantía contraviene las leyes locales, dicha Declaración de garantía se considerará<br />
modificada para acatar tales leyes locales. Bajo dichas leyes locales, puede que algunas de las declinaciones de responsabilidad y<br />
limitaciones estipuladas en esta Declaración de garantía no se apliquen al cliente. Por ejemplo, algunos estados en Estados Unidos, así<br />
como ciertas entidades gubernamentales en el exterior de Estados Unidos (incluidas las provincias de Canadá) pueden:<br />
a. Evitar que las renuncias y limitaciones de esta Declaración de garantía limiten los derechos estatutarios del cliente (por ejemplo, en el<br />
Reino Unido);<br />
b. Restringir de otro modo la capacidad de un fabricante de aumentar dichas renuncias o limitaciones; u<br />
c. Ofrecer al usuario derechos adicionales de garantía, especificar la duración de las garantías implícitas a las que no puede renunciar el<br />
fabricante o permitir limitaciones en la duración de las garantías implícitas.<br />
3. LOS TÉRMINOS ENUNCIADOS EN ESTA DECLARACIÓN DE GARANTÍA, SALVO HASTA DONDE LO PERMITA<br />
LA LEY, NO EXCLUYEN, RESTRINGEN NI MODIFICAN LOS DERECHOS ESTATUTARIOS OBLIGATORIOS PERTINENTES A LA<br />
VENTA DE PRODUCTOS <strong>HP</strong> A DICHOS CLIENTES, SINO QUE SON ADICIONALES A LOS MISMOS.<br />
Para clientes en México aplican las siguientes cláusulas:<br />
1) La sección 4 de la garantía de producto queda reemplazada por la siguiente:<br />
La garantía limitada de <strong>HP</strong> cubrirá sólo los defectos que surjan debido a un uso normal del producto y no cubrirá ningún otro problema,<br />
incluidos los derivados de los casos siguientes:<br />
- Cuando el producto se hubiese utilizado en condiciones distintas a las normales<br />
- Cuando el producto no hubiese sido operado de acuerdo con el instructivo de uso que se le acompaña<br />
- Cuando el producto hubiese sido alterado o reparado por personas no autorizadas por el fabricante nacional, importador o comercializador<br />
responsable respectivo.<br />
2) Para mayor información comunicarse a:<br />
<strong>Hewlett</strong>-<strong>Packard</strong> México, S. de R.L. de C.V.<br />
Prolongación Reforma No. 700, Col. Lomas de Sta. Fé<br />
Delegación Alvaro Obregón CP 91210 México, D.F.<br />
Consulte nuestra página Web: www.hp.com/support<br />
Centro de Asistencia Telefónica de <strong>HP</strong>:<br />
Ciudad de México: (55) 5258 9922 Para el resto del país: 01 800-474-68368<br />
Para hacer válida su garantía, solo se deberá comunicar al Centro de Asistencia Telefónica de <strong>HP</strong> y seguir las instrucciones de un<br />
representante, quien le indicará el procedimiento a seguir.<br />
3) Los gastos de transportación generados en lugares dentro de la red de servicios de <strong>HP</strong> en la República Mexicana, para dar cumplimiento a<br />
esta garantía, serán cubiertos por <strong>Hewlett</strong>-<strong>Packard</strong>.<br />
Información sobre la Garantía Limitada del Fabricante <strong>HP</strong><br />
Estimado Cliente:<br />
Adjunto puede encontrar el nombre y dirección de las entidades <strong>HP</strong> que proporcionan la Garantía Limitada de <strong>HP</strong> (garantía comercial adicional del fabricante) en su país.<br />
Usted también tiene los derechos que la normativa vigente le concede al consumidor frente al vendedor en caso de falta de conformidad de los productos con el contrato de<br />
compraventa, que son independientes y compatibles con la garantía comercial adicional del fabricante y no quedan afectados por ésta. Dichos derechos son los de reparación y/o<br />
sustitución, rebaja en el precio y/o resolución, que se aplicarán según lo establecido en el Título V del Real Decreto Legislativo 1/2007.<br />
España: <strong>Hewlett</strong>-<strong>Packard</strong> Española S.L., C/ Vicente Aleixandre 1, Parque Empresarial Madrid - Las Rozas, 28230 Las Rozas, Madrid<br />
24


